How To Glaze a Cabinet Using Stain

I’ve glazed, antiqued, and distressed furniture for a few projects that I’ve featured in the past, but during the makeover of my master bathroom, I tried a completely new and different way of glazing.  Instead of using my water/paint technique, this time I used stain.

As I mentioned in the master bathroom reveal, I had envisioned a slightly darker cabinet with a light colored glaze.  I had anticipated painting the cabinets, then instead of using my watered-down-brown-paint technique like I’ve done in the past for my cabinet and chair, I thought it would be interesting to try a watered down white paint technique.  In my head it was the perfect idea, but unfortunately it didn’t work – URGH!  I was knee deep already into the project, so I needed to come up with some sort of resolution to turn it around. But how? (that was the million dollar question brewing in my head)

I had remembered that I read a post that Kristi wrote on How to Paint and Glaze a cabinet, in which she used stain to age the piece of furniture.  So I went with it… how much harm could stain over paint do? (it can do alot, but what the heck, I gave it a try)…

So let me step back and share the play-by-play.

I started off by removing the attached toilet paper holder and sanding the entire cabinet with my electrical sander (I also manually sanded the crevices). Plus, I taped the freshly painted walls with painters tape.

I then primed the cabinets using the one-and-only Kilz Primer, and followed it by painting them a darker taupe color, BM Texas Tan, using my awesome Purdy Brush 😉

Ok, here comes the fail part {tears and frustration} well not really… just annoyance that it didn’t work as desired.

So after removing the white mixture (and some of the base coat too), which I thankfully only tried on a small area of the cabinet, that idea was ditched.  I repainted those areas and started with the stain.

Glaze is meant to be imperfect and give the look of age.  More or less stain can be used depending on the degree of “age” you desire.  If you’re looking for a really antiqued look, you can add “wear” marks to the edges using sandpaper and natural looking dents by using a hammer or chisel.  Also to add more definition to the overall look, add extra glaze in the crevices of the cabinet or piece of furniture.  You can use a smaller brush to get into the indented areas or brush on a second coat of stain in the crevices, and follow it up by gently wiping away so more stain remains.

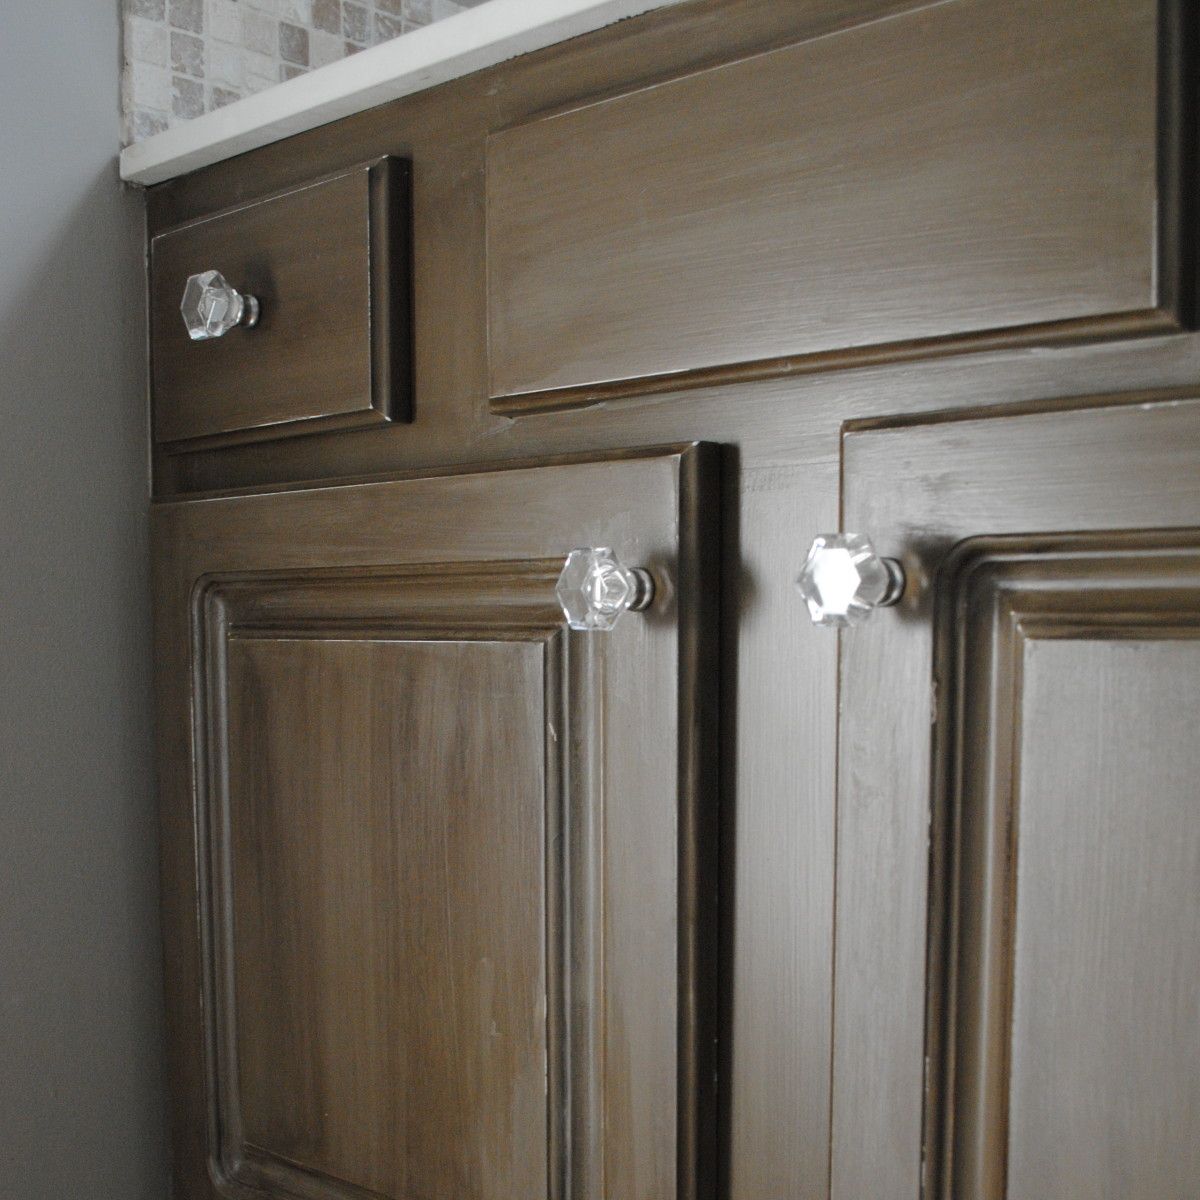
After completing the entire cabinet, take a look at the result:

Once the entire piece was “stained”, I went back and added some slight distressing.  Not as much as the glazed turquoise chair, but just a little to add some faux “aging”.  And of course to top it all off, I added two coats of polyurethane.  And voila.  The cabinet that I never envisioned creating turned out pretty good, wouldn’t ya say?!

Looking for more tips and tricks on how to age, antique, or distress furniture, check out this post I wrote: 5 Tutorials on How To Distress Furniture

Have you ever had a project FAIL that you turned around to create something you love? How have you added “age” to your furniture transformations?

I link my projects to some of these parties: Skip to My Lou, Dittle Dattle, Between Naps on the Porch, Today’s Creative Blog, Stories of A to Z, All Things Heart & Home, Savvy Southern Style, House of Hepworths, Finding Fabulous, Creation Corner, The Shabby Nest, Tatertots and Jello, Thrifty Decor Chick, Tip Junkie
How To Make Any Curtain into a Shower Curtain

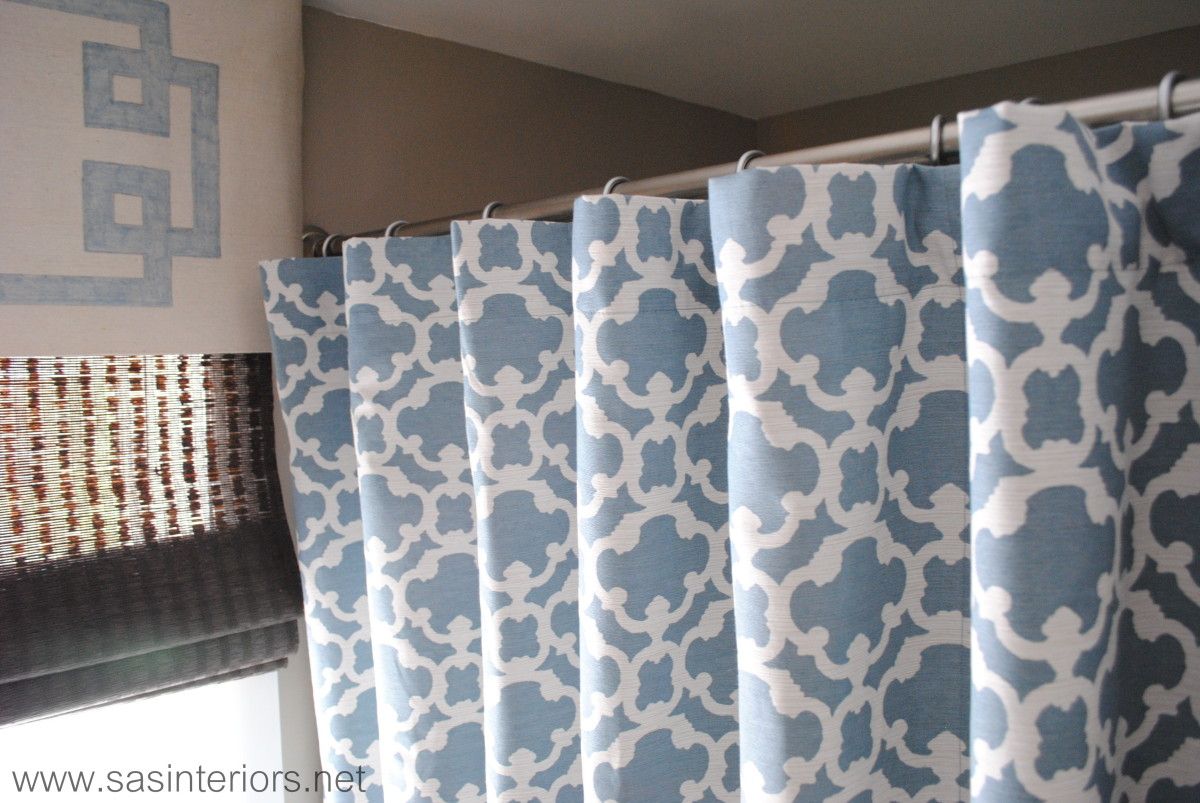
I am thrilled to have my master bathroom complete!  The kind and thoughtful comments that YOU, my awesome readers, have left over the past week have made the craziness all worth it.  So thank you, thank you, thank you.  As I mentioned during the reveal, I DIYed (technically not really a word, but you got it) my shower curtain using two window drapery panels (a.k.a. curtains), and now I’m going to show you how.

I had found these curtain panels a while ago and they were basically the inspiration for the space and everything I chose was set around these beauties.

When I originally purchased the window panels my intention was to simply put the shower curtain rod through the already created rod pocket of the window panel.  A problem arose when I went to hang them because the end of the rod was too big (2.5″ dia) for the rod pocket opening in the curtain.  (I hope I didn’t lose ya)…

My first thought was to create a bigger rod pocket on the curtain, but that would have involved sewing and shortening the height of the overall window panels. I nixed that idea right away because I envisioned the window panels as high as possible to heighten the room.  After some thought, I decided to use typical shower rings to create a ring top style panel. Take a look at my quick sketch.

So, here are the steps I took…

I had twelve shower hooks (which is typical for every shower), which I divided amongst the two window panels – 6 and 6.  Then I put a hook at the end of each panel and divided the remaining hooks (4) on the panel.

Note:

  1. My window panels were 54″ wide, times 2 = 108″, wider than a typical shower curtain – that’s okay.  Any width curtain should work and if you’re using this idea for a single shower stall, one window panel should be enough (the length might have to be altered).
  2. A ball-style shower hook would work best.  You can find them in most stores and they are one of the least expensive styles.
  3. As an added step which I have NOT DONE, you can make the cuts more secure by creating a sewn button hole with your sewing machine.
  4. I DID NOT sew the two panels together to create one large “shower curtain” panel, but it’s possible to do.   I left them as two panels in case I decide to use them someplace else in the future.

Once you’ve evenly spaced the shower hooks, using a scissor, cut a 1/2 – 3/4″ slit at each of the shower hook positions (ONLY CUT through the one layer of fabric, not both – the outside layer should look clean and uncut).

Before inserting the ball style shower hooks into the newly cut hole, first put on the shower curtain liner.  Because my window drapery panel was longer than a typical shower curtain, I had to get a longer plastic liner, which I found at Bed, Bath, and Beyond.  It was a little more expensive than a typical plastic liner, but was a must because of the extra length.

Once the plastic liner is in place, put the shower hooks through the “button” holes (or simply the cut holes since I haven’t yet made actual button holes).

And it’s done.  This really is a simple and easy project that makes a huge impact!

Using the two window panels creates for a slightly more flow-y (not in a bad way) shower curtain style as you can see in the image below.  Because the curtain is hung from typical shower hooks, it opens and closes just as a regular shower curtain would.

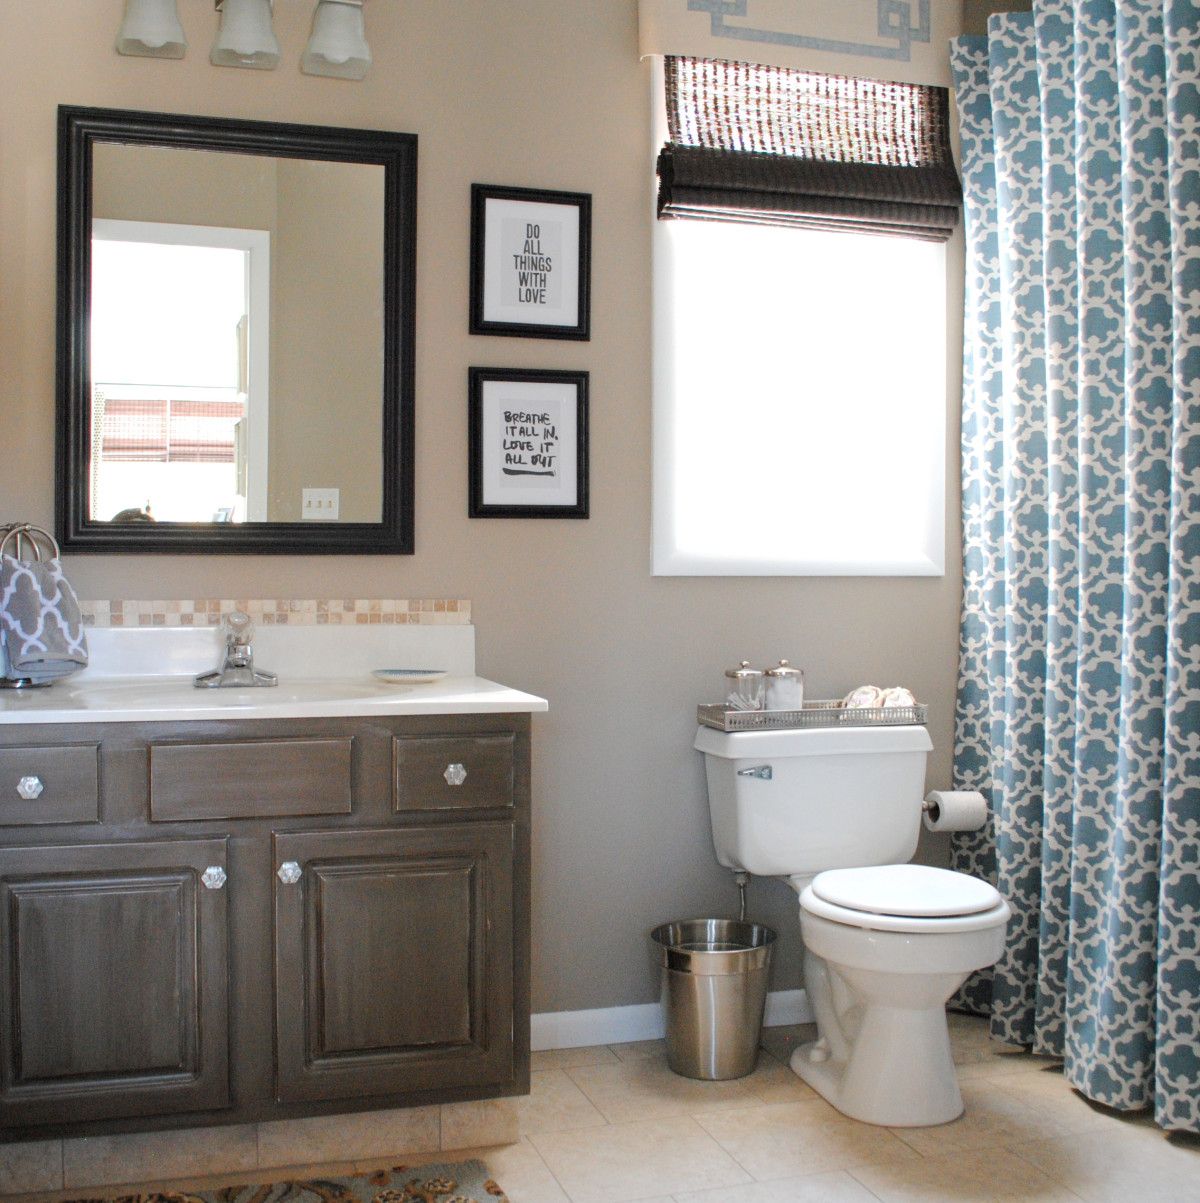
And here is the overall bathroom space –

The taller than typical curtain really gives the space more height, which makes the overall feel of the room much larger.  Actually one reader left me a comment saying, “Wow, you have tall ceilings”.  But honestly, they are only 8′-0″ high – typical of most homes.  But again, the long panel makes the space feel elongated.  This same idea pertains to the window valance, which is hung at the ceiling plane.  If you remember back from this post on The Right Way to Hang Window Drapery Panels, the higher the panels are hung, the larger the space. I have a tutorial coming soon on how I created the window valance, so stay tuned.

I link my projects to some of these parties: Skip to My Lou, Dittle Dattle, Between Naps on the Porch, Today’s Creative Blog, Stories of A to Z, All Things Heart & Home, Savvy Southern Style, House of Hepworths, Finding Fabulous, Creation Corner, The Shabby Nest, Tatertots and Jello, Thrifty Decor Chick, Under the Table & Dreaming

Horrid to Heavenly Master Bathroom Reveal

In one week, my master bathroom went from a place that I dreaded and turned into a heavenly, serene, and spa-like oasis.  The last 7 days have been a whirlwind of working around the clock, but it’s all worth it!  Looking back, I can’t believe I waited so long.  I walk into this space now and I feel a fresh of breathe air.  Take a look…

Pin It

Beautiful right?  But wait until you see the before, and you’ll be sure to appreciate the after even more!

Pin It

I’ve been slightly secretive about the plan that I had for this space.  I didn’t want to reveal too many details and ruin the big reveal.  If you want to see more though, you can check out Part 1 and Part 2 of the Bathroom Makeover.

Can you believe how horrid the bathroom looked before?  Frightening! Enough about that…  Let’s take a tour!

The process for this bathroom makeover started last Friday when I spackled and prepared the walls for painting. Quick backstory: Before we moved into our home, the walls were wallpapered.  The previous owners removed the wallpaper, and painted the walls that horrid pink/purple color.  When they removed the wallpaper, the walls got really damaged, so there was ALOT of prep work before painting could begin.

Along with the walls, we also painted the previously stained mouldings, with a fresh coat of semi-gloss white. This update alone, made the space look completely different!

Once the walls were painted and complete, it was time to lay the new floor.  I decided to use groutable vinyl floor tiles, which I layed directly over my existing floor.  I chose a tile that has a similar look to Botticino natural stone and installed the tile the same way I did for my parents foyer. Groutable vinyl truly looks JUST LIKE ceramic – it’s amazing!

After the joints were grouted and set, I moved onto the sink base cabinet.  This was quite the experiment for sure and turned out nothing as I envisioned, but I’m still happy with the result.  I desired a dark cabinet, but with a light glaze overlay (opposite of my glazed cabinet), but it didn’t work.  After wracking my brain for a bit, I decided to use stain as the glaze.

The shower curtain isn’t a shower curtain at all.  It’s actually two drapery panels made and hung to look like a shower curtain.  I had found these panels at Target and was desperate to use them someplace, and this bathroom was the perfect spot. (Tutorial on how to make any window panel/curtain into a shower curtain).

The window valance I also made using drop cloth fabric and something pretty neat (another tutorial coming soon).

Even though I spent alot of time on this makeover, the process went quite quickly because all the existing plumbing fixtures remained.  The sink, faucet, cabinet, countertop, toilet, and tub are all the same pieces we had before – nothing is new.  Even though the fixtures looked a lil’ sad in the before space, once they were spruced up and surrounded by other beautiful elements, they looked new again.

Surprised that I didn’t do something funky or with more color?  I am, but I truly desired a soft, subtle, and spa-like retreat. And do you blame me after the color I’ve lived with for so long?!

For the existing frameless medicine cabinet that is built into the wall, I added a wood frame surround and secured it with liquid nails.  I took the same steps as I did with the kids bathroom, but without the chalkboard. Simply adding a frame around this somewhat boring style medicine cabinet, gives it new life and a new look for about $15.

I love a good quote and these are simple, to the point, and important to remember every day.

Of course you need a place to put a towel.. or two.  I installed these darling towel hooks right outside of the shower.  I added small frames above the hooks that I spray painted white and the glass with chalkboard paint to create a W (for wife) and H (for husband)…  now each of us knows which towel is whose!

Here’s a recap and rundown of everything in the space –

  1. New lighting fixture from Lowe’s
  2. DIY window valance made of drop cloth material (tutorial coming soon)
  3. 8×10 black frames with quotes I printed on my home printer
  4. Mirror was created using a 24 x 36 picture frame.  I took the existing frameless mirror to a local glass shop, which they reused and cut it down to size to create this new mirror – all for less than $20
  5. New hand and bath towels from TJ Maxx
  6. New tile backsplash (Read Tutorial: how-to install tile backsplash)
  7. Espresso bamboo roman shade from  Lowe’s
  8. Accessories from Target, Home Goods, and various local shops
  9. DIY cabinet makeover (Read Tutorial: how To glaze a cabinet using stain); Crystal knobs from Lowe’s
  10. Wool rug from Target 
  11. Window panels from Target made into a shower curtain (Read Tutorial: how to make any curtain into a shower curtain)
  12. Groutable Vinyl Tile (Read Tutorial: how-to install groutable vinyl tile)


13. Place card frames made into initial frames with white spray paint and chalkboard paint
14. Towel hooks from Hobby Lobby
15. Bath towels from TJ Maxx
16. Bath stand from Home Goods

For about $500 (for supplies and accessories), I think this bathroom makeover was a huge success and a must! Here are a few more pictures for ya…

So would you agree this bathroom is a drastic difference from what it was only one week ago?  I’ve enjoyed many of the comments and thoughts on what y’all thought about the before bathroom… at least I gave you a few chuckles!  I’m just SO glad it’s complete and I’m thrilled with the results!

Tutorials you may want to read:

Thanks to these sites for featuring my Master Bathroom Makeover: Stories of A to Z, Centsational Girl BOTB, Addicted 2 Decorating

How to Make a Pallet Bookshelf

What a week it’s been!  Is it really March already?  I’m still in February!  I really thought I would have the bathroom complete by now to reveal today, but (I know, here it comes) it’s not done – boo hoo.  It’s 95% there, but the finishing touches are still needed, and that’s always the most important part.  So sorry to say, you’ll have to wait a few more days… you don’t mind, right? Instead, I have a fun, easy, and unique DIY project to share with you.

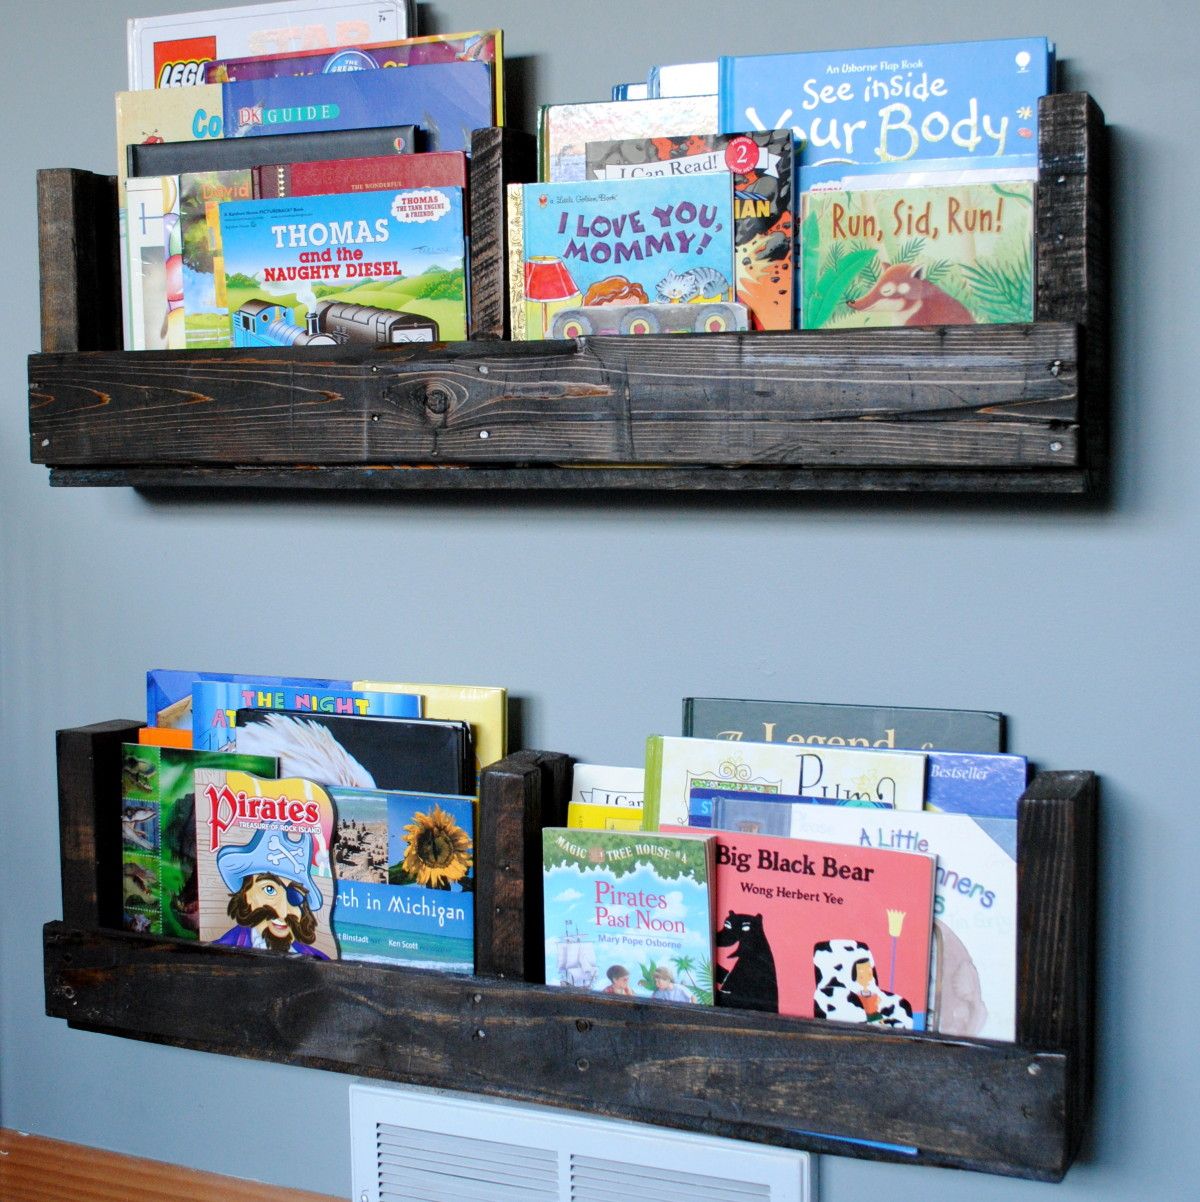
In the midst of my son’s room makeover, the bookcase he had wasn’t fitting anymore, but he still needed something to hold his many of books.  I had wanted to make shelves from old pallets for a long time, so this was the perfect opportunity.  I’ve seen alot of pallet bookshelves around the blogosphere, but hadn’t seen a tutorial (not that I searched long and hard either), so here we go…

After finally snagging a few pallets from my local hardware store, I was ready and working.  Depending on the pallet you find / pick up, you can get two bookshelves from one pallet.  Each end of the pallet is one bookshelf.

Duration of Project: 40 minutes (staining or painting will increase duration of project and may take longer than one day to complete)
Project Difficulty: Easy to Medium
How Many People Needed: 1

1. Remove / pry off the center wood strip(s) from the pallet (as shown in the above image), using the back of a hammer or crowbar.  This wood strip(s) will be reused for the bottom of the bookshelf.  Pallets come in a few difference sizes, so yours may have 1 or multiple center wood strips.  My pallet only had one, so I had to use a wood strip from another pallet to create the bottom for my second bookshelf.

2. Reuse the center wood strip and attach it to the side of the pallet, which will soon be the bottom of your bookshelf.  I reused the nails that were already in the wood strip, but you may need / want to use new nails.

It’s time to cut the wood to create the bookshelves!

3. Measure about 1-2″ above the higher wood strip and make a mark for your cuts.

4. Using a jigsaw, make your cuts.

5. Once the cuts are done, your bookshelf is essentially complete.

6. Sand down all the sharp edges using a hand sander or power sander.

7. Stain.  I used Minwax Jacobean stain for a dark look.  The wood was quite porous, so it soaked it right up!

8. Once completely dry (it took mine a few days to completely dry and not smell anymore), they were ready to hang. To hang the pallet bookshelves, I used Self-Drilling Drywall Anchors which are great to use when you can’t find a stud (never my strong suit).

And they’re ready to fill with your child’s favorites books.

I will admit that this style bookshelf doesn’t hold as much as a typical bookshelf, but I love how the kids can see (and choose) the books straight on.  They add so much color into the space!

These pallet shelves are also great for tight spaces since they’re only about 4″ deep.  Imagine a whole wall of them?!  (Ooo, that gives me an idea…)

The room is still coming together, but like the bathroom, it’s 95% complete (story of my life, I guess, lol). I have another exciting project to show you in his room, so stay tuned.

Have a great weekend!

Have you created anything using pallets?  If you’re in need of more pallet ideas, take a look at my post on Do-It-Yourself Projects Using Pallets.

Master Bathroom Makeover: Part 1

If you follow SAS Interiors on Facebook and Twitter (if you don’t, please do), you may have saw a few postings that I wrote mentioning that I finally decided to give my master bathroom a makeover.  And when I say finally, I mean FINALLY!  This is the only room in the entire house that hasn’t been touched since we moved in and it’s horrendous…  Until NOW.

Over the weekend, we (meaning the mister and I) finally took the plunge and gave this much-needed space a revamp.  I really wish that I could say in two days we finished the entire space, but that would be a big-white-lie. Bummer!  I went into this thinking it would be easy-peasy – we’ll paint, hang a few pictures, and we’ll be done.  HAHA – NOT! (I never allow for enough time – big no no)

The before space was a bright pink/purple color (why would anyone have chosen that color?).  When I first thought about this space, I envisioned 3 S’s – soft, serene, and spa-like.  Since the bathroom adjoins to the bedroom, I really wanted the two spaces to flow from one to another, so many elements in the new bathroom are an extension of the bedroom.  Here’s a peak at some of the selections for the new space.

The backdrop, similar to the bedroom, is a soft gray / taupe color with an accent color of dusty blue, which will be seen in the shower curtain (actually not a real shower curtain, but instead two window panels) and accessories. Again, because I envisioned the space being an extension of the bedroom, I felt it important that they “read” as one.  The accent color in the bedroom is orange, so the blue for this space is a perfect compliment.

I’m truly looking forward to this space being complete, especially since it was one of my Home Goals for 2012.  Actually, when I shared the before picture in my post about my home goals for this year, one reader wrote:

If you need help on your bathroom, I am sure all your readers would be willing…I know you did the best you could with what you had, but wow! I think I would have made that the first to redo when I moved in….not trying to be mean, or anything, but who would pick those colors????? All I can say is wow…  – Cindy

Well Cindy is so right!  Have you seen the before? I feel scared just showing it to you.

There are alot of reasons that this space got neglected, but the main issue was our indecisiveness to do a complete overhaul with a full tearout or a DIY bathroom with new paint and updates.  In the end, because of other priorities at the moment, we decided on a do-it-yourself revamp.  It simply makes the most sense for us!

On the list is:

  • New paint for the walls (gray / taupe)
  • New paint on the mouldings (white)
  • New floor (groutable vinyl – similar to my mom’s floor)
  • New paint for the cabinet
  • New hardware
  • New mirror
  • New light fixture
  • New accessories
  • New window treatment

So basically it’s all new, except for the plumbing fixtures.

And the reason why this space wasn’t complete by the end of Day 2?  Take a look at these snags…

1. The existing towel bar was attached to the wall with HUGE anchors… a full sized person could have hung from them. When the Mister took them out (which he had to yank them from the wall), a huge hole was left!  UGH.

2. Next frustrating snag? The light fixture had no junction box.  Really??  How is that possible?

3. And the most time consuming part was all the spackling – the walls were a mess!

Well no more complaining about this UGLY space.  It’s now in the process of being transformed.  Tonight’s task?  A new floor!  Wish me luck 😉

Have have remodeled a space in your home recently?  Have you made any updates to a bathroom in your home?

DIY: How To Paint Stripes and Product Review of U-Stripe It

Not too long ago I wrote an article for Build Direct on adding stripes into your decor.  Ever since, I’ve had the longing urge to add stripes SOMEPLACE in my home.  I recently made some new pillows for my family room and chose a fabric with stripes, but that wasn’t enough.  I truly envisioned making a bold statement, but just wasn’t sure where.  Until…

…I decided to makeover my son’s room which was a home goal of mine for 2012.  It was the perfect spot to make dramatic focal wall with STRIPES!

We started off by taking apart his bunkbeds (which you can see in this post), so he now has two twin beds in his room. We removed the train table, which he was getting a little too old for (his words, not mine) and in the midst of furniture rearranging to create my new office space, I gave him one of the desks that I was no longer using.  ‘This desk’ has been desperately waiting patiently for a makeover for a LONG TIME and now that it finally has a home, it’s time. {sigh}

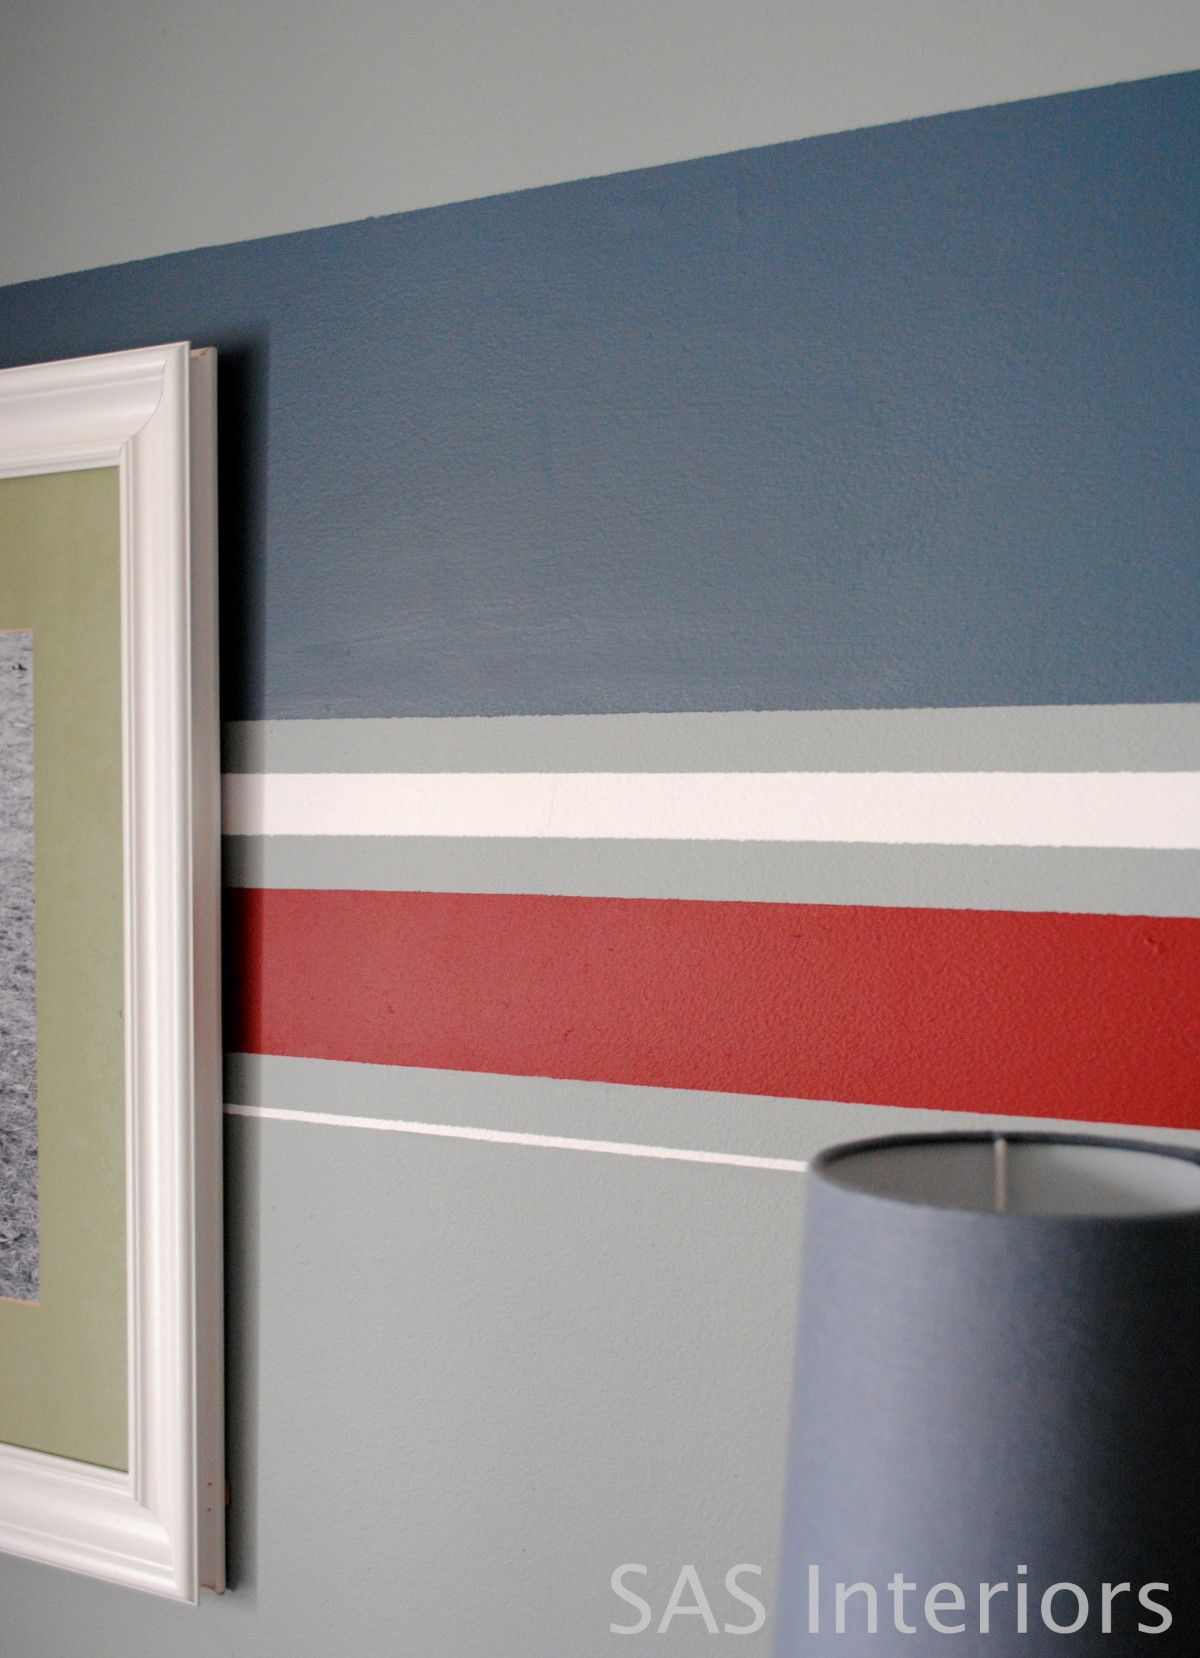
Thankfully to my generous friends at U-Stripe It, they made my life alot easier to tackle my idea for adding stripes to the wall.  Because the wall was already painted (Benjamin Moore – Puritan Gray), I was able to jump right in and start painting the stripes.  For fun stripes, I used denim blue, rustic deep red, and crisp wintry white. There was no rhyme or reason to my stripe layout, but before I started, I sketched this quick drawing as a vision for what I wanted to create.

From U-Stripe It, I received everything I needed to create my stripes, including their handy-dandy Paint Tool, a roll of 3M Painters tape, two levels, and 3M Command Mounting Strips.

Once I was ready to start my stripes, I added the mounting strip to the back of the U-Stripe It Paint Tool, positioned it horizontally on the wall, and locked it in place.

I then added the painters tape along the edges of the tool and continued it across the wall.

In about 30 minutes, I had completed making my stripes on the wall…

…And I was ready to paint. {WARNING: these pictures aren’t so pretty since I was painting fairly late in the evening once the kiddos were asleep.  And NO, I was NOT painting over my son’s head – he was fast asleep in another room}

Once the painting was complete, it was time to do the unveiling!

What a difference the room looks.  A simply added touch, truly makes for a huge impact.

Over the two beds will be black and white pictures of my little boy (which I still have to do).  I moved the vintage airplanes (which I purchased from Home Goods years ago) over the dresser instead of  over his head (not a good place if one ended up snapping off the fishing line and falling on his head during the night).  I also handmade a sign with his name and traits – this was probably the most difficult project I’ve ever created, but I kept with it and in the end, am really happy with the result. Lastly, the dresser he’s had for a few years and was purchased from Ikea.

There is still some work to be done on this room and I wouldn’t dare show you a picture of the current state that it’s in, but it’s coming along!

Stripes are such a fun and easy way to add some personality to a space. Have you painted stripes in your interiors?

Disclosure: I have a material connection because I received an item of nominal value from a company affiliated with a brand, topic and/or product that is mentioned herein, but all the content and opinions in this post are 100% mine!

Traditional to Transitional Spoon Rack Revamp

As you know, I have a little obsession (well more than a little – little would be an understatement) with transforming and updating the decor around my home.  Most of the furniture or accessories though, have been of little or no value, which always makes me less apprehensive about jumping into a project.  If I mess up, who cares!  There are many pieces that I would love to change, but feel I don’t have the skill set (yet) and would be very upset if the result was NOT what I envisioned.

BUT, recently I took a (reluctant) leap of faith, and changed a special piece… my spoon rack, that houses my growing collection of spoons from our family trips and travels.  It’s a special piece and I was quite apprehensive about touching it, but I really was just tired of the traditional style with heavy black wood and red velvet fabric backing.  The style needed an update for my decor and I couldn’t look at it anymore without wanting to give it a lighter, simpler overhaul.

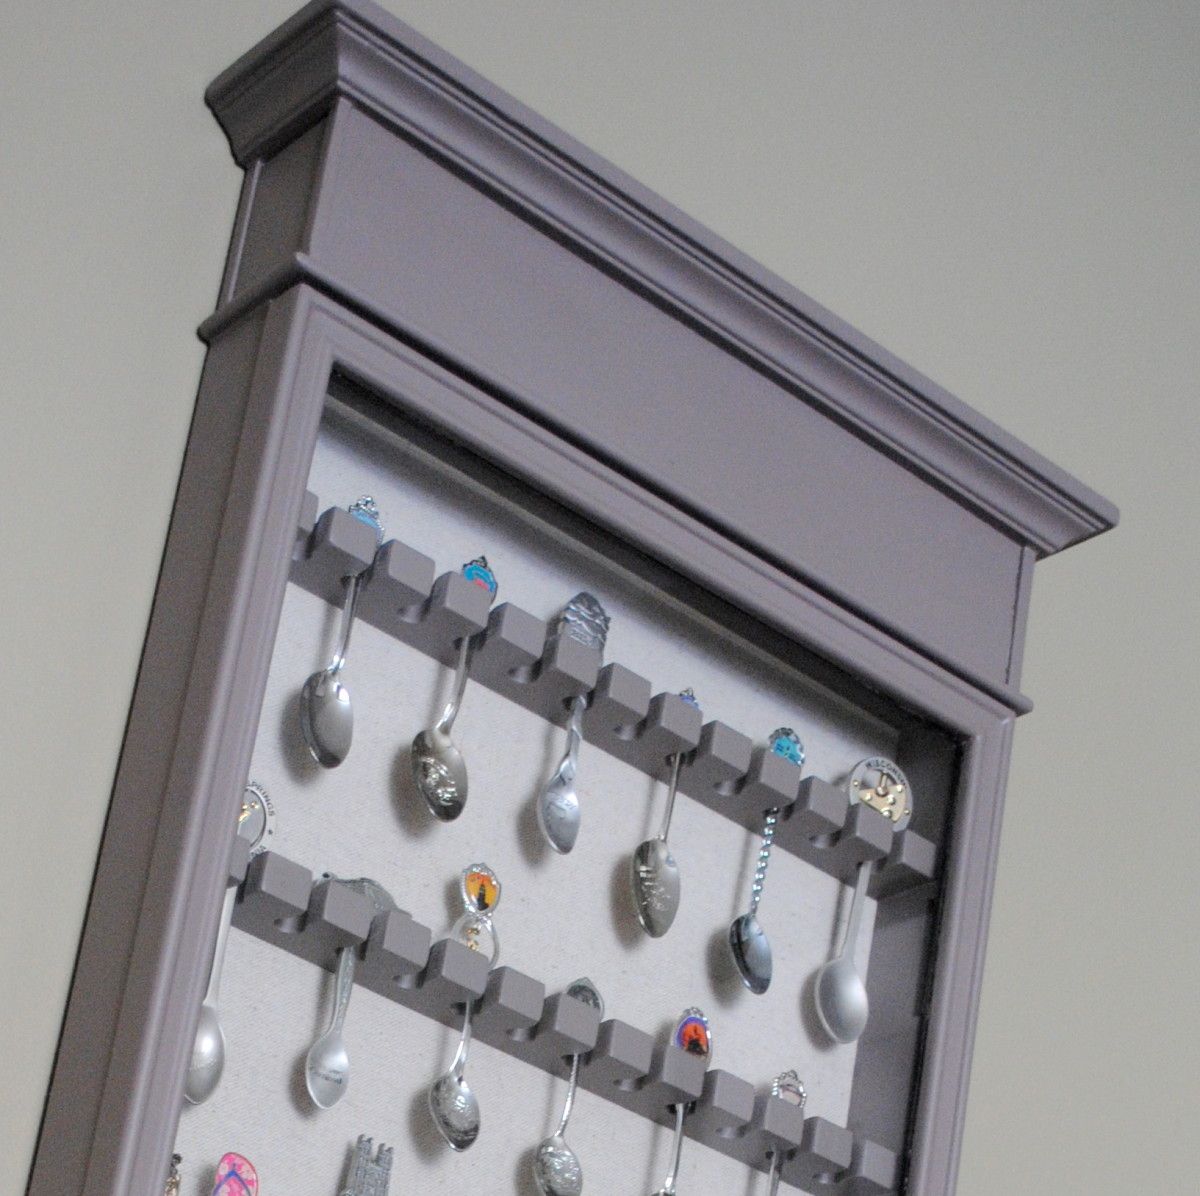
Well, here “she” is.  It was quite the process to get “her” to this point, but I have to say, I am quite satisfied.

I actually wrote about my spoon collection and my special spoon rack when I first started blogging.  It’s kind of dorky and a bit of a cliche to collect spoons, but other than my memories and pictures, the only tangible connection from our family trips are these spoons and they’re a pleasant reminder of the places we’ve been.

I purchased the spoon rack about 7 years ago from the Bombay Company, which I don’t think is even in business anymore.  At the time, the style went well with my aesthetic and I really liked how different this spoon rack looked compared to what was typical.  But recently, my style has been going more casual and less ornate, so a change was a must.

The before… And the after…

Thankfully, this year the Winter has been non-existent and a few weeks ago, the weather was so nice that I was able to work on this project outdoors.  I hadn’t planned on tackling the tranformation till Springtime, but when the opportunity allowed, I jumped on the chance!

I started off sanding all the surfaces with my orbital hand sander, as well as using sandpaper by hand to get in the nooks and crannies.

Then, I applied one coat of primer to all the surfaces to allow for a good base before painting.

All primed and ready to paint!

I was originally going to paint the spoon rack the same color as my kitchen cabinets, since my plan was to put the rack in the adjacent room, and the two spaces would tie together.  After giving it some thought, painting it would have been ALOT OF WORK.  So spray paint was the answer.  Thin, Slow, Even Strokes always leads to spray painting success!

My spray paint color of choice for this project? Thorny Brush in Satin (a taupe hue)

After completely spray painting the frame, I tackled the glass door.  This was a little trickier, but using painters tape around the edge and foil in the center, I was able to spray paint the outer edge without getting any paint on the glass. Once it was dry, I ripped off the tape (carefully, of course).

**CONFESSION** ~ I should have taken my own advice.  At first, I DIDN’T use foil for the center and after putting on the tape, just started spray painting.  SHAME, SHAME. Paint got on the glass.  THANKFULLY, I have a quick fix = Brillo and a sharp knife.  Using an abrasive brush or pad (like Brillo), gently scrub the paint off the glass, but steer clear of the edges.  For those tough parts, a sharp knife is perfect to scrape off the paint.

The last step to finish up this spoon rack overhaul was to change the fabric back.  Originally, I thought about using a bright color, then I thought about a fun and funky fabric, but in the end I wanted the spoons to “speak”, so decided on a quiet linen fabric.

What a change!  Once it was complete, I gave a HUGE *sigh* of relief!!  The spoons got to go back to their home.

It’s complete and hung on the wall {happy}!

Throughout the process, I quietly cursed a few times and bit my fingernails alot, but in the end, I am quite happy with the result!  I’m proud of myself for taking a chance on something that I was so unsure about.

Have you transformed or upcycled any projects recently?  Have you ever changed a piece of furniture or decor that you truly treasured? and if so, what was the result?

I link my projects to some of these parties: Skip to My Lou, Dittle Dattle, Between Naps on the Porch, Today’s Creative Blog, Stories of A to Z, All Things Heart & Home, Savvy Southern Style, House of Hepworths, Finding Fabulous, Creation Corner, The Shabby Nest, Tatertots and Jello, Thrifty Decor Chick, Under the Table & Dreaming

Roadside Restoration: Distressed Turquoise Chair

I’ve got a few design clients that I am working on projects for right now, and one happens to be a good friend of mine.  Her style is traditional-eclectic and it has been enjoyable to introduce some unique elements into her space.  The latest part of her home that we’ve been transforming is her master bedroom.  Upon choosing a sunshine yellow for the walls and a floral patterned rug with bursts of color, I made the suggestion of introducing elements of turquoise!  A chair was a must for the space, and with my radar-alert always turned on, I actually found one on the side of the road.  Remember when I shared this picture on my facebook page?  Yes, that’s the chair on top of all of my groceries – I couldn’t leave it behind.

Once I got the go-ahead, I started to transform the chair.  I knew exactly what I wanted to do… Distress Turquoise. {beauty}!

The chair was obviously headed for the junkyard, so it was in desperate need for a makeover once I got my hands on it!  Here’s how it looked before .

I started off by removing the seat…

Sanded all the surfaces with my orbital sander…

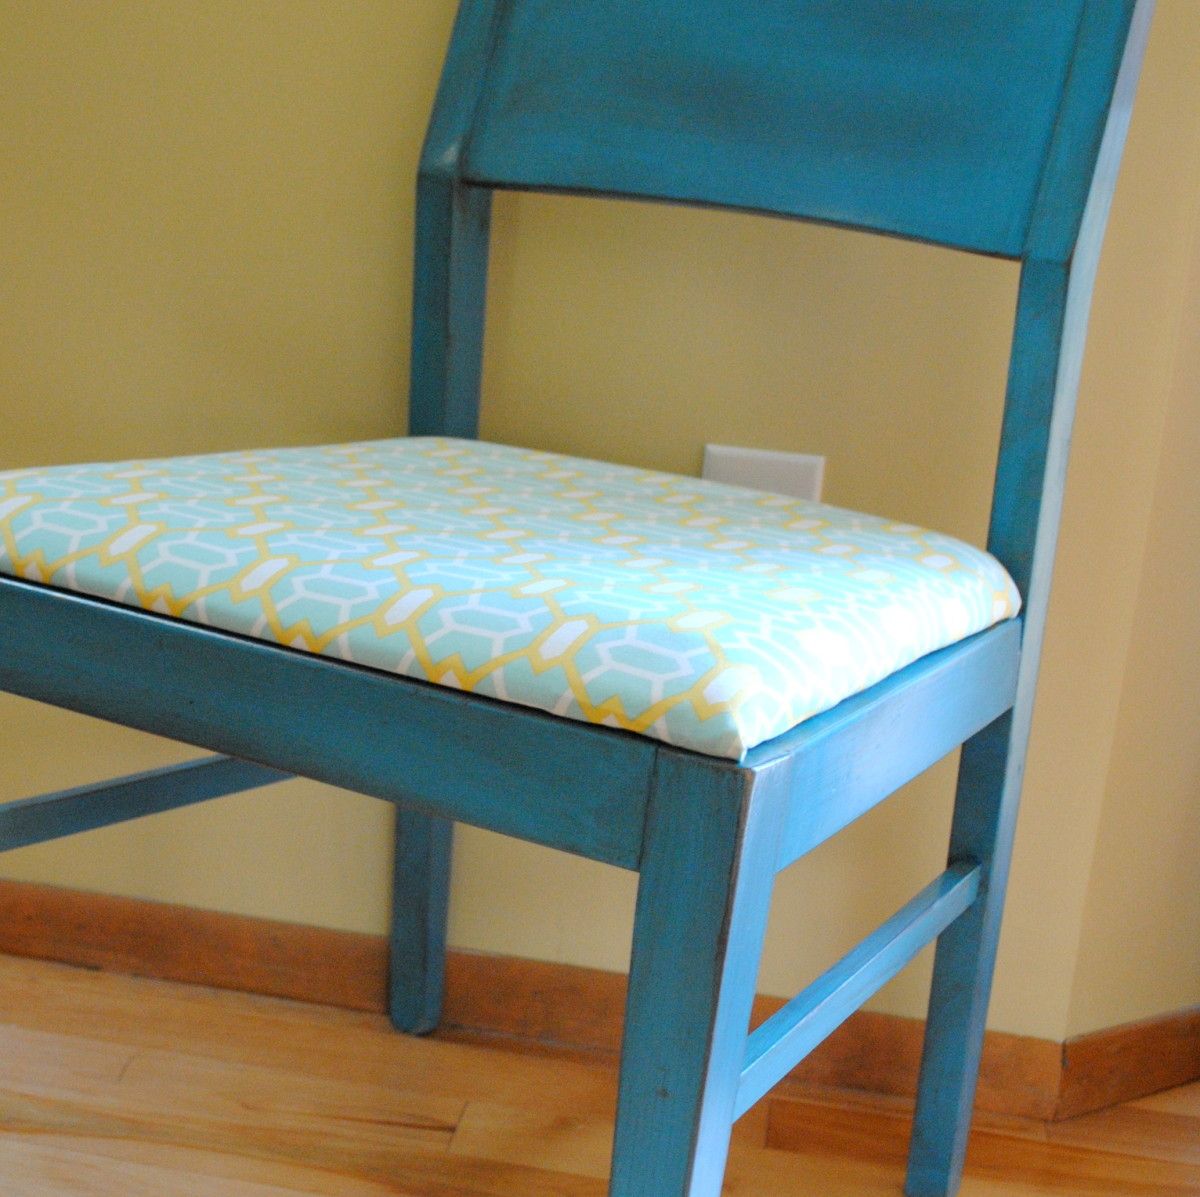
And was ready to start spray painting.  For this chair makeover, I decided on Valspar Tropical Oasis.  I’ve been wanting to use this color for SO LONG and was thrilled to finally get the opportunity.

Spray painting can sometimes be tricky!  If you need some tips, check out {this post}.

Once the spray paint was completely dried (about one day later), I was able to begin the distressing.   I used the same steps as I did to create my foyer cabinet, but here’s a recap:

  1. I diluted brown paint with 1 part water, 1 part paint.  Using my Purdy brush, I lightly brushed on the water-paint mixture.
  2. Brush on the water-paint mixture in sections – I started with the chair legs, then moved onto the seat back.  Don’t get too far ahead of yourself.
  3. Using a clean, lint-free rag, wipe away the paint.  Depending on how much distressing you want, you can vary your degrees of wiping pressure.  (wipe alot for less distressing and wipe alittle for more distressing)
  4. And you’re done.  Now move on to the next section, until the entire piece of furniture is completely distressed.

I call the distressed overlay “glaze”, but it’s not really glaze, but instead this water-paint mixture that I created. This is a step by step of me applying the water-paint mixture to the chair back and then “wiping” it off with the rag.  The “glaze” is fairly forgiving.  Again, the more you wipe, the less distressed the result.

To add a bit more distress to this chair, I also lightly sanded some of the edges with medium grit sandpaper.  This just added to the “aged” aesthetic.

Once the edges were slightly sanded and the “glaze” was dried, which didn’t take a long time, I applied 2 coats of polyurethane to seal the chair.  (don’t forget this step – it’s important)

It wasn’t complete yet, since there was nothing to sit on and I wouldn’t dare put that old yellow crushed-velvet-like fabric back on.  I searched and searched and found this fabric that I thought would be perfect for the buttercup yellow room!

I removed the old seat fabric (there was actually three layers of old fabric) and was left with this…

And then it was time to add my newly chosen pretty fabric!  I flipped over the seat…

Using a staple gun, I attached the fabric to the underside of the seat.

Recovering a seat is really easy and can make a huge difference in updating the look.  The corners though can sometimes be tricky, so here’s an easy step-by-step pictorial of how I created them.

The completed seat…

And the finished chair…

I was so happy with the outcome of this chair and the color is exactly what I had envisioned.  I just wish…

… it could be mine!  Doesn’t it look so pretty in this spot?!  Unfortunately though, I delivered it to my friend and it now sits perfectly in her bedroom 🙂

Don’t you just love turquoise?  It really is one of my favorite colors.  When I ordered the fabric for this chair, I also ordered a few other fabrics to make new pillows for my living room and guess what color they have in them??  Yes…you guess – turquoise!  I’ll share more soon!!

I link my projects to some of these parties: Skip to My Lou, Dittle Dattle, Between Naps on the Porch, Today’s Creative Blog, Stories of A to Z, All Things Heart & Home, Savvy Southern Style, House of Hepworths, Finding Fabulous, Creation Corner, The Shabby Nest, Tatertots and Jello, Thrifty Decor Chick, Under the Table & Dreaming

DIY: Holiday Photo Cards

It’s that time of year when the post office is at it’s peak with the hustle and bustle of people sending out packages and waiting on line for stamps to mail their Holiday cards.  I usually design my cards in early November and mail them out right after Thanksgiving (this year though, I was a little late).

Because I have young kids and we have family near and far that we don’t often get to see throughout the year, I like to design and send a photocard, but they can often be expensive.   In being somewhat of a frugal person, I decided to make my own Holiday photocards this year (and honestly, I like the result better than the plug-your-picture-in-and-print style).

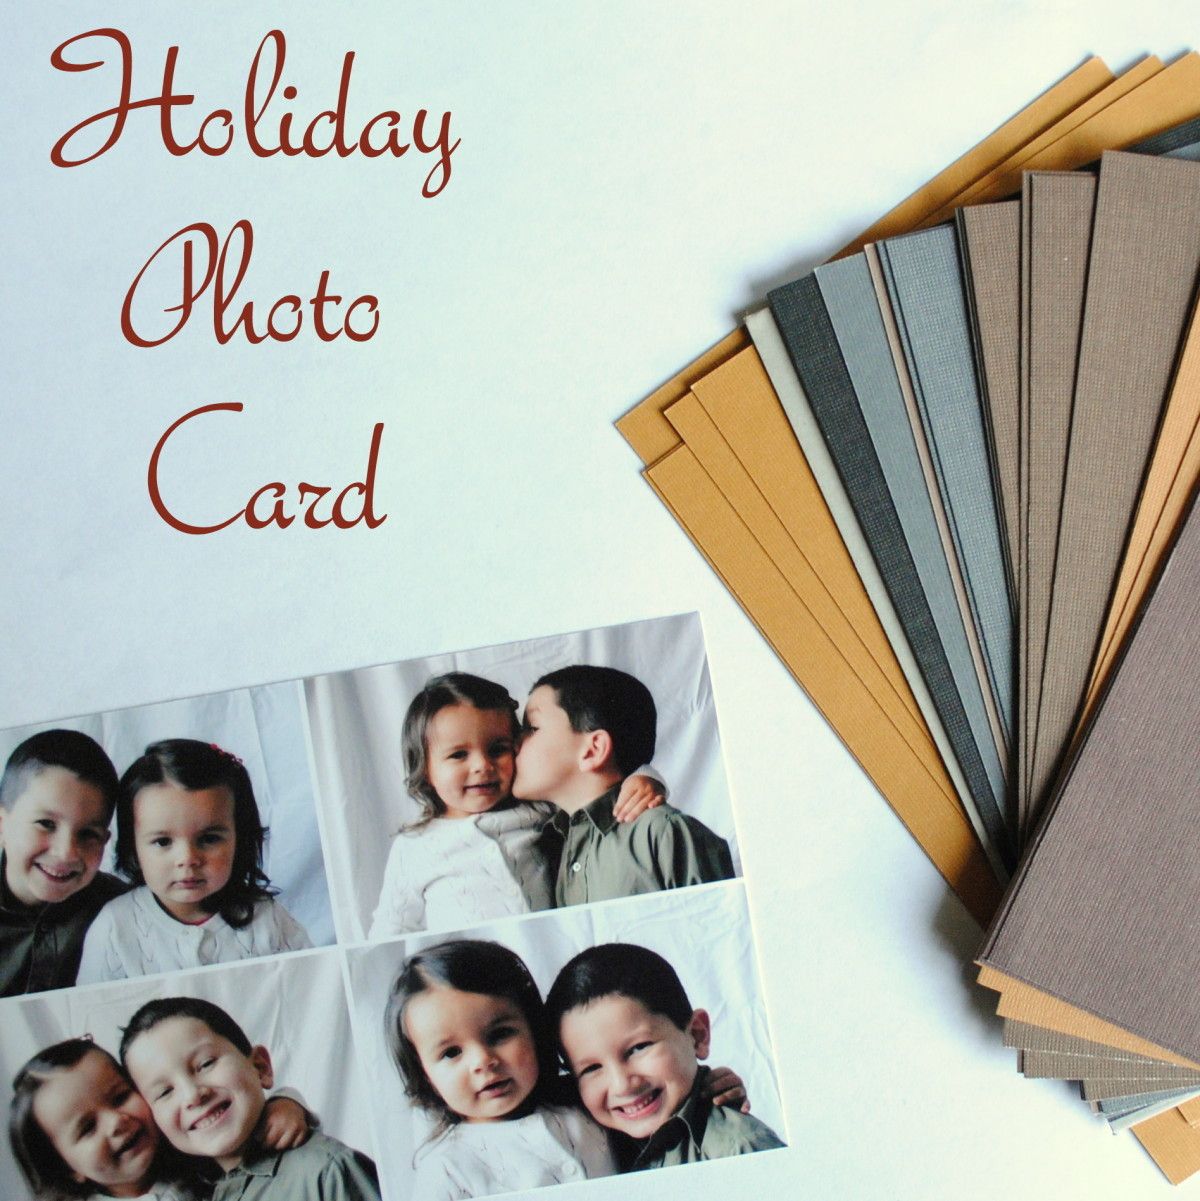
After a long photo session with the kids (which I was the photographer of), I used the free program, Picasa, to make a collage of pictures that would be perfect for the card.  I had them printed at Walmart for .09 cents each (x 40), which ended up costing me just over $3.00.

I was originally thinking of using white index cards to mount them on, but then I was able to find really heavy and pretty card stock that was slightly larger than the picture.  The card stock came in an assortment of earth tone colors, and was the perfect backdrop for the photo montage.

Using Aleene’s Tacky Tape Runner, I added three rows to the back of the picture to make a tacky surface so it would stick to the card stock.

This is the back of the photo, where you can see the three rows of Tacky Tape that I added.  I originally planned to use a gluestick to adhere the picture to the card stock, but this tape was SO MUCH BETTER!  It was easy to apply to the picture and then it adhered very well to the card stock surface.

I actually was lucky enough to receive this Tacky Tape from Aleene’s, along with some other “tacky” products that they offer. (and I mean “tacky” in a good way, not the overboard-ugly-too much way!)

Then flip the card onto the cardstock, and it’s complete!

Write something on the back, and they will be ready to mail!

We don’t really have an Aunt Betty…  I just wrote this out for the tutorial 🙂

If you’re interested in trying out products by Aleene’s to create your own creation, their products are available at Michael’s stores or online at www.Ilovetocreate.com.  I know you will be happy with the result of your project when you use their products – I sure was!

My Holiday cards are in the mail…  Are yours?

All the opinions in this post are 100% mine! Full post disclosure here

I link my projects to some of these parties: Skip to My Lou, Dittle Dattle, Between Naps on the Porch, Today’s Creative Blog, Stories of A to Z, All Things Heart & Home, Savvy Southern Style, House of Hepworths, Finding Fabulous, Creation Corner, The Shabby Nest, Tatertots and Jello, Funky Junk, Under the Table & Dreaming

If you’d like to see more projects by other bloggers using the Aleene’s products, click on the links below:


DIY: Christmas Stockings

Did you check out my newly decorated Christmas mantel?  If not, that’s okay (but head over there now).  In that post you got a little sneak preview of the Christmas stockings that I recently made.  As a family of four, we’ve never had matching stockings.  The mister and I have the same (since we bought those together after getting married), but then came child #1 and he got a different style stocking, and after that child #2 came along and she has an even different style stocking.  Anyway, each year it’s been a mish-mosh of different color and style stockings hung on the mantel, until now.

You know my love for drop cloth, so what did I use?  Yes, you guessed it…the big DC!

I’ve always wanted to make stockings, but was intimidated thinking it would be too difficult – but IT WASN’T!

Using drop cloth material for the main stocking, creme colored felt for the cuff, and the basic sewing essentials, I created these stockings, that now sit at the mantel, in no time!  To start off, I used the old stocking as a template to create the “boot-like” shape.  I then cut an 8″ x 12″ piece of felt for the cuff, and sewed the “right” sides together (see pictorial).

I made 4 stockings (which have 2 sides each), so I had a total of 8 sides.

Once the cuff is attached to the “boot”, open the cuff and iron.  Then put the “right” sides of the boots together and pin all around.  Using a 1/2″ inseam, sew around the entire boot, EXCEPT at the top edge of the cuff.

Once you finished sewing all the way around, turn the stocking to the “right” side using the opening at the top edge.  Then iron the edges flat.

The stocking form is made – YAY!

At this point of the stocking-making-process, the tops of the cuffs will probably not match – that’s OKAY!  Taking a scissor or rotary cutter, trim the top edge of the cuff to get a straight line.

Then it’s time to make the cuff – turn over the felt fabric and adjust it to the amount that you want to see for the “cuff”.  I’ll admit, at this point, I was a wee bit mad at myself for not forethinking what I’m about to share.  There are many different ways to make stockings and honestly, I didn’t do any research beforehand, and just “went for it”.  Kind of a mistake.  When I went to turn the fabric over to make the cuff, I realized that you could see the stitching on what was before the “inside” of the cuff (see right pictorial).  At this point, I was about to ditch the project, but then I realized because the fabric is felt, it won’t fray and it actually gives the edge a decorative look.  I trimmed the edge about 1/4″ off the seam and I’m pretty happy with the result.  Another (slight) fail to success project!

Essentially it’s complete at this point, but of course you need something to hang the stocking.  Using another piece of felt, I simply made a loop that I sewed on to the inside edge of the stocking cuff.

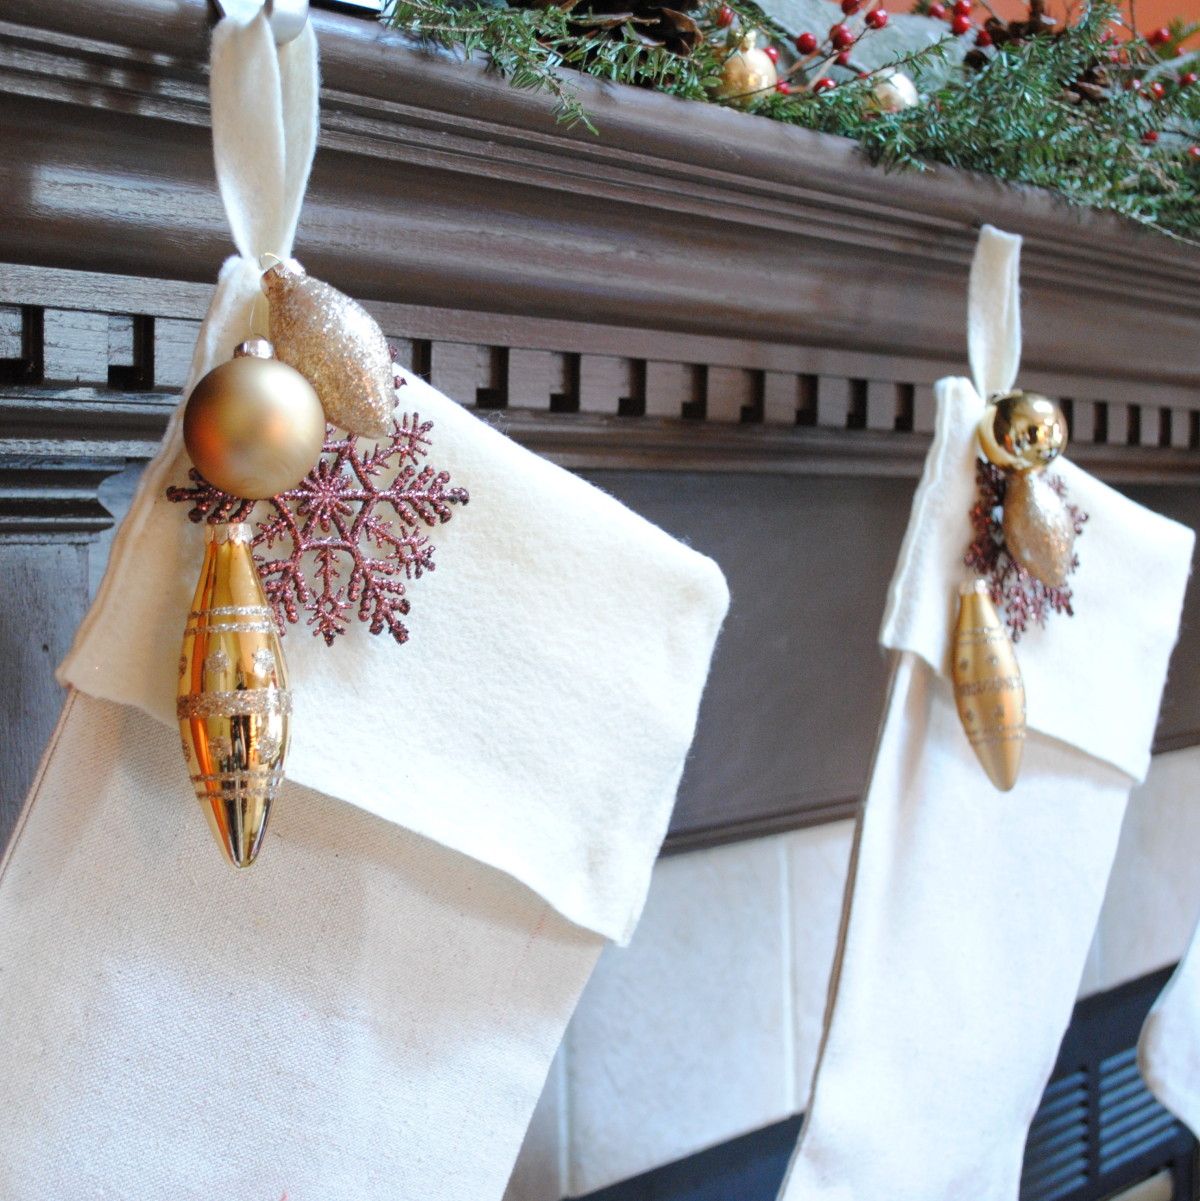
Now they are ready to hang!  If you saw my Christmas mantel the other day, you may have noticed that the stockings were plain and unembellished.  Well that only lasted a day.  Using the ornaments from my Organic Centerpiece that I displayed on my dining table last Christmas, I looped them through clear fishing line and hung them around the felt loop of the stocking.  Also adding a chocolate glitter snowflake, the collection was a beautiful accent to the neutral-colored background fabric.

Also placed on two of the stockings are pins that were favorites of my husband’s late grandmother. A little way he remembers her around the Holidays.

I really love the simplicity of these stockings.  Each year as I change my colors and Christmas decor they will always be a beautiful accent to different embellishments that I can add.  Do you hang stockings at the fireplace?  Are they matching or a mish-mos of different styles like I had for the past years? (and just to set the record straight…  I don’t mind mish-mosh…  it’s eclectic!)

I link my projects to some of these parties: Skip to My Lou, Dittle Dattle, Between Naps on the Porch, Today’s Creative Blog, Stories of A to Z, All Things Heart & Home, Savvy Southern Style, House of Hepworths, Finding Fabulous, Creation Corner, The Shabby Nest, Tatertots and Jello, Thrifty Decor Chick, Under the Table & Dreaming