Outdoor Sculpture Made From Trash

DIY: Outdoor Sculpture using metal straps from an old barrel. Big impact with little work + no cost!

I hope you had a wonderful weekend!  It was a half rainy, half sunny weekend in my neck of the woods, so I took the opportunity to do some thrifting with my mom on Saturday and then some major DIYing on Sunday.  I actually worked on about 6 different DIY projects and am super psyched to share some of them over the next week or two.

One project in particular is a new outdoor sculpture that now sits in my garden that I made using, well…  trash.  It’s kinda crazy, but I love it!

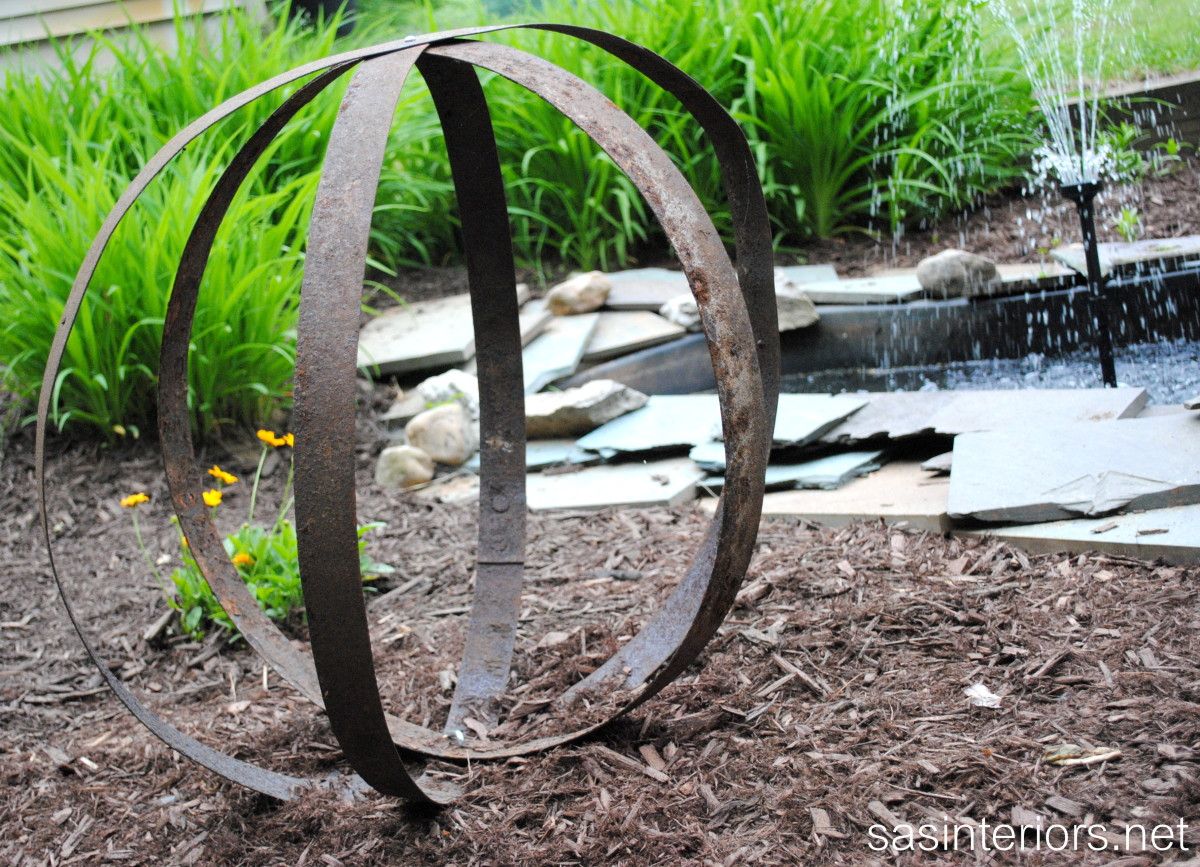
Before the cleanout began for the sideyard makeover (which I’ve mentioned here and there over the last few months), there was an old wood barrel planter sitting in the corner, falling apart, and in desperate need for the trash.  When the time came for the barrel to hit the garbage, there was a DIY fairy that sat on my shoulder telling me to keep the corroded metal straps that once, long ago, kept the barrel together.


I had NO IDEA what I would do with them, but in the shed they went… for about two months… until the revelation hit me… How about making them into a sculpture??  Hmmm… That could work!

There was part of the garden on the sideyard that was bare and instead of planting more flowers, the vacant spot was perfect for my new-found idea.

How to Make the Trash Turned Sculpture

This sculpture took minutes to make – probably less than 10 minutes in all!  Using a drill with a metal drill bit, the Mister and I worked together and drilled 2 holes in each ring.  The holes were placed directly opposite of each other.

Once all the holes were drilled, we aligned the top and bottom holes of each ring.  We secured the rings at the top with a nut and bolt, and for the bottom, we used a 6″ tent stake which went into the ground.

And that was it!  I rotated the rings until the positioning was just right, and then sat back to admire this trash to treasure.

So what do you think?  Pretty neat, right?
What treasures have you made from trash?

I link my projects to some of these parties: Skip to My Lou, Dittle Dattle, Between Naps on the Porch, Today’s Creative Blog, Stories of A to Z, All Things Heart & Home, Savvy Southern Style, House of Hepworths, Finding Fabulous, Creation Corner, The Shabby Nest, Tatertots and Jello, Thrifty Decor Chick, Tip Junkie

Staircase Makeover: Filling Holes and Staining Treads

It’s almost been 2 weeks since I posted about the stair makeover, but don’t think I haven’t been hard at work.  The staining took quite a long time and not because it was difficult, but for another reason – keep on reading.  Anyway, I can officially say that the staining is complete and I am at the half way point now (I hope).

This second phase of the staircase makeover covers sanding the stairs, filling the gazillion holes from the carpet tacks and staples, and staining the treads. So let’s jump right in and get started!
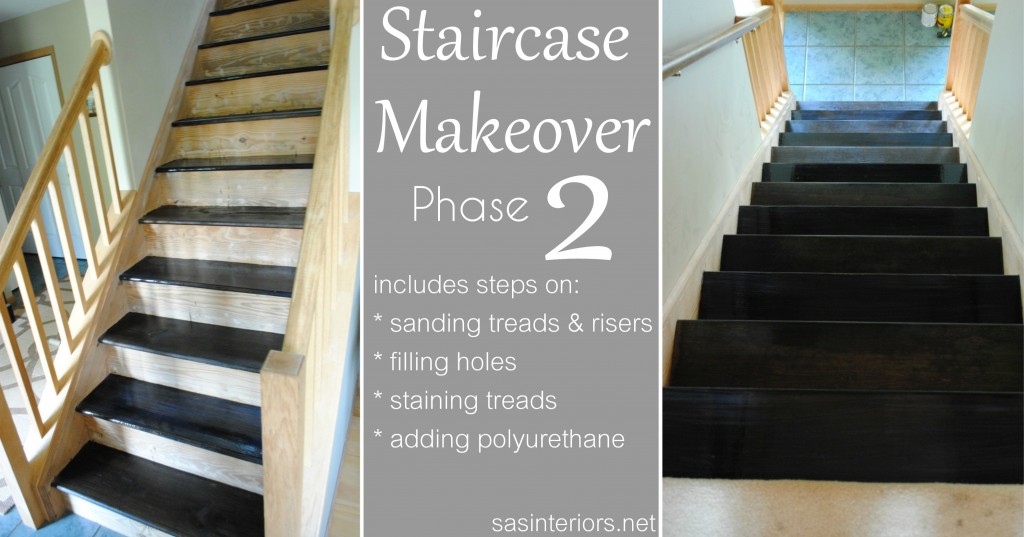
Project Details

Duration of Phase Two: 1.5 hours for sanding & filling holes; 2 overall hours for staining / polyurethane (5-10 minutes for each coat)
Phase 2 Difficulty: Easy to Medium
How Many People Needed: 1

The supplies I used for this phase of the project are:

  • Orbital Sander (sandpapering by hand is also possible, but will take longer)
  • Wood Filler (in a color to match the wood)
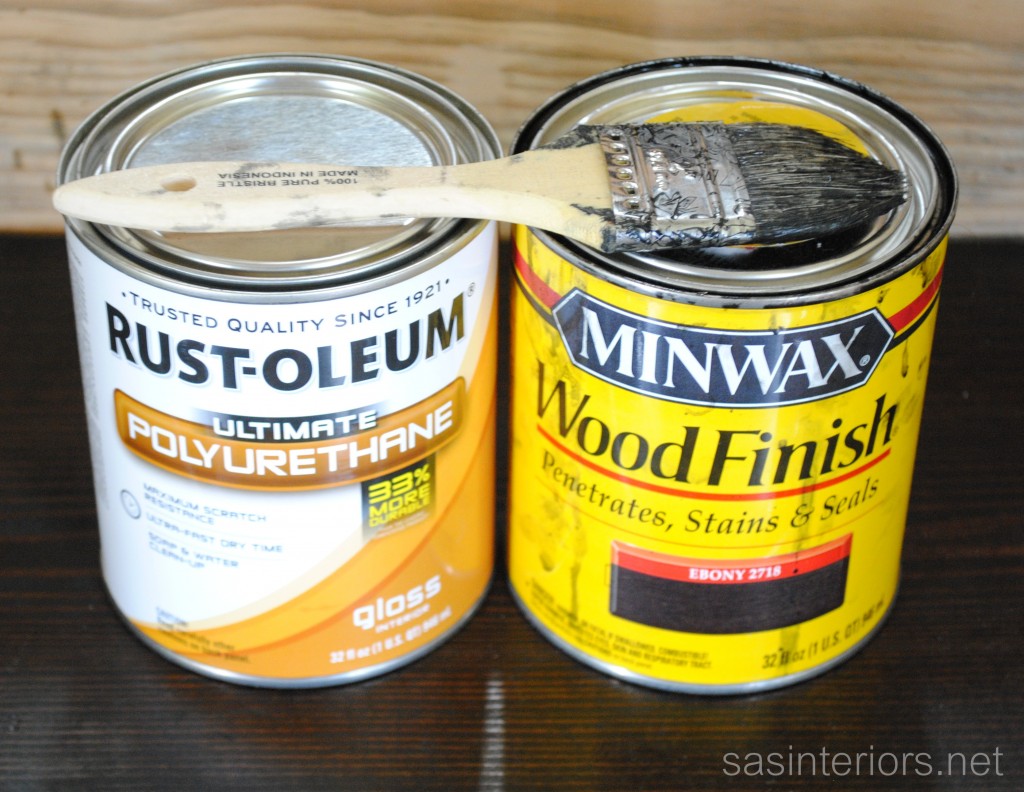
  • Stain – I used Minwax Wood Finish in Ebony
  • Polyurethane – I used Rustoleum (water-based) in a gloss finish
  • Cheap brush or sponge brush that can easily be thrown away
  • Mineral Spirits (if you don’t want to use a cheap brush and instead wash them)
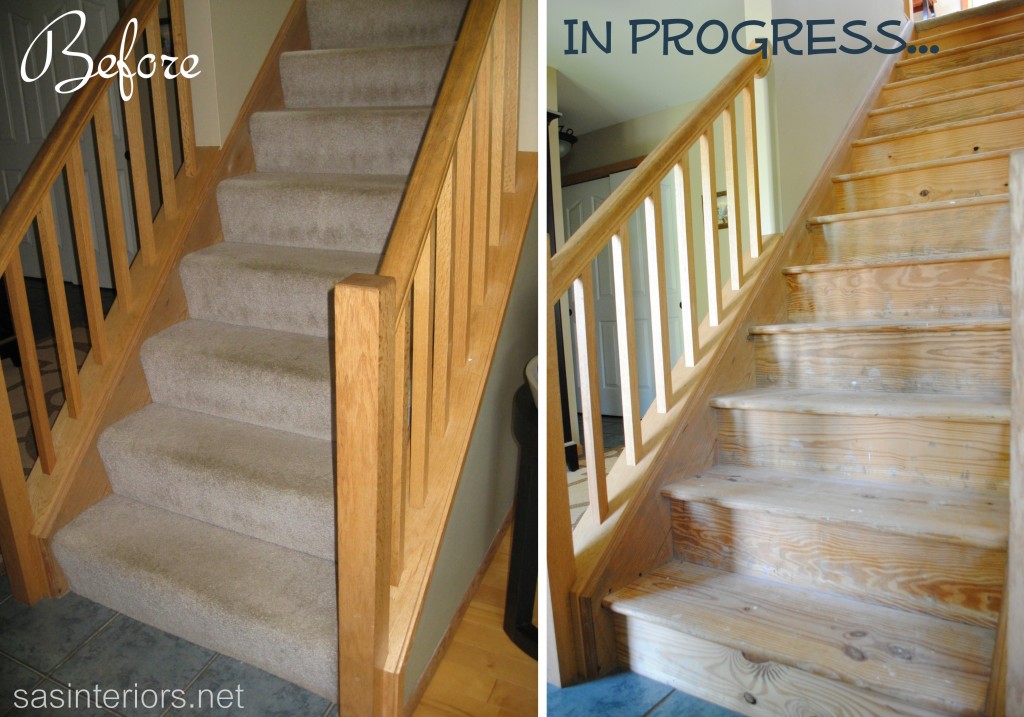
In my last post on removing the carpet and prepping the stairs, I left you off with this…
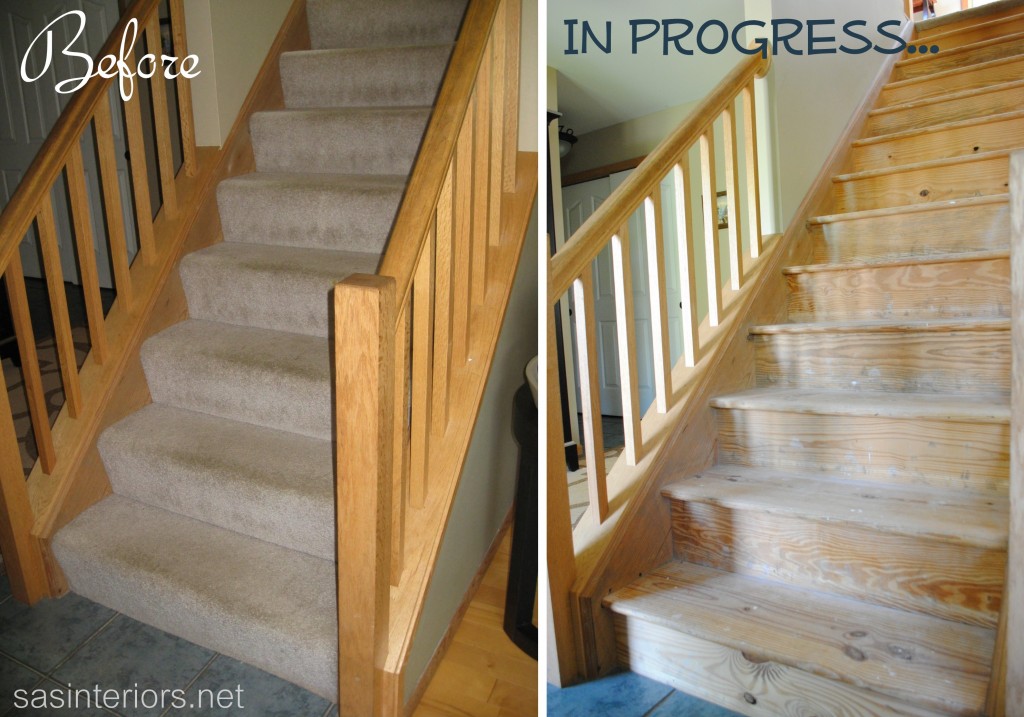
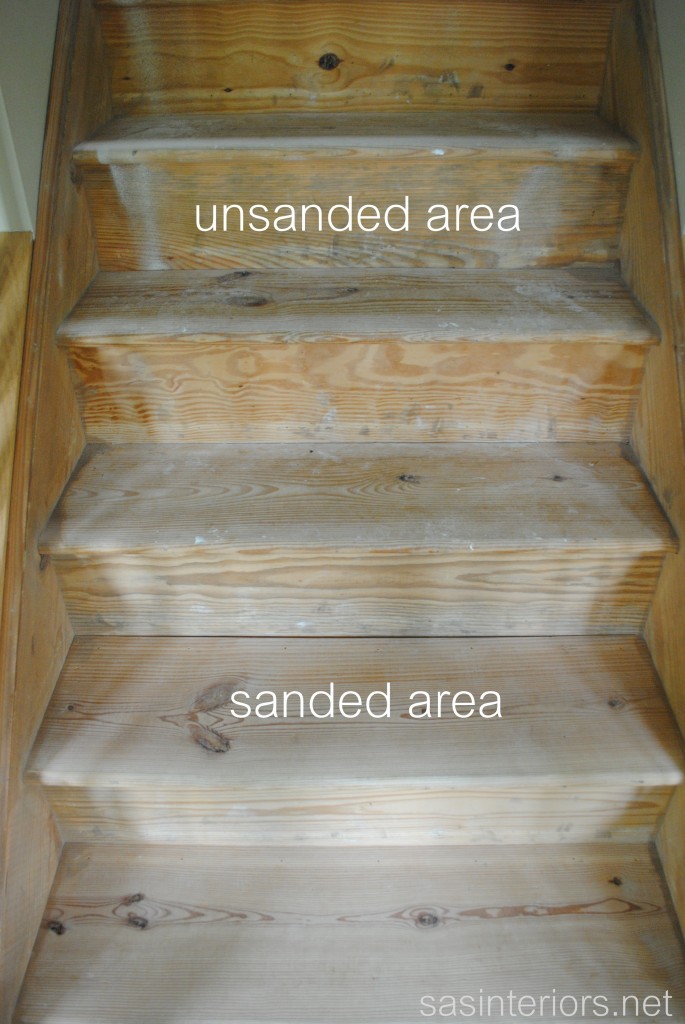
Once the carpet tacks and staples were fully removed, it was time to sand the stairs.
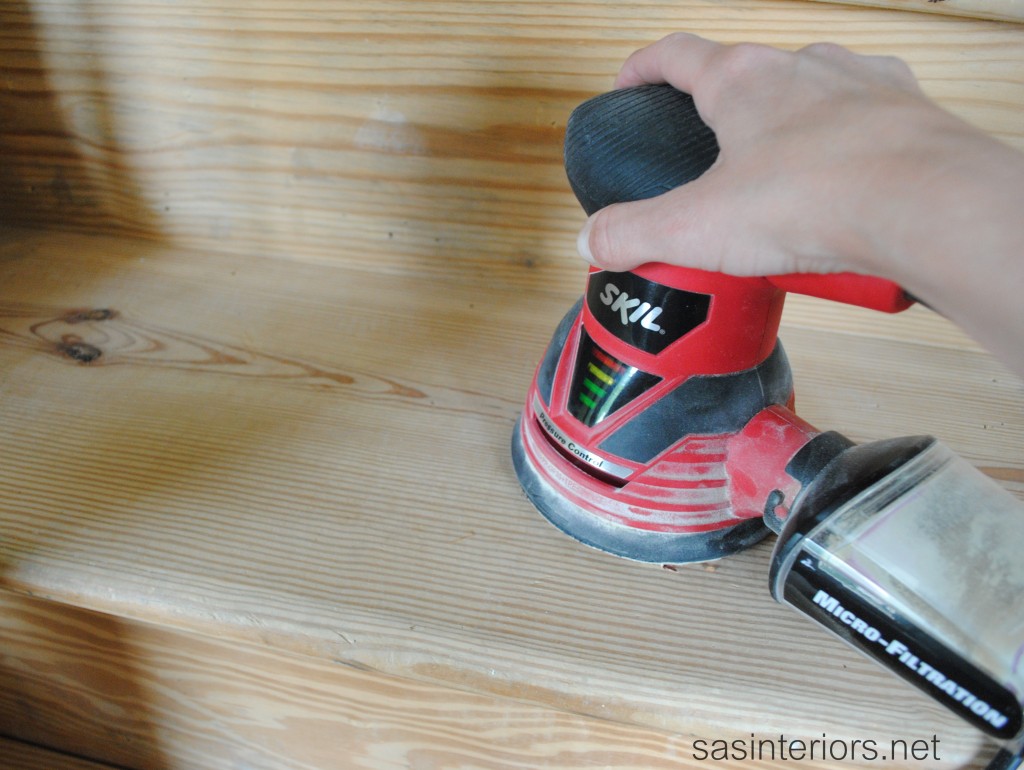
As I mentioned above in the supply list, I used my orbital sander to get a really smooth finish and to take away marks and old paint drippings.  Manually sanding the treads and risers with sandpaper is fine too, but will take longer and is more laborious – if you’re looking to build your arm muscles, this may be your calling 😉
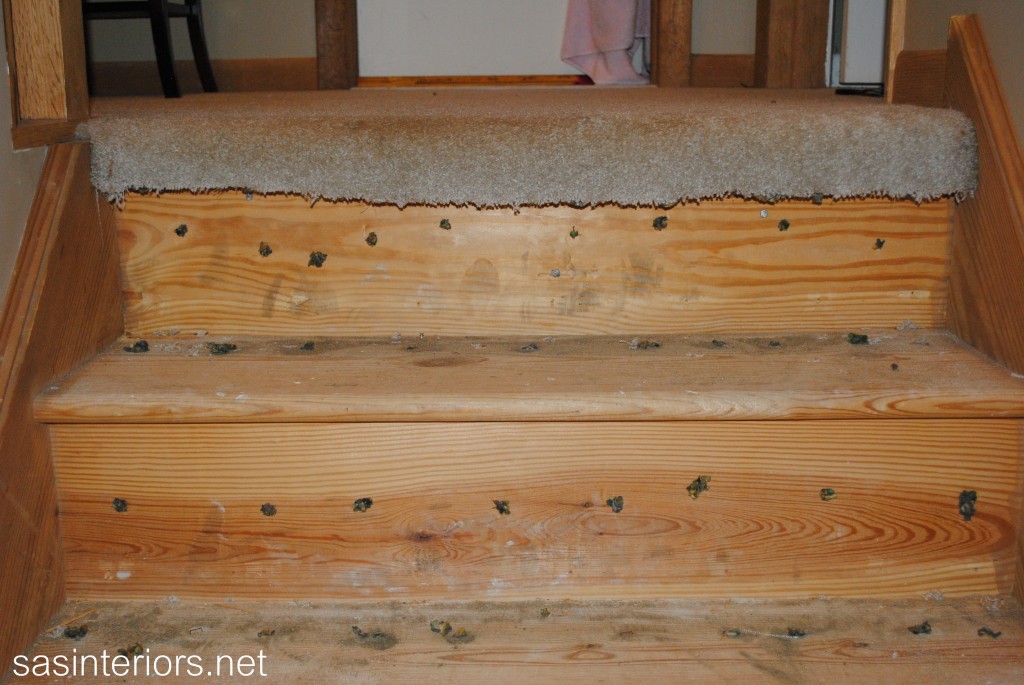
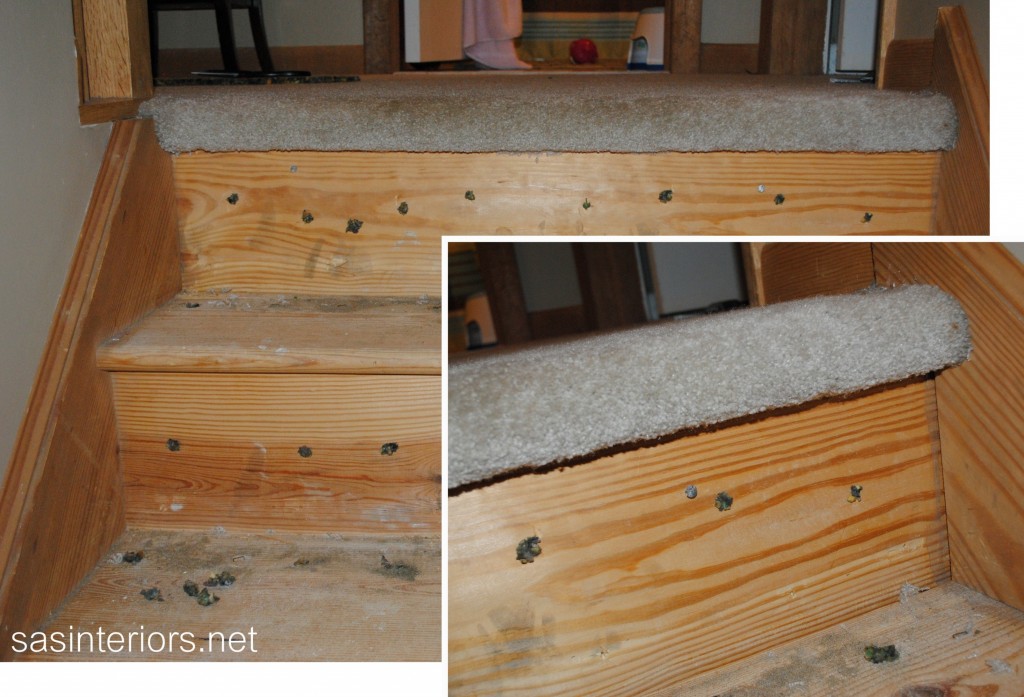
Once the stairs were smooth, I used wood filler to fill in the many holes left from the carpet strip tacks and the carpet pad staples.  There were also a few holes from the natural grain of the wood that I also filled in.
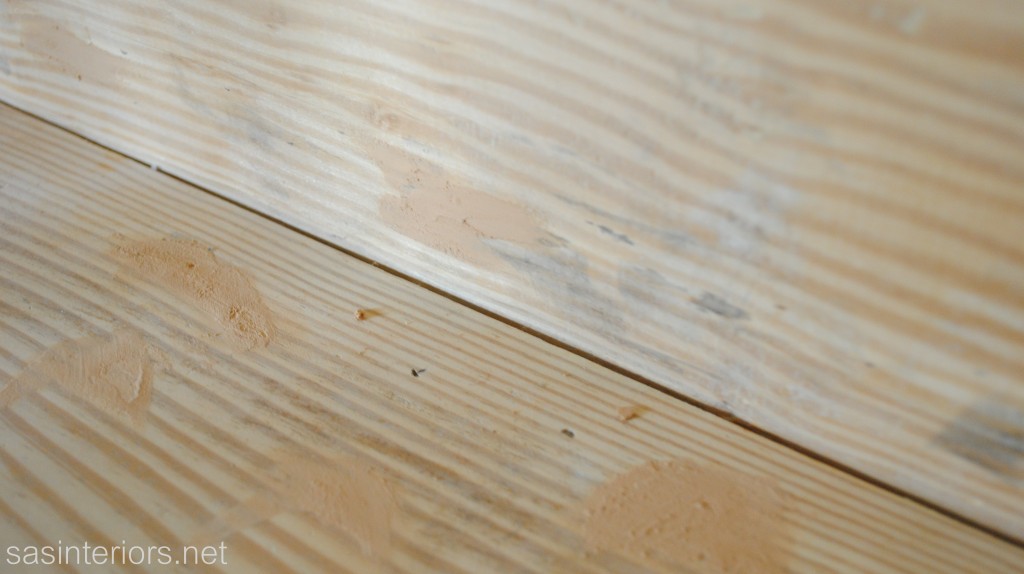
After the holes were filled and the wood filler was completely dried and hard 24+ hours later (it’s important that the wood filler is really dry!), I sanded again.  The wood treads were ready for staining when the stairs were completely smooth to the touch.

Now to the staining process…

I don’t have alot of staining experience, and frankly staining has always scared me.  Unlike painting, it seems so difficult, but thankfully I was proven wrong with this project.

As I mentioned in my last post, I was desiring a really dark stained tread for the stairs, so I chose to use an ebony finish.  Before making the final decision though, I reached out to my blogging bud and the very talented DIYer, Kate of Centsational Girl.  I had showcased her stair makeover as one of my inspirations, and wanted to know what she used for her dark tread.  She told me that she used a product called Duraseal, which has a molasses-like consistency and gave a darker finish because it was less watery than typical stain.  I couldn’t find the Duraseal and was anxious to get started on the staining, so I chose to use Minwax Wood Finish in ebony.  It was the darkest color they had, so I was up for the task of trying it out.  As an alternative, Kate gave me the advice of trying a gel stain which like the Duraseal has a thicker consistency.  I’m a bad girl because I didn’t take her advice, BUT thankfully I’m happy with the result I achieved, so all is good 🙂

When staining, it’s key to apply thin coats of stain and angle the brush at a 45 degree angle to avoid bubbles.  After cleaning the stairs with a rag to remove any remaining dust from the sanding, I was ready to get started. I used a cheap bristle brush to apply the stain, so I could easily throw it away after the stain applications.

Here are the few steps I took to stain the treads.

1. I started at the corner of the treads.

2. I feathered my brush towards the center, parallel to the wood grain.

3. Then I carefully dragged my brush along the edge of the tread and the stair stringer.

4.. After that I feathered the stain in the same direction of the grain again.

The reason for doing these steps is so the tread is thoroughly covered with stain AND minimal stain gets on the stringer (side piece).  For my stairs, I will be painting the stringer white and using a stain blocker beforehand, BUT I was nervous (here comes my apprehension of using stain again) and didn’t want too much stain to get onto the stringer.  Alittle nutty, I know… but it worked.
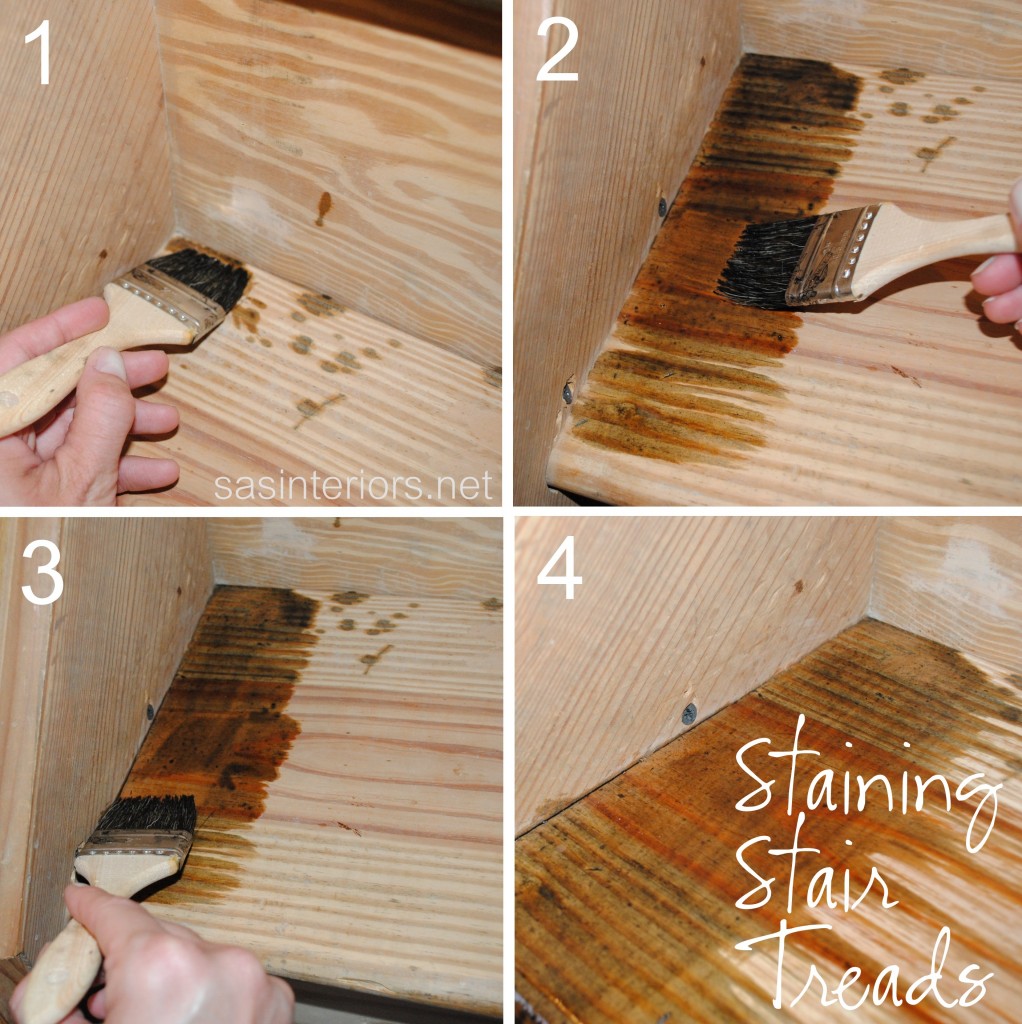
Continuing with the staining, I applied it to the remainder of the tread in the same direction as the wood grain.
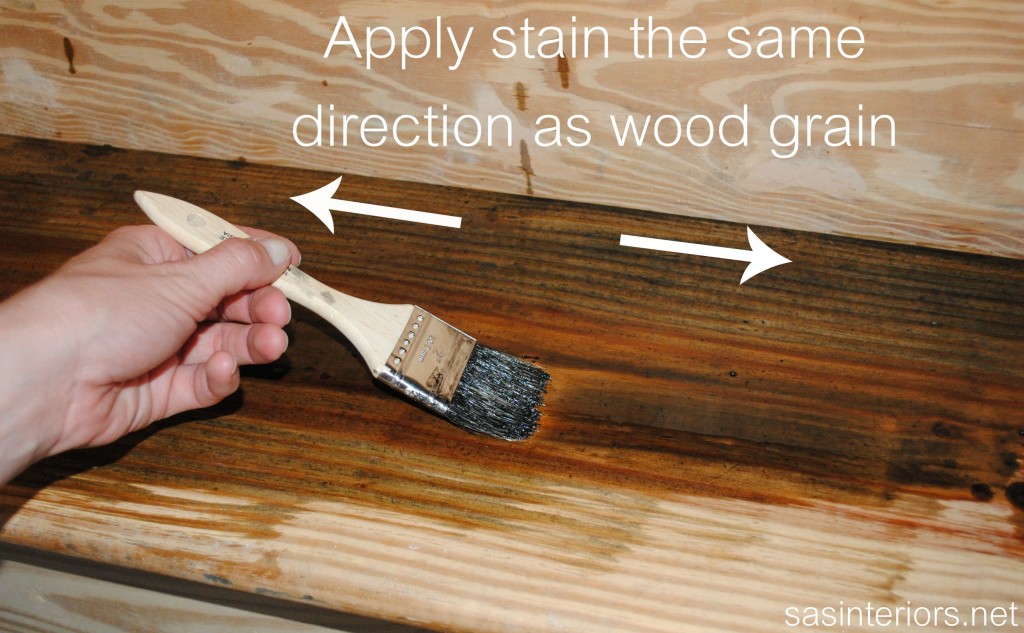
Now that I shared the particulars on how to stain, let me tell you some more details…

The staining process took a while and the major reason was because we still needed to use the stairs.  What to do??  Well, I ended up staining every other stair so we could still get up to the second floors. We did need to sleep, of course 😉
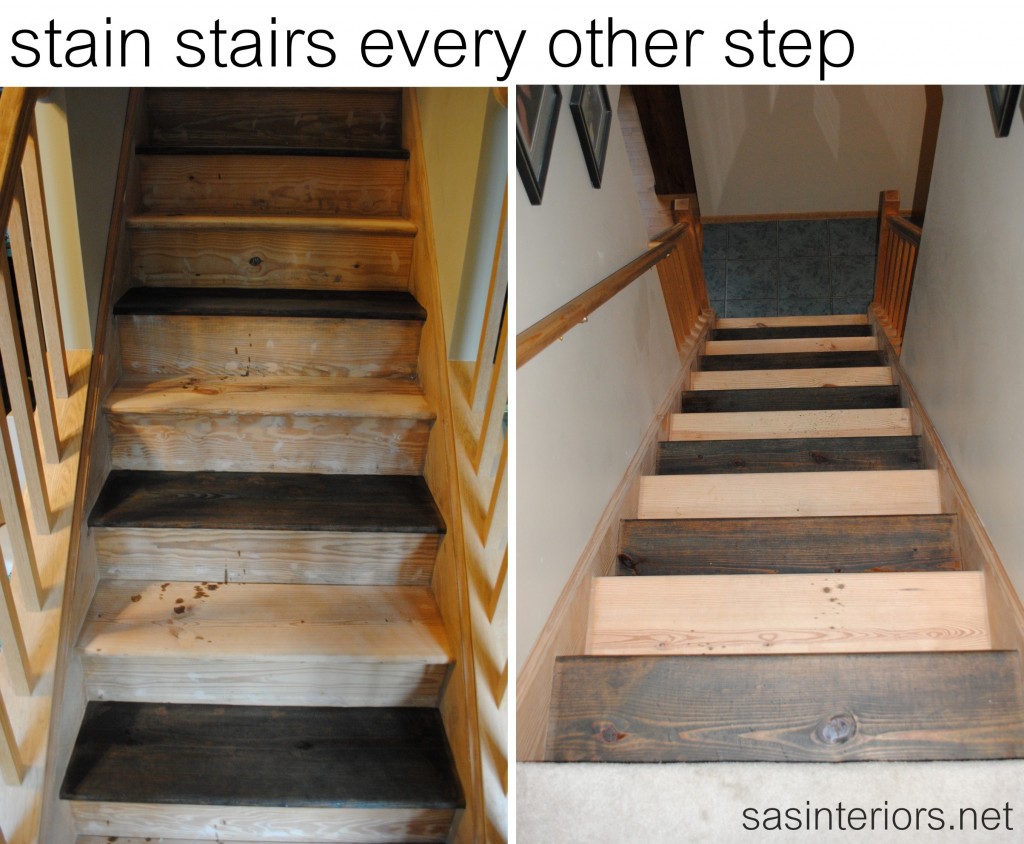
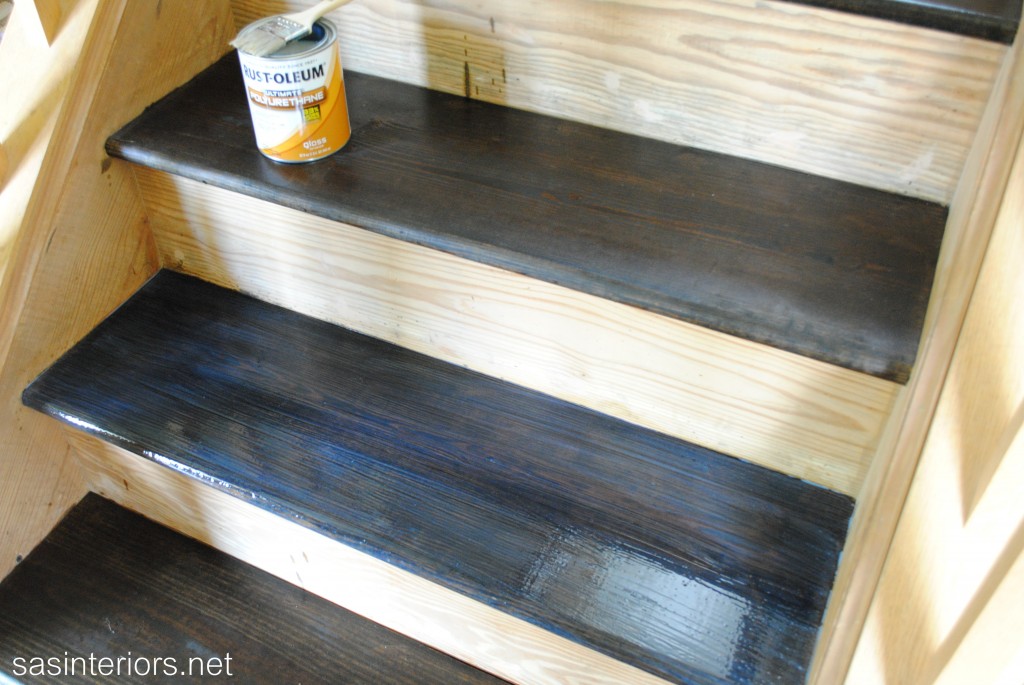
So… because I had to break the project up into two phases, it took longer.  After applying the first coat of stain, it soaked right into the wood, and was dry within about 1-2 hours – there was absolutely no wiping away needed.

Then I applied a second coat of stain, which also soaked right in and took about 1-2 hours to completely dry.  At this point, the stair had a really dull finish to it, but it still wasn’t dark enough for my taste.

So a day later, I added a third coat of stain and that was key!! It took a good day for it to completely dry, but I was happy. Then I was able to move on to the other stairs that were still raw.
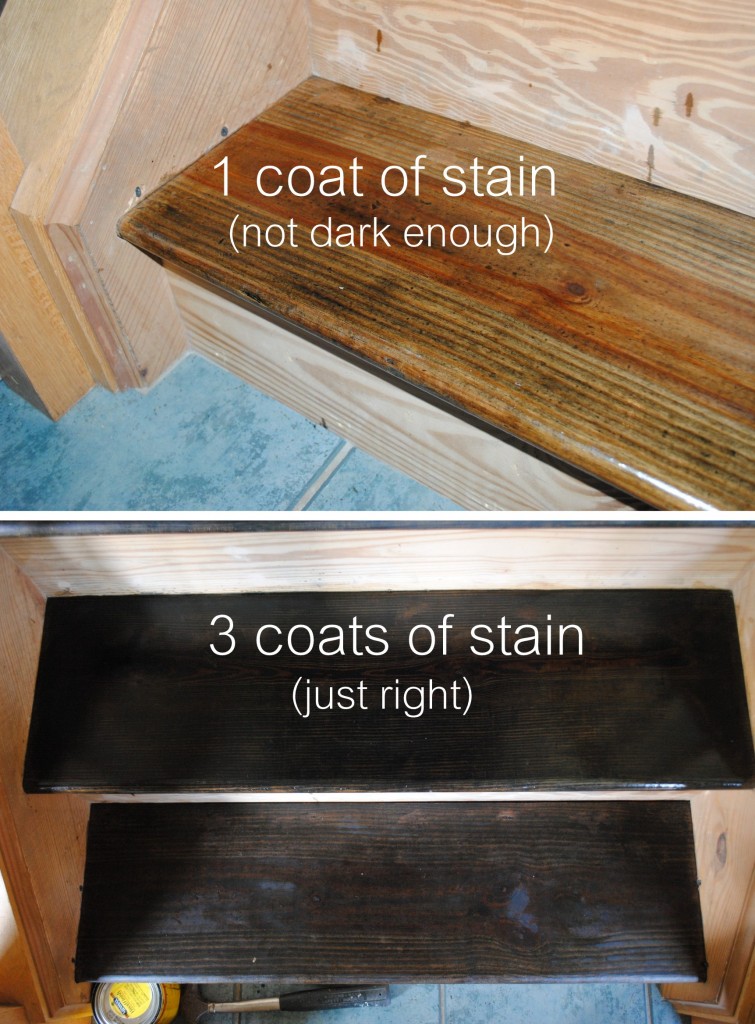
The more coats you apply, the darker the result

Once the third coat of stain was complete, I sealed the stairs with Polyurethane.  I had tested one small area using a semi-gloss finish, but it wasn’t right, so I decided on a gloss finish.  It gave just enough sheen, but wasn’t overly glossy (if that makes sense).

Kate recommended applying 2-3 coats of polyurethane and this time I took her advice.  After all my hard work, I wouldn’t want these stairs to get ruined!
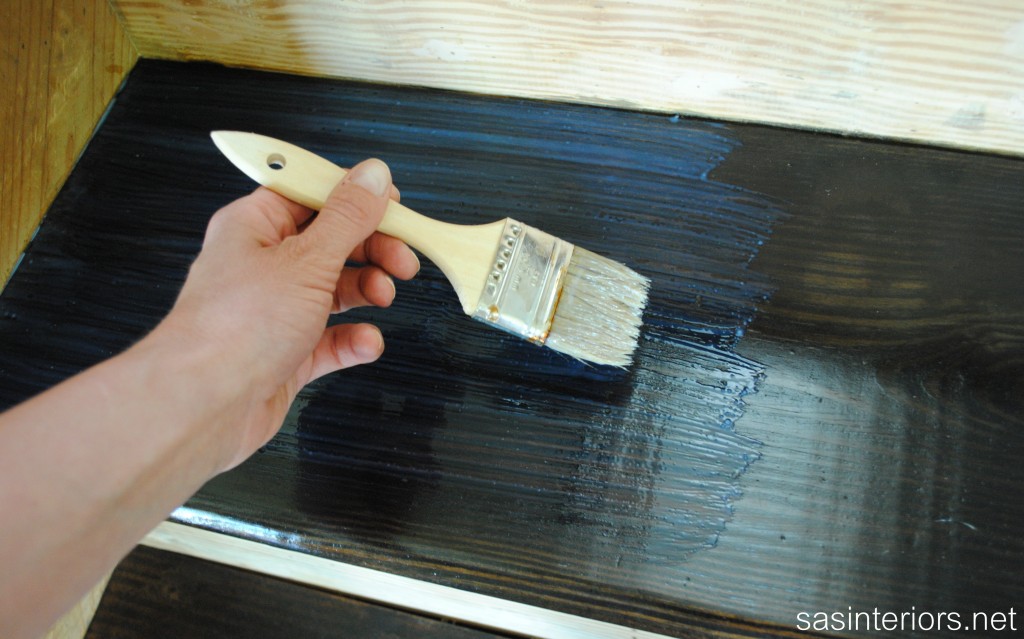
The polyurethane that I used had a blue tinge when applied (which I freaked out about for only a few seconds), but quickly went away – thank goodness!
And that’s it for the staining process.  This same process and techniques could also be used for furniture.

I got a few comments from readers after my last post that they enjoyed how thorough and explanatory my post was, so I tried to do the same with this – I hope you enjoyed it and learned something new.  If you still have questions, let me know!
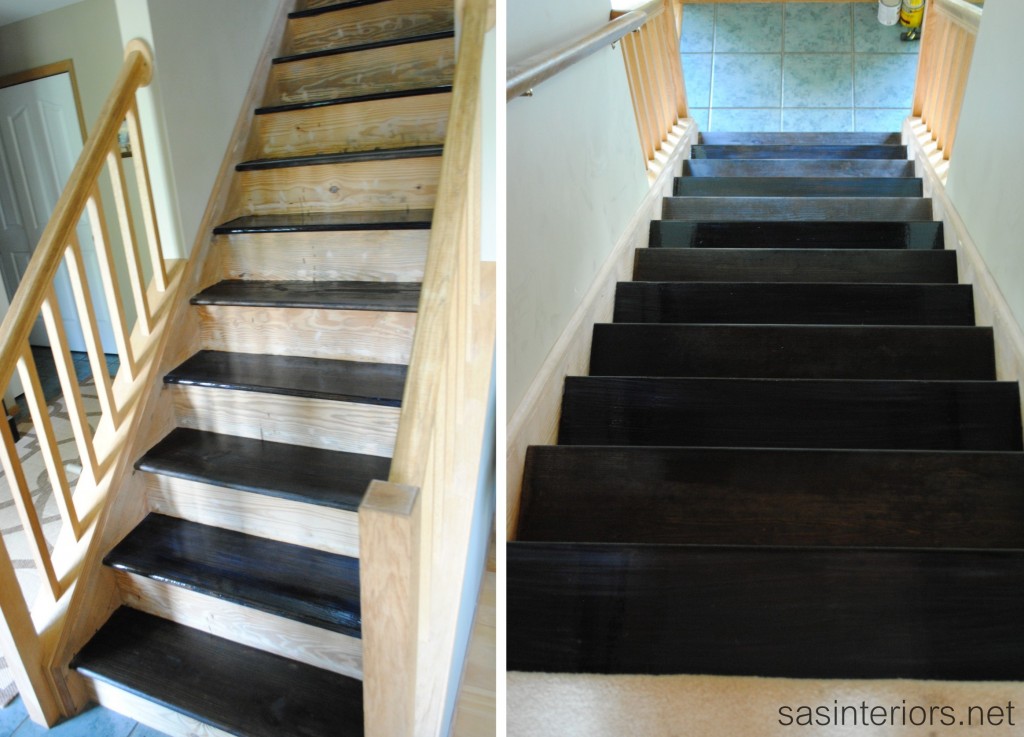
It’s really coming along and I’m excitedly anxious to start the next process… painting the risers, banister, baluster, and stringer! Until next time…
Create Your Own Succulent Arrangement

I’m a sucker for succulents, but have always been hesitant to get them because I don’t have a green thumb and most arrangements are pretty pricey (keep on reading and you’ll see)!

Recently, on my quest to bring the outdoors in, I finally got the courage and set out on search for a pretty succulent arrangement, and couldn’t believe how much they cost.  Similar to terrarium arrangements, most are $30+ and that’s certainly not in my budget, especially since I haven’t had success in the past with keeping plants living for long.

If you remember back not too long ago, my gal blogger pal, Brittany of Pretty Handy Girl, shared a tutorial on how to make your own terrarium and save big bucks, and now I’ll show you How-To Make Your Own Succulent Arrangement for less than $15.

Let’s get started…

Thanks to my FB community for pointing me in the right direction, I purchased my succulents at Lowe’s (I didn’t even realize that they carried succulents).  I looked for succulents that paired well together giving some variation in height and color.  I also got one larger succulent to “anchor” the arrangement.

For the box, I used a wood planter that the Mister actually made a few weeks ago using pallet planks. If anyone’s interested, I’ll share a tutorial on that soon – let me know.

Knowing the size of the box, I chose four different succulent plants and placed them in the box to see how best they should be arranged before adding the soil.

Once I figured out the best layout, I removed the succulents from the box and lined the box with a plastic garbage bag.  If you are making a similar arrangement, lining the planter isn’t a must, but since this pallet box is made of wood and wasn’t perfect at the corners, I felt it best to line the interior so water and soil wouldn’t seep out the corners.

I left about 2″ of exposed wood at the top, so once the soil was added it would thoroughly cover the liner.  I wanted to see my pretty flowers, not the liner 🙂

I then added the soil leaving about 1″ of exposed wood at the top.

Next came the beautiful succulents, which I recommend starting with the largest one first. Like with all plants, I was sure to gently separate the roots before planting.

The arrangement looked alittle messy once it was complete… but just wait!

It was time to add the small rocks which are almost always seen in those pricey succulent arrangements.  I picked these up for about $3 and only used half the bag.

I carefully placed a thin layer on top of the soil so only the succulents would show through.

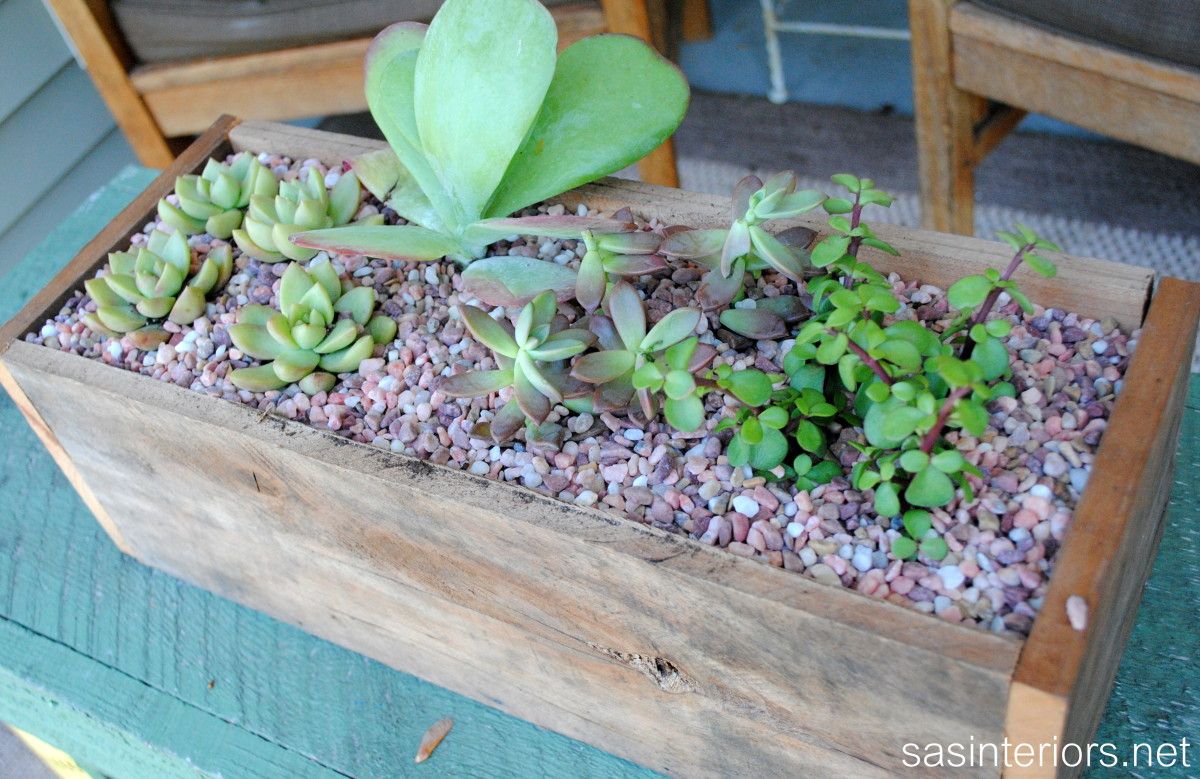
Once the rocks were put in place, the succulent arrange was complete

…And sits beautifully on my front porch.

Want to learn more on caring for a succulent? Check out this awesome article on growing healthy succulents.  I learned quite a few good tips to keep my new succulent arrangement strong and healthy!

Let’s break it down to see how much I saved…

  • (4) succulent plants were: $2.98 each
  • (1) Bag of rocks that I used half of: $3.00 /2 (for half) = $1.50
  • Wood Planter Box: Free  – made from an old pallet

So the grand total to create this beautiful Succulent Arrangement was around $13.  Not bad, right?!

Check out this arrangement that I just found online for $68. I like mine way better!  What do you think? Make it or Buy it??

Succulent arrangements are fun to make any time of year, but since they truly love the sun, Spring and Summer is a great time of year to create one of your own.

Do you have succulents in your home?  Have you ever made your own succulent arrangement? Would you rather make (and save) or buy?

Staircase Makeover: A New DIY Venture Begins

One evening late last week, the Mister and I found ourselves without something on our to-do list, so we finally embarked on the staircase project that I posted about 2 weeks ago.  It took longer than expected to start this project, but I needed my man’s muscles and braun to assist on the beginning stages.

If you remember back, the removing of the carpet was one of my DIY project goals for 2012 and I’m excited that its finally begun.  I initially wanted to remove/replace all the carpet on the second floor (yet it’s not within the budget), but removing the carpet on the stairs is going to be a big improvement since that gets the most traffic. Even though I’ve never been happy with the carpet, it was in place more for safety than aesthetics – now it’s time to say ba-bye!

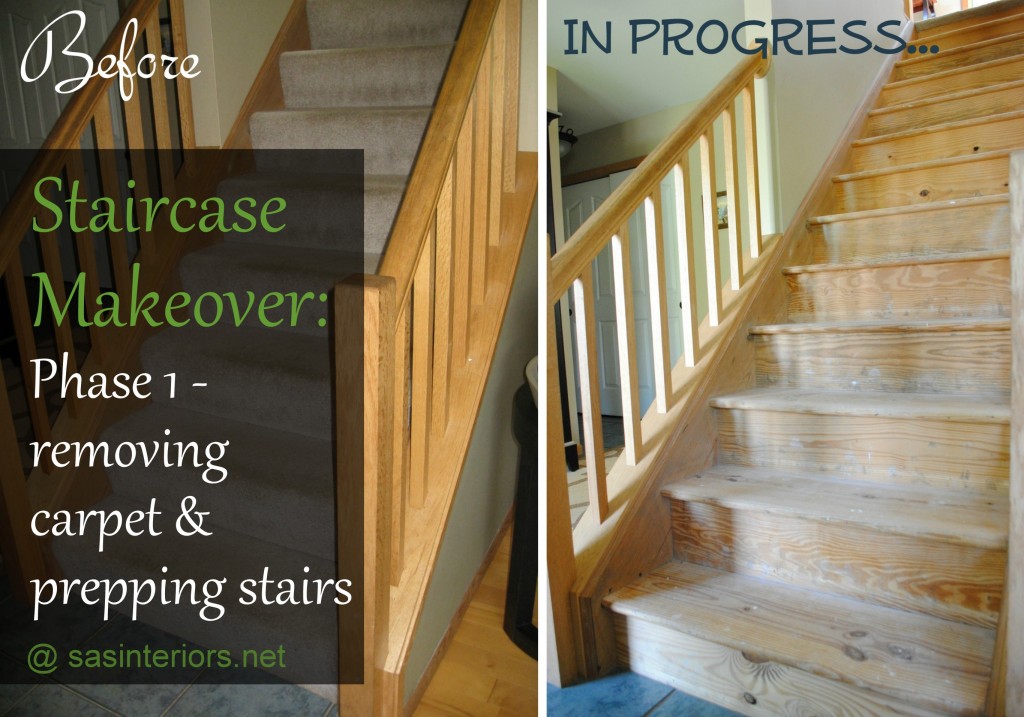
We’re lucky to have real wood on the stairs instead of plywood, but there are still alot of details to giving these stairs an entire new look, so I’m going to break the process into a few posts. Plus they’re not nearly done and I couldn’t wait to share the “happenings” with you till the end.

Take a look…

Project Details

Duration of Phase One: 1.5 hours
Phase 1 Difficulty: Medium
How Many People Needed: 1

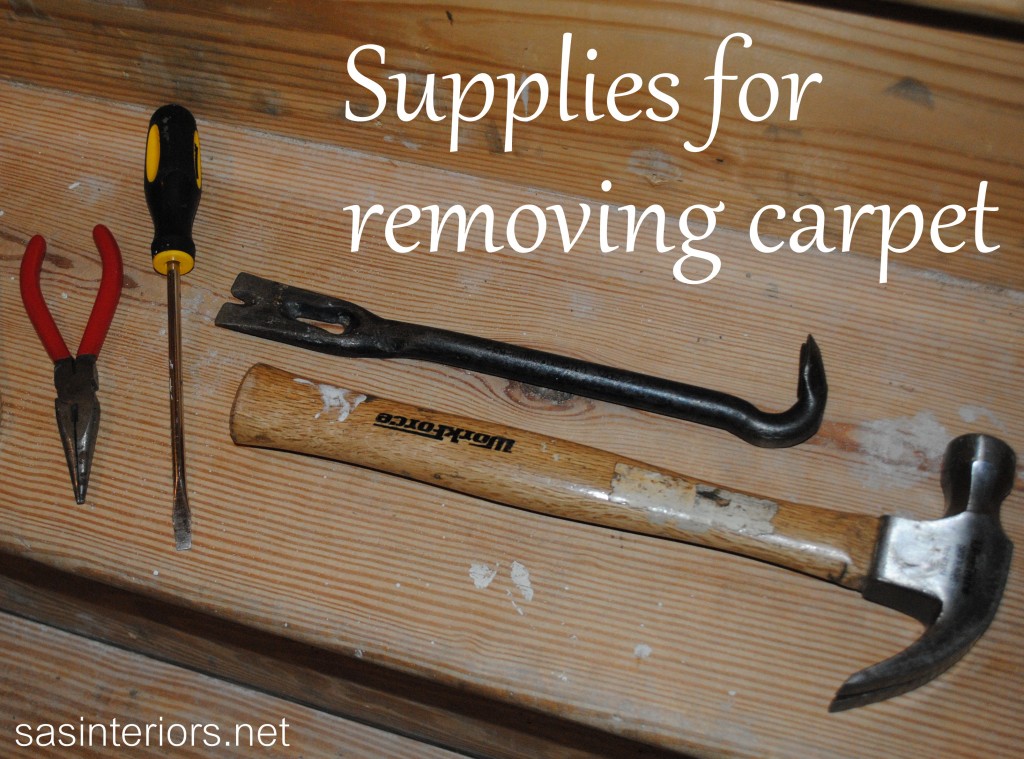
The first phase includes steps to remove the carpet, remove the carpet tack strips, and how to transition the wood steps to the 2nd floor carpet.  But before we begin, here are the supplies that I used.

  • Hammer
  • Cats Paw
  • Needle Nose Pliers
  • Flat Head Screwdriver
  • Muscles 🙂

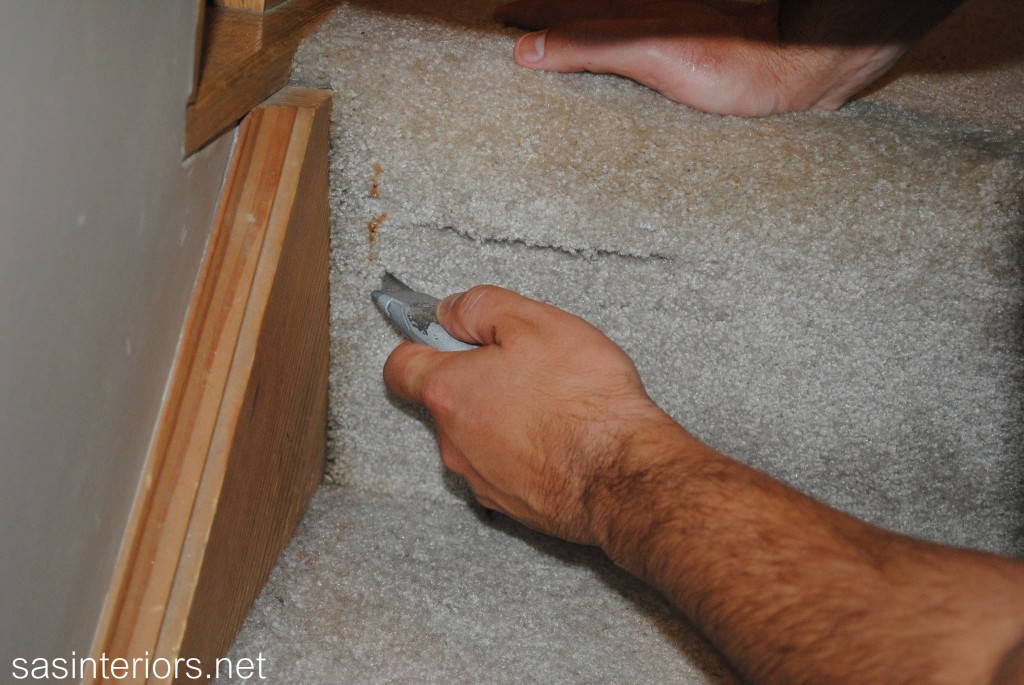
For this stair makeover, we started by removing the carpet. Every two steps, we used an X-acto blade and cut the carpet where the tread and riser meet. This made the process more manageable with smaller pieces of carpet instead of one large piece.

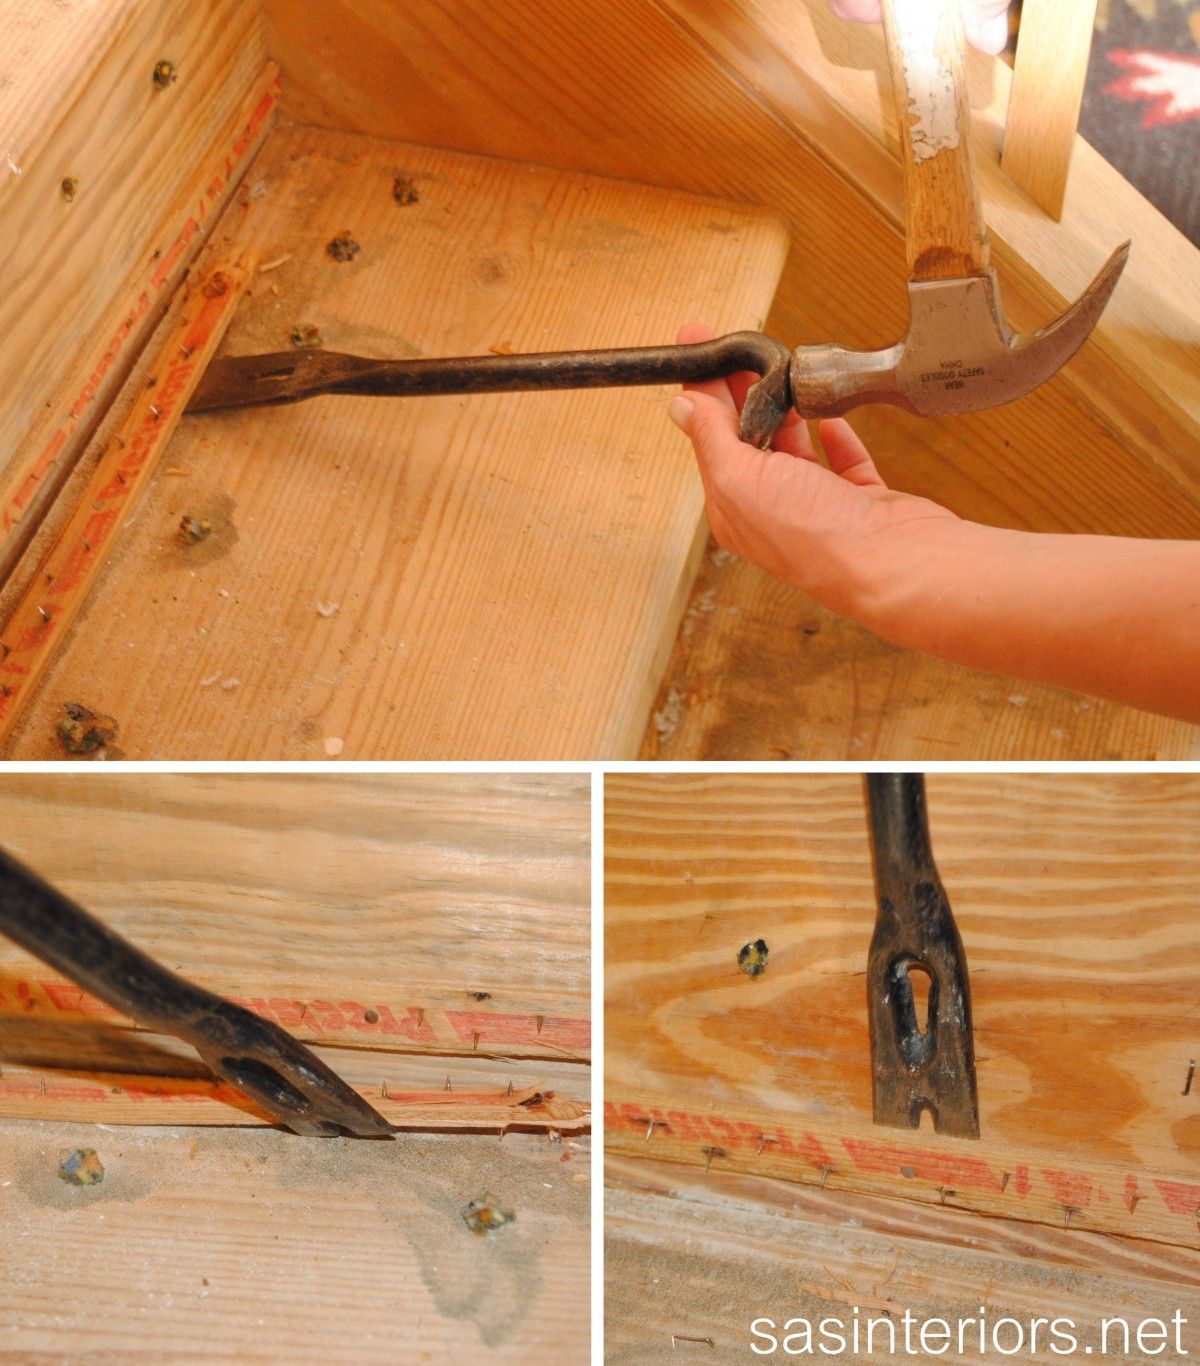
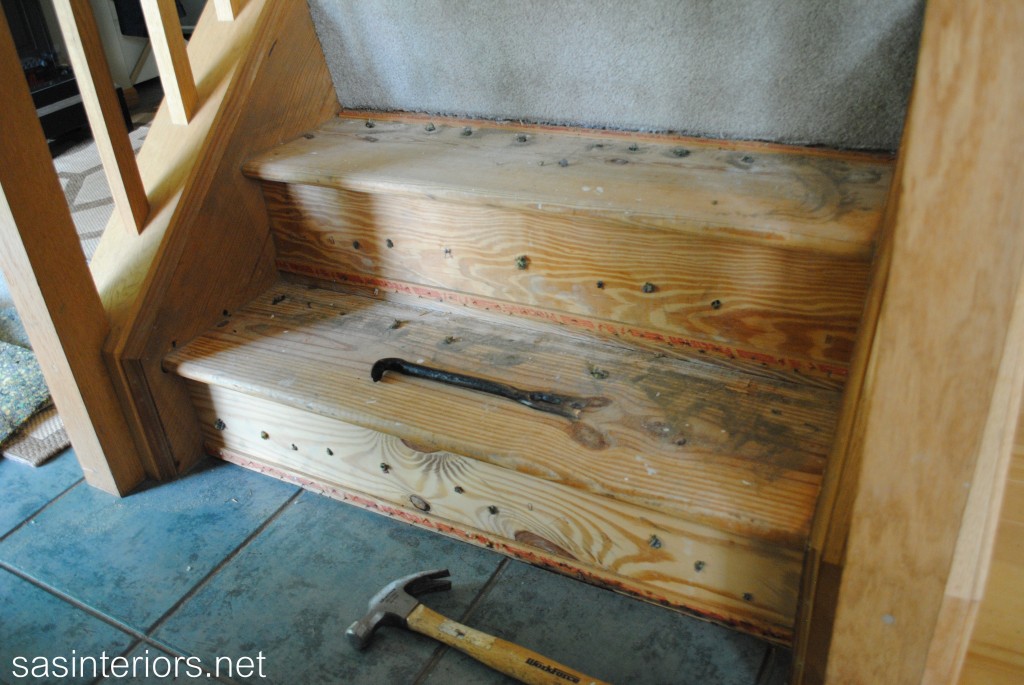
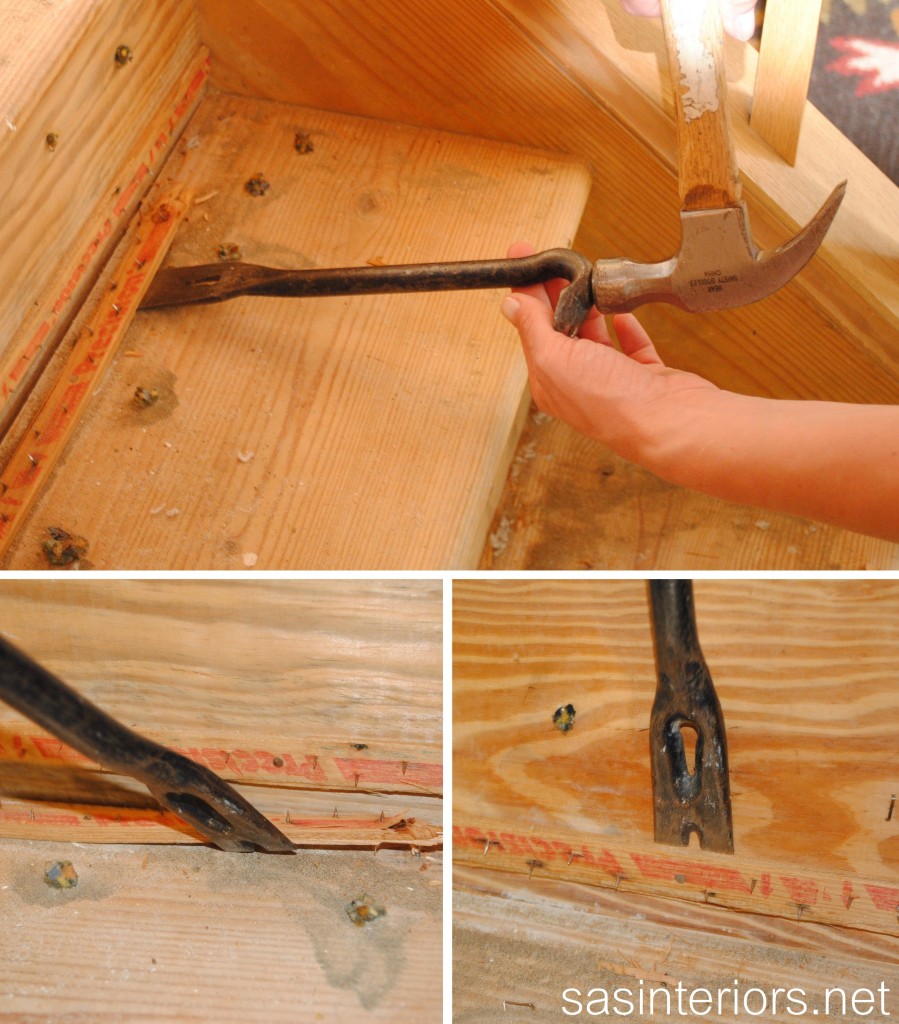
As we went along and took the carpet off of every two stairs, we removed the carpet tack strips with a hammer and cats paw.  A cats paw is a great tool that we use for alot of projects.  For the stairs it worked well to get under the tack strips, yet didn’t damage the wood on the stair tread.  I highly recommend it 🙂

Watch your toes on those tack strips – they’re sharp!

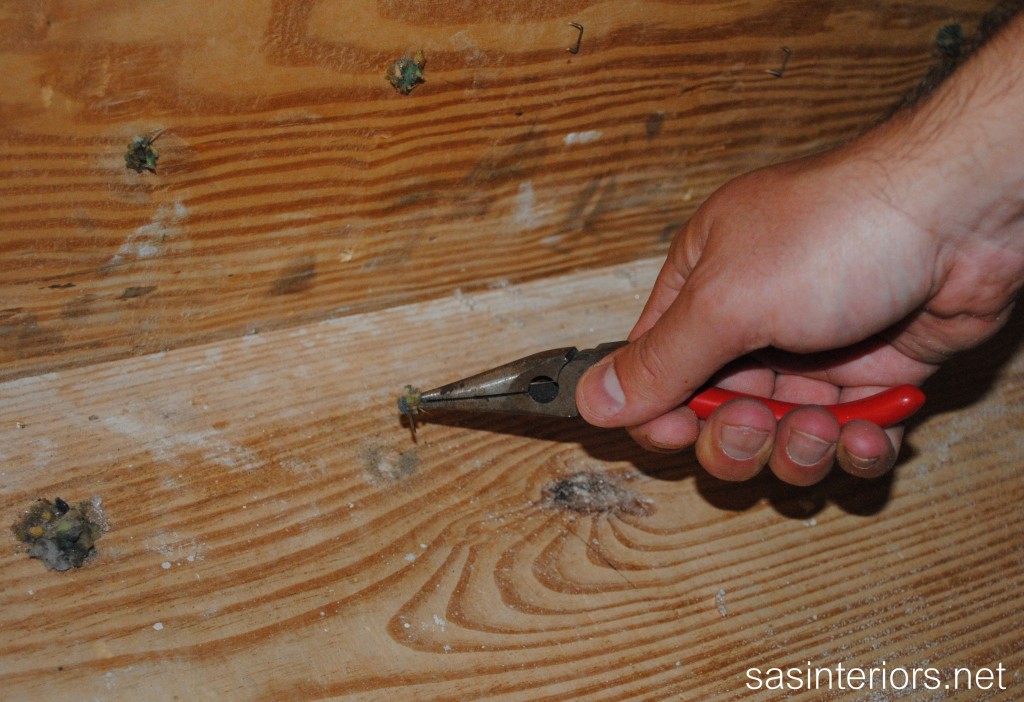
Once the carpet was removed from the entire stair case, it was time to remove the staples from the carpet pad…  and boy, there were alot of them! For this step, it’s best to use a needle nose plier and/or a flat head screw driver.

The last step for this first phase was to cleanly transition the existing carpet and the newly exposed wood stair at the second floor landing.  Using an X-acto knife, we trimmed the carpet so there would be enough to wrap around the top step.

It didn’t need to be perfectly cut, but it was important that there was enough carpet to wrap it around the top stair nosing.

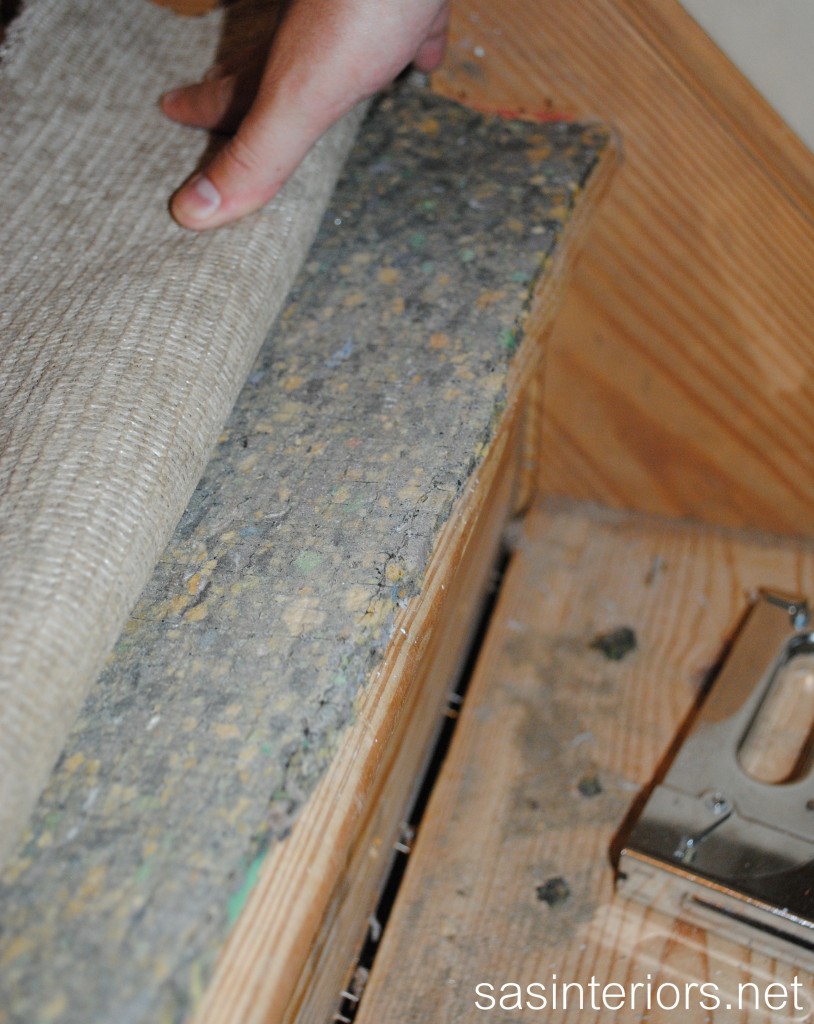
The carpet pad also needed to be trimmed.  Using a scissor, we trimmed the pad to be at the same edge as the stair nosing.  Trimming it at this point instead of wrapping it around the nosing (like the carpet) made it easier to staple the carpet under the nosing.

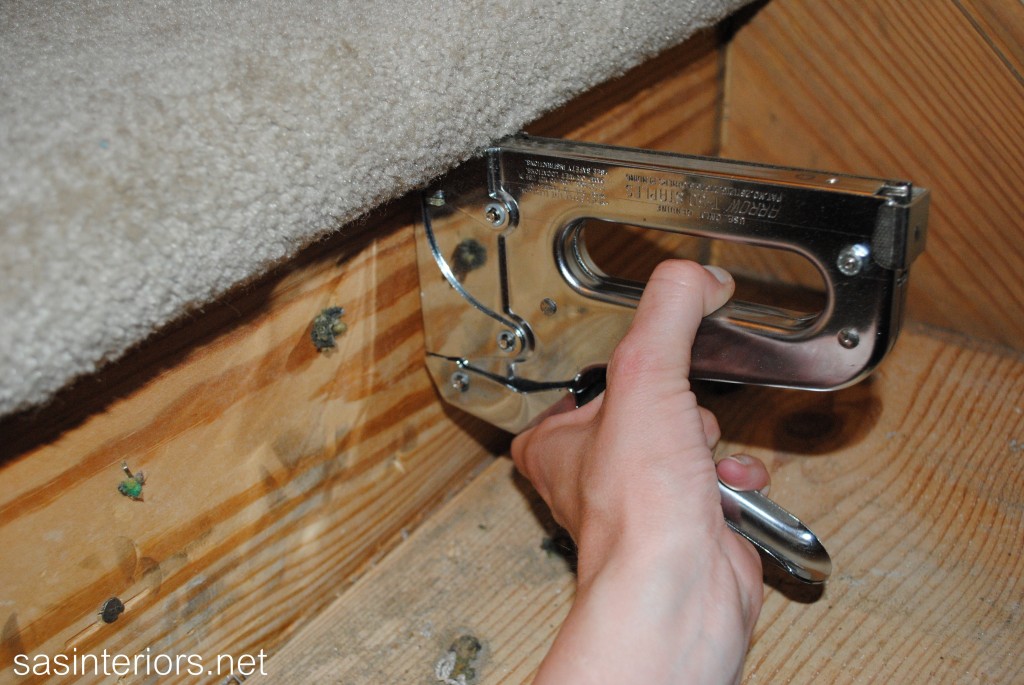
Lastly, using a staple gun we stapled the carpet under the top nosing.  It’s important to use longer length staples so each goes securely through the carpet and into the wood.

The result is a clean transition from wood to carpet…

There is still much more to do to get these stairs to completion, but we’re on our way.  Many of you have asked what we plan on doing on the stairs (thank you for taking interest) – stain, paint, stair runner…  so many options.

After lots of thought, I plan on staining the treads a dark walnut finish, painting the risers and balusters a crisp white, and painting the banister and newel post a taupe color (same as my kitchen – BM berkshire beige). Wouldn’t that be amazing?!

1. source unknown 2. Centsational Girl 3. Benjamin Moore Berkshire Beige 4. Walnut stain

Again, here’s a peak at the changes from phase one.

Spring Front Porch {Reveal}

Confession…

I didn’t even have 5 minutes to start my staircase carpet removal this past weekend – Huge Bummer, I know!  I’m sure some of you are disappointed {I am} after my exciting Another DIY Project is Born post from Friday, buuuuut I have to say the weekend was not filled with R & R.  Instead of embarking on my latest DIY idea (removing the ugly, old, worn carpet on the stairs), we continued our efforts on the exterior instead.

Take a look…

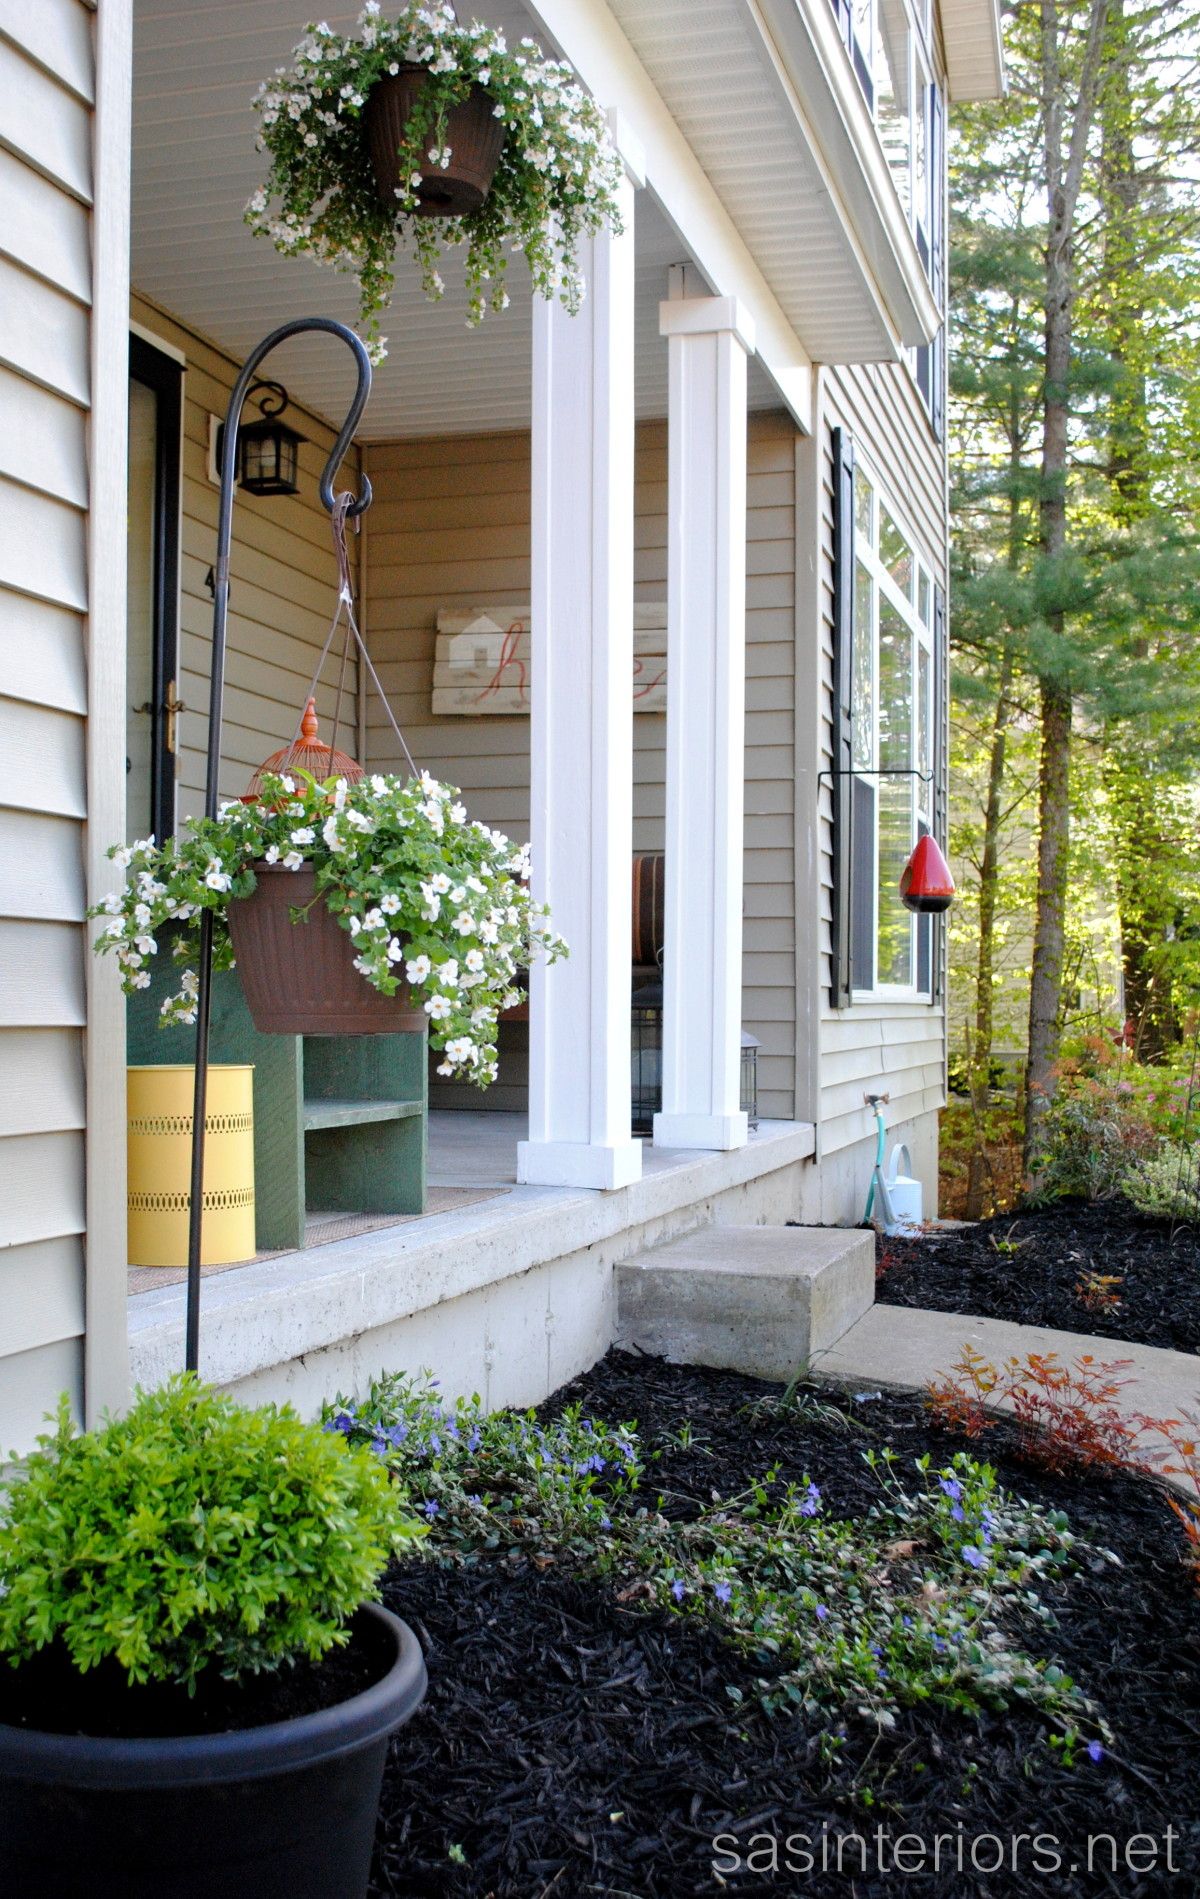
Pretty snazzy, right?  Boy, did it take A-L-O-T of effort and my butt is still aching, but it was definitely worth it.  AND there is still a few weekends ahead of us before it’s complete (if ever).  Let me show you around…

Last week I mentioned that the Mister and I enlarged the exterior columns and I finally took pictures, so here they are!  I’ve got a ‘thing’ for beefy columns and the 3″ wide style we had before always bothered me.  Now… the larger style columns, which are about 8″ wide, make the house appear more grounded and the overall scale actually feels larger – to me anyway.

So what do you think?

Want to see how it looked before? These are a few pictures from the time when we moved in two years ago up until last year when we started the transformation process.

Even looking at these pictures myself, I’m surprised at how much work we’ve done over the last two years.  With lots of Tender Loving Care, our outdoor front space has truly changed.  Last year we started with a few plantings and they’re really growing – I’m kinda shocked since I have no green thumb.

I have to show you my favorite plant in the garden (thus far), which is the bleeding heart.

And the new hanging baskets.

All the plantings in the front beds are perennials and started off much smaller last year and have continually been growing.  So far this year, I got two new hanging baskets with annual flowers, as well as two boxwoods that I planted in large black pots that flank the garage. From my understanding (which I was told by our local gardening center), the boxwoods will continue to grow and should last up to 10 years – we shall see.

Aside from the flowers, I’ve added bursts of color with accessories and pillows throughout the porch area.  Even though it’s not an overly large porch, it’s quaint and a great place to sit, relax, and read a book.

The burnt orange bird feeder is another colorful addition to the front porch. I wasn’t sure how it would look, but I’m loving how it brightens up the porch and hopefully birds will come for some good food.

And to give you an update on the side yard, the tree stumps are out and I seeded the 3000 sq.ft.  area – O, do I hope that grass grows!

But, I can say, I got this pond up and running too this weekend – another FINALLY!  It’s been here since we moved in, but hasn’t worked.  Until now.

Thanks so much for visiting and allowing me to share my progressing front porch and plantings with you.  There’s lots more to come! Have you started planting flowers yet this Spring?

The Beginning of a New DIY Project: Staircase

Ever wonder how I come up with the DIY projects around my home?

I’ll be honest, I don’t often sit n’ stew over things I want to do, but instead when a thought comes into my head, I ACT… quickly.  Time doesn’t pass long without me getting my feet wet (meant figuratively, not literally – most of the time).

Just moments ago (literally this time), a new idea popped in my head and before you know it, I was hard at work.

If you recall a few months ago, one of my goals for 2012 was to recarpet the stair and second floor bedrooms.  Well unfortunately with all the work and $$$ we’ve been spending outdoors, it’s just not possible at the moment.  The worst part of the carpet is on the stairs due to all the foot traffic day in, and day out.  So just a few moments ago, I decided to rip off the carpet from the bottom stair to see what was there.

I moved forward slowly just in case there was more work to be done than we could currently manage, but this was what I found…

Holy Cannoli… the stair underneath is in great condition!  Thank goodness.  I quickly called my husband at work and told him the good news.  I wasn’t quite sure of what his reaction would be (“Jenna, not another DIY project” OR “wow, that’s great”).  Thankfully it was the latter and he was super psyched as well.  He even said we could start it this weekend – YIPPY!  The carpet wasn’t hard to lift, but the nails and carpet tacks will be, so I’ll need his muscles for this DIY project!

So I’m off and have my weekend plans cut out for me…

And that’s how a new DIY project is born! Have a great weekend – What are your plans?

Placemat Pillow

Happy Monday!  For the past week I’ve been a little MIA around the blogosphere because I was enjoying a much-needed vacation with my family and was without any form of technological communication – yes, crazy, I know and it was fabulous!

I am officially “back”, but have lots to catch up on, so I’ve got another blogging bud sharing a fun and easy DIY project with you today.

Please welcome Angie of The Country Chic Cottage
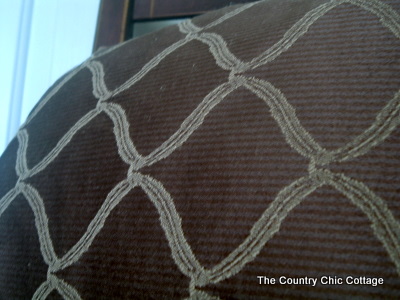
So happy to be guest blogging on SAS Interiors today!  I am Angie with The Country Chic Cottage and I blog about home decor, crafts, vintage finds, and farmhouse style.  The placemat pillow is one of my favorite go to crafts.  It is quick, easy, and inexpensive.  Plus it makes a big statement when you are done.  Sounds great right?  I can’t walk past a stack of place mats at the store without stopping to see if any of them will work.  You just need a place mat that is #1 your style and #2 has two “sides” sewn together.

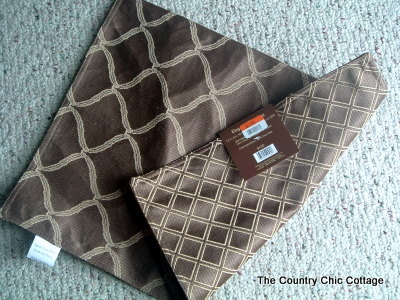
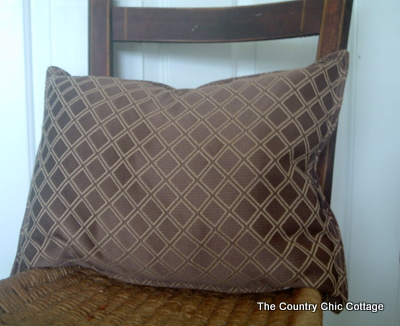
This placemat came from Big Lots of all places and was $2.  It fits my style and is two sided.  We need to talk pillows a minute.  I make lots for my family room and some may look like they are not to be used by snot nosed kids.  My theory is, I put $2 into this pillow, let the snot fly!  When it is too nasty to take it anymore, I will make another one and toss this one.

These are seriously the easiest craft you may ever do.  You just use your seam ripper to make yourself a hole in one edge.  Enough to get your stuffing in there is all you need.  Then just stuff and sew that little hole back up.

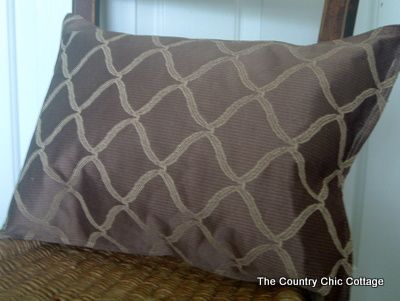
Okay that side above is definitely my favorite!  But the other side doesn’t look shabby at all…

I heart my new $2 pillow!!  I will continue to love it until someone rips it or spills something on it…then it will be on to the next pillow!

Thanks so much Jenna for having me today!  Y’all stop by the cottage anytime for a visit!

~Angie~ 
Thank you Angie for sharing such an inexpensive and fun project!

Painted Two-Toned Desk + Tips on Painting Furniture

I’m just about finished with the updates for my son’s bedroom makeover.  It hasn’t been a huge overhaul, but with rearranging the furniture, adding colorful stripes on the wall, and hanging new DIY pallet shelves, this space has received a welcome refresher.  In the midst of moving around the beds and dresser, I realized  my little man is at the age where he really needs a desk to work at and hold all his creative supplies.

If you remember back quite a long time ago, I purchased a beauty of a desk off Craigslist.  It lived in my family room ever since (over 6 months), but wasn’t “right”.  Then pufff… I had an idea – it would be perfect for my son’s room.


And this is the evolution of the Craigslist Desk…

It started off as a stained executive desk typical of the 1940s and is in really great condition.  The only thing it needed was a little makeover to update it and bring it back to life to mesh with today’s decor style.

In knowing that the desk would live in my son’s room, I wanted to do it right.  With my lack of patience, I sometimes skip steps or rush, but with this desk makeover I took my time so the result would be something he could live with for many years.

Supplies: Onto the makeover – here’s my arsenal of supplies…

1. Fill Holes & Sand: I started off removing the hardware, which I decided to replace with simple knobs.  Then I filled all of the scratches, holes, and nicks with wood filler.   And the last step before painting was to sand the overall desk surface with my orbital sander using a 120 grit sandpaper (medium coarse), then a 220 grit sandpaper (very fine coarse).

2. When the sanding was complete, I cleaned off the entire surface with a damp rag before I started priming.

3. Primer: Once the desk was completely dust-free, I added one coat of primer with my favorite Kilz Primer which blocks the stain and allows for a well-prepared surface to paint.

4. Secret Agent: With every painting job, I always add my favorite “formula” to eliminate brushstrokes – Floetrol.  It always works like a charm to achieve a clean, brushstroke-free surface! (And I wasn’t even paid to say that – I truly just love it 😉

Desk Colors:

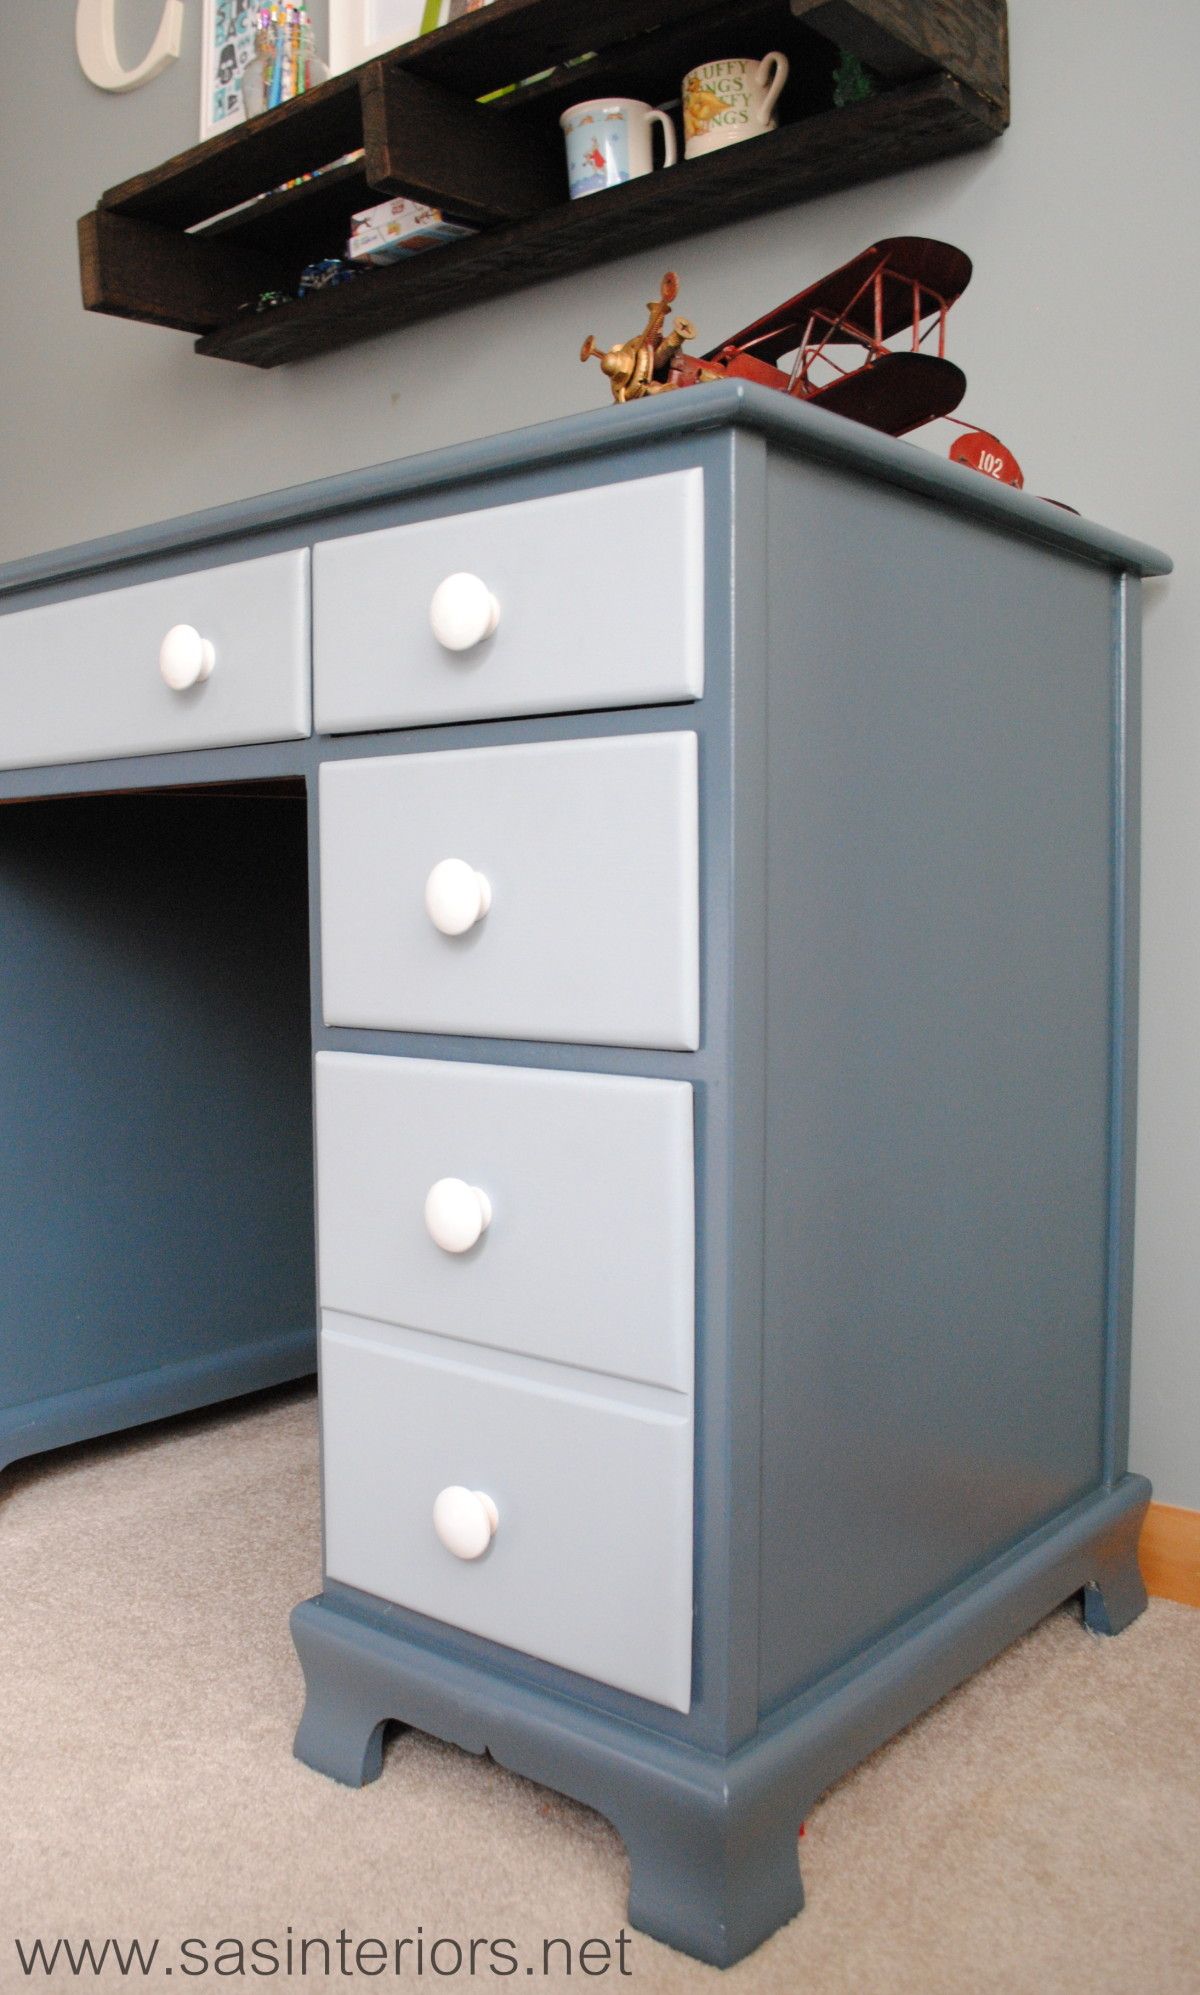
  • Desk Top & Frame – Dutch Boy High Seas
  • Drawer Fronts – Dutch Boy Hurricane Cliffs

5. Paint: After the one coat of primer, I added the first coat of paint, which I used both a brush and roller.  On the top and flat surfaces of the desk, I used a 5″ wide small roller and for the difficult crevices and edges, I used my favorite 1.5″ wide Purdy brush.  *Sometimes, I used the brush first and went over it with the roller.  The roller makes for a smooth surface to avoid brushstrokes.

6. Then onto painting the drawers.  I wanted this desk to be a little playful and not just one color, so I decided to use a lighter color blue on the drawer fronts.

7. Polyurethane: The last painting step was to add a coat of polyurethane – truly the most important part in finishing any piece of furniture!  I usually use water-based clear satin polyurethane, but since I knew this desk would be getting lots of use in the years to come, I decided to use an oil-based polyurethane, which really is more durable (hands-down).

8. Hardware: Once the painting was complete, I drilled one hole in each drawer front for the new knobs, which were originally natural that I spray painted white.  The knobs went in and the desk was complete.

To add a little unexpected fun to the desk, I added a drawer liner that has a geometric pattern with green, blue, and turquoise colors.  My son was quite surprised when he opened the drawers to find this hidden treasure!

And once again here is the before and after…

And these are just a few important tips to remember when painting furniture:

 Do you like painting furniture? Have you painted anything lately?

Spring Mantel with Shades of Turquoise

Last week here in Upstate NY, the weather was amazing and I soaked up every bit of sun I could get. Now it’s a little chillier, but Spring and Summer will be here before ya know it! In the midst of the gorgeous weather, I took some time to put together my new Spring Mantel.

Over the past few months, I have been introducing more cooler colors than the warmer colors that I’ve lived with for many years. So my latest mantel creation has a whole lotta turquoise, which is a beautiful and dynamic compliment to the burnt orange focal wall.

Here it is… What do you think?

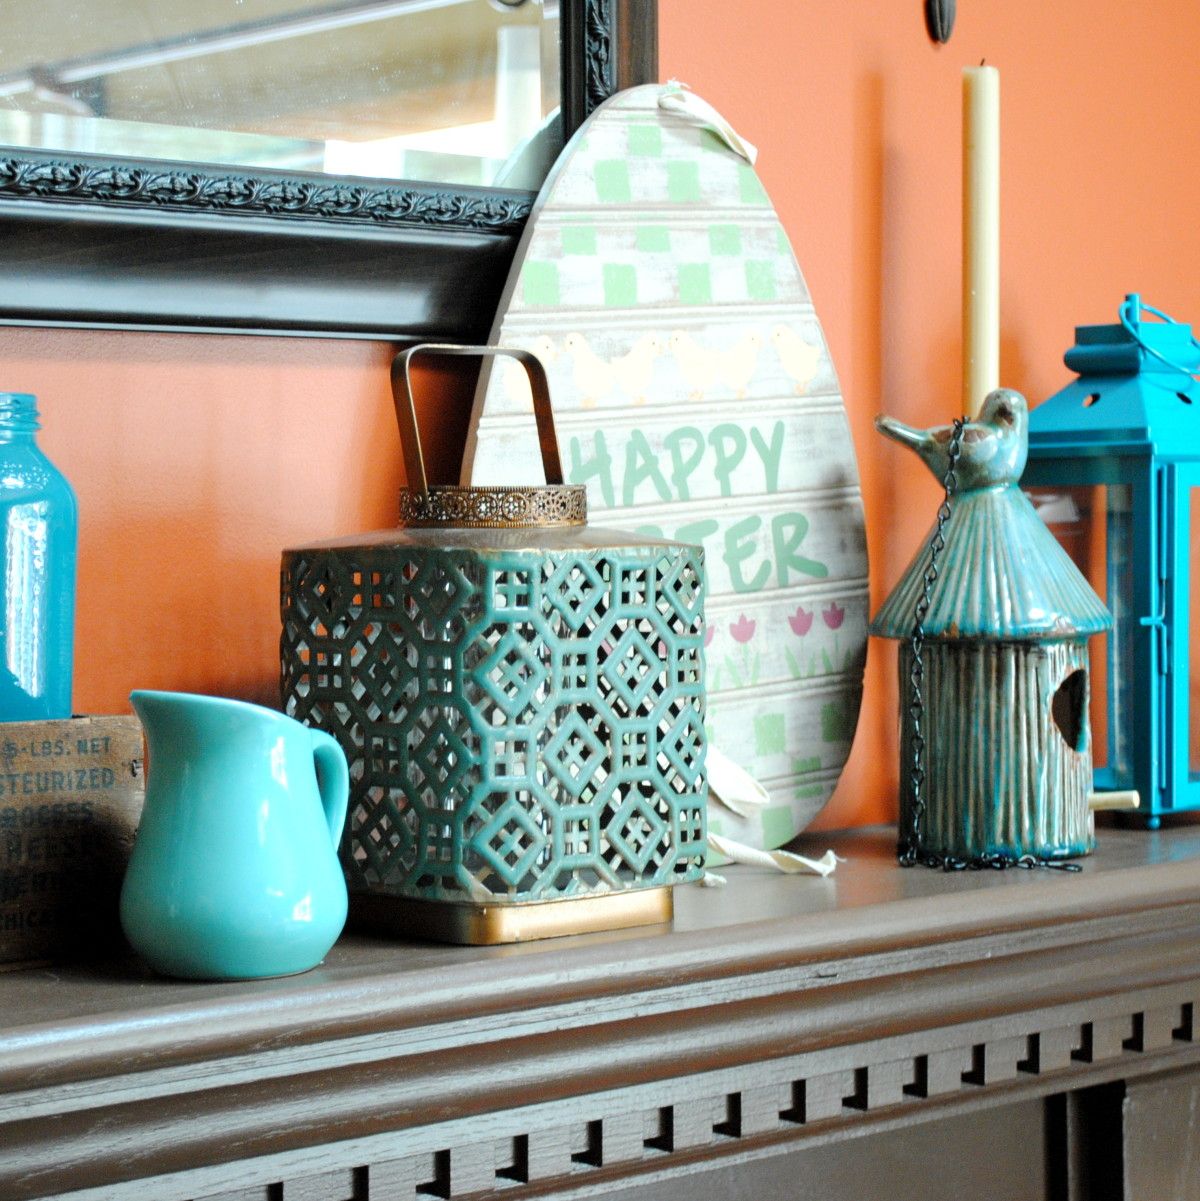
Turquoise is absolutely one of my favorite colors and from my past post, Totally Turquoise, many of you love it just as much!  It was kind of risky to have the mantel be dominant in one color and when planning it out in my head, I wasn’t sure if it was going to work.  I think by including a variety of different turquoise shades, the overall composition has alot of depth and intrigue, especially with the backdrop of the burnt orange wall.  Other textures and muted colors of browns were also added within to break up the monotony.

Here’s an in depth look …

Many of the pieces that make up my new Spring Mantel have been repurposed from around my home or picked up at local stores for very little.  The turquoise glass vase on the left is something new I bought a few weeks ago at TJ Maxx.  I had already had this turquoise-mantel-idea in my head and thought this would make a perfect addition – it was taller and I knew it’d make a great ‘anchor’ piece!  The glass mason jars which I found at an estate sale last year have been showcased on my mantel before and are filled with lentils and a votive candle. To the right is a tall glass jar filled with rocks from last years vacation to the beach.  I love displaying memories and these rocks are a beautiful and quiet shade of blue…  a perfect compliment to the other bold and vibrant colors.

One of my favorite upcycling things-to-do is paint old, used glass jars – tomato sauce jars, apple sauce jars, jelly jars, any jar will do! It’s so easy and unexpected.  In the Blue Label wood box stand two sauce jars that I added a little color to (it’s actually the leftover paint from my kids bathroom cabinet).  My mantels are always about layering, so in front of the wood box is a cute little turquoise pitcher and to the right is a lantern, both of which I purchased at Homegoods.

Of course, I had to add a touch of Easter decor within my Spring mantel.  I love this egg shaped Happy Easter sign that I’ve had for years (forget where I got it), but in a few weeks once the Holiday is over, it’ll be swapped out with a new Spring sign (not sure yet what it’ll be).

Continuing to the other side of the mantel, I added a sweet distressed turquoise ceramic bird feeder.  Originally intended for my daughter’s room, its so cute and fit perfectly amongst the like colors. To “anchor” the other end, I finished the mantel with two different sized bold turquoise lanterns that I purchased from Target.  They have some awesome colors this season like lime green, hot pink, and of course turquoise.

I also whipped up some fun new pillows with accents of turquoise.

Isn’t that owl fabric so cute?!  Love it with the brown and white chevron.

And this is how the entire room looks all pulled together for Spring.  It’s so different from last year’s quieter, frappe colors.

I think this is my favorite mantel design yet!  What do you think?

Do you love turquoise just as much as I do? 

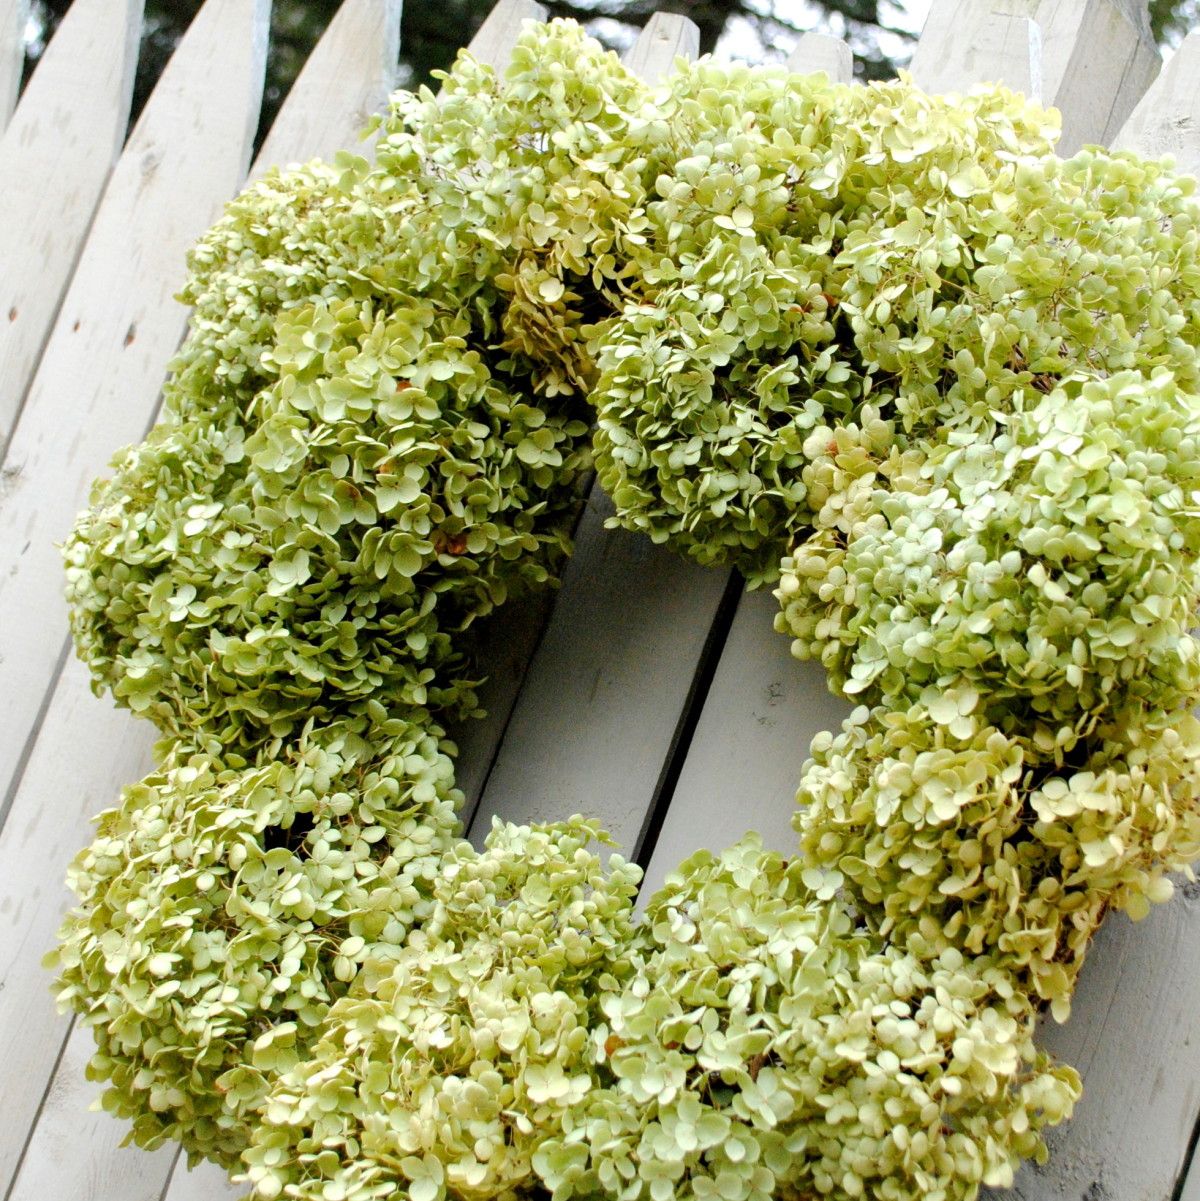
Dried Hydrangea Wreath

It’s officially Spring! This is definitely a favorite time of year for me when the days are longer and the temps are warmer.  The winter was pretty non-existent in Upstate NY this year, so thankfully a lot of projects that were on the backburner till Spring, already got finished. Over the weekend when the weather was in the 60s and sunny, we started tackling our first outdoor project of the year, but I stepped away from the cutting and hammering for a moment to make this beautiful Dried Hydrangea Wreath.

I had anticipated making this wreath in the Fall and cut off a bunch of hydrangea flowers from my mom’s garden before the first freeze last year.  Unfortunately, I never got around to it, so the hydrangeas sat in my garage since then, but I knew they’d make a beautiful Spring wreath when the time came.

I started off with a grapevine (or twig) wreath that I purchased for $2.88 at AC Moore.  That was the only part of this project that I had to purchase, so essentially it cost me less than $3 to make – no $40 wreath for this girl!

The key to making a full, yet balanced dried hydrangea wreath is to start with the larger flowerheads as the base around the wreath, and then add in smaller flowerheads.

Starting with larger hydrangea flowerheads, I gently threaded the stems through the grapevine wreath.

I then added the medium sized flowerheads and filled in the areas around.

I finished the wreath by adding the smallest flowerheads to any of the open gaps.  The smallest size is really the most important because it really completes the fullness of the wreath.

Note: As you’re threading the stems through the wreath, you may need to secure them with floral wire.  I didn’t need much since the stems were long enough and were tucked fairly tight between the twigs of the grapevine wreath.

Once all of the dried hydrangea flowerheads were added to the wreath, I trimmed the stems in the back of the wreath with a scissor.

And it was complete.  The entire wreath cost less than $3 and took me about 15 minutes to create – simple and inexpensive!  How much better can you get?!  And here’s the result…

I want to mention that the hydrangea leaves are fragile, so it’s important to create this wreath with a gentle hand.  This wreath is also not great for a high traffic place or door (ie: front door).  I’ve got the perfect spot for it though… stay tuned!

Have you made a new wreath for the Spring?

I link my projects to some of these parties: Skip to My Lou, Dittle Dattle, Between Naps on the Porch, Today’s Creative Blog, Stories of A to Z, All Things Heart & Home, Savvy Southern Style, House of Hepworths, Finding Fabulous, Creation Corner, The Shabby Nest, Tatertots and Jello, Thrifty Decor Chick, Tip Junkie