Easily Change a Recessed Light to a Decorative Hanging Fixture

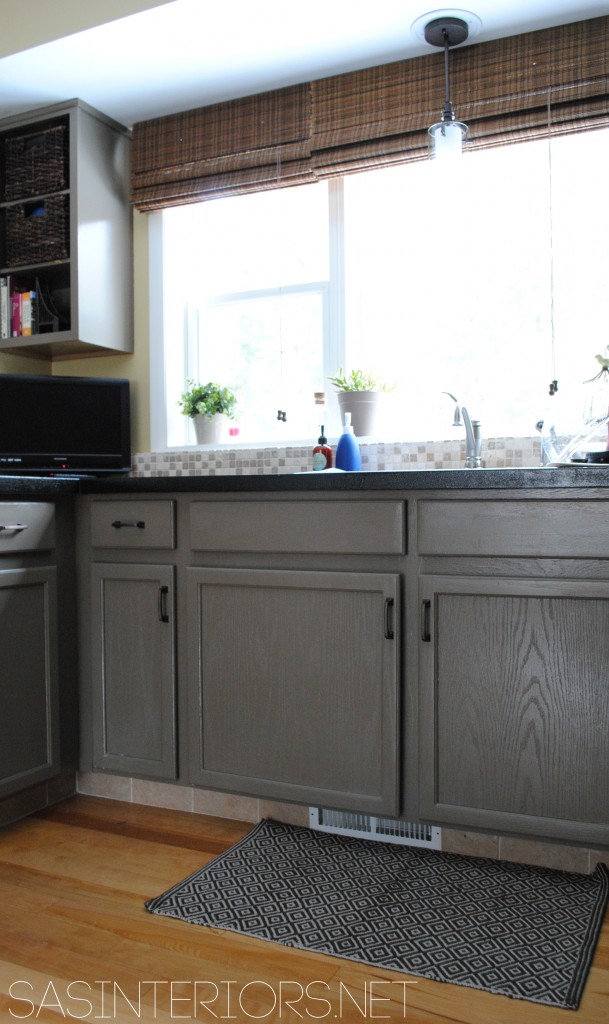
In my quest to make a few easy upgrades in the kitchen (I shared my new bamboo shades earlier in the week), I was really hoping for some sort of decorative fixture.  It was near impossible aesthetically because of the close proximity to the hanging fixtures in the adjacent rooms, plus there are 6 recessed lights (hi-hats) in the space and the layout just wouldn’t allow – I wasn’t wanting to change the space that much for an electrician to come in and rip out the entire ceiling to simply add a pretty new light.

But thenwww.JENNABURGER/wp-content/uploads/2013/02/RecessedLightToFixture2.jpg”>Easily and Inexpensively Convert a Recessed Light to a Hanging Decorative Fixtures by @Jenna_Burger via sasinteriors.net

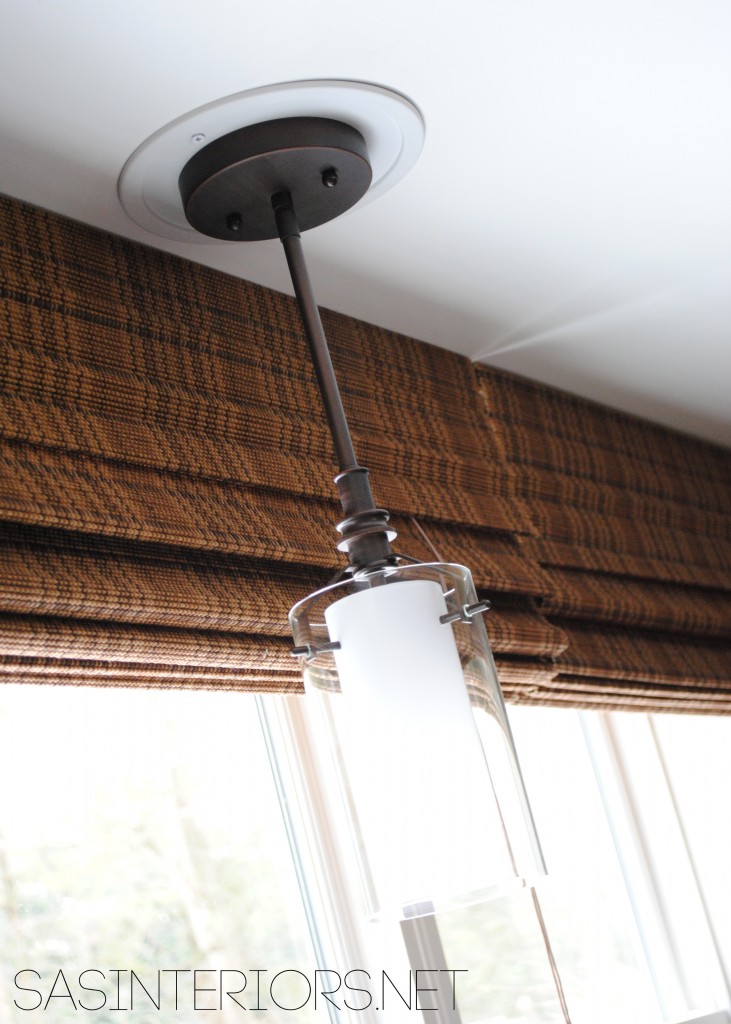
To easily make the upgrade, I used a Recessed Light Adapter Kit (a.k.a. Recessed Fixture Converter) which quickly and inexpensively allows a recessed light to be converted to any style hanging fixture or pendant.  Think about the possibilities for all those blah hi-hats that can now be WOW – hallways, bathrooms, kitchens…

Easily and Inexpensively Convert a Recessed Light to a Hanging Decorative Fixtures by @Jenna_Burger via sasinteriors.net

To start off, the Mister and I removed the light bulb and the plastic can, so only the sheetrock and wires inside were exposed.  Then we took the new white plate from the conversion kit and installed it as specified in the directions (the electrical wires were still exposed and dangling).

Easily and Inexpensively Convert a Recessed Light to a Hanging Decorative Fixtures by @Jenna_Burger via sasinteriors.net

Then it was time to hang and electrify the fixture.  If you plan on changing out your recessed light, follow the directions that come with the kit!  I am not an electrician and I’m sharing the pictures and steps that I took, but every condition is slightly different.

Easily and Inexpensively Convert a Recessed Light to a Hanging Decorative Fixtures by @Jenna_Burger via sasinteriors.net

The hanging fixture we chose was from Lowe’s and it’s a great accent to the fixtures in the nearby spaces. Cute, right? It was less than $50 so it was a winner in my book. I’ve seen similar for a lot more $$$, so I was a #happygal.

Easily and Inexpensively Convert a Recessed Light to a Hanging Decorative Fixtures by @Jenna_Burger via sasinteriors.net

Within about 20 minutes, the fixture was hung and we stood back to admire.

Easily and Inexpensively Convert a Recessed Light to a Hanging Decorative Fixtures by @Jenna_Burger via sasinteriors.net

Check out how the kitchen has transformed over the years.

All DIY baby!!

Evolution of Kitchen Makeover revamped entirely with DIY projects (no professionals) by @Jenna_Burger via sasinteriors.net

It’s hard to believe how it looked less than 2 years ago.  I’m super happy with the recent revamp of the bamboo shades and the decorative light fixture.  (Who knows what will be next…)

If you want to read more about the DIY Kitchen Makeover, click {here} or feel free to ask me.

Have you ever changed a recessed light to a decorative fixture?  If not, where in your home would you like to?

A Simple Kitchen Window Upgrade

Do you ever feel with a little upgrade, a space in your home that you haven’t quite loved, will finally look exactly how you always hoped?  That little revamp which won’t take long, but the room doesn’t feel “right” without ?

Well, I’ve had that feeling in my kitchen for a while.  The part that needed a redo wasn’t horrible, but I was kind of tired of it.

It’s not the cabinets because I still love them 2 years later.

It’s not the hardware because I still love that too.

But instead it was actually the valance over the windows that I felt blah about.

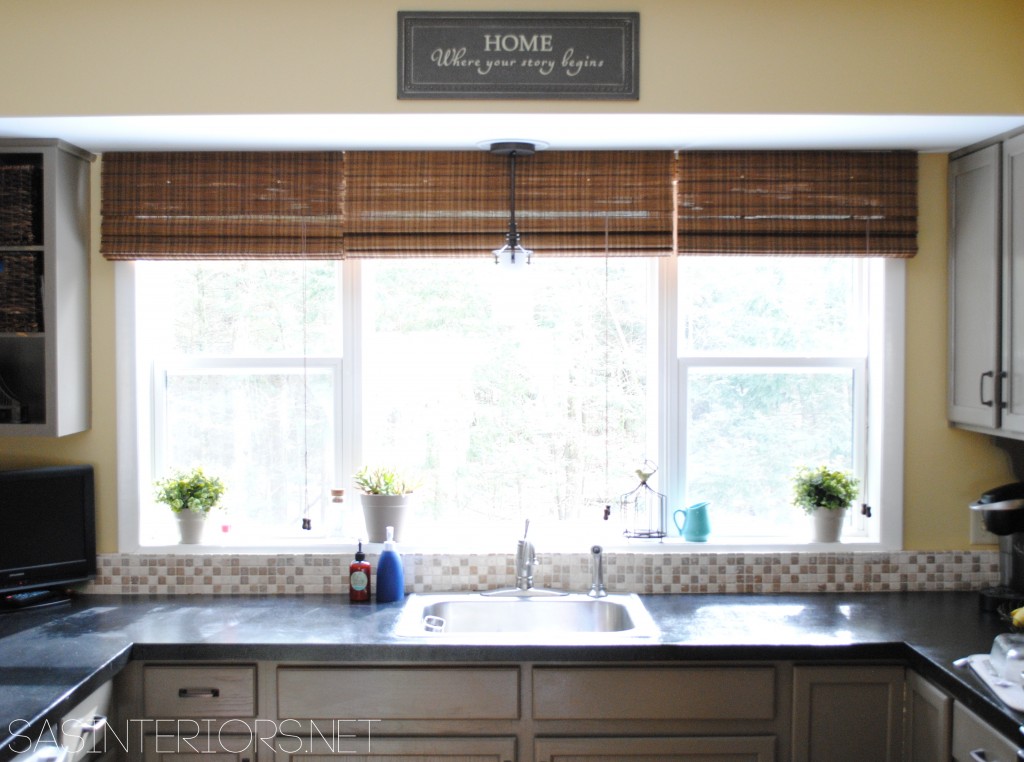
So the kitchen window got a revamp!

Kitchen Window Revamp - A simple upgrade for a large kitchen window via @Jenna_Burger, sasinteriors.net

I created the previous valance 2 years ago and I never felt it was just right (don’t tell the Mister.  He didn’t see anything wrong with it).  To others, the valance was fine, but for me, it just wasn’t exactly what I envisioned.  Here’s how it looked before (with the old oak cabinets too – crazy to look at)…

Kitchen Valance

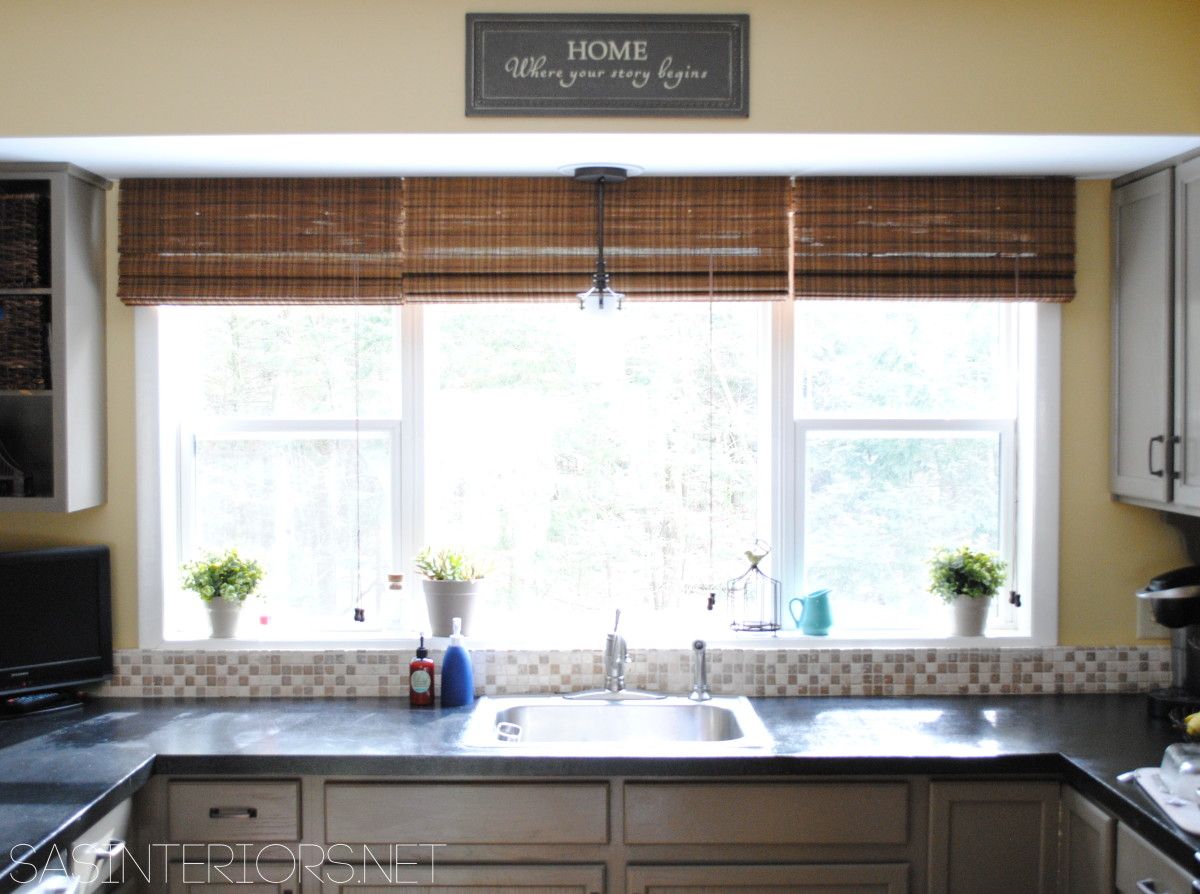
Anyway, since I’ve been adding bamboo shades (which I got from favorite resource, Payless Decor) to many of the first floor windows after I painted the mouldings white, it seemed like the most appropriate choice to continue the look + I love the wood texture of the shades against the light yellow wall color and crisp, white mouldings!

Aren’t they gorgeous?!

Kitchen Window Revamp - A simple upgrade for a large kitchen window via @Jenna_Burger, sasinteriors.net

This past weekend while the kids went out for breakfast with their grandparents, I found a few hours of free time to finally hang my new roman shades.  When does that ever happen – free time – huh??  I blasted the music – Katy Perry was my fav choice for this project 🙂 – and got to work.

You might have seen me post this pic on Instagram Saturday afternoon…Kitchen Window Revamp - A simple upgrade for a large kitchen window via @Jenna_Burger, sasinteriors.net

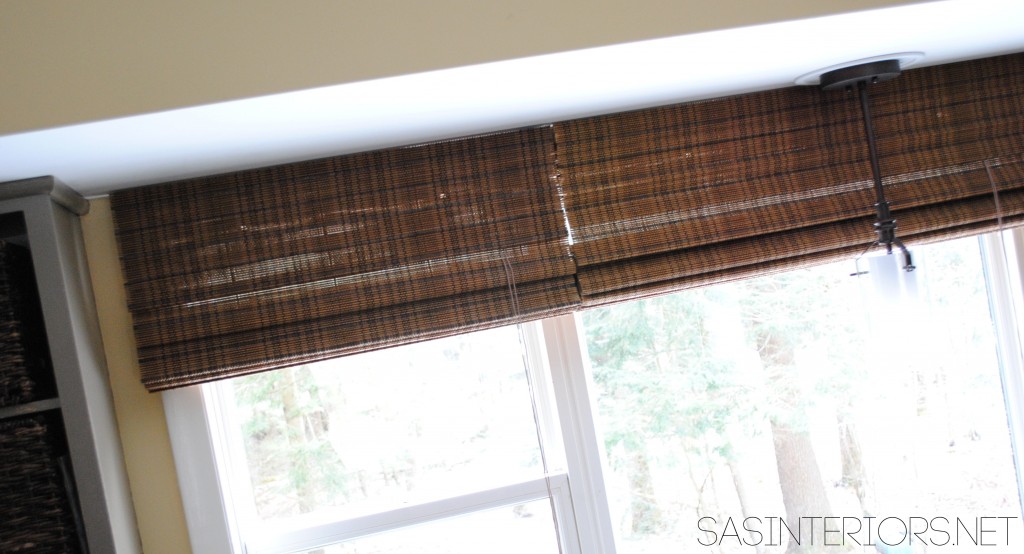
I removed the old valance + there was still a cellular shade from the old owners behind it.  Then in about an hour, I hung the new roman shades.  Usually I always choose inside mount shades because decorative treatments (long drapes) are on the outside, but because the moulding of the kitchen window hits the ceiling and I wanted to allow as much light in as possible, so I decided on an outside mount.  Now the new bamboo shades touch the ceiling.

What do you think?

Kitchen Window Revamp - A simple upgrade for a large kitchen window via @Jenna_Burger, sasinteriors.net

Such a difference and the new shades go so well with the open cabinet.

Kitchen Window Revamp - A simple upgrade for a large kitchen window via @Jenna_Burger, sasinteriors.net

O, and did you notice the new light?  That was an easy switch-aroo that we did a few weekends ago as well.  We changed the hi-hat to a hanging fixture.  I’ll share more on that later this week, so stay tuned…

Kitchen Window Revamp - A simple upgrade for a large kitchen window via @Jenna_Burger, sasinteriors.net

It’s amazing how small things which only take a few hours (or a morning filled with good music), change the entire look of a room.  I am thrilled with the new look of this room.

If you love the look of these gorgeous bamboo shades, they’re from Payless Decor and the color is Tibet.

Kitchen Window Revamp - A simple upgrade for a large kitchen window via @Jenna_Burger, sasinteriors.net

Ahhh… Much Better – #happygirl

What small adjustments have you made in a room of your home to completely change the look? If nothing yet, what changes do you want / hope to make?


Trash To Treasure: Upcycled Light To Vase

Sometimes the most unlikely objects can turn from trash to treasure.

Trash to Treasure: Upcycled Light to Vase created by @Jenna_Burger, sasinteriors.net

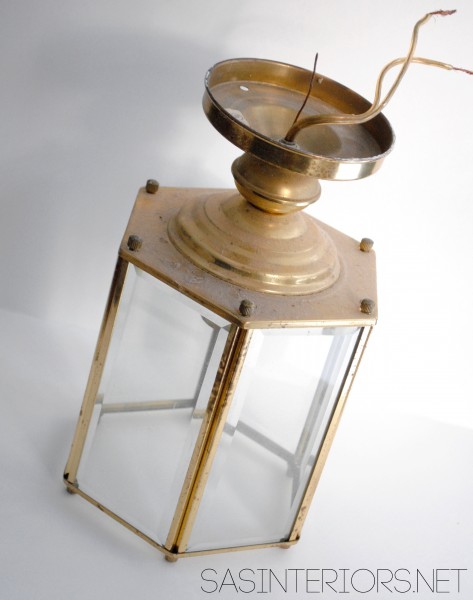
As we’ve been changing the light fixtures throughout our home over the last 3 years (I’m pretty sure every. single. one. has now been updated), most went straight to the curb.  A few weekends ago when the last old, brassy light came down in the upstairs hallway, it was half way to the trash, until I had a thought…

Could I upcycle it into something else?  But what?? A cloak?  Another light?  A vase?  Should I spray paint it or leave it brass?  Lots of thoughts were brewing.

Of course, I forgot to take a pick of the light in it’s old home, but here’s what it looked like right after taken down from the ceiling.

Dust and all…

Trash to Treasure: Upcycled Light to Vase created by @Jenna_Burger, sasinteriors.net

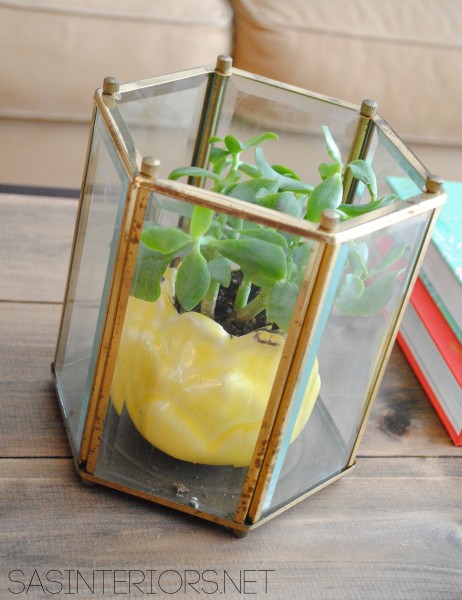
After giving it a good scrubbing, I decided to leave the brassy finish (I liked the warm hue) and use it as an accessory to hold a vase.  A vase within a vase.  Yes!  Perfect!

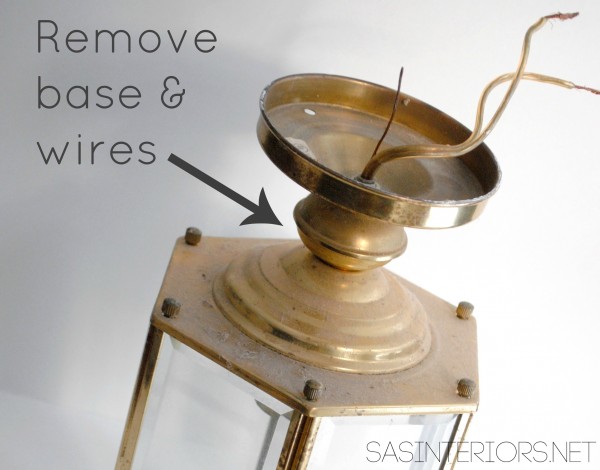
I removed the base (which I was going to you as a candle stick, but it all fell apart), as well as the wires.

Trash to Treasure: Upcycled Light to Vase created by @Jenna_Burger, sasinteriors.net

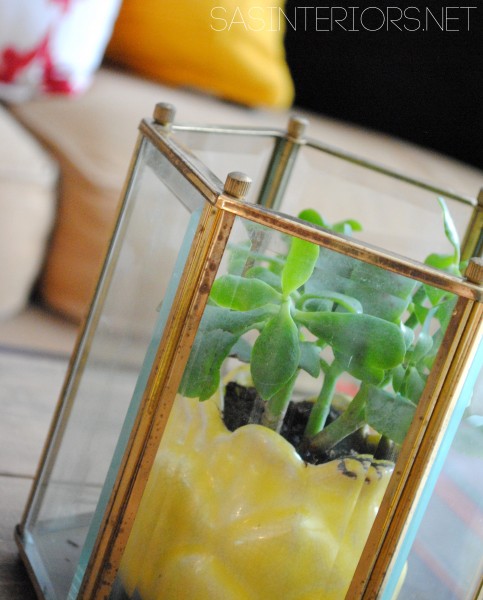
And then within minutes it went from ugly to this treasure…

Trash to Treasure: Upcycled Light to Vase created by @Jenna_Burger, sasinteriors.net

O, you know how I love to spend $0 and shop my home!

Trash to Treasure: Upcycled Light to Vase created by @Jenna_Burger, sasinteriors.net

Trash to Treasure: Upcycled Light to Vase created by @Jenna_Burger, sasinteriors.net

Trash to Treasure: Upcycled Light to Vase created by @Jenna_Burger, sasinteriors.net

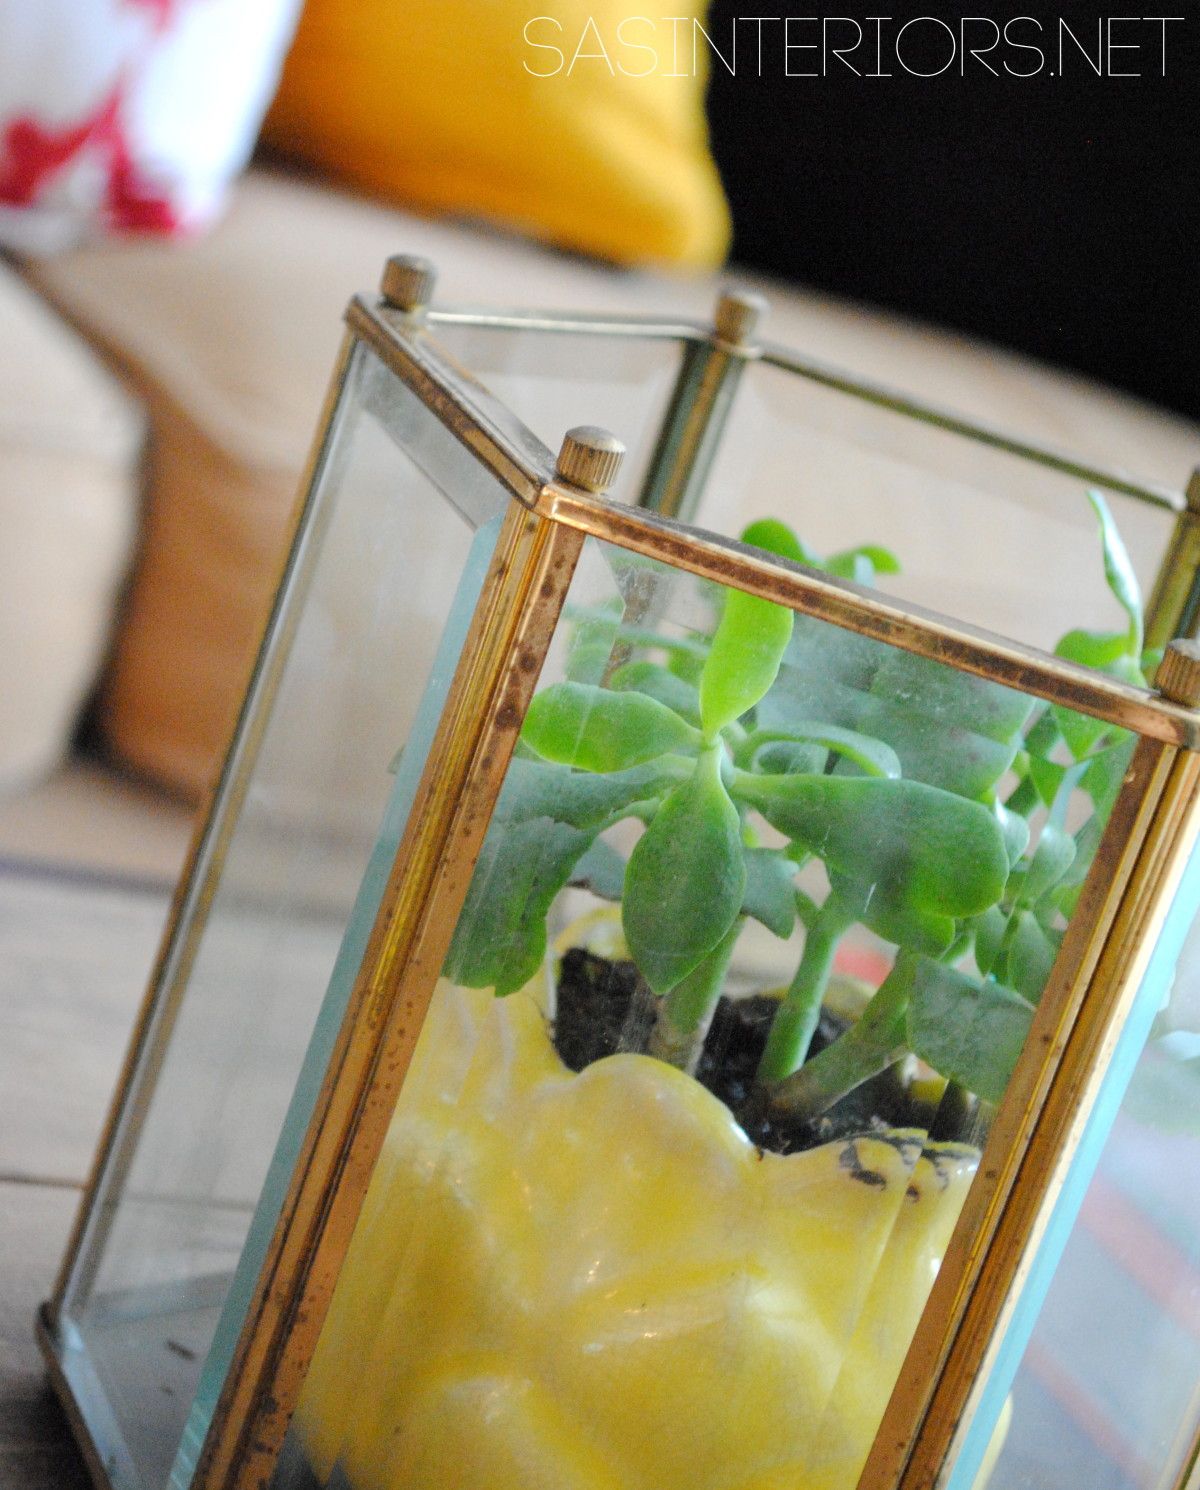
I’m in love! Such a silly thing made into something spectacular.  For now it sits on the coffee table, but I’ve got other ideas for my new found treasure.  We’ll see where my thoughts and ideas take me…

What items have you upcycled in your home?  How have you made treasure out of trash?

I link my projects to some of these parties: Skip to My Lou, Dittle Dattle, Between Naps on the Porch, Today’s Creative Blog, Stories of A to Z, All Things Heart & Home, House of Hepworths, Finding Fabulous, The Shabby Nest, Serenity Now, Tatertots and Jello, Thrifty Decor Chick, Tip Junkie


DIY: Glass Jar Pen Holder using a Pipe Clamp

Are you ready for a super easy project (from start to finish it took 5 minutes) that can be used all throughout the house and cost pennies to create?

I knew you would be!

My revamped central command center has put our family on the right path to an organized year (I’m crossing my fingers it’ll stay that way).  You’ve all loved it which I’m completely psyched about and today I’m back sharing the easy step-by-steo on how I created the new glass jar holders hanging on the wall.  It’s super simple, so let’s get started!

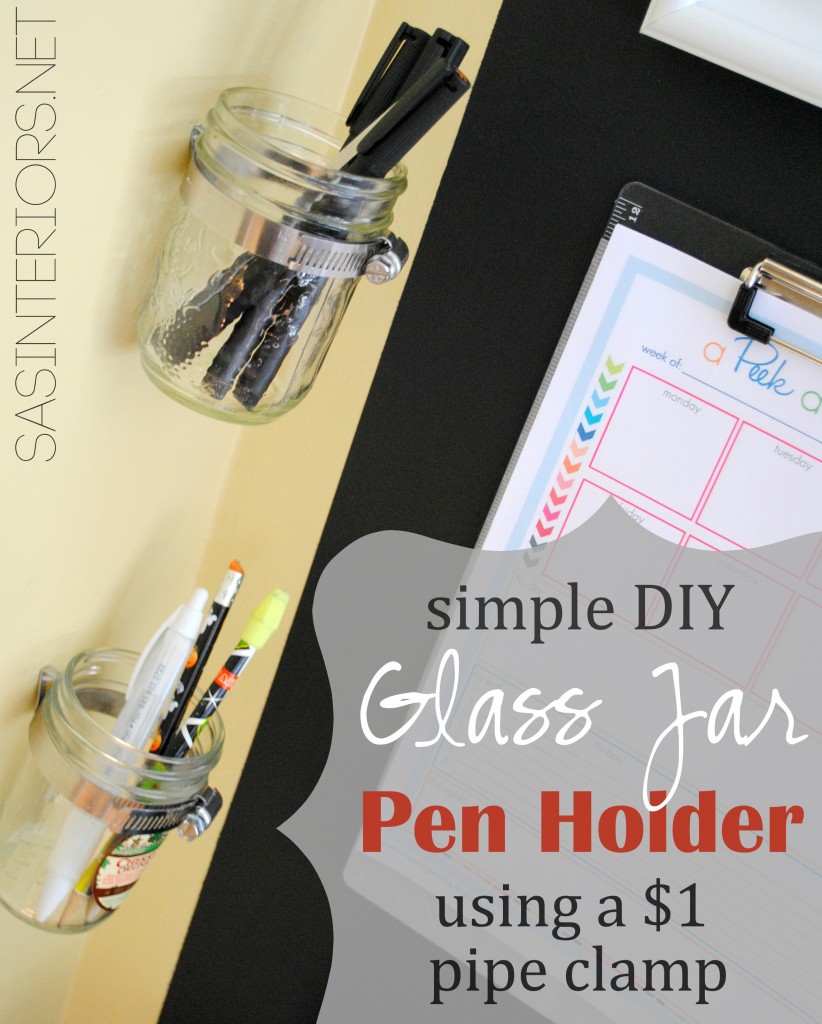
Simple DIY Glass Jar Pen Holder using a one dollar pipe clamp! Super easy to create & can be used anywhere around the house!

The one big annoyance with the old CCC was the lack of pen and pencil storage.  When in need of something to write with, we would always be hunting around the house and then the task or thought that needed to be remembered and written down was totally forgotten.

NOT ANYMORE!

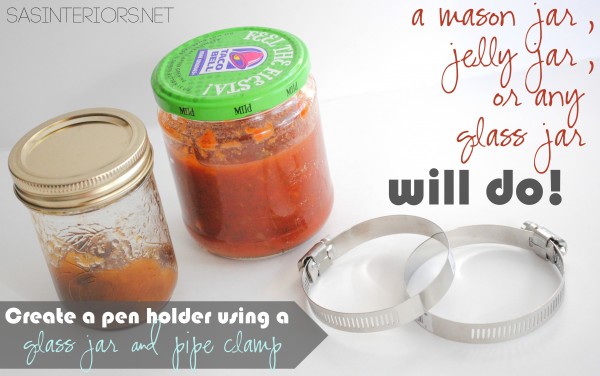
To start out, I grabbed a few glass jars from the refrig that were either empty or almost near empty.  I chose a jelly jar and a salsa jar, but really any glass jar will do!  (Unfortunately the diameter of the salsa jar was too big, so I substituted it with another glass jar).

Simple DIY Glass Jar Pen Holder using a one dollar pipe clamp! Super easy to create & can be used anywhere around the house!

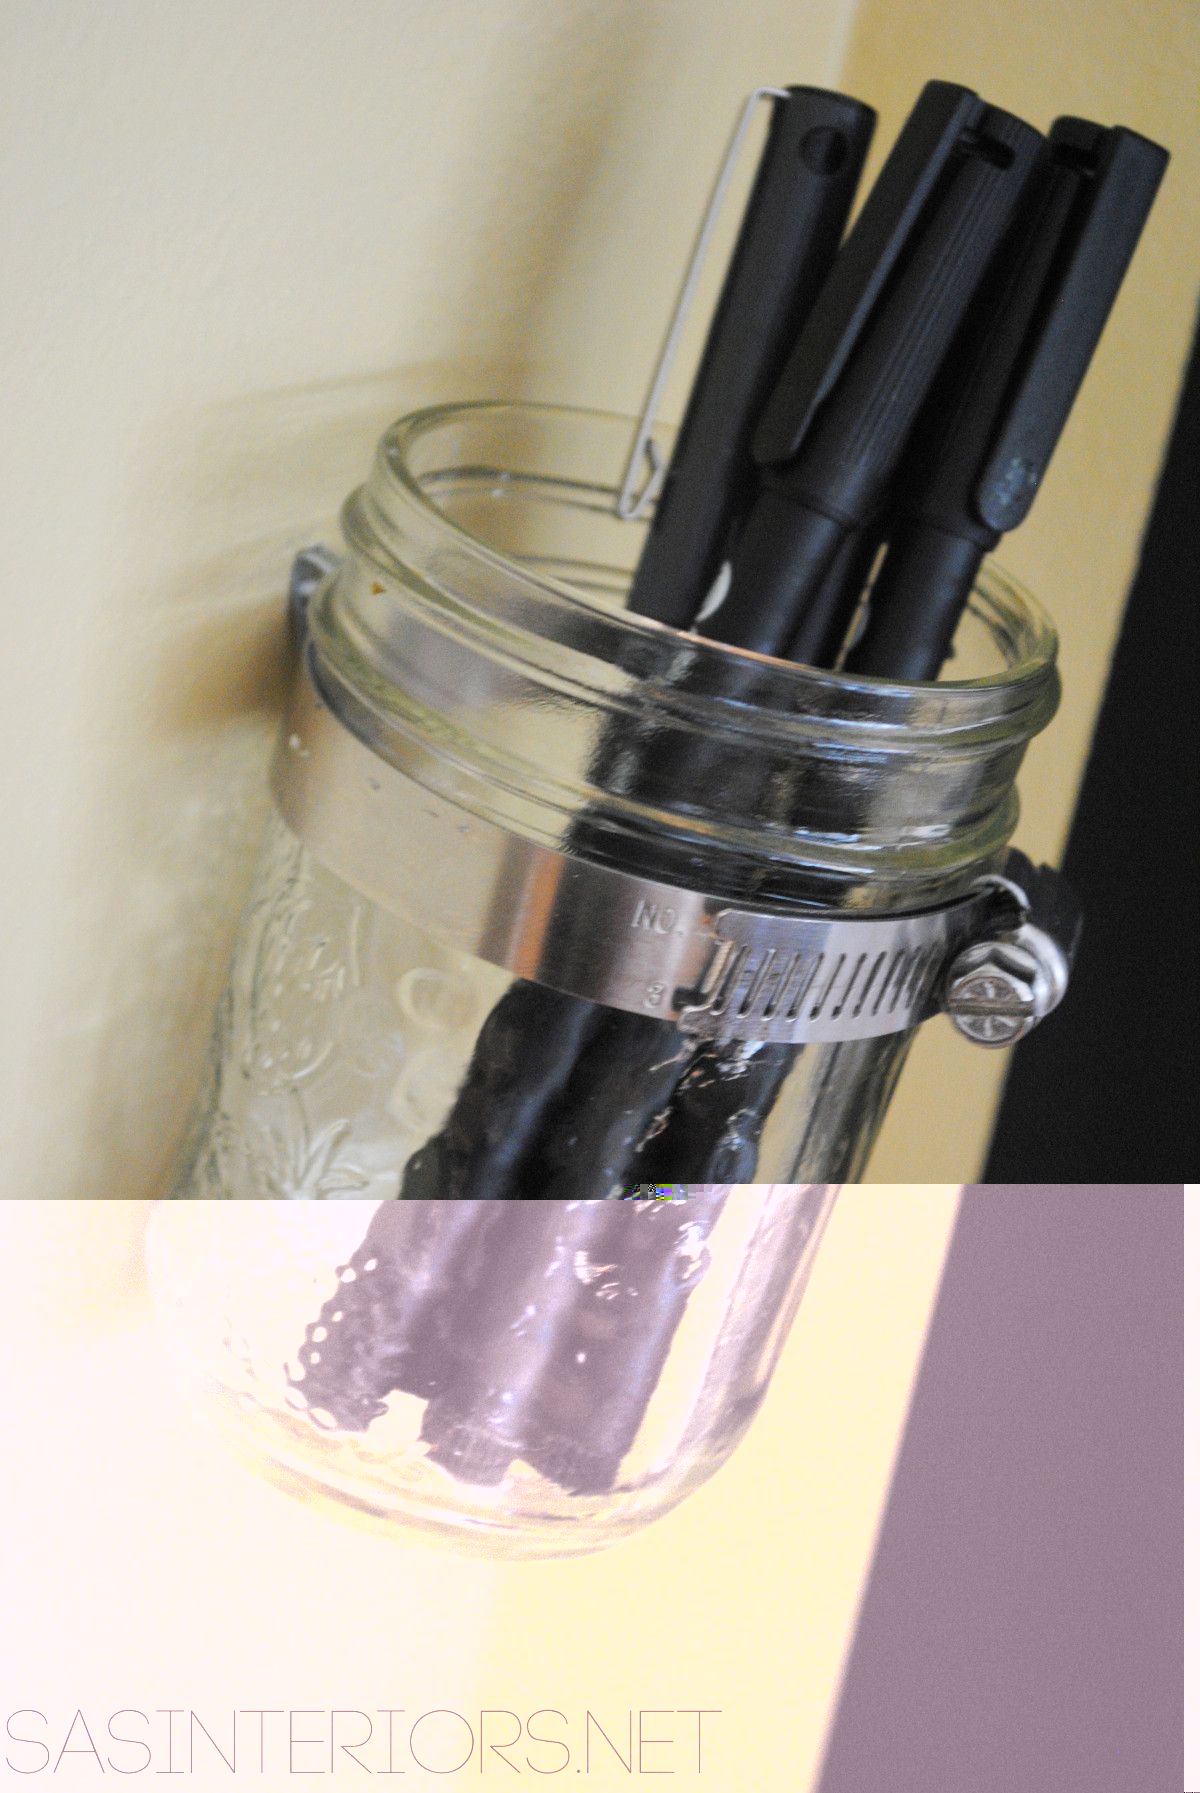
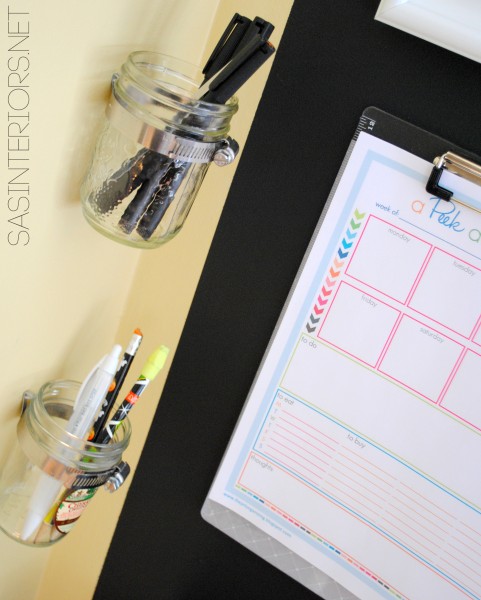
The trick to these babies hanging from the wall is a $1 (I actually think it cost even less $$$) hose pipe clamp (usually found in the plumbing section). I chose a 3″ diameter, but there are larger and smaller styles.  The salsa jar could have worked if I chose a 4″+ size.

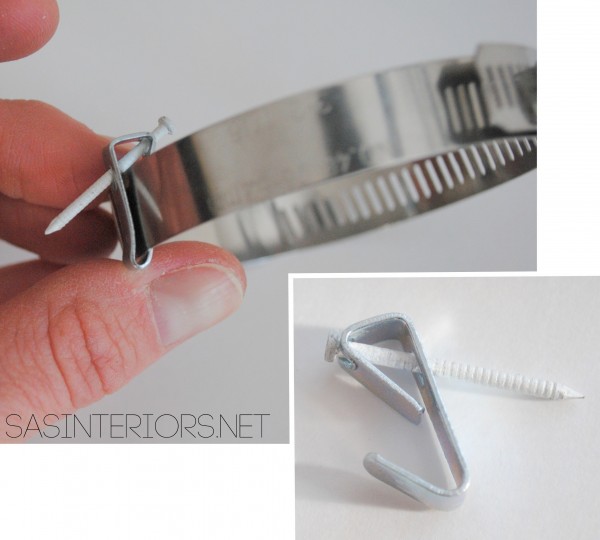
Once I had the jars cleaned out, they were ready to hang.  After some thought (and a few fails), I thought the easiest way to hang the hose pipe clamps from the wall was with a picture hanger.  This would allow for there to be only one hole in the wall (easy patch up job at a later date) and I could easily choose the right spot for install.

I wrapped the picture hook around the hose clamp and tightened it a bit so it was secure – super easy.  No tools needed other than a hammer.

Simple DIY Glass Jar Pen Holder using a one dollar pipe clamp! Super easy to create & can be used anywhere around the house!

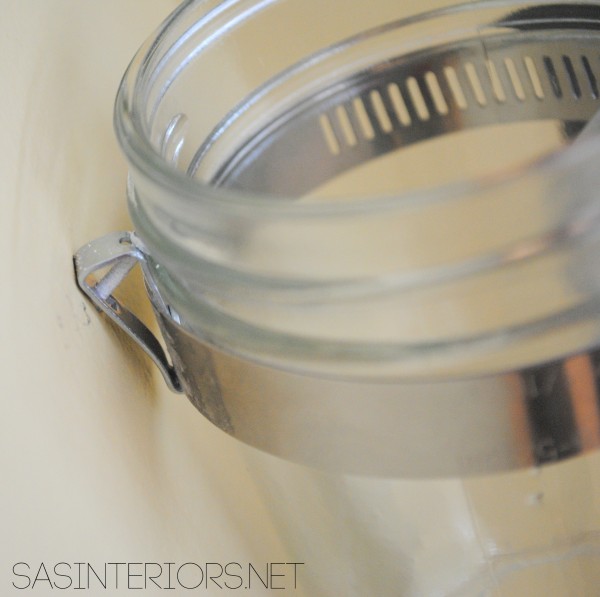
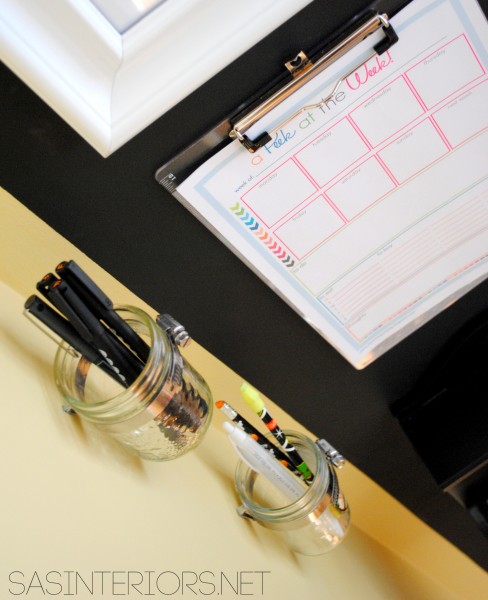
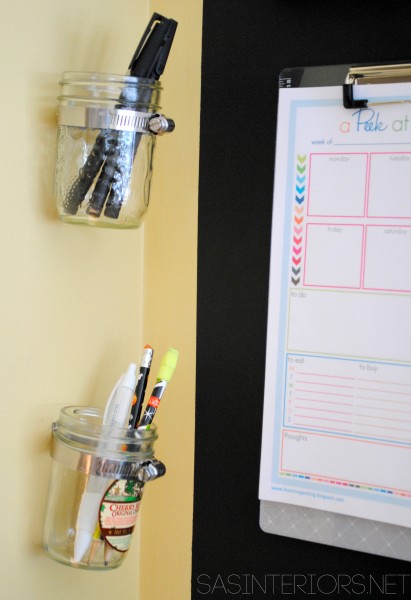
The result once hung…

Simple DIY Glass Jar Pen Holder using a one dollar pipe clamp! Super easy to create & can be used anywhere around the house!

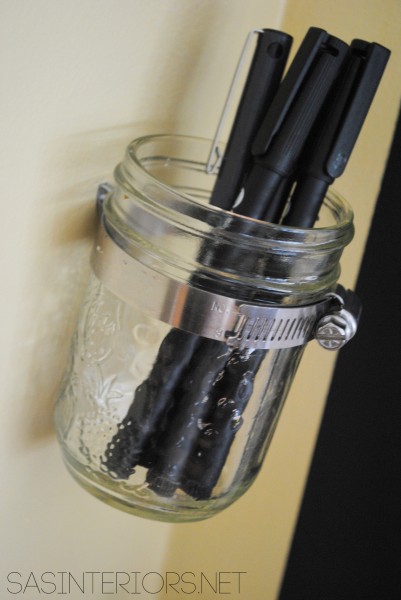
And the result with actual pens…

Simple DIY Glass Jar Pen Holder using a one dollar pipe clamp! Super easy to create & can be used anywhere around the house!

Super easy and unbelievably functional!  YES – huge score.

Simple DIY Glass Jar Pen Holder using a one dollar pipe clamp! Super easy to create & can be used anywhere around the house!

To keep the glass jars even more secure, I added a tacky dot at the spot where the jar meets the wall.  Now it stays perfectly in place.


Simple DIY Glass Jar Pen Holder using a one dollar pipe clamp! Super easy to create & can be used anywhere around the house!

If you want to see more of my Family Central Command Center, click {here}

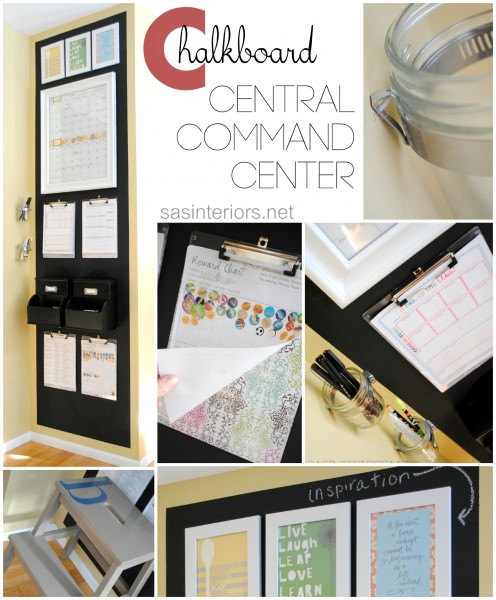
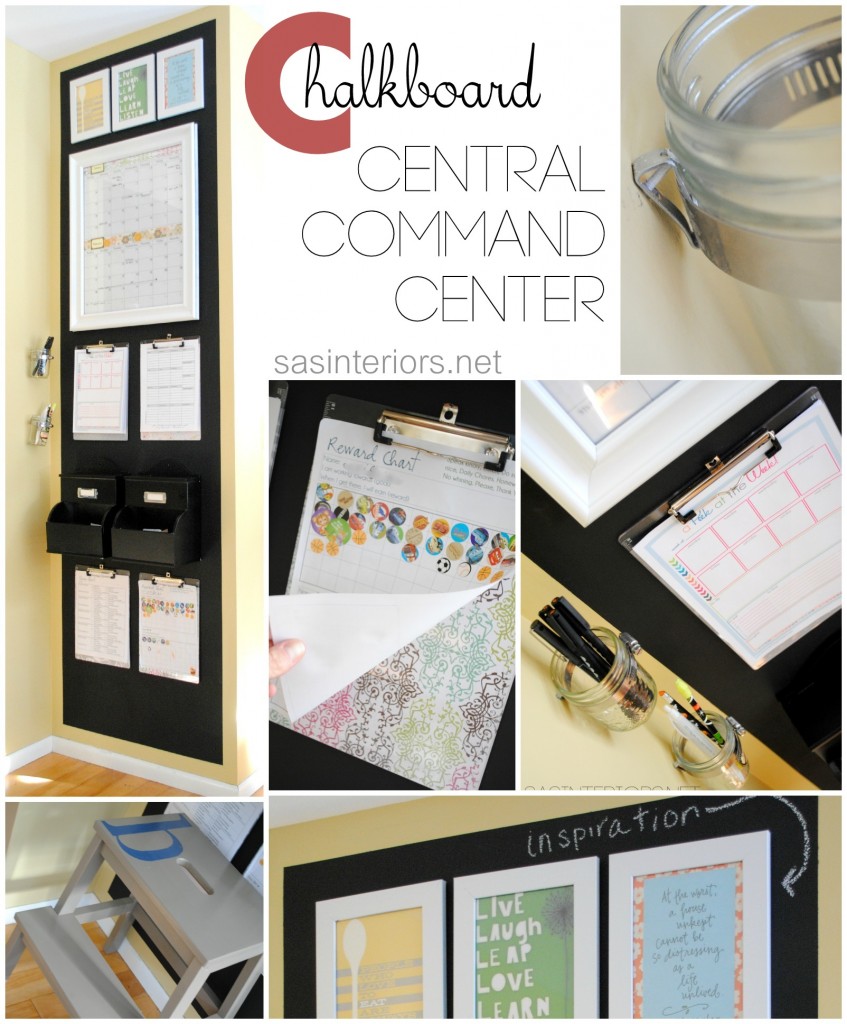
Chalkboard Family Central Command Center for the heart of the home including a monthly calendar, kids charts, inspirational quotes, and more.  Created by @Jenna_Burger via sasinteriors.net

It’s amazing what can be created with very little money and at the same time be super useful!  Now I’m on the hunt for other places around the house where I can stick a glass jar (or two) on the wall.

Do you collect or display mason jars?  Ever use this technique of using a hose pipe clamp?

How-To Make a Chalkboard Wall

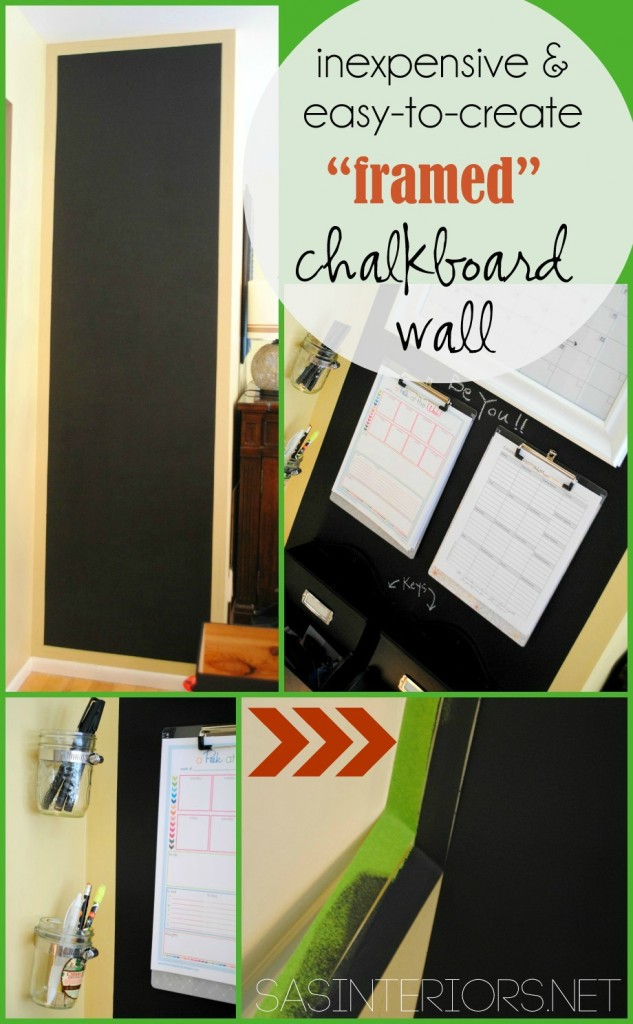
Chalkboard walls are not just for kids.  They are super fun & functional for everyone, at any age.  While the kids are busy creating new drawings, us moms are making lists so nothing’s forgotten at the store.  The need for a chalkboard wall in a home can also change and evolve as your family changes and grows.

Another plus about chalkboard walls is that with the use of chalkboard paint, they are super easy to create.  For less than $10 and a few spare hours, a new wall can be created anywhere in your home (or office)!

Inexpensive & Easy-To-Create "Framed" Chalkboard Wall using @frogtape by @Jenna_Burger, SASinteriors.net

Earlier this week, I shared my revamped CCC {Central Command Center}.  This 30″ wide spot in our home has had about 6 (or maybe more) makeovers, but it’s an intracle spot that keeps our family on track day-to-day.

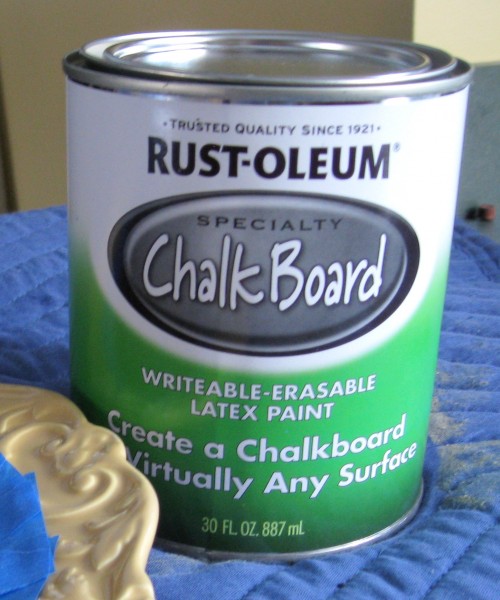
For this new CCC, I decided to add a chalkboard backdrop.  To create this fun, yet important part of the wall, I used chalkboard paint.

chalkboard paint

This lil’ old can has been around for almost 2 years and has been used on a ton of projects.  The largest before this project was the chalkboard wall we created in the basement for the kids a couple of years back.  Anyway, this can has lasted a long time!

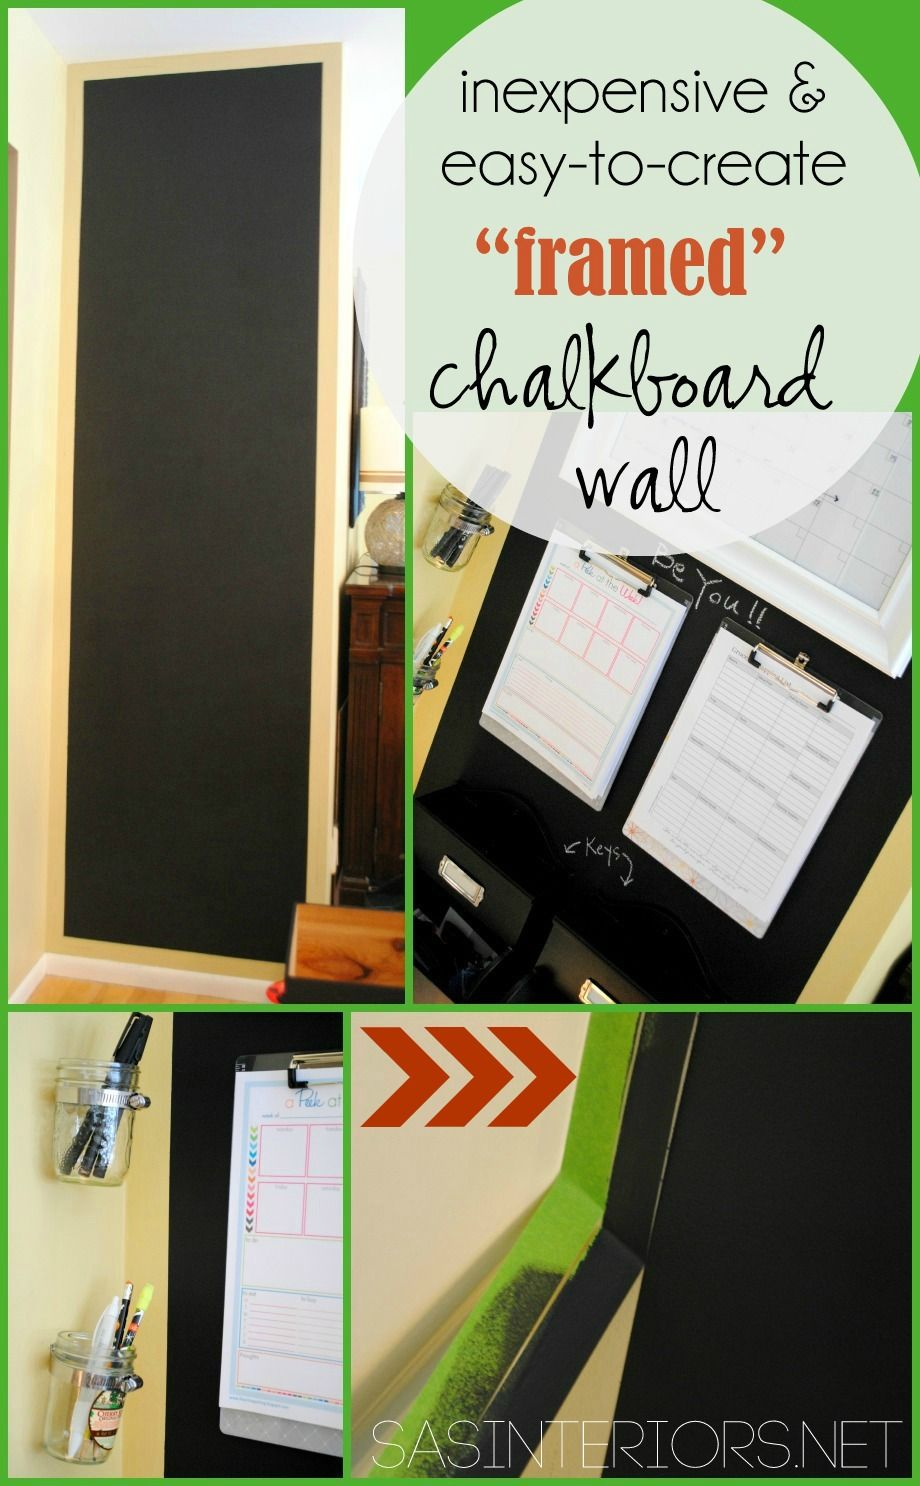
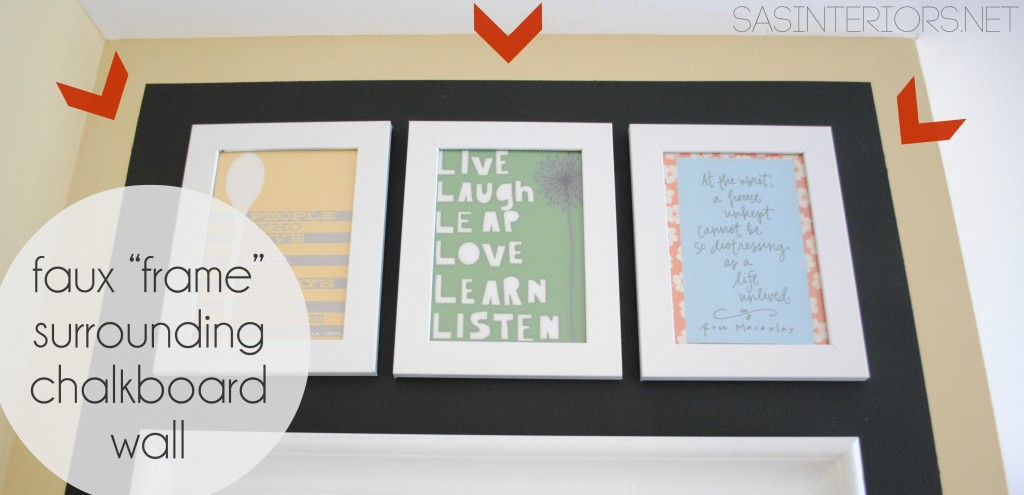
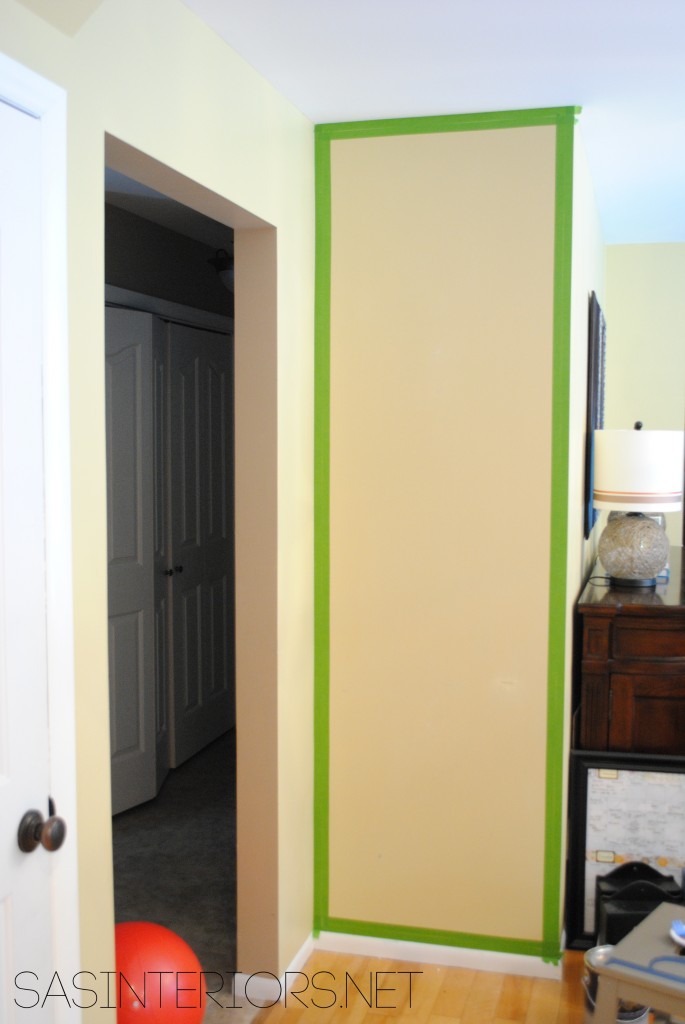
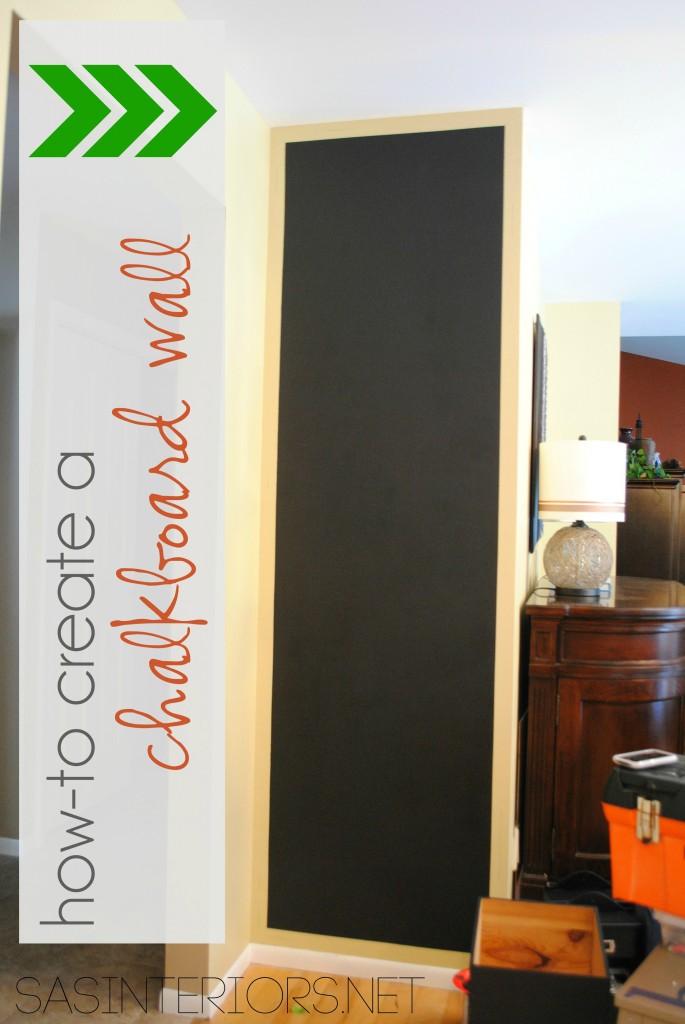
Before starting the chalkboard wall, I decided I wanted to create a “frame” surround.  There really is no “frame” on the wall, but by leaving 3″ of the yellow wall color, a “frame” surround was created.

Inexpensive & Easy-To-Create "Framed" Chalkboard Wall using @frogtape by @Jenna_Burger, SASinteriors.net

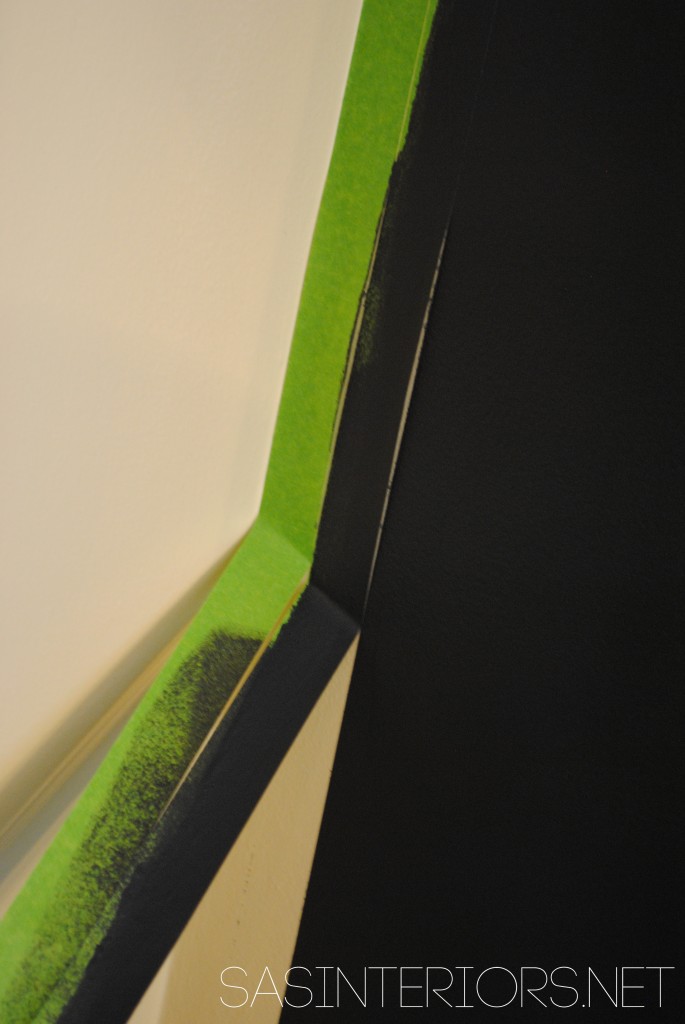
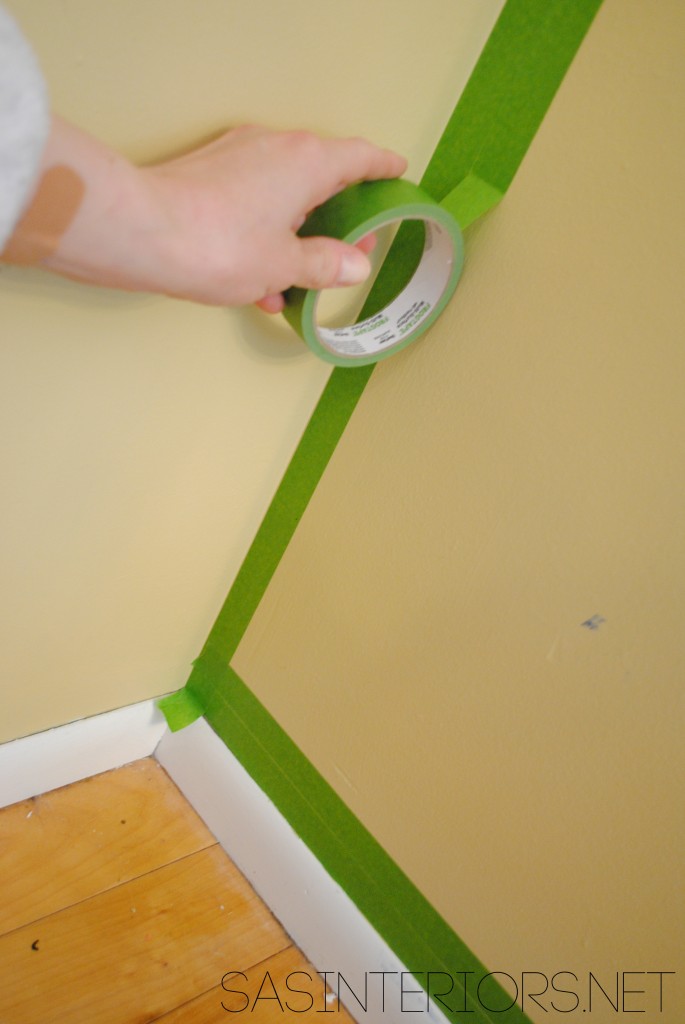
To create the frame, I applied two layers (two rows of tape side-by-side) of FrogTape.  This was my first time using FrogTape and I’m in love!  It was great.  Y’all know what a pain of a time I had when I painted the mouldings white, well this stuff would have come in handy.  Basically this tape has a sealer that when applied to the wall it doesn’t let paint seep underneath.  I had a few spots that the paint went under, but for the most part, it was great!

Inexpensive & Easy-To-Create "Framed" Chalkboard Wall using @frogtape by @Jenna_Burger, SASinteriors.netI wasn’t provided product from FrogTape.  I bought it myself because I’ve been wanting to try it out for a long time.  It gets my seal of approval!

Inexpensive & Easy-To-Create "Framed" Chalkboard Wall using @frogtape by @Jenna_Burger, SASinteriors.net

Once I applied the FrogTape and “burnished” it (pressed down really hard at the edges), I was able to start painting.

Inexpensive & Easy-To-Create "Framed" Chalkboard Wall using @frogtape by @Jenna_Burger, SASinteriors.net

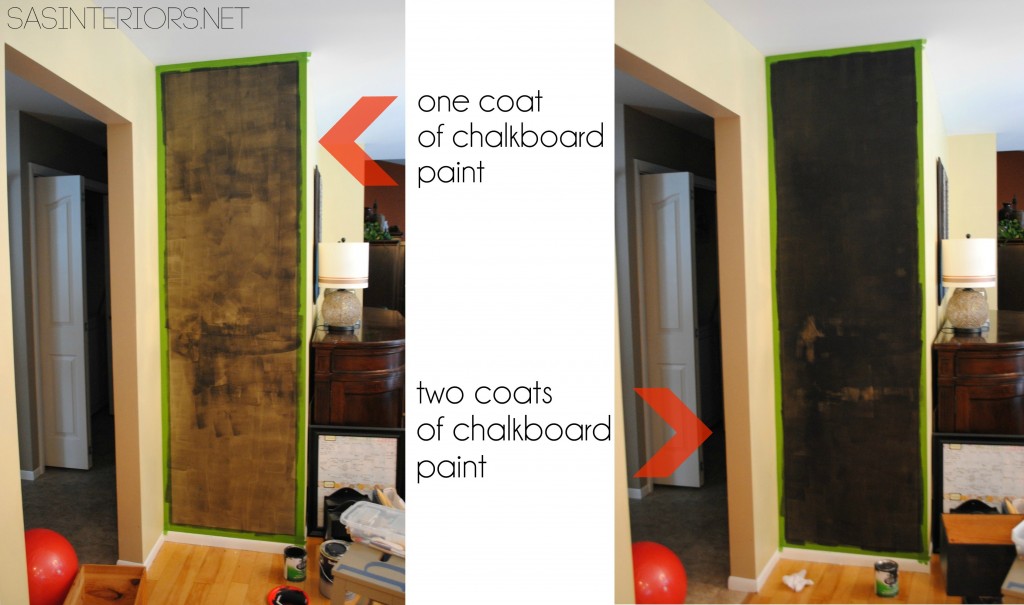
I applied 3-4 coats of the chalkboard paint so the surface was fully covered and no wall color from underneath came through.

Once I knew no more coats were needed, I removed the paint.  If the paint is still wet, that’s okay.  As you peel away the tape, you’ll see your crisp, clean line! What a beauty.

Inexpensive & Easy-To-Create "Framed" Chalkboard Wall using @frogtape by @Jenna_Burger, SASinteriors.net

And then you’re ready to stand back and admire!

Inexpensive & Easy-To-Create "Framed" Chalkboard Wall using @frogtape by @Jenna_Burger, SASinteriors.net

Once your chalkboard wall is complete, the fun of either drawing or layering can begin! Since this is more of a functional spot than a fun spot, I created a Family Central Command Center.  This is how it resulted…  And you can learn more about it {here}.

Central Command Center_11a

Have you ever used chalkboard paint before? If so, what have you created?

Want to see more of my chalkboard projects (using this one can of paint)?
New Years Sparkly Tablescape with Chalkboard Candles
Kids Play Kitchen
Framed Chalkboard Medicine Cabinet
Chalkboard Platter

Revamped Family Chalkboard Central Command Center

Chalkboard Family Central Command Center for the heart of the home including a monthly calendar, kids charts, inspirational quotes, and more.  Created by @Jenna_Burger via sasinteriors.net

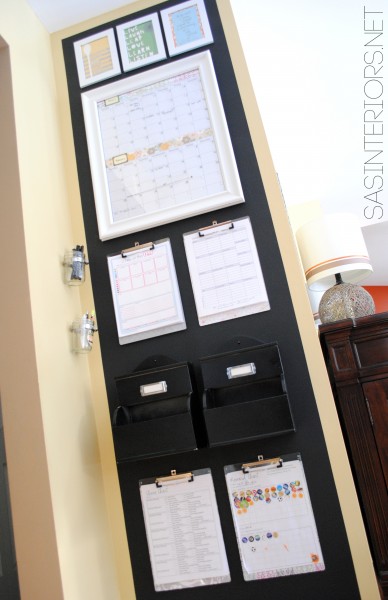
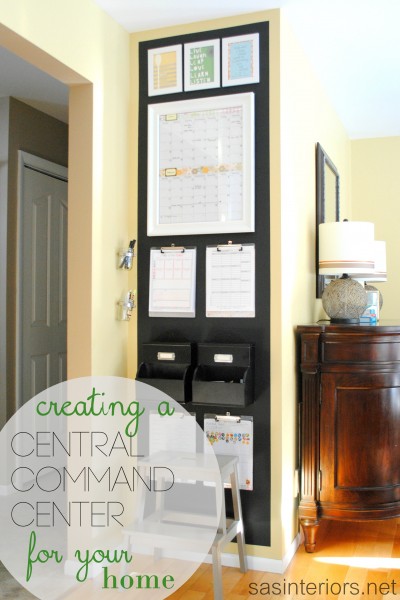
This 30″ wide wall has had more makeovers than any other spot in my home.  In the almost 3 years that we’ve lived here, I think it’s had at least 6 lives – thank goodness it’s not an entire room.  But I have to say, this 30″ wall is the key to how we function – it’s our Central Command Center… a.k.a. CCC

I couldn’t let the year begin without making a few updates to this small, but important part of our home (the previous CCC can be found here).  I actually had made a few changes about a month ago, but it just wasn’t right.  After living with it for a while, I knew what it needed…  A chalkboard.  An entire wall of chalkboard.

The revamp started with removing everything from the CCC, patching up the old holes, and touching it up with some fresh paint.  Once the wall was ready, I was off applying the chalkboard paint.

I’ll share more on the specifics of how I created the chalkboard backdrop in a separate blog post, but in the meantime, let’s take a tour of my NEW Family Central Command Center…

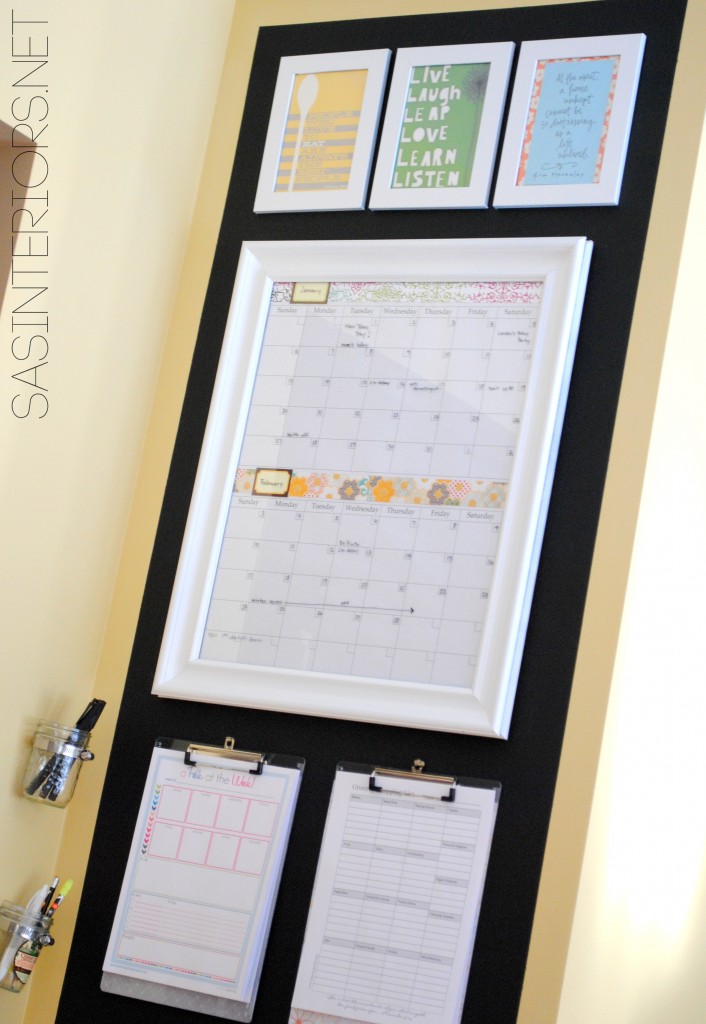
Chalkboard Family Central Command Center for the heart of the home including a monthly calendar, kids charts, inspirational quotes, and more.  Created by @Jenna_Burger via sasinteriors.net

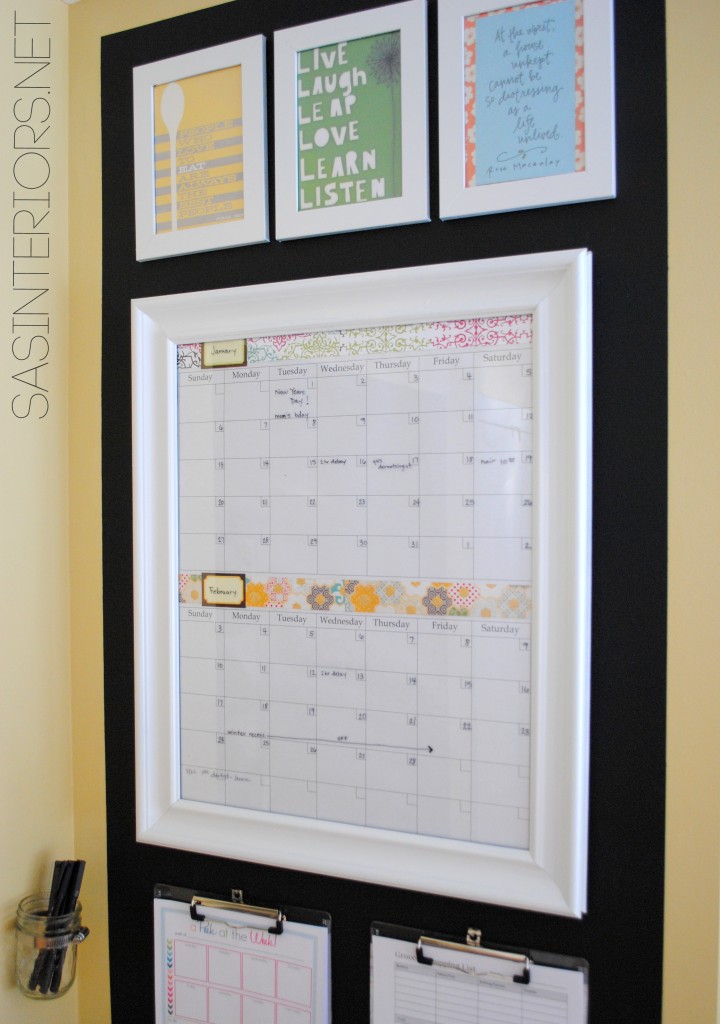
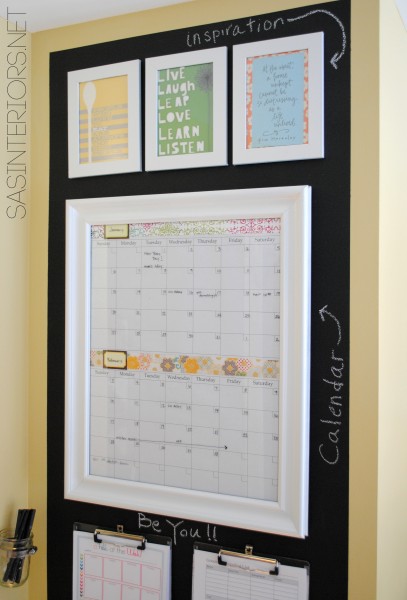
One of the major changes to the CCC is the calendar.  The calendar that I had previously created was for only one month.  SO many of you asked me, “I love the one month, but what do you do with plans you need to write down for the next month?”.  I actually had the same dilemma and now it’s resolved.  There are two calendars for two months.  Problem solved. When the month we’re in is on the bottom, I put the next month’s dates on the top.  It’s a little backwards having the month after above, but it works!

Chalkboard Family Central Command Center for the heart of the home including a monthly calendar, kids charts, inspirational quotes, and more.  Created by @Jenna_Burger via sasinteriors.net

On the picture frame turned calendar, I still use a sharpie, dry-erase pen, or these handy-dandy pens by NameBubbles that are available with their write-on labels.

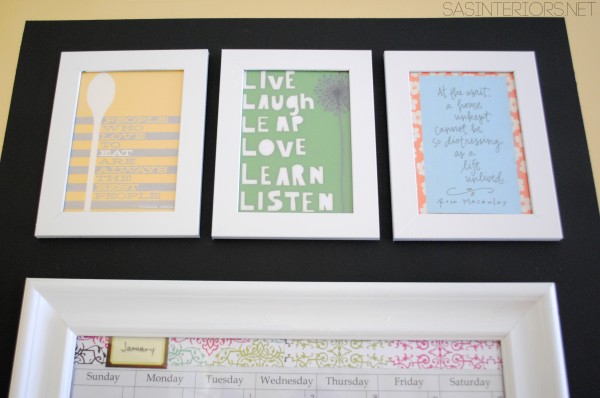
Did you notice the frames on the calendar & pictures above are now white instead of black?  Once the chalkboard was painted on the wall, the black frames disappeared, so I spray painted the old ones.  Using a white primer spray paint + a white glossy top coat, the frames are as good as new.

I still love my inspirational quotes and those are the same (in their new white frames).

Chalkboard Family Central Command Center for the heart of the home including a monthly calendar, kids charts, inspirational quotes, and more.  Created by @Jenna_Burger via sasinteriors.net

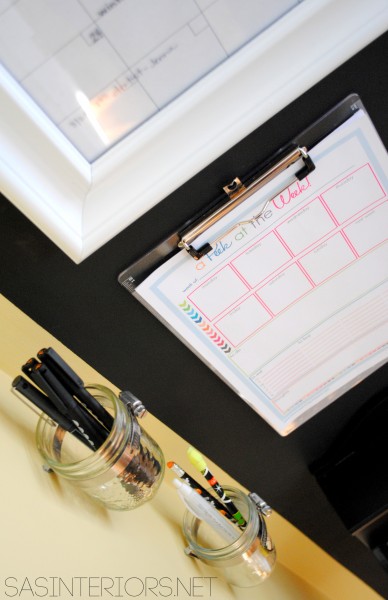
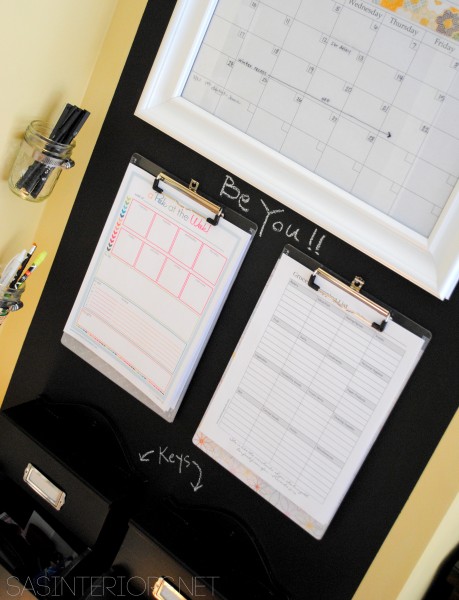
Below the calendar are the new additions to the CCC.  A month ago when the wall got an update, I made these 4 fun clipboards with scrapbook paper.  In between them are our key (and misc stuff) boxes that I had purchased at TJs and spray painted them black.

Chalkboard Family Central Command Center for the heart of the home including a monthly calendar, kids charts, inspirational quotes, and more.  Created by @Jenna_Burger via sasinteriors.net

Chalkboard Family Central Command Center for the heart of the home including a monthly calendar, kids charts, inspirational quotes, and more.  Created by @Jenna_Burger via sasinteriors.net

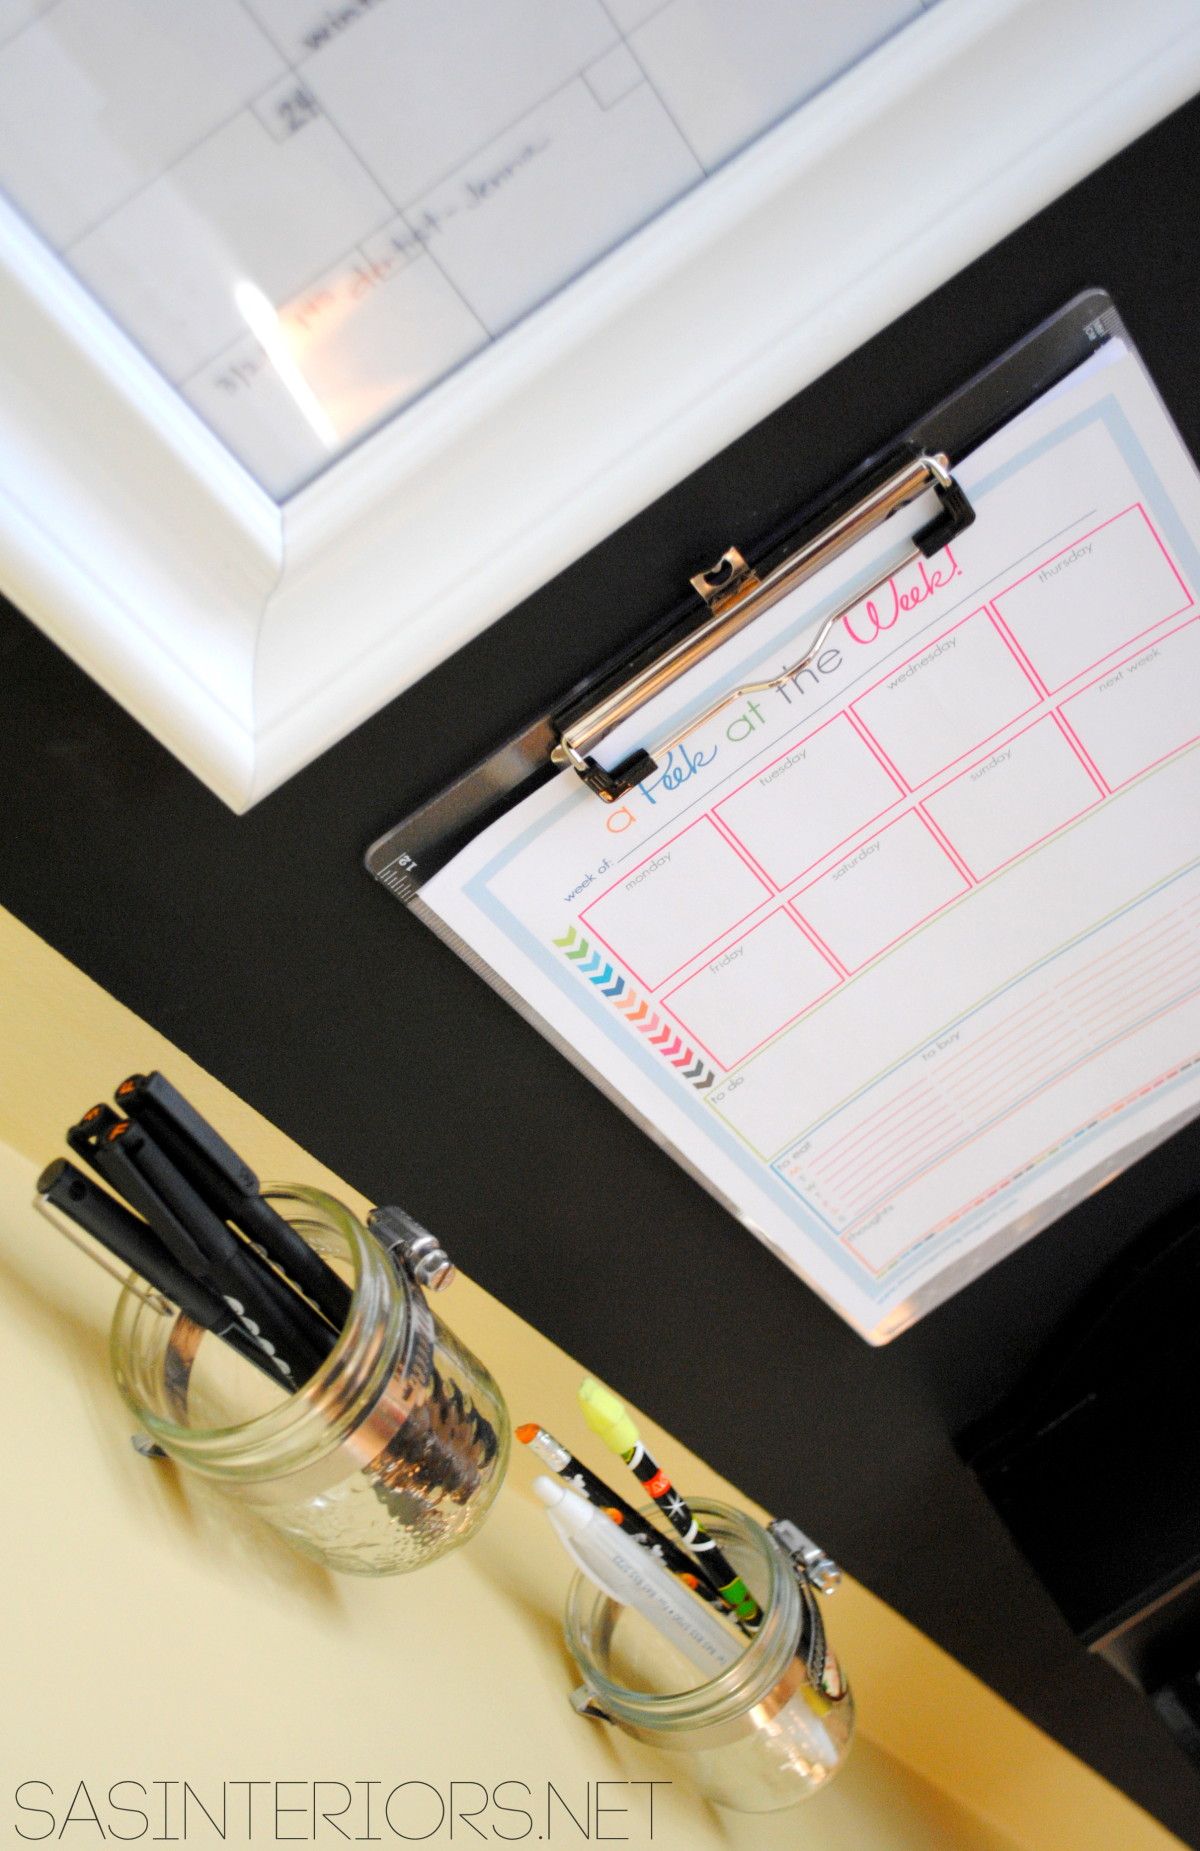
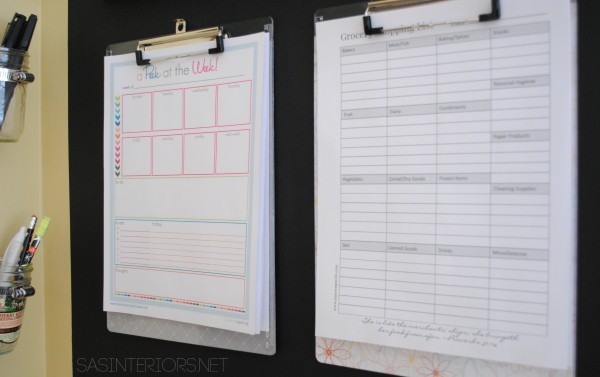
The top clipboards hold our grocery list & our Peak at the Week schedule.  Now I have no excuses to forget anything at the store – haha (wishful thinking)…

Chalkboard Family Central Command Center for the heart of the home including a monthly calendar, kids charts, inspirational quotes, and more.  Created by @Jenna_Burger via sasinteriors.netLooking to print these out – click {here} for the Peak at the Week chart created by iheartorganizing.com; Click {here} for the Grocery List created by The Time-Warp Wife (thanks to the awesome reader who found the link!)

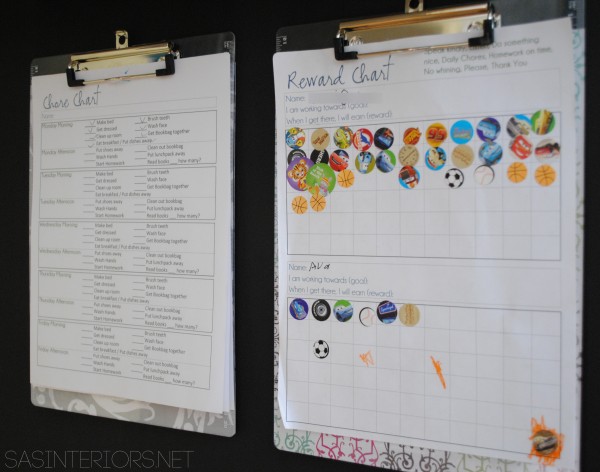
And below are the kids charts – a chore / responsibility chart for my son and a reward chart where both kids get to add stickers when they’ve made good choices / decisions.

Perfectly at their level!

Chalkboard Family Central Command Center for the heart of the home including a monthly calendar, kids charts, inspirational quotes, and more.  Created by @Jenna_Burger via sasinteriors.netLooking to print these out – click {here} for the chore chart and click {here} for the reward chart

I chose this spot of the home because it’s in the ideal location, kinda close to the foyer and kinda close to the kitchen.  It’s a small spot (a large wall or space isn’t really needed), yet is efficiently and thoughtfully put together for all our family needs.

Chalkboard Family Central Command Center for the heart of the home including a monthly calendar, kids charts, inspirational quotes, and more.  Created by @Jenna_Burger via sasinteriors.net

One of the major needs that was missing in our previous CCCs was something to write with.  Somehow we can NEVER find a pen or a pencil in our home (our kids must eat them – hehe).  Being inspired by others who used mason jars for storage, I grabbed some hose clamps from Lowe’s and installed two pencil / pen holders next to the charts.  I put them high enough, so little fingers hopefully won’t touch them. {A tutorial on how-to create jelly jar pen holders to come soon}.

Chalkboard Family Central Command Center for the heart of the home including a monthly calendar, kids charts, inspirational quotes, and more.  Created by @Jenna_Burger via sasinteriors.net

Chalkboard Family Central Command Center for the heart of the home including a monthly calendar, kids charts, inspirational quotes, and more.  Created by @Jenna_Burger via sasinteriors.net

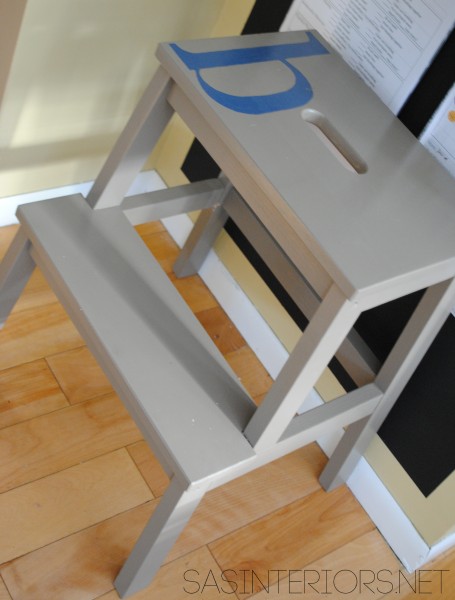
Something that I haven’t shared, but created a long time ago is our family stool.  It’s something so simple, but used everyday!  From using it in the kitchen and closet or as an extra seat, our Ikea step stool is awesome.  When I bought it, it had a natural wood finish, but with a little paint (the same color as the kitchen), I revamped it.  Then using the same stencil that I created for my pallet box, I added our family initial: b.

Chalkboard Family Central Command Center for the heart of the home including a monthly calendar, kids charts, inspirational quotes, and more.  Created by @Jenna_Burger via sasinteriors.net

Lastly, of course we had to chalk-up our new wall!  That’s the point of chalkboard!!

Chalkboard Family Central Command Center for the heart of the home including a monthly calendar, kids charts, inspirational quotes, and more.  Created by @Jenna_Burger via sasinteriors.net

I love how a chalkboard wall allows you to continually change it.

Chalkboard Family Central Command Center for the heart of the home including a monthly calendar, kids charts, inspirational quotes, and more.  Created by @Jenna_Burger via sasinteriors.net

And that sums up the tour of our 30″ wide everything wall!

Chalkboard Family Central Command Center for the heart of the home including a monthly calendar, kids charts, inspirational quotes, and more.  Created by @Jenna_Burger via sasinteriors.net

 How does your family stay organized?  Do you have a central “spot” in your home?

5 Creative Ways to Wrap with Craft Paper

Wrapping gifts makes me happy!

With a yummy glass of wine in hand, I wrapped quite a few last evening. It brings me joy to give to others.

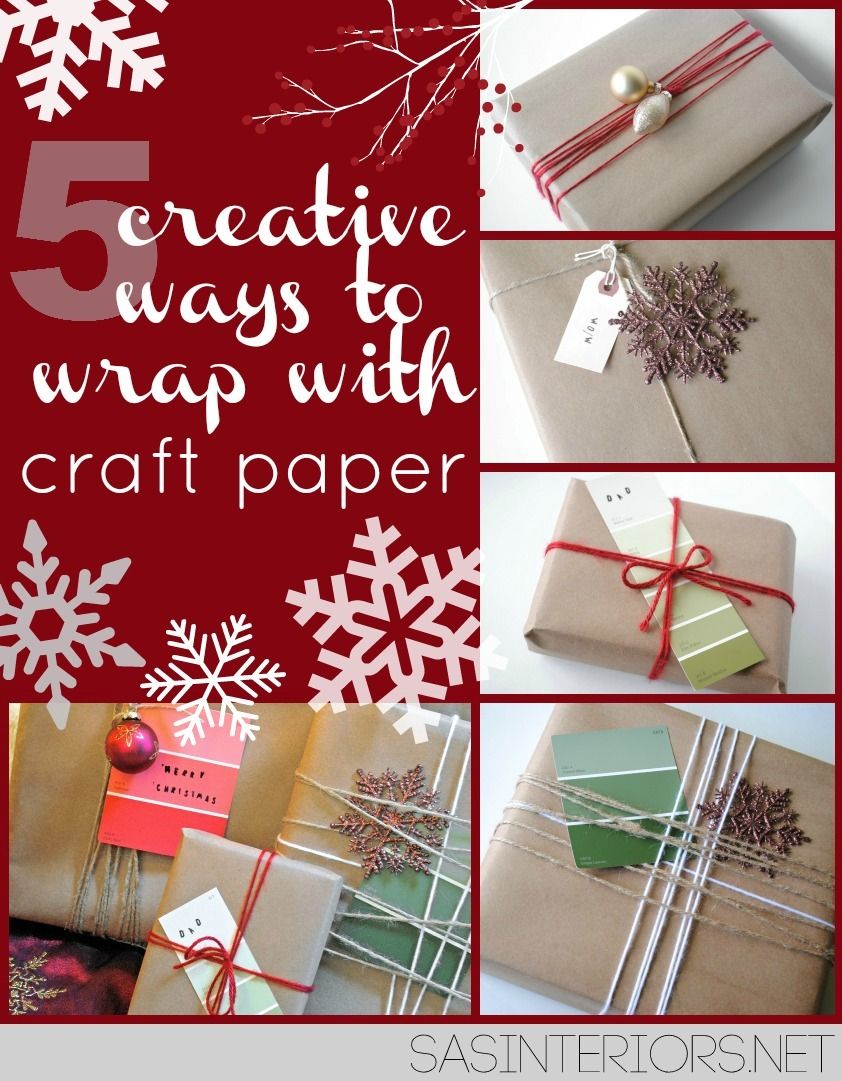
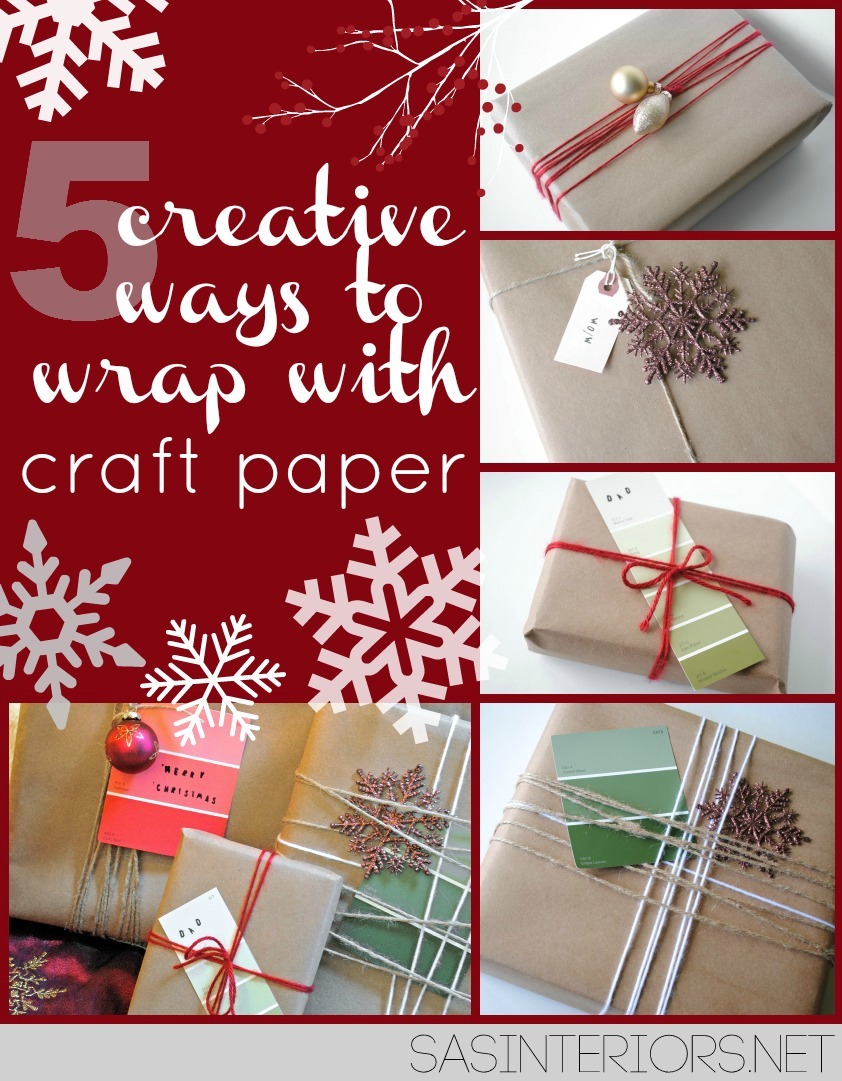
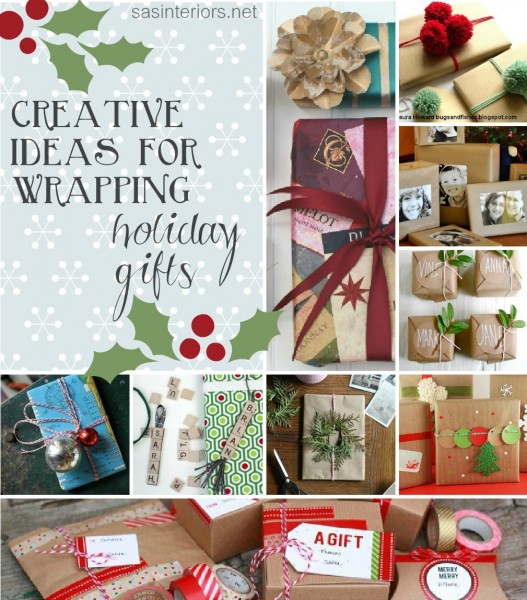
Until this year, I used the typical fun and festive paper that you see in the holiday aisles at most big-box stores.  Papers come in a variety of colors, lengths, and themes,  but there is something impersonal about it.  Just like a front door to a home, the packaging on a present sets the tone for what’s the come.  Wrapping doesn’t have to be expensive, but creative is key.  Earlier this week, I shared 15 unique ways to wrap holiday gifts and today I’m sharing how the gifts I will be giving this year will be wrapped.

5 Creative ways to wrap holiday gifts using craft paper by @Jenna_Burger via sasinteriors.net

From the graphic and title of this post you can pretty much figure out what I used for wrapping gifts this year, but if not, it’s… Craft Paper.

I love it!  Why? It’s inexpensive, you’ll never run out, it can be used and customized for any occasion, it’s multi-functional, and is super thick/heavy (like high-end pricey papers at $6/$8 a roll).

And let me say it again… you’ll never run out (well eventually you will but not for at least 5 or 10 years)! I purchased a 500′ roll of brown craft paper for $8 at Lowes.  Pretty awesome, right?!

Let’s dig right in to see how my presents will be wrapped for Christmas 2012…

After wrapping my presents in the brown craft paper, I got started with the embellishments a.k.a. the fun part!

Craft Paper Idea #1

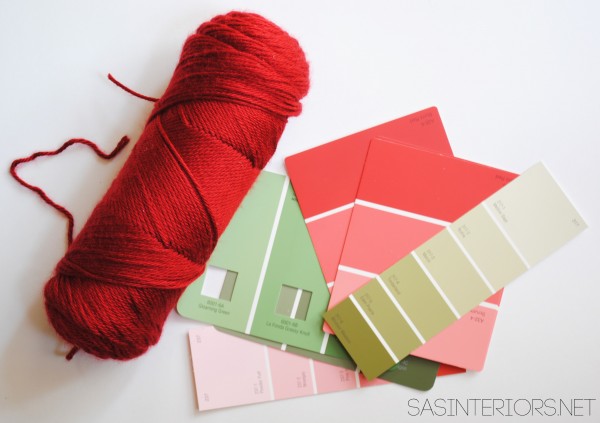
Materials

  • Yarn
  • Paint Chip samples or other gift tags

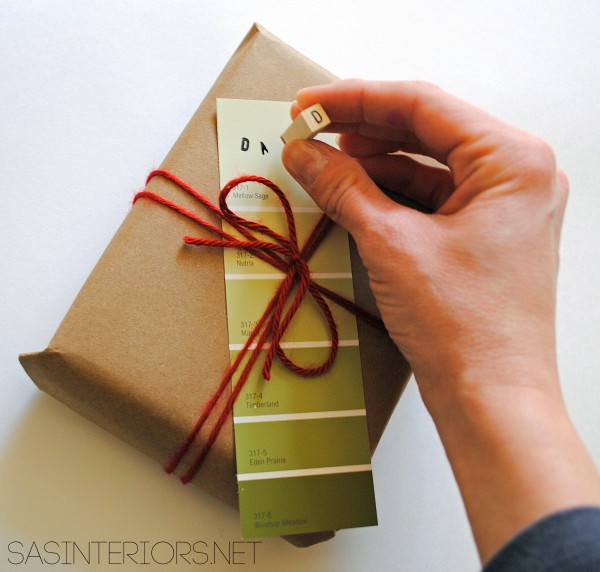
As a DIYer and crafter, paint chip samples seemed unique and so appropriate to add to a gift that came from me. I picked a few up that seemed Christmas-like in a range of red and green hues.

5 Creative ways to wrap holiday gifts using craft paper by @Jenna_Burger via sasinteriors.net

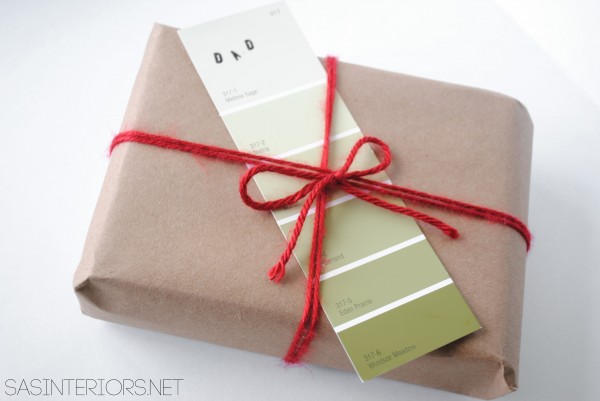
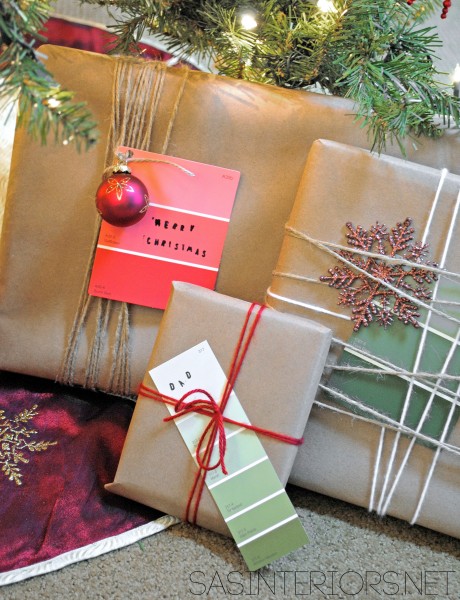
You really can do so much with paint chip samples!  After I wrapped my present in brown craft paper, I then wrapped two layers of red yarn around and finished it off with a long green paint chip sample.  I added the words DAD on it with individual letter stamps that I got at AC Moore for $1.  Super cheap and so pretty!

5 Creative ways to wrap holiday gifts using craft paper by @Jenna_Burger via sasinteriors.net

And the result…

5 Creative ways to wrap holiday gifts using craft paper by @Jenna_Burger via sasinteriors.net

Craft Paper Idea #2

Materials

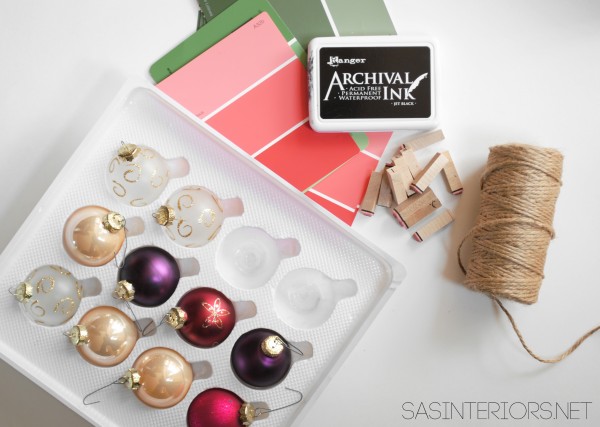
  • Jute
  • Leftover (non-used) small ornaments
  • Paint Chip samples
  • Letter Stamps

5 Creative ways to wrap holiday gifts using craft paper by @Jenna_Burger via sasinteriors.net

Again super easy to make and some of the supplies are a repeat from the last gift idea.  Instead of using the yarn this time, I decided on jute, which again is very inexpensive. I got this roll at Walmart for $3 and have used it for many things around the house.

After wrapping and adding the embellishments, here’s the result…

5 Creative ways to wrap holiday gifts using craft paper by @Jenna_Burger via sasinteriors.net

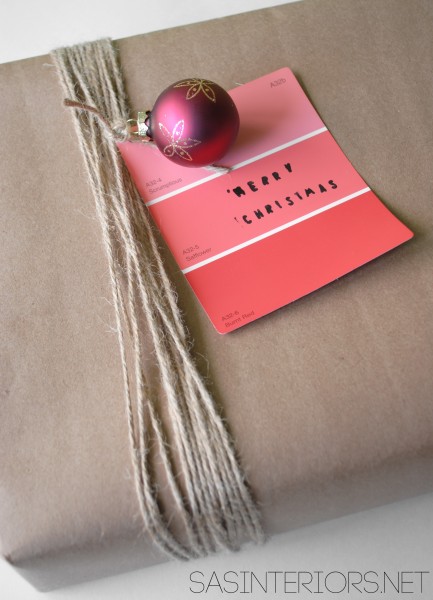
It was so simple to make!  I wrapped  a loooong strand of jute towards the end of the box (not centered) with an ornament and paint chip sample, and it was complete.  With the individual letter stamps, you can say anything and add as many words as you’d like.  The options are endless.  For this present I wrote Merry Christmas.

Craft Paper Idea #3

Materials

  • Jute
  • A simple tag
  • Any ornament

5 Creative ways to wrap holiday gifts using craft paper by @Jenna_Burger via sasinteriors.net

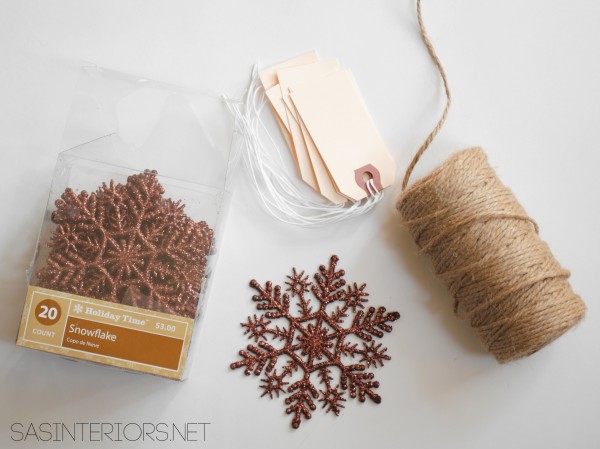
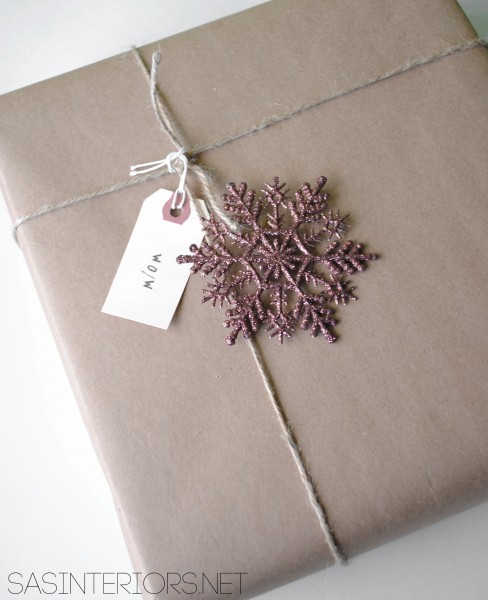
Using any ornament – I loved how these chocolate snowflakes sparkled – add it to a present for a creative embellishment.  I wrapped one layer of jute around the box, added a tag, and the simple snowflake ornament, and my present was complete.

This special one is for my mom…

5 Creative ways to wrap holiday gifts using craft paper by @Jenna_Burger via sasinteriors.net

Craft Paper Idea #4

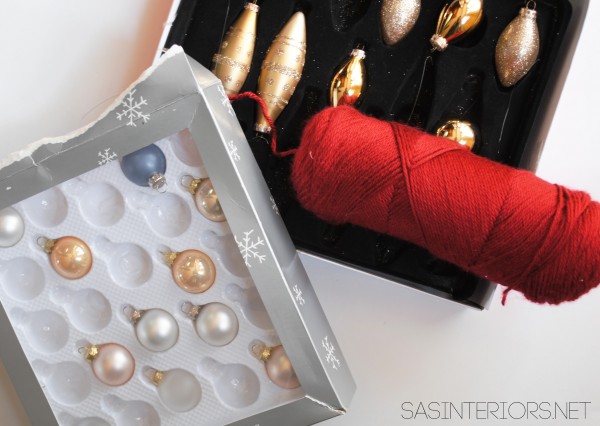
Materials

  • Yarn – I chose red
  • Small Ornaments

5 Creative ways to wrap holiday gifts using craft paper by @Jenna_Burger via sasinteriors.net

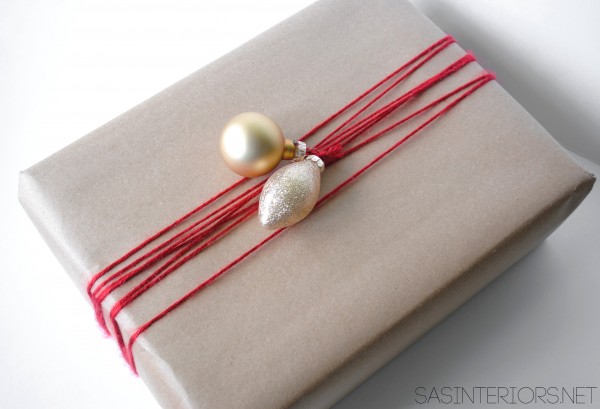
A minute later, the result…

5 Creative ways to wrap holiday gifts using craft paper by @Jenna_Burger via sasinteriors.net

For this present in particular, I simply wrapped a looong strand of red yarn around the box and finished it with two small ornaments.  So easy.

Craft Paper Idea #5

Materials

  • All of the above!

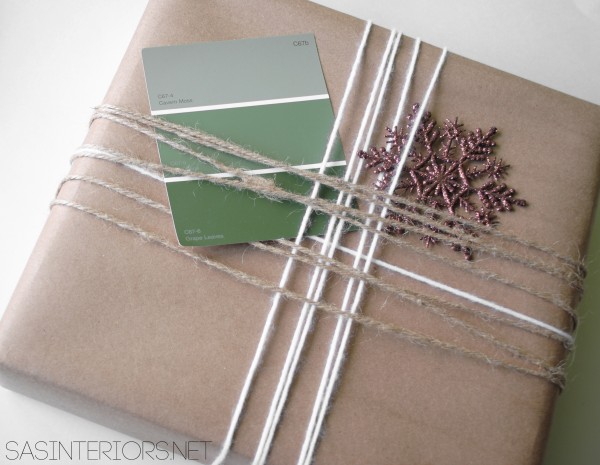
To create this last idea, I used it all…  Jute, yarn, an ornament, and a paint chip sample.

5 Creative ways to wrap holiday gifts using craft paper by @Jenna_Burger via sasinteriors.net

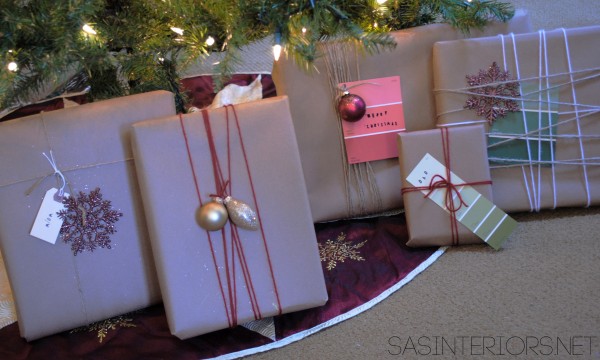
As you see, each present has similar materials, but is put together differently each time to truly make a one-of-a-kind gift.  How special?  And what recipient wouldn’t appreciate the time you took to think outside of the box?!

5 Creative ways to wrap holiday gifts using craft paper by @Jenna_Burger via sasinteriors.net

5 Creative ways to wrap holiday gifts using craft paper by @Jenna_Burger via sasinteriors.net

Pretty, simple, and O so fun and unique to create!

If you’re looking for even more ideas on how to wrap, then you’ll have to check out my Wrapping Round-Up of 15 Unique Ideas to Wrap Holiday Gifts.Creative ways to wrap holiday gifts using craft paper by @Jenna_Burger via sasinteriors.net

How do you usually wrap your Holiday gifts?

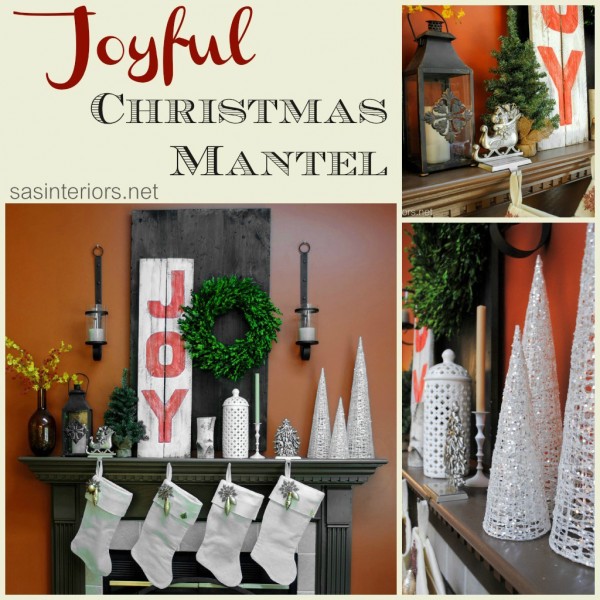
JOYful Christmas Mantel

The hustle and bustle of the Holidays are in full swing, but I was able to step back from the craziness of it all this past weekend to revamp my mantel and deck it out for Christmas.

As a Blogger, I feel so lucky to have a platform to share my new creations.  When the time comes to create a new mantel composition, I push myself to always try something new and different, and raise the bar from the previous year.  Thus the result of my new JOYful Christmas Mantel…

Like with every mantel, I cleared off all the decor from my Fall mantel so I could see the space free and clear!  This always helps start the ball-rolling for my latest montage.  I’ll tell you, I don’t usually go into decorating my mantels (or many areas of my home) with a plan.  Once I see a blank slate, somehow it all starts coming together.

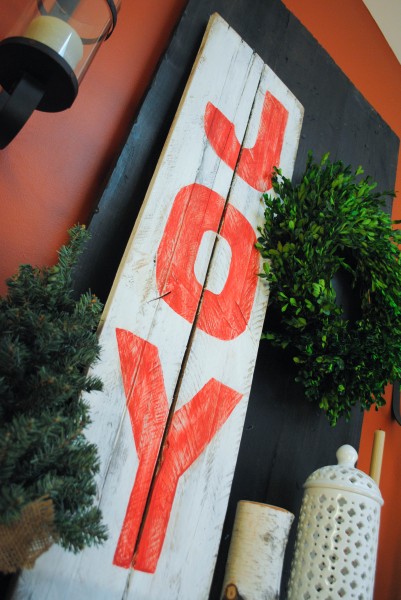
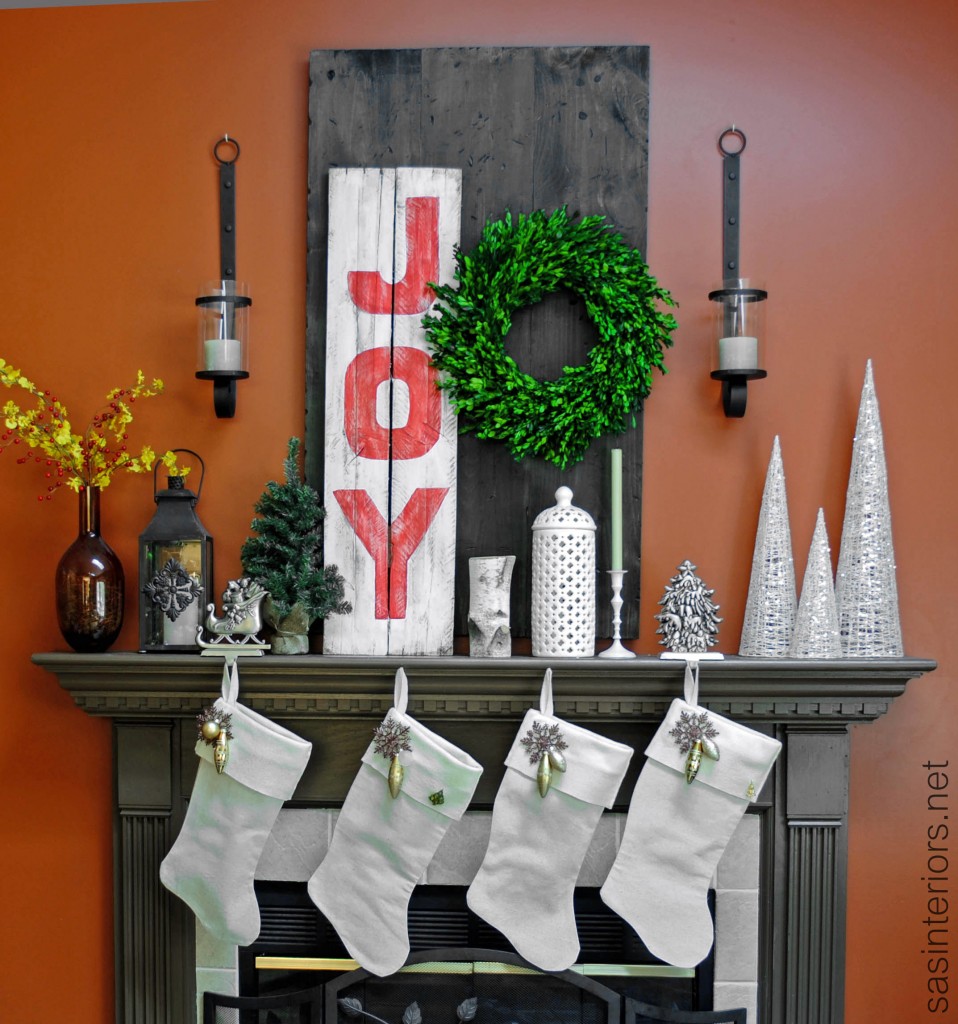
I will say though, I’ve had the idea to create this JOY sign for a while.  I thought it would look beautiful leaning against the new ebony stained wood board backdrop. Thankfully all came together and I’m so pleased with the result – I’ll be sharing a quick and easy tutorial on how I created the sign very soon.

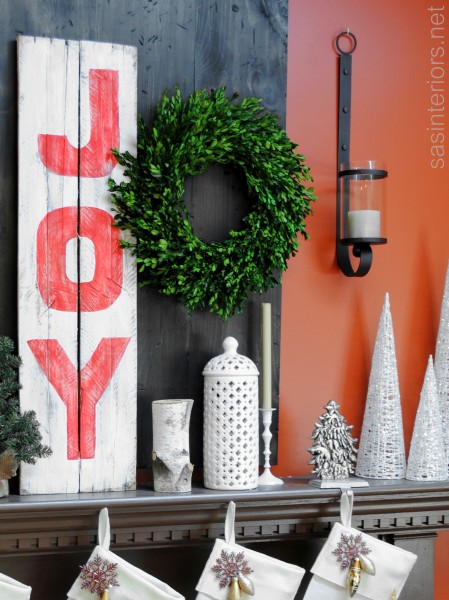
Going for an asymmetrical look,  I added a gorgeous boxwood wreath next to the JOYful sign.  I scored this totally faux, but looks totally real, wreath at Lowe’s – I’m in love, I’m in love, I’m in love.  I love decorating with boxwood and cedar branches, and when I saw this, I grabbed it.  Well actually I thought about making it at first, but after figuring out the cost, this was a better deal.

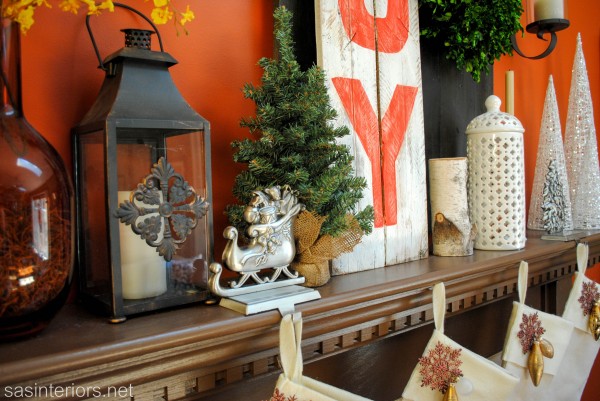
In creating the mantel, I mixed in a few Christmas elements with a few non-Holiday pieces.  I couldn’t dare put away my fabulous white ginger jar that I enjoy looking at everyday, so of course there it is… (along with my easy-peasy presto-chango-with-spray-paint candle stick).  And I think they look great amongst everything else.

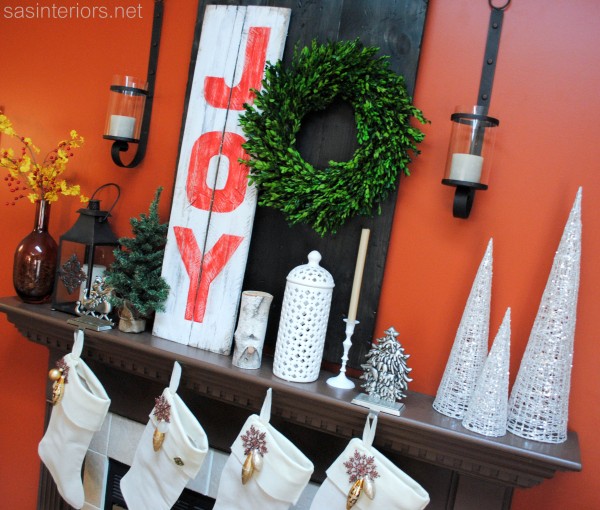
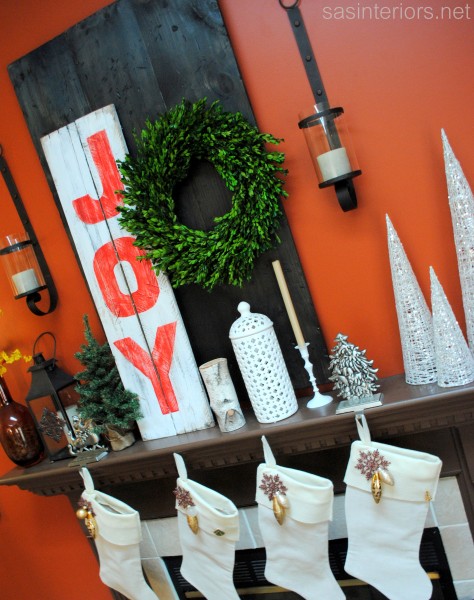
Some of the fun, festive decor that I added around it are the:  three sparkly mod Christmas trees, two brushed nickel Christmas stocking holders (which I got forever ago from Target), and one piece of birch log.

My burnt orange wall is a show-stopper in itself, but I always like to add a burst of color in another way.  With this mantel, I brought in a pop of yellow with a few sprigs of forsythia (totally wrong flower for the season, but I love the yellow with the red in the JOY sign).  In the same vase, I added some faux red berries.  Yellow + Red = Perfect Compliment!

The mantel is simple, elegant, and festive.  O, I truly wish you could see it in person!

The drop cloth and felt stockings are still a favorite of mine.  I made them last year and added metallic gold ornaments to give a little accent.

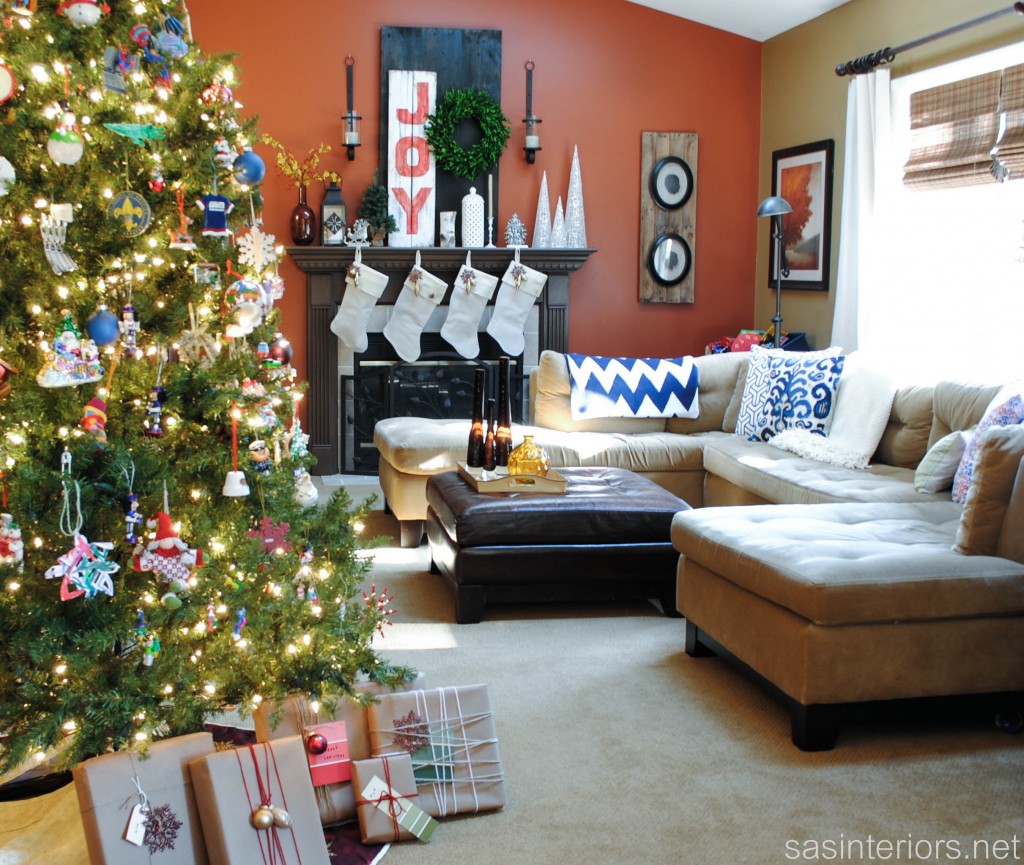
And here’s the overall space…

O, how I love thee!

Thanks for taking a tour of my Christmas Mantel 2012.  Similar to my recent tablescape creation, I mixed in items from around my home with dollar store deals and DIY projects.

Have you decorated your mantel for Christmas yet?  If so, please share the link below so I can visit. 

Looking for tips on how to decorate a mantel? {click here}

I link my projects to some of these parties: Skip to My Lou, Dittle Dattle, Between Naps on the Porch, Today’s Creative Blog, Stories of A to Z, All Things Heart & Home, House of Hepworths, Finding Fabulous, The Shabby Nest, Serenity Now, Tatertots and Jello, Thrifty Decor Chick, Tip Junkie

Christmas Card Holder – A Lowes Creative Idea #LowesCreator

I hope you had a wonderful Thanksgiving weekend and stuffed your tummies full of turkey and mashed potatoes (with butter of course) – my personal favorite.  We traveled and enjoyed the Holiday very much, but the only bummer about not hosting was the lack of leftovers.  Anyway, let’s get on to something fun…

I’m super excited for today because I have so much to share with you!  I’ve been busy preparing for the Christmas season (yes, alreadyI know for some it’s early), but wanted to let Thanksgiving pass before bombarding you with all my Christmas inspiration.  Now that the Holiday season countdown has begun, brace yourself for a fun few weeks ahead with DIY creations and decorating ideas and tips!

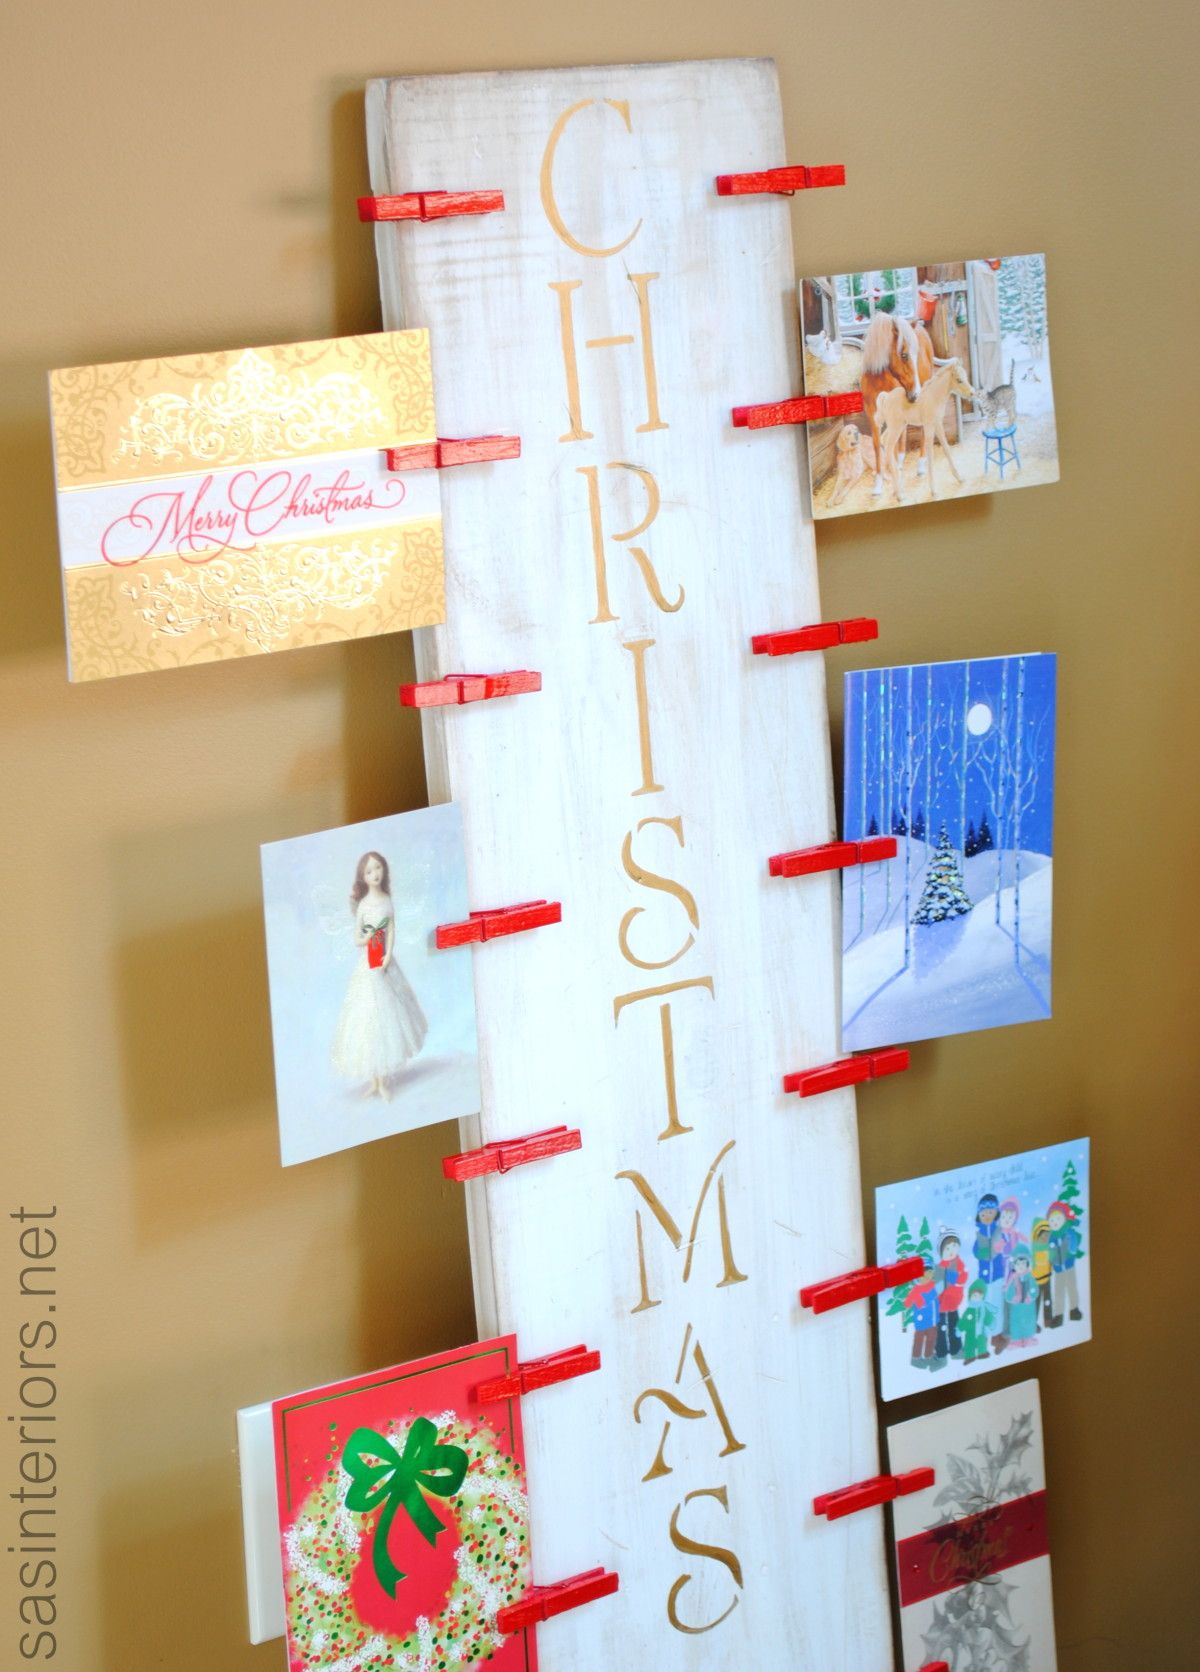
Now that Thanksgiving is over, the first Christmas cards started trickling in over the weekend and since my December Lowe’s Challenge was to create something for the upcoming Holiday season, a new Christmas Card Holder seemed so apropos.
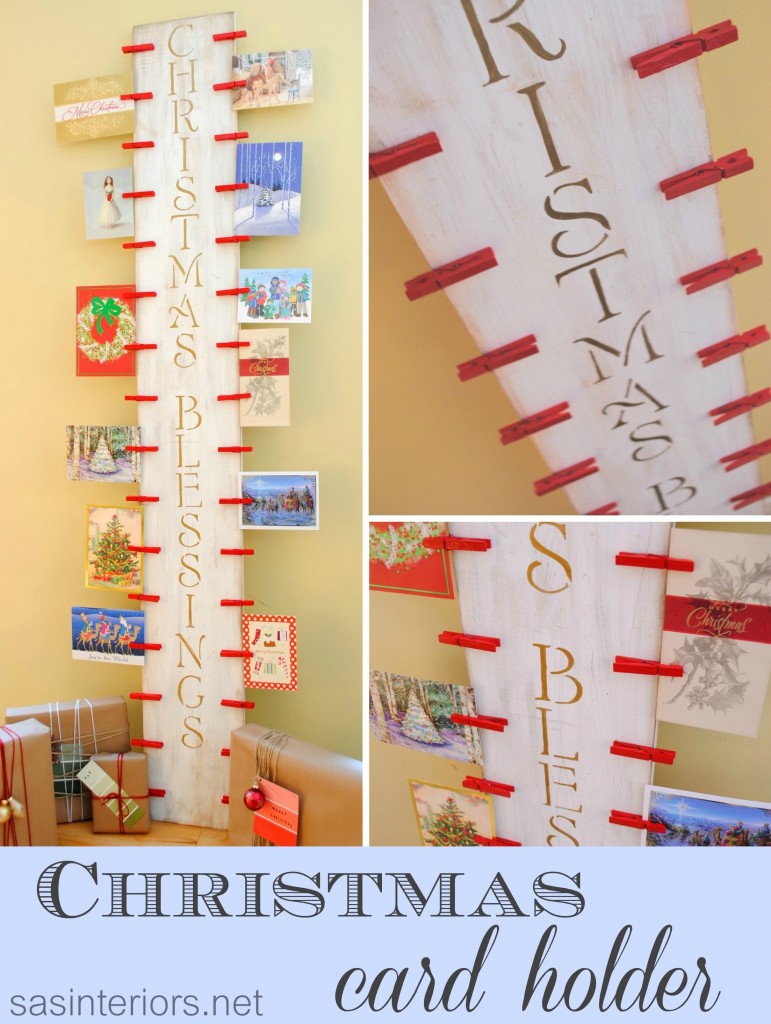
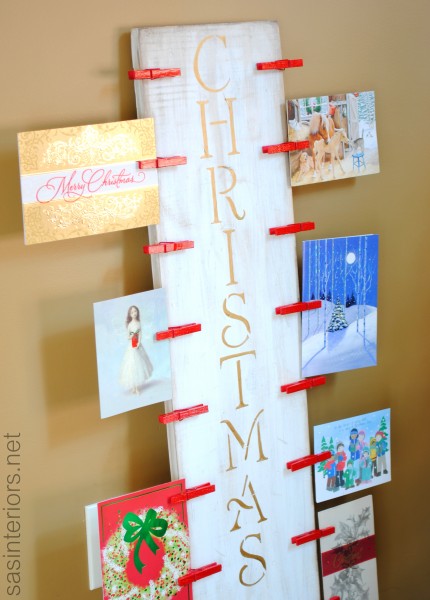
This card holder is one of my favorite projects I’ve ever made.  I got the idea when creating the family pallet photo holder a few weeks ago.  At the time, I mentioned how I felt the photo holder was so versatile and didn’t have to just hold family photos, but also christmas cards during the holidays, as well as invitations, announcements, etc anytime of year.  Thus my Christmas Card Holder was created…

I started off my hitting the lumber and paint aisles of my local Lowe’s and picked up a few must-have items:

  • 6′ long X 12″ wide wood board
  • clothes pins (30 – 35)
  • spray paint (I chose Valspar Glossy Cut Ruby)
  • stencil (purchased at AC Moore / a silhouette would work too)
  • white paint & stain (for the distressing)
  • paint for the letter (I chose metallic gold)

I began by…

1. Distressing the Wood

I was going for a worn look and wanted the wood to look old and distressed, so I banged-it-up a bit and layered it with a combo of paint and stain.

I began by using  nails, chain, and a hammer to bang up the surface to make it “used and abused”.  This is a great way to get out some of that pent-up aggressionhehe.

Once I achieved the desired “wear”, I added one coat of white paint.  I used a semi-gloss finish paint that I had laying around, but any kind will do.  Once dry, I sanded the wood thoroughly so some areas of the raw wood showed through and the surface was smooth.  I added a light coat of stain focusing more on the edges and ends. I applied it in small sections and quickly wiped it away so only a thin layered remained. Then I added another coat of white paint and sanded the surface once more.  This layering process resulted in just the right amount of wear.

Old to New in 30 minutes!
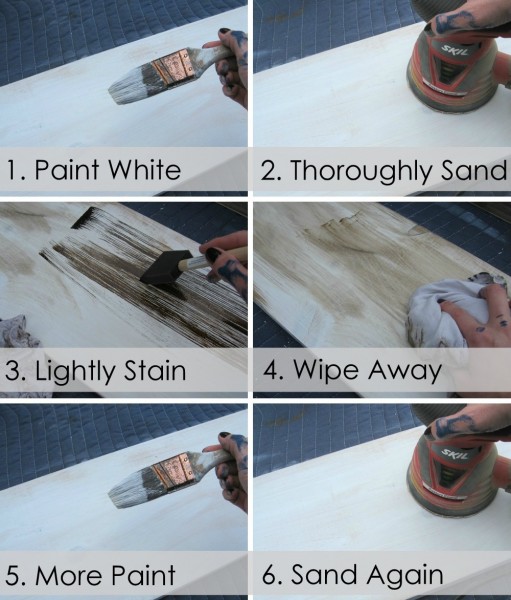
2. Stencil

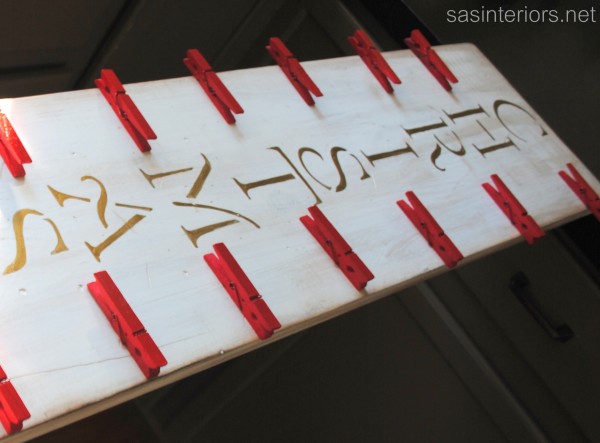
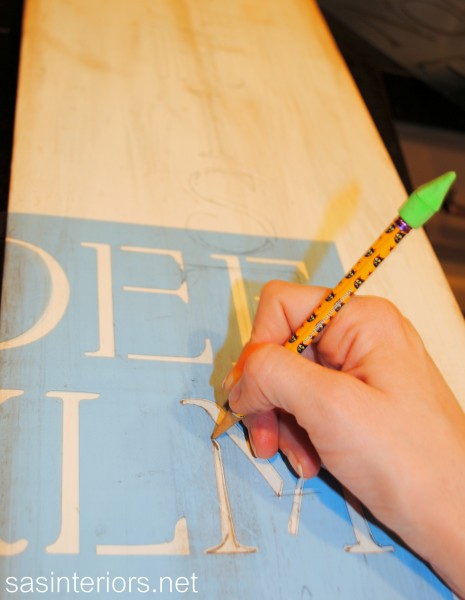
I found a pretty stencil at AC Moore which I got for about $3+ (using a 50% off coupon). The letters are 3″ high and the words CHRISTMAS BLESSINGS fit just right on the 6′ board.
3. Paint

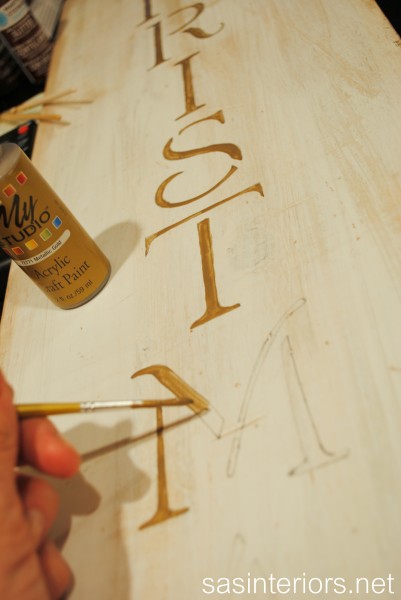
Once I outlined the stenciled letters with a pencil, I filled them in with a nice metallic gold craft paint. At first, I was going to use red or green for the letters, but I am so glad I chose gold – I’m loving the hue, especially with the other goldtones in my other holiday decor.
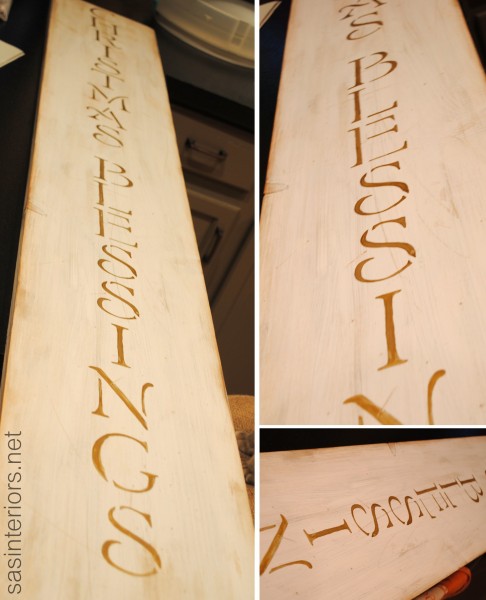
4. Adding the Clothespins

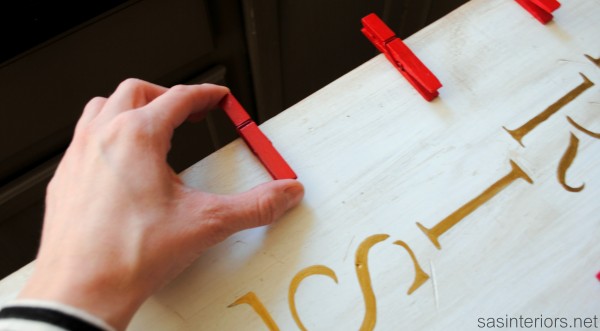
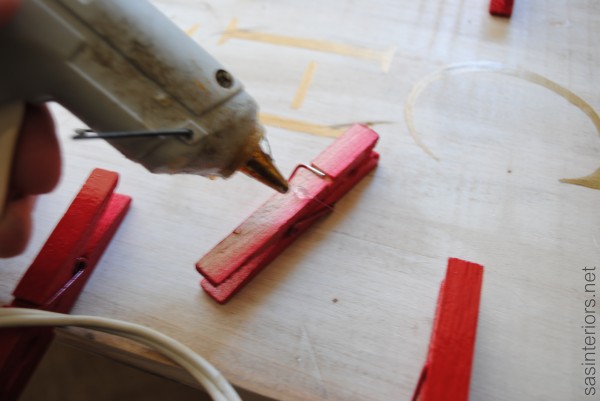
While the letters were drying, I spray painted the clothes pins with Valspar Glossy Cut Ruby.  Once they were ready, I attached them to the wood board with hot glue.  The spacing between each clothespin is about 5-6″ and there are 16 on each side.
 And it’s done…
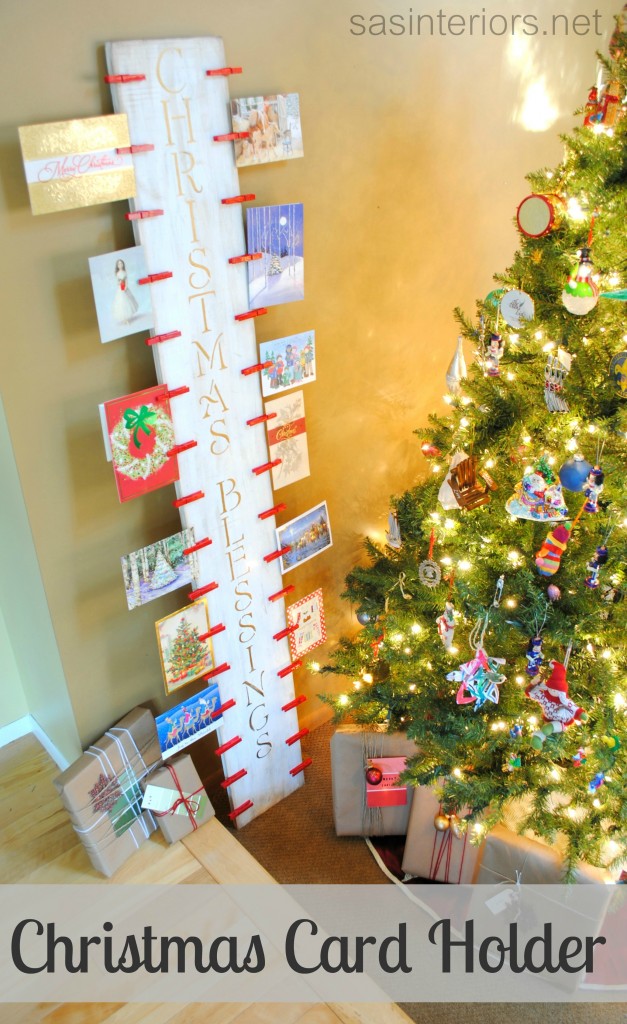
I’ll admit, the Christmas cards are from last year – I haven’t received that many yet.  I always keep my cards and then use them the next year as tags for presents, so that’s what these will be used for in a few short weeks.
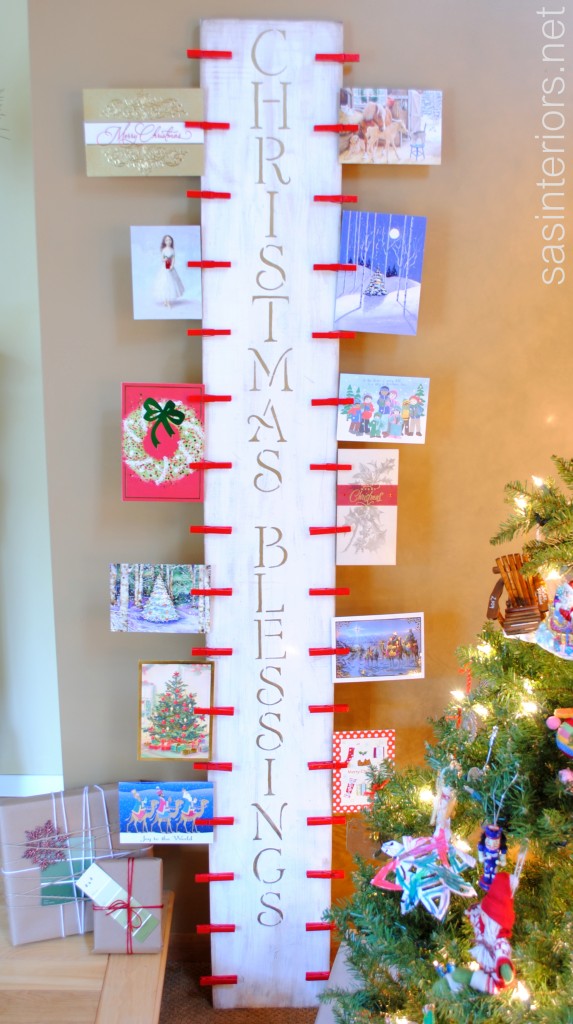
My new card holder is such a unique and fun addition to our Christmas decor. I have it situated right next to the Christmas tree so we can enjoy the treasures that are sent from family and friends – true Christmas Blessings!
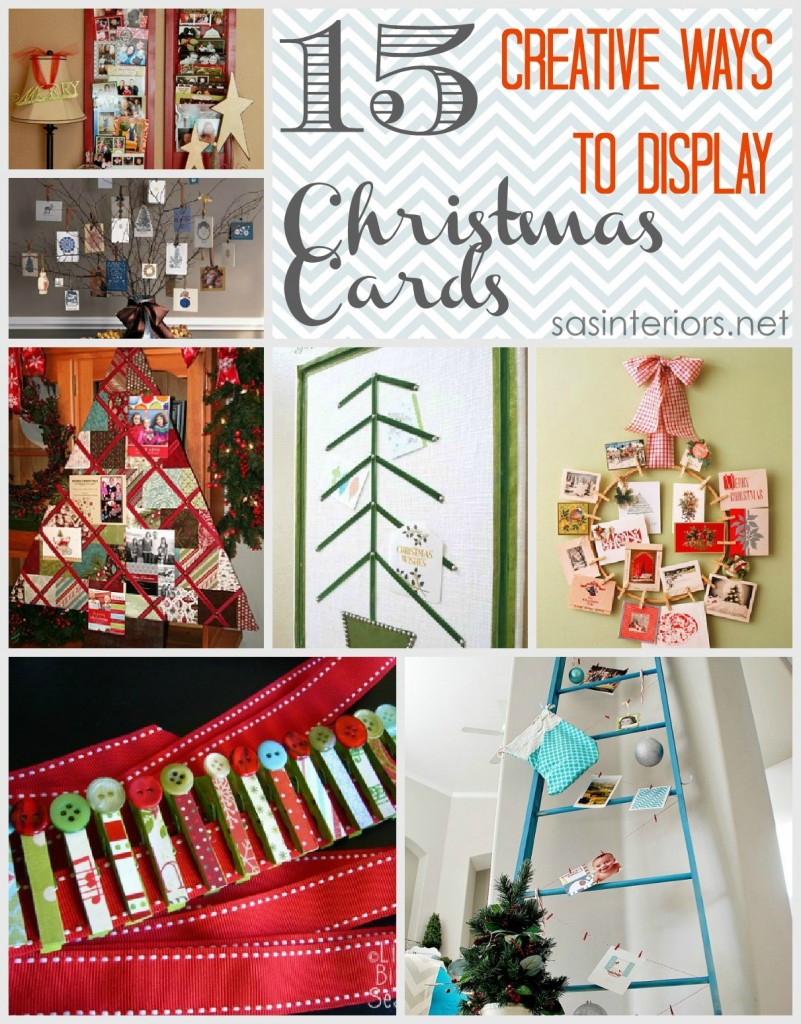
If you’re looking for more ideas on how to display Christmas Cards, check out the roundup I did last year, by clicking on the link: 15 Creative Ways to Display Christmas Cards.
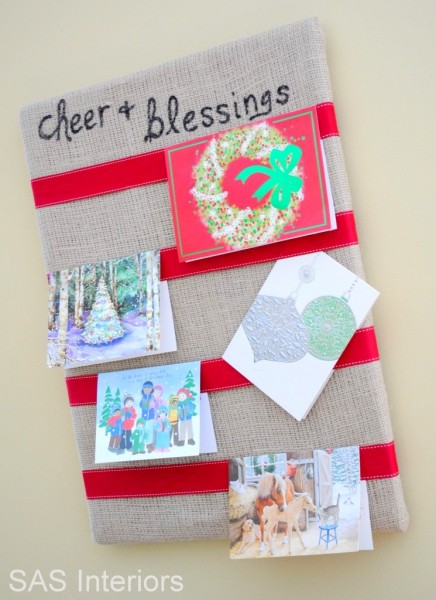
And I created another card holder last year if you want to see that as well.  I love this one too, but with all the cards we receive, it ended up not being large enough.  This new one though, has lots of room! Click to see: Holiday Card Holder.
I’m still working on putting the finishing touches on the rest of the house, and hope to share a Christmas Tour next week.  In the meantime, I’ll be showing you a few more DIY projects, as well as some easy and fun decorating ideas.

Have you decorated for the Holidays yet?  How to you display your Christmas cards?

Disclosure: I am part of the Lowe’s Creative Team and was provided with a Lowe’s gift card to purchase items for my project.  I was also compensated for my time to use the products.  No one told me what to create, what to buy, how to use the product, or what to write.  All opinions are 100% mine!

I link my projects to some of these parties: Skip to My Lou, Dittle Dattle, Between Naps on the Porch, Today’s Creative Blog, Stories of A to Z, All Things Heart & Home, House of Hepworths, Finding Fabulous, The Shabby Nest, Serenity Now, Tatertots and Jello, Thrifty Decor Chick, Tip Junkie

Stick Star Door Decor

Last week I was vying to create something for my front door to transition the time between now and Christmas.
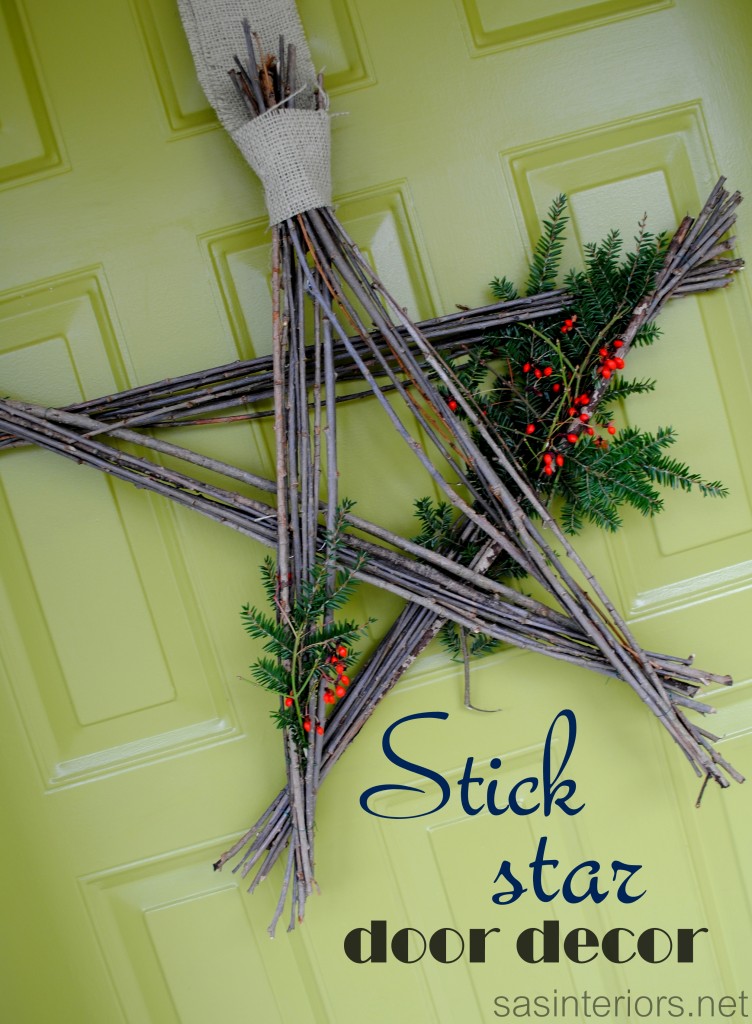
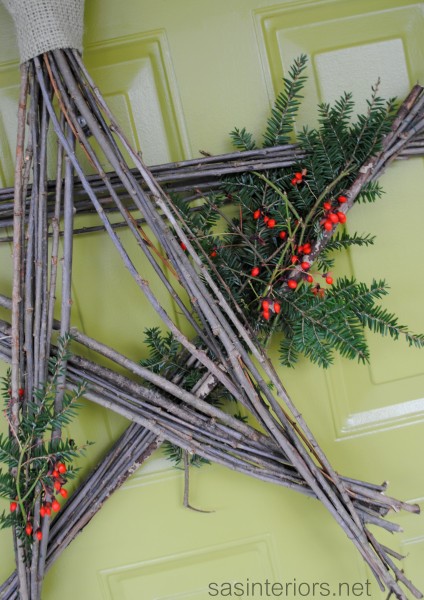
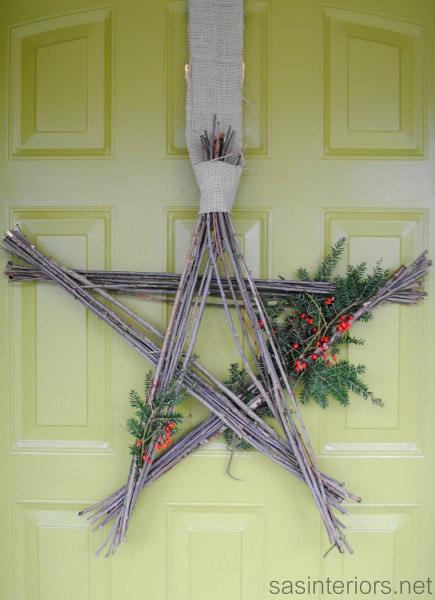
I’ve had my Fall wreath up for a while and I was ready for a lil’ change.  Then while driving over the weekend, I spotted a large wood star on an old, distressed barn.  It got me thinking and inspired my latest creation… a Stick Star which I’m now donning on my apple green front door.

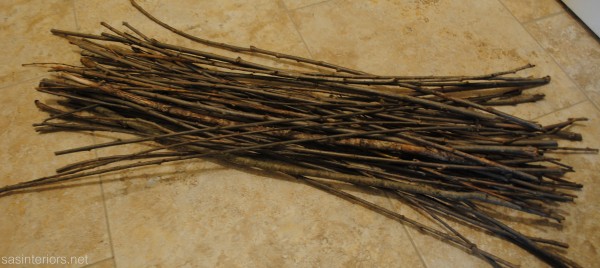
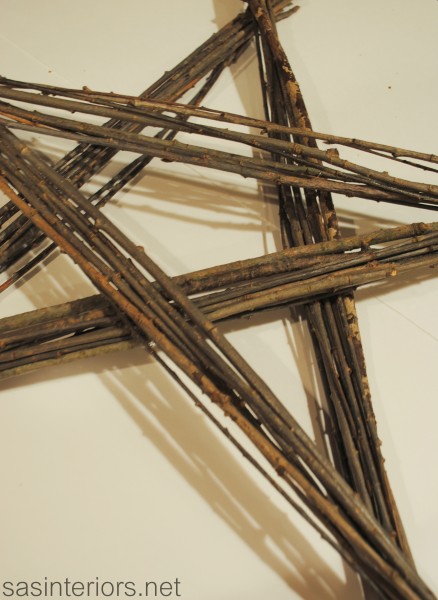
In the front of my home is a 20’+ weeping willow tree and it’s beautiful in the summer, but this time of year with all the wind, the soft, thin branches often easily break off leaving lots of piles.  When cleaning up the yard on Sunday, we collected a bunch of branches and I knew they’d be perfect for the foundation of the stick star.

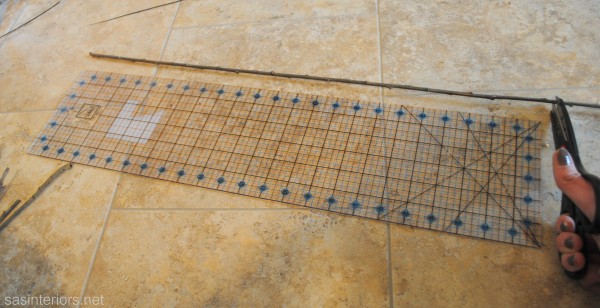
With my son helping out, we collected a good pile of branches and I started out making my new door decor. With my ruler in hand, I trimmed the soft branch to 30″ long.  And cut 49 more to have a total of 50.

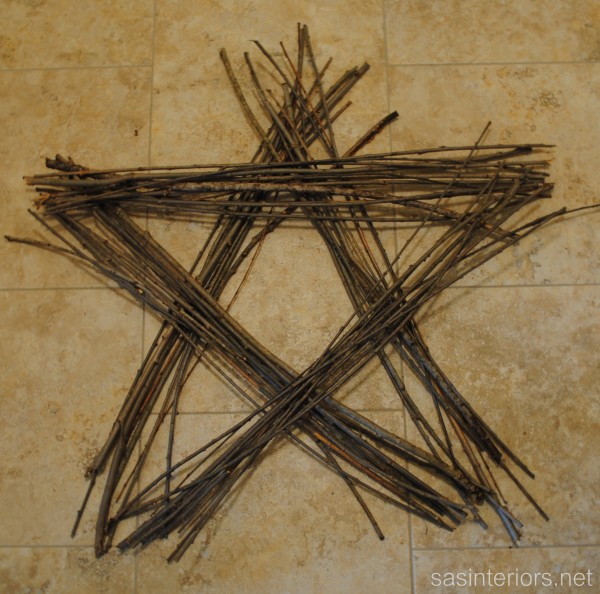
The branches didn’t have to be exactly 30″, but close to it. After 50 were cut, then I broke them into 5 groups of 10. The 5 groups were used for each “leg” of the star.

This was a dry run and I was pretty happy with the direction it was looking.  Surprisingly it actually looked like a star, ha!

It was time to put it together!

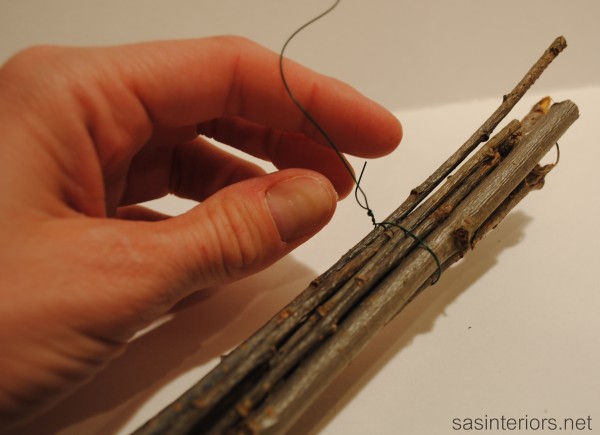
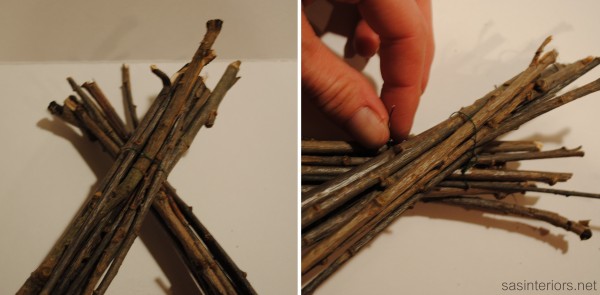
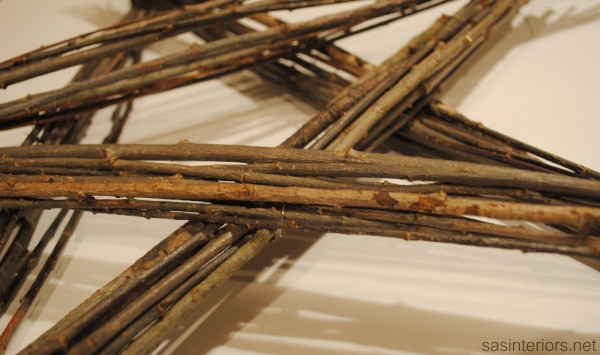
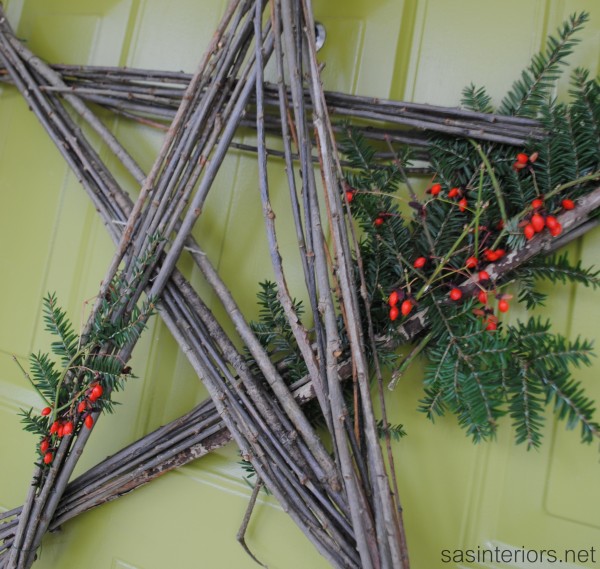
I disassembled the star mock-up and separated each star “leg”.  Using floral wire (or any thin wire would do), I tied each end of the stick grouping so it was secure and “one”.

Once each “leg” was secure on each end, I put them together to create the star.  Once the star was layed out, I secured them together with more floral wire.

Since the floral wire is close to the color of the sticks, it really isn’t visible unless you are close to the arrangement.

And honestly within about 10 minutes, it was done.  It was really simple to create and something different than I’ve ever created before.  And I have to say, once the sticks are together in a bunch, they are really secure as “one”.

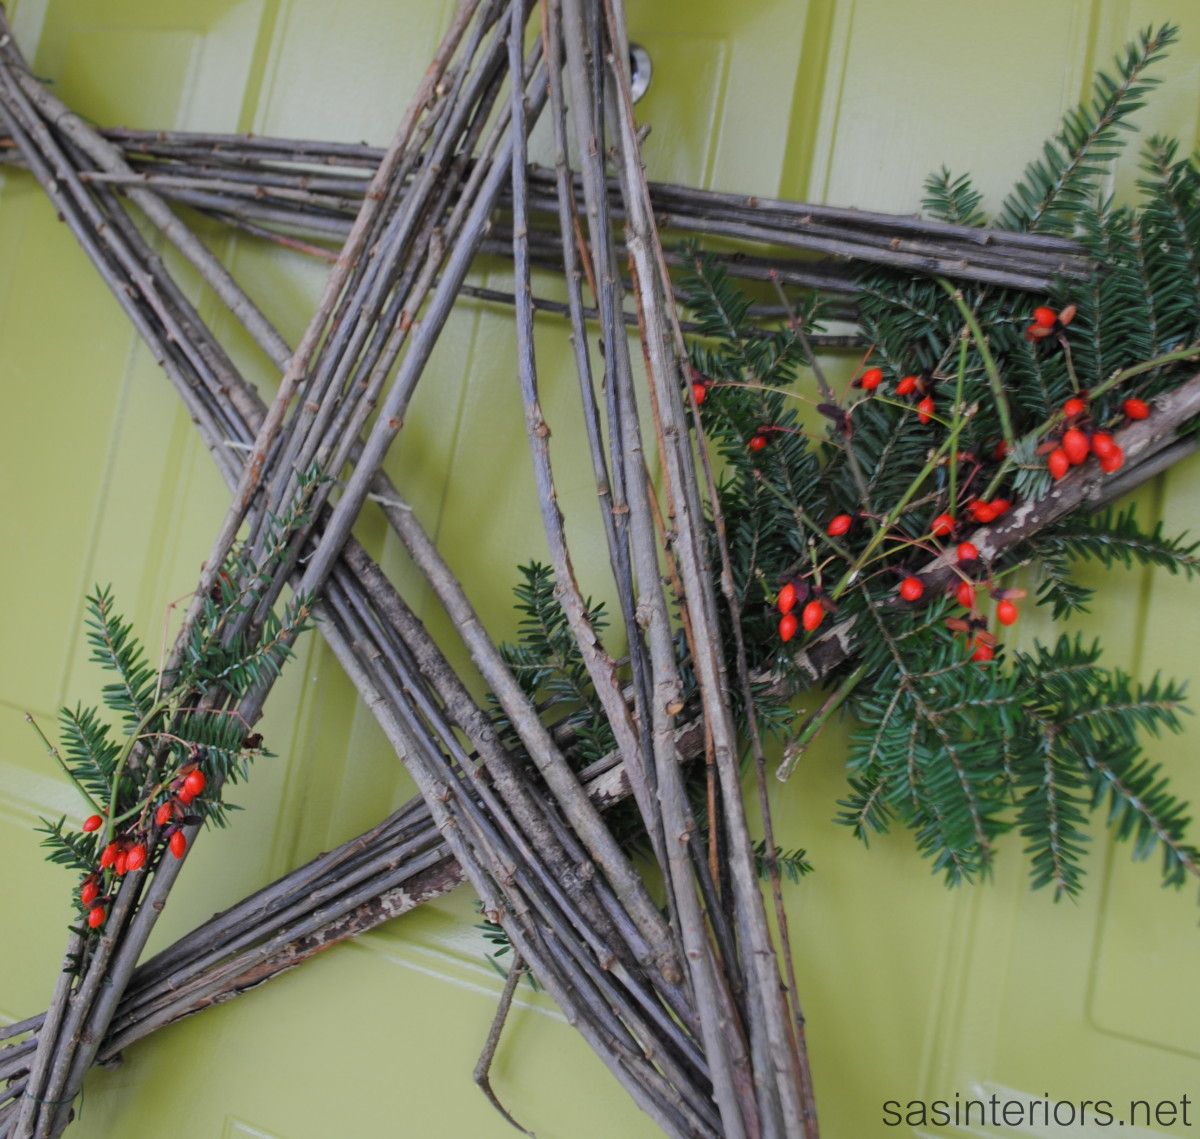
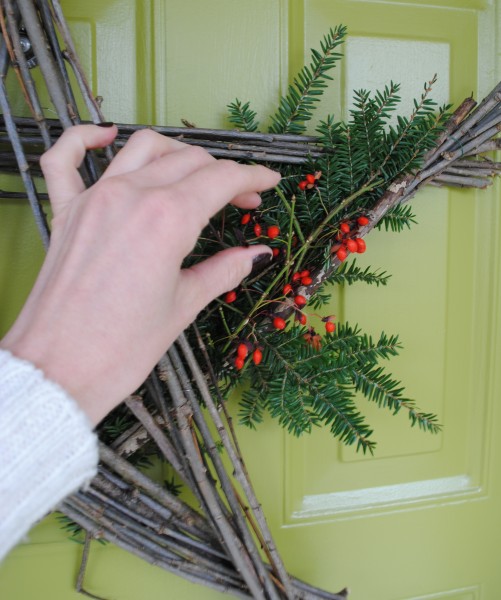
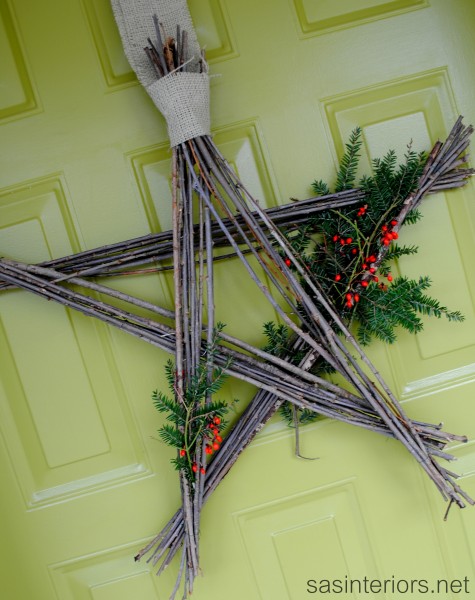
It still needed something though, so I trimmed a few branches and berries from my yard and tucked them within the branches.

This pretty and easy to create stick star can be used all year round and dressed up for any occasion.  It can be used on a door (like I used it for), indoors, or outdoors.

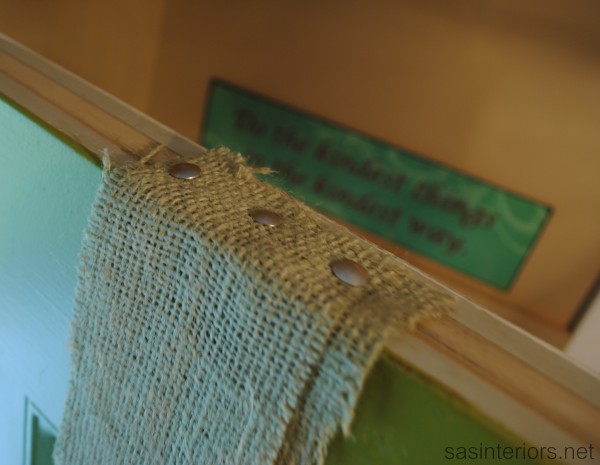
For my stick star door decor, I cut a 3″ strip of burlap, attached it with floral wire to the back of the branches and secured the top onto the head of the door with push pins.  There’s no damage to the door and it can easily be switched out.

And here is the result…

My stick star was super simple to create and didn’t cost a penny!  The perfect door decor for the coming Holidays or any time of year. I just love simple, just stylish creations!