
Year: 2013

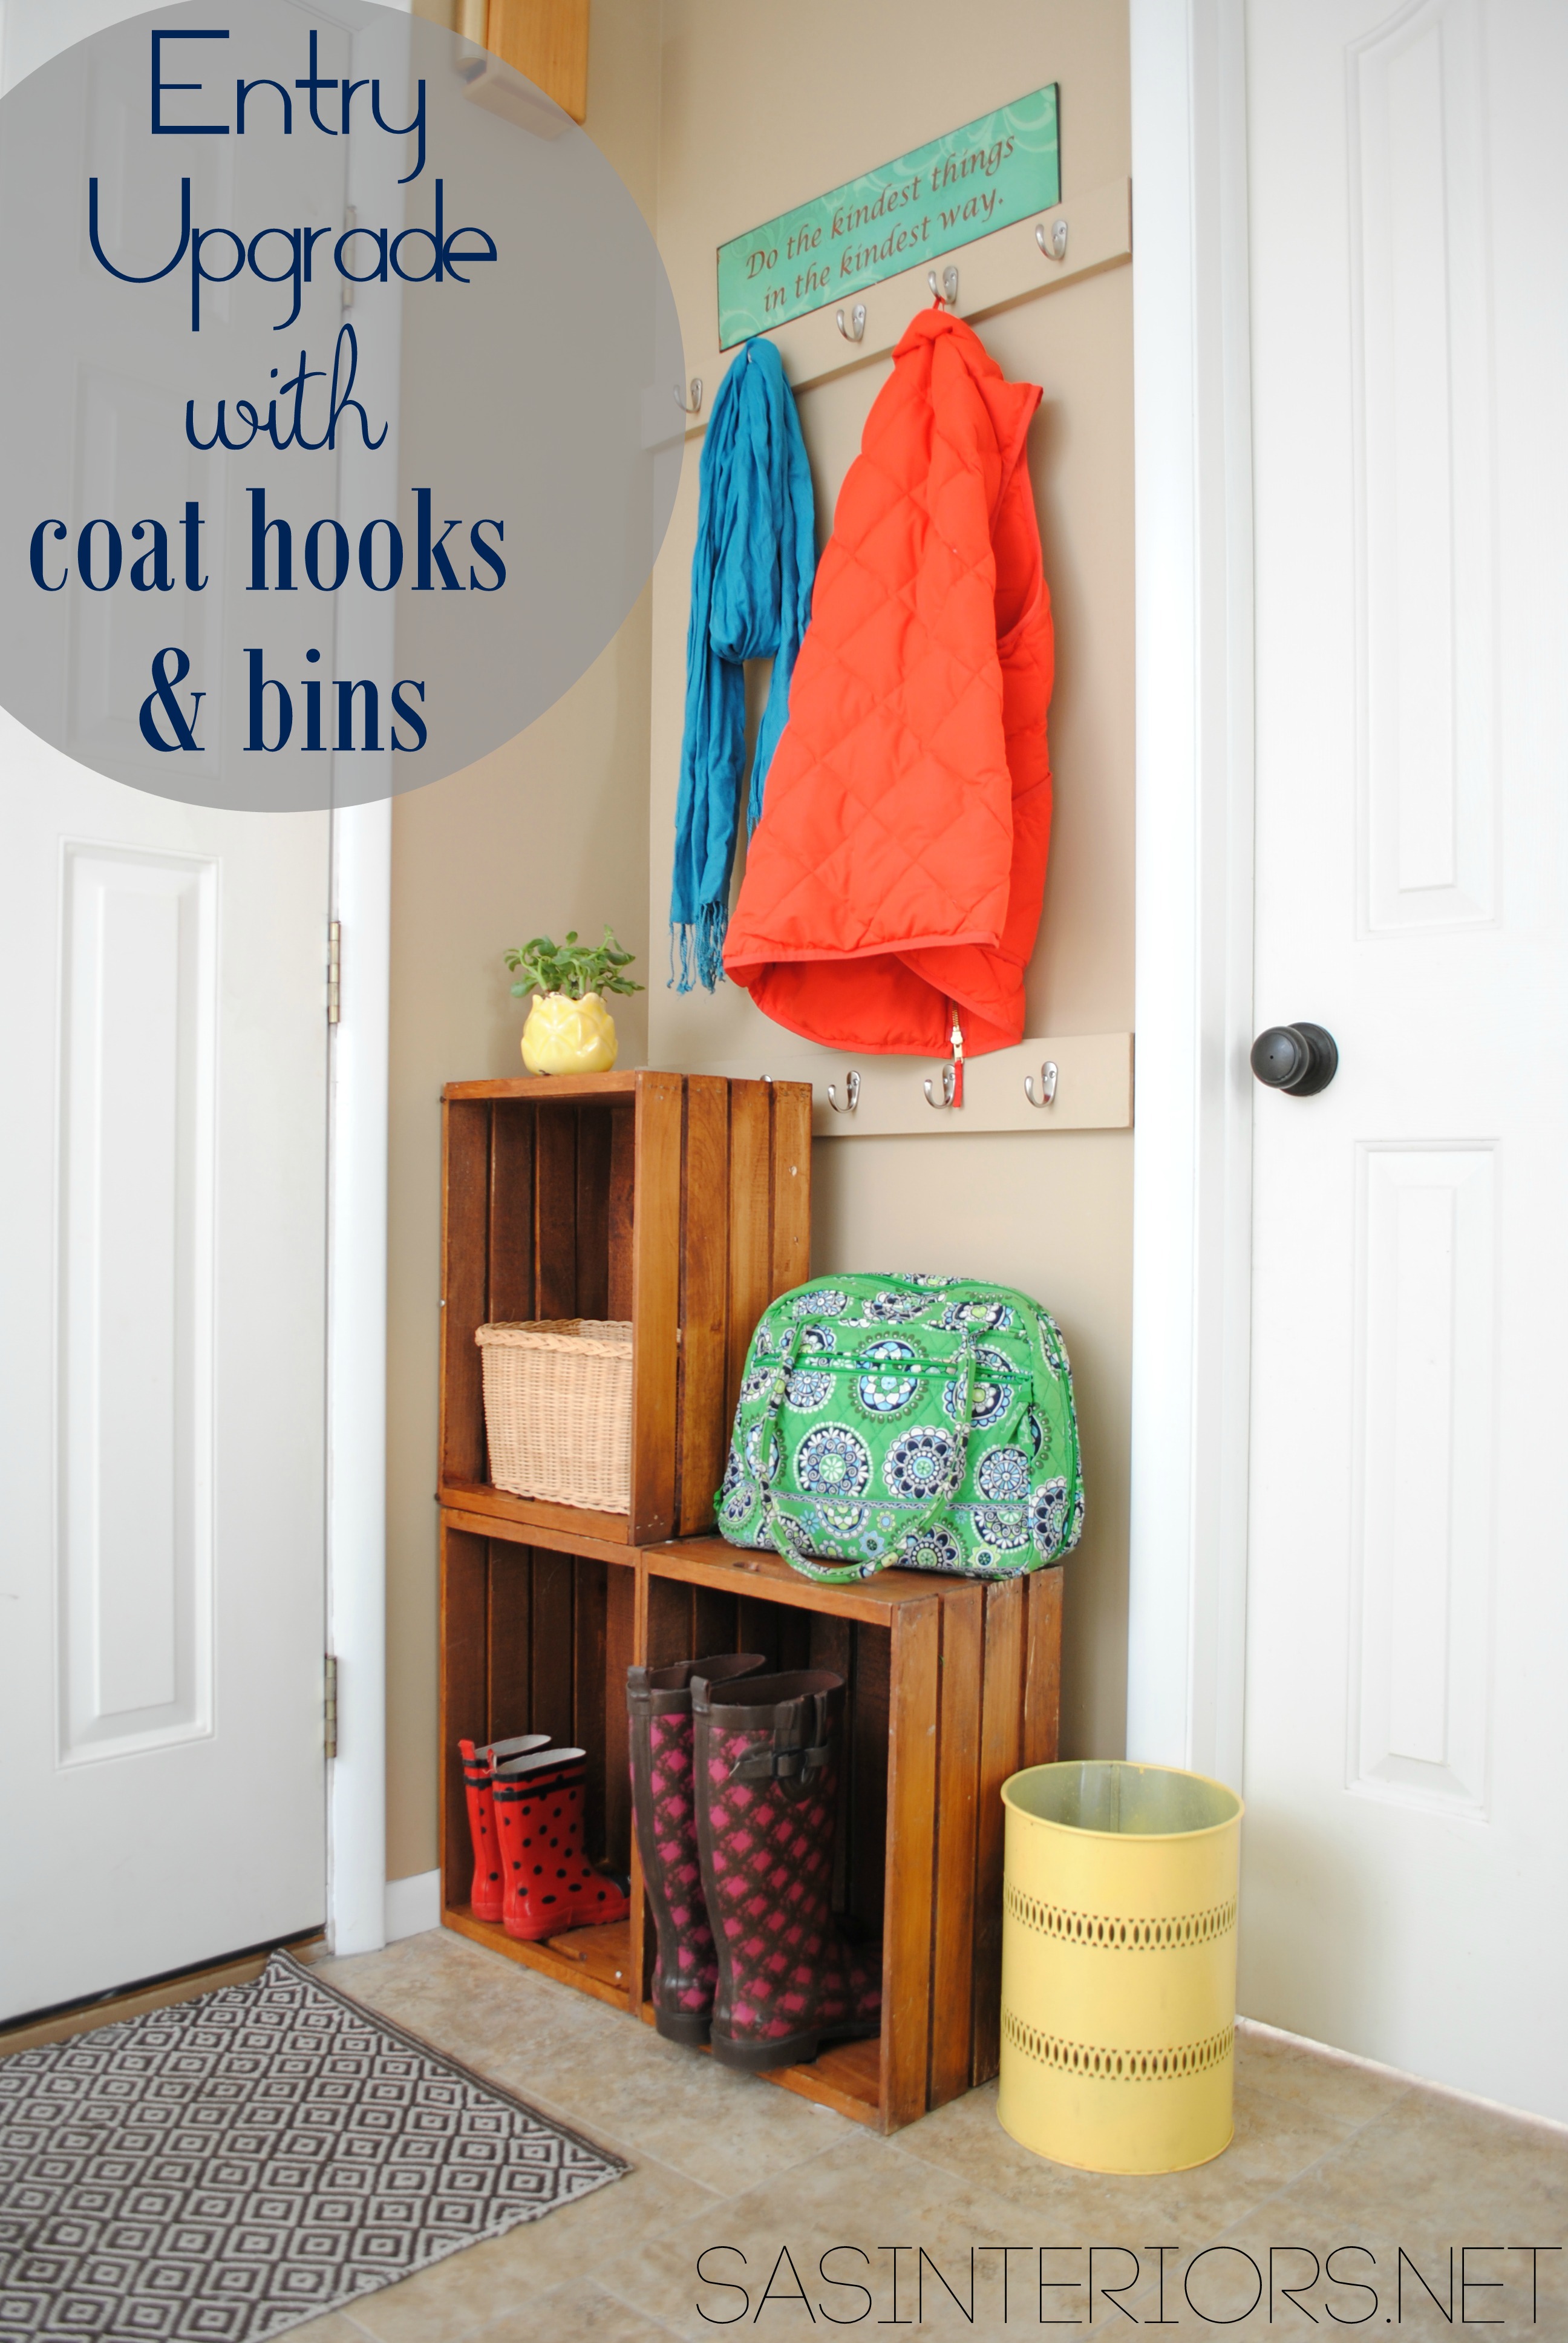
An Easy Upgrade for a Small Space

Large mudrooms with a plethora of storage and plenty of seating are desired by most, but not a reality for many (myself included).  When I was in need of more storage in my small entryway, I decided to take advantage of the 30″ wide wall behind the front door to create more space for coats and our everyday wares.

When we first moved into our home, I had made the front closet a dual pantry / coat closet, which provided more shelf storage but cut the coat space (especially during the winter months) in half.  And even with the addition of my updated “vintage” cabinet, which holds most of the kids shoes, it just wasn’t enough.

As a growing family, we needed more space for coats, backpacks, and the every day “stuff”, so using the wall behind the entry door was the ideal spot for adding built-in coat hooks and wooden crates.

Easy Entry Upgrade with DIY built-in coat hooks and wooden crates via @Jenna_Burger, www.jennaburger.com

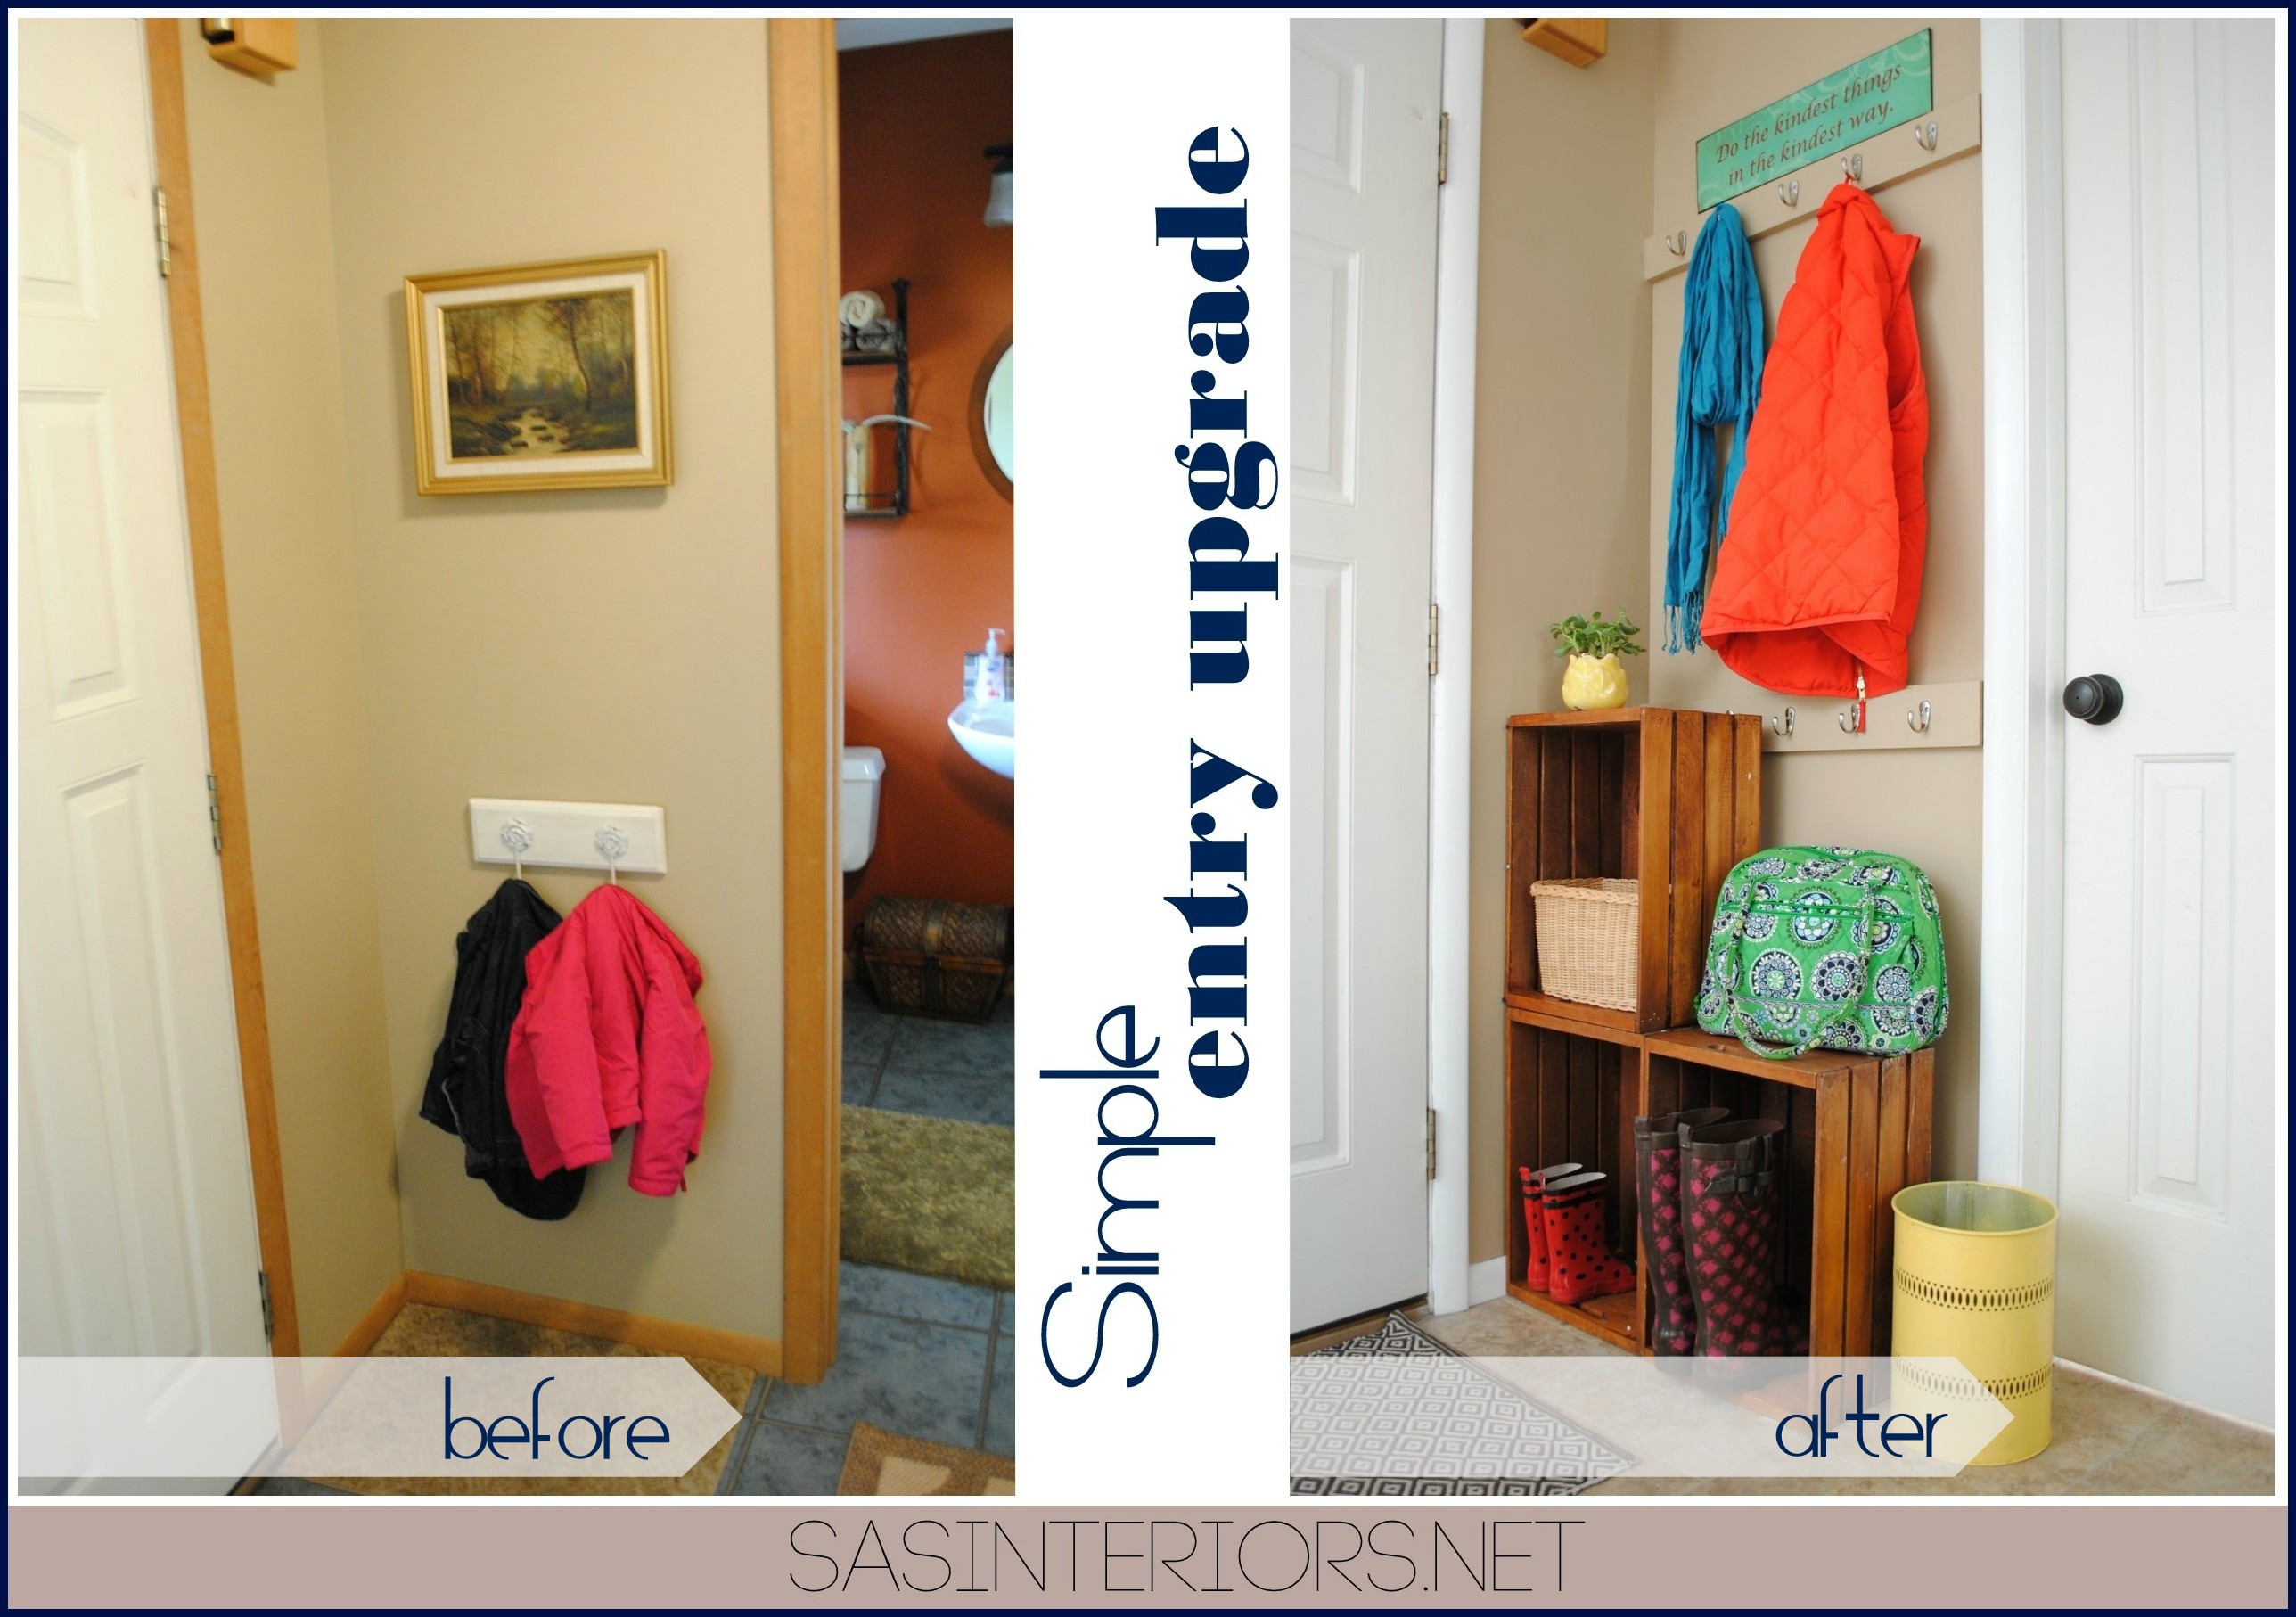
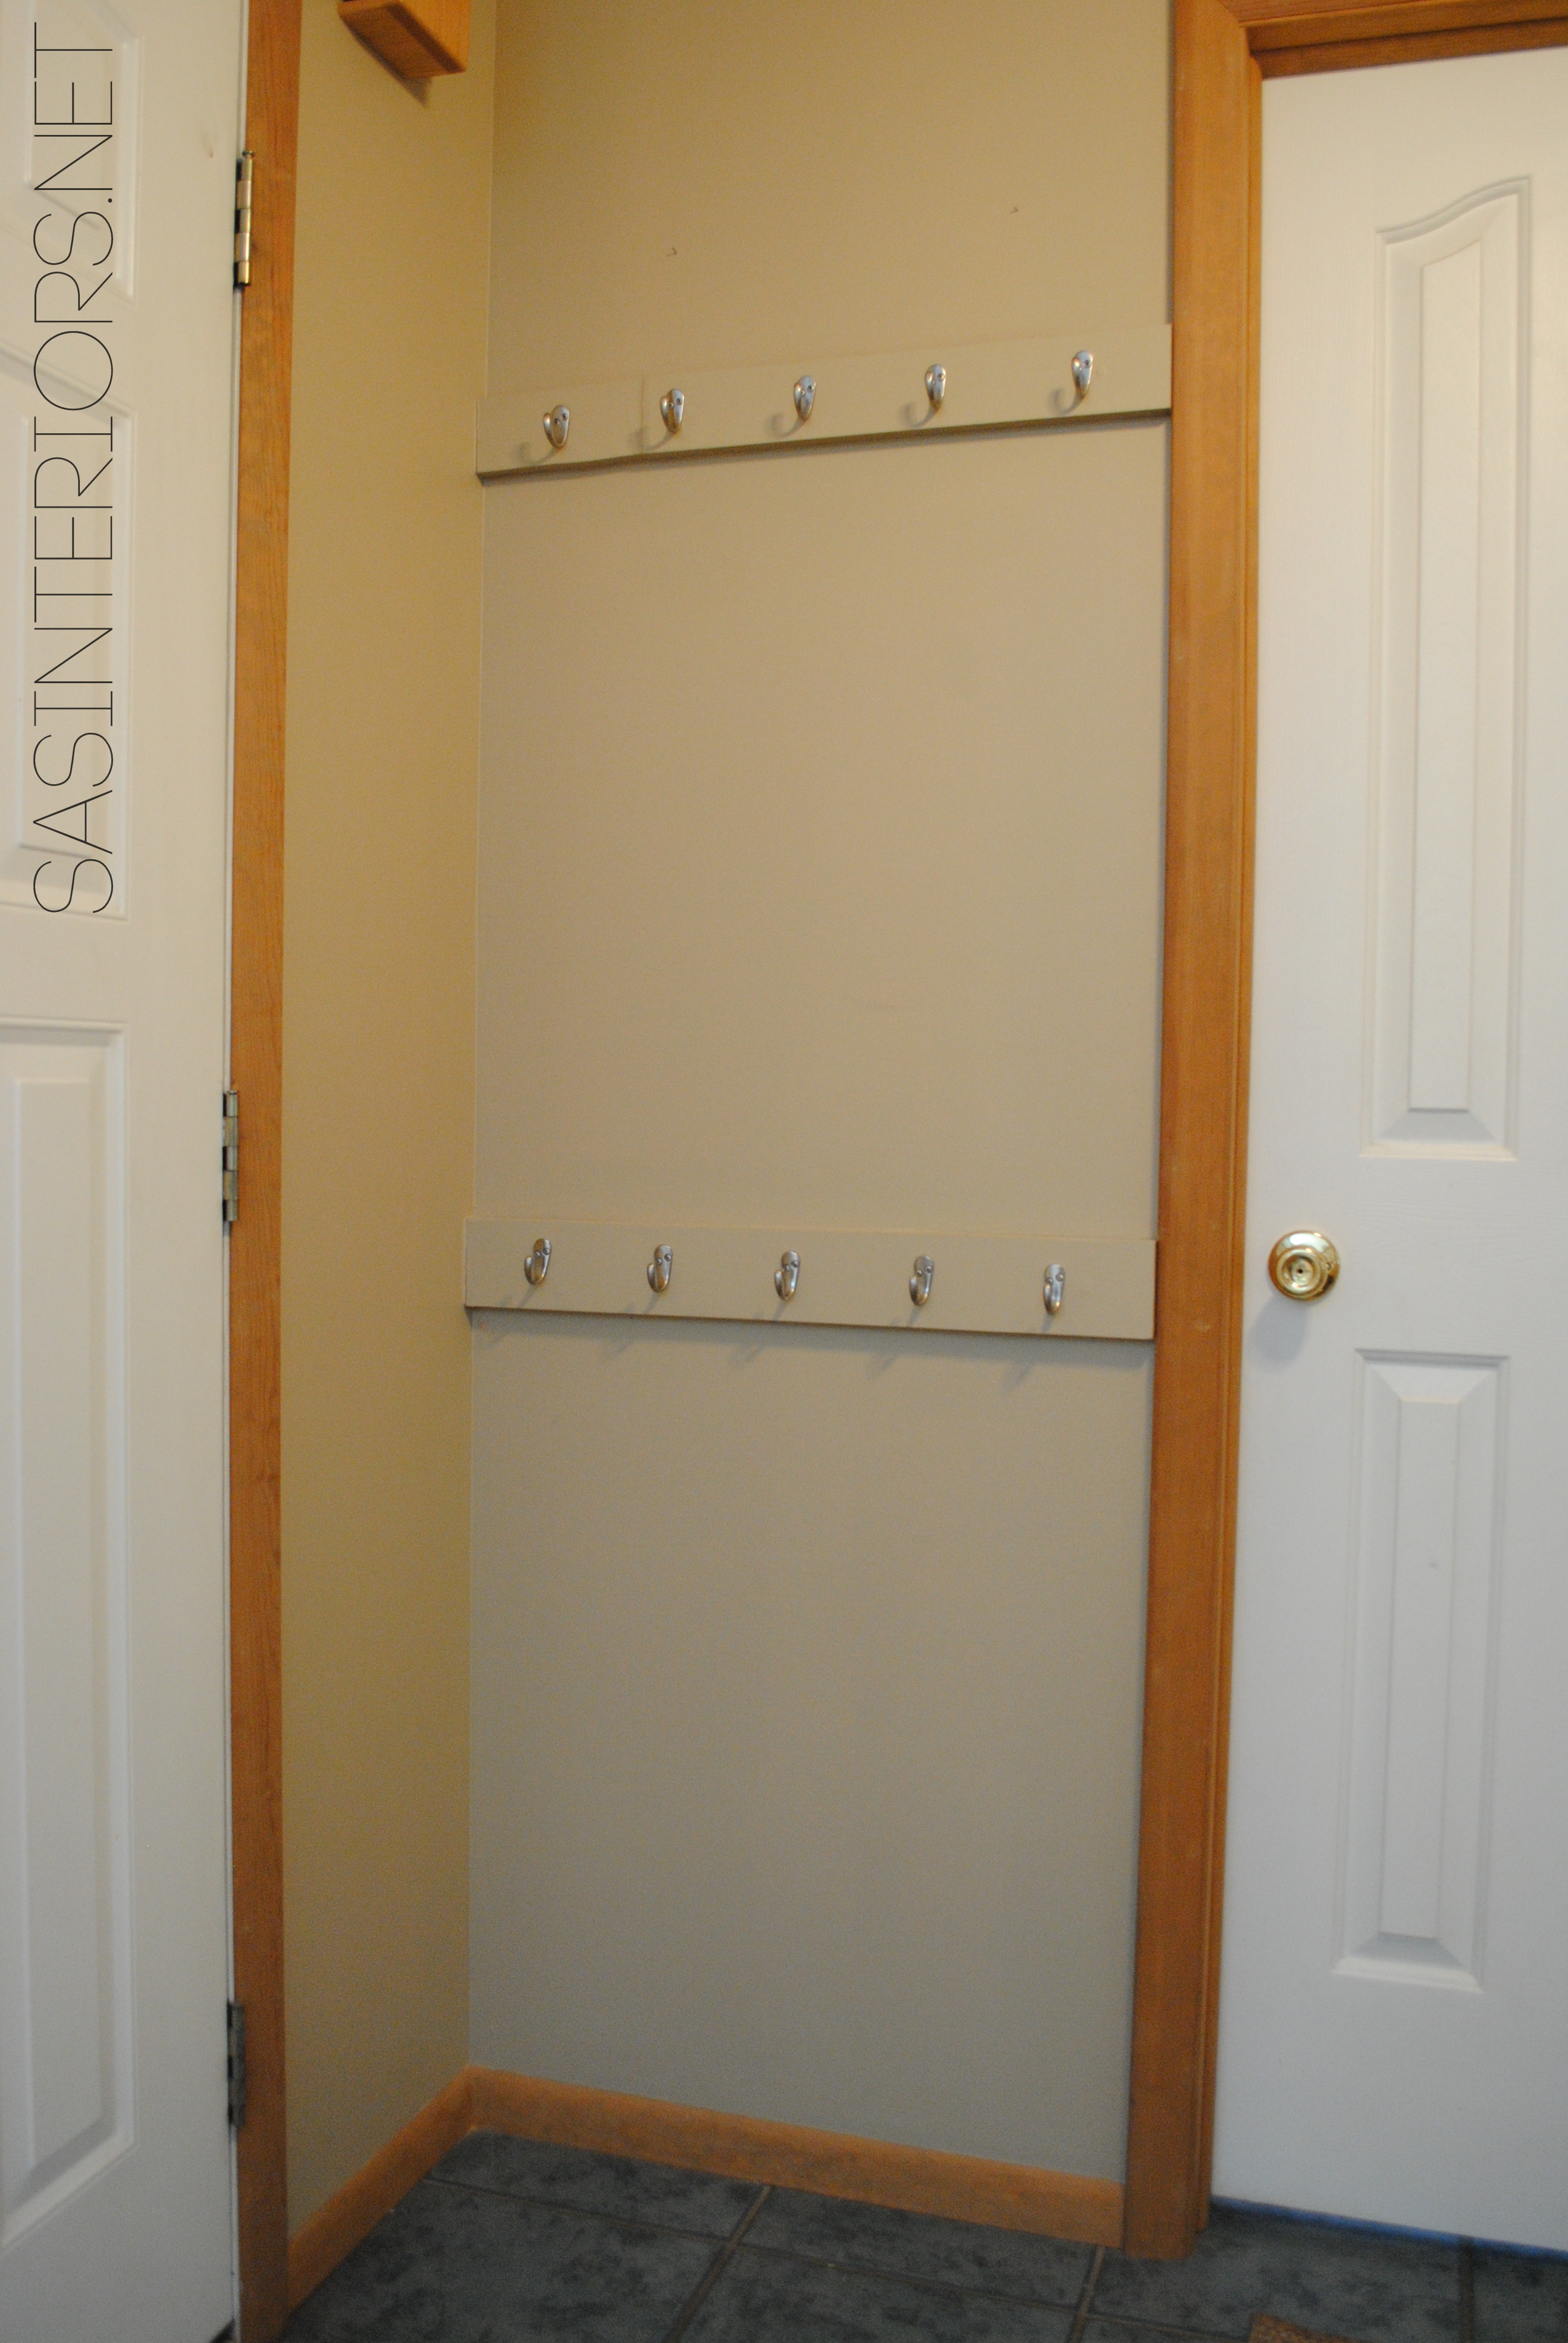
Before adding the built-in coat hooks, I had hung a decorative coat hanger for the kids coats. With only two hooks, it just wasn’t enough.  There was so much potential for this 30″ wide wall…

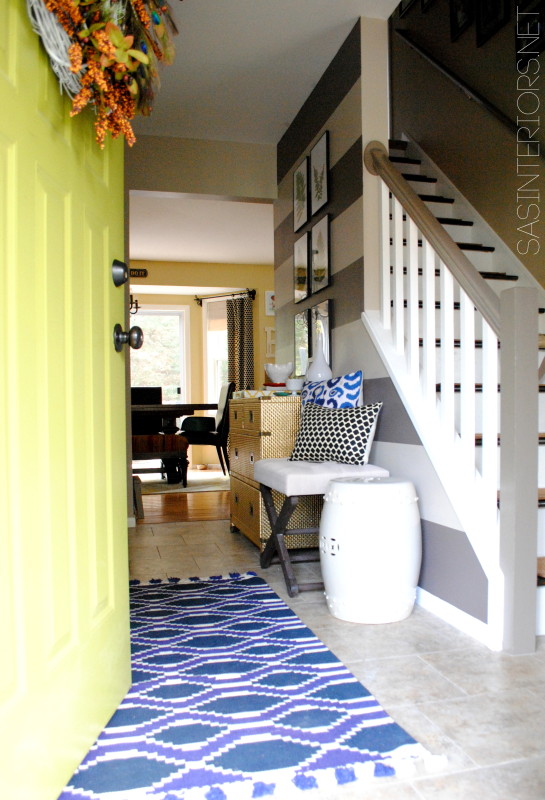
This is the wall before (and another peak at the ‘after’)…

Easy Entry Upgrade with DIY built-in coat hooks and wooden crates via @Jenna_Burger, www.jennaburger.com

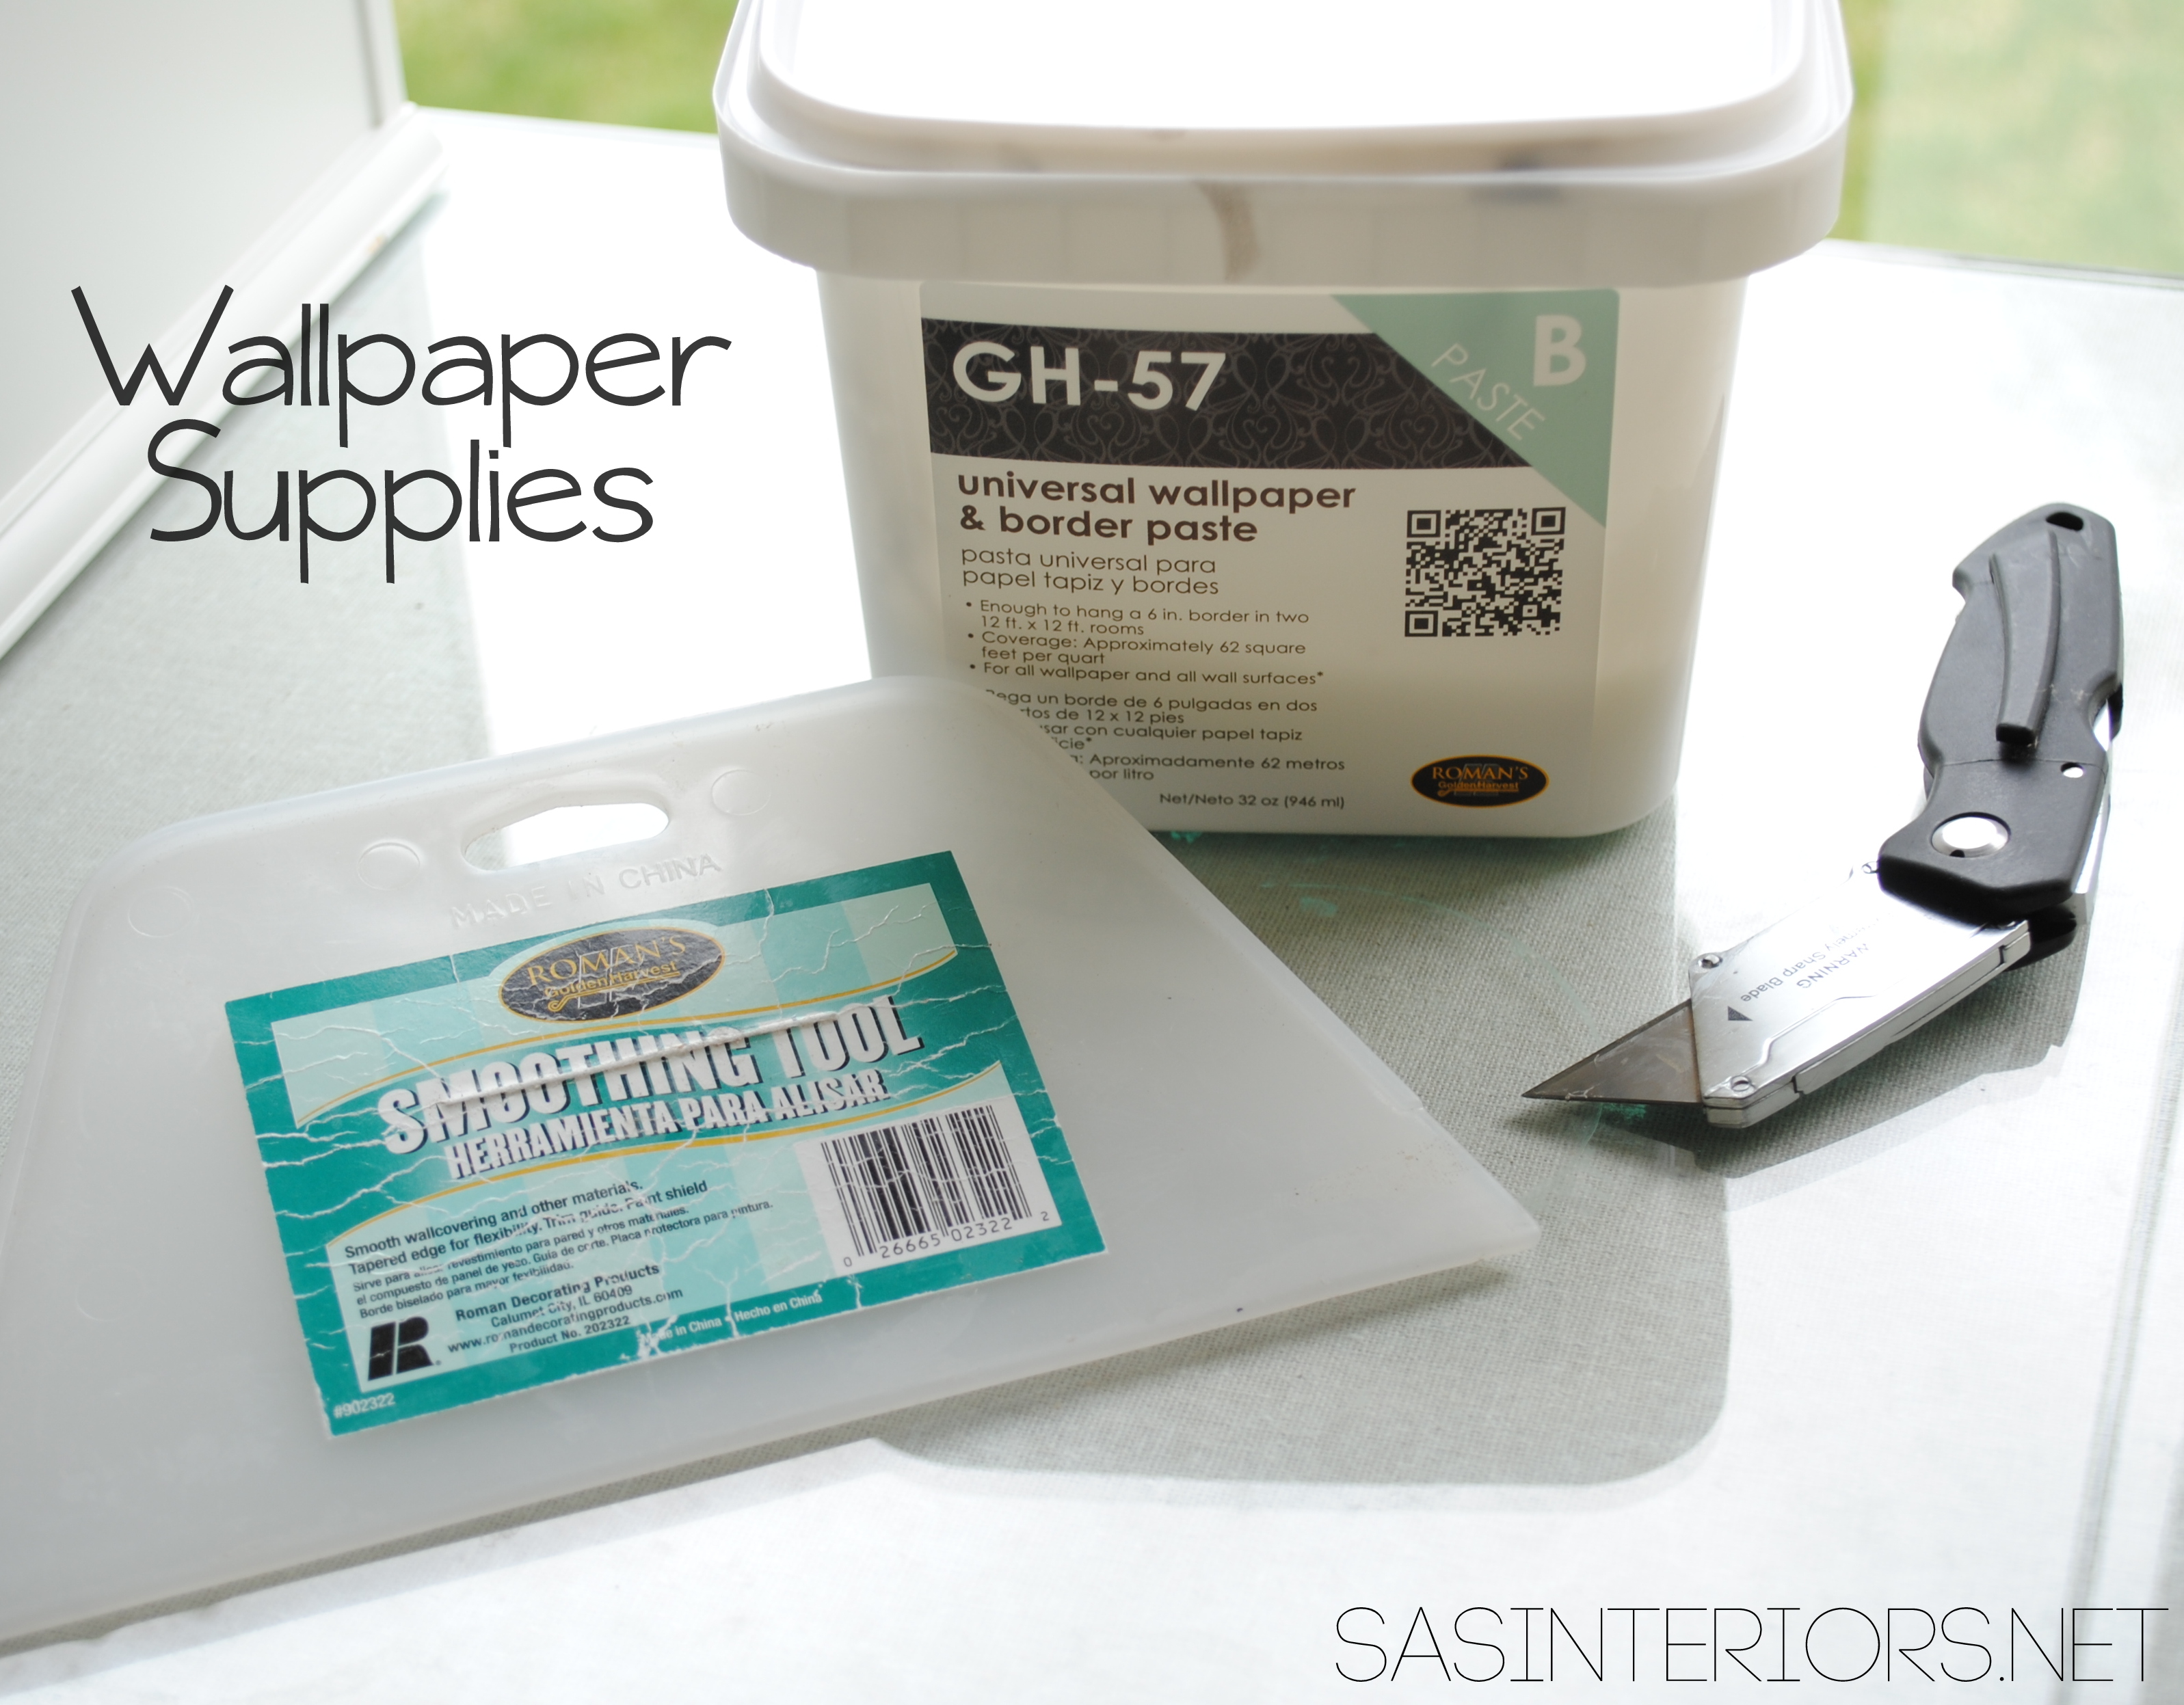
The supplies I used for this project were:

  • MDF (medium density fiberboard) Board(s) cut to fit the alloted space
  • Drillable Anchors (if you can’t find a stud)
  • 1-1/2″ Wood Screws
  • Decorative Coat Hooks
  • Liquid Nails or Wood Glue
  • Drill and/or Screwdriver
  • Wood Putty / Filler

Duration of Project: 4 hours (1-2 days because of drying time for paint)
Project Difficulty: Easy to Medium
How Many People Needed: 1

To get started, I cut (2) MDF boards to size to fit the wall.  I had a few pieces leftover from a previous project, which I trimmed to fit snug on the wall from the wall edge to the door moulding.  If you’re starting the project from scratch and purchasing the boards from a home improvement store, then bring the measurements of your wall to the store and they will custom cut your pieces – this will definitely save you time and a few headaches!

Once I had the MDF boards cut, it was time to attach them to the wall.  My plan of action??  Determine the placement of the boards.  Add liquid nails to the back of each board to hold it in place, then…

Easy Entry Upgrade with DIY built-in coat hooks and wooden crates via @Jenna_Burger, www.jennaburger.com
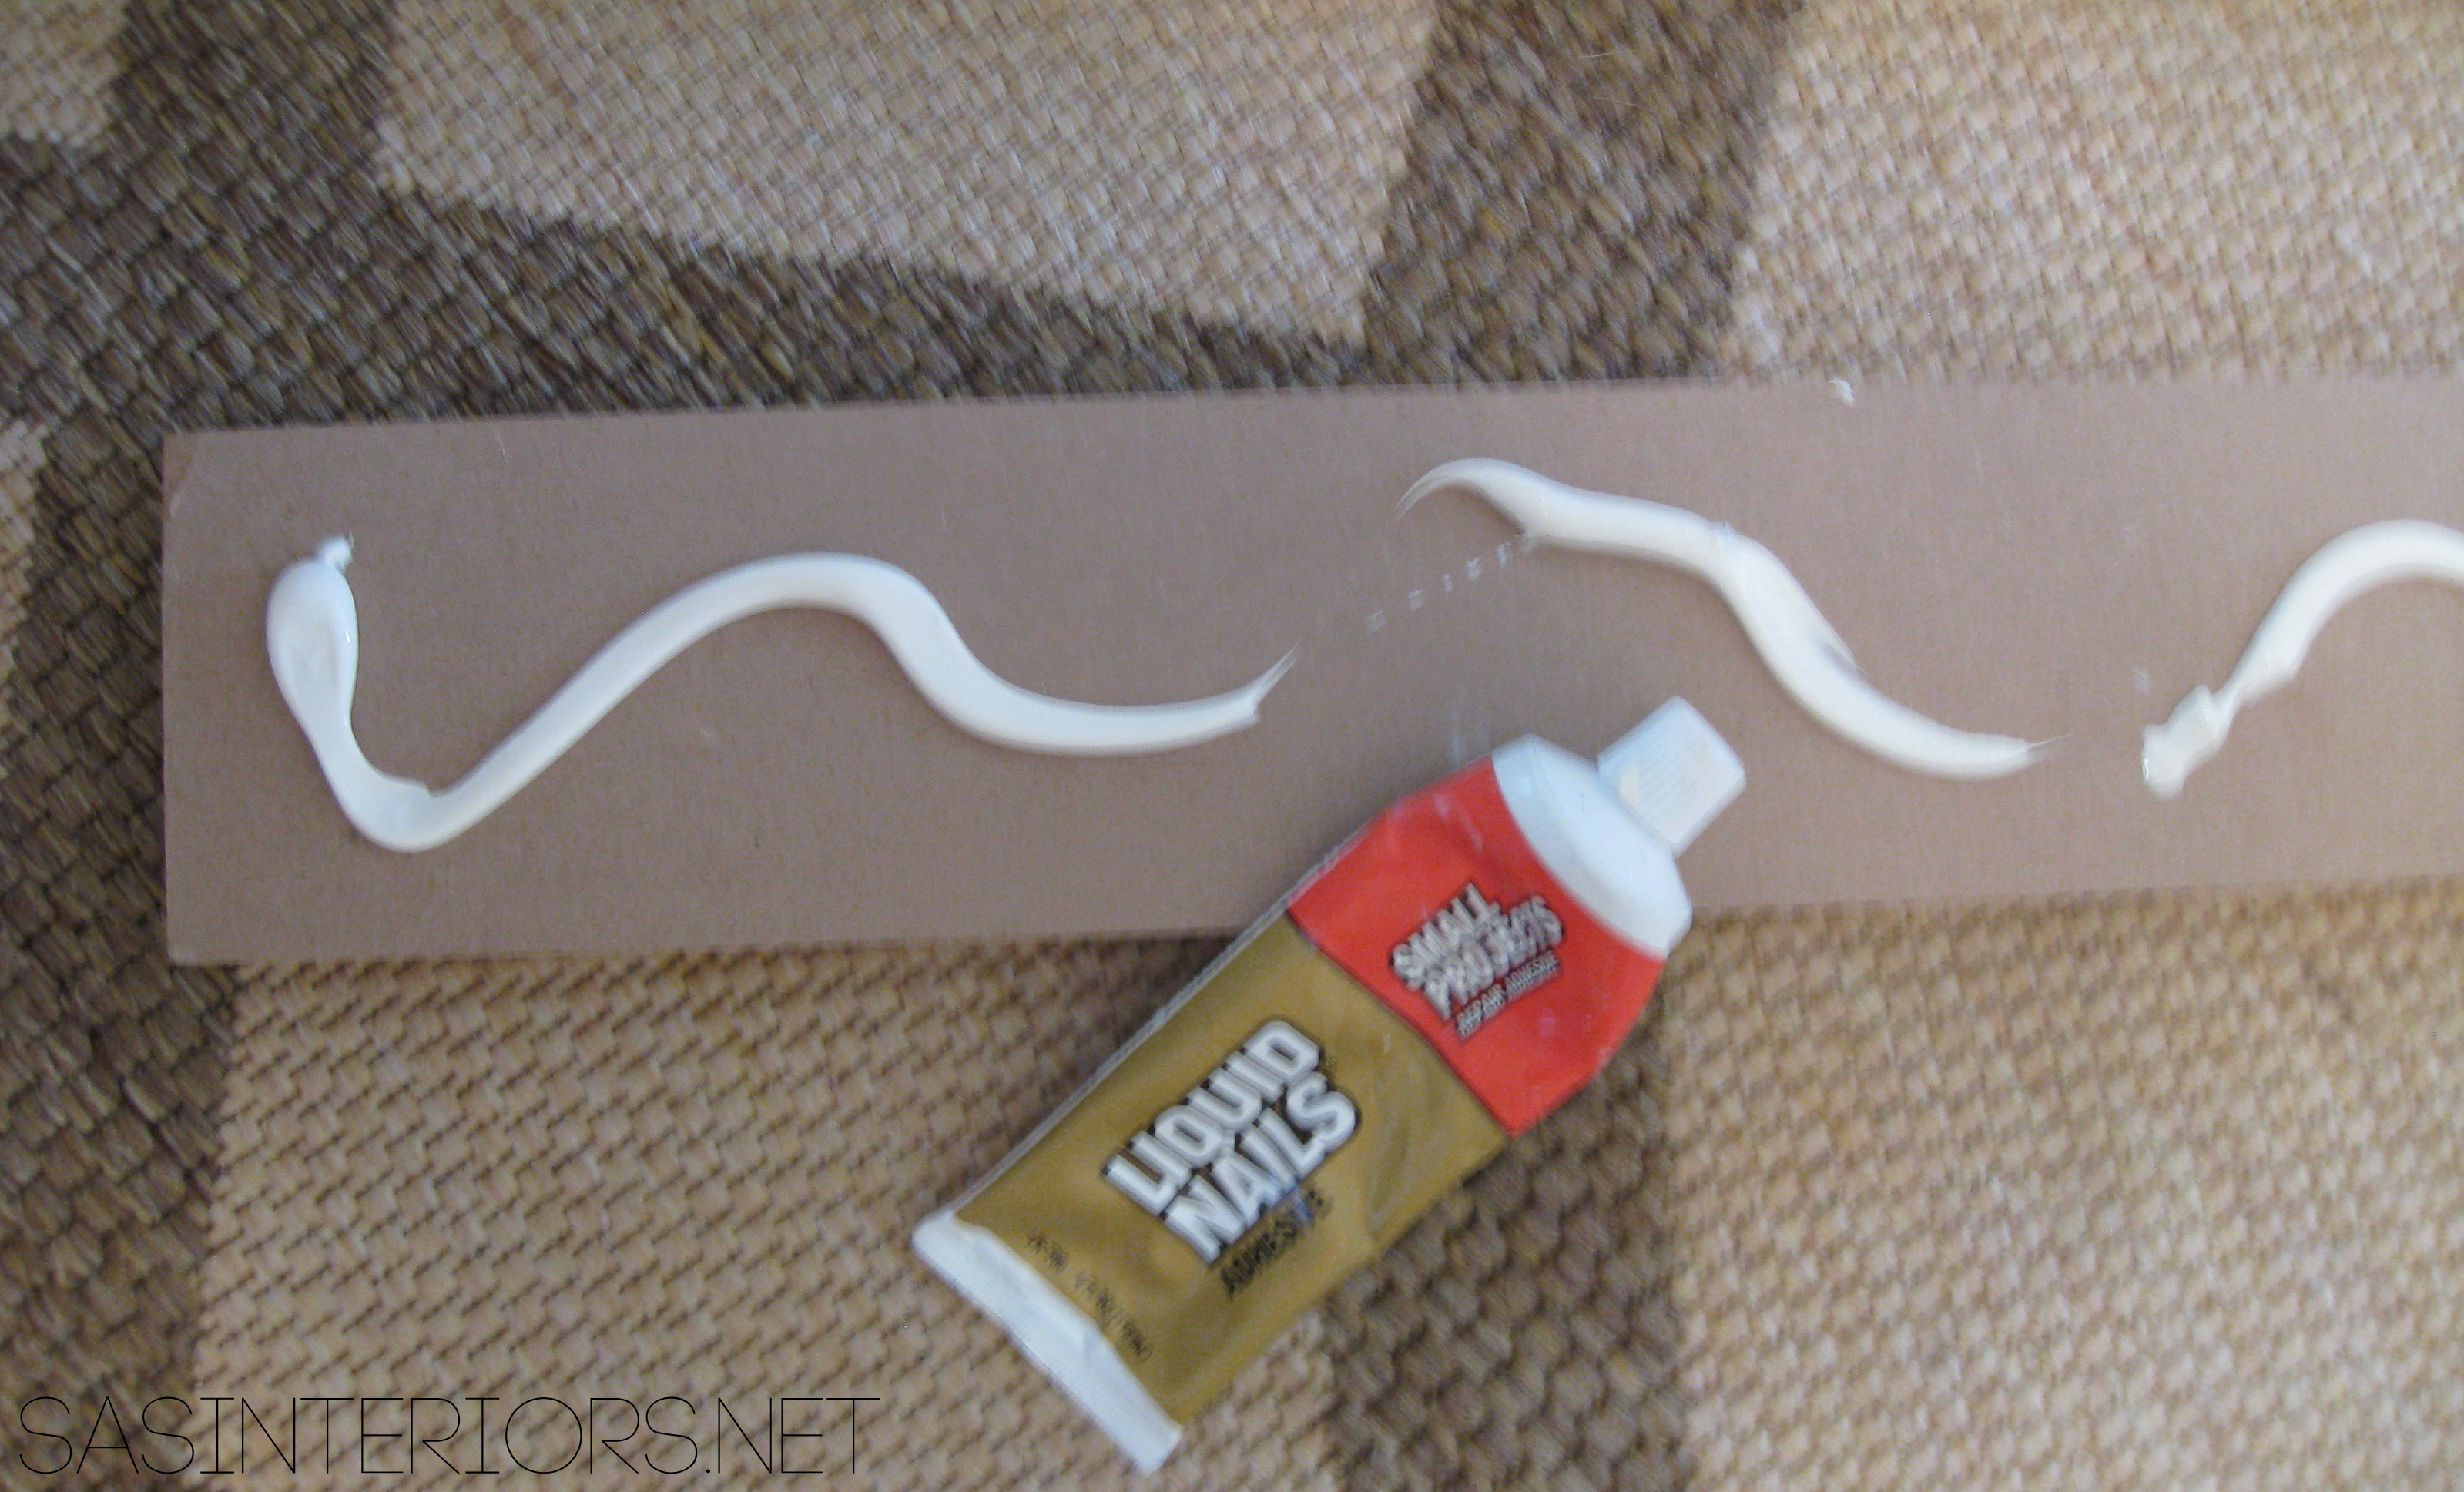
fuzzy pic – not so pretty, sorry.  You get the picture though

…making sure they were level and plumb, I was ready to…

Easy Entry Upgrade with DIY built-in coat hooks and wooden crates via @Jenna_Burger, www.jennaburger.com

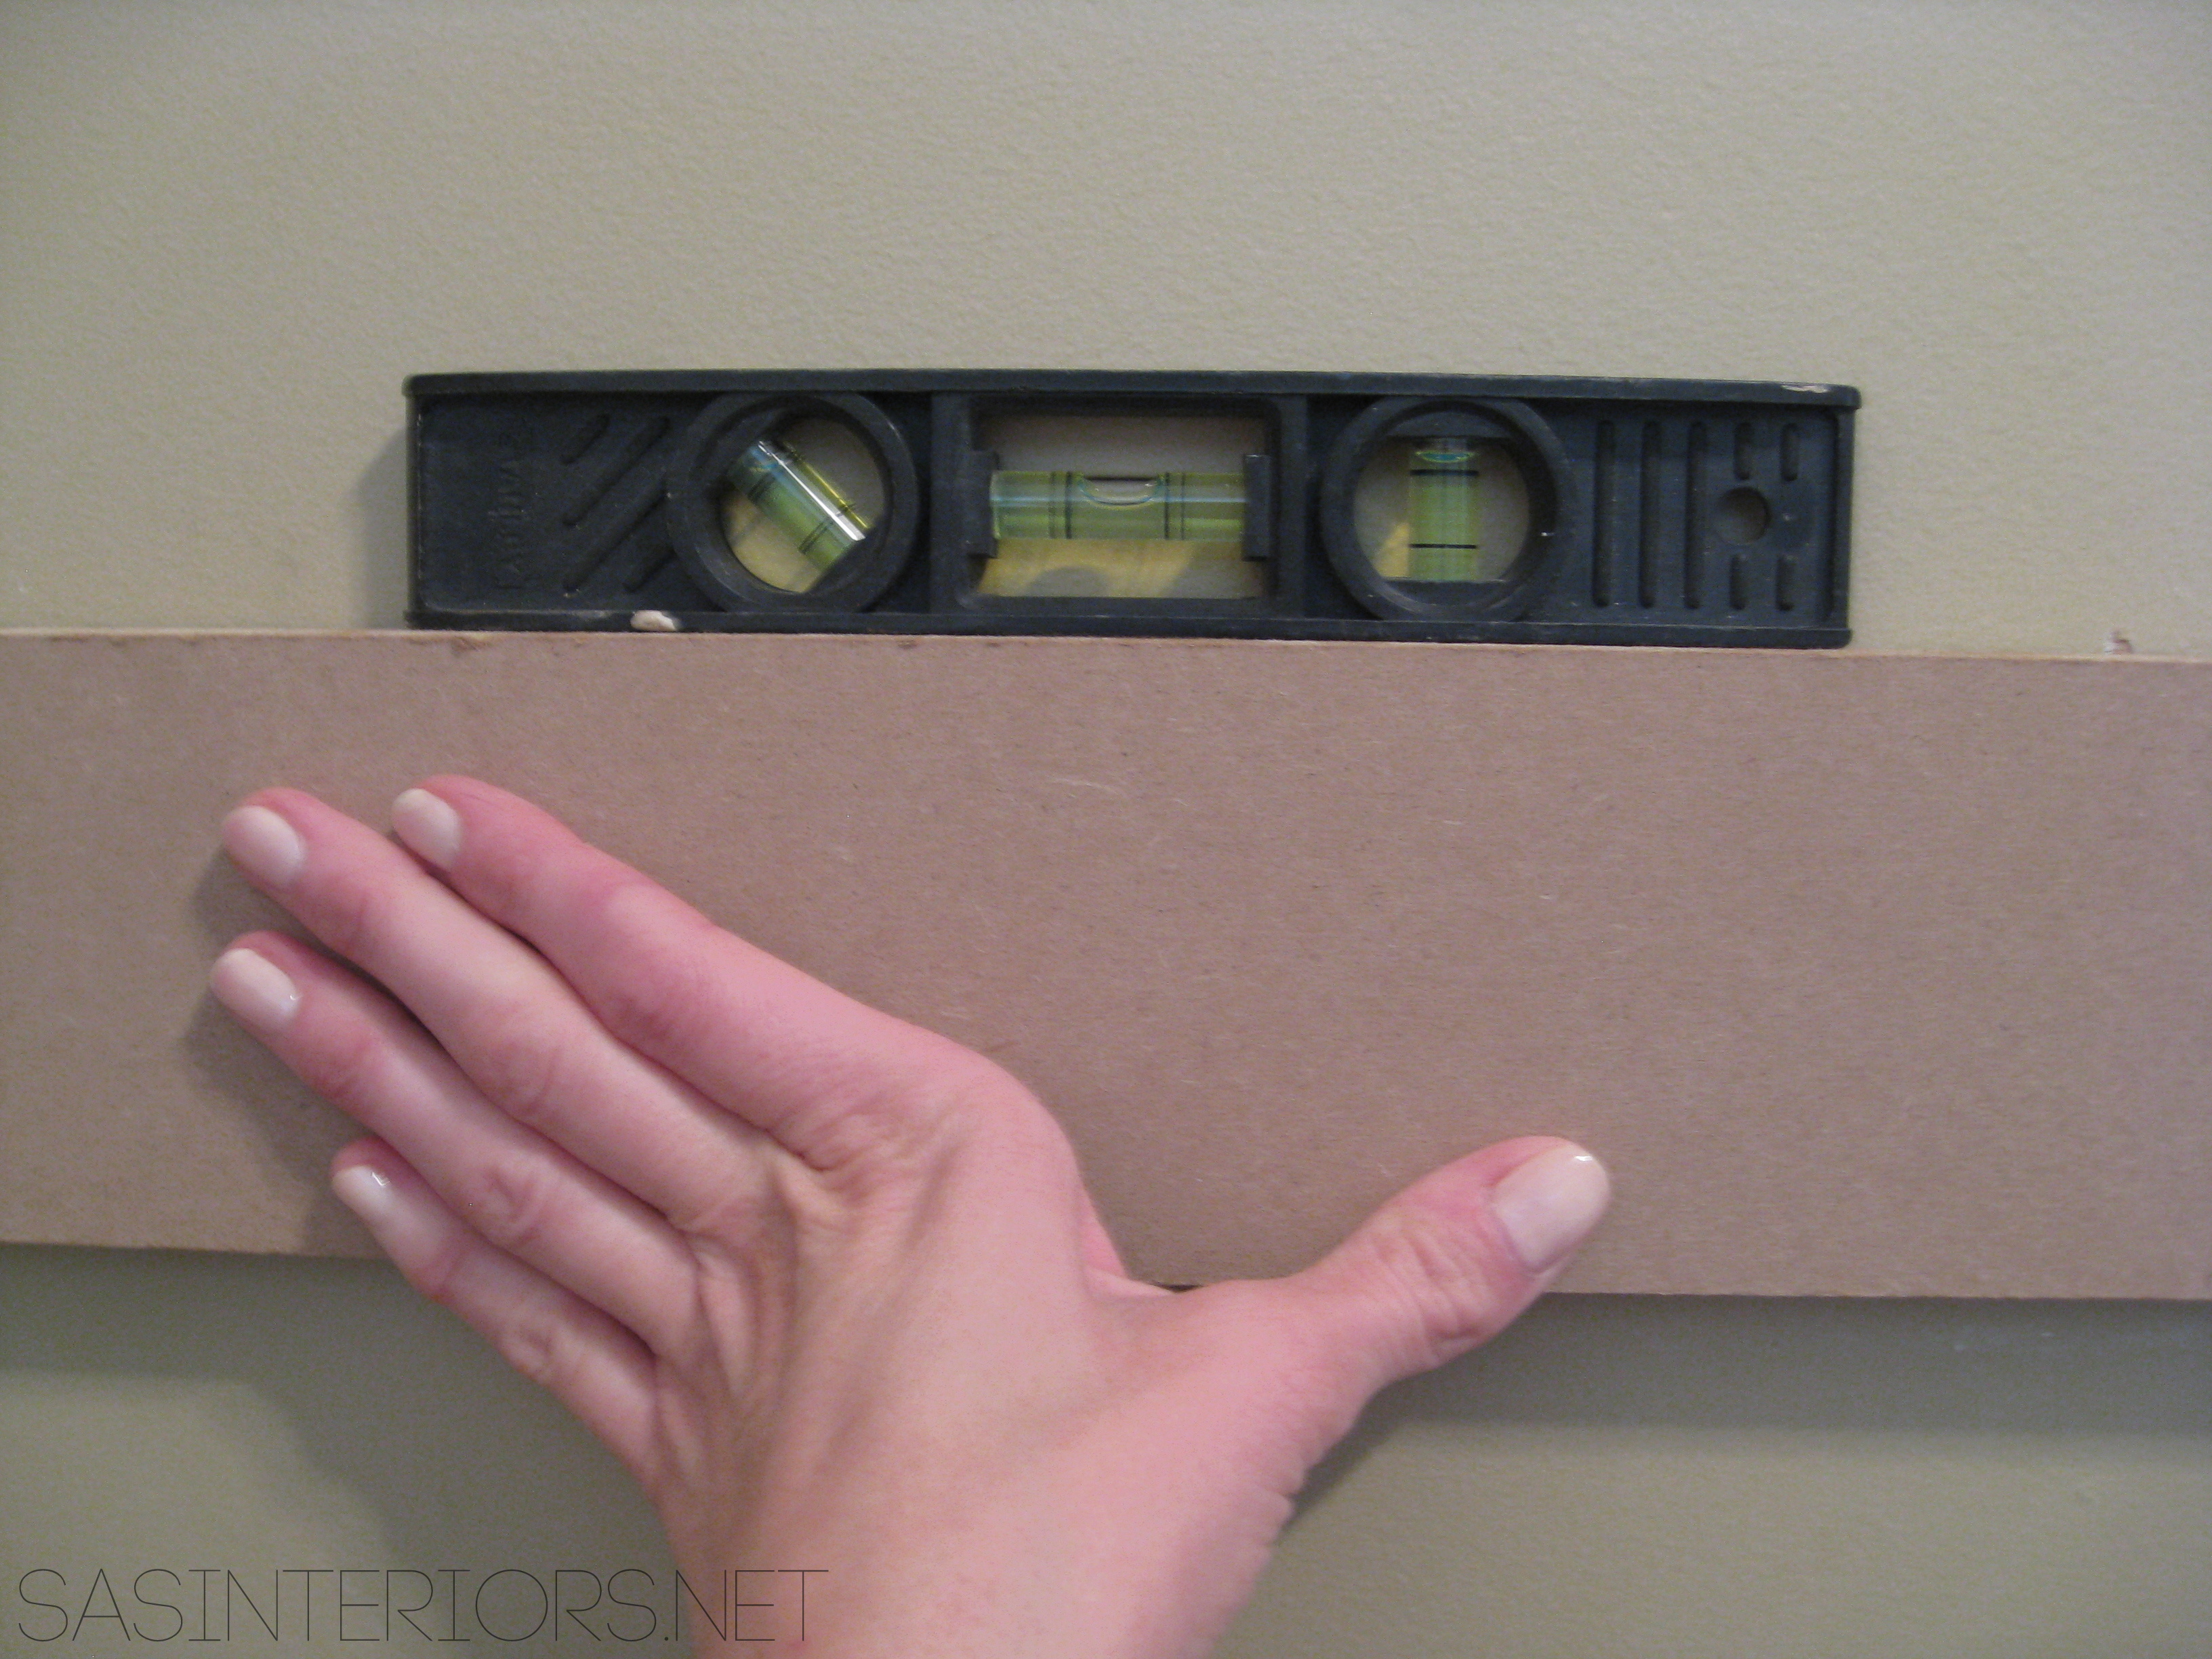
…DRILL!  Once the placement of the boards was determined, I found the locations of the studs and drilled 4 holes through the board into the wall.  If you can’t find a stud, then use anchors so the boards are securely attached.

Easy Entry Upgrade with DIY built-in coat hooks and wooden crates via @Jenna_Burger, www.jennaburger.comI didn’t mention this earlier, but I installed 2 boards at different heights – One board was set lower for the kids coats and one board was set higher for the adult coats.

Once both boards were in place, I wanted to achieve a seamless look at the edges where the board meets the wall, so I used wood filled to fill in the gaps and holes.

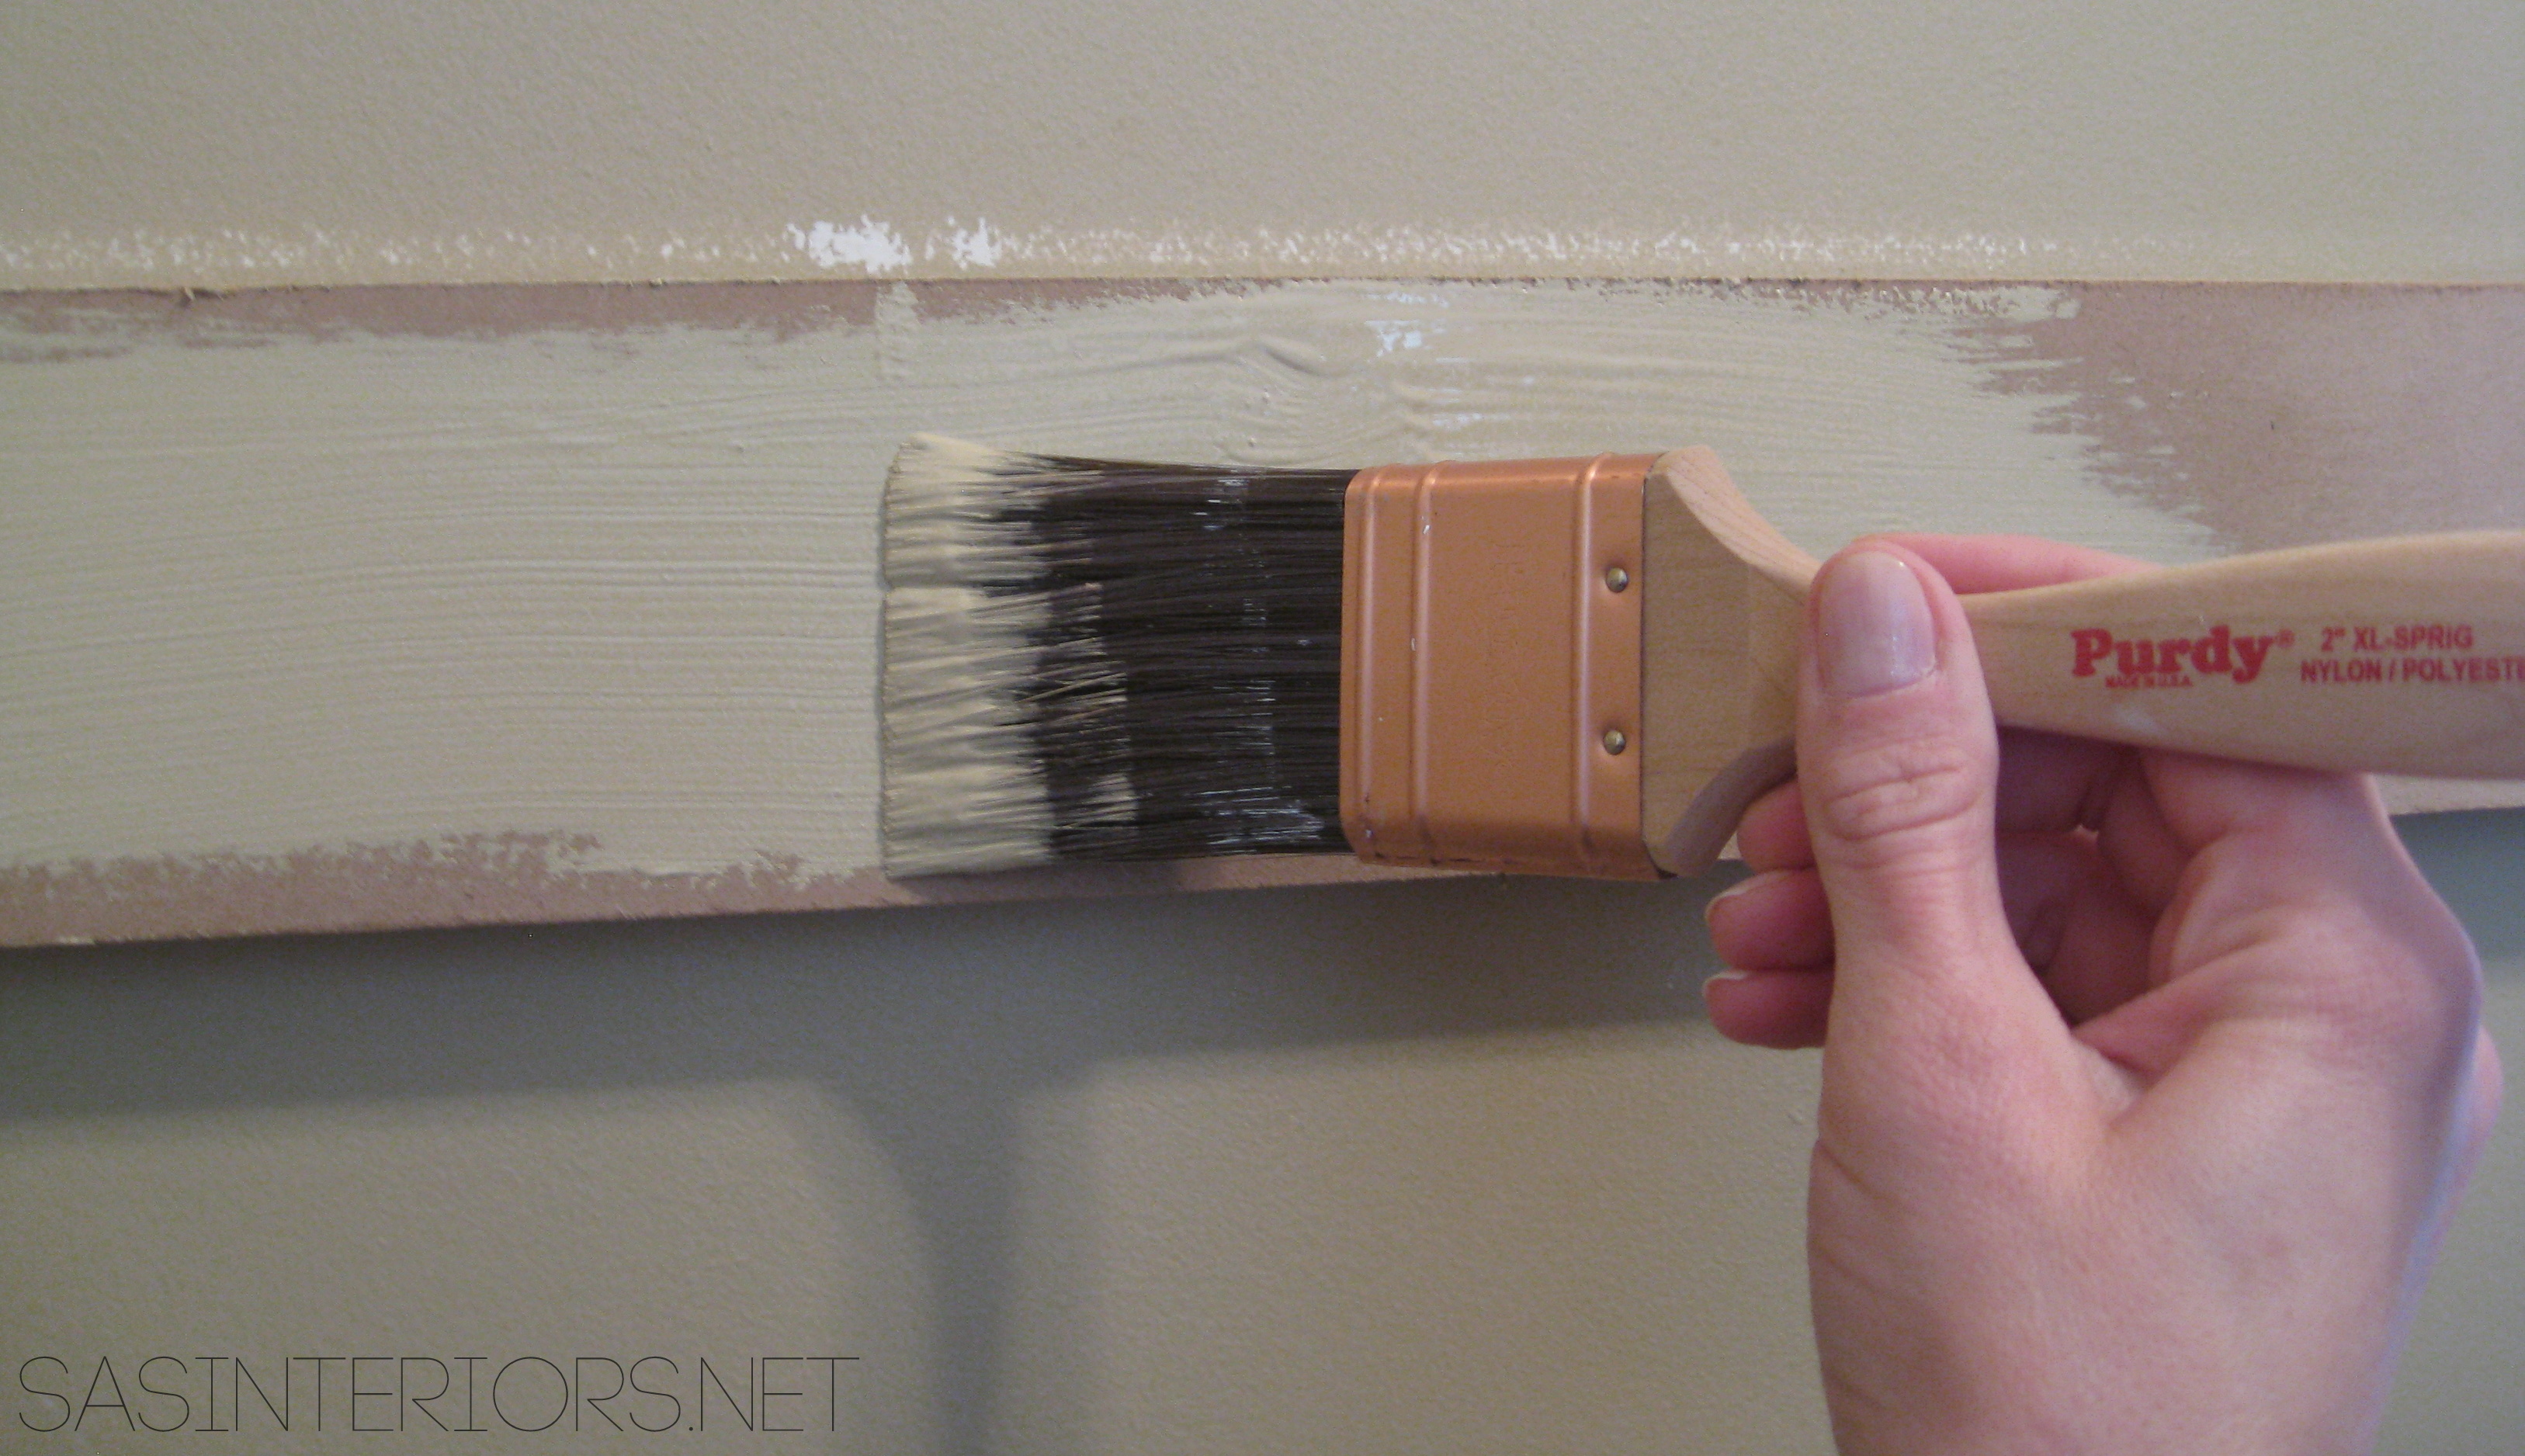
Then it was time to paint the boards.  This step was probably the hardest because as much as I wanted to make this a fun and funky spot, I also didn’t want to draw any more attention than needed.  After much thought, I decided to simply paint the boards the same color as the existing wall, so it would  blend in, but also provide the function that our family needed.

Easy Entry Upgrade with DIY built-in coat hooks and wooden crates via @Jenna_Burger, www.jennaburger.com

To add the finishing and most important touches, I completed my built-in coat rack with hooks.

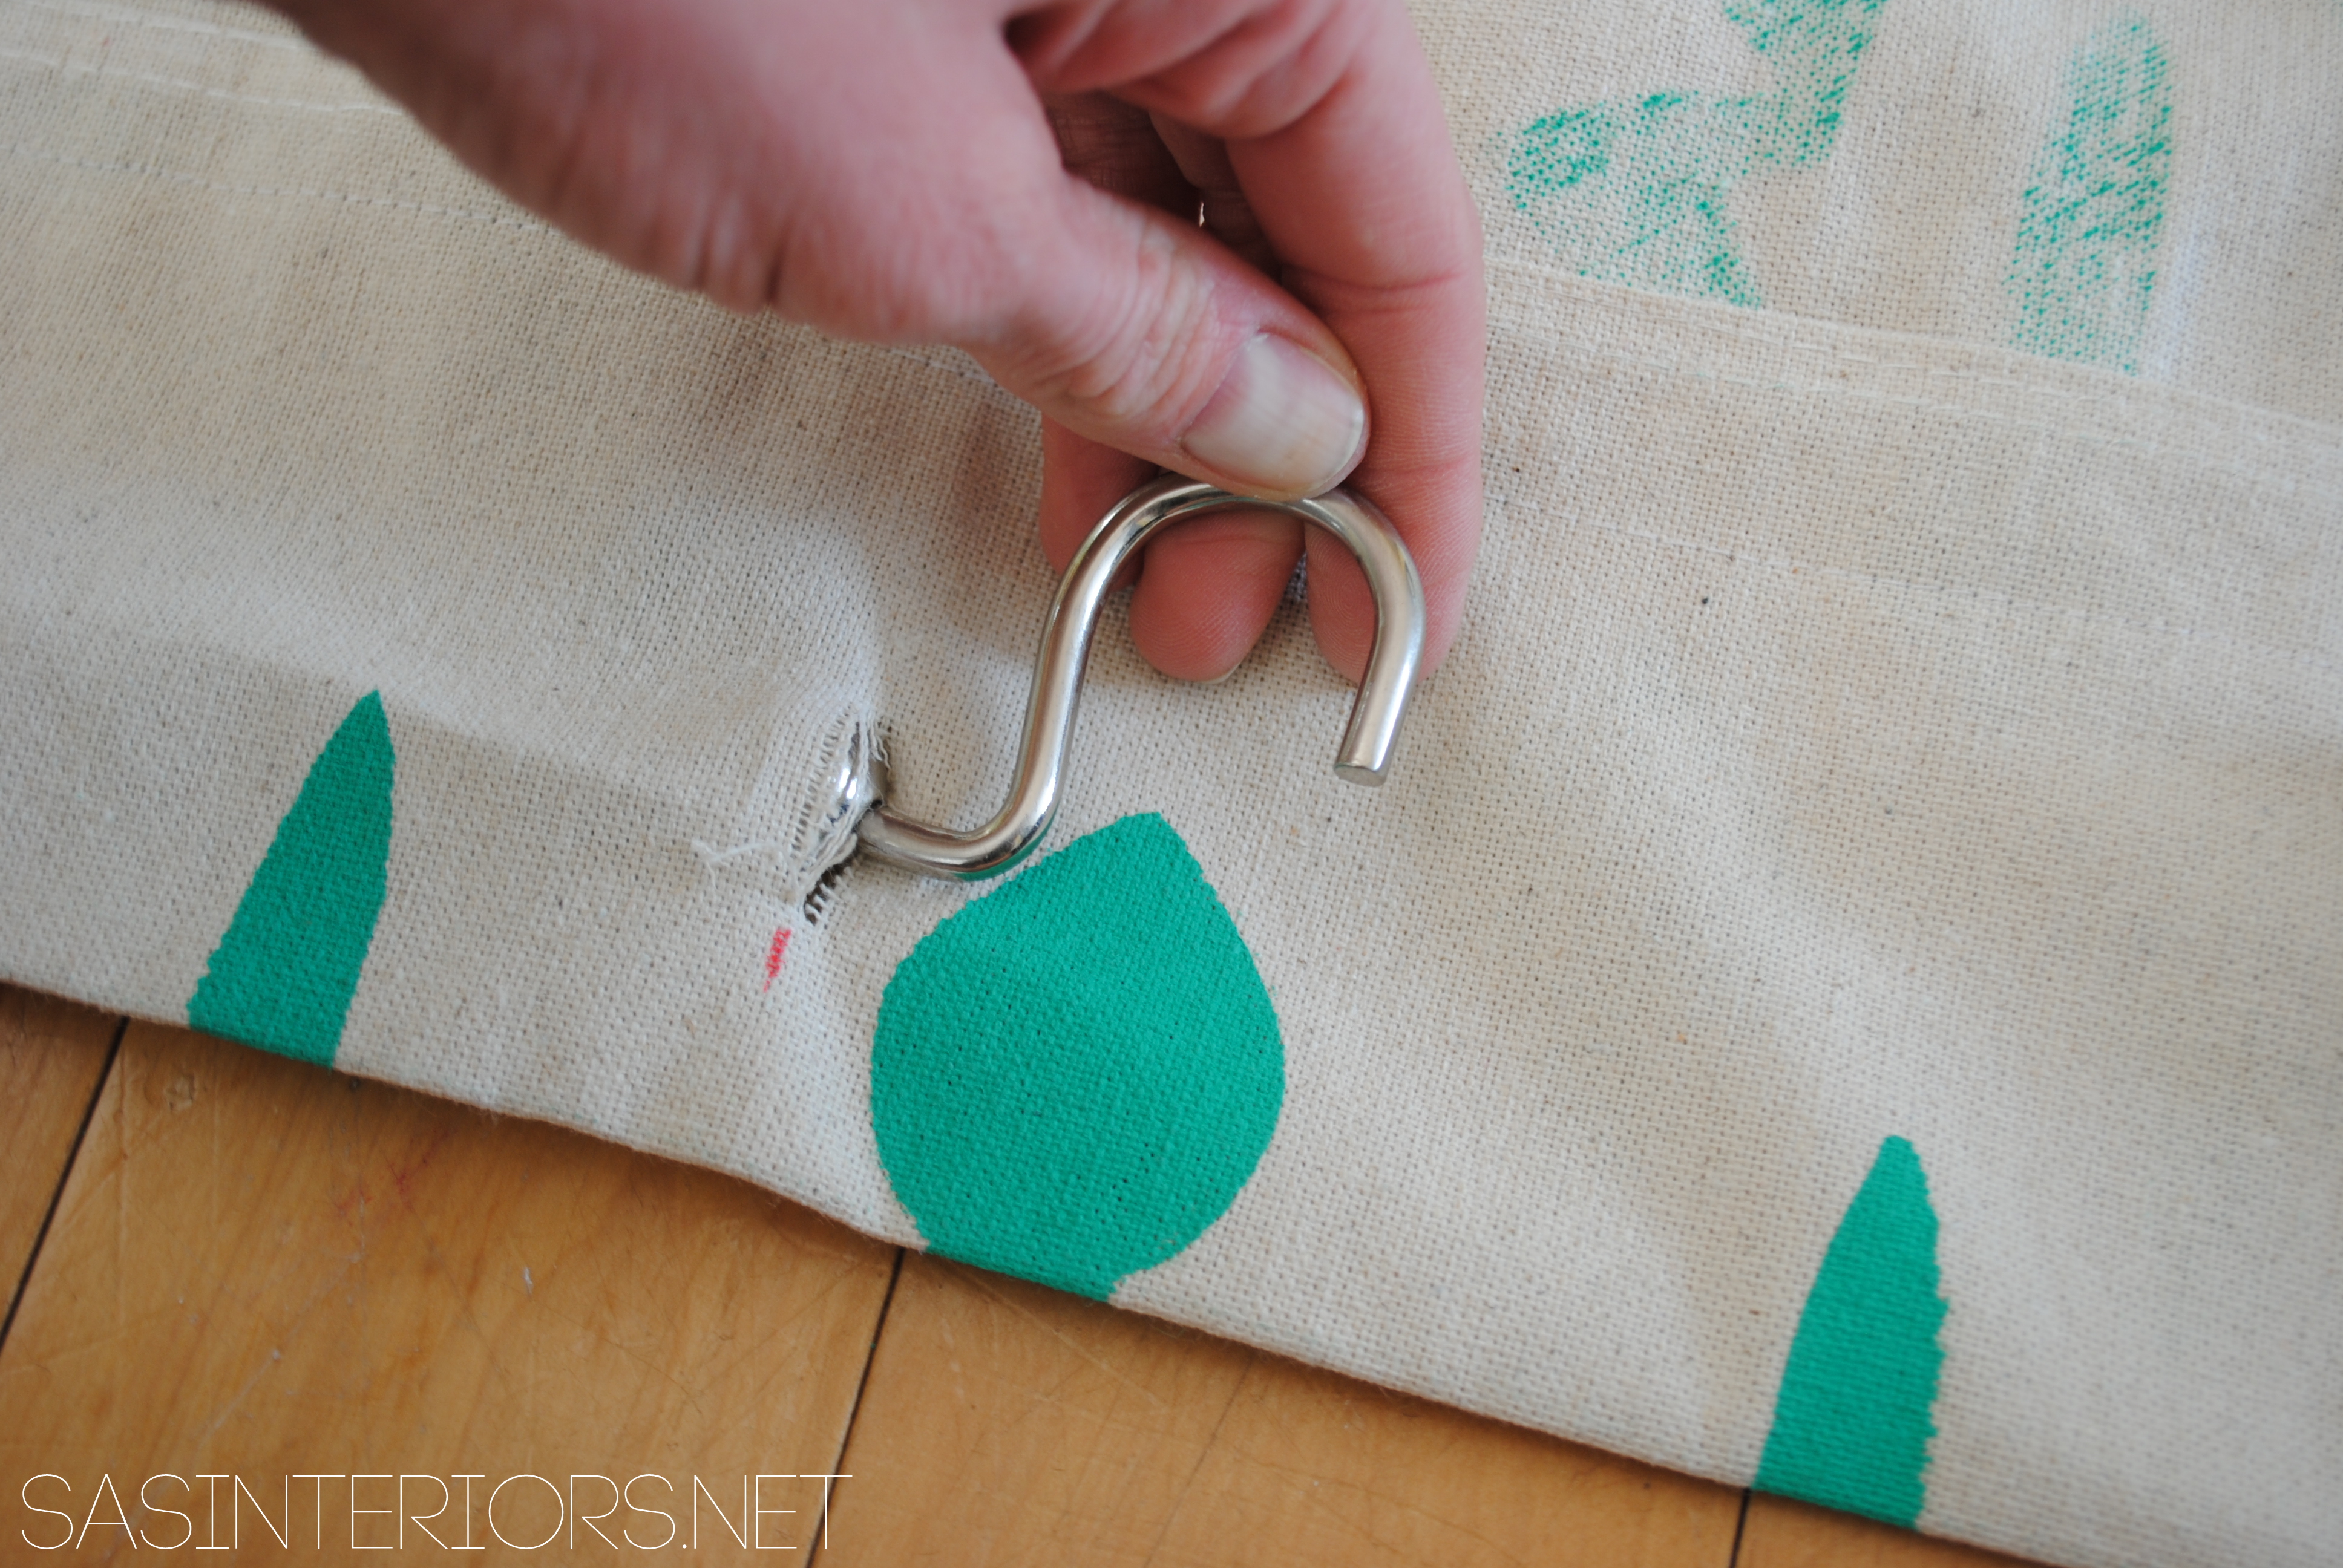
Installing the hooks was real easy!

Easy Entry Upgrade with DIY built-in coat hooks and wooden crates via @Jenna_Burger, www.jennaburger.com

Easy Entry Upgrade with DIY built-in coat hooks and wooden crates via @Jenna_Burger, www.jennaburger.com

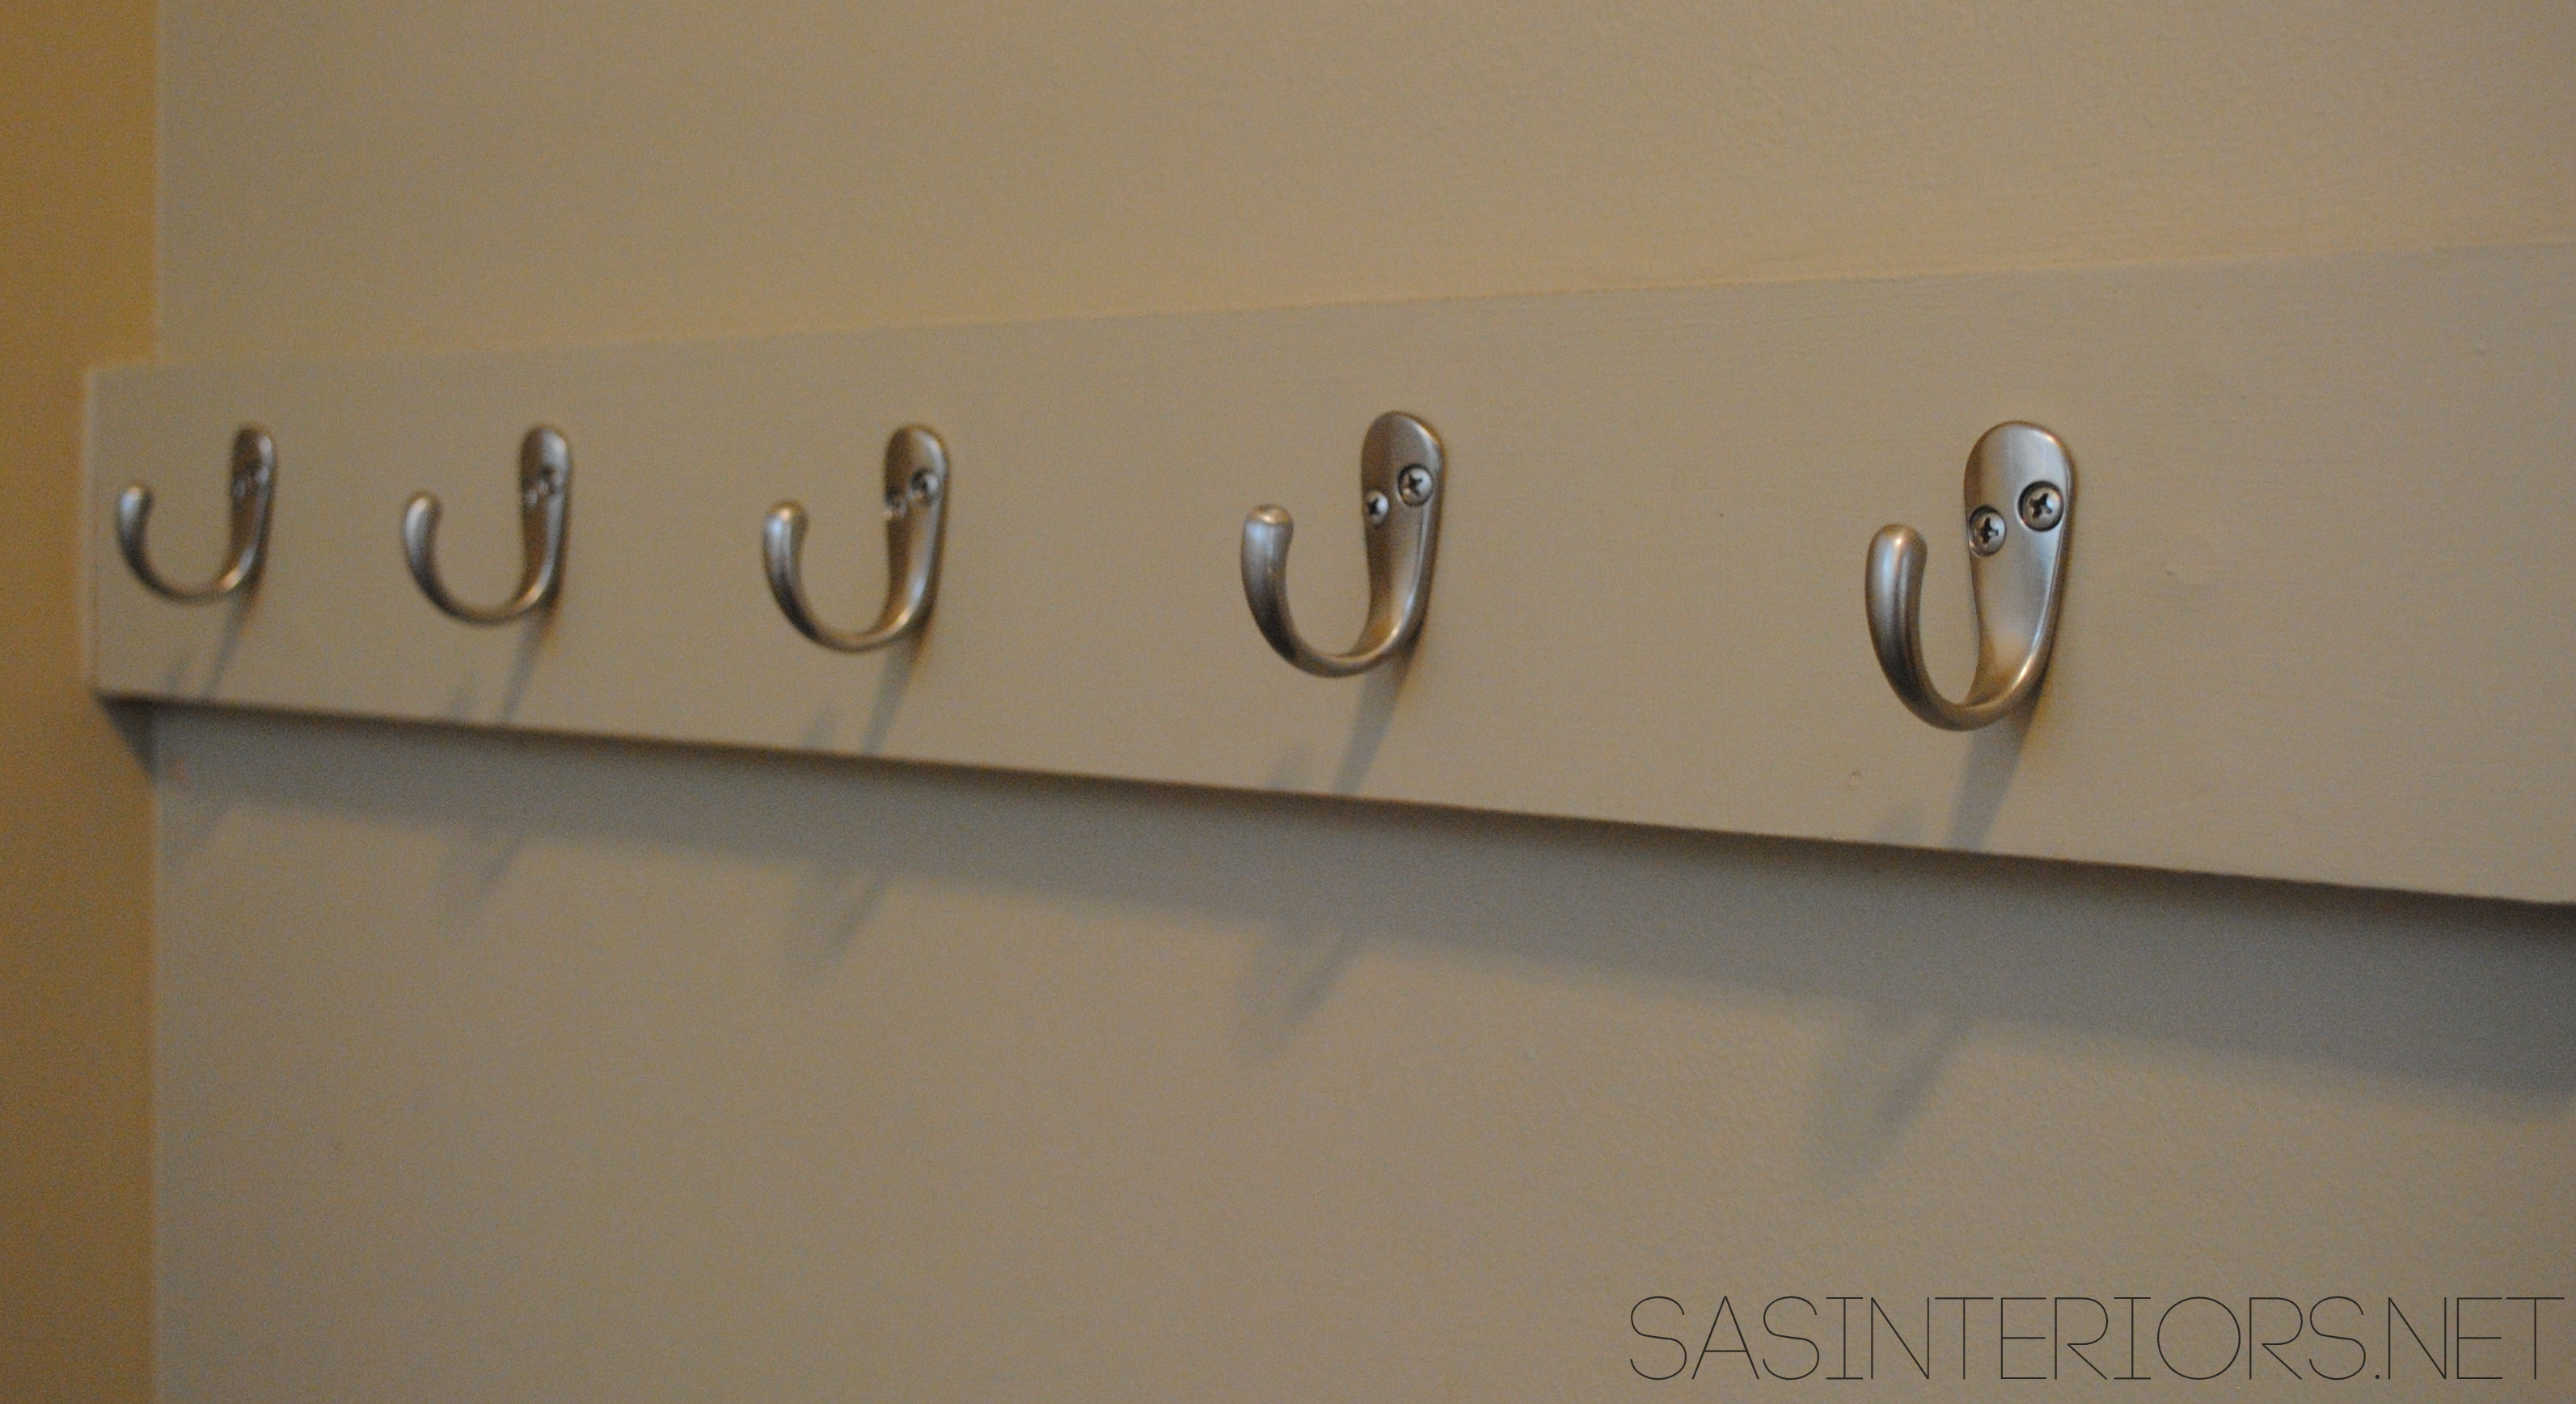
And my newly created coat hooks were complete!

Easy Entry Upgrade with DIY built-in coat hooks and wooden crates via @Jenna_Burger, www.jennaburger.com

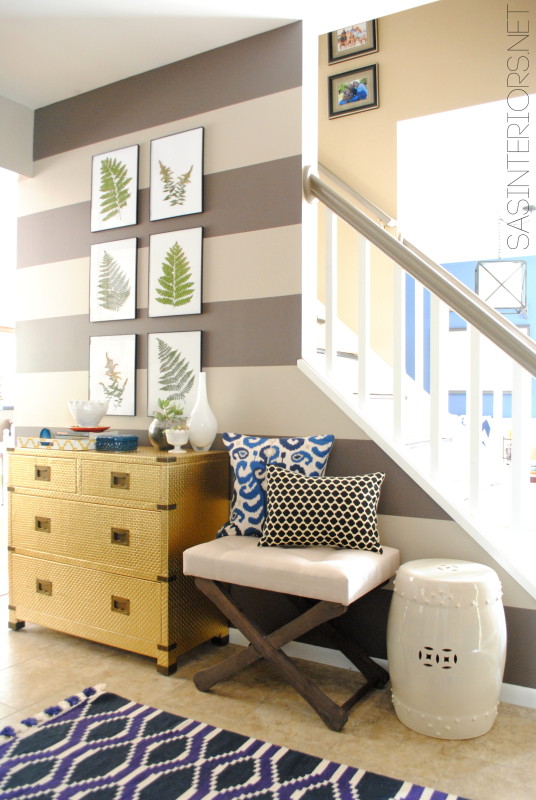
Since this project was completed, the remainder of the space got a makeover too, including a new floor and freshly painted mouldings.

Once those DIY projects were complete, I wanted to make the space even more functional so I added wooden crates.  I purchased the already stained wood crates from a local thrift store, but I’ve seen similar unfinished styles at AC Moore and Micheals.

I stacked 2 wood crates in the corner and one to the right to create a stepped effect.  The crates are ideal for holding / storing bins, baskets, boots, bookbags, and last minute run-out-the-door essentials.

Easy Entry Upgrade with DIY built-in coat hooks and wooden crates via @Jenna_Burger, www.sasinteriors.net

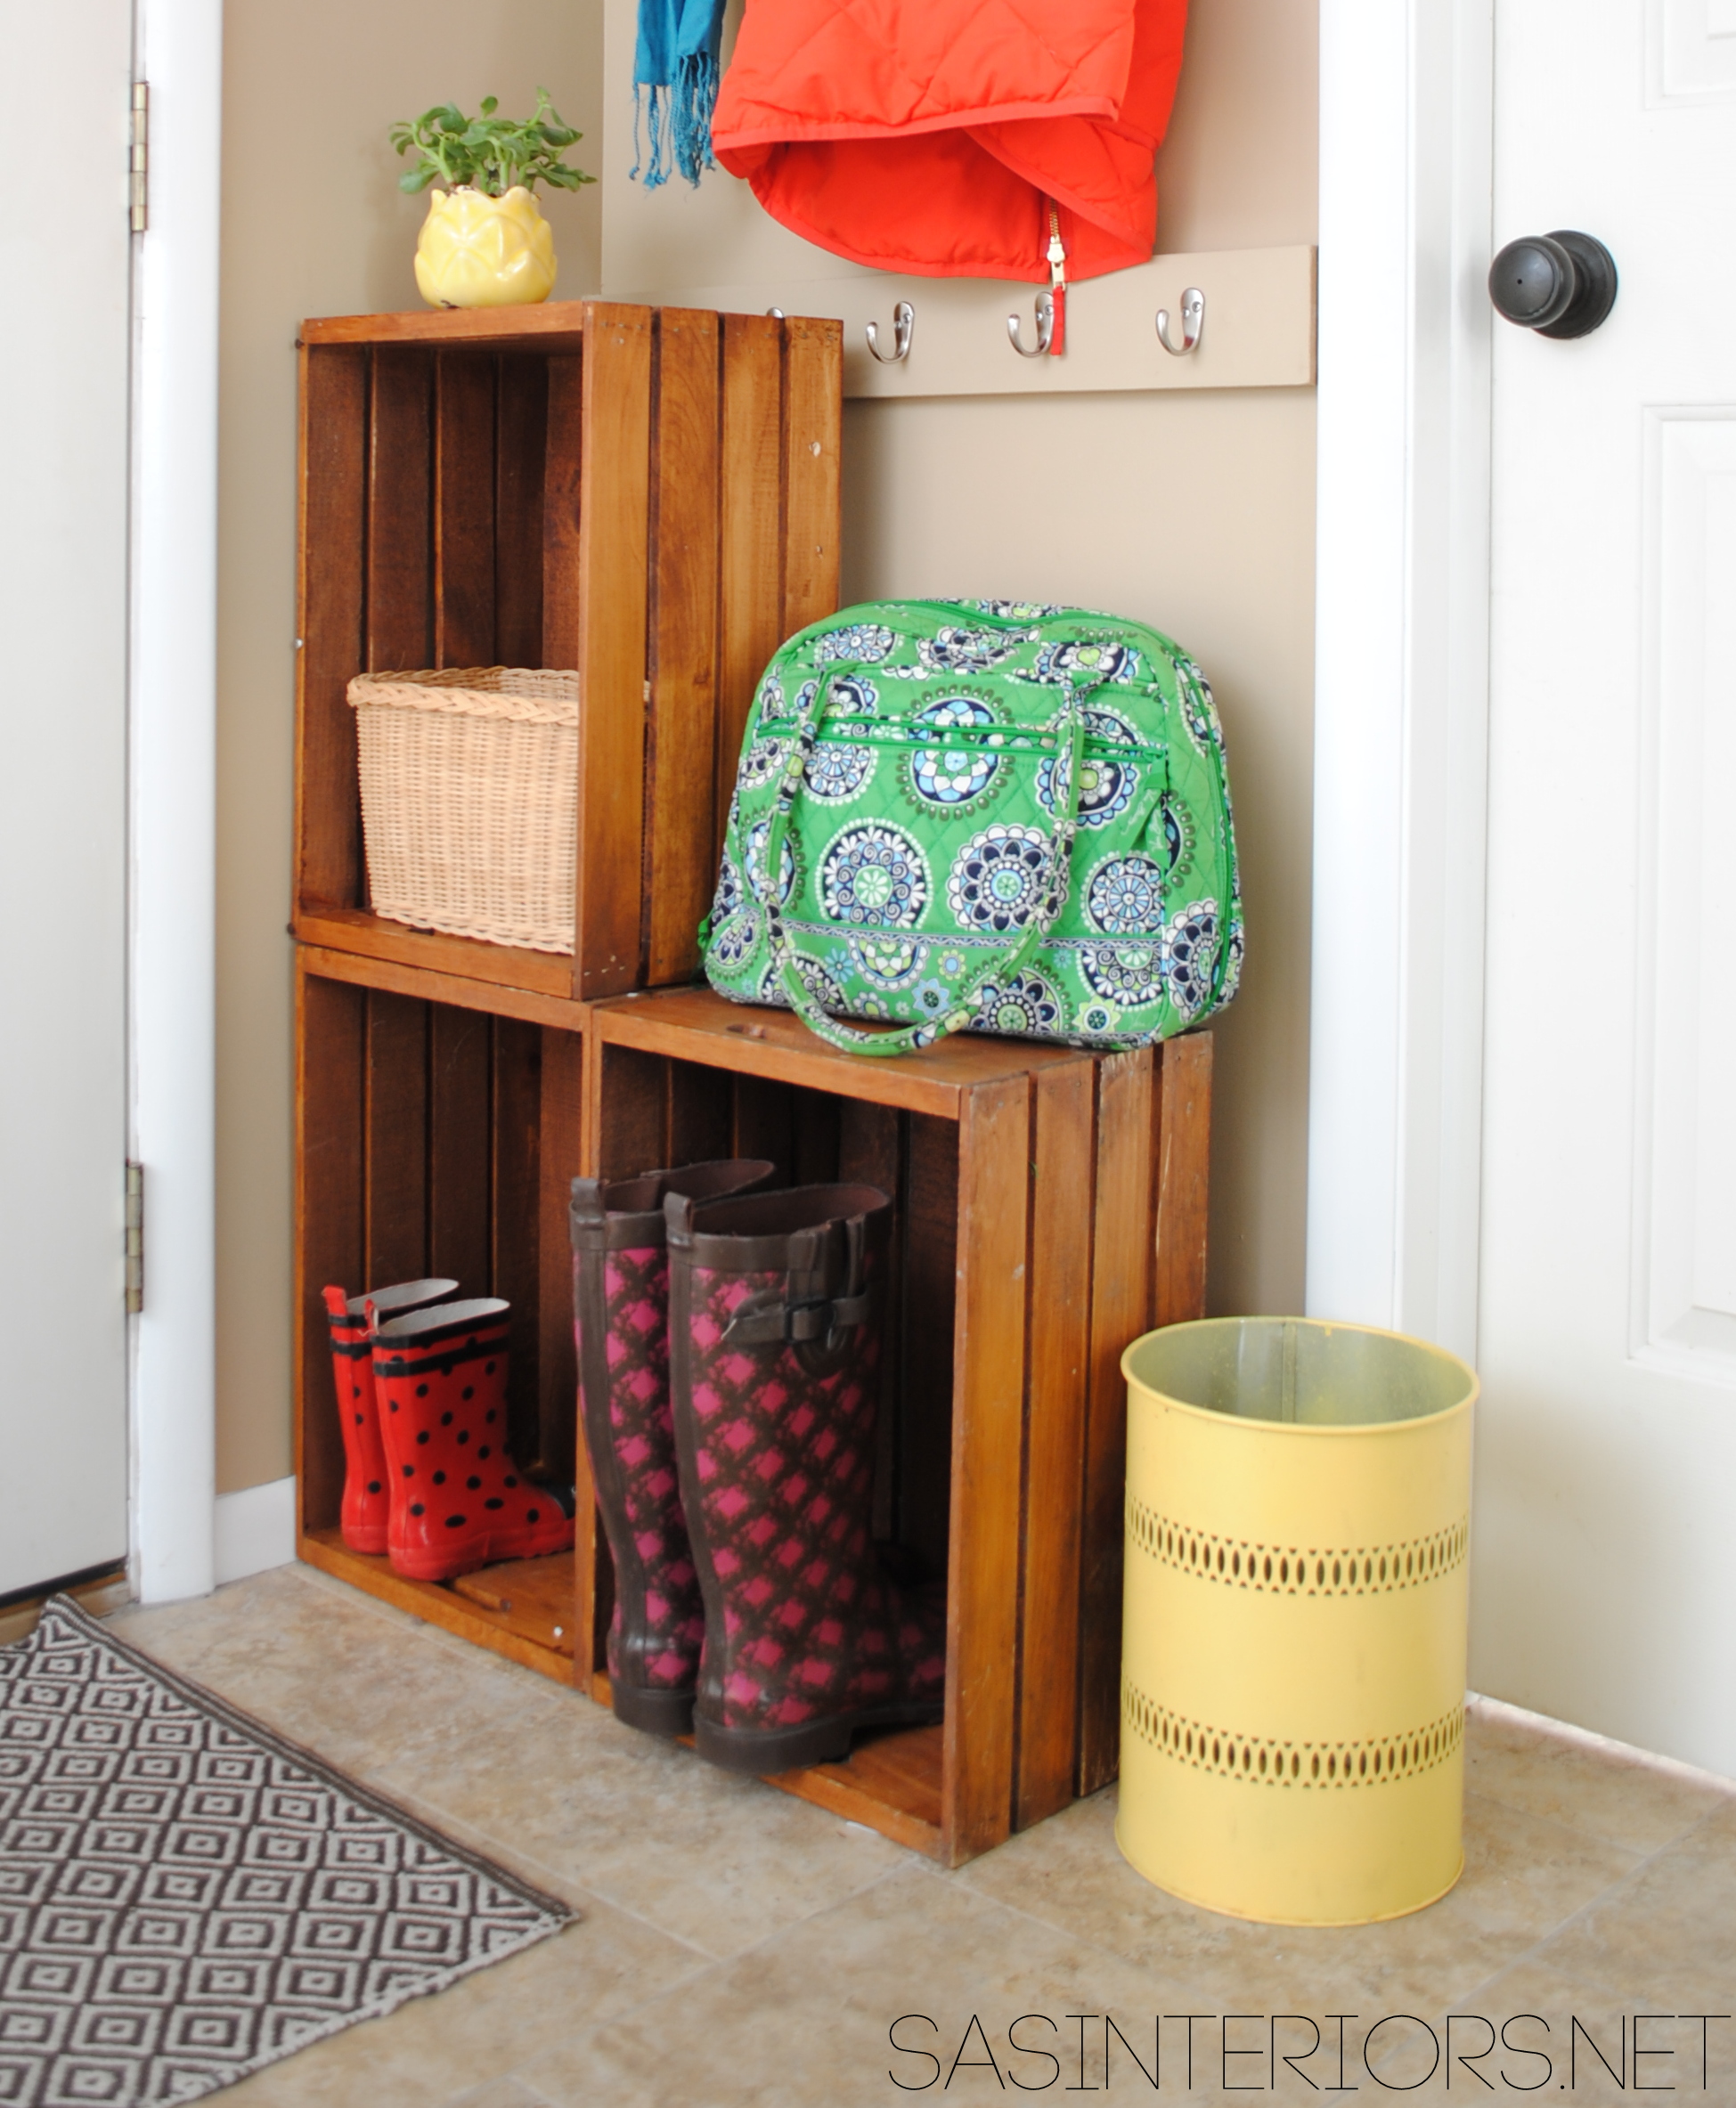
What I love about the wooden crates is that they can be moved, rearranged, or simply taken away in no time.  But right now, they are the perfect addition for our newly well-functioning entry!

Easy Entry Upgrade with DIY built-in coat hooks and wooden crates via @Jenna_Burger, www.jennaburger.com

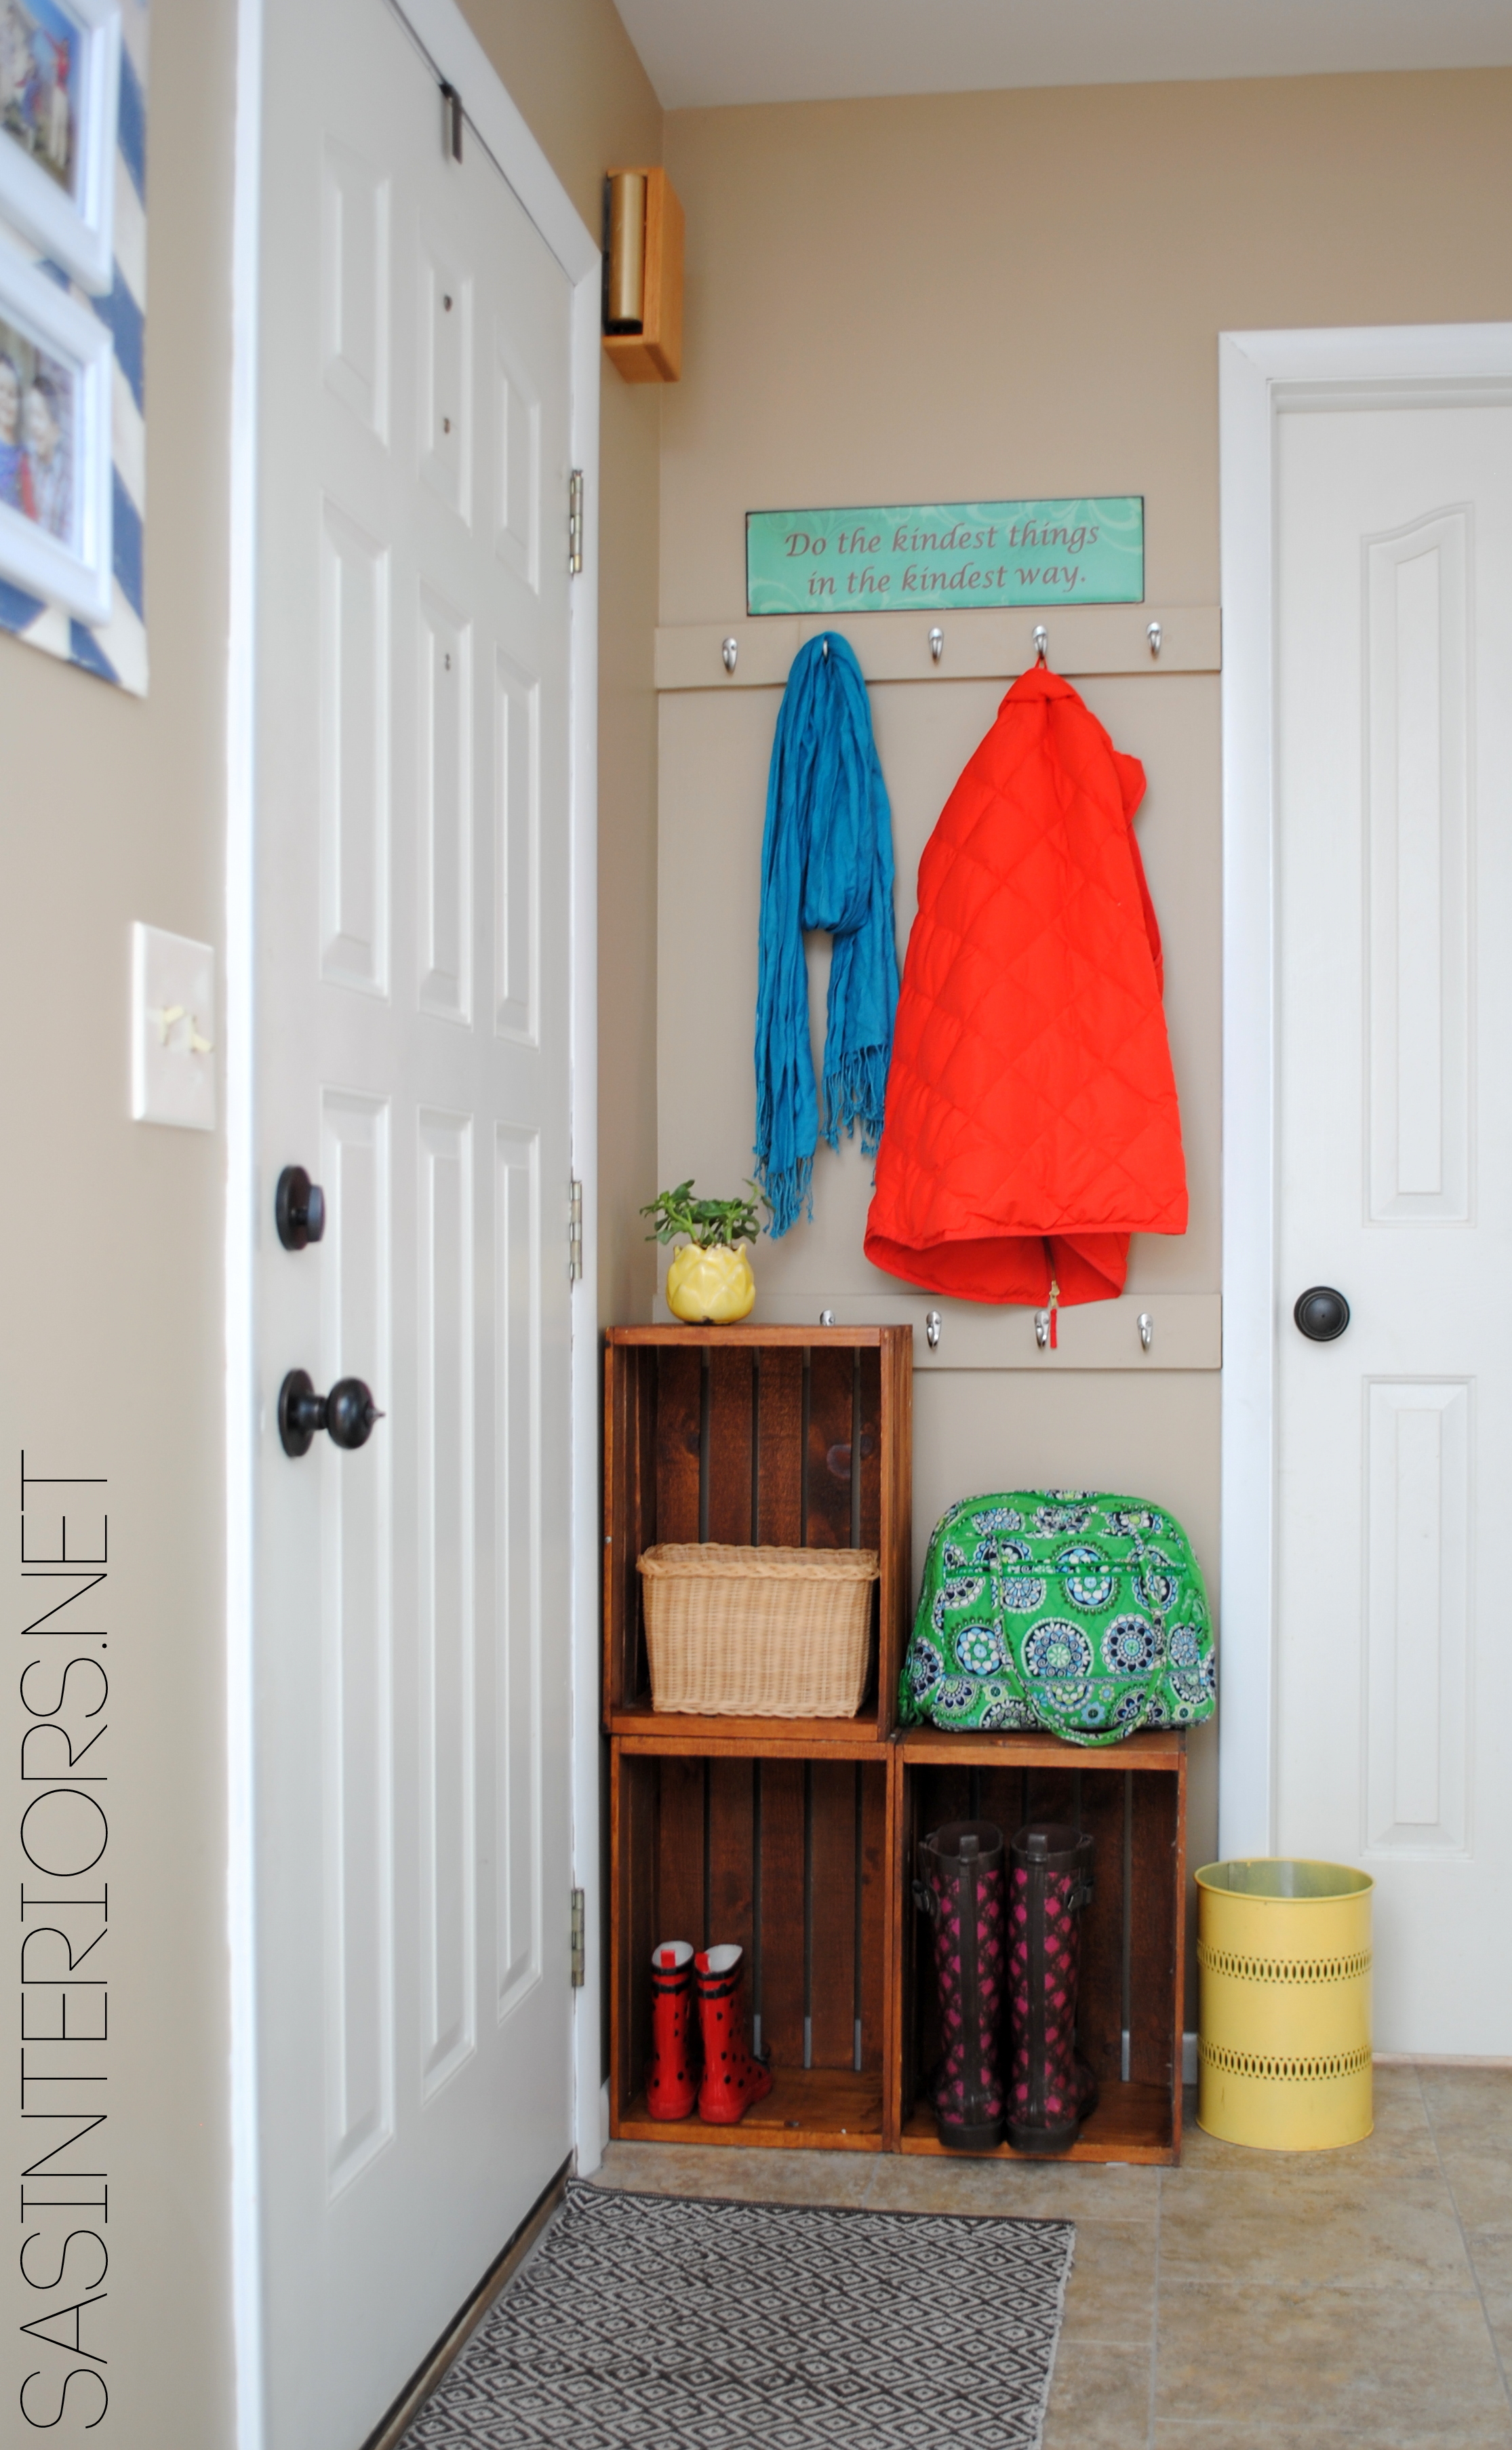
Even though it’s essentially a small space at 30″ wide, it’s SO USEFUL!

I also added this cute sign that I found at Hobby Lobby and thought it had such a darling saying, “Do the kindest things in the kindest ways”…  something we strive for everyday!

Easy Entry Upgrade with DIY built-in coat hooks and wooden crates via @Jenna_Burger, www.jennaburger.com

This spot has really been a great addition to our front entry.

Do you have a large mudroom?  If not, how have you maximized your front entry space?  Do you have any built-ins or do you have built-in coat hangers?

How-To Stain a Wood Deck

For the past few years, we knew something major had to happen with our exterior wood deck, but with SO much work (most of it do-it-yourself projects) to do in other areas of the yard, it kept being put on the back-burner.  Well… Baby didn’t want to be put in the corner no more (I know, that was cheesy), so this year was the year for a makeover.  And boy does she look smokin’…

How to Stain a Wood Deck - Before and After Wood Deck Makeover

I think (well, actually I know) one of the hesitations of the deck was the process.  Well, so I thought.  Honestly, it was so much easier and more manageable than I ever thought possible.  One of the major reasons for that was the use of a hand sprayer. WOW, was spraying easier than hand rolling and/or brushing.  We did that last year with the exterior fence and boy did it take ALL SUMMER LONG.

With a sprayer, the stain is applied (slightly) thicker and the coverage is much more even.  But best of all, it takes way less time and is much less labor intensive.

Before we get to any more of the process or the after pictures, here is what the deck looked like before.

How to Stain a Wood Deck - Before and After Wood Deck Makeover

How could a deck get so bad?  I dunno!  Living in this house for only 3 years, I have no clue as to when the last time the deck was done.  Also come to find out, the deck was previously painted, not stained.  Paint on the outside (especially if it’s not the right paint) does not last nearly as long as stain.  Also if you take a look, the spindles were white and after looking closely, they were only primed.  What I suspect happened, is that when the deck was painted last, someone got lazy, and only went as far as painting the deck surface and the handrail around.  Geesh.

Learning from that, for this before and after deck makeover project, we decided to use Cabot Solid Stain.  Because we were applying it over a painted surface and didn’t want to sand down to the raw wood, a solid stain seemed like the best choice.  Cabot is known for their quality wood products, so there was no doubt that they’d definitely get the job done (after being a disaster for so long)!

How to Stain a Wood Deck - Before and After Wood Deck Makeover

Supplies for staining a deck:

  • Stain (I used a solid stain, but also available are wood tone finishes, semi-transparent finishes, and semi-solid finishes)
  • Tools to clean / prep the deck surface (I used a power washer, as well as a bristle brush to get dirt off, as well as flaking wood chips)
  • Sprayer (this is a great one that I would recommend <=affiliate link)
  • Plastic wrap (for protecting areas you don’t want stained)

1. To start off it’s a must to give the deck a good cleaning.  Whether previously coated or bare wood, cleaning the wood deck surface is the MOST IMPORTANT step of the staining process.  A few weeks ago, I borrowed our neighbors power washer and went to town on it.  It was amazing how much dirt and mildew washed away with a quick sweep of the hose. Plus all the chipped and peeling paint was stripped right off.  Because of the power washers strength, it really made a nice clean surface for staining.

How to Stain a Wood Deck - Before and After Wood Deck Makeover

A brush like this with firm bristles is great for removing excess dirt and peeling wood chips.  This was used right before the staining process started.

How to Stain a Wood Deck - Before and After Wood Deck Makeover

2. The house and areas we didn’t want touched were covered with clear plastic wrap.

How to Stain a Wood Deck - Before and After Wood Deck Makeover

3. With the wood deck clean and completely dry, we started staining using a hand sprayer.

How to Stain a Wood Deck - Before and After Wood Deck Makeover

JUST LIKE with spray painting, the key to hand spraying is to:

  • Shake Shake Shake the stain before applying
  • Spray about 7-10″ away for the surface
  • Move back and forth in a steady, rapid motion in the same direction as the wood grain
  • Don’t concentrate the nozzle in any one place at any given time
  • Start spraying in a conspicuous spot (in case is spatters at the start), then continue in a consistent sweep
  • Wear a mask – the fumes aren’t great to breathe in

Most importantly (which has nothing to do with hand spraying, but with staining in general), read the directions.  Apply only the recommended number of coats and be sure not to overapply.

How to Stain a Wood Deck - Before and After Wood Deck Makeover

I will be honest, we had someone help us with the deck (due to lack of time) and he used a more powerful hand sprayer.  Even though it’s smaller, the one I mentioned above would still work great for a deck or fence.  Same rules applies.

And then it was done.

How to Stain a Wood Deck - Before and After Wood Deck Makeover

Let the SUMMER BEGIN!

How to Stain a Wood Deck - Before and After Wood Deck Makeover

I can not wait to get this deck filled with my Summer Essentials – a spot to  eat, a spot to grill, and of course a spot to relax!

How to Stain a Wood Deck - Before and After Wood Deck Makeover

The details on the stain…

I wanted a darker color for the deck so it would stand out against the neutral taupe / beige siding.  As I mentioned before, I decided on a solid stain because I wanted to skip the process of stripping the deck.  I chose Burnt Hickory for the color.  It’s perfect.  I was worried that it would be too dark, but it’s just the right depth of color that I was looking for.

O, you just wait to see what’s coming…  It’s going to be a party deck before you know it!

How to Stain a Wood Deck - Before and After Wood Deck Makeover

Huge difference, right?!

And about 24-48 hours, the deck was ready to use and being transformed as we speak.  Many more deck details to come.  Overall, the process of staining the deck wasn’t at all as difficult as I had envisioned.  Yes it was time consuming.  Yes, it was laborious.  But all well worth it to get this finished look!

Have you ever stained a deck or fence before?  If so, how was your experience?  And how was the result?

Disclosure: Cabot has provided me product for my project.  No one told me what to create, what to buy, how to use the product, or what to write.  All opinions are 100% mine! I truly believe Cabot has a great selection of wood staining products.

Powder Room Remodel: Repairing Wall and Hanging Wallpaper

Between baseball, a birthday party, and celebrating Mother’s Day (shout out to all the moms out there – hope you had a great day), there was very little time to actually get anything major accomplished on the DIY homefront this weekend.  BUT, somehow with 5 minutes here and 10 minutes there, I was able to squeeze in a few trips to Lowe’s (for supplies) and a few moments to hang wallpaper.  And thankfully with those spare moments, I actually got alot done and I feel like I’m making progress – even though it’s slow.

owder Room Remodel: Patching holes and hanging wallpaper - Follow along on this bold transformation #powderroomremodel

Since announcing the plans for the powder room and sharing details on the removal of the toilet and pedestal sink, the room has really taken a drastic turn – for the good. When I left you last, there was a huge hole in the wall from where the tile backsplash was removed and the wall colors were still orange and beige.  Well not anymore.

Before I could even think about wallpapering, the hole had to be repaired.  I’ll admit, I haven’t had the best of luck patching holes and achieving a flawless finish.  It’s definitely an art.  I’m good, but not great.  (need a great tutorial on patching holes in the wall?  check out Sawdust Girl).  THANKFULLY, most of the hole will be covered with the new vanity, so I wasn’t super obsessed with making it perfect and smooth.  To start, I grabbed  a 2′ x 2′ piece of sheetrock from Lowe’s, cut it to fit tightly in the hole (a tight fit is key), and spackled the edges.  This isn’t the best way of patching a hole, but it’s the lazy way I took – again because I know it’ll be covered with the vanity.

It took a few days for multiple thin layers of spackle and drying time before I could give the wall a good sanding.  The hand sander gave a really nice smooth finished surface.

Powder Room Remodel: Patching holes and hanging wallpaper - Follow along on this bold transformation #powderroomremodel

Once the walls were smooth and clean, I was able to paint and wallpaper the room.

I started out with painting the corners and edges at the window and door of the 3 non-wallpapered walls.

Powder Room Remodel: Patching holes and hanging wallpaper - Follow along on this bold transformation #powderroomremodel

The color is Blue Mystery by Valspar and it’s almost an exact match to the background color of the wallpaper.  Even though it’s blue, it has a deep purple / violet hue.  It’s actually a very different blue than my office, but with the foyer in between the two spaces, you can’t notice the differing tones.

Powder Room Remodel: Patching holes and hanging wallpaper - Follow along on this bold transformation #powderroomremodel

Once the walls were done, it was time to get down and dirty with wallpapering!

Powder Room Remodel: Patching holes and hanging wallpaper - Follow along on this bold transformation #powderroomremodel

How-To Wallpaper using Paste

I had thought the wallpaper I chose was a pre-pasted wallpaper (wallpaper that has paste and is activated with water) but when I added water to the back of my sample piece, I quickly learned it wasn’t.  So this was my first time wallpapering using paste.  I was apprehensive at first, but it actually wasn’t at all as difficult as I thought it would be. I wrote a tutorial a long time ago on How-To Hang Prepasted Wallpaper, if you want to check that out.

Supplies:

  • Wallpaper of your choice.  I chose Amy Butler Lacework in Midnight.
  • Wallpaper Paste
  • Smoothing Took
  • Sharp Razor or blade
  • Other handy tools for wallpapering are: a tape measure, a laser level, a pencil

Powder Room Remodel: Patching holes and hanging wallpaper - Follow along on this bold transformation #powderroomremodel

1. To start, I found the center of the wall and made a mark.  Then knowing the width of the roll (20.2″), I determined how far over the edge would need to start (1/2 of the overall which is 10.1″).  I made another mark and used my laser level to make marks all the way up the wall (which will be the location for the edge of the wallpaper).

Powder Room Remodel: Patching holes and hanging wallpaper - Follow along on this bold transformation #powderroomremodel

2. After determining where the wallpaper edge would be placed, I added the wallpaper paste to the center section of the wall using a brush.

Powder Room Remodel: Patching holes and hanging wallpaper - Follow along on this bold transformation #powderroomremodel

* There are several techniques to hanging wallpaper, but I thought it would be best to follow the steps that came with my wallpaper roll.  Another method that is readily used is to apply the paste to the wallpaper back, fold over both ends of the strip (being careful not to crease the paper) so that they meet in the middle.  This gives the paste a chance to activate.  Again, the instructions with my wallpaper said to apply the paste directly to the wall, which is what I did.  If you want to see more on the other application, I found this helpful step by step method.

3. After the paste was applied, I took the end of the wallpaper roll (leaving about 3″ extra at the top) and adhered it to the wall aligning the edge with the mark I made on the wall.  Then continued to roll it out down the wall.

Powder Room Remodel: Patching holes and hanging wallpaper - Follow along on this bold transformation #powderroomremodel

4. As I was adhering the paper to the wall, I used the smoothing tool to eliminate the bumps, wrinkles, and air bubbles.  It’s best to start at the top and move down the wall, as well as from the center of the paper and smooth out towards the edges.  You want to press firmly, but not too hard so all the glue seeps out.  Alittle glue seepage is okay and expected.

Powder Room Remodel: Patching holes and hanging wallpaper - Follow along on this bold transformation #powderroomremodel

5. Once the first panel was hung, it was time to hang the second adjacent sheet.  The same steps should be taken, but this time it’ll be key to align the seams so the design / pattern matches (especially with the paper I was using).

Powder Room Remodel: Patching holes and hanging wallpaper - Follow along on this bold transformation #powderroomremodelphoto credit: my 7 year old!

6. Once the paper is up and in place, it’s time to trim – the ceiling, edges, and base. Using a sharp blade / razor, follow the crease / edge and gently cut the paper.  It might be damp from the paste, so try not to pull the paper because it’ll rip.  Scissors also help.

Powder Room Remodel: Patching holes and hanging wallpaper - Follow along on this bold transformation #powderroomremodel

I also had to trim around the light fixture…  that’s to come.

Powder Room Remodel: Patching holes and hanging wallpaper - Follow along on this bold transformation #powderroomremodel

And the result is…

…a beautiful, bold focal wall!

Powder Room Remodel: Patching holes and hanging wallpaper - Follow along on this bold transformation #powderroomremodel

The quality of this paper is amazing.  Comparing it to the previous time when I wallpapered, this paper is alot heavier which hides many of the imperfections on the wall – score!

Powder Room Remodel: Patching holes and hanging wallpaper - Follow along on this bold transformation #powderroomremodel

Not to shabby going from this…  to this…

Powder Room Remodel: Patching holes and hanging wallpaper - Follow along on this bold transformation #powderroomremodel

Plan of Action for #powderroomremodel:

  • Choose and buy sink
  • Choose and buy toilet
  • Choose and buy faucet
  • Remove sink
  • Remove toilet
  • Repair hole with new sheetrock
  • Repair floor @ sink and toilet
  • Hang wallpaper
  • Paint
  • Add crown moulding (yes, my 1st moulding ever)
  • Assemble sink
  • Install sink and faucet
  • Install toilet
  • Accessorize – mirror, pictures, etc.

7 items crossed off the list since last time.  Now that’s progress!

But there’s still more to come. Stay Tuned.

Have you ever hung wallpaper?  What method did you use?  Was it pre-paste or the kind where you had to add the paste?

Craft Room: Progress Update 1

This morning, I mentioned that I was headed out early for a site visit to check on the progress of the mega craft room /office space that I’ve been working on for the last few months.  It’s a local project which I shared details about a few weeks ago and the transformation has been amazing.

In the last post about this project, the construction hadn’t even begun, but since then alot has happened, including:

  • Removal of the popcorn ceiling
  • Removal of old carpet and installation of new hardwood floor (in this room and throughout the entire house)
  • Removal of old window treatments
  • New recessed lighting / hi-hats
  • New painted walls
  • New crown moulding
  • And last, but not least GORGEOUS NEW BUILT-INS!

Here are some progress pictures…

Craft Room: Progress of Client Project _ Designed by @Jenna_Burger

Still in progress, but better than before…

Creative and Inspiring Craft Room Mood Board by @Jenna_Burger, WWW.JENNABURGER.COM

Crazy that it’s the same space, right?

Here are some more teasers…

The turquoise backs are gorgeous and all those cubbies are going to give plenty of room for storage!

Wait until you see what is going on the sides of that awesome built-in. {Major Goodness}

Craft Room: Progress of Client Project _ Designed by @Jenna_Burger

This is a view from the craft studio into the office.  It used to be a small doorway, but now it’s a large opening that lets in a huge amount of light and gives a unified flow to the overall space.

Craft Room: Progress of Client Project _ Designed by @Jenna_Burger

More turquoise.  This is just the beginning of how fabulous this room is going to look…

Craft Room: Progress of Client Project _ Designed by @Jenna_Burger

And the bench.  A 6′ long X 30″ deep heavenly haven.  Don’t you want one of these for your home??  And the little book nook is adorbs!

Craft Room: Progress of Client Project _ Designed by @Jenna_Burger

Last but not least, a few of the details.

Like the chandelier…

Craft Room: Progress of Client Project _ Designed by @Jenna_BurgerDoes it get better?!

And this darling fuschia C-table.  How can you not love it.  The fabulous contractor that I’m working with built-in using these Ana White plans. I so want one for myself!

Craft Room: Progress of Client Project _ Designed by @Jenna_Burger

More updates to come soon!

Powder Room Remodel – Phase 1: Removing the Existing Toilet and Pedestal Sink

My feet are sore and my fingers have a few blisters, but it’s well worth the pain for how much work around the house was accomplished this past weekend.  It was the first days of really nice weather and aside from a baseball game and a birthday celebration, much of the weekend was spent cleaning out the garage, sprucing up the exterior, and starting the powder room remodel.

I shared details of my plans for the powder room a few weeks ago and was thrilled to finally get started. To begin the process the old had to come out before the new goes in, so the Mister and I got our tools out and got to work on removing the existing toilet and pedestal sink. I actually didn’t know the process of how to remove either plumbing fixture, but thankfully the Mister has done this before and helped me out – of course with a few bumps along the way – can’t be a DIY project without…

Powder Room Remodel- Phase 1: Tutorial on how to remove an existing toilet and pedestal sink. It's not as difficult as it may seem. Pin NOW, check out later. @Jenna_Burger, WWW.JENNABURGER.COM #powderroomremodel

Do you know where and how to start the process of removing a toilet and sink?  If not, this post is for you! Keep on reading, but I’ll worn you, this tutorial is ultra detailed, but the pictures aren’t pretty.

Removing an existing toilet.

1. Turn off the water supply.  The oval valve at the side or back of the toilet is the water supply.  Using a vice grip or adjustable wrench, turn the valve so you turn off the water.  Then flush the toilet a few times to empty the tank.  Using old rags, put them in the tank and/or bowl to soak up any left over water.  It’s best to use gloves during the process as the toilet bowl isn’t a pretty place.

Powder Room Remodel- Phase 1: Tutorial on how to remove an existing toilet and pedestal sink. It's not as difficult as it may seem. Pin NOW, check out later. @Jenna_Burger, WWW.JENNABURGER.COM #powderroomremodelYup, that’s a closeup of my toilet… Not something you probably expected to see on a Monday mornin’

2. Remove the tank bolts. Remove the (2) plastic caps on each side of the toilet base.  Once exposed, you will see the tank bolts, also sometimes referred to as “Johnny Bolts”.  Remove the nut, which is easiest to do using a vice grip or adjustable wrench, and the bolt will be exposed.

Then carefully loosen the toilet, rocking it from side to side to loosen the wax seal, and lift it up. Residual water may spill, but that’s fine.

 Powder Room Remodel- Phase 1: Tutorial on how to remove an existing toilet and pedestal sink. It's not as difficult as it may seem. Pin NOW, check out later. @Jenna_Burger, WWW.JENNABURGER.COM #powderroomremodel

I warned you this post wasn’t pretty, BUT it sure will be helpful when you want to upgrade that sad looking toilet.  There surely isn’t a need to hire a plumber because you CAN do it yourself.

Powder Room Remodel- Phase 1: Tutorial on how to remove an existing toilet and pedestal sink. It's not as difficult as it may seem. Pin NOW, check out later. @Jenna_Burger, WWW.JENNABURGER.COM #powderroomremodel

3. Remove the old wax. Once the toilet is lifted, the existing wax will need to be removed.  Using a putty knife, scrape away the wax from the pipe flange. It’s definitely important to use gloves too (of course we didn’t, but I suggest you do).

Powder Room Remodel- Phase 1: Tutorial on how to remove an existing toilet and pedestal sink. It's not as difficult as it may seem. Pin NOW, check out later. @Jenna_Burger, WWW.JENNABURGER.COM #powderroomremodel

We also removed the tank bolts and plan on replacing them when we install the new toilet.

Here is the hole, free and clear of wax.

Pretty sight, right?

NOT! But at least you now know it’s not that difficult of a process.

Powder Room Remodel- Phase 1: Tutorial on how to remove an existing toilet and pedestal sink. It's not as difficult as it may seem. Pin NOW, check out later. @Jenna_Burger, WWW.JENNABURGER.COM #powderroomremodel

If there is a time lapse between removing and installing a new toilet, it is very important to plug the drain opening with a rag to prevent sewer gases leaking into your home.

Removing an existing pedestal sink.

Toilets are toilets, and are fairly similar, but there are a range of sink configurations, so I’m sharing the details of my situation, but yours may be different.

The process of removing our pedestal sink was tricky because we could not get our hand in the back to turn off the water supply.  After years of wear, the valve had rusted making it very difficult to turn off.  So what did we do?  We broke the sink.  Not what we anticipated doing, but it had to be done.

Powder Room Remodel- Phase 1: Tutorial on how to remove an existing toilet and pedestal sink. It's not as difficult as it may seem. Pin NOW, check out later. @Jenna_Burger, WWW.JENNABURGER.COM #powderroomremodel

After that we…

1. Turn off the water supply. Just like the toilet, turn the oval valve at the back of the sink so the water is shut off.  Remove the nut from the water supply.  Then put a bucket under the drain trap to collect any residual water, and loosen the nut to remove the trap.

Powder Room Remodel- Phase 1: Tutorial on how to remove an existing toilet and pedestal sink. It's not as difficult as it may seem. Pin NOW, check out later. @Jenna_Burger, WWW.JENNABURGER.COM #powderroomremodel

Disconnect any additional plumbing connections and remove the sink.  For us, we had to unscrew the sink bowl section of the pedestal from the wall and then remove the tile backsplash I added a few years ago.  New sheetrock will need to be installed before anything else.

Powder Room Remodel- Phase 1: Tutorial on how to remove an existing toilet and pedestal sink. It's not as difficult as it may seem. Pin NOW, check out later. @Jenna_Burger, WWW.JENNABURGER.COM #powderroomremodel

And this is the result…

Powder Room Remodel- Phase 1: Tutorial on how to remove an existing toilet and pedestal sink. It's not as difficult as it may seem. Pin NOW, check out later. @Jenna_Burger, WWW.JENNABURGER.COM #powderroomremodel

Powder Room Remodel- Phase 1: Tutorial on how to remove an existing toilet and pedestal sink. It's not as difficult as it may seem. Pin NOW, check out later. @Jenna_Burger, WWW.JENNABURGER.COM #powderroomremodel

The entire room will look pretty in no time…

Powder Room Makeover Phase 1: Tutorial on how to remove an existing toilet and pedestal sink. It's not as difficult as it may seem. Pin NOW, check out later. @Jenna_Burger, WWW.JENNABURGER.COM #powderroomremodel

Plan of Action for #powderroomremodel:

  • Choose and buy sink
  • Choose and buy toilet
  • Choose and buy faucet
  • Remove sink
  • Remove toilet
  • Repair hole with new sheetrock
  • Repair floor @ sink and toilet
  • Hang wallpaper
  • Paint
  • Add crown moulding (yes, my 1st moulding ever)
  • Assemble sink
  • Install sink and faucet
  • Install toilet
  • Accessorize – mirror, pictures, etc.

That’s quite a list for a little space…

Please tell me you’ve found this post helpful.  The Mister thought I was kinda insane for taking pictures of a toilet, one of the ickiest parts of the home.  I know it’s not the prettiest post ever, but who knows when it’ll come in handy.

Before you read this post did you know the details on how to remove a toilet or sink?  Not to difficult, right?!

Happy Monday to ya!

DIY: Vertical Pallet Garden

The warmer weather has got me movin’ and groovin’ outdoors.  This past weekend I got my DIY mojo on for this months Lowe’s challenge and created (what I think) is something pretty cool.  Check out my newly created Vertical Pallet Garden using colorful pots…

DIY: Vertical Pallet Garden by @Jenna_Burger, WWW.JENNABURGER.COM

Though the flowers are finally starting to peak through around the yard, I was in need of color NOW to start decorating my front porch for Spring.  I, of course, hit up my local Lowe’s garden center to get my color fix.  It’s still the early days of Spring, so the selection (at my local Lowe’s in NY) was limited, but I was able to find a few perennials for shaded areas that would be ideal for under the front covered porch.  I chose a few colorful perennials & vines because they could easily be transplanted to the garden at the end of the season (smart & savvy thinking).

Pallets have been all-the-rage for a while, but I just don’t get tired of them – probably because they’re free.  I’ve created so many DIY projects with pallets and I just love their old, worn texture and aesthetic.  When thinking about this seasons porch, my major desire was to add height.  Height = drama, and that was my goal. 

DIY: Vertical Pallet Garden by @Jenna_Burger, WWW.JENNABURGER.COM

For this project, the materials I used were:

  • Pallet (which I snagged – with their permission of course – for free in the back on my local Lowe’s)
  • (4) Eye hooks for 100 lbs+
  • 3′ of metal chain
  • Plastic pots (I used lime green and turquoise from Lowe’s)
  • Drill with 1/4″ drill bit
  • 3″ S hooks (found in the outdoor section of Lowe’s)
  • Vise Grip

DIY: Vertical Pallet Garden by @Jenna_Burger, WWW.JENNABURGER.COM

Here’s the DL (downlow for short) on how I created the Vertical Pallet Garden

1. At the top of the pallet (slats oriented horizontally), screw in (1) eye hook at about 2-3″ in from each end. It’s best to start out by using a large nail to start the hole.  Once the hole is started, screw in the eye hooks with the help of a vise grip to get leverage.  Unless you’re the Hulk, it’ll probably be impossible with just your bare hands.

2. With the Misters help, we then unlinked one of the chain links and linked it through the eye hook. (one side only – the other side has to wait until hung)

DIY: Vertical Pallet Garden by @Jenna_Burger, WWW.JENNABURGER.COM

3. Heading over to the house, we installed the eye hooks (using a drill to start the hole) through the siding and into the house about 2″ below the ceiling plane at the same distance apart as the hooks in the pallet.

DIY: Vertical Pallet Garden by @Jenna_Burger, WWW.JENNABURGER.COM

4. Once the eye hooks were in, we took the loose end of the chain of the pallet, slipped it through the eye hooks, and secured the chain on the other side.

DIY: Vertical Pallet Garden by @Jenna_Burger, WWW.JENNABURGER.COM

The pallet base is complete!

DIY: Vertical Pallet Garden by @Jenna_Burger, WWW.JENNABURGER.COM

Then it was time to create the “garden”.

5. Using varying sized plastic pots in fun colors, drill a 1/4″ hole about 1″ down from the top rim. Using a 3″+/- S hook, slip it through the hole.

DIY: Vertical Pallet Garden by @Jenna_Burger, WWW.JENNABURGER.COM

6. Plant the pretty flowers…

DIY: Vertical Pallet Garden by @Jenna_Burger, WWW.JENNABURGER.COM

…And it was complete!

DIY: Vertical Pallet Garden by @Jenna_Burger, WWW.JENNABURGER.COM

DIY: Vertical Pallet Garden by @Jenna_Burger, WWW.JENNABURGER.COM

DIY: Vertical Pallet Garden by @Jenna_Burger, WWW.JENNABURGER.COM

The vertical pallet garden adds so much color to the front porch.

DIY: Vertical Pallet Garden by @Jenna_Burger, WWW.JENNABURGER.COM

S-hooks make it easy to move the flower pots around or bring them into the sun.

DIY: Vertical Pallet Garden by @Jenna_Burger, WWW.JENNABURGER.COM

A beautiful focal point for the porch.

DIY: Vertical Pallet Garden by @Jenna_Burger, WWW.JENNABURGER.COM

If you’re wondering about the pretty white wreath, that was a DIY project that was featured on Jen’s blog.  It was created for Valentine’s Day, but I took off the paint chip flowers and just hung the wreath plain and simple.  Who knows how I will transform it for another holiday or season to come.

DIY: Vertical Pallet Garden by @Jenna_Burger, WWW.JENNABURGER.COM

I’m still working on the rest of the porch since it’s still in need of more color and pizazz.  By late May, I hope to have that done and ready to share.  Right now we’re still getting alot of rain and most nights are still way too chilly to get my gardening-on.

DIY: Vertical Pallet Garden by @Jenna_Burger, WWW.JENNABURGER.COM

I couldn’t be more thrilled with the outcome of this fun and easy DIY project.  It’s brought gorgeous height and beautiful color to my Spring front porch.

To see more creations of mine using pallets, click on the links below:
How-To Make a Pallet Shelf
Monogrammed Pallet Chevron Tray
Pallet Picture Holder
Eclectic Family Gallery Wall

Disclosure: I am part of the Lowe’s Creative Team and was provided with a Lowe’s gift card to purchase items for my project.  I was also compensated for my time to use the products.  No one told me what to create, what to buy, how to use the product, or what to write.  All opinions are 100% mine!

DIY: Stenciled Shower Curtain using Drop Cloth

I hope you’re having a wonderful week so far.  Now that I’m coming off my amazing moment high and getting back into my DIY groove, I’m excited to show you the new stenciled shower curtain panel that I recently made for the kids bathroom.

You may have seen a sneak peak of the shower curtain a few weeks ago when I shared some Spring updates.  A few of you even commented saying you loved the color choice (I do too).

It’s bright.

It’s bold.

It’s an eye-catcher…

DIY: Stenciled Shower Curtain Using Drop Cloth Material - super simple & inexpensive to create! @Jenna_Burger, SASinteriors.net

…And I made it myself.  It was super easy, inexpensive, and something you can absolutely do too!

The materials I started off with were:

  • 6′ x 9′ Canvas drop cloth (from Lowe’s)
  • Stencil – I used the same design from Cutting Edge Stencils that I used in the foyer
  • Paint – Valspar Pantone Emerald – #PN9055
  • Shower tension rod
  • Ball style shower curtain hooks
  • Foam roller
  • Tape measure
  • Scissors

Before I begin, here’s my beef with the typical store bought shower curtains… 

They’re too short.

Every shower curtain on the market is 72″ x 72″.  I like my shower curtains to sit just slightly above the floor, but then there is SO much space left above the curtain area, so it looks strange and you can see the showerhead.  You know how I feel about window panels being placed as high as they can go, well I feel the same with shower curtains.  When I redid my master bathroom, I ended up using two curtain panels to create a shower curtain.  It was an awesome solution! Since the panels were taller than a typical shower curtain, they heightened the space allowing the room to feel much larger.

That being said, this DIY drop cloth shower curtain is 7′ tall; much higher than the norm and there is only about 12″ from the top of the panel to the ceiling plane versus 24″+.

NOW, let’s begin.  Here’s how I made this dynamic shower curtain…

1. The canvas drop cloth size I found at Lowe’s was the perfect size (6′ x 9′), so there was essentially no trimming needed.  I started off by laying out the large panel on a flat surface – my kitchen /dining area is a large open space and is the ideal spot for big projects. 

I placed the stencil in the upper corner of the drop cloth and secured it with painters tape.

DIY: Stenciled Shower Curtain Using Drop Cloth Material - super simple & inexpensive to create! @Jenna_Burger, WWW.JENNABURGER.COM

2. Using the vibrant Emerald color and a foam roller, I carefully rolled the color over the stencil putting enough pressure on the roller so the paint adhered to the fabric, but not too much so the paint seeped under the stencil.  Believe me, up close it’s not perfect.

DIY: Stenciled Shower Curtain Using Drop Cloth Material - super simple & inexpensive to create! @Jenna_Burger, WWW.JENNABURGER.COM

DIY: Stenciled Shower Curtain Using Drop Cloth Material - super simple & inexpensive to create! @Jenna_Burger, WWW.JENNABURGER.COM

3. Once the first section was done, I waited about 1-2 minutes and then carefully lifted the stencil and positioned it in the right place next to the previously painted area.  The Cutting Edge Stencils designs are awesome because they create each of the stencils so it easily matches up as you move it along your painting surface.

DIY: Stenciled Shower Curtain Using Drop Cloth Material - super simple & inexpensive to create! @Jenna_Burger, WWW.JENNABURGER.COM

4. I worked my way across and down. And then…

DIY: Stenciled Shower Curtain Using Drop Cloth Material - super simple & inexpensive to create! @Jenna_Burger, WWW.JENNABURGER.COM

…realized I made a huge boo-boo!  At first, I didn’t put anything under the drop cloth and when I went to reposition it, I realized the paint seeped through.  UGH!  Thankfully it was still damp and the steamer took the paint right off.

Lesson Learned: Put something under your drop cloth before painting!

DIY: Stenciled Shower Curtain Using Drop Cloth Material - super simple & inexpensive to create! @Jenna_Burger, WWW.JENNABURGER.COMYou live and learn!

5. After the debacle, I was back on track!  Once all the stenciling was done, it was time to make the large panel into a shower curtain.   With the 6 end, I took the top edge and rolled it over about 4″ (alittle more or less is fine), and ironed a crease.  This edge will create the top part of the shower curtain.

DIY: Stenciled Shower Curtain Using Drop Cloth Material - super simple & inexpensive to create! @Jenna_Burger, WWW.JENNABURGER.COM

6. Once the crease was created, I took it over to the sewing machine and sewed the edge.  Take a look at the graphic for the specific spot to sew – this is important!

DIY: Stenciled Shower Curtain Using Drop Cloth Material - super simple & inexpensive to create! @Jenna_Burger, WWW.JENNABURGER.COM

7. Once the edge was sewn,  I layed the large panel out on the floor again.  I took the 12 ball style shower hooks and equally positioned them along the newly created hemmed edge.

DIY: Stenciled Shower Curtain Using Drop Cloth Material - super simple & inexpensive to create! @Jenna_Burger, WWW.JENNABURGER.COM

8. I marked the locations of where the ball style hooks layed.  Again, make sure they are equally spaced.

DIY: Stenciled Shower Curtain Using Drop Cloth Material - super simple & inexpensive to create! @Jenna_Burger, WWW.JENNABURGER.COM

9. Then it was time to create the hole for the ball style hook to fit into. Only trim through the first layer, not through the finished side of the panel.

DIY: Stenciled Shower Curtain Using Drop Cloth Material - super simple & inexpensive to create! @Jenna_Burger, WWW.JENNABURGER.COM

10.  Slip the hook into the hole. If you decide to tackle this project, you could create a true button opening so the fabric doesn’t fray, but I took the easy way out and didn’t, hehe.

DIY: Stenciled Shower Curtain Using Drop Cloth Material - super simple & inexpensive to create! @Jenna_Burger, WWW.JENNABURGER.COM

DIY: Stenciled Shower Curtain Using Drop Cloth Material - super simple & inexpensive to create! @Jenna_Burger, WWW.JENNABURGER.COM

It’s almost finished!

11. Once the hooks were in place, I put the curtain on the shower curtain rod.  This was the part of the project where I decided the exact length of my newly created shower curtain.  If you remember before, I mentioned I purchased a 9′ long piece of canvas drop cloth, so it definitely needed to be trimmed a bit.  Once hung, I put a few pins in to mark the finished length that I wanted.

DIY: Stenciled Shower Curtain Using Drop Cloth Material - super simple & inexpensive to create! @Jenna_Burger, WWW.JENNABURGER.COM

12. Leaving about 4″ extra to create a bottom hem, I trimmed the excess fabric.

DIY: Stenciled Shower Curtain Using Drop Cloth Material - super simple & inexpensive to create! @Jenna_Burger, WWW.JENNABURGER.COM

13. Lastly, I ironed and sewed the bottom hem so the crease was at the exact spot that I marked with the pins.

DIY: Stenciled Shower Curtain Using Drop Cloth Material - super simple & inexpensive to create! @Jenna_Burger, WWW.JENNABURGER.COM

And then it was done!  Trimmed, sewn, and sitting high on the wall.  Perfecto.

DIY: Stenciled Shower Curtain Using Drop Cloth Material - super simple & inexpensive to create! @Jenna_Burger, WWW.JENNABURGER.COM

The kids bathroom is right at the top of the stairs so this is the first sight you see. (another reason why I wanted something taller than the typical too-low shower curtains).

It surely is dynamic, fun, and unexpected!

DIY: Stenciled Shower Curtain Using Drop Cloth Material - super simple & inexpensive to create! @Jenna_Burger, WWW.JENNABURGER.COM

What a breathe of fresh air!  Don’t ya think?!  Canvas drop cloth is a favorite of mine to work with and I’m thrilled with the outcome of the project.

Here are more DIY projects I created using canvas drop cloth:
Placemats with Decorative Top Stitch
Drop Cloth Table Runner
Faux Roman Shade using Drop Cloth
Christmas Stockings
Simple Lined Window Panels with Drop Cloth Lining
Personalized Envelope Pillow

Powder Room Remodel: The Plan of Action

Happy Hump Day, y’all!

You may have noticed a lack of DIY creations around here lately.  To be honest, I have been knee deep in so many other projects that my personal projects have had to take a back burner.  From E-Design clients, to local clients, to getting the house ready for the BHG crew to come soon, I have been non-stop on the go.  Plus I was away last week on a little vacay, so getting back into the groove of things has been a bit rough.

Powder Room Renovation_SASinteriors.net
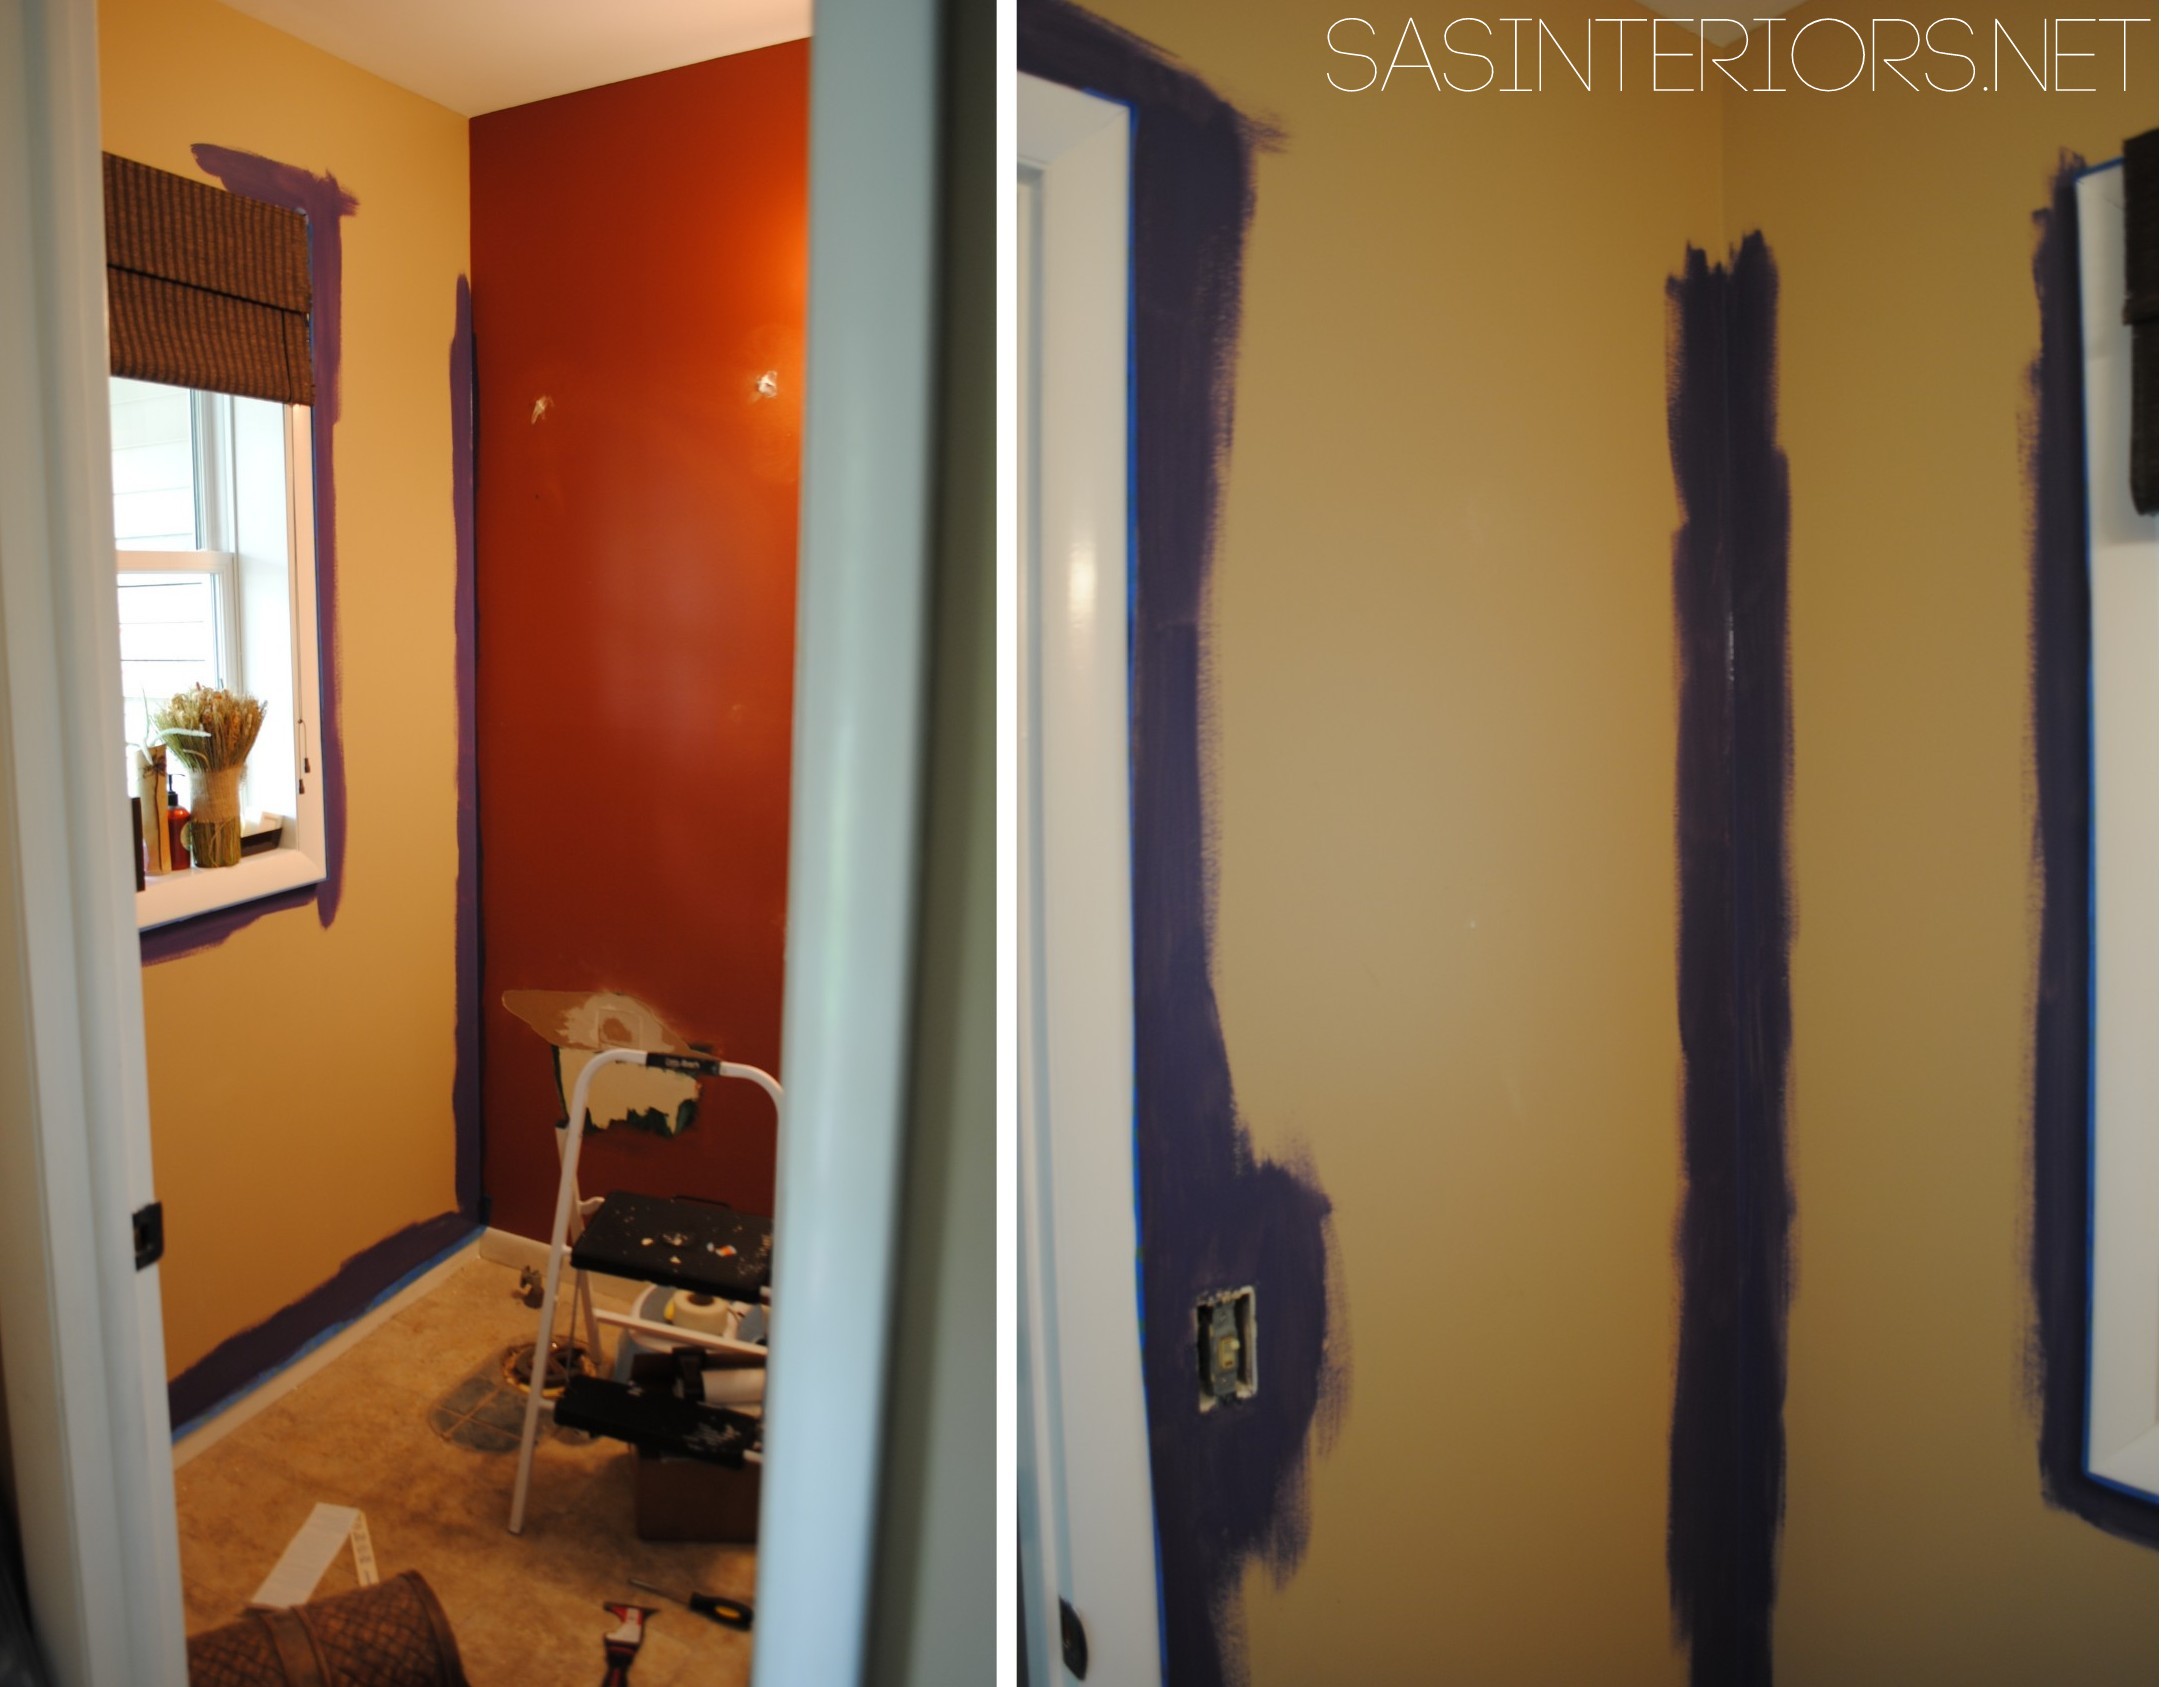
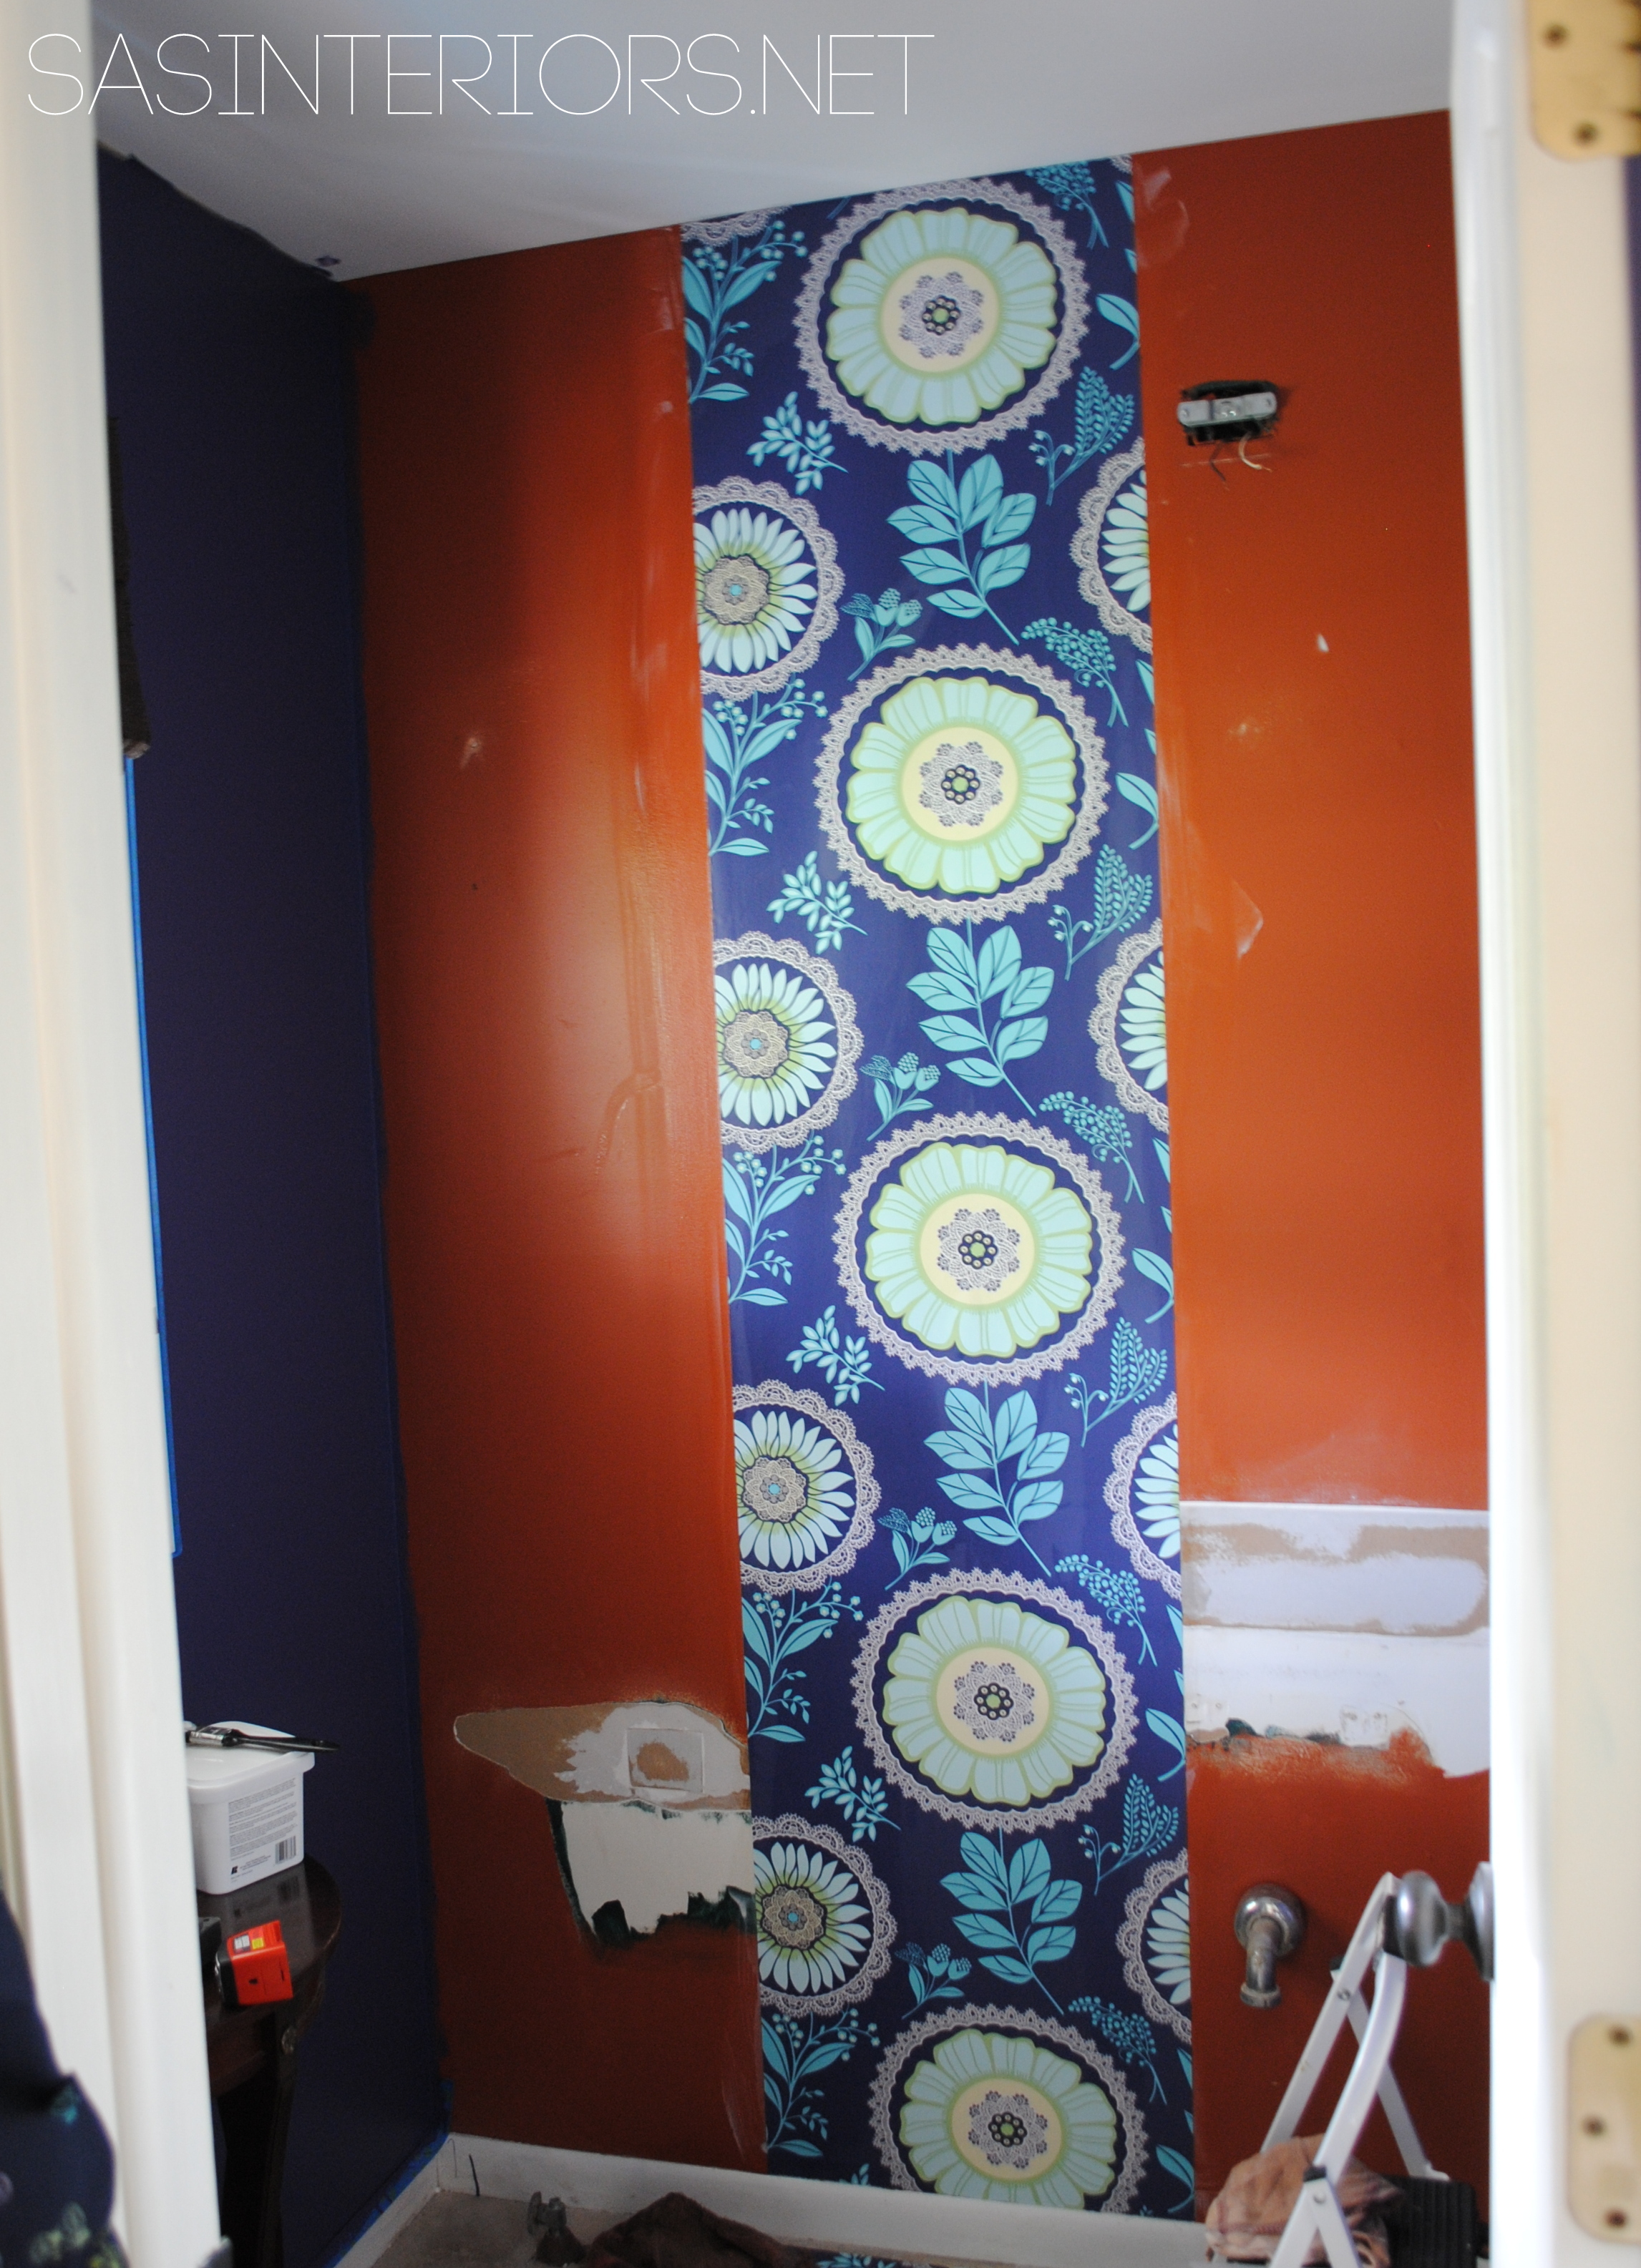
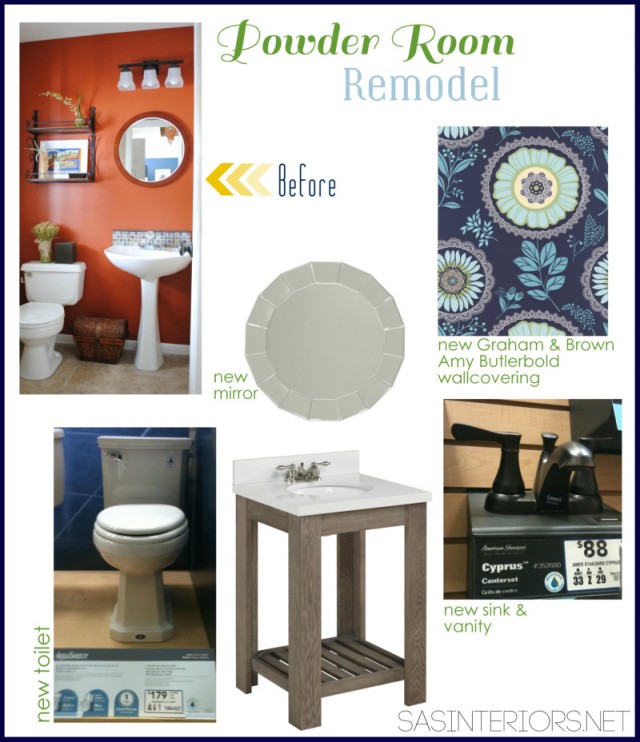
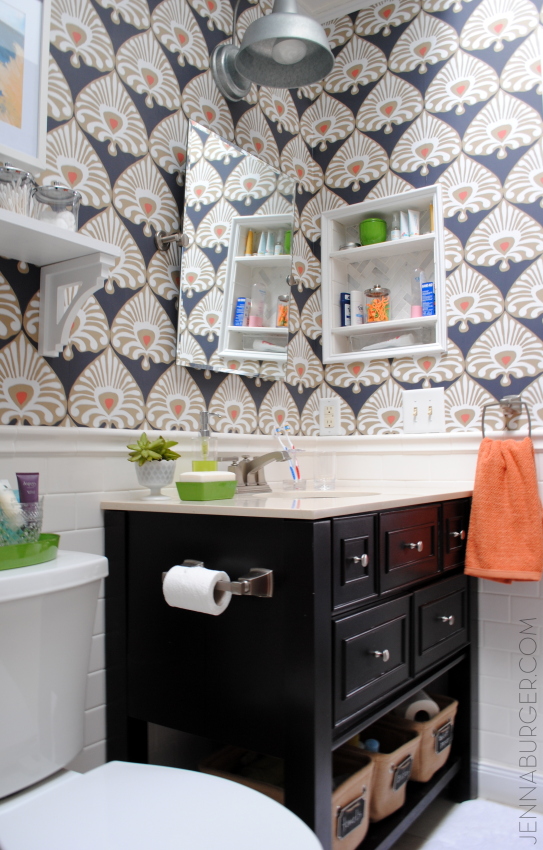
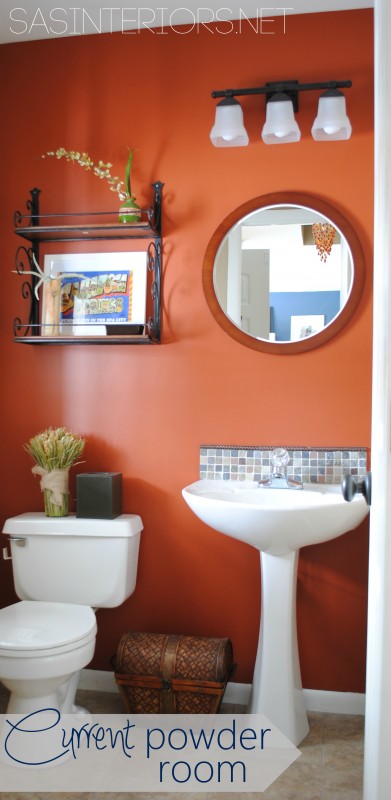
ANYWAY, enough of the chit-chat, I am psyched to share with you that I have decided to spice-up one of my bathrooms.  The powder room to be exact.

It’s pretty.

It’s fine.

But I want it to be dynamite!  So a new (hopefully quick) reno is in store.

Before that, a ‘before‘ shot is a must.

The current space has an orange focal wall – same paint color (glidden crisp autumn leaves) as the family room.  The toilet, pedestal sink, and faucet are original to the house (about 15 years old), but the light and door hardware got a switch-aroo since we’ve lived here…  hence why they are oil rubbed bronze and the faucet is chrome.  The tile floor is new – used to be blue ceramic  – so that will be staying.

I’m pretty psyched about what I have planned for the new space.  After much thinking about how to create a WOW impact in a  4′ x 4′ box, I think I’ve come up with a pretty awesome solution.

So on to the plan of action

The fixture placement will remain – there’s no need to move them, the cost would be way too much, and I couldn’t even think of a better configuration than the existing.  So basically, the fixtures will be replaced, a new vibrant wallpaper will be introduced, and some major awesome accessories will complete the look.

The concept for the powder room reno started with this beautiful wallpaper by Amy Butler.

Amy Butler Graham & Brown Wallpaper _ Powder Room Reno _ SASinteriors.net

Continuing my love for navy, it will be the perfect addition to the powder room which can be seen from my home office / family room that dons deep blue walls.

The repeat is fairly large, so this space is going to be dynamic. Here’s a picture of the wallpaper used in a foyer setting.

amy-butler-lacework-midnight-blue-wallpaper_1320679302

Once I found the wallpaper, I started to become really excited about the rest of the space, but was still at a loss on what style sink would be ideal.  Pedestal? Cabinet?  And then I found this wash sink at Lowe’s and literally gasped when I saw it.

Powder Room Remodel_SASinteriors.net

I’ll be honest, I think it looks better in person than in this picture.  And I think it’ll look even more fabulous against that hot modern floral Amy Butler wallpaper.  Don’t you think?

To complete the bathroom, a few new other details will be added. Here is a quick Creative Vision Board I put together.

Powder Room

Major gorgeousness, don’t you think?  It will absolutely be epic, and continue the classic eclectic style of my home.

So here is the bummer part.  I have the wallpaper.  I have the wash basin (sink).  But I have not started any of the actual remodel yet.  Like I said, I’ve been super busy over the past few weeks, but by mid-April I hope to start tackling all of this DIY goodness.  I hope you’ll follow along for the before-and-after.

Stay Tuned…

Have you tackled a DIY bathroom makeover?  How did you make it WOW and dynamic?

Spring Mantel with Sensational Succulents #LowesCreator

Happy Monday!  Yes, it’s Spring, but sadly it doesn’t feel like it (at least here in NY).

I am so ready for the warmer days ahead and am yearning for the array of colorful flowers, the endless chirping of birds, and the sounds of outdoor laughter.  I know it’ll be here soon, but I am just ready for winter (and the endless snow) to be over.

In my search for all things Spring, I decided this years seasonal mantel had to include elements of the outdoors. Last Friday when perusing the aisles of Lowe’s, specifically the outdoor section, I saw a huge display of succulents.  I immediately knew they’d be the ideal addition for my Spring mantel!

Spring Mantel with Sensational Succulents - Creative ideas for bringing in natural elements by @Jenna_Burger, SASinteriors.net

While in the gardening section, I gathered a variety of succulents in different sizes and styles, along with a new bag of potting mix.  I wasn’t going to dare dig through the garage in search of leftover soil from last year, plus I saw this soil that is fast draining and made for cactus type plants.  I thought I’d give it a try, since I don’t have a great track record with keeping greenery alive. Yes, I admit, I don’t have a green thumb…

Once home, I collected a bunch of glass vases, dishes, and bowls that I had laying around the house.  A few I picked up last week at TJ Maxx, but most I’ve had for a long time stored in the closet.

Spring Mantel with Sensational Succulents - Creative ideas for bringing in natural elements by @Jenna_Burger, SASinteriors.net

Then it was time to transplant these beauties into their new homes.

Choosing the right size bowl / vase for the size of the succulent is important.  One rule of thumb that I always try to follow is to be sure that the plant isn’t too big for the pot (or bowl / vase in my case) so it has room to grow.  The teeny size succulents (which I bought for $2.98/each) went in the smaller bowls and the larger styles ($3.98/each) went into the clear glass vases (which are my favorite because you can see the soil and plant roots – so interesting).

Once the right size “home” was chosen, I loosened up the roots and made the transfer.  A few minutes later, all my succulents were planted and ready to add to the mantel.

Spring Mantel with Sensational Succulents - Creative ideas for bringing in natural elements by @Jenna_Burger, SASinteriors.net

Gardening in the kitchen isn’t something I would suggest, but with 30 degree temps, I wasn’t going to dare be outdoors longer than I had to.  A little mess wasn’t too bad to clean up…

Spring Mantel with Sensational Succulents - Creative ideas for bringing in natural elements by @Jenna_Burger, www.JENNABURGER.COM

Then the fun started and here’s the result of my natural Spring mantel using sensational succulents…

Spring Mantel with Sensational Succulents - Creative ideas for bringing in natural elements by @Jenna_Burger, www.JENNABURGER.COM

It’s a beautiful collection of natural elements mixed in with colorful favorites.

Spring Mantel with Sensational Succulents - Creative ideas for bringing in natural elements by @Jenna_Burger, www.JENNABURGER.COM

Spring Mantel with Sensational Succulents - Creative ideas for bringing in natural elements by @Jenna_Burger, www.JENNABURGER.COM

Any style bowl, vase, cup, or container will make for the perfect holder to display succulents. My collection includes a clear glass round vase, a similar square style, a plain white double dish, a decorative ceramic bowl, and a white milk glass cup.

Spring Mantel with Sensational Succulents - Creative ideas for bringing in natural elements by @Jenna_Burger, www.JENNABURGER.COM

Spring Mantel with Sensational Succulents - Creative ideas for bringing in natural elements by @Jenna_Burger, www.JENNABURGER.COM

Choosing succulents of varying sizes allows for an interesting mantel composition.

Spring Mantel with Sensational Succulents - Creative ideas for bringing in natural elements by @Jenna_Burger, www.JENNABURGER.COM

Spring Mantel with Sensational Succulents - Creative ideas for bringing in natural elements by @Jenna_Burger, www.JENNABURGER.COM

Spring Mantel with Sensational Succulents - Creative ideas for bringing in natural elements by @Jenna_Burger, www.JENNABURGER.COM

Spring Mantel with Sensational Succulents - Creative ideas for bringing in natural elements by @Jenna_Burger, SASinteriors.net

Spring Mantel with Sensational Succulents - Creative ideas for bringing in natural elements by @Jenna_Burger, www.JENNABURGER.COM

Despite the frigid temps, the Lowe’s gardening section is already stocking up on their summer displays including an array of flowers, plants, and a large selection of outdoor furniture.

Lowe's Creative Ideas App - Great ideas & Inspiration

To gather even more unique, fun, and creative ideas for your indoor and outdoor Spring decor, I would definitely suggest downloading the Lowe’s Creative Ideas app on the iphone and ipad.  I’m always checking out the FREE app for great inspiration. Consider following Lowe’s on Facebook, Pinterest, and Instagram as well.

Disclosure: I am part of the Lowe’s Creative Team and was provided with a Lowe’s gift card to purchase items for my project.  I was also compensated for my time to use the products.  No one told me what to create, what to buy, how to use the product, or what to write.  All opinions are 100% mine!

I link my projects to some of these parties: Skip to My Lou, Dittle Dattle, Between Naps on the Porch, Today’s Creative Blog, Stories of A to Z, All Things Heart & Home, House of Hepworths, Finding Fabulous, The Shabby Nest, Serenity Now, Tatertots and Jello, Thrifty Decor Chick, Tip Junkie

Come Tour My Home

The entrance way to a home, is what I believe, sets the tone for what’s to come, so it’s such a delight to surround our home in nature’s beauty.

House Tour of @Jenna_Burger, DIYer, Designer, and Home Blogger of www.JENNABURGER.COM

Step inside.

What a transformation this foyer has received. From an entire new staircase to new flooring to the gorgeous stripes on the wall (the wall used to be stenciled), the foyer sets the aesthetic of my classic eclectic design style where I believe, all things should have meaning.

Foyer Remodel with newly striped walls, fern art, and layers of colors + texture.  Spaced designed by @Jenna_Burger, www.JENNABURGER.COM

Foyer Remodel with newly striped walls, fern art, and layers of colors + texture.  Spaced designed by @Jenna_Burger, www.JENNABURGER.COM

Posts associated with the foyer
Foyer Reveal
Painting perfect stripes on the wall
New greige wall color
Removing carpet from stairs
Filling homes & staining treads
Staircase Reveal
Stenciled Wall
Glazed cabinet
How to install a luxury vinyl floor

When entering into my foyer and as soon as you look to the right, BAM there is my newly created home office / family room.  I’m loving the blue walls and this is one of the spaces that was recently featured in a major mag AND will also be featured in BHG soon (squeal)!  This room has had quite the evolution process (and probably the most difficult in my home to design), but the result was so worth the wait.  It’s such an inspirational space, which I’m so thankful for since it’s where I spend the most time (other than the kitchen… hehe).

House Tour of @Jenna_Burger, SASinteriors.net

Posts associated with the office / family room
How to paint laminate shelving
How to style a shelves
My favorite navy wall colors
How to hem & paint stripes on curtains using paint
How to make a GIANT inspiration board
Home Office / Family Room reveal
DIY: Modern to industrial style coffee table

House Tour of @Jenna_Burger, www.JENNABURGER.COM

Speaking of kitchen…  My office / family room is adjacent to the kitchen.  This space got a huge DIY renovation 2 Summers ago and everyday I still love the color I chose for the cabinets.  I had originally thought black cabinets, but changed my mind to this gray/taupe/almost-green hue.  It’s a color that I have continued to use around my home and can be seen in other accents like the stair banister and the fireplace surround.

The countertops also got transformed from hunter green to black. What a change and a great spot to cook!

SASinteriors_Kitchen_After_1

Posts associated with the kitchen
Countertop transformation
Painting the cabinets
Custom tile backsplash
Faux support brackets
Kitchen reveal
Simple window upgrade
Change a recessed light to decorative light

SASinteriors_Kitchen_After_3

From the kitchen is the dining room / breakfast room / we-eat-all-our-meals-here room…

If you were to walk straight through the foyer, you’d enter into this space as well.  My home is a total open concept, so every space flows into each other; I love the bright and airy feel of flowing rooms.  Navy was a color that I started to introduce last year and from the looks of the dining room, and obviously my office (pictures above), you can see that I just adore the deep hue.  The dining room has a large bay area with two side windows and a sliding glass door that leads to our deck.  Super easy access to the outdoors.  We love being outside once the weather warms up (I can’t wait)!

House Tour of @Jenna_Burger, www.JENNABURGER.COM

The dining room then leads to the orange-accent-wall living room…

Another example of how I love color.   This is our comfy room.  The space where the kids play and our family relaxes (well tries to relax amongst all my DIY projects).  It’s a large space and really makes the house feel bigger because it steps down from our dining room and has a high angled ceiling.  With the addition of the skylights, there’s so much sunshine that enters in, which we adore.

Would you like to come relax with us?

SASinteriors_LivingRoom_After_1Posts associated with the living room
Fireplace Transformation

So that’s basically it for the first floor.  Come on upstairs…

…into the master bedroom.  A space that has forever been in transition (and is still a work in progress).  Somehow this room gets neglected often and even though it looks pulled together here, it rarely looks like this (I’m so bad at taking the time to make our bed).  Just like my office, this space has a huge amount of light filtering through.  The windows are amazing.

The aesthetic in this room is more serene than the rest of the house.  Comparably to the other spaces, it seemed less dramatic, until it got a revamp earlier this year!  The space is still very serene and has a quiet palette, but pops of color bring in the added dimension and depth it needed to pop.

Master Bedroom

Master Bedroom

Posts associated with the bedroom
How to make a simple lined curtain (from previous space)
Master Reveal {2014 revamp}
Master Makeover: Plan of Attack
The Dark Side: Choosing a Contrasting Paint Color
Ideas for Breaking Up Matching Furniture
Customizing Store Bought Curtain Panels
How-To Make a Pendant Fixture
Desk Makeover using Make-Your-Own Chalk Finish Paint
Picture Gallery Wall
DIY: Jewelry Holder

And then there is the bathroom.  If you want to see a horrid looking bathroom, you have got to check out the ‘before’!!  You’ll be frightened.  And to think back and remember that it took us over a year before we even started to redo it, just simply scares me.  Anyway, similar to the bedroom, the master bathroom is another quiet space accented with shades of blue.  From the ‘before’ color, you’ll know why this hue was chosen.

Similar to most of the spaces in my home, the master bathroom was a full-on DIY endeavour.  From the cabinet to the floor to the mirror to the shower curtain, this space was entirely transformed using my two hands (and a bit of the Misters – gotta give him credit.  He’s my “Can you help me?” savior)!

House Tour of @Jenna_Burger, SASinteriors.netPosts associated with the master bathroom
Horrid to heavenly master bathroom reveal
How to glaze a cabinet using stain
How to make a shower curtain using a curtain panel

Onto my kids spaces…

The room that my 2 daughters share has had quite the transformation over the years starting as a nursery, then getting revamped to a big girl room with a 3-in-1 play tent.  Once baby #3 (our littlest lady) came along, a new wall color was added and changes were made to accommodate a nursery nook.

This is kind of how it looks today minus that the beige wall which was recently revamped with a new mint-colored hue…

House Tour of @Jenna_Burger, SASinteriors.netPosts associated with my girls bedroom
Washi tape initial craft
How to add decorative trim to curtains (for cheap)
DIY: 3-in-1 Play Tent
Nursery to big girl room reveal

Here is the nursery nook (which took place of the 3-in-1 tent) & the newest DIY creation, honeycomb wall hooks.

Nursery Nook created by Jenna Burger Design

DIY Tutorial: Honeycomb shaped wall hooks [inspiration for many other fun + functional wall storage ideas] Tutorial by Jenna Burger Design www.jennaburger.com

And now to my little guys room…

His room actually got a makeover last year, which has received lots of kind comments, but many of you still love his old space with the stripes, so here are details on both…

At one time he had bunkbeds, but we took them apart to make two twin beds.  Since we don’t have a guest room, having an extra bed was nice, but it was rarely used so in his current revamped room, he only has one twin bed.  His ‘before’ room, which is an untraditional blue-for-boy was a fun and creative space.

House Tour of @Jenna_Burger, SASinteriors.netPosts associated with my boys ‘before’ bedroom
How to paint stripes
Skateboard shelves
How to make pallet shelves
Painted two-tone desk + Tips on painting furniture

His current space which was finally completed in mid-2014…

Rolling Cart 10a

Boy Bedroom

Posts associated with my boys ‘current’ bedroom
Ideas for a shared kids room (when we thought our kids were going to share a space)
How-To hang wallpaper like a PRO!
New Leaning Shelves: Decorating with leaning + ladder shelves
DIY: Rolling underbed toy storage crates
DIY: Honeycomb Shelves
Boy Bedroom Reveal

Last, but not least (since it’s my latest + greatest room revamp), the hall bathroom…

This was my biggest DIY to date because this involved hardwork + manpower (actually more like willpower) + plumbing, which made for a big job!

Bathroom Makeover

Bathroom Makeover

Posts associated with the hall bath
Plan of Action
Demo: Removal + Installation of the Tub & Walls
How-To Tile + Grout the Bathroom Walls
Installing Wallpaper
Adding a Tile Accent Border
Creating a Tiled Niche

And that’s my home.  WOW!  I hope I didn’t loose you in one of the rooms.

House Tour of @Jenna_Burger, DIYer, Designer, and Home Blogger of SASinteriors.net

Thanks for taking the tour with me. What’s your favorite space?  Hmmm… I’ll have to give some thought to which mine is.

While your thinking, if you want to check out the paint colors in my home, here is the post on all the details…

Whole House Wall Paint Color Palette