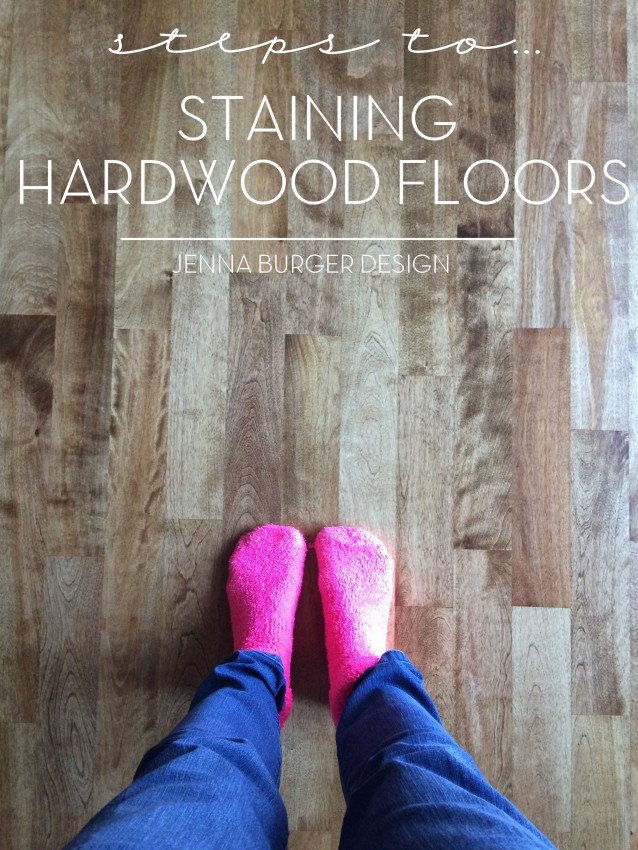
Tag: Jenna Burger Design

Schoolhouse Style Decor

Only days till Christmas.

Are you still hustlin’ + bustlin’ with shopping + preparations for the big day?

Amidst the Christmas Craze, I wanted to share that I have a new post up on BHG.com about Decorating with Schoolhouse Style.

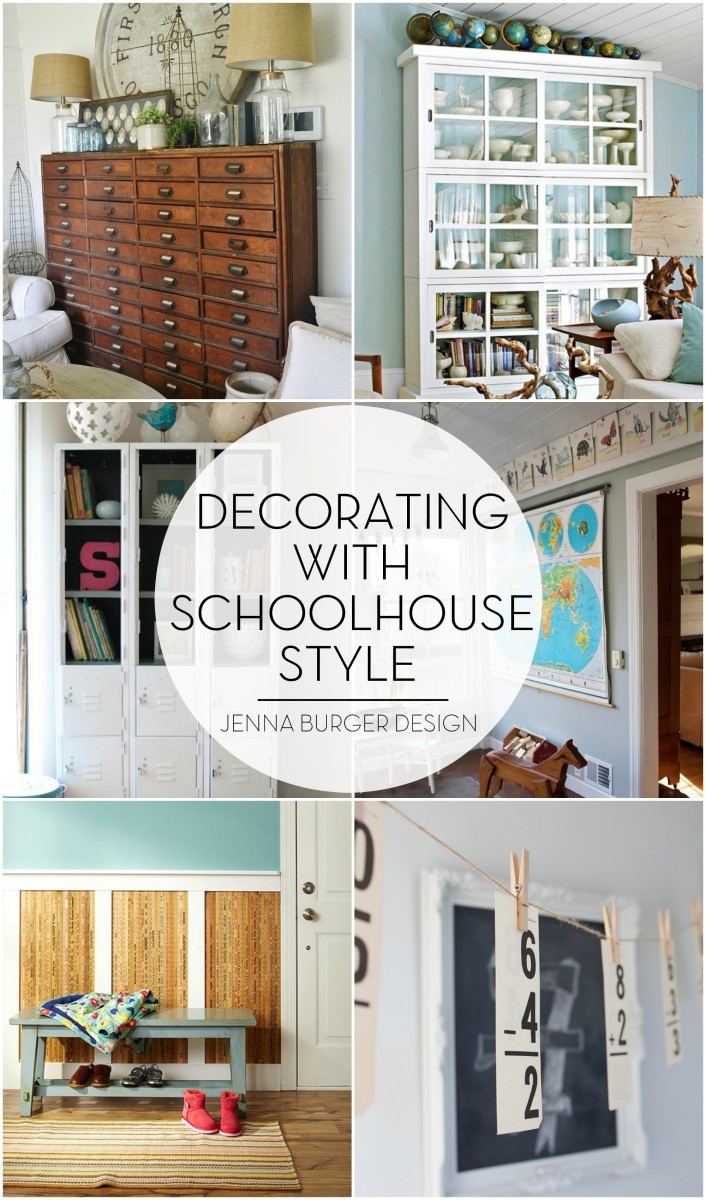
It’s never too cool to bring classroom style + decor into the home. From industrial-style lights + school lockers, to vintage maps + globes, decorating with schoolhouse decor brings back the nostalgia of the younger years.

Click to read the full article on  >>>  Decorating with Schoolhouse Style

Decorating ideas using SCHOOLHOUSE style decor, Round up by www.JennaBurger.com

Check out my bio page on Better Homes and Gardens

More content coming soon to be featured on BHG.com!

Faux Stacked Log Fireplace Screen

2 weeks till Christmas, WHAT?!

How can it be?

Last week was so great with the Holiday Housewalk!  Thank you to those who toured my home and left such sweet comments – I can not tell you how much your kind words + thoughts mean.

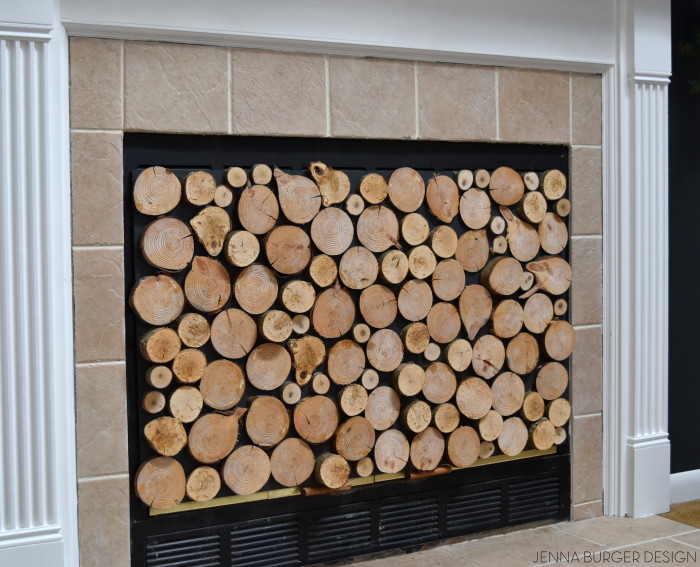
One part of the tour that I received a lot of happy comments on was the fireplace, specifically how I stacked all the logs so perfectly.

Fooled ya!

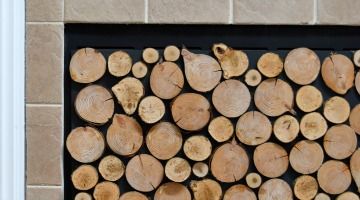
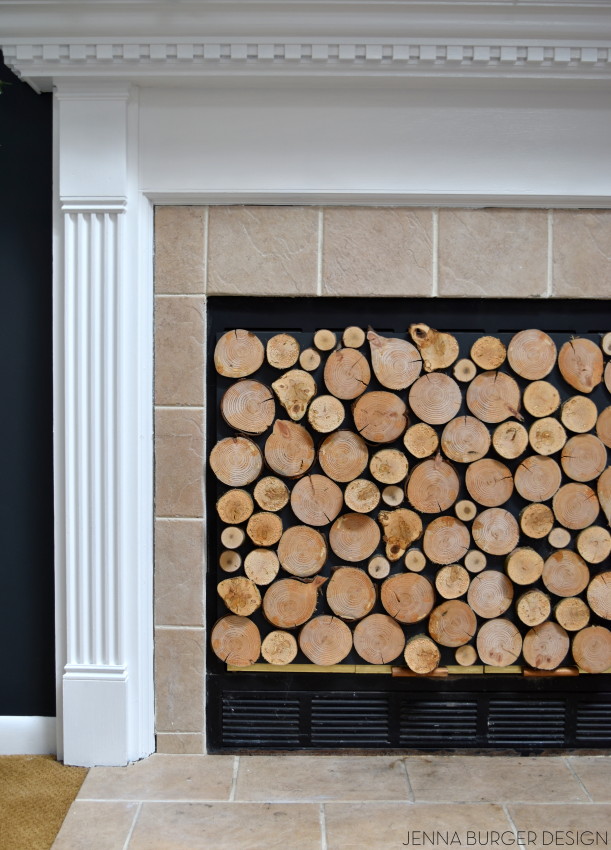
They’re not stacked at all, but instead it’s a FAUX stacked log screen that sits in front of the fireplace.  Not only does it look fabulous & hides the not-so-pretty-that-we’ve-wanted-to-replace-for-years fireplace, but it also is a barrier to keep the cold air from filtrating through.

Whether for aesthetic purposes or for heat conservation, if you love it, here’s how to make it…

DIY: Tutorial on how to make a FAUX STACKED LOG FIREPLACE SCREEN. check out how-to make it at www.JennaBurger.com

MATERIALS

> 1/4″ thick plywood cut to desired size

> Black Paint + Paint Brush

> Fallen Trees / Logs

> Powered Miter Saw (check out my favorites here)

> Liquid nails

> Magnetic Strips (optional, if needed)

HOW-TO

For Christmas and beyond, this is a great project to jazz up the fireplace.

1

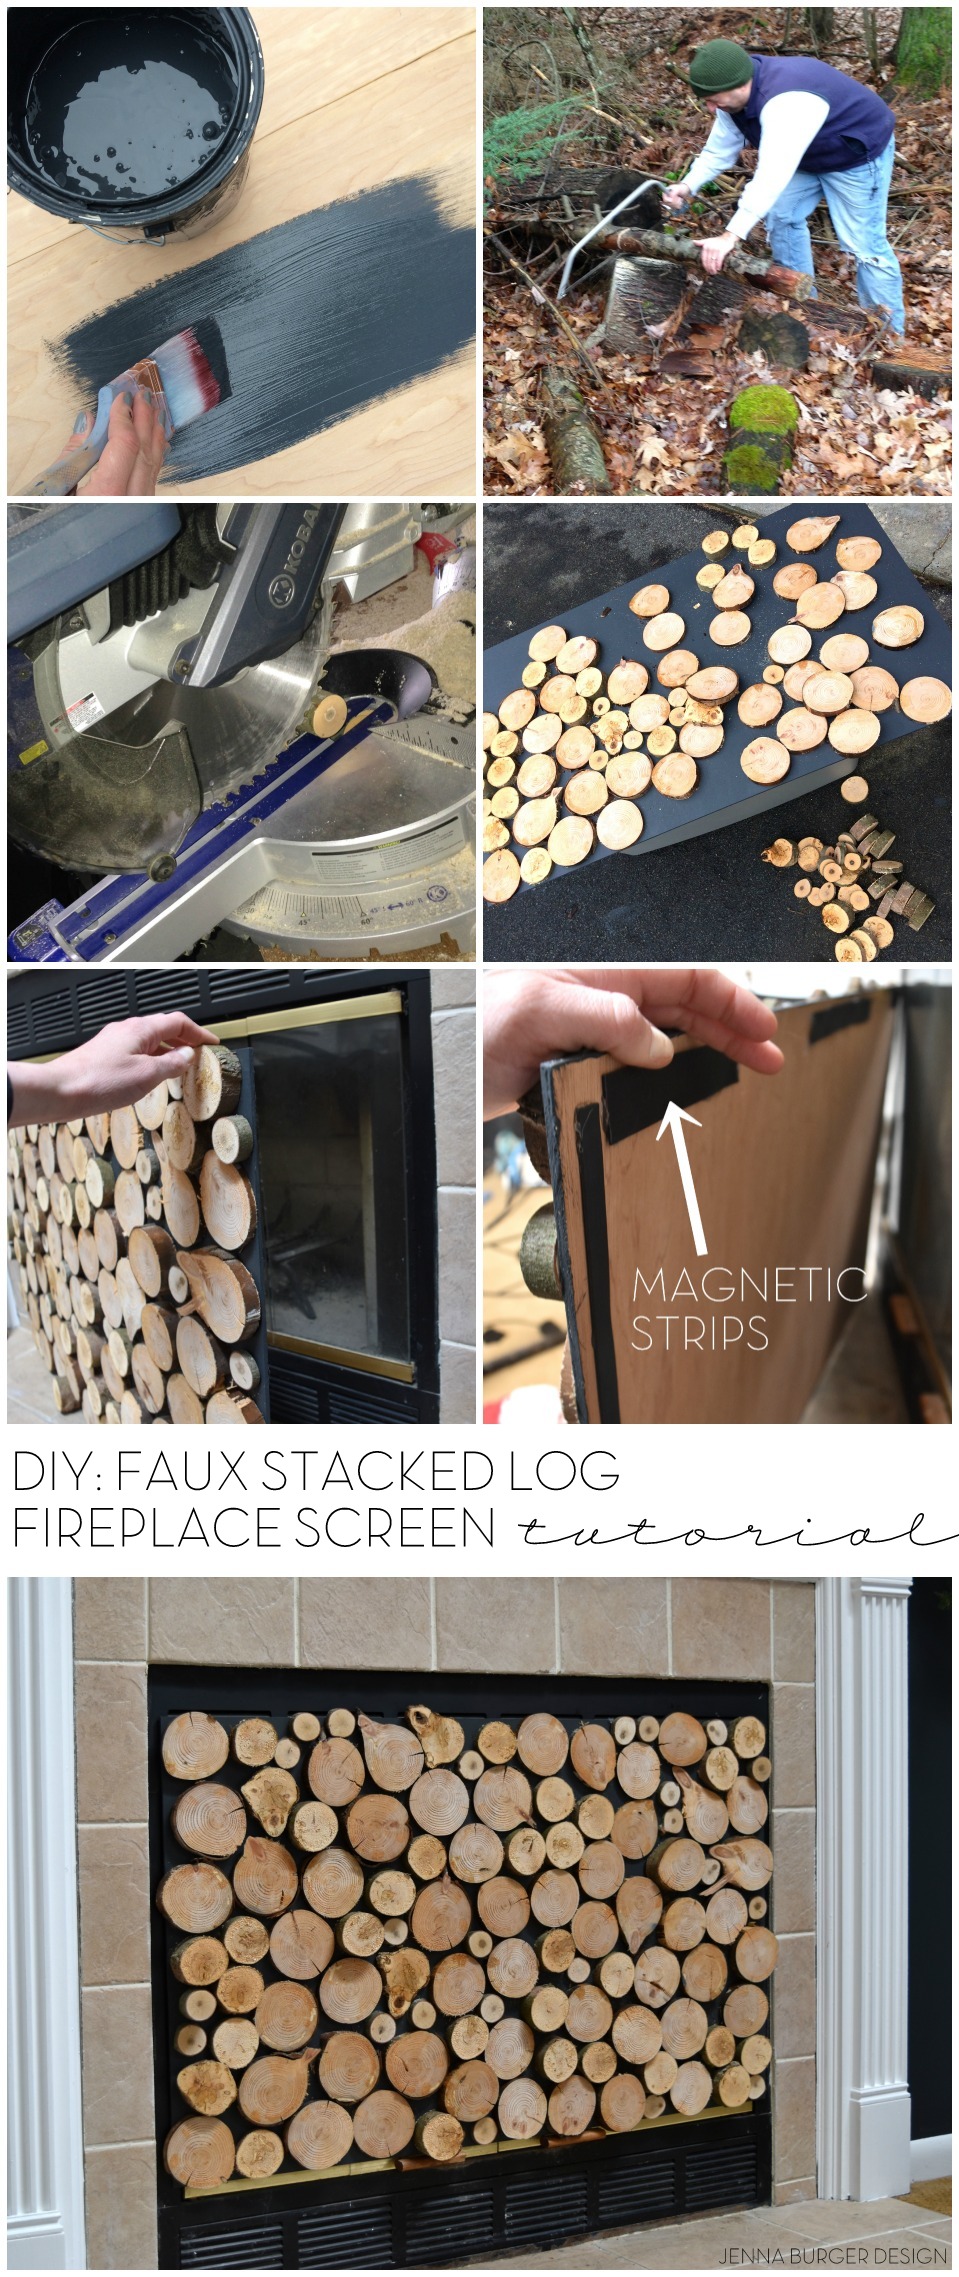
Whether you are fitting the faux ‘screen’ into a fireplace opening or covering part of the fireplace (like I did), cut a piece of plywood to your desired size.

I measured beforehand and had Lowe’s cut my piece so I didn’t have to do it at home.

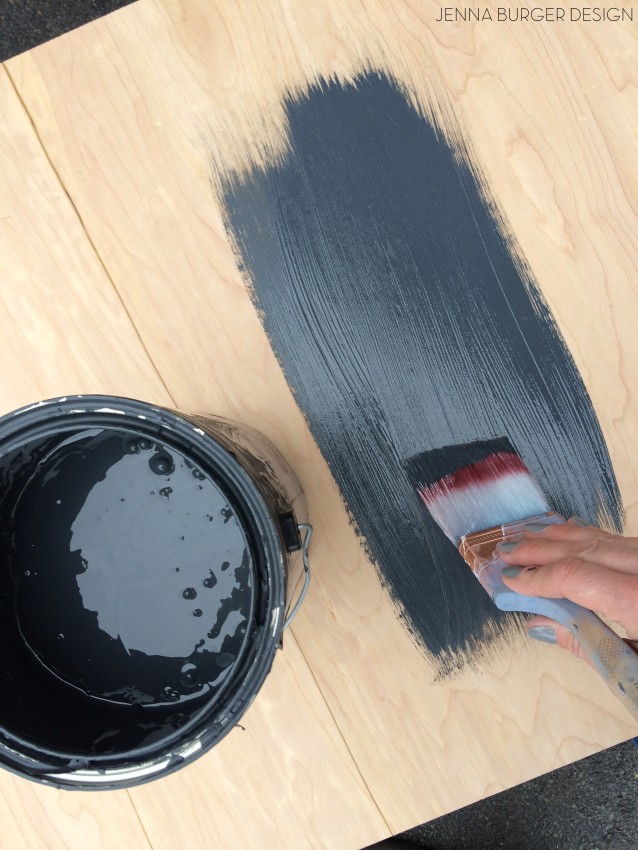
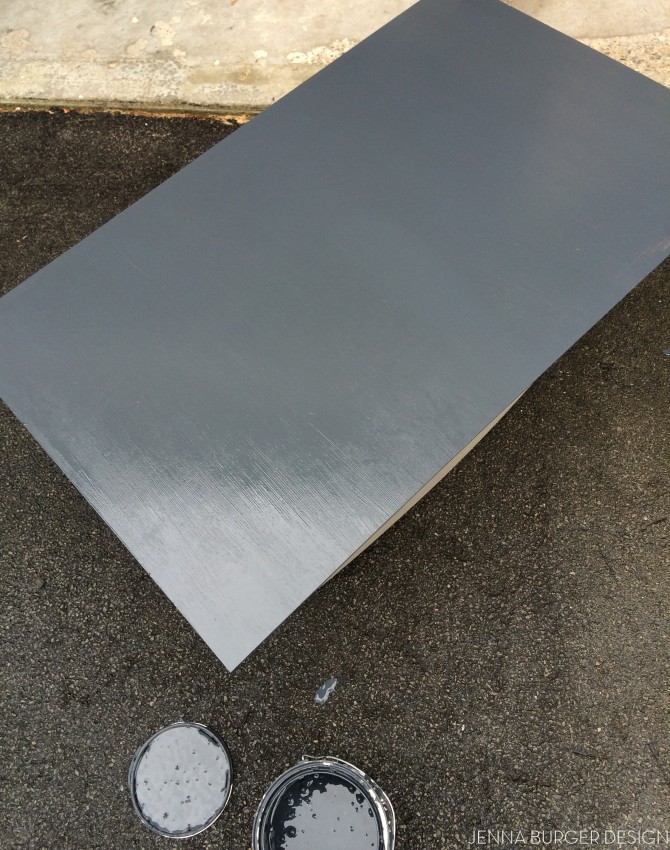
Paint one side of the plywood using black paint. I used leftover paint from the black wall in the living room.

The black paint allows the eye to be fooled that the space behind the logs is a lot further back than it actually is…

DIY: Tutorial on how to make a FAUX STACKED LOG FIREPLACE SCREEN. check out how-to make it at www.JennaBurger.com

Let it dry and in the meantime, head to step 2…

DIY: Tutorial on how to make a FAUX STACKED LOG FIREPLACE SCREEN. check out how-to make it at www.JennaBurger.com

2

While the paint is drying, start gathering fallen trees + logs.  Look for logs in various diameters between 1/2″ to 3″.

Here’s my lumberjack in our woods cutting a few trees that had just fallen.  Be sure to gather logs that are solid inside, holes = bugs (yuck)!

What a guy…

3

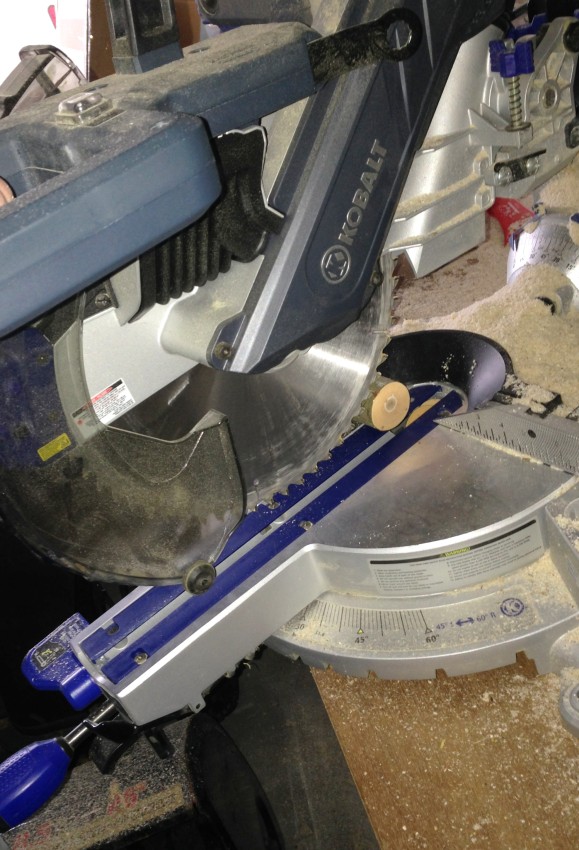
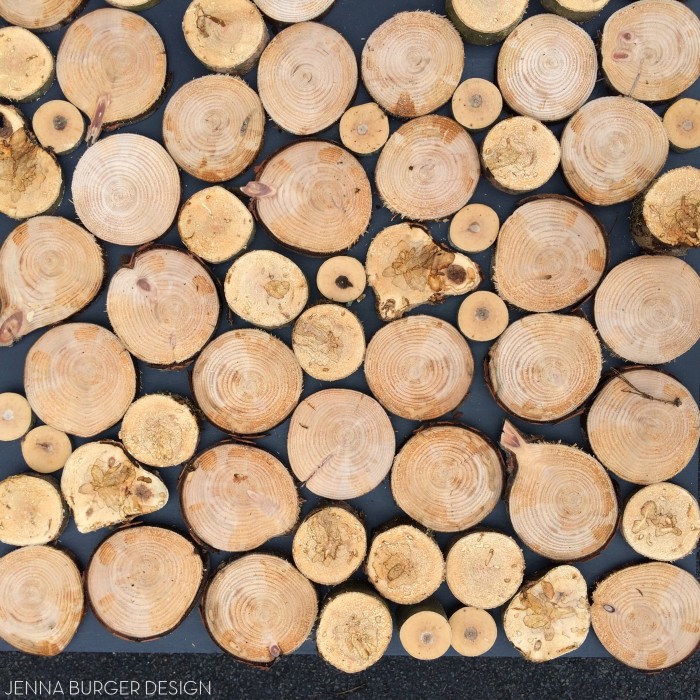
When you have a collection of various sized logs, it’s time to cut them into discs.

Imperfect is better! When have you ever heard that before…

Cut the wood in to discs that are about 1/2″ to 2″ thick.  This will make the “screen” look 3-dimensional like real stacked wood.

DIY: Tutorial on how to make a FAUX STACKED LOG FIREPLACE SCREEN. check out how-to make it at www.JennaBurger.com

4

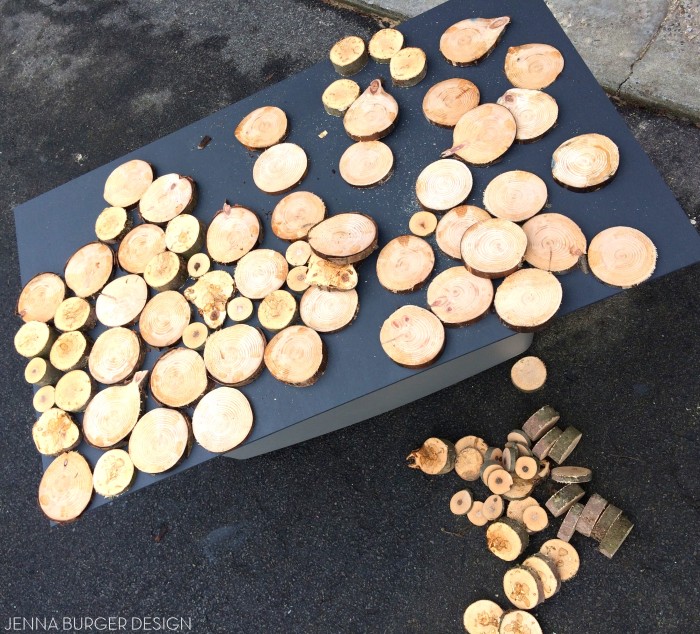
In all, we cut about 125 discs in varying sizes and as the Mister was cutting, I was putting this jigsaw puzzle together…

The key is to start with the bigger pieces and fill in with the medium sizes, then the smallest.

DIY: Tutorial on how to make a FAUX STACKED LOG FIREPLACE SCREEN. check out how-to make it at www.JennaBurger.com

5

In no time, the puzzle was complete and it was time to glue.  No picture for this part, but one-by-one I used liquid nails to attach each wood disc to the painted plywood. Don’t skimp out on good glue… if you do, the discs WILL FALL OFF!

DIY: Tutorial on how to make a FAUX STACKED LOG FIREPLACE SCREEN. check out how-to make it at www.JennaBurger.com

6

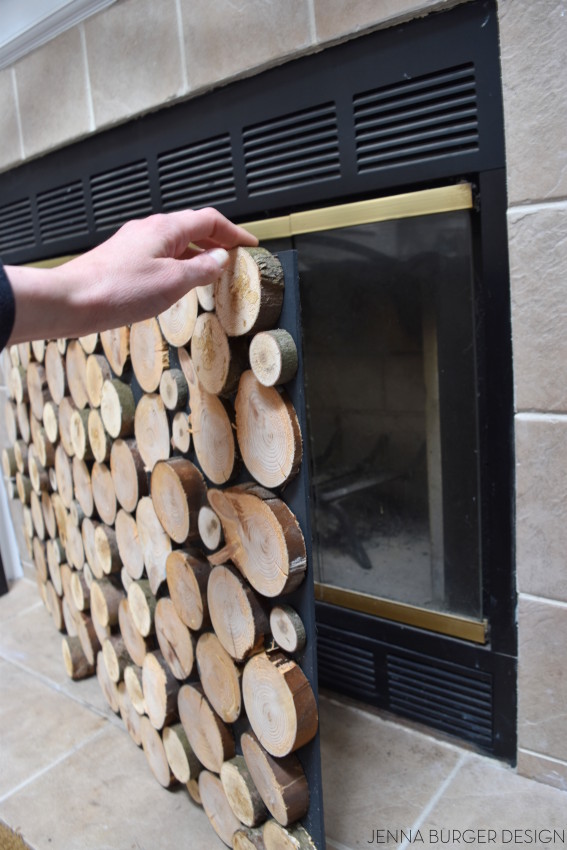
Once the discs were in place, the board was heavy.  The screen is fairly thin, but with 125 +/- wood discs there is a lot of weight!  I had to be sure to secure it so it wouldn’t topple forward.

DIY: Tutorial on how to make a FAUX STACKED LOG FIREPLACE SCREEN. check out how-to make it at www.JennaBurger.com

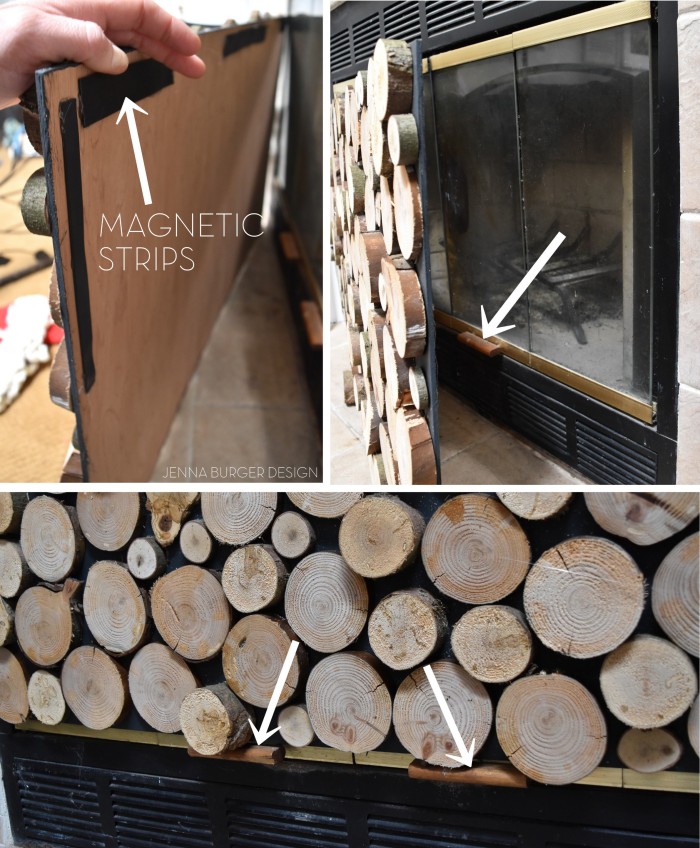
For my fireplace, the “screen” lays on top of the glass doors instead of being inset into an opening.  To secure it to the fireplace, I added heavy-duty magnetic strips to the back of the plywood + I have it leaning on the fireplace handles.

DIY: Tutorial on how to make a FAUX STACKED LOG FIREPLACE SCREEN. check out how-to make it at www.JennaBurger.com

In place and complete…

DIY: Tutorial on how to make a FAUX STACKED LOG FIREPLACE SCREEN. check out how-to make it at www.JennaBurger.com

DIY: Tutorial on how to make a FAUX STACKED LOG FIREPLACE SCREEN. check out how-to make it at www.JennaBurger.com

If you missed my Christmas Home Tour that I shared last week, here it is with the faux stacked log fireplace, front & center… What a focal point…

Christmas Home Tour at JennaBurger.com. Come on over...

Christmas Home Tour at JennaBurger.com. Come on over...

RECAP

Do it now or save it for later…

DIY: Tutorial on how to make a FAUX STACKED LOG FIREPLACE SCREEN. check out how-to make it at www.JennaBurger.com

Kitchen Renovation: The Cabinets

It’s been about 2+ weeks since I shared an update on the progress of the kitchen renovation and A LOT has happened!

Once the hardwood floors were complete and we were able to move back into our home, the CABINETS ARRIVED.  It was a very, very exciting day to say the least.

Kitchen Renovation + Cabinet Installation using Kraftmaid. Before & After @ www.jennaburger.com

For this kitchen renovation that I am partnering with Lowe’s on, I chose to use cabinets by Kraftmaid.

Not only does Kraftmaid have an extensive selection of cabinet styles + colors, their attention to detail is exquisite, as well as the craftmanship of their product.  When I started the design process for this renovation, I was quite impressed with all the ‘bells & whistles’ that they offer (many of which come standard with their cabinetry) + the variety of storage solutions they offer.

Once the design plan was in place and the cabinets went into production, a date for their arrival was lightly scratched in stone (versus ‘set in stone’ – bad joke, I know).  We didn’t know if the cabinets would actually arrive on that date, but the Lowe’s independent contractor worked day after day to have everything with the walls + floors buttoned up by this magical date.

So the morning of the date comes and I heard crickets…  I never was so anxious to receive a call, and THEN my phone rank and I was jumping for joy.

The cabinets DID arrive as planned on the date and I was able to breathe again…

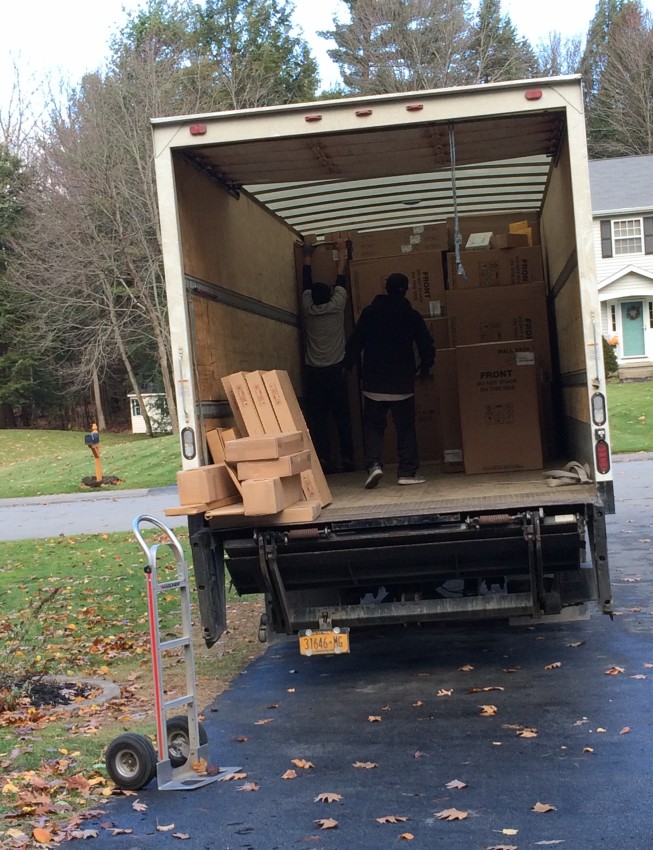
The delivery company unloaded the truck box by box and stacked them ALL into my garage.

Cabinets Arrive

There were a lotta boxes and the garage was filled to the max!

The cabinets were gorgeous.  Just how I imagined.

And then the fun began of installation…

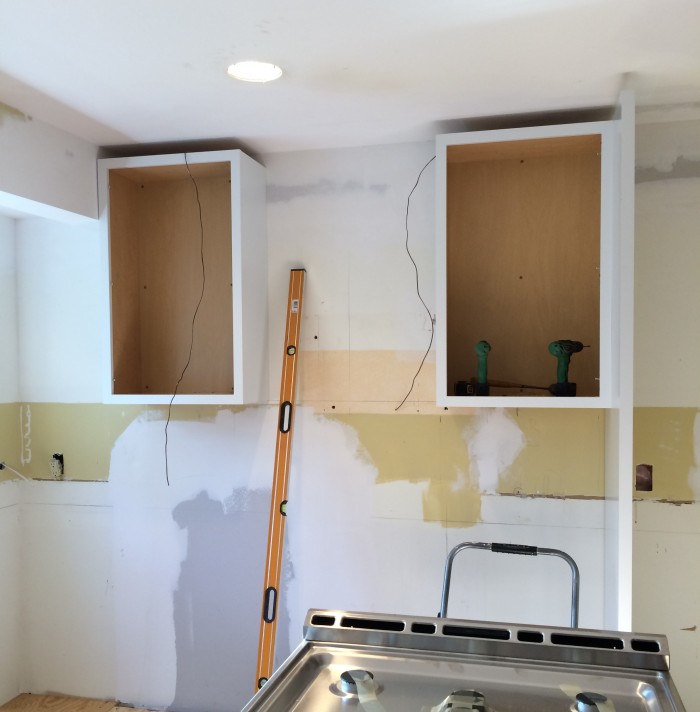
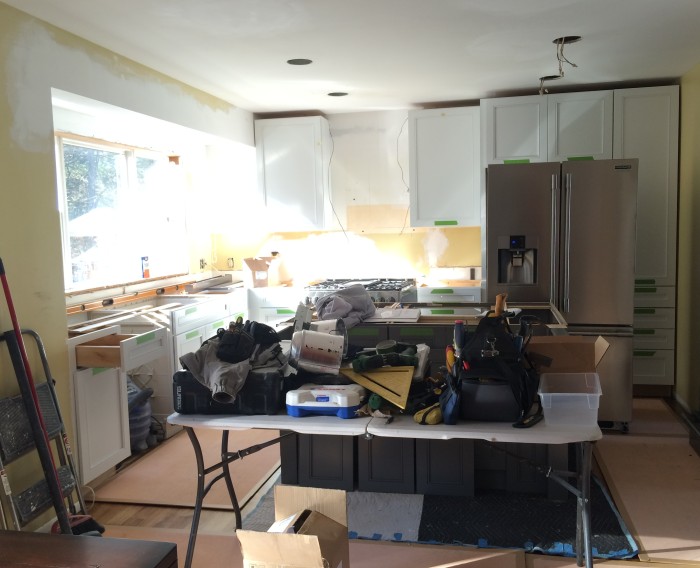
The following Monday, the contractor got started with installing the cabinets in the empty shell that we once called our kitchen.  The upper cabinets (which there are only 2 of) were the first to go into place.  They set the placement for everything else thereafter.

Kitchen Renovation + Cabinet Installation using Kraftmaid. Before & After @ www.jennaburger.com

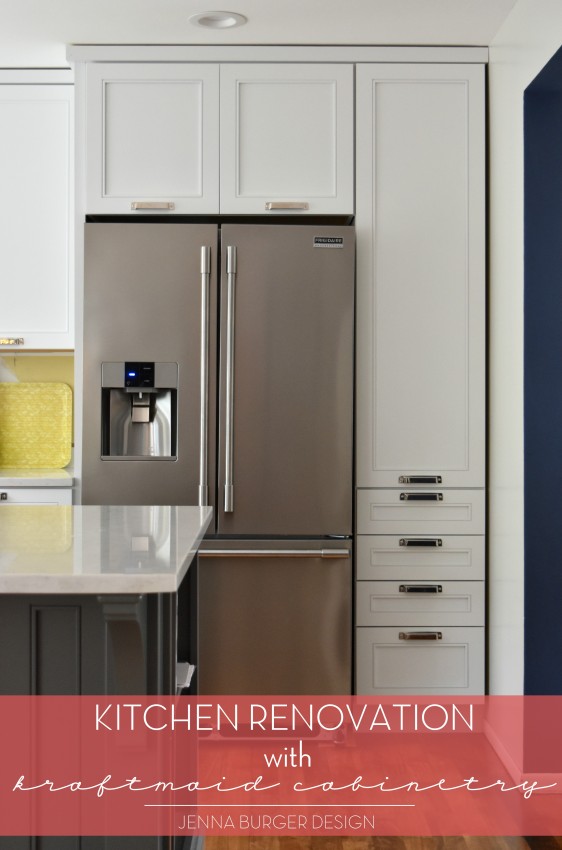
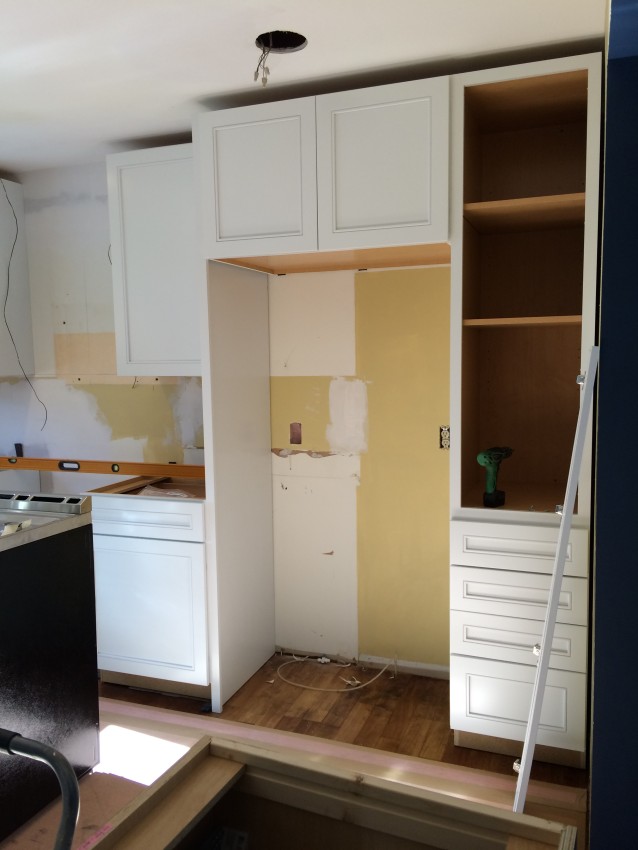
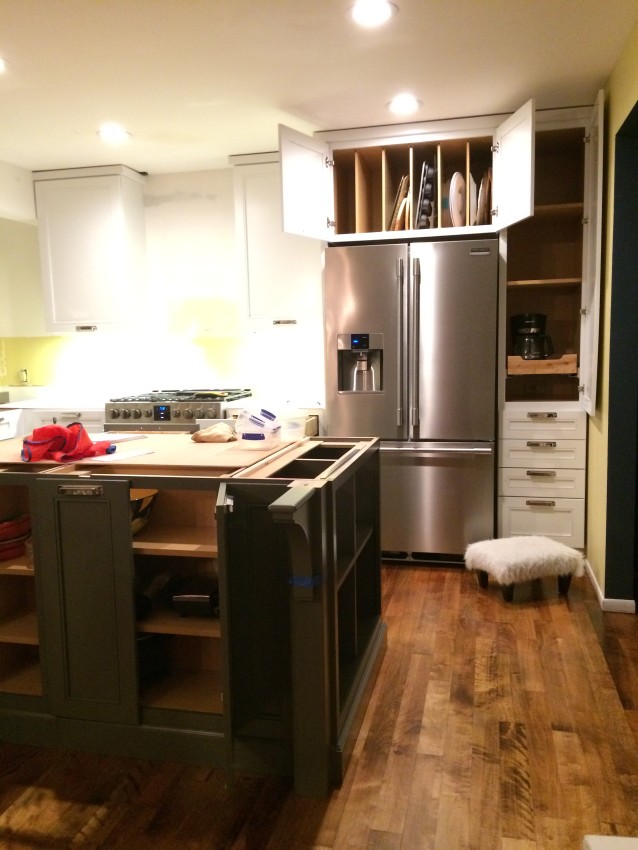
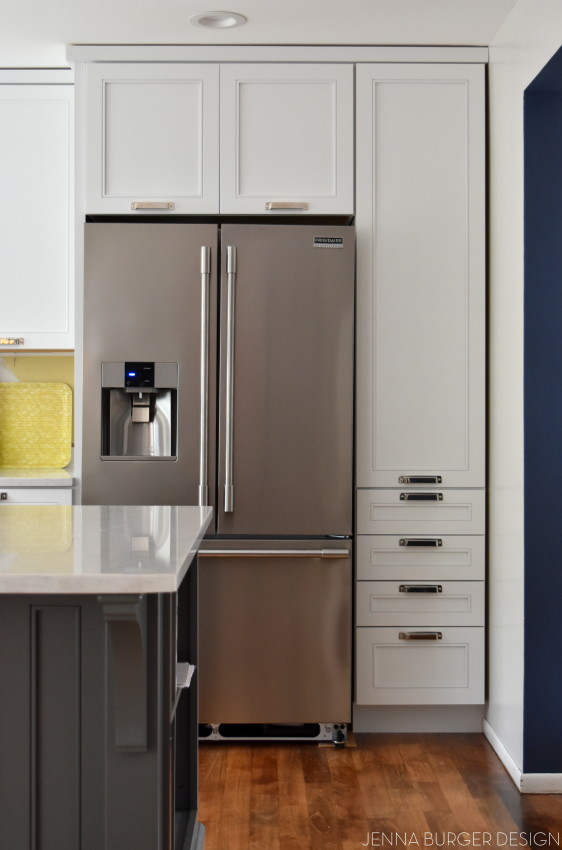
Once the upper cabinets were in place, the base cabinets were installed, followed by the cabinet above the refrigerator + the pantry to the right…

Kitchen Renovation + Cabinet Installation using Kraftmaid. Before & After @ www.jennaburger.com

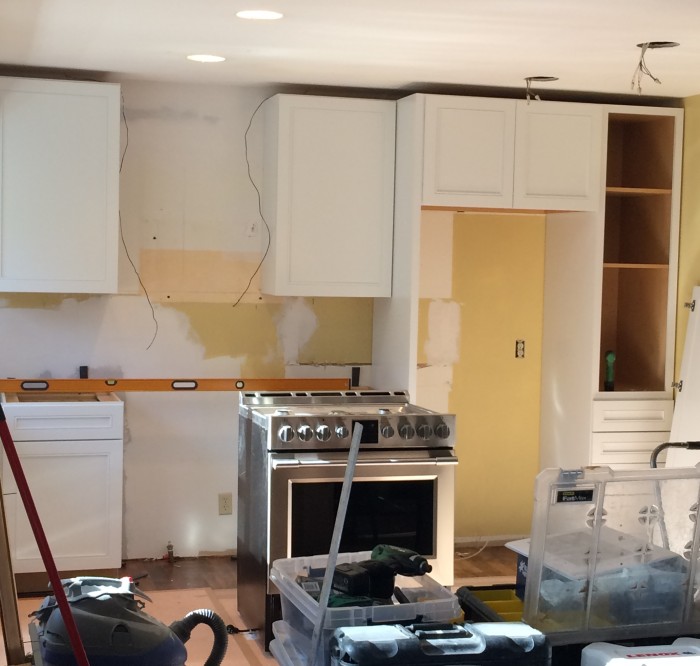
By the end of Day One, this was the progress that was made.

Kitchen Renovation + Cabinet Installation using Kraftmaid. Before & After @ www.jennaburger.com

I loved watching the new space evolve.

I literally gasped with excitement as each new cabinet was set into place.

Day after day, more progress was made and it started to look & feel like a kitchen.

A real kitchen.

After dreaming about this space for so long + being without a functioning hub for weeks, it felt so good.

Kitchen Renovation + Cabinet Installation using Kraftmaid. Before & After @ www.jennaburger.com

In about 5 days, about 95% of the cabinets were installed.

And then IT HAPPENED…  after weeks of living out of boxes, I was able to put away all my kitchen essentials.

A glass of wine + some serene tunes on Pandora and IT WAS A PARTY.  By myself. With my dishes.

Kitchen Renovation + Cabinet Installation using Kraftmaid. Before & After @ www.jennaburger.com

Above…

Kitchen Renovation + Cabinet Installation using Kraftmaid. Before & After @ www.jennaburger.com

Below…

Kitchen Renovation + Cabinet Installation using Kraftmaid. Before & After @ www.jennaburger.com

…There is so much incredible storage + space.  From the outside to the inside, every nook & cranny is so pretty!

Kitchen Renovation + Cabinet Installation using Kraftmaid. Before & After @ www.jennaburger.com

CABINETRY

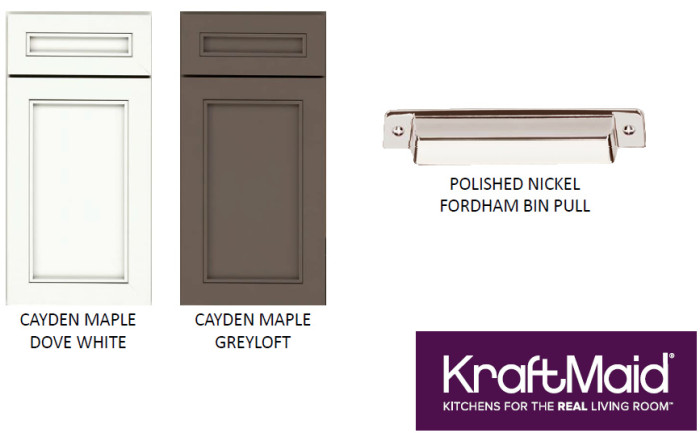
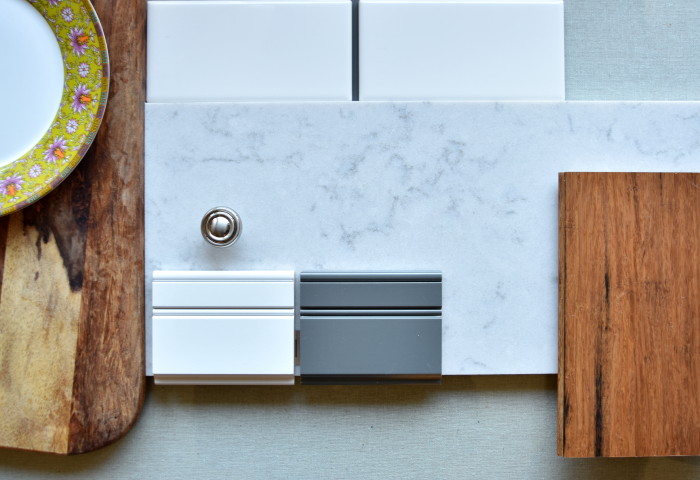
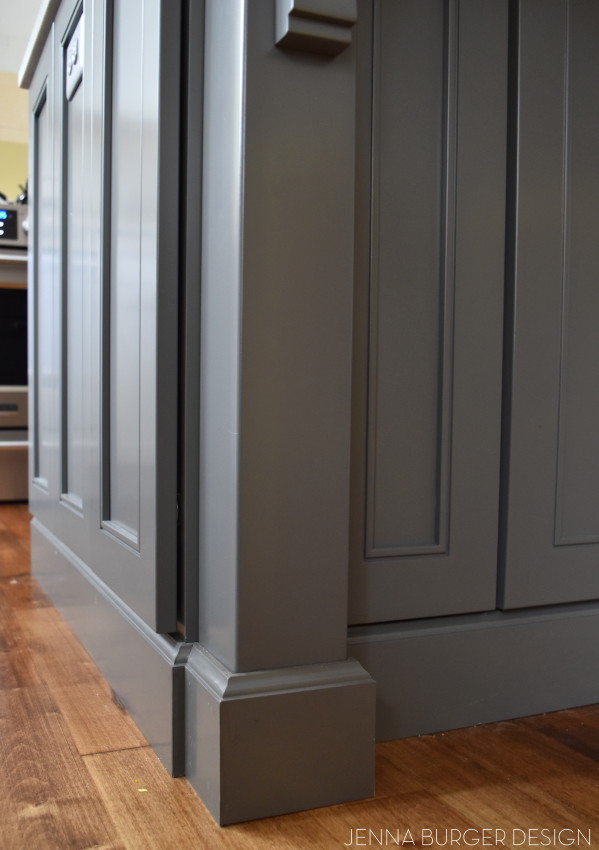
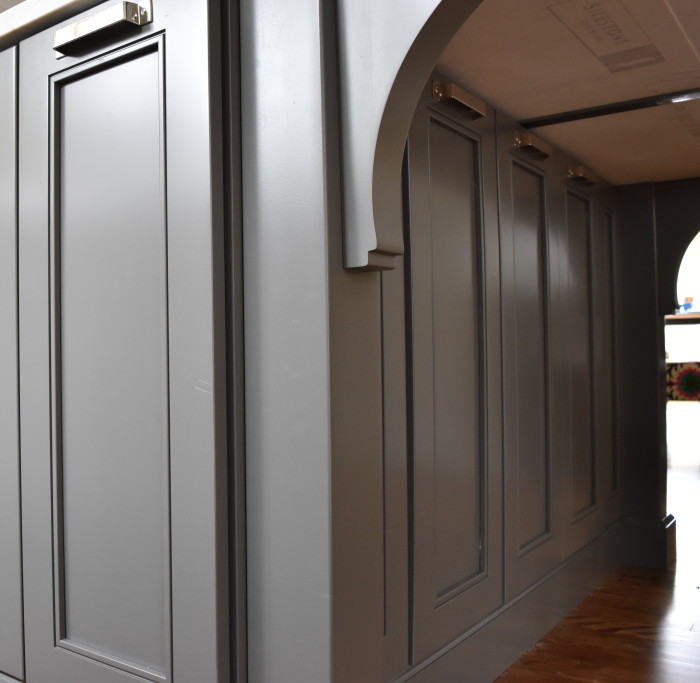
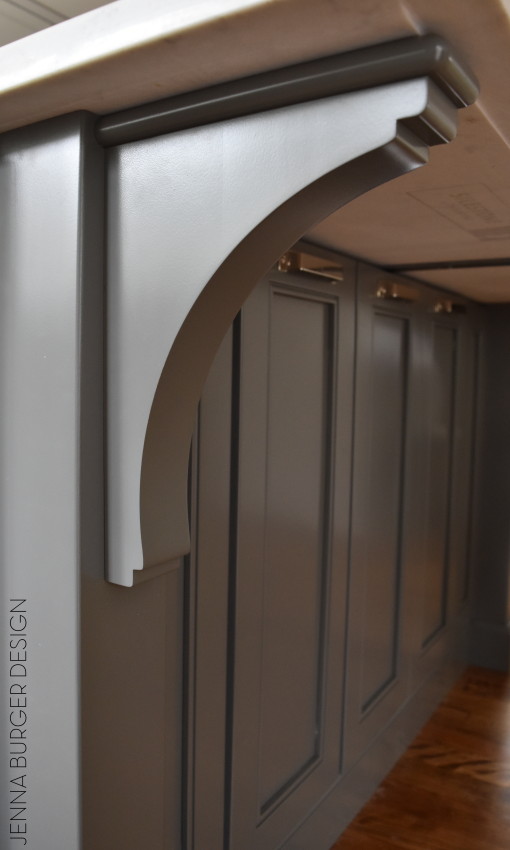
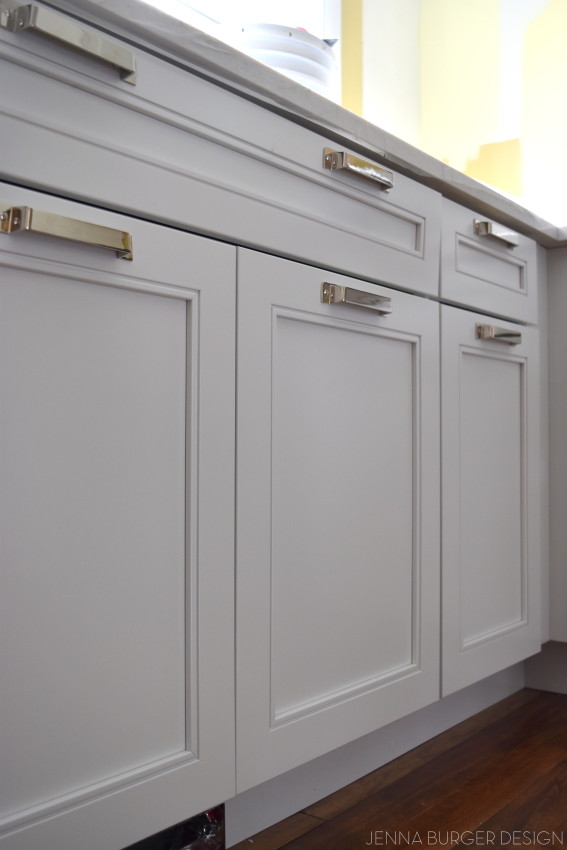
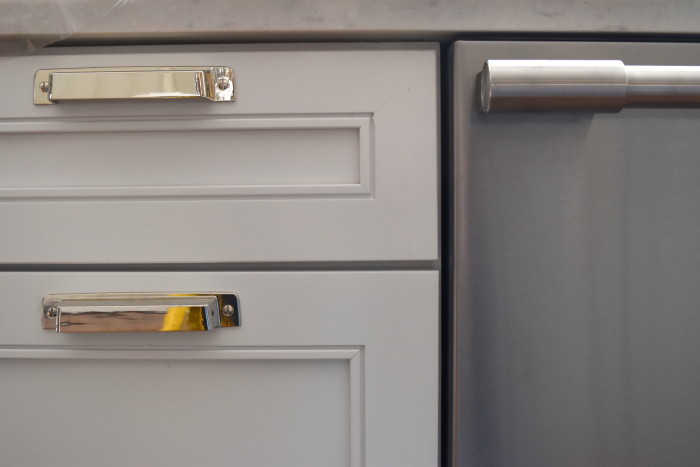
For this kitchen renovation, I chose the Cayden line of cabinets in Dove White (perimeter cabinets) + Greyloft (island cabinets) by Kraftmaid.  It’s a full overlay door with an inset panel and minimalist detailing.

For the hardware, I chose the sleek polished nickel Fordham pull.

Kitchen Renovation + Cabinet Installation using Kraftmaid. Before & After @ www.jennaburger.com

This was the palette that I created during the design phase and the actual space is really coming together how I envisioned. squeal…

Kitchen Renovation + Cabinet Installation using Kraftmaid. Before & After @ www.jennaburger.com

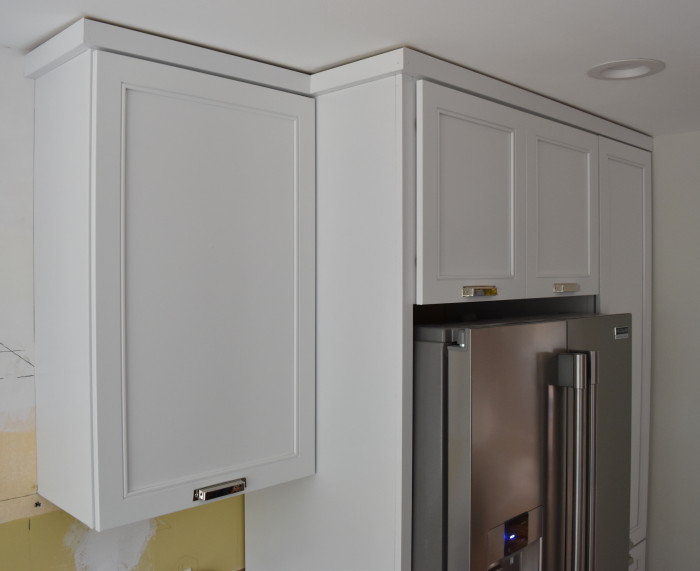
Without giving too much away, here are a few close up peeks at how the finished cabinets look once installed…

Kitchen Renovation + Cabinet Installation using Kraftmaid. Before & After @ www.jennaburger.com

Kitchen Renovation + Cabinet Installation using Kraftmaid. Before & After @ www.jennaburger.com

Kitchen Renovation + Cabinet Installation using Kraftmaid. Before & After @ www.jennaburger.com

Kitchen Renovation + Cabinet Installation using Kraftmaid. Before & After @ www.jennaburger.com

Kitchen Renovation + Cabinet Installation using Kraftmaid. Before & After @ www.jennaburger.com

The crown moulding still has to be finished, but the flat stock has been added.

Kitchen Renovation + Cabinet Installation using Kraftmaid. Before & After @ www.jennaburger.com

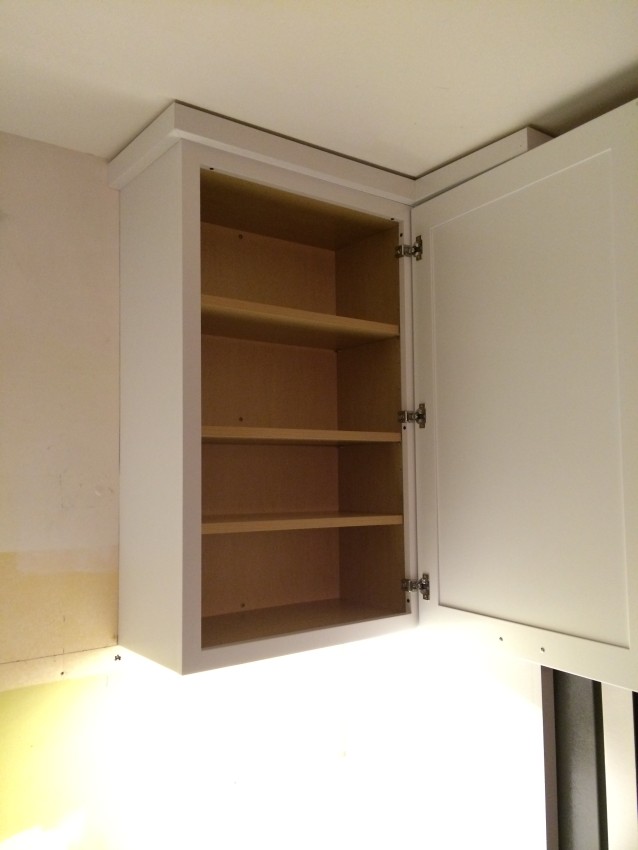
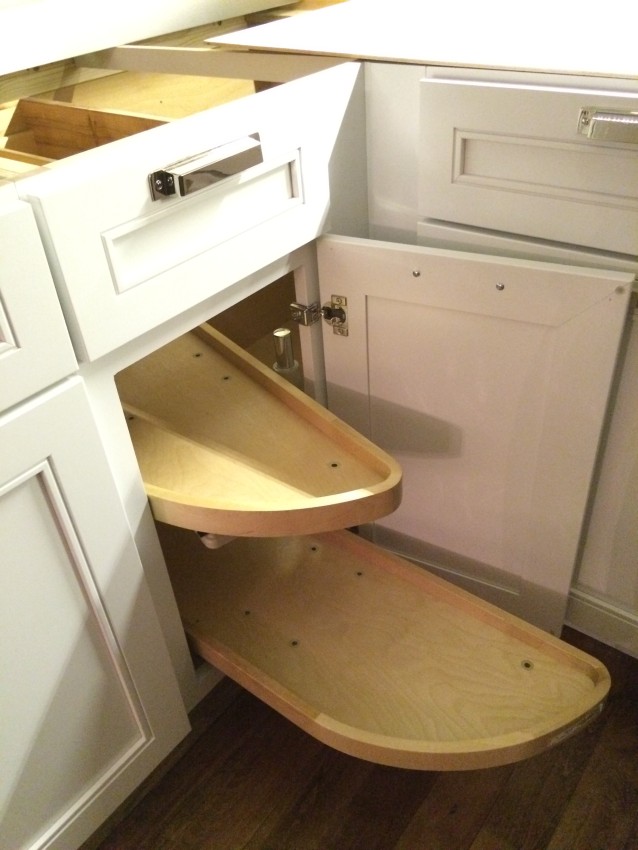
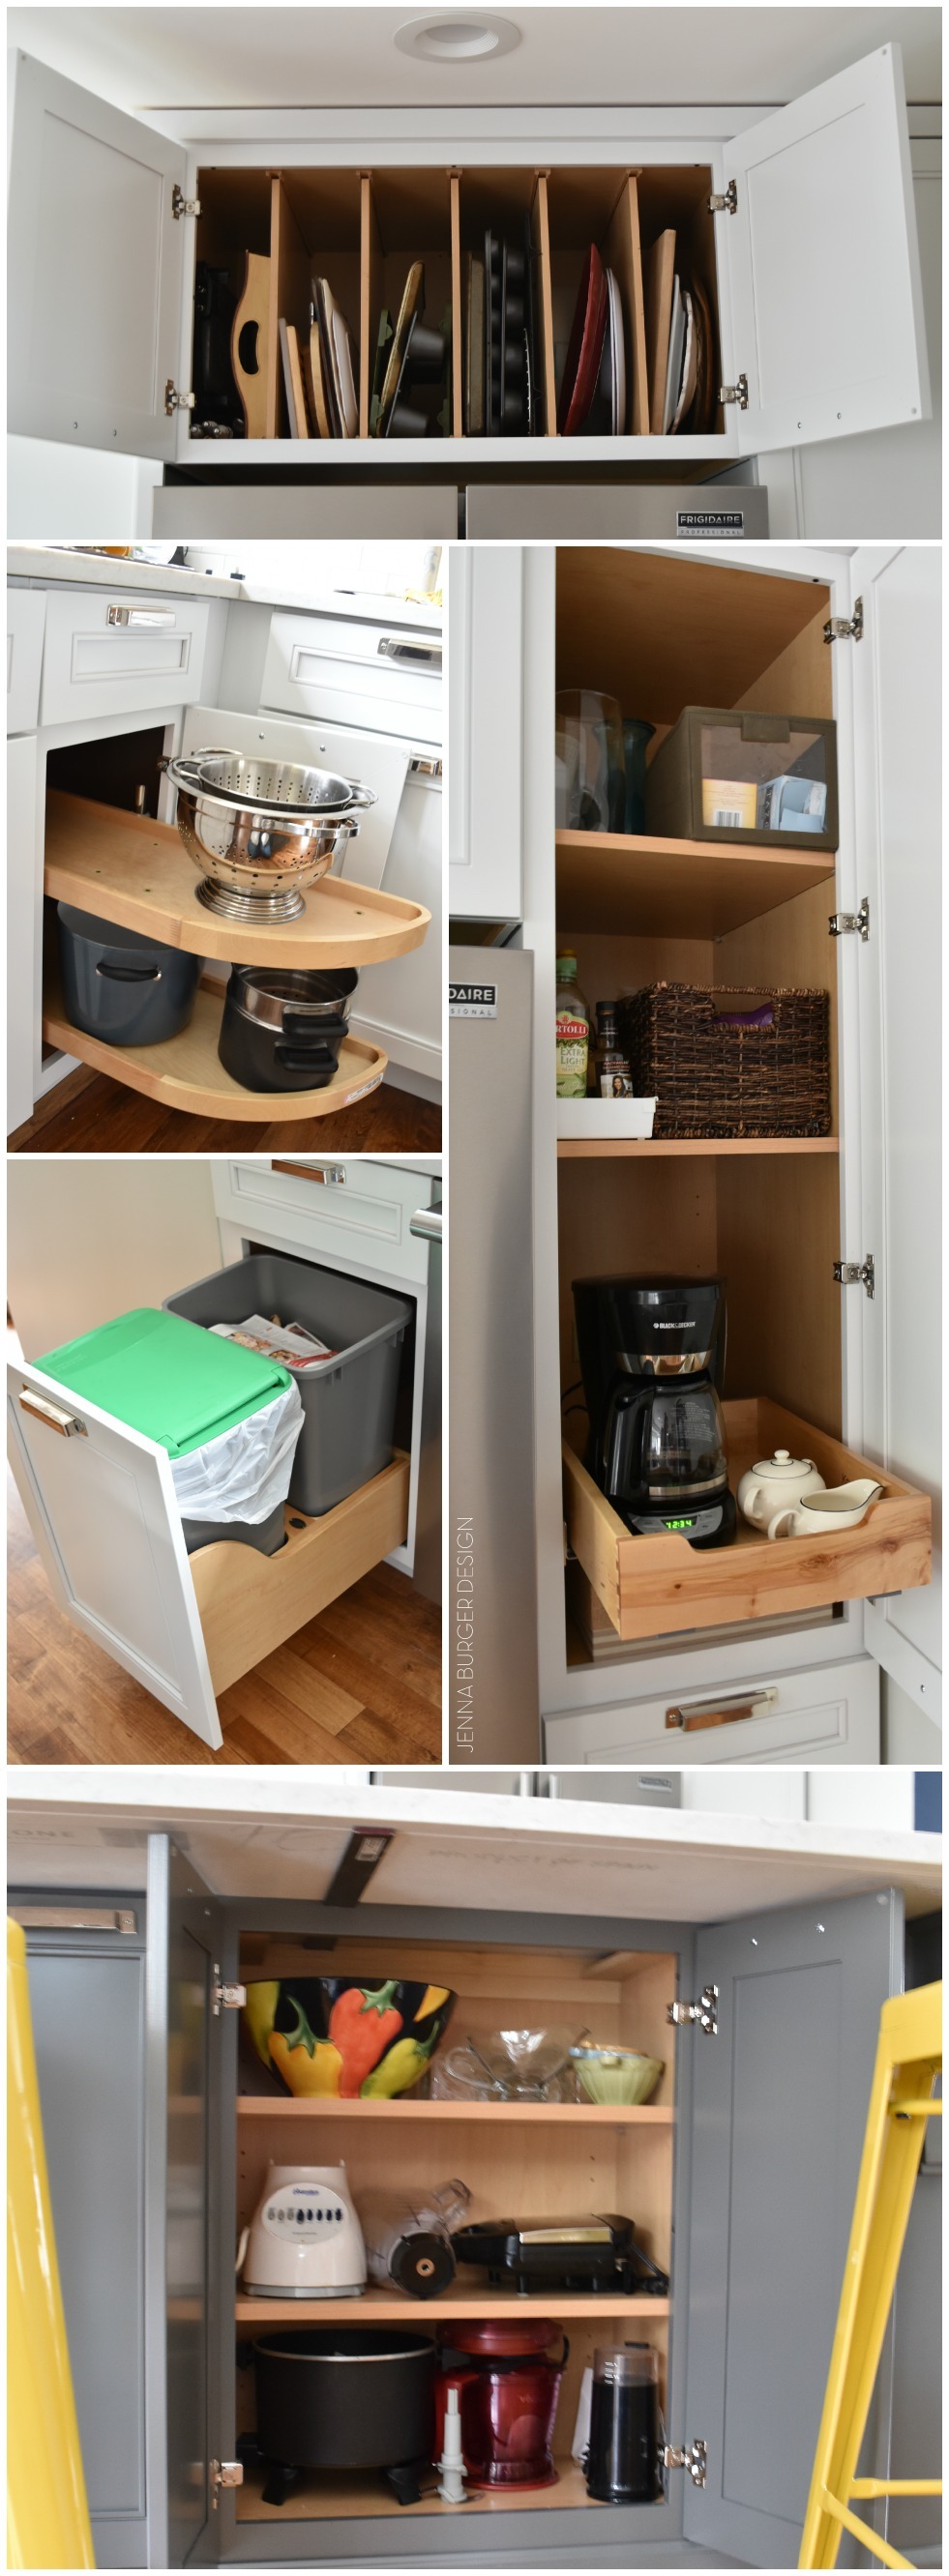
CABINET INTERIORS

Check out a few snapshots of the cabinet interiors…

Kitchen Renovation + Cabinet Installation using Kraftmaid. Before & After @ www.jennaburger.com

WHY KRAFTMAID.

It’s a fair question.  From Ikea to custom, there are a zillion cabinetry companies out there to choose form, so why Kraftmaid?

DESIGN. Lowe’s offers a great service of working with a kitchen designer who can create a plan for you.  Whether you know exactly what you want or need hand-holding + direction, the Lowe’s design team will work with you to implement a plan.  You not only want to create a high-functioning space, but also a kitchen area that fits your style + aesthetic…  the Lowe’s kitchen designers can do that for you!

SELECTION. Kraftmaid has an incredible selection of cabinet styles, colors, decorative enhancements (add-ons), storage solutions, hardware, etc…  Having options allows the possibility of achieving a custom-to-you, one of a kind kitchen!

QUALITY.  Kraftmaid stands behind their product (check out their warranty) and with a big investment you want a company that cares about their product.  Their attention to detail + the craftsmanship of their product is exquisite.  What other cabinet companies upcharge for, Kraftmaid cabinets come as standard including solid wood dovetail drawers that are full extension + soft close and a finishing system on their doors to make them twice as resistant to scratches.

STORAGE. Kraftmaid has a huge selection of storage solutions.  As much as the outsides of the cabinets need to be pretty, the insides have to be functional.

I am so thrilled with the progress of this kitchen renovation.  I will be 100% honest, the renovation process has been exhausting + wearing and I haven’t even lifted a finger (with all the DIY we do, I couldn’t not imagine doing this as a do it yourself project… that’s just too much for me).  There have been frustrating + tiring days, but I just keep focusing on the end result.  In mere months, this renovation will be simply be a past moment in time. For now, I’m just thankful to have cabinets + focusing  on the day-to-day progress!

Next up… countertops.  I can not wait to share with you what I chose!

If you want to see all the posts documenting the kitchen renovation, here they are from start to finish:
Wonderful White Kitchen Inspiration
Kitchen Remodel: Before + Plan of Action
Demo Day: Steps for Demolishing the Kitchen
Kitchen Progress: Staining Hardwood Floors
The Cabinets Arrive + Get Installed
Natural Quartz Countertops in the Kitchen
10 Countertop Materials to Consider for the Kitchen
Subway Tile Installation + Choosing the RIGHT Subway
Kitchen Backsplash Tile Options + Inspiration
Choosing a Paint Color + Wallpaper for the Kitchen and Dining Room
Kitchen Renovation: The Appliances
Dissecting the Details
Kitchen Renovation: REVEAL + RESOURCES

DISCLAIMER: THIS KITCHEN RENOVATION IS A COLLABORATION WITH LOWE’S USING KRAFTMAID CABINETRY.  ALL OPINIONS + SELECTIONS ARE MY OWN WITH THE ASSISTANCE OF KRAFTMAID AND THE LOWE’S DESIGN TEAM.

Christmas Home Tour 2015

Welcome!

I am elated that this day has finally arrived.  I’ve been busily and excitedly preparing + waiting for weeks to give you a tour of my home decorated for Christmas…  And today is the day!

I can not believe it is my 3rd year (check out 2013 + 2014) on the Jennifer Rizzo Holiday Housewalk and I am thrilled to show you lots of new spaces.  If you are following along on tour (start the tour here), I am house #19 and the first on the tour for today.  If you’re continuing through from yesterday, then you just hopped on over from Restoration House.  Wasn’t Kennesha’s house just beautiful with all her fresh greenery?!

holiday housewalk Restoration house, stop 18

Amidst a big renovation (we ripped out our kitchen…), I ‘m shocked that I was able to pull ‘Christmas’ off this year.  I think without this Housewalk Tour planned, decorating for Christmas would have gone to the wayside.  So thank you ALL for the nudge to create this years magical space.

Without further ado, grab a cup of joe or your favorite hot chocolate, put your feet up, and enjoy.

Let the tour begin…
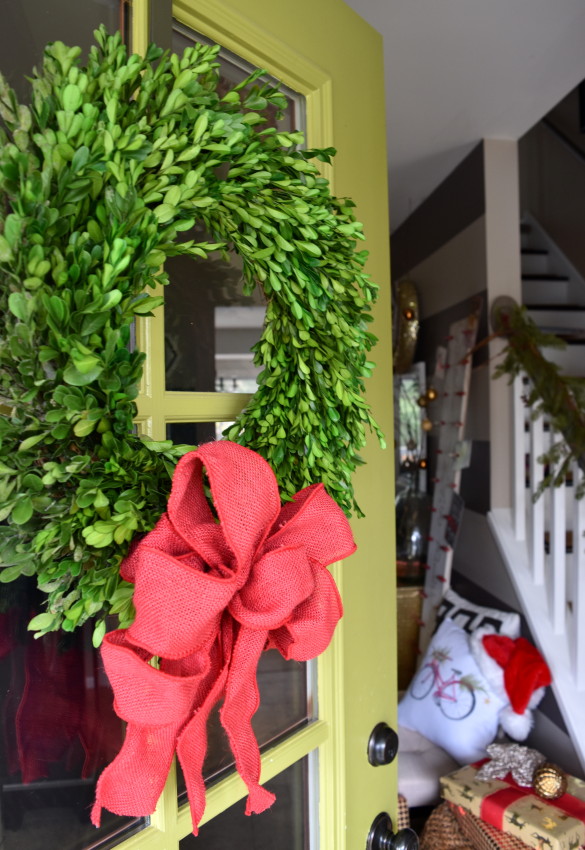
Christmas Home Tour at JennaBurger.com

Our beautiful boxwood (by the way, it’s faux…) welcomes us + guests into our home.  It adorns the apple green colored front door and a red burlap bow gives the perfect layering contrast.

Come on in…
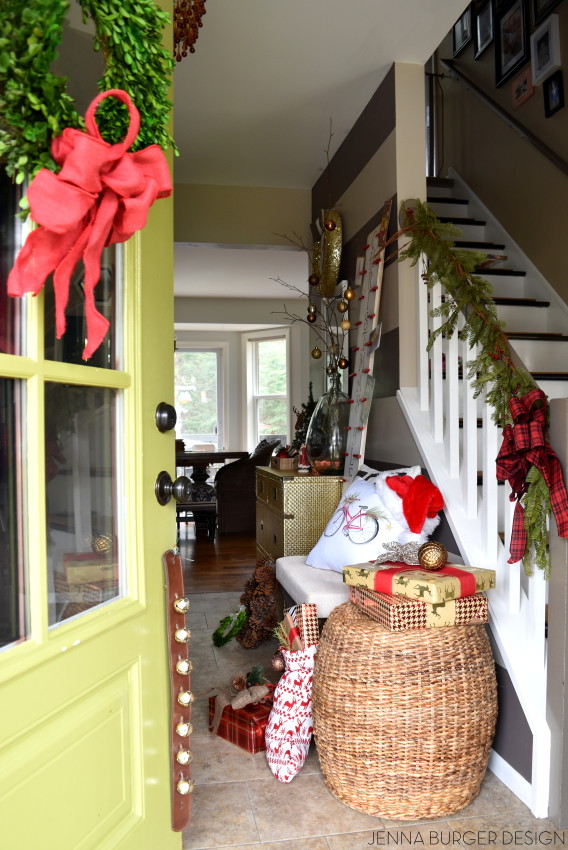
Christmas Home Tour at JennaBurger.com. Come on over...

Not overly large, but well-thought out + functional, our foyer is decorated with hues of golds and reds.

My approach for holiday decorating, especially at Christmas, is to add in seasonal layers amongst the everyday decor.  Accessories are changed out, but our family is still hustling & bustling all day, everyday, so the main elements are still in use.

My new favorite addition to this years holiday decor is the adorable vintage red bicycle pillow created by none other than the fabulous Jennifer Rizzo.  Snag one for yourself at her Society 6 shop!
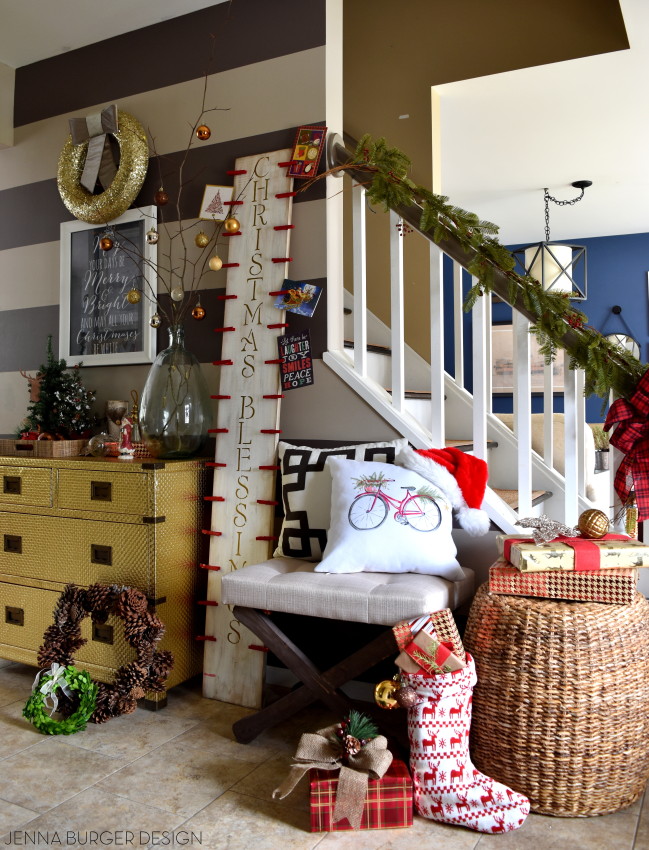
Christmas Home Tour at JennaBurger.com. Come on over...

The beautiful gold dresser (which holds the kids shoes) is still the main focus of our foyer.  I swapped out the pictures above and added in a chalkboard printable that was created by my sweet friend KellieMay you days be merry & bright, And may all your Christmases be white.  Above it I added a simple gold glitter wreath.
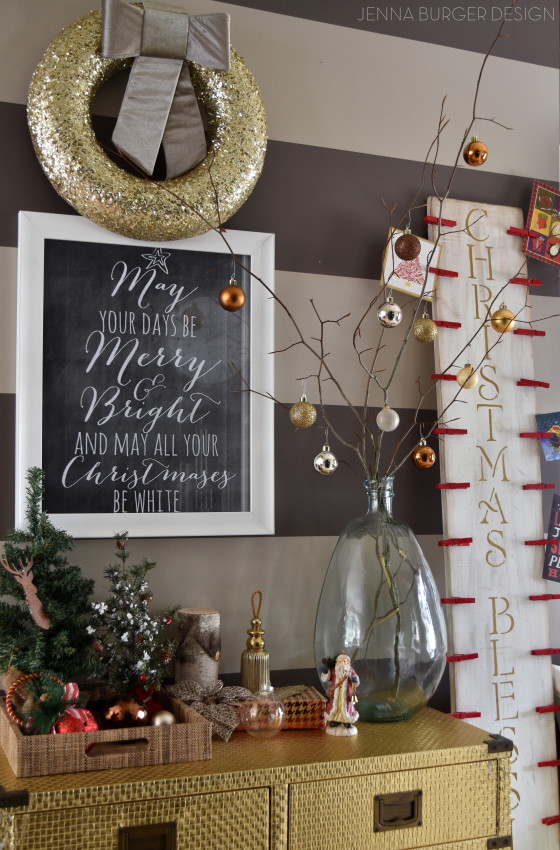
Christmas Home Tour at JennaBurger.com. Come on over...

Atop the dresser, I filled a large vase with branches from the yard and hung medium sized ornaments in shades of chocolate. hmmm. I love the height & ‘drama’ the branch arrangement gives our entry.
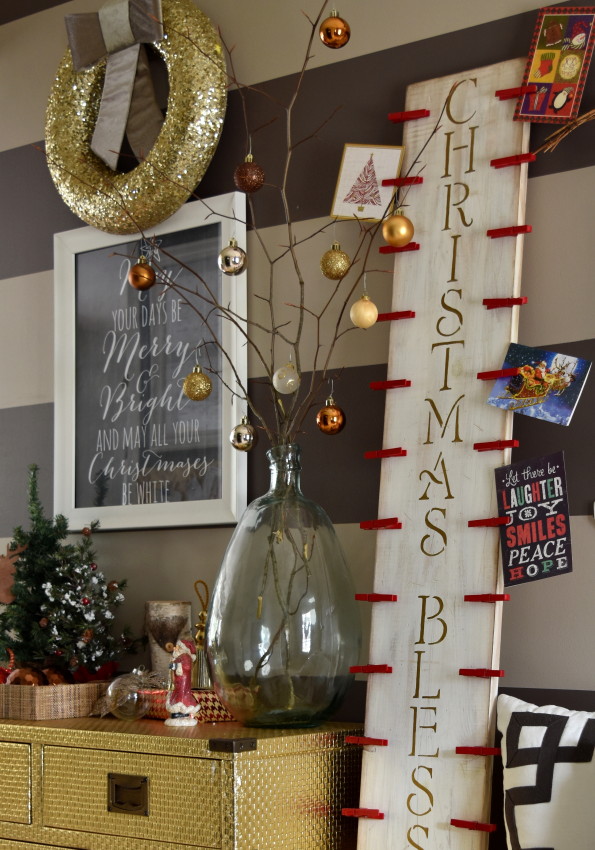
Christmas Home Tour at JennaBurger.com. Come on over...

Other seasonal favorites fill the dresser top including small trees, wrapped presents, and DIY creations like the JOY ornament that I made using a gold Sharpie.

Christmas Home Tour at JennaBurger.com. Come on over...

Since making our CHRISTMAS BLESSING card holder a few years back, I seem to find a ‘new home’ for it each holiday season.  This year it fit perfectly in this spot of the foyer & beautiful cards from friends + family have already started to trickle in.
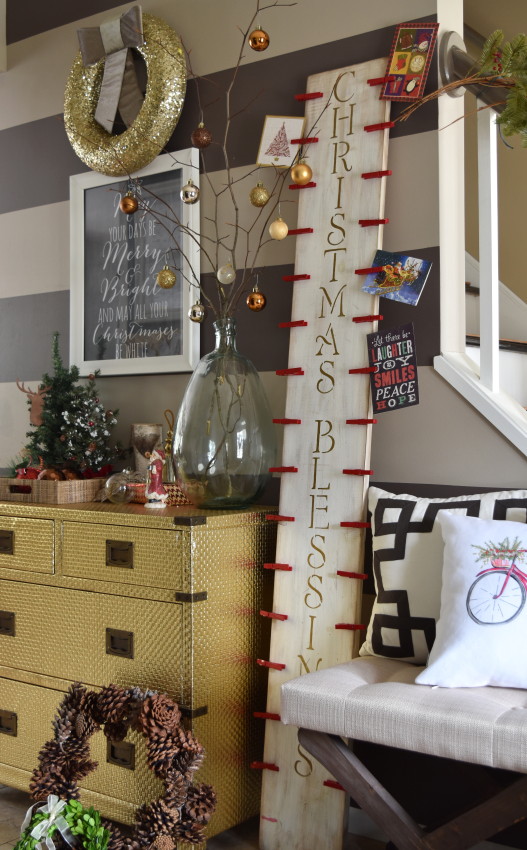
Christmas Home Tour at JennaBurger.com. Come on over...

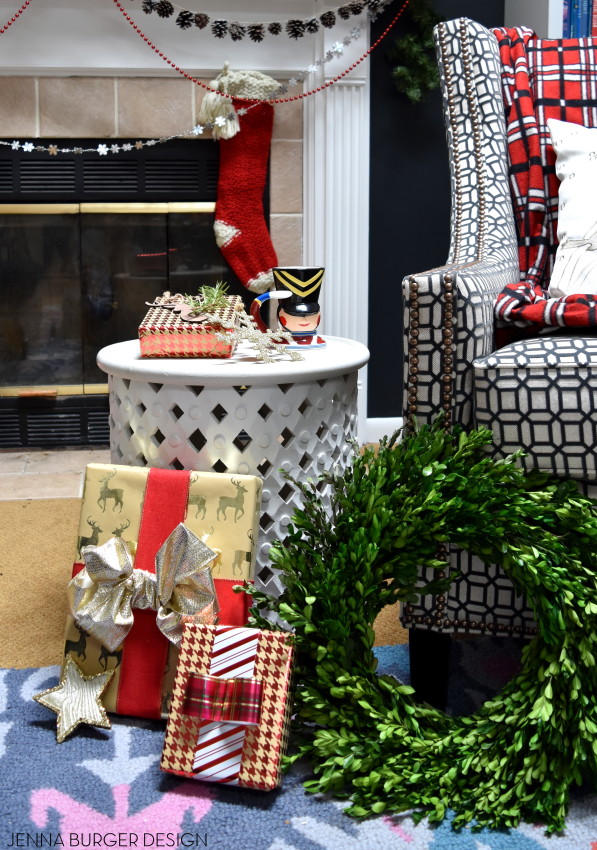
Pretty paper in patterns of houndstooth, stripes, and a reindeer silhouette were used to wrap presents.  Then ribbon, ornaments, and rosemary were used to dress them up. I love giving a present that smells just as good as it looks…
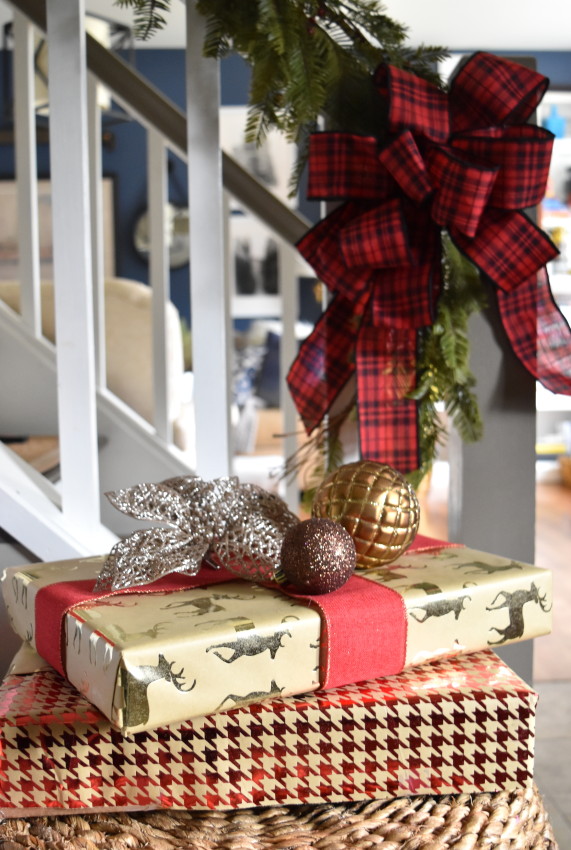

Christmas Home Tour at JennaBurger.com. Come on over...

Christmas Home Tour at JennaBurger.com. Come on over...

Christmas Home Tour at JennaBurger.com. Come on over...

Let’s head from the foyer to the dining room where you can finally get a glimpse of our tree…
Christmas Home Tour at JennaBurger.com. Come on over...

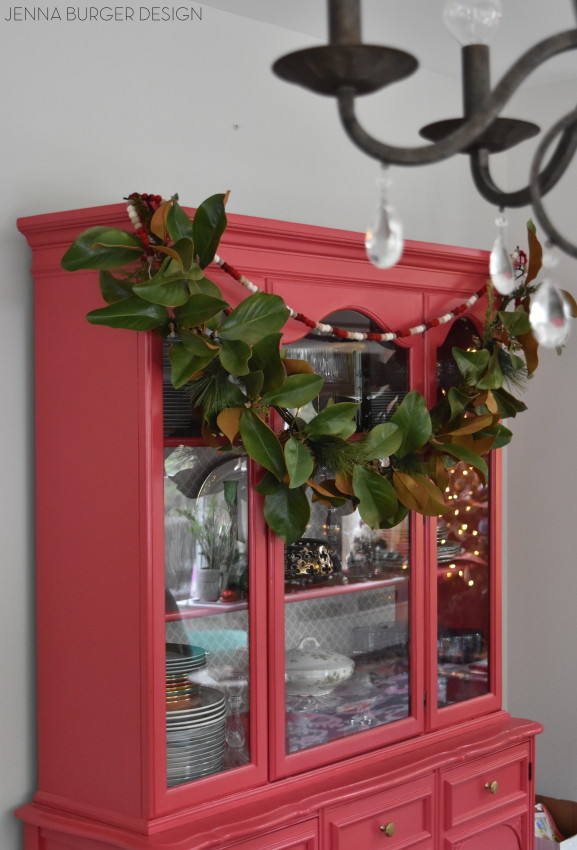
Do you see it?  Do you see it? White twinkly lights reflected in the glass…  We’re getting closer…

My beautiful Craigslist-found china cabinet is draped with beautiful magnolia garland (again it’s faux) along with a simple strand of pom pom garland (sent by my friends at Minted).

I wish I could show you more of this space, but honestly it’s still kind of a construction zone.  I guess I could put bows on all the boxes & add them tot the tour, but I’ll spare you, lol.

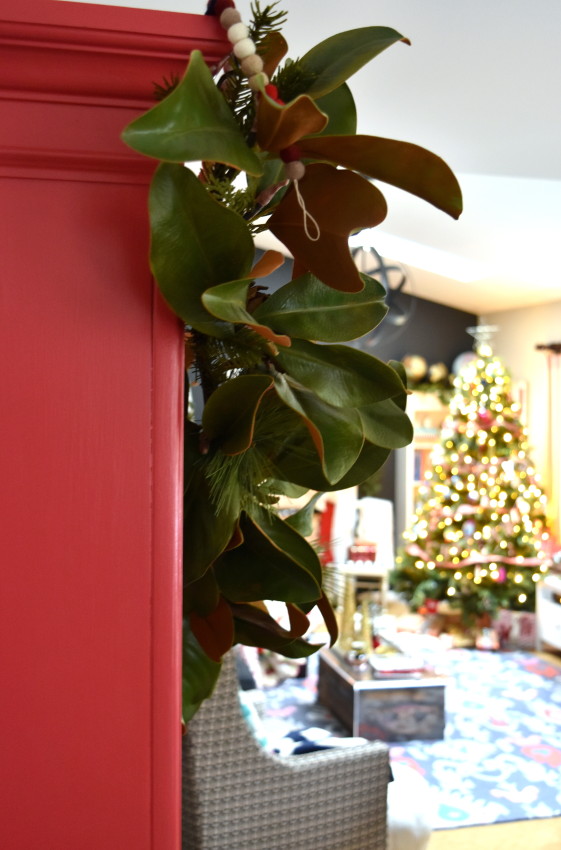
Let’s just keep looking for the lights.  I see another glimpse…
Christmas Home Tour at JennaBurger.com. Come on over...

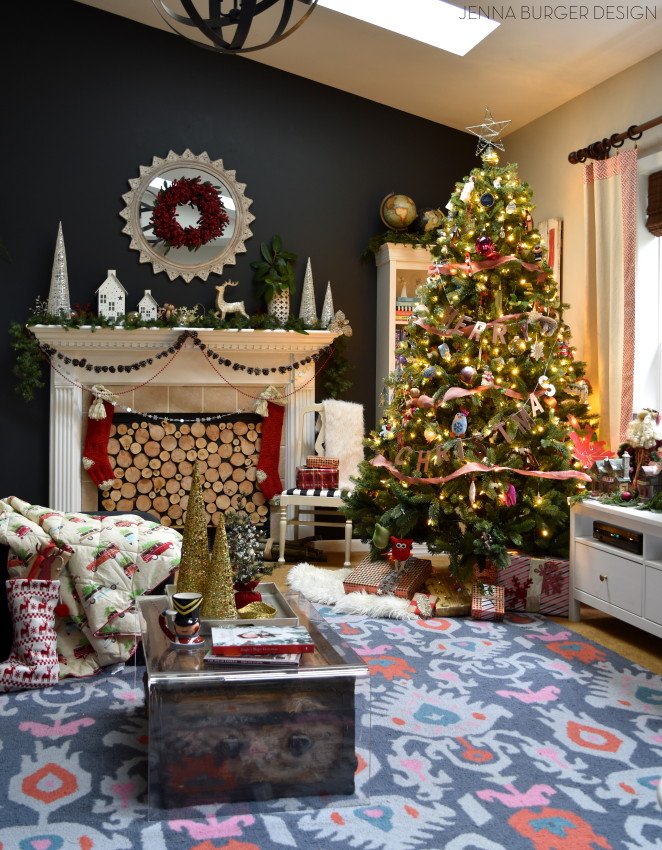
There it is.  Our Tree. Our beautiful Tree decorated for another Christmas season.
Christmas Home Tour at JennaBurger.com. Come on over...

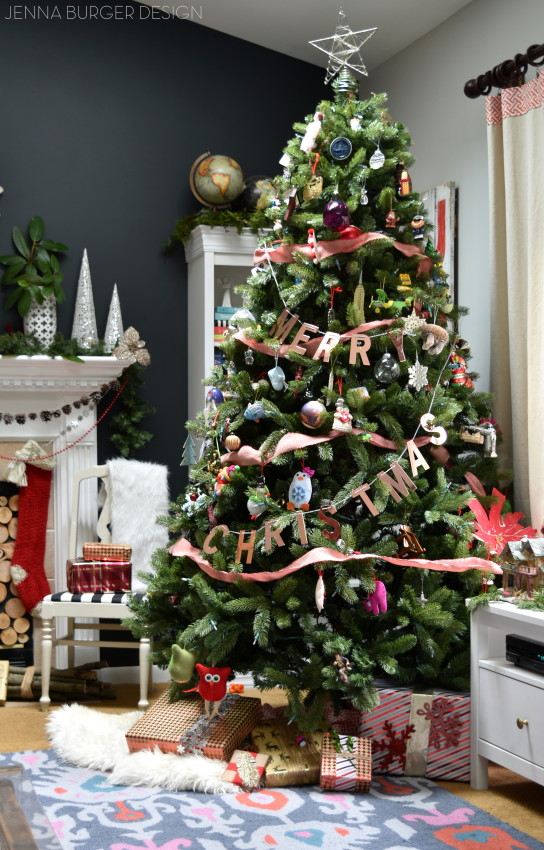
And the lights off for a different view without the lights…

just snagged that copper Merry Christmas garland from Target & I love it!
Christmas Home Tour at JennaBurger.com. Come on over...

Yes the tree is a material object, but it symbolizes so much.  It tells so much about our family.

Who we are.

Where we’ve been.

What we love.

I can honestly say, other than putting the garland + ribbon on, I had no part in the creation of the tree.

All the credit goes to these 2 …

Christmas Home Tour at JennaBurger.com. Come on over...

It might not be the prettiest or ornately decorated (hands down, I know it isn’t), but I don’t care.  My kids l-o-v-e decorating for Christmas and since I have control of creating beautiful vignettes around the house, they have the tree.  Complete ownership goes to them!

No joke, this is me watching & enjoying as they took over…

Christmas Home Tour at JennaBurger.com. Come on over...

To me, FAMILY + MEMORIES is what Christmas is about.

I’m in love with how the family room came together for this Christmas.  It was enjoyable having a new palette to work with since renovating this space earlier in the year.
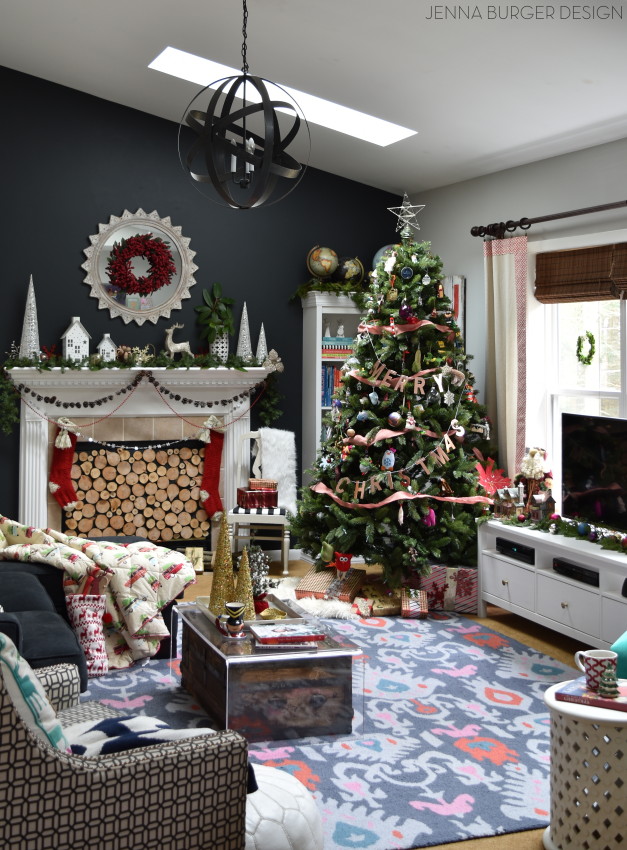
Christmas Home Tour at JennaBurger.com. Come on over...

Again, our everyday is layered with our seasonal favorites, family keepsakes, and DIY creations…

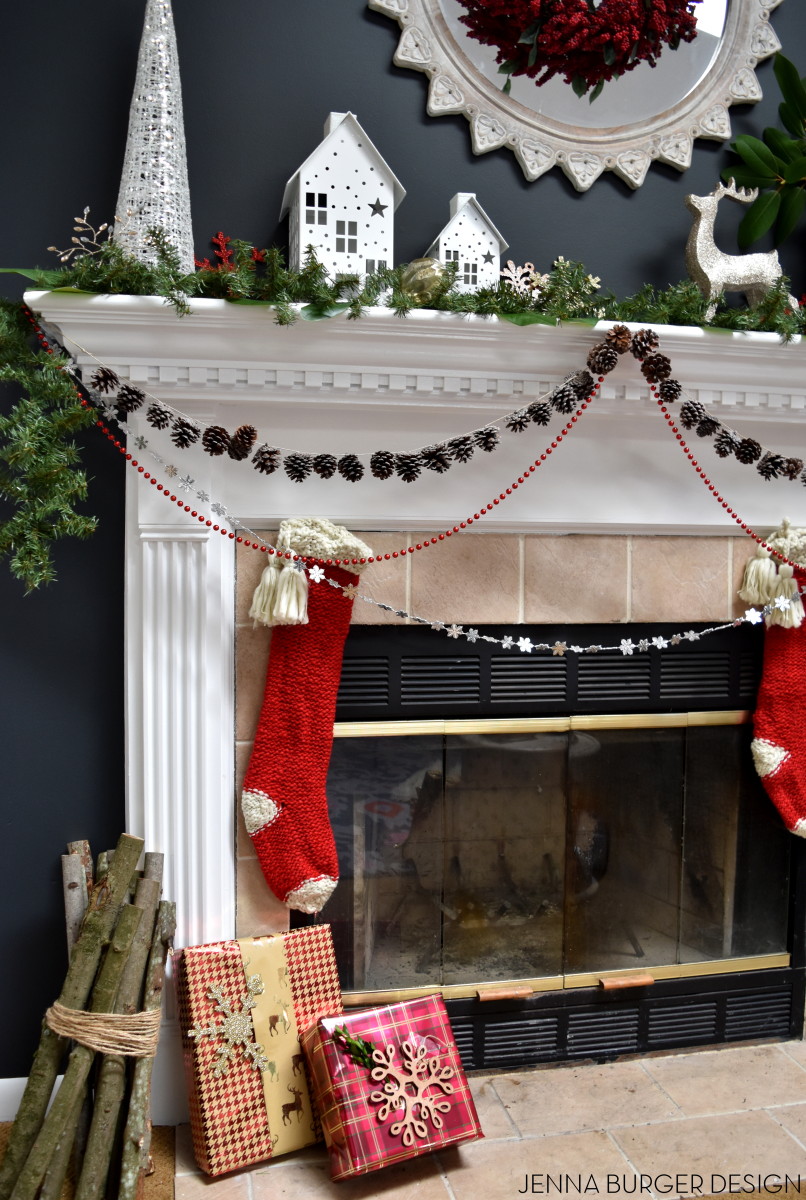
I shared our Christmas Mantel earlier this week, but it got a slight revamp since then.  Check out what’s inside the fireplace…  A lot of logs that my husband laboriously cut (not, it just looks like that – tutorial coming soon).

The look of the logs gives a beautiful focal point to the fireplace especially since we rarely have a roarin’ fire going.

Our stockings are definitely hung by the chimney with care…
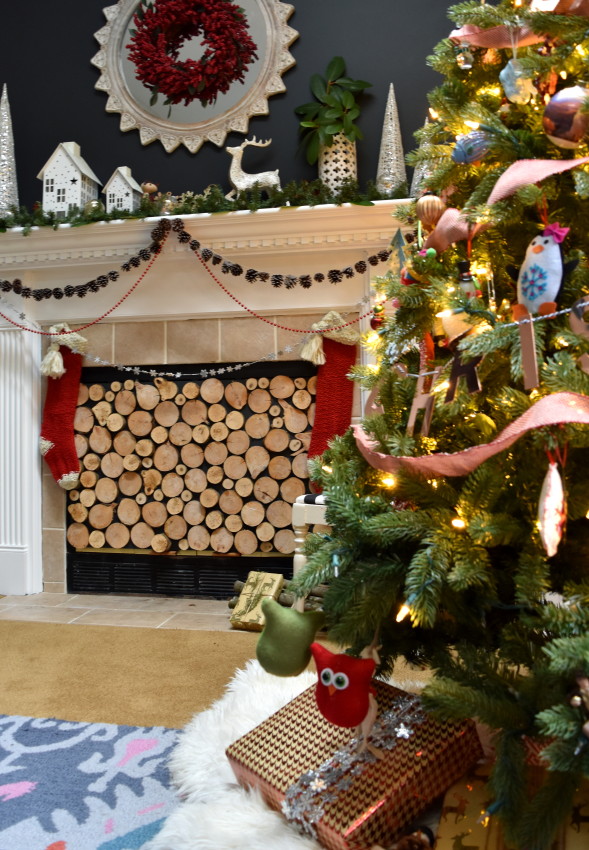
Christmas Home Tour at JennaBurger.com. Come on over...

Christmas Home Tour at JennaBurger.com. Come on over...

This space is our hang-out-do-everything room, so it has to be comfortable + inviting + functional. It’s not stuffy or inhibiting, but instead relaxing, enjoyable, AND most importantly reflects US!

A new favorite this season is this Oh-So-Warm + cute down blanket with the most adorable vintage car pattern.  It’s put us to sleep many-a-nights on this sofa with the TV still on at 3am…
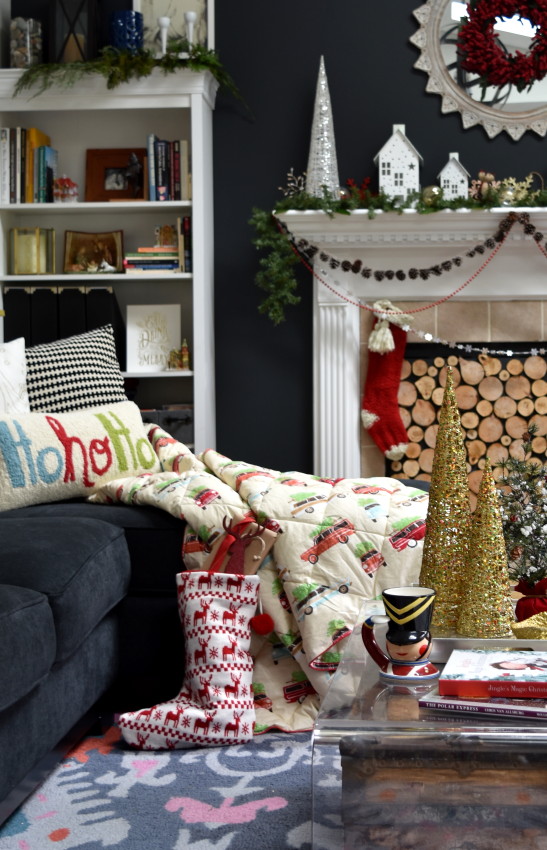
Christmas Home Tour at JennaBurger.com. Come on over...

The Ho Ho Ho knit pillow is another addition this season and makes such a pretty layer on the sofa.
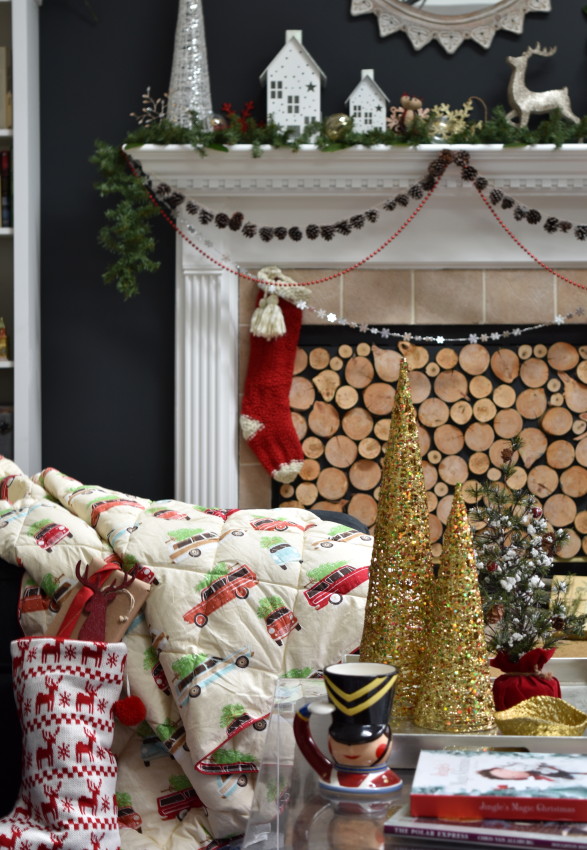
Christmas Home Tour at JennaBurger.com. Come on over...

On a typical day, most things that sit on the coffee table get knocked off (thanks to the busy hands of a 17-month old), but for the tour I jazzed it up with gorgeous gold glitter cone trees + a few of our holiday books we love to read as we countdown to the BIG 2-5!
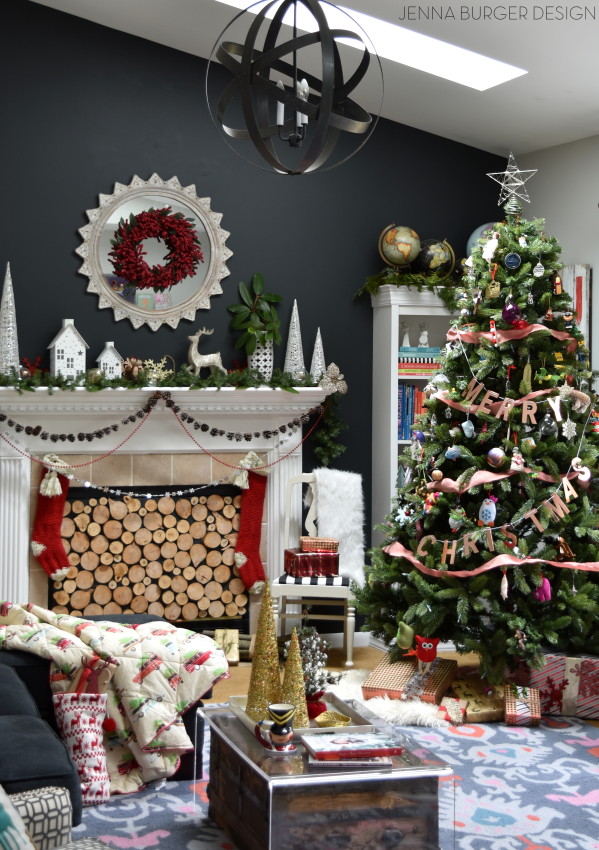

Christmas Home Tour at JennaBurger.com. Come on over...

Christmas Home Tour at JennaBurger.com. Come on over...

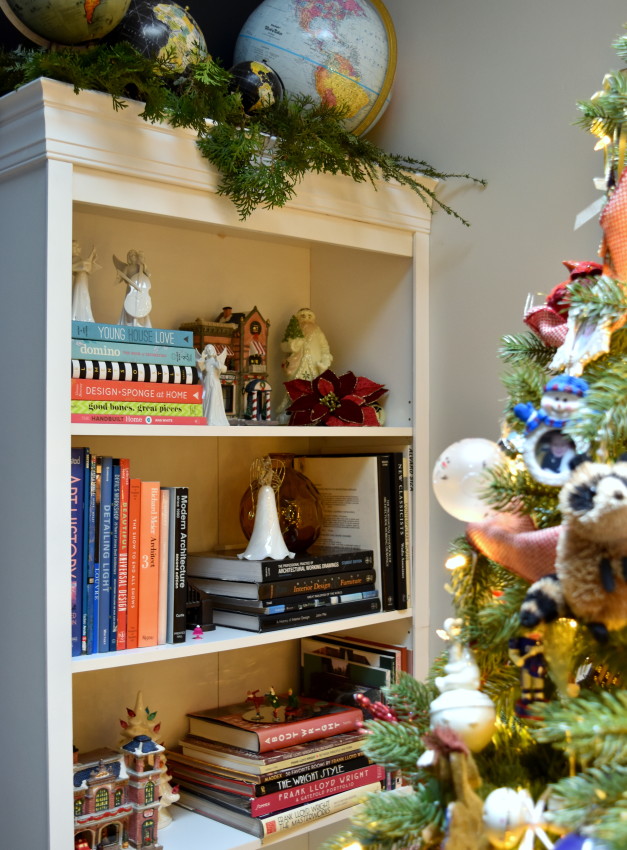
Along with our special keepsakes to decorate with, I also love incorporating elements from nature.  Cut branches and greenery are all around us so where I can, I’ve layered branches + greens on the bookcase tops, the mantel, and in front of the TV…


Christmas Home Tour at JennaBurger.com. Come on over...

Christmas Home Tour at JennaBurger.com. Come on over...

Christmas Home Tour at JennaBurger.com. Come on over...

And on the windows I added three small boxwood wreaths.  They are just the cutest…
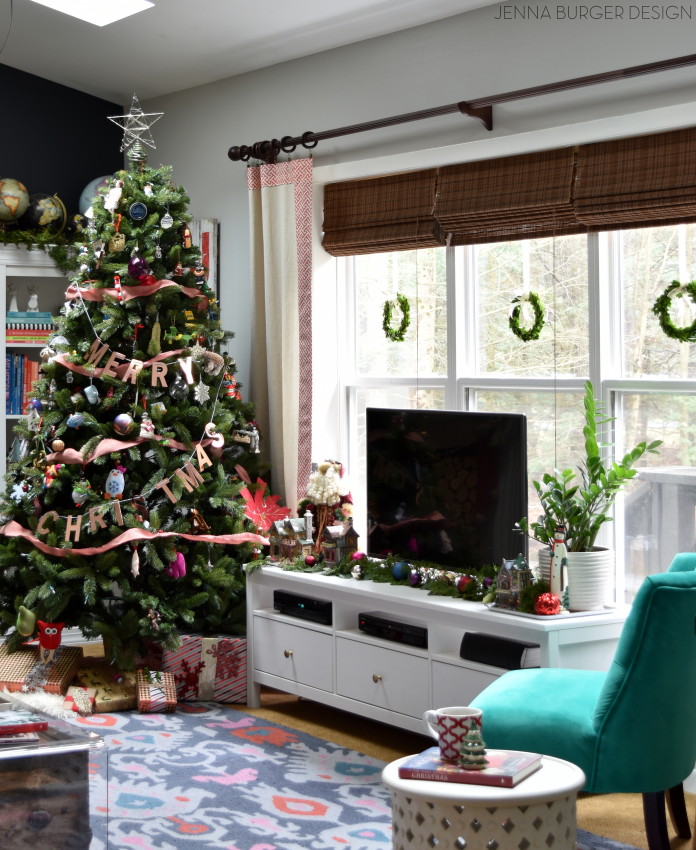
Christmas Home Tour at JennaBurger.com. Come on over...

Lots of old mixed in with a few new festive treats, like this pillow that I just couldn’t resist from Target.

There is a definite reindeer ‘theme’ this Christmas…
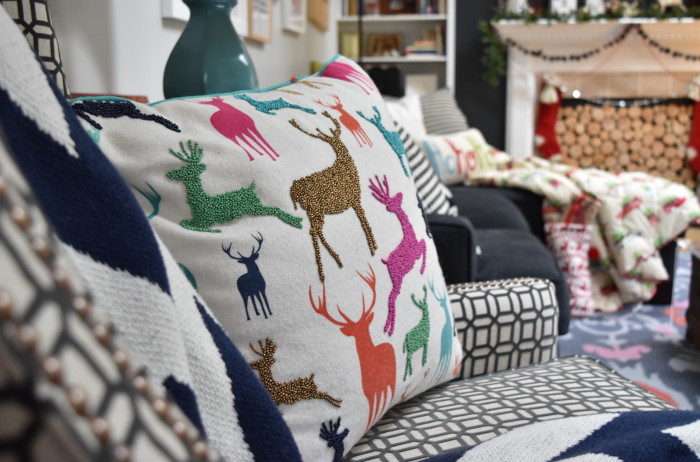
Christmas Home Tour at JennaBurger.com. Come on over...

Well there you have it.  Thank you so much for taking the tour of my home decorated for Christmas.  A lot of thought + love went into this years seasonal space, but important of all it’s meaningful to our family.

I hope I’ve inspired you with what I’ve created + shared.

Now on to the next house, At the Picket Fence, which is stop #20 on the Holiday Housewalk Tour.

You are in for a treat…

holiday housewalk tour, At The Picket Fence

Christmas Home Tour at JennaBurger.com. Come on over...
Thank you to Joss & Main and Good Housekeeping magazine for partnering with this years Housewalk Tour.  Also a big shout out to Garnet Hill + Lowe’s, who I collaborated with for this years Christmas spaces.  Their decor is gorgeous and I love showcasing their beautiful goods in my home!

Merry Christmas
Christmas Mantel
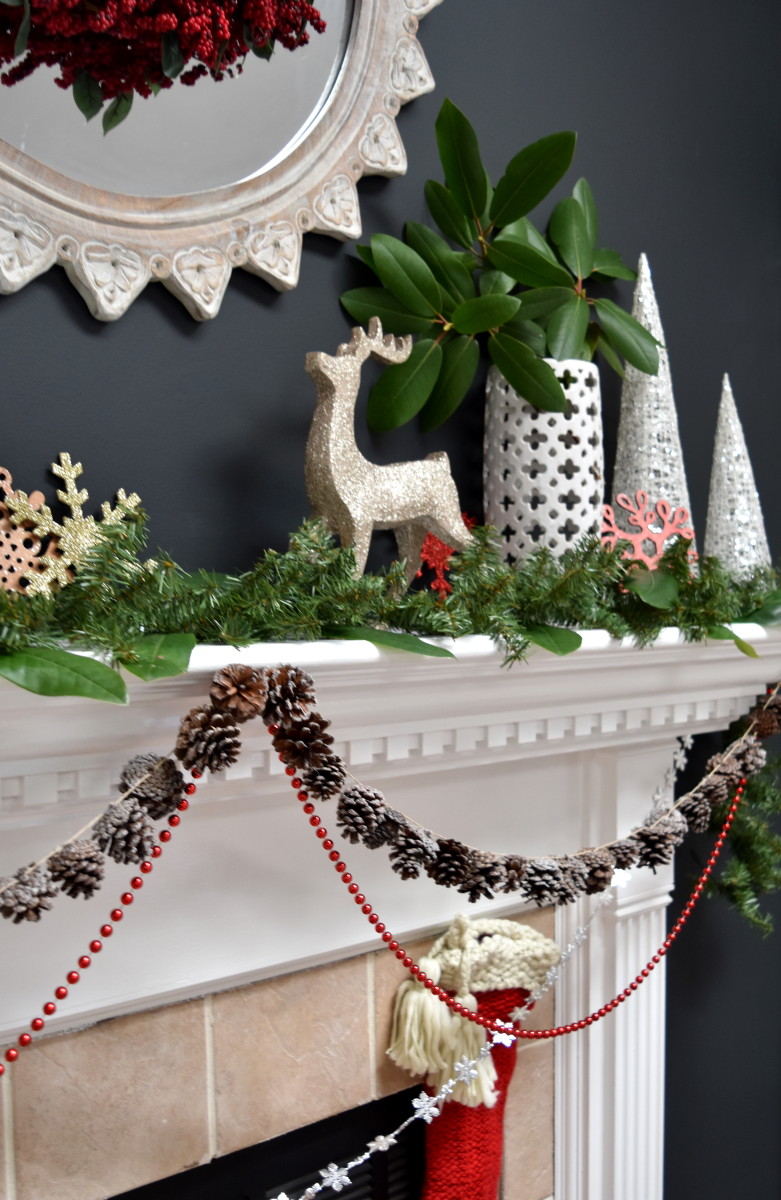
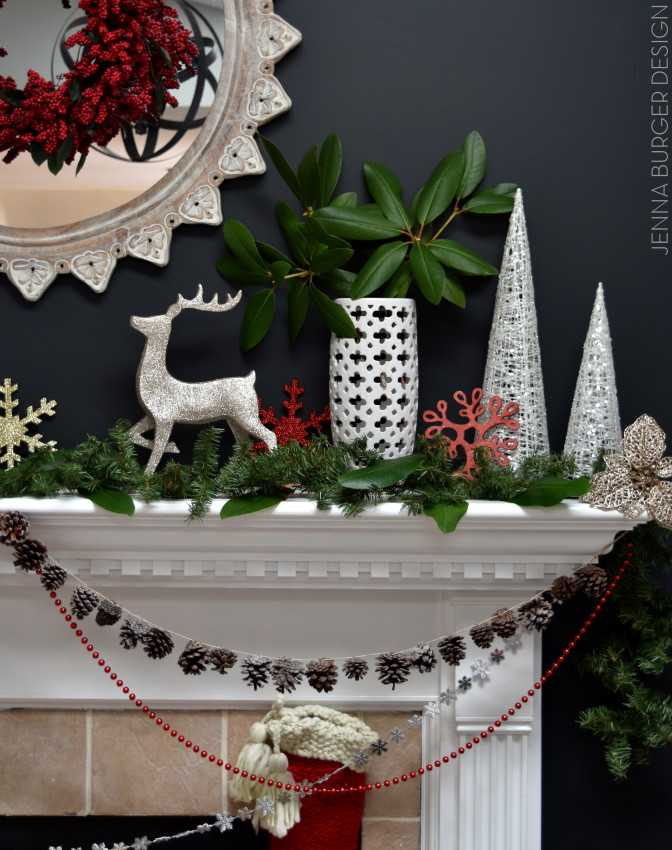
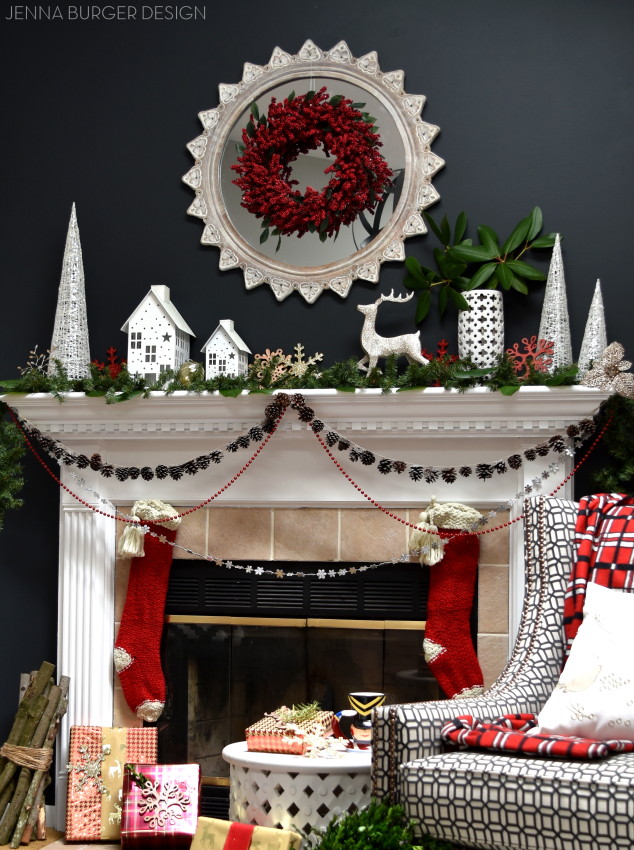
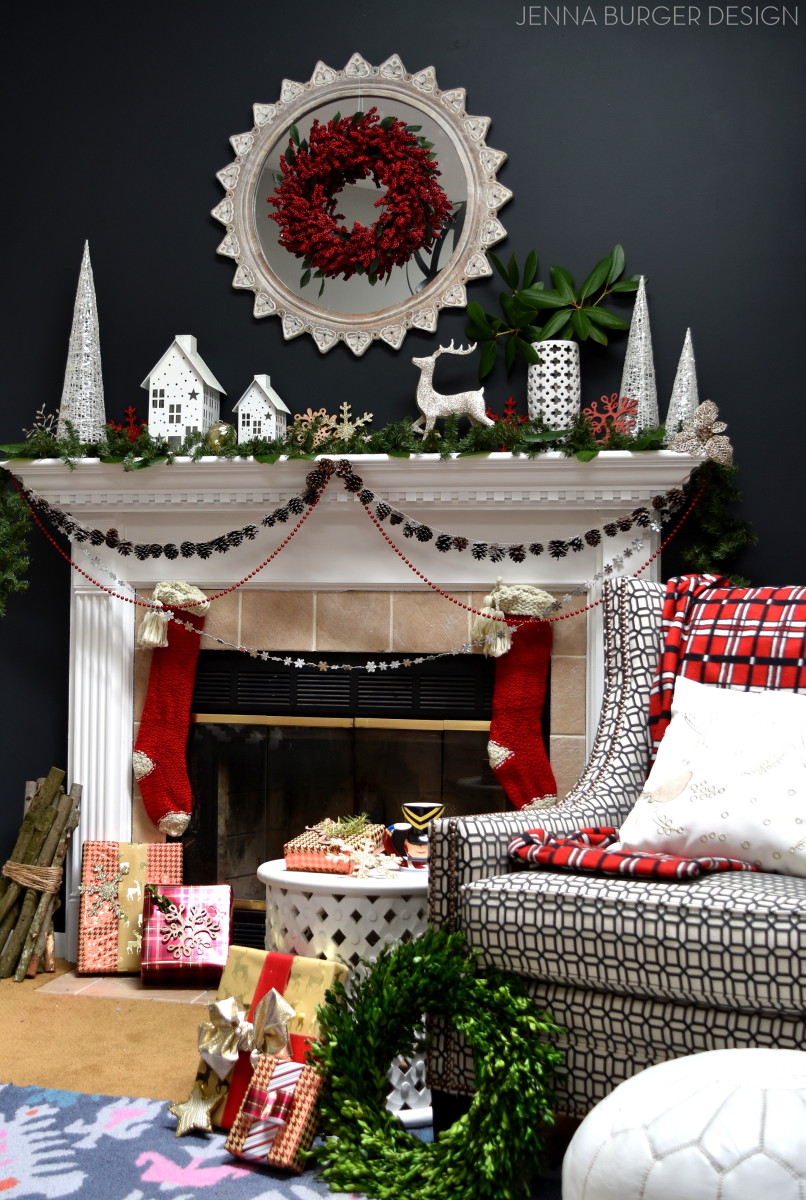
Christmas Mantel filled with old & new. Created by www.jennaburger.com
The Holiday season is underway – yay!

Since Friday – the day after Thanksgiving – we’ve been hustling + bustling indoors and out decorating for Christmas.  This year has been a bit tricky with the kitchen renovation (walls are still being painted & the hardwood floors are still curing), but we are making do with the areas that we can add our festive favorites…

One area of our home that’s been decorated for a few weeks is the mantel.

I got the Christmas bug a few weeks ago after making my way into the Christmas section of Lowe’s and leaving with a handful of new fun finds.  They’re selection of seasonal decor this year is stellar.
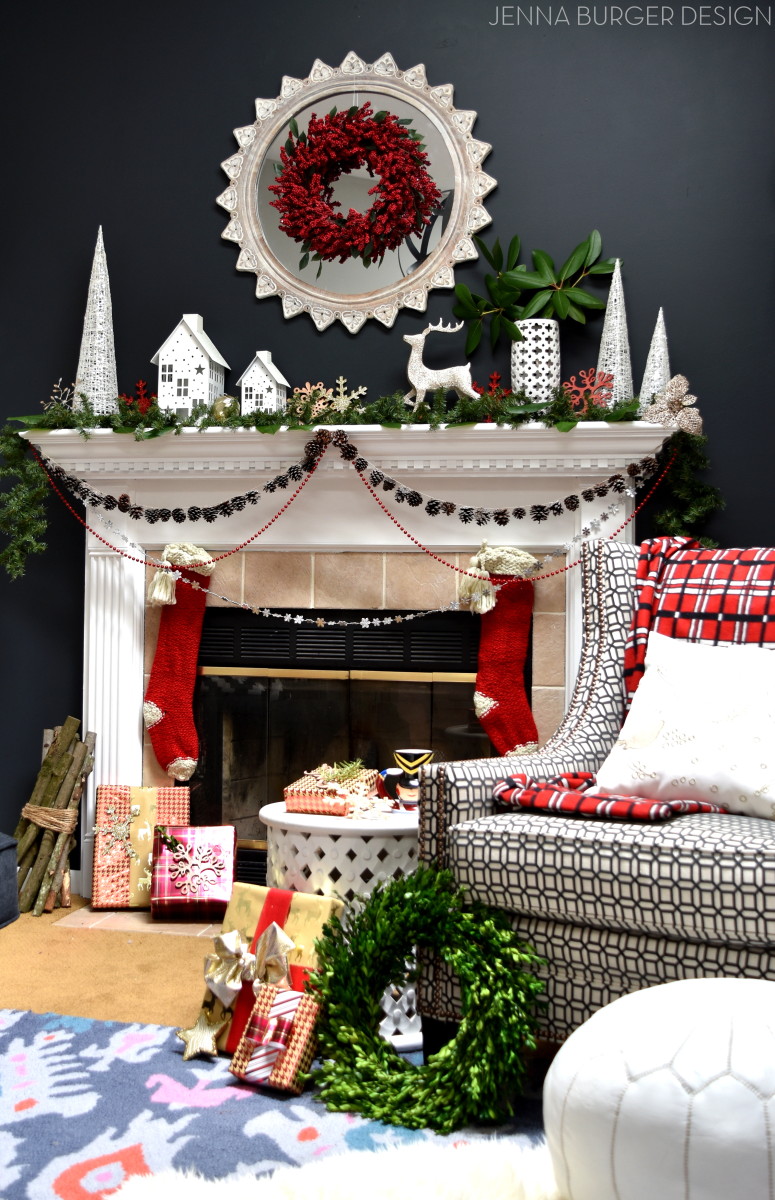
I incorporated a lot of new with the old…

Christmas Mantel filled with old & new. Created by www.jennaburger.com
Christmas Mantel filled with old & new. Created by www.jennaburger.com
I had such a fun + relaxing (well kinda in my OCD way) time creating this years Christmas mantel.  It was enjoyable to have a different backdrop to work with since this room, specifically the fireplace wall, got a revamp for burnt orange to black earlier this year >>> check out the living room transformation
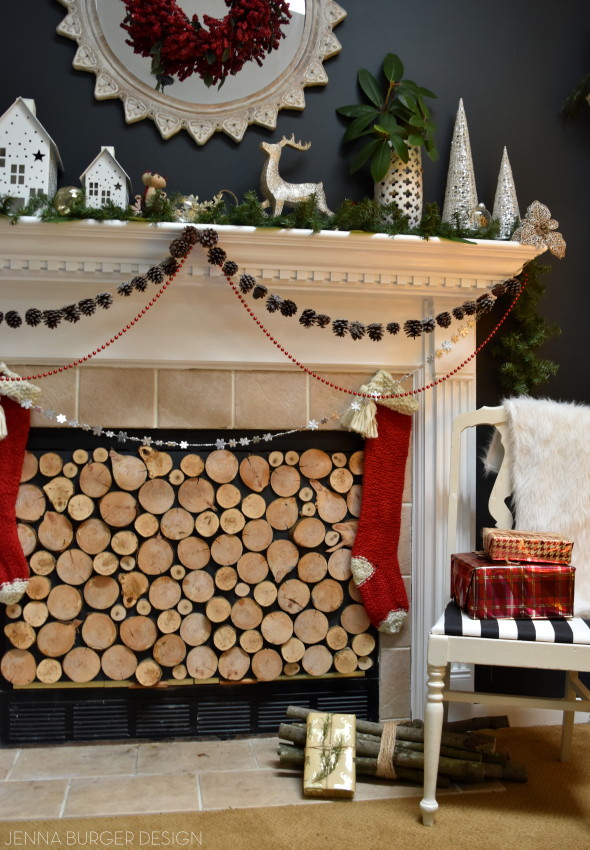
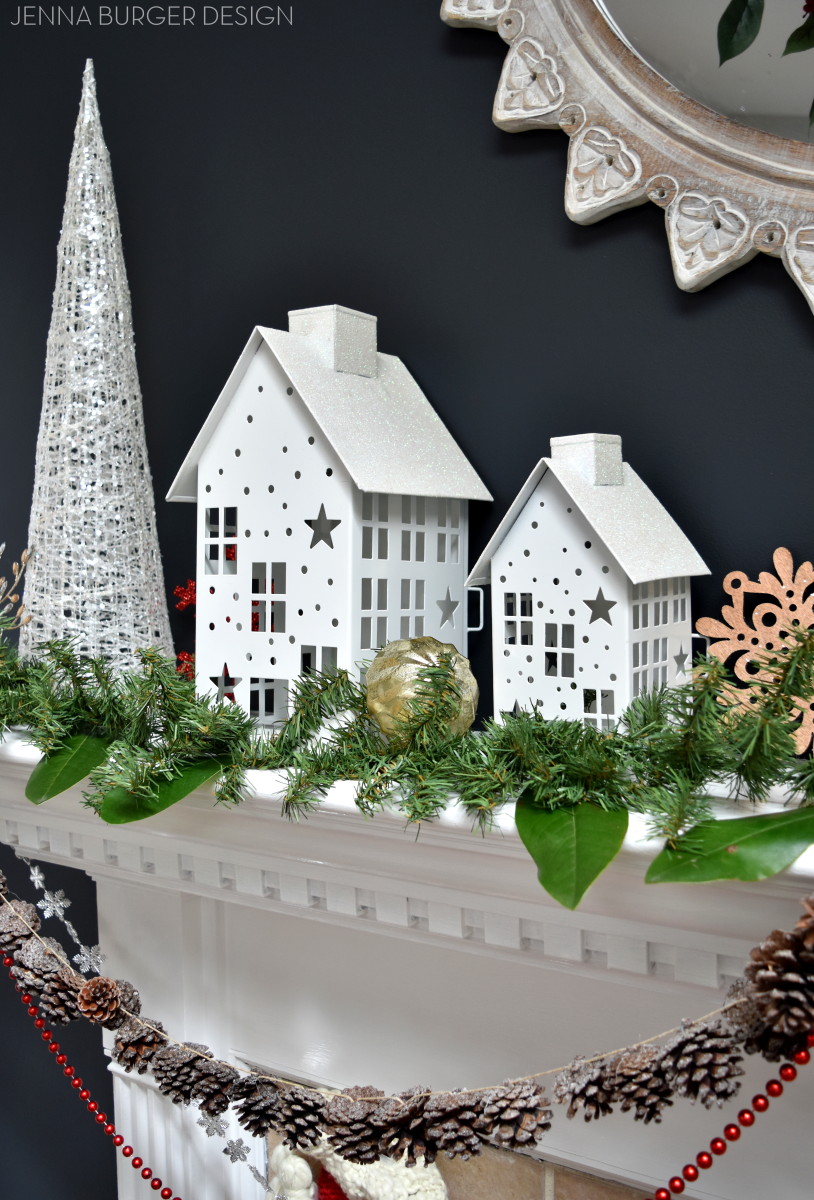
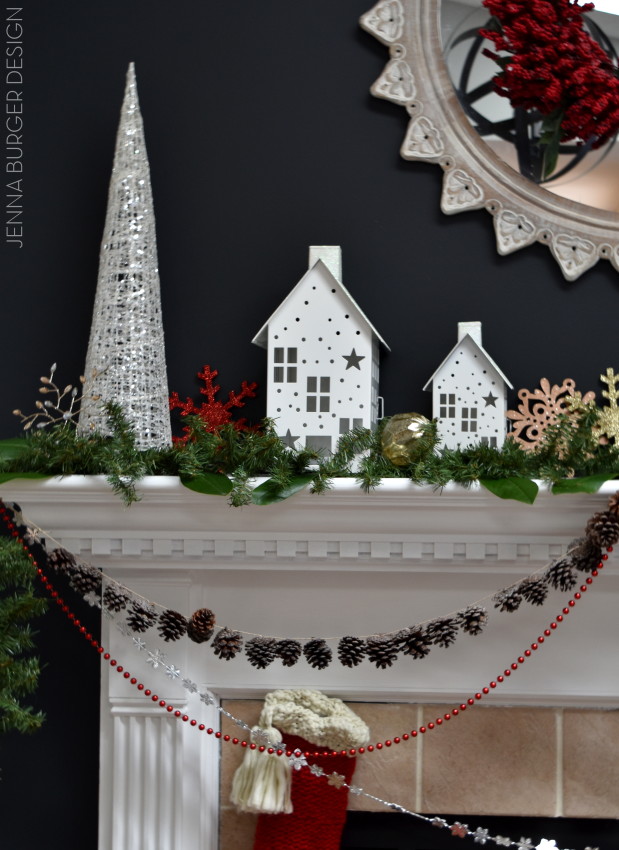
The new black wall – color: Valspar Black Heron – was the perfect backdrop to layering contrast white elements.

Christmas Mantel filled with old & new. Created by www.jennaburger.com
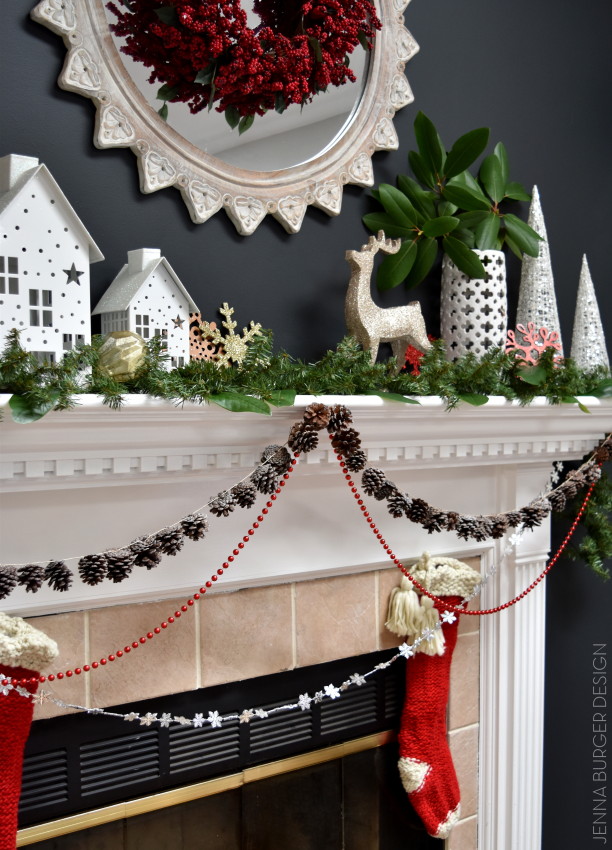
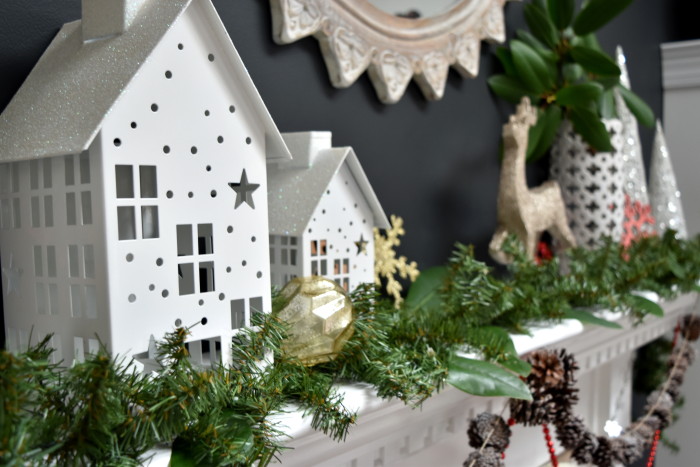
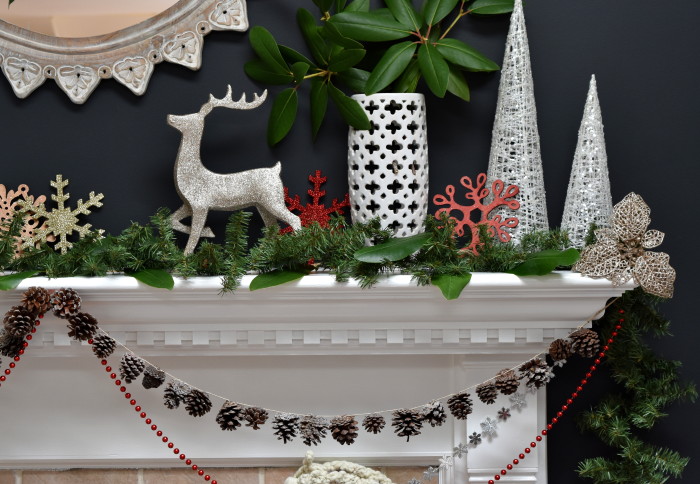
I stumbled upon these adorable white houses – in varying sizes – and couldn’t resist incorporating them in the mantel.  The same houses come in red as well, but I loved the crisp white with glitter roof.

Christmas Mantel filled with old & new. Created by www.jennaburger.com

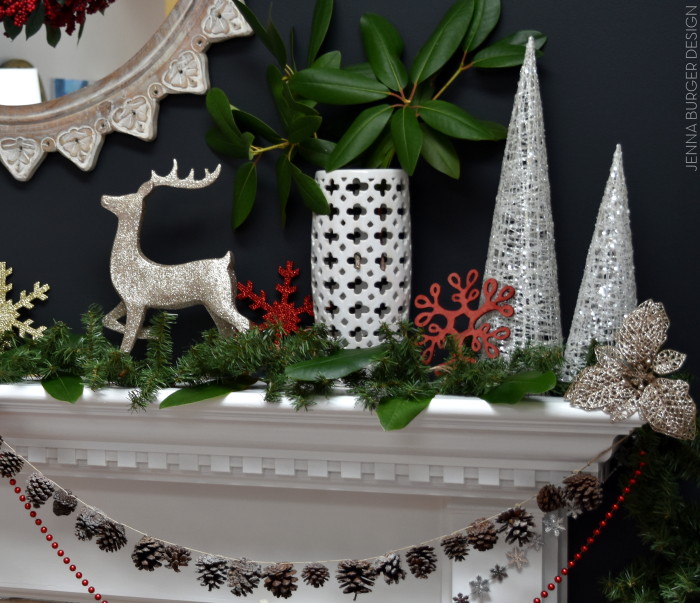
As the base of the mantel, I used a faux greenery garland and added in real cut magnolia leaves that I got from the tree in my yard.

Adding in real leaves amongst the faux, gives such a great look.  It is a nice idea to create a realistic-looking garland without the headache of drying branches + can be used year after year.

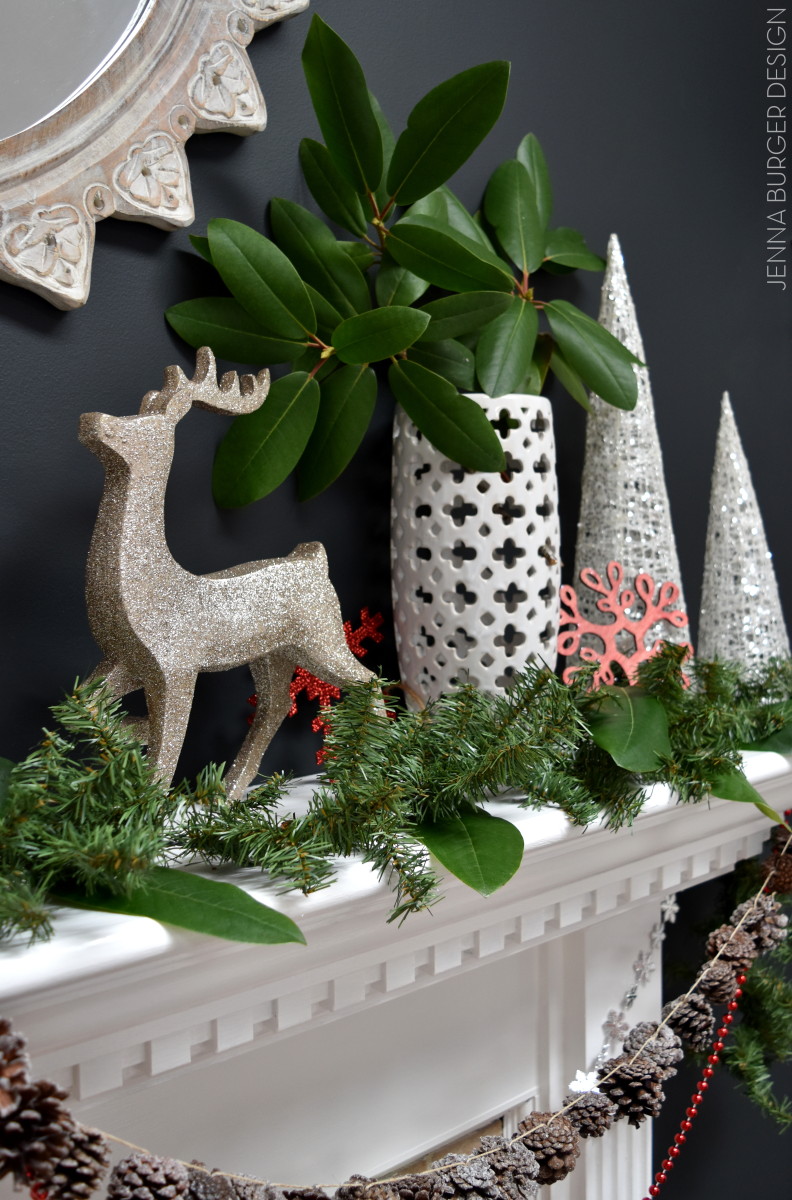
I also added a few magnolia branches to a tall white vase to introduce an organic element + height to the fireplace.

Christmas Mantel filled with old & new. Created by www.jennaburger.com
Christmas Mantel filled with old & new. Created by www.jennaburger.com

The sparkly reindeer is another new + fun find and if I could put my finger on a ‘theme’ for this years decor, it would be reindeer…

I snagged a few reindeer elements and I just love what they represent… a woodland, outdoorsy, winter feeling.

Christmas Mantel filled with old & new. Created by www.jennaburger.com

On the face of the fireplace, I draped several strands of differing garland.  I picked up a beautiful pinecone garland – which was a pleasant surprise because I thought they were individual pinecones which I was going to pile in a bowl – and hung it them from end to end on the mantel.

Then using red bead garland – that I got from Dollar General years ago – I hung a longer swag from edge to edge, and finished it with a silver snowflake garland across the front.

Hung by the fireplace with care are adorable knit red + white stockings.  I just love the oversized tassels!

Christmas Mantel filled with old & new. Created by www.jennaburger.com
Christmas Mantel filled with old & new. Created by www.jennaburger.com

Christmas Mantel filled with old & new. Created by www.jennaburger.com

Recognize the mirror?  I used it for my Thanksgiving table, then decided to use it as the focal point above the fireplace and mounted a beautiful berry wreath on the face.

Giving height and grounding each end, I added in my one of my seasonal favorites, the glitter cone-shaped trees in silver + white (check out similar ones here).  I have gold too and they’ll be someplace else in the room.

Christmas Mantel filled with old & new. Created by www.jennaburger.com

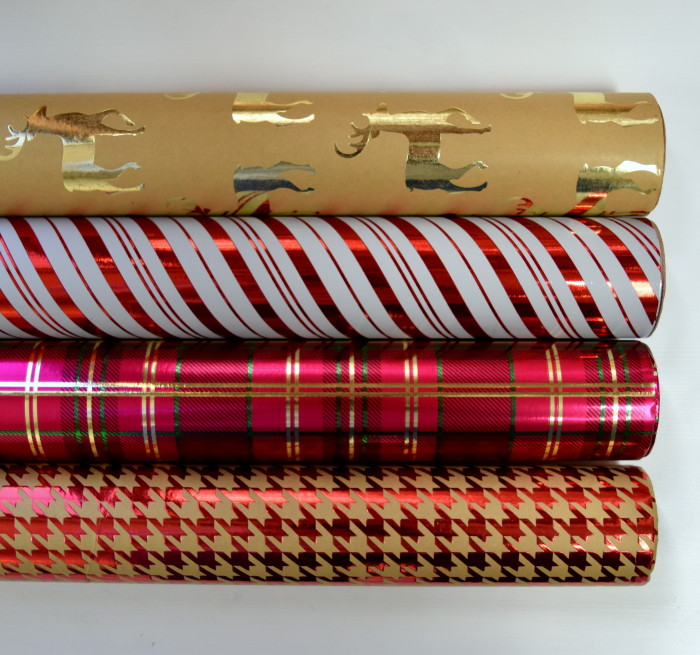
My reindeer ‘theme’ also continued with the wrapping paper I chose.  Check out this paper with the reindeer silhouette – I couldn’t resist.  I loved pairing it with the houndstooth + striped paper.

Christmas Mantel filled with old & new. Created by www.jennaburger.com
Christmas Mantel filled with old & new. Created by www.jennaburger.com

Throughout, I layered in new + old ornaments that added sparkle + shine.  These wood laser-cute ornaments were a surprising find this year and I grabbed a similar wood reindeer ornament version as well.

Christmas Mantel filled with old & new. Created by www.jennaburger.com

I am so happy with how this years Christmas mantel came out.  I had no real plan when I started decorating, but as usual when the everyday decor came down and I was left with a blank canvas, the ideas started to flow.

With some changes + tweaks, the result is pretty fantastically festive…

Christmas Mantel filled with old & new. Created by www.jennaburger.com

I can’t let you go without sharing that the annual Holiday Housewalk hosted by Jennifer Rizzo begins today!  This is the 3rd year that my home will be on the tour along with about 30 others.  You will NOT WANT TO MISS IT.  My home is coming up later in the week, so I hope you will stop back.

Holiday Housewalk hotsed by Jennifer Rizzo

Have a blessed Christmas season and thanks for checking out my mantel.

DISCLOSURE: THIS POST IS A COLLABORATION WITH LOWES, BUT ALL OPINIONS ARE 100% MY OWN.

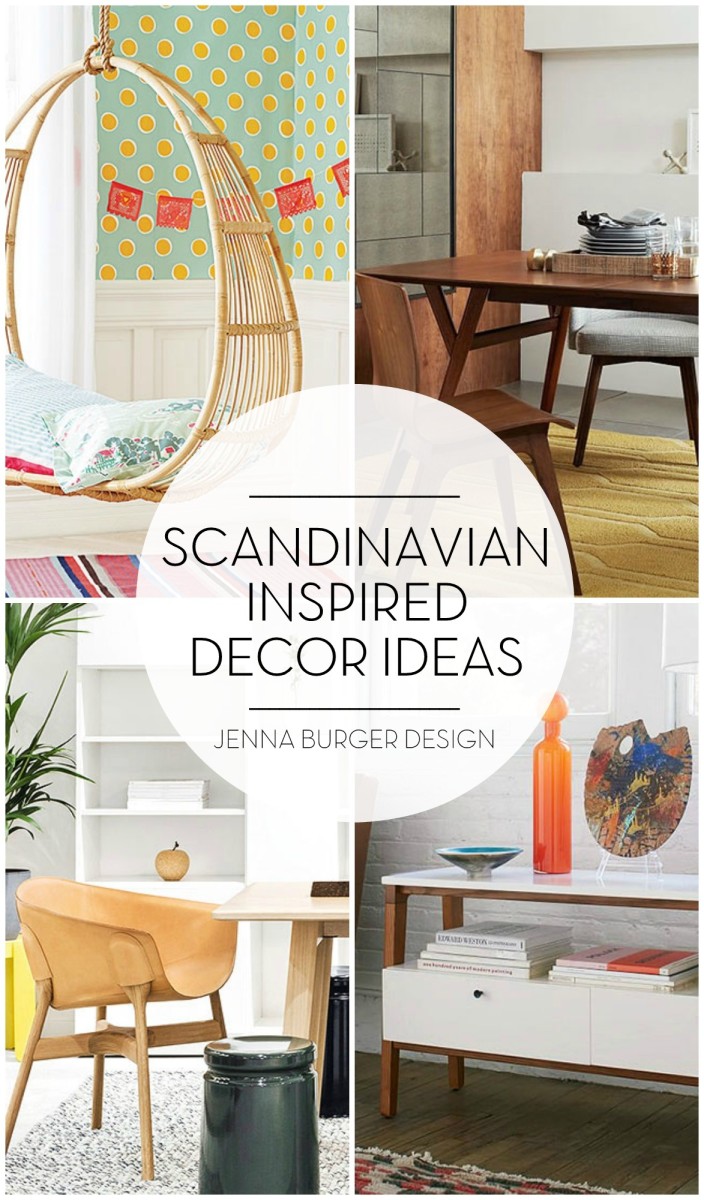
Scandinavian Inspired Decor Ideas

Happy Thanksgiving Eve + One month till Christmas Countdown… it’s a day to celebrate!  

I’m in the midst of crazy at the moment finishing up a slew of client projects before the 4-day freeze of unwinding + relaxing with the family.  But before my send off, I wanted to let you know that I have a new article to share on BHG.com.

The topic is a favorite… Scandinavian Style.

Scandinavian furniture + decor evokes clean lines, high-quality craftsmanship, and a minimalist style.  Form follows function when it comes to creating understated, well-made decor that can be beautifully integrated into any home.

Click to read the full article on  >>> Dreamy Scandinavian-Inspired Decor Ideas

Dreamy Scandinavian Inspired Decor Ideas: Scandinavian furniture + decor evokes clean lines, high-quality craftsmanship, and a minimalist style. Check out these beautiful ideas...

Check out my bio page on Better Homes and Gardens

More content coming soon to be featured on BHG.com!

The Right Tools for the Girl on the Go

The Right Tools for the Girl on the Go: The must-have necessities for running a small business. www.jennaburger.com

Without a doubt, I can say I am a girl on the go.

Owning + Running + Managing a small business takes a lot of time + effort and everyday brings on new challenges.  At the same time though, I know I’m on the path that was set out for me and most moments of the day don’t even feel like ‘work’.  While trying to manage my business + my family’s needs & obligations, everyday is different.  I somewhat have a routine, but ‘my job’ is certainly not 9 to 5.

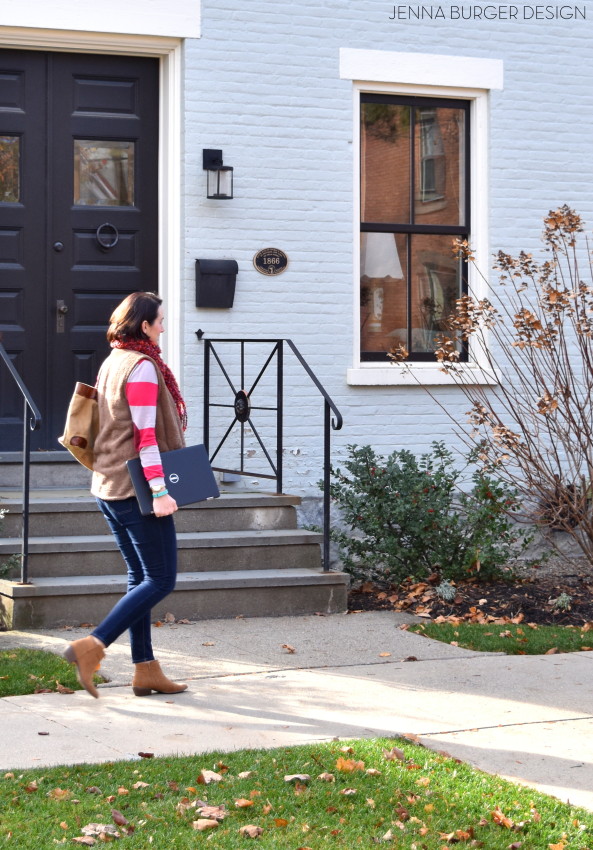
When I carve out the time to work, it’s often on the go.  From my desk to the library to the local coffee shop, I sit + design where I feel most inspired at that moment.  Some days are strictly at-my-desk, buckle-down days to pump out as many design plans as possible, while others days I hit the pavement at 9am and am out & about all day from job to job. On those days when I’m meeting with a client, I often throw all my stuff – Intel 2 in 1 laptop / tablet, camera, notebook, sketchpad, calendar, pens – in my work bag and hit the road running…

The Right Tools for the Girl on the Go: The must-have necessities for running a small business. www.jennaburger.com

No matter what time of day (or night more often than not), my laptop is like my 4th child.  It’s by my side, pulling at my leg to give it attention until it rests for a moment, then rises again in a few hours… Seriously though, my laptop is my everything pertaining to work.  From creating design plans, to searching for client inspiration + printing vision boards, to blogging about my latest DIY creation, my laptop is open + on A LOT!

The Right Tools for the Girl on the Go: The must-have necessities for running a small business. www.jennaburger.com

And how can it not be when it can easily switch from laptop to tablet in seconds?!

The Right Tools for the Girl on the Go: The must-have necessities for running a small business. www.jennaburger.com

When I’m at my desk creating a floor layout + design plan for a client, I am often at a flat surface with a mouse in hand (yes I still use a mouse) working away…

The Right Tools for the Girl on the Go: The must-have necessities for running a small business. www.jennaburger.com

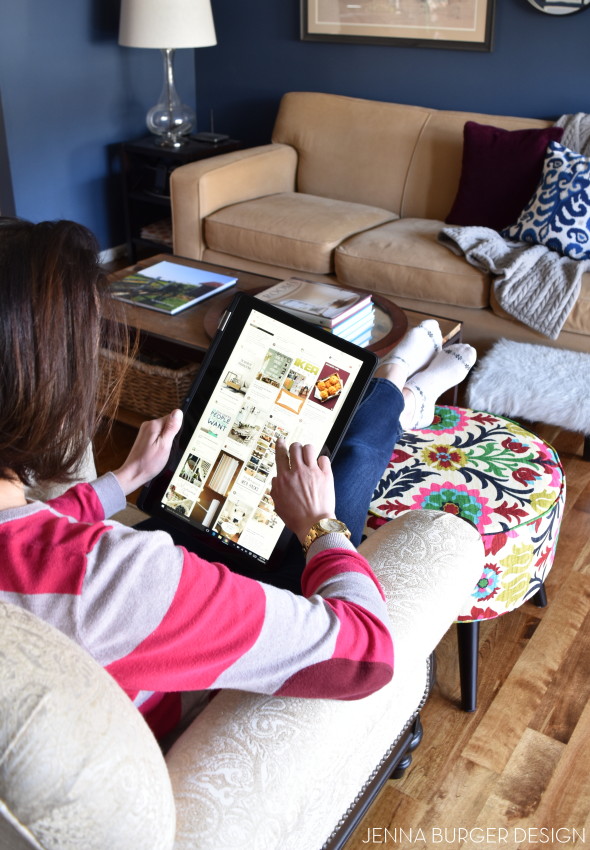
But after hours of sitting straight – often by the afternoon – I like to enjoy an afternoon tea and put my feet up to scour the internet for inspiration. This is where the tablet comes in perfect…

Along with cutting out images from magazines (it may be old school, but it’ll never go out of style), I also hunt through favorite design sites & resources, and create collaborative pinterest boards with clients to gather my ideas.

The Right Tools for the Girl on the Go: The must-have necessities for running a small business. www.jennaburger.com

The Right Tools for the Girl on the Go: The must-have necessities for running a small business. www.jennaburger.com

For me, a laptop + tablet is most important for my job because it allows the flexibility to work anywhere at any time.  I’ve had a desktop and I’ve had other tablets in the past, but I can’t lug a huge desktop with my to a job site and I don’t want to be weighed down with multiple devices.

The Intel 2 in 1 laptop and tablet make my life easy and as a girl on the go,  I couldn’t be happier.

Along with my laptop, here are a few other essential tools that help me run my business…

The Right Tools for the Girl on the Go: The must-have necessities for running a small business. www.jennaburger.comLive Work Create Bag / Planner / PenNotebook / Clipboard / Intel 2 in 1

ON THE BOARDS

I have a slew of projects on the boards at the moment.

Along with my kitchen renovation (did you see the sneak peek picture I shared on Instagram?), I am working on an entire 3000 s.f. home remodel which will include a new kitchen, master bathroom, and all new interior furnishings.

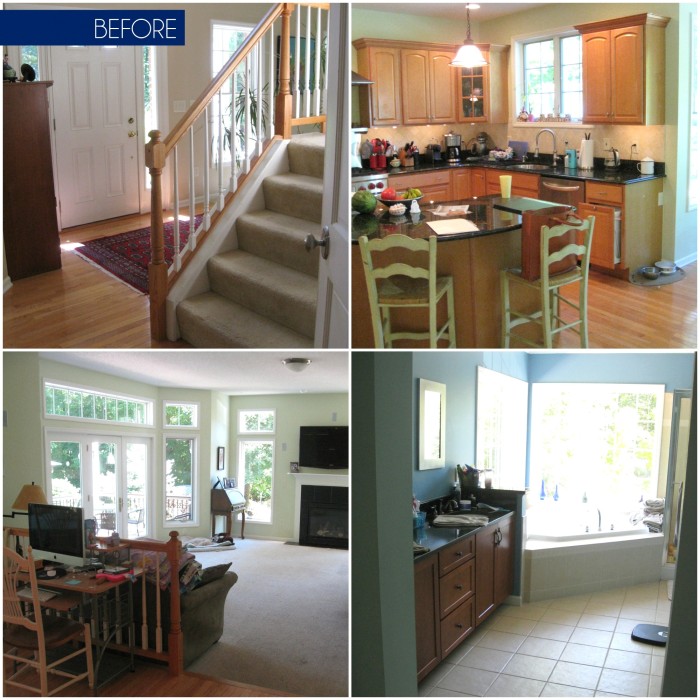
Client 'before' images

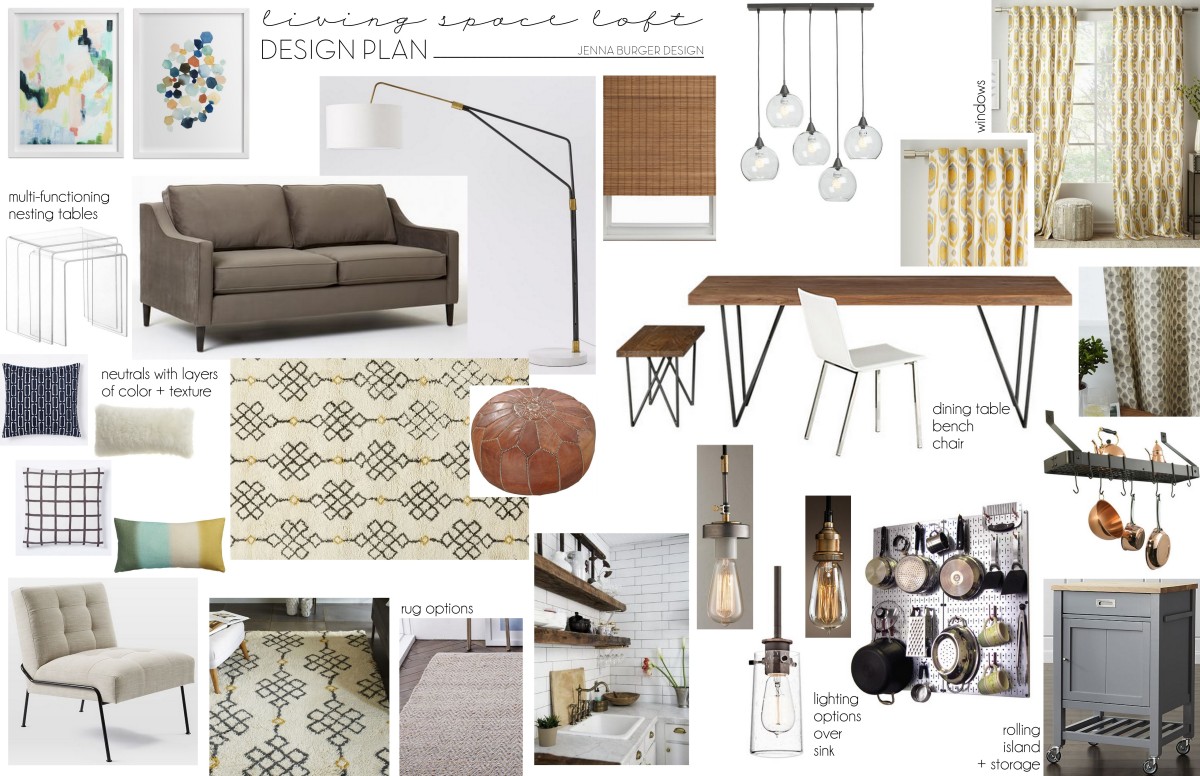
I’m also in the midst of creating a design plan for a row house with a west elm style aesthetic.  From the floors to the walls and everything in between, I will be selecting + styling it all.

Creative Vision Board with West Elm style direction

For this project, I am meeting with the client tomorrow to present the design direction.  I have a few more details to finish up, so I’m off to the coffee shop to jump on my laptop to get a few more hours of work in before the kiddos come home…

The Right Tools for the Girl on the Go: The must-have necessities for running a small business. www.jennaburger.com

Running a small business isn’t easy.  It takes time, energy, and money.  But what is most important is passion and drive.  If you love what you’re doing, like me, then most moments don’t feel like ‘work’.

As a girl on the go, I try to surround myself with others to handle the nitty-gritty and to power myself with equipment + the right tools to make my life easier and to allow my focus to be on letting my creative juices flow.

DISCLOSURE: THIS POST IS A PARTNERSHIP WITH INTEL TO SHARE MY THOUGHTS + HOW I USE THE INTEL 2 IN 1 LAPTOP FOR MY DESIGN BUSINESS. #spon

Mod Podge DIY Christmas Ornament

This post is brought to you by Plaid and Blueprint Social. The creation + words shared are 100% my own!

Another Christmas season is upon us…

As the seasonal boxes start to make their way up from the basement, I always like to integrate our festive favorites with new finds + homemade creations.

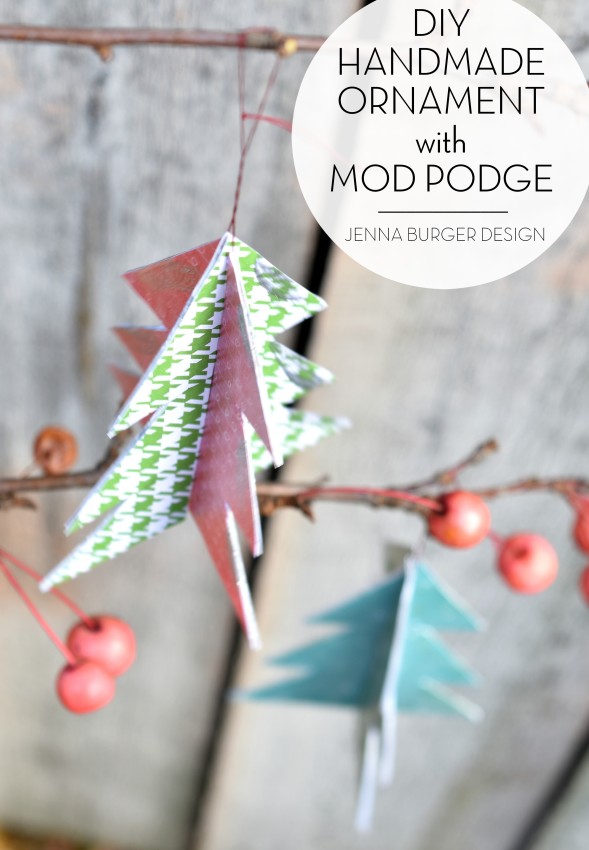
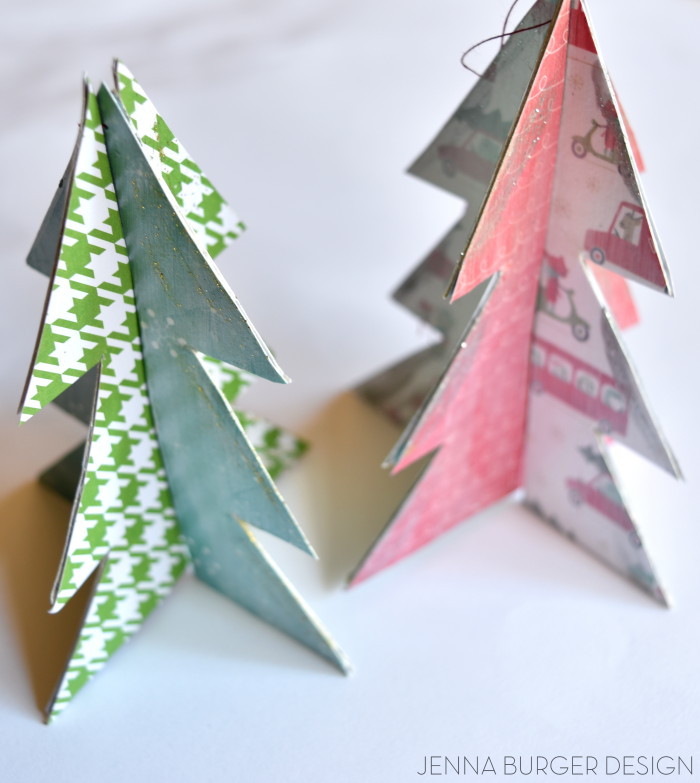
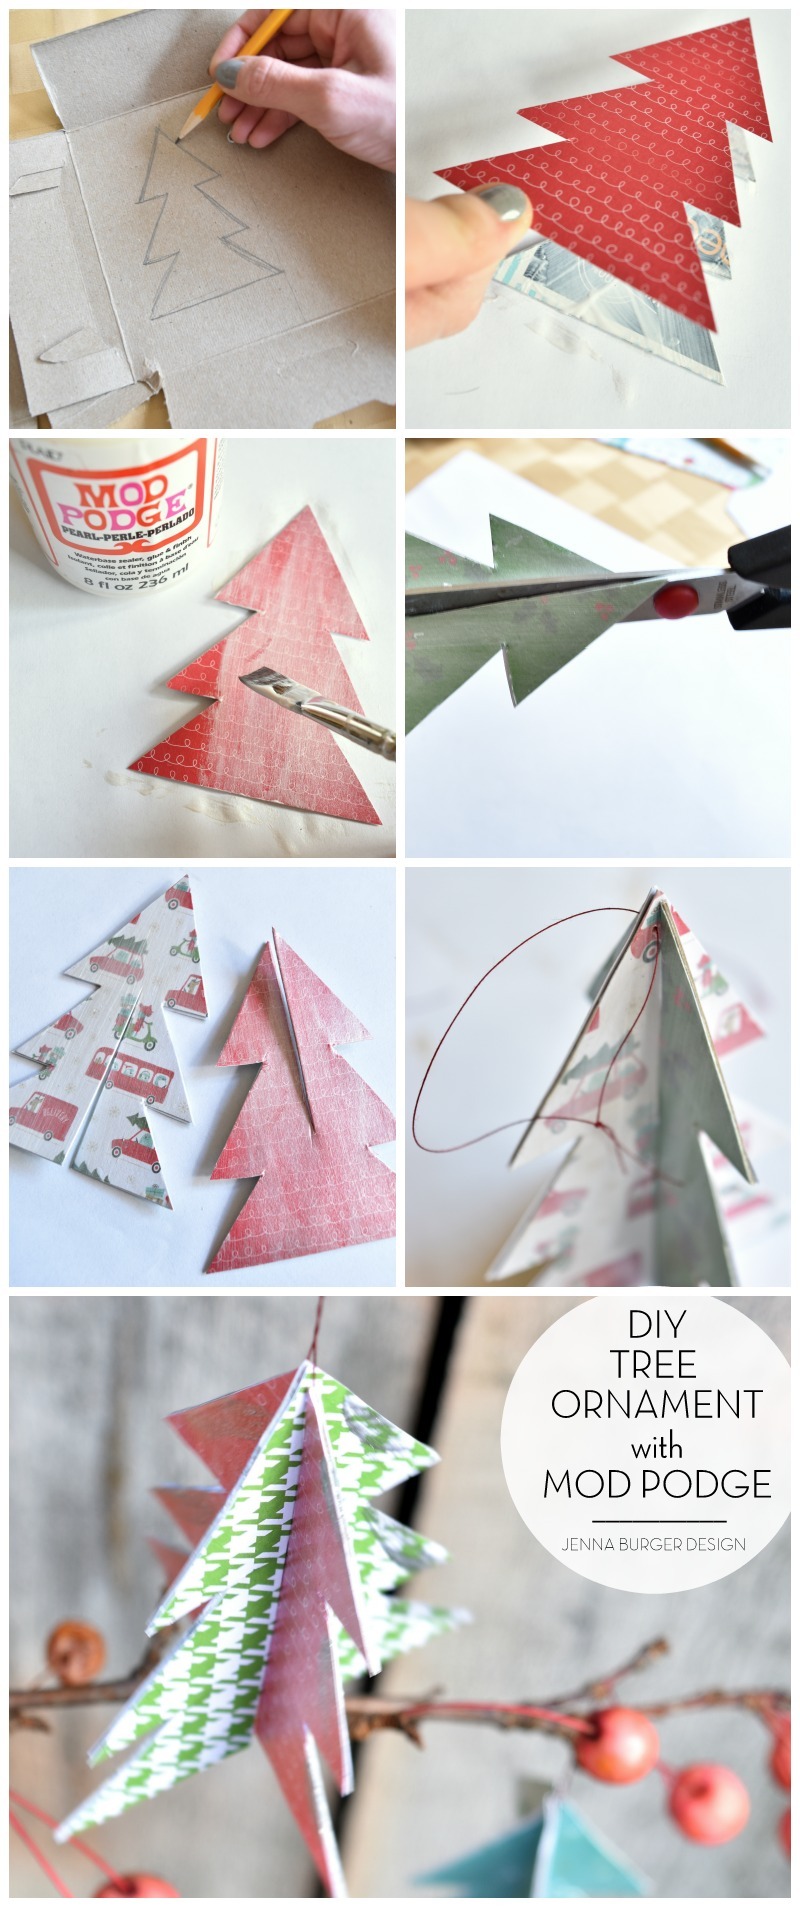
Last week while the kids had a half day of school, we got our craft-on and made these adorable Christmas Tree Ornaments with Mod Podge

DIY: Handmade Tree Ornament using Mod Podge by www.JennaBurger.com

Mod Podge by Plaid has a slew of products for decoupaging, but they just launched a new pearl formula that has an pearlescent sheen and it’s so pretty for creating a ‘mother of pearl’ effect.  When creating my handmade paper trees, the pearl Mod Podge gave the prettiest top coat overlay along with adding some some gold + glitter using FolkArt Multi-Surface paint.

DIY: Handmade Tree Ornament using Mod Podge by www.JennaBurger.com

MATERIALS

> Mod Podge (pearl)
> FolkArt paints
> Cereal box (or thin cardboard)
> Scrap paper – holiday theme
> Scissors
> Needle + Thread

HANDMADE ORNAMENT

This project was real easy + enjoyable to make.  It took about a half hour and I was able to get the kids involved too.

1

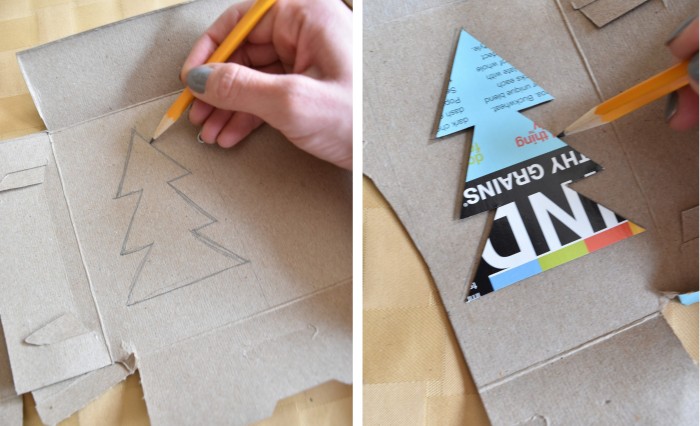
Using the inside of a cereal bar box, I started off this project by free-hand sketching a christmas tree about 3″ tall.

I cut it out and used it as a template for the other trees.

DIY: Handmade Tree Ornament using Mod Podge by www.JennaBurger.com

2

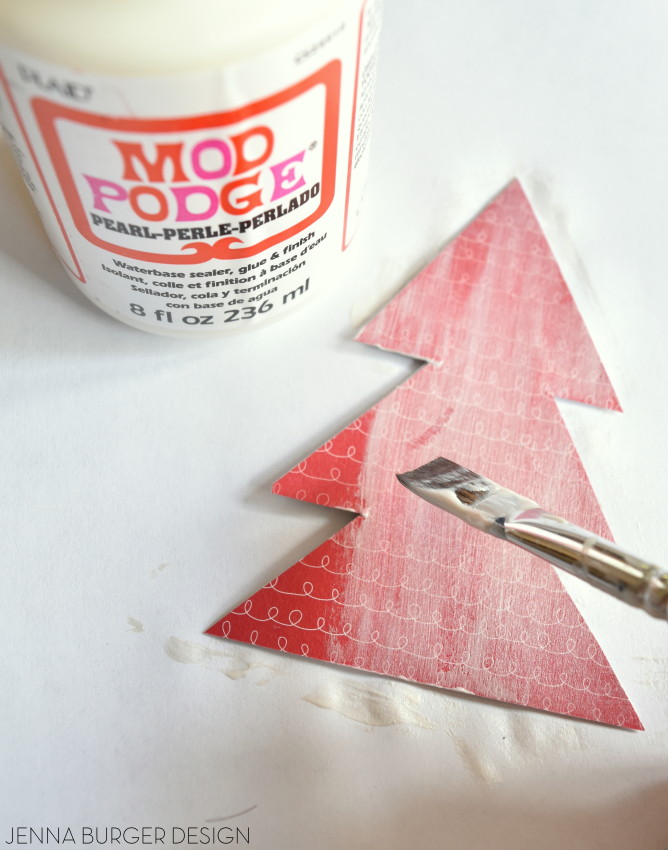
Once all the trees were cut,I I used the template and traced the tree outline of the holiday themes scrapbook paper.

Then it was time to have fun with the Mod Podge…

I applied a thin layer of Mod Podge to the cardboard layer and layed the cut scrapbook paper in place.

DIY: Handmade Tree Ornament using Mod Podge by www.JennaBurger.com

3

Then I applied another thin layer of Mod Podge over the pretty paper.

DIY: Handmade Tree Ornament using Mod Podge by www.JennaBurger.com

4

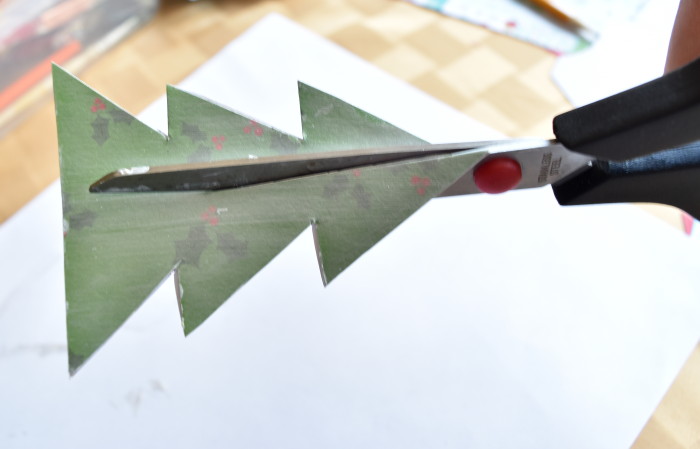
Once all the trees were dry, it was time to assemble them.  To do that, they would need to fit in to each other.

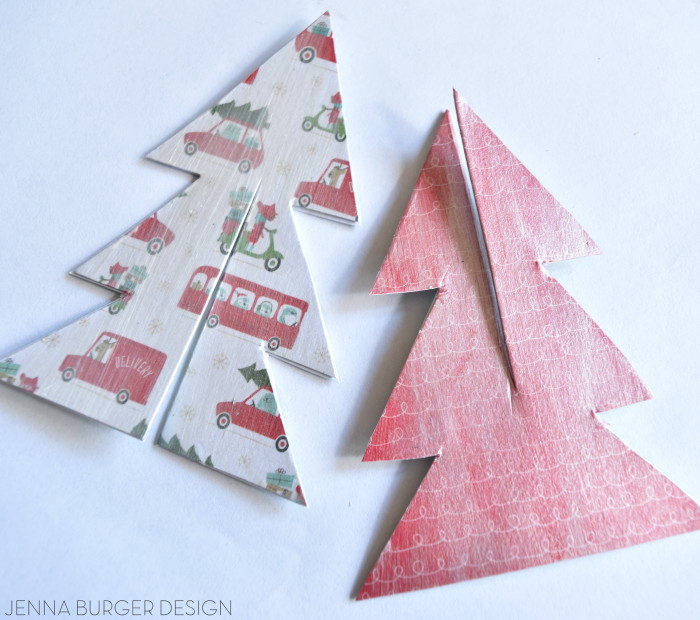
Using scissors, I cut a slit half way down the center of 2 trees – one top down, the other trunk up…

DIY: Handmade Tree Ornament using Mod Podge by www.JennaBurger.com

DIY: Handmade Tree Ornament using Mod Podge by www.JennaBurger.com

5

Assembly time… fit them together to make a three-dimensional tree.

This is when I jazzed them up using the FolkArt paints.  I added a little gold + glitter…

DIY: Handmade Tree Ornament using Mod Podge by www.JennaBurger.com

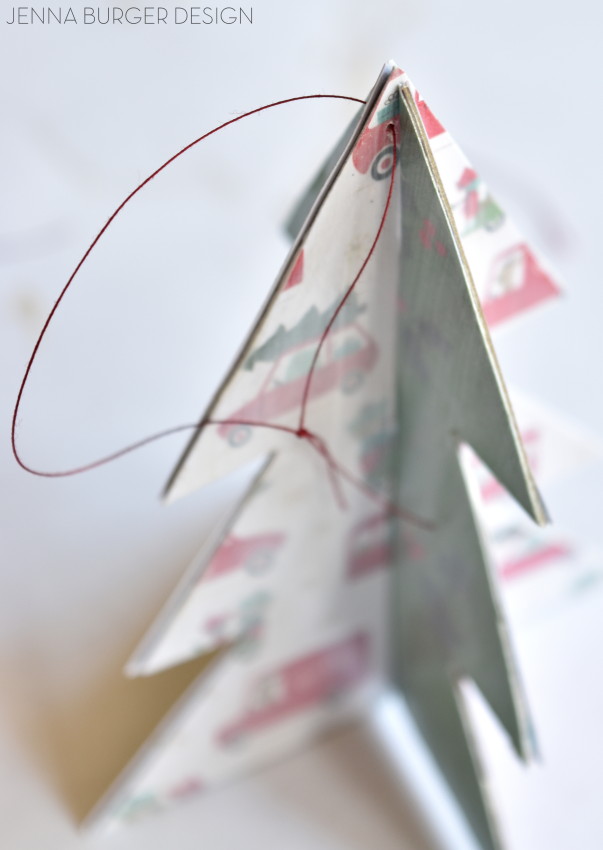
To hang, I used a needle to thread a thin string through the top of the tree.

DIY: Handmade Tree Ornament using Mod Podge by www.JennaBurger.com

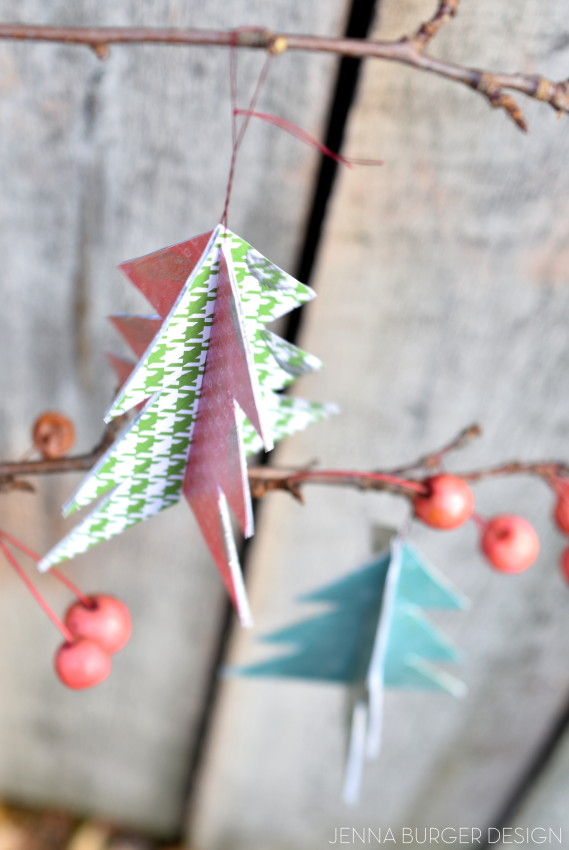
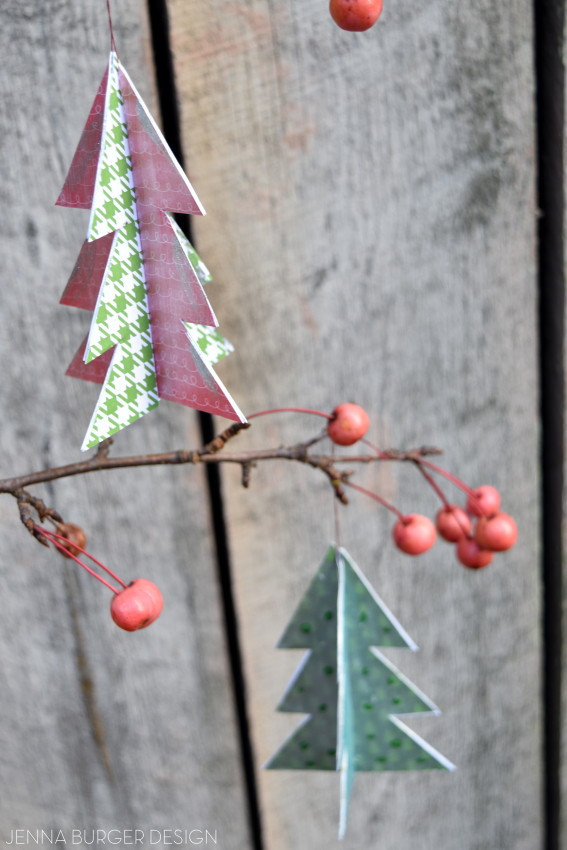
The simplest + prettiest handmade ornament for the tree…

DIY: Handmade Tree Ornament using Mod Podge by www.JennaBurger.com

DIY: Handmade Tree Ornament using Mod Podge by www.JennaBurger.comRECAP

or to pin for later…

DIY: Handmade Tree Ornament using Mod Podge by www.JennaBurger.comCheck out more products + DIY creations by Plaid on Pinterest, Facebook, and Instagram!

I wish you a wonderful season of decorating + Happy Holidays!

Kitchen Progress: Staining Hardwood Floors

Kitchen Renovation: Patch, Repair, and Stain the Hardwood Floors

We are still full-force ahead with the kitchen renovation through Lowe’s.

Last week was equal to a roller coaster ride with lots ups & downs, but we kept chugging along and now another week is upon us.  I *think* I can say, I see the light…

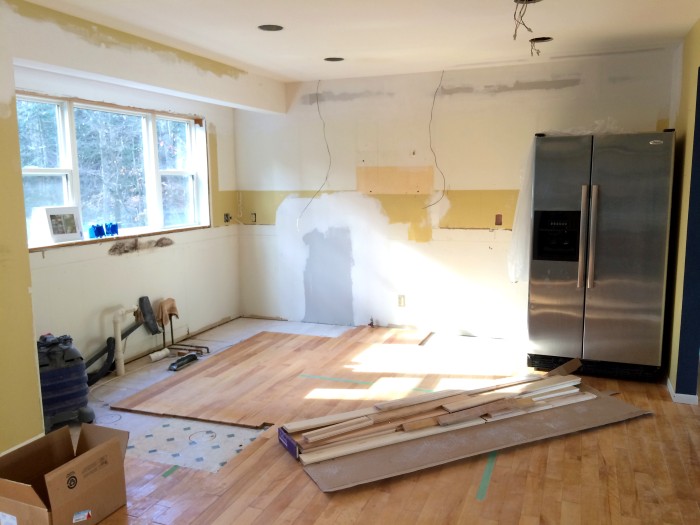
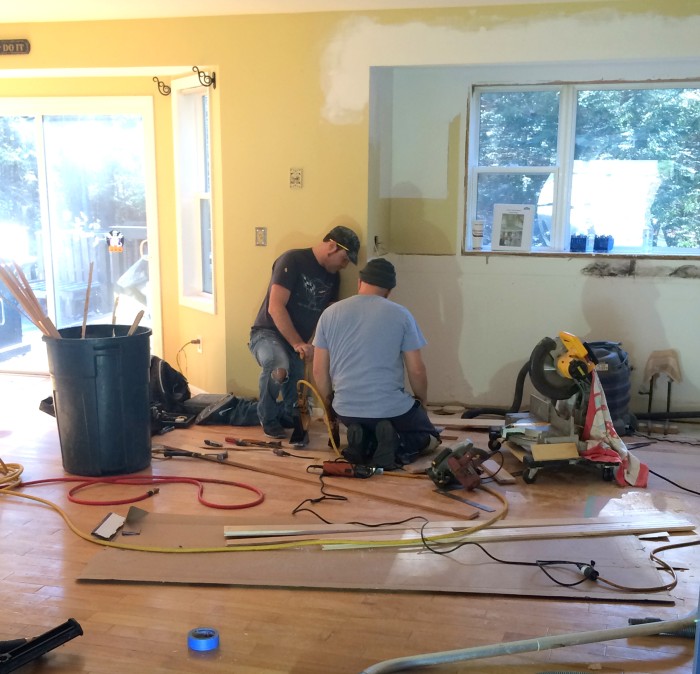
Since I left off last, a lot of progress has been made.  Day one of Demo was very exciting + eye-opening.  It was amazing how we woke in the morning with a full working kitchen, but by the days end, it was completely taken apart with only the shell of the space remaining…

The remainder of week one was filled with patching and repairing the walls, moving electrical openings (in the walls + ceiling), and sanding the walls to prepare for the cabinet installation.

Demo Day: Steps to Demolishing an Existing Kitchen + Creating a new renovated space. Remodel by www.jennaburger.com

Once the vertical surfaces were complete, the next area of focus was the hardwood floor, which started out week two of renovations.

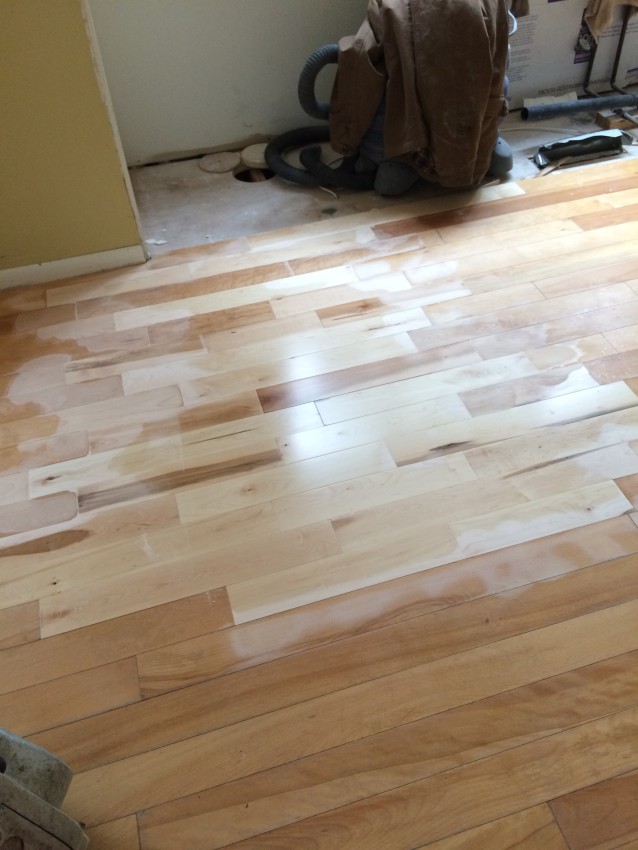
Because of the new cabinetry layout, there was an area of hardwood where the dishwasher used to sit that needed to be patched with new material. Once patched, it would all be sanded, then stained…

Kitchen Renovation: Patch, Repair, and Stain the Hardwood Floors

The major stresser started with locating material…  Our existing hardwood is 3-1/4″ wide maple and it was challenging to find material in a short amount of time – literally we had less than 2 days.

Hardwood should be in the home 3- 7 days before installation so it can acclimate to the setting.  After locating enough material at Lumber Liquidators, we were good to go.

It took about 3 hours to weave in the new hardwood material to patch the vacant area.

The new material is lighter than the existing, but no worries, because it would all be sanded down to bare wood…

Kitchen Renovation: Patch, Repair, and Stain the Hardwood Floors

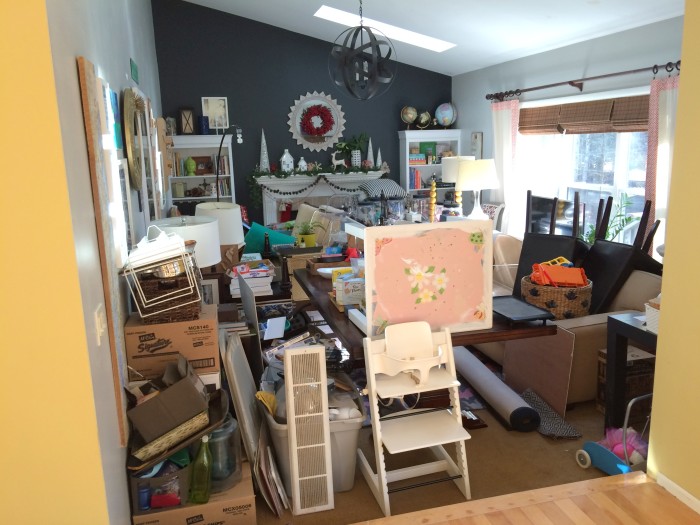
At this point, we ‘moved out’ of the house because despite it smelling bad, all of our furniture was piled high in the family room & it was like walking through a maze in the foyer…

Next step for the floors, sanding…

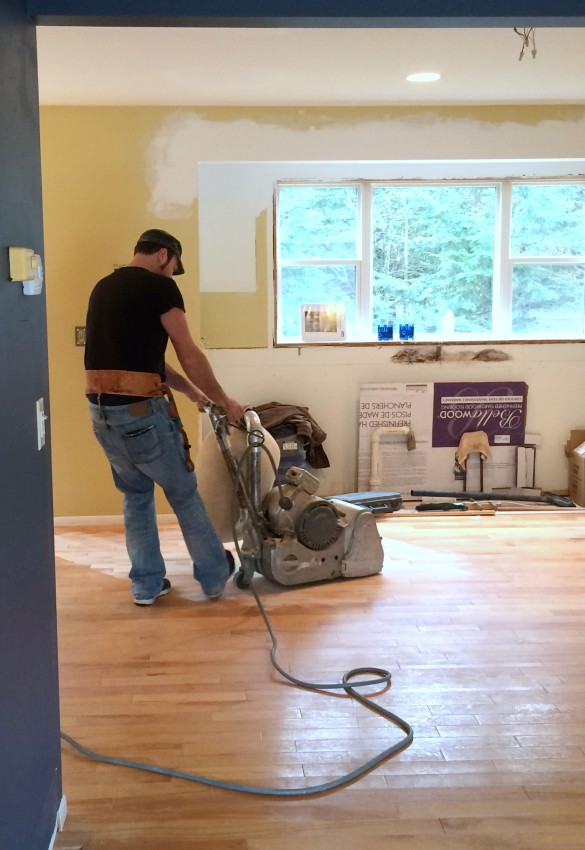
We hired out for the floors through our Lowe’s independent contractor, who used an industrial sander to sand all the floors down to the bare wood.  When finished, the gorgeous maple shined through, but in my taste they had to go darker especially with the new white cabinets.

Kitchen Renovation: Patch, Repair, and Stain the Hardwood Floors

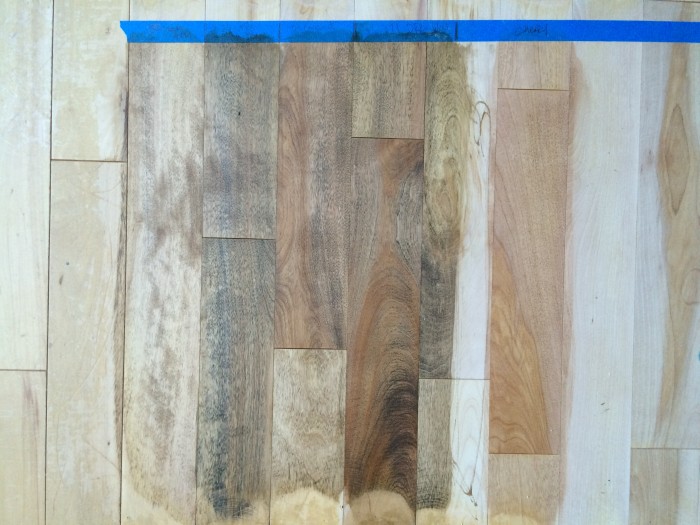
Here were a few samples of stains that they applied…

Kitchen Renovation: Patch, Repair, and Stain the Hardwood Floors

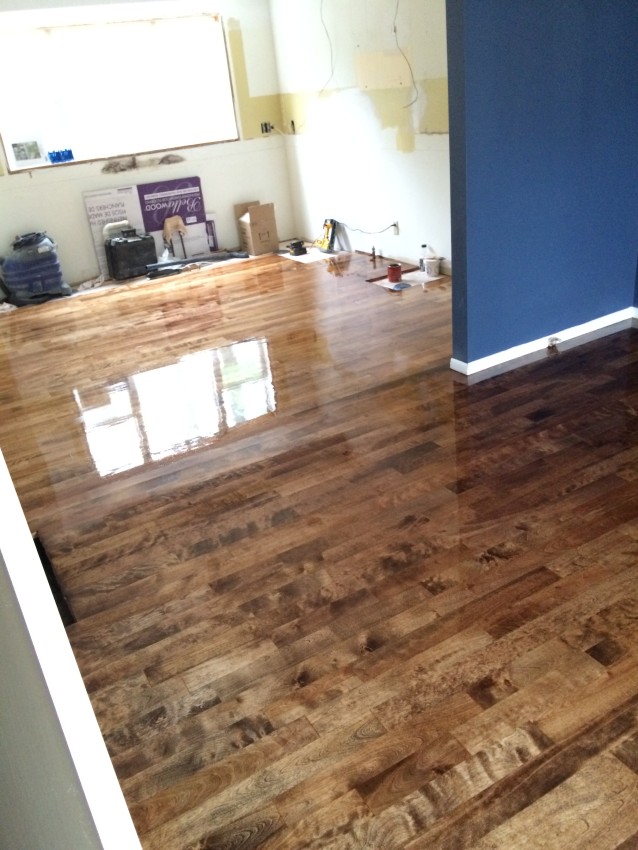
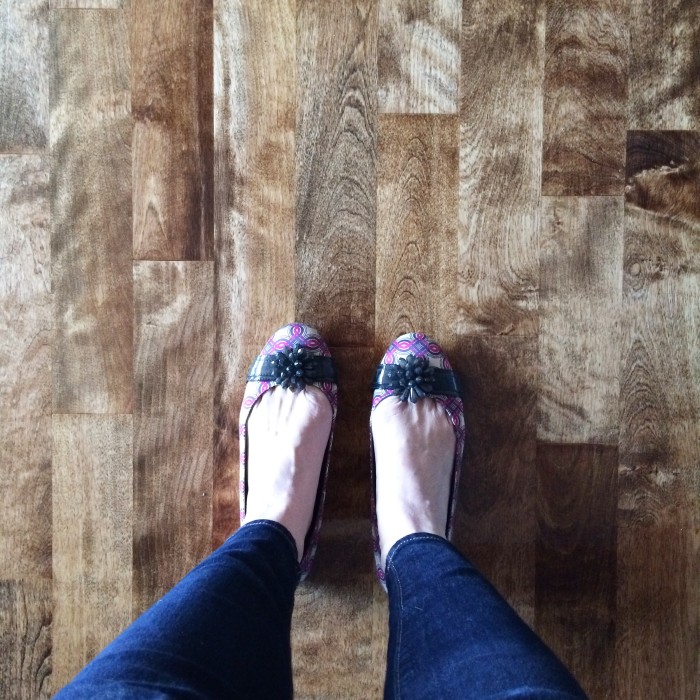
In the end, I chose a stain called COFFEE and it’s the 2nd board from the left. It was the perfect medium brown hue with no red or orange.

After the floors were sanded on day 2, they stained the floors, and applied a clear coat of oil sealer in a glossy finish.

Kitchen Renovation: Patch, Repair, and Stain the Hardwood Floors

It looked like a gym floor with the high-gloss finish but this wouldn’t be the final finish.  They apply this high-gloss finish (2 applications) because it is most durable.  Once dry (2 days later), the floors were lightly sanded again and the final coat of sealer in a satin finish was applied.

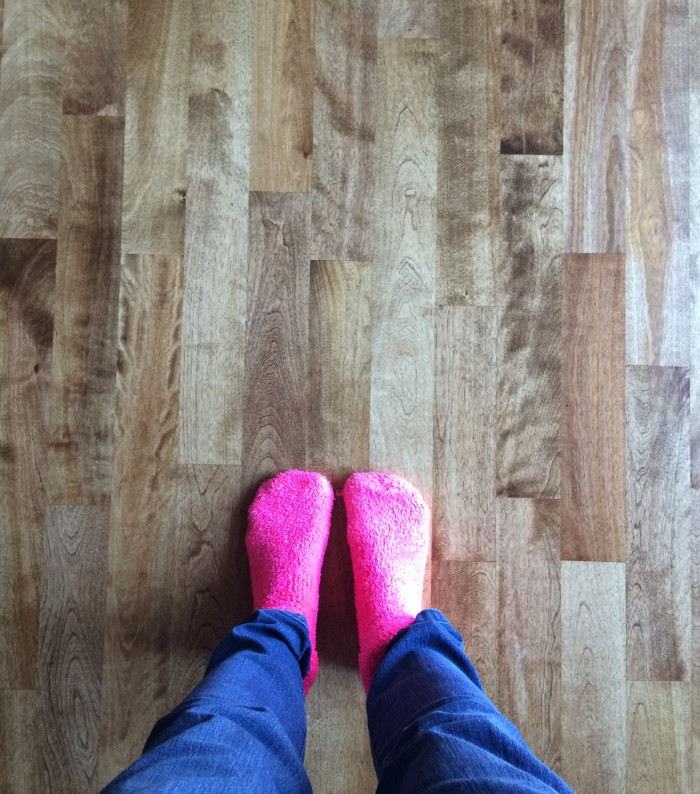
After 5 days we moved back home – yay – and this is how the floors look now…

Kitchen Renovation: Patch, Repair, and Stain the Hardwood Floors

I just can not contain my love for them…

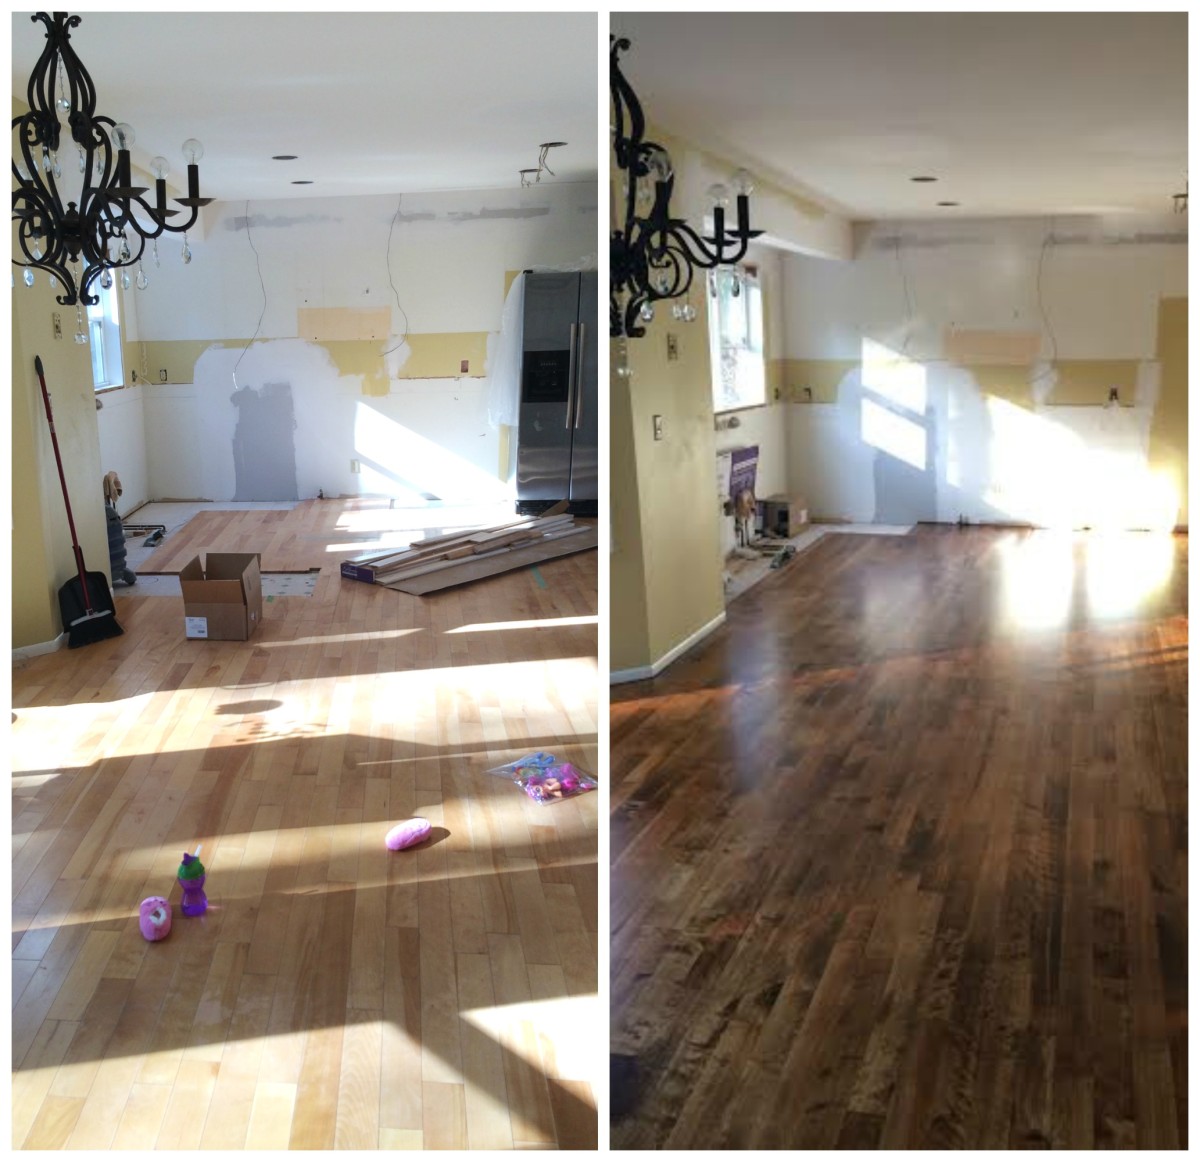
The before & after is breathtaking.  It looks like a completely new space!

Kitchen Renovation: Patch, Repair, and Stain the Hardwood Floors

They are so rich + warm.

I’m in love.

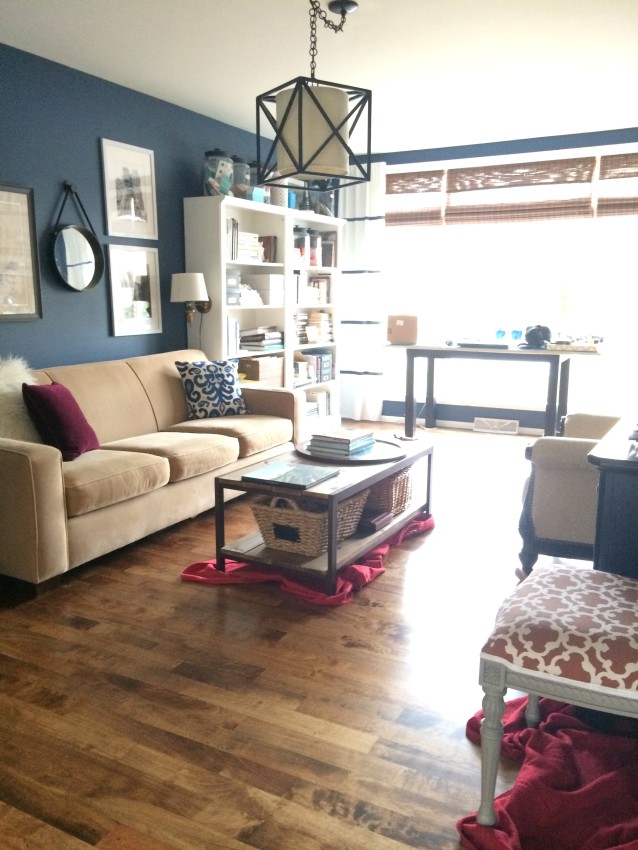
The floors will take 30 days to fully cure, just like paint on a wall, so for now all the furniture is placed on blankets, craft paper, or felt.  I want to protect these bad boys!

Look how beautiful the front room looks with the new floors (ignore the bright red blankets, lol)…

Kitchen Renovation: Patch, Repair, and Stain the Hardwood Floors

And there you have it.  Walls complete. Wood complete.

Next up cabinets + appliances!  They will be arriving in the coming days…

RECAP

Before I leave you, here is a recap for staining hardwood floors:

Staining hardwood floor can be quite an undertaking.  It’s not difficult, but time consuming and involved.  A good sander + high-quality product is key!

THE PROCESS FOR STAINING HARDWOOD FLOORS

– 1 –  Clean + Clear out the room(s)

– 2 –  Sand floors to bare wood – coarse grit sandpaper to fine grit sandpaper

– 3 –  Stain floors (a roller works best)

– 4 –  Polyurethane floors (3 times using a roller)

– 5 –  Let the poly cure for at least 48 hours

– 6 –  Move back in!

>>> Polyurethane takes 30 days to full cure, so no shoes.  Be Remember to place furniture down, don’t drag!

Steps to Staining Hardwood Floors to achieve a beautiful new finished floor! www.JennaBurger.com

If you want to see all the posts documenting the kitchen renovation, here they are from start to finish:
Wonderful White Kitchen Inspiration
Kitchen Remodel: Before + Plan of Action
Demo Day: Steps for Demolishing the Kitchen
Kitchen Progress: Staining Hardwood Floors
The Cabinets Arrive + Get Installed
Natural Quartz Countertops in the Kitchen
10 Countertop Materials to Consider for the Kitchen
Subway Tile Installation + Choosing the RIGHT Subway
Kitchen Backsplash Tile Options + Inspiration
Choosing a Paint Color + Wallpaper for the Kitchen and Dining Room
Kitchen Renovation: The Appliances
Dissecting the Details
Kitchen Renovation: REVEAL + RESOURCES

DISCLAIMER: THIS KITCHEN RENOVATION IS A COLLABORATION WITH LOWE’S.  ALL OPINIONS + SELECTIONS ARE MY OWN WITH THE ASSISTANCE OF THE LOWE’S DESIGN TEAM.

Nature Inspired Holiday Decor

Good Morning Lovelies – Happy Monday!

I know, I know…

It’s only mid-November and I’m posting about Christmas, but believe me it’s for good reason.

A new article that I wrote is up on BHG.com and it’s about inspiring ideas for holiday decorating using nature.

As the holiday season approaches – Thanksgiving is less than 2 weeks away – it’s that time of year again when we transform our homes from the everyday and fill it with our festive favorites.

Whether you are ready to decorate now or plan on waiting a few weeks, be inspired by bringing the outdoors in this Christmas season…

Click to read the full article on  >>> Nature Inspired Holiday Decor

Nature Inspired Holiday Decor: Ideas to integrate the outdoors into your holiday setting by JennaBurger.comCheck out my bio page on Better Homes and Gardens

More content coming soon to be featured on BHG.com!