There are some do-it-yourself projects that are wham-bam-done and then there are those DIY creations that seem to take as long as building a house…
Well I just wrapped up a fantastic, in my eyes, DIY project but it didn’t come without a hundred hurdles along the way. BUT we – yes, the Mister lent a hand for this one – kept chugging along and made it to the end.
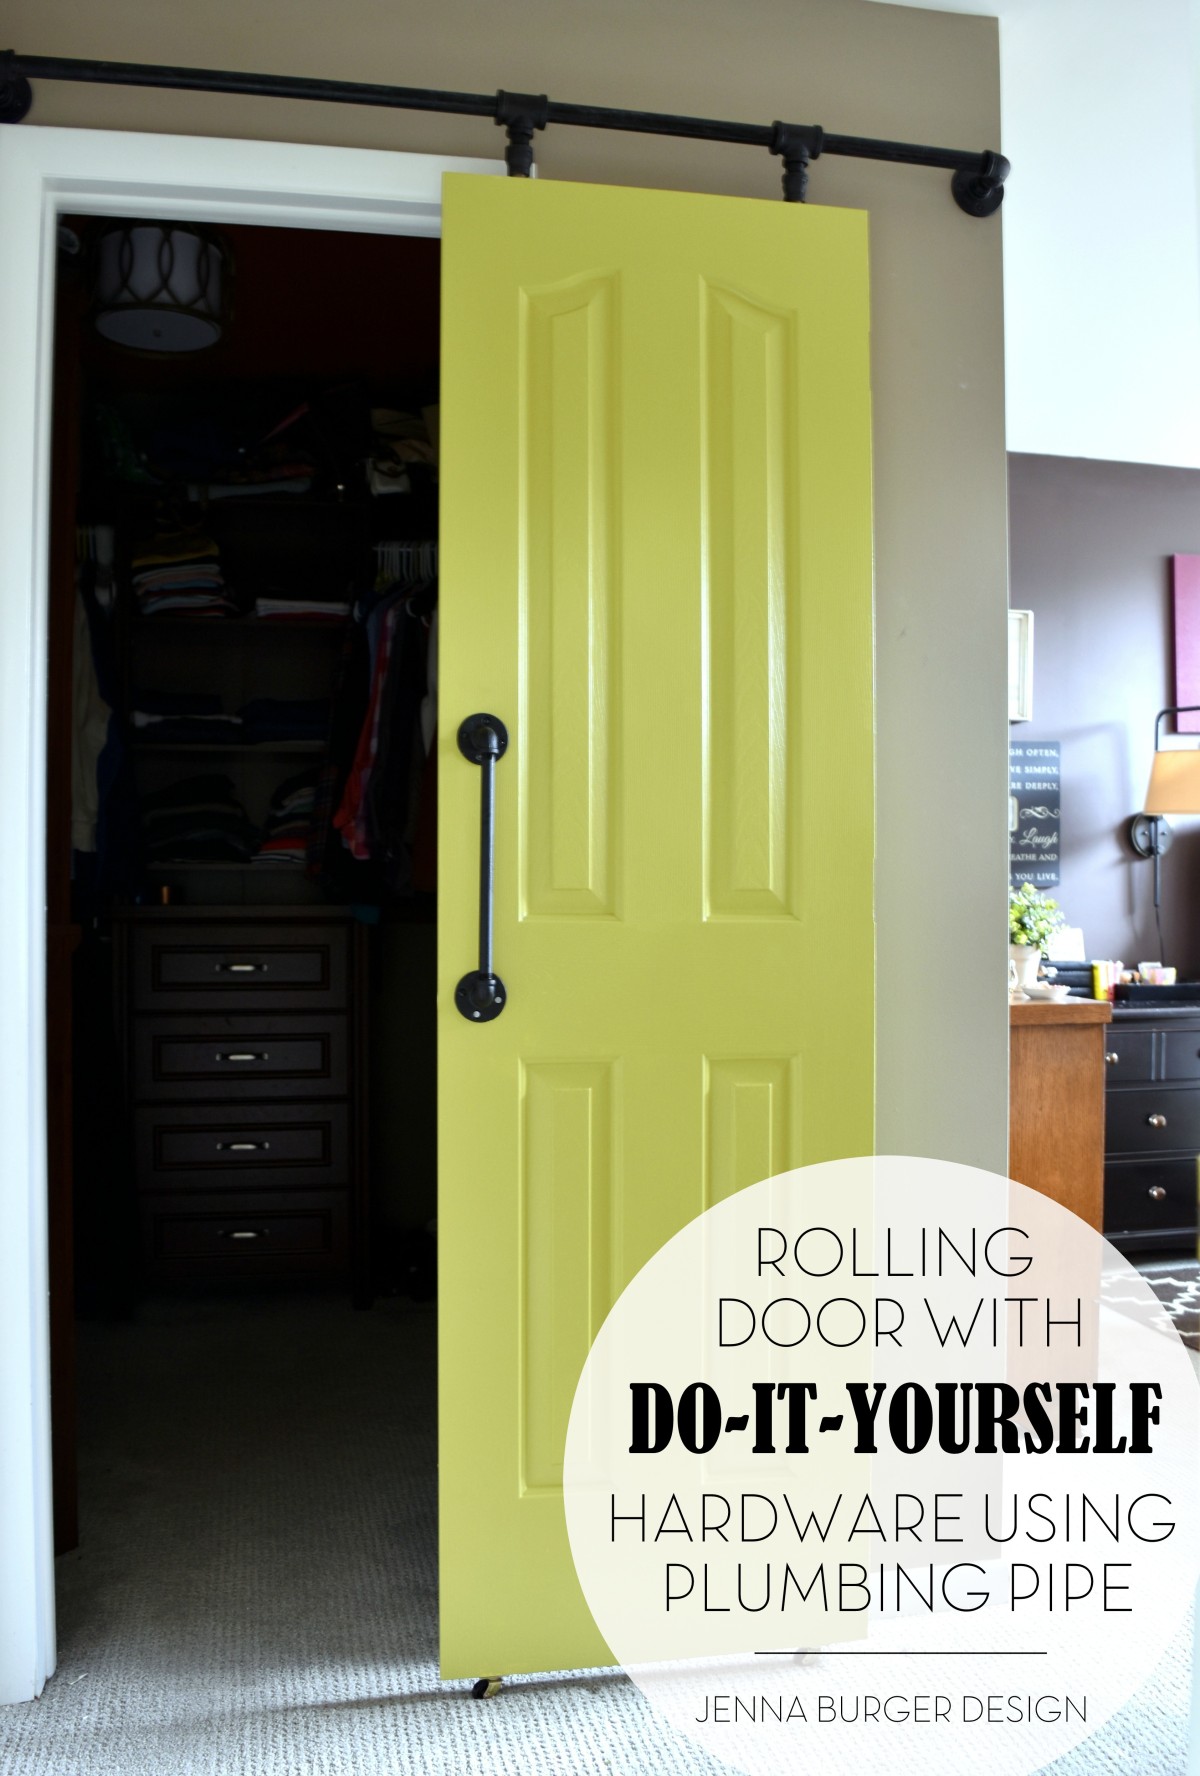
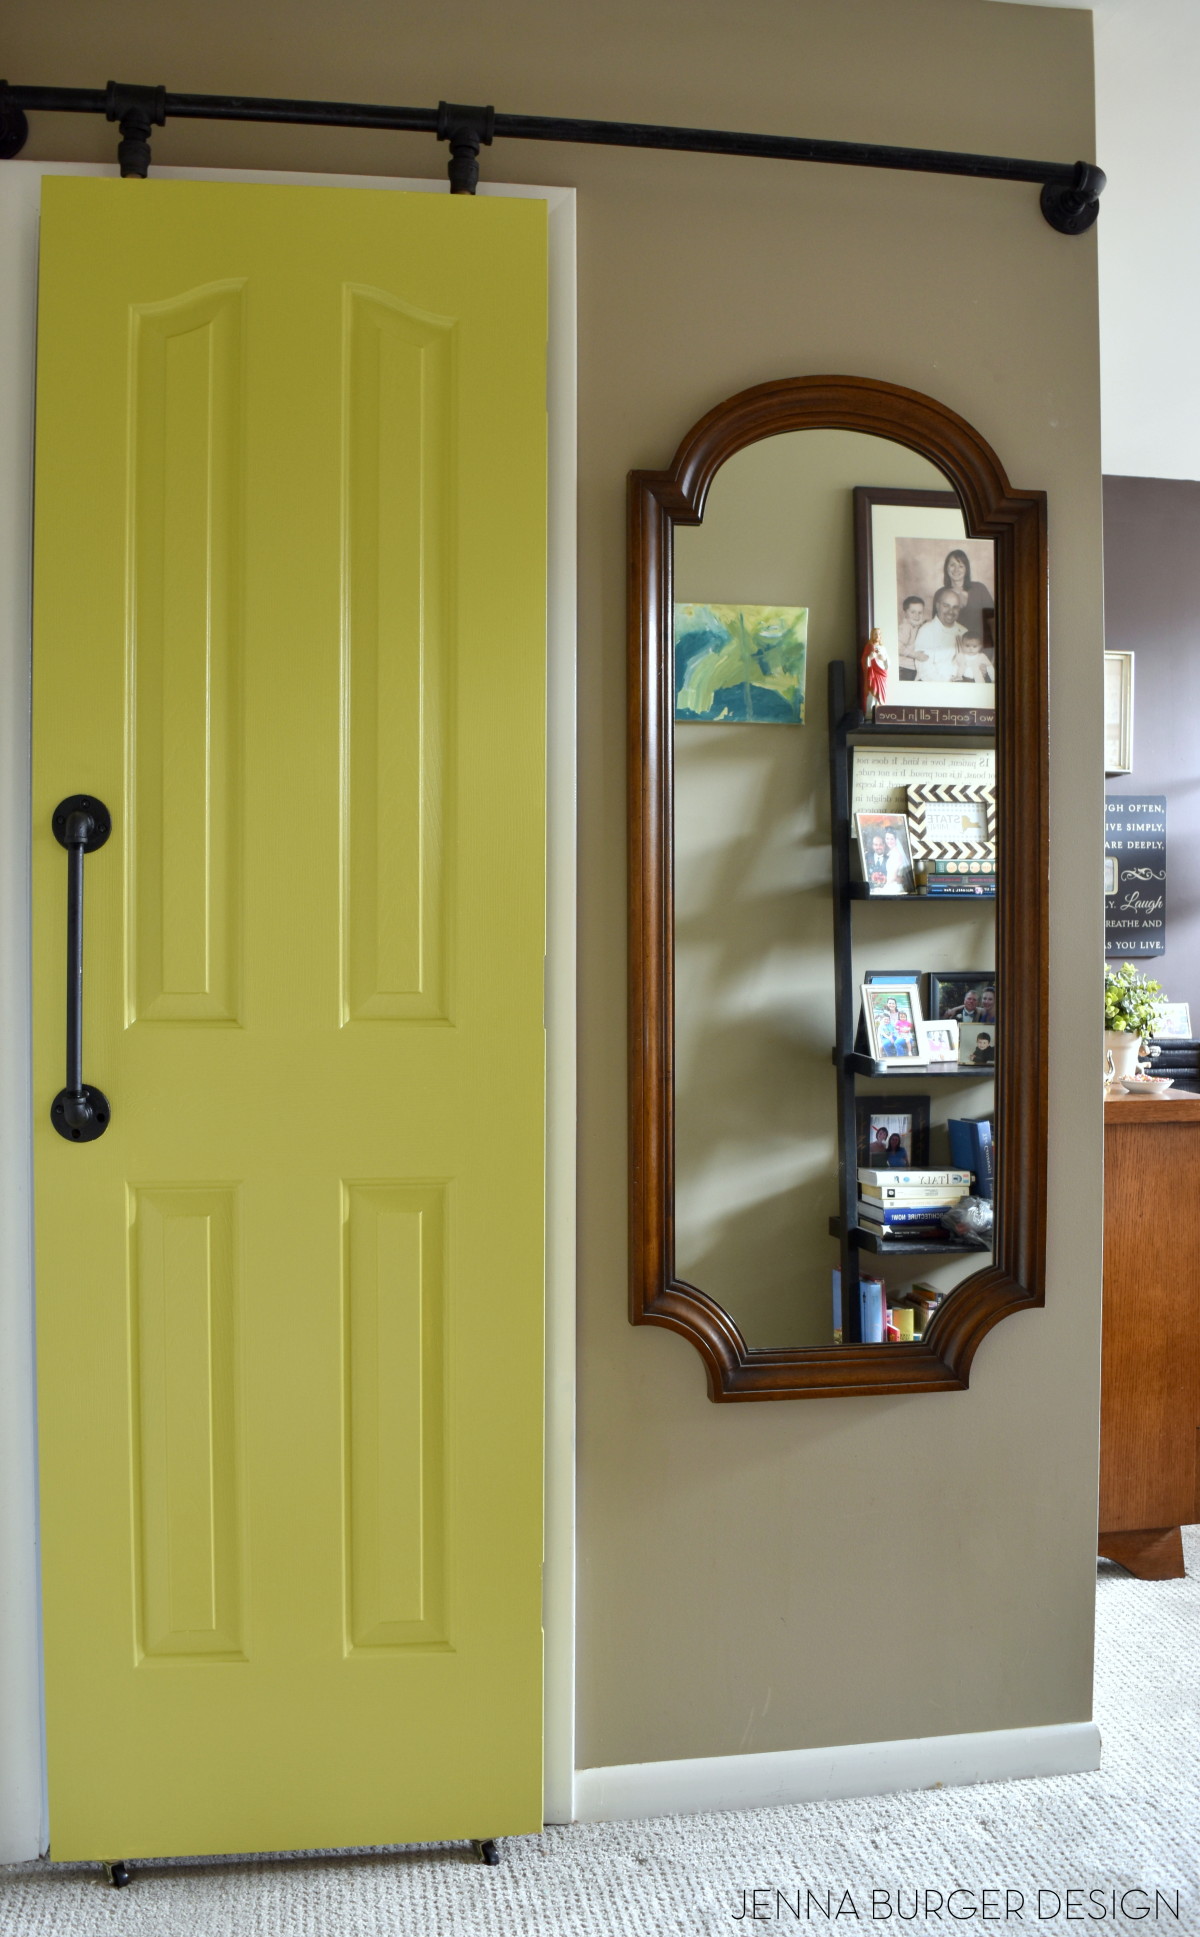
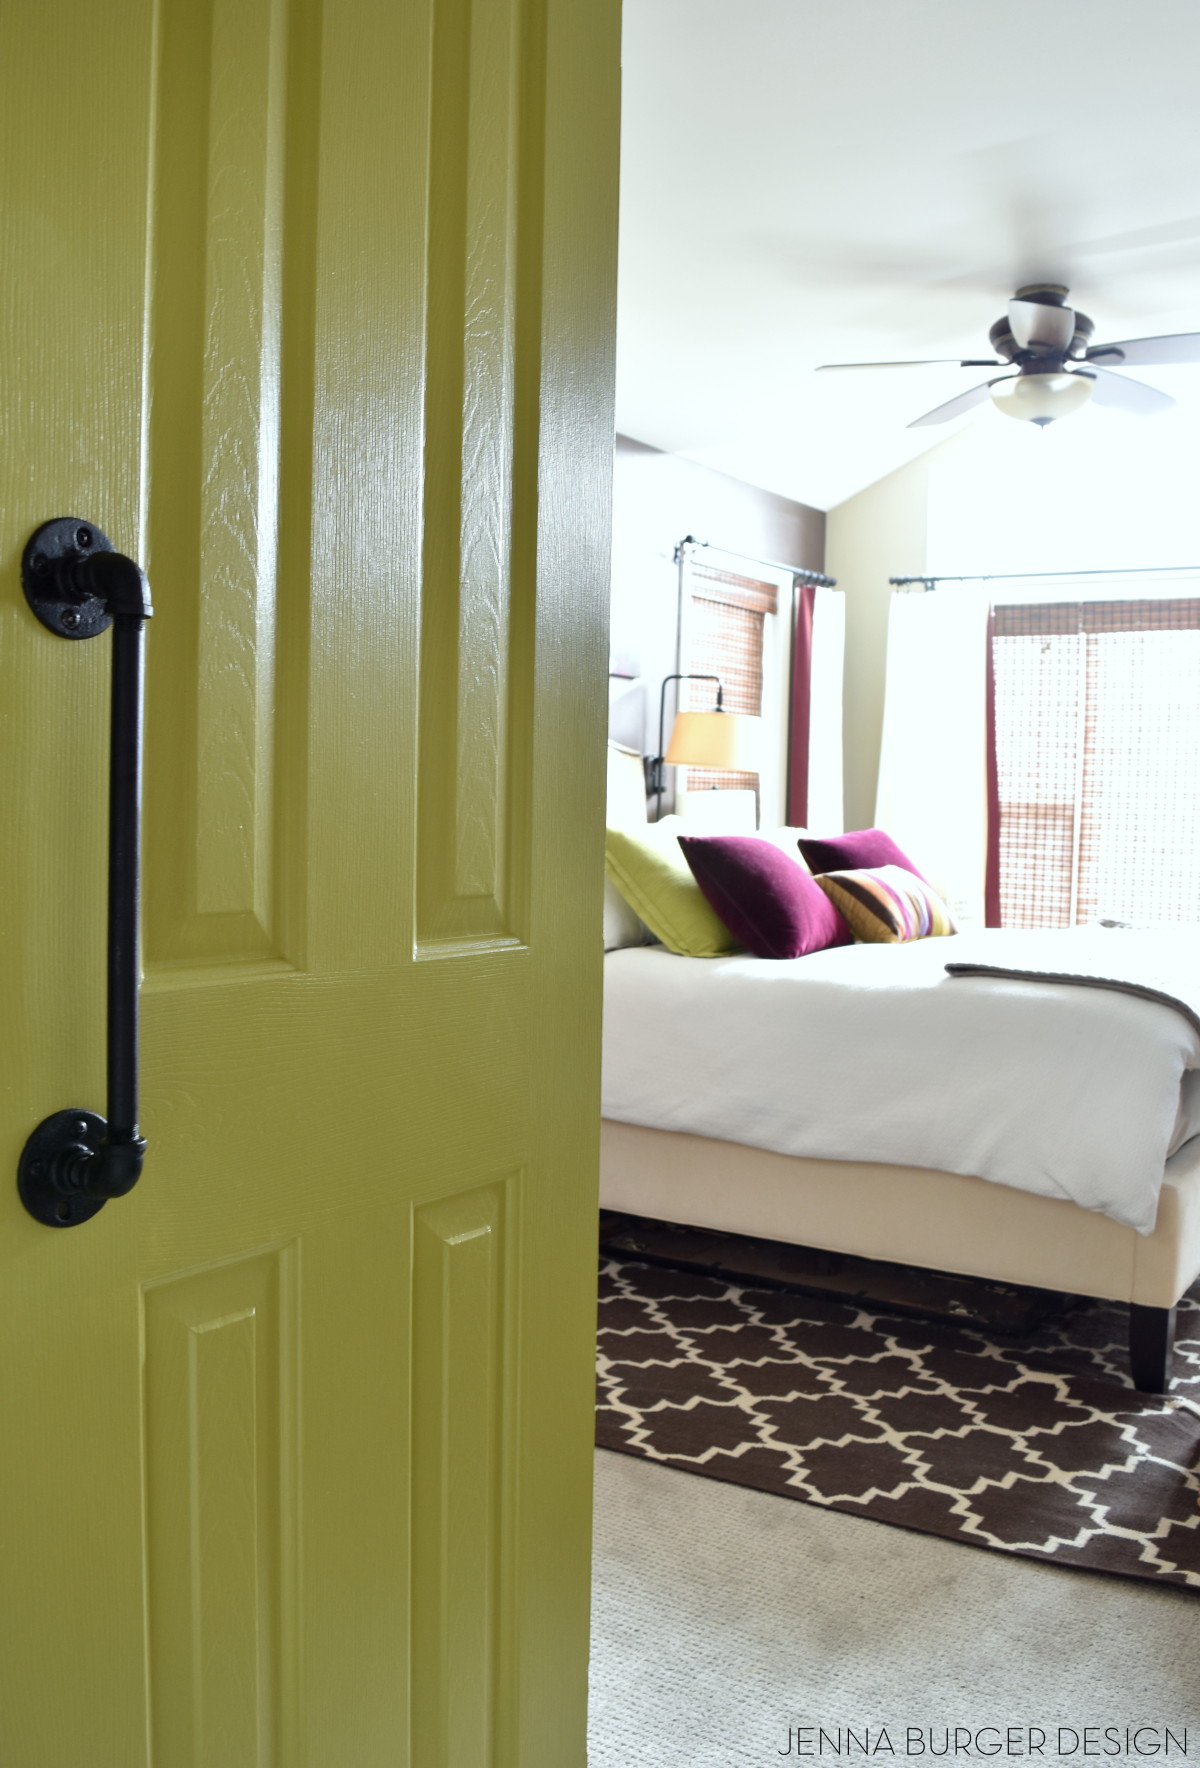
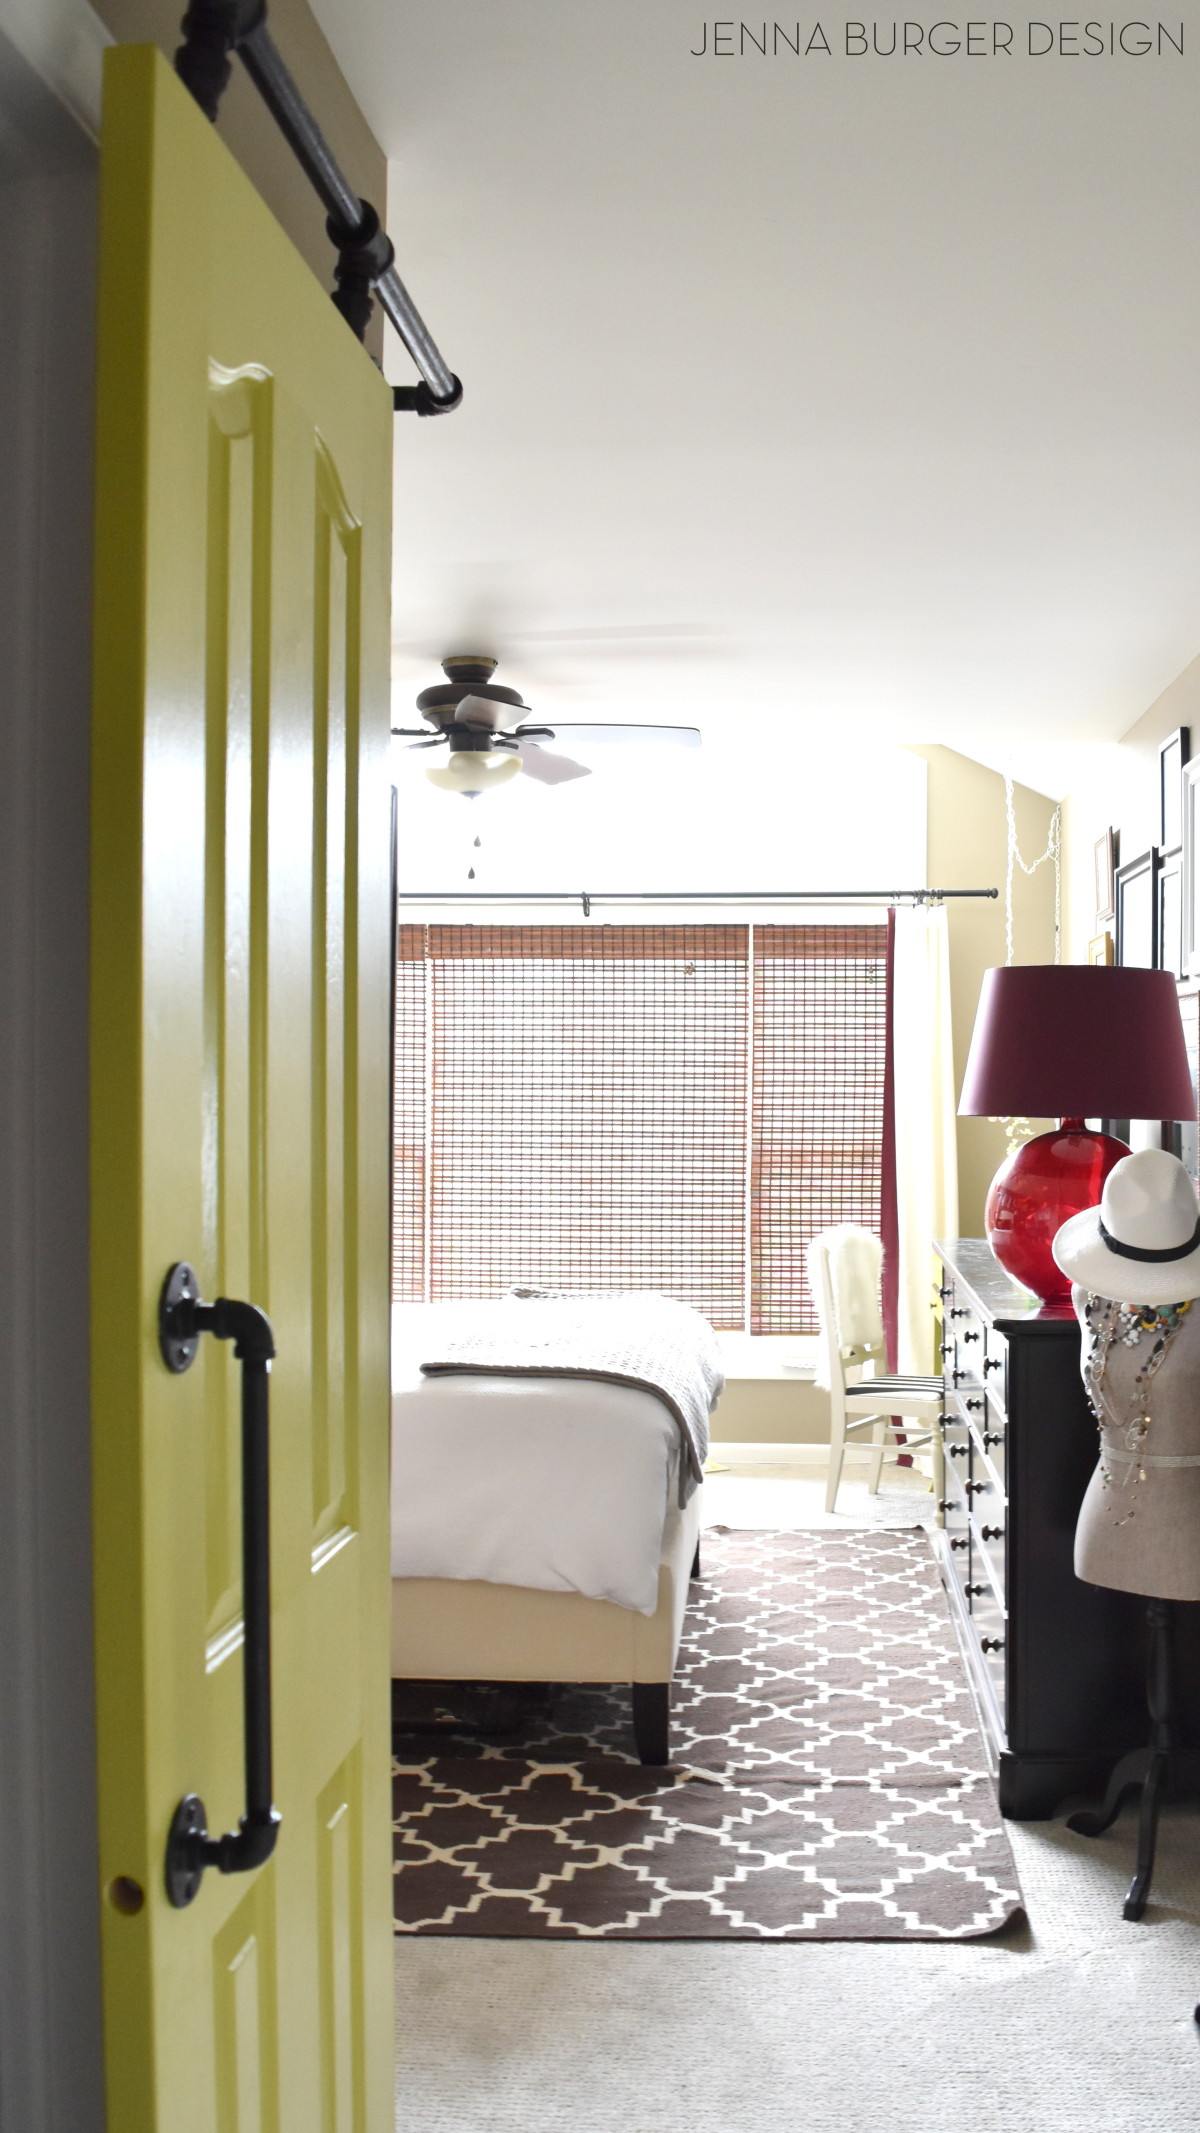
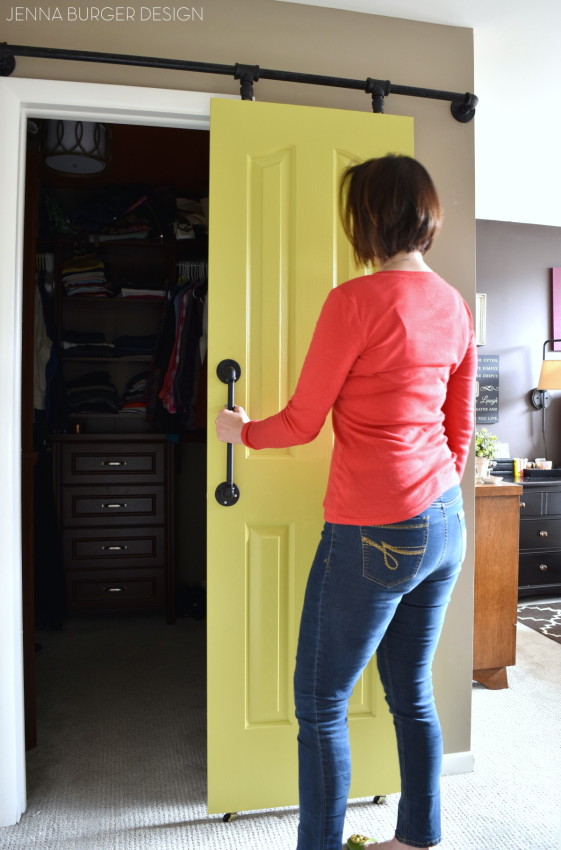
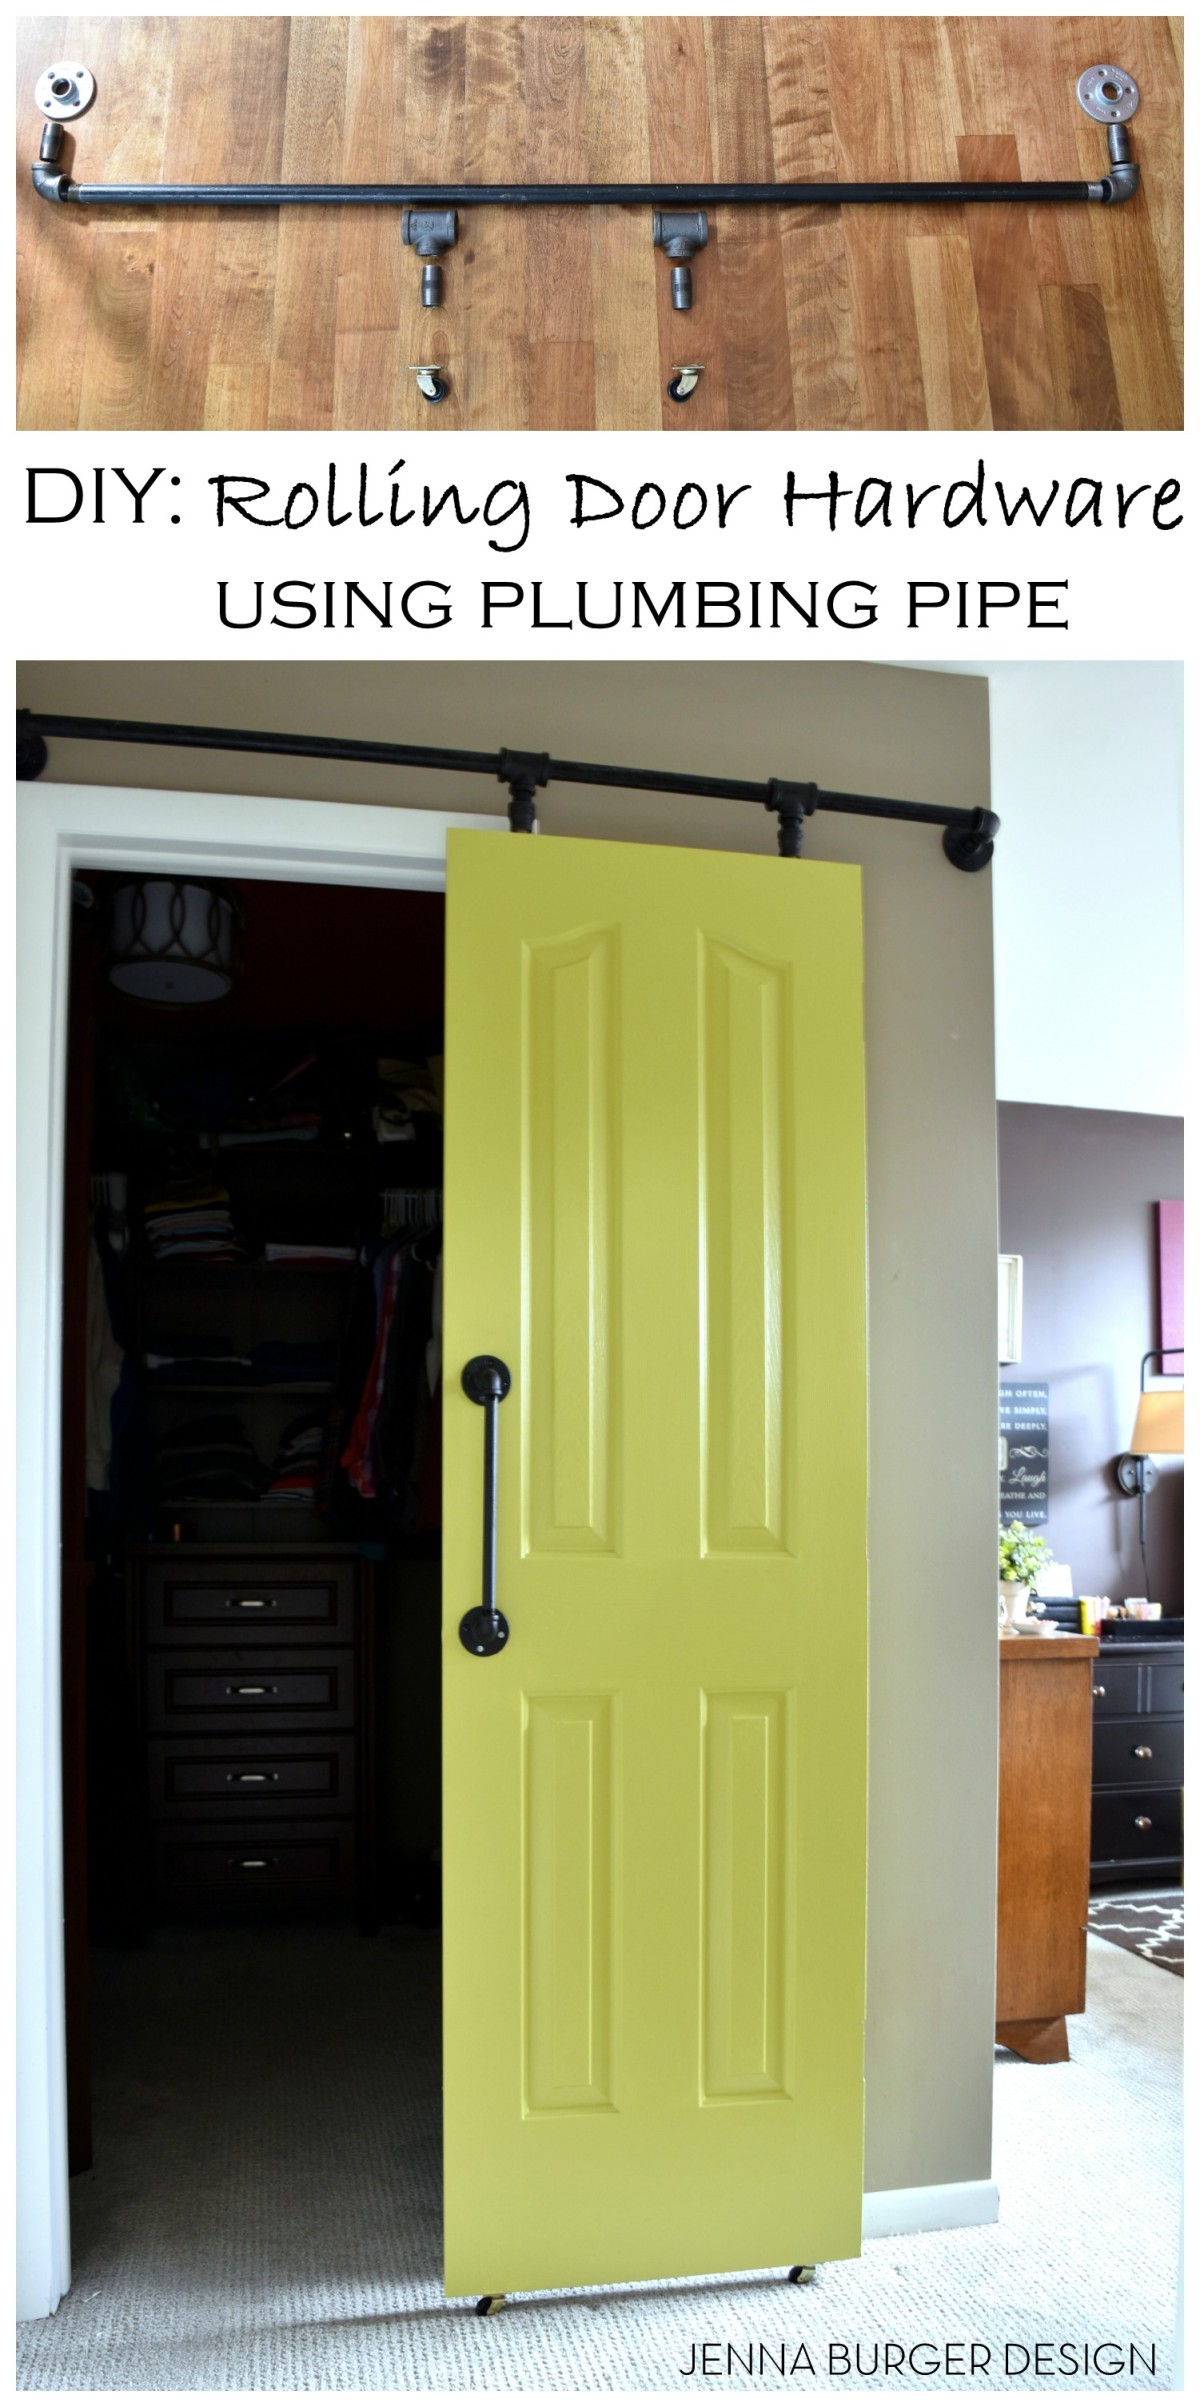
My latest + greatest project? A rolling door with DIY hardware using plumbing pipe. The popularity of rolling doors continues and even though I’m not in favor of following every trend, adding a door of this style was the only solution for our master closet.
The door to the closet was removed a few years back when revamping the space to maximize on shelf area. Since then there’s been no door… Solution? A rolling door to give privacy + a splash of color.
The result of this challenging, but rewarding result…

Let me explain where the hurdles + difficulties arose with this project…
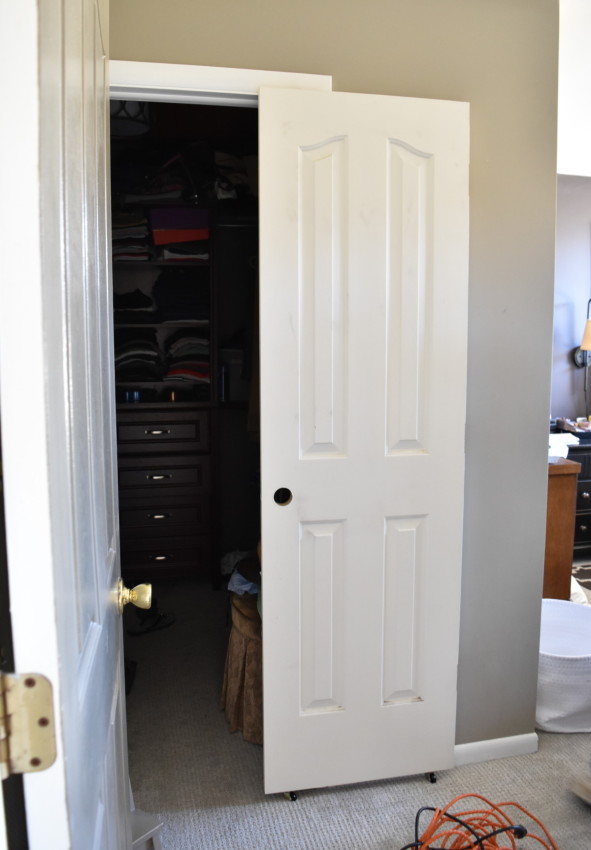
I had anticipated using a reclaimed door, so the hunt was on. After scouring local thrift stores + ‘junk’ spots, I found the perfect door with the 29″ width that I needed. Brought the door home. Went to sand it but it was an old door, and we assumed it was lead paint. So we stripped the door using a liquid stripper. It didn’t work. Hours spent + poor results = a very frustrated DIYer. We painted over the door to seal it. Went to hang it and the door was 6″ TOO SHORT. The salvaged door I spent hours prepping couldn’t be used – UGH. In the end we used the hinged door that was originally used for this opening. The width is not ideal, but it works.
Let’s move forward with the tutorial. There are a lot of parts, so let’s dive in…


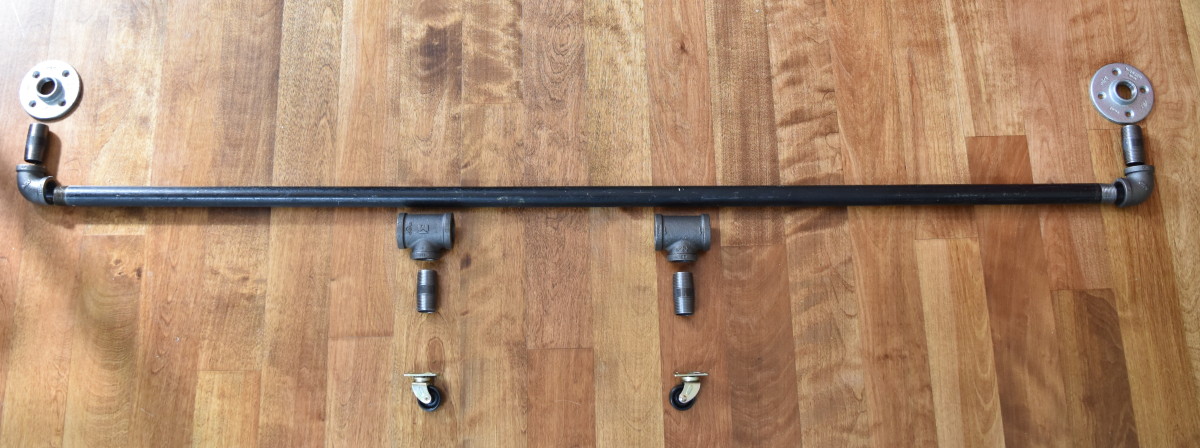
MATERIALS NEEDED
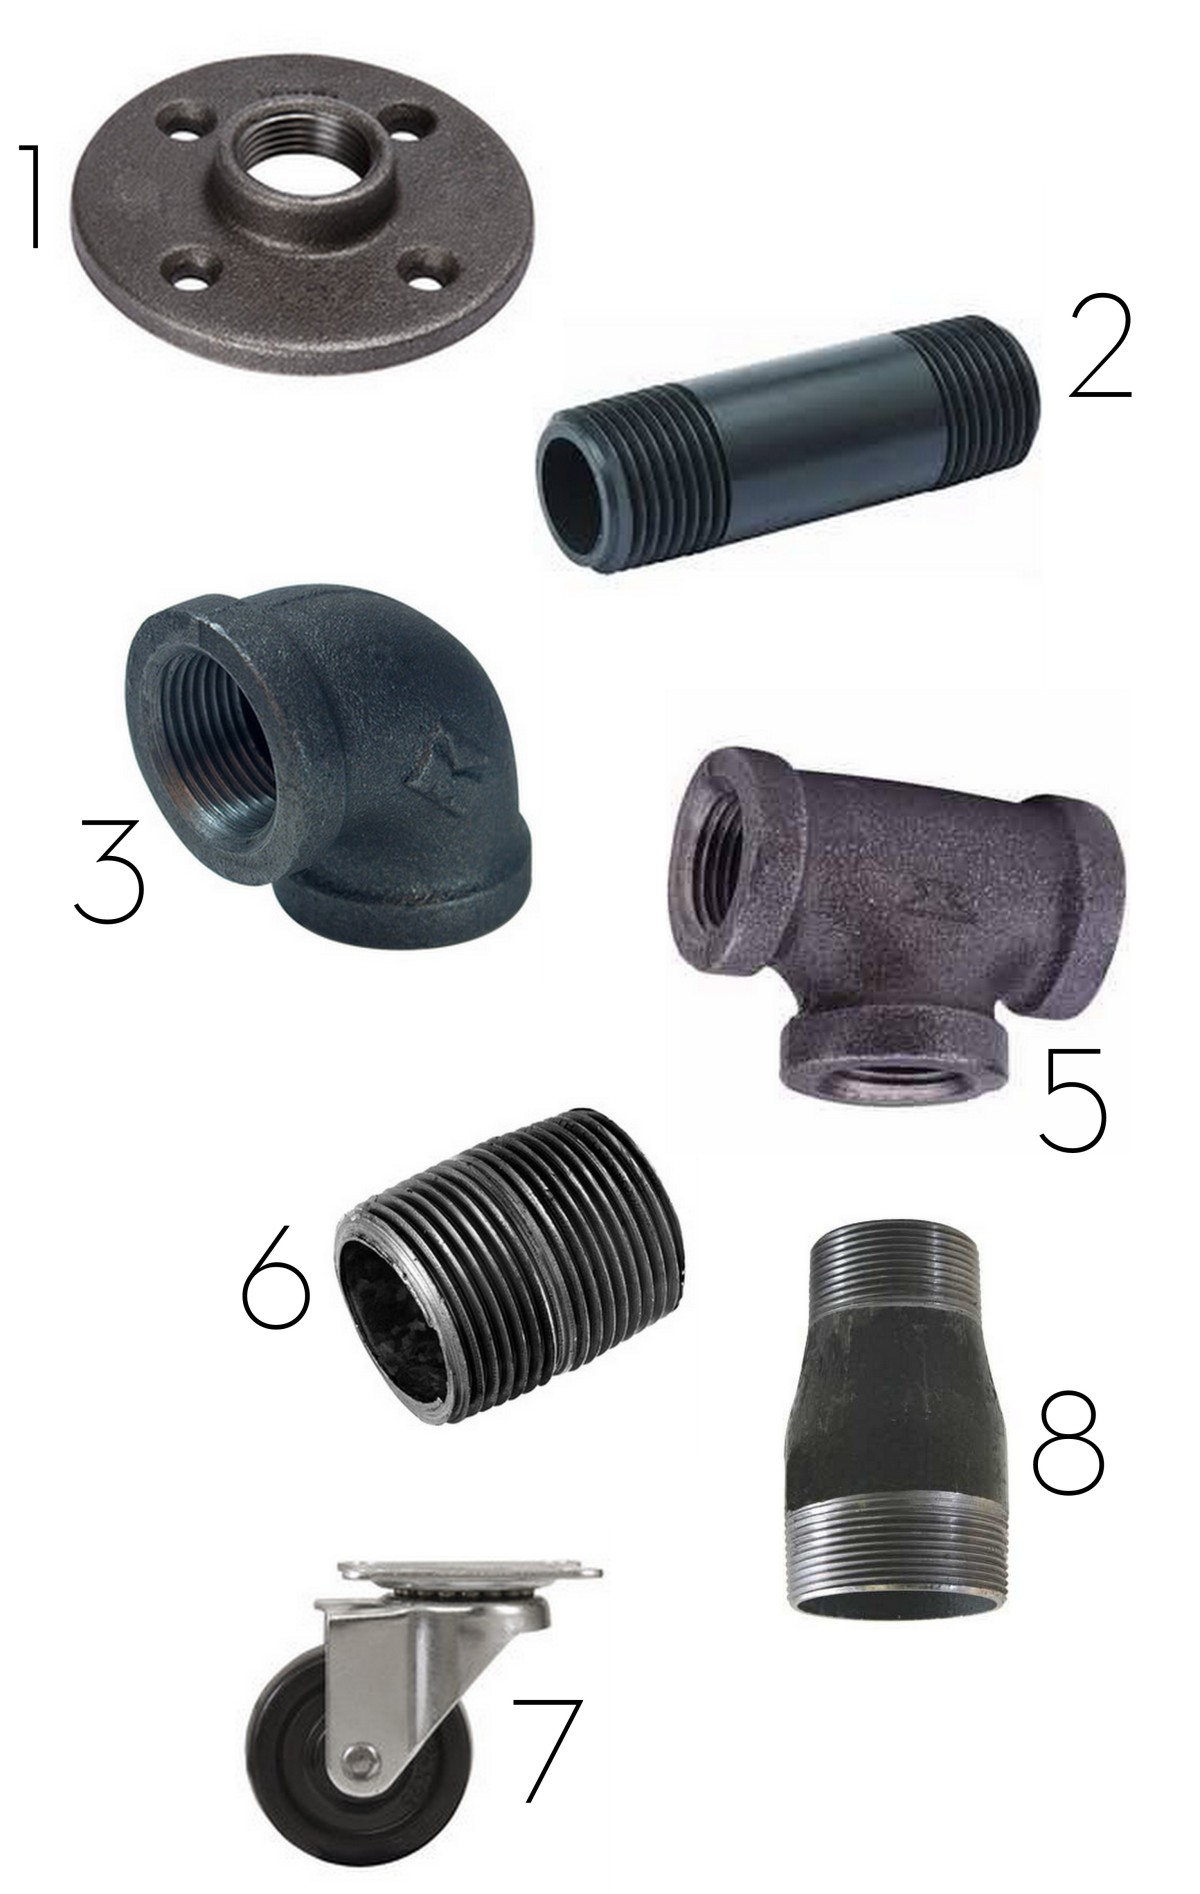
1 – Flange (qty 2)
2 – 3/4″ x 1″ Black Steel Nipple Fitting (qty 2)
3 – 3/4″ Elbow (qty 2)
4 – 3/4″ Black Iron Pipe – can be cut to size (qty 1)
5 – 3/4″ Black Iron Tee (qty 2)
6 – 3/4″ x 1/2″ Black Steel Nipple Fitting (qty2)
7 – Casters (qty 2)
8 – Black Iron Reducing Coupling (qty 2)
> Screws + anchors (if there are no studs)
> Drill
> Door to your liking
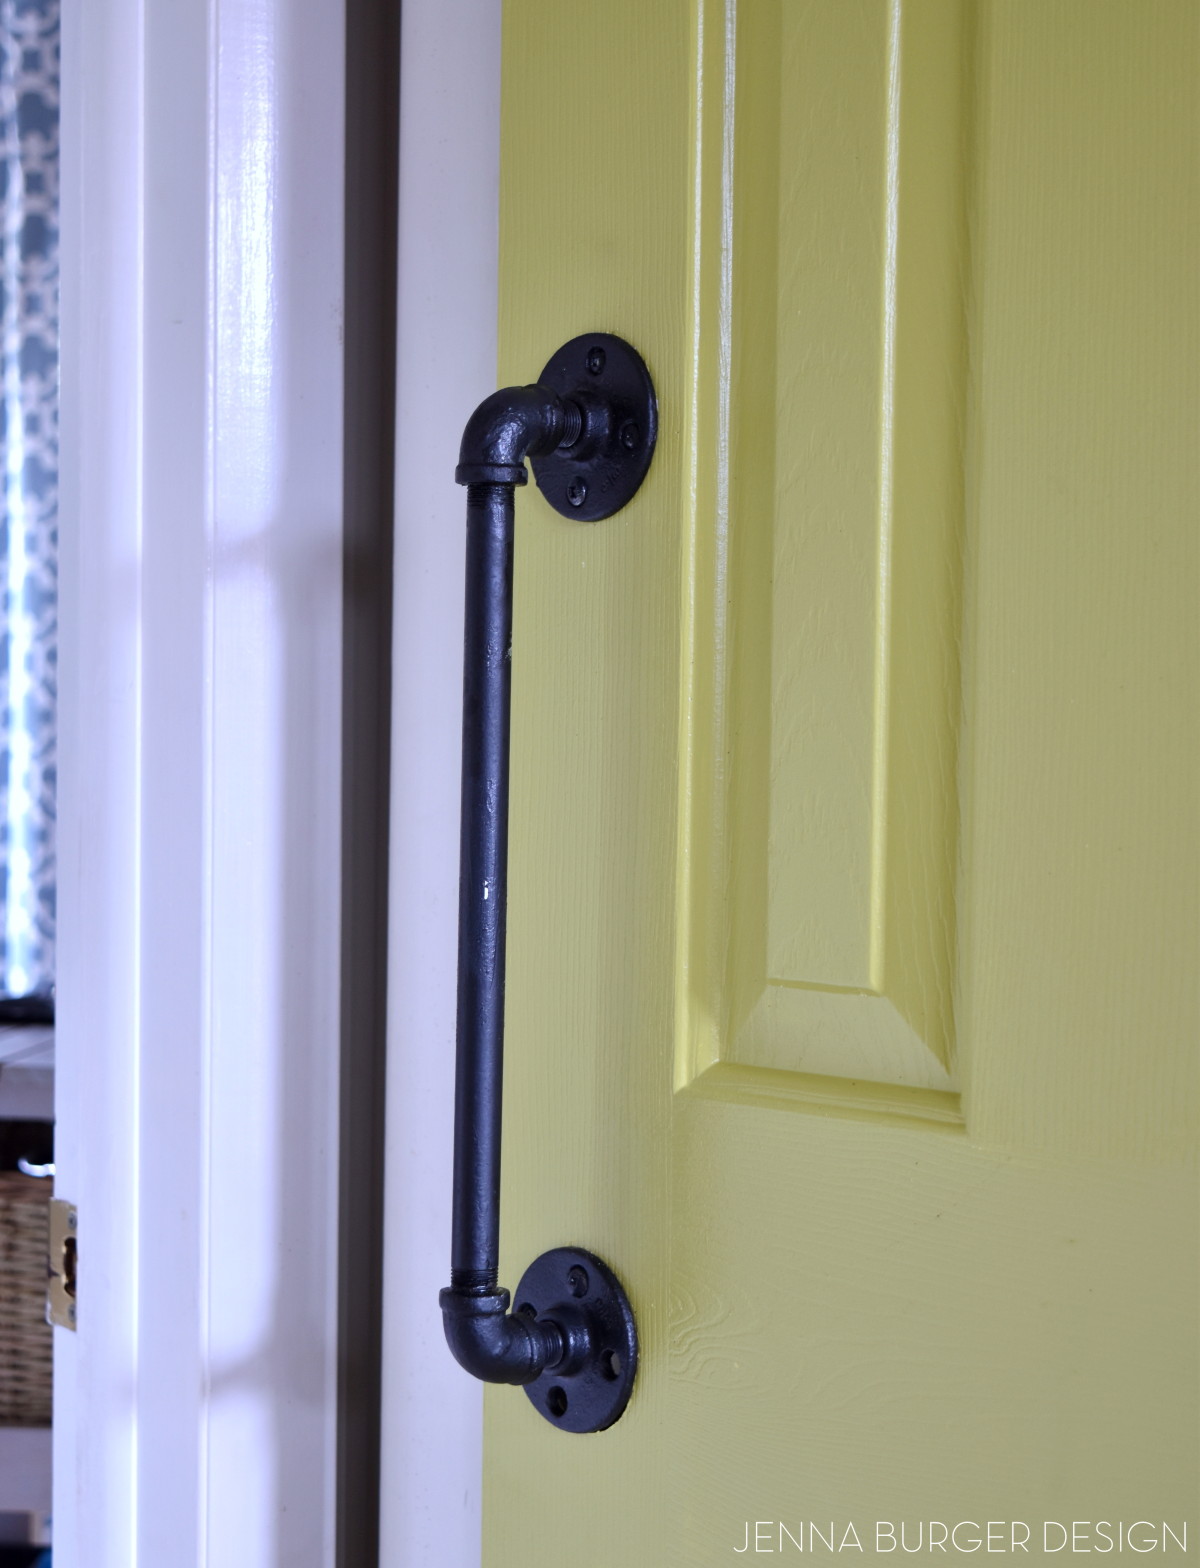
> Handle – plumbing pipe handle is made with (2) flanges + (2) elbows + (1) 12″ L x 1/2″ W pipe
These *should* be all the hardware that is needed, but of course, every project / condition is different. In my initial trip to Lowe’s for the supplies, I got all of the above with the exception of the Reducing Coupling part. That was needed because the pipe needed to be reduced from 3/4″ to 1/2″ to fit in the door…
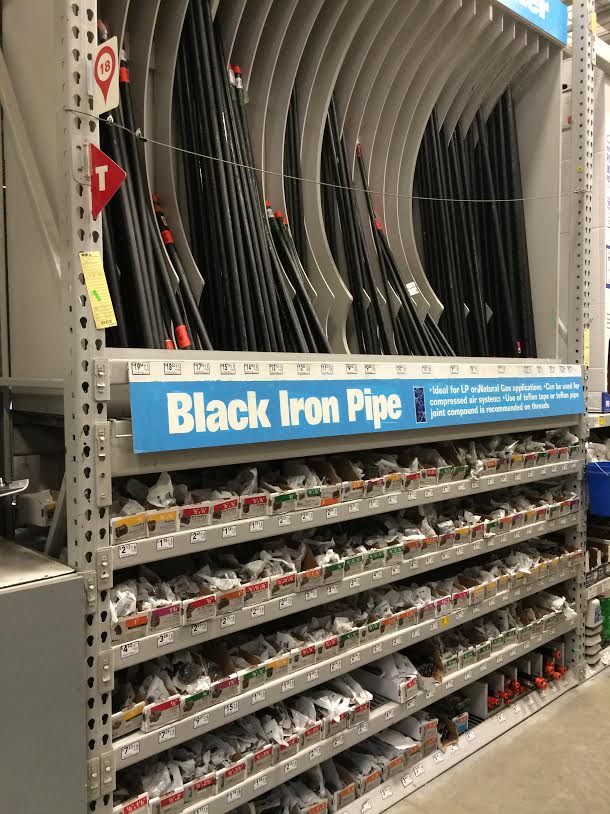
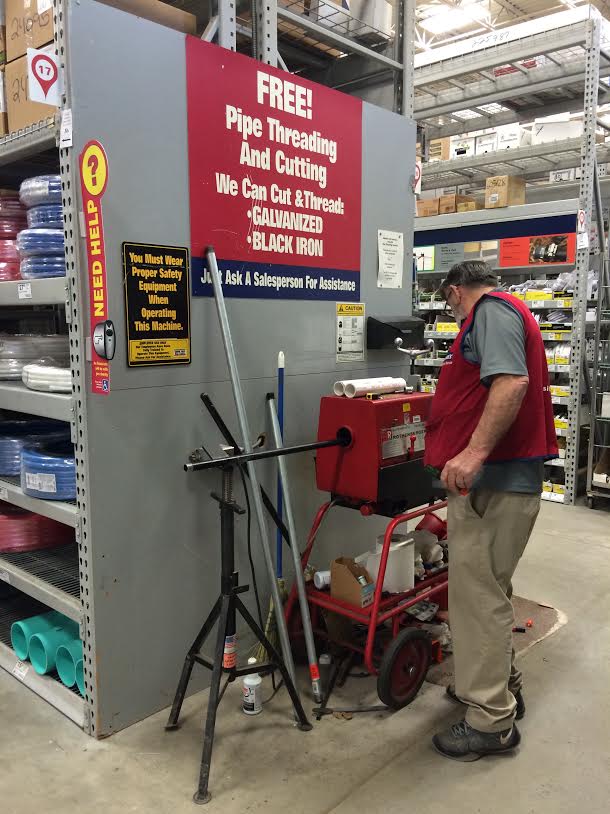
I shopped for all the plumbing parts at my local Lowe’s. Using their cutting machine, they were able to cut the long pipe to fit my exact length. For large plumbing pipe projects like a bookcase, this is a great source.
DIY ROLLING DOOR HARDWARE TUTORIAL
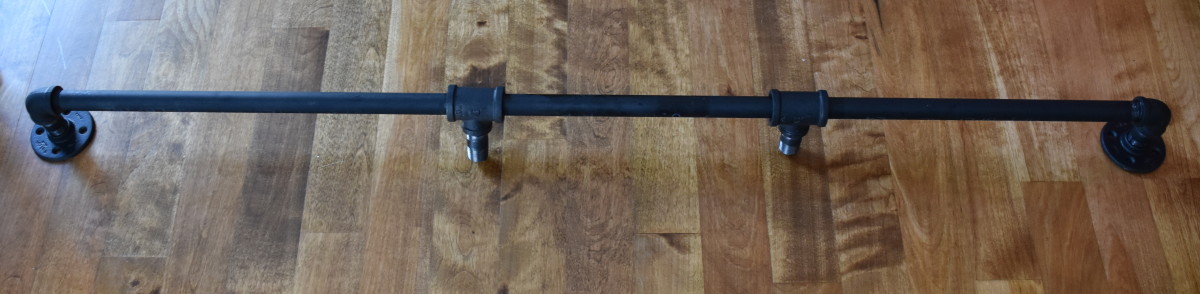
1 To start off, I laid out all of the parts for the rolling door track.

2 Then I connected the pipes together. Before threading pipe to pipe, it’s best to use a pipe lubricant to make the connection easier + smoother.

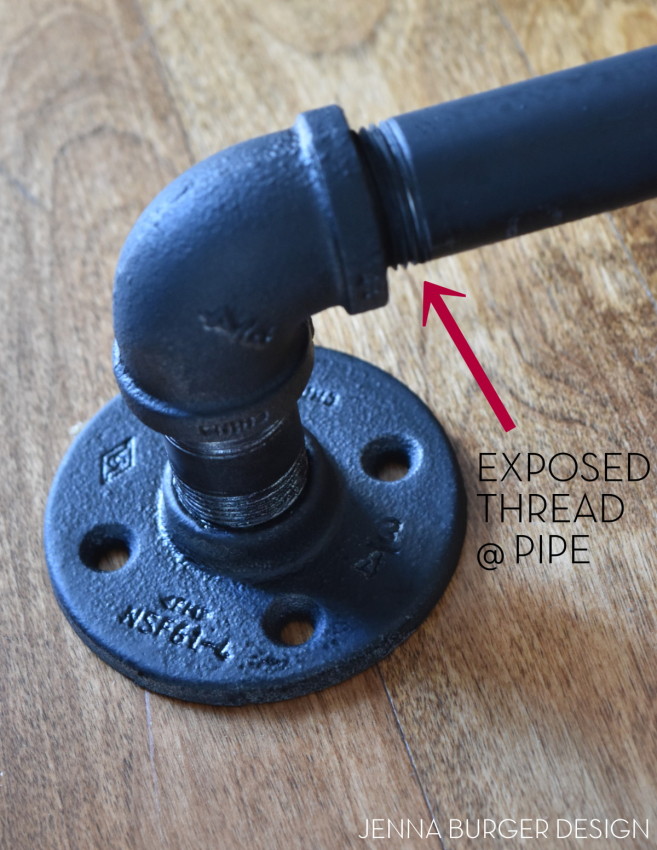
Note, connecting the pipes can be slightly challenging. I anticipated screwing each connection the entire way so no threading would be exposed. That is impossible. A section of the pipe showing the threading will be exposed. Account for that when taking measurements.
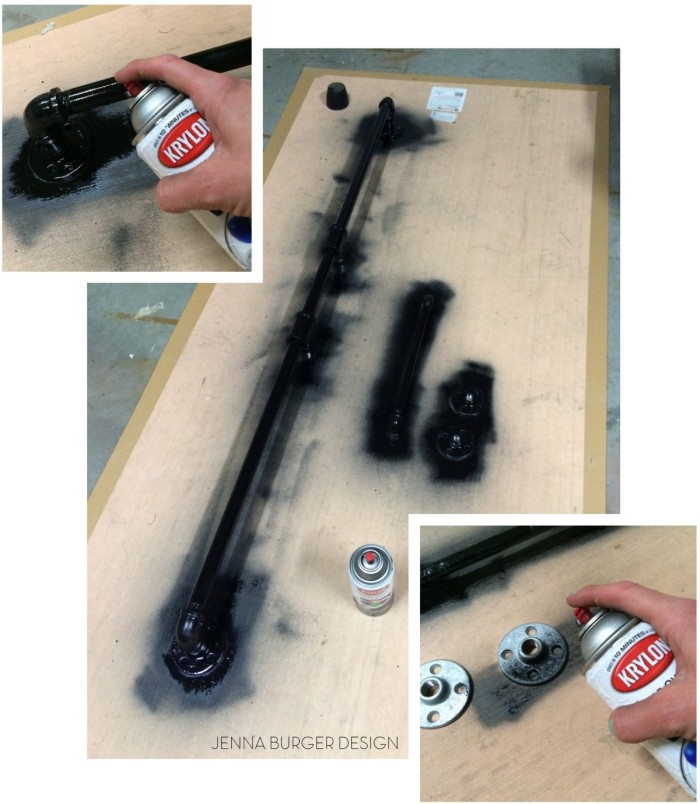
3 The plumbing pipes didn’t match in color, so to give them a unified look, I spray painted the track using a flat black color.
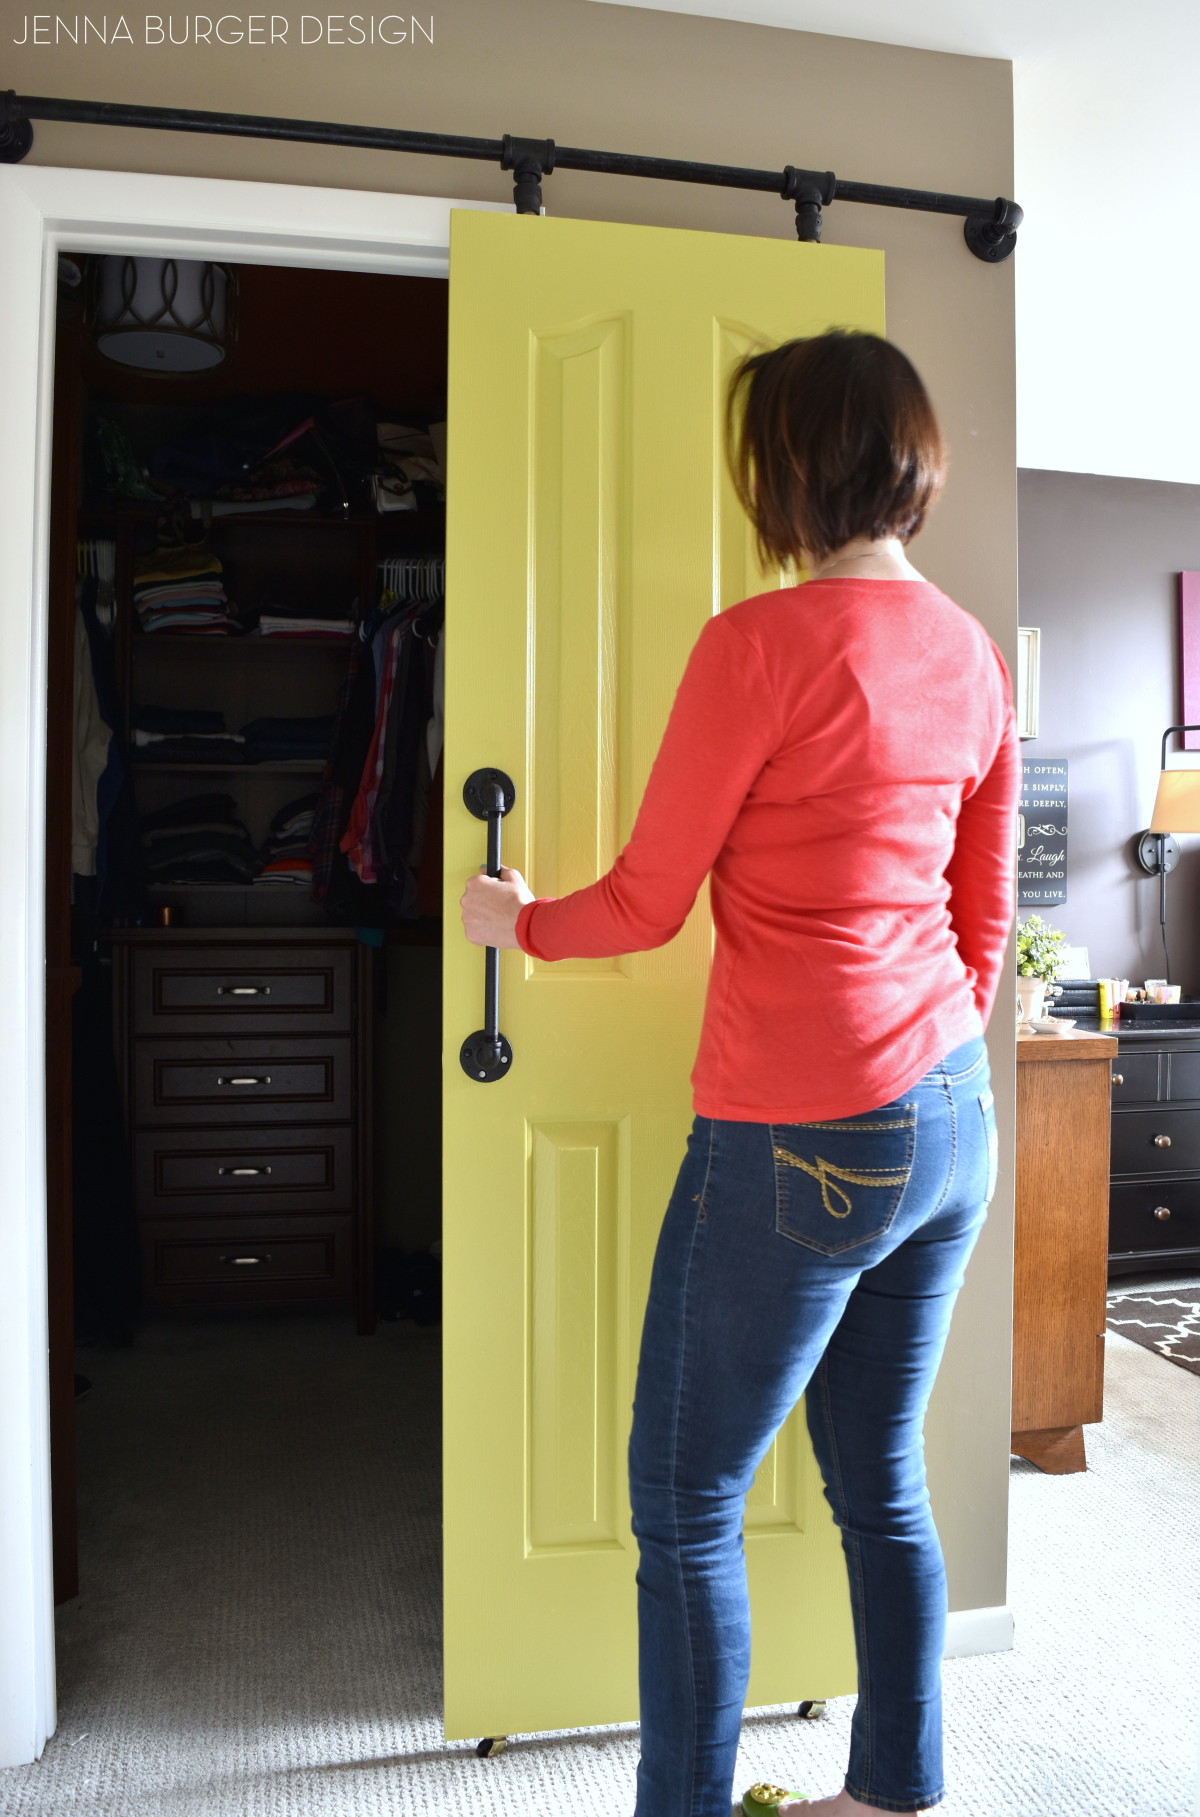
4 As I mentioned above, I ended up using the door that was previously hinged. I added two caster wheels to the bottom of the door.
WHY? Plumbing pipe will bend under tension. If the door was hung from the pipe with no wheels support, the pipe would bend in time. The wheels support the door and the track keeps the door in place.
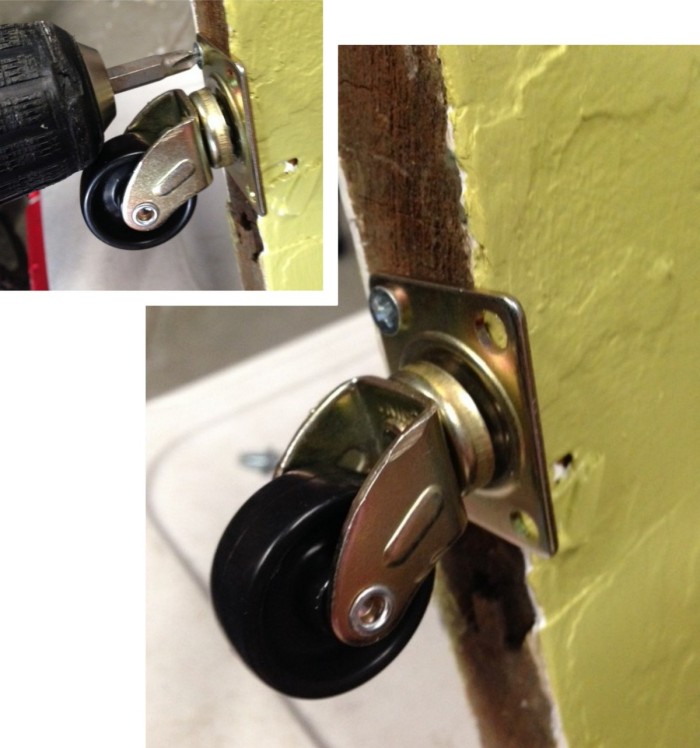
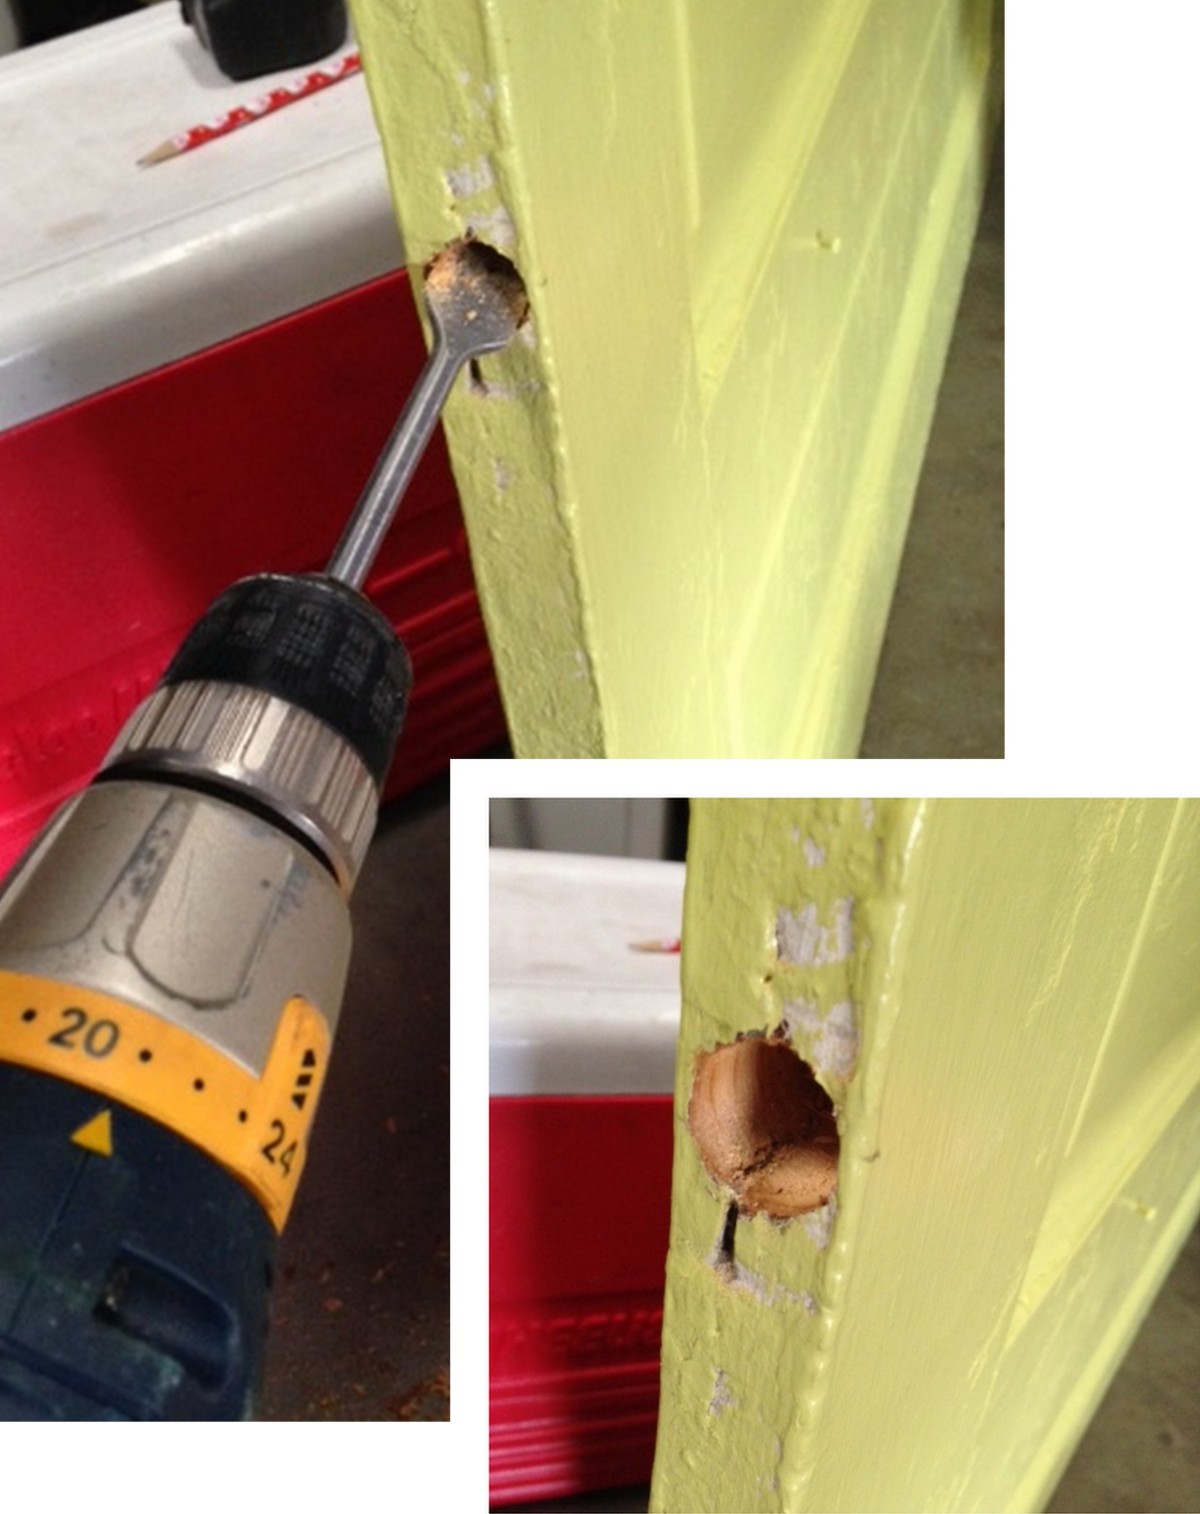
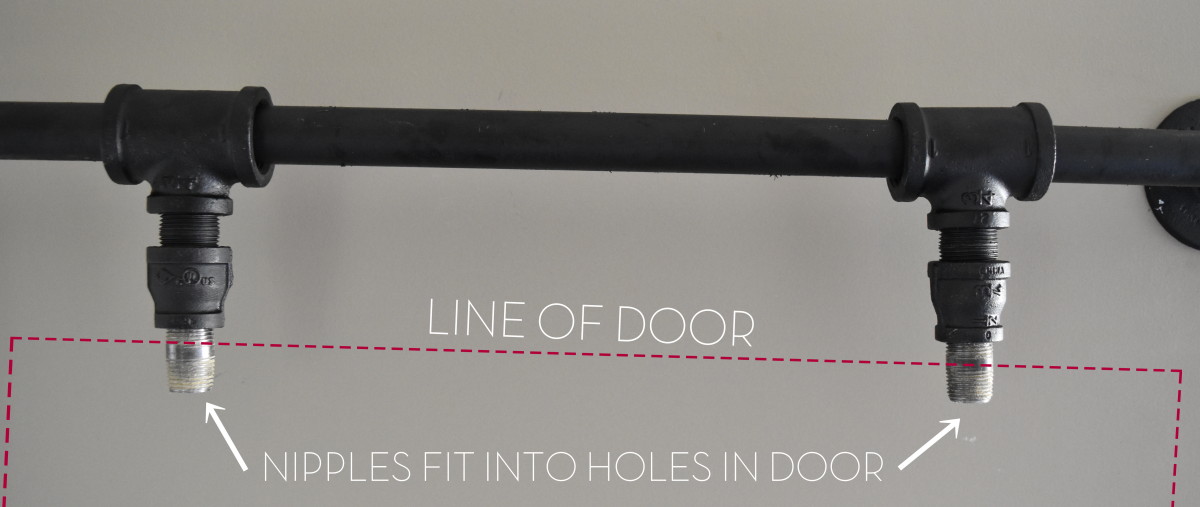
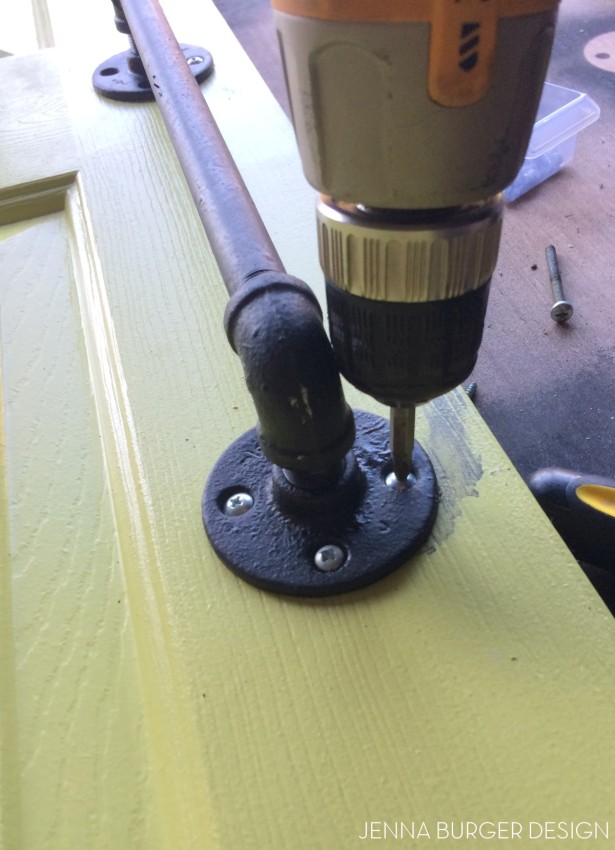
5 (2) Holes were drilled at the top of the door for which the nipple fittings will fit into.

6 With the casters installed on the bottom + the holes drilled on the top, I got the door in position and measured out where the plumbing pipe track should be installed.
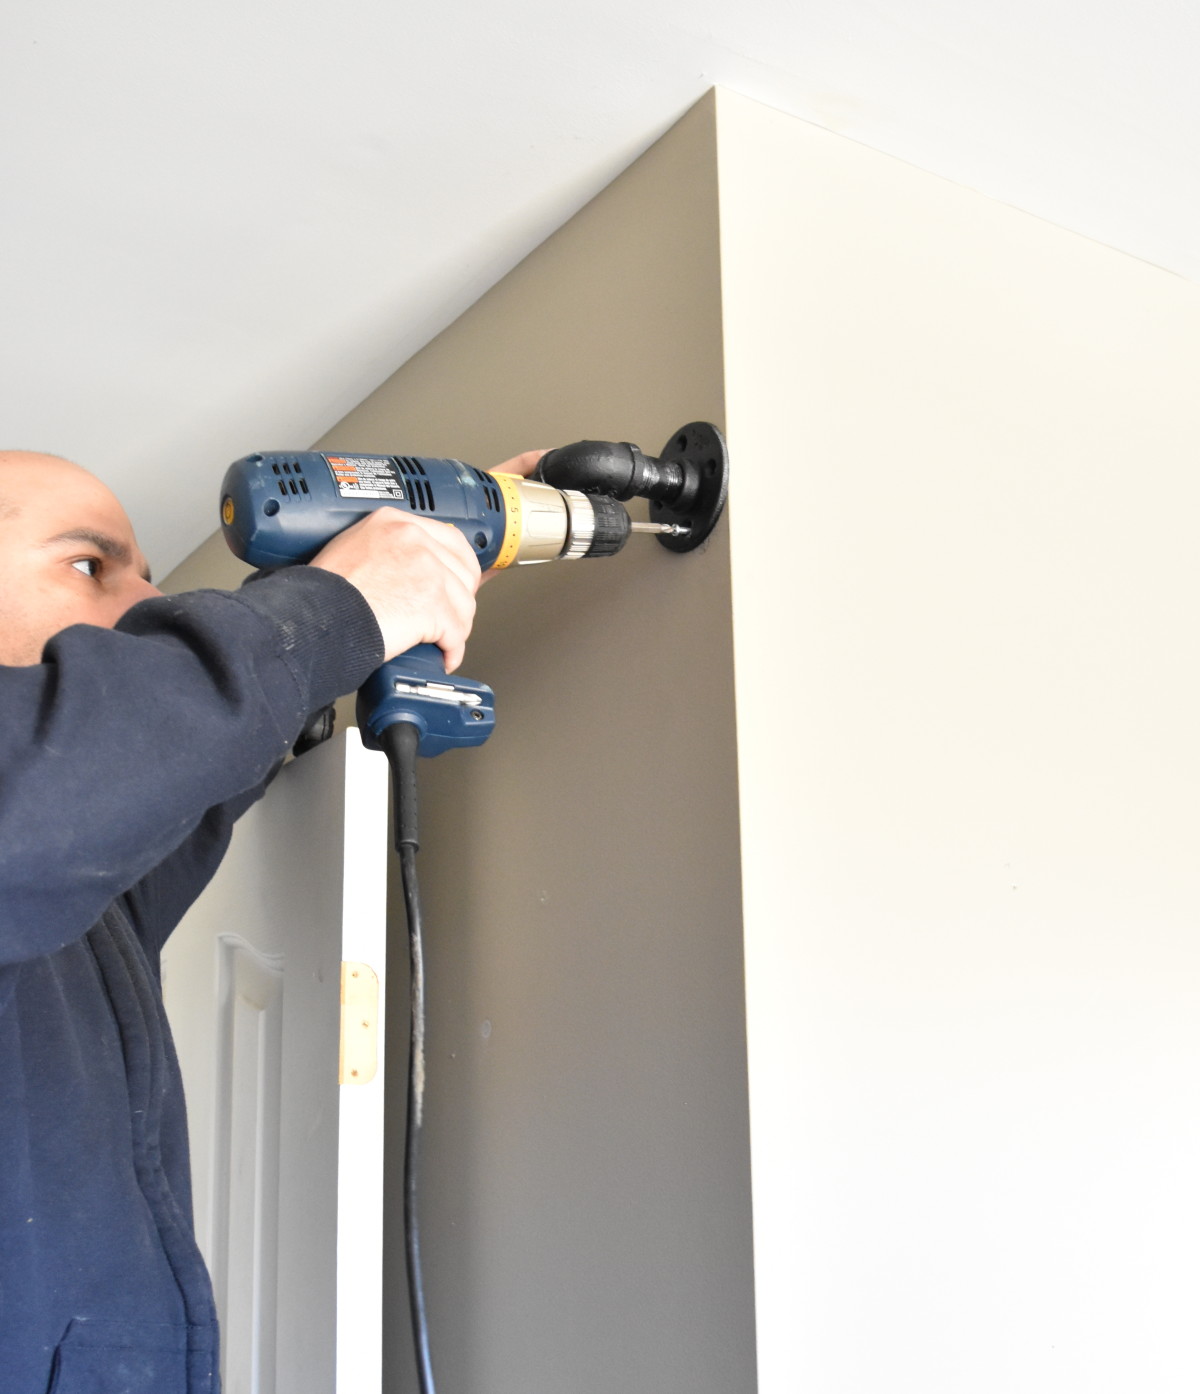
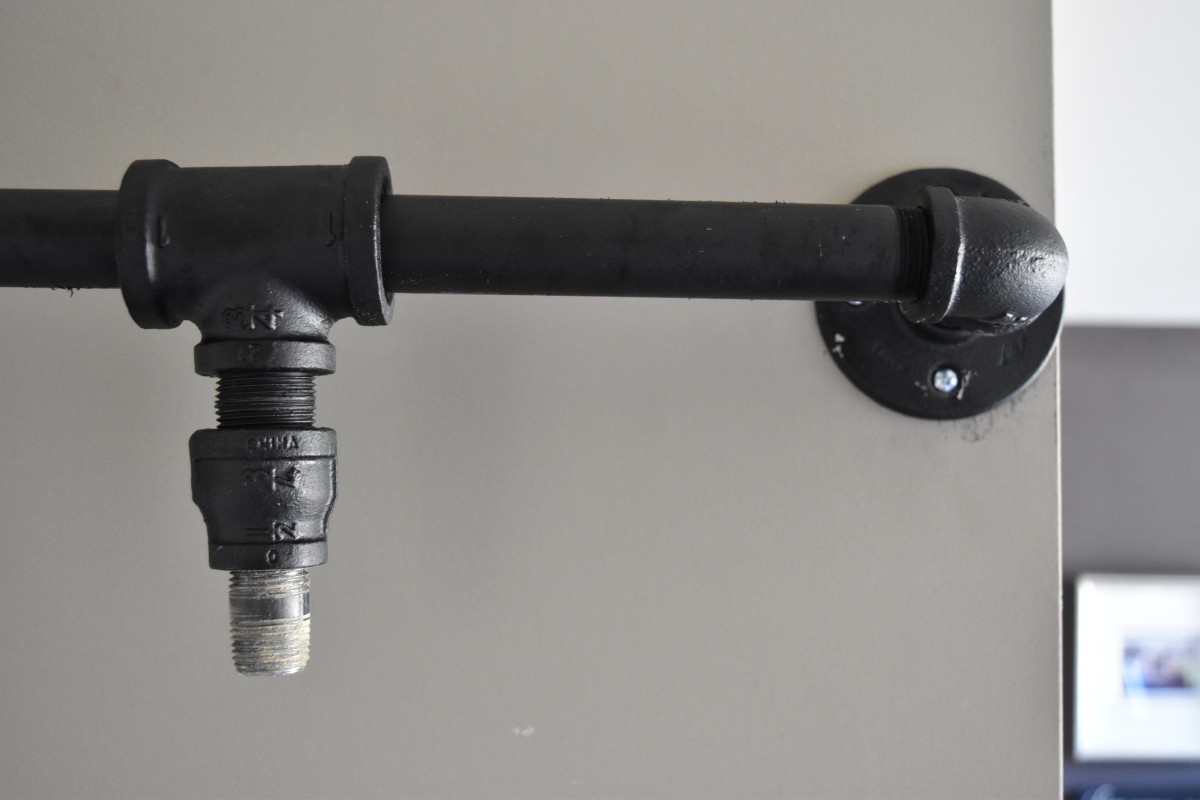
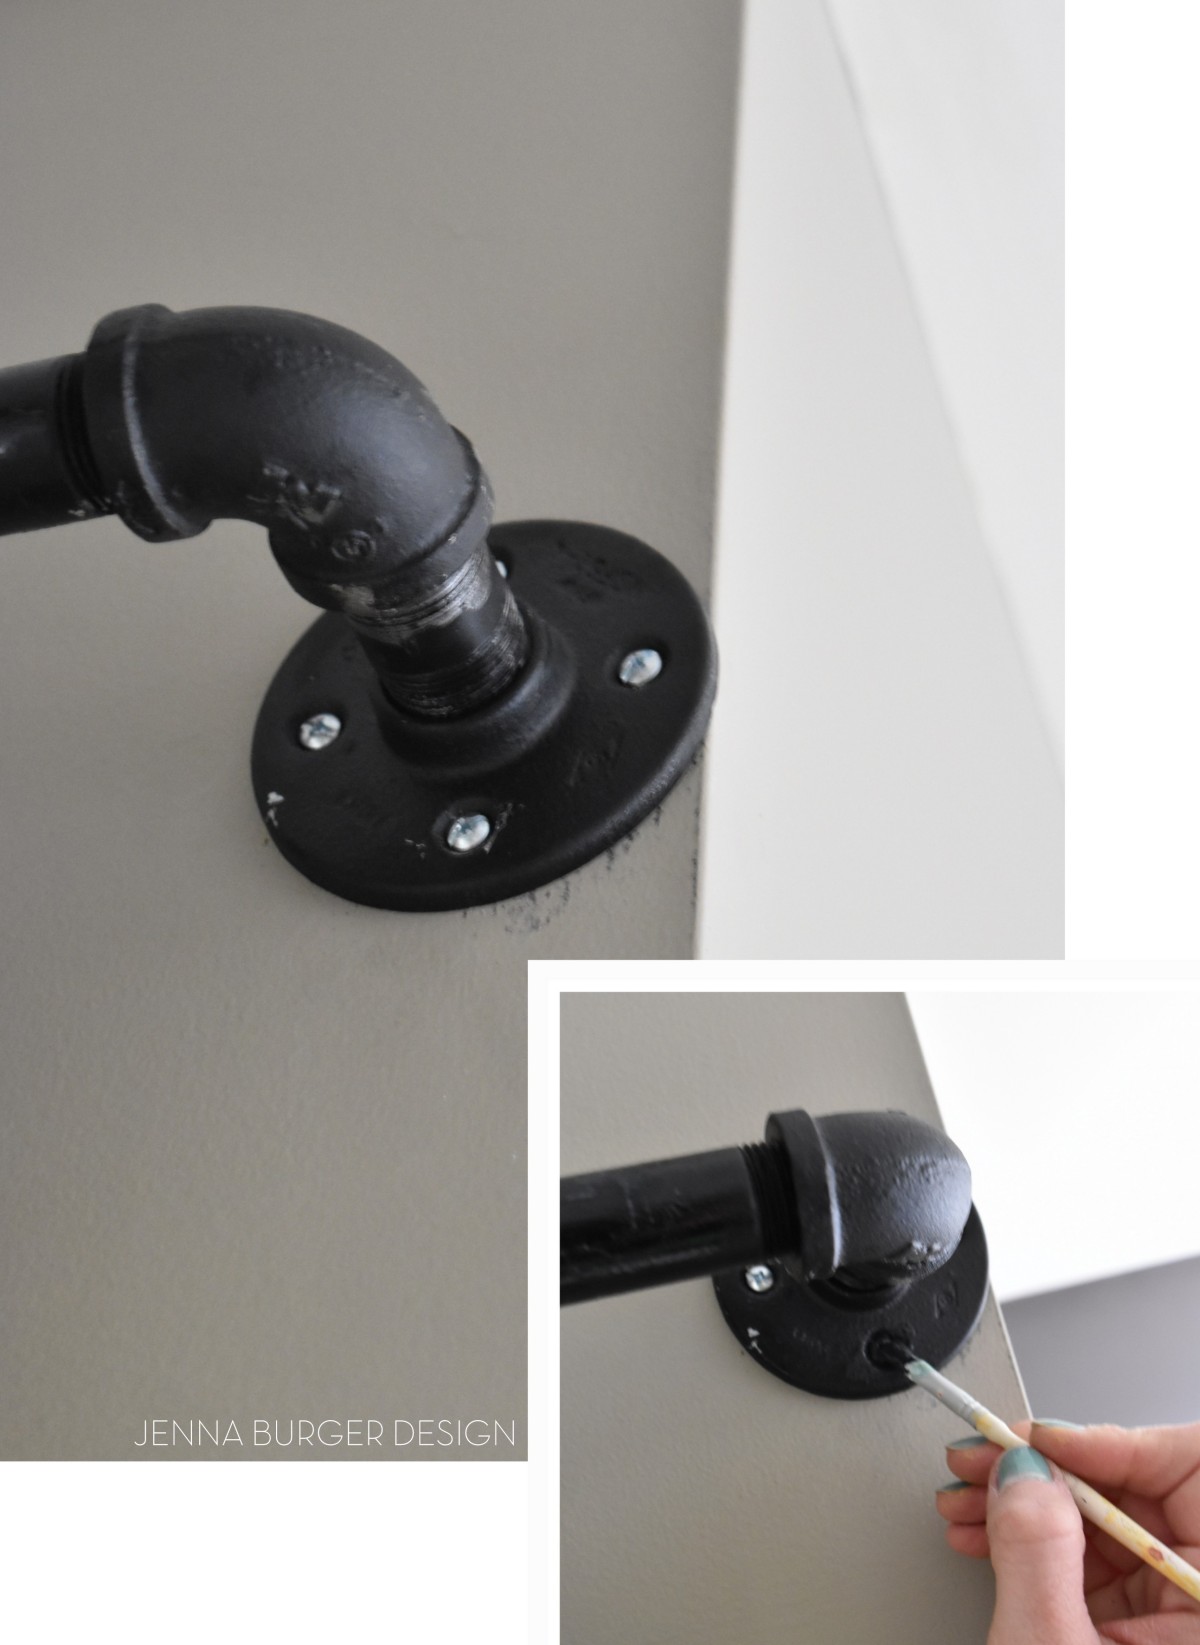
7 Upon measuring and marking the wall (sorry, no pictures, all hands on deck), we were set to install the plumbing pipe. Using 1.5″ long screws (no anchors needed because we drilled into a stud) we installed the (2) flanges to the wall.

The nipple fittings held on by the tee fittings slide into the holes in the top of the door. The drilled holes are just slightly larger than the nipples so they fit snug, BUT the door can easily come out any time.

The reducing coupling fitting wasn’t originally planned for. That was a part we added later because the 3/4″ nipple fitting (that comes out of the tee fitting) was too large to fit into a hole in the top of the door. This reducing coupling fitting allows the transition from a 3/4″ nipple fitting to a 1/2″ nipple fitting.

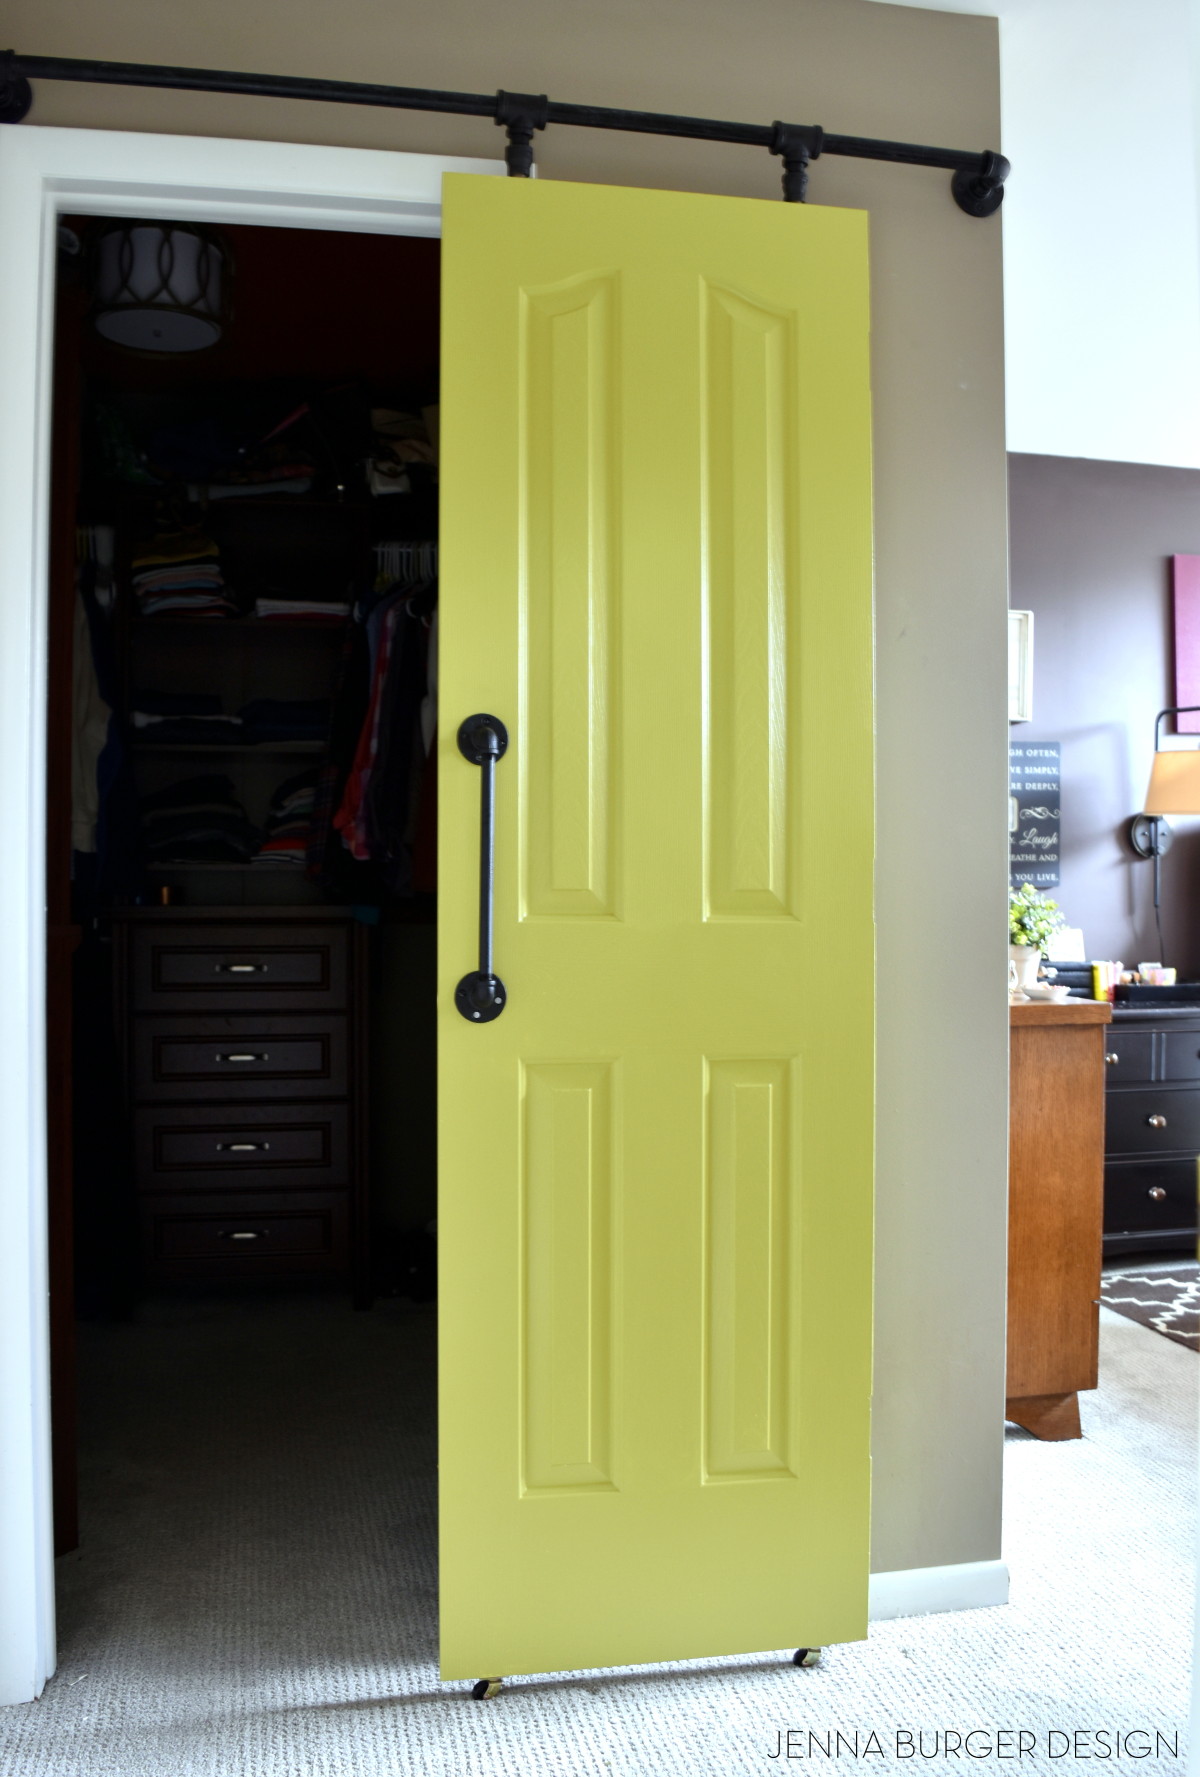
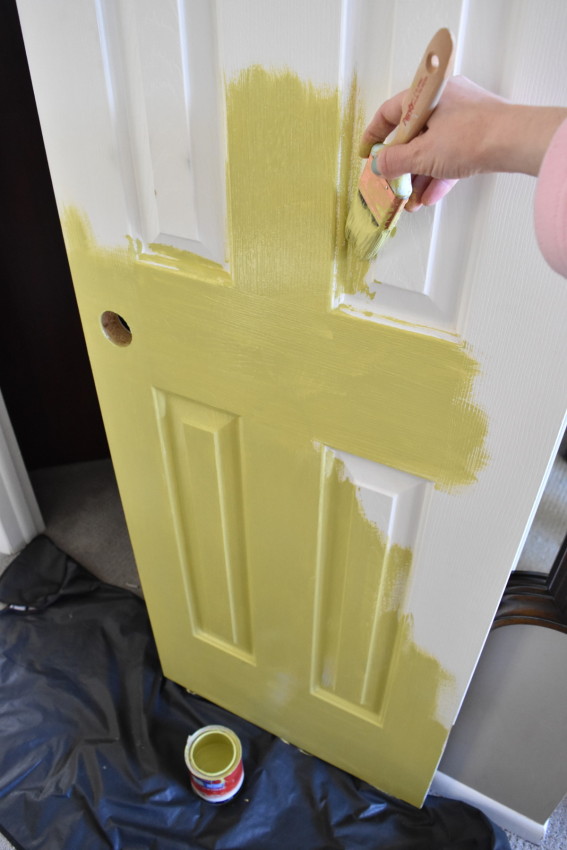
8 Once the track + door were place, I painted it a fun + vibrant green hue – it ties with the same color used for the DIY chalk paint desk transformation. The color is Benjamin Moore Martini Olive CSP-890, which I had color matched at Lowe’s using Valspar Signature Paint.
9 I also painted the screws that hold the track using black paint.

10 Once the I painted the door face with 2 coats of paint, I added a door handle using plumbing pipe parts.
And finally, finally, finally, it was COMPLETE! Phew, it took a village to get this project done…
With any DIY project there is a learning curve and hopefully if you tackle this project, it’ll be smoother sailing with the kinks ironed out from my experience.
THE RESULT


Something to note, this is a DIY track with parts that are metal on metal. The door will go back and forth, but not with ease as a typical rolling door track. When I first installed the track, it was very difficult to “slide” the door – another hurdle – but I added a lot of lubricant (actually I used petroleum jelly) to the long pole. Adding the lubricant has made moving the door a lot easier.
That being said, this DIY track is a whole lot less expensive than true rolling door hardware, BUT I wouldn’t use it for areas that need privacy with high-traffic use multiple times a day. For us, this is DIY door is perfect for the master closet since most of the time it’s left open. As a main hall closet, maybe not so much.
This DIY rolling door came together in part with the tutorial by Kristi @ Addicted 2 Decorating+ some sleuthy thinking and planning on my part for how to make it work for this space. Because of the limited wall area, a standard track was too big, so without going custom, this was the only solution.
In the end, I love the result. I’ll be honest though, it didn’t come without a few hiccups and flaws, but it absolutely suits the purpose for the setting.

It’s definitely been nice to get some privacy – on a rare occasion – and see a pop of color when entering into the room.
AND on the random days when I don’t want to clean up the closet, I just close the door…
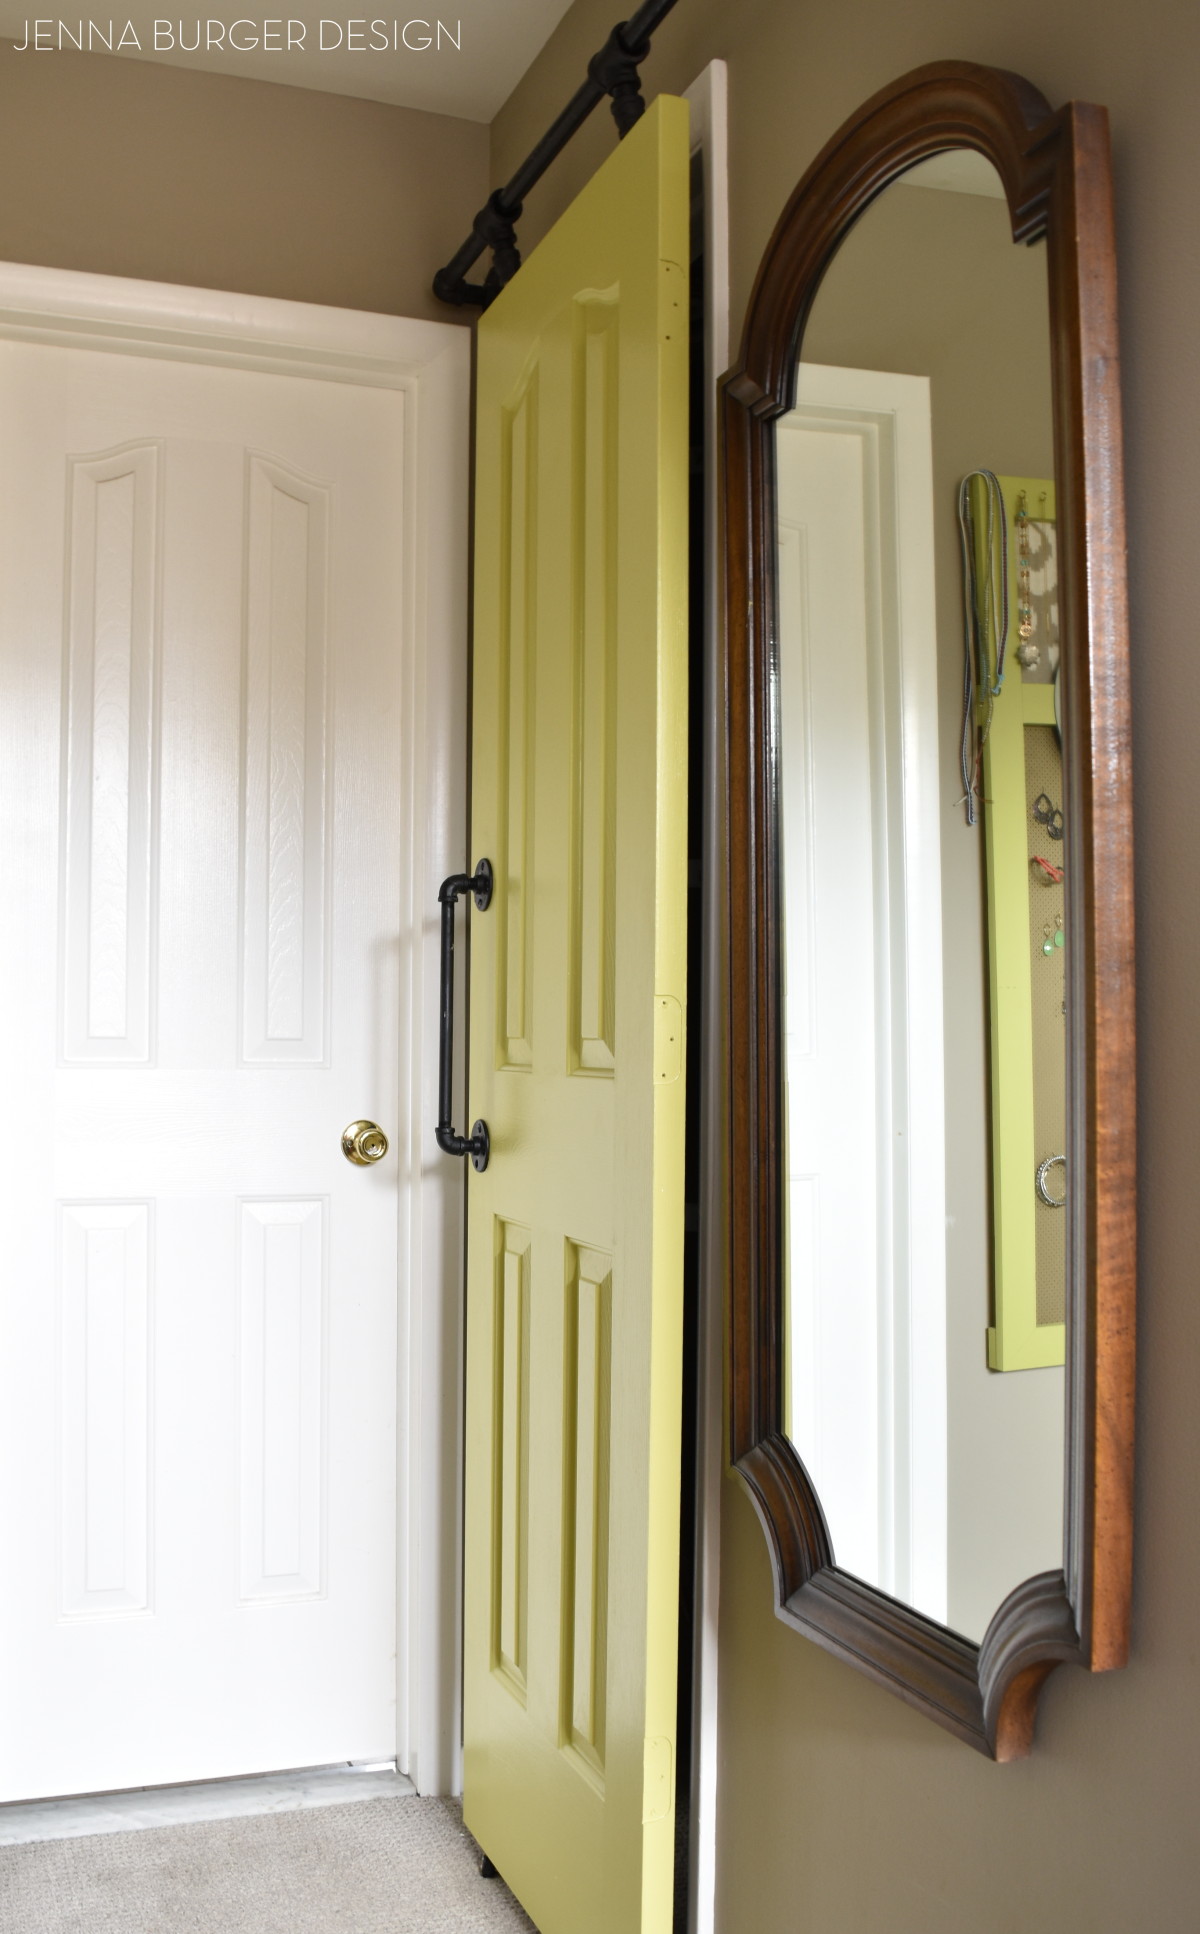
The view from the side. Thankfully the projection of the door on the track allowed enough room for my mirror to stay in place.
Now you see it… Now you don’t…

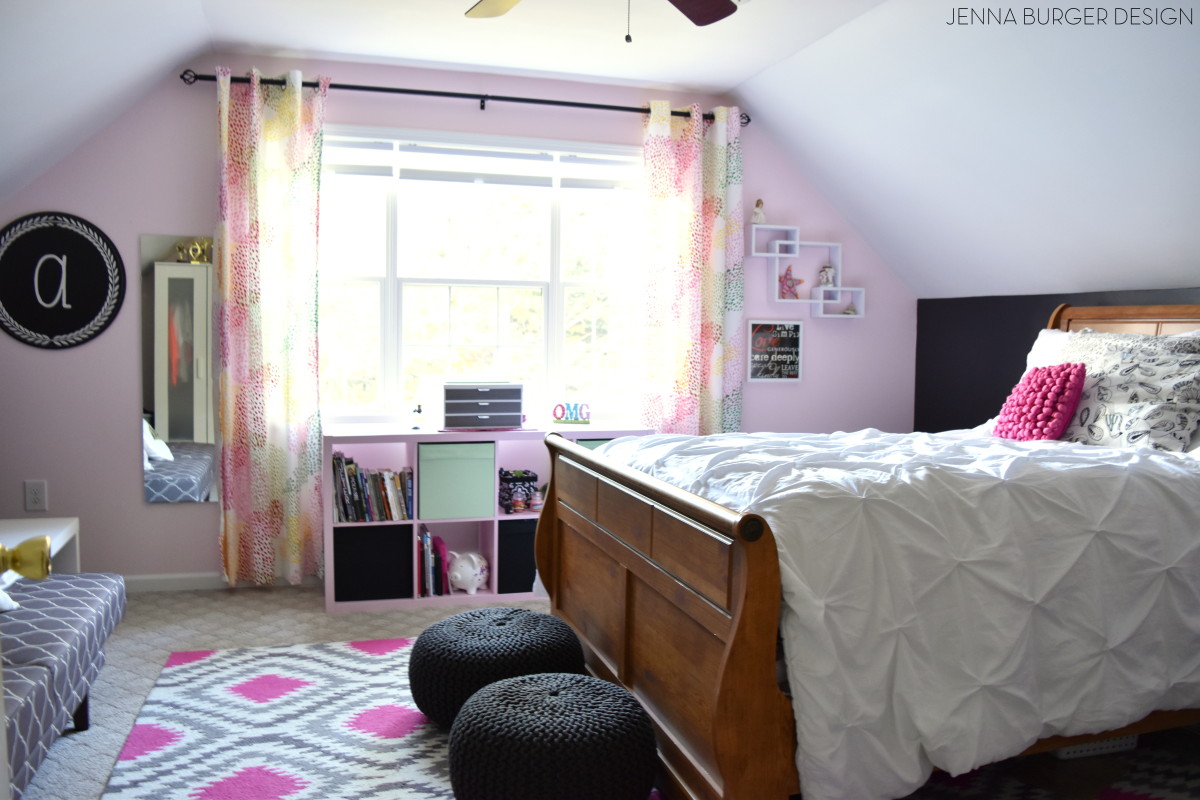
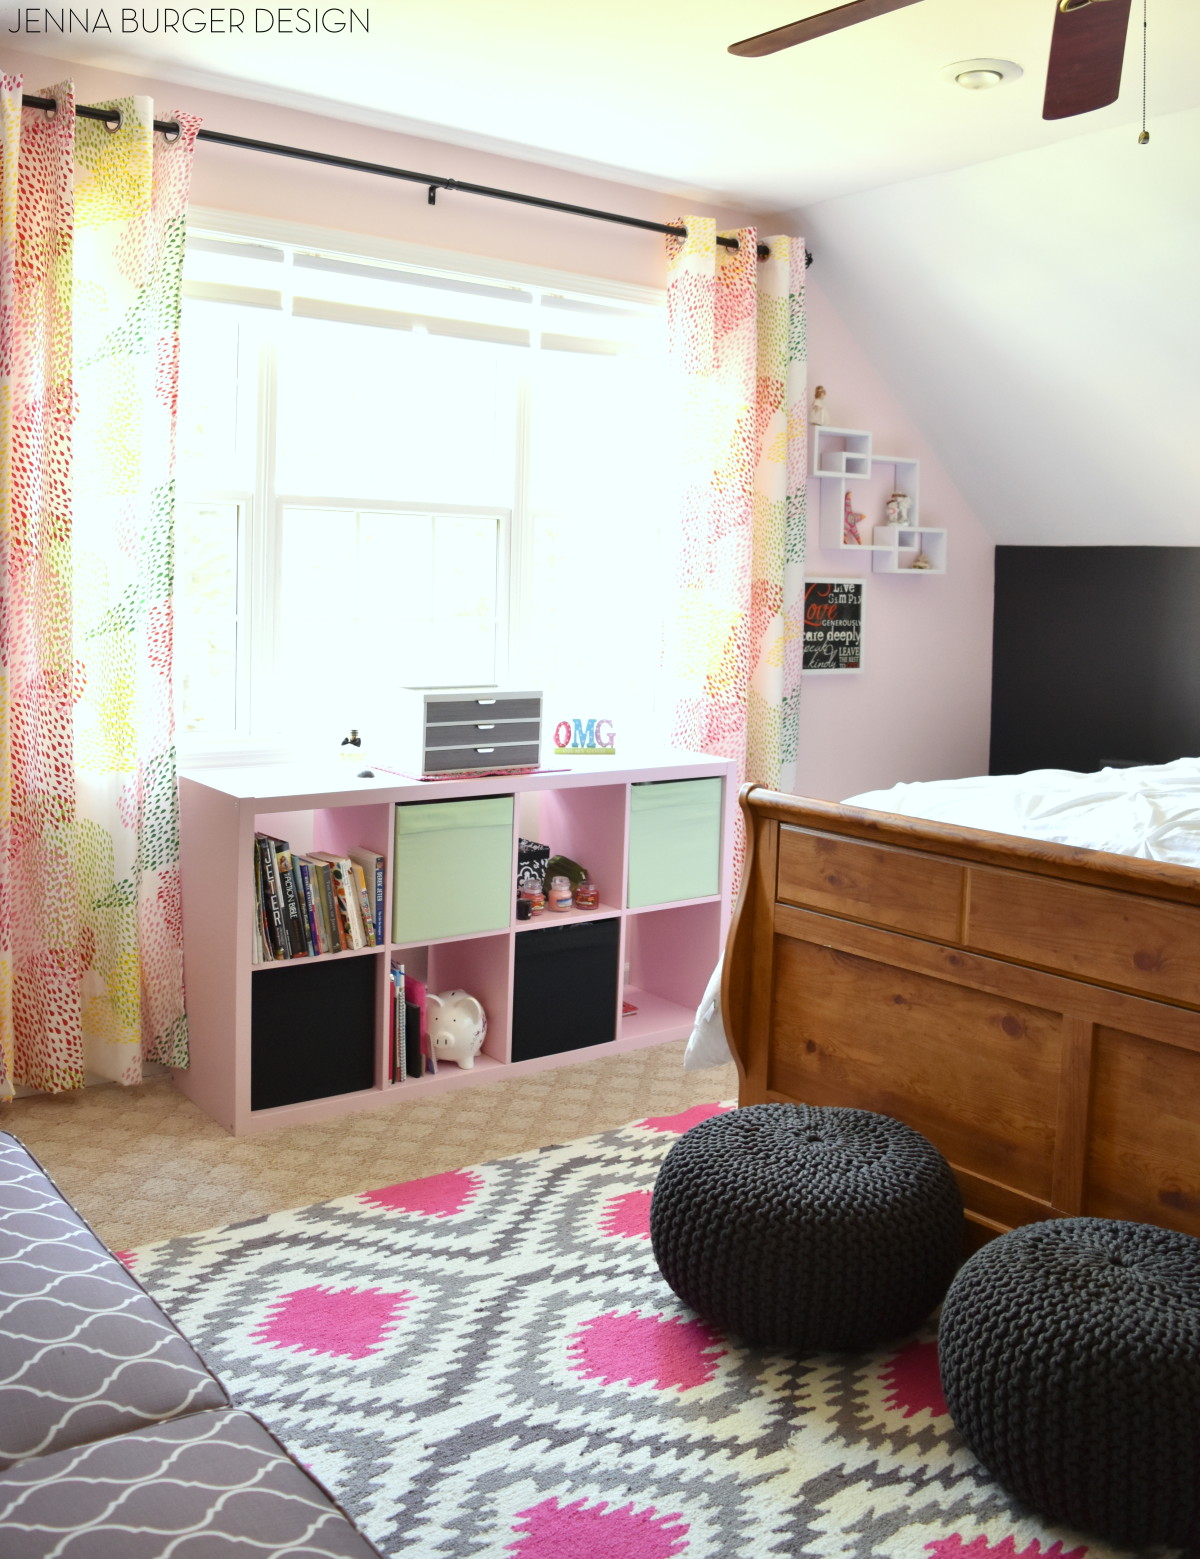
Here’s a peek at how the door looks with the rest of the bedroom. There are pops of this citron color all over…

Want to see more of this master bedroom revamp? Check it out here.

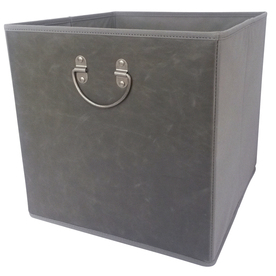
While I was working on the closet, I got a bit sidetracked and gave it a mini-makeover. Some new organizational items – hooks + bins – made all the difference to jazz this space up.
Lowe’s has these awesome new bins that are faux leather. I feel in love when I saw them. They are oversized too (13″ x 13″), so they hold alot. They’re perfect for holding scarves, small bags, and summer flip flops.
Here’s a peek at the inside of my closet…

That’s a wrap!
Love this project and want to tackle it now or later? Save or Pin it to your favorite DIY board…
Despite my challenges, the result of this project for the price is a great one. Even though it resulted in my grays than I hoped, it was worth the few tears to achieve the style + function + look I was hoping for, and at the end of the day that’s what I call a success!
DISCLAIMER: THIS DO IT YOURSELF PROJECT WAS IN COLLABORATION WITH LOWE’S. THE PROJECT IDEA + ALL OPINIONS ARE MY OWN.