Author: Jenna

13+ Closet Organizing Ideas: Combat the Closet Clutter

It’s Day 3 of Organizing Ideas for the Home!

Over the past 2 days, I’ve shared over 30 ideas + tips for organizing the KITCHEN & the BATHROOM.  It’s now day three and we’re moving on to CLOSETS.  From the clothes closet, to the kids closet, to the entry closet, to the linen closet…

Let’s organize THE CLOSET!

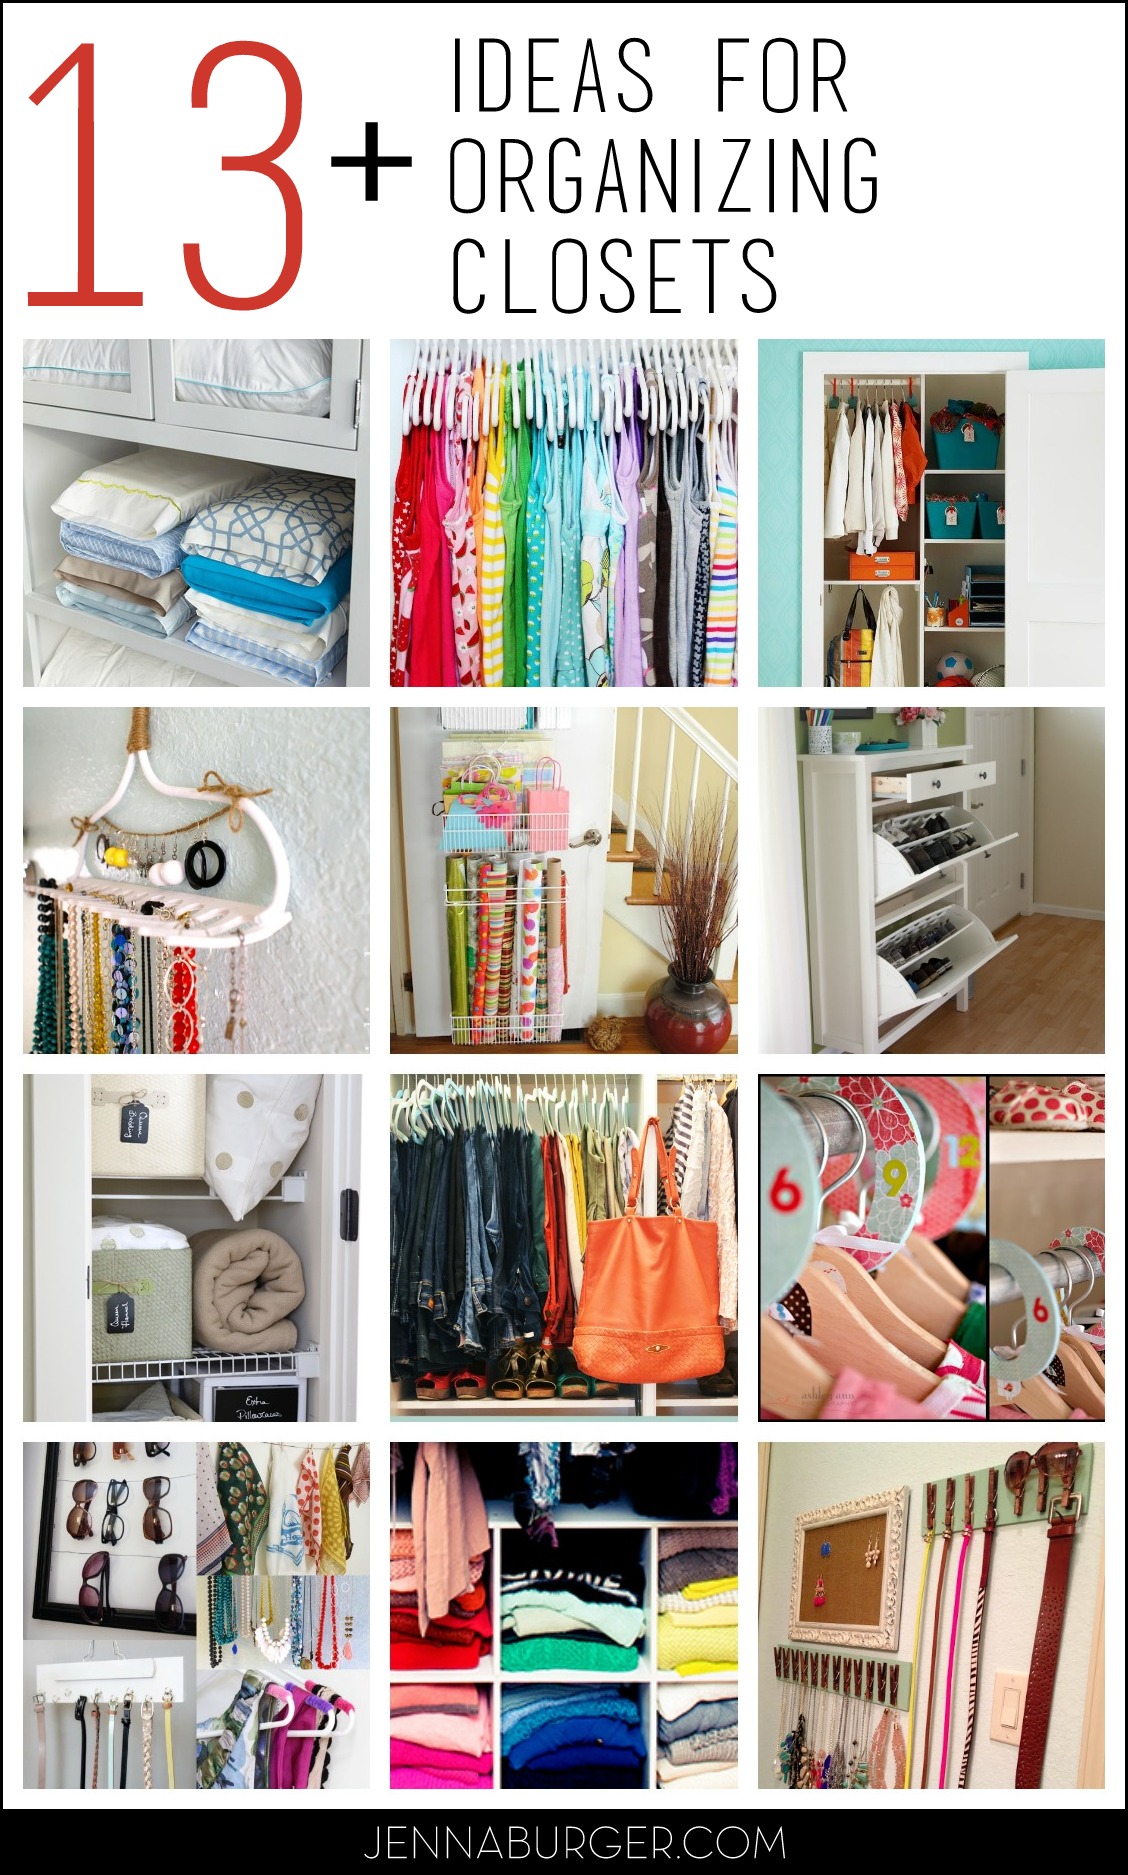
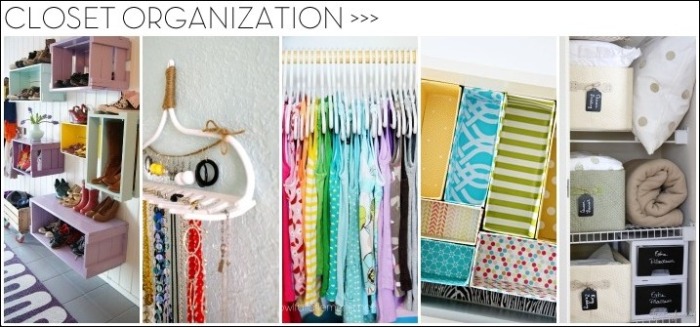
13+ Organizational Ideas for CLOSETS: Tips + Tricks to help organize every all types of closets!

Whether large or small, with closets we often pack them till there full.  Stop the clutter, remove it all, and start fresh. Here are 13+ savvy solutions to combat the closet clutter… (links to the original source, creation, and/or tutorial are BELOW the picture)

Closets

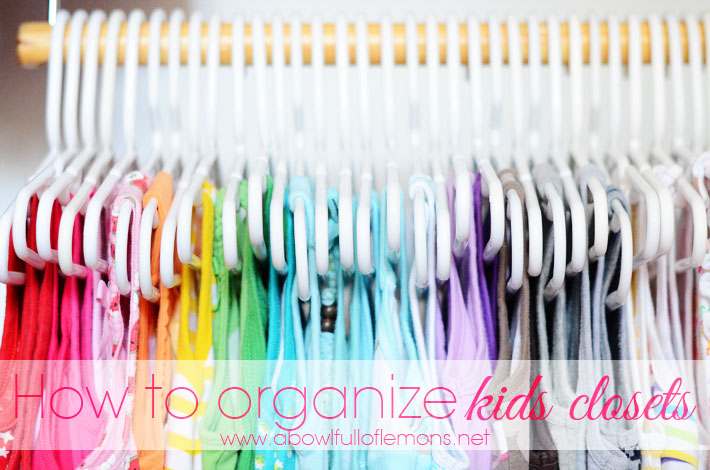
13+ Organizational Ideas for CLOSETS: Tips + Tricks to help organize every all types of closets!Kids closet organization by A Bowl Full of Lemons

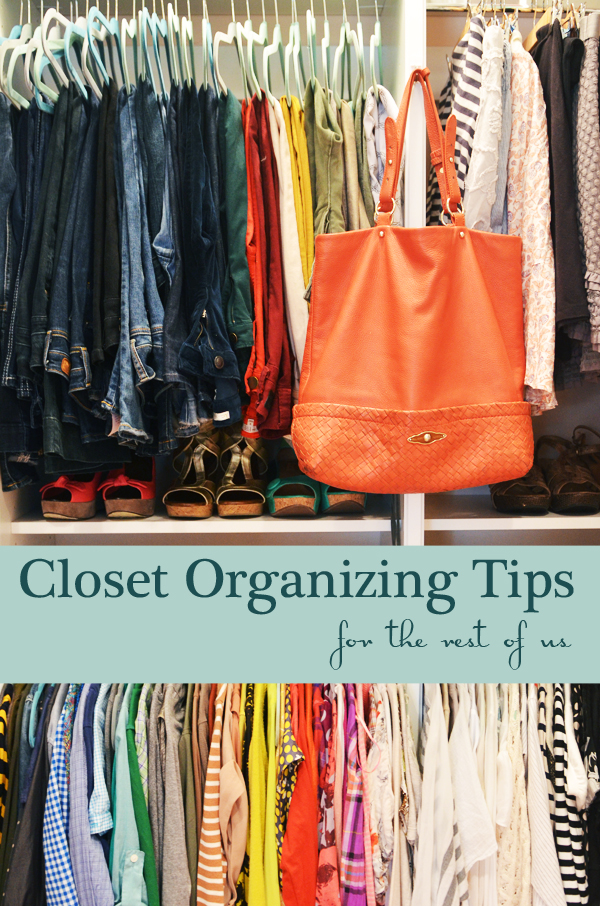
13+ Organizational Ideas for CLOSETS: Tips + Tricks to help organize every all types of closets!Closet organizing tips… for the rest of us by Life in Grace

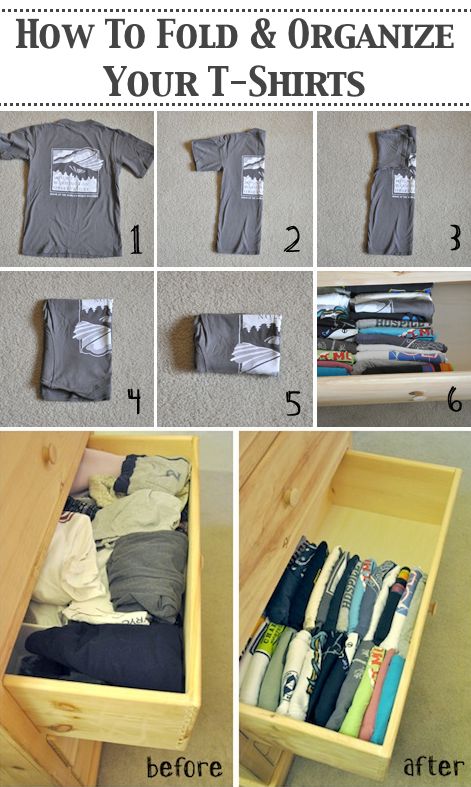
13+ Organizational Ideas for CLOSETS: Tips + Tricks to help organize every all types of closets!How-to fold and organize t-shirts by Darkroom and Dearly

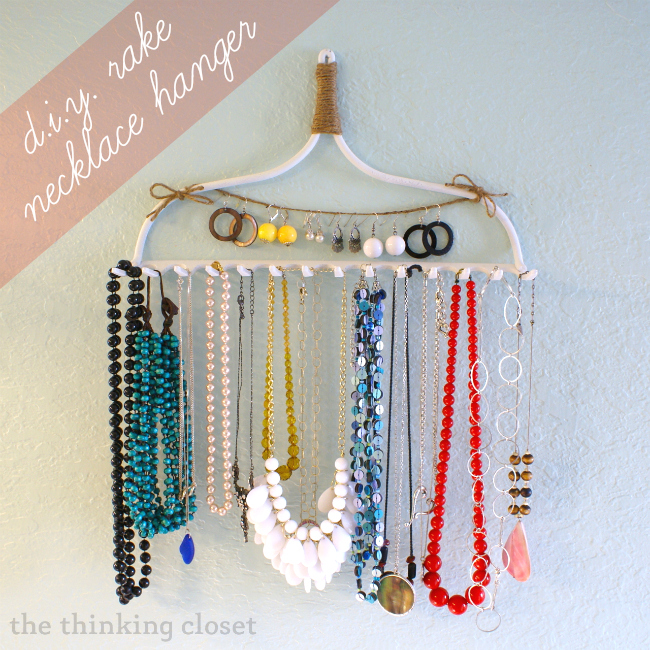
13+ Organizational Ideas for CLOSETS: Tips + Tricks to help organize every all types of closets!Rake necklace hanger by The Thinking Closet

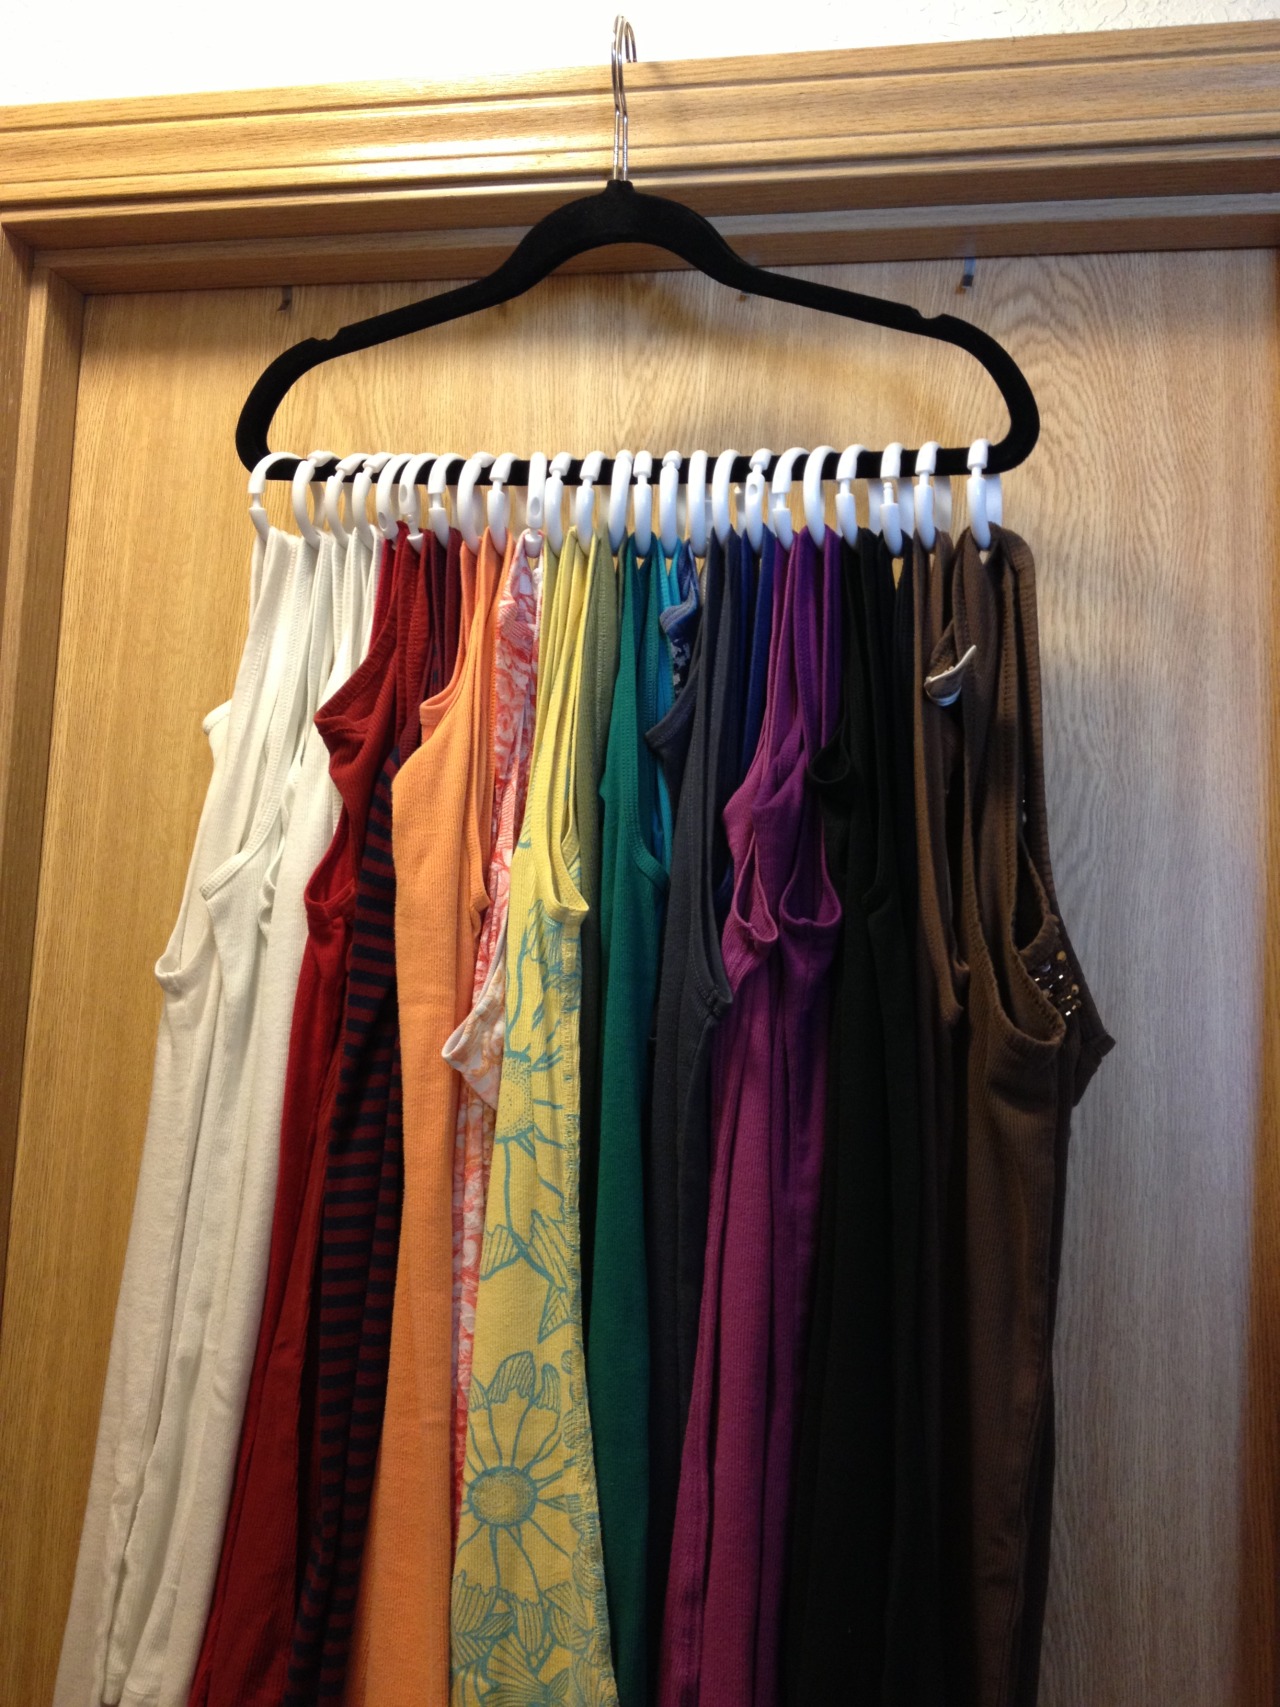
13+ Organizational Ideas for CLOSETS: Tips + Tricks to help organize every all types of closets!Shower curtain rings used to hang tanktops via

13+ Organizational Ideas for CLOSETS: Tips + Tricks to help organize every all types of closets!Closet dividers by Under the Sycamore

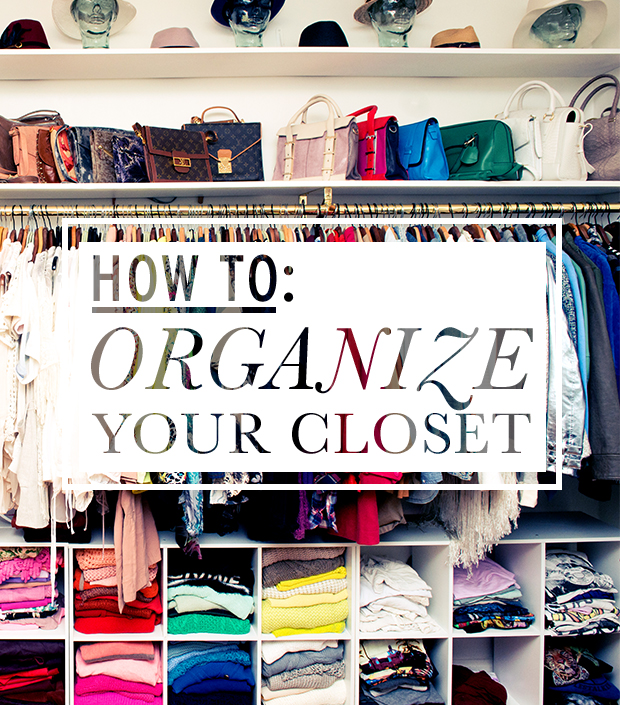
13+ Organizational Ideas for CLOSETS: Tips + Tricks to help organize every all types of closets!Tips for a clean, well organized closet by Who What Wear

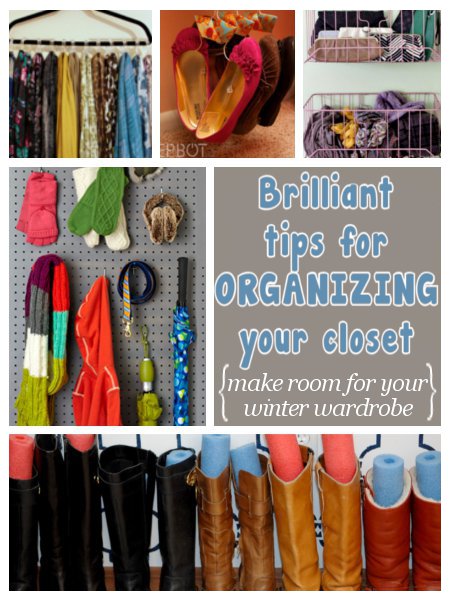
13+ Organizational Ideas for CLOSETS: Tips + Tricks to help organize every all types of closets!Brilliant tips for organizing your closet by DIY Home Sweet Home

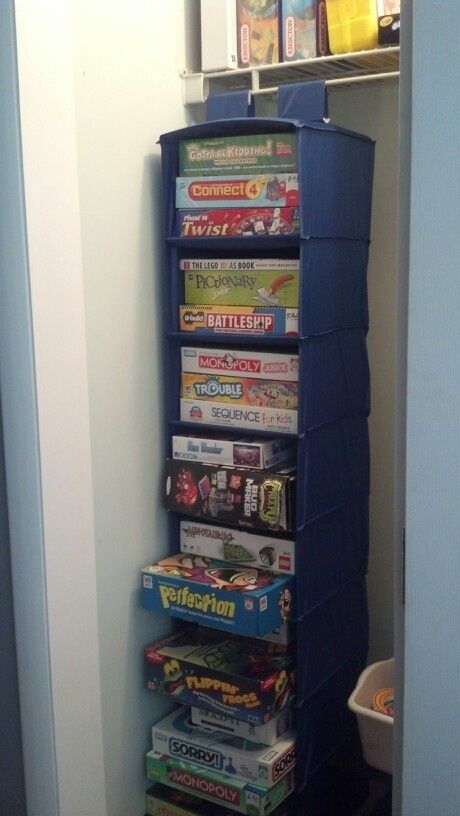
13+ Organizational Ideas for CLOSETS: Tips + Tricks to help organize every all types of closets!Board game organizing idea by Money Saving Sisters

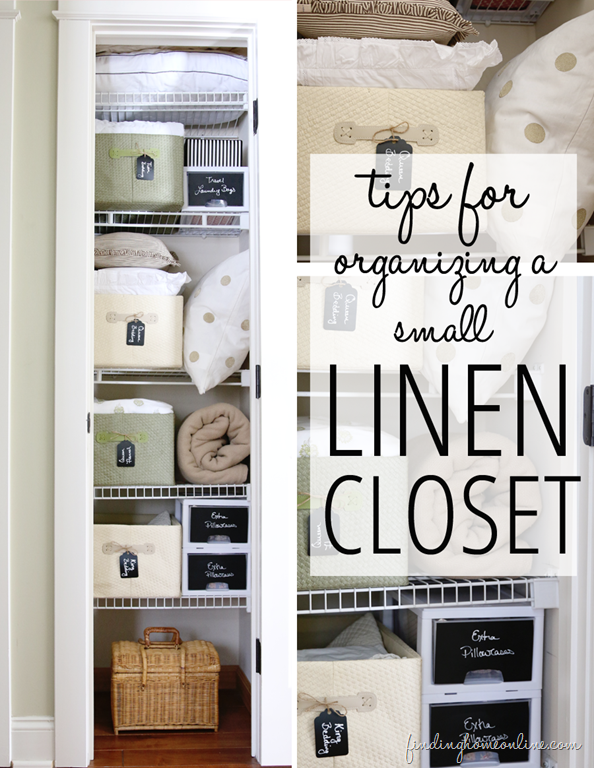
13+ Organizational Ideas for CLOSETS: Tips + Tricks to help organize every all types of closets!Organizing a small linen closet by Finding Home

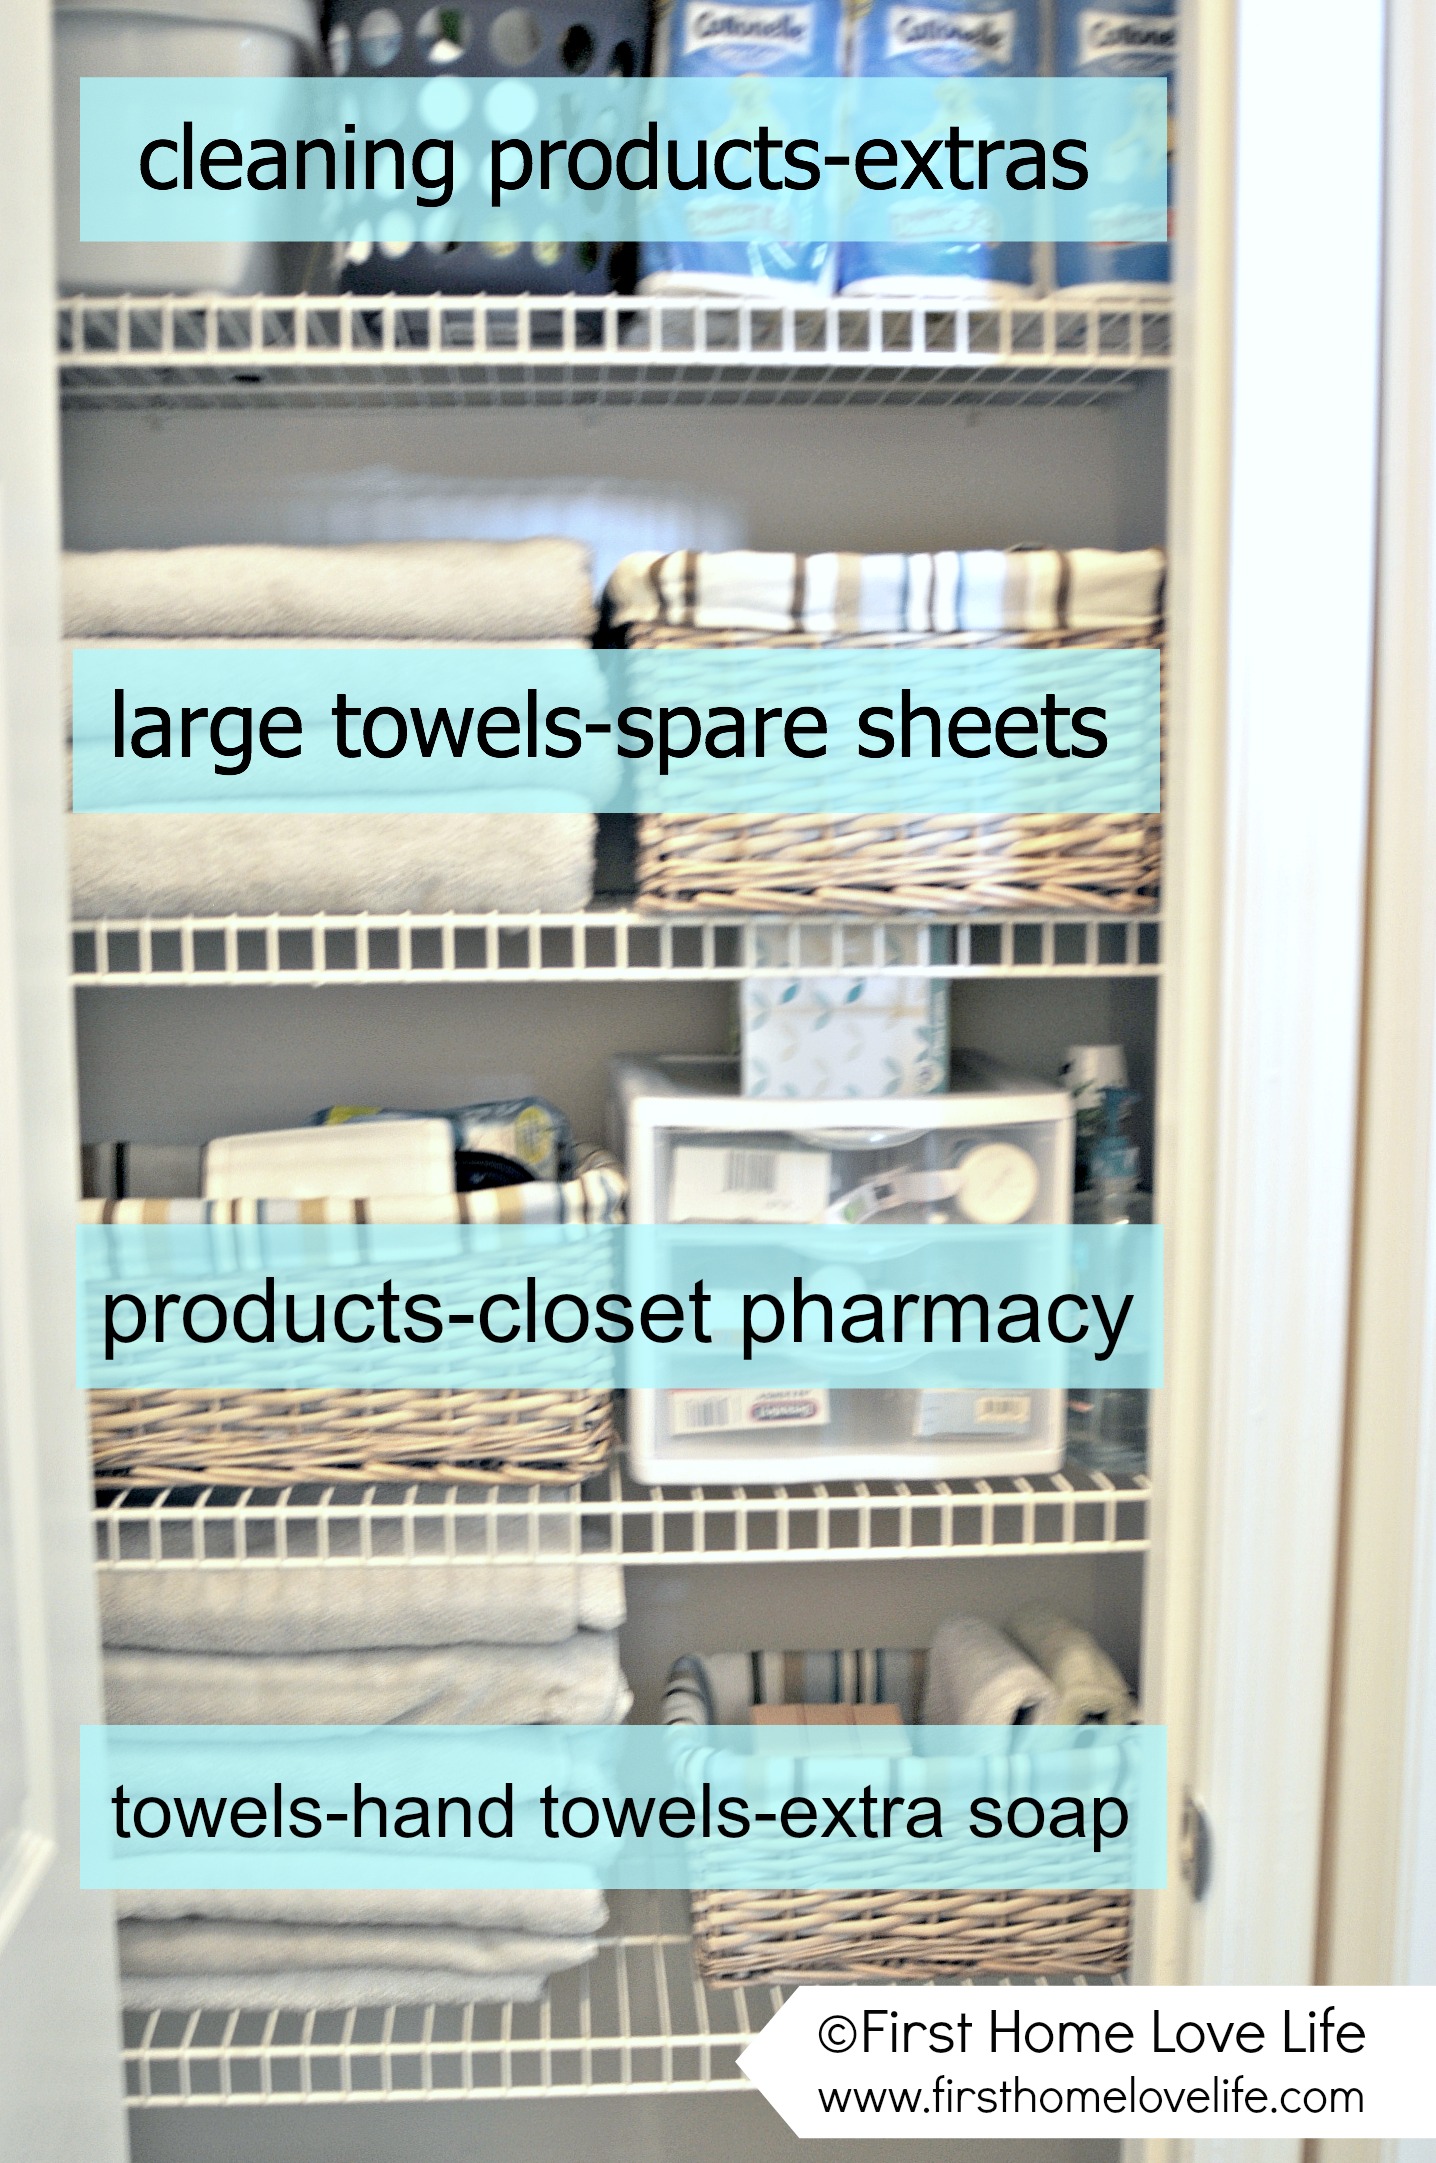
13+ Organizational Ideas for CLOSETS: Tips + Tricks to help organize every all types of closets!Linen closet organization by First Home Love Life

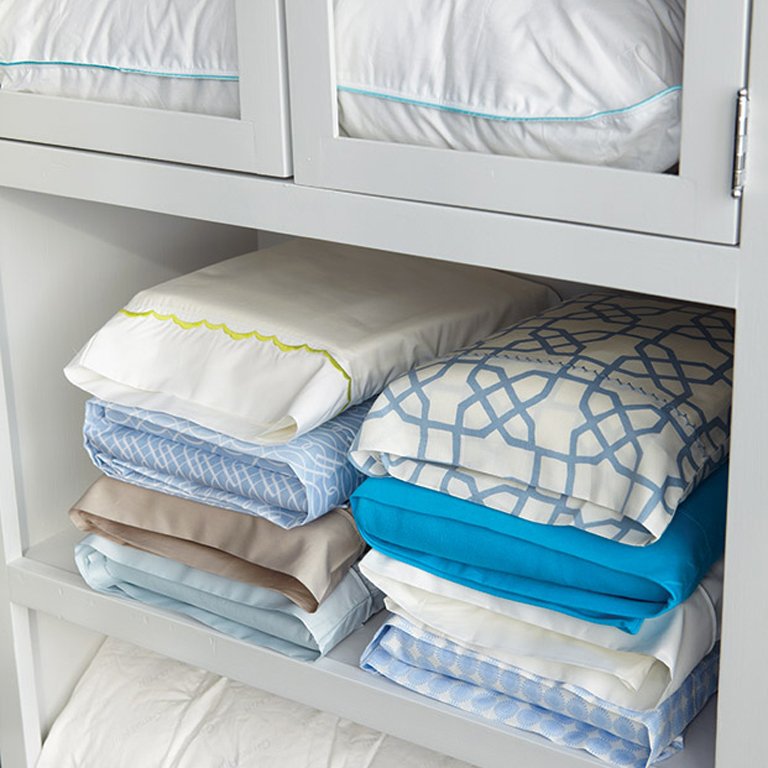
13+ Organizational Ideas for CLOSETS: Tips + Tricks to help organize every all types of closets!Keep matching sheets together via Martha Stewart

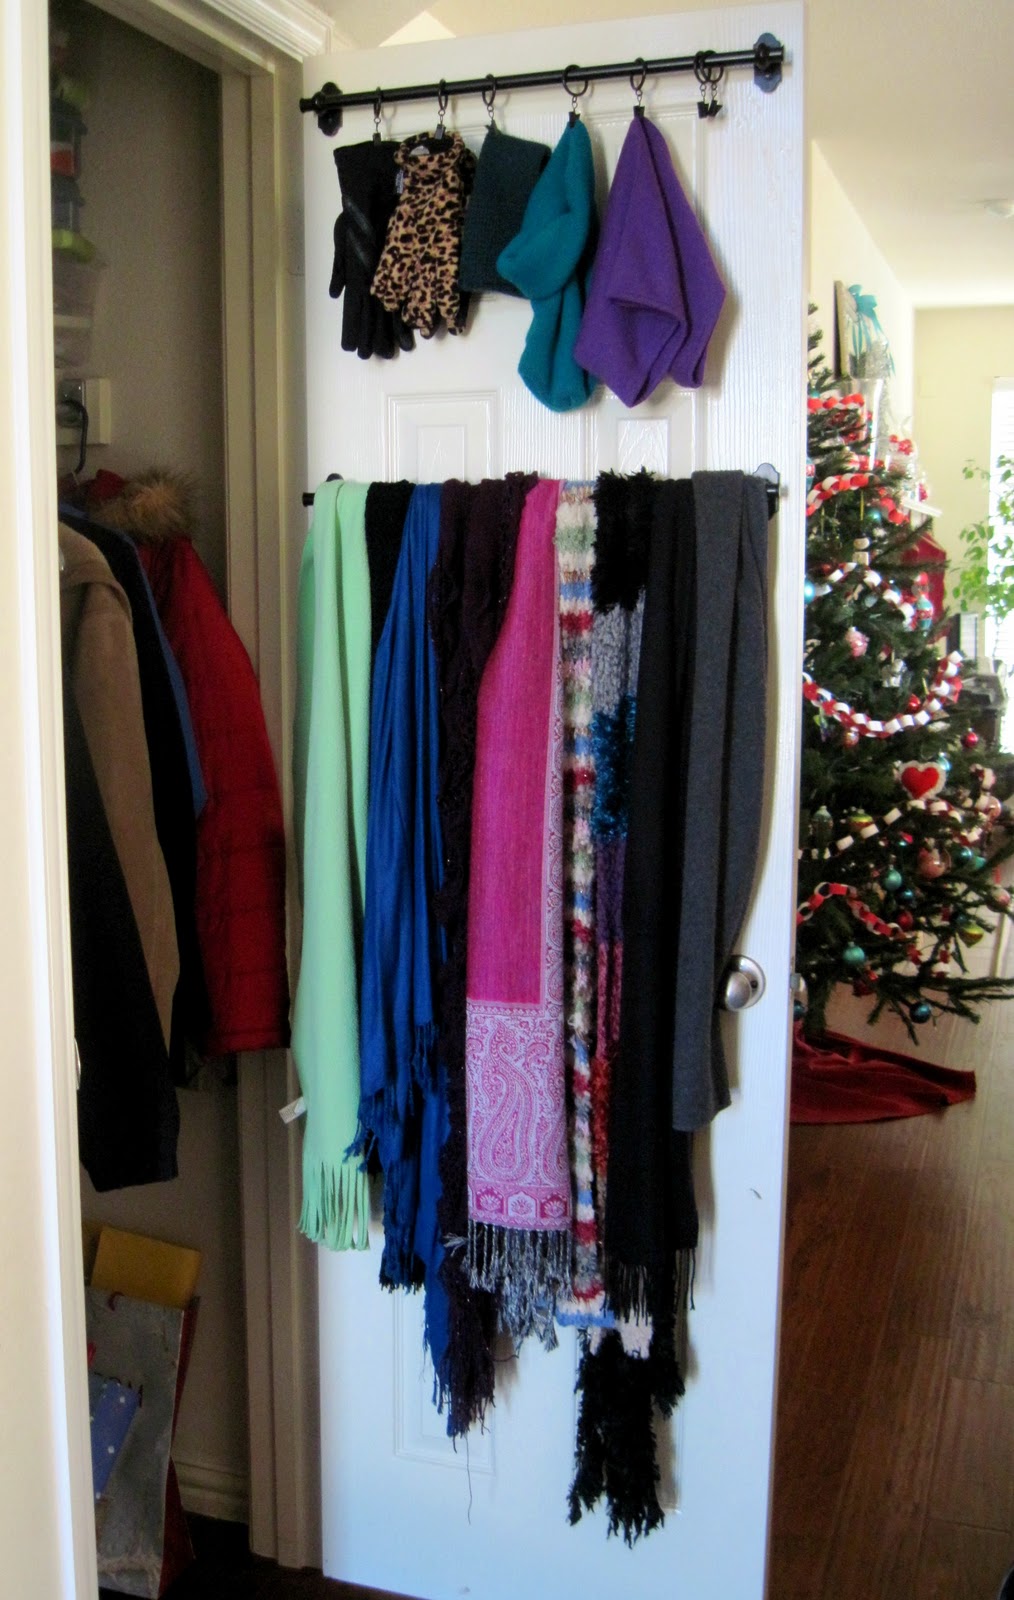
13+ Organizational Ideas for CLOSETS: Tips + Tricks to help organize every all types of closets!Scarf + hat + glove organizer in closet by Wayside Sacraments

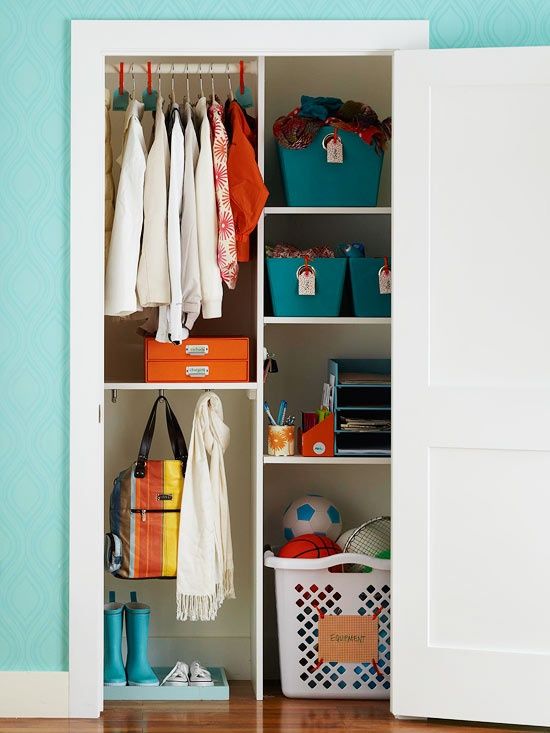
13+ Organizational Ideas for CLOSETS: Tips + Tricks to help organize every all types of closets!Great ideas for organizing an entry/foyer closet via BHG

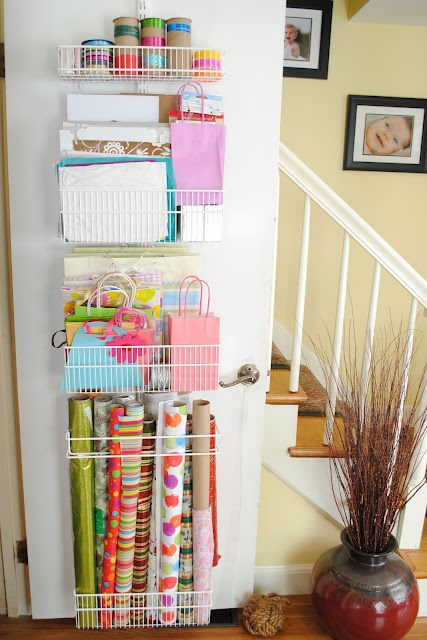
13+ Organizational Ideas for CLOSETS: Tips + Tricks to help organize every all types of closets!Coat closet + Wrapping Organization by The Chronicles of Home

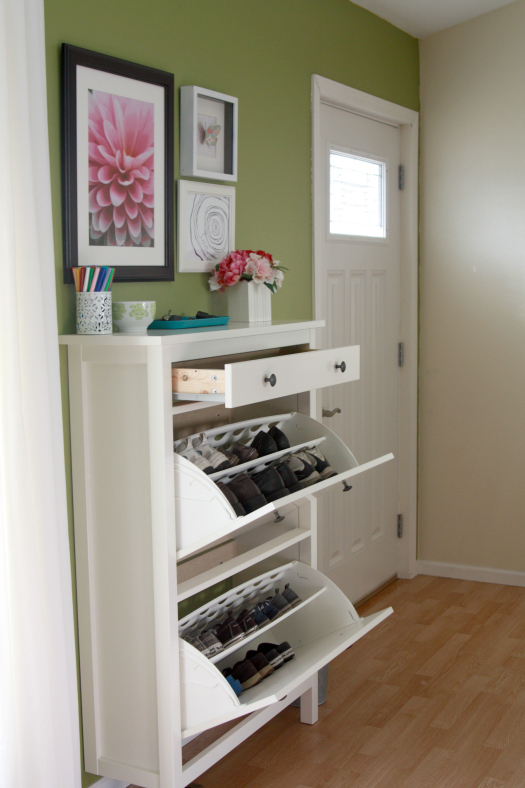
13+ Organizational Ideas for CLOSETS: Tips + Tricks to help organize every all types of closets!Entry shoe organizer by I Heart Organizing

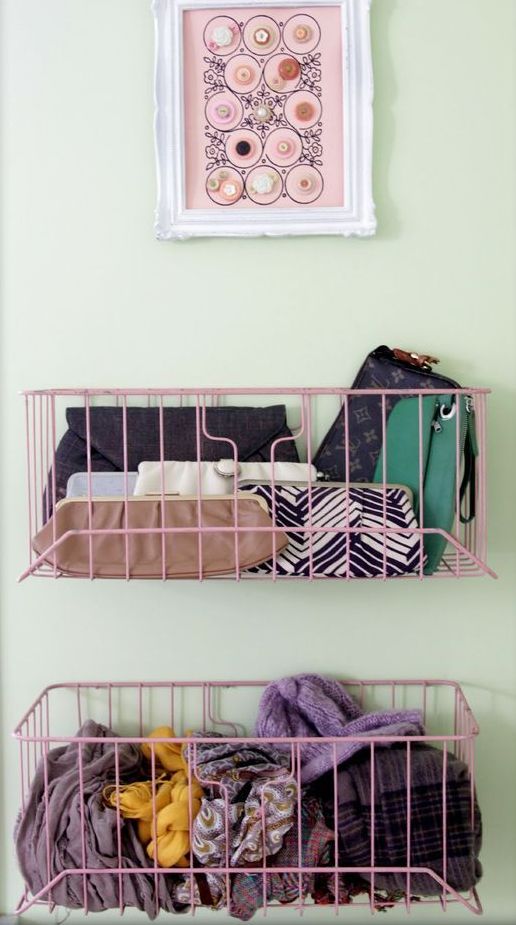
13+ Organizational Ideas for CLOSETS: Tips + Tricks to help organize every all types of closets!Clutch / Pocketbook in wire baskets by Decor Fix

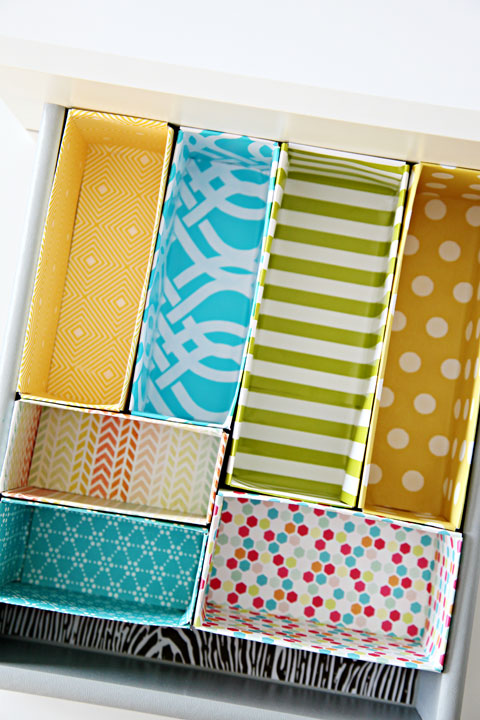
13+ Organizational Ideas for CLOSETS: Tips + Tricks to help organize every all types of closets!Cereal box drawer dividers by I Heart Organizing

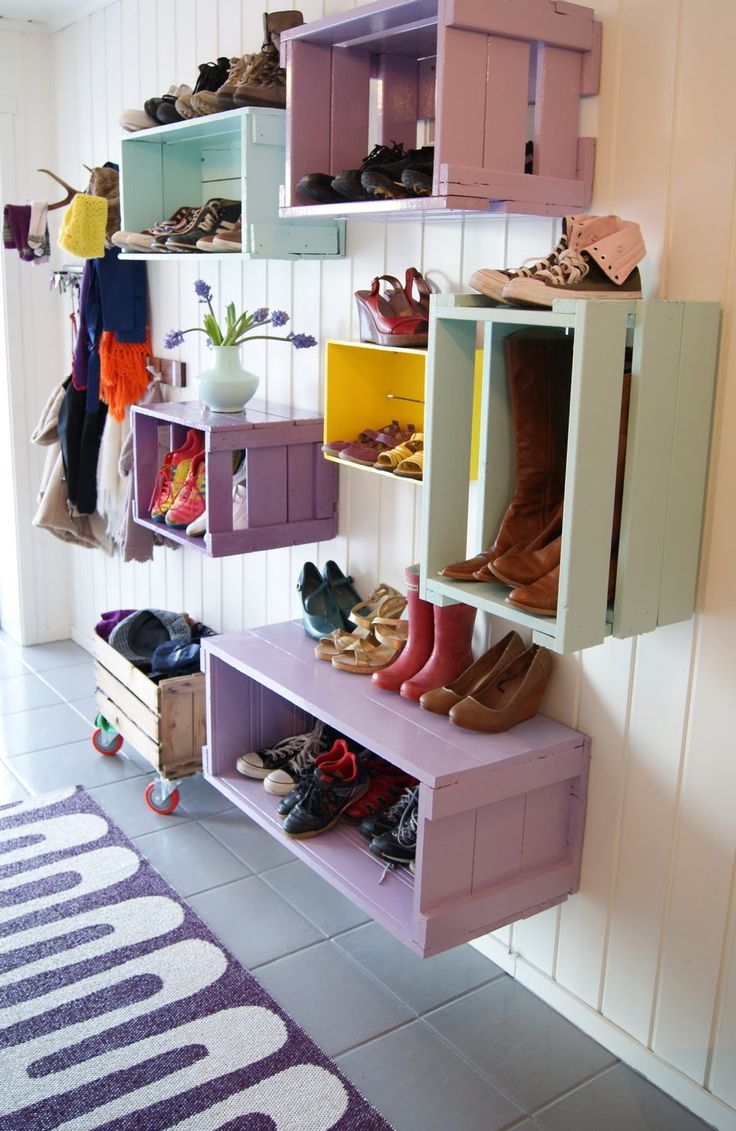
13+ Organizational Ideas for CLOSETS: Tips + Tricks to help organize every all types of closets!An entry closet alternative with colorful wood crates for show storage by Thea’s Mania

And that’s a wrap for ideas to get all the CLOSETS in your home organized!

Here is a recap of the week so far (click on the image to bring you to the original post)

Organizing for the Home: 30+ ideas, tips, & tricks to help organize every nook & cranny in the home

15 + Organizational Ideas for the BATHROOM: Tips + Tricks to help organize every nook & cranny of the bathroom!

13+ Organizational Ideas for CLOSETS: Tips + Tricks to help organize every all types of closets!

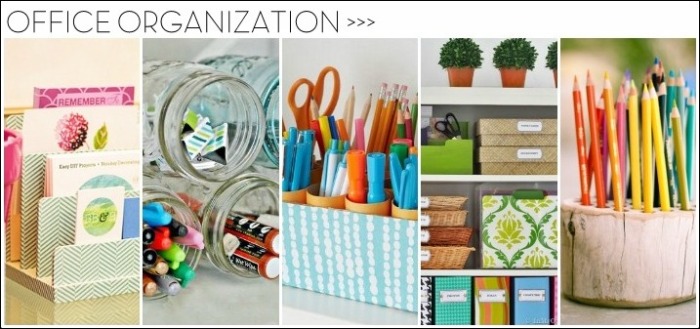
Organzing ideas + tips for the HOME OFFICE!

Watch out for tomorrow’s post when I’ll be sharing organizational inspiration for THE OFFICE!

15+ Bathroom Organizing Ideas: Inexpensive + Easy!

For some organizing is fun (some meaning the 1% of you anal peeps out there), but for most (the other 99% of us – me included) it can be a bit grueling + tedious task to get organized. But admittedly, once a space, a closet, or a room, is organized, I always feel empowered, happy, and a huge weight lifted off my shoulders.  Are you the same?

As I mentioned yesterday, I am in full-on organizing mode since the new year began and after anticipating writing one post on organizing every nook & cranny in the home, it evolved into a week’s worth of organizing inspiration starting with the 20+ ideas for the kitchen that I shared yesterday.

Today’s focus… THE BATHROOM.

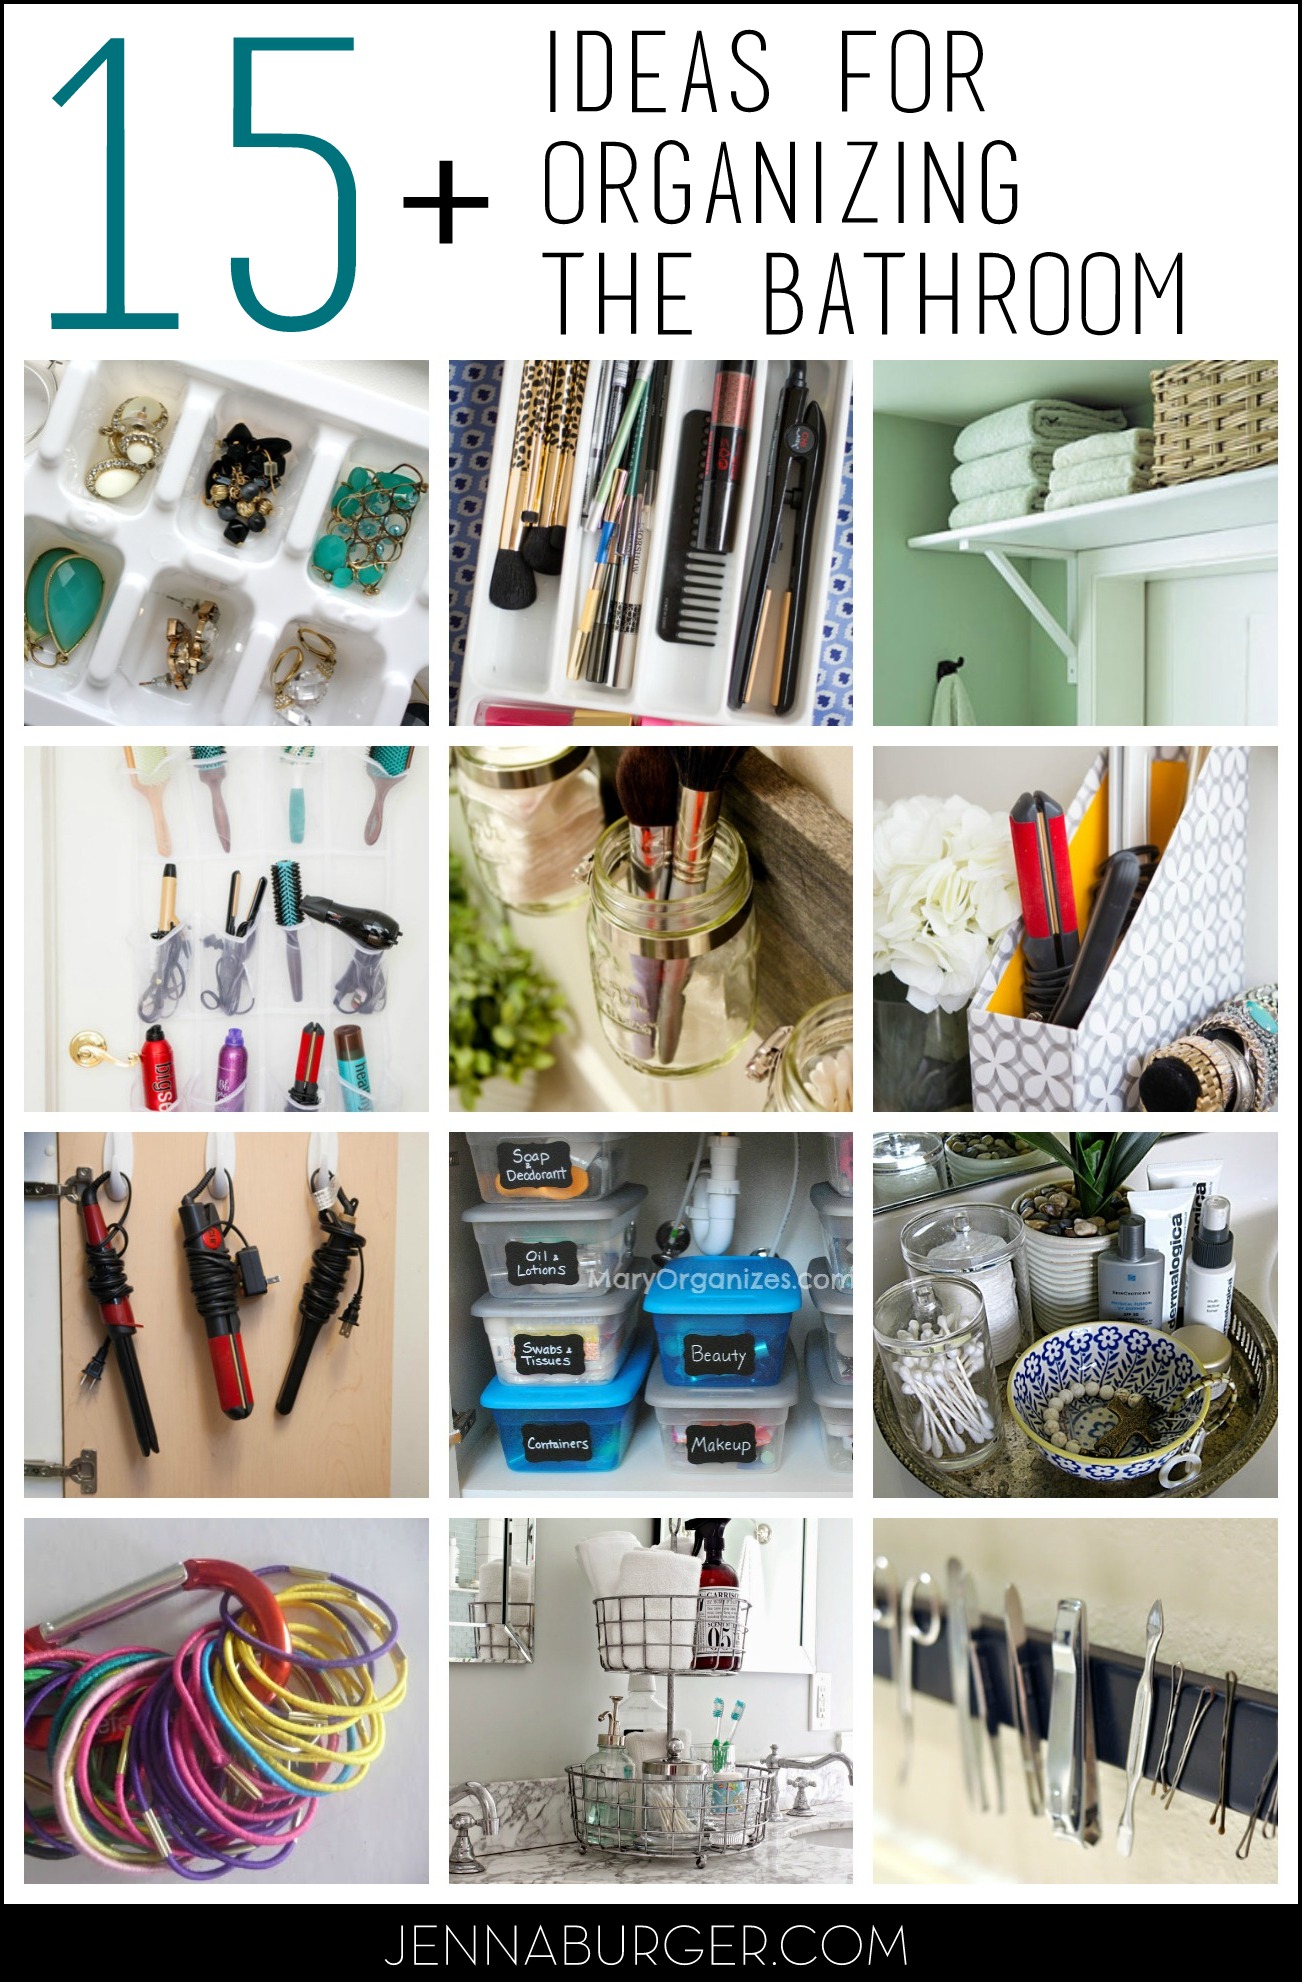
15 + Organizational Ideas for the BATHROOM: Tips + Tricks to help organize every nook & cranny of the bathroom!

Often a small space, but packed with a whole lotta stuff.  Here is a roundup I put together with 15+ Bathroom Organizing Ideas: affordable + easy… (links to the original source, creation, and/or tutorial are BELOW the picture)

Bathroom

Savvy solutions for the bathroom space… No more wasted time looking for the right sized curling iron or that pretty green eye shadow.

Organizing for the Home: 30+ ideas, tips, & tricks to help organize every nook & cranny in the homeBathroom storage ideas via Cosmopolitan

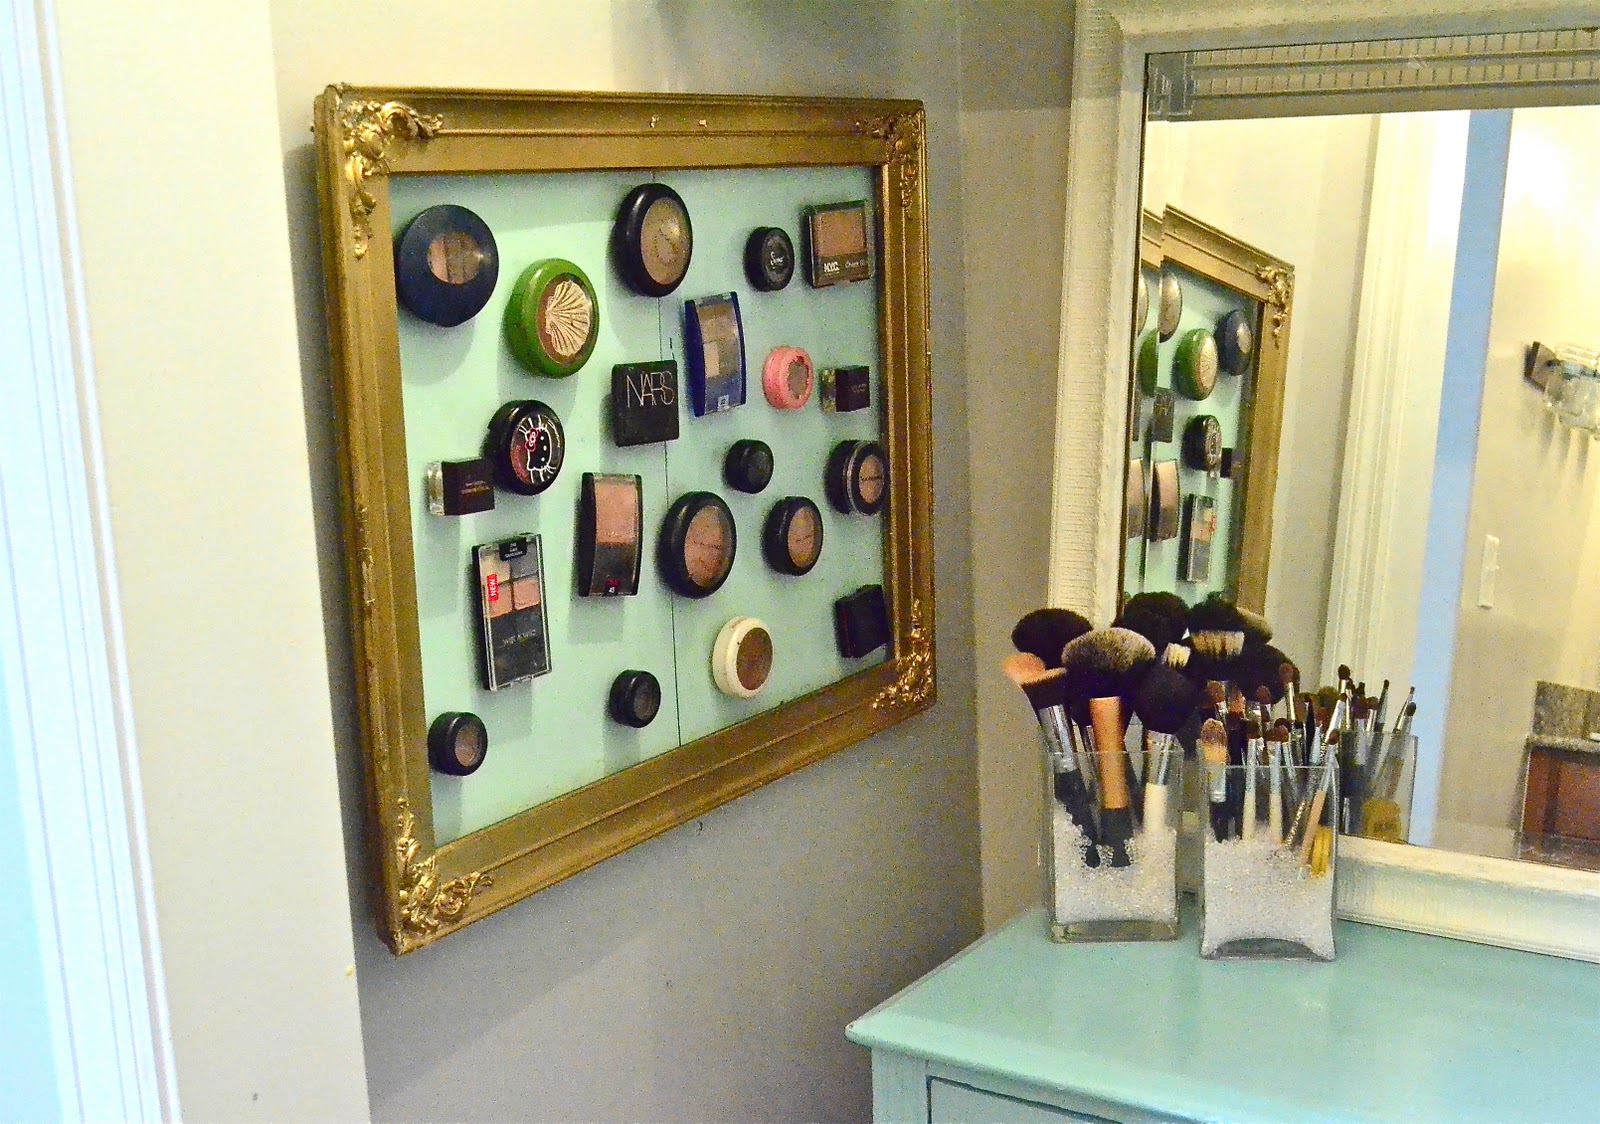
Organizing for the Home: 30+ ideas, tips, & tricks to help organize every nook & cranny in the homeMagnetic Makeup Board by Liz Marie

towel-rack-cabinet-wm_thumb

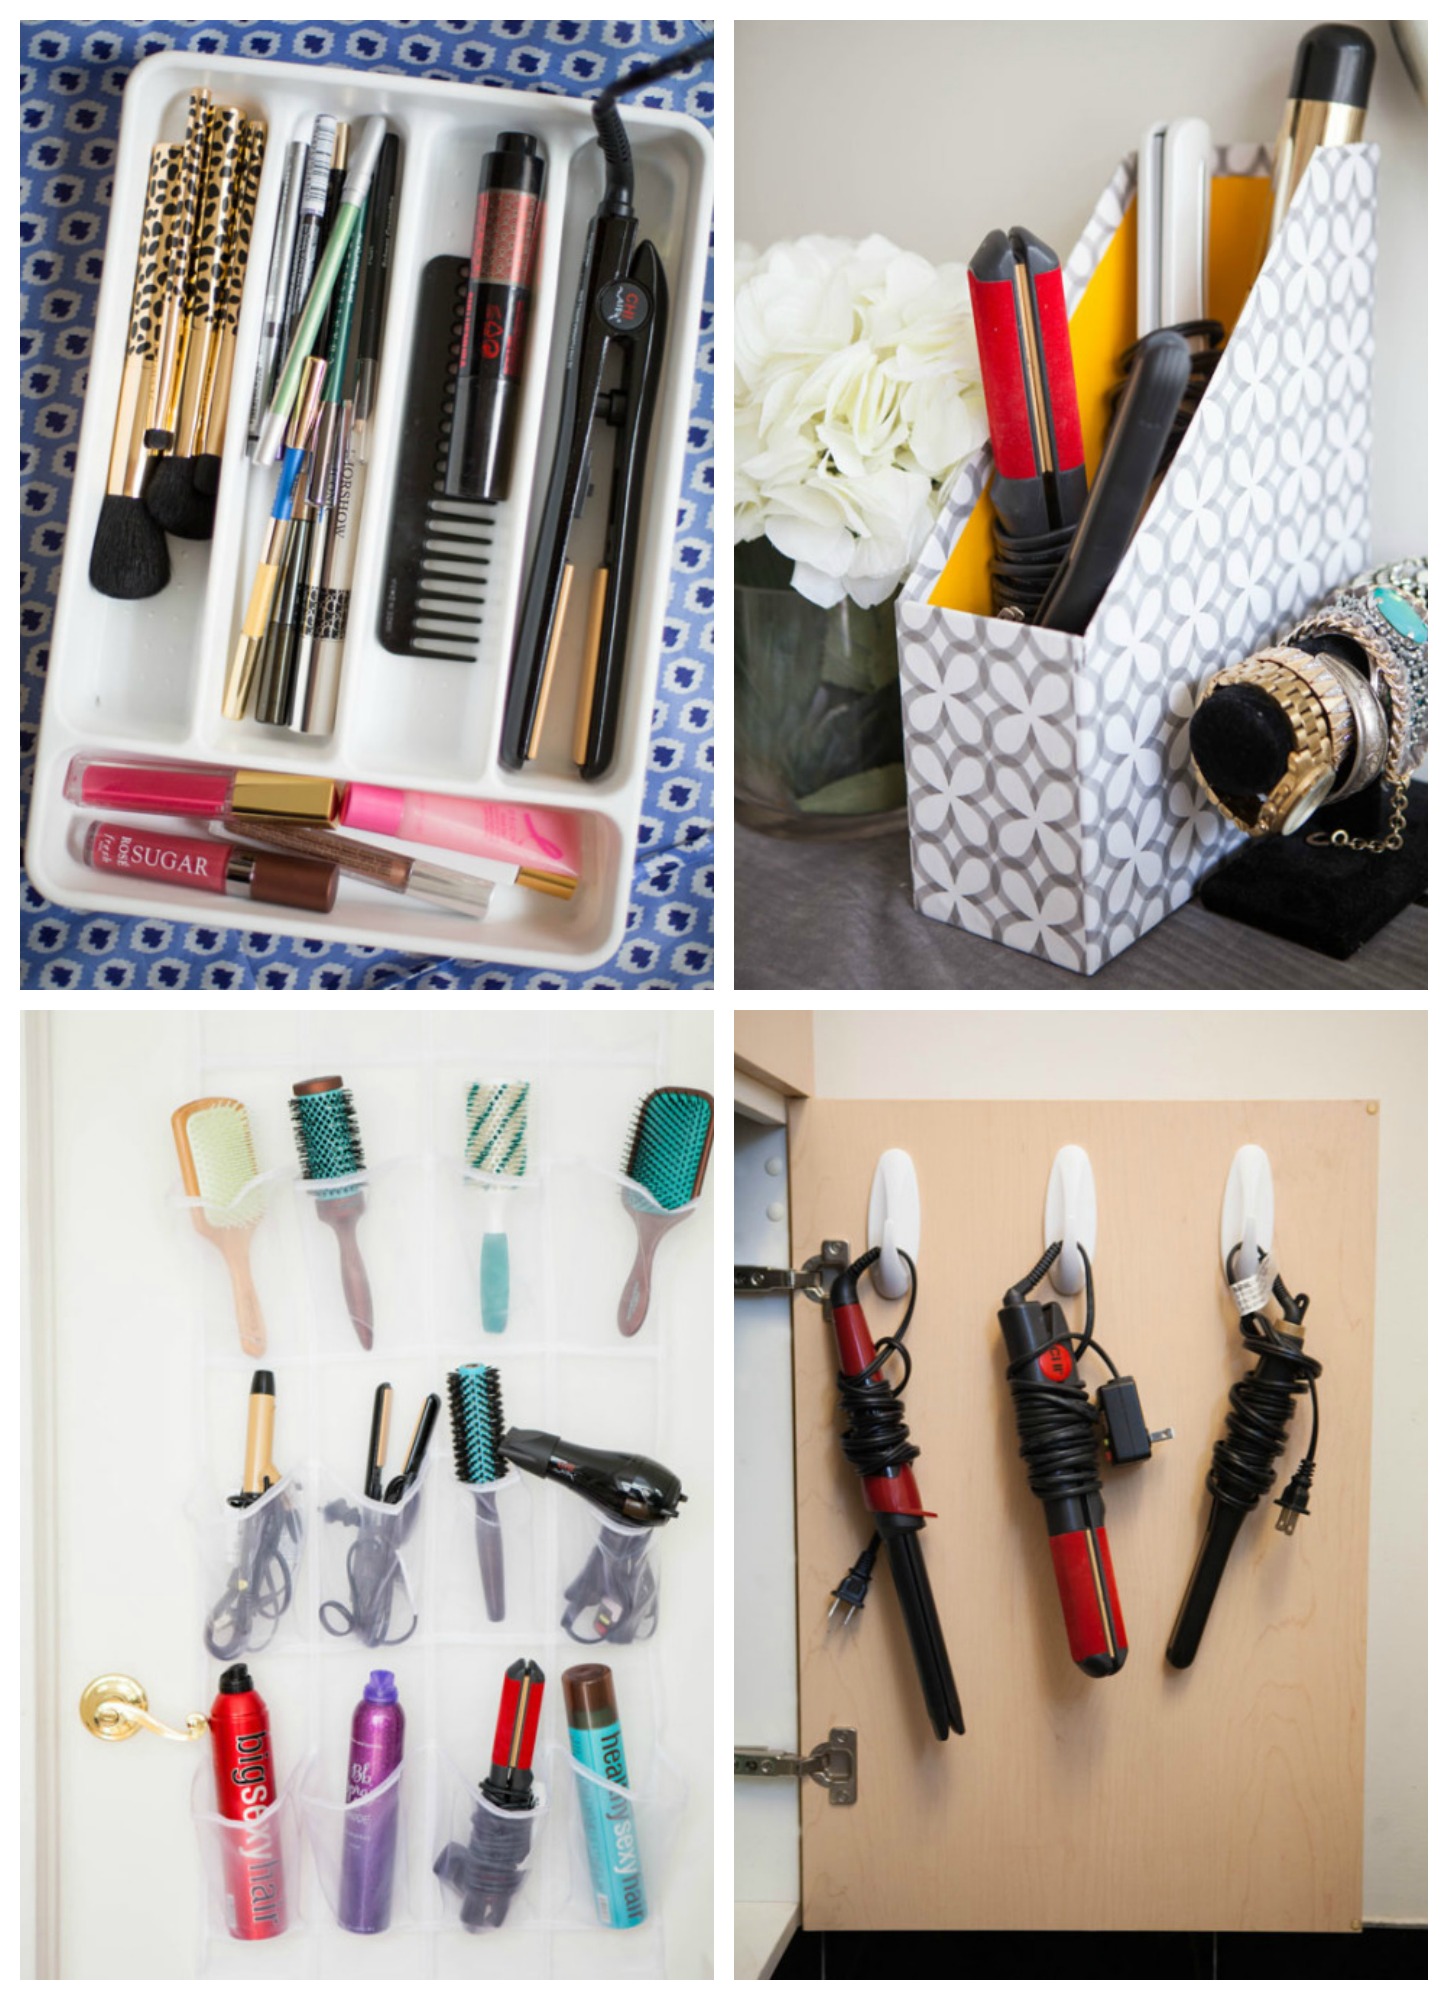
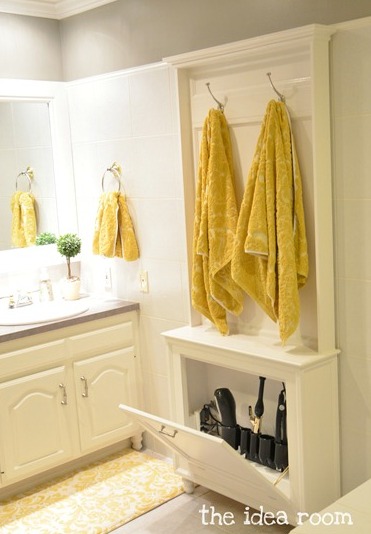
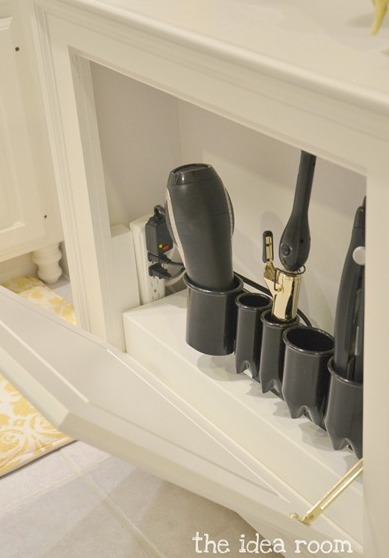
towel-rack-cabinet-10wm_thumbHair tool storage caddy by The Idea Room

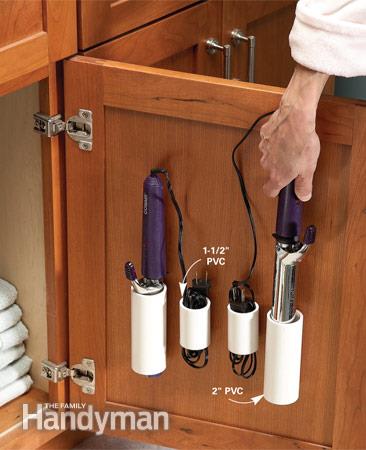
15 + Organizational Ideas for the BATHROOM: Tips + Tricks to help organize every nook & cranny of the bathroom!Another tool storage idea… inside the cabinet via The Family Handyman

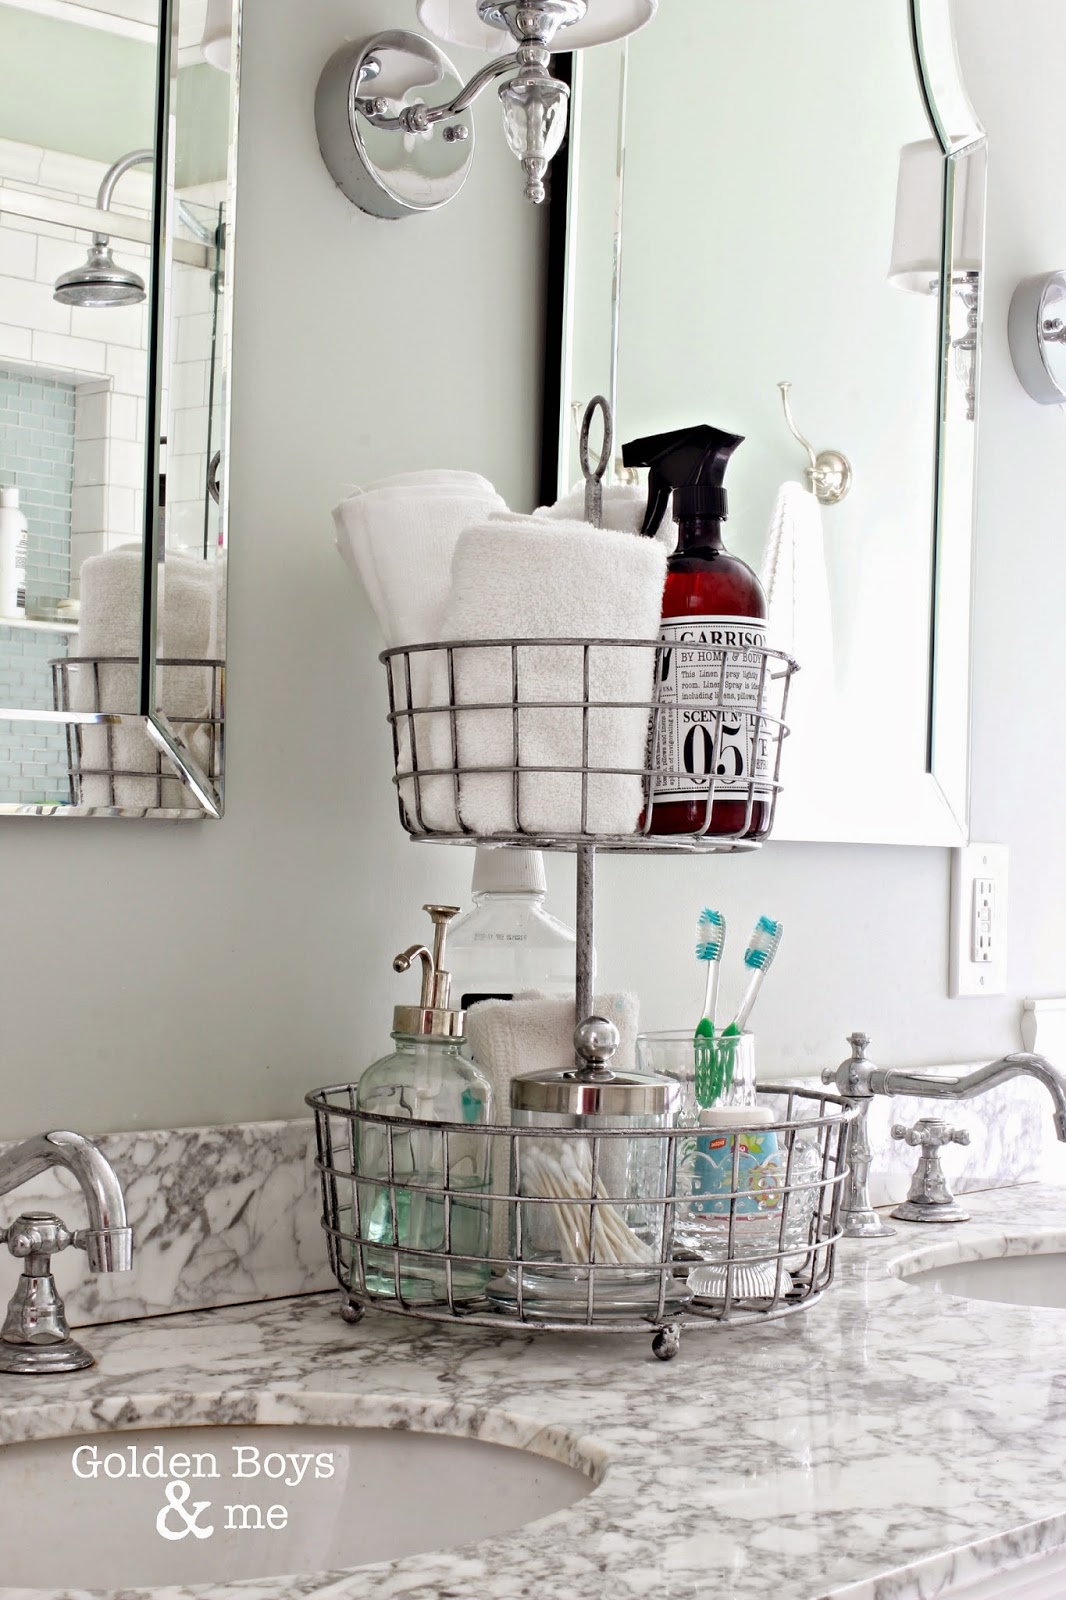
Organizing for the Home: 30+ ideas, tips, & tricks to help organize every nook & cranny in the homeBath countertop caddy by Golden Boys & Me

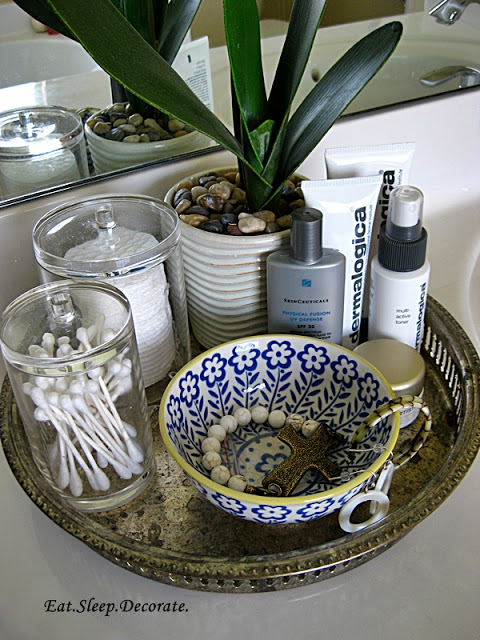
15 + Organizational Ideas for the BATHROOM: Tips + Tricks to help organize every nook & cranny of the bathroom!Countertop tray for toiletries + bathroom essentials by Eat. Sleep. Decorate.

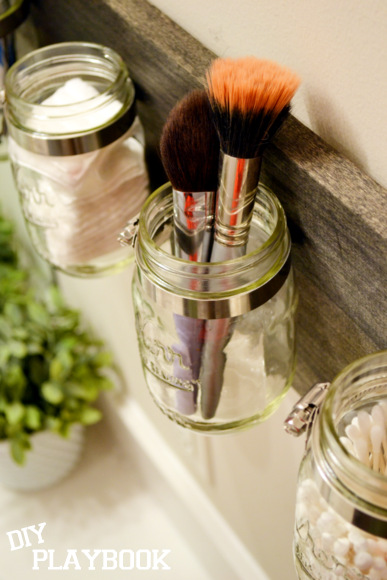
15 + Organizational Ideas for the BATHROOM: Tips + Tricks to help organize every nook & cranny of the bathroom!Mason jar organizer by The DIY Playbook

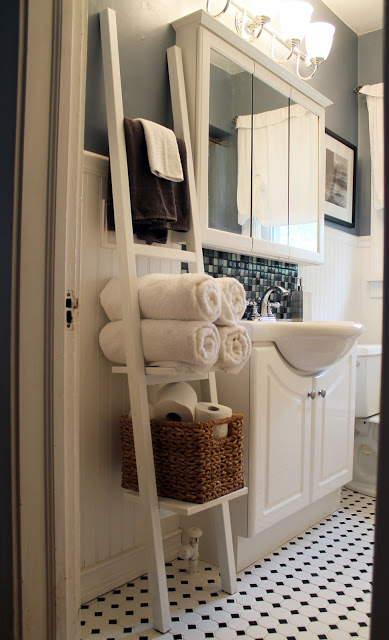
15 + Organizational Ideas for the BATHROOM: Tips + Tricks to help organize every nook & cranny of the bathroom!Ladder shelves are great for storage by Hammers and High Heels

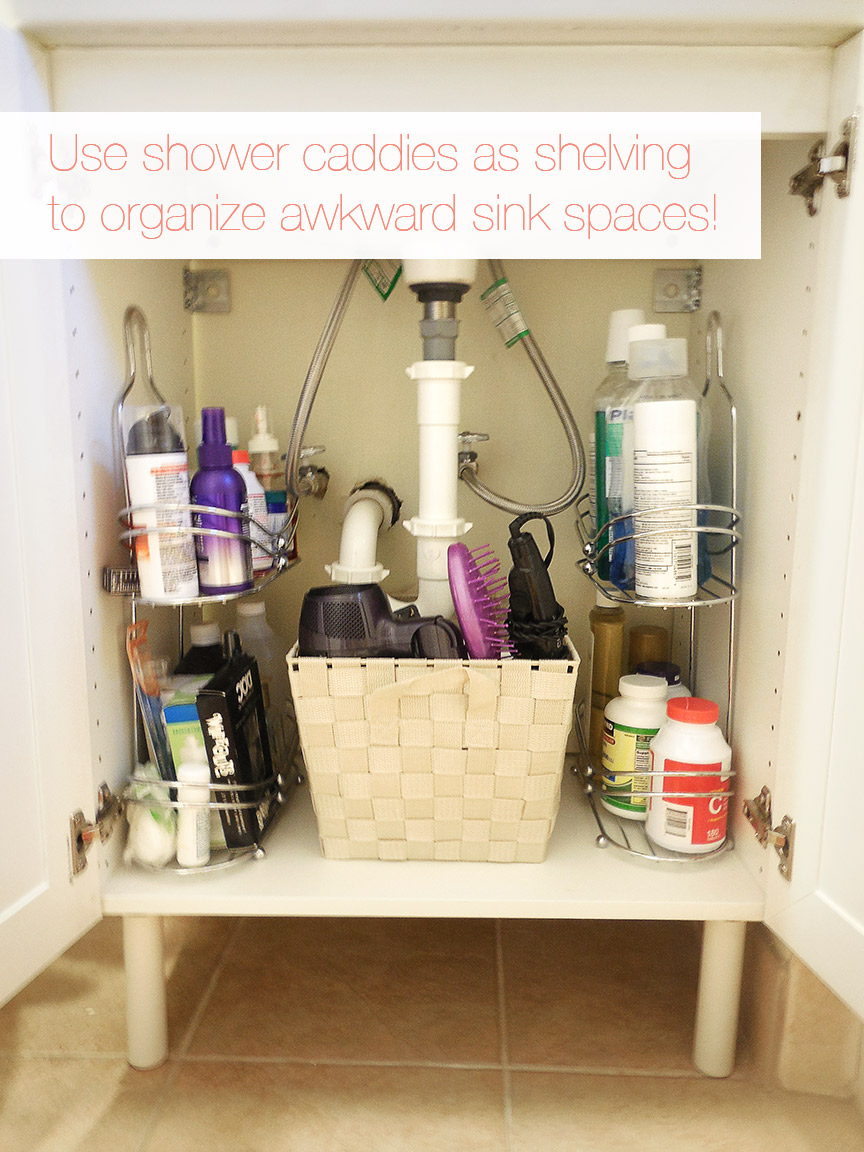
Organizing for the Home: 30+ ideas, tips, & tricks to help organize every nook & cranny in the homeOrganization under the sink via Pretty Organized

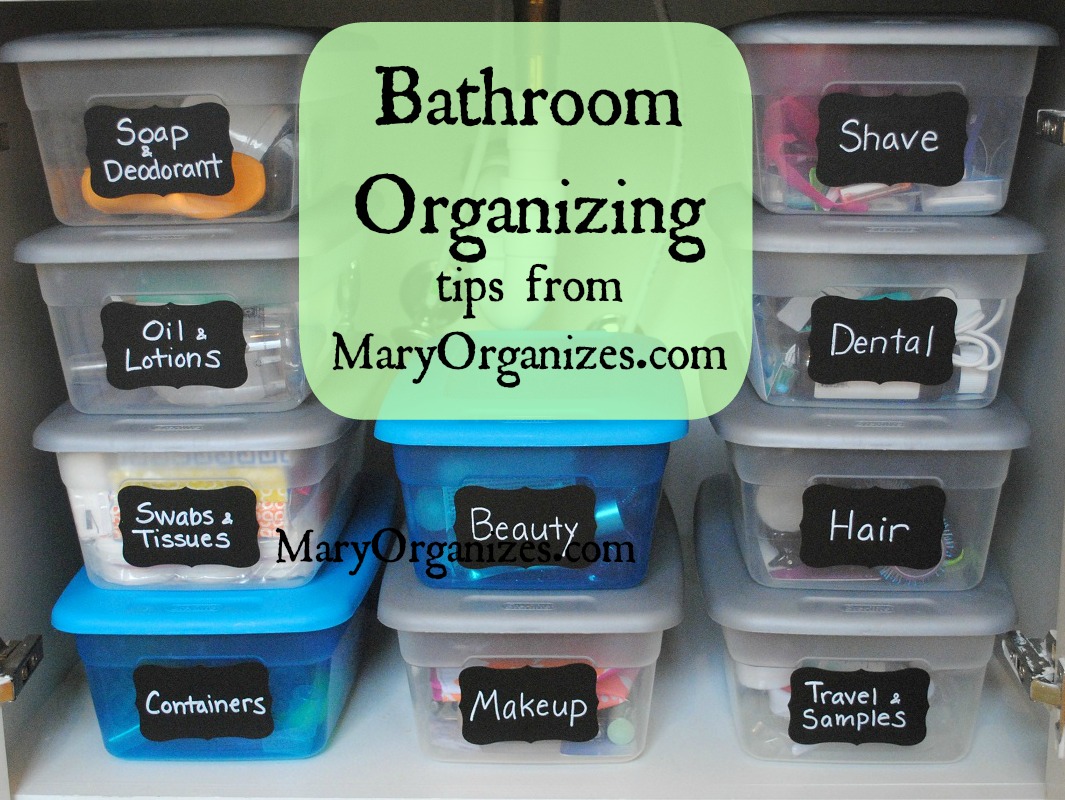
15 + Organizational Ideas for the BATHROOM: Tips + Tricks to help organize every nook & cranny of the bathroom!More under the counter organizing ideas by Mary Organizes

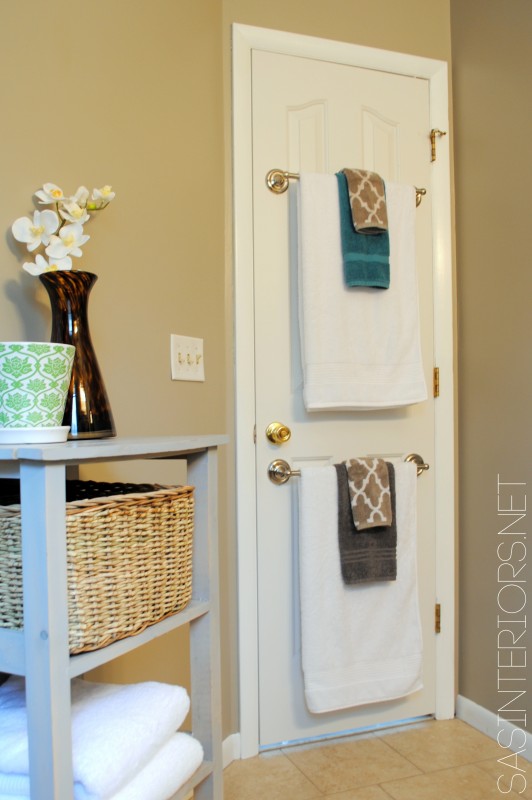
Organizing for the Home: 30+ ideas, tips, & tricks to help organize every nook & cranny in the homeTowel storage on the back of the bathroom door via Jenna Burger

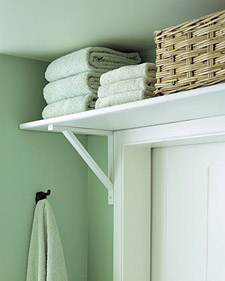
15 + Organizational Ideas for the BATHROOM: Tips + Tricks to help organize every nook & cranny of the bathroom!A shelf with brackets over the door via Martha Stewart

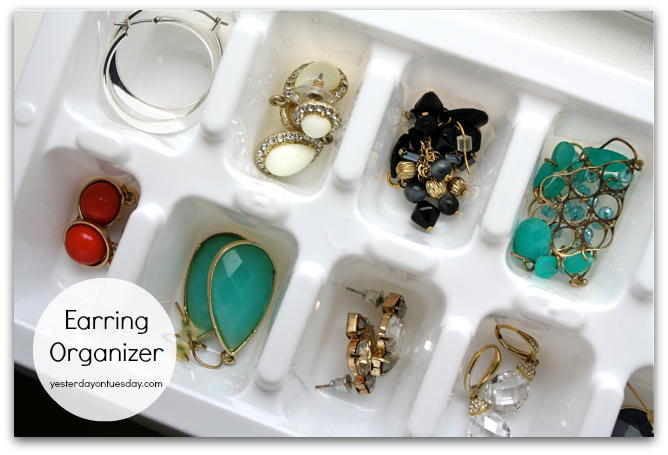
15 + Organizational Ideas for the BATHROOM: Tips + Tricks to help organize every nook & cranny of the bathroom!Ice cube tray jewelry holder + other dollar store organizing ideas by Yesterday on Tuesday

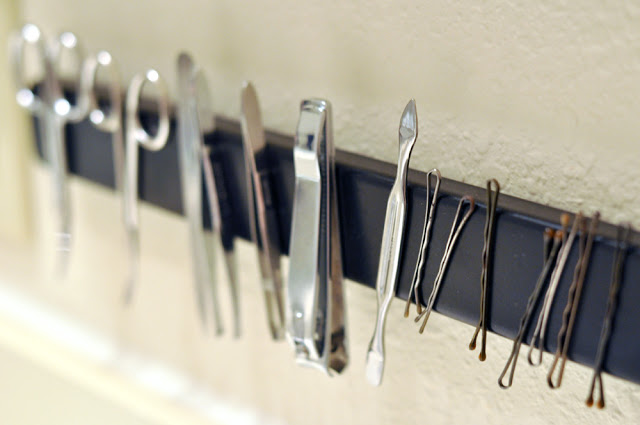
15 + Organizational Ideas for the BATHROOM: Tips + Tricks to help organize every nook & cranny of the bathroom!Magnetic Bathroom Rack via Darkroom & Dearly

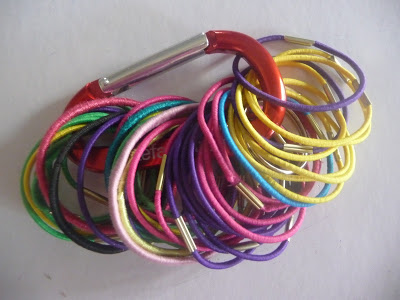
15 + Organizational Ideas for the BATHROOM: Tips + Tricks to help organize every nook & cranny of the bathroom!Ponytail Holder by It’s Jilly

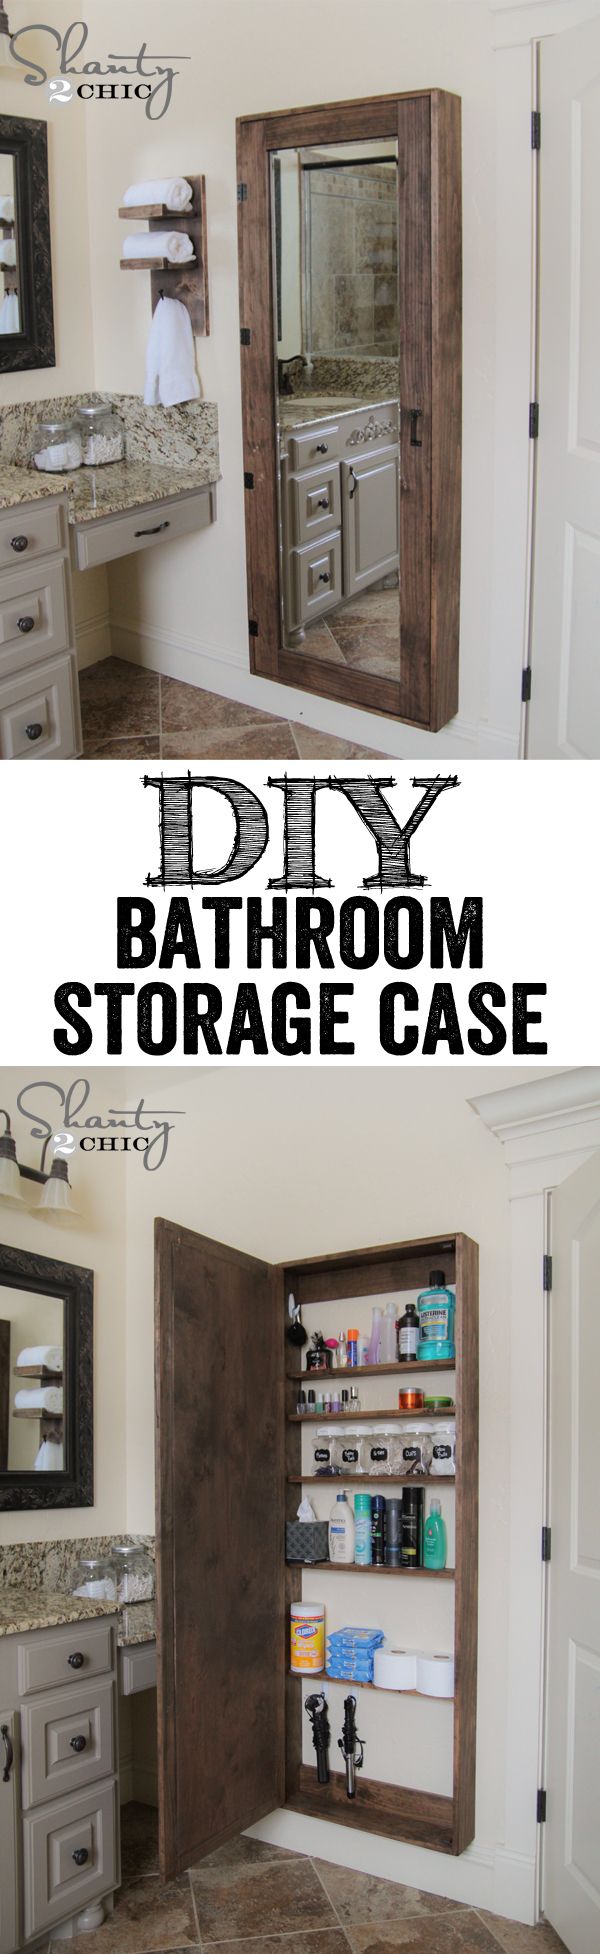
15 + Organizational Ideas for the BATHROOM: Tips + Tricks to help organize every nook & cranny of the bathroom!Bathroom Mirror Storage Case by Shanty 2 Chic

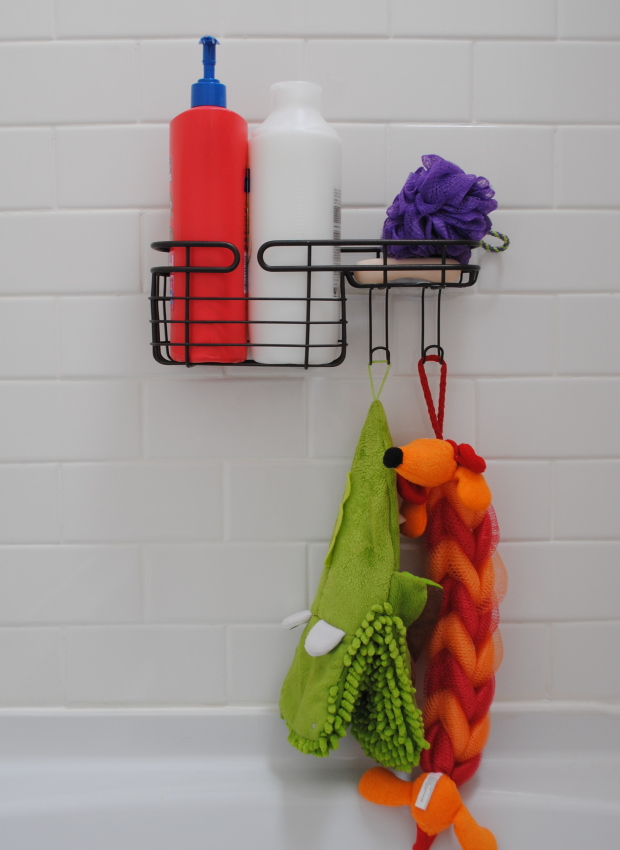
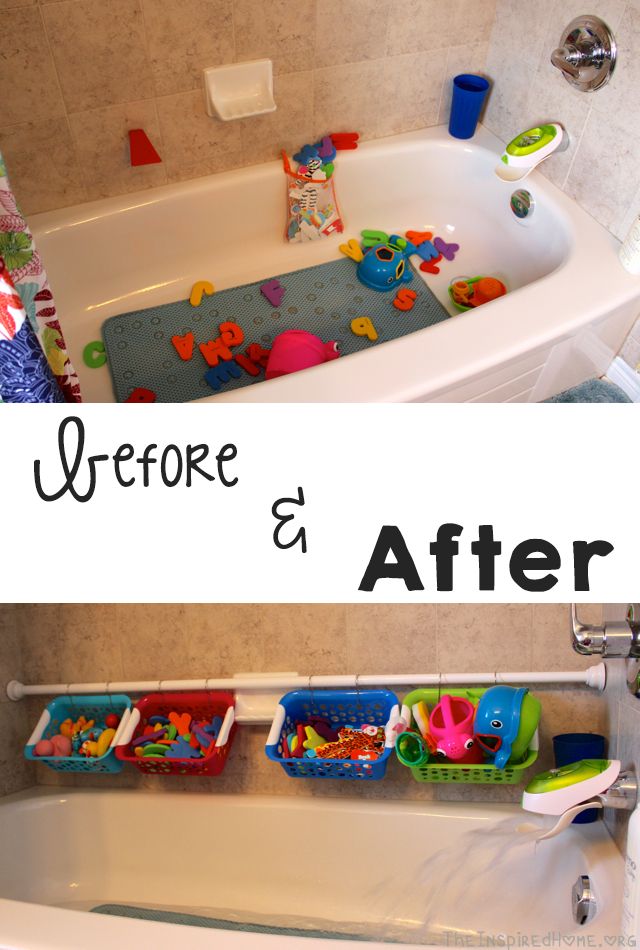
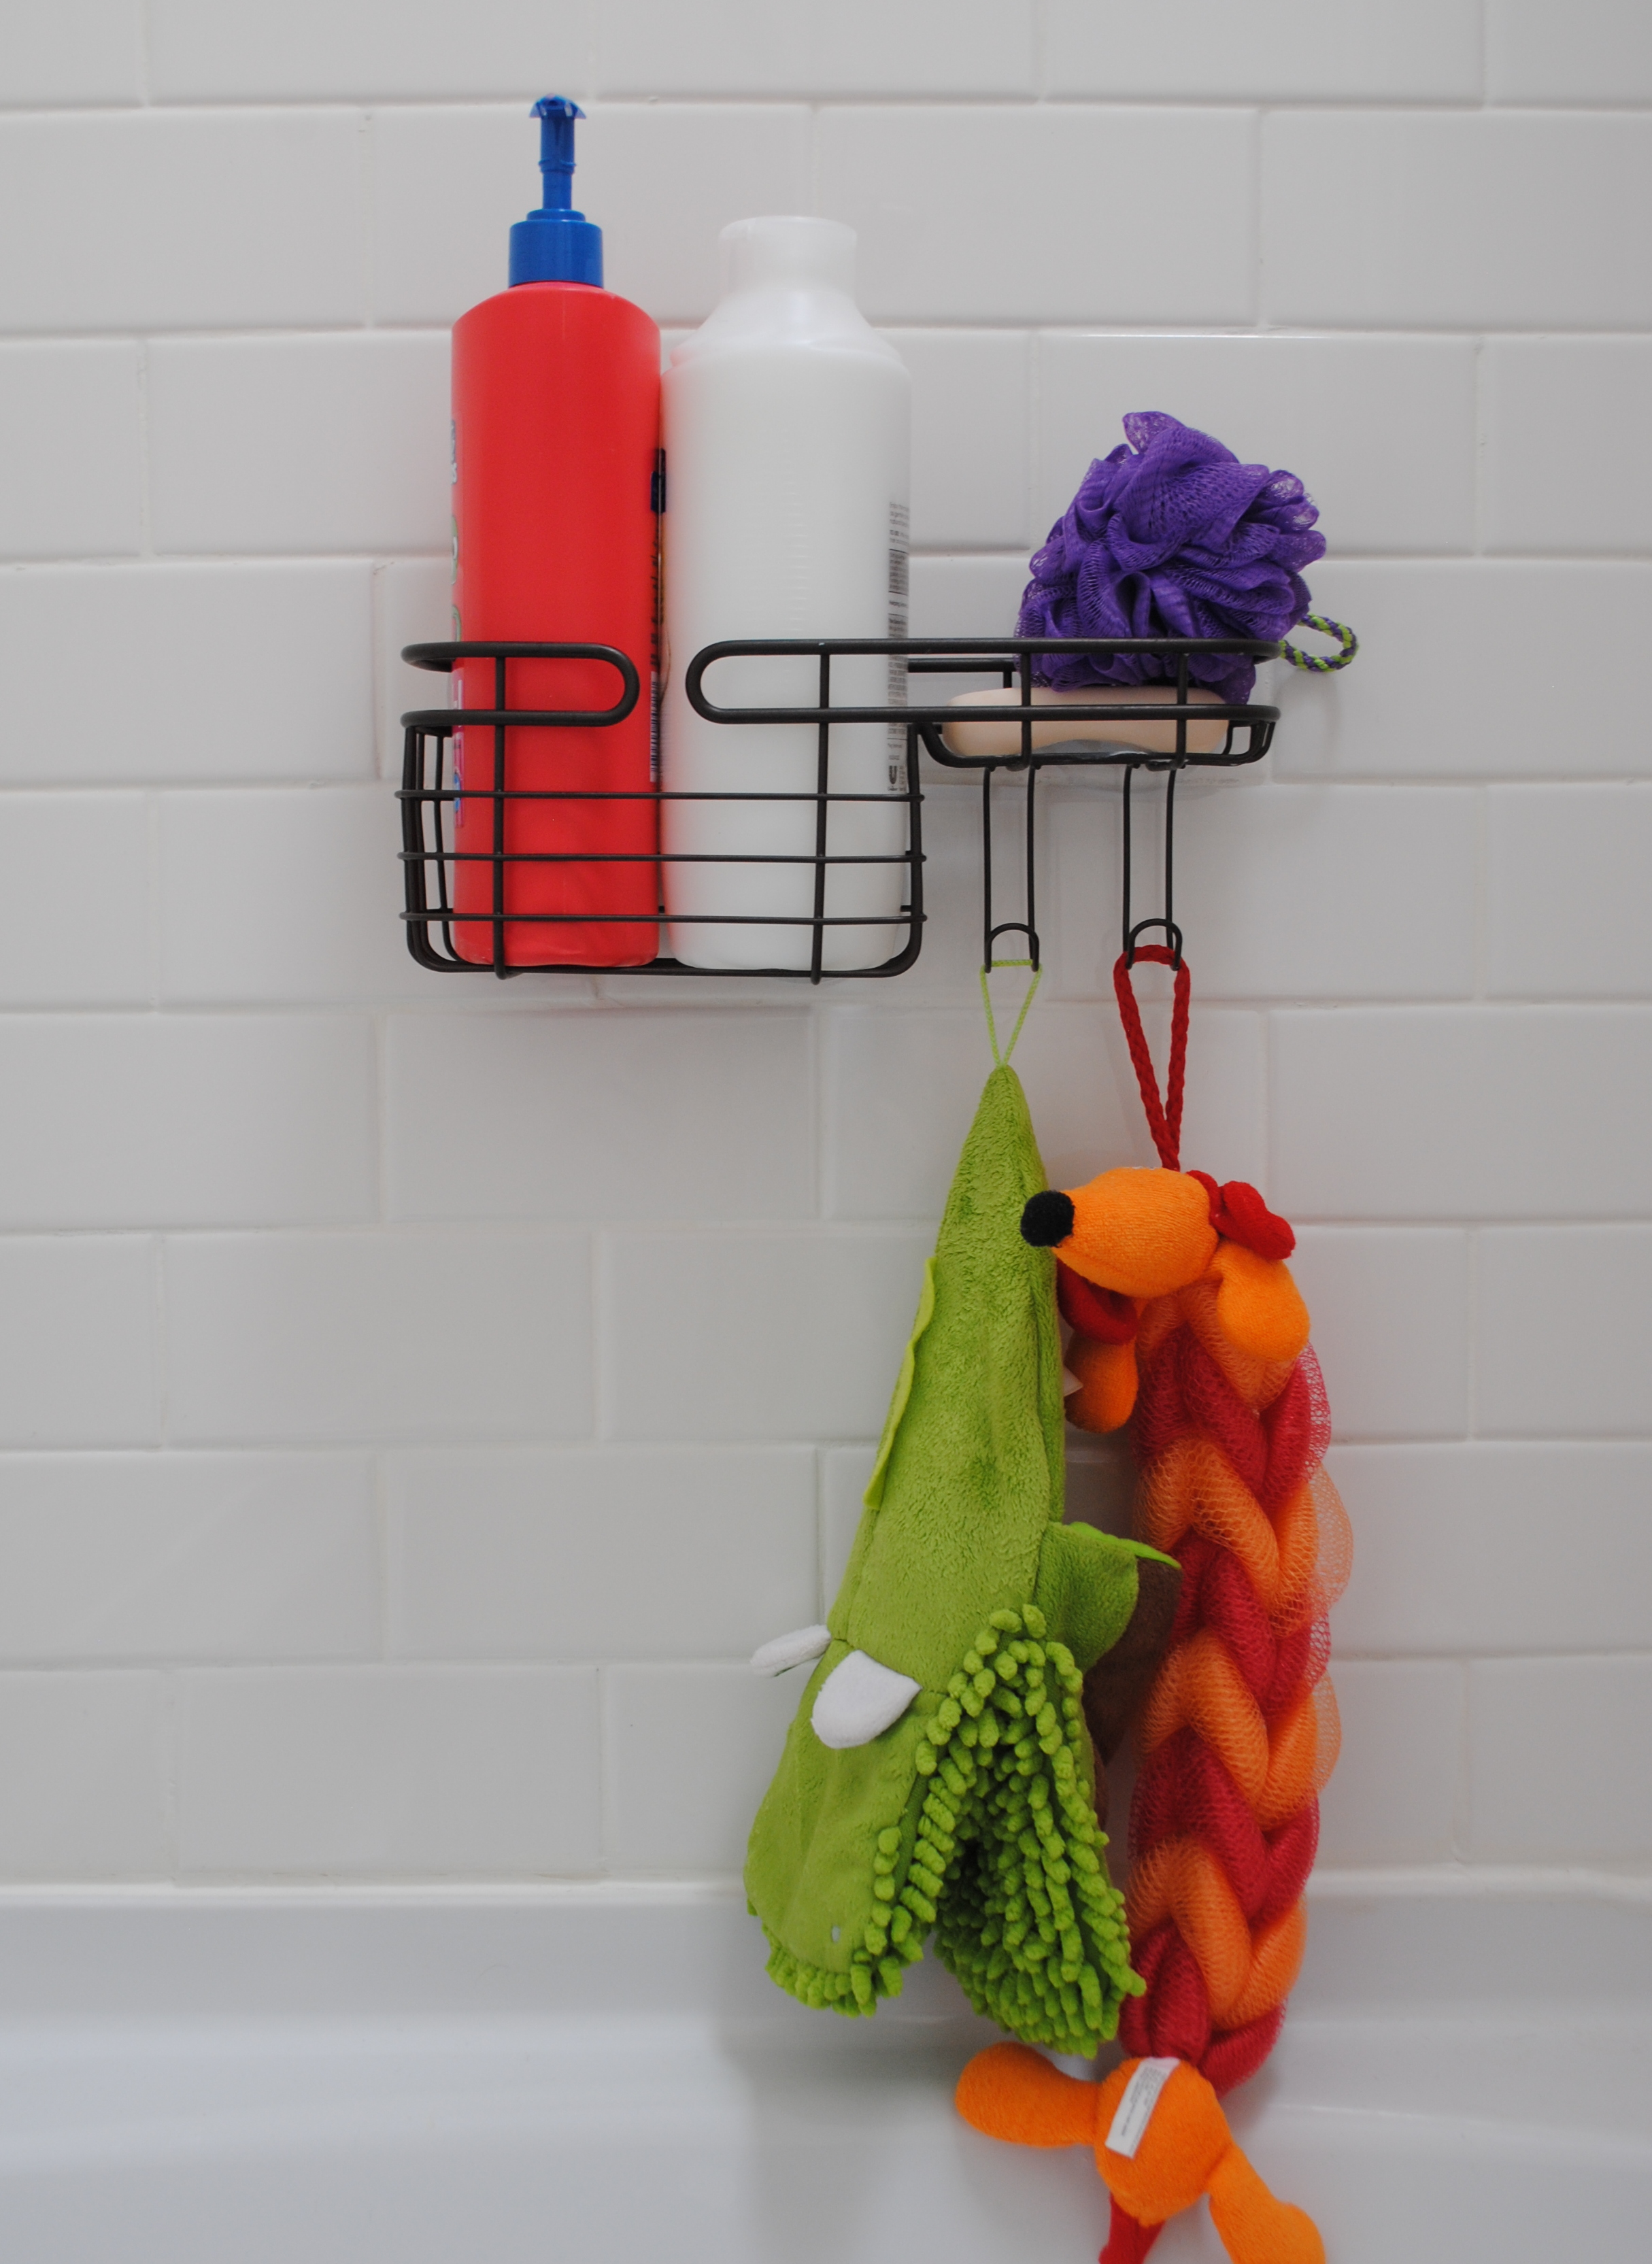
15 + Organizational Ideas for the BATHROOM: Tips + Tricks to help organize every nook & cranny of the bathroom!Bath toy organization by The Inspired Home

WOW, those are all great ideas to keep the bathroom space looking good + organized!  Do you have a favorite tip or trick for keeping the bathroom organized.  I didn’t before putting this post together…

Here is a recap of the week so far (click on the image to bring you to the original post)

Organizing for the Home: 30+ ideas, tips, & tricks to help organize every nook & cranny in the home

15 + Organizational Ideas for the BATHROOM: Tips + Tricks to help organize every nook & cranny of the bathroom!

13+ Organizational Ideas for CLOSETS: Tips + Tricks to help organize every all types of closets!

Organzing ideas + tips for the HOME OFFICE!

Tomorrow’s post is going to be all about closets.  Don’t miss it!

20+ Kitchen Organizing Ideas: Tips that will Change Your Life

This post is more for me than for you… hehe.  After reading it from the first word to the last, you will never have to go anywhere else for more kitchen organizational ideas & tips. I HAVE YOU COVERED – I promise!

Interesting enough, this post started off as a round up of organization inspiration for the ENTIRE HOME, but after scouring the web for tips & tricks to organize every nook & cranny for the house, the post was getting way too long because of the incredible amount of smart solutions & ideas out there…

The result of my plethora of finds is going to be a week of inspirational organizational ideas from the kitchen to the bathroom, from the closets to the garage.  I have found so many creative ideas that will truly change your life.  Most are super inexpensive and can easily be implemented today.

Let’s start with the kitchen

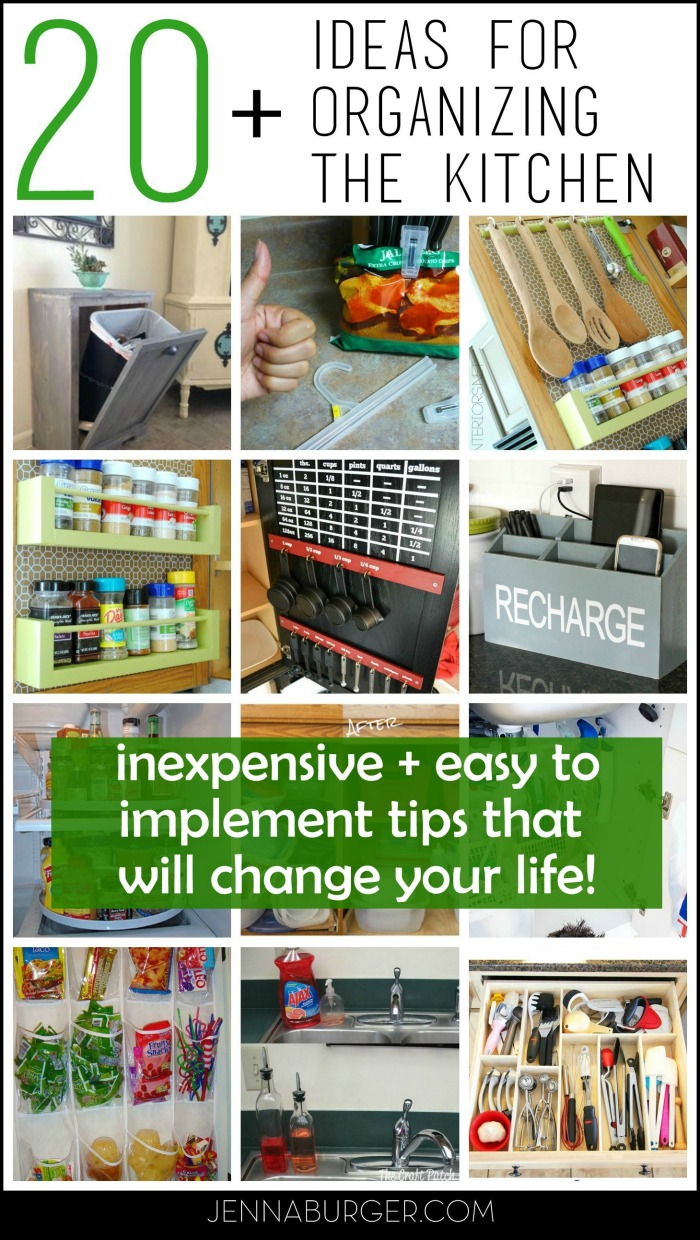
20 + Organizational Ideas for the Kitchen:Tips + Tricks to help organize every nook & cranny of the kitchen!

Here are 20+ ideas for organizing the…

Kitchen / Pantry

Tips & tricks for keeping your kitchen organized… (links to the original source, creation, and/or tutorial are BELOW the picture)

Organizing for the Home: 30+ ideas, tips, & tricks to help organize every nook & cranny in the homePantry organization by Design, Dining + Diapers

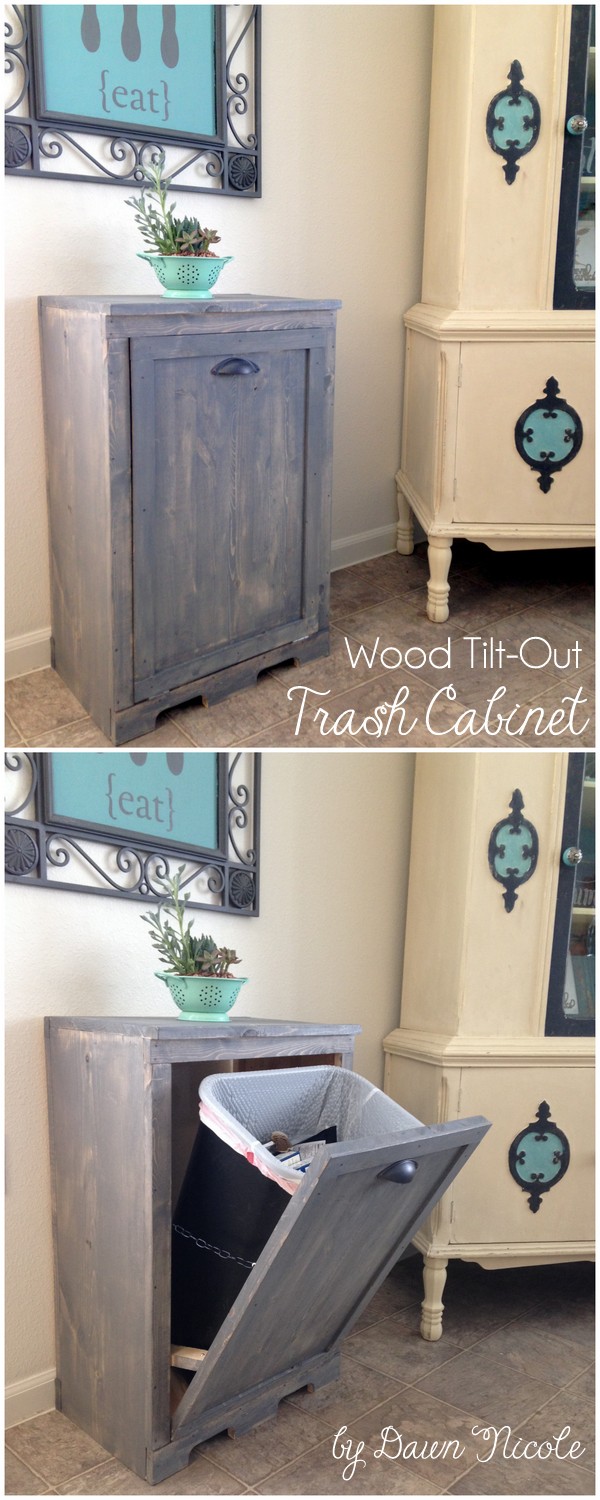
Organizing for the Home: 30+ ideas, tips, & tricks to help organize every nook & cranny in the homeWood Tilt-Out Trash Can by Dawn Nicole

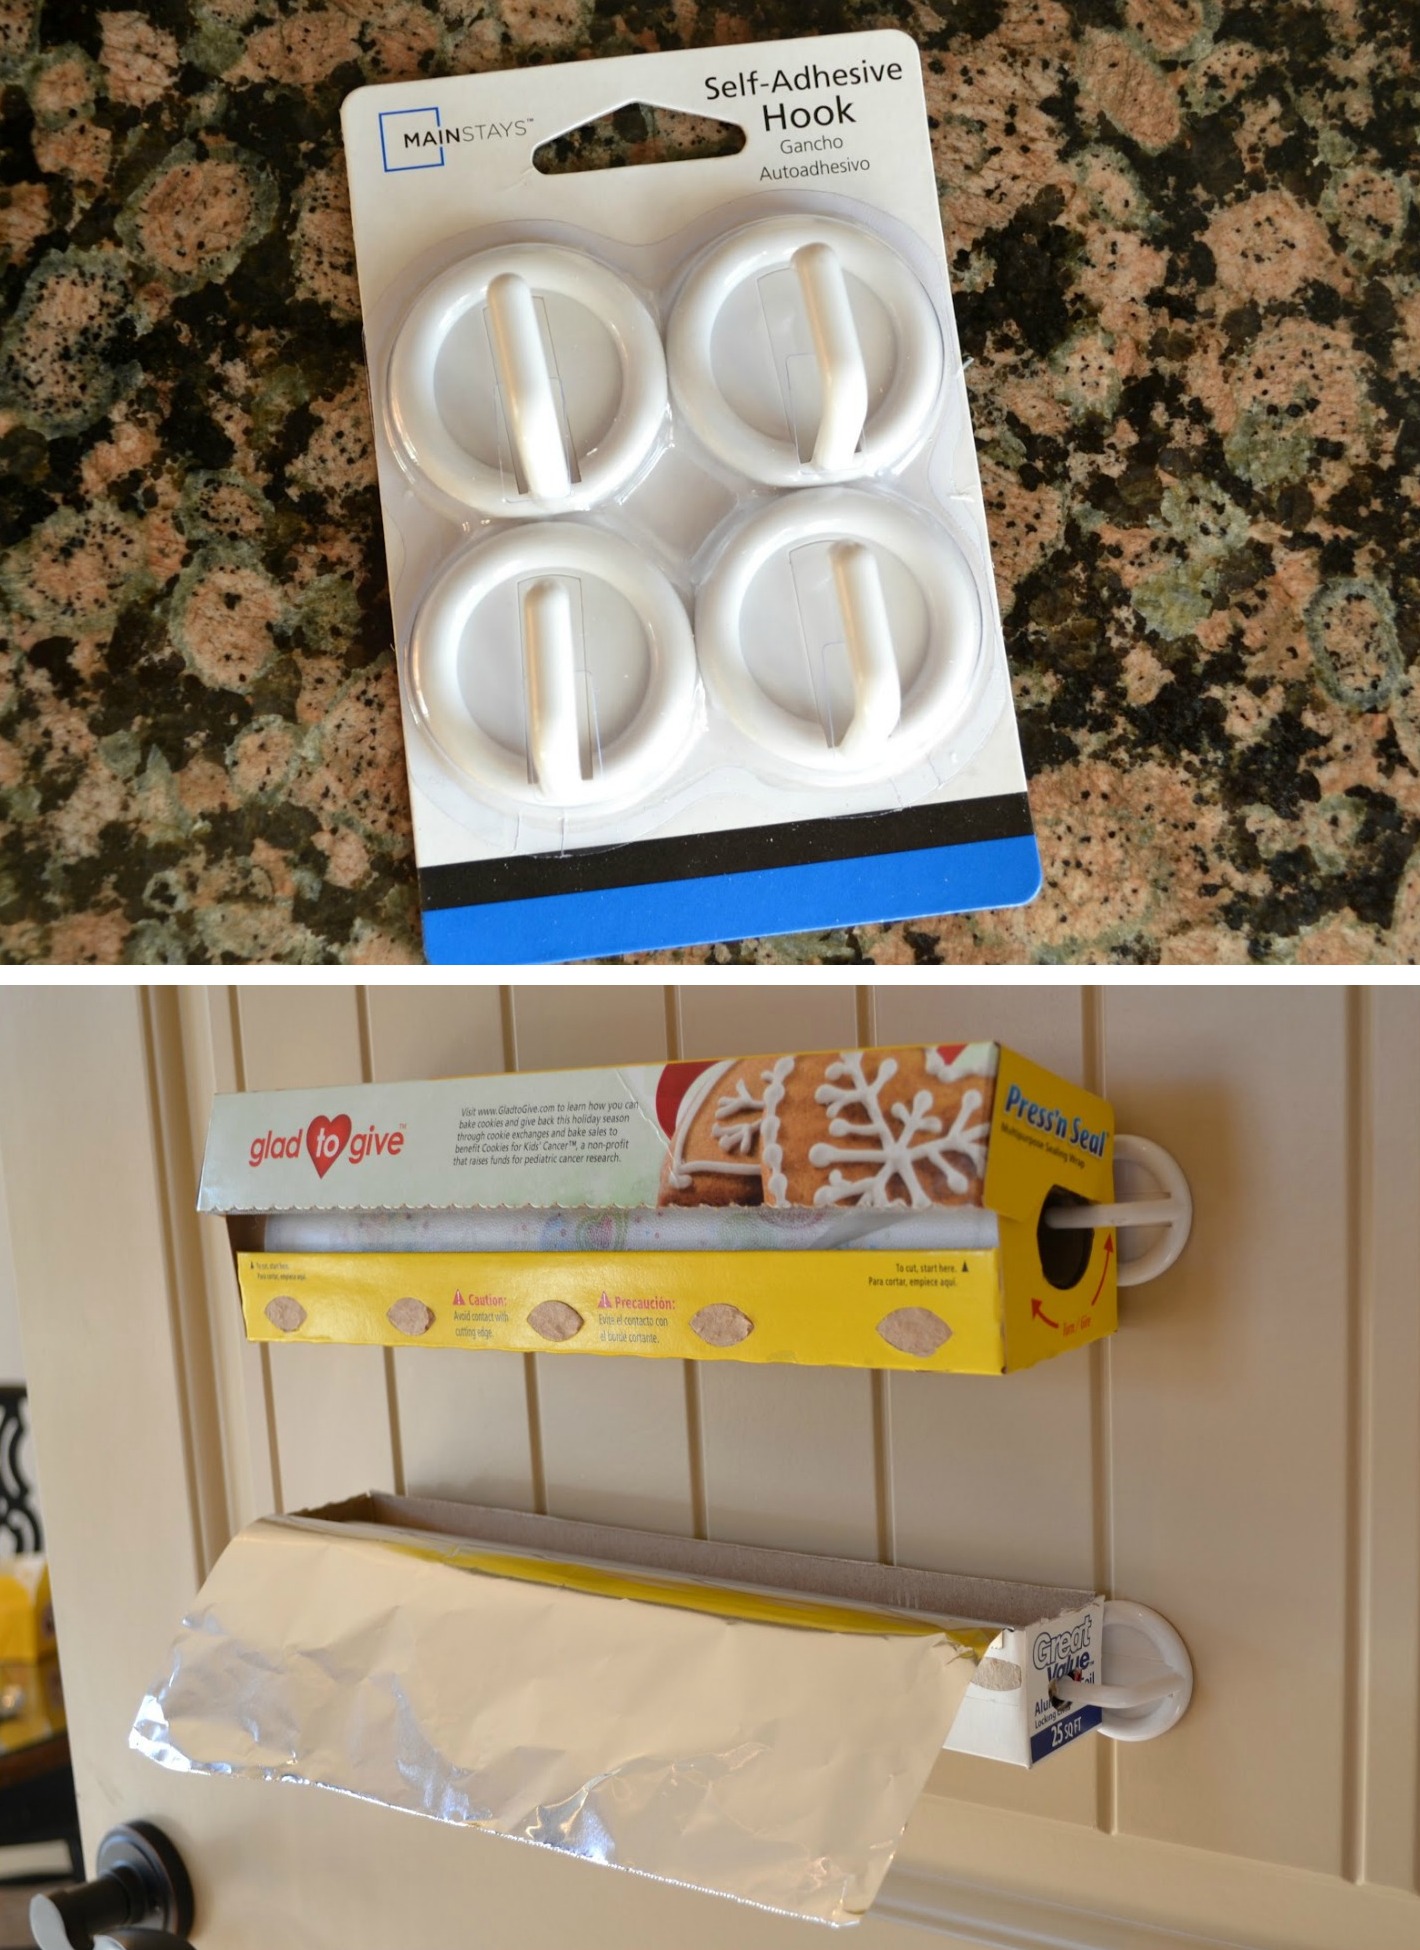
Organizing for the Home: 30+ ideas, tips, & tricks to help organize every nook & cranny in the homePlastic wrap & tin foil holders by Ask Anna

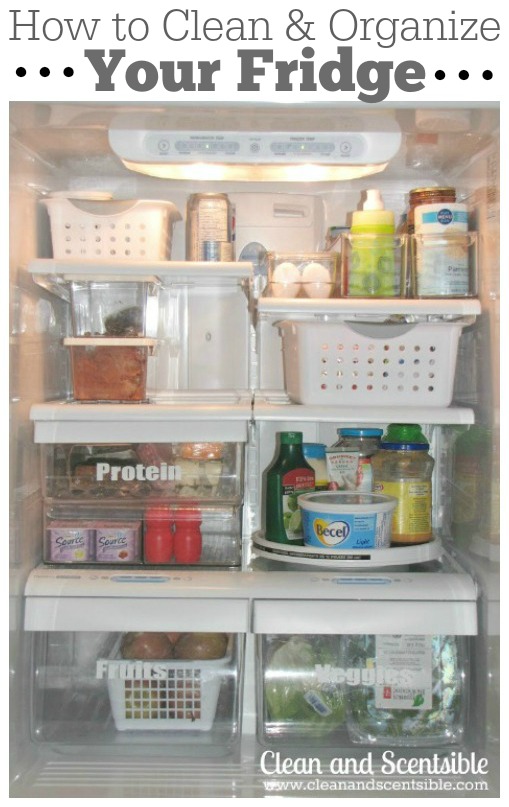
Organizing for the Home: 30+ ideas, tips, & tricks to help organize every nook & cranny in the homeFridge & Freezer organization by Clean and Scentsible

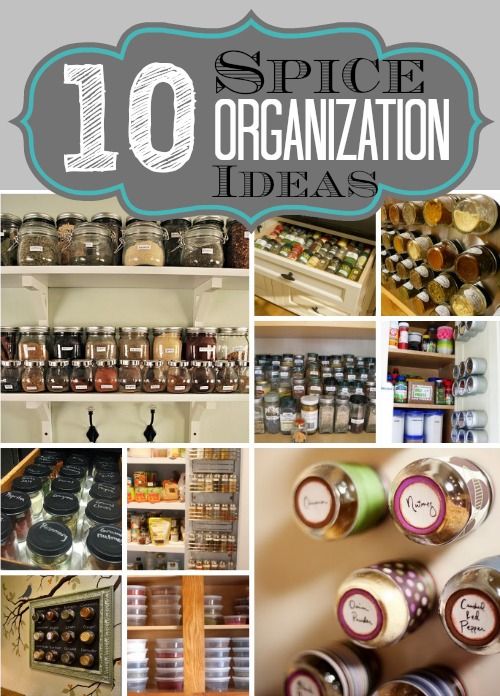
Organizing for the Home: 30+ ideas, tips, & tricks to help organize every nook & cranny in the homeIdeas for organizing your spices via The Blessed Life

Organizing for the Home: 30+ ideas, tips, & tricks to help organize every nook & cranny in the homeDollar Store organization by Ashley Ella Design

Organizing for the Home: 30+ ideas, tips, & tricks to help organize every nook & cranny in the homePots & Pans organization by Organizing Home Life

Organizing for the Home: 30+ ideas, tips, & tricks to help organize every nook & cranny in the homeDrawer dividers using inexpensive wood scraps by The Organized Mom

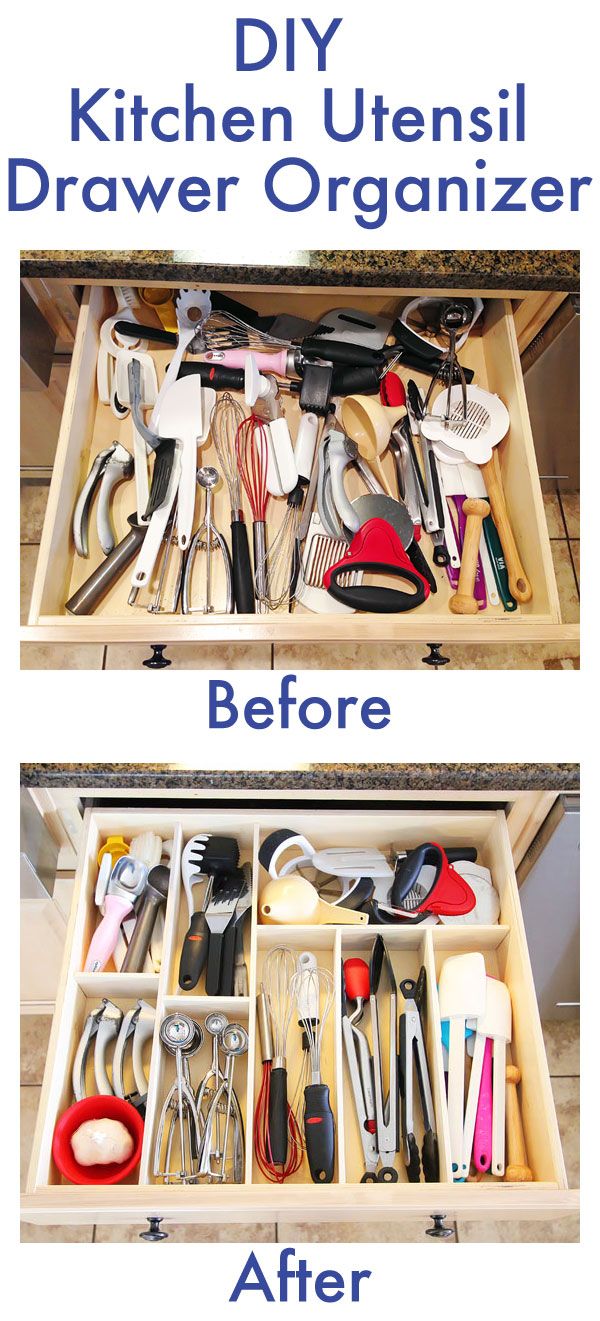
Organizing for the Home: 30+ ideas, tips, & tricks to help organize every nook & cranny in the homeDIY Kitchen utensil dividers by Kevin and Amanda

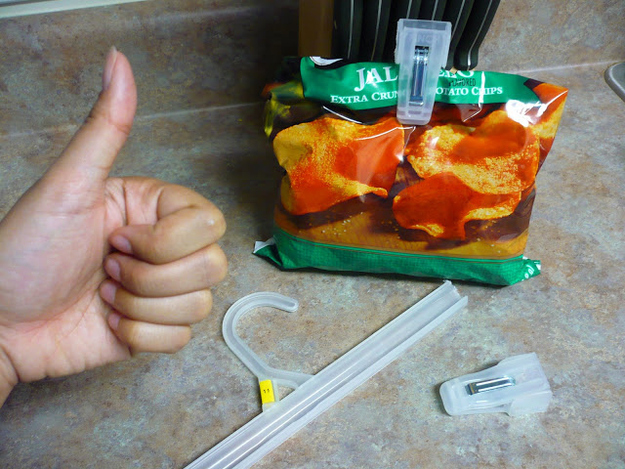
Organizing for the Home: 30+ ideas, tips, & tricks to help organize every nook & cranny in the homeHanger turned clip by Craftster

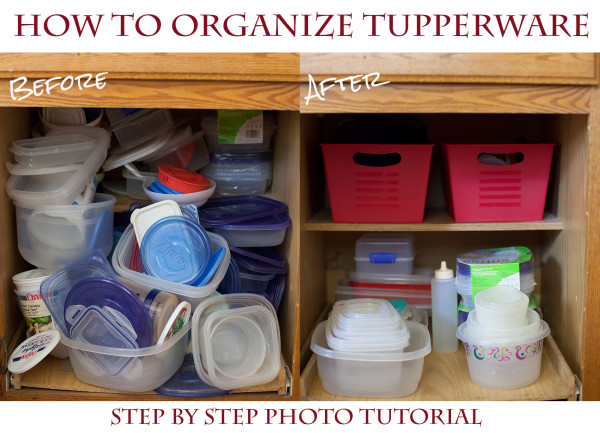
Organizing for the Home: 30+ ideas, tips, & tricks to help organize every nook & cranny in the homeTupperware organization by Eating Rich

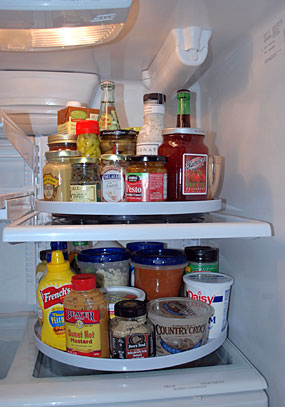
Organizing for the Home: 30+ ideas, tips, & tricks to help organize every nook & cranny in the homeInside the refrigerator organization by Fridge Butler

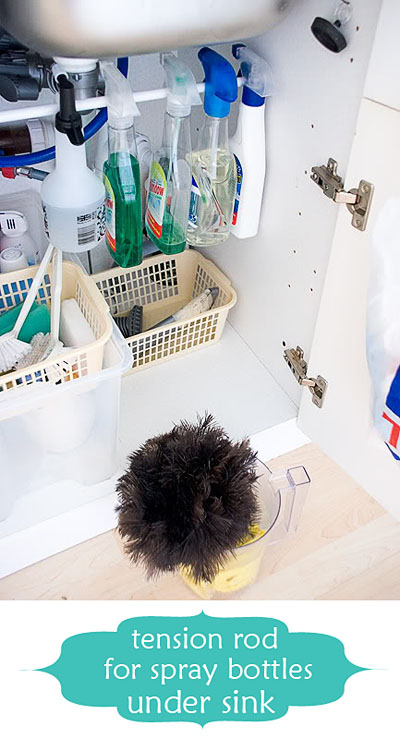
Organizing for the Home: 30+ ideas, tips, & tricks to help organize every nook & cranny in the homeUnder-the-sink cleaning supplies organization by Jen Thousand Words

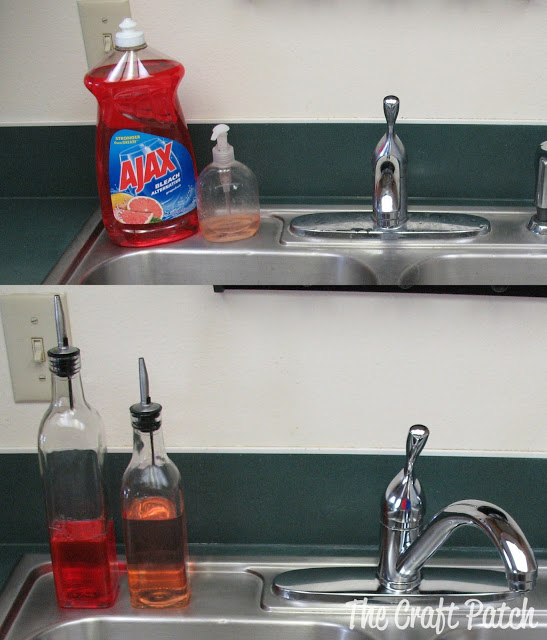
Organizing for the Home: 30+ ideas, tips, & tricks to help organize every nook & cranny in the homeOlive Oil bottles are the perfect solution to ditch the ugly soap bottles. Idea by The Craft Pitch

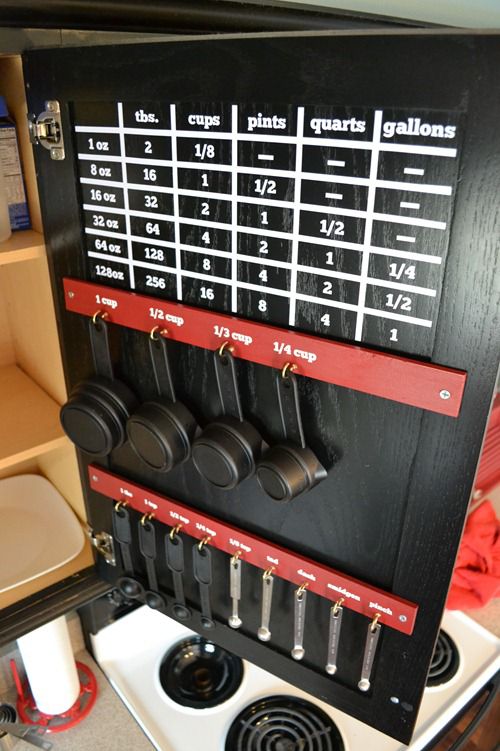
Organizing for the Home: 30+ ideas, tips, & tricks to help organize every nook & cranny in the homeMeasurement conversion chart on the inside of the kitchen cabinet by Infarrantly Creative

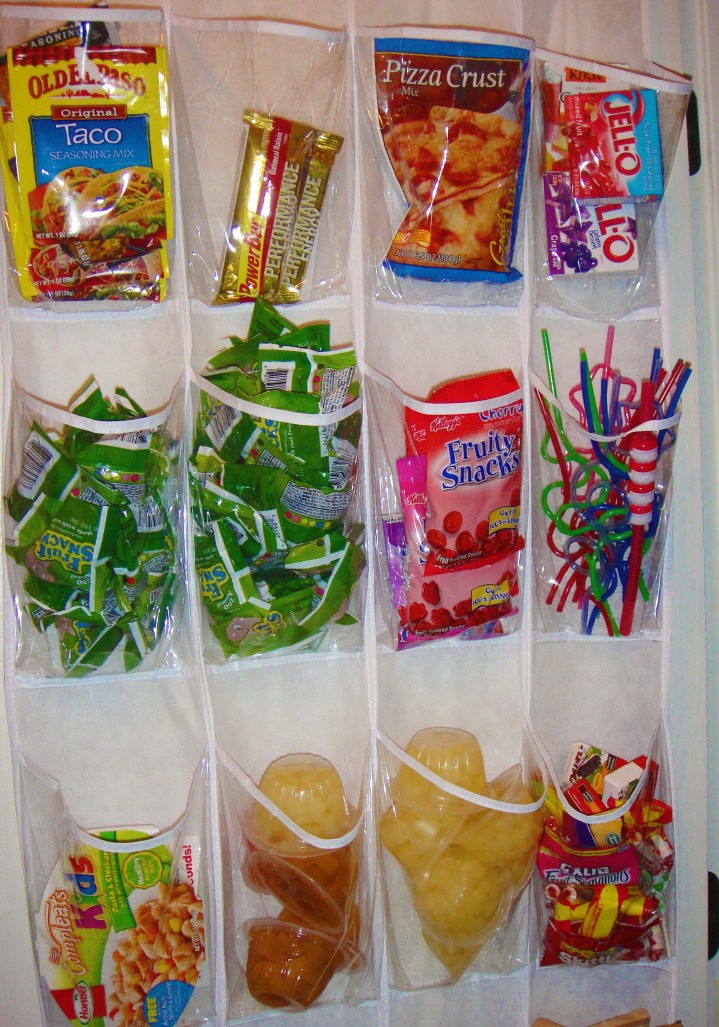
Organizing for the Home: 30+ ideas, tips, & tricks to help organize every nook & cranny in the homeOver-the-door shoe organizer for snacks, coupons, small items by Money Saving Queen

Organizing for the Home: 30+ ideas, tips, & tricks to help organize every nook & cranny in the homeOrganization ideas for the inside of the kitchen cabinets by Jenna Burger

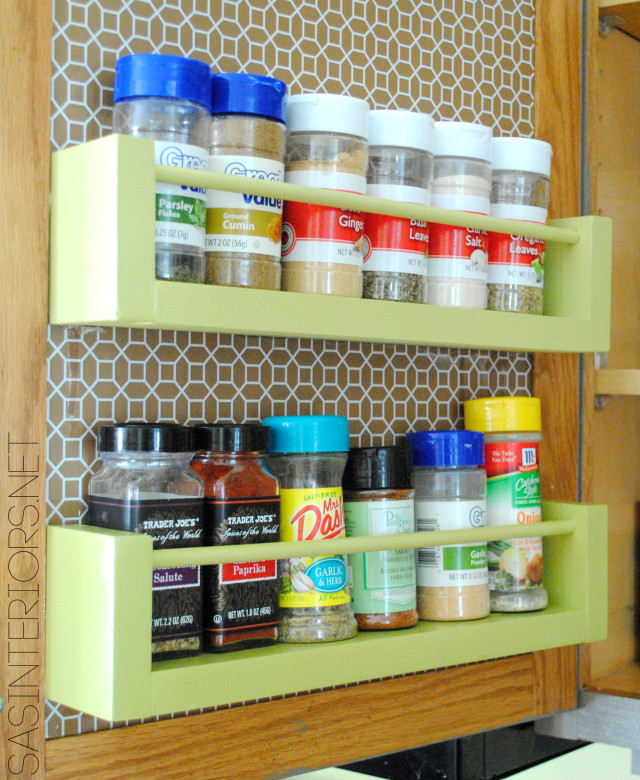
Organizing for the Home: 30+ ideas, tips, & tricks to help organize every nook & cranny in the homeWood Spice Rack by Jenna Burger

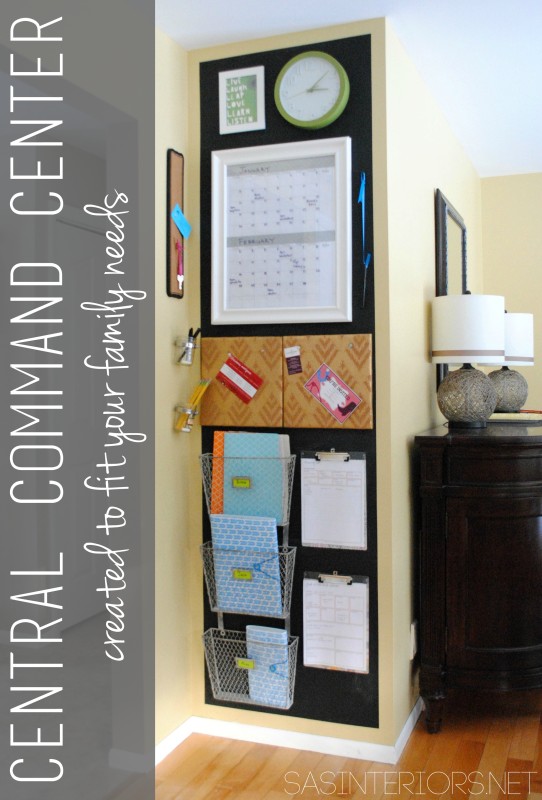
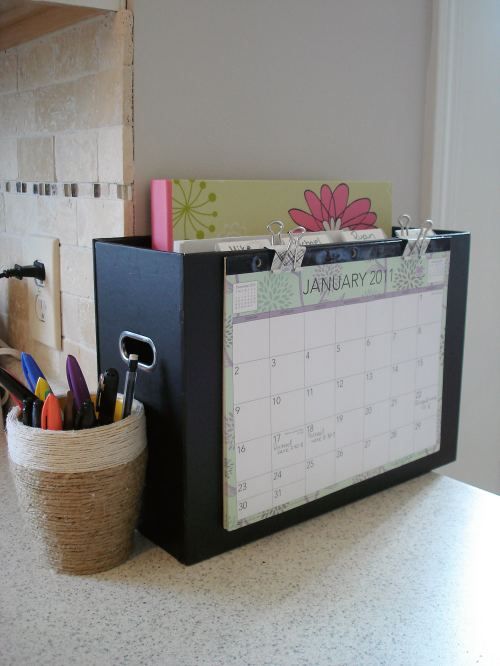
A central command center in the hub of the home is one of the most important ways to keep a family on schedule…

Organizing for the Home: 30+ ideas, tips, & tricks to help organize every nook & cranny in the homeCentral Command Center in the kitchen by Jenna Burger

Organizing for the Home: 30+ ideas, tips, & tricks to help organize every nook & cranny in the homeCountertop command center by Lovely Crafty Home

Organizing for the Home: 30+ ideas, tips, & tricks to help organize every nook & cranny in the homeDry erase to-do or menu board by Make and Takes

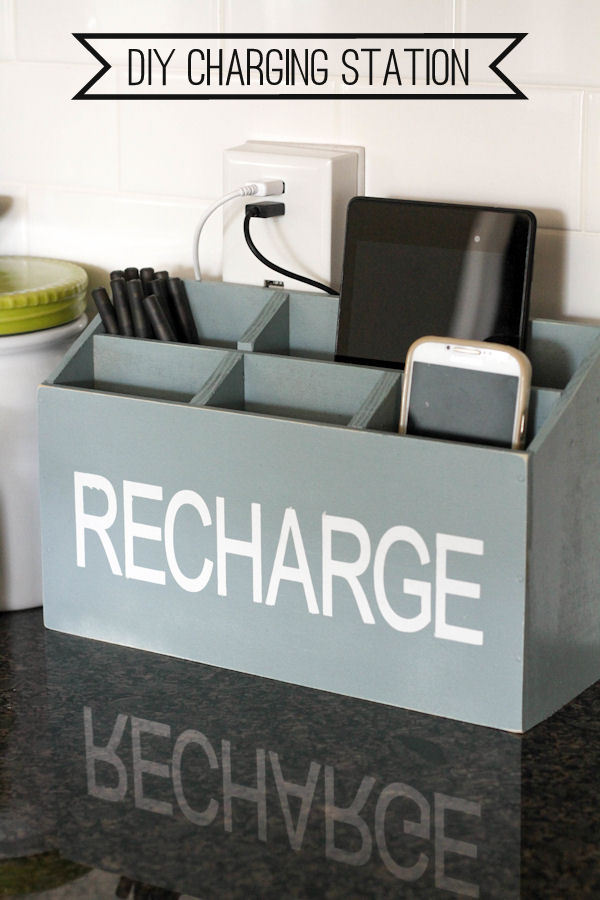
I so need this… a charging station instead of all those wires and plugs!

Organizing for the Home: 30+ ideas, tips, & tricks to help organize every nook & cranny in the homeDIY Charging station created by Lil’ Luna

I am still on a mission to clean this place up, bag it up – send it out, & get organized in 2015!  For me, it’ll never be 100% picture perfect, but this is a home of 5 not a museum.  As I’m working on purging + organizing + renewing my home this year, I am also striving to focus on what’s most important to me and living with intention!  Admittedly, it’s not easy, but with often reminders (to myself) I am working towards being more mindful and living with purpose.

Here is a recap of the week so far (click on the image to bring you to the original post)

Organizing for the Home: 30+ ideas, tips, & tricks to help organize every nook & cranny in the home

15 + Organizational Ideas for the BATHROOM: Tips + Tricks to help organize every nook & cranny of the bathroom!

13+ Organizational Ideas for CLOSETS: Tips + Tricks to help organize every all types of closets!

Organzing ideas + tips for the HOME OFFICE!

Ridding the stuff that isn’t needed and organizing what we want to keep has really made a difference!  Tomorrow’s space of focus… THE BATHROOM.

Bathroom Makeover: Resources

So you guys really like the bathroom makeover???  I am thrilled!  Those of you who left comments about the transformation on the blog or on facebook + instagram – thank you so much.  Your kind, sweet words mean the world to me!

As promised, I am back today to share the specific resources for the bathroom revamp.  The other day my post went on and on with pictures of the newly finished space and today’s post is all about the details…

As I’ve mentioned throughout the process of renovating this bathroom, my design approach was to create a space with neutral, classic basics and layer in the bold + unexpected.  The main items in the bathroom – tub, vanity, toilet, etc. – are basic bath elements typical of many homes.  What makes it above and beyond the norm are the details & layers – the wallpaper, towels, shower curtain, etc.  Those layered elements give the sophisticated wow-punch!  At the end of the day, it’s all about the layered colors + patterns and how they work together to create an overall beautiful composition.

On to the resources…

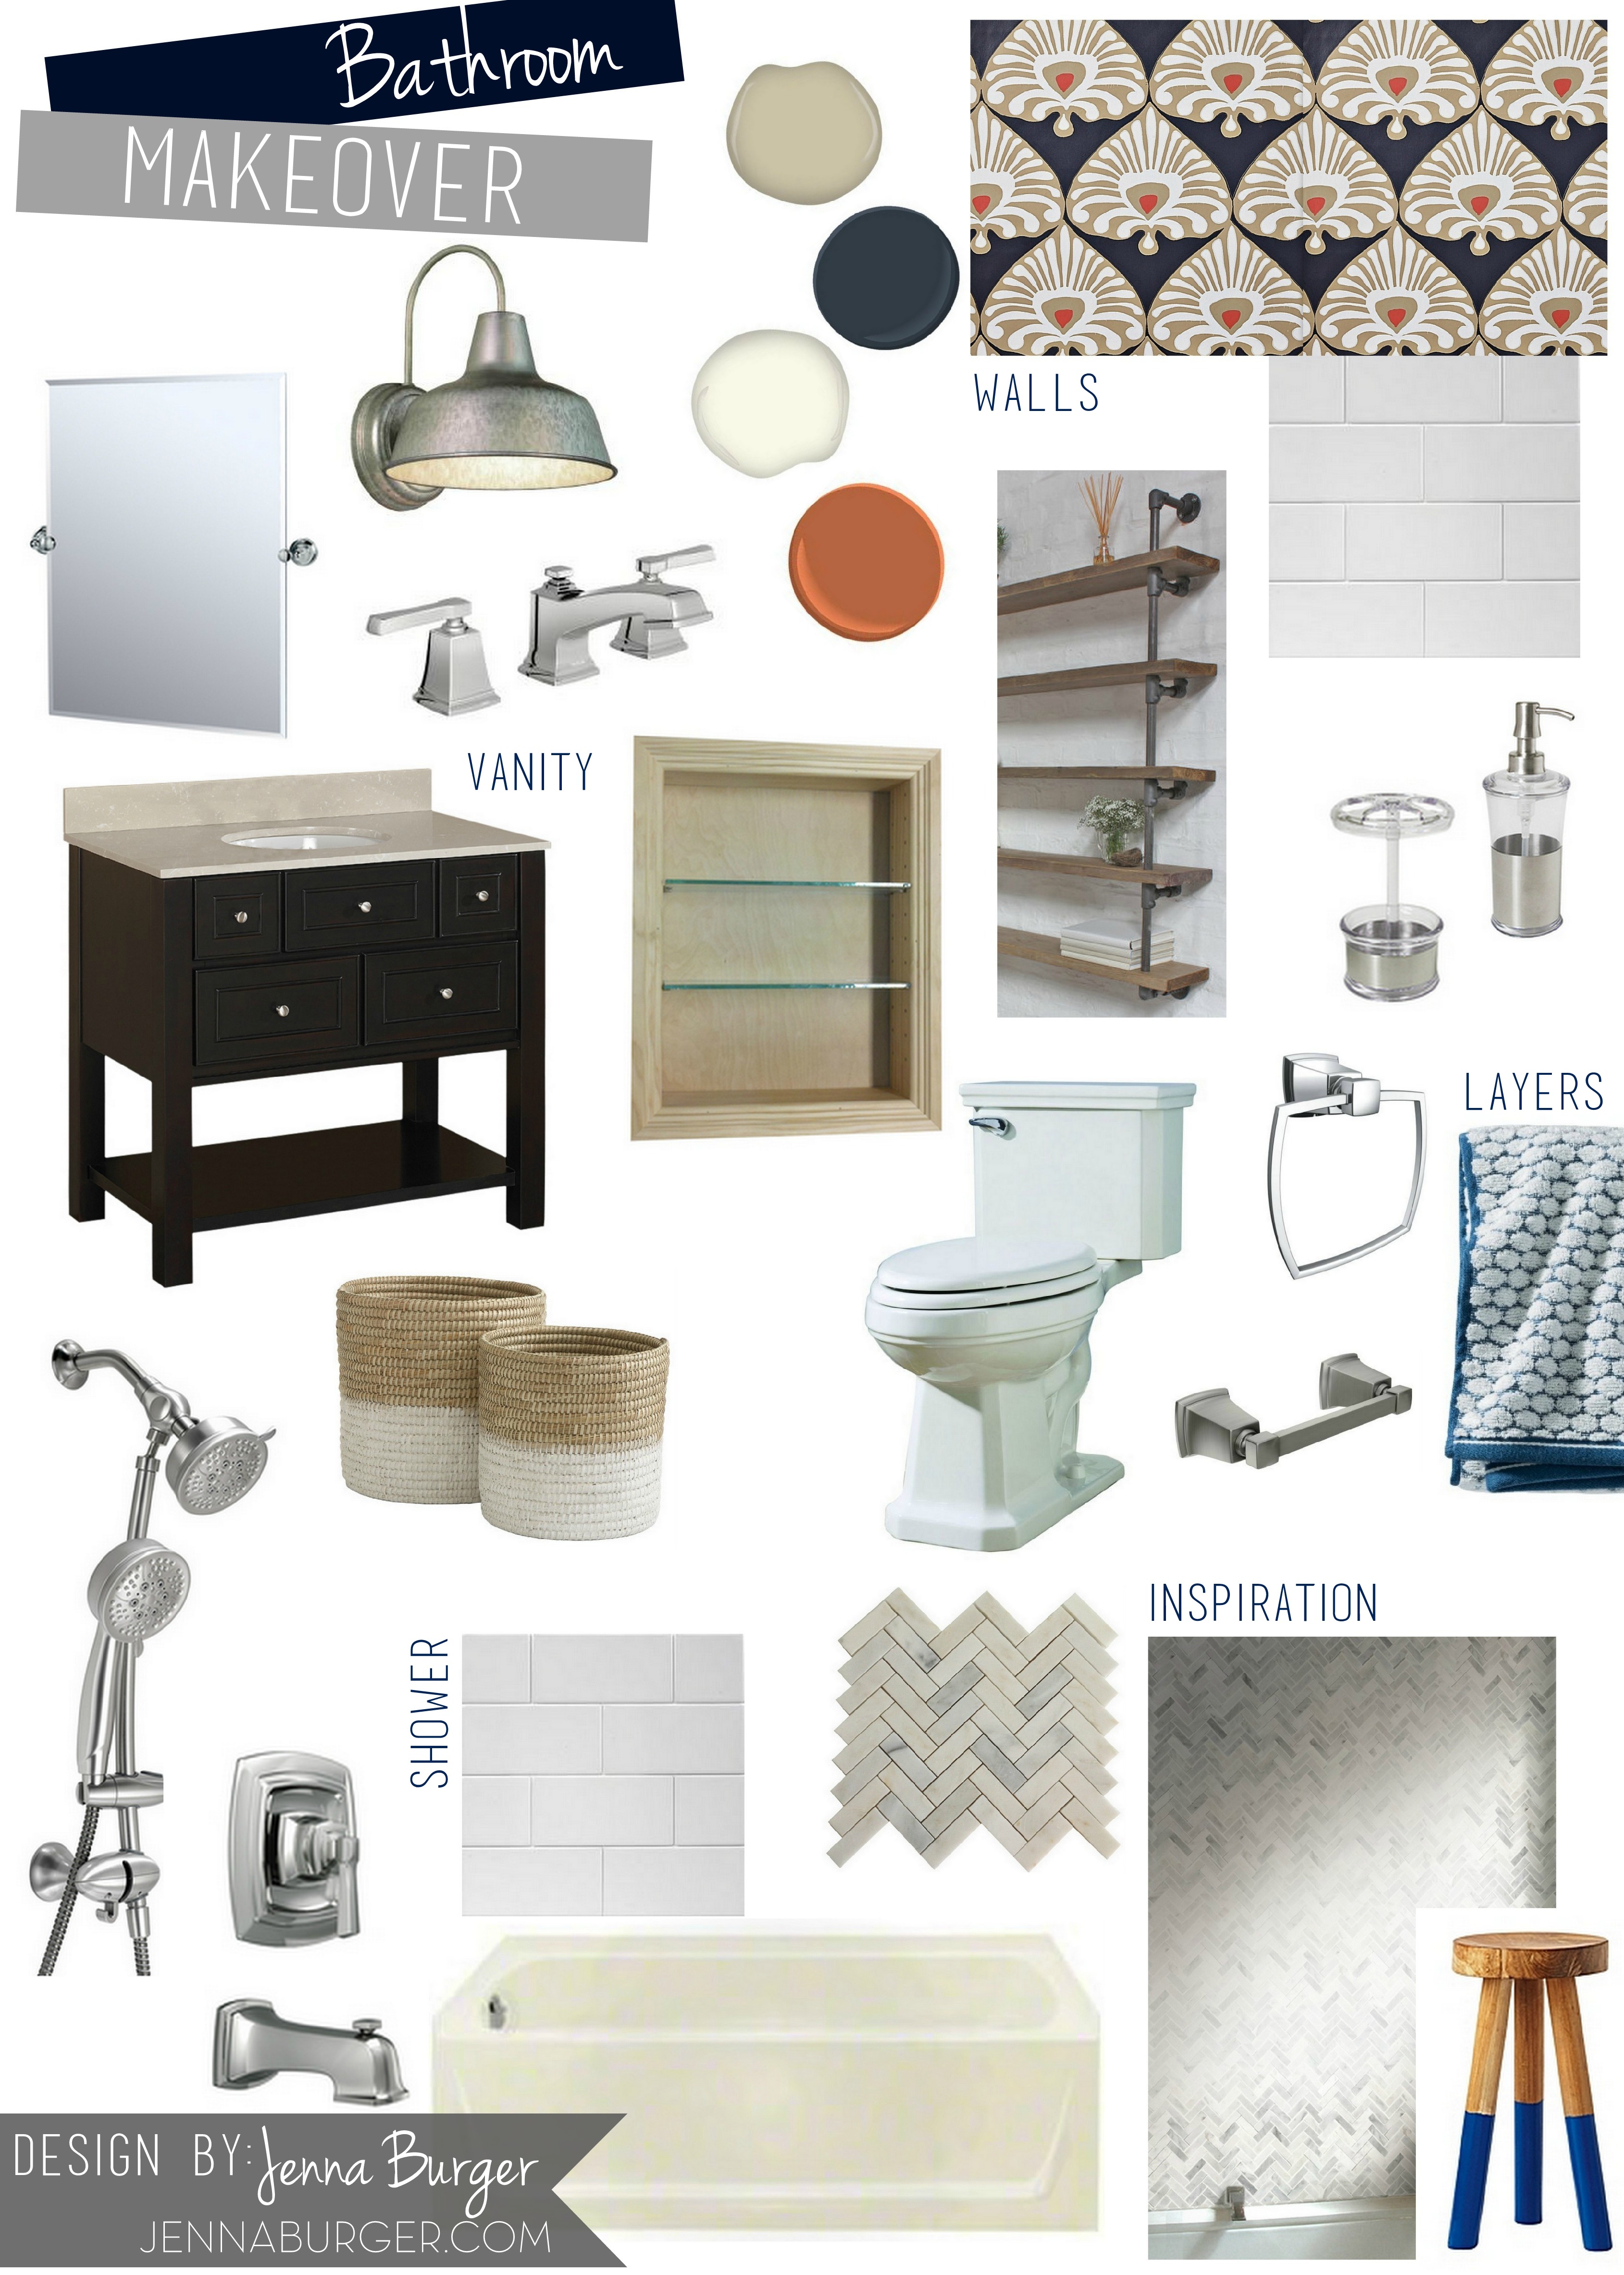
Starting with the original mood board – some of the elements changed, but the overall idea/aesthetic stayed the same…

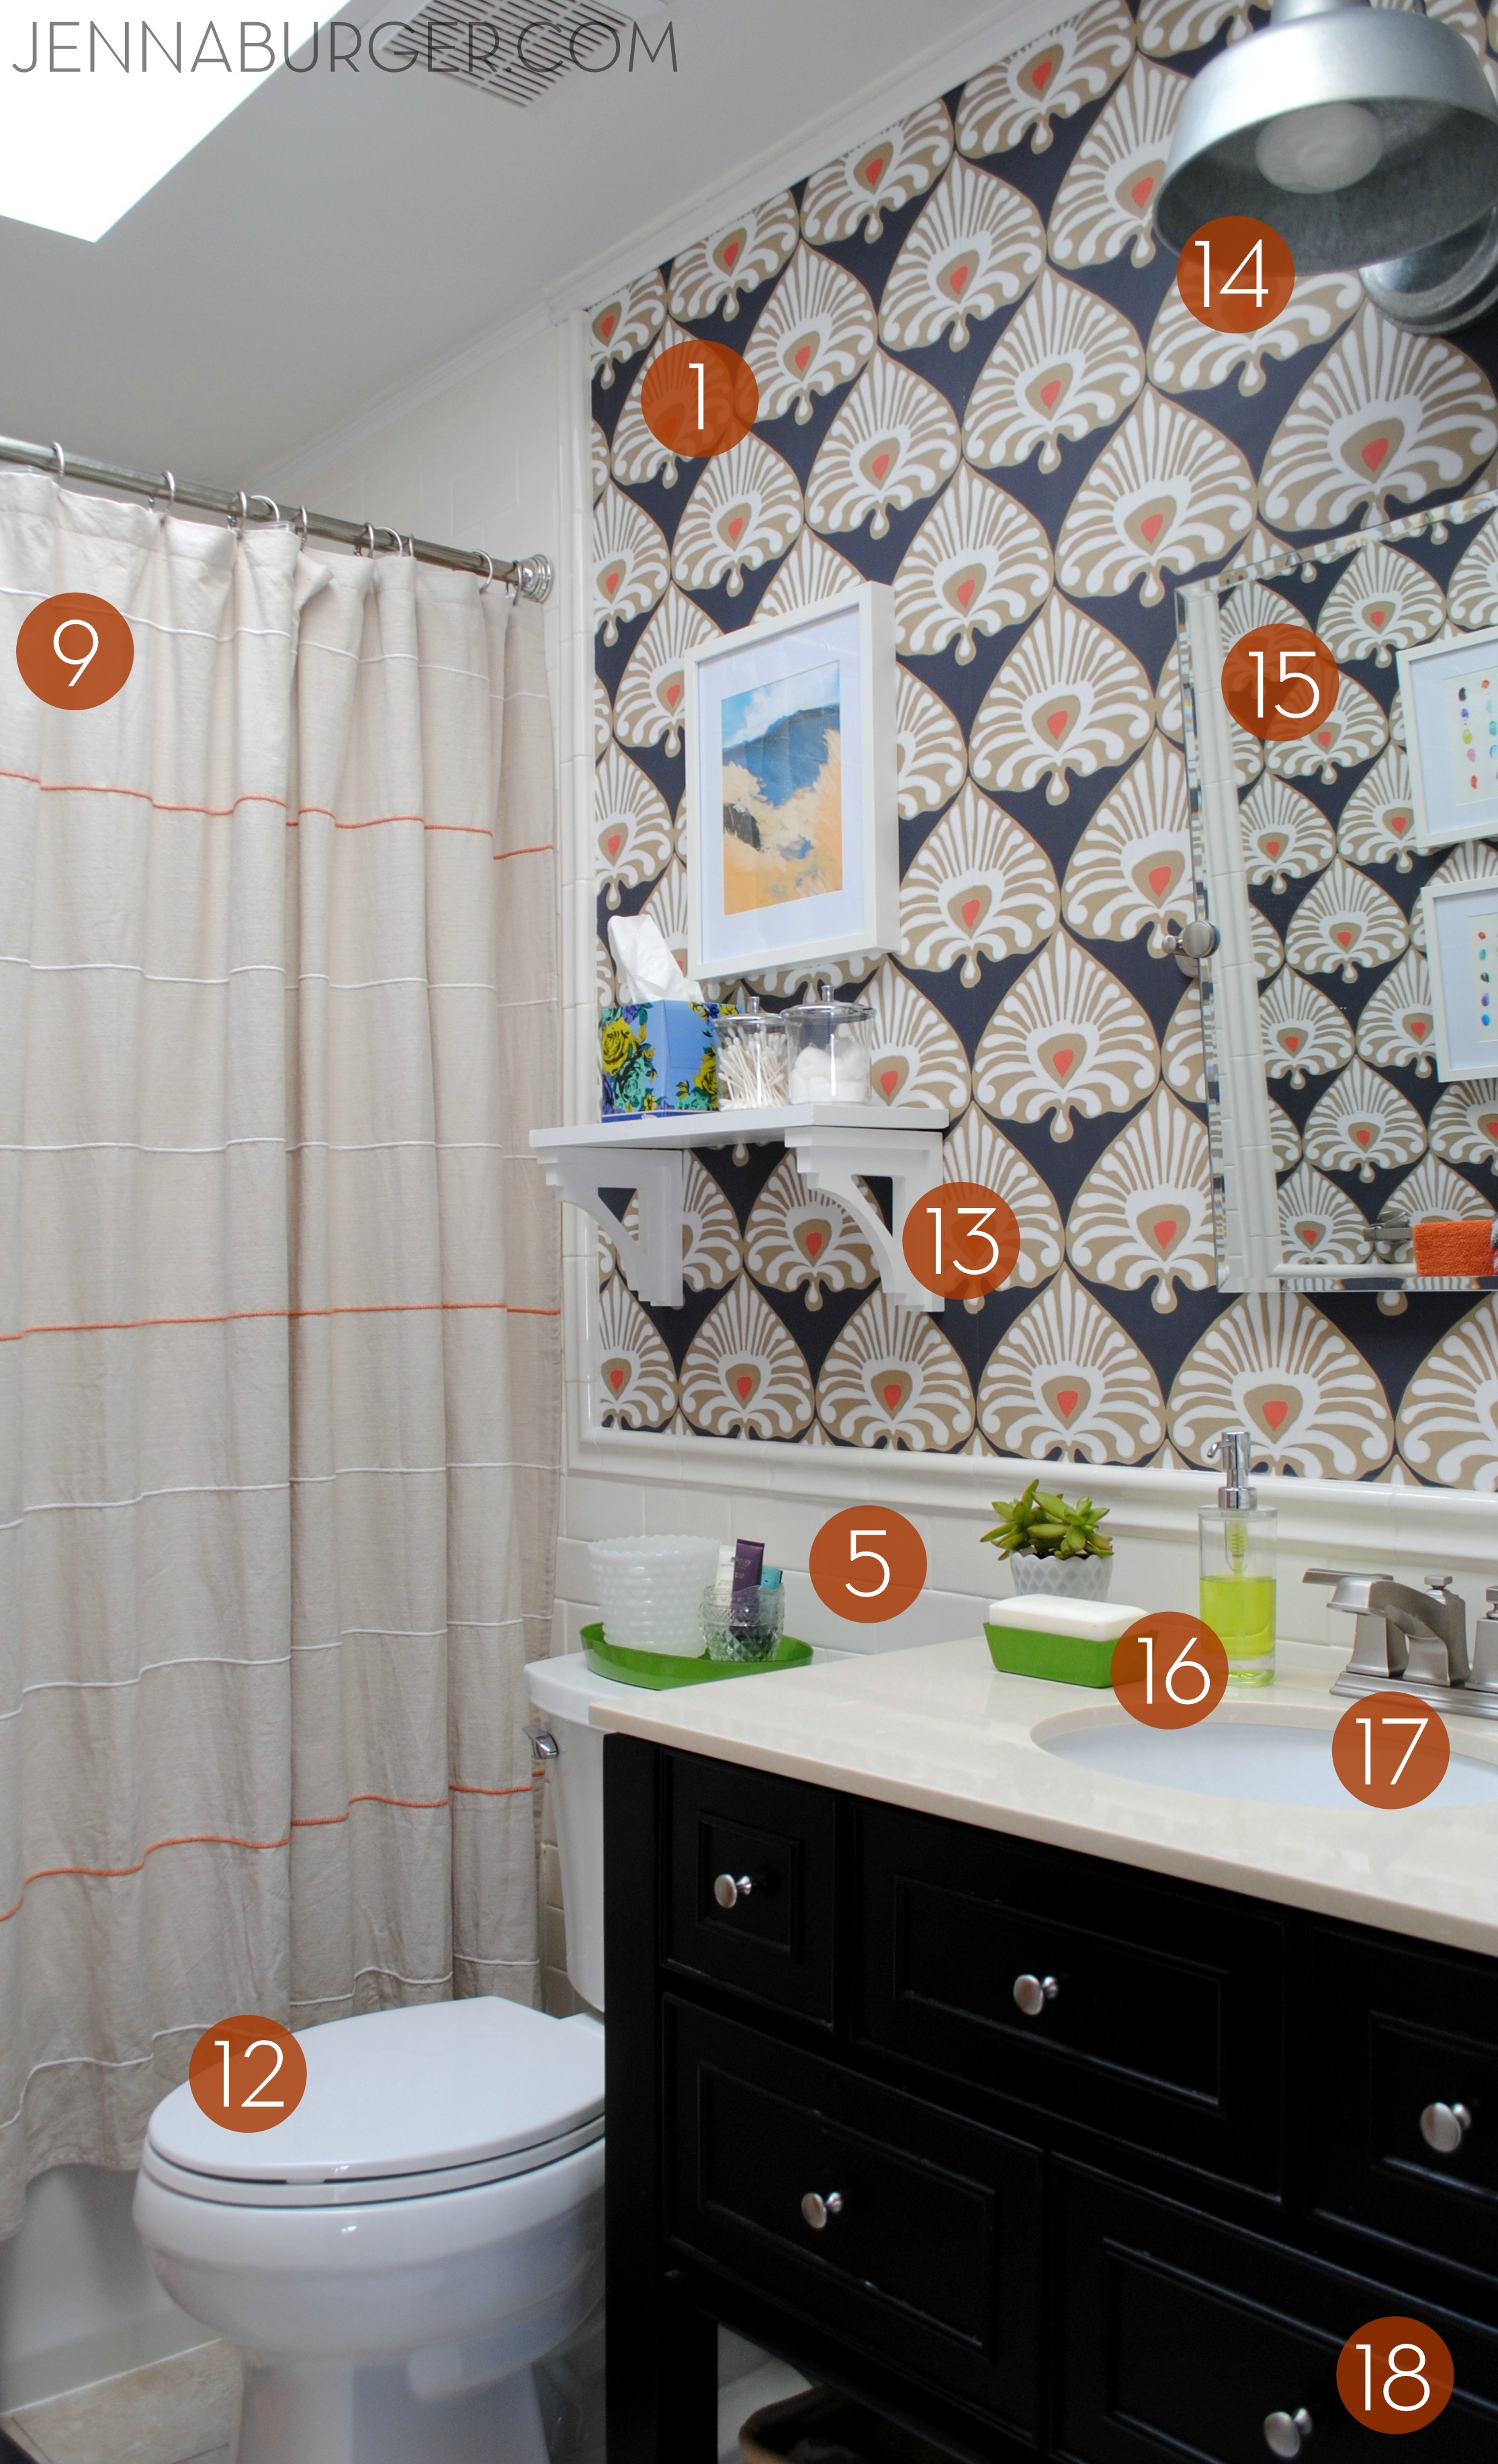
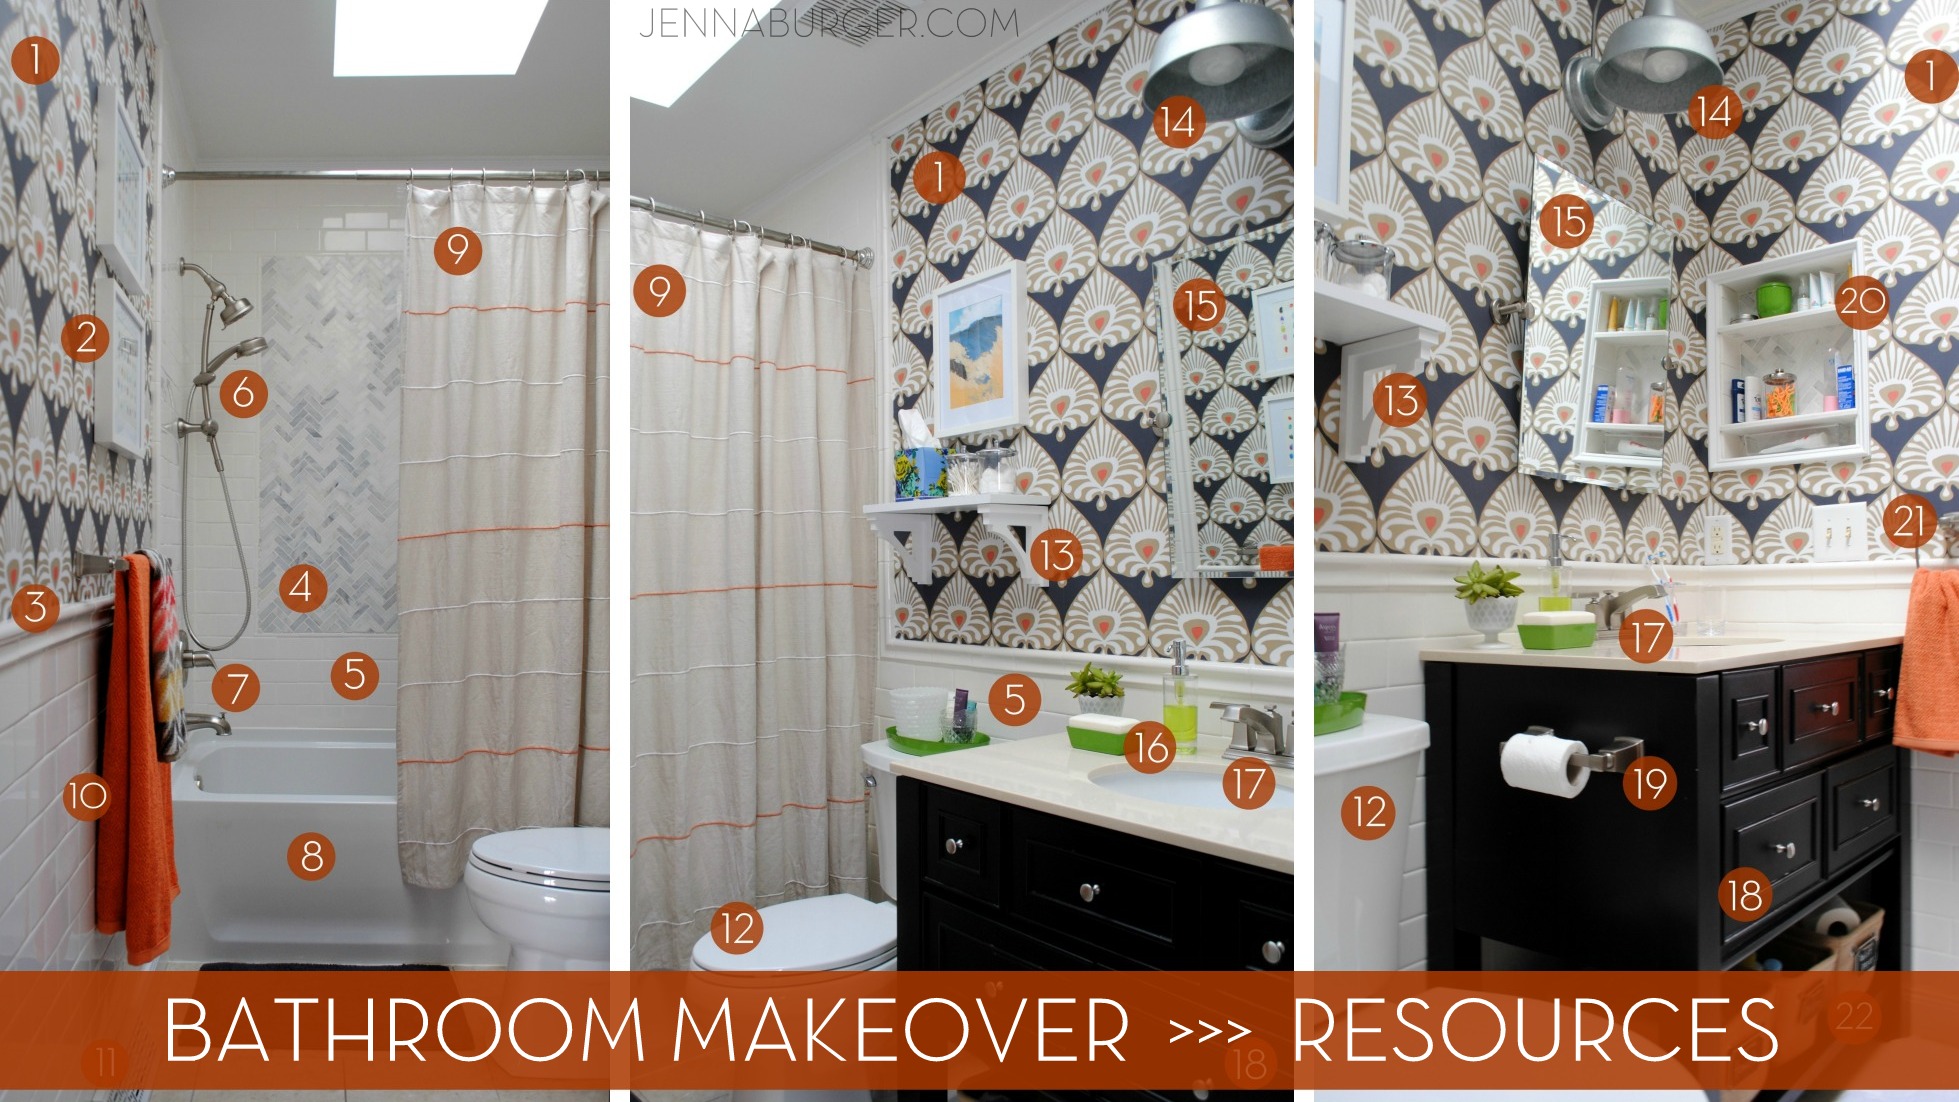
Bathroom Makeover details: the specific resources for this classic bath with bold layers.  Designed by Jenna Burger Design, www.jennaburger.com

From wall to wall, these are the specifics…

Bathroom Makeover details: the specific resources for this classic bath with bold layers.  Designed by Jenna Burger Design, www.jennaburger.com

Bathroom Makeover details: the specific resources for this classic bath with bold layers.  Designed by Jenna Burger Design, www.jennaburger.com

Bathroom Makeover details: the specific resources for this classic bath with bold layers.  Designed by Jenna Burger Design, www.jennaburger.com

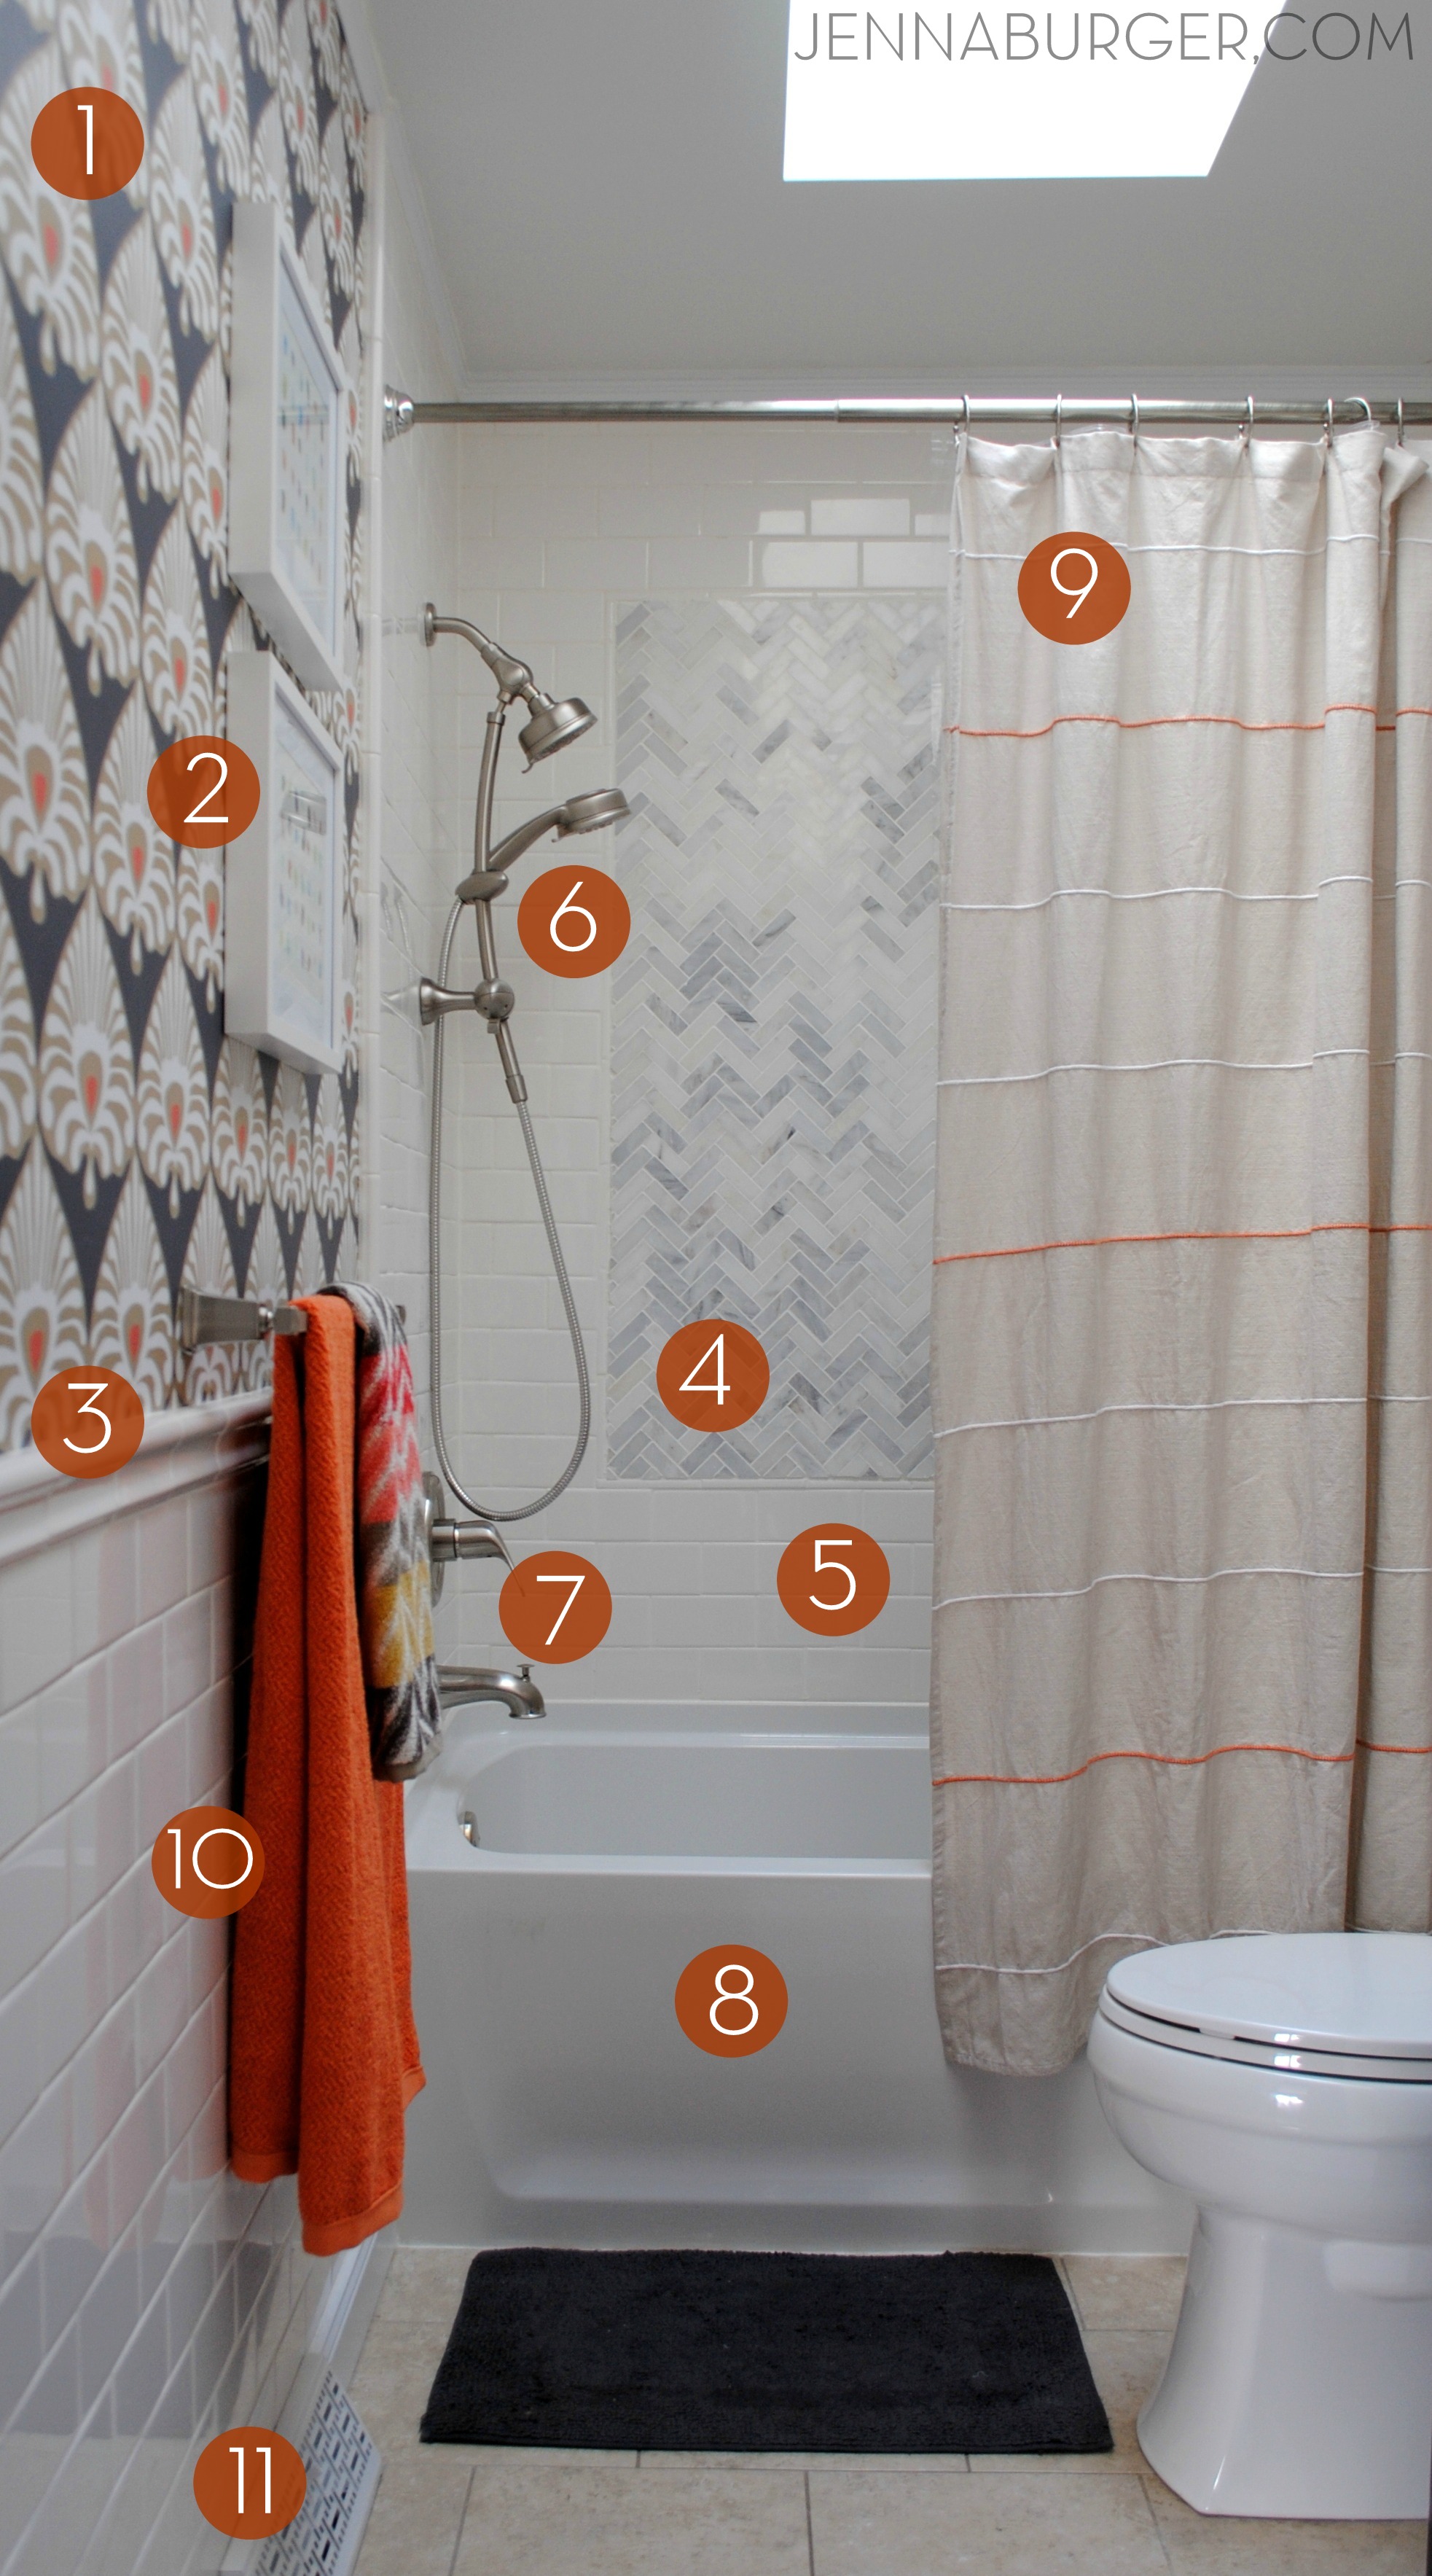
Resources

1. Wallpaper – Serena and Lily

2. Framed prints – frames from AC Moore and prints were a DIY project

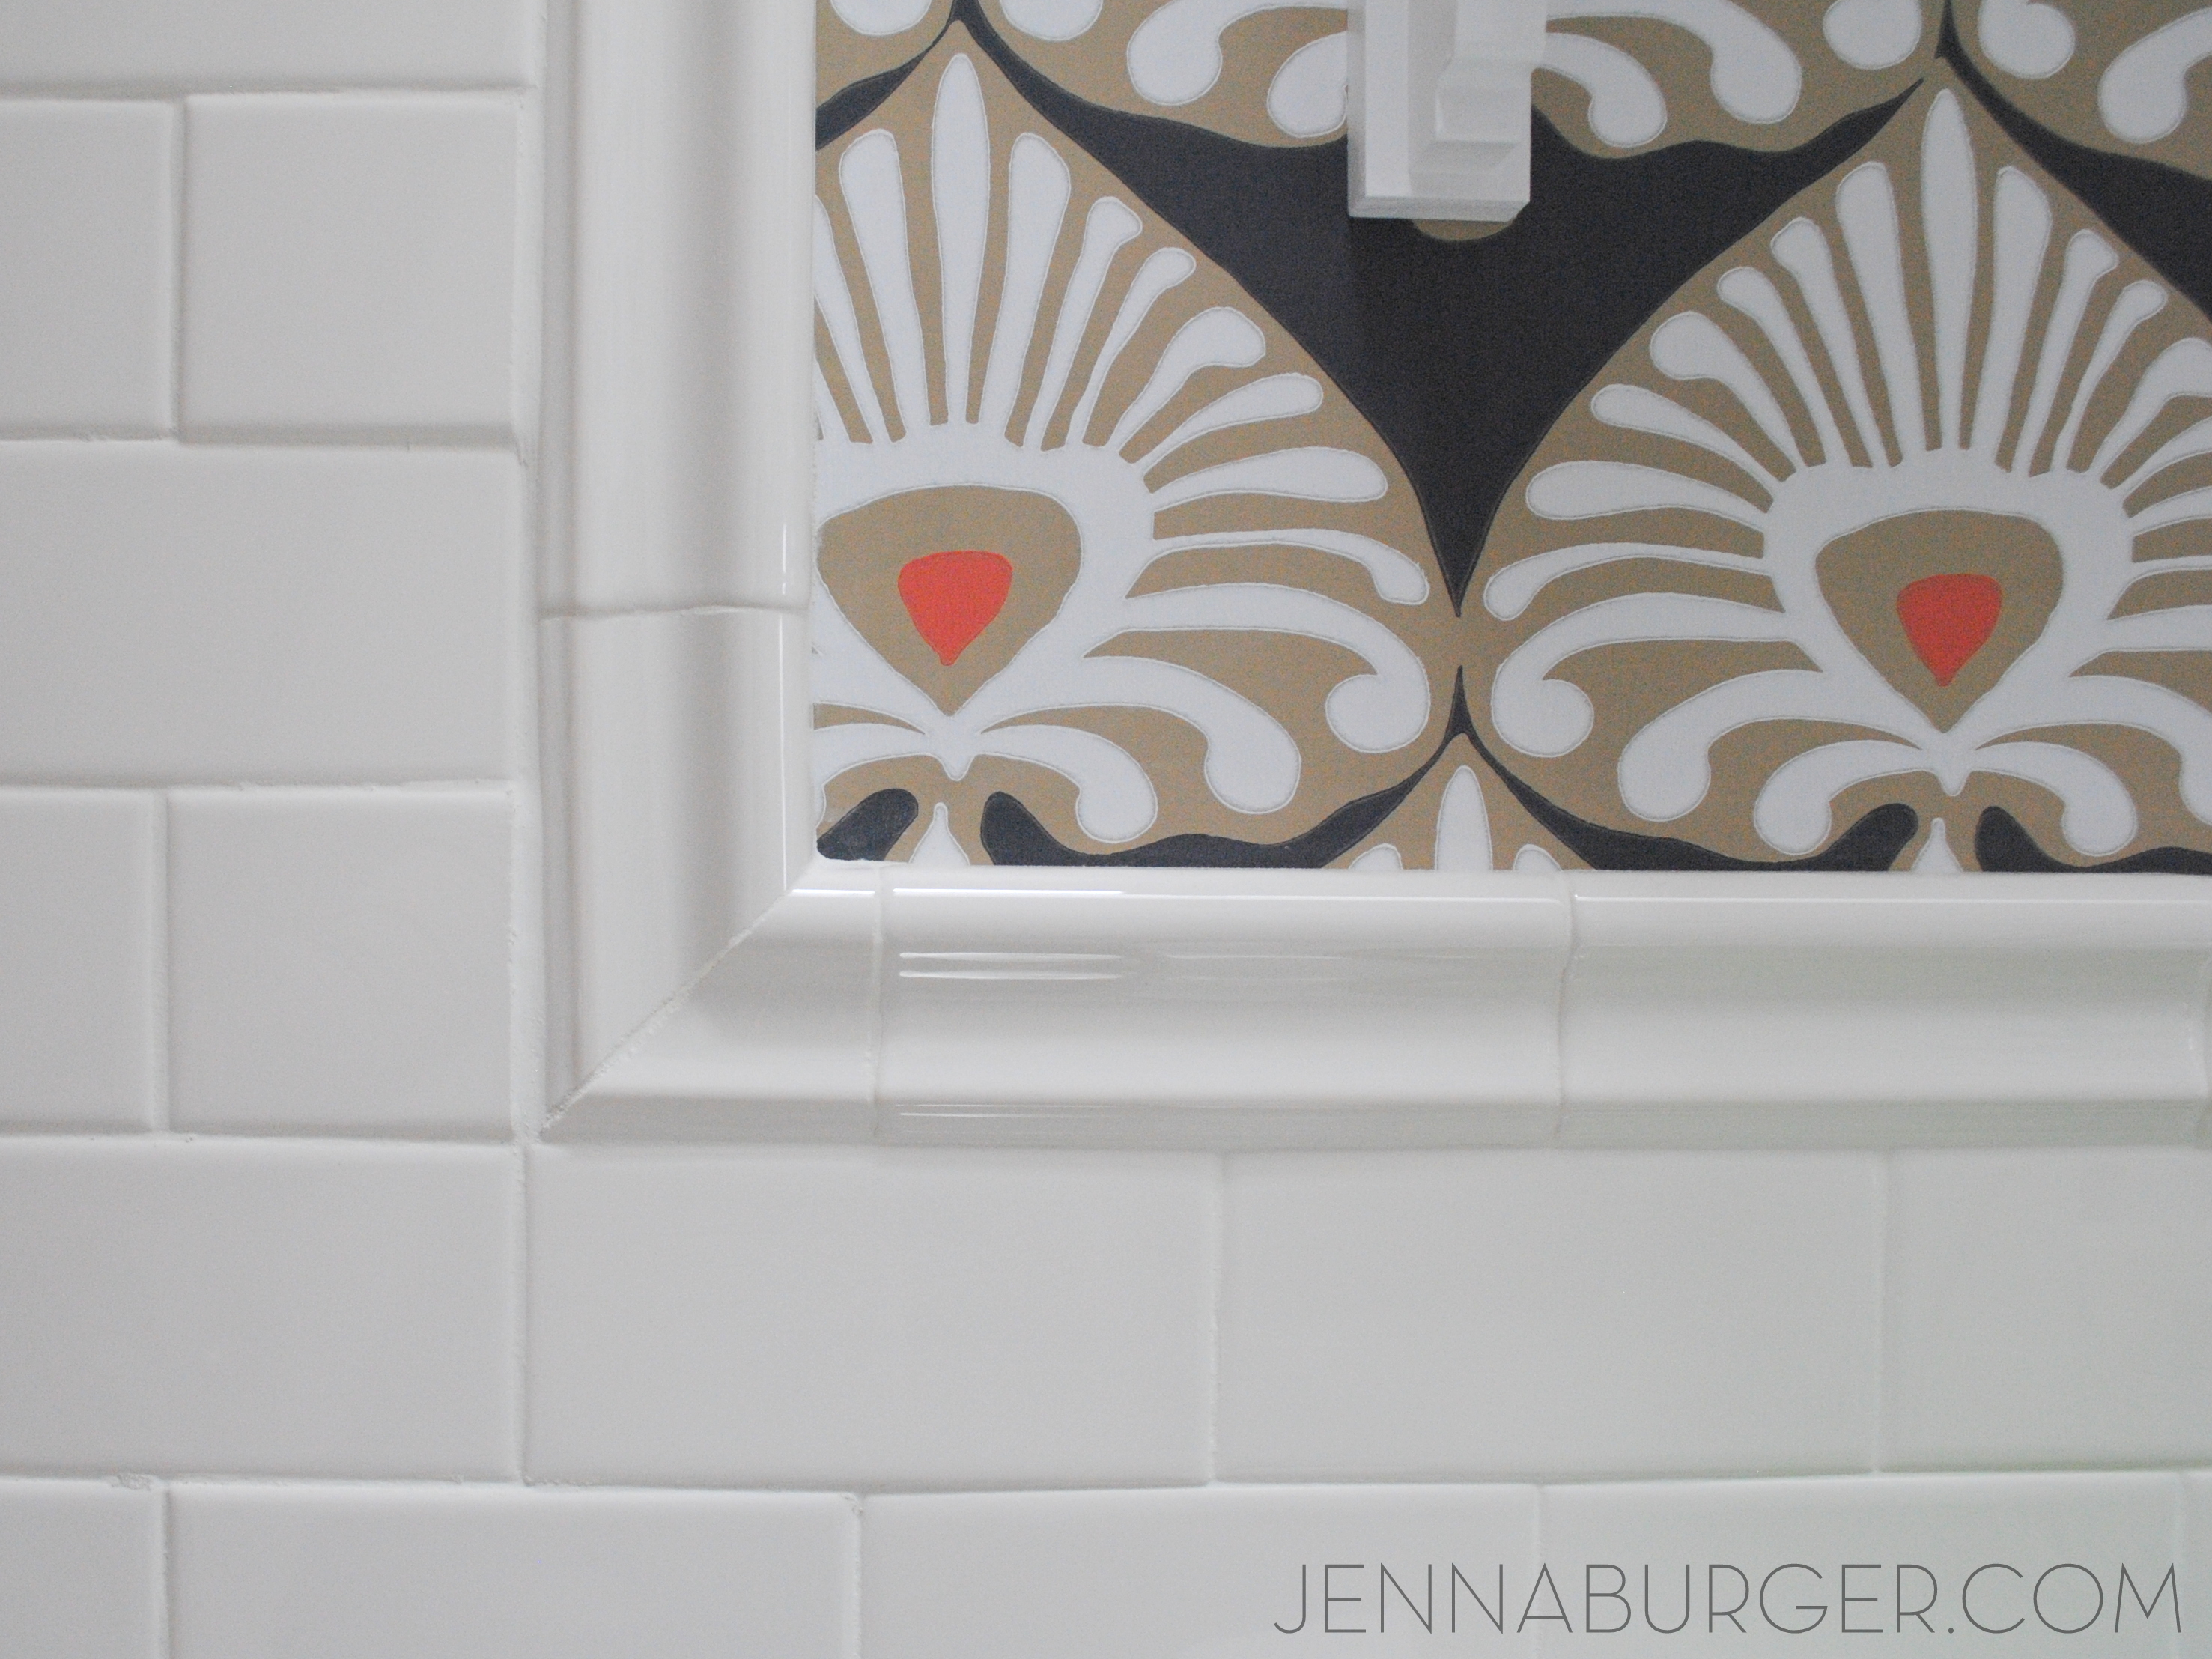
3. Decorative tile border – Lowe’s

4. Herringbone accent tile – Lowe’s

5. 3×6 Subway tile – Lowe’s

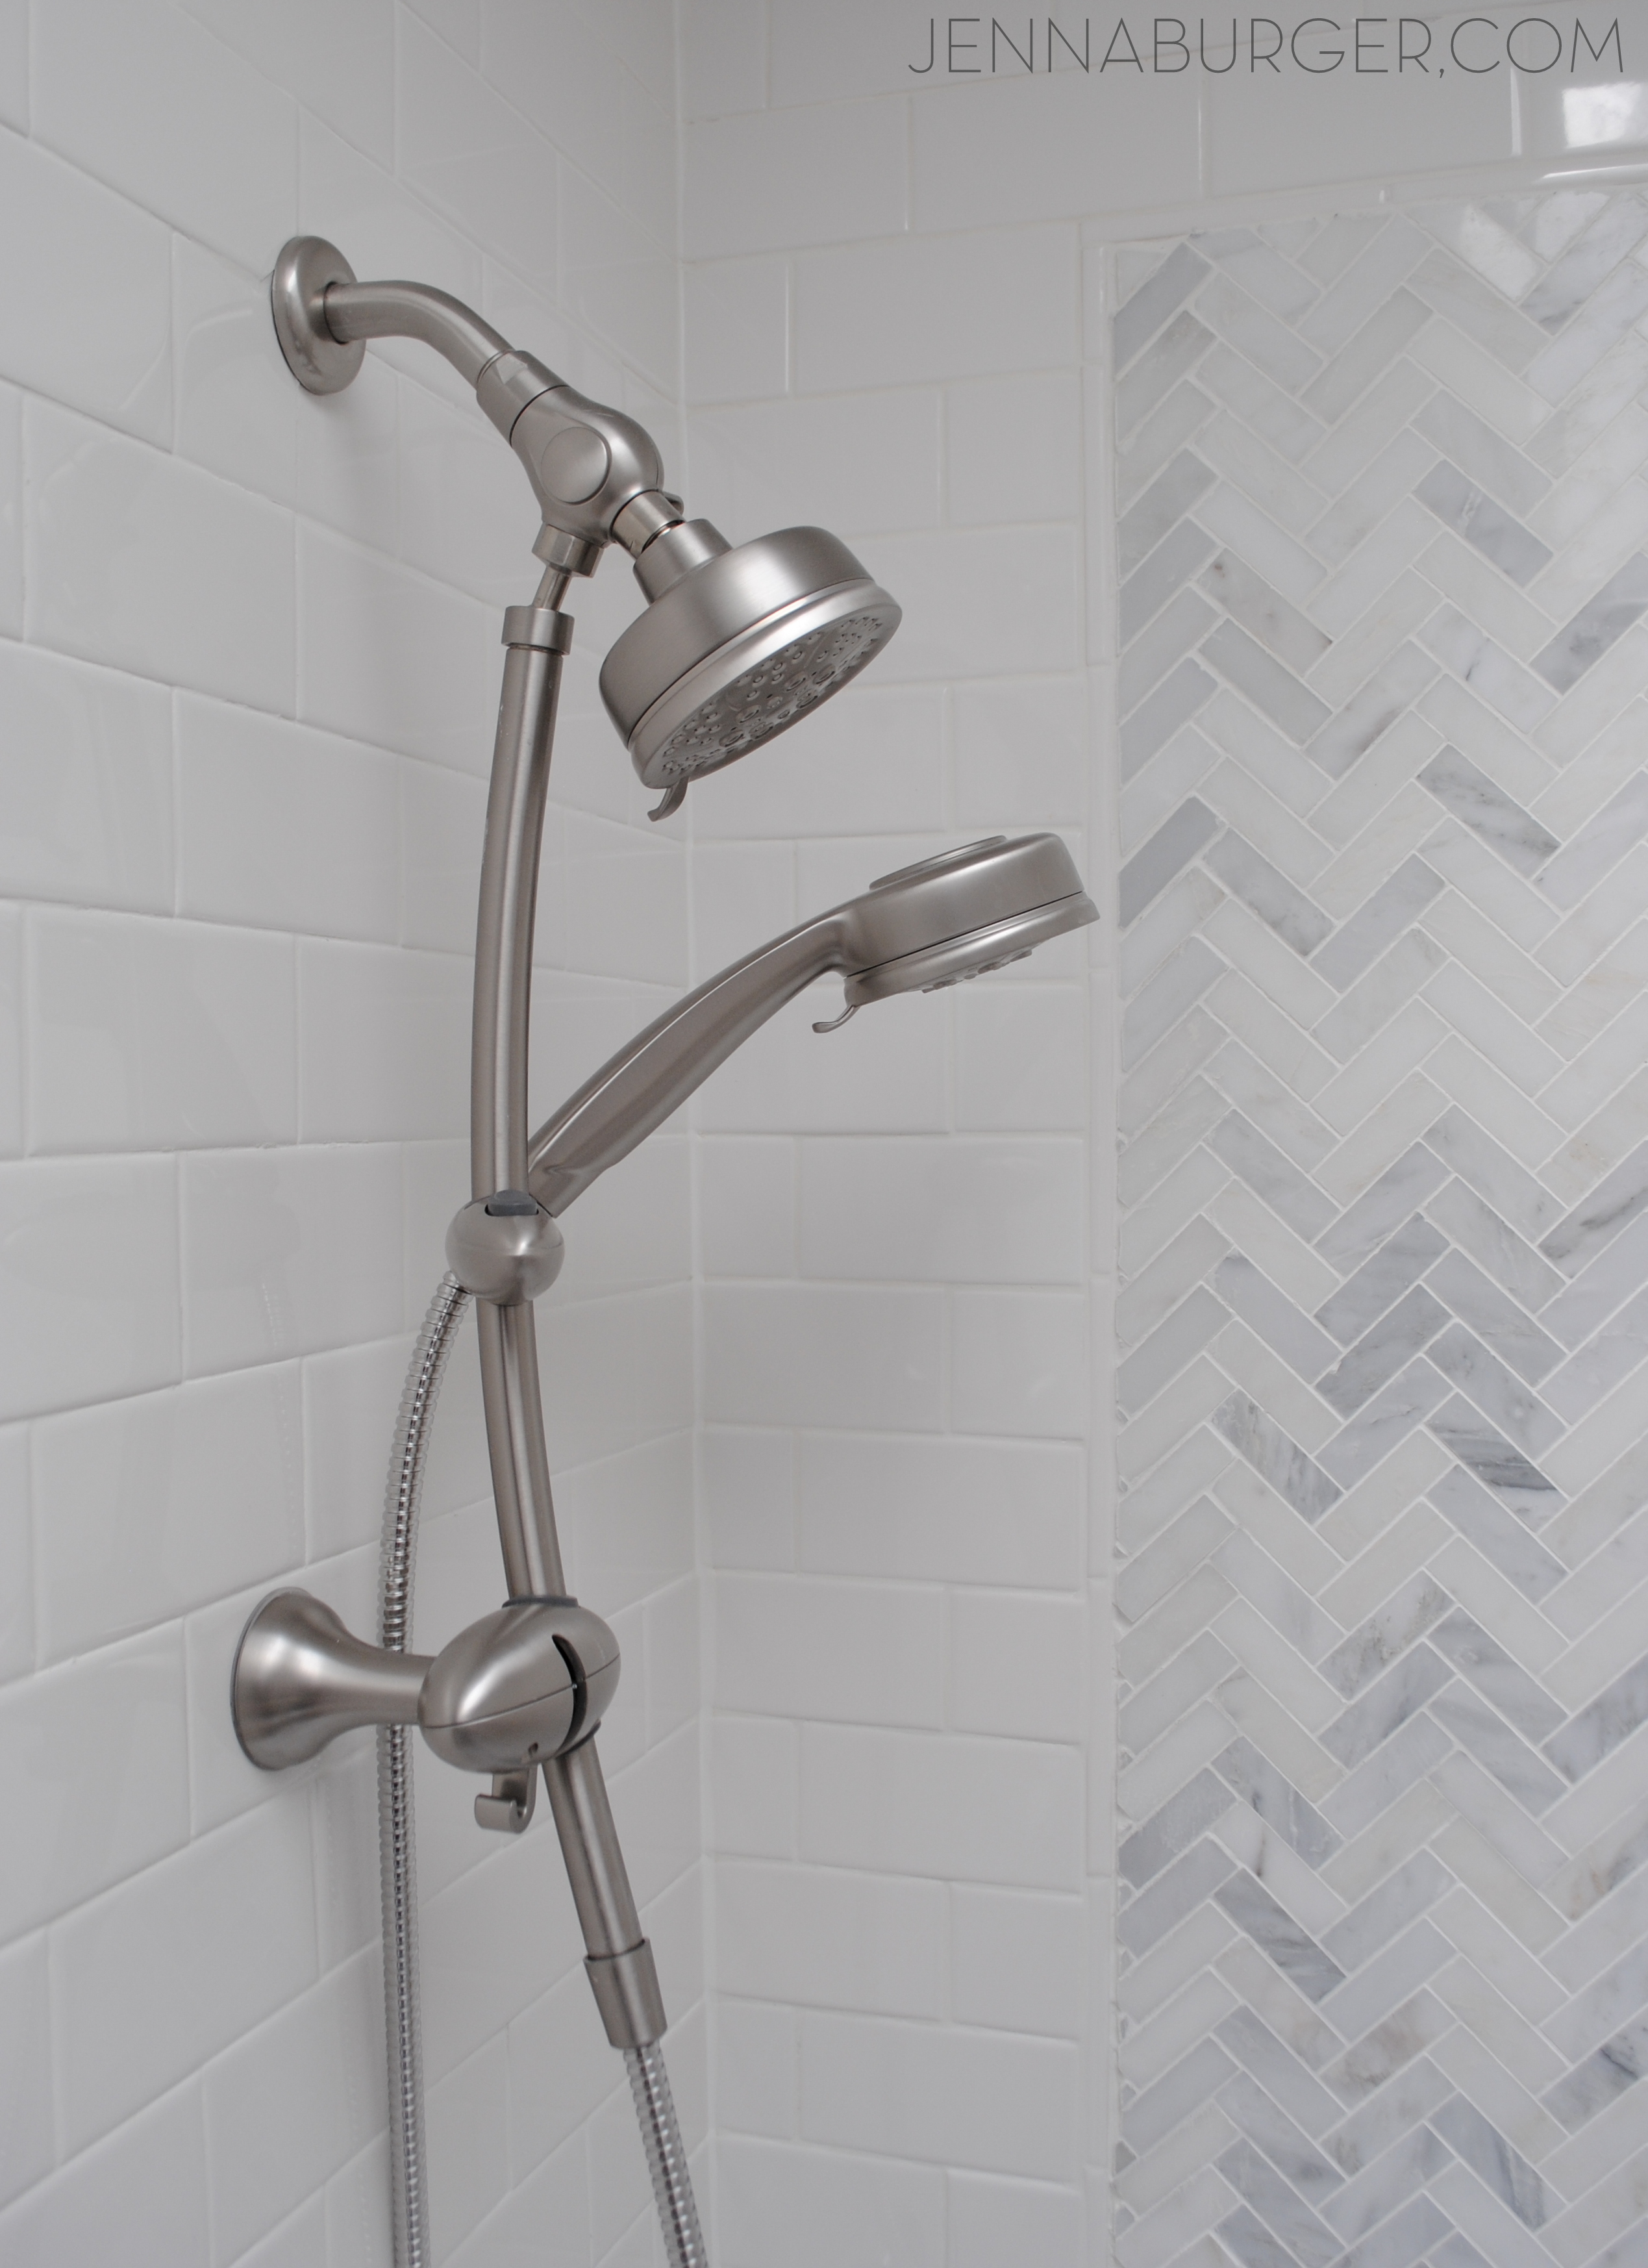
6. Showerhead – Lowe’s

7. Tub fittings (replacement fittings for the old Moen fittings) – Lowe’s

8. Tub – Lowe’s

9. Shower curtain – Target

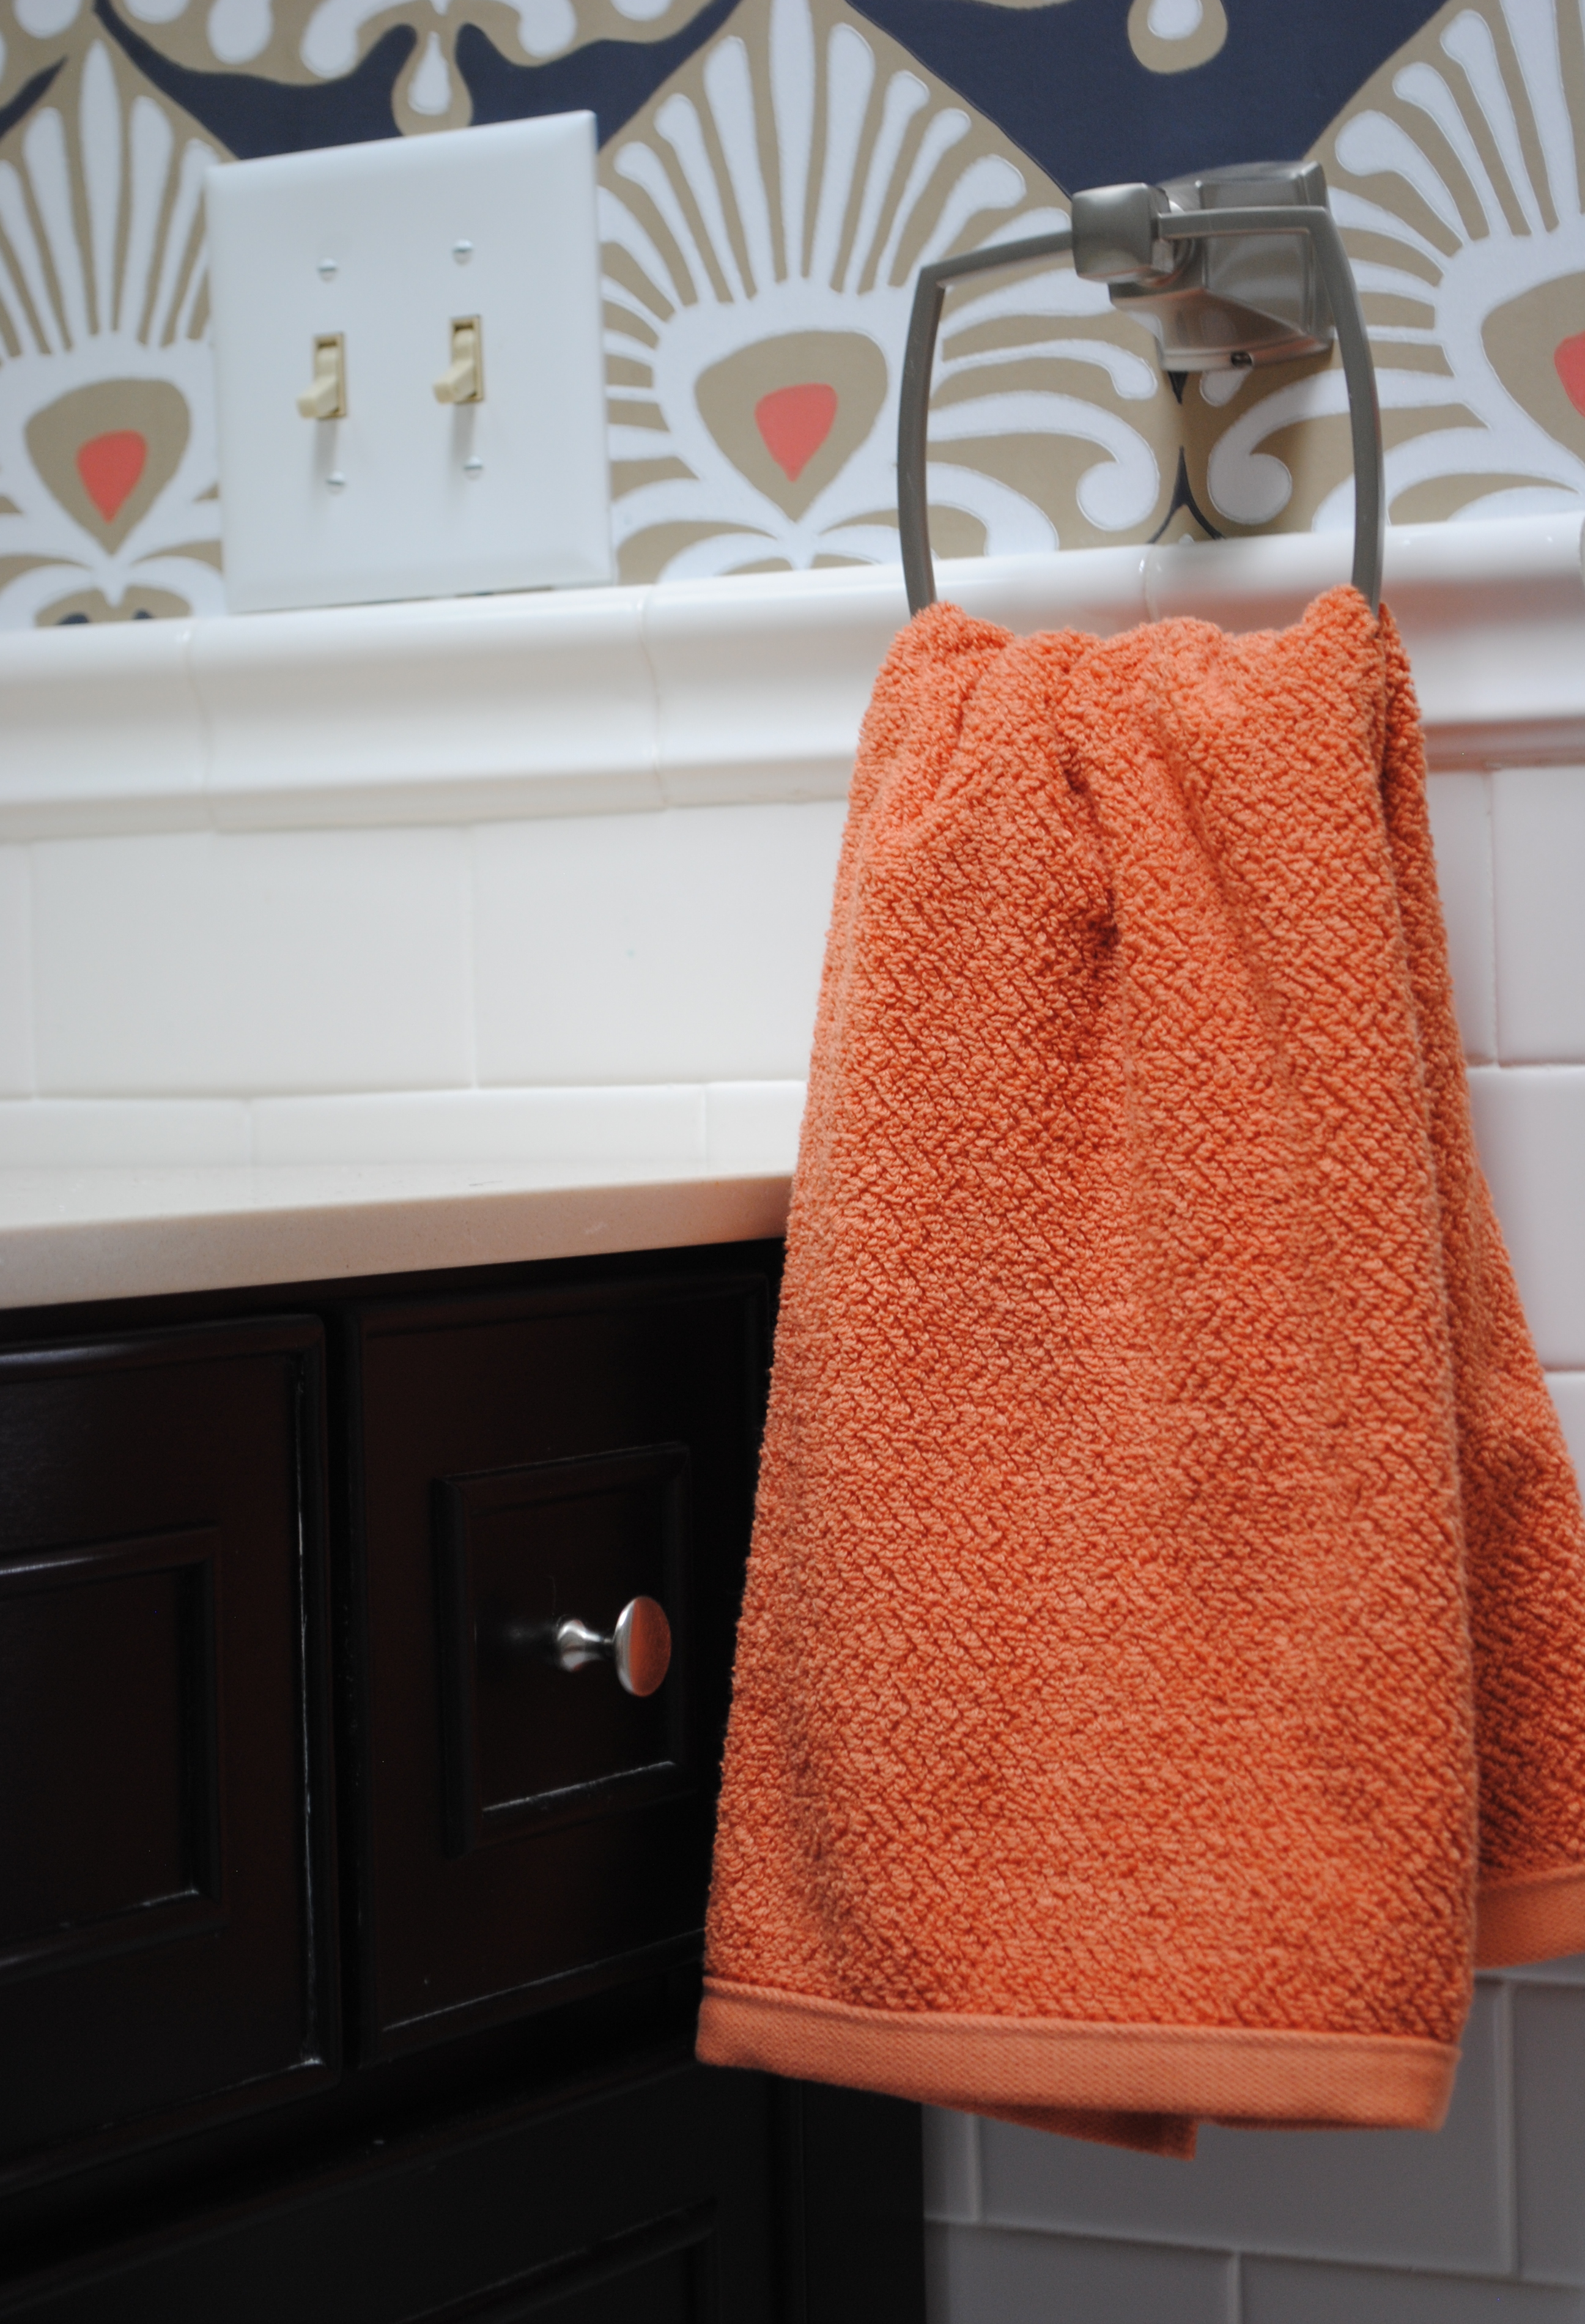
10. Towels – Homegoods

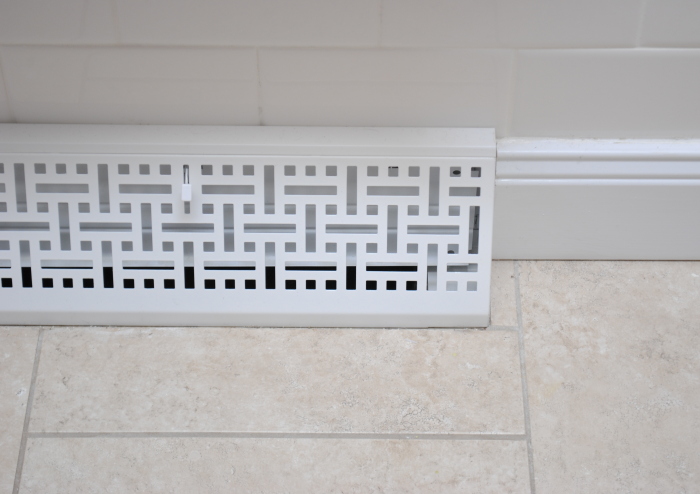
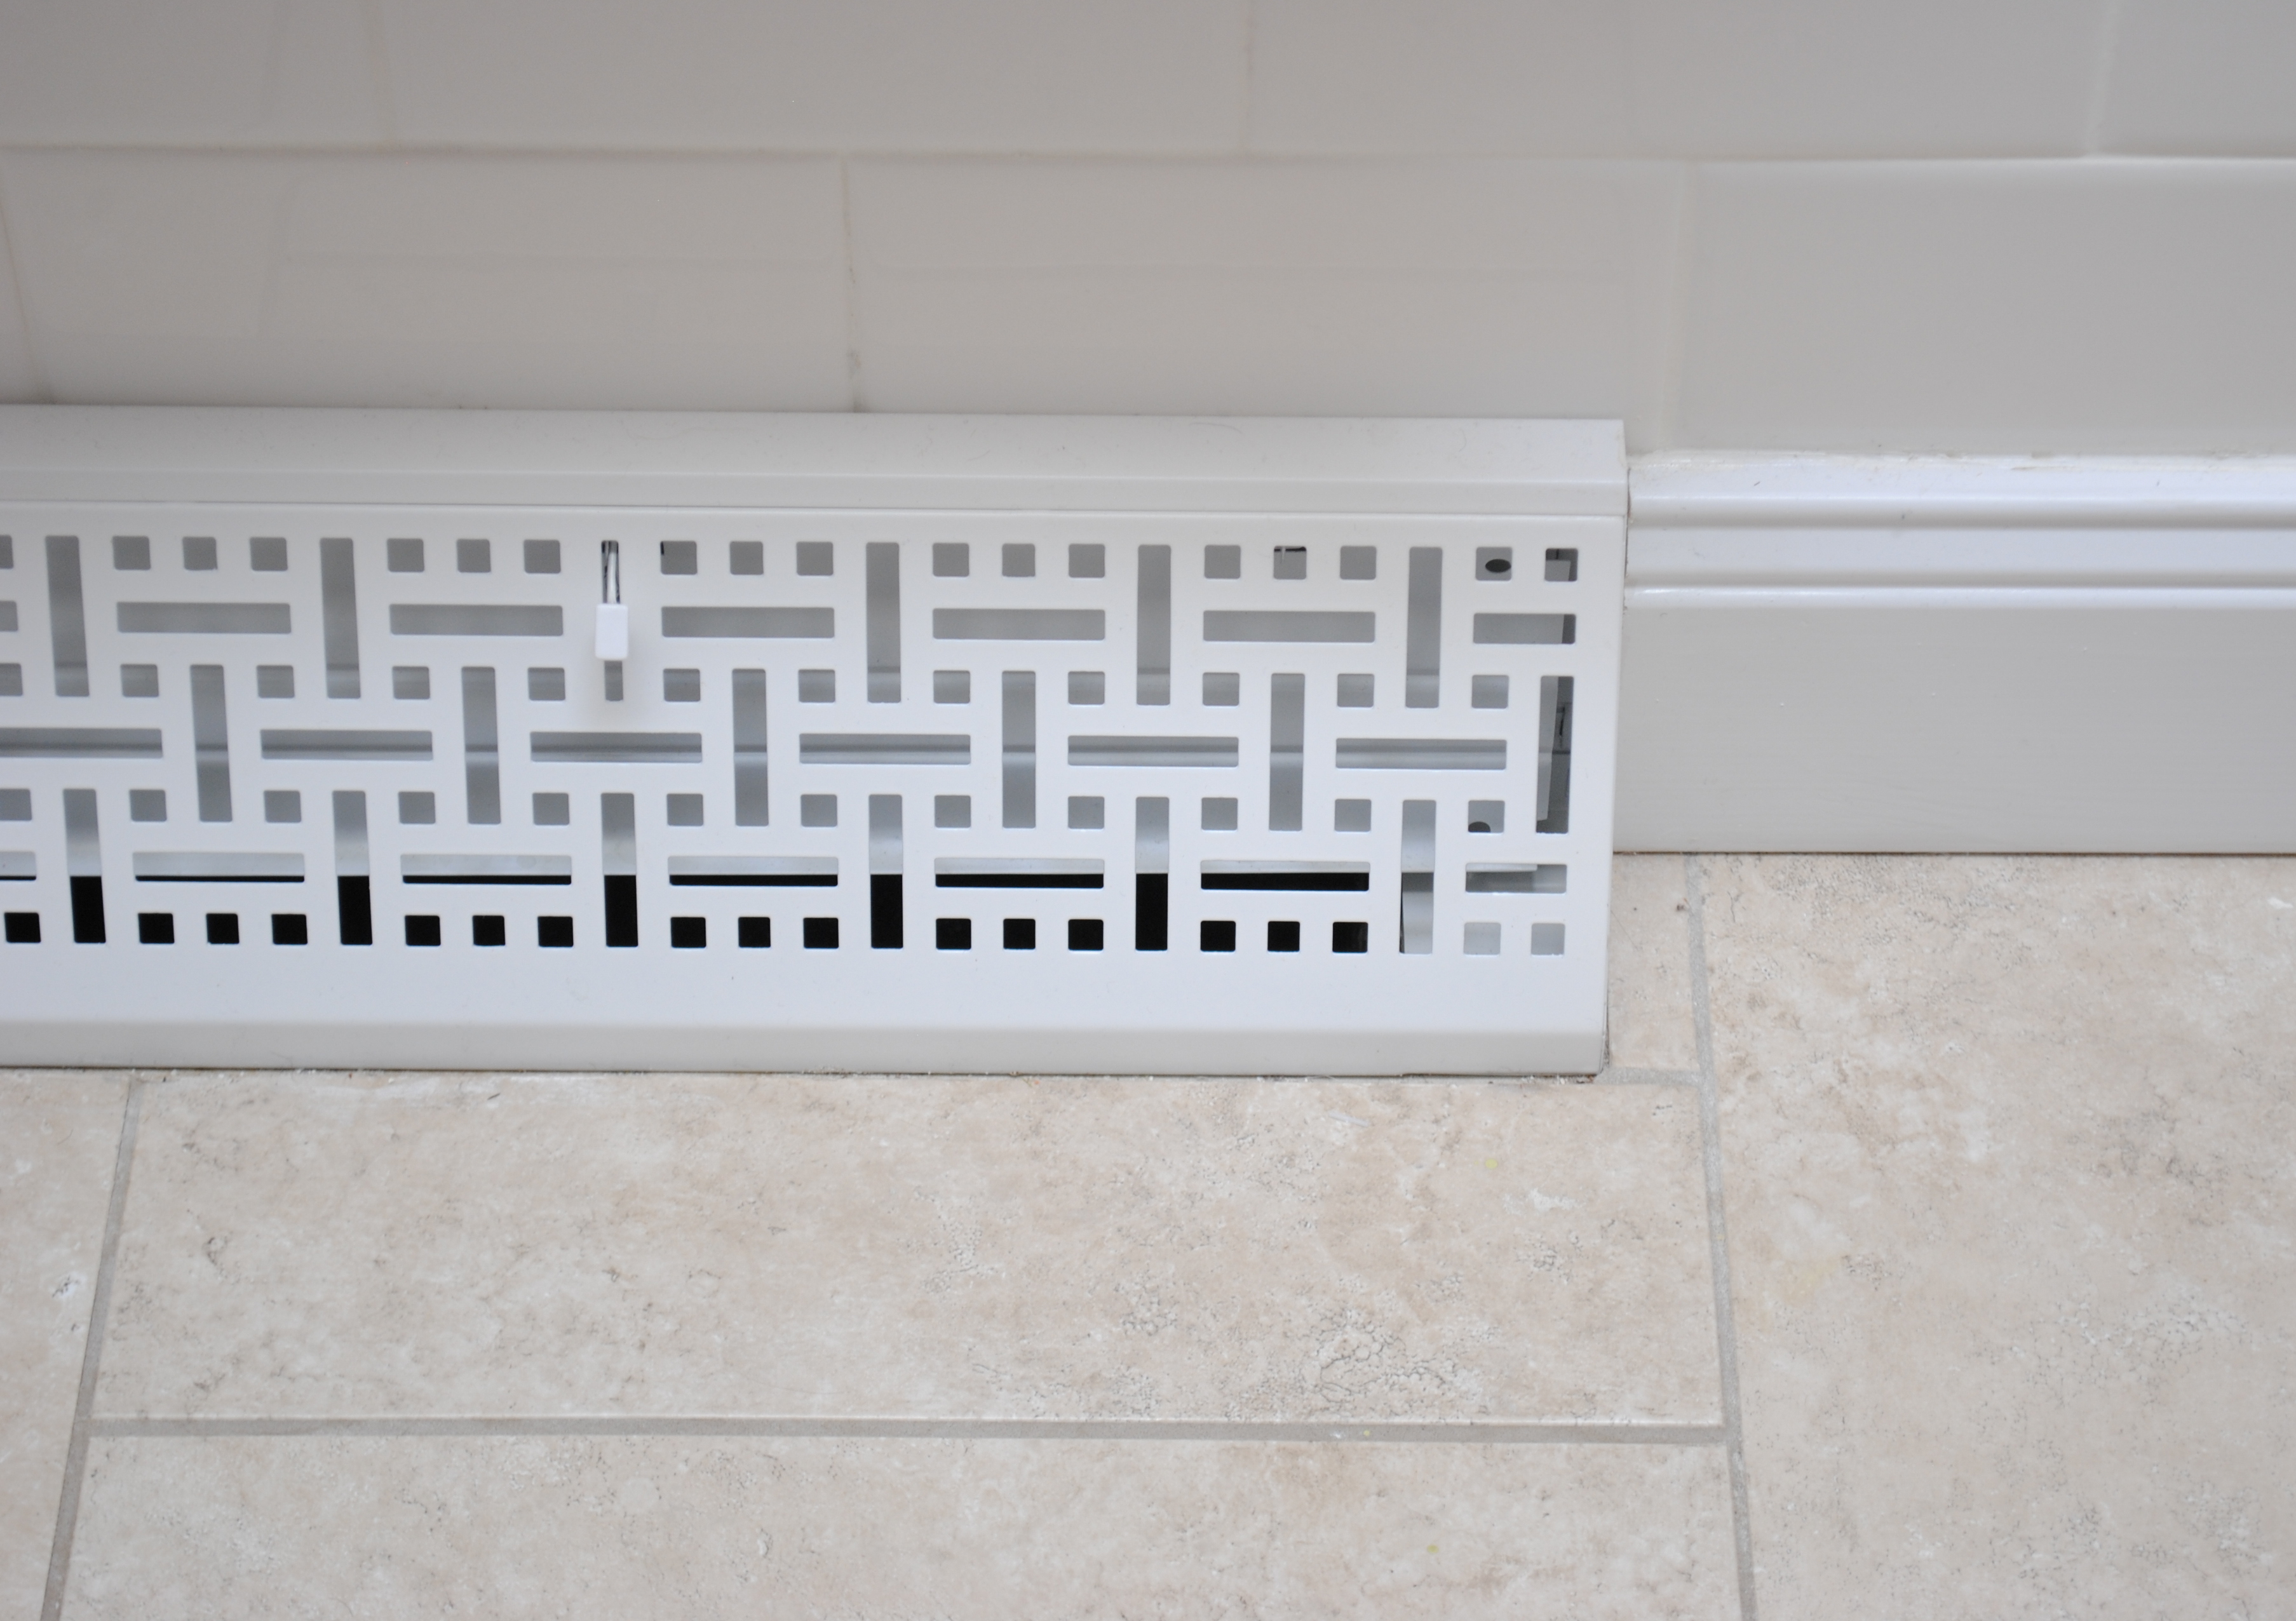
11. Metal Allen & Roth baseboard vent – Lowe’s

12. Toilet – Lowe’s

13. Shelf – DIY project; materials from Lowe’s – tutorial coming soon

14. Light – Lowe’s

15. Mirror – Lowe’s

16. Accessories: soap dispenser, toothbrush holder, cup – Lowe’s

17. Faucet – Lowe’s

18. Vanity – Lowe’s

19. Toilet paper holder – Lowe’s

20. Tiled Niche – DIY project >>> click for tutorial

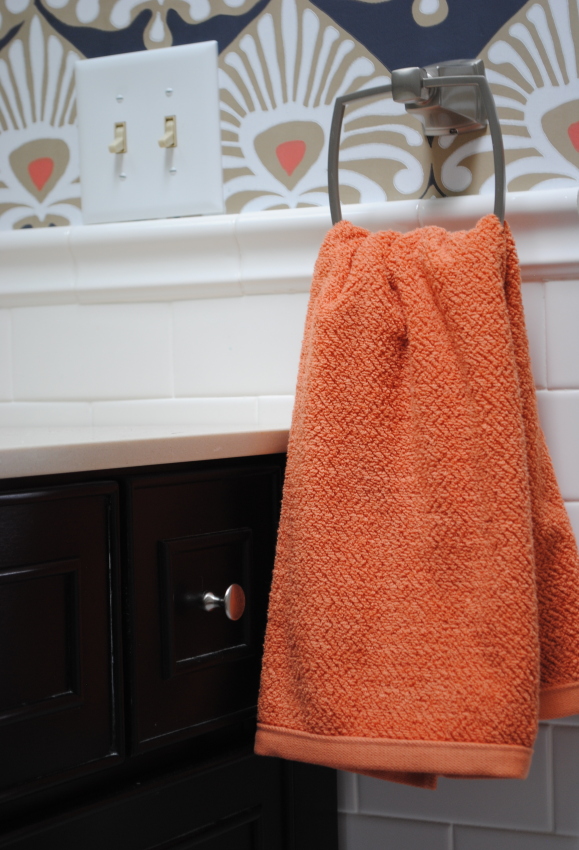
21. Hand towel holder by Moen – Lowe’s

22. Burlap baskets – Lowe’s

Bathroom Makeover details: the specific resources for this classic bath with bold layers.  Designed by Jenna Burger Design, www.jennaburger.com

From start to finish, these are all the posts pertaining to this bathroom remodel
Plan of Action
Demo: Removal + Installation of the Tub & Walls
How-To Tile + Grout the Bathroom Walls
Installing Wallpaper
Adding a Tile Accent Border
Creating a Tiled Niche
Bathroom Makeover Reveal
Resources

Publication Feature: Storage + 100 Ideas Decorating Small Spaces

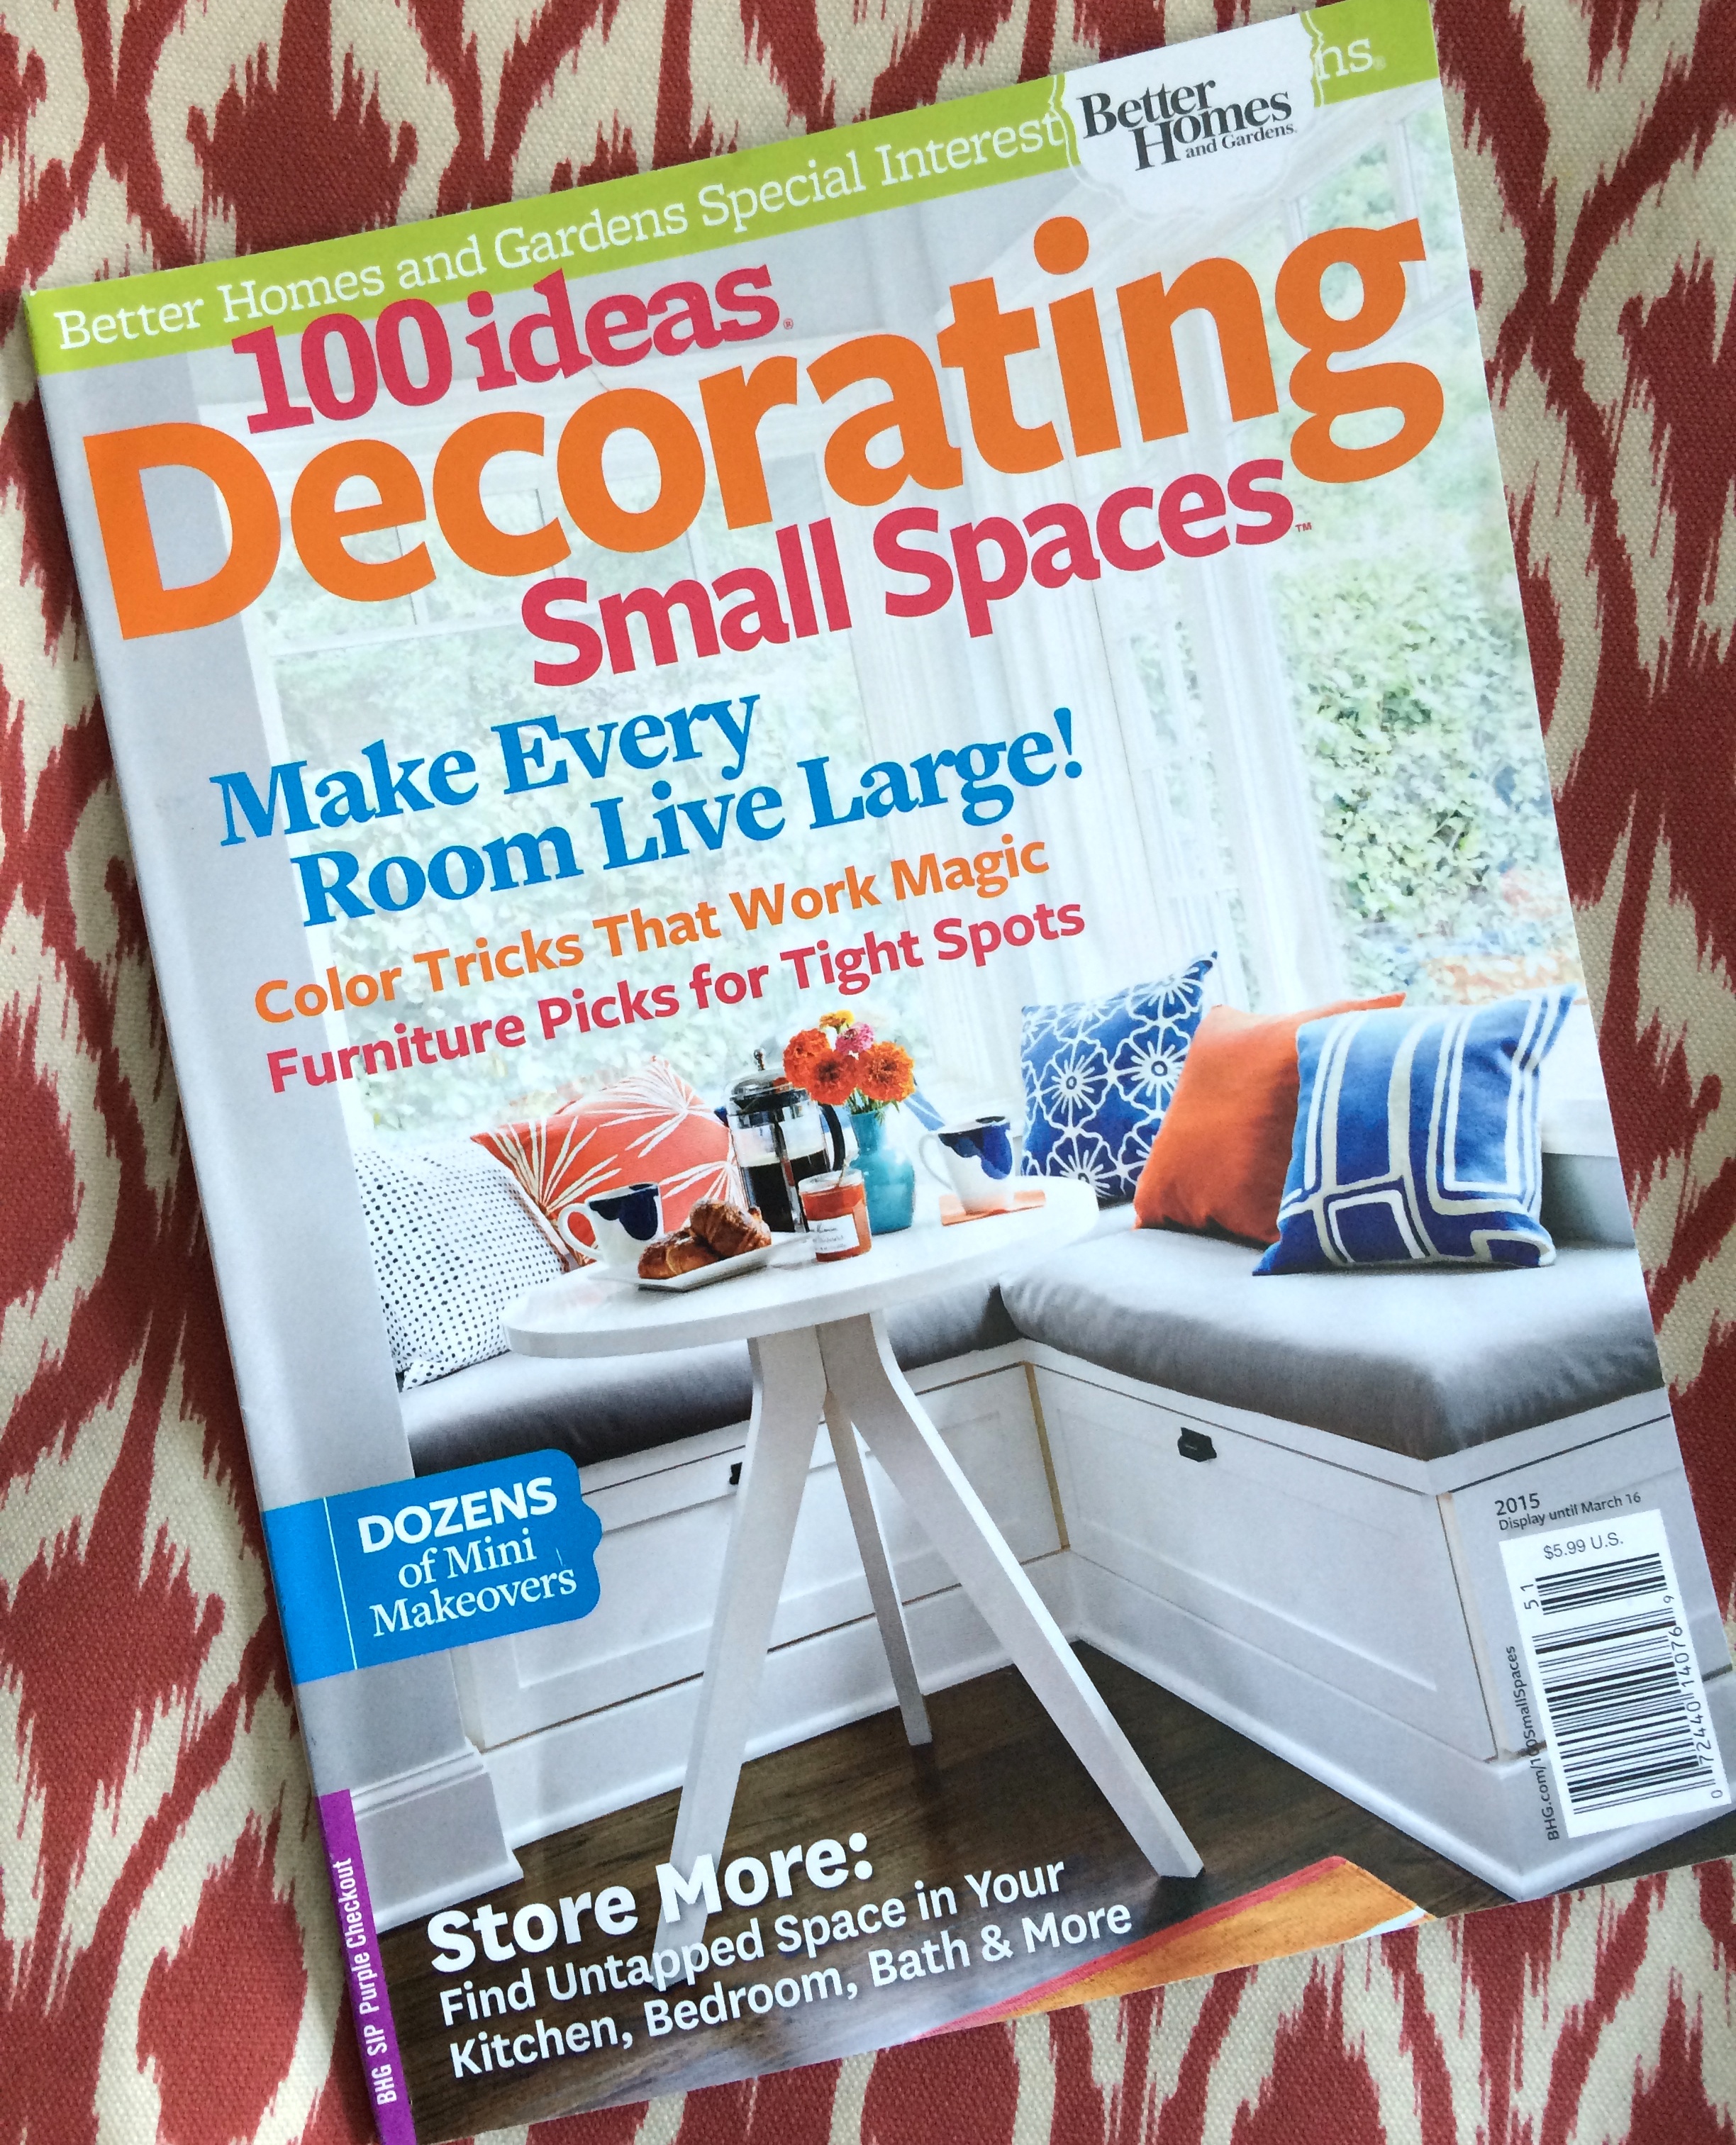
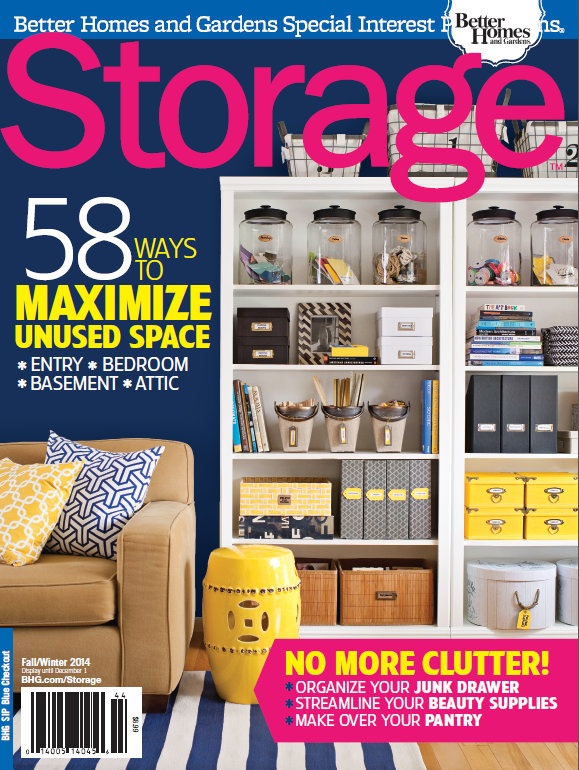
I am thrilled to share that 2 national magazines – Storage Magazine & 100 Ideas Decorating Small Spaces, both Better Homes & Gardens Specialty Publications – that just hit newsstands are featuring client projects of mine.

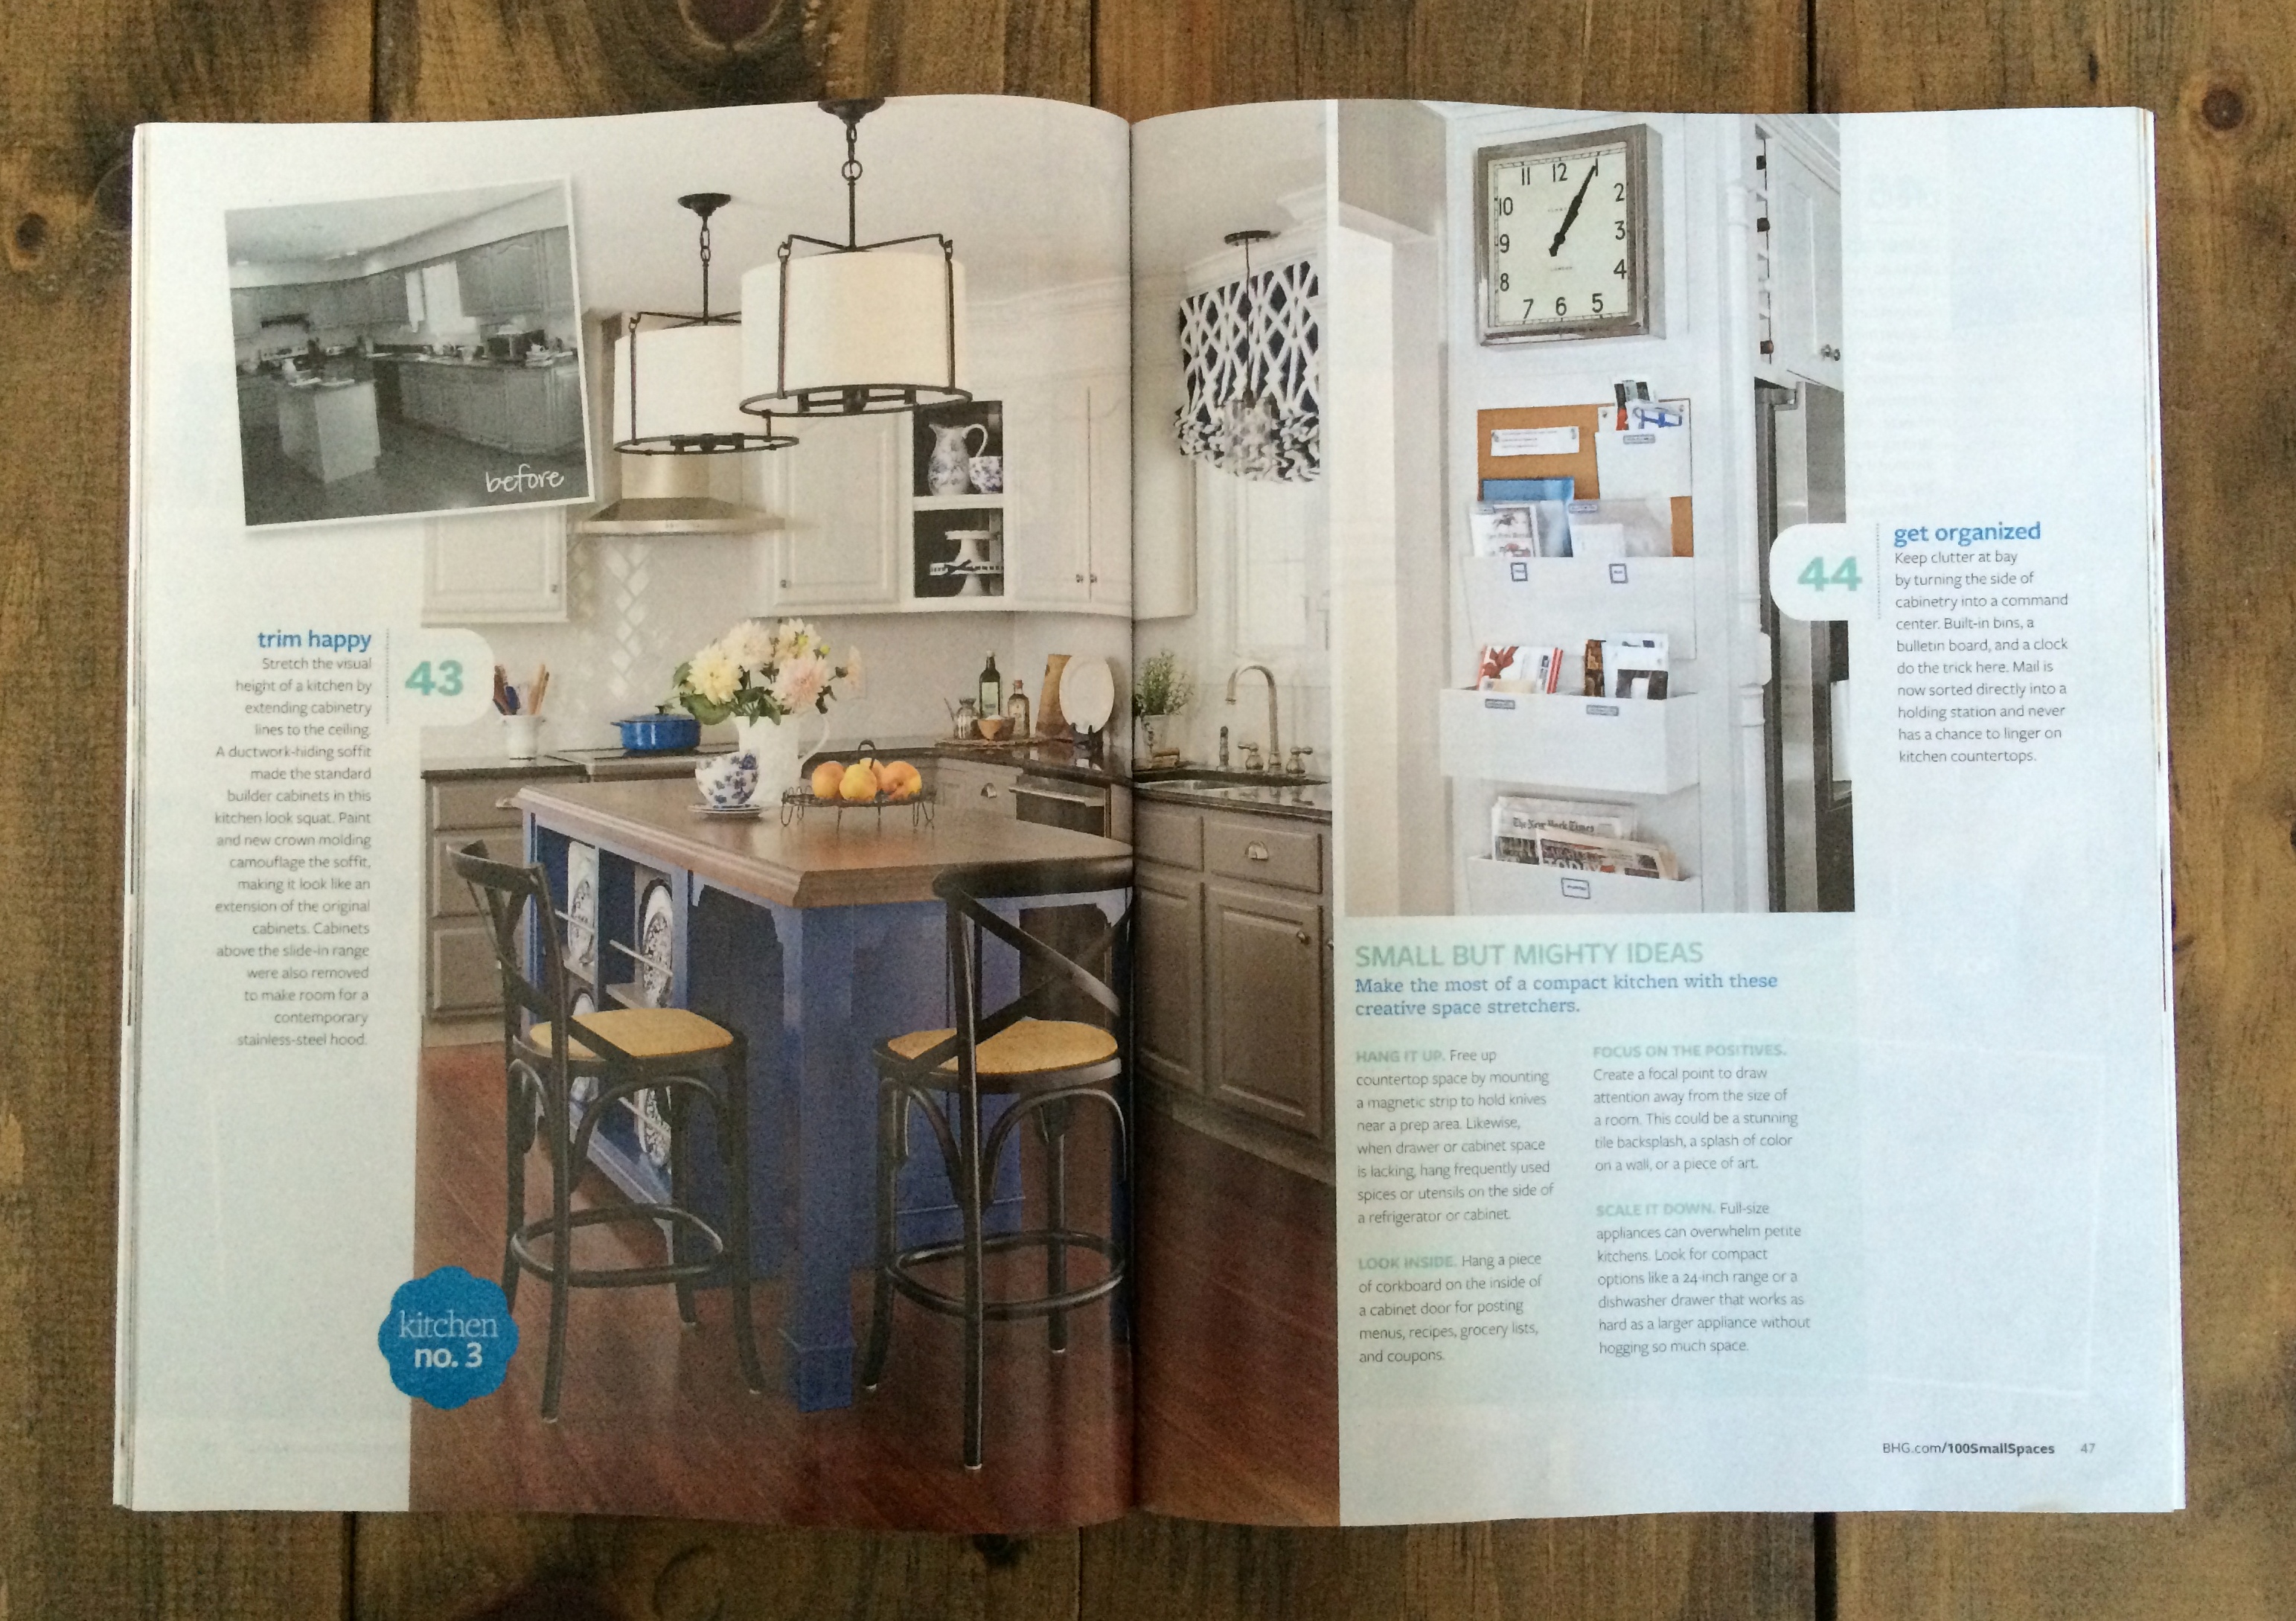
100 Ideas Decorating Small Spaces is a 2-page spread and is featuring a client kitchen makeover that was originally published (and on the cover) of the Spring 2014 issue of Kitchen + Bath Makeovers magazine. See the before & after + read about the cover feature here

100 Ideas Decorating Small Spaces

It’s my most favorite kitchen project transformation to date and always brings a smile when I see it, so it was a delightful, unexpected surprise when I was told that it was being featured again in a new issue.  In this magazine, different from the last, small but mighty design ideas are shared + tips on getting organized with a command center… perfect for the New Year!

100 Ideas Decorating Small Spaces featuring a kitchen I designed

Feature #2 is in Storage magazine and this I have been waiting on for a long time.

Storage Magazine

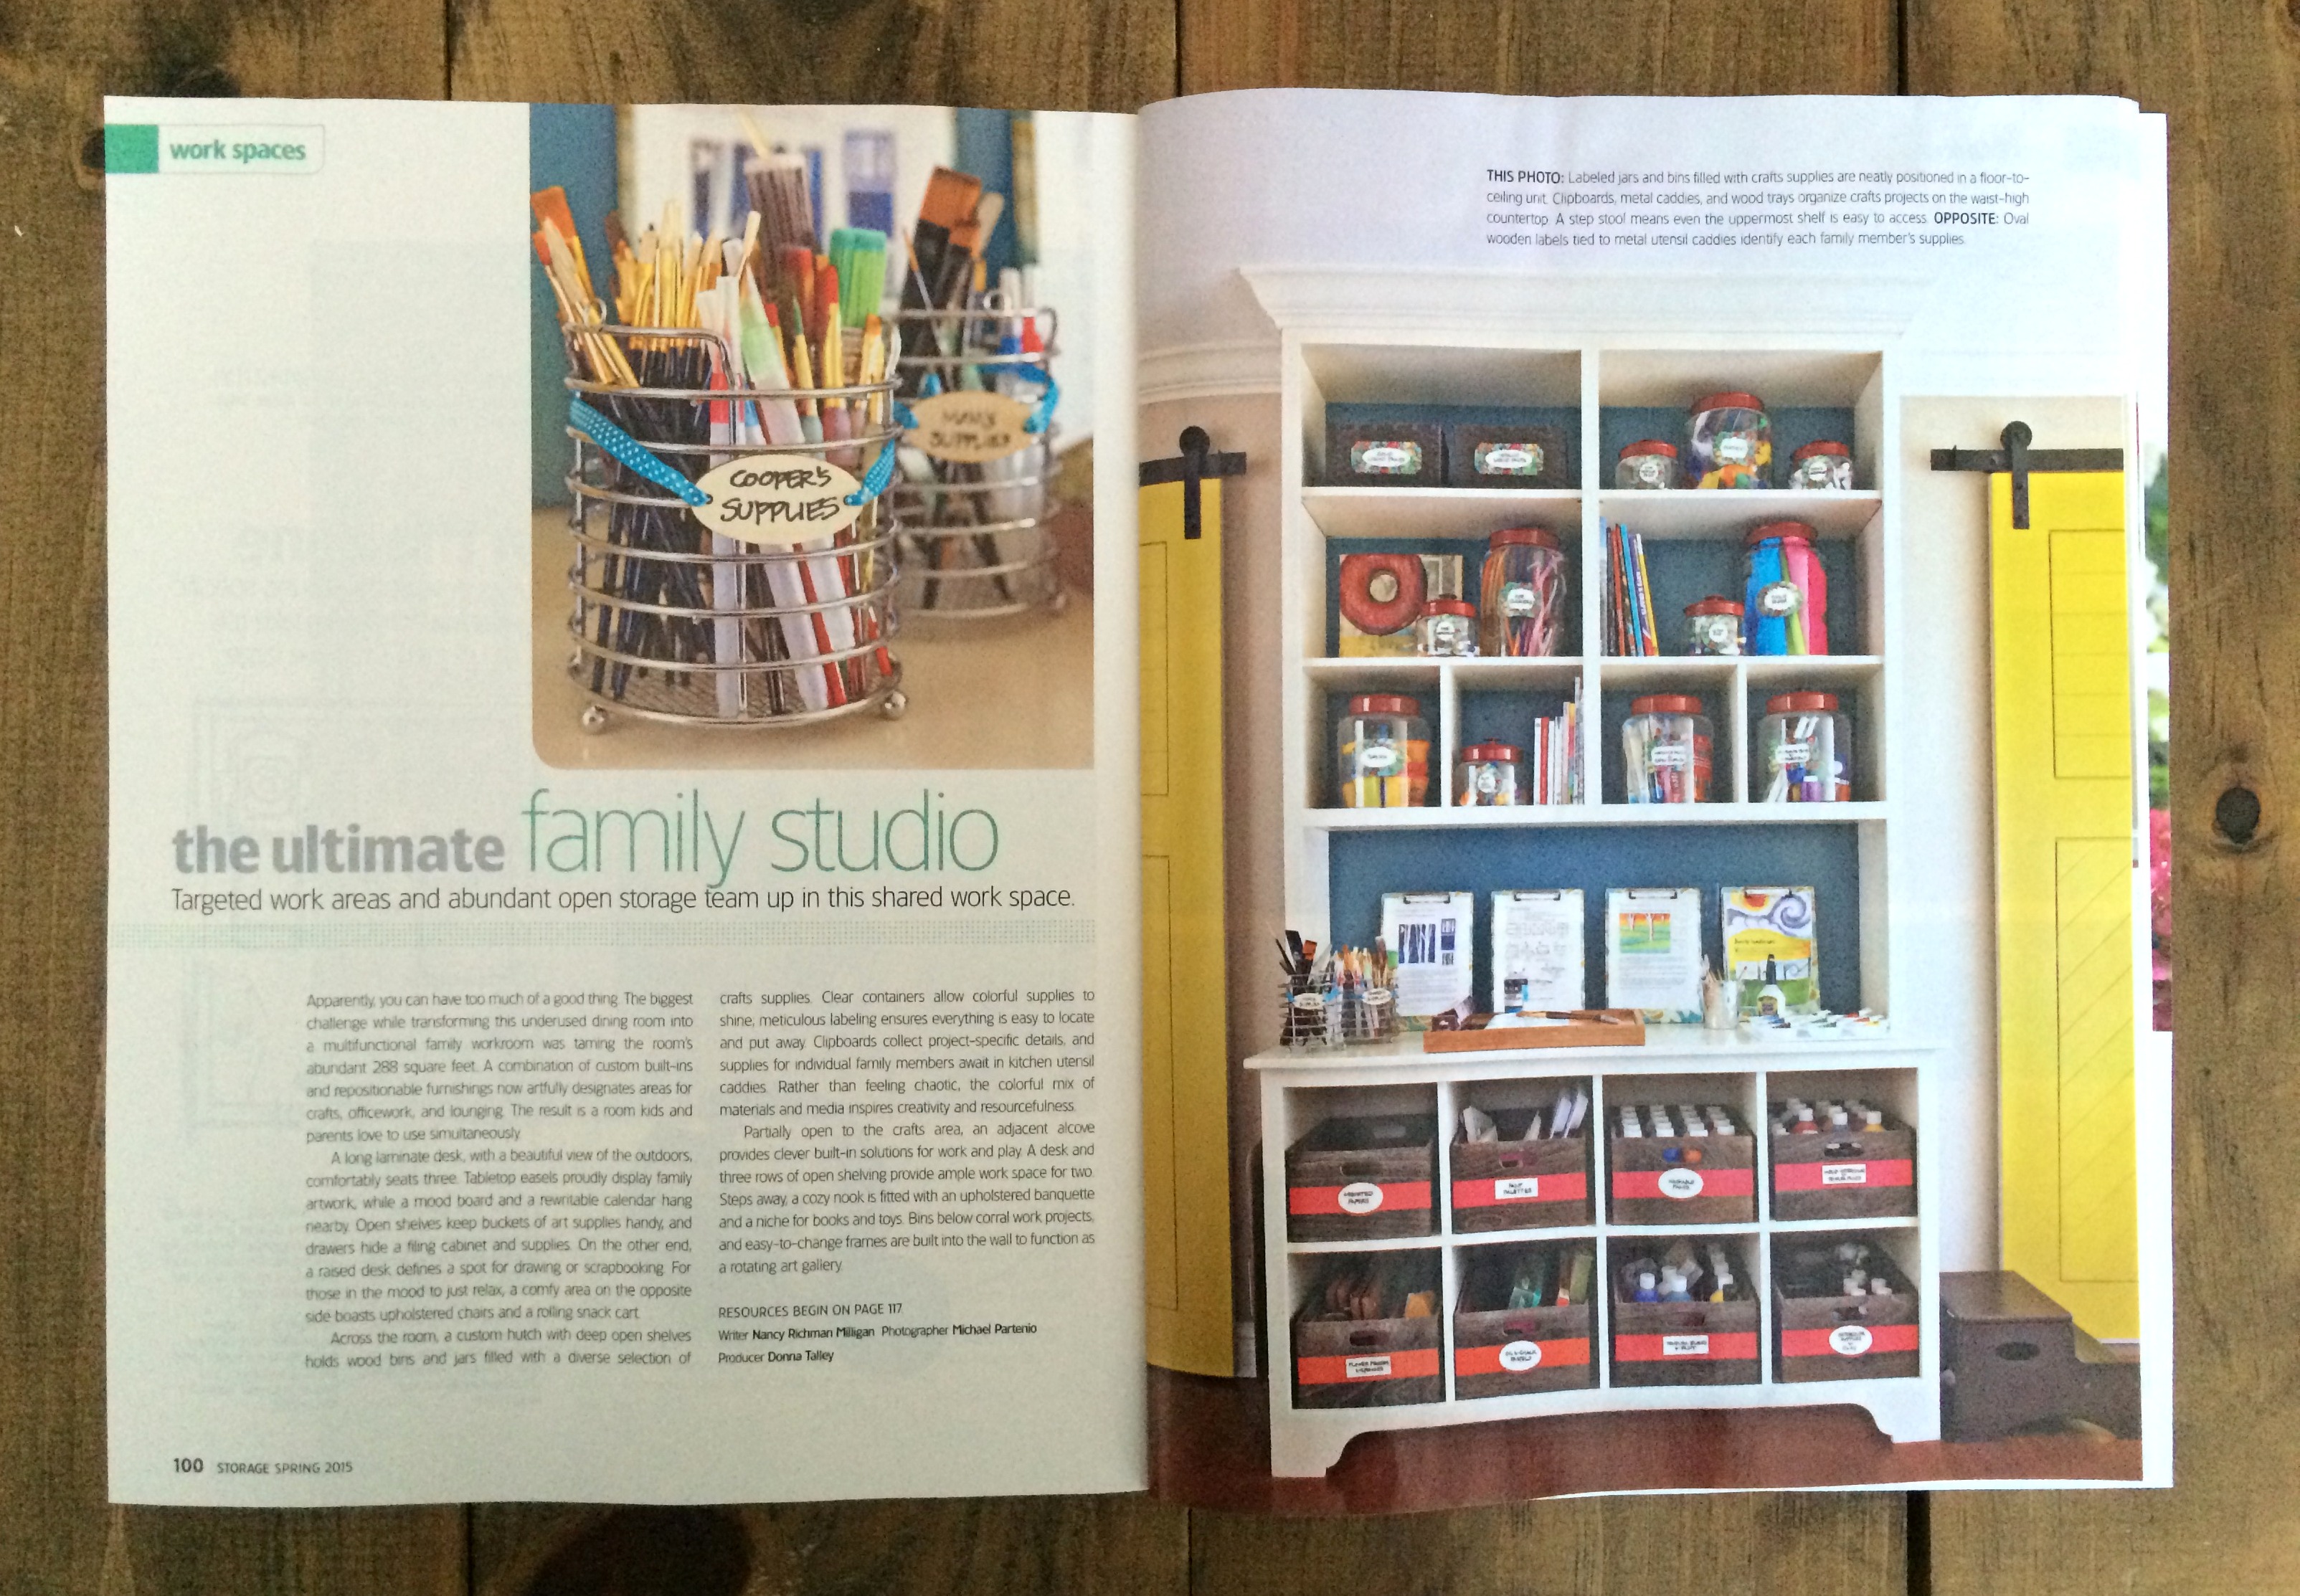
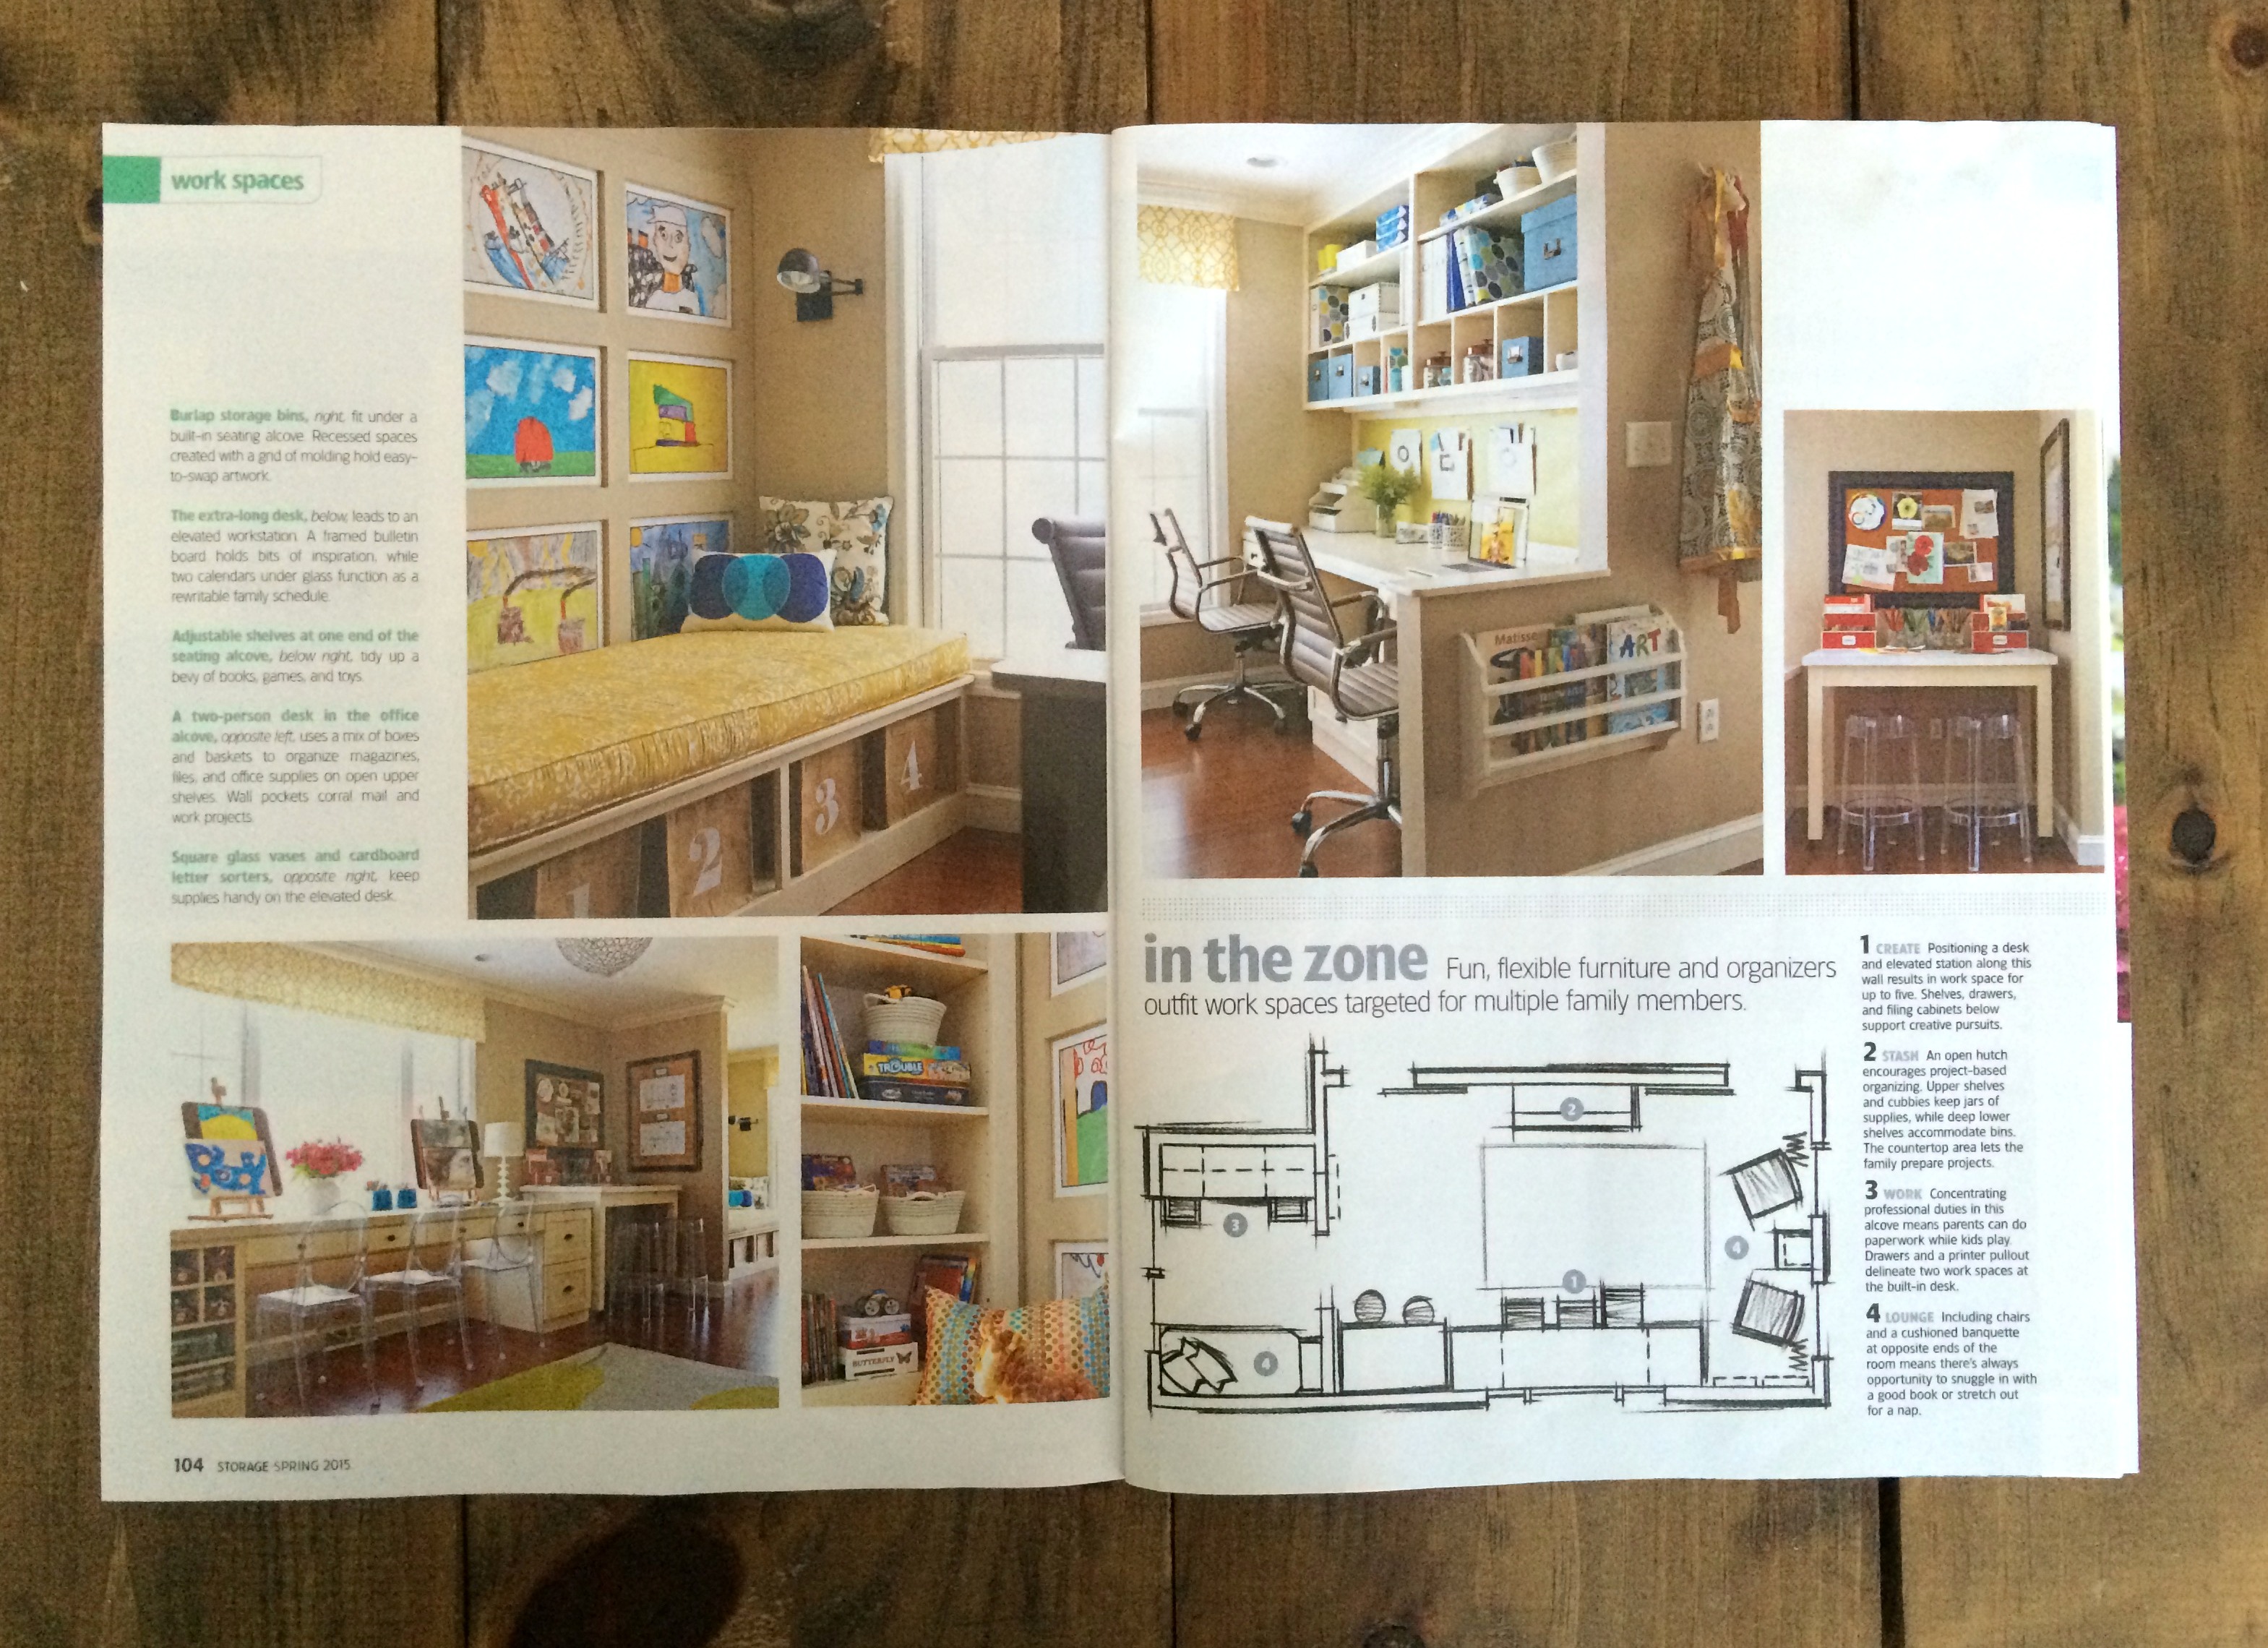
The space was finished almost 2 years ago and was photographed for the magazine over a year ago (I had just learned I was pregnant at the time and now my baby is 6 months).  The spread is of a mega craft room/office makeover I designed, which you can see more of in this post.  Donna Talley, Producer and Michael Partenio, Photographer, who created & photographed this room really brought it to the next level.  Their work is amazing! I feel truly blessed to have my work featured as it has!

Storage Magazine featuring a project I designed

You can not leave this post without seeing the before >>> Click to see the before & after of this space

Storage Magazine featuring a project I designed

Storage Magazine featuring a project I designed

If you’re out and about over the coming weeks, be sure to grab these 2 issues (or you can get them online too).  They not only feature these 2 spaces that I designed, but are chock full of beautifully designed & inspiring spaces!

More big news to come on other magazine features…

Bathroom Makeover: Reveal

The day is finally here… reveal day of the Bathroom MakeoverThe project that I challenged myself to do in 30 days.  Keeping reading (till the end) to see if I accomplished the goal…

The finished space has taken a wee bit longer than planned to share, but with the holiday high, I got a bit sidetracked.  Good news, Good news… the bathroom is done and has been for a few weeks.  I was planning on sharing the reveal sooner, but thought it would be best to wait till after the Christmas craze.

Without further ado, here it is…
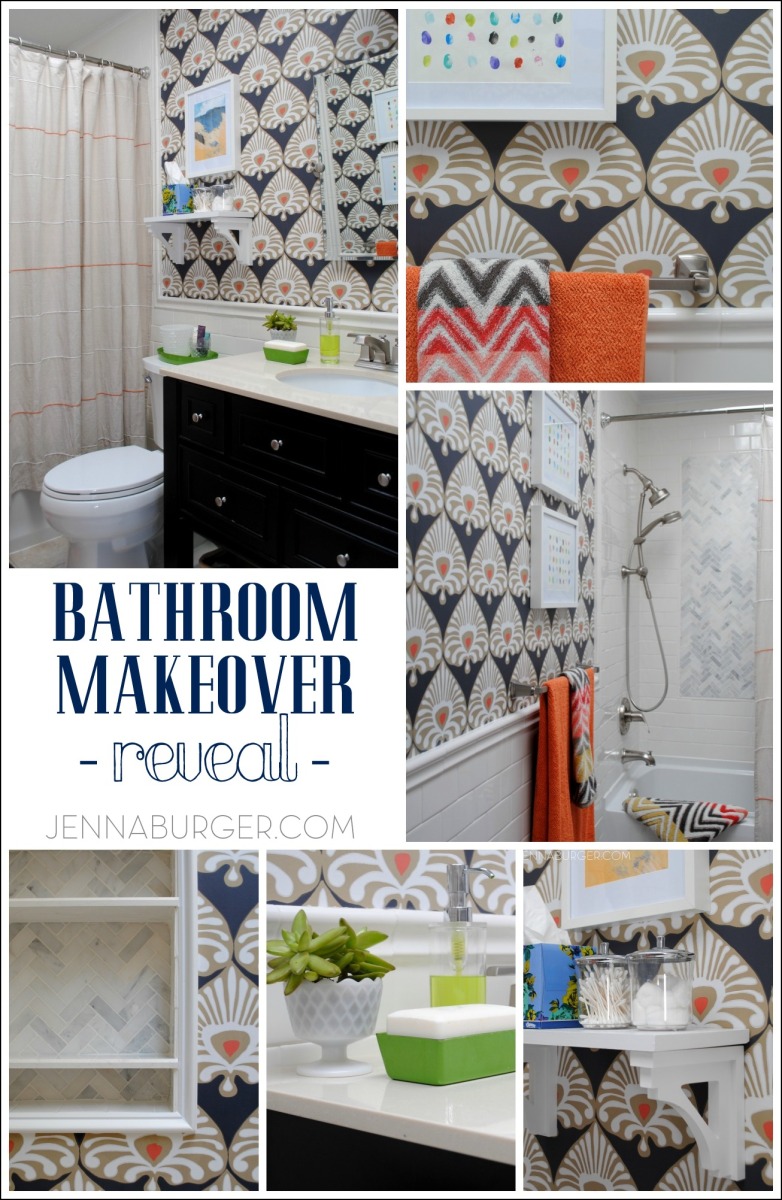
Bathroom Makover with 95% of the space being a DIY project - new tub + tile, vanity, wallpaper, and more!  Lots of details on this multi-post before & after.  Bathroom makeover by Jenna Burger Design www.jennaburger.com

As always, I love partnering with Lowe’s on projects and this bathroom makeover wasn’t any different.  I have worked with Lowe’s on so many projects over the years and not only am I thrilled to be apart of their Creative Team, but I truly love their product line.  Minus a few elements, this entire space was pretty much created using in-stock items that can be found in most of their stores.  How great is it not to have to order and wait 8 weeks for something to arrive?!  Grab & go today – that’s a bonus in my book. (I wasn’t paid to say any of that and am sharing my true, honest thoughts!)

Before sharing more of the ‘after’, I have to state that bathrooms – in my opinion – are so difficult to photograph because of the limited size of the space.  I’m not a pro photog, so I tried capturing it the best I could.  That being said, let’s get to it.

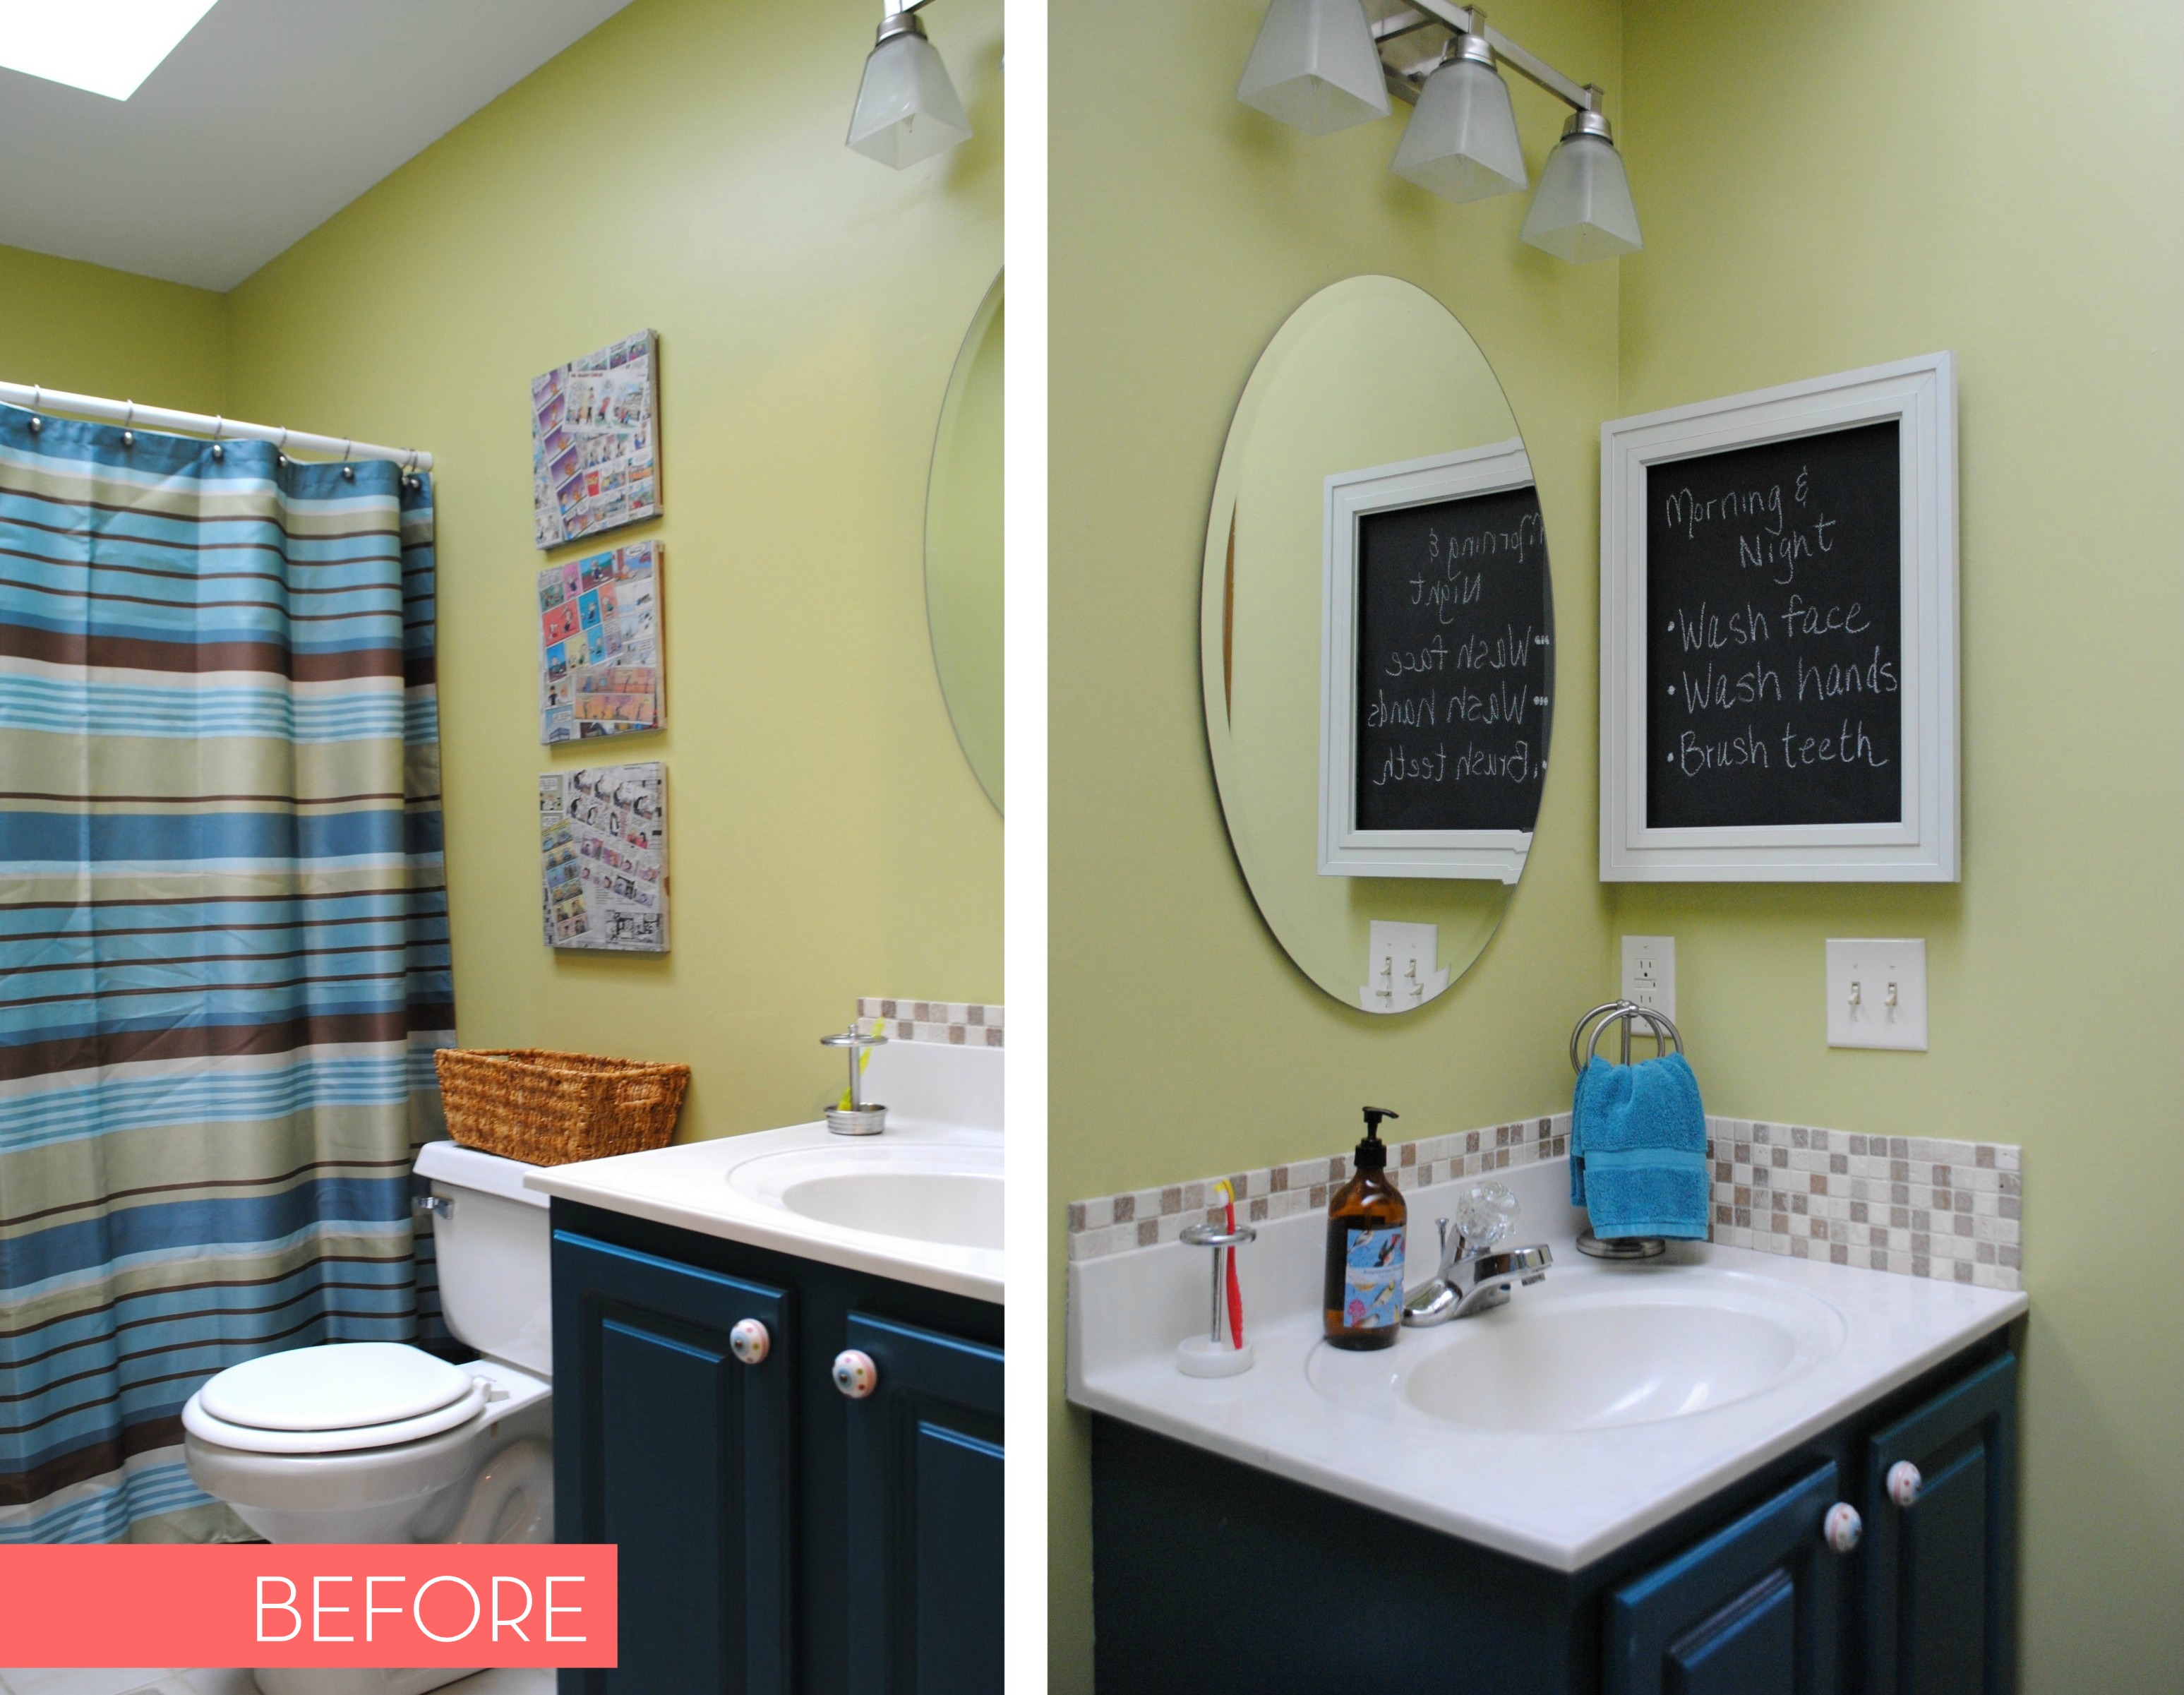
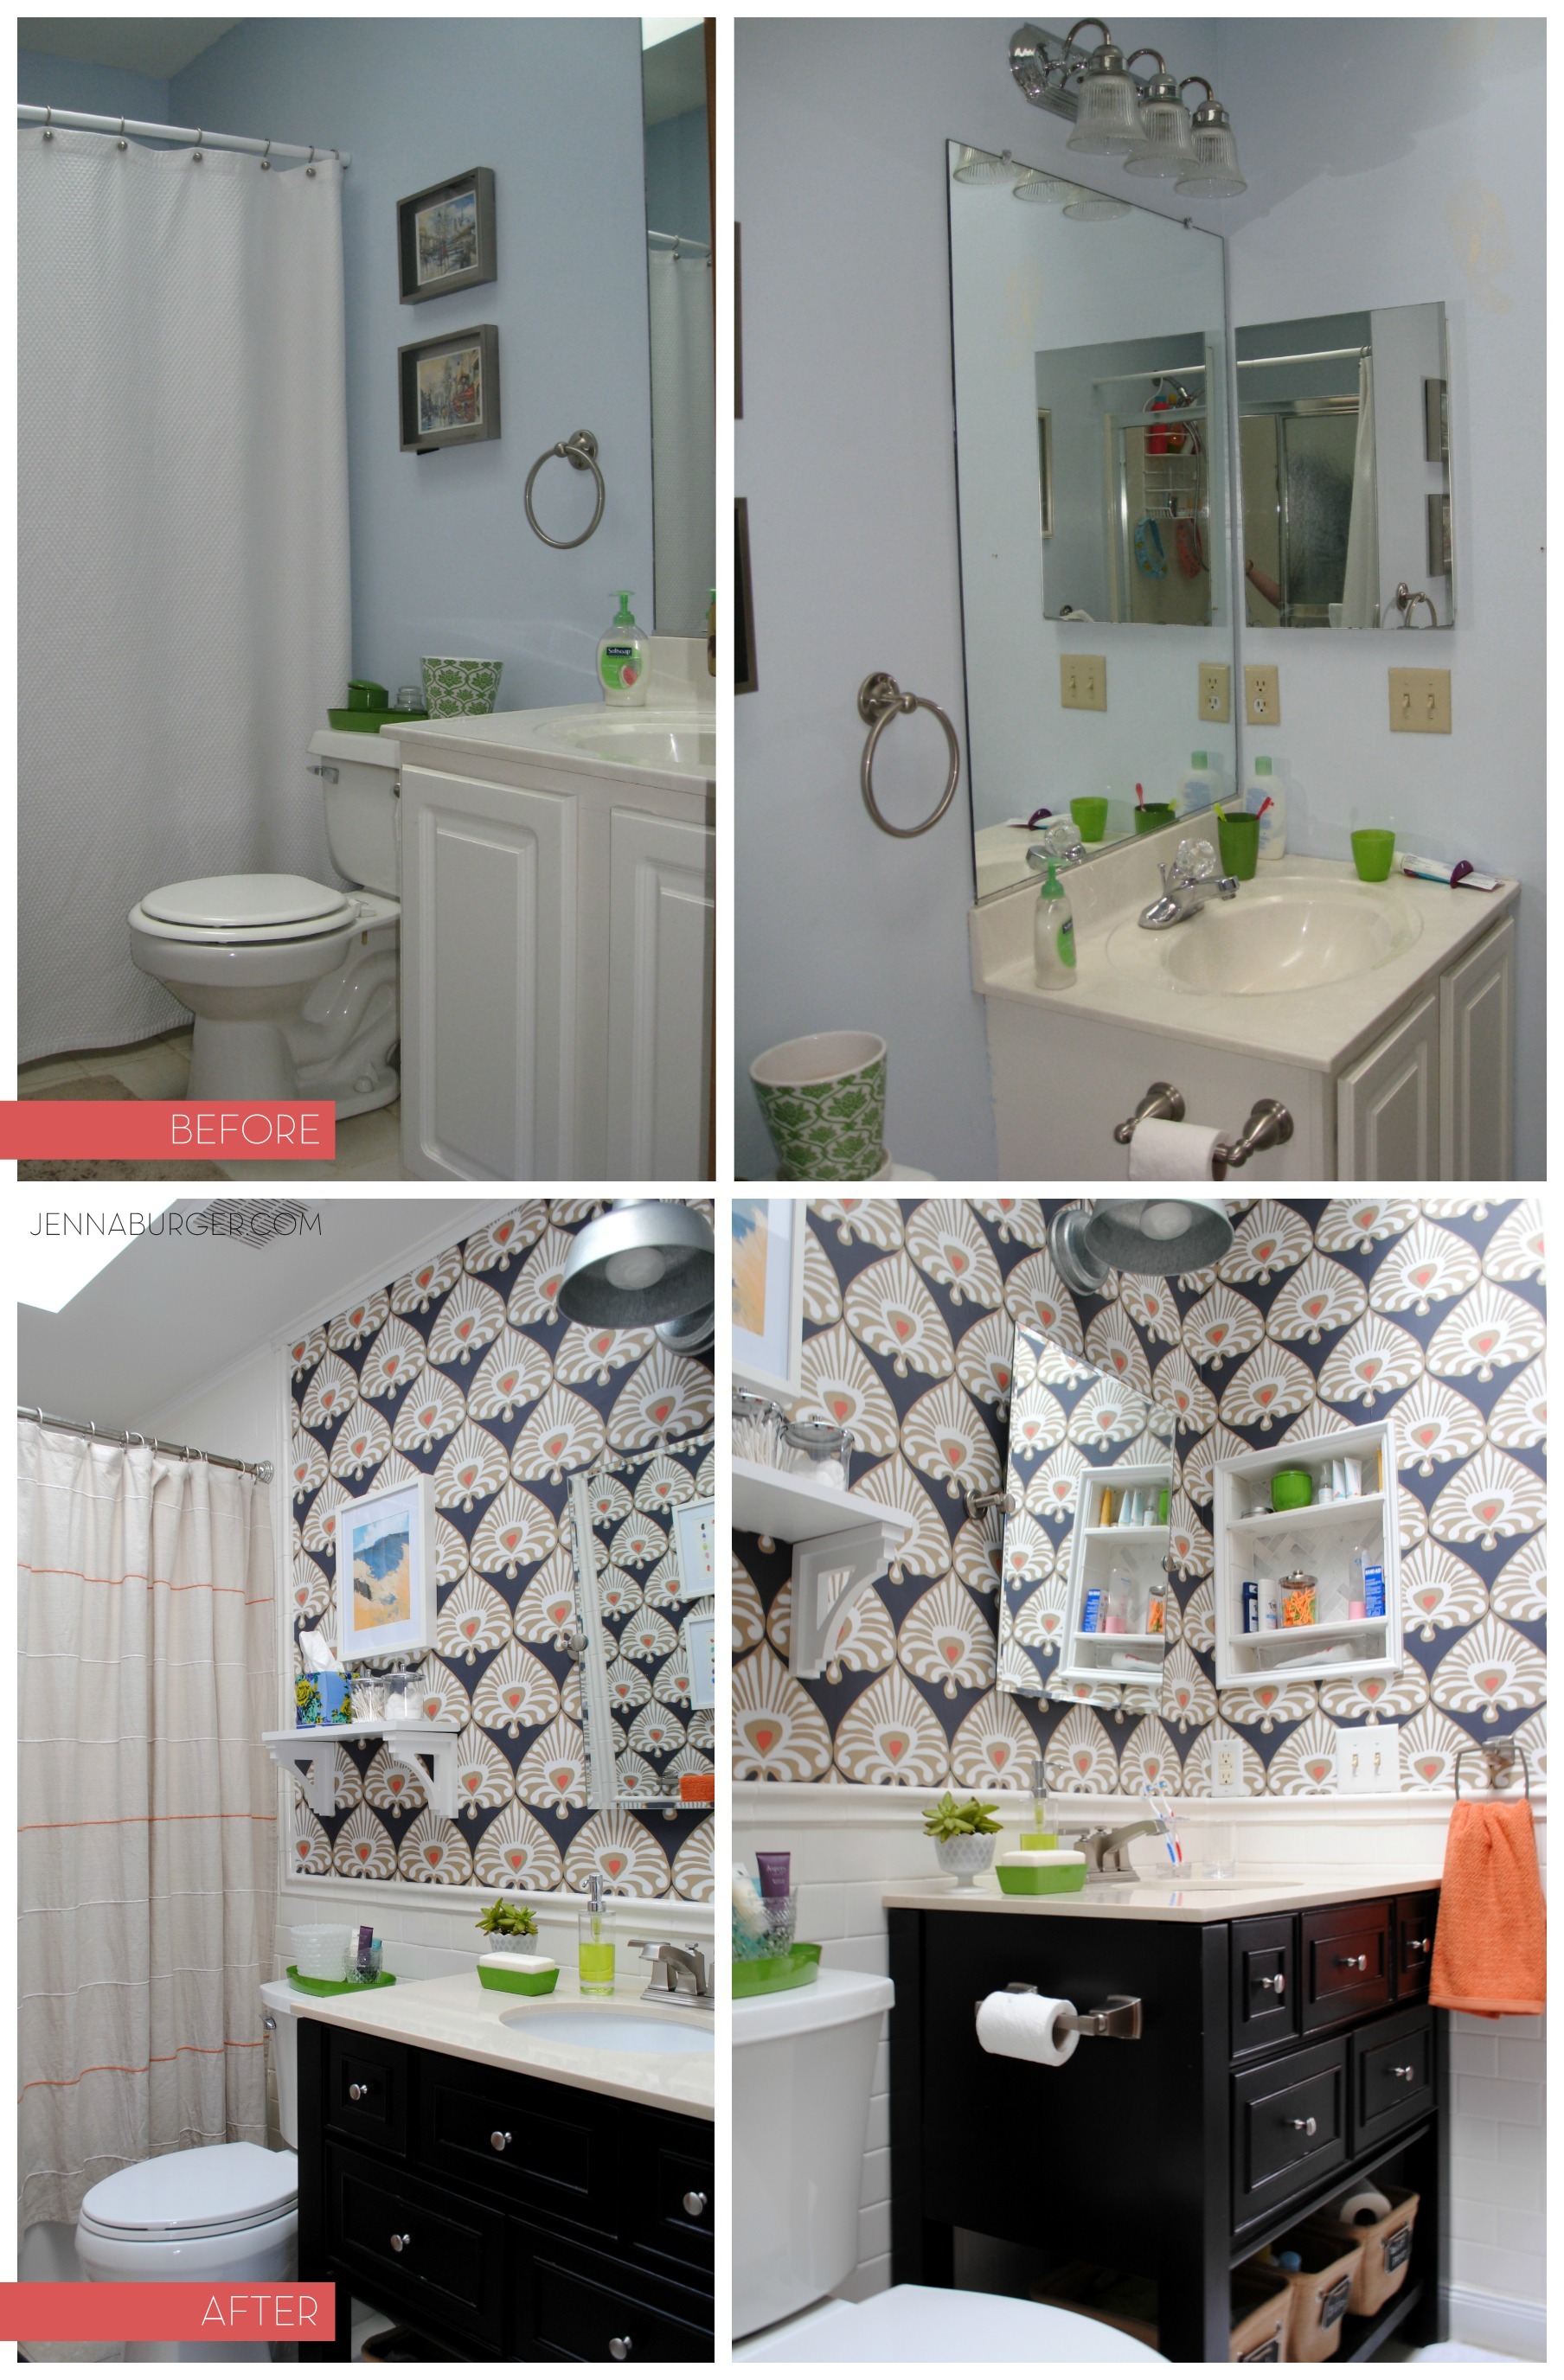
You can’t appreciate the after, without seeing the before.  This bathroom has had quite the evolution.  It was pretty sad when we moved in…
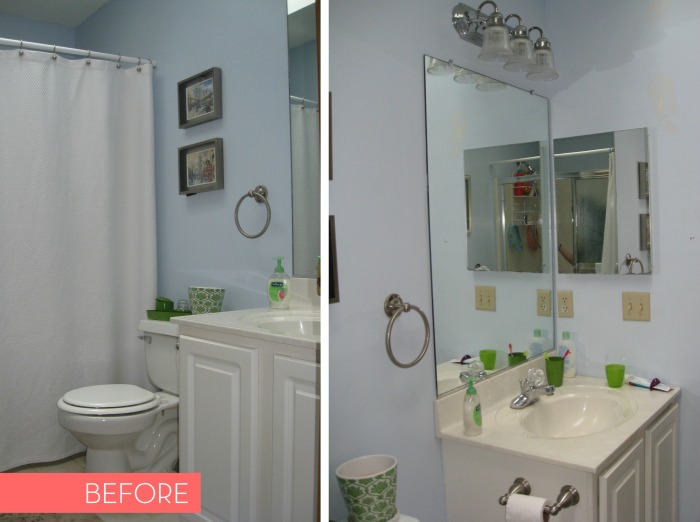
Before Bathroom

Within a year, it was painted & got a little refresh…
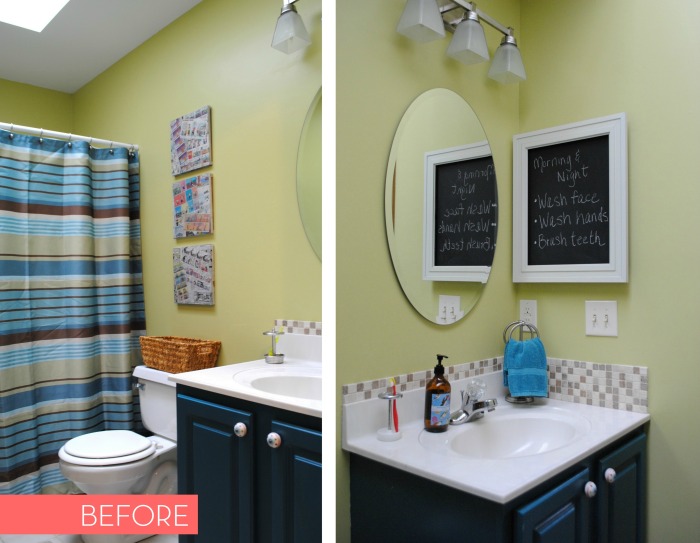
Before Bathroom

Since it’s heavily used by 2 young kiddos it got + gets quite the abuse on a daily basis.  After a while, the exposed walls (sheetrock) + the builder-grade melamine cabinet  just wasn’t fitting the bill anymore.

If you missed following along from the beginning, this was the mood board I created for the new space…
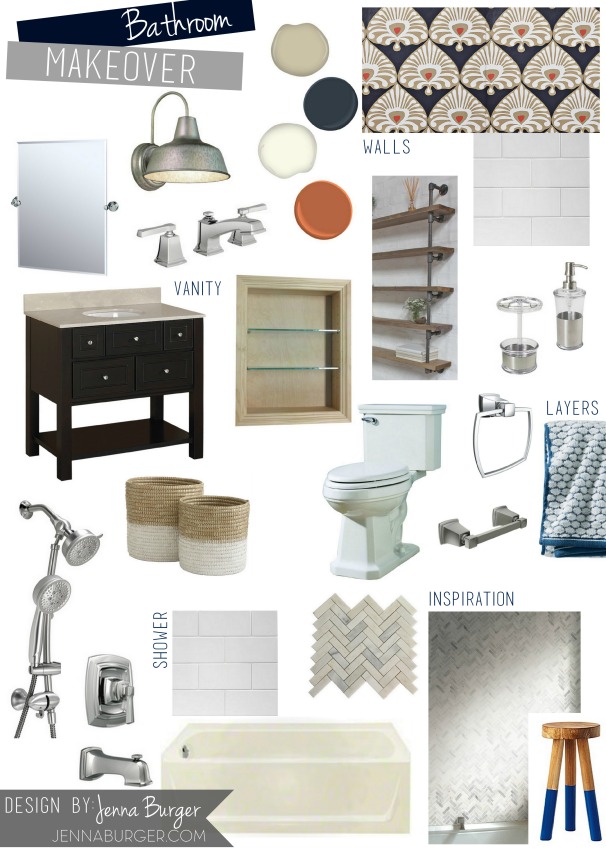
Bathroom Makeover Mood Board / Plan of Direction for space

A few changes had to be made along the way, but the main elements & more so, the main aesthetic / feel of the space, was absolutely achieved.

My goal was to create an updated, modern bathroom with a classic (live-a-long-time) background + lots of eye-popping, unexpected layers.  I am thrilled with the result not only because it’s super functional for the kids (with tile going half way up the walls), but it’s really a dynamic + fun space!

Come on in…
Bathroom Makover with 95% of the space being a DIY project - new tub + tile, vanity, wallpaper, and more!  Lots of details on this multi-post before & after.  Bathroom makeover by Jenna Burger Design www.jennaburger.com

Many have asked, “why did you choose to do the kids bath instead of the Master?”, and the reason for that is I see this bathroom much more throughout the day (plus it seemed more of a manageable DIY project because it’s a smaller space).

This bathroom is right at the top of the stairs and since I am up & down a lot on a daily basis, I wanted it to look & feel new, updated, and fresh.  I’ll get to the Master bath someday.  Even though it was featured in a national magazine, it does need some fixin’ up!

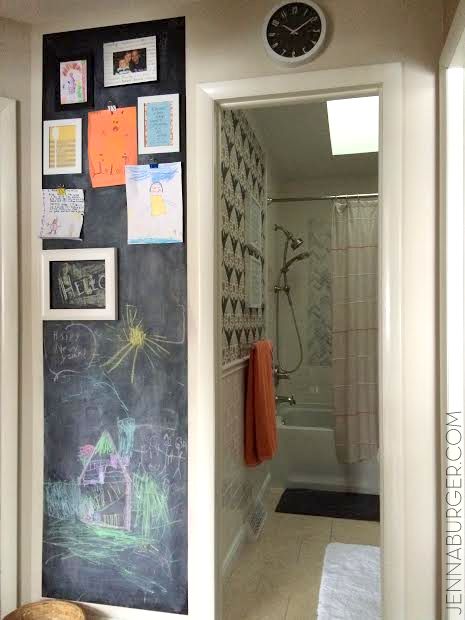
This is what I see each & every time I walk up the stairs…

snapshot from my phone The hallway entry into the remodeled bathroom space...
Let’s explore the new bath space more…
Bathroom Makover with 95% of the space being a DIY project - new tub + tile, vanity, wallpaper, and more!  Lots of details on this multi-post before & after.  Bathroom makeover by Jenna Burger Design www.jennaburger.com

The space is a typical standard 5′ x 8′ bathroom with a sink, toilet, tub layout on one wall & then a straight wall on the other side.

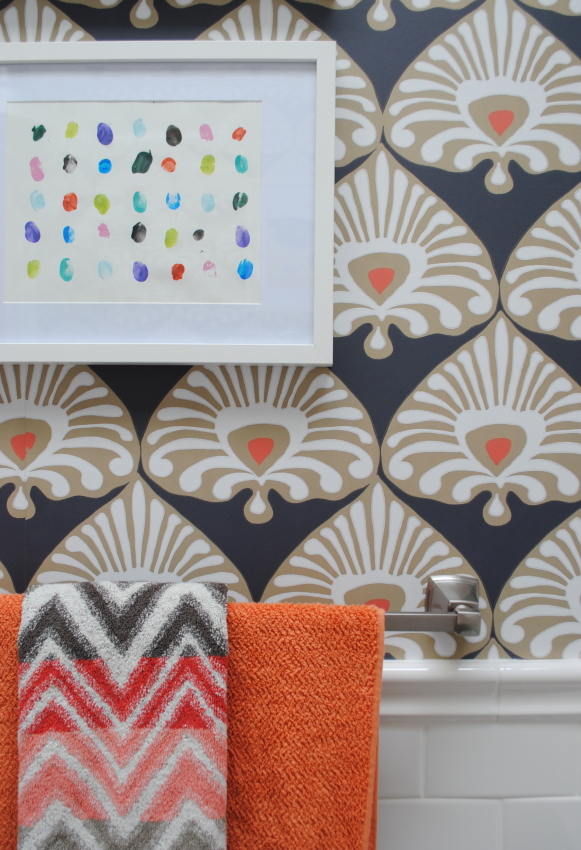
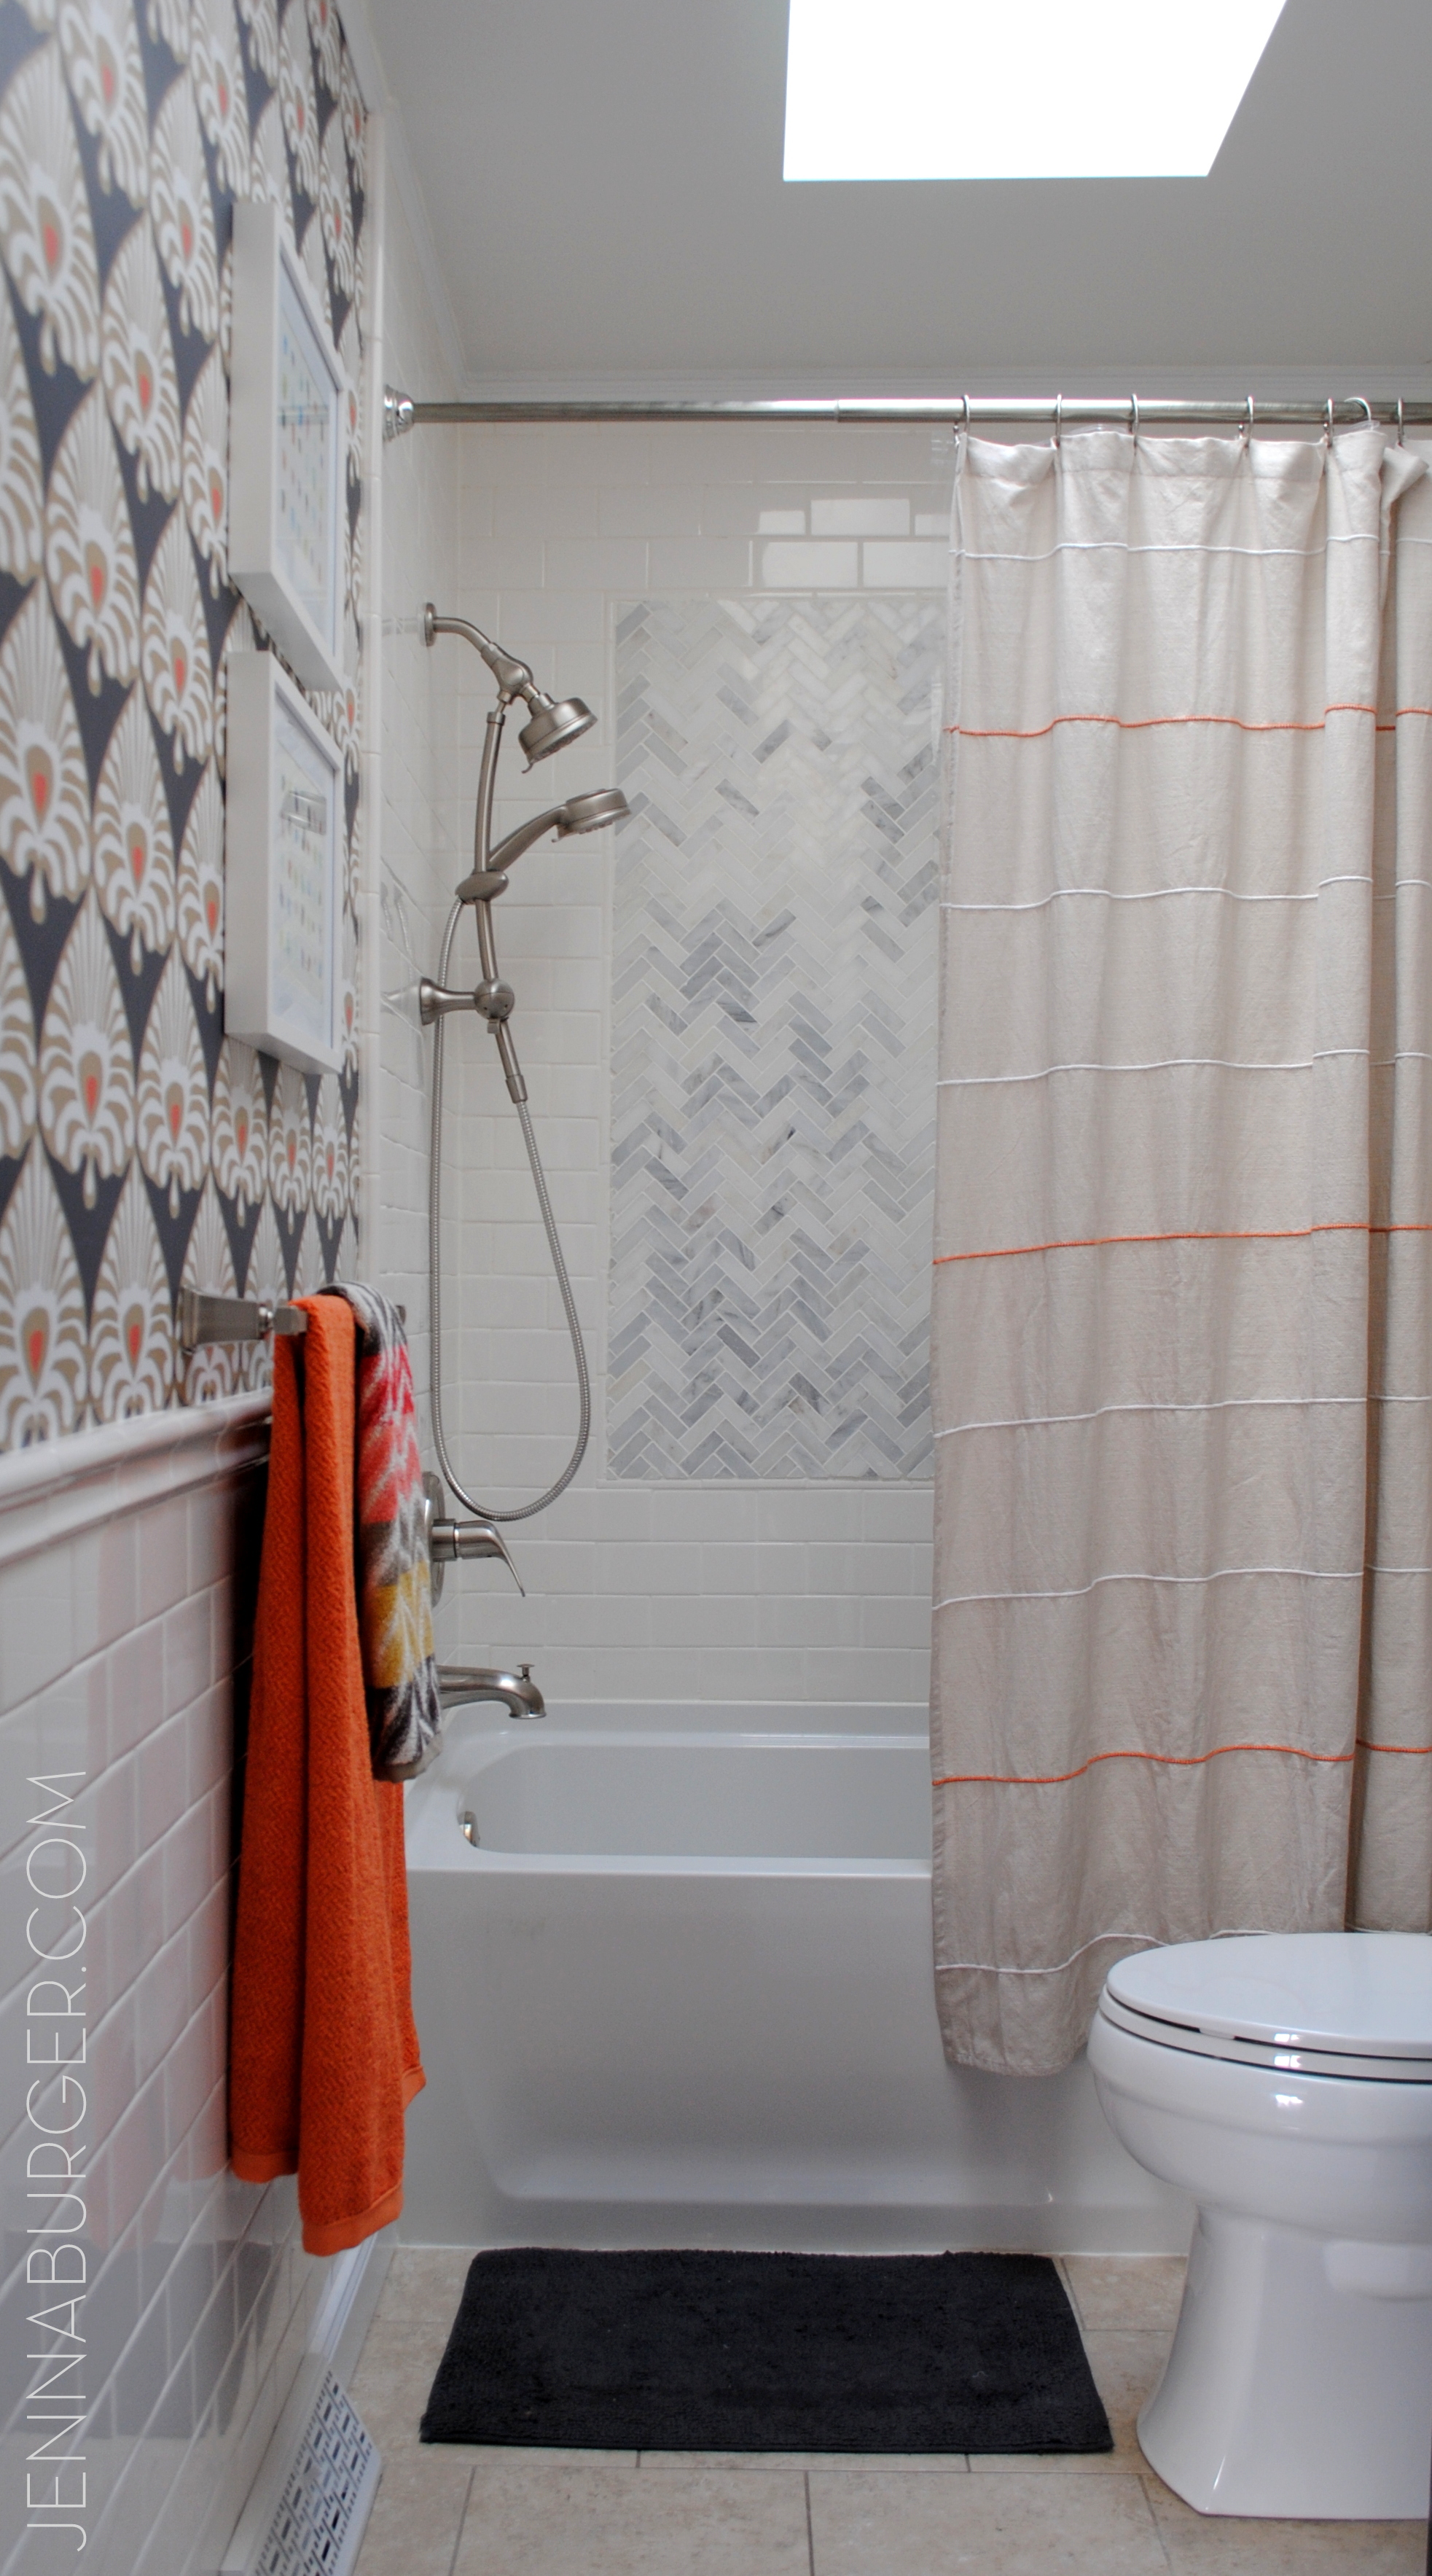
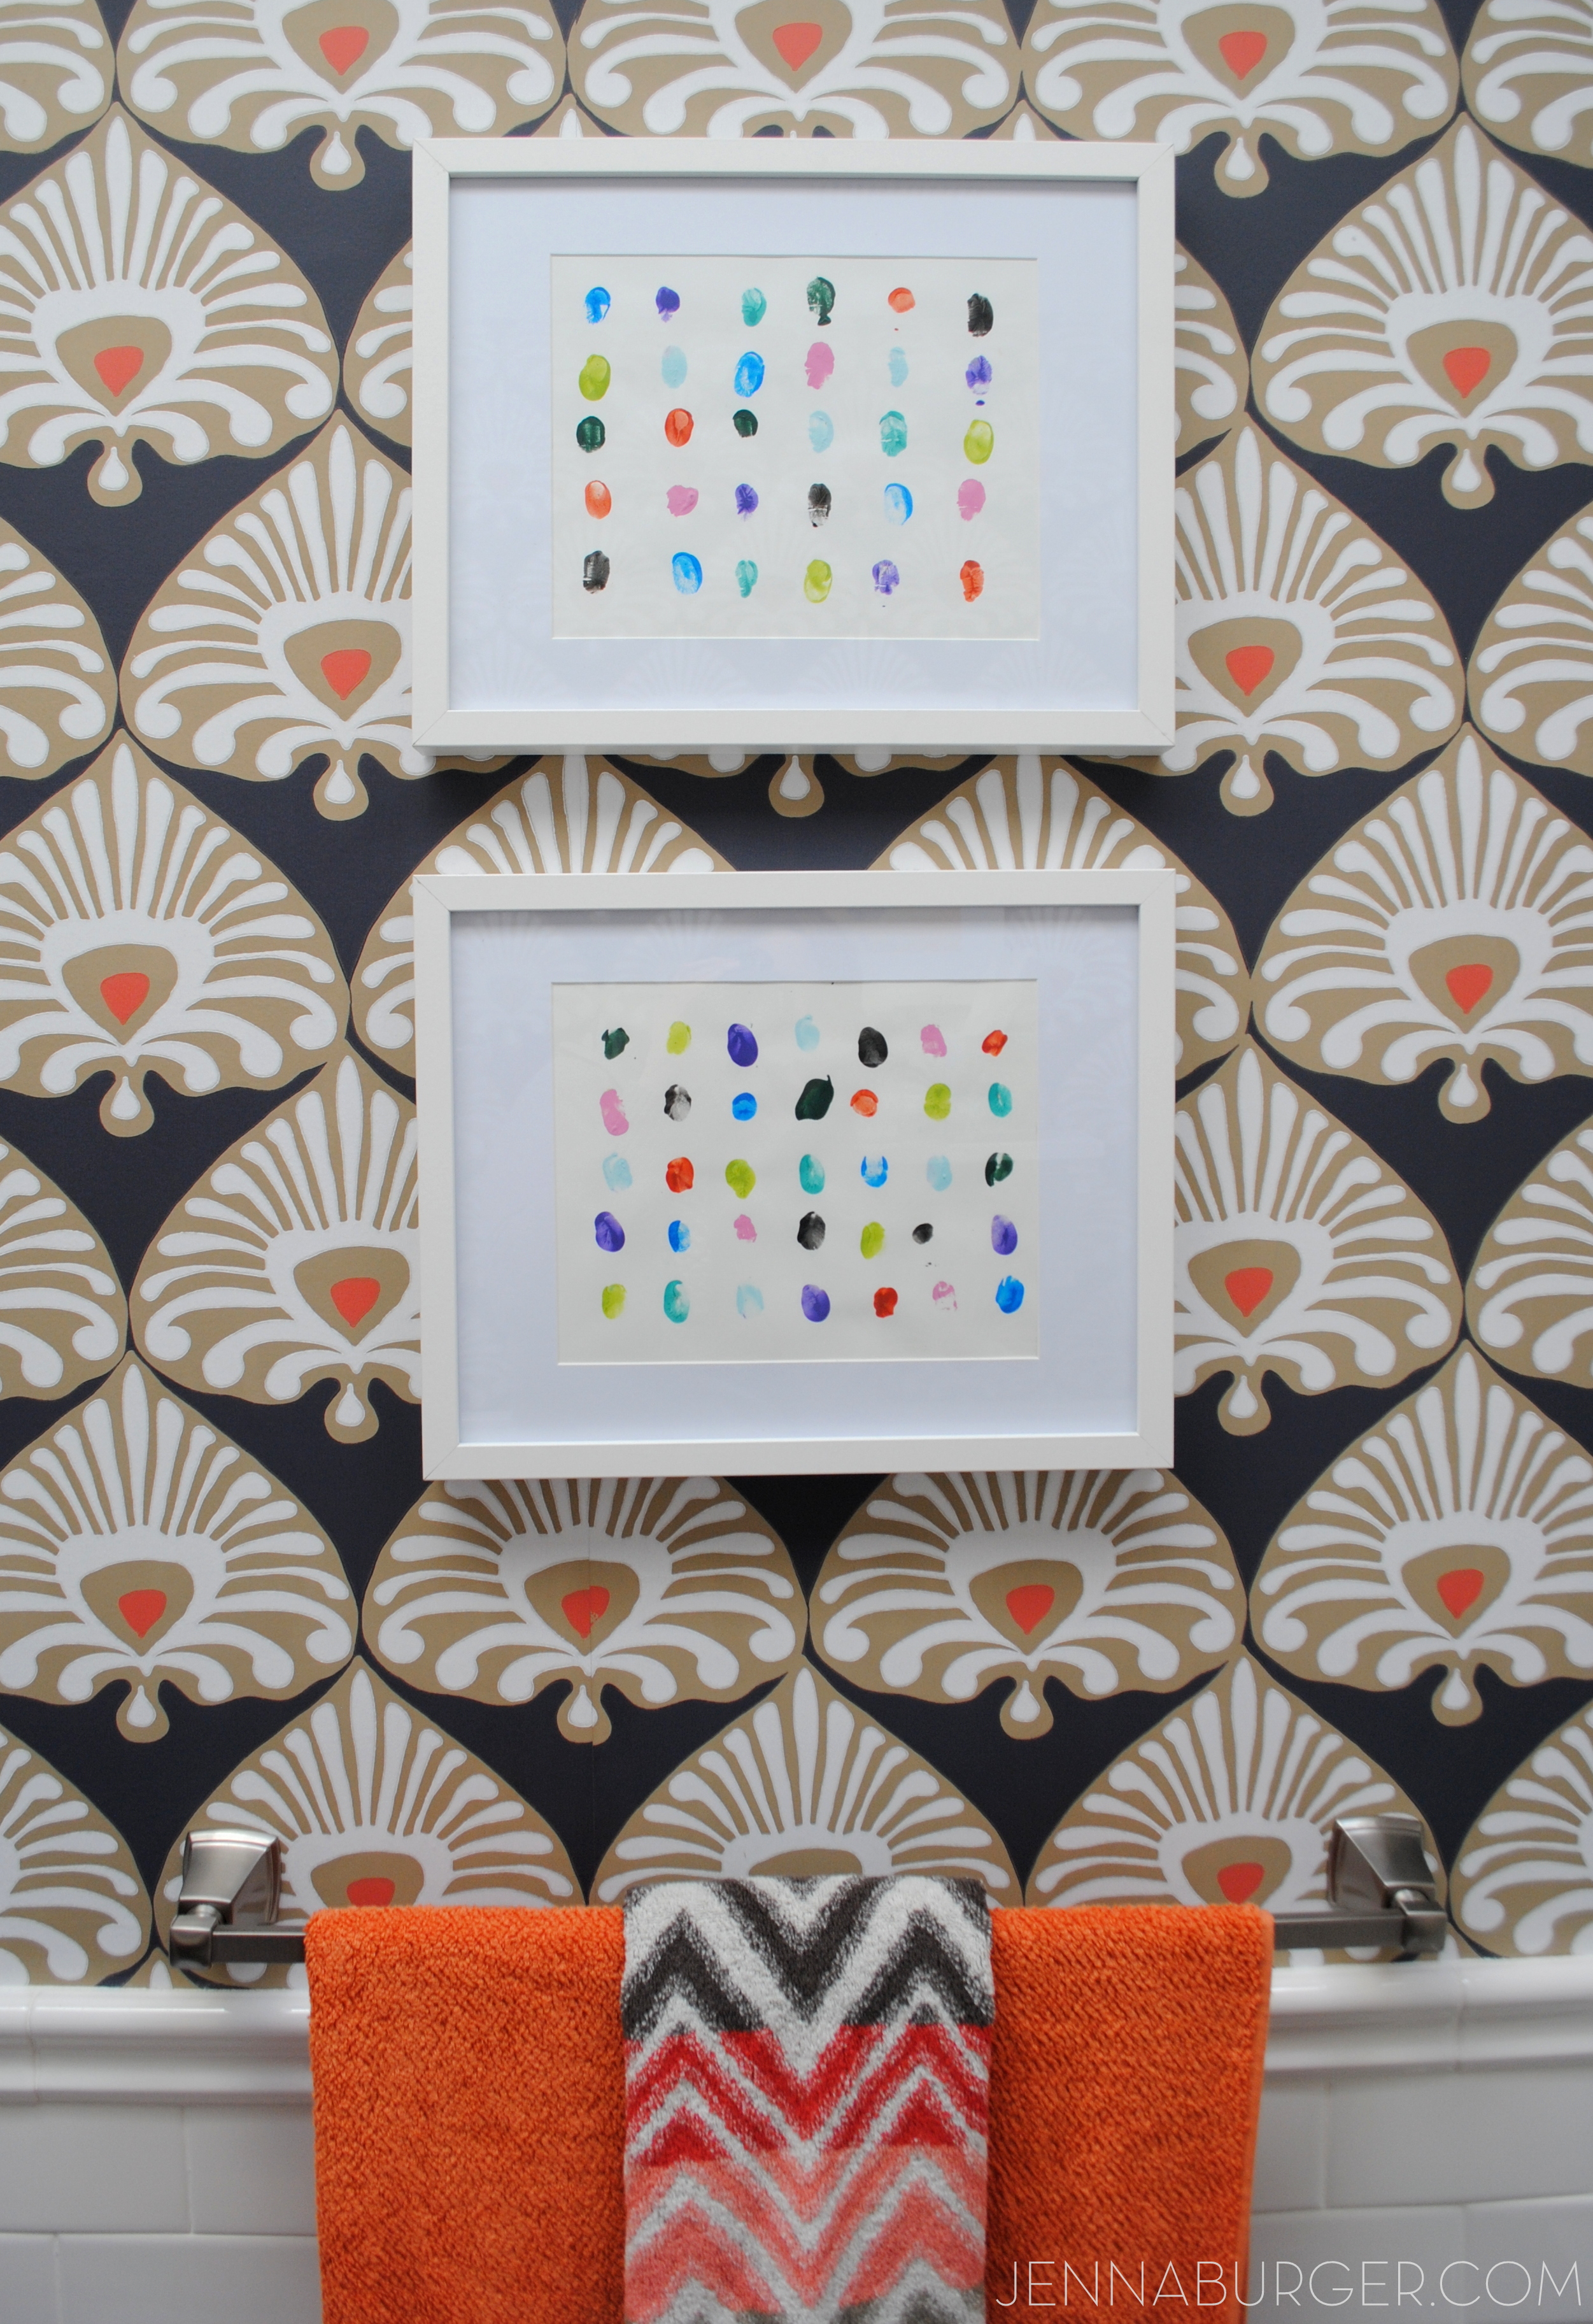
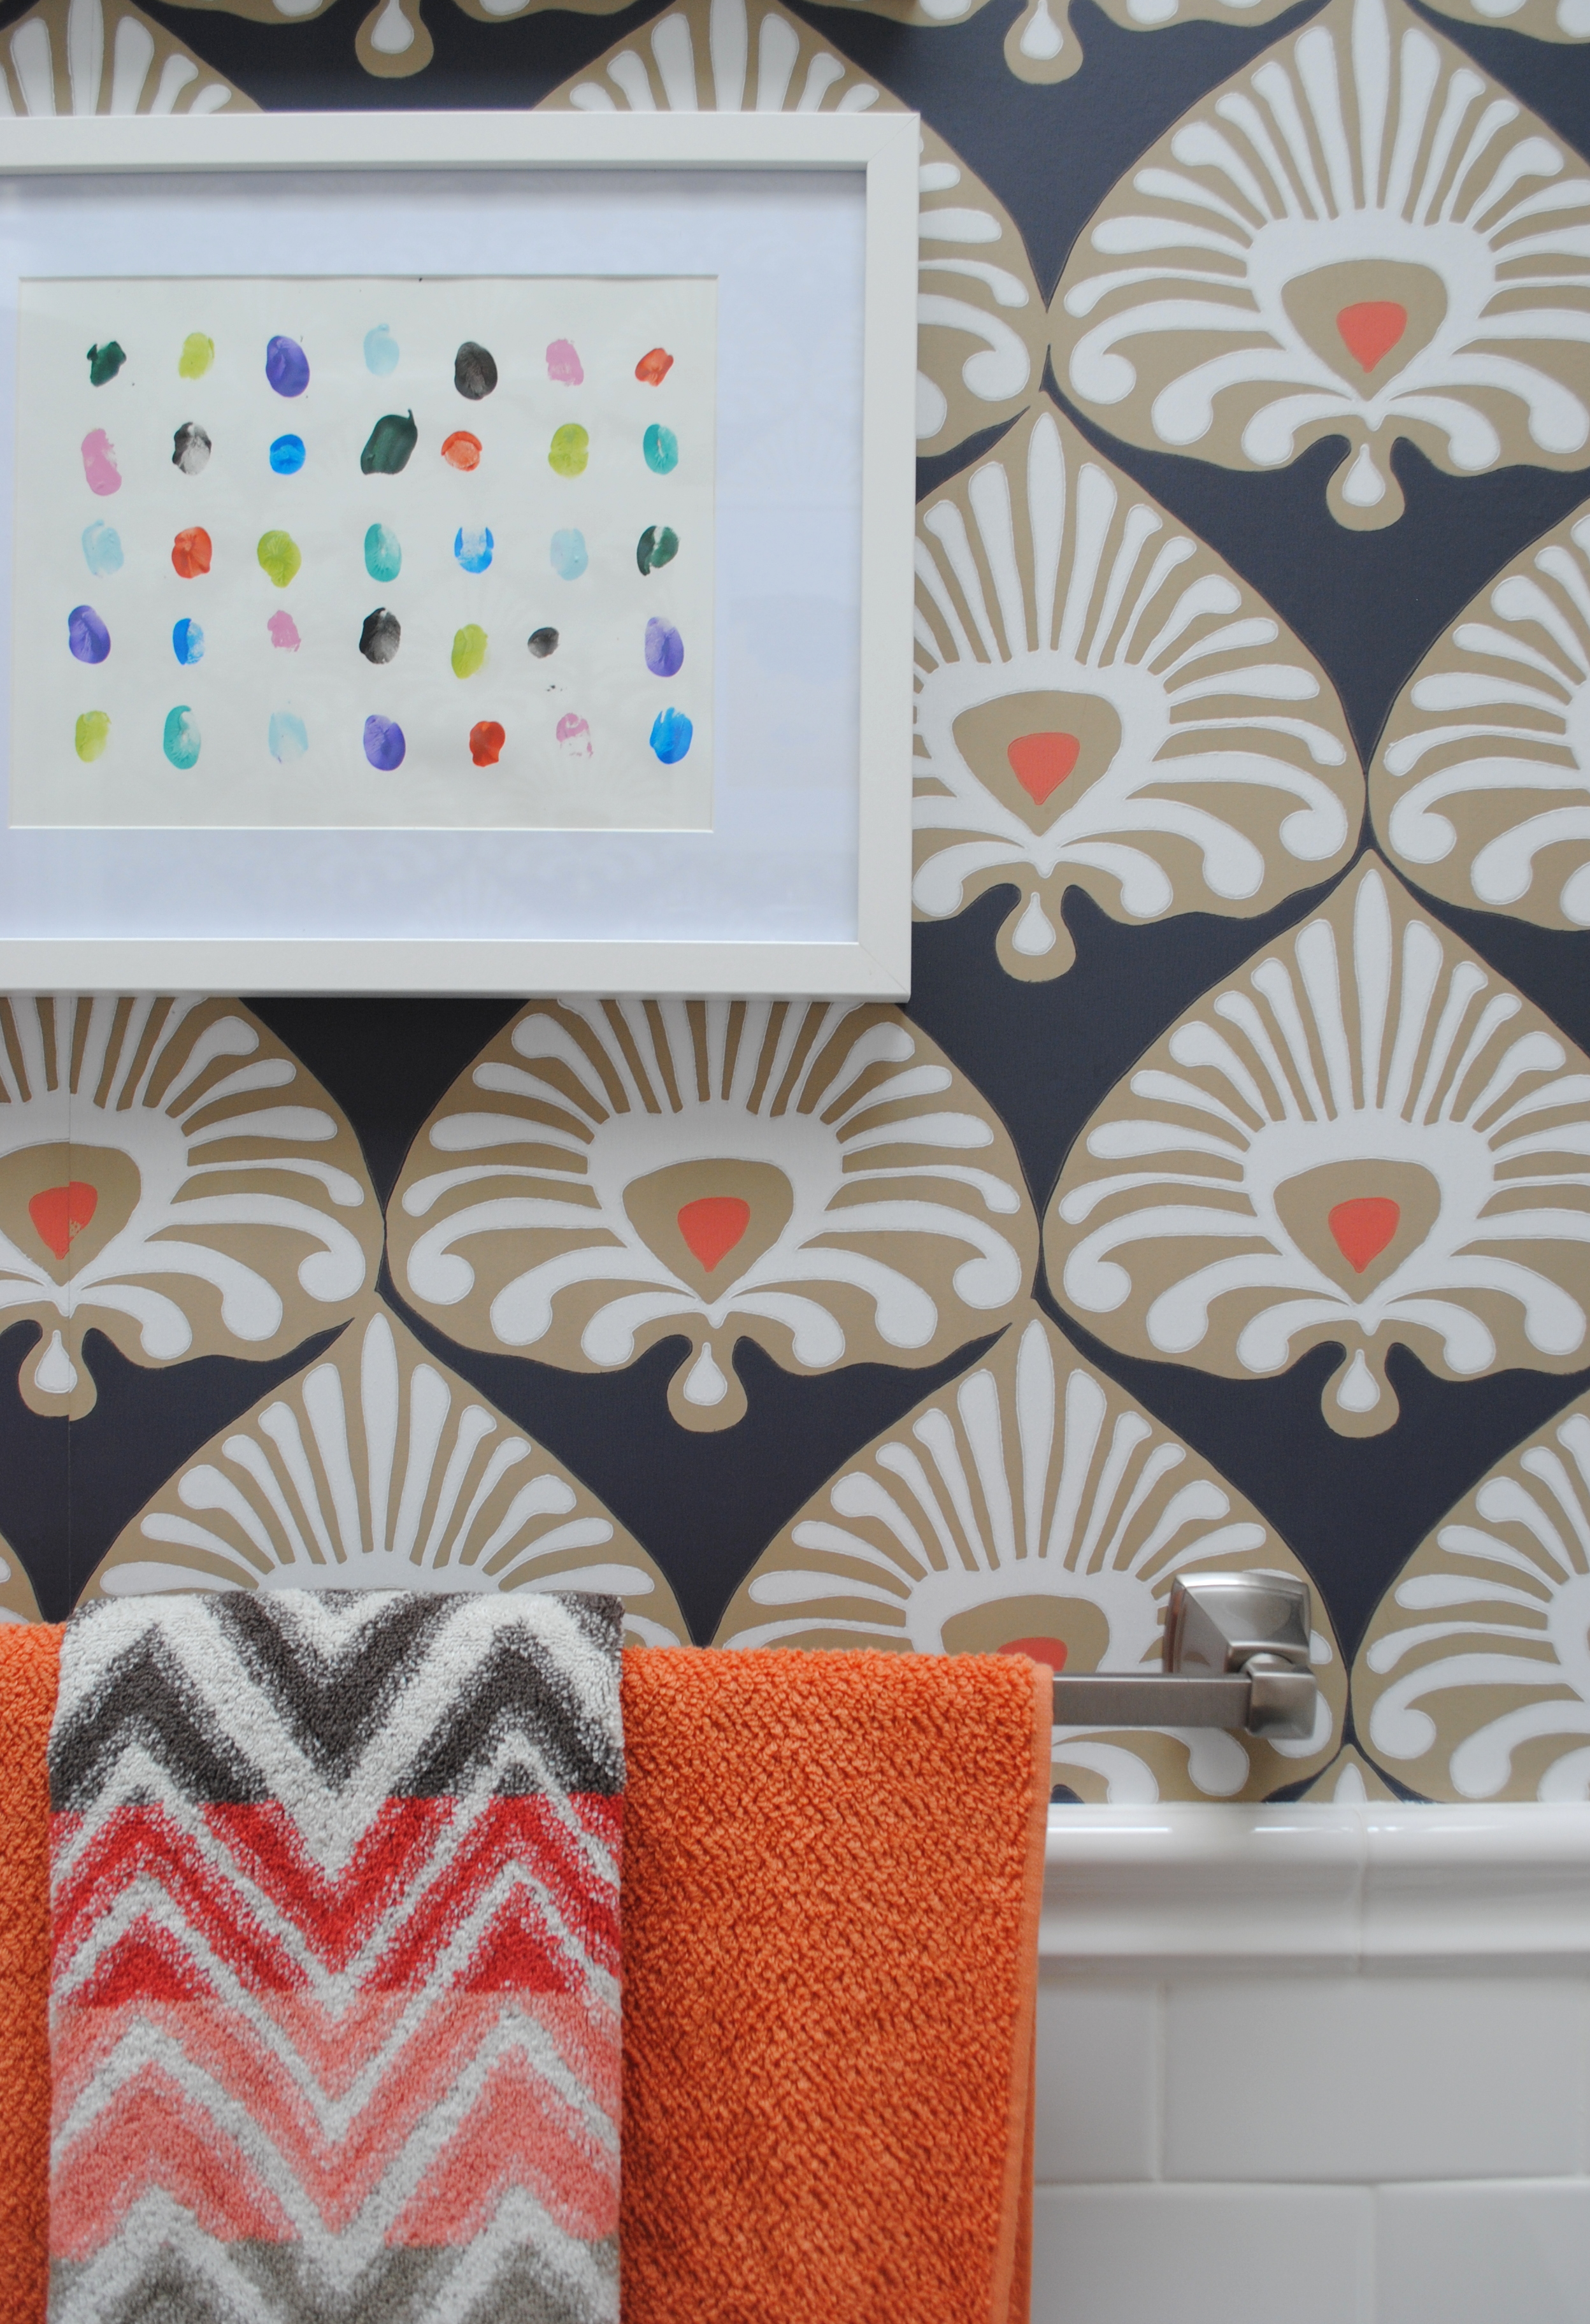
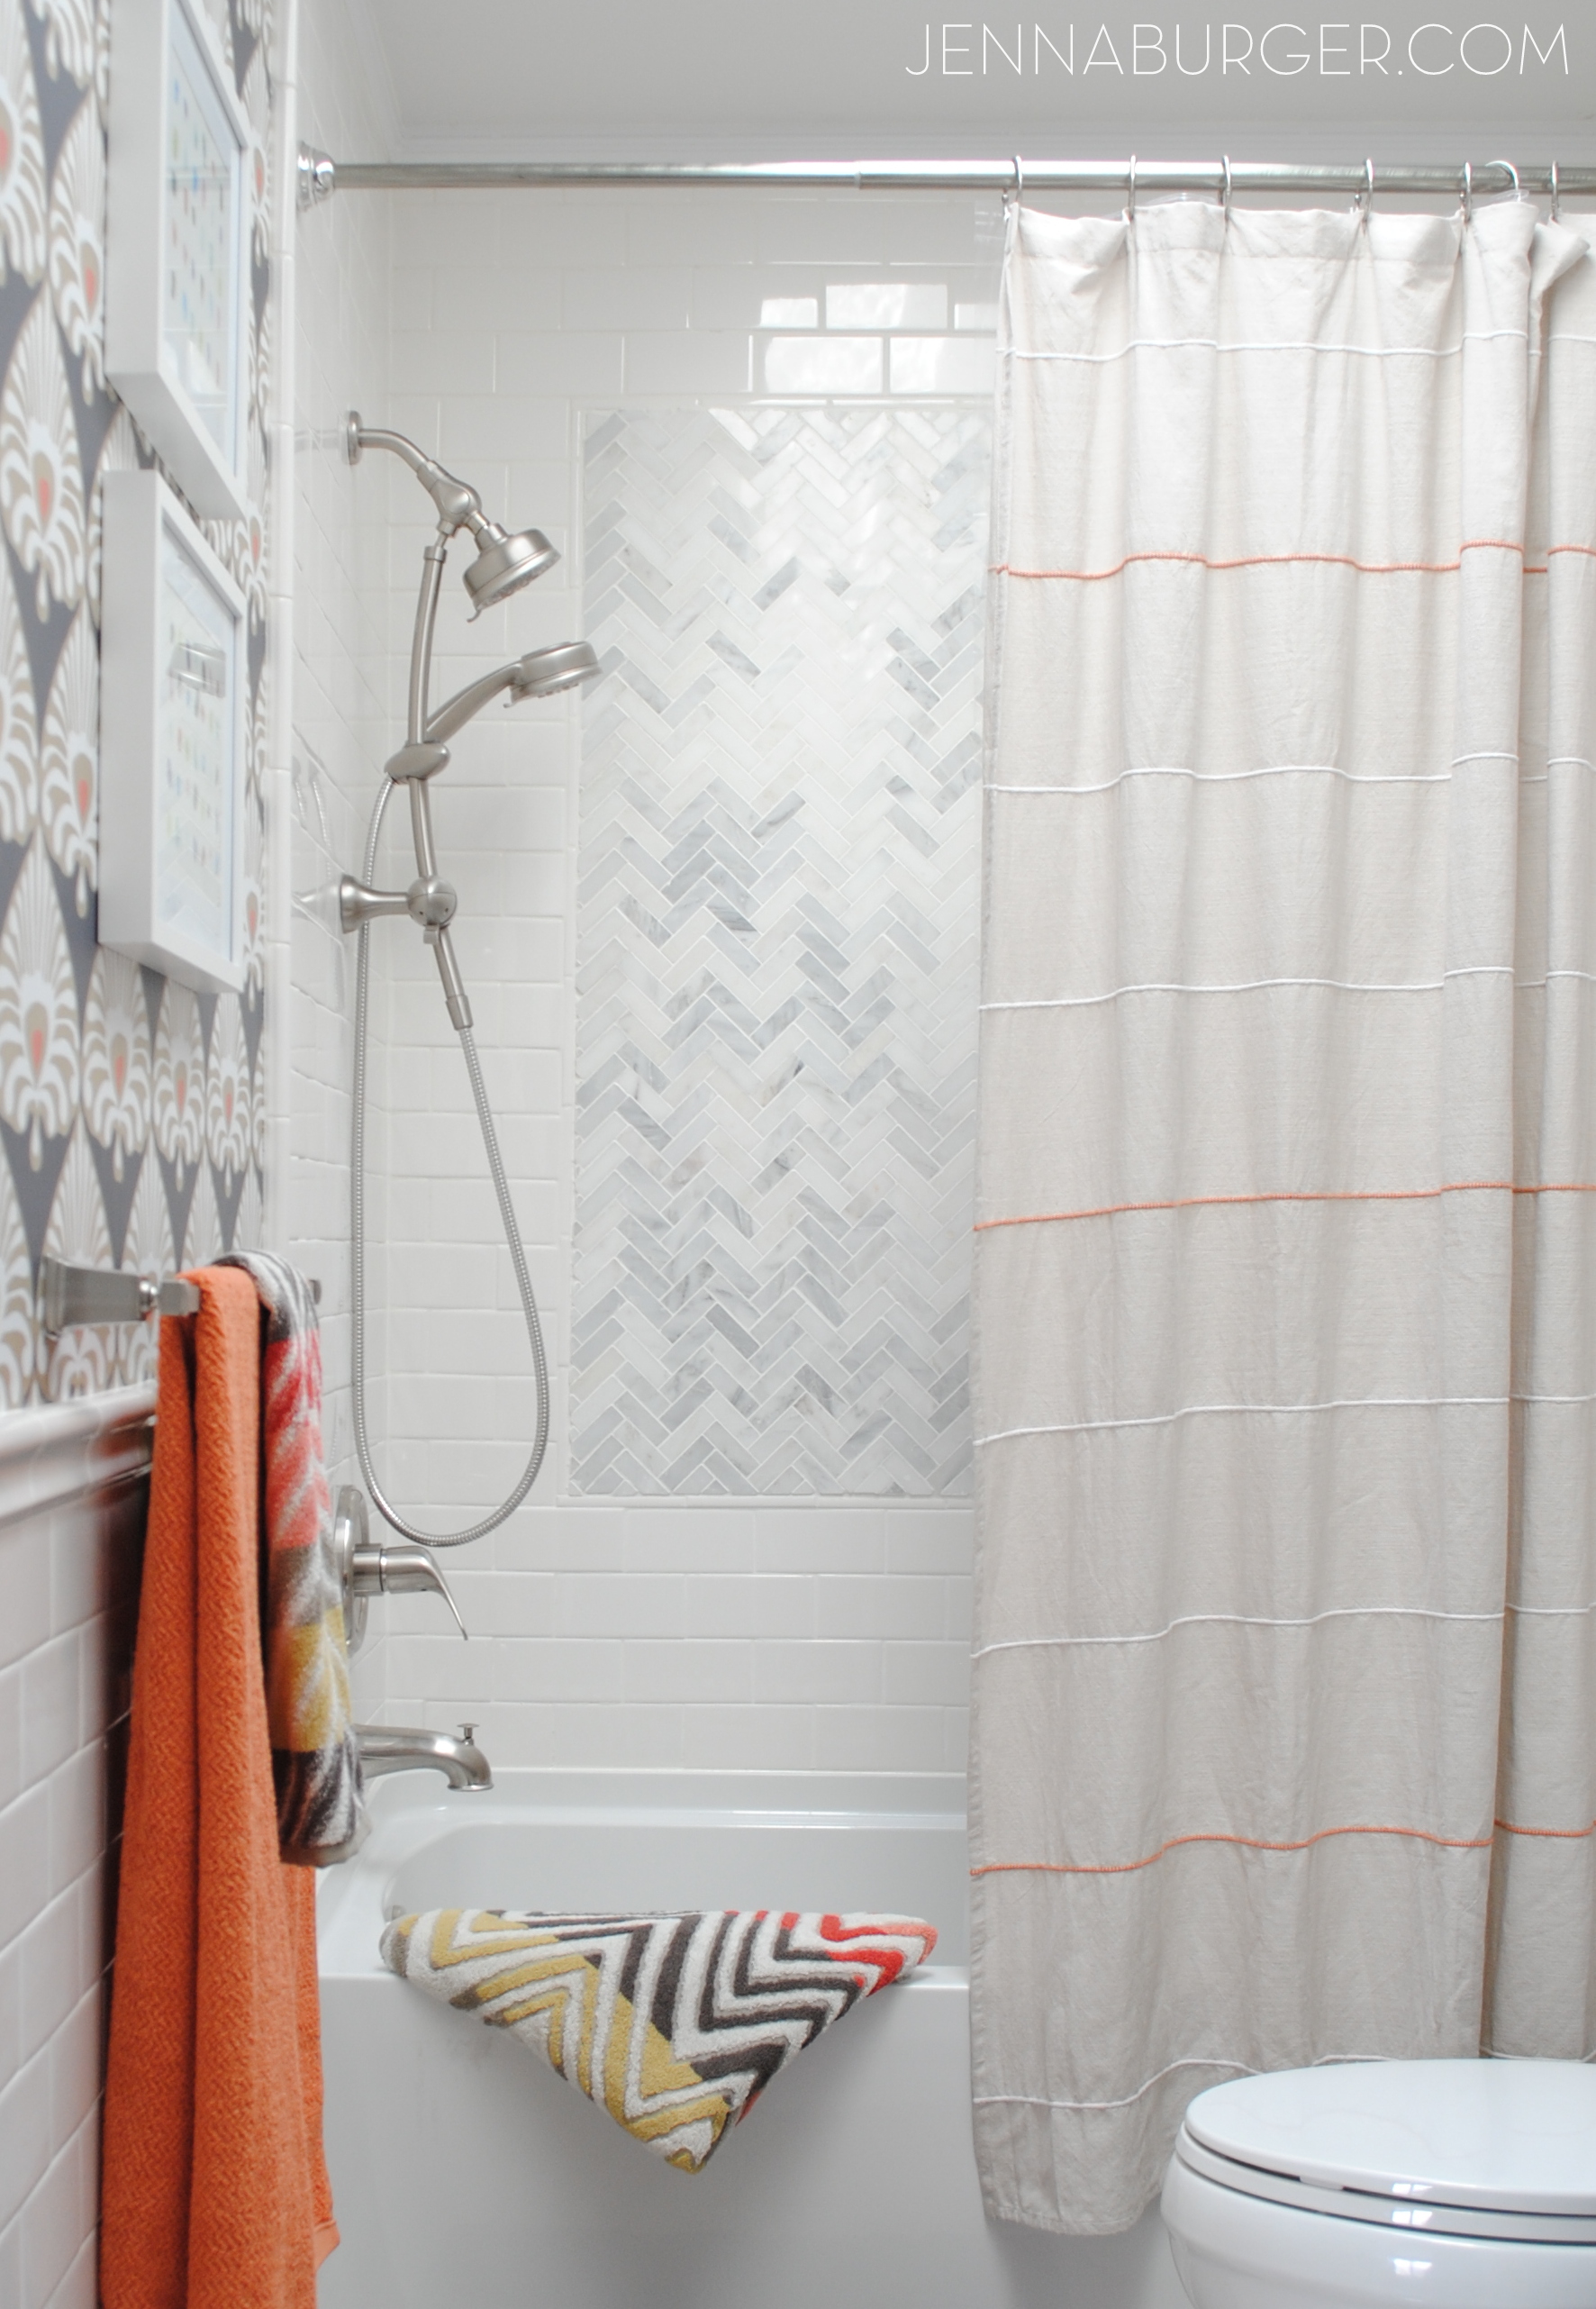
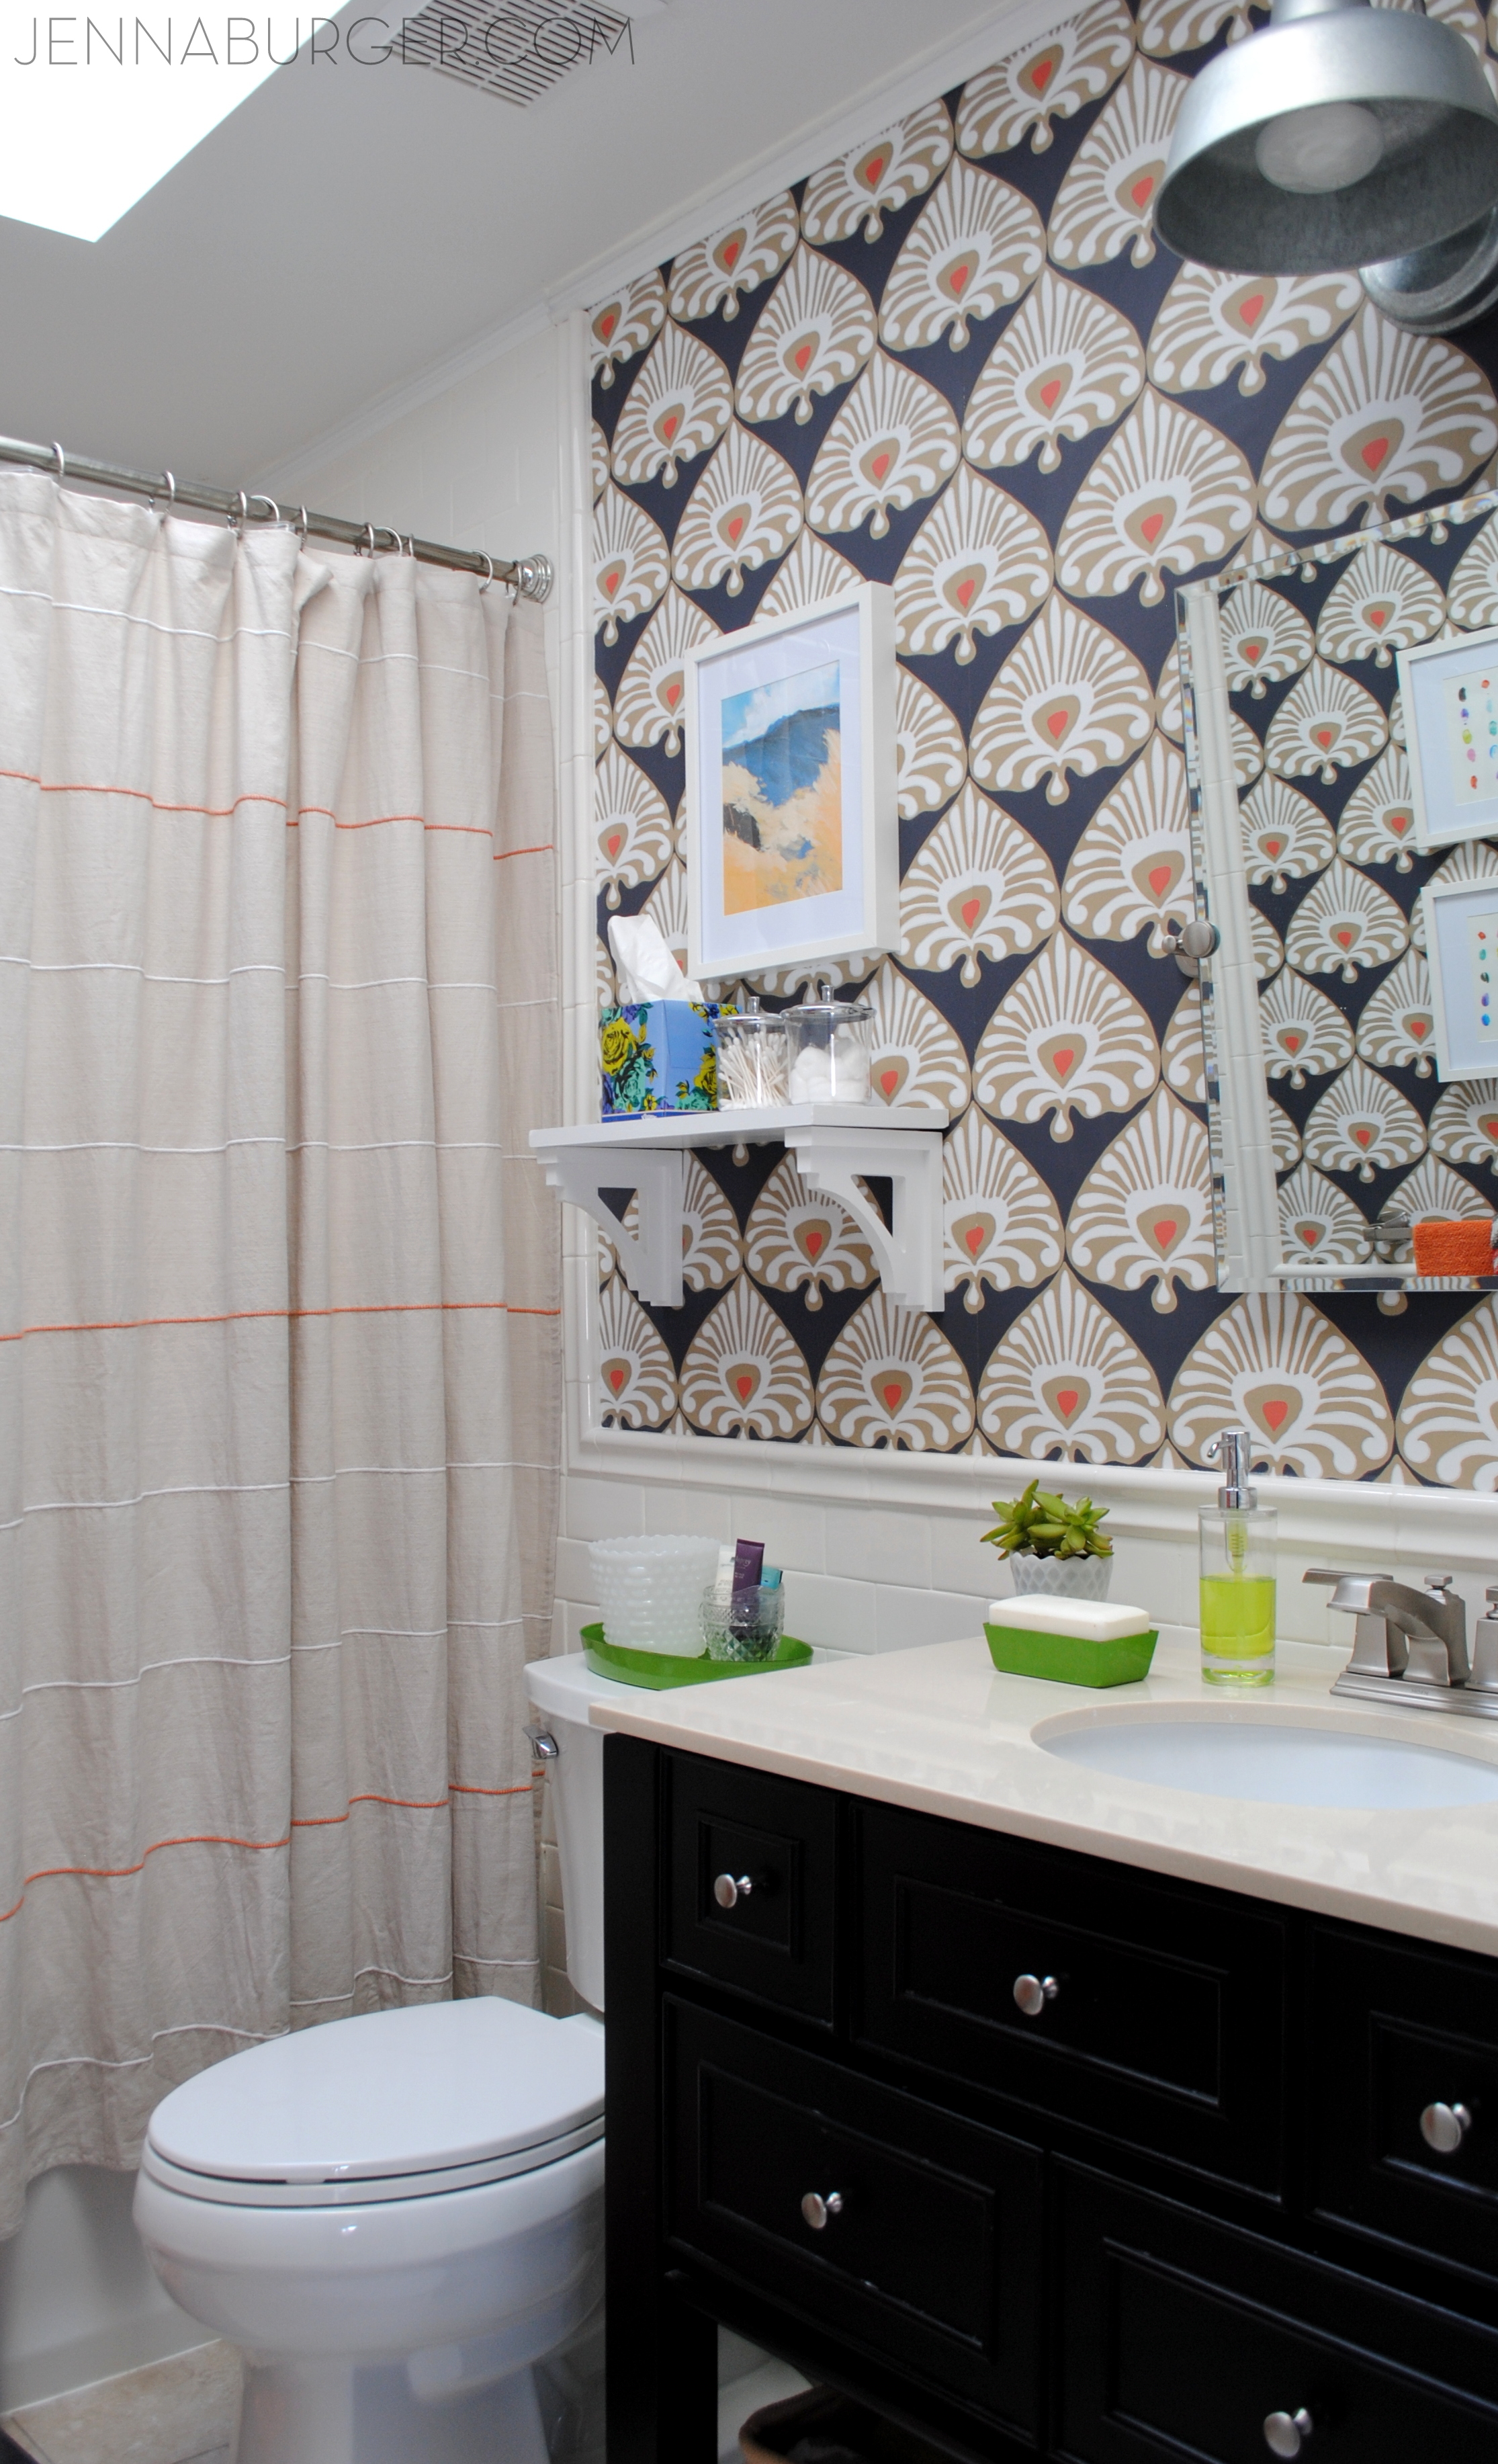
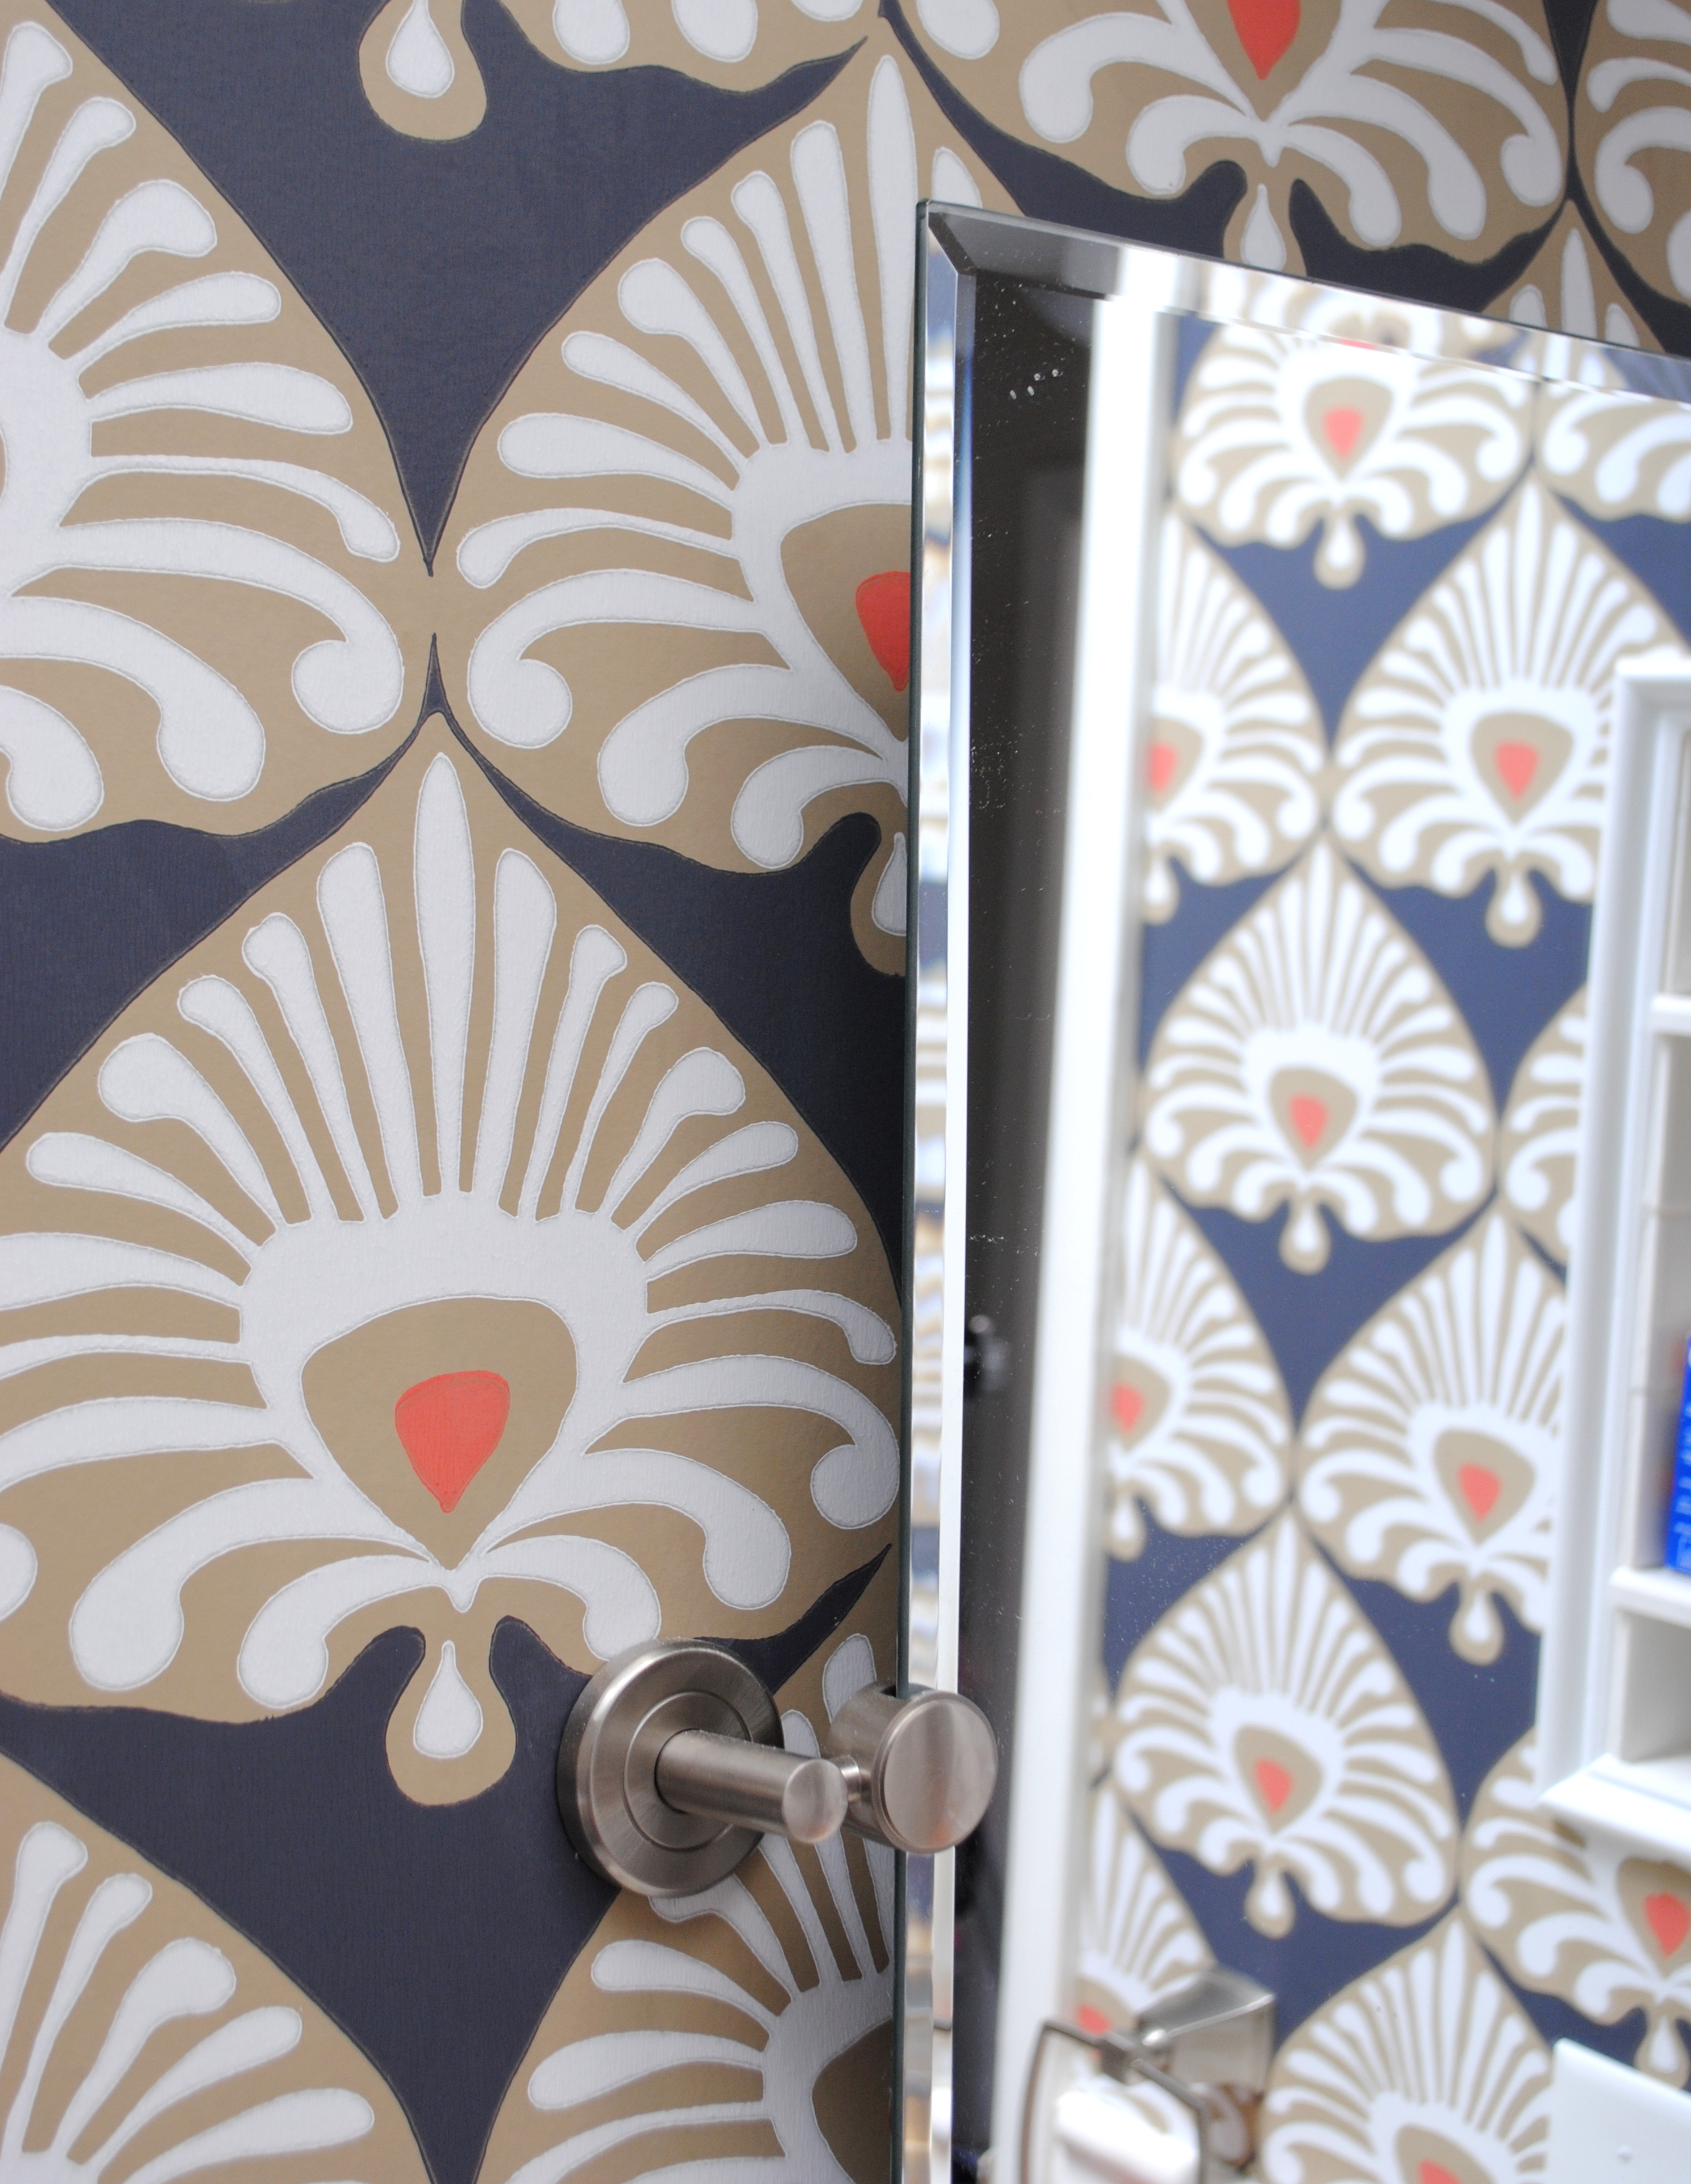
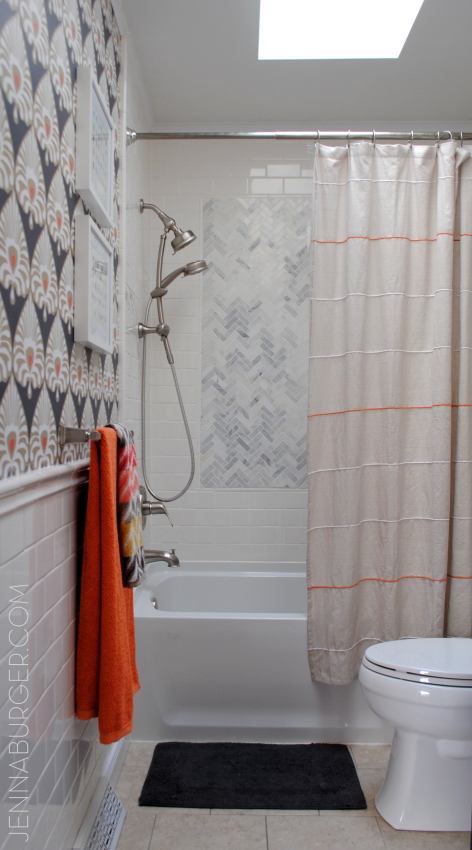
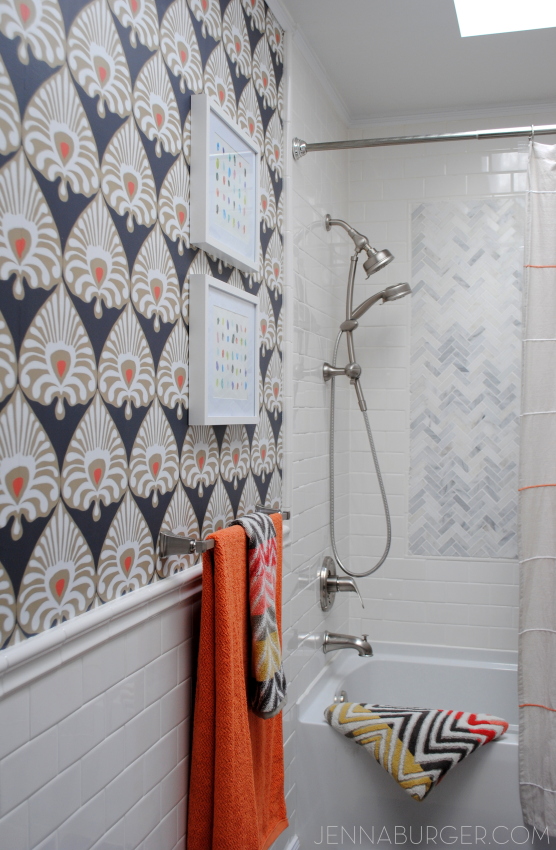
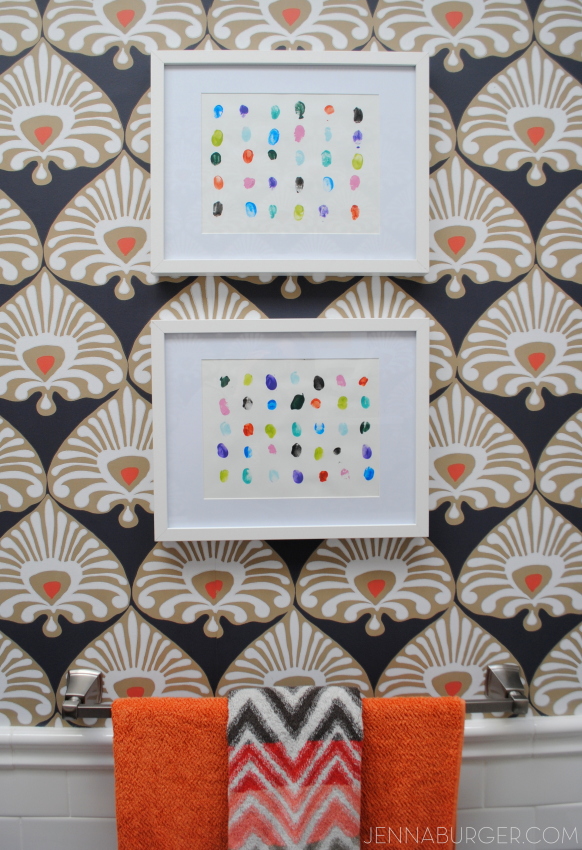
I installed 3×6 subway tile from the tub deck to the ceiling in the tub space and continued the tile about 3′ up the wall in the main part of the bathroom.  Above the tile, I installed a dynamic wallpaper in a beautiful damask pattern with colors of navy, beige, and orange.  It really is the art of the space so I didn’t add much more to the walls.

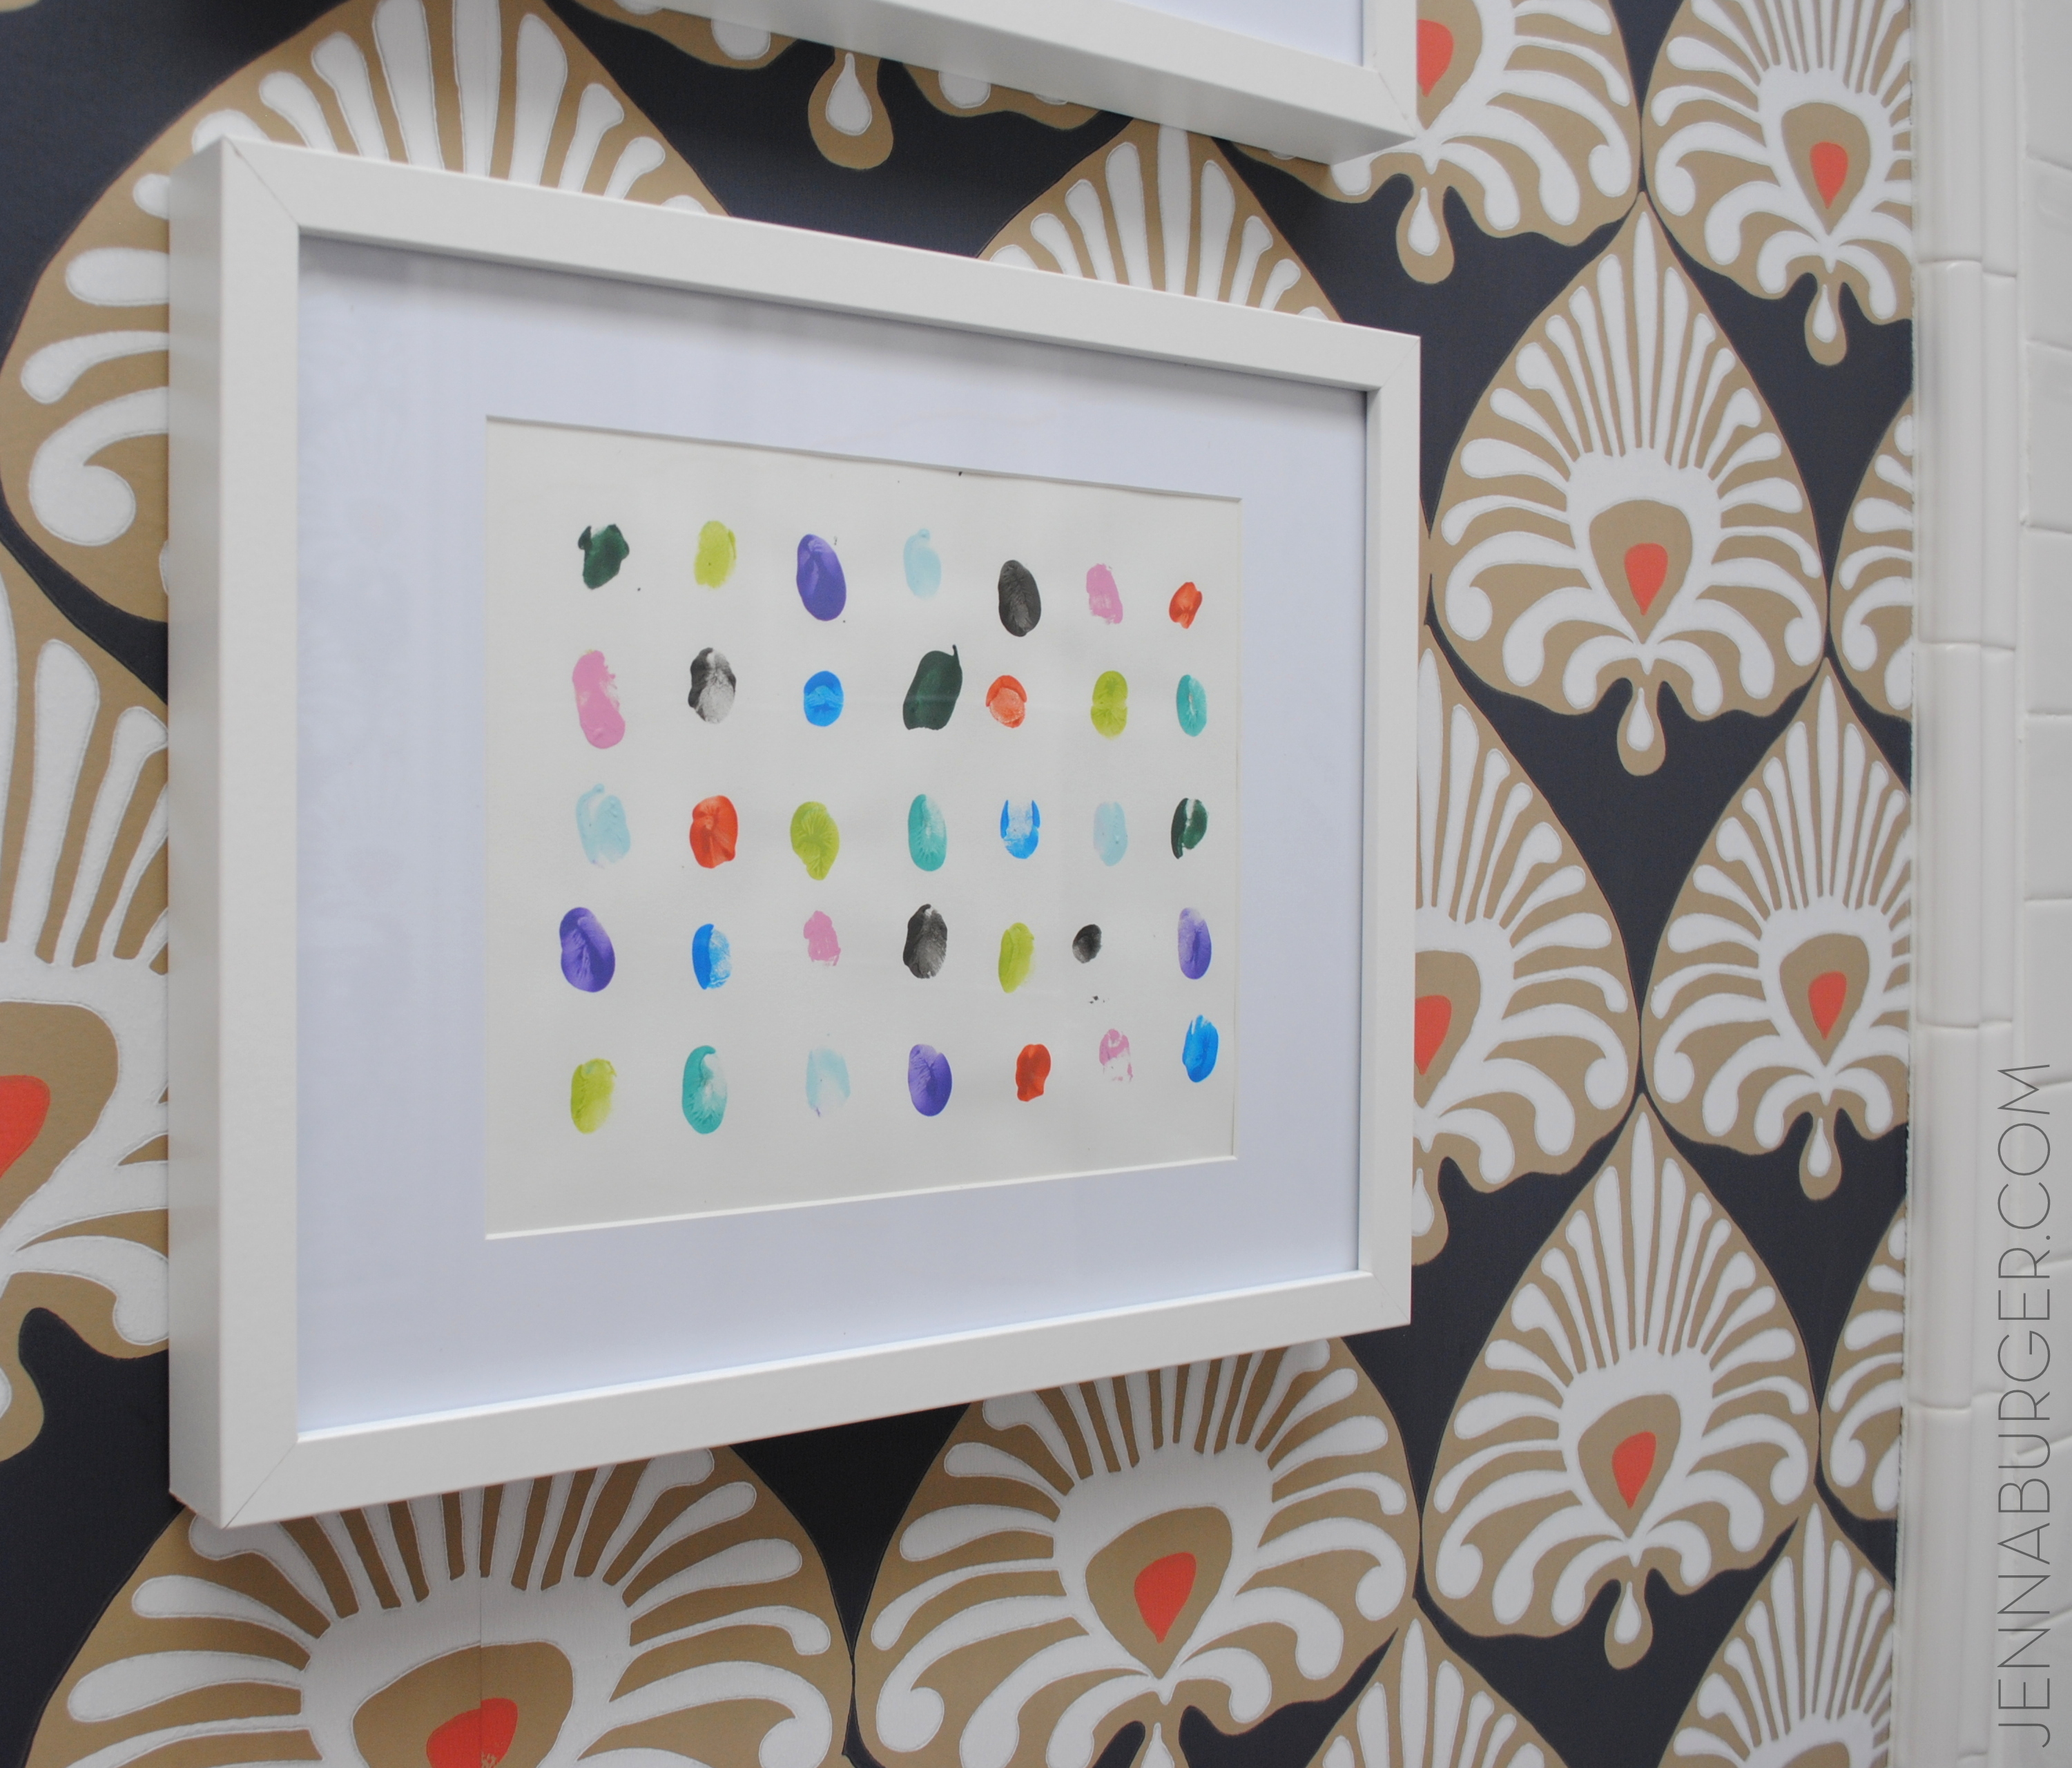
On the left side, above the towel bar, I hung two framed custom art pieces (created by my 2 older kiddos) which I will be sharing more details on soon.  The frames + matting are white & simple, the perfect contrast to the bold background.
Bathroom Makover with 95% of the space being a DIY project - new tub + tile, vanity, wallpaper, and more!  Lots of details on this multi-post before & after.  Bathroom makeover by Jenna Burger Design www.jennaburger.com

tutorial for >>> how to install wallpaper
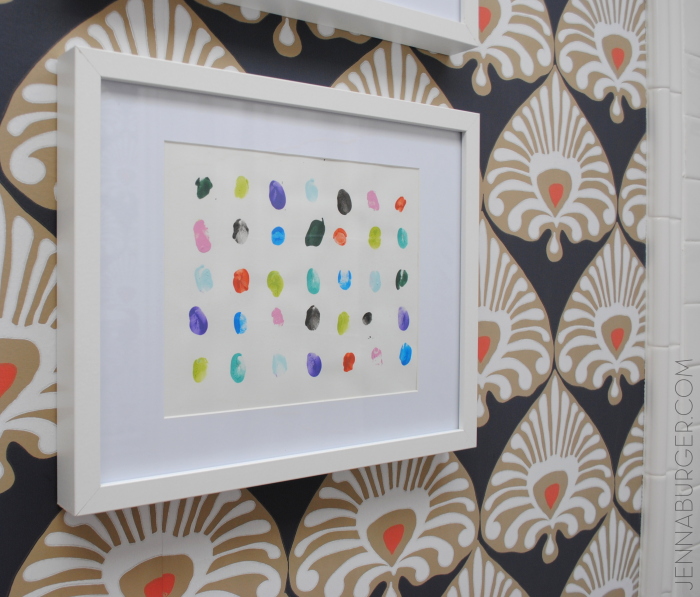
Bathroom Makover with 95% of the space being a DIY project - new tub + tile, vanity, wallpaper, and more!  Lots of details on this multi-post before & after.  Bathroom makeover by Jenna Burger Design www.jennaburger.com

Bathroom Makover with 95% of the space being a DIY project - new tub + tile, vanity, wallpaper, and more!  Lots of details on this multi-post before & after.  Bathroom makeover by Jenna Burger Design www.jennaburger.com

As you continue around the revamped bathroom,  you round the corner to the tub space.  This area is drastically different with new floor to ceiling tile (all installed by me – thank goodness my hands aren’t cracked anymore).

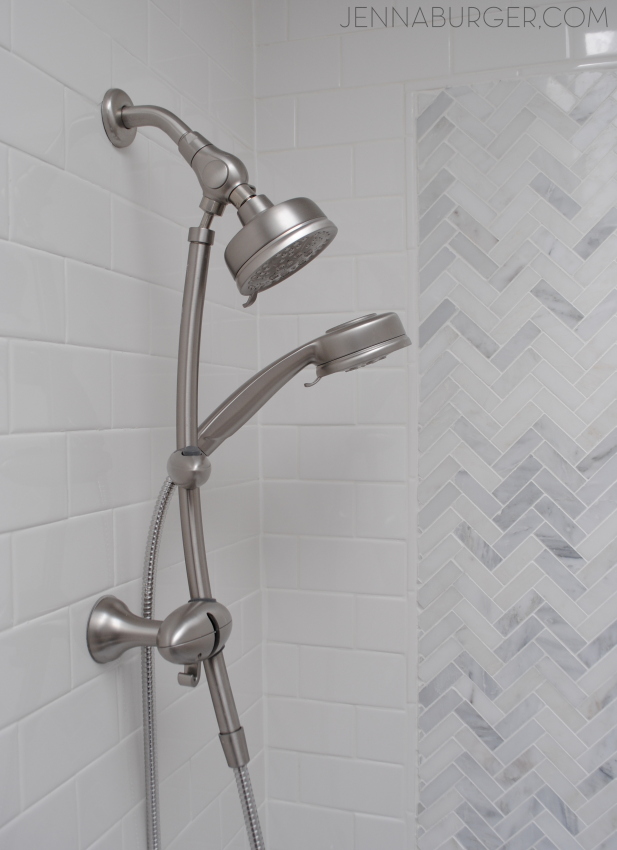
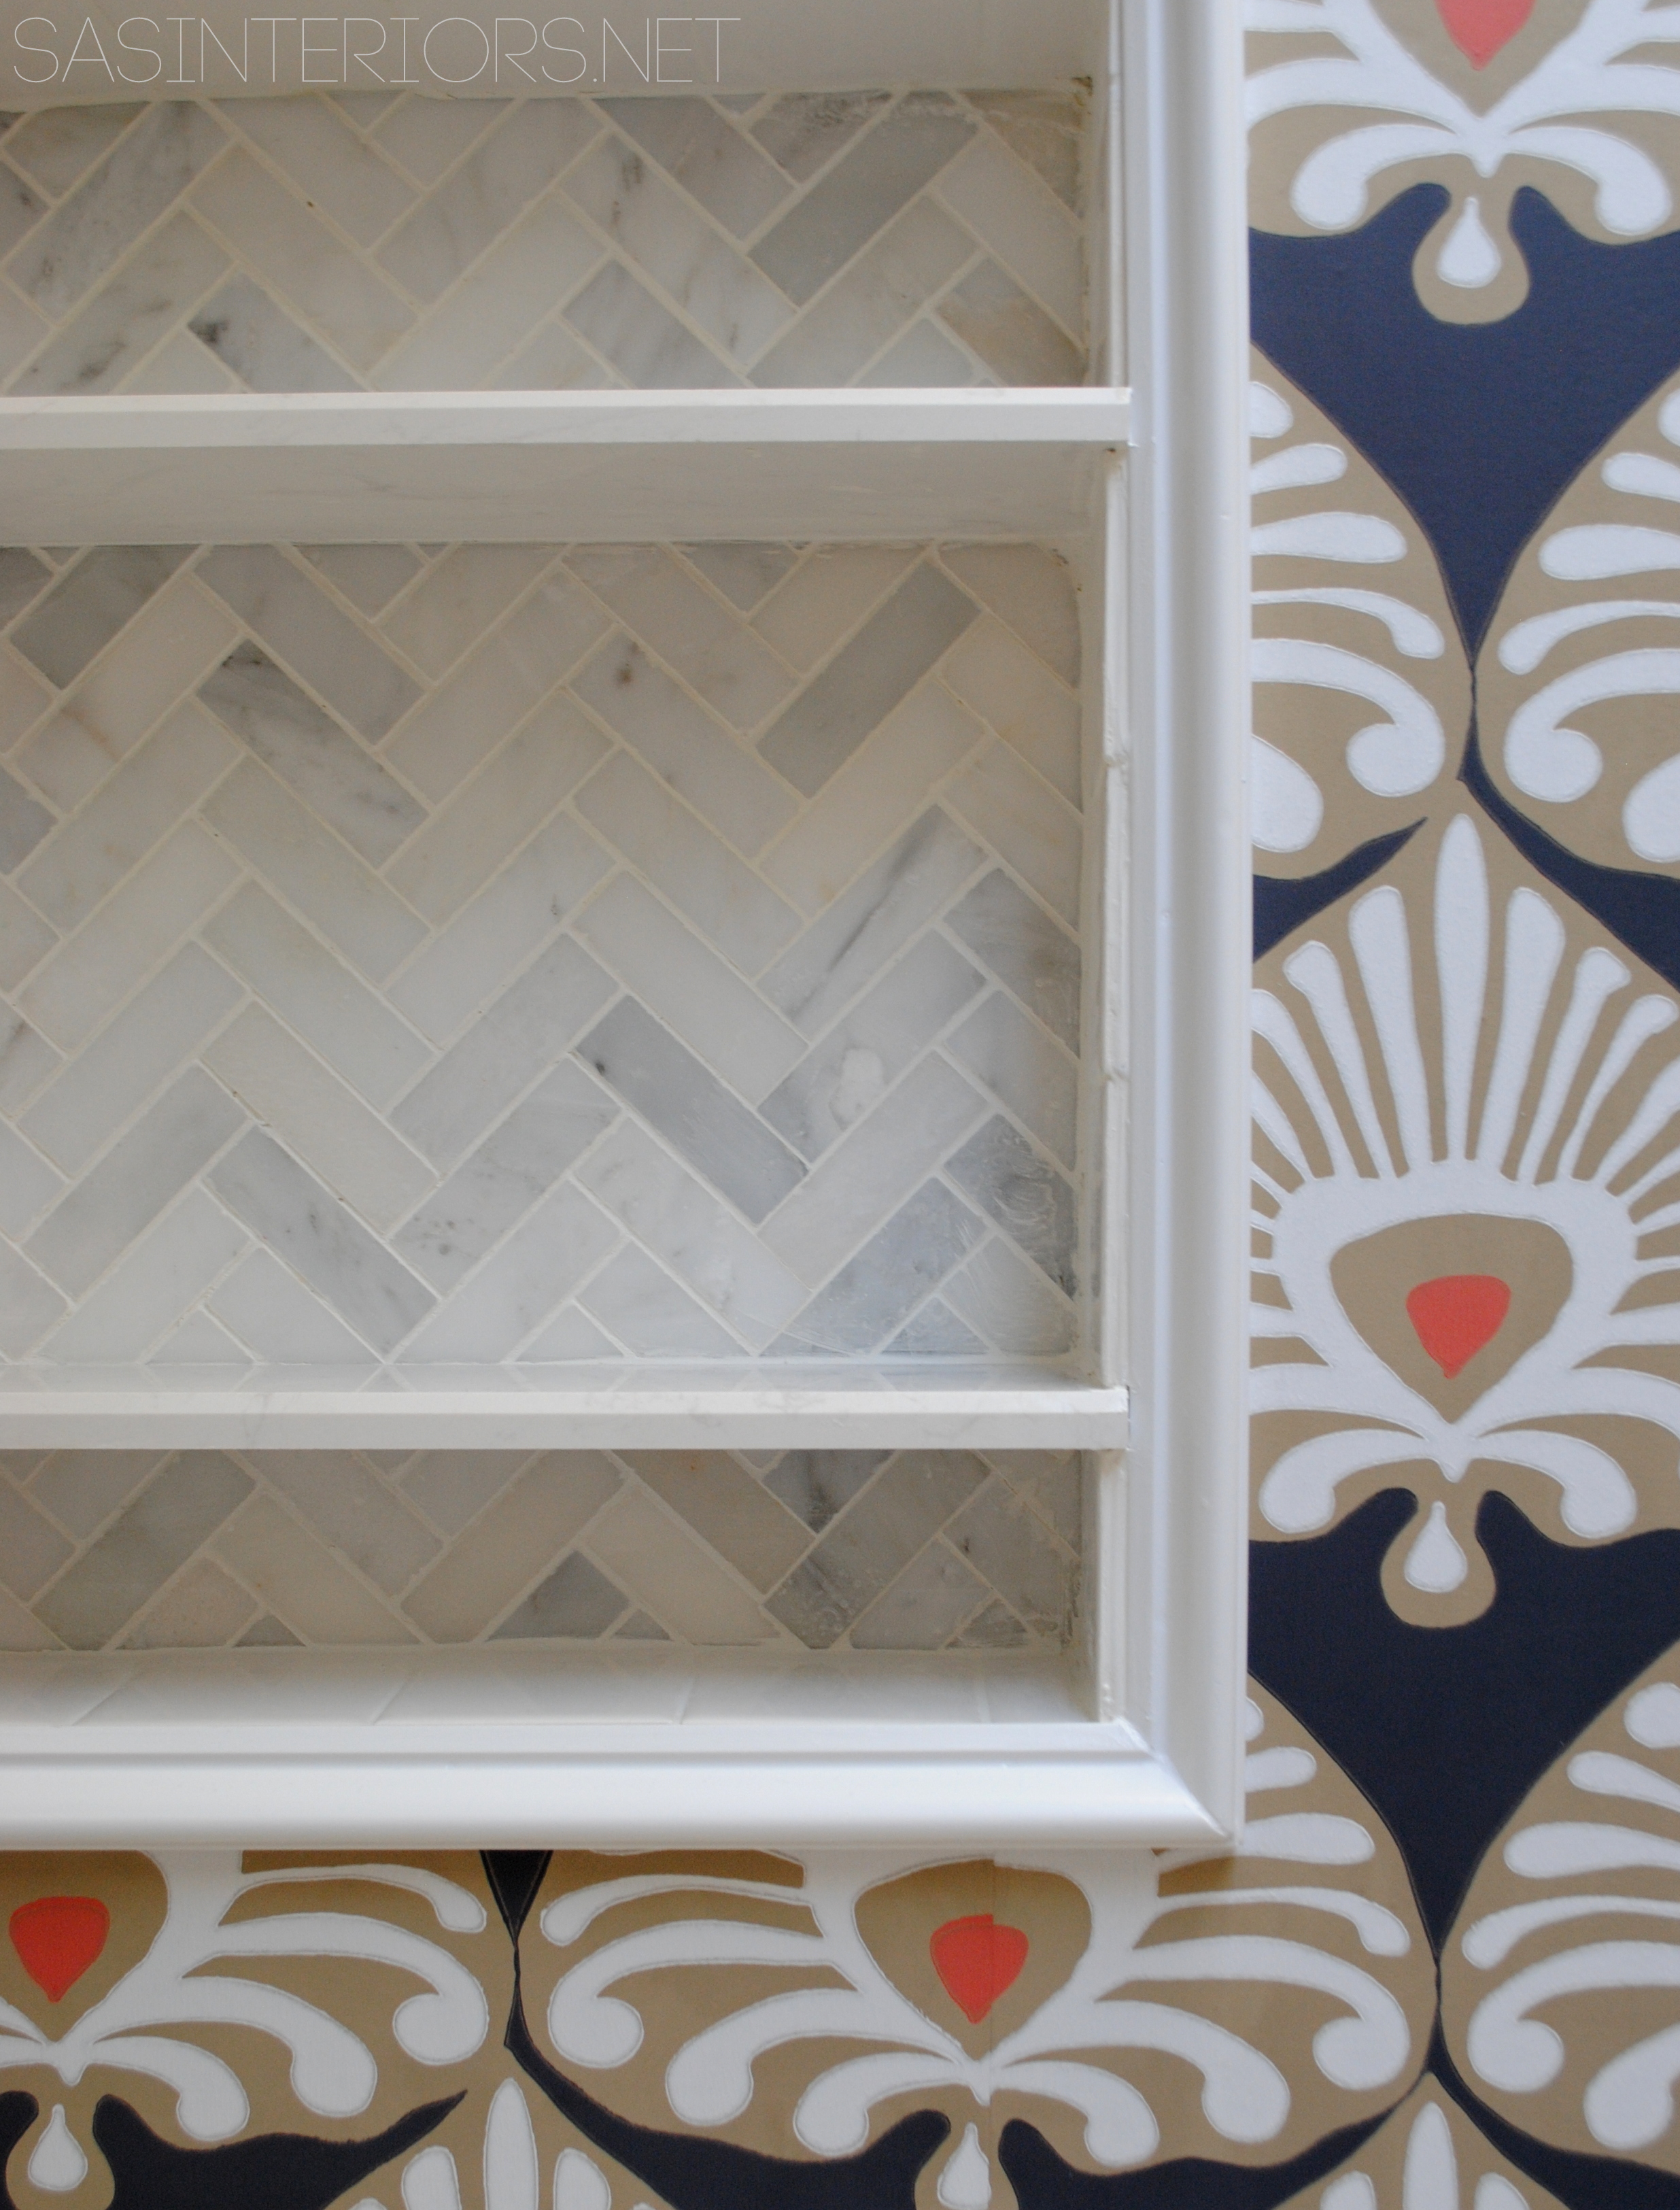
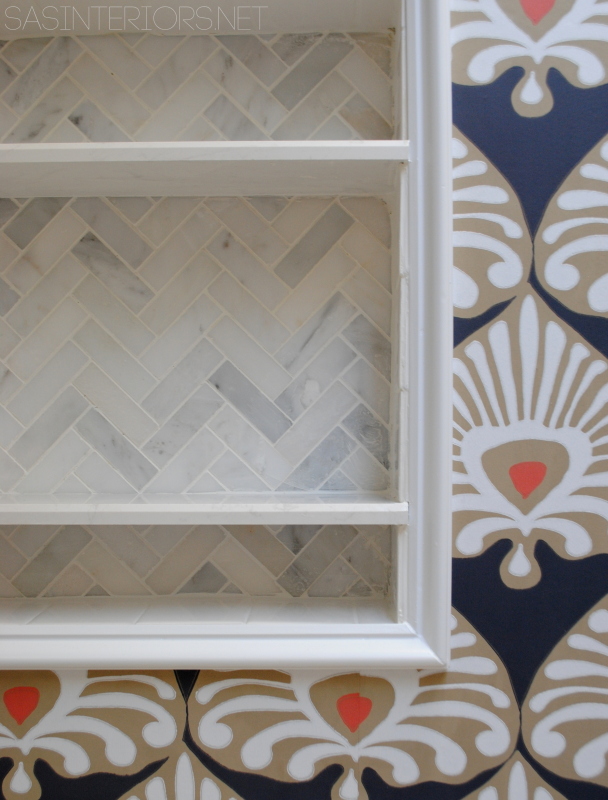
3×6 subway tile was used as the main tile material, which frames an accent tile of natural stone in a small herringbone pattern
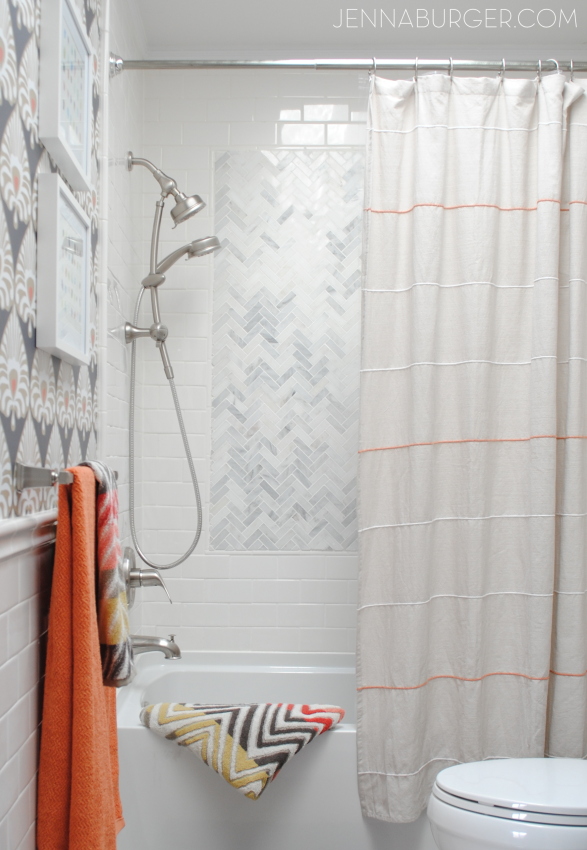
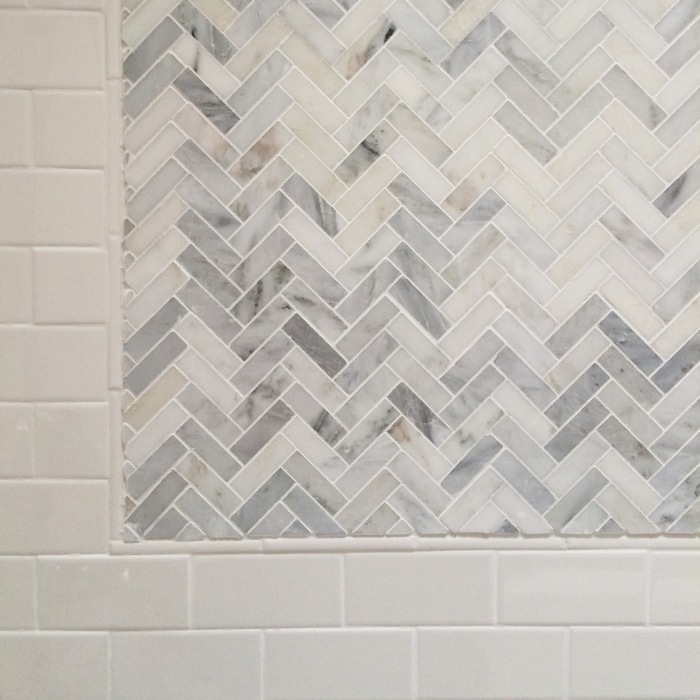
Bathroom Makover with 95% of the space being a DIY project - new tub + tile, vanity, wallpaper, and more!  Lots of details on this multi-post before & after.  Bathroom makeover by Jenna Burger Design www.jennaburger.com

3 x 6 subway tile with herringbone accent tile in carrera

tutorial for >>> how to install tile + grout
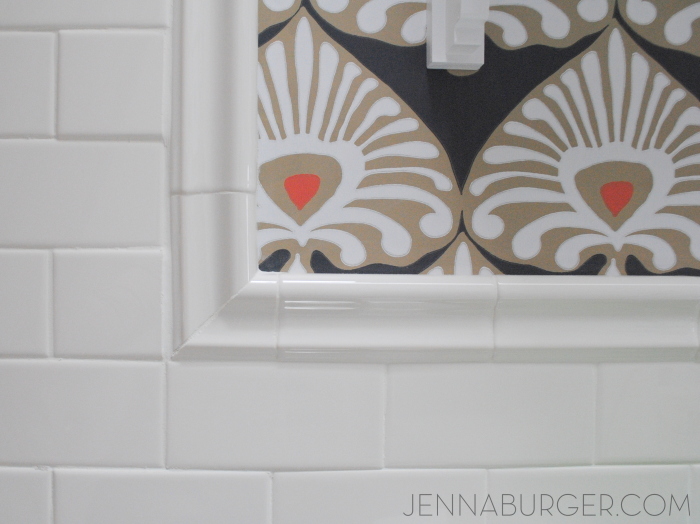
Bathroom Makover with 95% of the space being a DIY project - new tub + tile, vanity, wallpaper, and more!  Lots of details on this multi-post before & after.  Bathroom makeover by Jenna Burger Design www.jennaburger.com

Bathroom Makover with 95% of the space being a DIY project - new tub + tile, vanity, wallpaper, and more!  Lots of details on this multi-post before & after.  Bathroom makeover by Jenna Burger Design www.jennaburger.com

Bathroom Makover with 95% of the space being a DIY project - new tub + tile, vanity, wallpaper, and more!  Lots of details on this multi-post before & after.  Bathroom makeover by Jenna Burger Design www.jennaburger.com

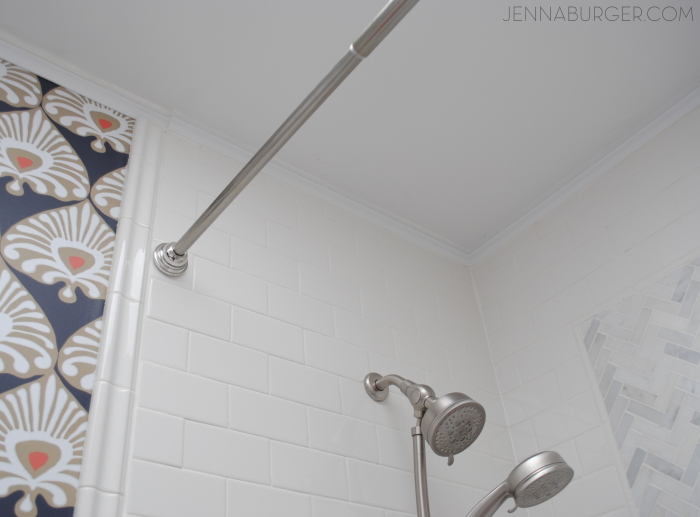
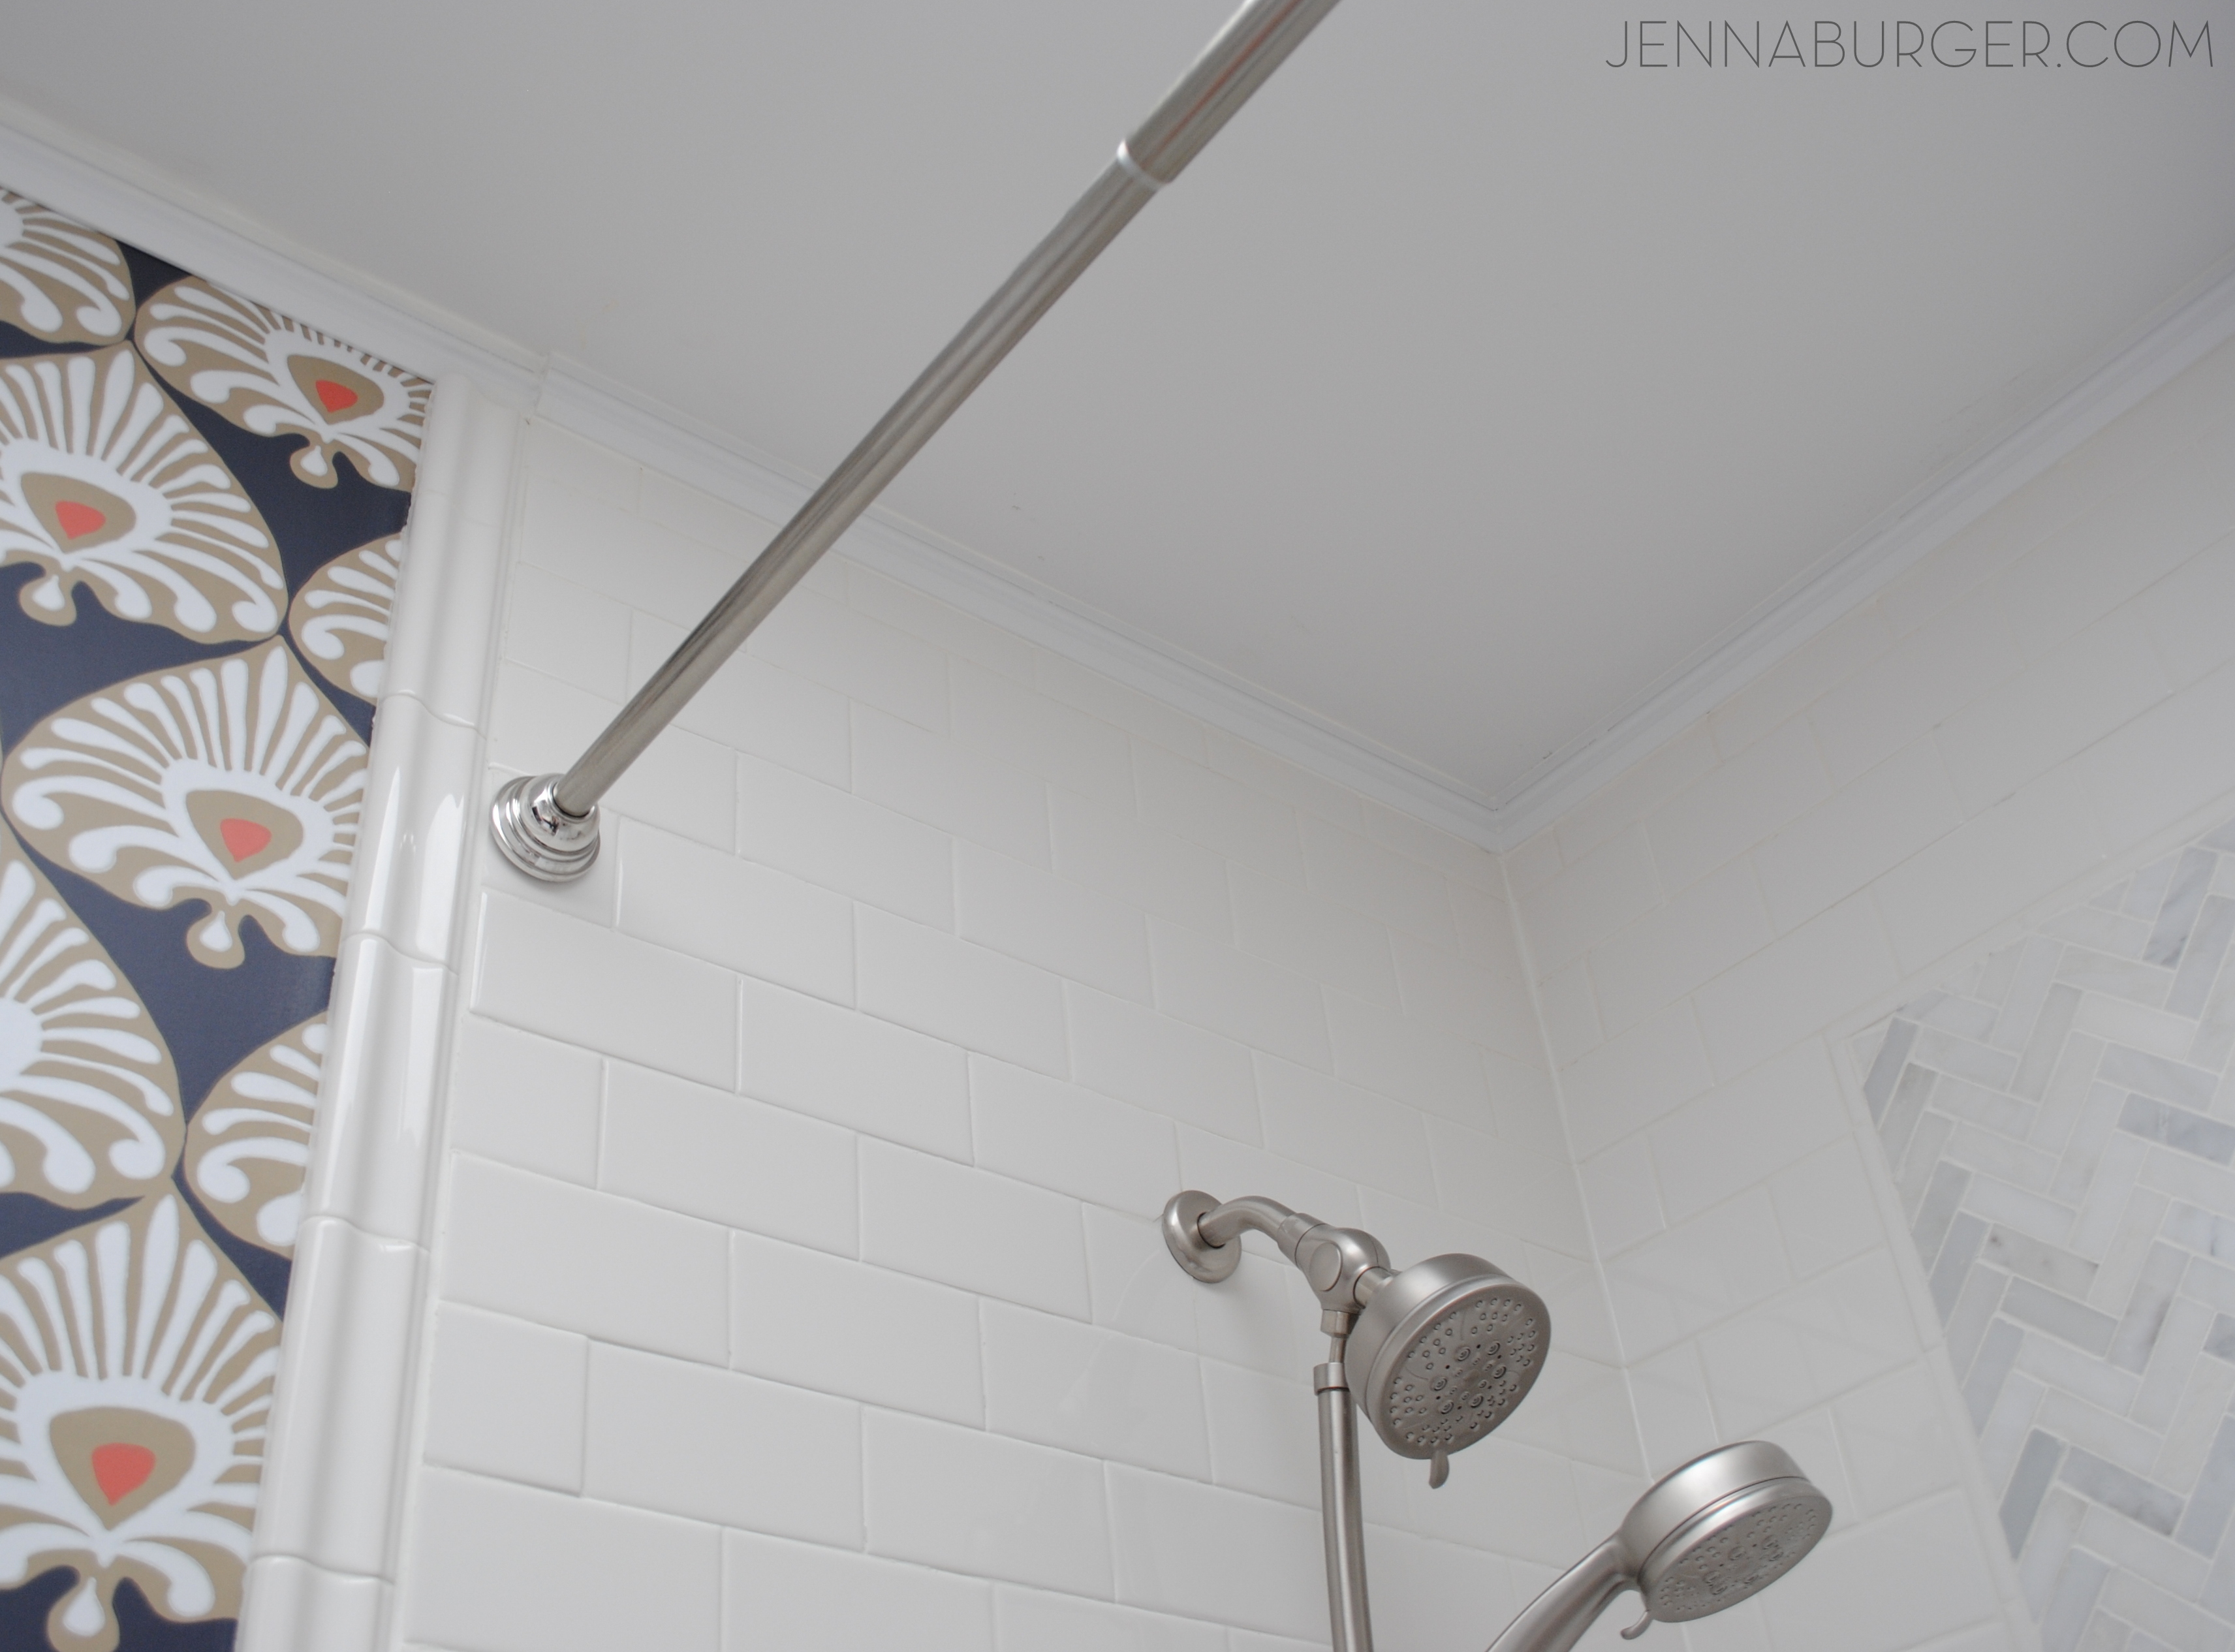
Where the wall meets the ceiling, I added a small decorative moulding, which really gave the space a finished, tailored look.  I am not very good with moulding (remember my troubles in the powder room), so this time I chose a moulding that had a 90 degree angle and it was much more manageable + easy to install since the cut was a simple 45.

Adding the moulding not only provides a finished look, but it allowed the install of the wallpaper to be easier – the wallpaper didn’t have to be perfect at the top because the moulding covered it.  Additionally, the moulding continues in the tub area where I was left with a 1/2″ gap between the last tile and the ceiling – a space too small to install tile.

Here I am installing it…
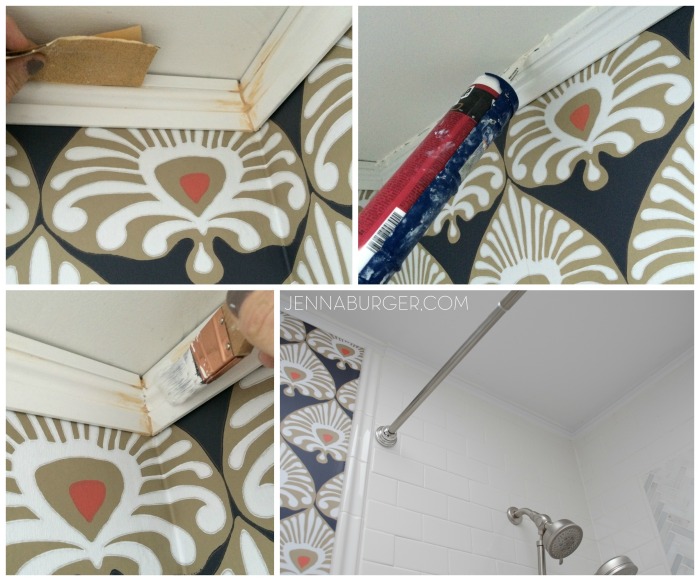
Installing Moulding in the Bathroom

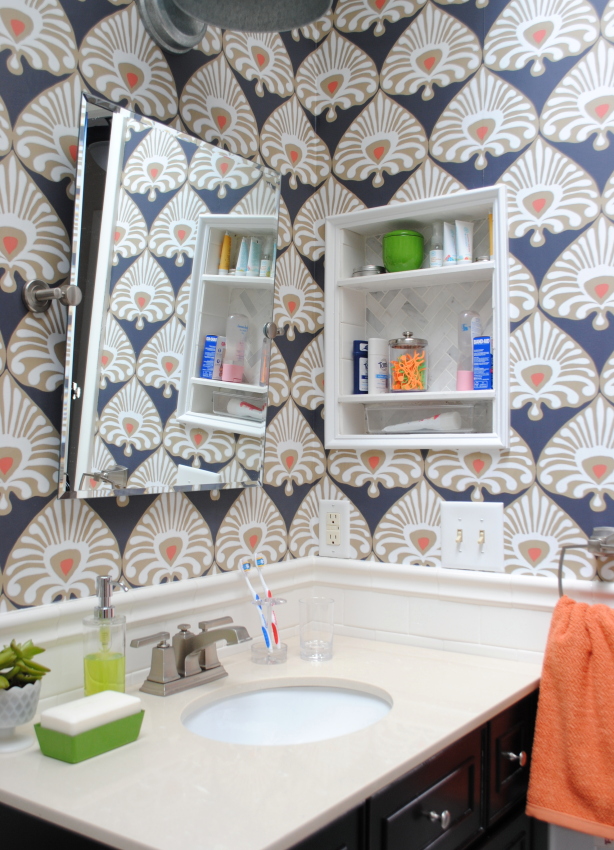
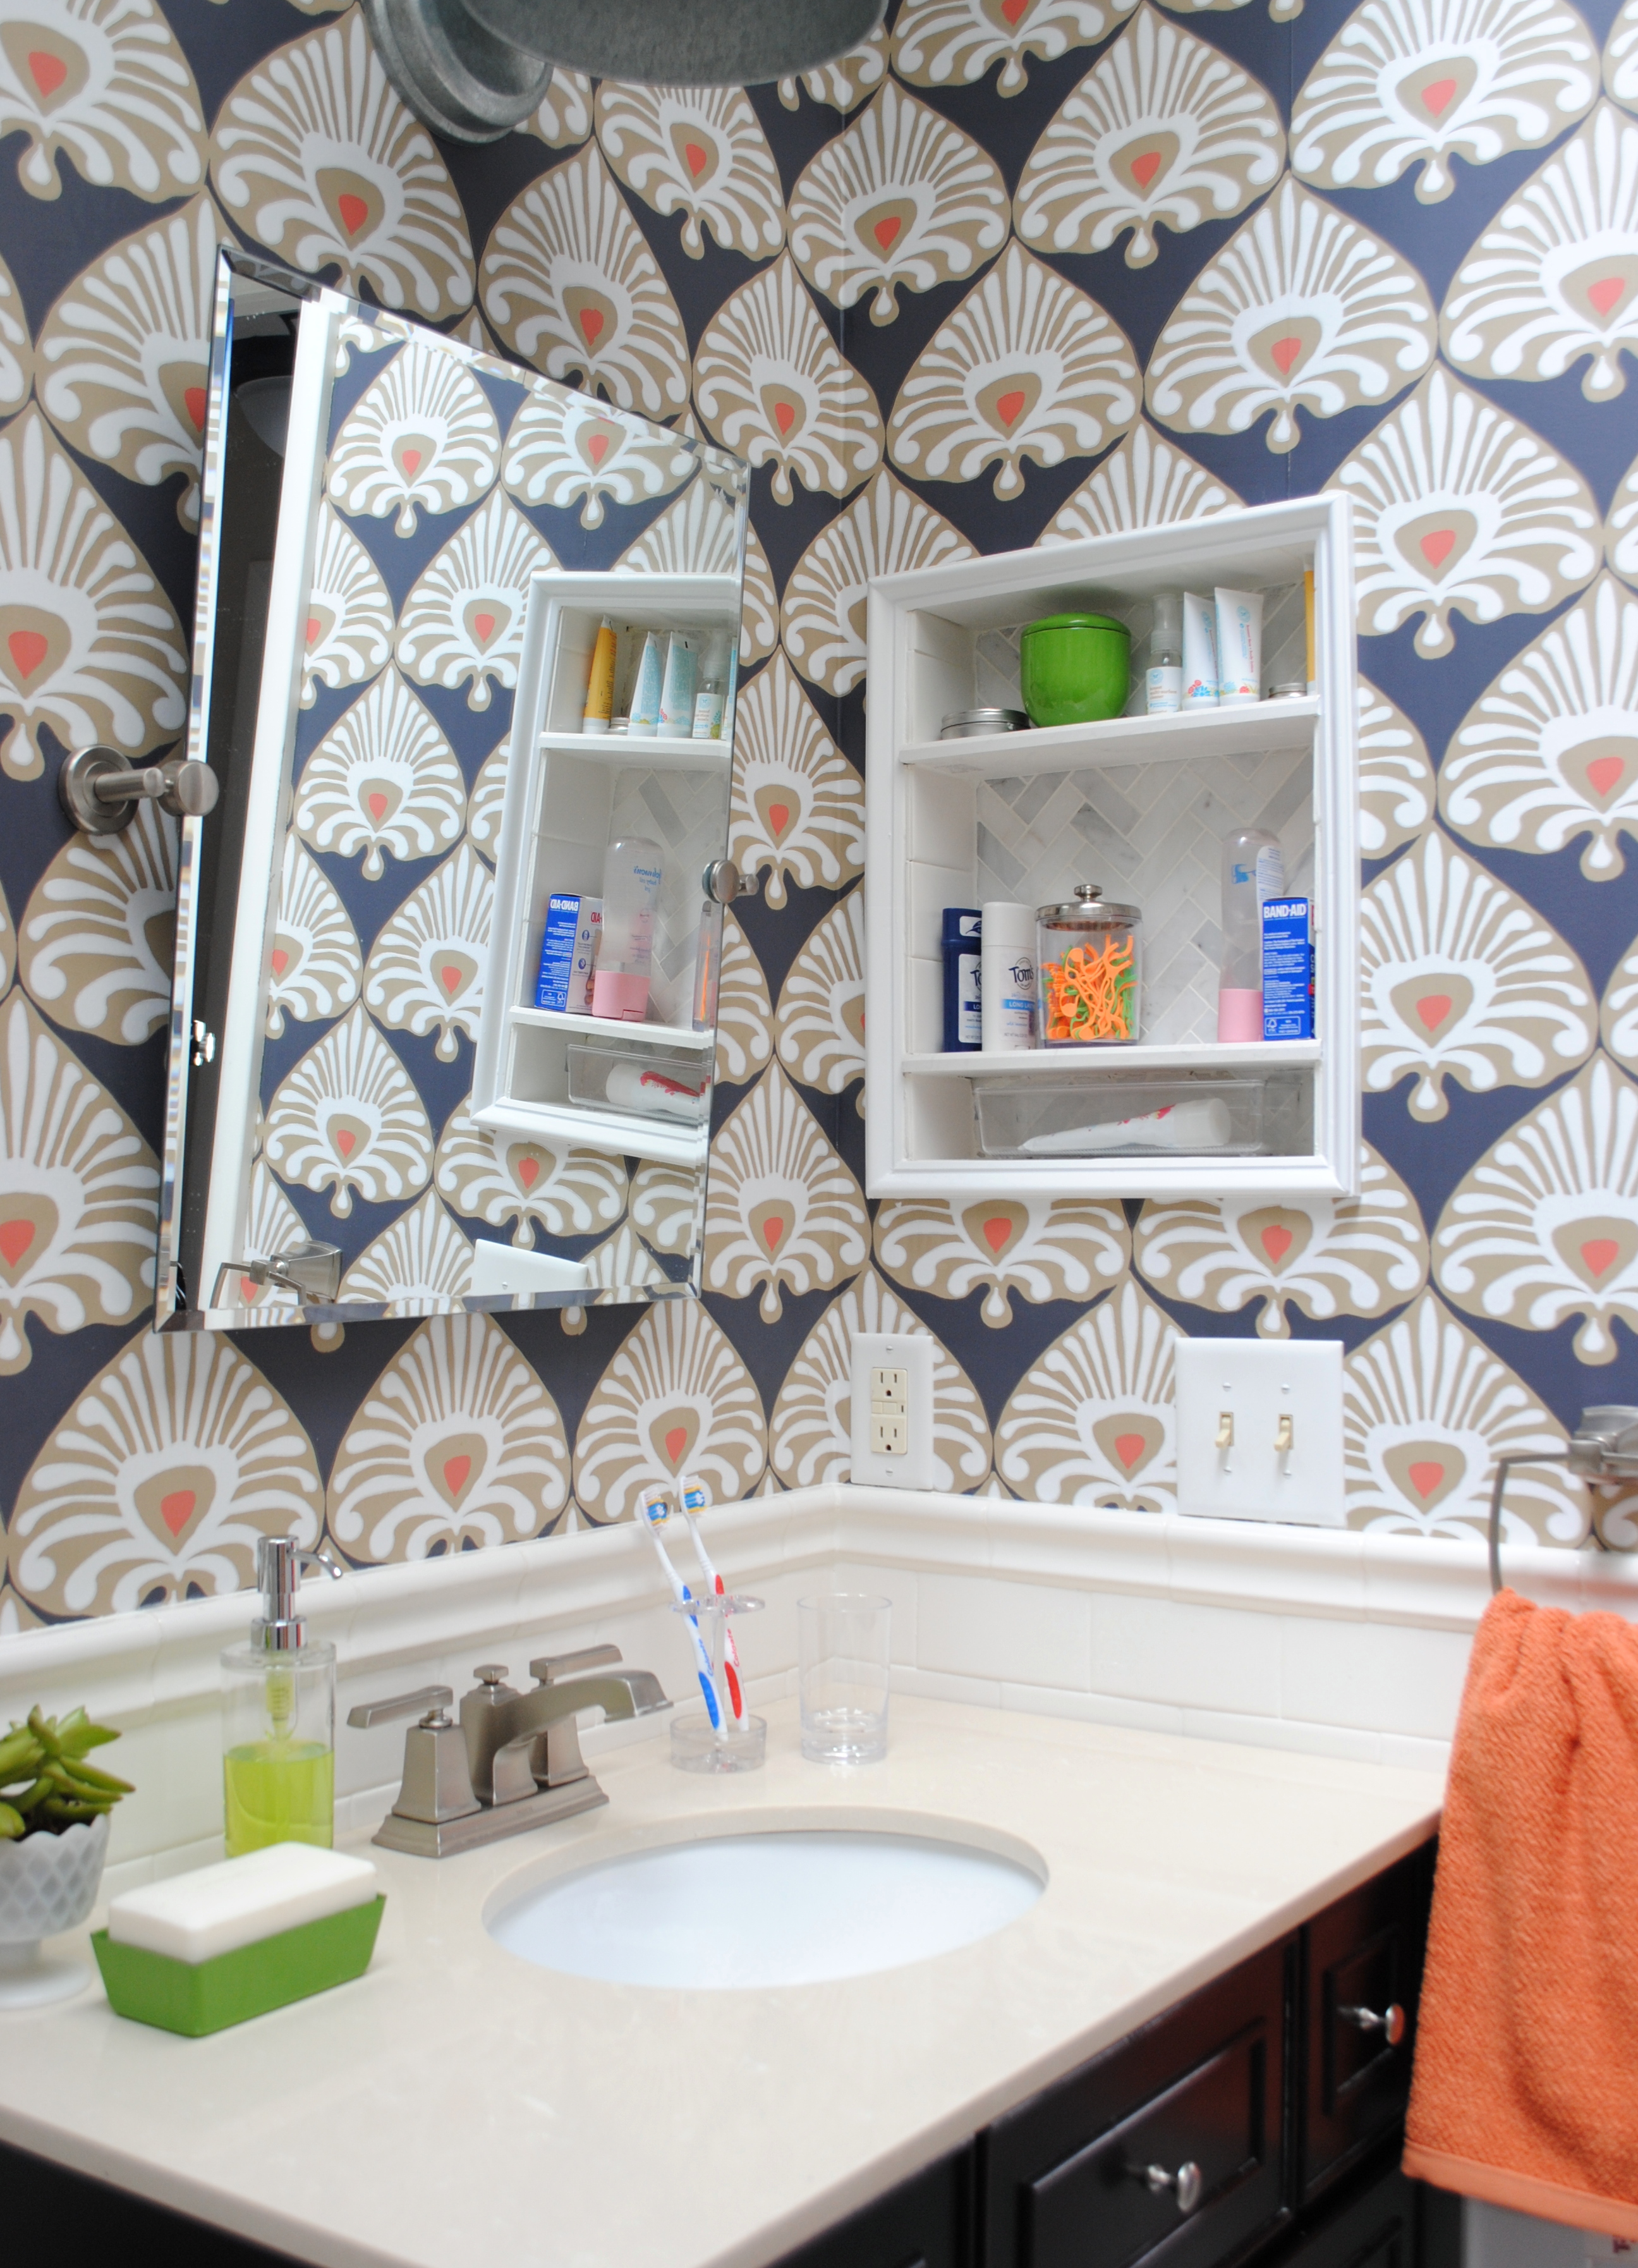
On the other side of the bathroom were more big changes…  a new toilet, vanity, lighting + a new shelf and medicine cabinet turned tiled niche.
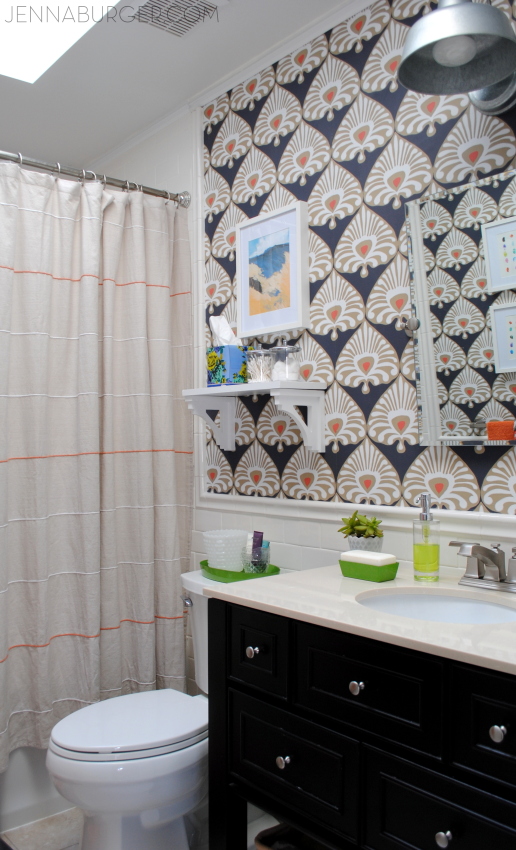
Bathroom Makover with 95% of the space being a DIY project - new tub + tile, vanity, wallpaper, and more!  Lots of details on this multi-post before & after.  Bathroom makeover by Jenna Burger Design www.jennaburger.com

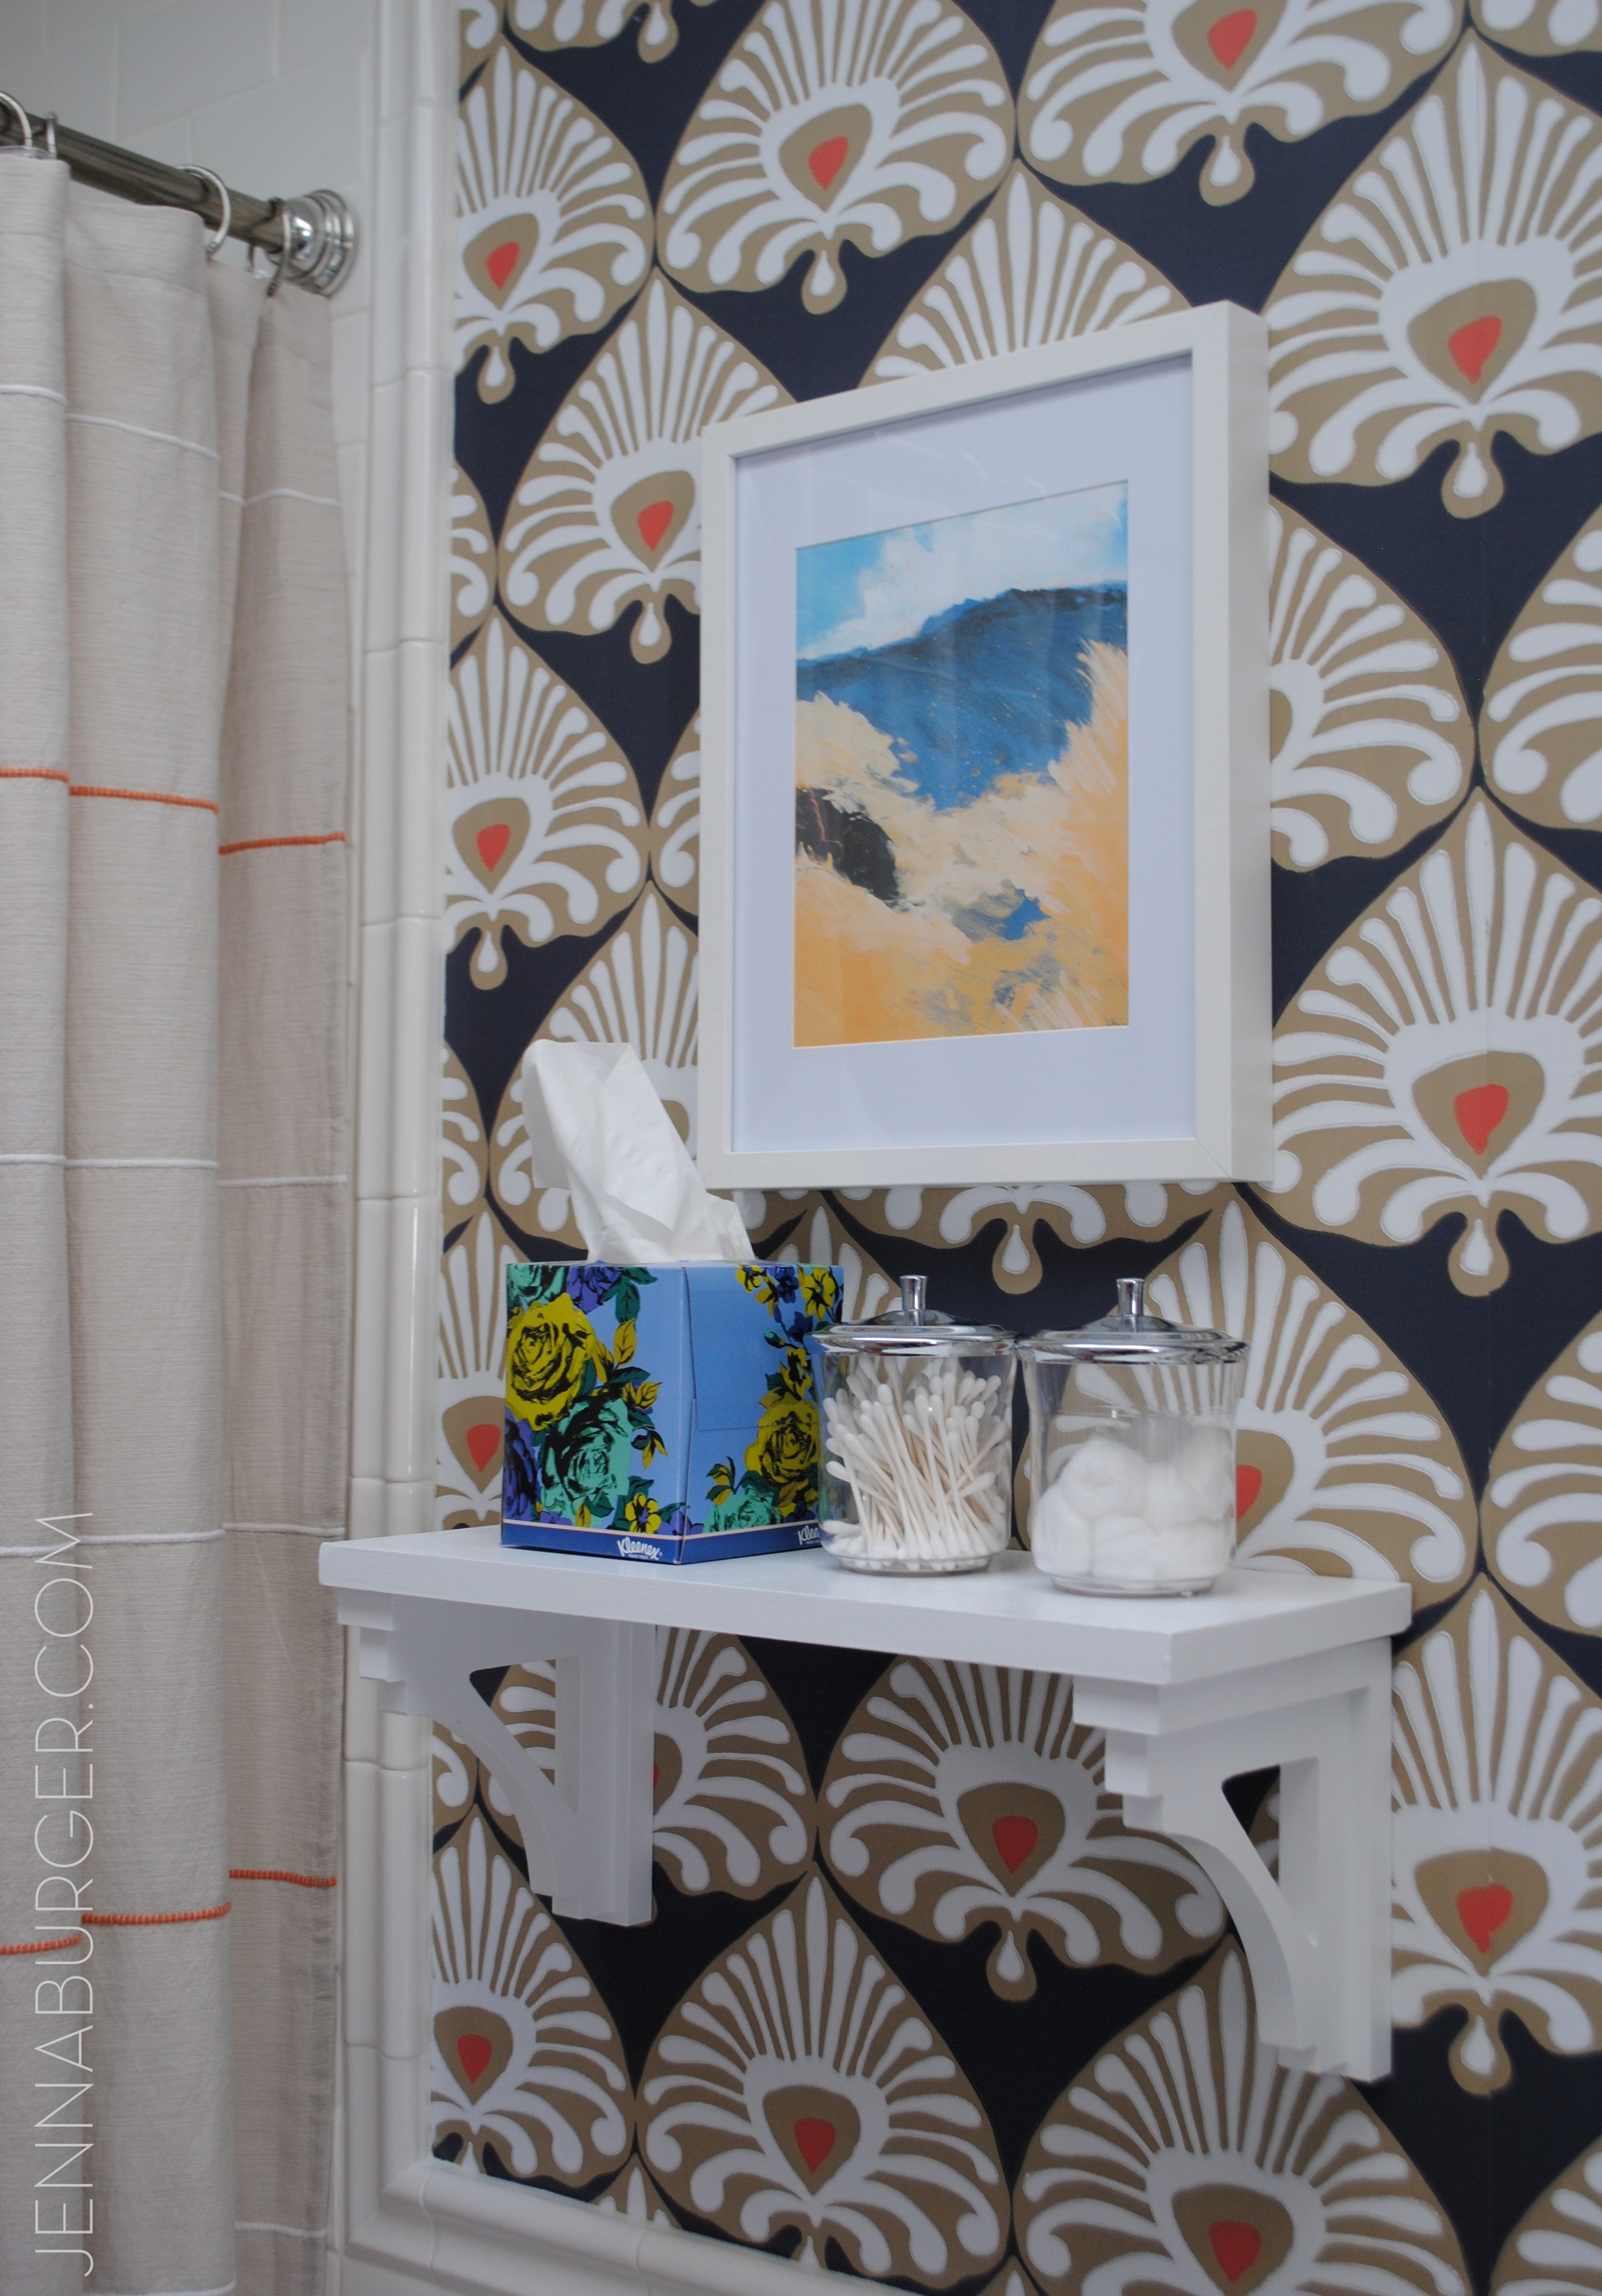
The shelf is a simple DIY project that I will share more about soon.  The original thought / plan was to add an industrial-style shelf above the toilet, but after the wallpaper went up, I just couldn’t bring myself to cover it + with the new vanity there was ample storage.

A simple white shelf along with a few layered accessories and a framed print seemed to be the perfect addition.

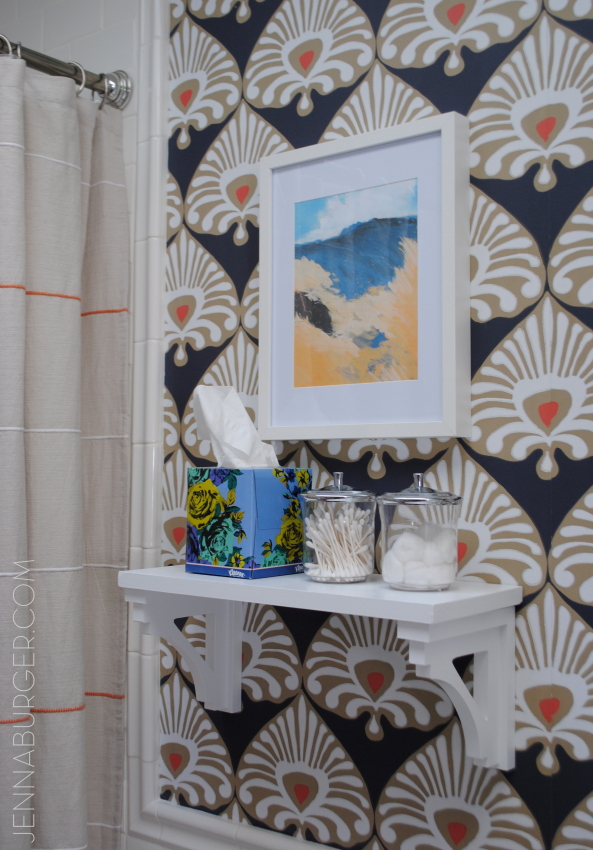
Bathroom Makover with 95% of the space being a DIY project - new tub + tile, vanity, wallpaper, and more!  Lots of details on this multi-post before & after.  Bathroom makeover by Jenna Burger Design www.jennaburger.com

Bathroom Makover with 95% of the space being a DIY project - new tub + tile, vanity, wallpaper, and more!  Lots of details on this multi-post before & after.  Bathroom makeover by Jenna Burger Design www.jennaburger.comTo the vanity…

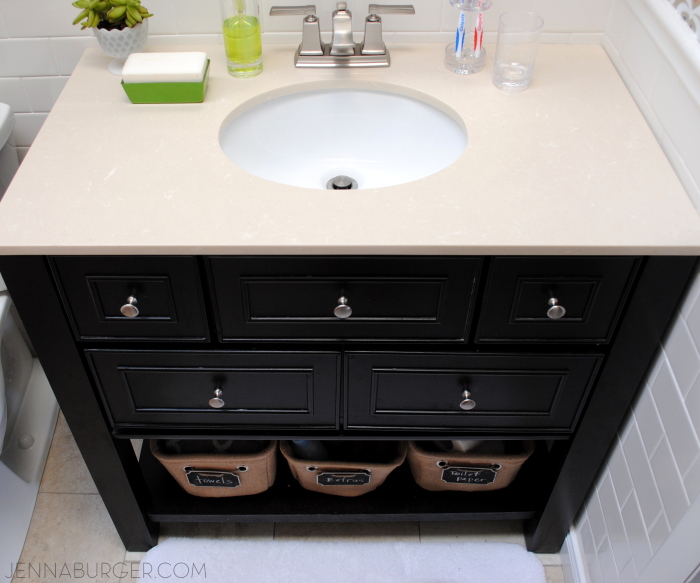
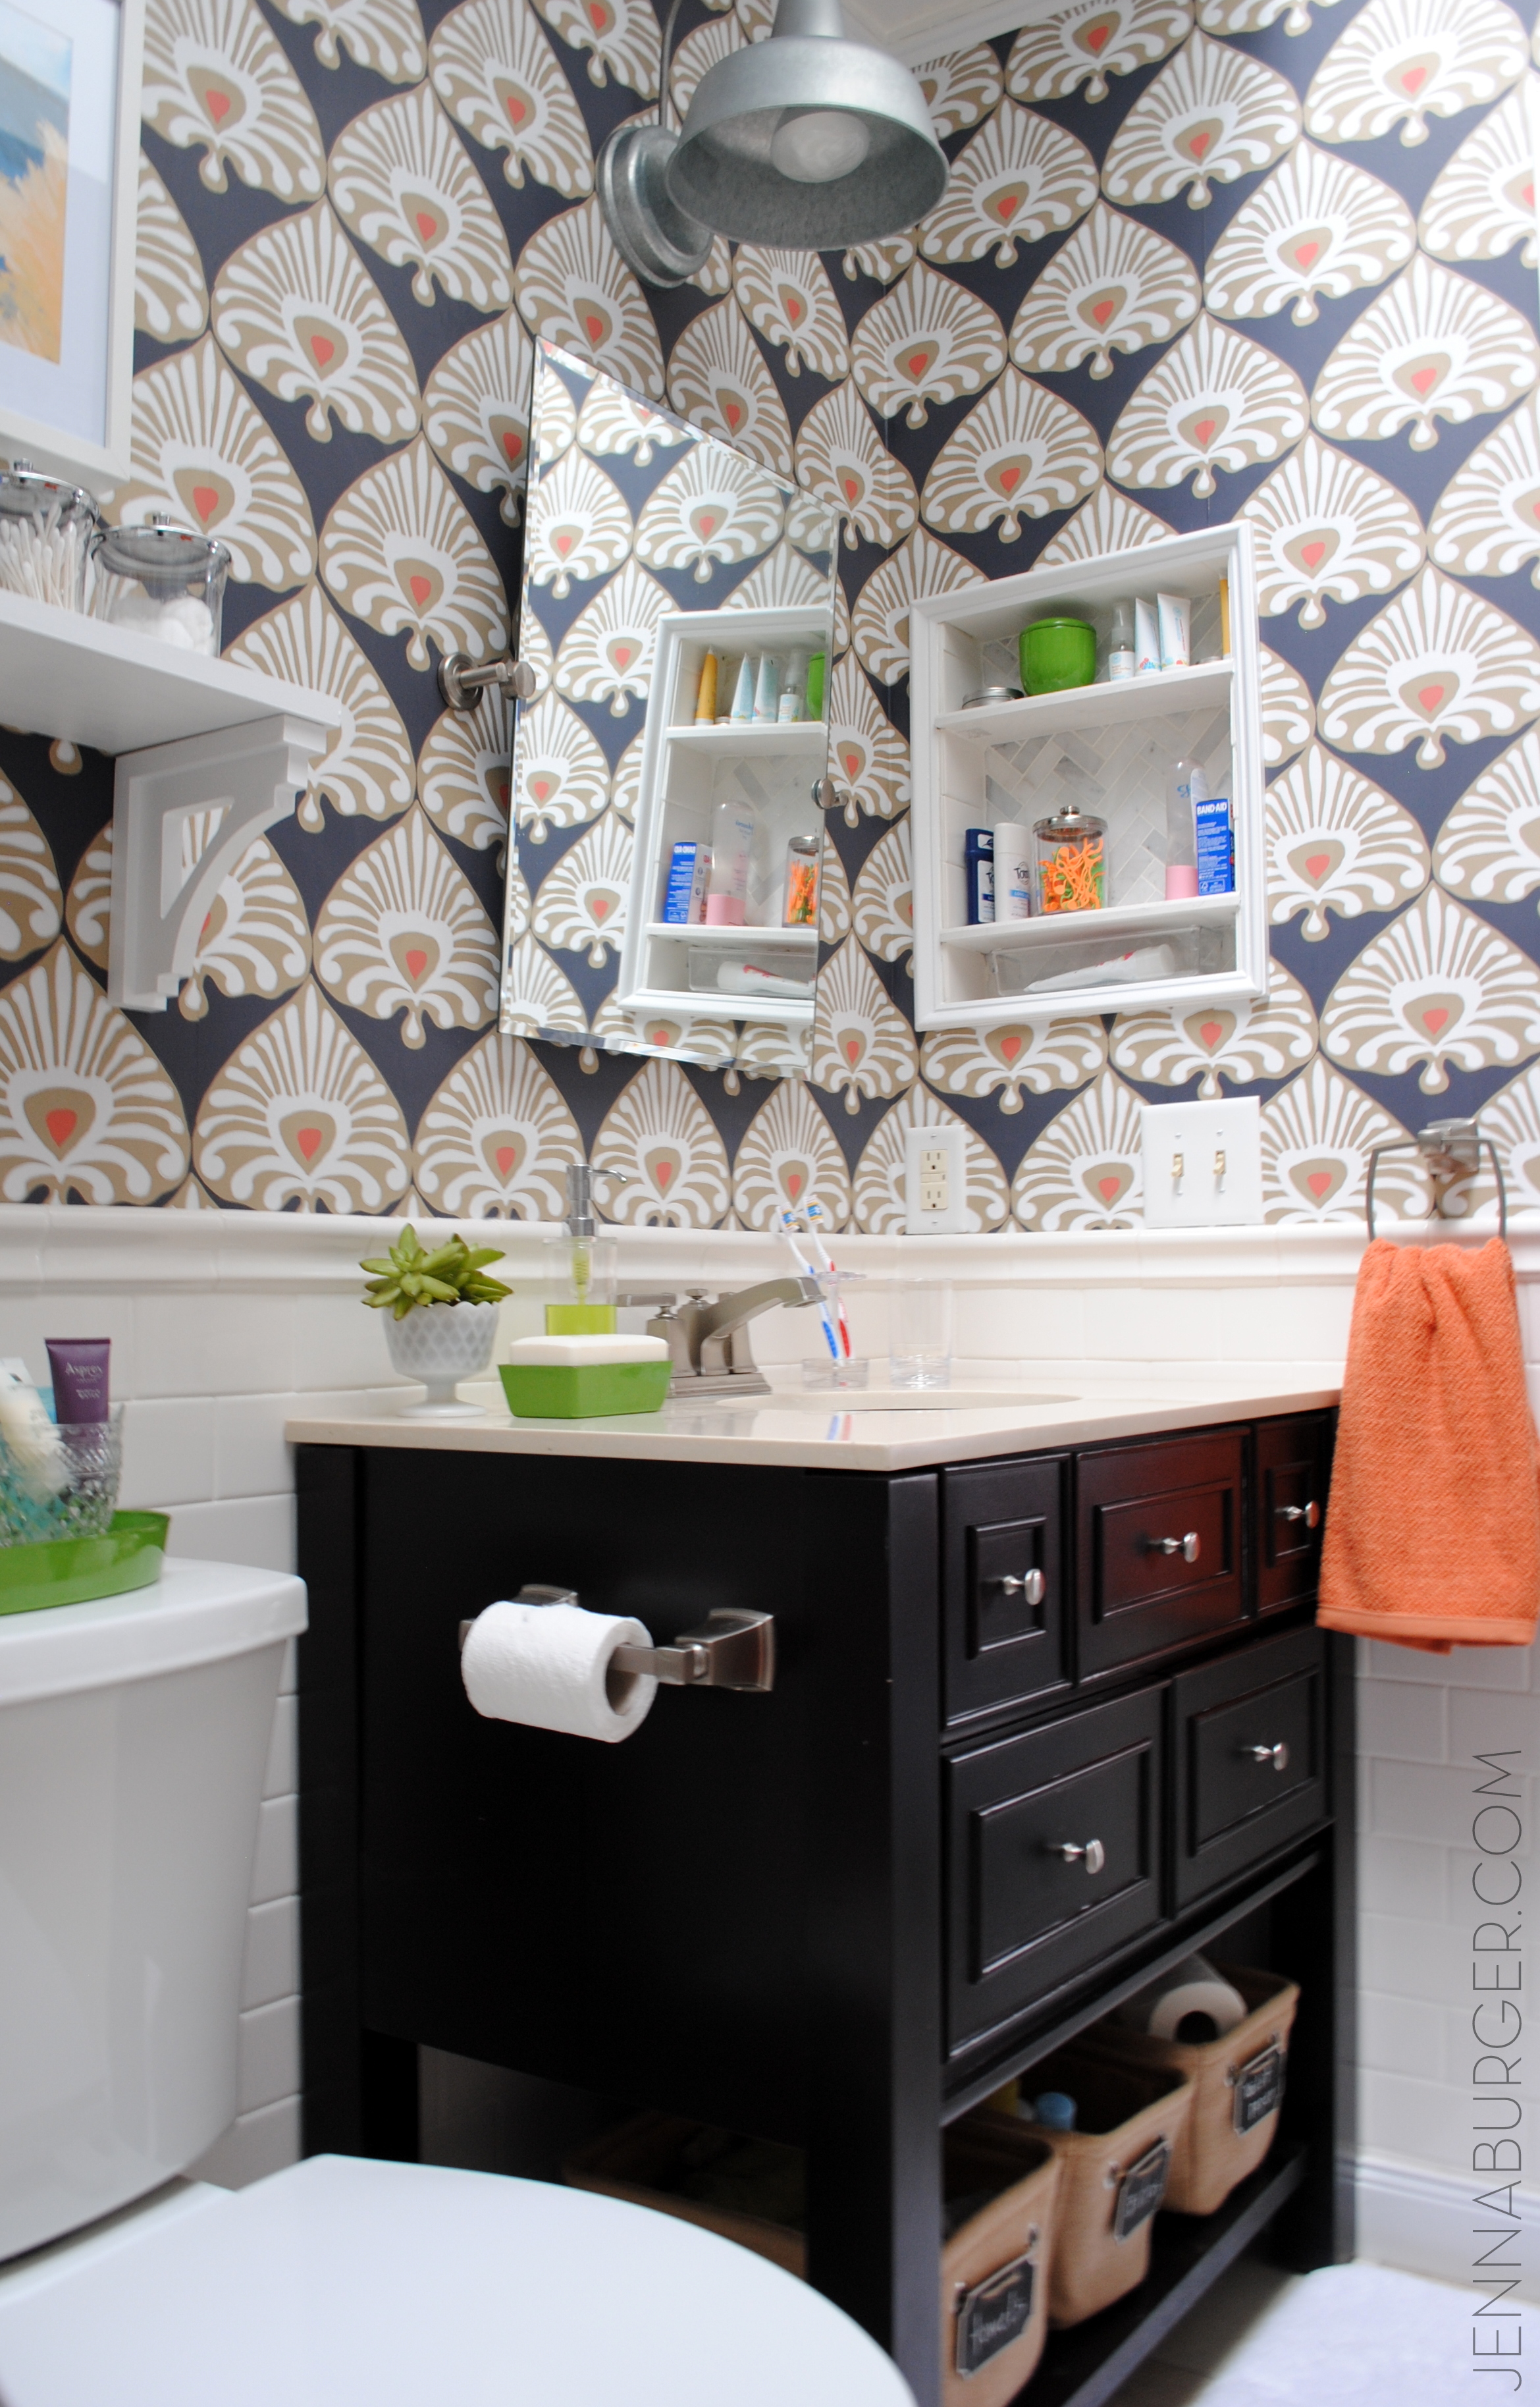
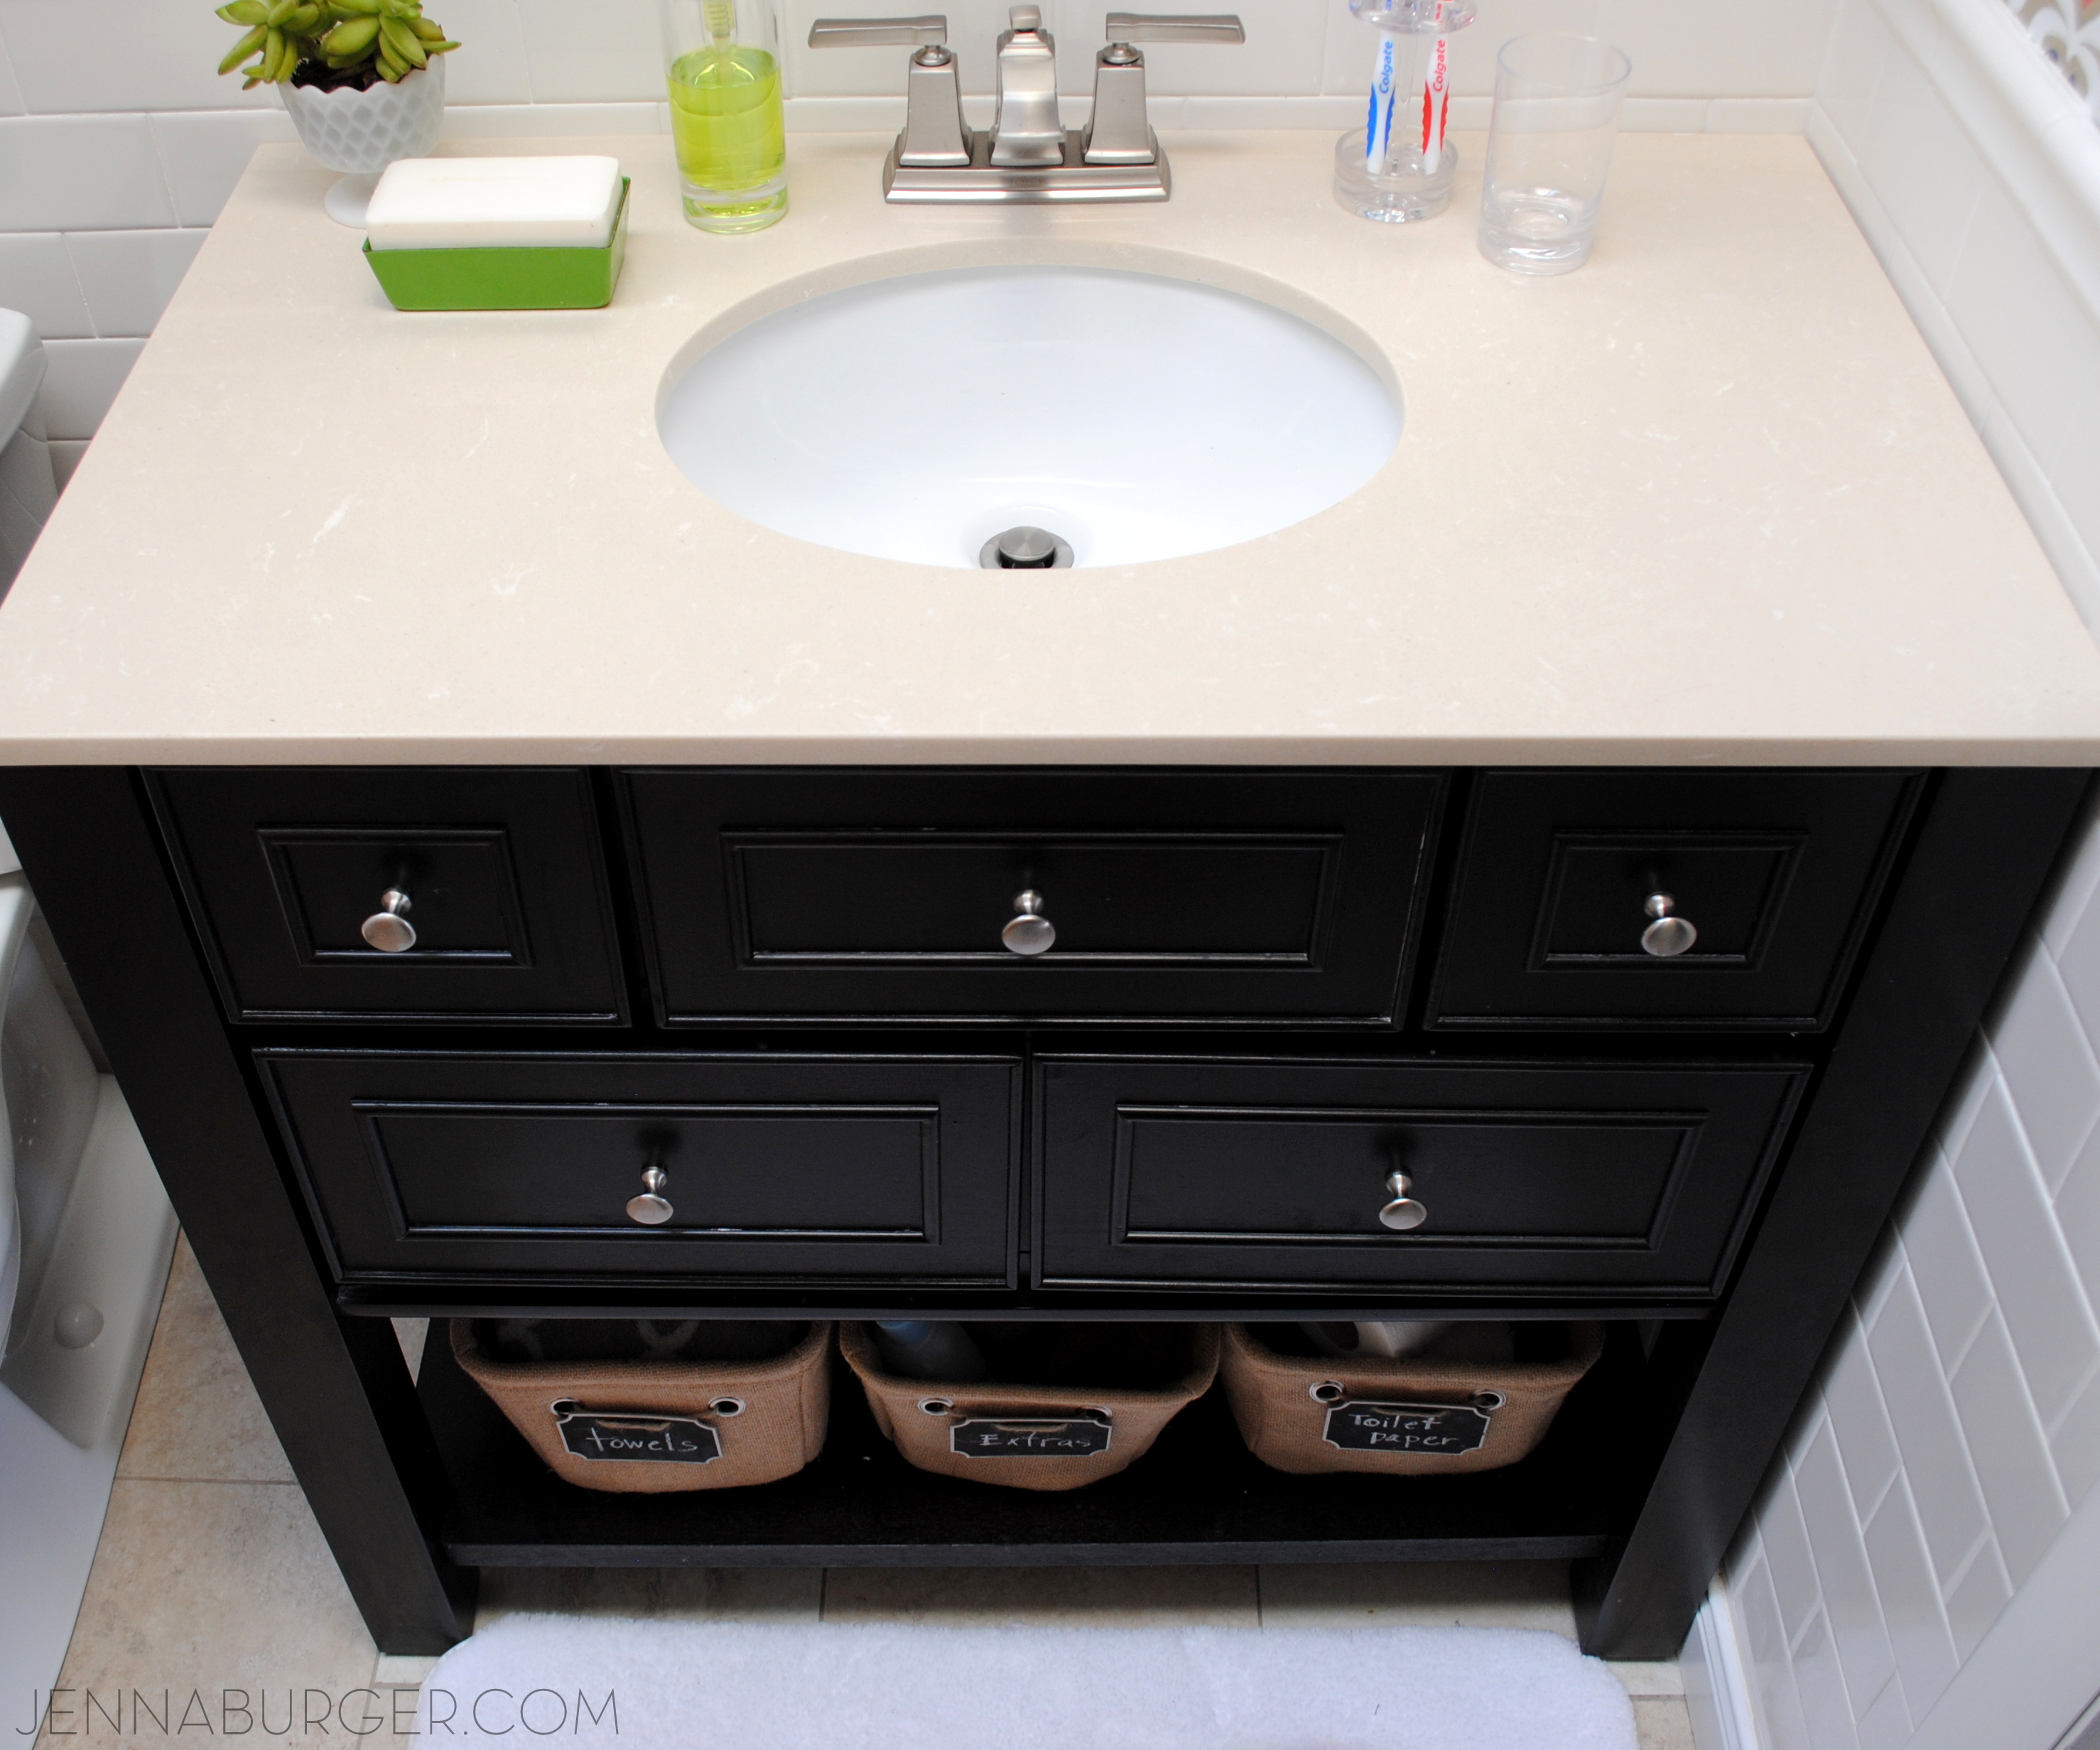
The vanity is a beauty and I love the openness it brings to the space.  This vanity compared to the previous one is about 6″ longer.  There was enough room at the side of the toilet to go a bit wider and the additional inches really makes a difference.  Even though it’s minimal, there seems to be a lot more countertop space.

Also having drawers with this vanity, the amount of storage has tripled versus having 1 large open cavity with the last cabinet.  There looks to be 5 drawers, but the center drawer under the sink is a faux panel.  The 2 smaller side drawers + the 2 larger drawers provide so much room.  As the kids get older & accumulate more stuff, I am sure the drawers will definitely fill up.  For now, they’re fairly unused.
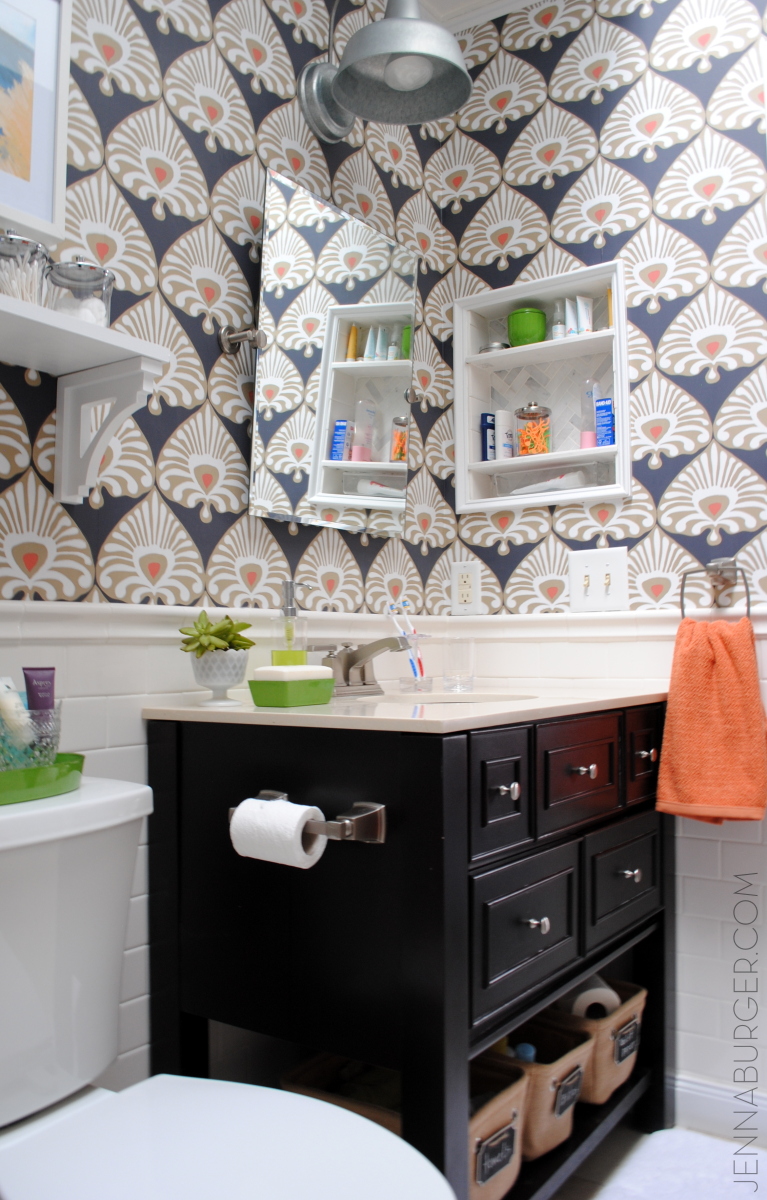
Bathroom Makover with 95% of the space being a DIY project - new tub + tile, vanity, wallpaper, and more!  Lots of details on this multi-post before & after.  Bathroom makeover by Jenna Burger Design www.jennaburger.com

Underneath the closed part of the cabinet is an open shelf perfect for towels, baskets, etc.  I chose these cute burlap bins at Lowe’s and revamped them a bit (of course, how could I not…?)

I loved the texture of the burlap, but the rope pull was slightly too nautical, so I swapped them out for a chalkboard label that I found in the dollar bin at Target.  Using jute rope, I attached them through the holes and in 30 seconds gave these pretty bins a whole new look…

I love how easy & simple something like this can change a space & be unique to your personal aesthetic + style.
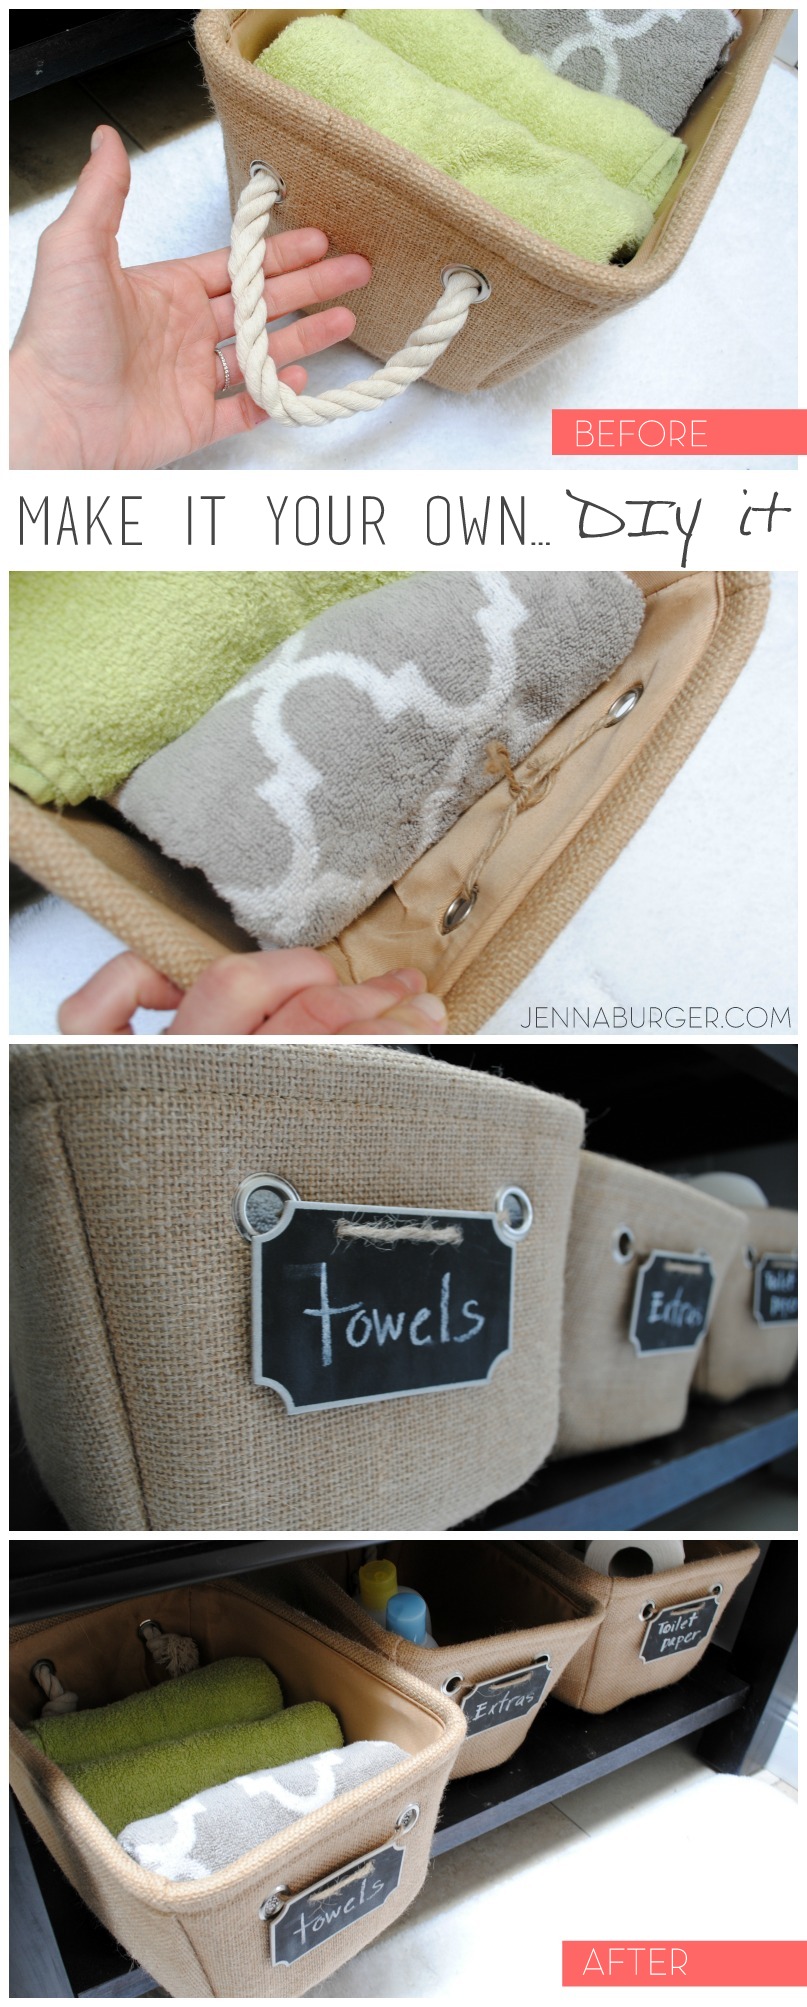
Make it your own by changing up a store-bought item.  From rope pulls to chalkboard labels, this DIY upgrade was less than a $1.

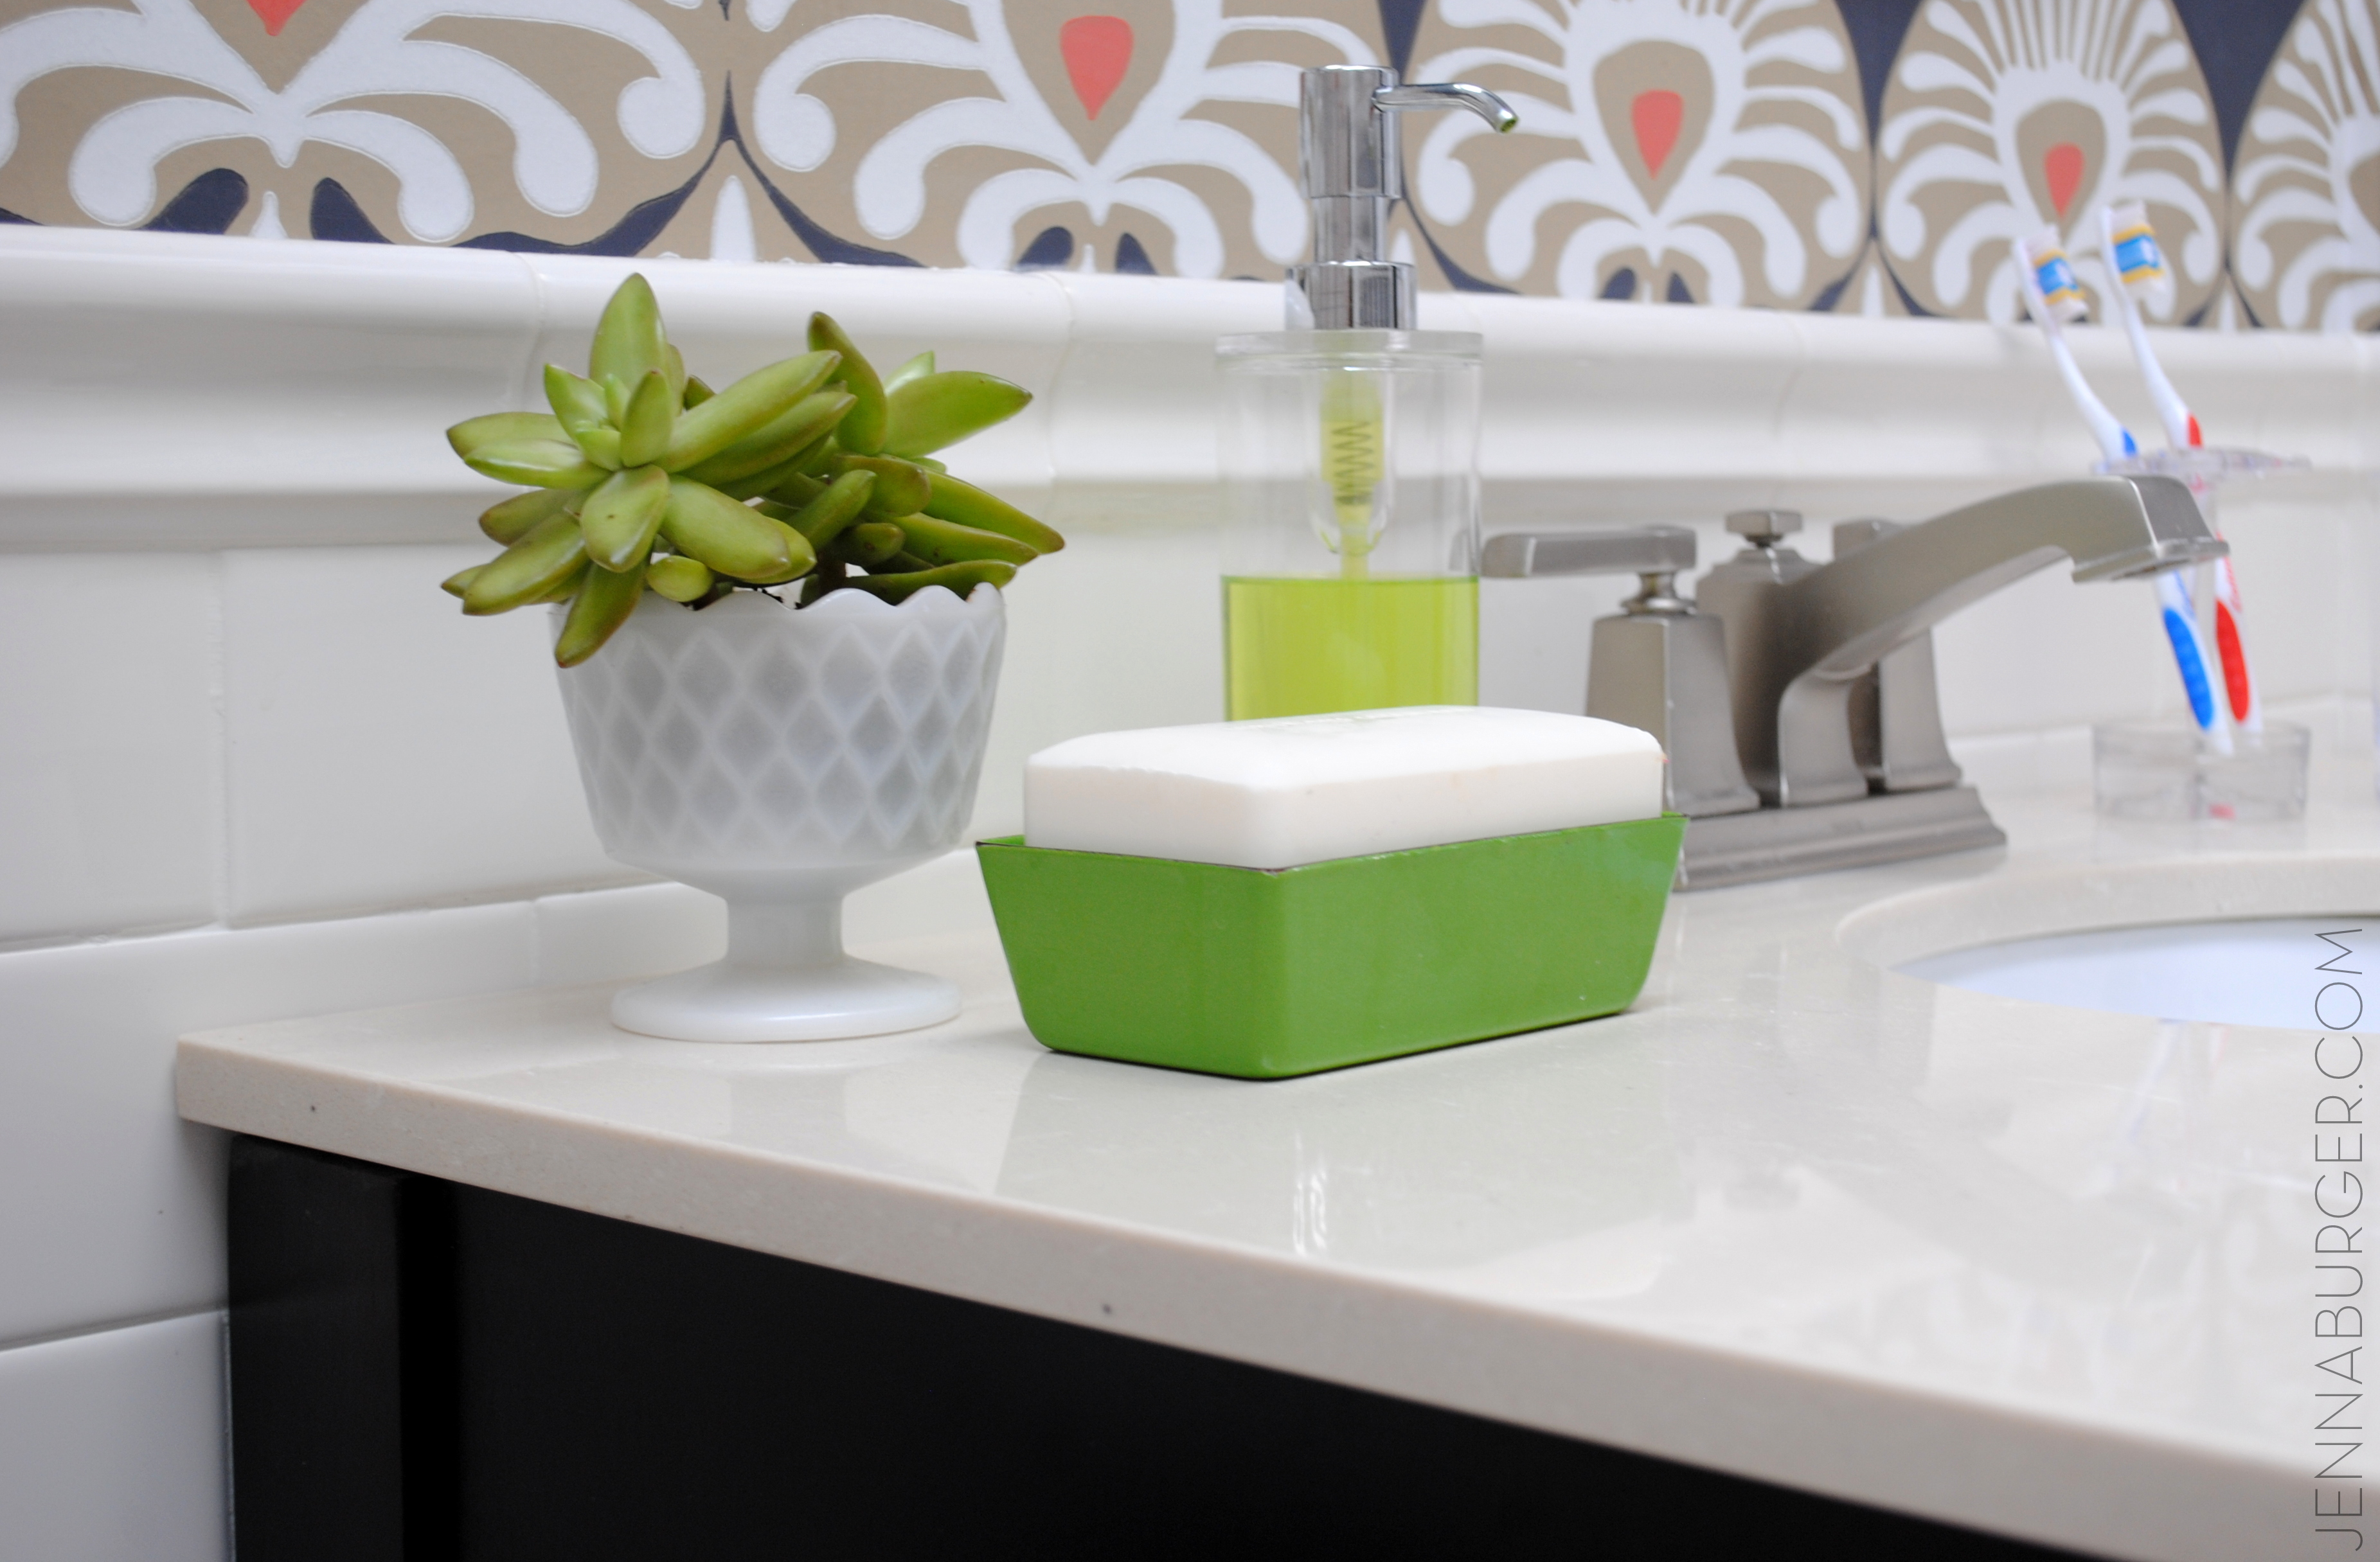
Back up above, the countertop is adorned with a few simple, but must-need items.  I found these really cute accessories – liquid soap holder, toothbrush holder, and cup – that were super inexpensive at Lowe’s.  They are clear (plastic), but look very modern and $$$.  The look of lucite is hot right now.
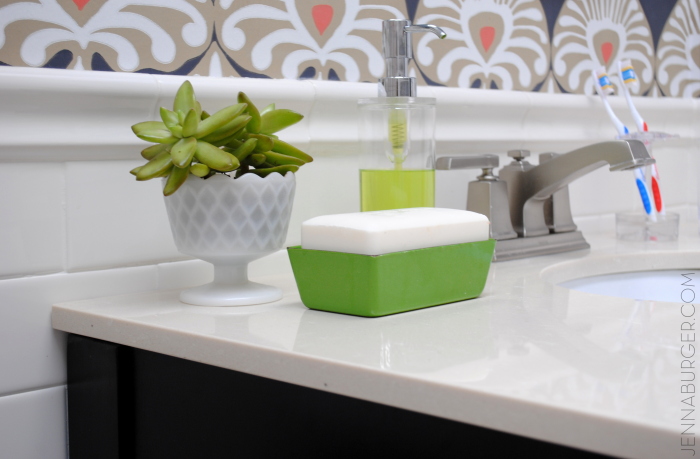
Bathroom Makover with 95% of the space being a DIY project - new tub + tile, vanity, wallpaper, and more!  Lots of details on this multi-post before & after.  Bathroom makeover by Jenna Burger Design www.jennaburger.com

I chose a minimalist-style, frameless, rectangular tilt mirror and an industrial-style oversized outdoor light that is centered above (because of the longer vanity, the light had to move over a few inches – my contractor did that since it’s above & beyond my skillset).
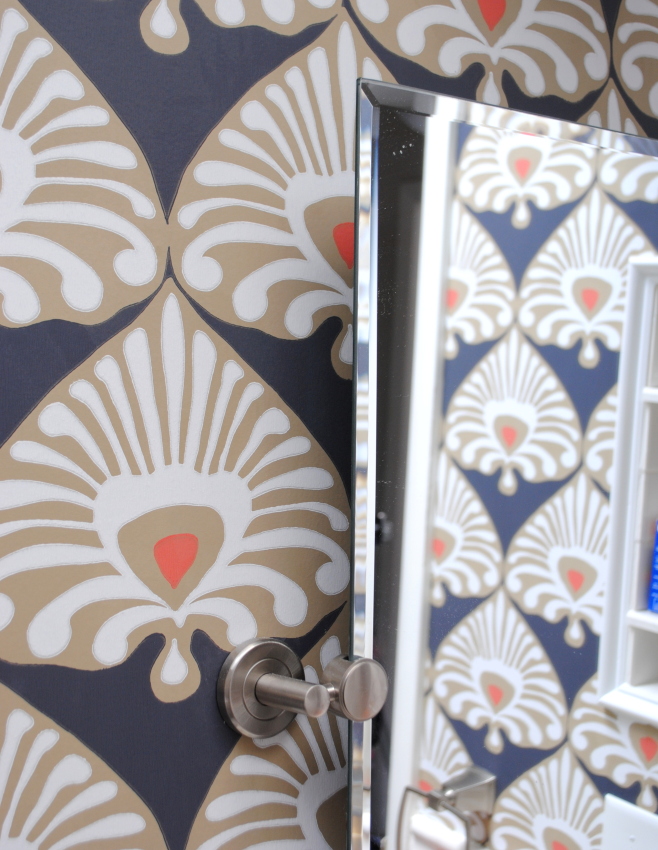
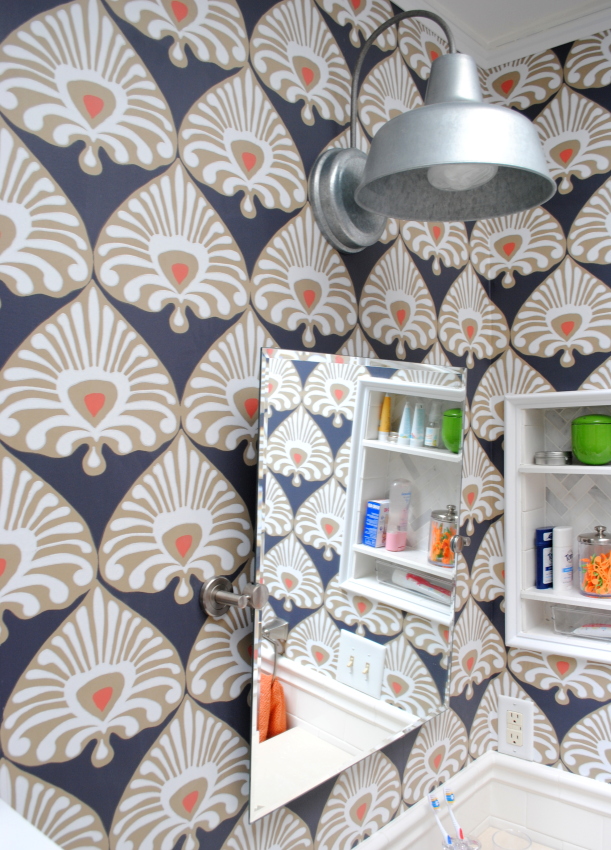
Bathroom Makover with 95% of the space being a DIY project - new tub + tile, vanity, wallpaper, and more!  Lots of details on this multi-post before & after.  Bathroom makeover by Jenna Burger Design www.jennaburger.com

Bathroom Makover with 95% of the space being a DIY project - new tub + tile, vanity, wallpaper, and more!  Lots of details on this multi-post before & after.  Bathroom makeover by Jenna Burger Design www.jennaburger.com

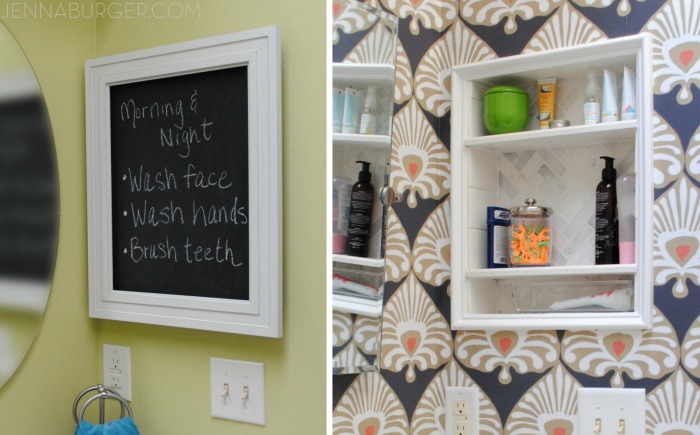
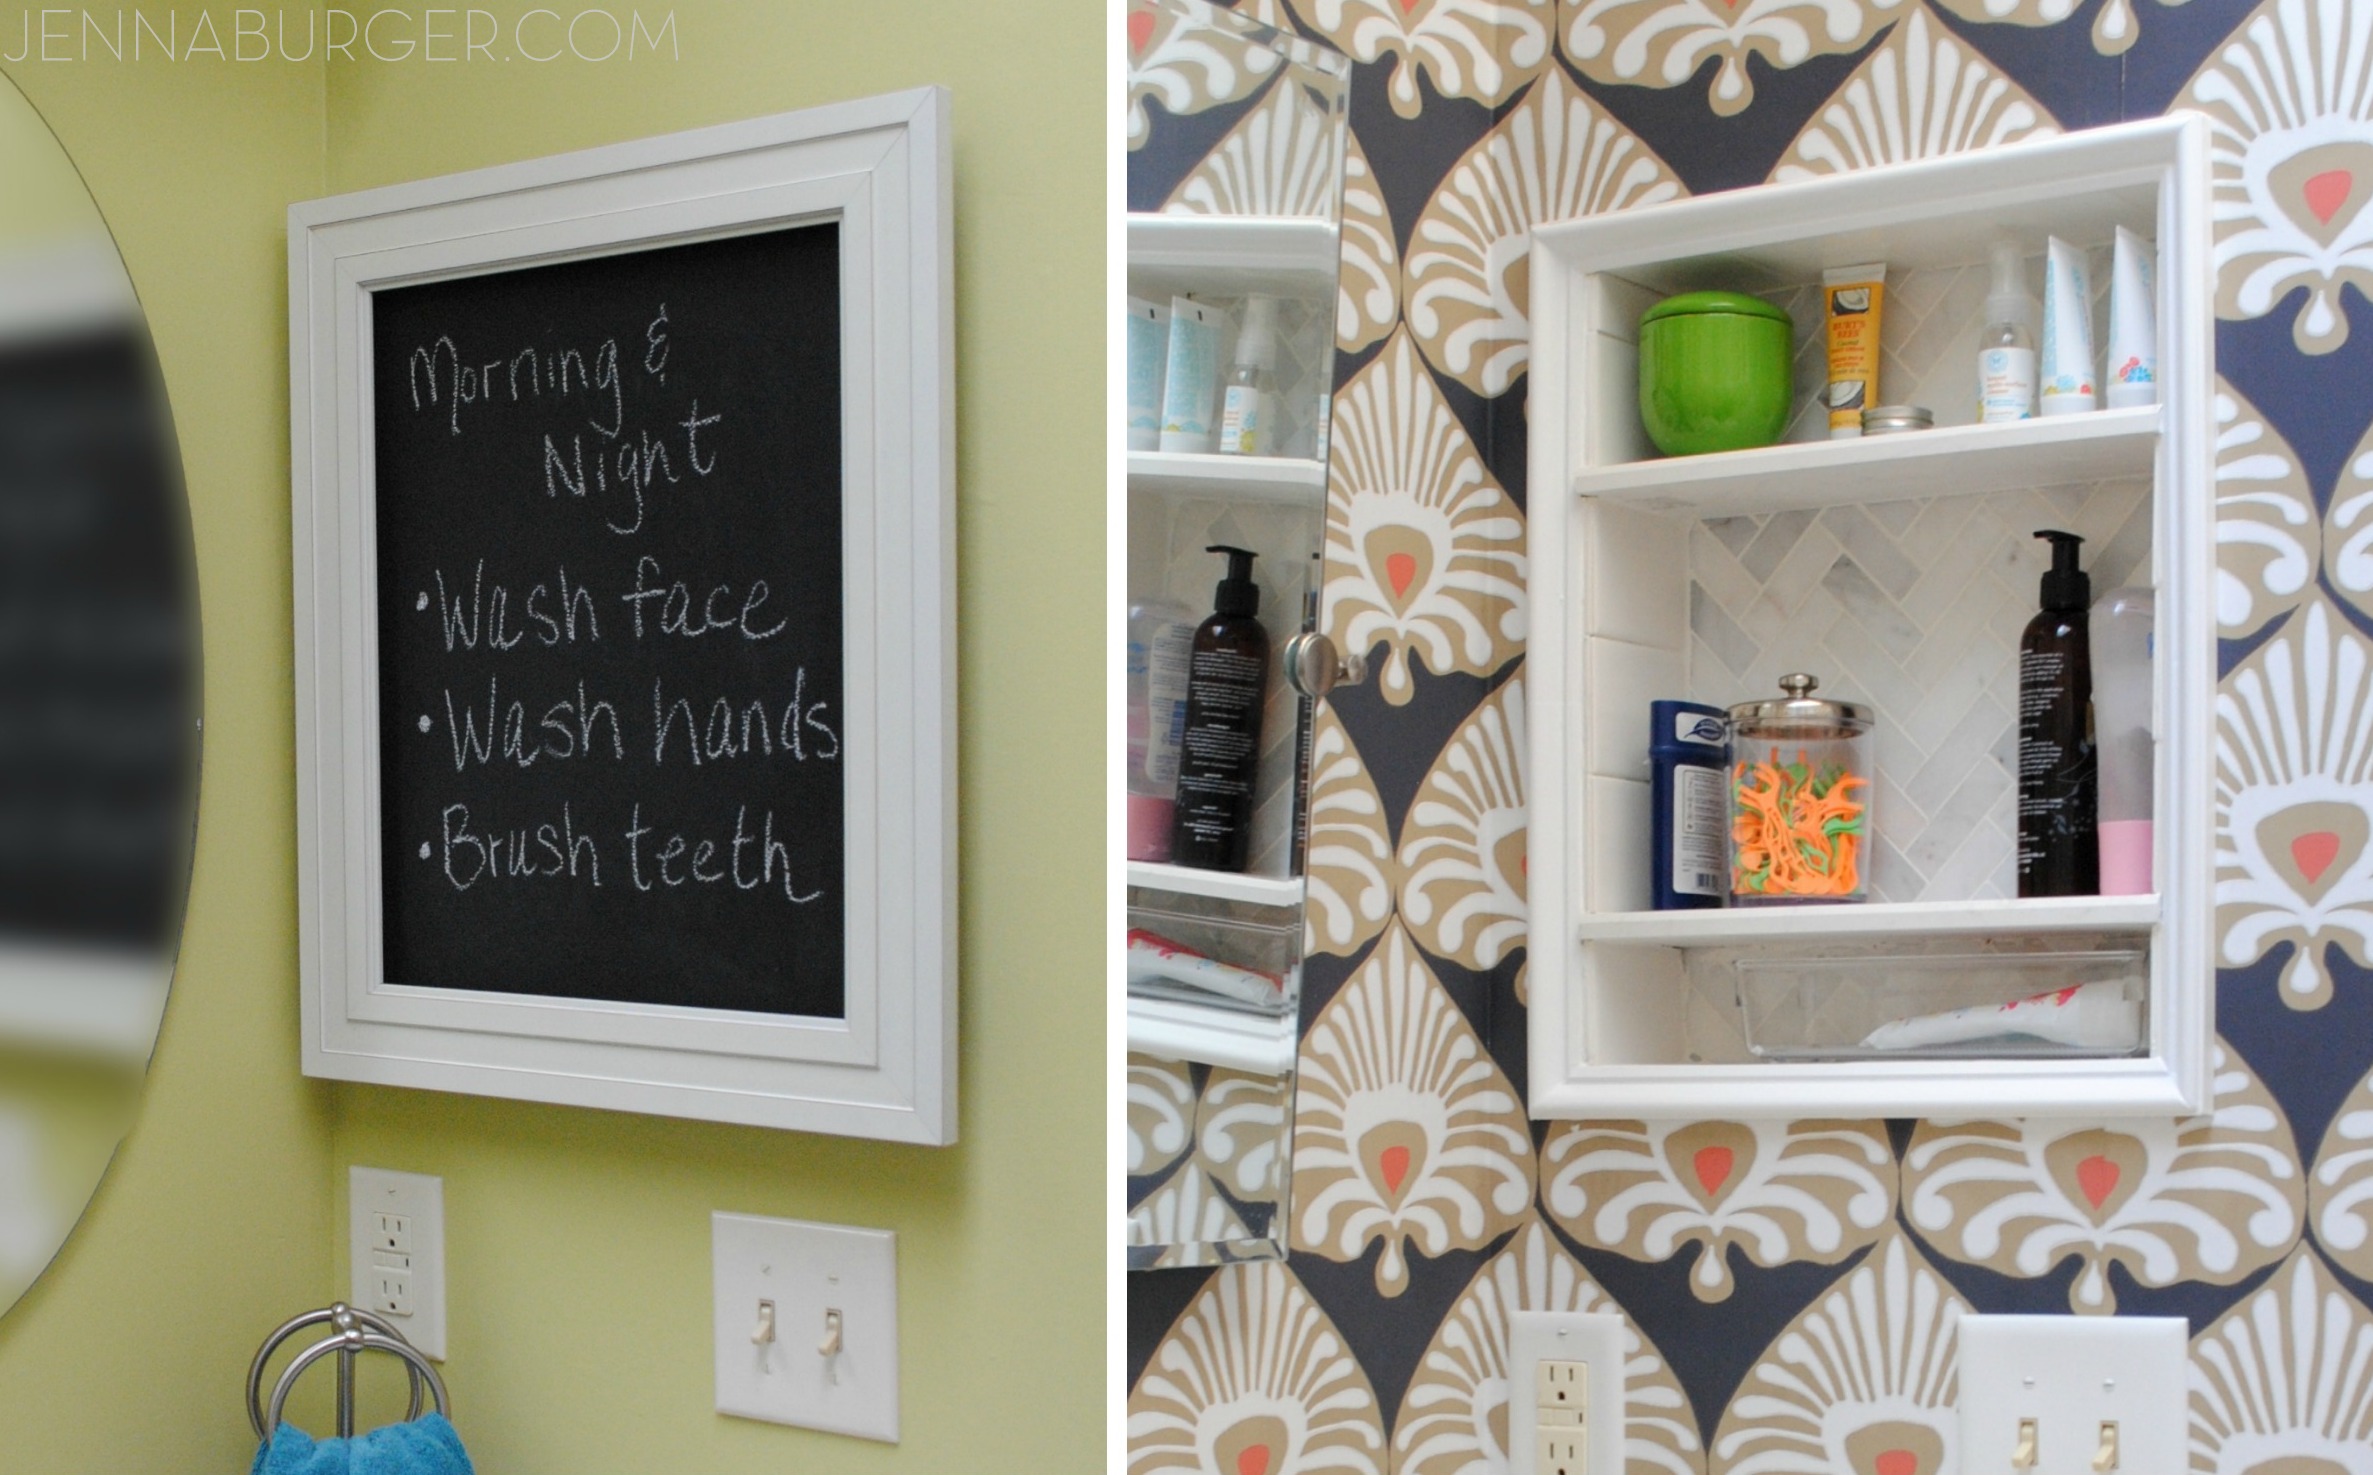
On the wall to the right of the vanity was a medicine cabinet (which I had painted with chalkpaint + added a frame a few years ago) and is now an open tiled niche

Bathroom Makover with 95% of the space being a DIY project - new tub + tile, vanity, wallpaper, and more!  Lots of details on this multi-post before & after.  Bathroom makeover by Jenna Burger Design www.jennaburger.com

A niche is really so much easier for the kids and tiling it makes cleanup so simple.  I was originally going to create the niche using wood and that would have been a big mistake. wood + water = disaster.
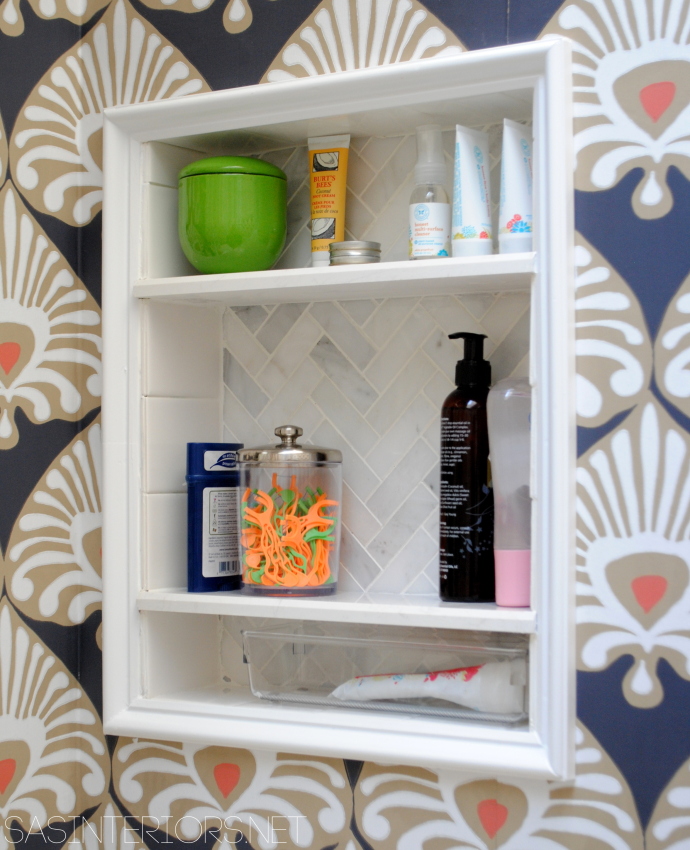
DIY: A tiled niche in place of a medicine cabinet.

tutorial for >>> creating a tiled niche
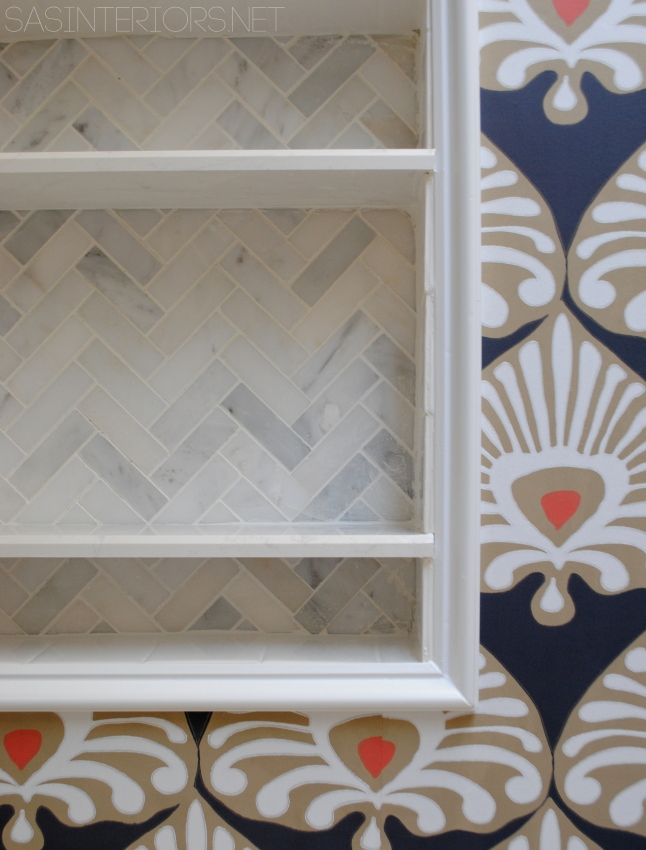
DIY: A tiled niche in place of a medicine cabinet.

before &after DIY: A tiled niche in place of a medicine cabinet.

A few more detail shots…

Bathroom Makover with 95% of the space being a DIY project - new tub + tile, vanity, wallpaper, and more!  Lots of details on this multi-post before & after.  Bathroom makeover by Jenna Burger Design www.jennaburger.com

Bathroom Makover with 95% of the space being a DIY project - new tub + tile, vanity, wallpaper, and more!  Lots of details on this multi-post before & after.  Bathroom makeover by Jenna Burger Design www.jennaburger.com

Bathroom Makover with 95% of the space being a DIY project - new tub + tile, vanity, wallpaper, and more!  Lots of details on this multi-post before & after.  Bathroom makeover by Jenna Burger Design www.jennaburger.com

Bathroom Makover with 95% of the space being a DIY project - new tub + tile, vanity, wallpaper, and more!  Lots of details on this multi-post before & after.  Bathroom makeover by Jenna Burger Design www.jennaburger.com

And of course a look at a few before & afters…
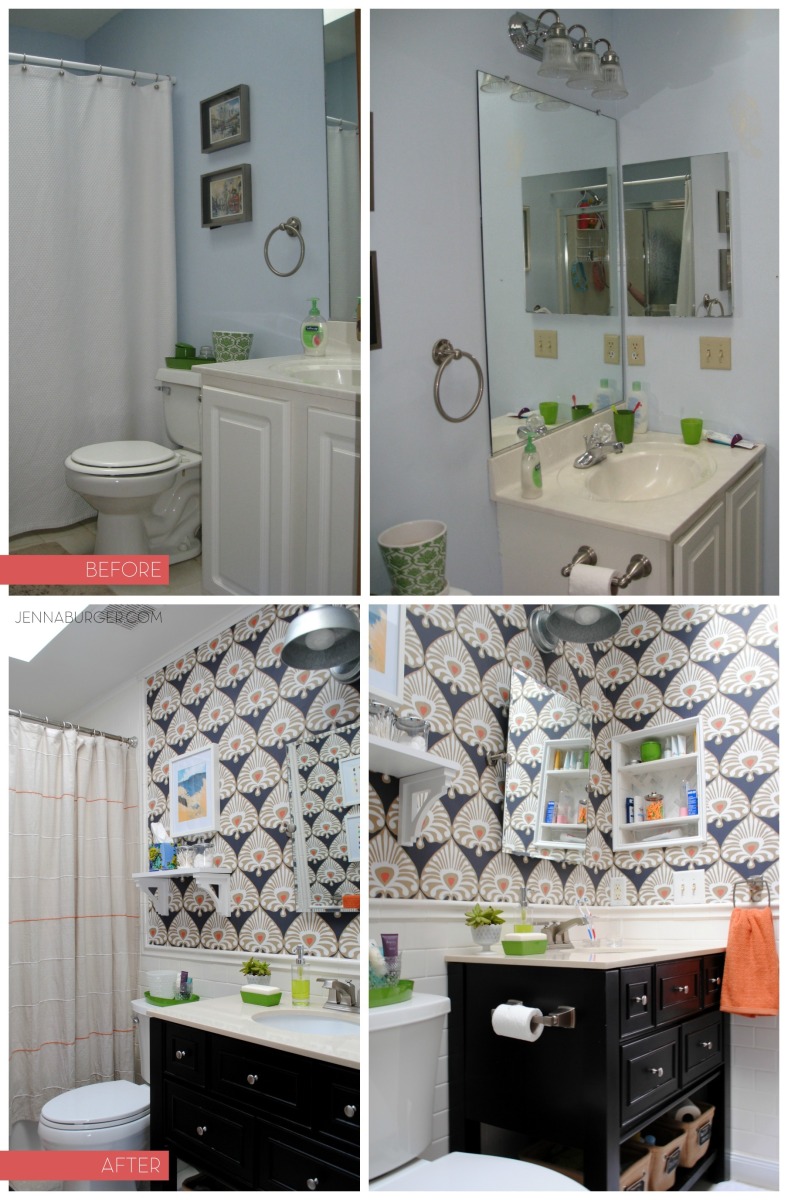
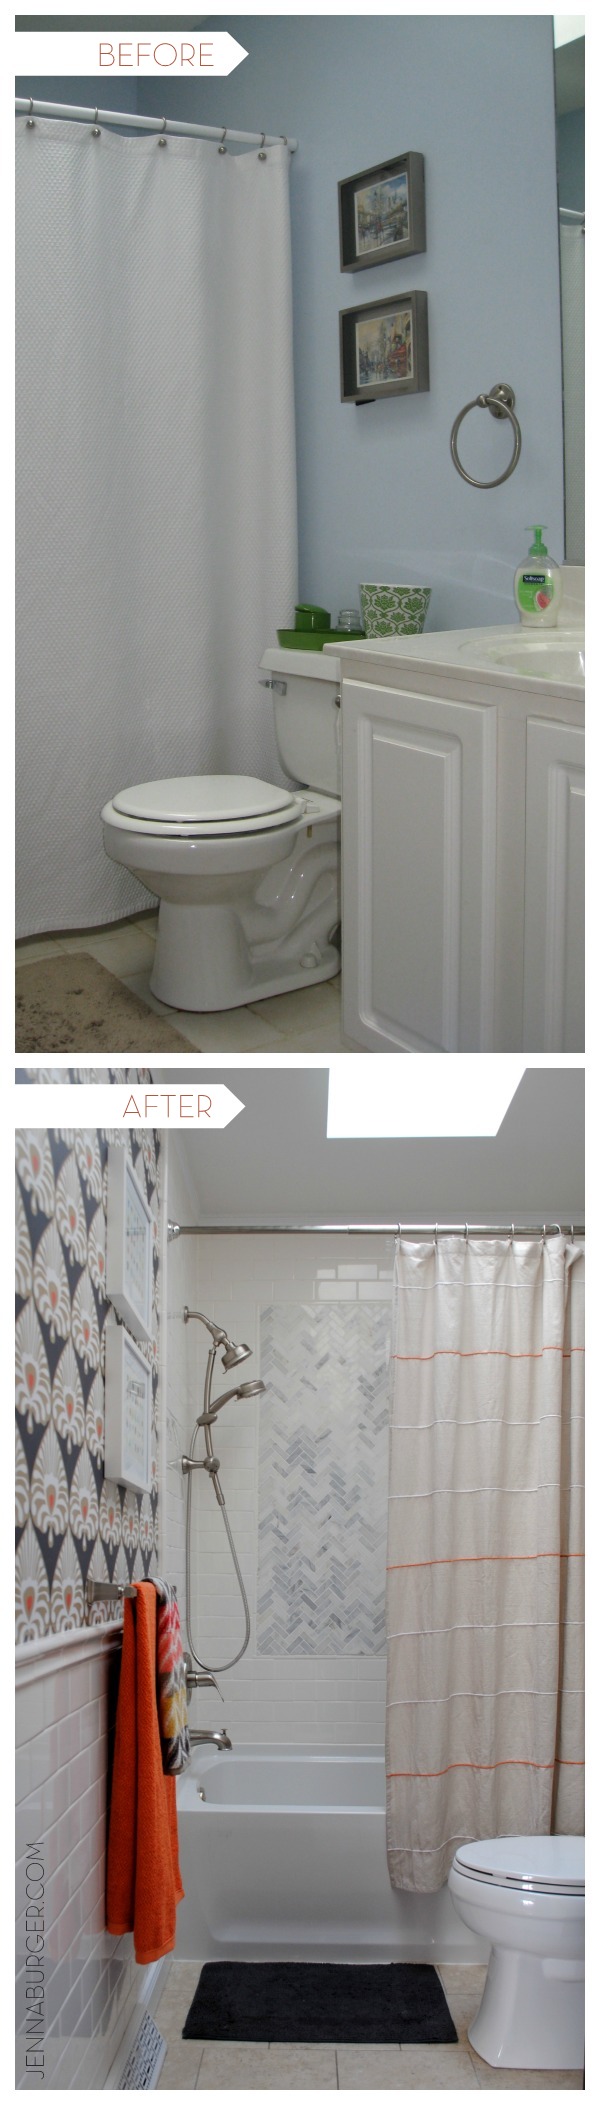
BEFORE & AFTER Bathroom Makover with 95% of the space being a DIY project - new tub + tile, vanity, wallpaper, and more!  Lots of details on this multi-post before & after.  Bathroom makeover by Jenna Burger Design www.jennaburger.comBEFORE & AFTER Bathroom Makover with 95% of the space being a DIY project - new tub + tile, vanity, wallpaper, and more!  Lots of details on this multi-post before & after.  Bathroom makeover by Jenna Burger Design www.jennaburger.comI will admit, I am so happy this bathroom is done.  It was a bit tiring, but in all honesty, it was 100% worth the blood + sweat + tears the effort!  This post was chock full of info on the final stages + reveal of the space, but you really might be wanting where I got it all & the actual resources.  No worries… that post will be coming up later this week – pinky promise.

In all, from start to finish, this bathroom makeover took just around 30 days to complete (95% DIY and mostly all by myself – the mister helped when he could).  So I guess I can say, I met my challenge… which I really only set for myself so I would finish it 100% and not slack off.   10 days, 30 days, 60 days, who cares.  It’s done!  This makeover was a big accomplishment for me as tackling the removal & install of a tub + such a HUGE tile project was nothing that I had done before.  The challenge scared me, but I did it! That’s the beauty of DIY!

From start to finish, these are all the posts pertaining to this bathroom remodel
Plan of Action
Demo: Removal + Installation of the Tub & Walls
How-To Tile + Grout the Bathroom Walls
Installing Wallpaper
Adding a Tile Accent Border
Creating a Tiled Niche
Bathroom Makeover Reveal
Resources

Lastly, I want to give a big shout out to Lowe’s for believing in my talents & choicing to partner with me on this project. They never tell me what to do, what to buy, or what to write, but instead they always say do what you do best… create something good & inspire!

Thanks for following along with me on this bathroom makeover journey!  Cheers to another successful (but tiring) before & after makeover!

Resources for all the items in this bathroom makeover coming later this week.

DIY: Honeycomb Wall Hooks

DIY Tutorial: Honeycomb shaped wall hooks [inspiration for many other fun + functional wall storage ideas] Tutorial by Jenna Burger Design www.jennaburger.com

I am quickly realizing that little girls need lots of storage.  And no matter how much they have, it’s not enough…

As the end of 2014 closed out, I was determined to put the final touches on the shared girls room for my 2 daughters.

There really wasn’t a lot to do since creating the nursery nook, but it’s those little things that add up making it feel incomplete.  Most of the walls were filled & looked fabulous, but the space around the closet needed something.  After contemplating for quite a long time on what to do and knowing the requirements – fun + unique + functional + DIY – I was on the move.  At the request of my daughter to also have something with a honeycomb design (similar, but different to my sons honeycomb shelves), I set out on creating these…  Honeycomb Wall Hooks.

DIY Tutorial: Honeycomb shaped wall hooks [inspiration for many other fun + functional wall storage ideas] Tutorial by Jenna Burger Design www.jennaburger.com

When Lowe’s gave the Creative Ideas Team the freedom this month to choice any style project – bloggers choice – I knew this was the spot for it!  I had a blast making these wall hooks over the holiday break & my daughter is in love with “her” honeycomb creation.

If you’re thinking of creating something similar, this project is just an inspirational stepping stone to so many other great + unique possibilities.  Different shapes could be used (think squares or triangles), different colors (green, blue, gray for a boys room), different arrangement (how about a larger area on a wall).  These wall hooks are not only functional, but beautiful; they are the art of the space.

Here is what I used to create the honeycomb wall hooks

> (2) 1 x 8 x 6′ long – I created 12 hexagons, so the amount of wood needed will depend on the quantity you want to create

> Circular Saw – to cut hexagon shapes (see my recommendations for a circular saw here)

> Pencil, Ruler, and other general supplies

> Paint – colors of your choice

> Knobs – I found knobs at Lowe’s for .87, then painted them

> Drill

> Command Strips (or any wall adhesives)

1

To start out, I cut the wood into squares.  The width of a 1 x 8 is actually 7-1/4″, so I measured and cut the length of the board using the circular saw in 7-1/4″ increments.

DIY Tutorial: Honeycomb shaped wall hooks [inspiration for many other fun + functional wall storage ideas] Tutorial by Jenna Burger Design www.jennaburger.com

2

Once the squares were created, I made the hexagon shape.  I started out with a strategy of how long each “leg” should be, but in the end, I just winged it by eye.  It really doesn’t need to be perfect and there is not “right” way.

I lined up the wood with the saw and figured out that the angle of 22.5 was ideal to cut the angles for the hexagon shape.

DIY Tutorial: Honeycomb shaped wall hooks [inspiration for many other fun + functional wall storage ideas] Tutorial by Jenna Burger Design www.jennaburger.com

Then I cut the 2 opposite angles.  Flipped over the wood and cut the other two angles which created the hex shape.

DIY Tutorial: Honeycomb shaped wall hooks [inspiration for many other fun + functional wall storage ideas] Tutorial by Jenna Burger Design www.jennaburger.com

3

Taking the easy route (and thankfully it worked), I made one hexagon shape and used it as a template to trace the shape on the other 11 pieces.

DIY Tutorial: Honeycomb shaped wall hooks [inspiration for many other fun + functional wall storage ideas] Tutorial by Jenna Burger Design www.jennaburger.com

4

Before the painting process, I gave the edges a quick sanding with sand paper.

DIY Tutorial: Honeycomb shaped wall hooks [inspiration for many other fun + functional wall storage ideas] Tutorial by Jenna Burger Design www.jennaburger.com

And then they were complete…

DIY Tutorial: Honeycomb shaped wall hooks [inspiration for many other fun + functional wall storage ideas] Tutorial by Jenna Burger Design www.jennaburger.com

5

For the paint colors, I used what I had on hand.  Either craft paint or wall paint works…  I used both.  I chose colors of pink, fuchsia, gold, white, turquoise, and coral (which resulted a bit darker, but it works).  Using a foam brush (a regular paint brush would do just fine too), I painted all of the hex shapes the various colors.

DIY Tutorial: Honeycomb shaped wall hooks [inspiration for many other fun + functional wall storage ideas] Tutorial by Jenna Burger Design www.jennaburger.com

6

I snagged wood knobs at Lowe’s for .87 and painted them white for the colored hexagons and mint for the white hexagons.  And for the gold hex shapes, I used the knobs that were previously in the kids bathroom and added super glue to attach them to the surface.

DIY Tutorial: Honeycomb shaped wall hooks [inspiration for many other fun + functional wall storage ideas] Tutorial by Jenna Burger Design www.jennaburger.com

7

For the wood knobs from Lowe’s, I drilled a hole into the wood block, then used the screw that it came with to secure them.

DIY Tutorial: Honeycomb shaped wall hooks [inspiration for many other fun + functional wall storage ideas] Tutorial by Jenna Burger Design www.jennaburger.com

Last step…  to hang them!

8

I had a bit of fun creating the layout.  It took a few tries to get it how I felt looked best. Once the layout was set, I used command strips to hang them to the wall.  This most likely won’t be a forever creation (what is in my house?) so these wall adhesives are great + they leave no damage to the wall.

DIY Tutorial: Honeycomb shaped wall hooks [inspiration for many other fun + functional wall storage ideas] Tutorial by Jenna Burger Design www.jennaburger.com

I hung 10 of the hex shapes on the left side of the wall (since it was fairly bare) and 2 on the other side.  Here’s the result of the honeycomb wall hooks.

DIY Tutorial: Honeycomb shaped wall hooks [inspiration for many other fun + functional wall storage ideas] Tutorial by Jenna Burger Design www.jennaburger.com

Functional Art!

DIY Tutorial: Honeycomb shaped wall hooks [inspiration for many other fun + functional wall storage ideas] Tutorial by Jenna Burger Design www.jennaburger.com


DIY Tutorial: Honeycomb shaped wall hooks [inspiration for many other fun + functional wall storage ideas] Tutorial by Jenna Burger Design www.jennaburger.com

Within minutes this wall was girl-ified with jewels…  costume jewels, of course!

DIY Tutorial: Honeycomb shaped wall hooks [inspiration for many other fun + functional wall storage ideas] Tutorial by Jenna Burger Design www.jennaburger.com


DIY Tutorial: Honeycomb shaped wall hooks [inspiration for many other fun + functional wall storage ideas] Tutorial by Jenna Burger Design www.jennaburger.com

DIY Tutorial: Honeycomb shaped wall hooks [inspiration for many other fun + functional wall storage ideas] Tutorial by Jenna Burger Design www.jennaburger.com

DIY Tutorial: Honeycomb shaped wall hooks [inspiration for many other fun + functional wall storage ideas] Tutorial by Jenna Burger Design www.jennaburger.com

Perfect for dress up too.  Can you imagine a playroom filled with these wall hooks?!

DIY Tutorial: Honeycomb shaped wall hooks [inspiration for many other fun + functional wall storage ideas] Tutorial by Jenna Burger Design www.jennaburger.com

DIY Tutorial: Honeycomb shaped wall hooks [inspiration for many other fun + functional wall storage ideas] Tutorial by Jenna Burger Design www.jennaburger.com

I almost forgot to share a pic of how this space looked before…  Incredible update, right?!

DIY Tutorial: Honeycomb shaped wall hooks [inspiration for many other fun + functional wall storage ideas] Tutorial by Jenna Burger Design www.jennaburger.com

This room has had quite the transformation over the years starting as a nursery, then getting revamped to a big girl room with a 3-in-1 play tent.  Once baby #3 (our littlest lady) came along, a new wall color was added and changes were made to accommodate a nursery nook.  This gorgeous fun + functional wall creation was exactly what the room needed to be complete!

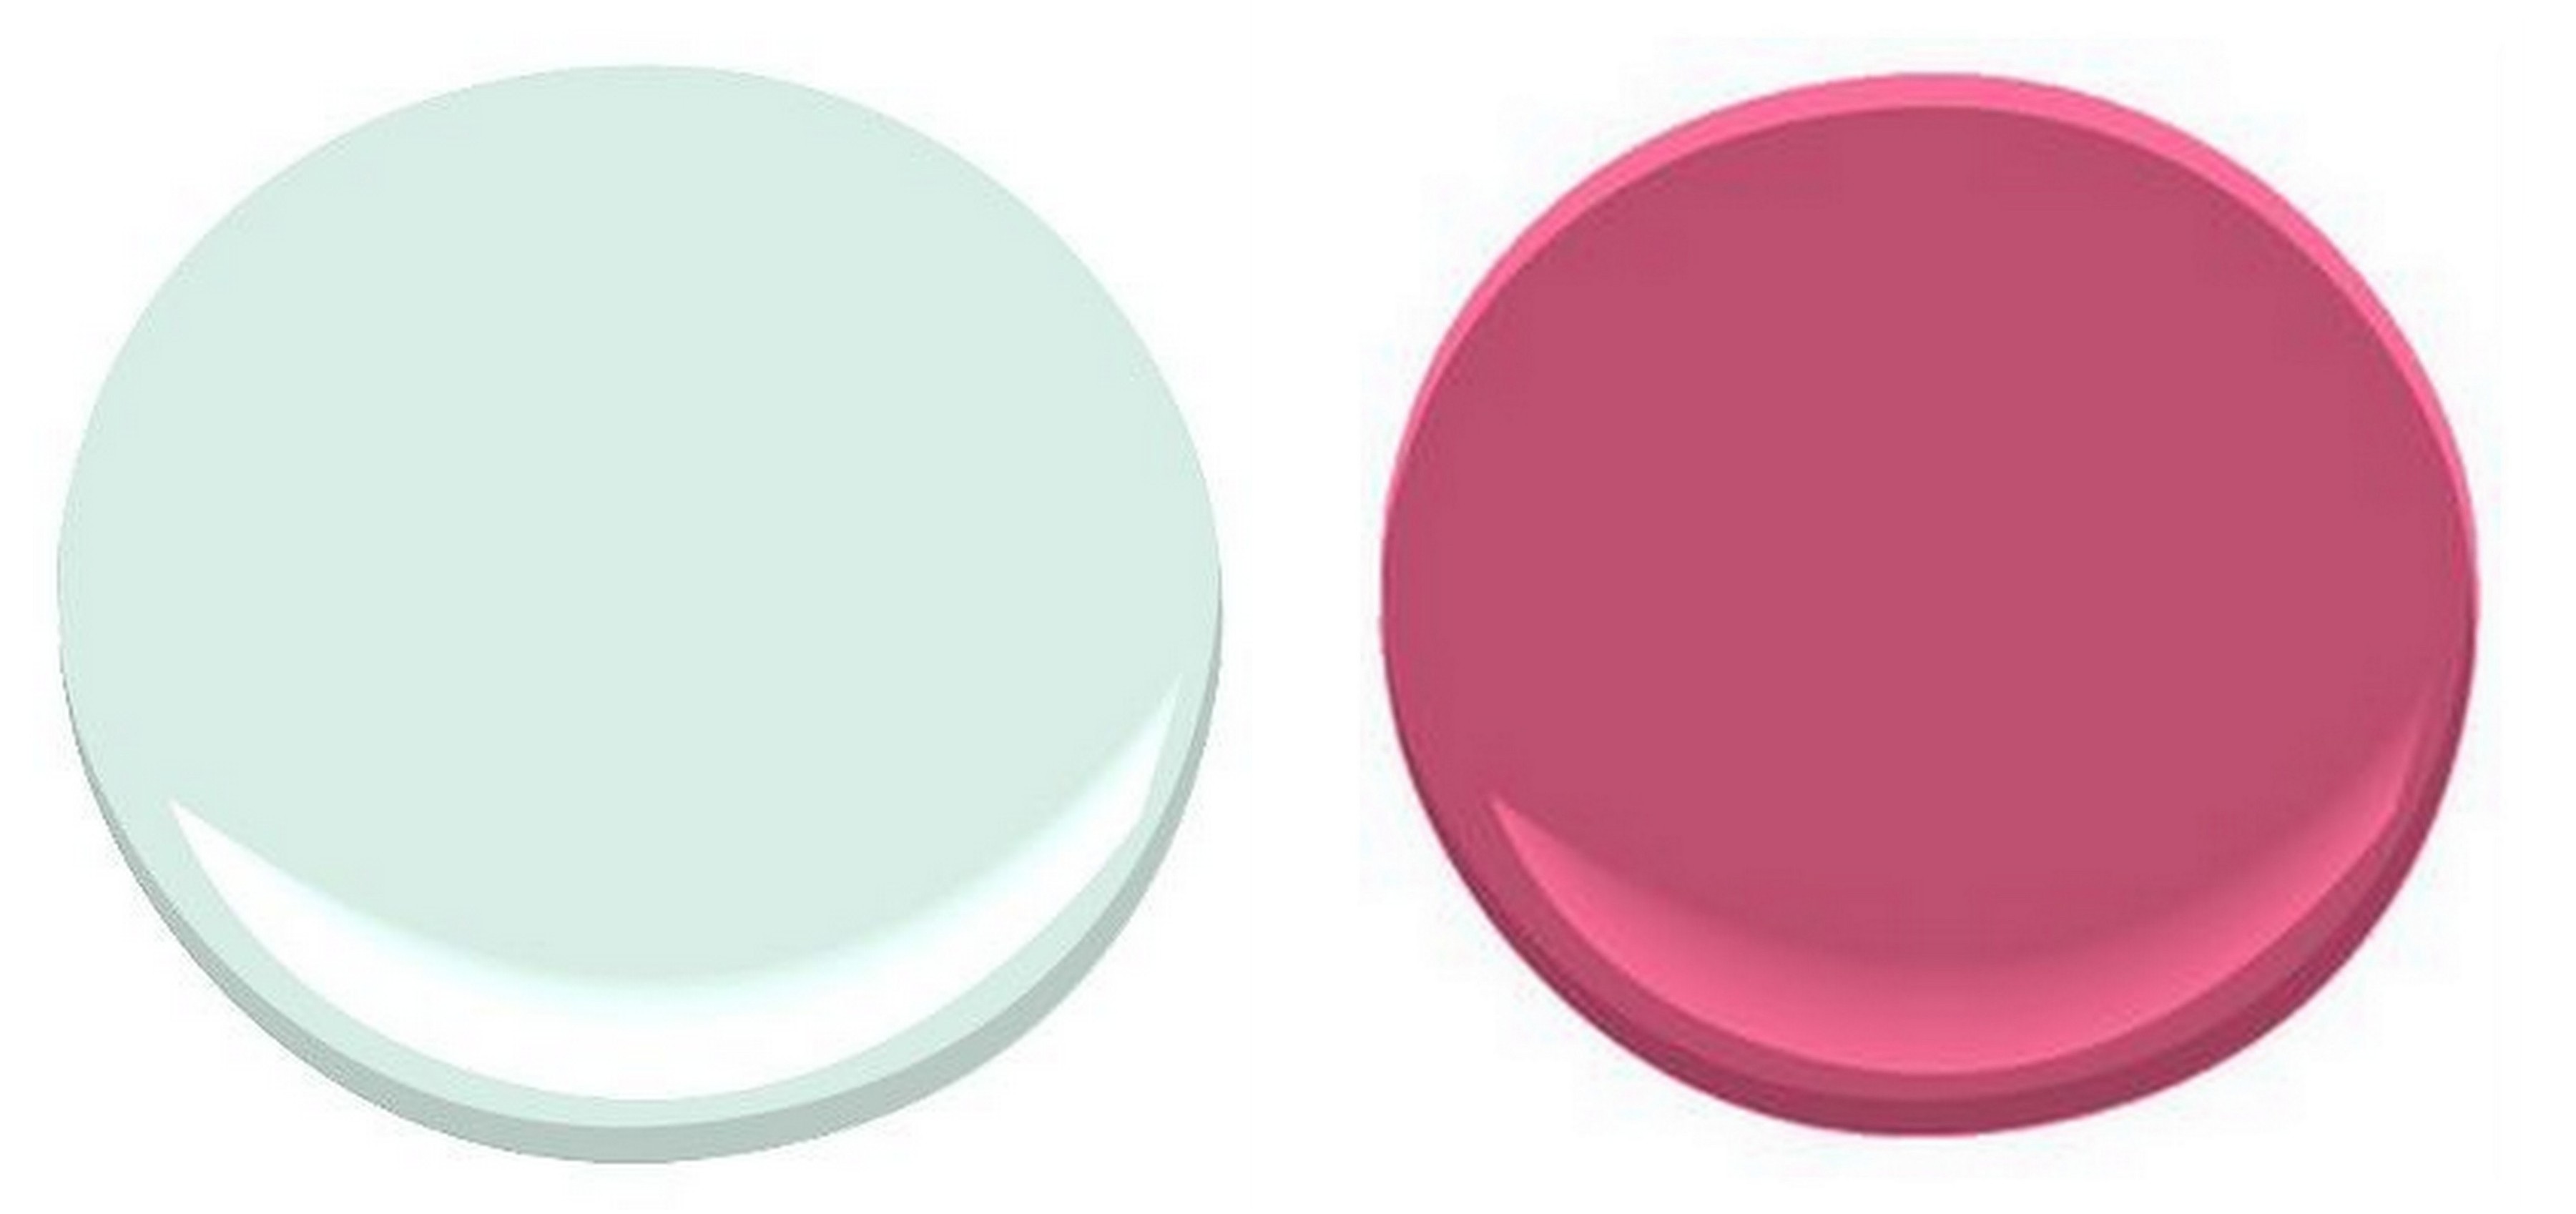
If you’re interested in the colors of the room, the deep fuchsia color is Benjamin Moore Royal Fuchsia and the mint color (which used to be beige) is Benjamin Moore Spring Mint.
Benjamin Moore Spring Mint + Royal Fuchsia

If this project has inspired you, pin it to save for later!

DIY Tutorial: Honeycomb shaped wall hooks [inspiration for many other fun + functional wall storage ideas] Tutorial by Jenna Burger Design www.jennaburger.com

Thanks so much for following along and I really hope you enjoyed seeing the steps I took to make this creation!

Lowes Creative Ideas Team Member

To gather even more unique, fun, and creative ideas for your indoor and outdoor Winter spaces, I would definitely suggest downloading the Lowe’s Creative Ideas app on your iphone and/or ipad.  I’m always checking out the FREE app for great seasonal + do-it-yourself inspiration.

Also consider following Lowe’s on Facebook, Pinterest, and Instagram as well.

Disclosure: I am part of the Lowe’s Creative Team and was provided with a Lowe’s gift card to purchase items for my project.  I was also compensated for my time to use the products.  No one told me what to create, what to buy, how to use the product, or what to write.  All opinions are 100% mine!

6 Foolproof Steps to Purge + Organize + Renew your Home

With the 859,934 organizational pins on Pinterest, I’m already feeling a bit behind + overwhelmed and it’s only the 5th of January!  Deep breath. Deep breath.  Please tell me I’m not alone… BUT I am strongly pushing away those anxious thoughts and instead putting my efforts on living with intention, my focus for the coming year.

Organizing doesn’t come easy to me.  I am known to be a hoarder collector & have difficulty parting with things – keep or toss, keep or toss???  But over the past few months things around the little ole’ homestead of mine have gotten a wee bit out of hand (I guess anew baby can do that to ya) and I am ready to rise above & take back this joint!

As we wind down from the Christmas craze, January typically is a quiet + cold + drear month in our neck of the woods.  As I start the process of transitioning our home back to the everyday after the holiday mayhem, I always feel the New Year is ideal to clear the mind and begin a fresh start.  Now is the time to clean house and create a more organized home!!

This past weekend, actually news years day to be exact (because over the past week I’ve completely lost track of time), I started the clearing out/organizing process.  4 bags have already gone to goodwill… go me!  Coming from the person who hates to throw things away, this is big.

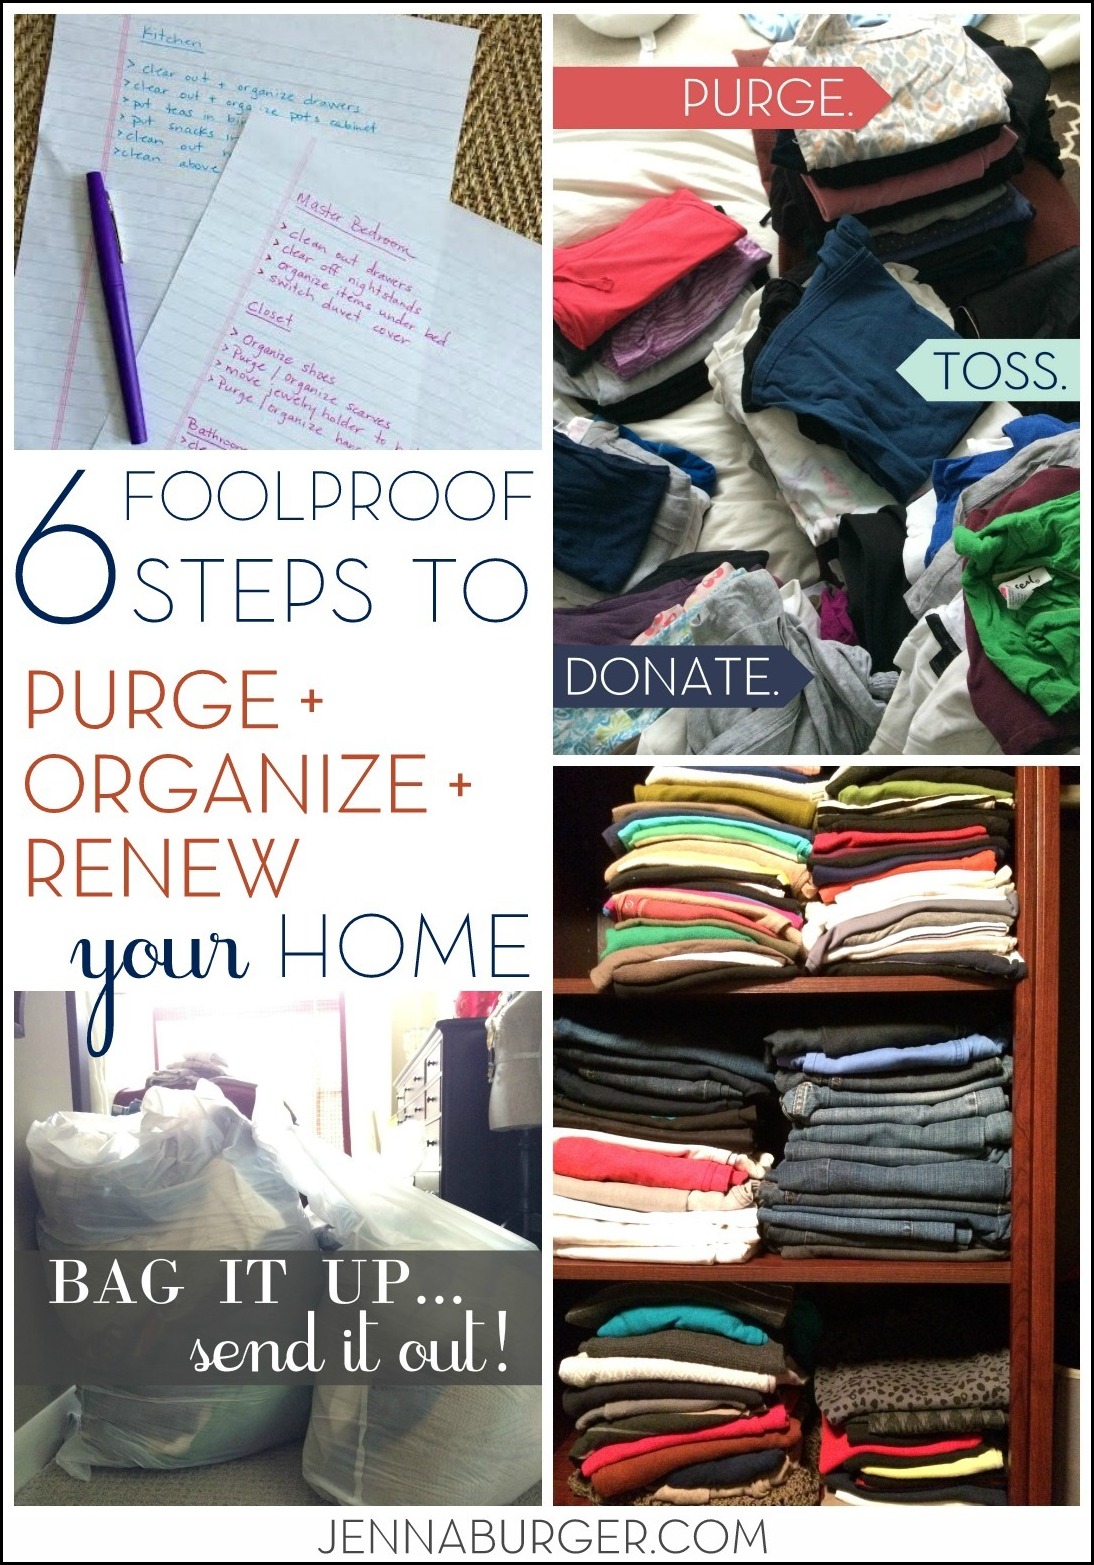
Here are the 6 steps that I have found really work [my foolproof tips] to purge + organize + renew your home for a fresh step in the right direction for the New Year

6 Foolproof steps to PURGE + ORGANIZE + RENEW your home in the new year! www.jennaburger.com

1. Make a list
I am a list person. I love to write it down, perform the task, and then cross it off.  To me, the “cross off” is the best part.  I feel so accomplished afterwards! So here is what I do…

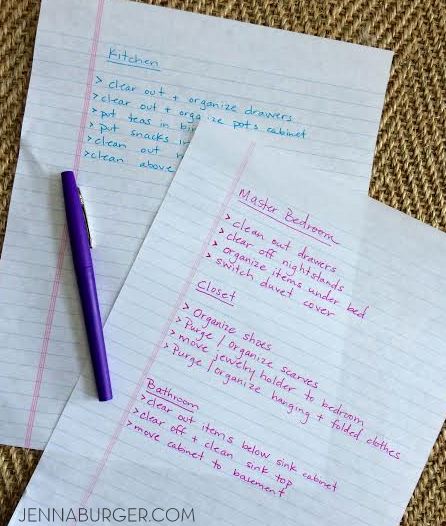
Go room to room around the home and make a list of what is working and what isn’t.  Look in the closets, peek under the beds, and open the drawers. Create a page for each room and write down a plan of action for what you want to organize and what you need to lose (ie: organize sock drawer, purge papers/magazines, donate unused toys, etc).

6 Foolproof steps to PURGE + ORGANIZE + RENEW your home in the new year! www.jennaburger.com

A list will keep you focused + stay on track. When a task is complete, cross it off. Once all the tasks on your list are finished, the best part is reflection; looking back at all your hard work + efforts. It will also keep you motivated to do more!

2. Get Moving

Once your plan of action is in place, it’s time to get moving. Don’t analyze (which I’m known to do) Just start.Choose a room to start with and let your list guide you. Most likely, the whole house won’t be fully organized in a day – it’s simply not possible unless you already live in a spotless pad.

Instead of stressing and overwhelming yourself, set a time limit or a specific goal to work towards. Once it’s reached, be done. Then the next day, do the same. This will help avoid burn-out and will keep you motivated to continue. Organizing and taking control of the stuff in your home can be exhausting, so mentally prepare yourself for the job.

You’ll be amazed at how much better every room in your home looks once you get rid of the useless items.  Like I said 4 bags already packed up & shipped out.  Many more to go!

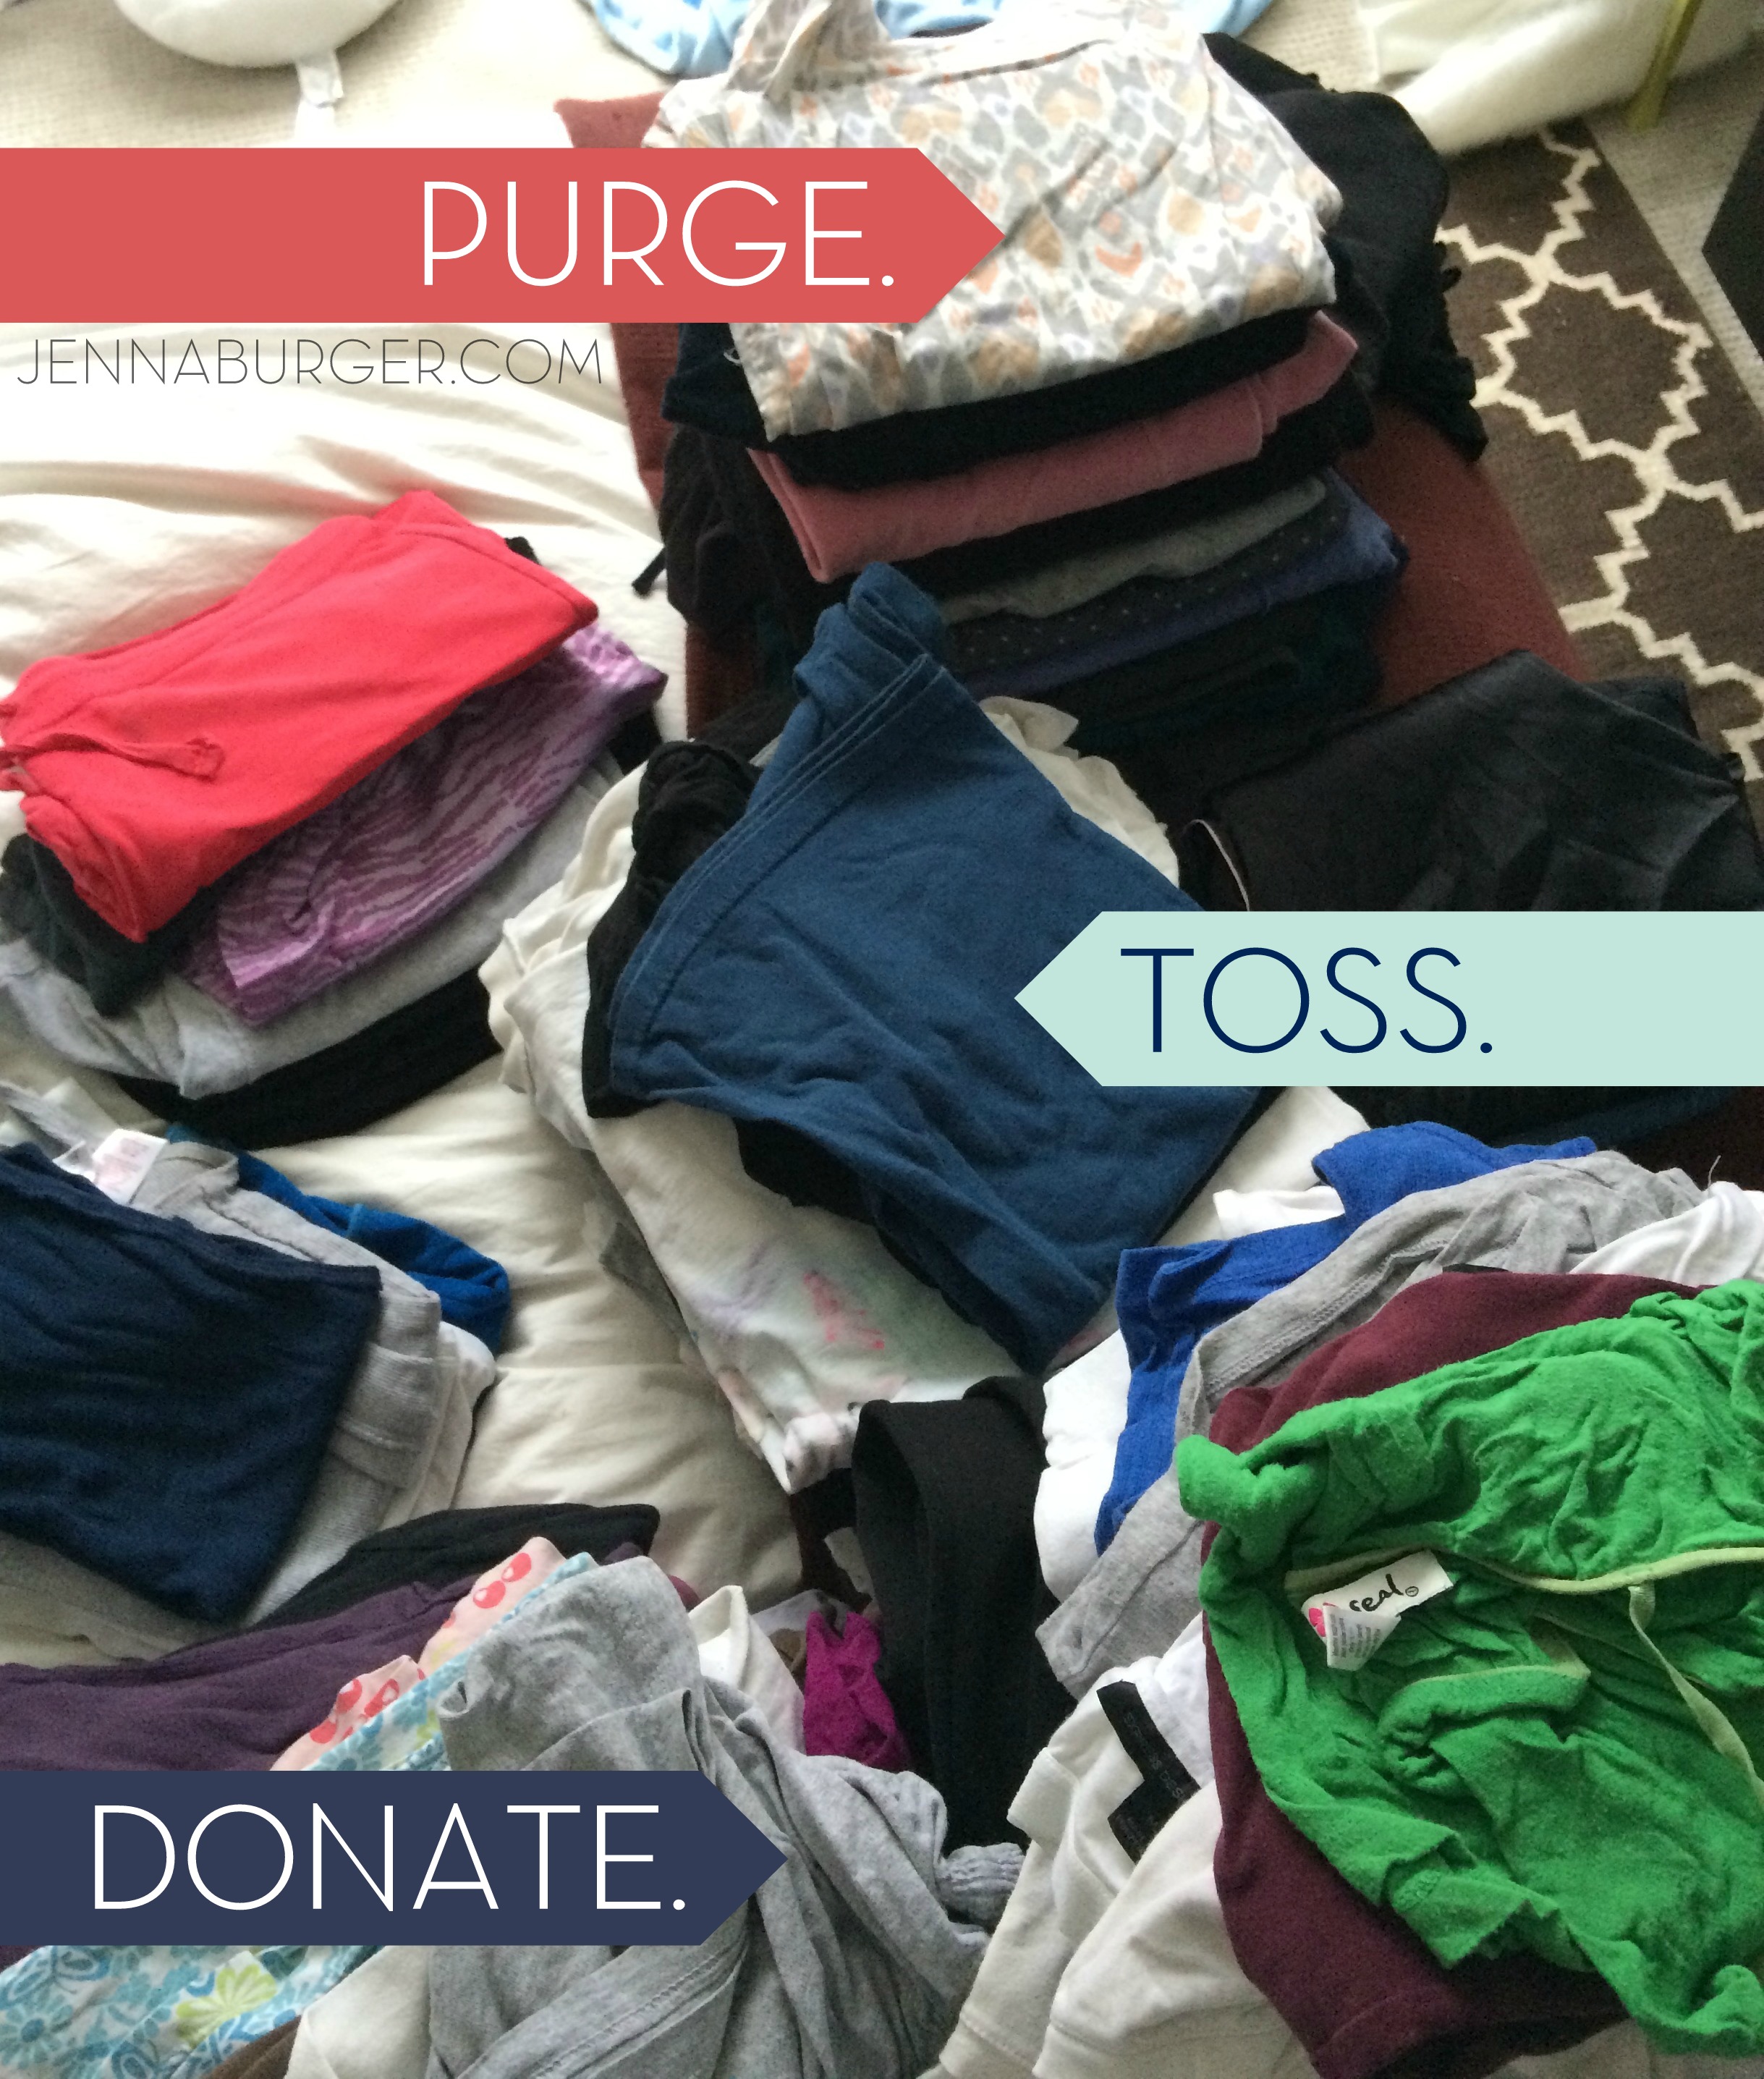
3. Purge. Toss. Donate.

Just keep saying to yourself… purge, toss, donate.  purge, toss, donate.  purge, toss, donate.

When going room by room, start by sorting through the items you no longer need, use, and/or want. Set up 3 boxes or bags (I typically use large heavy-duty garbage bags) to purge, toss, and/or donate. This will make the process faster + more efficient.  Have you ever tried the 3-for-1 rule?  For every new item you bring into the home (think about all those Christmas presents – shirts, books, toys, etc.), say goodbye to three things. Keep in mind, if something hasn’t been touched/used in 6-12 months, you probably don’t need it.

If you don’t use it, lose it.

PURGE. TOSS. DONATE. 6 Foolproof Home Organizational Tips that will get you pointed in the right direction NOW!

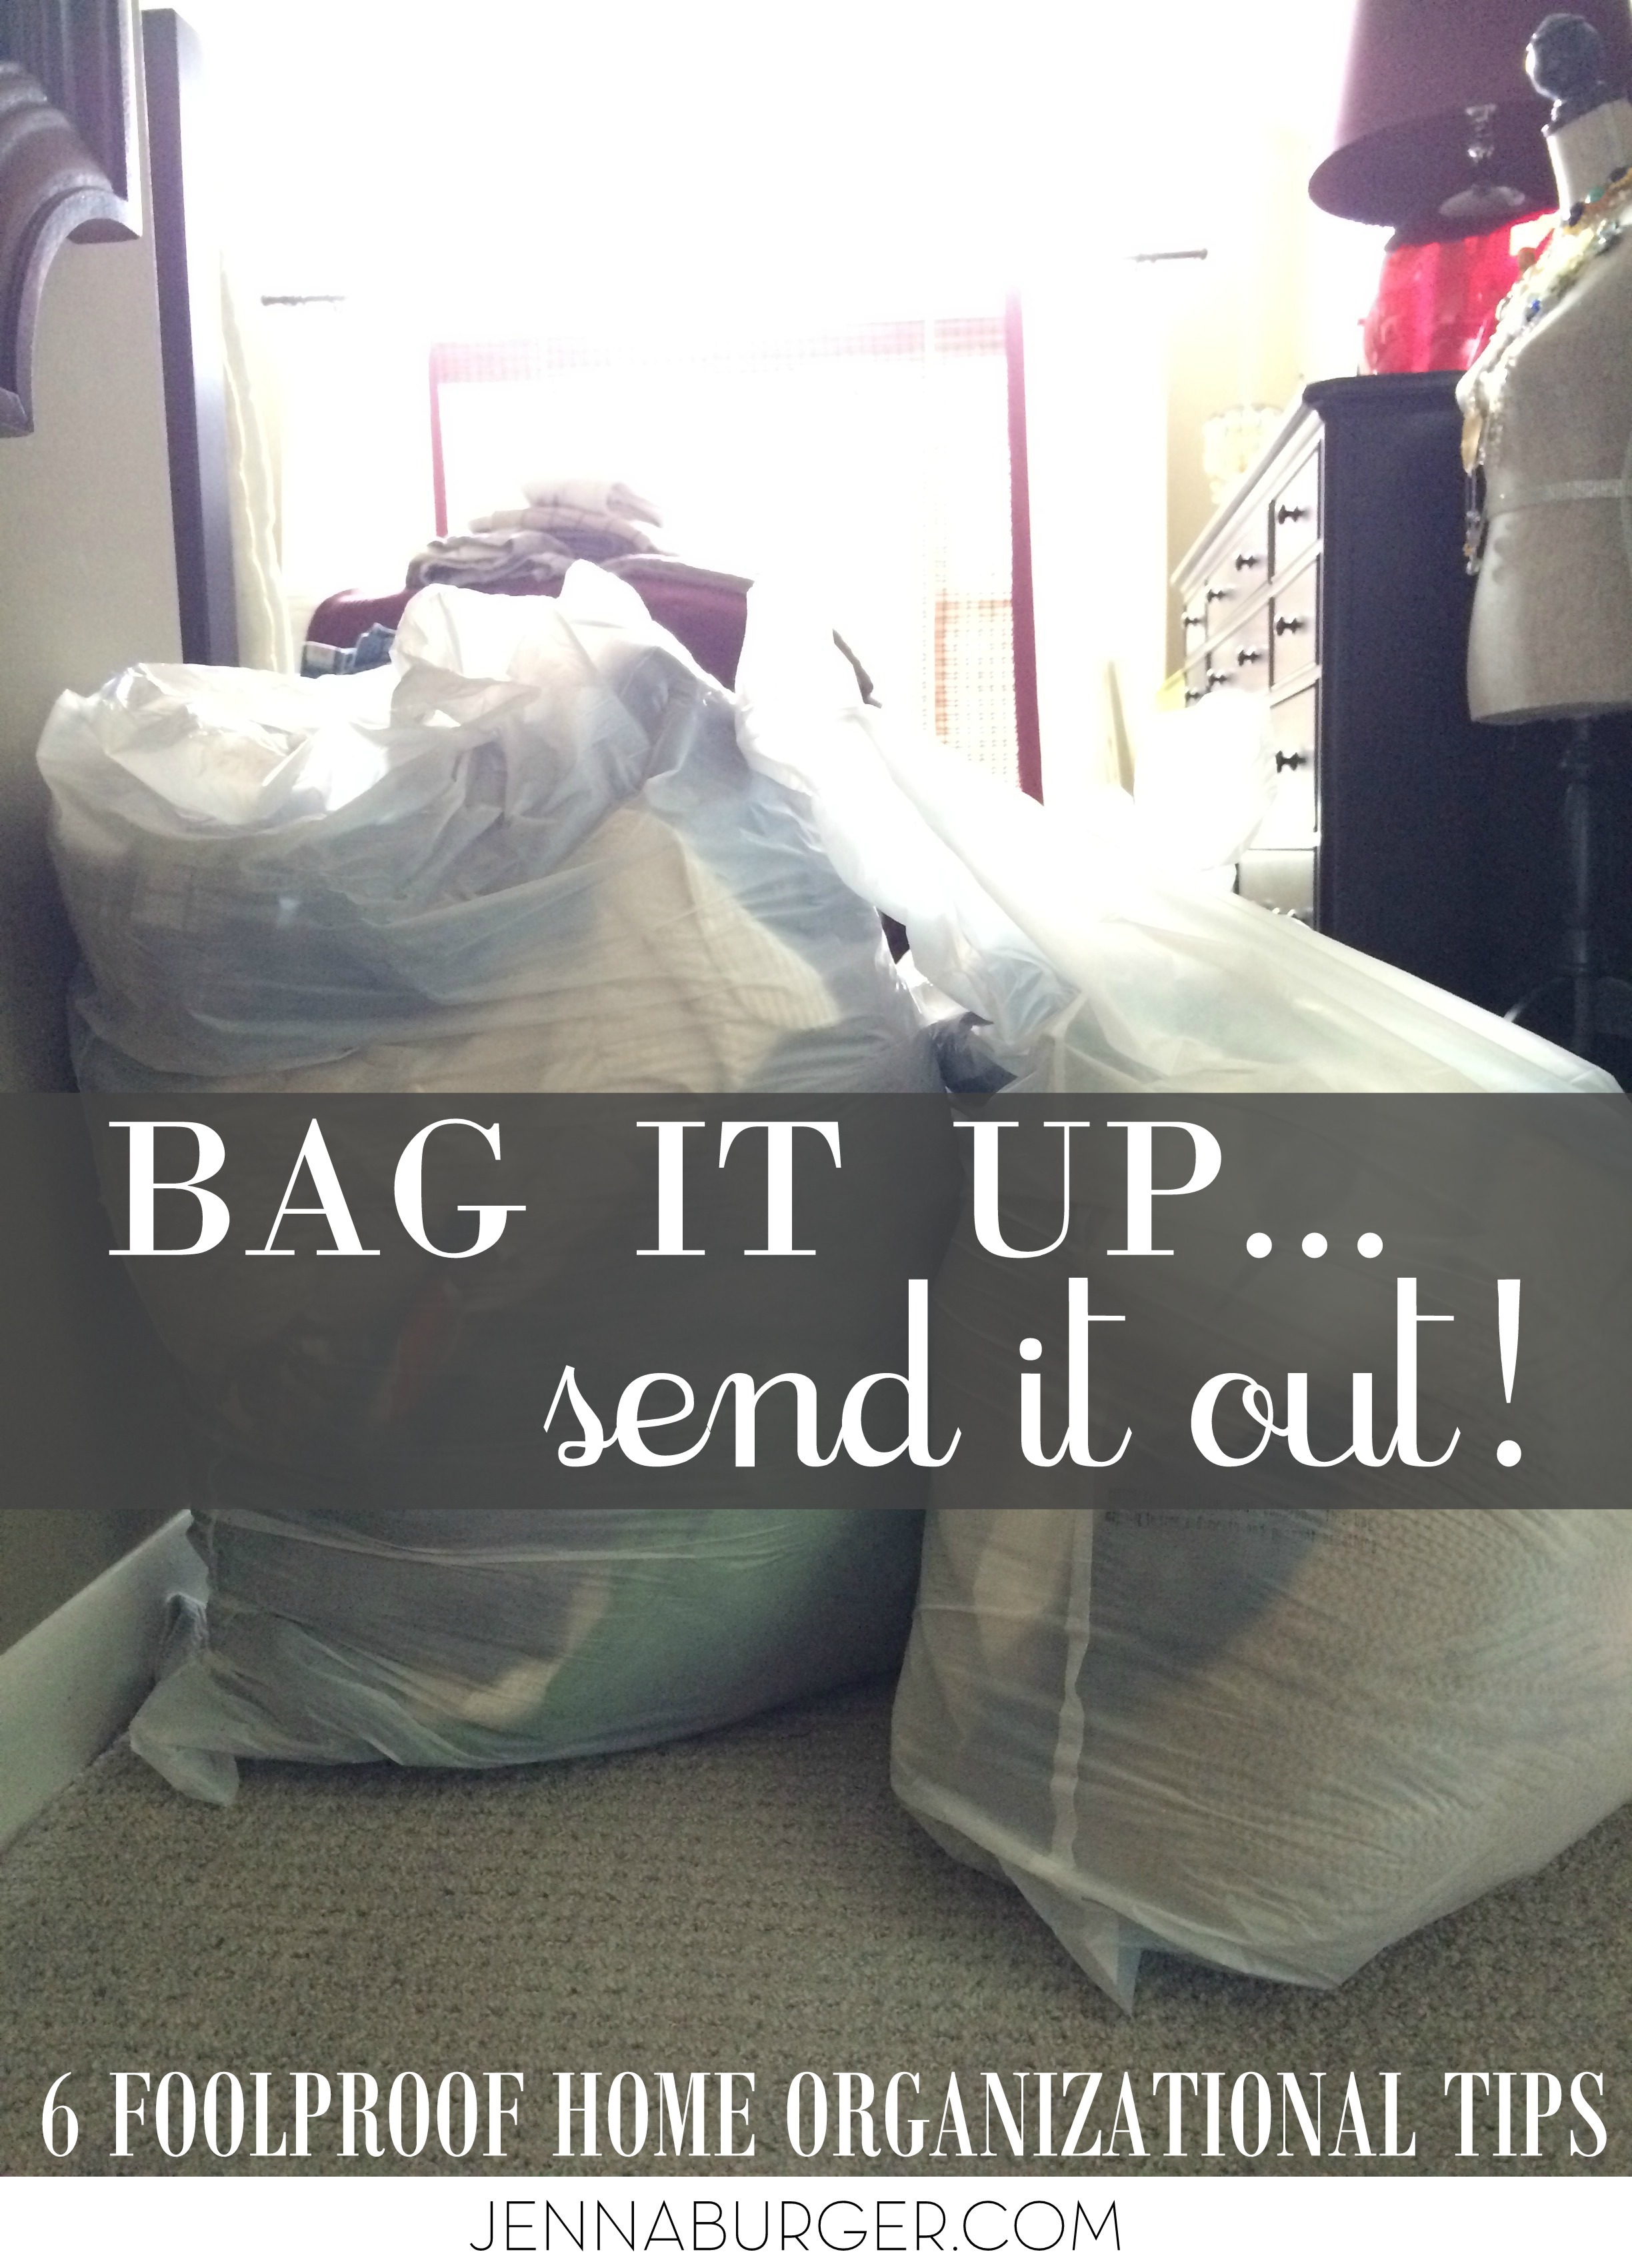
Once you have everything bagged up, ship it on out as soon as you can.  That way there can’t be regrets or second guessing!

6 Foolproof steps to PURGE + ORGANIZE + RENEW your home in the new year! www.jennaburger.com

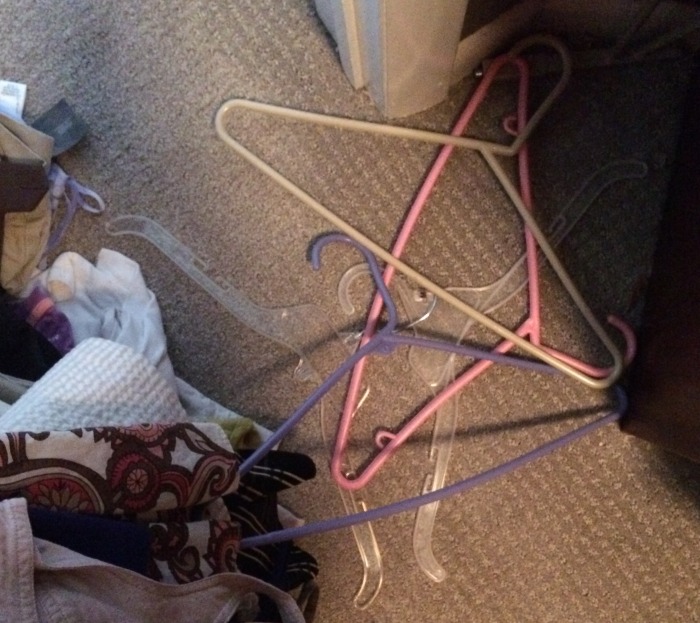
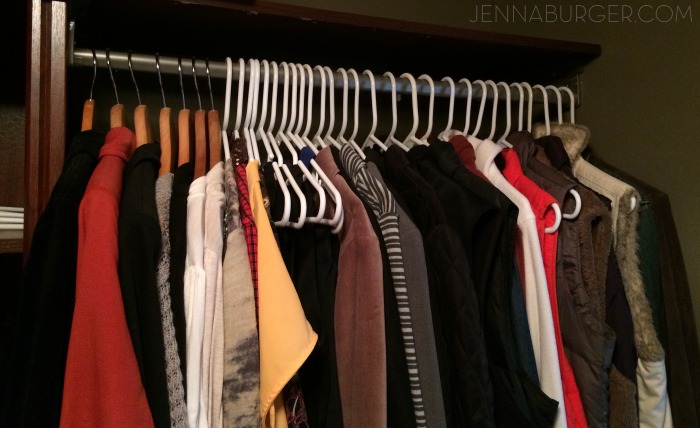
And toss the miss-matched hangers! Go for all one color… IT’S LIBERATING!

PURGE. TOOSS. DONATE. 6 Foolproof Home Organizational Tips that will get you pointed in the right direction NOW!

4. Organize

Organizing is different than cleaning.  Sometimes the 2 can get confused (according to my Mister).  I am a great cleaner (surface cleaning), but when you open a drawer, it often doesn’t look so hot.

Once you’ve removed your unused items, it’s time to organize. I have found baskets, bins, trays, and other storage caddies are a great way to organize items you want to keep. Make a point to have a spot / a place for everything. This is especially key to keep the clutter in check with kids toys, books, games, and art supplies.

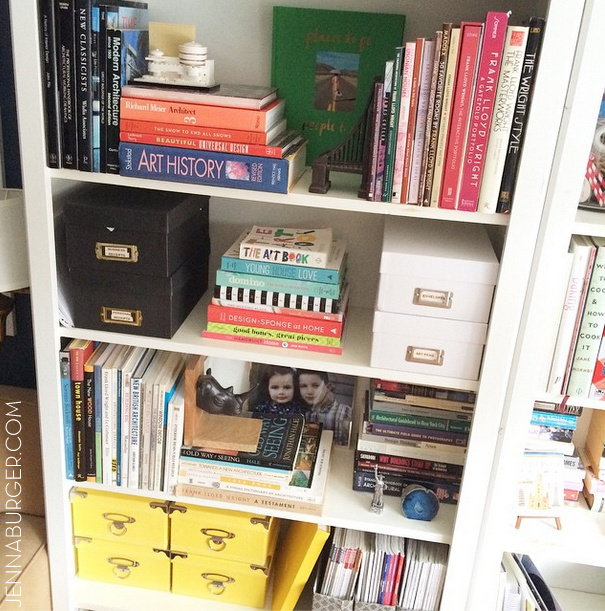
Fullscreen capture 152015 100438 AM.bmpMy newly revamped bookcase…  Baskets + Boxes + Bins are my happy place!

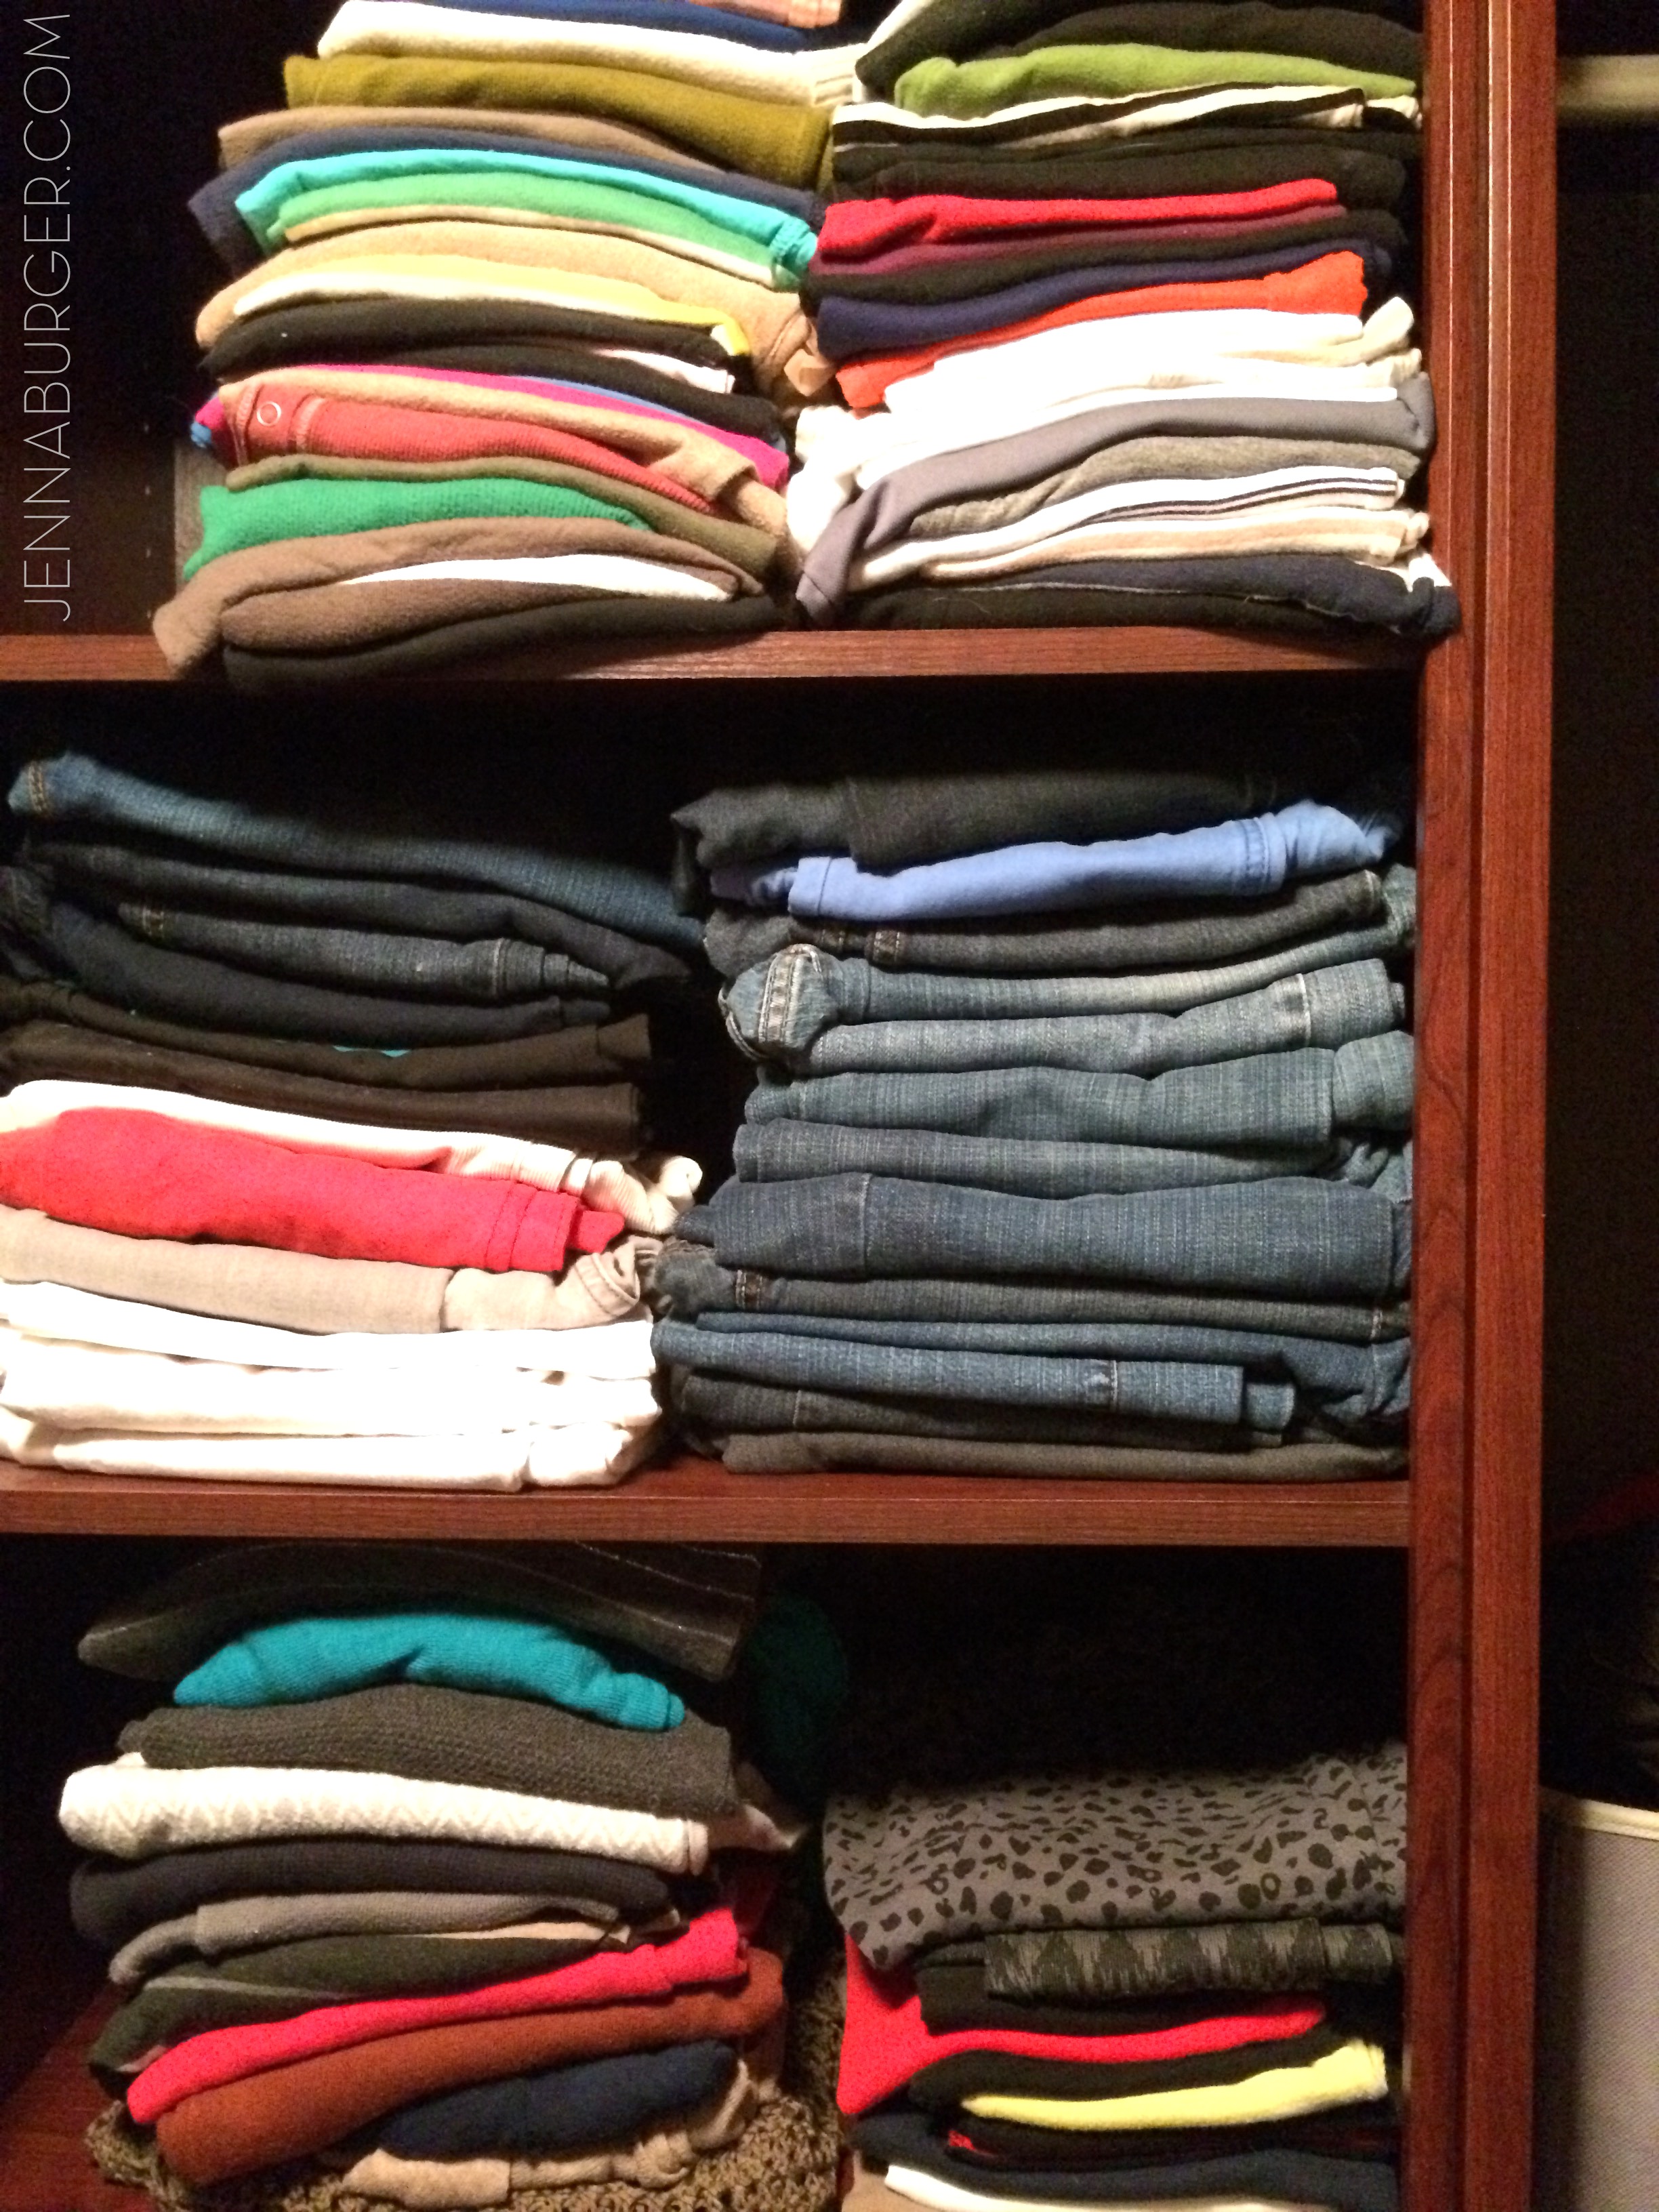
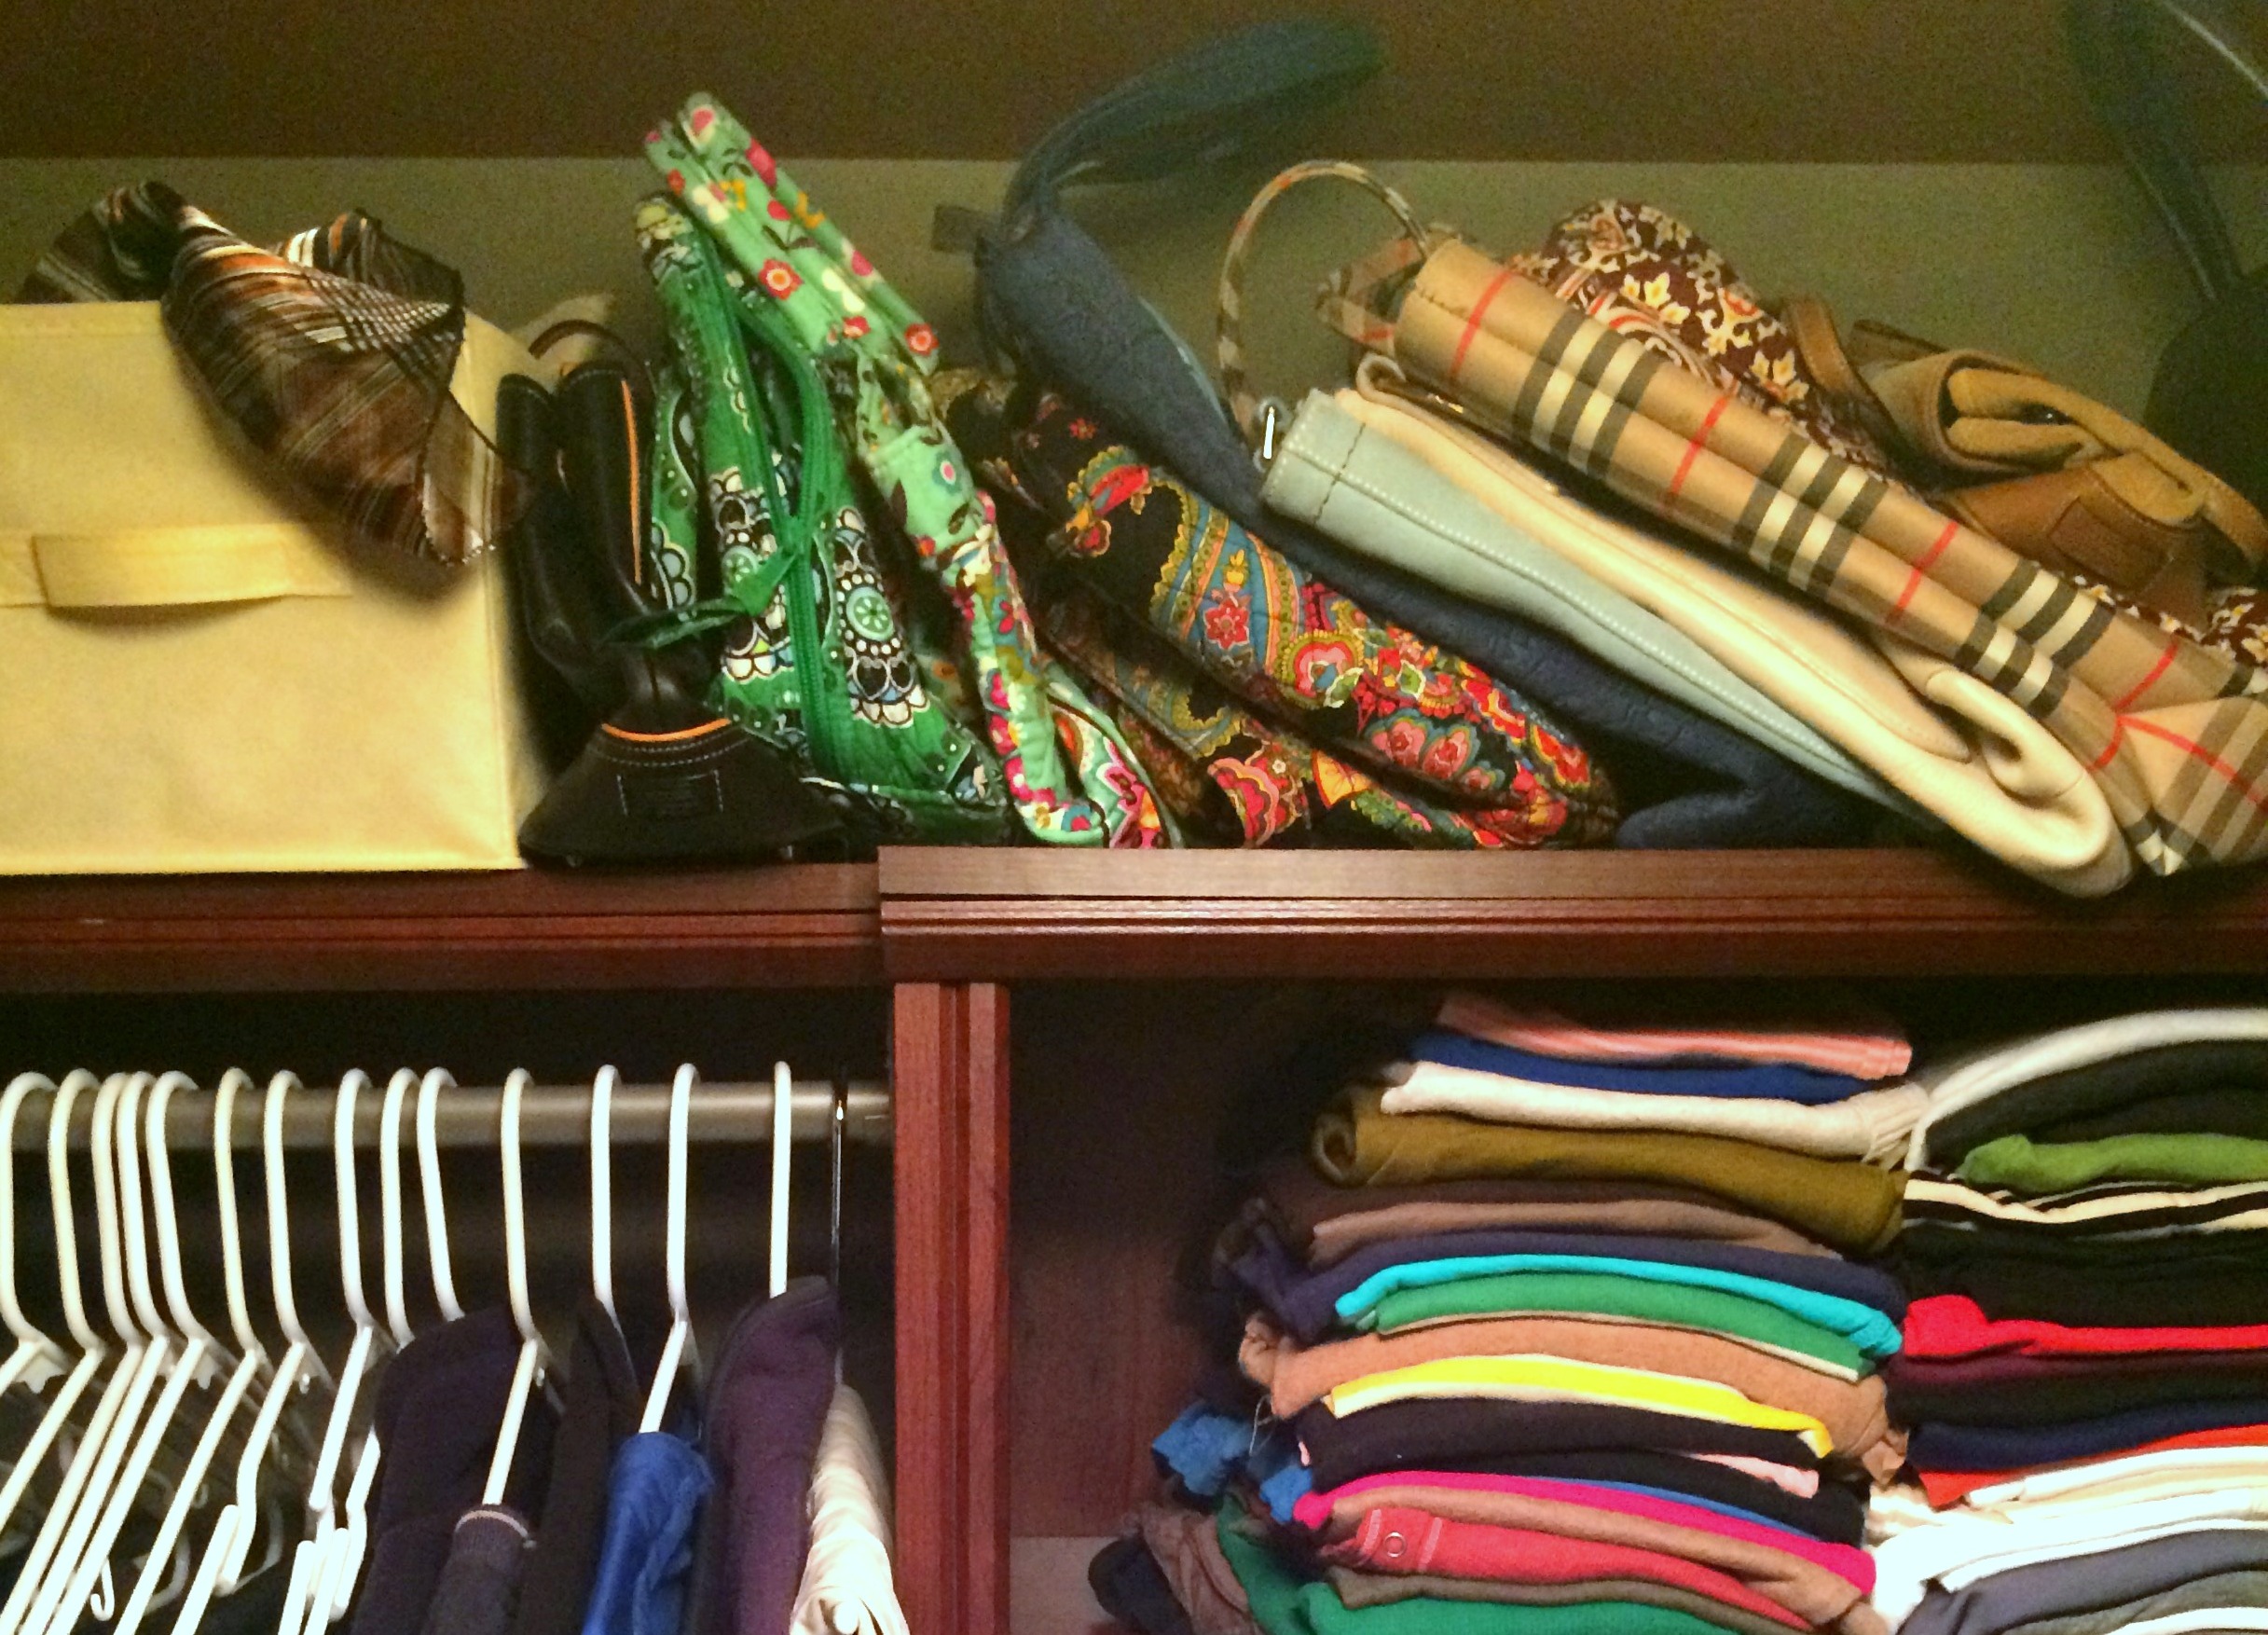
And keep in mind, it doesn’t have to look perfect because the reality is it won’t stay that way for long.  As long as everything you keep is needed and placed/arranged in an orderly way, that is ‘perfect’.  Take a glimpse at my newly organized closet…  To some it may still look a mess, but to me, this is good!  Shirts are together.  Pants are in one section. Scarves are in a bin. Bags are in place.  DONE!

PURGE. TOSS. DONATE. 6 Foolproof Home Organizational Tips that will get you pointed in the right direction NOW!

These were snapped with my iphone cam which is why they’re a bit grainy, sorry…

Did I really just share a picture of my closet???

PURGE. TOOSS. DONATE. 6 Foolproof Home Organizational Tips that will get you pointed in the right direction NOW!

5. Go Vertical

Maximize your storage capabilities by using more wall space. Bookshelves are great for going vertical to get things off the ground, thus creating more floor area. In closets, add shelving as high as possible for extra storage of blankets or non-everyday essentials. Add hooks in the entry for additional coat/bookbag storage. Hang additional shelving in the basement and/or garage for more space to put large bins.

Get Organized! For an easy entry upgrade, add built-in coat hooks and wooden crates [easy do it yourself project] www.jennaburger.comour entry coat rack > click for DIY Tutorial

A side tip for you >>> Choose furniture that can serve double duty to save on space!

6. Commit

The most important, but most difficult part of organizing…

Getting organized is one thing, but staying organized is truly a commitment. Once you’re organized, take the extra 10 minutes each day to tidy up and monthly to go through each room to purge any unused items or papers. Each night once the kids are in bed, I make sure all their toys are back in place, the dishes are done, the counters + tables are cleared off.  It’s amazing what 10-15 can do to get the job done rather than piling up day after day!

Decide.  Commit.  Succeed.

Expect that there will be minor setbacks throughout the year (not a biggie), but remaining positive+ focused will help keep you motivated to stay organized.

While the snow is piling up outside, put that overabundance of extra energy and efforts into purging and organizing inside.  The simpler we live, the saner we are! Rid your lives of the clutter and unused things to achieve a more meaningful, organized home.

What ideas / tips / suggestions can you share that keep your home organized + clutter free?

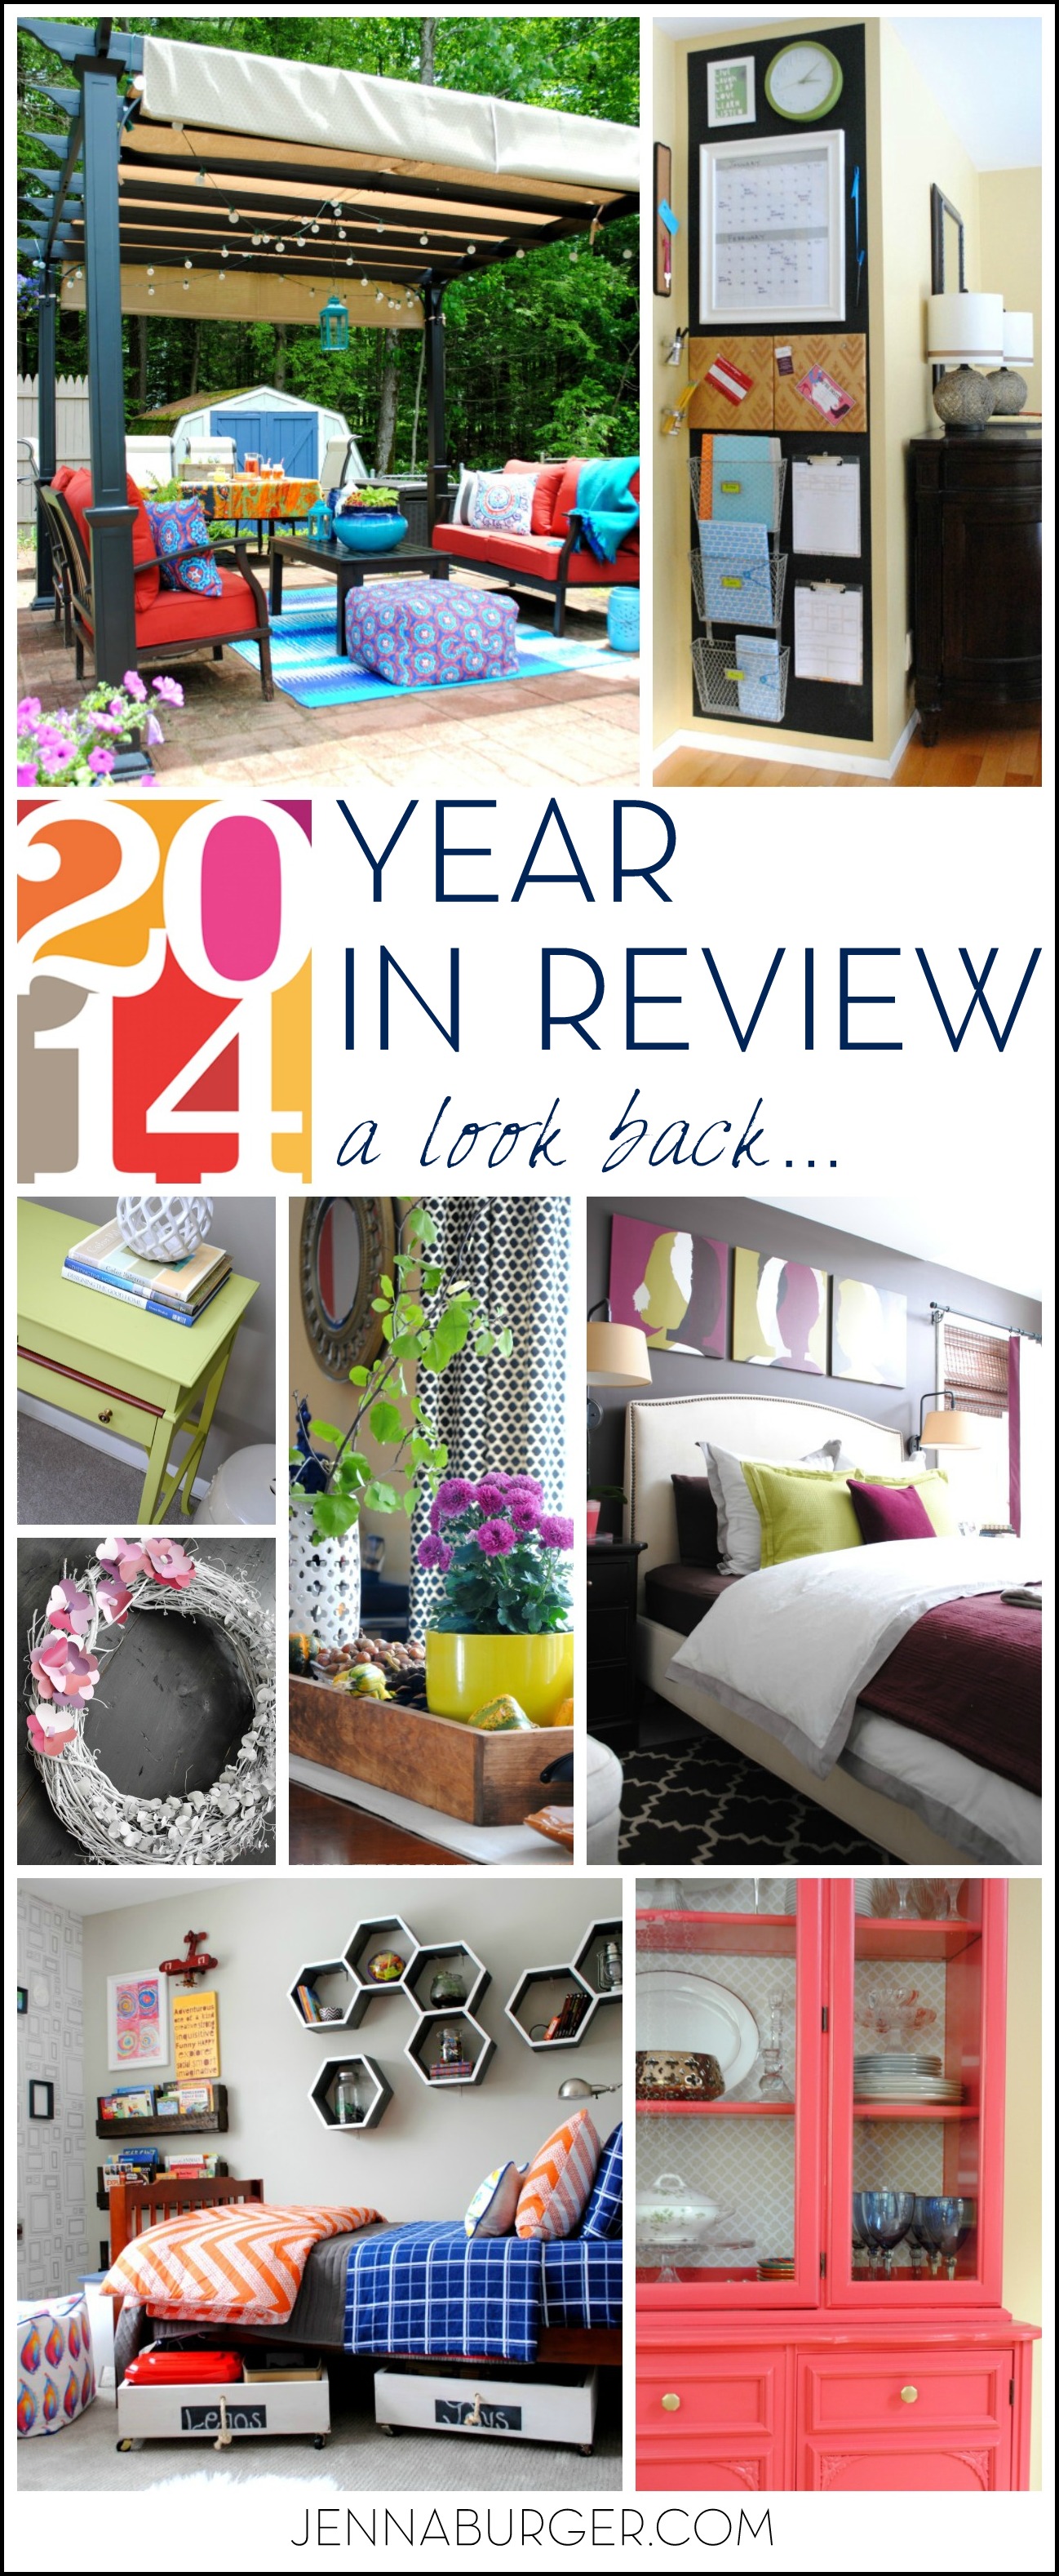
2014 Year in Review… a look back

I feel like I say this way too often, but seriously, Where does the time go?

As another year comes to an end, I love taking a few minutes to reflect + reminisce on all that I’ve worked on & accomplished over the past 12 months.  And it has been quite a year, for sure.

From being featured in 6 national magazines ( > see them all here), to revamping 4 spaces ( > boys bedroom + master + patio + bathroom), to completing 3 client kitchens ( > see one of them here), to having a NEW BABY (my biggest + best accomplishment of 2014), it has been an incredibly busy, but joyously & rewarding year.

Take a look back on all the highlights of 2014 with a year in review!

As always, it’s fun and a bit bittersweet to take a stroll down memory lane.  Let’s see what exciting + crazy adventures I got myself into to over the last 365 days

Central Command Center revamp (again) - creating a central "spot" that works for your family!

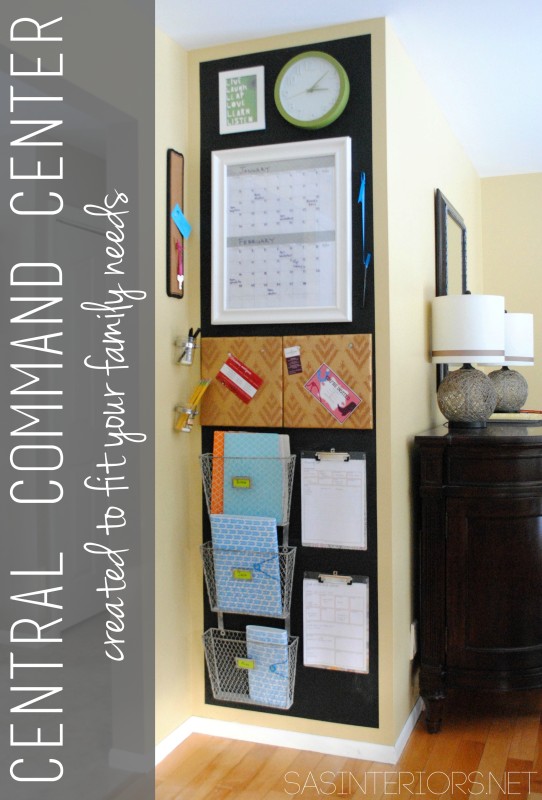
January started out with a bang when I was finally able to sing from the treetops that my kids and I were featured in the I Did It section of Better Homes & Gardens.  Third times a charm, right, and the year began with me sharing our revamped (again) Central Command Center.  As our family needs changed, the CCC was updated to follow suit.  Even today, it looks a bit different than it did a year ago.  As the first month of the year continued, I made some updates in the kitchen to add some color + openness – an update that I am still enjoying today.

The biggest post of the month was the announcement that our family was expanding.  After a rough 3 months prior, it was exciting to finally spill the news.  After that, I shared ideas for our kids sharing a room (even though they ended up not).  A few days later I shared even more inspiration for shared kids bedroom spaces, which then started the process of making over my son’s bedroom.

But before that, the master…

Master Bedroom Makeover with many DIY projects


Valentine Wreath using Paint Chips

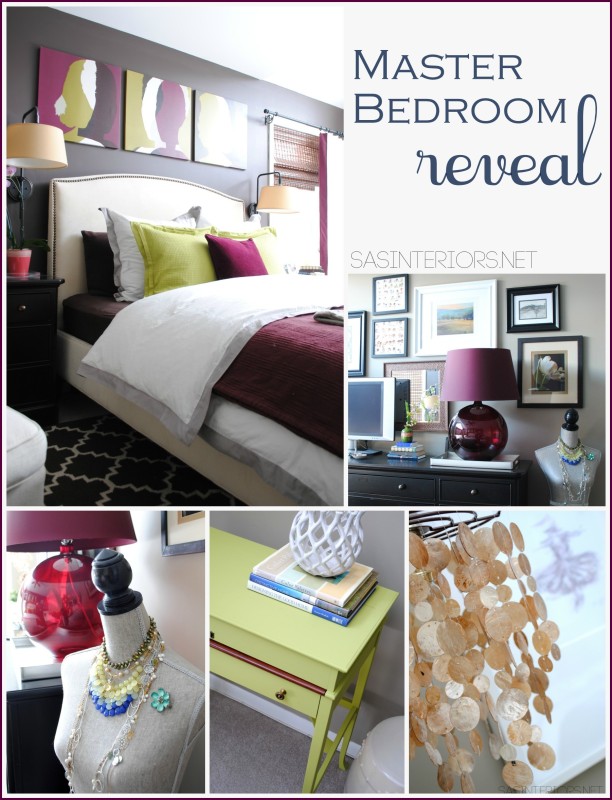
As February rolled around, I shared my Valentine wreath (still my favorite to date) and started the room makeover #2 for the year, my master bedroom. After choosing a darker color for the bed wall, I painted a desk using my own chalk finish formula, jazzed up store-bought curtain panels by adding a leading edge fabric, and made a light fixture with a capiz shell pendant.  A little rearranging of the walls to create a large picture gallery wall to conceal the TV completed the makeover and the master bedroom refresh was finished!

Then back to my boys bedroom…

Rolling Cart toy storage

A kitchen I designed on the cover of KBMO

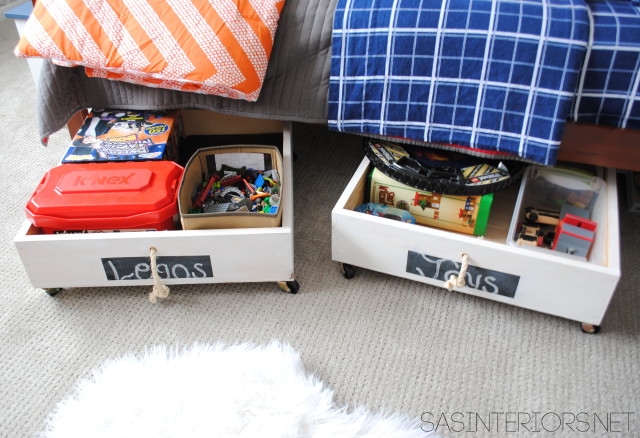
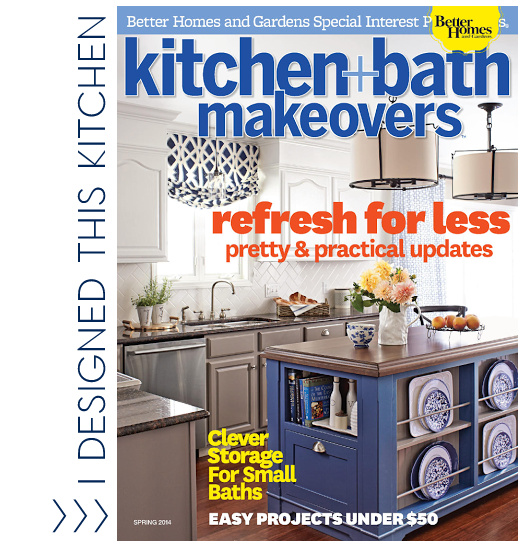
Then March rolled around and I was back to room makeover #1, my son’s bedroom.  The plan was for my 2 older kids to share a bedroom, but when we found out Baby #3 was a girl, that plan went out the window.  Since his room was already in the midst of a revamp, we just continued with it…  I started with painting the walls a lighter hue, hanging a fun wallpaper, and adding much-needed storage for toys!  March also was an exciting month when I shared the ‘after’ of a client kitchen I had worked on and the feature of another client kitchen which was on the cover of Better Homes and Gardens Kitchen + Bath Makeovers.

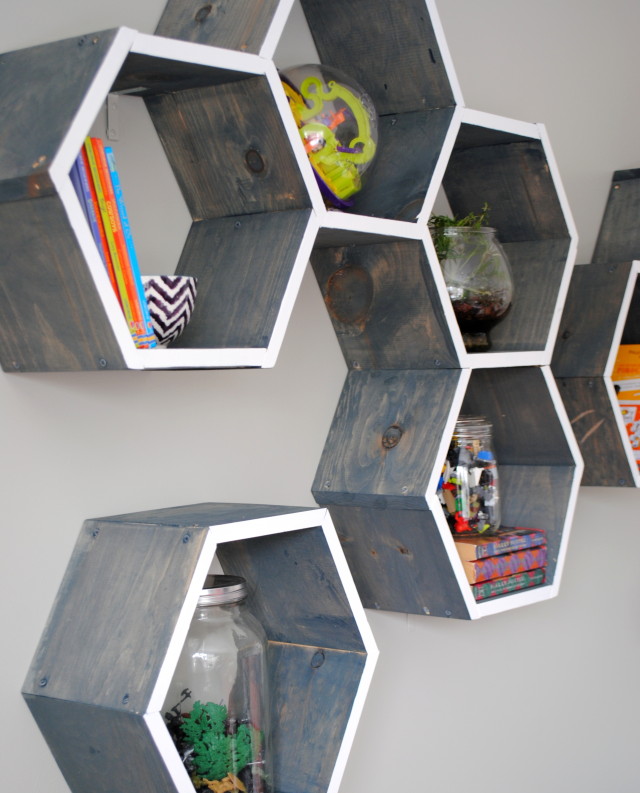
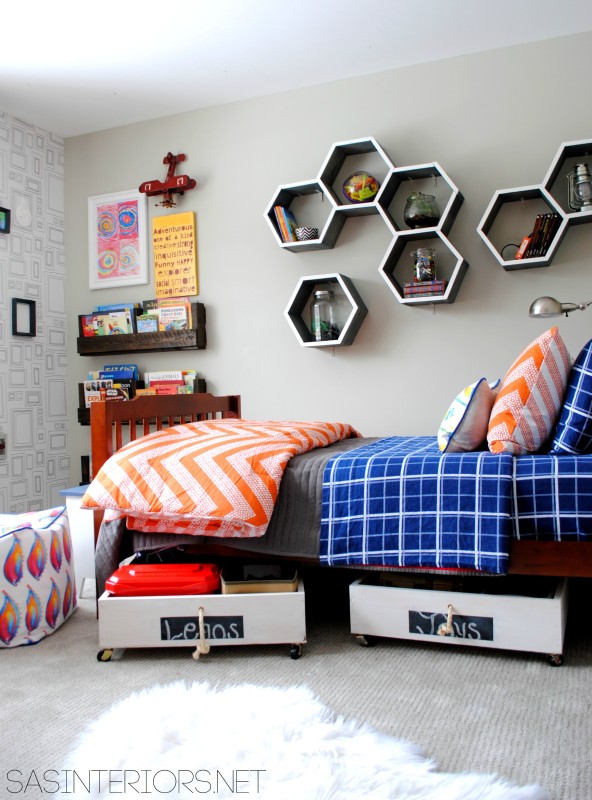
Hexagon Shelves

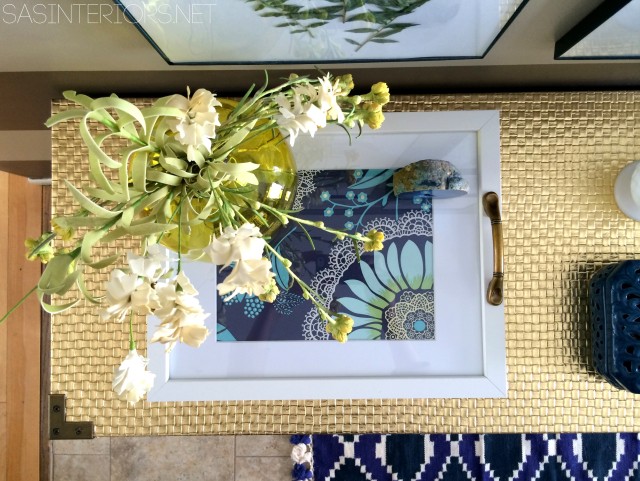
Frame Turned Tray

April was welcomed with a mix of projects and creations…  From creating 2 DIY colored Easter eggs (using crayons and food coloring), to sprucing up the foyer for Spring, to making a jewelry holder, it was a month of transition to the warmer months to come.  And of course, I continued to work on my son’s room and created my favorite DIY project of the year, the wood honeycomb shelves.

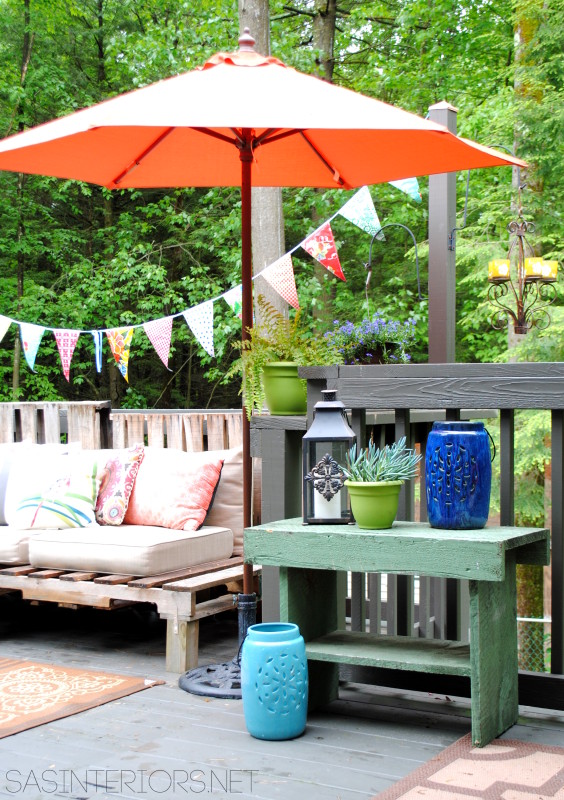
Outdoor Deck

May, the month we were finally able to spread our wings and spend more time outdoors than in.  Throughout the month I worked a little here and a little there… I continued working on my son’s bedroom makeover by painting his closet door with a pop of color and creating instagram art for the walls.  Additionally I collaborated with Lowe’s in May on an “Ugly Bathroom” campaign and shared 5 ways to update a bathroom on a budget + design solutions for an ‘ugly bathroom’. Have a bathroom in need of a makeover, then this post is a must-read. Finally by the end of the month, the Spring weather was incredible so I spruced up our outdoor deck and created a plan for our patio makeover.

8-545x800

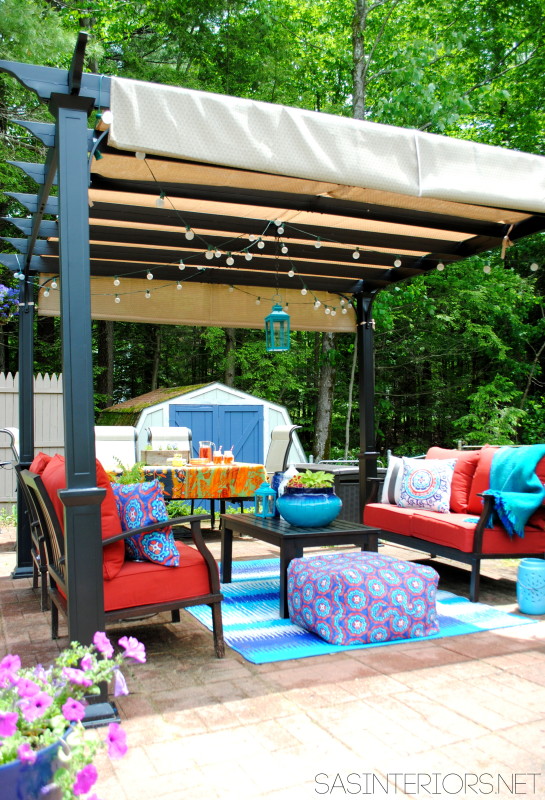
As June rolled around, I was getting bigger by the minute and slowing down fast.  BUT, we managed to finish the patio makeover (which came out dreamy) and I also shared a peek at the new nursery nook that was created for baby #3.  I also had a little downtime strawberry picking with my girl and shared 15 must-try strawberry recipes (you will definitely WANT these for Spring!).  The month also brought the start of Year 2 of the Creating a Meaningful Home blog series.  My friend, the incredibly talented Melissa of The Inspired Room, started out the series with some beautiful thoughts + words about what fills a home with meaning.

By month’s end, our best DIY + biggest accomplishment of 2014 arrived

and she’s now 6 months old.

Here are my clan of 5 just a few days ago on Christmas…

My clan of 5

Where has the time gone?!

Boy Bedroom Reveal

July was quiet.  You probably don’t need me to tell you why…  But action on the blog didn’t stop.  More of my great friends – Carrie, Jennifer, Jaime, Jenna, Carmel, + many more – filled the days with posts on how they’ve made their homes meaningful.  July also brought the reveal of my son’s bedroom makeover.  I, of course, finished it before the baby arrived, but hadn’t had a chance to share it.  The result was pretty spectacular!

My chat with David BromstadAugust was just as crazy + hectic at our homestead, but on the blog even more friends opened their beautiful homes for the Creating a Meaningful Home blog series.  Additionally, I shared my announcement of being featured 3x in one national magazine, had a chat on the phone (for real) with celeb-designer + HGTV star David Bromstad, and got an incredible new mattress (the best ever & I am still sleeping like a baby)!

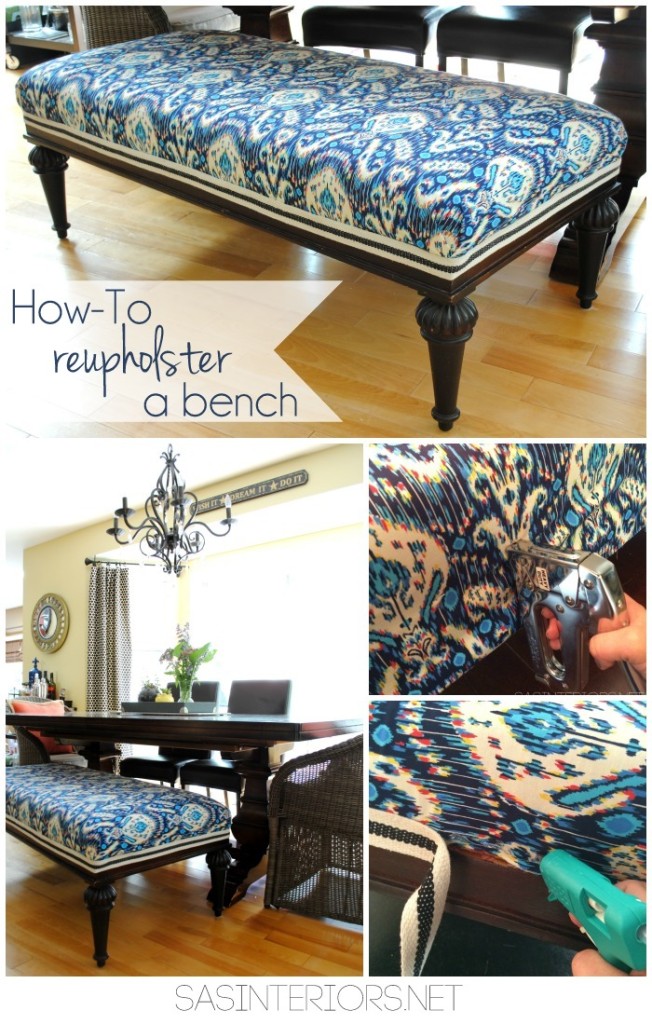
Reupholstering a bench

Fullscreen-capture-8292014-71304-AM

By September, I started getting my s**t together a bit more.  The kids were back in school, my little baby was 2 months old, and I actually started to shower again (ha, some days).  I also started getting my DIY groove back and tackled a few new projects like reupholstering the dining bench, making a window valance, and starting the china cabinet makeover that I found on Craiglist.  This month, I also shared inspiration on making DIY window treatments, gorgeous Fall spaces, and EVERYTHING FALL – all my seasonal posts in one place.  The month didn’t end without a huge highlight… my home on the cover of STORAGE magazine. {squeal + two pinches to make sure this is reality}.

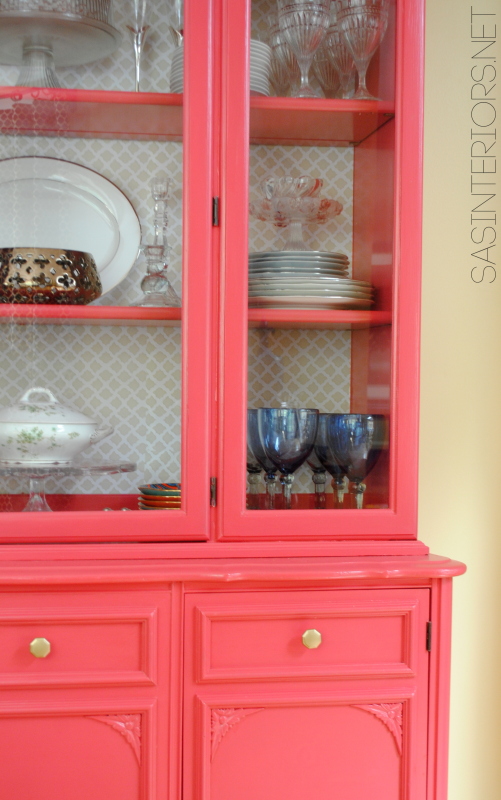
Craigslist China Cabinet Makeover

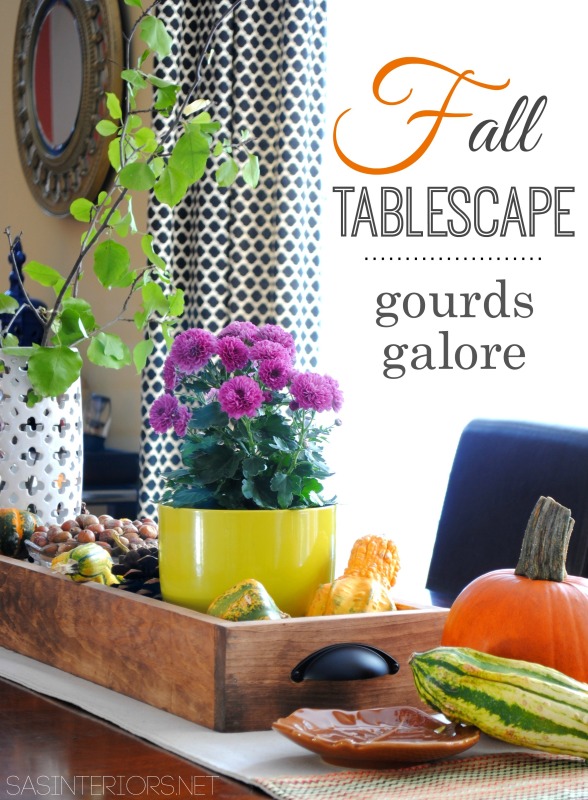
Fall Tablescape

October rolled around and I was in full-on DIY mode with my latest + greatest makeover, the china cabinet!  From prepping + sanding, to priming, to painting this cabinet got a major transformation.  The result was pretty fabulous!  October also brought a beautiful Fall tablescape creation & the start of #4 room makeover, the bathroom.

Bathroom Makeover

November was filled with a mix of the bathroom makeover + Christmas prep (with a nature-inspired theme).The bathroom makeover was hands-down my biggest & toughest DIY makeover to date.  With it not being the typical paint + fabrics, but instead demo, tiling (big time), plumbing, wallpapering, and more, this was a full-on challenge.  But I am always up for a challenge and we (the Mister + I) pushed through!  psst… final reveal coming next week.

Christmas Home Tour 2014

And lastly, but certainly not least… The last month of the year, December.  I always find this month bittersweet.  There is so much excitement leading up to Christmas and then when it’s over and the stillness + quietness set in and time allows for reflection, it’s brought with smiles + a few tears.  Smiles for all the good and tears for it going all too fast…  This month has been a great one starting off with my Christmas Home Tour which was apart of the Jennifer Rizzo Holiday Housewalk for the 2nd year.  After that I shared more details on my mantel, progress of the bathroom makeover,  and a look ahead at the new color of the year, Marsala.

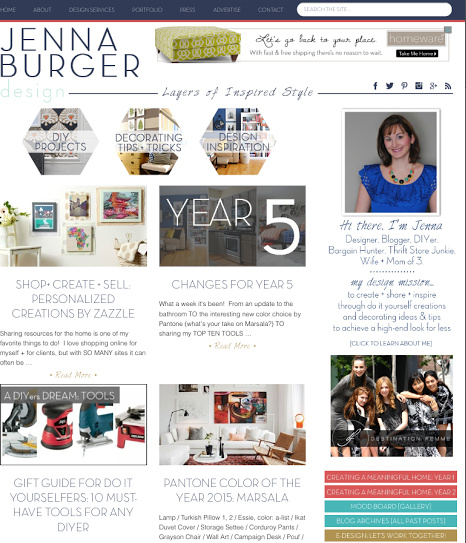
New Site - JennaBurger.com

December also brought the exciting change / upgrade of my website.  As I head into Year 5 of my business + blog (yes I started this whole thing in 2010), I felt my site no longer reflected what I was feeling.  In 5 years, my design style has grown + evolved, and I wanted my site to evoke that simpler, cleaner, but eye-popping aesthetic.  That being said, my mission to inspire & live with meaning will always be at the forefront of my blog and business!

So raise your glasses (or your cup of Joe) and Cheers to a wonderful year that is winding down & an even better year to come!

As I did last year, I am hooking up with a few of my blogging besties, Jessica of Decor Adventure & Carrie of Making Lemonade, to host a link up party for fellow bloggers who have also created a “Best of 2014” or a “Year In Review” post. These posts are always a fun + fantastic recap highlighting the biggest accomplishments throughout the year.

Year in Review Link Up!

After you link up your post, head on over to Carrie and Jessica’s blogs where they are sharing their recaps + your “Best of 2013″ posts will be seen on their blogs too.

The only party guidelines: Visit the co-hosts and if you link up, perhaps publicize the party on Facebook or Twitter so others can find out about it as well. The more the merrier!

Changes for Year 5

What a week it’s been!  From an update to the bathroom TO the interesting new color choice by Pantone (what’s your take on Marsala?) TO sharing my TOP TEN TOOLS for DIYers, it’s been jam-packed with goodness.  But I have news to share that’s even bigger and better… My blog + business of almost 5 years is getting a revamp.

Here’s a peek >

New Blog Design

If you haven’t noticed yet, some changes have already taken form.  For the past week, what used to be sasinteriors.net is now jennaburger.com (take a look up at the URL bar – My site will always be accessible using sasinteriors.net, but going forward it’ll automatically redirect to jennaburger.com).  This weekend, the blog will be down for a bit while the design is changed over but bright and early Monday morning, the new blog will be up and running with an entire new look.

New Button

Why the Change?

As I head into Year 5 of my design business & blog,  I was feeling a need for change.  It’s like that moment you walk into your closet, hate everything, and rush out to buy an entire new wardrobe.  Oh, thats never happened to you?  Me neither, but I dream about it sometimes… 

The decision to change my blog name + redesign my little spot in the blogosphere was difficult to make.  From day one choosing a name that defines my mission for inspiring & creating seemed impossible.  I was never thrilled with my blog & business name, and after living it + breathing it for 4 years, I was ready to go in a different direction.   Since my site is not only my inspirational blog, but also a business platform for my design company, the title / the name needed to make sense for both facets.  To simply use my name, Jenna Burger, made the most sense.  That’s what people know me as and over the years it has become my brand.  I, Jenna Burger, am the one to create and I am the one who inspires.    The new tagline Layers of Inspired Style was a fluid addition to accompany my name and I feel it sums up my mission & thought-process on design with the layering of materials to create a cohesive, unexpected, and eye-catching composition.

With all the new changes coming, PLEASE don’t fret that my mission and design ideas will be changing.  That will all remain the same and more awesomeness is to come in the New Year!  I feel this new design and layout is a better reflection of me and my design aesthetic.  The new layout/design is a lot cleaner & simpler so in turn my hope is for you, my readers, to find things & navigate the site faster & easier!

There might be a few hiccups over the next couple weeks so if you see a broken link or something missing/wrong, please let me know.  An extra set of eyes is always helpful.  Thanks so much and as always, I appreciate all of you so much!  Here’s an early CHEERS to 2015!