Author: Jenna

Living Room Makeover {Reveal}
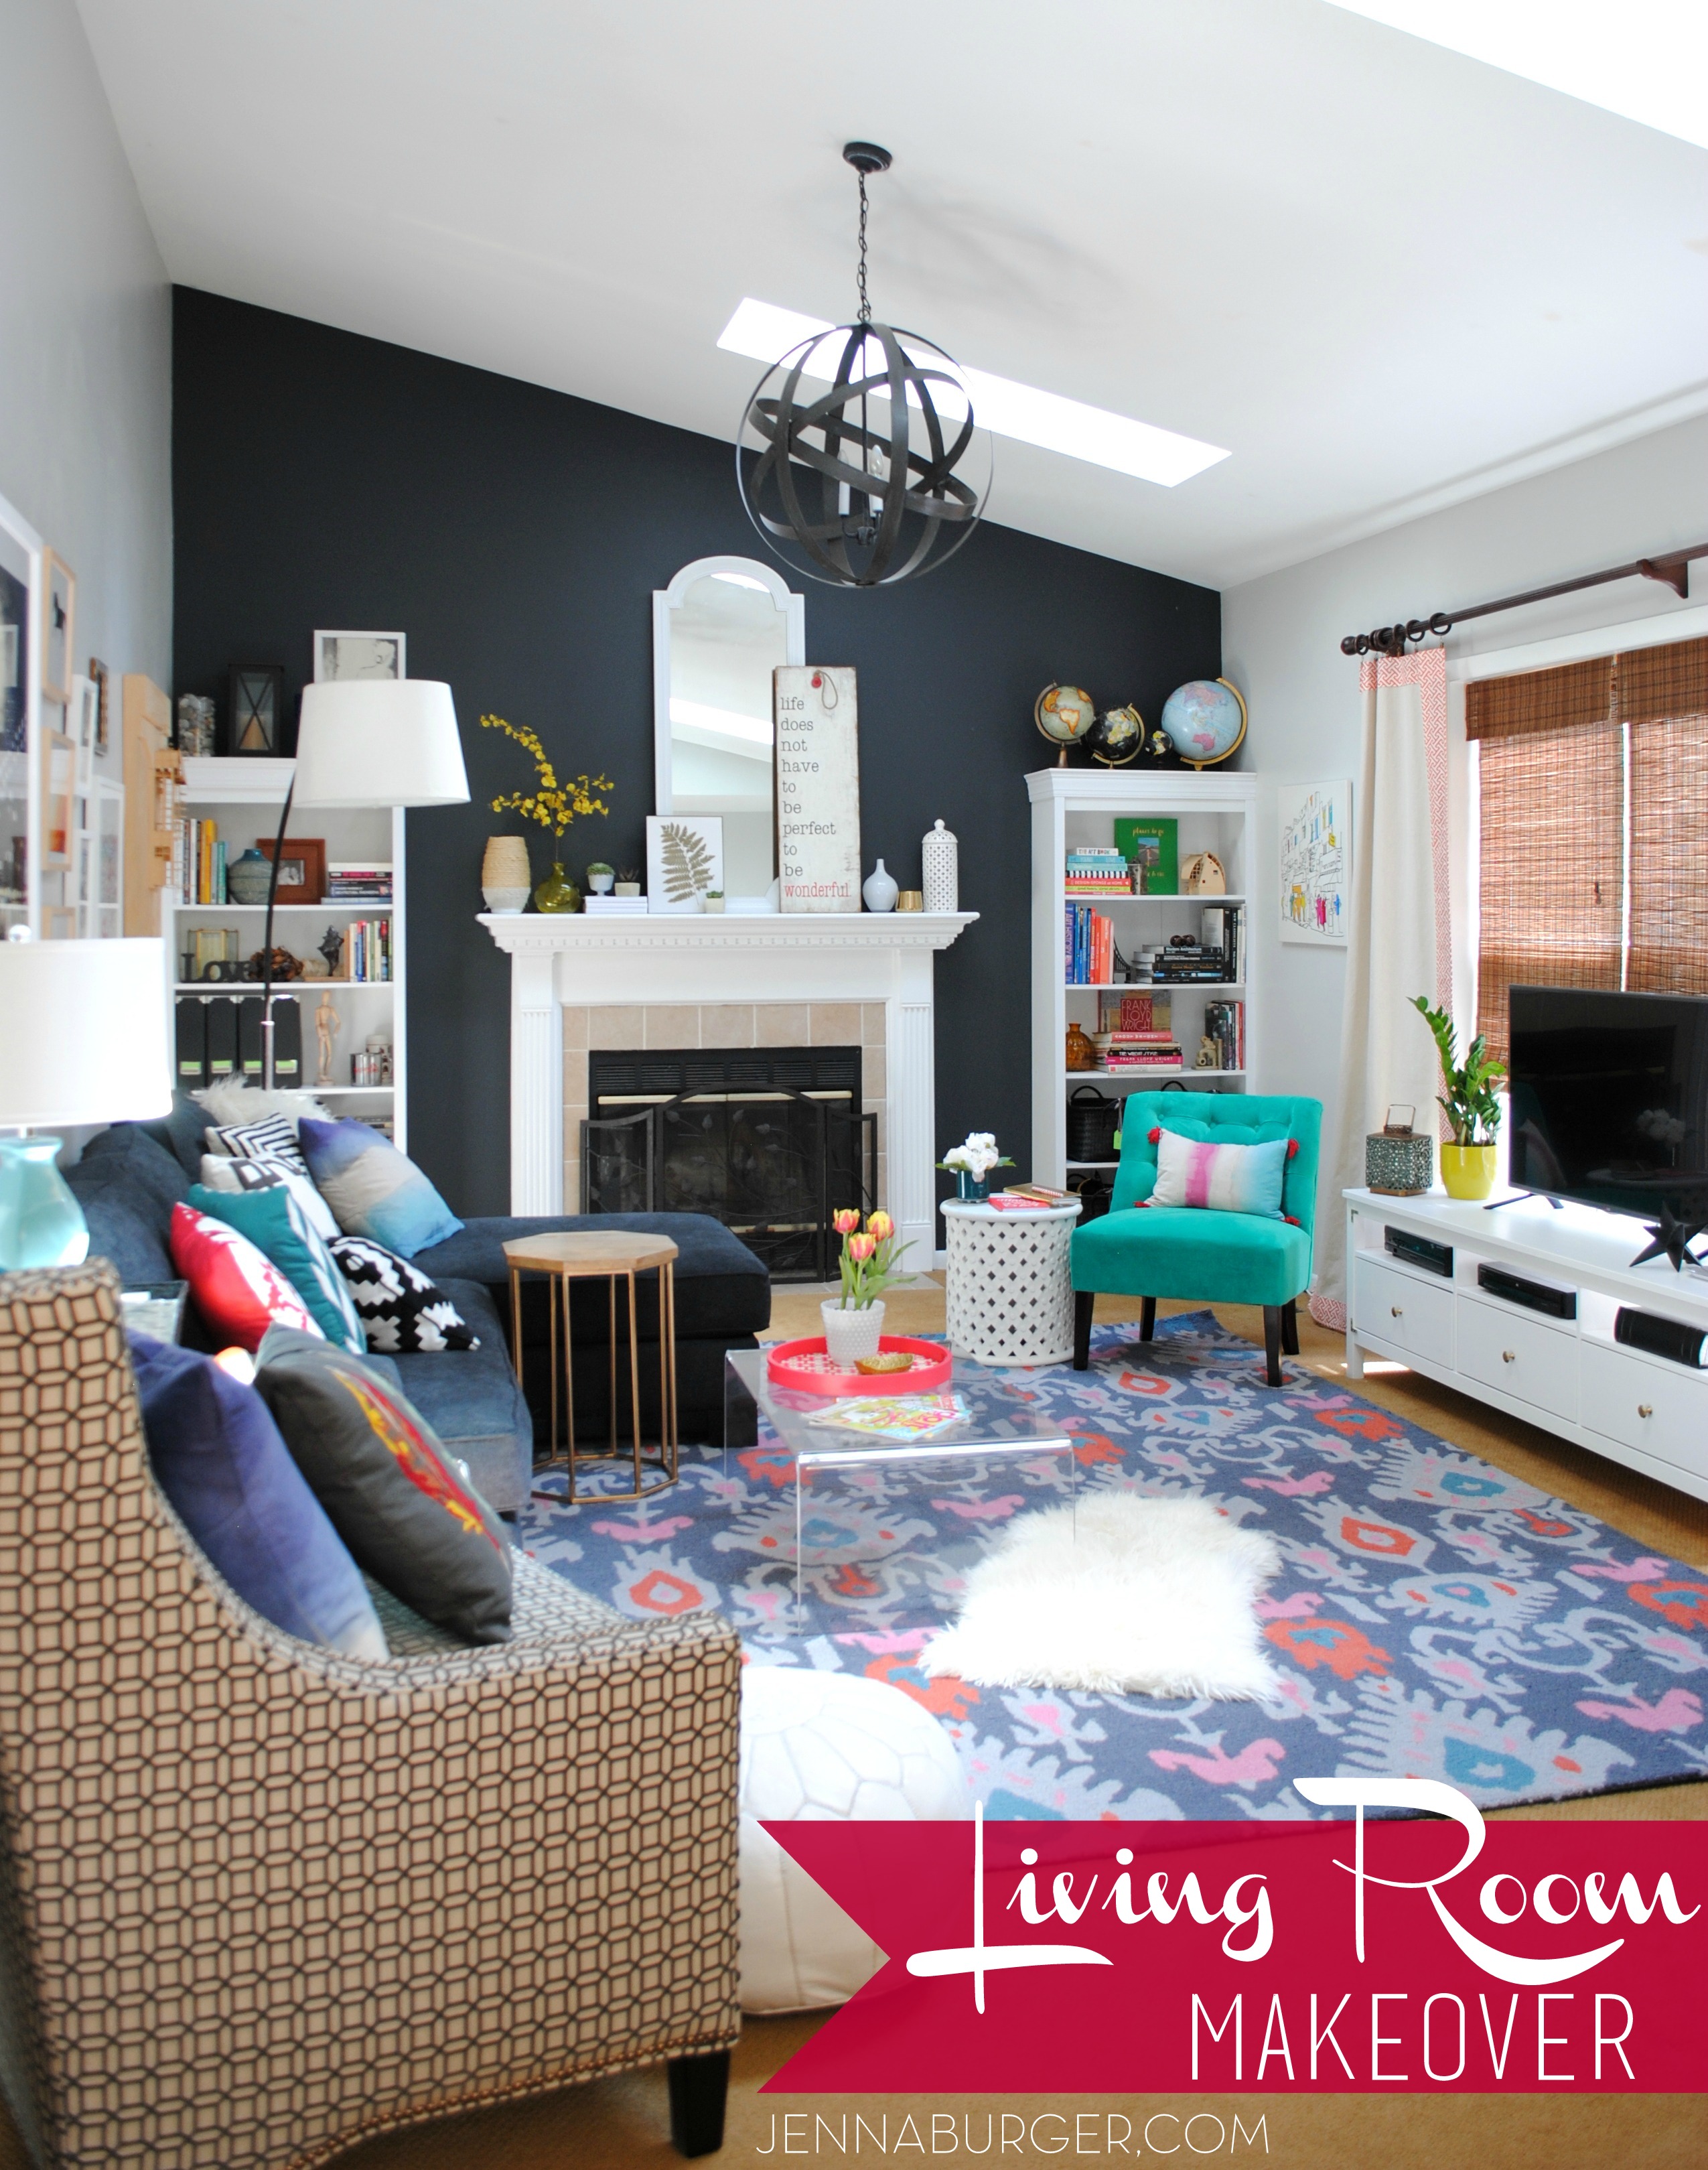
Living Room Makeover with bold black + pops of color - emerald, raspberry, coral, and light blue.  Design by Jenna Burger Design, www.jennaburger.com

I hope you are having a wonderful week.  I am in pure bliss at the moment.  Between the amazing 60 degree sunny days we’ve been having + finishing the living room, I am incredibly delighted.  plus my little guy is going to be turning 9 in a few days and that just makes my heart happy…

So yes, the living room makeover that I’ve been working on for the past 4 months is FINISHED and I am overly joyed to finally share details of the makeover + the big reveal!

The evolution of this space has been quite long + slow.  And I am perfectly content with that because we’ve gotten the chance to “live” in it to know what works + what doesn’t.

When we moved in to our home about 5 years ago, it started out like this…

welcome to our new home – ugh, ok not so pretty. 
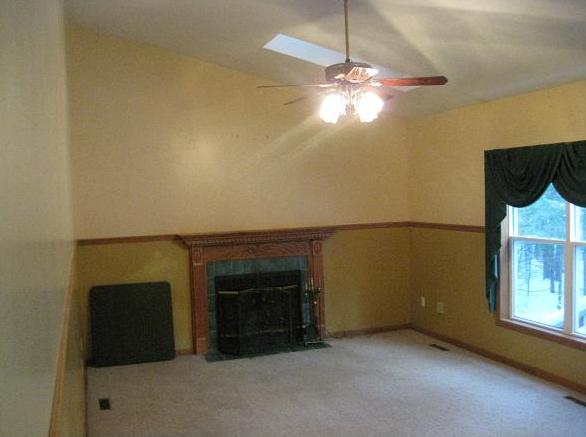
before living room

We needed color right away, so we painted the fireplace wall a deep burnt orange hue, while the other walls were covered in a warm-beige, cardboard brown tone.  Furniture from our previous home went into place and we were happy to have a space for our family of 4 (at the time).
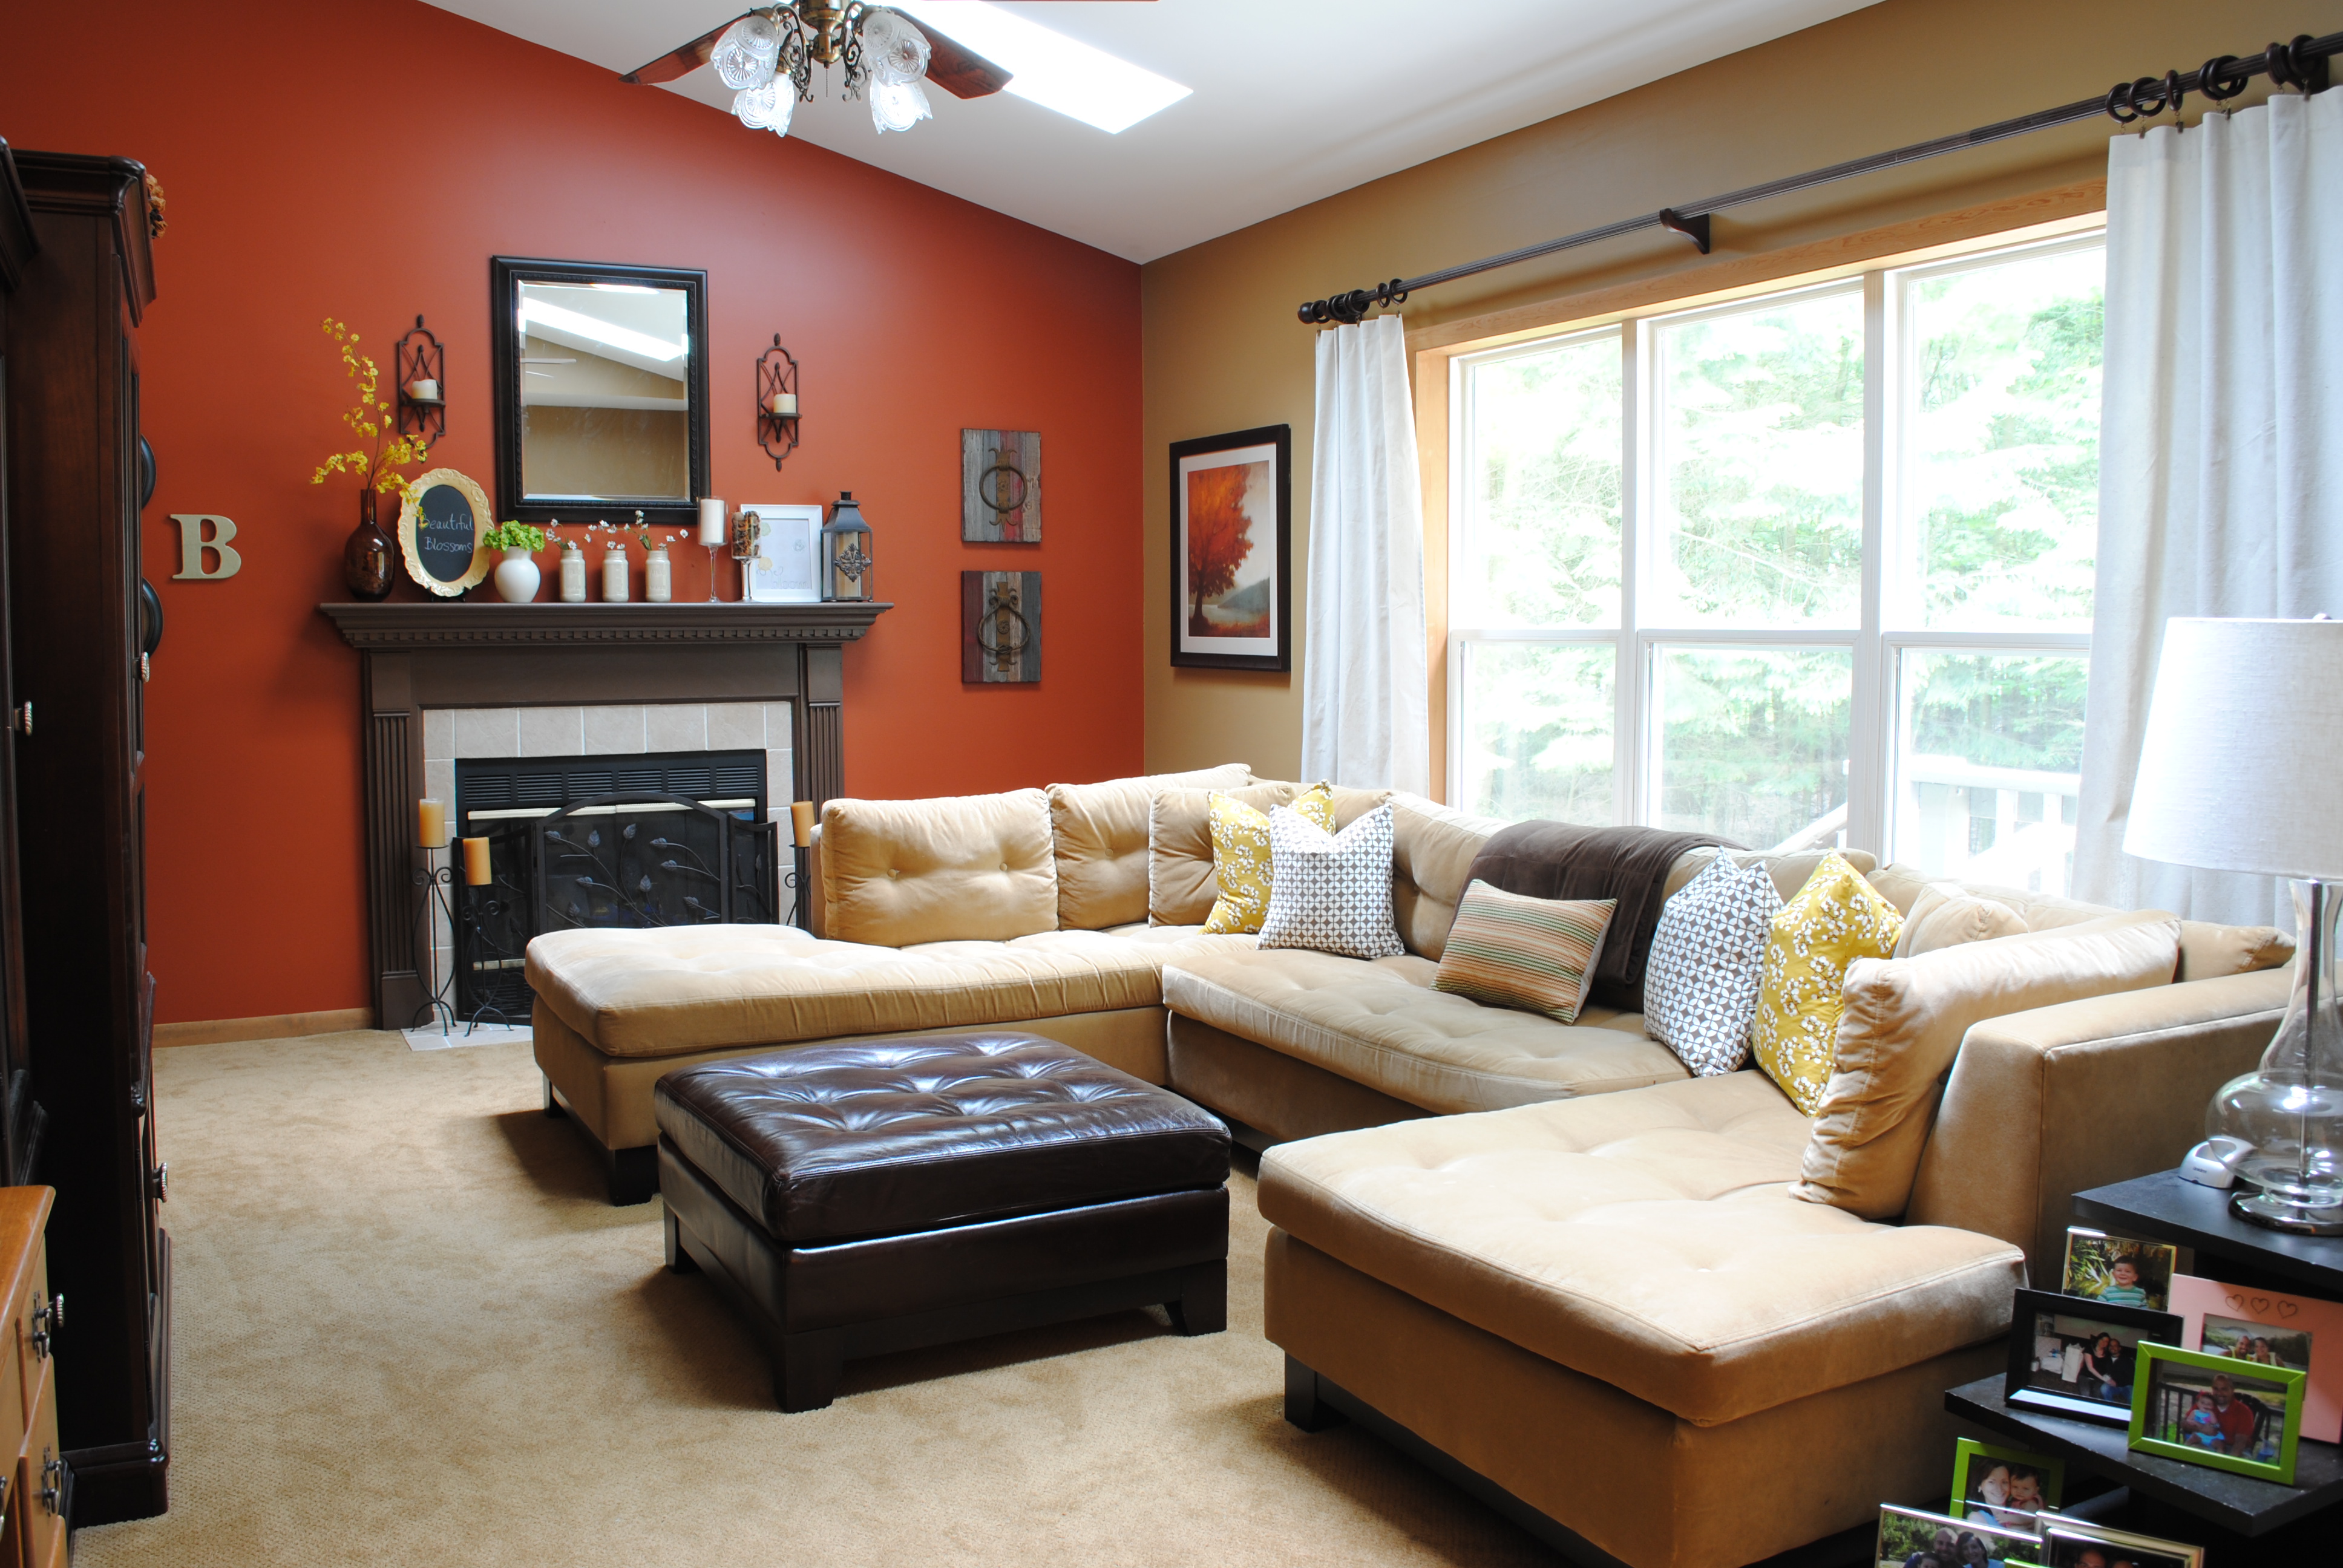
before living room

With some minor updates + layers, eventually the space started to feel like “us”…
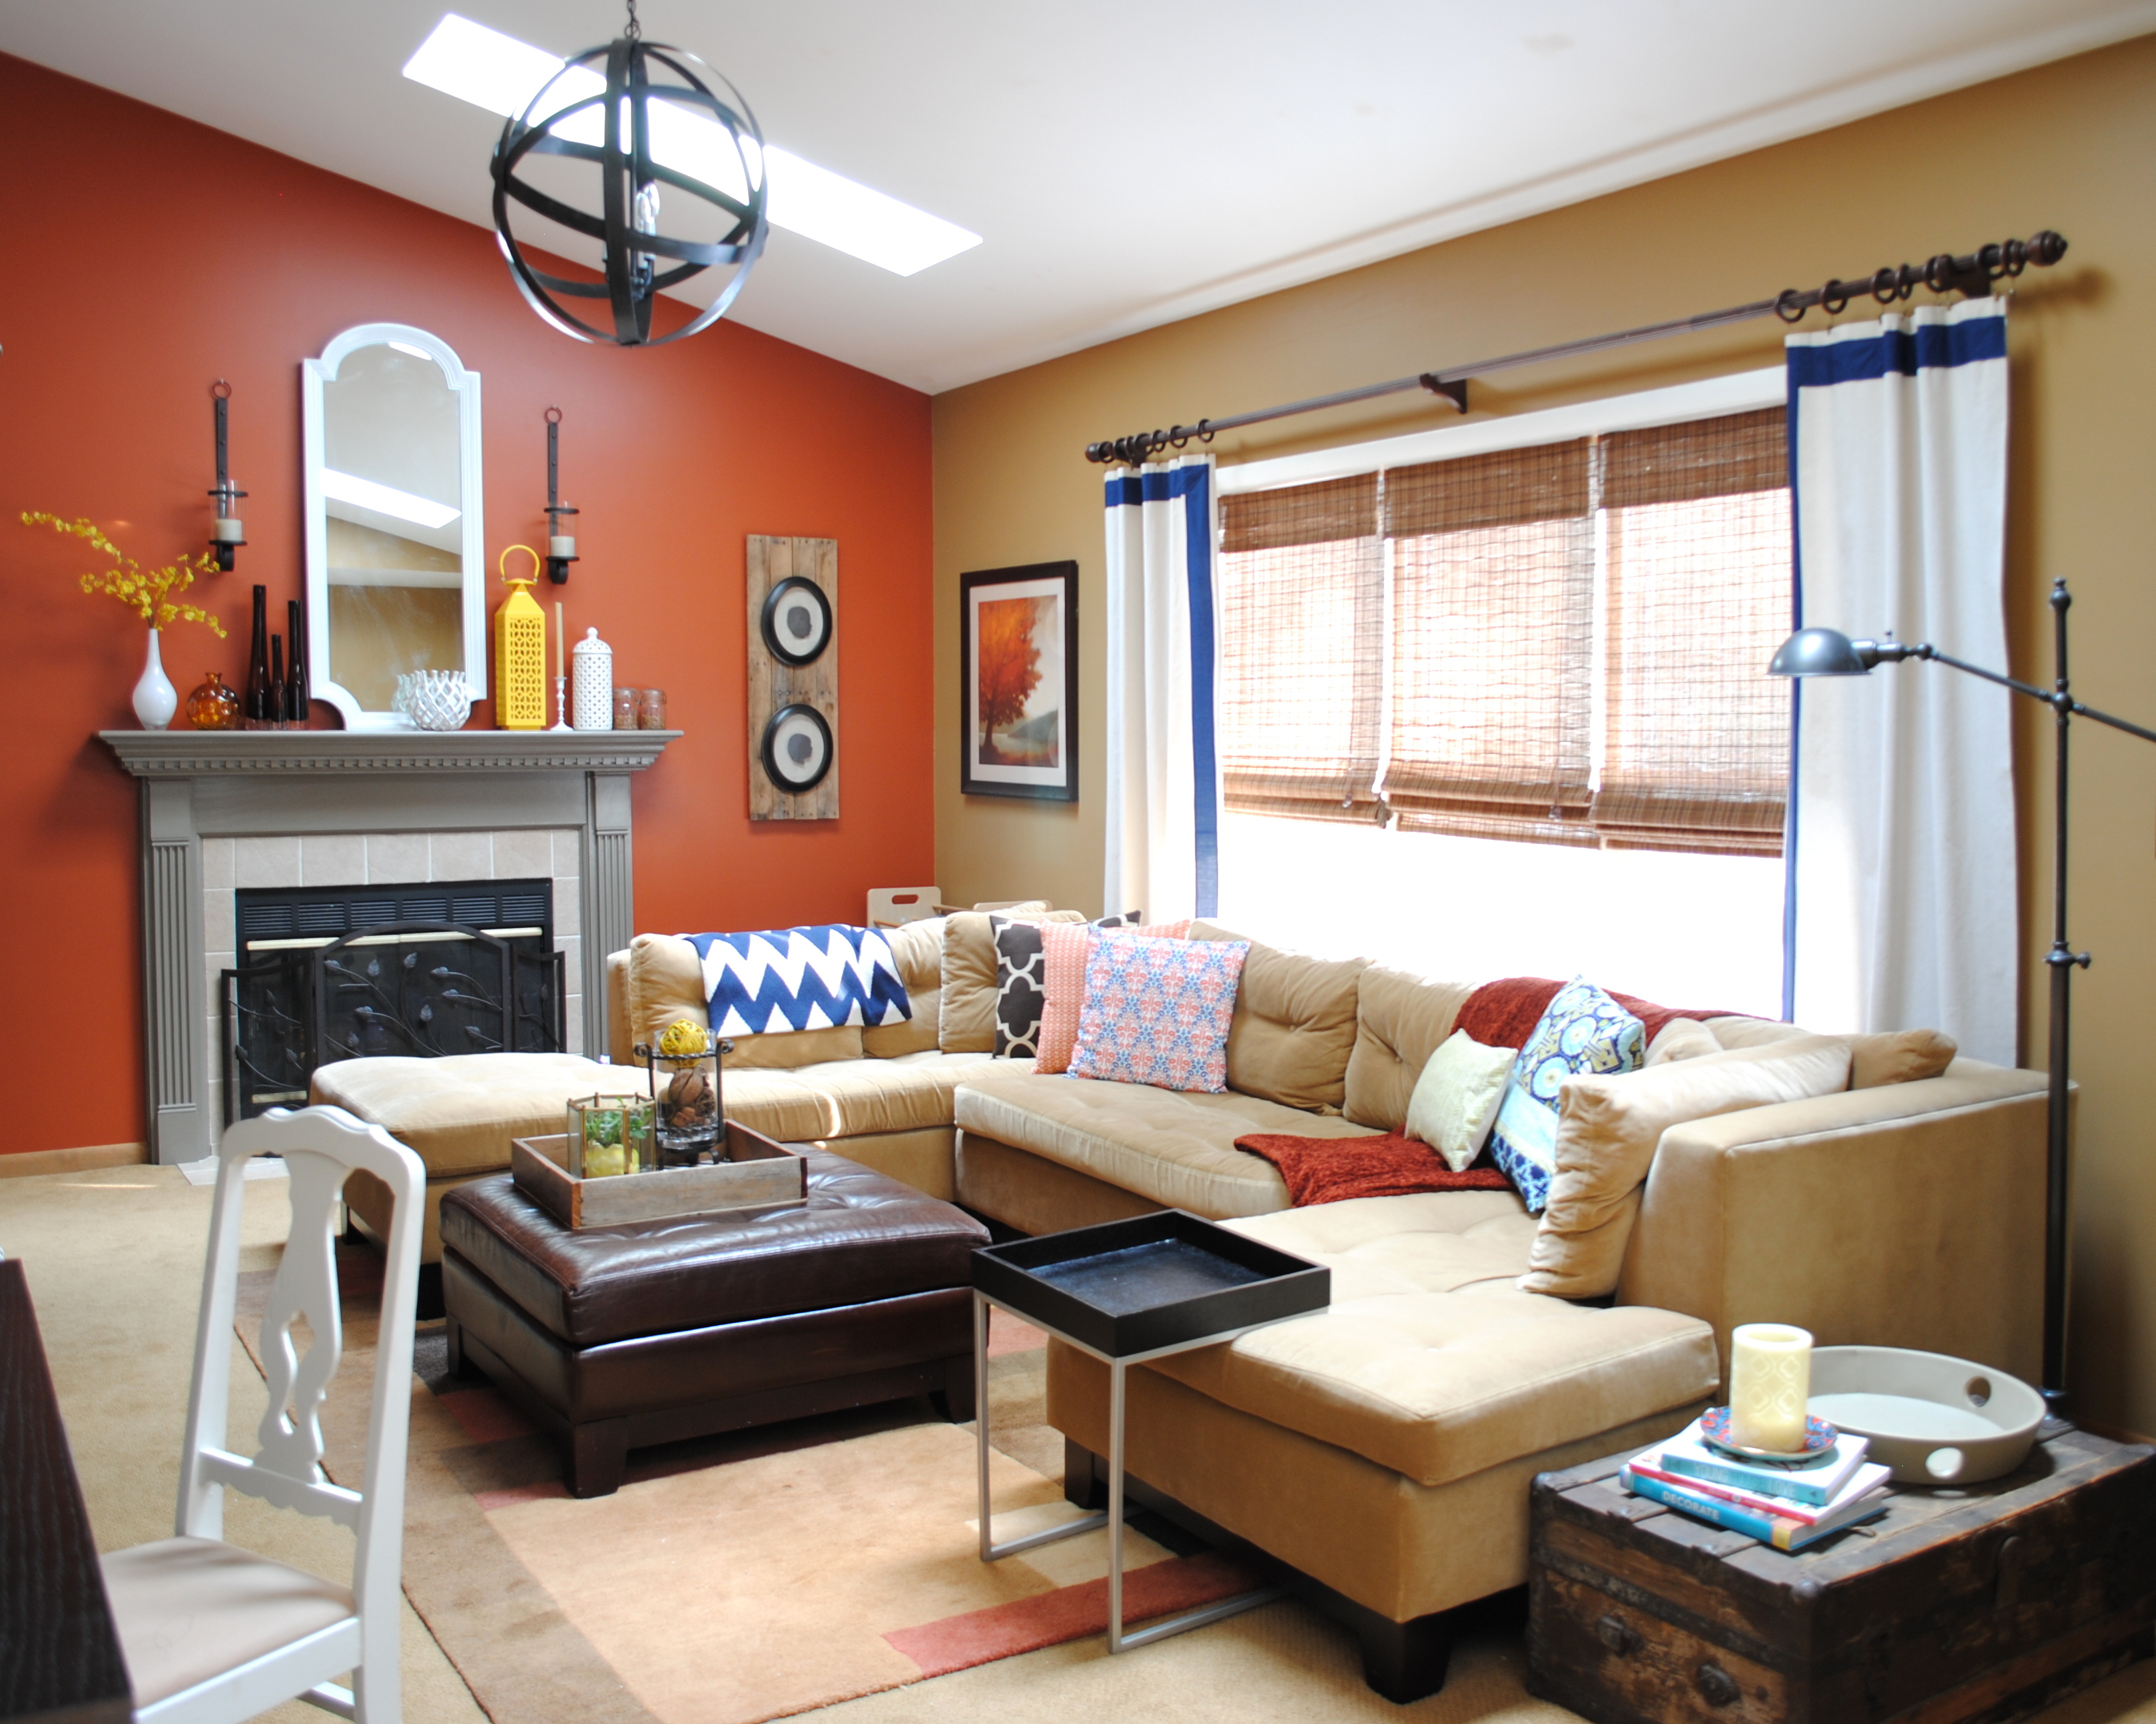
before living room

That’s how our living room looked until this makeover started.

Over the years, I knew the furniture didn’t work “right” for the room, but because of the emotional connection/attachment to our beloved sofa + the lil’ budget we had, it stayed as is.

Then late last year we got the bug.  Even the Mister who hates change & is content with most any ole’ space, was thinking the room needed some new life.  And it all started with the TV…

Here’s a quick storyline: The Mister wanted a larger flatscreen, which the TV cabinet wouldn’t be large enough for.  That got the ball rolling to get rid of the oversized TV cabinet [you can see what it looks like in this post].

Once the cabinet was gone, the sofa followed along with it, and rearranging the furniture so the TV would no longer be opposite of the windows because of the sun glare made the most sense.  it was near impossible to watch tv during the day because of the sun filtering in.  In the end, a friend bought most of the furniture and we were left with a big empty shell!

This was the new layout I created for the space…
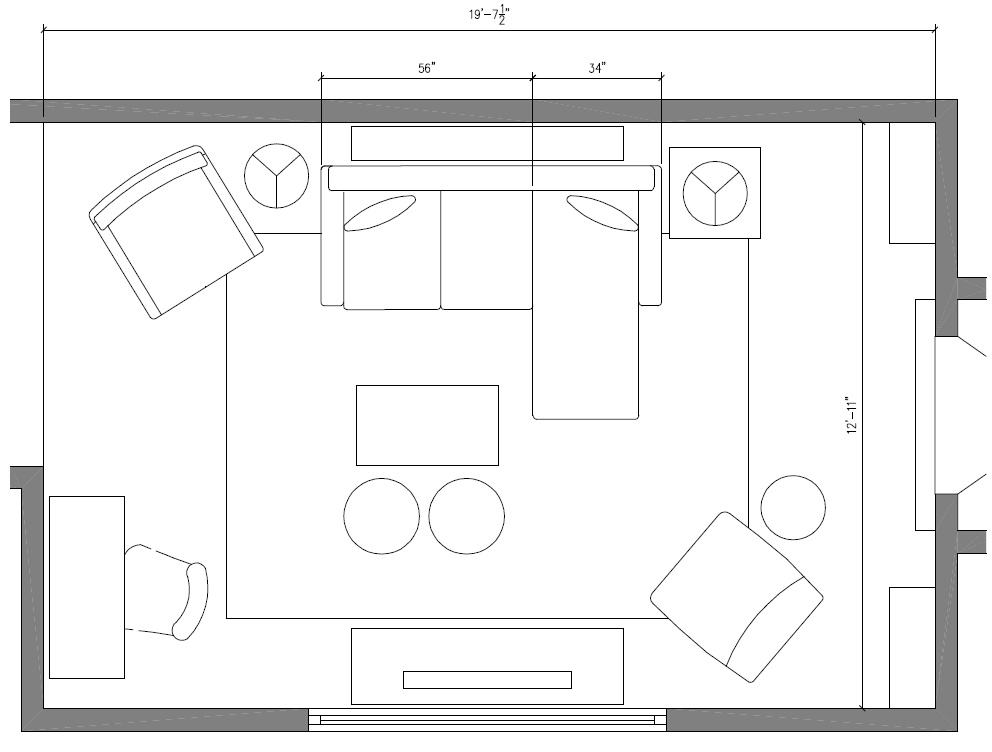
Living Room Floor PlanMy creative juices started to flow and this was what I envisioned for the room. [click to read my original plan of action for this space]
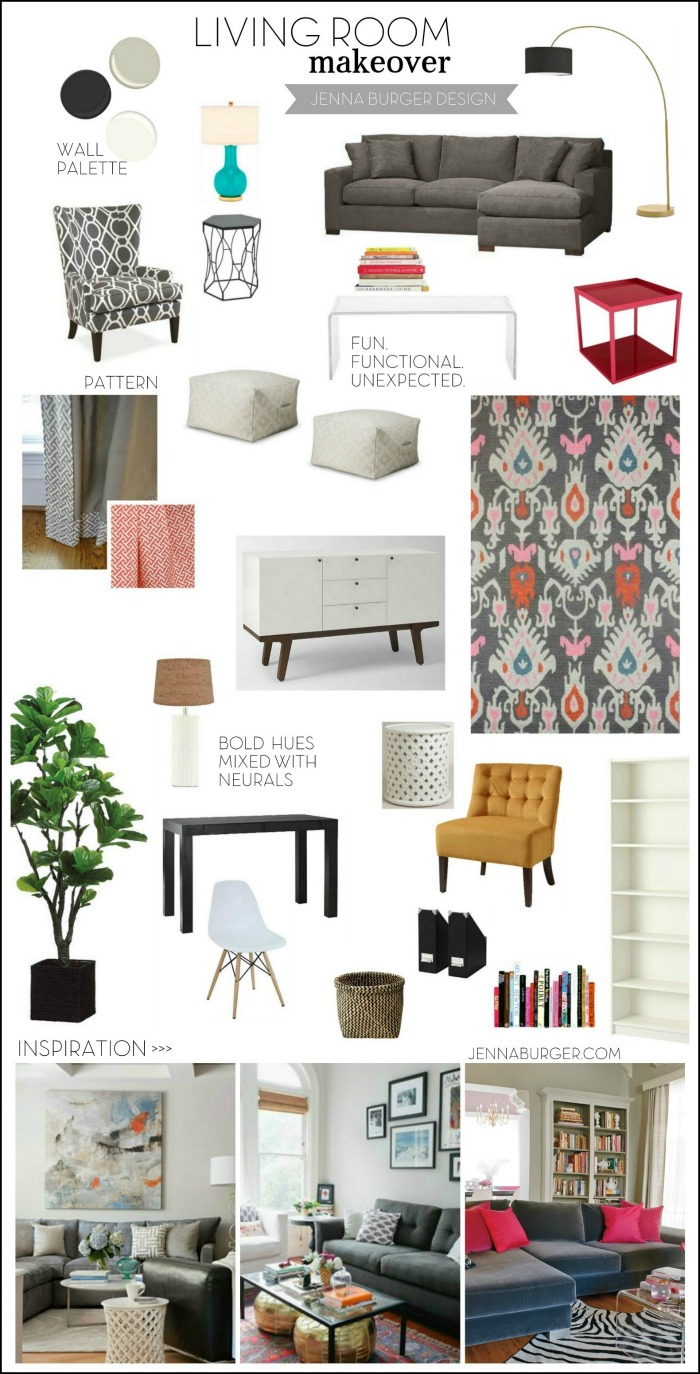
collage and inspiration photos for our living room makeover

After some project fails & loss of momentum along the way, here is the result of our new living room…

Living Room Makeover with bold black + pops of color [emerald, raspberry, coral, and light blue] Design by Jenna Burger Design, www.jennaburger.com

That is the main view of the room from the kitchen & dining space.

To the right is a desk nook where the kids do their homework & keep their art supplies.  I made some styling edits when I photographed the space, but typically there is rolling cart next to the desk that holds their coloring books, notebooks, and art supplies.

Last Fall a local photographer took family photos of us, which we get to treasure in window panes (that I found on the side of the road) turned photo frames.

Living Room Makeover with bold black + pops of color [emerald, raspberry, coral, and light blue] Design by Jenna Burger Design, www.jennaburger.com

Above the desk is a recent handmade sign creation that I shared about the other day.  No stencil or silhouette was used to create it, but instead I used chalk to “transfer” the letters.  It was a fairly easy process and the “chalk transfer” technique can ultimately be used for any design onto any hard surface.

Living Room Makeover with bold black + pops of color [emerald, raspberry, coral, and light blue] Design by Jenna Burger Design, www.jennaburger.com

Continuing around the room, I decided to put the TV stand + new flat screen TV (the element that sparked the redesign) in front of the window.

When I shared my original plan for this makeover, I got some comments about the TV location – “you’re putting the TV in front of the window?” – but honestly it really works in this room.  The windows are really large + there are skylights above that bring in lots of light.  The location of this space is also in the back of our home, so no one from the outside is looking in.  I questioned the placement at first too, but we are really enjoy seeing the outdoors (ie: many snowfalls) at the same time we watch TV.

Living Room Makeover with bold black + pops of color [emerald, raspberry, coral, and light blue] Design by Jenna Burger Design, www.jennaburger.com

The TV cabinet is from Ikea and to make it unique, I added similar knobs to the china cabinet (that I transformed last year) + ‘L’ brackets to make it like a campaign-style cabinet.

The window panels are the same as those previously in the room, but they too got spiced up with new fabric on the leading edge [the material is drop cloth and here is original the tutorial].  Layered behind the window panels are bamboo roman shades – same as they were before.  When I painted the mouldings wood to white a few years back, this window with the layered window treatments took on an entirely new life!

Living Room Makeover with bold black + pops of color [emerald, raspberry, coral, and light blue] Design by Jenna Burger Design, www.jennaburger.com

Isn’t that new chair fabulous?!  It’s new and it’s daring and I love it.  I’m going to share all the sources for the new room in another post, but I have to spill the beans.  This fabulous emerald chair (yes, it’s a true emerald green color) is from World Market and it’s really a great bang-for-the-buck.  At first, I had another chair in it’s place and it wasn’t dynamic enough.  I nervously ordered this chair unsure if it would be too bold for the room.  It arrived and there was no other green like it in the room.  I thought about it and lived with it for a few days and fell in love.  Now I feel it truly makes the room!

The new black focal wall is a show stopper.  Many people thought I was crazy when I said I was going to paint this huge wall black, but it really works.  The black is a soft, charcoal hue, so it’s not harsh.  The walls flanking the fireplace were always tricky to style and since we never have enough bookcases, we built these beauties – more on that in another post.

Living Room Makeover with bold black + pops of color [emerald, raspberry, coral, and light blue] Design by Jenna Burger Design, www.jennaburger.com

The shelves of these new bookcases hold lots of our books, magazines, and accessories + some of the kids toys.  This is a living room for our family of 5.  This is the #1 space we hang out in, so when designing the new layout, it HAD to be kid-friendly.  The older 2 kids have a lot of their toys in their rooms or in the basement, but some of their smaller things are now in baskets on the shelves and are easily accessible.

I have a few more stylish baskets in the living room that also hold the baby toys. I love baskets and when they’re pretty, it doesn’t matter what’s inside. [Here are more savvy storage solutions using baskets]

Living Room Makeover with bold black + pops of color [emerald, raspberry, coral, and light blue] Design by Jenna Burger Design, www.jennaburger.com

As you continue around the room, there is a second bookcase to match the other, which holds more books, family photo albums, CDs (yes, we still listen to CDs even though it seems archaic to some), and a large basket that houses a few comfy blankets.

As you make your way around the space, the sofa now sits opposite of the window and a blank canvas above was turned into a beautiful art wall with a bit of old and touches of new.

Living Room Makeover with bold black + pops of color [emerald, raspberry, coral, and light blue] Design by Jenna Burger Design, www.jennaburger.com

The new deep charcoal sofa is heavenly.  It’s beautiful against the light blue wall + picks up the tones of the black focal wall.  It was hard to see our other sofa go (but I still see it often because a good friend of mine is now enjoying it), but this new one really fits the room so much better.  We chose a sofa with a chaise on the end, which gives extra seating + a spot to put your feet up and lounge.

The rug really is the statement element in the room and that was the one piece that started the design.  I was drawn to it because it has so many colors from other rooms in our home.  This space now truly feels cohesive with the rest of the house!  The coffee table is another piece that I love.  It’s there, but at the same time, totally disappears, allowing the rug to “speak” it’s beauty.

Living Room Makeover with bold black + pops of color [emerald, raspberry, coral, and light blue] Design by Jenna Burger Design, www.jennaburger.com

Living Room Makeover with bold black + pops of color [emerald, raspberry, coral, and light blue] Design by Jenna Burger Design, www.jennaburger.com

Living Room Makeover with bold black + pops of color [emerald, raspberry, coral, and light blue] Design by Jenna Burger Design, www.jennaburger.com

Creating the art gallery wall was fun, but challenging.  This wall is almost 20′ of open canvas, so it definitely took some planning [read more about the planning + creating of the art wall] but the extra steps to get it right was worth the effort.

Living Room Makeover with bold black + pops of color [emerald, raspberry, coral, and light blue] Design by Jenna Burger Design, www.jennaburger.com

One of the issues with the old space was the lack of lighting.  We have a decorative ceiling fixture in this space, but it’s somewhat harsh on the eyes.  Personally, I like soft light from table lamps and floor lamps.

I didn’t want to go matchy-matchy on the sides of the sofa, so instead I chose to use a table lamp between the chair & sofa that sits on a side table and an arched floor lamp (which provides a lot of soft light) to the right of the sofa.  Now when the lights are turned on in the evening, the 2 fixtures provide the perfect ambiance.

Living Room Makeover with bold black + pops of color [emerald, raspberry, coral, and light blue] Design by Jenna Burger Design, www.jennaburger.com

It was very important to continue colors from other areas of the house into this new space.  Because our first floor is all open where each room flows from one to the next, bringing in elements to make it feel cohesive was the only way this room would work and feel like an extension of what’s been created elsewhere.

From this view, you can see how the china cabinet painted in a deep raspberry color is in the adjacent dining area.  It now all flows and feels like one.

Living Room Makeover with bold black + pops of color [emerald, raspberry, coral, and light blue] Design by Jenna Burger Design, www.jennaburger.com

And just so you know we are a real family who absolutely use this space.  Here’s my crazy clan of 3 in action…
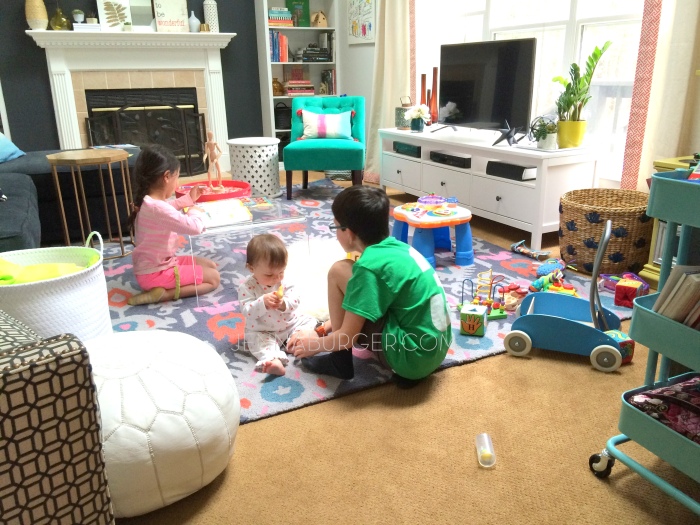
From sunrise to sunset (and beyond) we are 100% enjoying this new living room space.  Even though there were a few ups and downs to creating this new haven in our home, we are overjoyed with how fresh it feels & how much it reflects our vibrant family!

I’m sure you are interested in knowing where I found all the awesome pieces for our new living room.  Next post will be details on all the sources.

Front Door Dilemma: Choosing a New Color

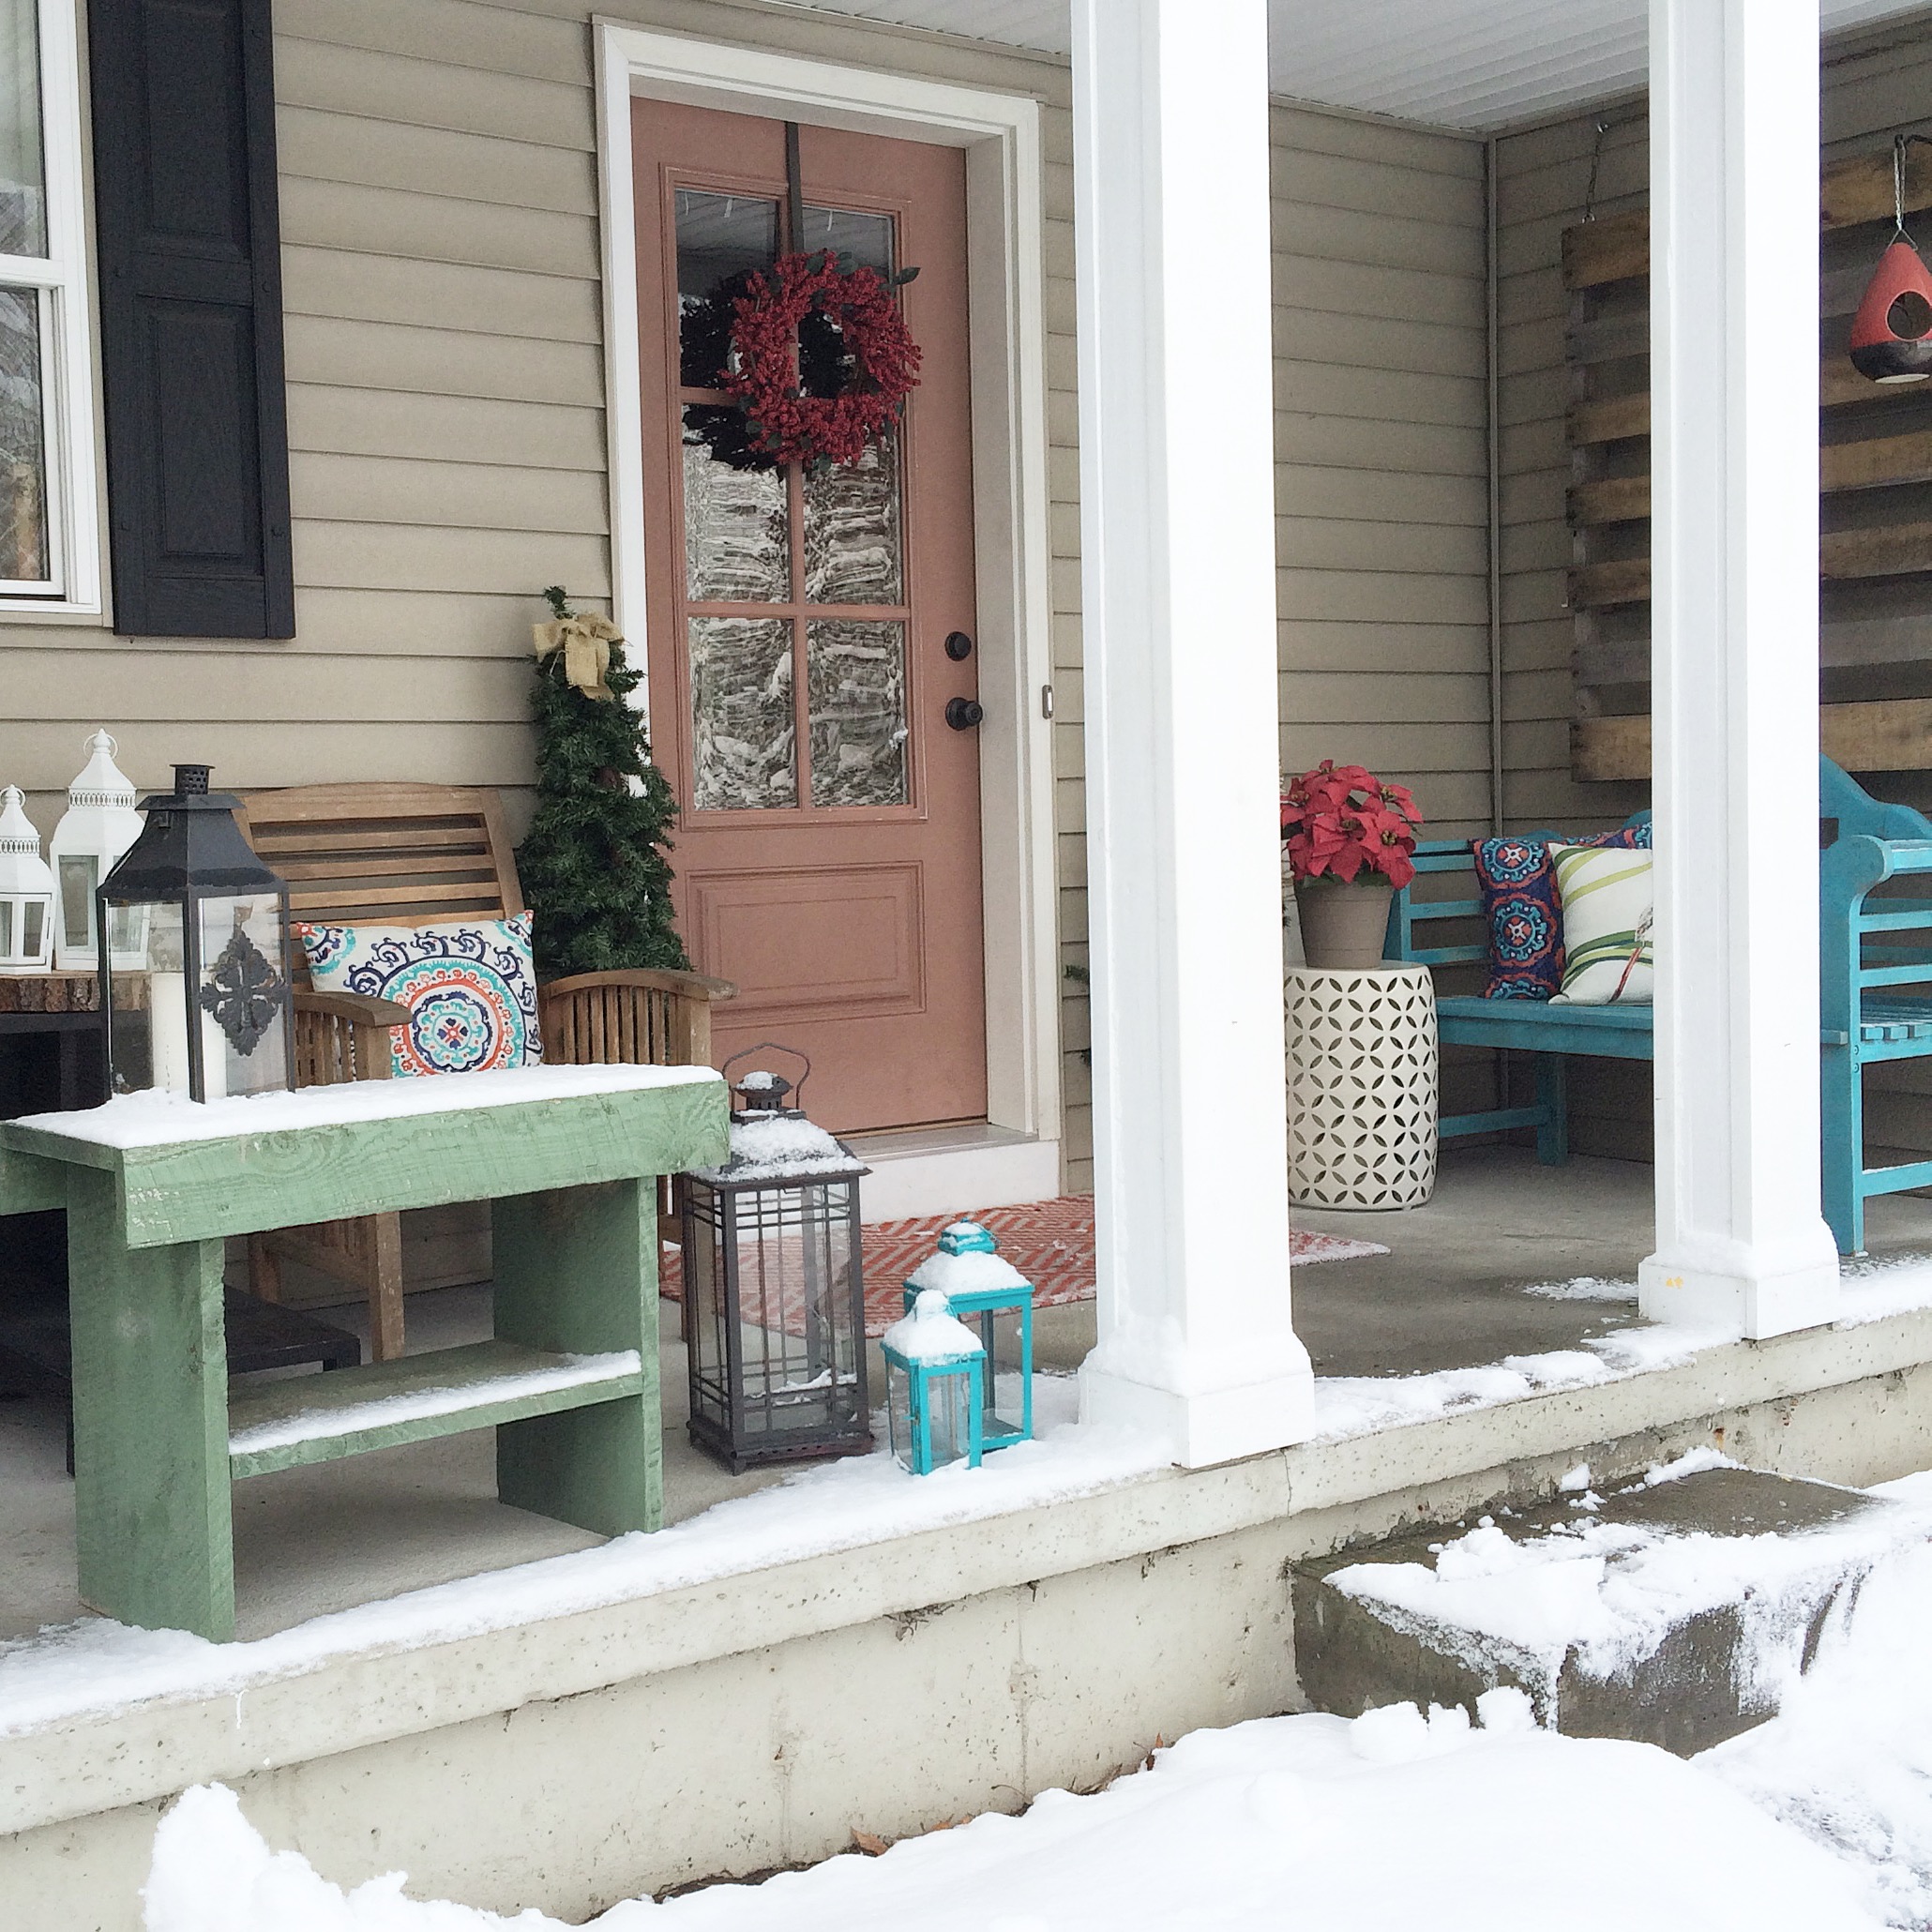
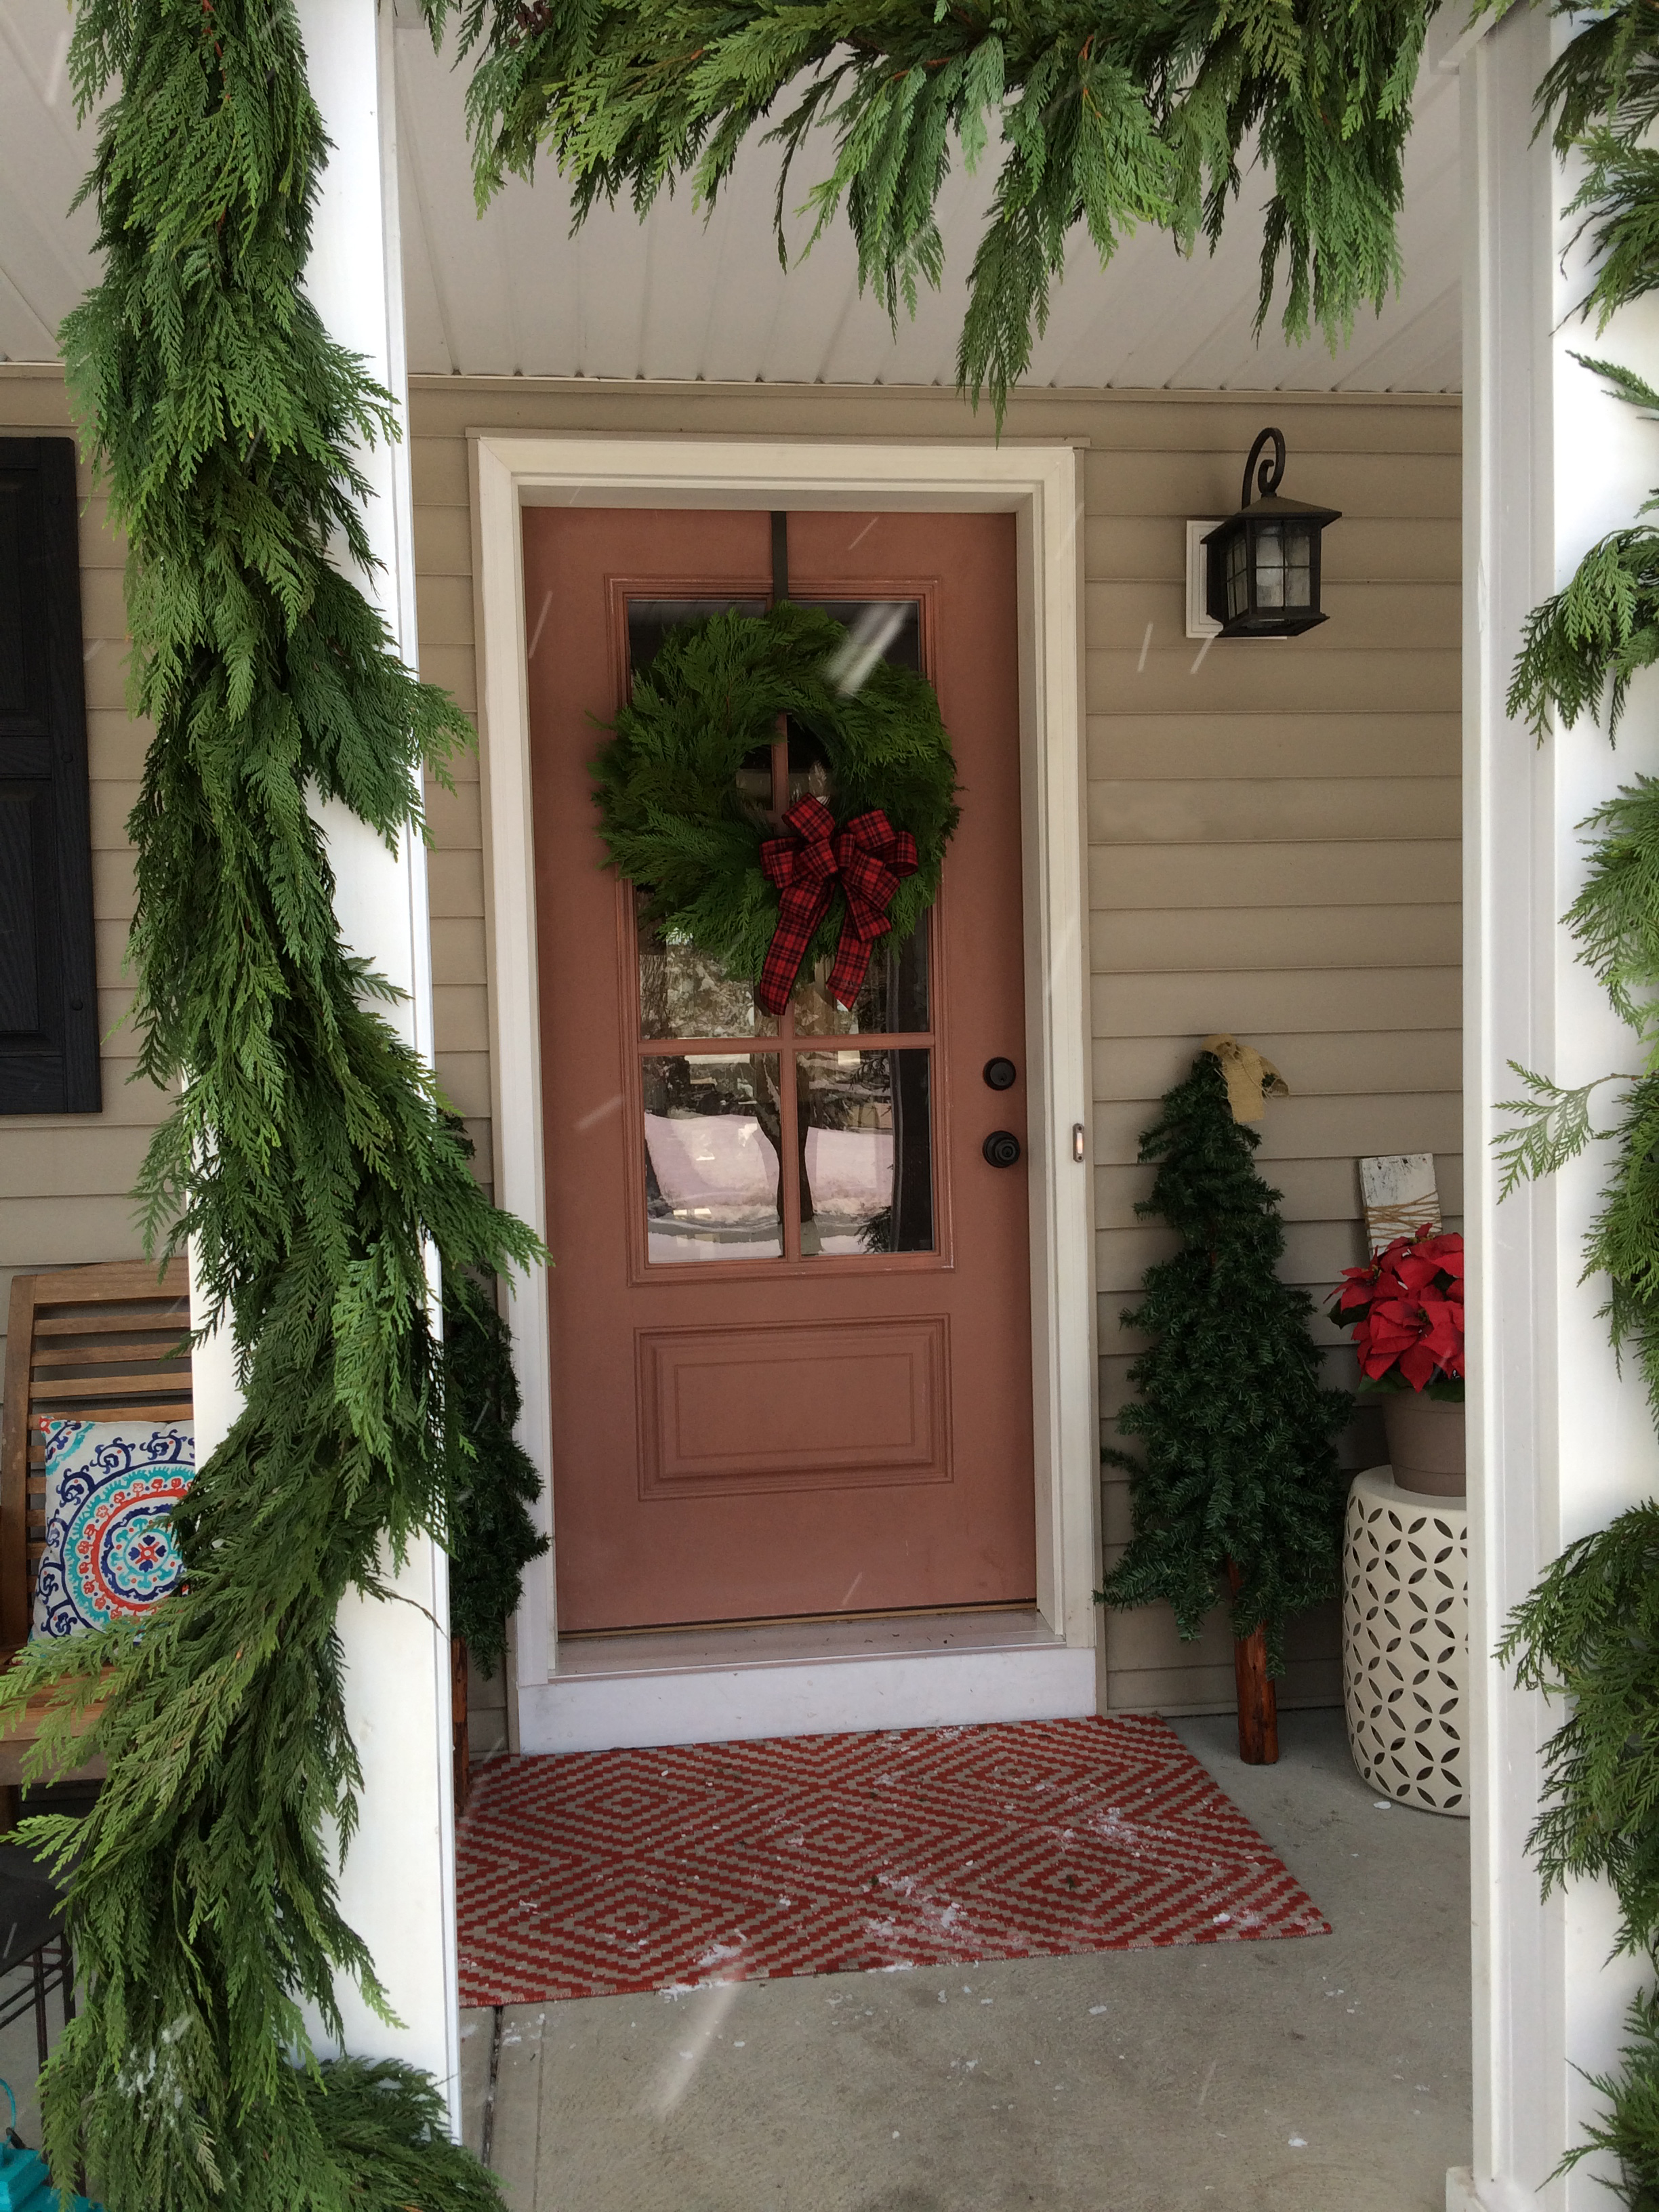
Late last year we said farewell to our beautiful + bright apple green front door (it’s been the backdrop to many of my seasonal wreaths). In it’s place we welcomed a new beauty that has brought us much more light, but is in need of a pop of color!

You might have caught a glimpse of it during the Holiday Housewalk

Primed front door ready for a new paint color

Primed front door ready for a new paint color

A few of you asked, “what happened to your front door?”. Did you get rid of the cheery apple green door?

We did and for good reason.

Changing the front door was something I dreamed about from the moment we moved into our home. As the foyer transformed over the years to a space we truly love to come home to, we weren’t loving the feeling of the foyer when the door was closed (mostly during the winter months). Since there are no other windows in the foyer, when the solid front door was closed, it felt dark & cavernous.

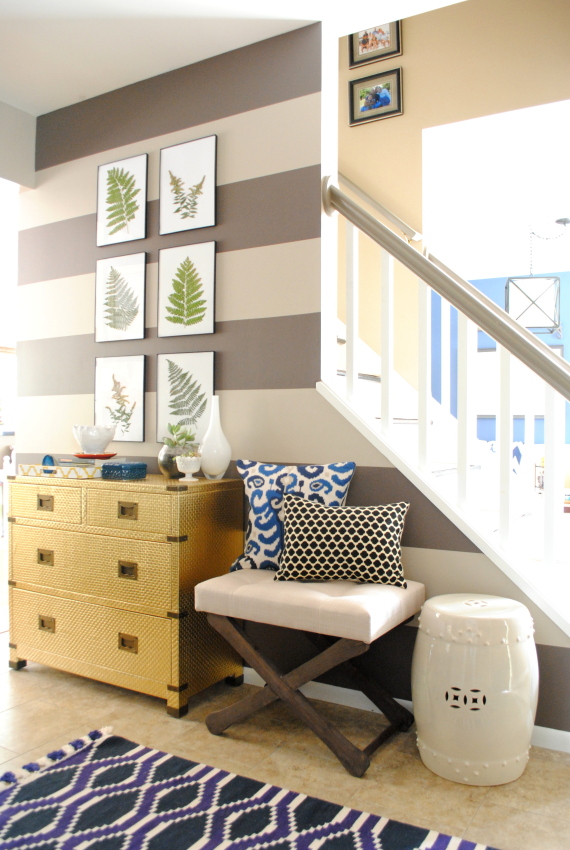
bold foyer with stripes; design by @Jenna_Burger

We were originally going to make the front door swap-out a do it yourself project, but in the end with the advice from the reps in the door section at my local Lowe’s, we decided to have it professionally installed. Thank goodness we did #bestdecisionever

It took a few hours + lots of tools, but when it was complete, I was in love & even more so because I didn’t have to lift a finger!

Our beautiful new door with 3/4 glass has been a dream come true. On the bitterest of days of -30 to the almost 70 degree day we had yesterday, we have really enjoyed the beautiful light filter in all year long. But the time has come to choose a color. After living with this burgundy color all winter – it’s actually how it came primed – we are ready to freshen it up with a new color.

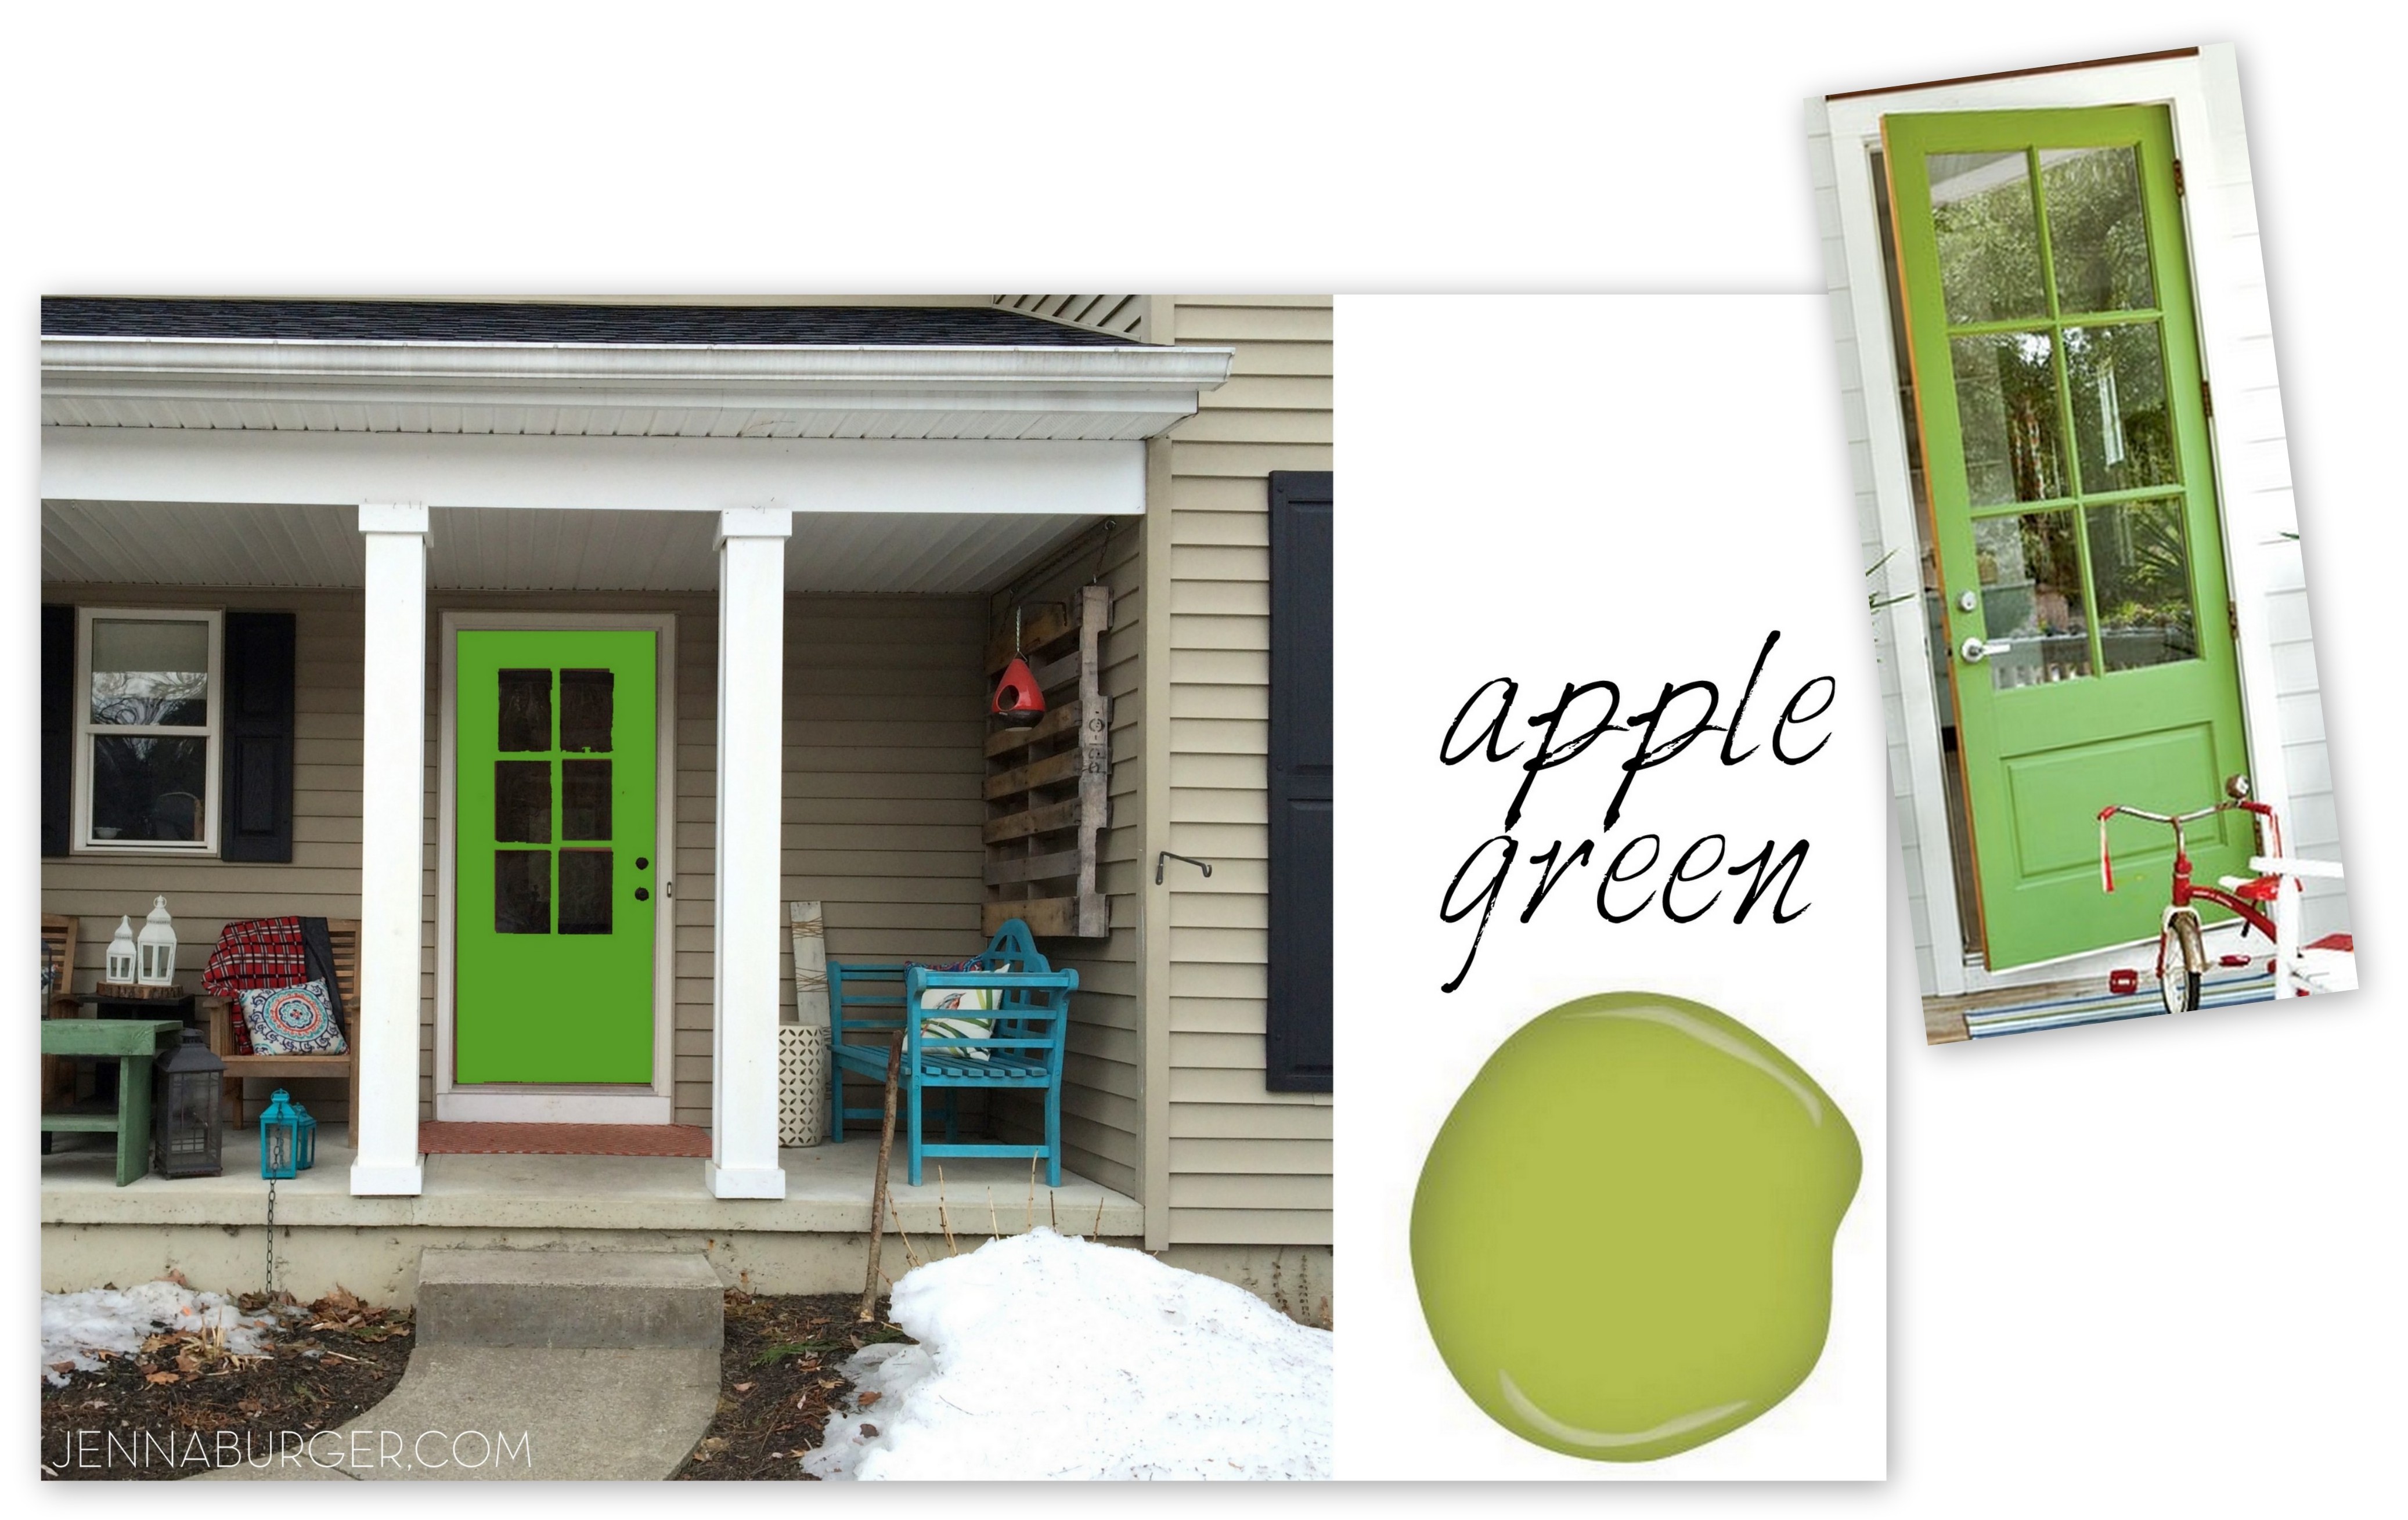
I am actually leaning towards painting the new door apple green because I loved the color so much, but I am unsure…

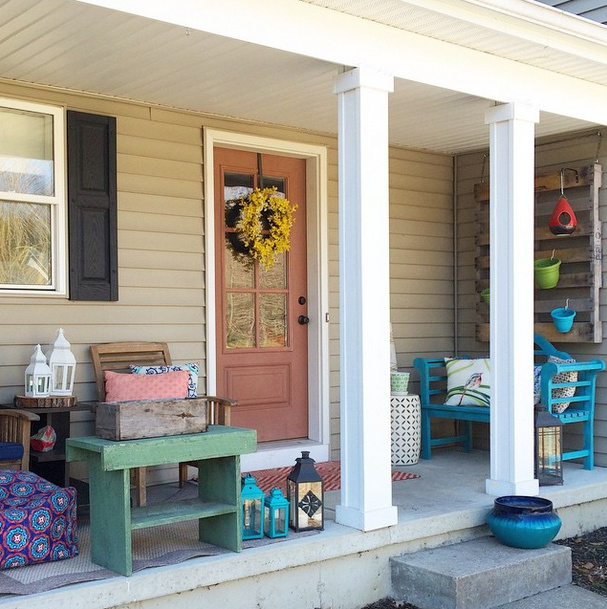
Here is a picture I snapped + shared on Instagram yesterday after spending some time adding in some of our Spring + Summer decor.

Spring front porch with a new front door that needs COLOR.

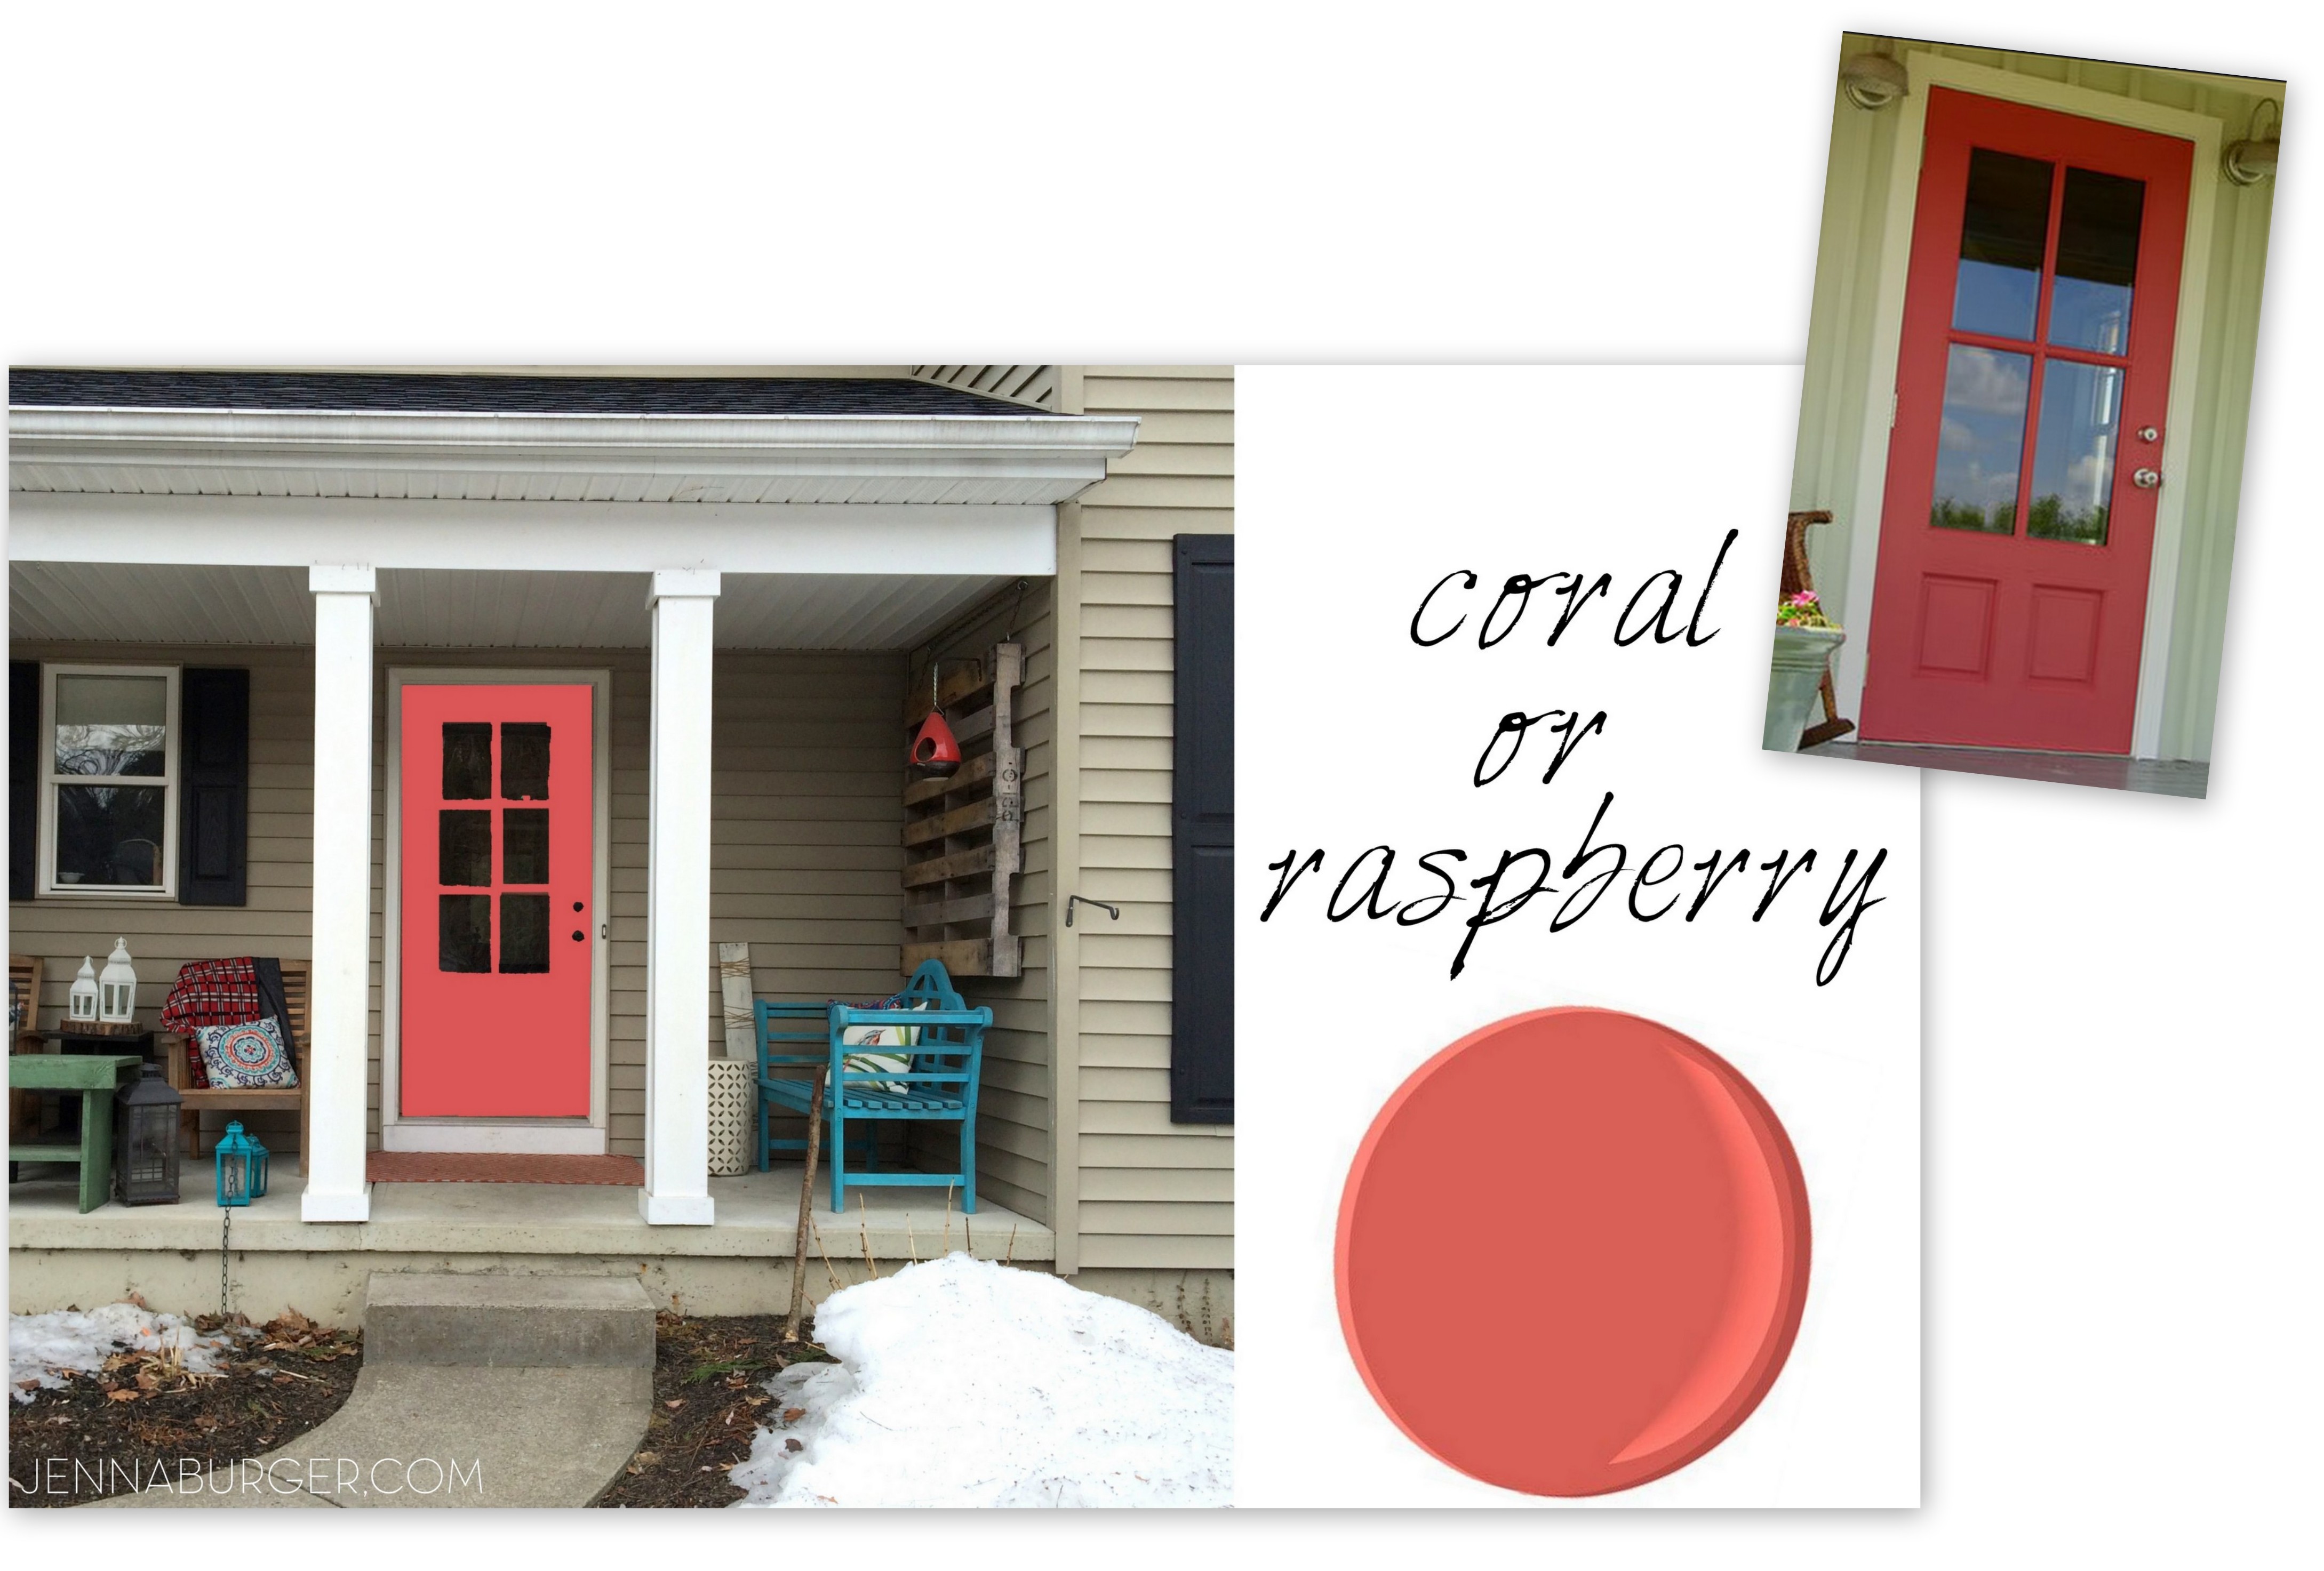
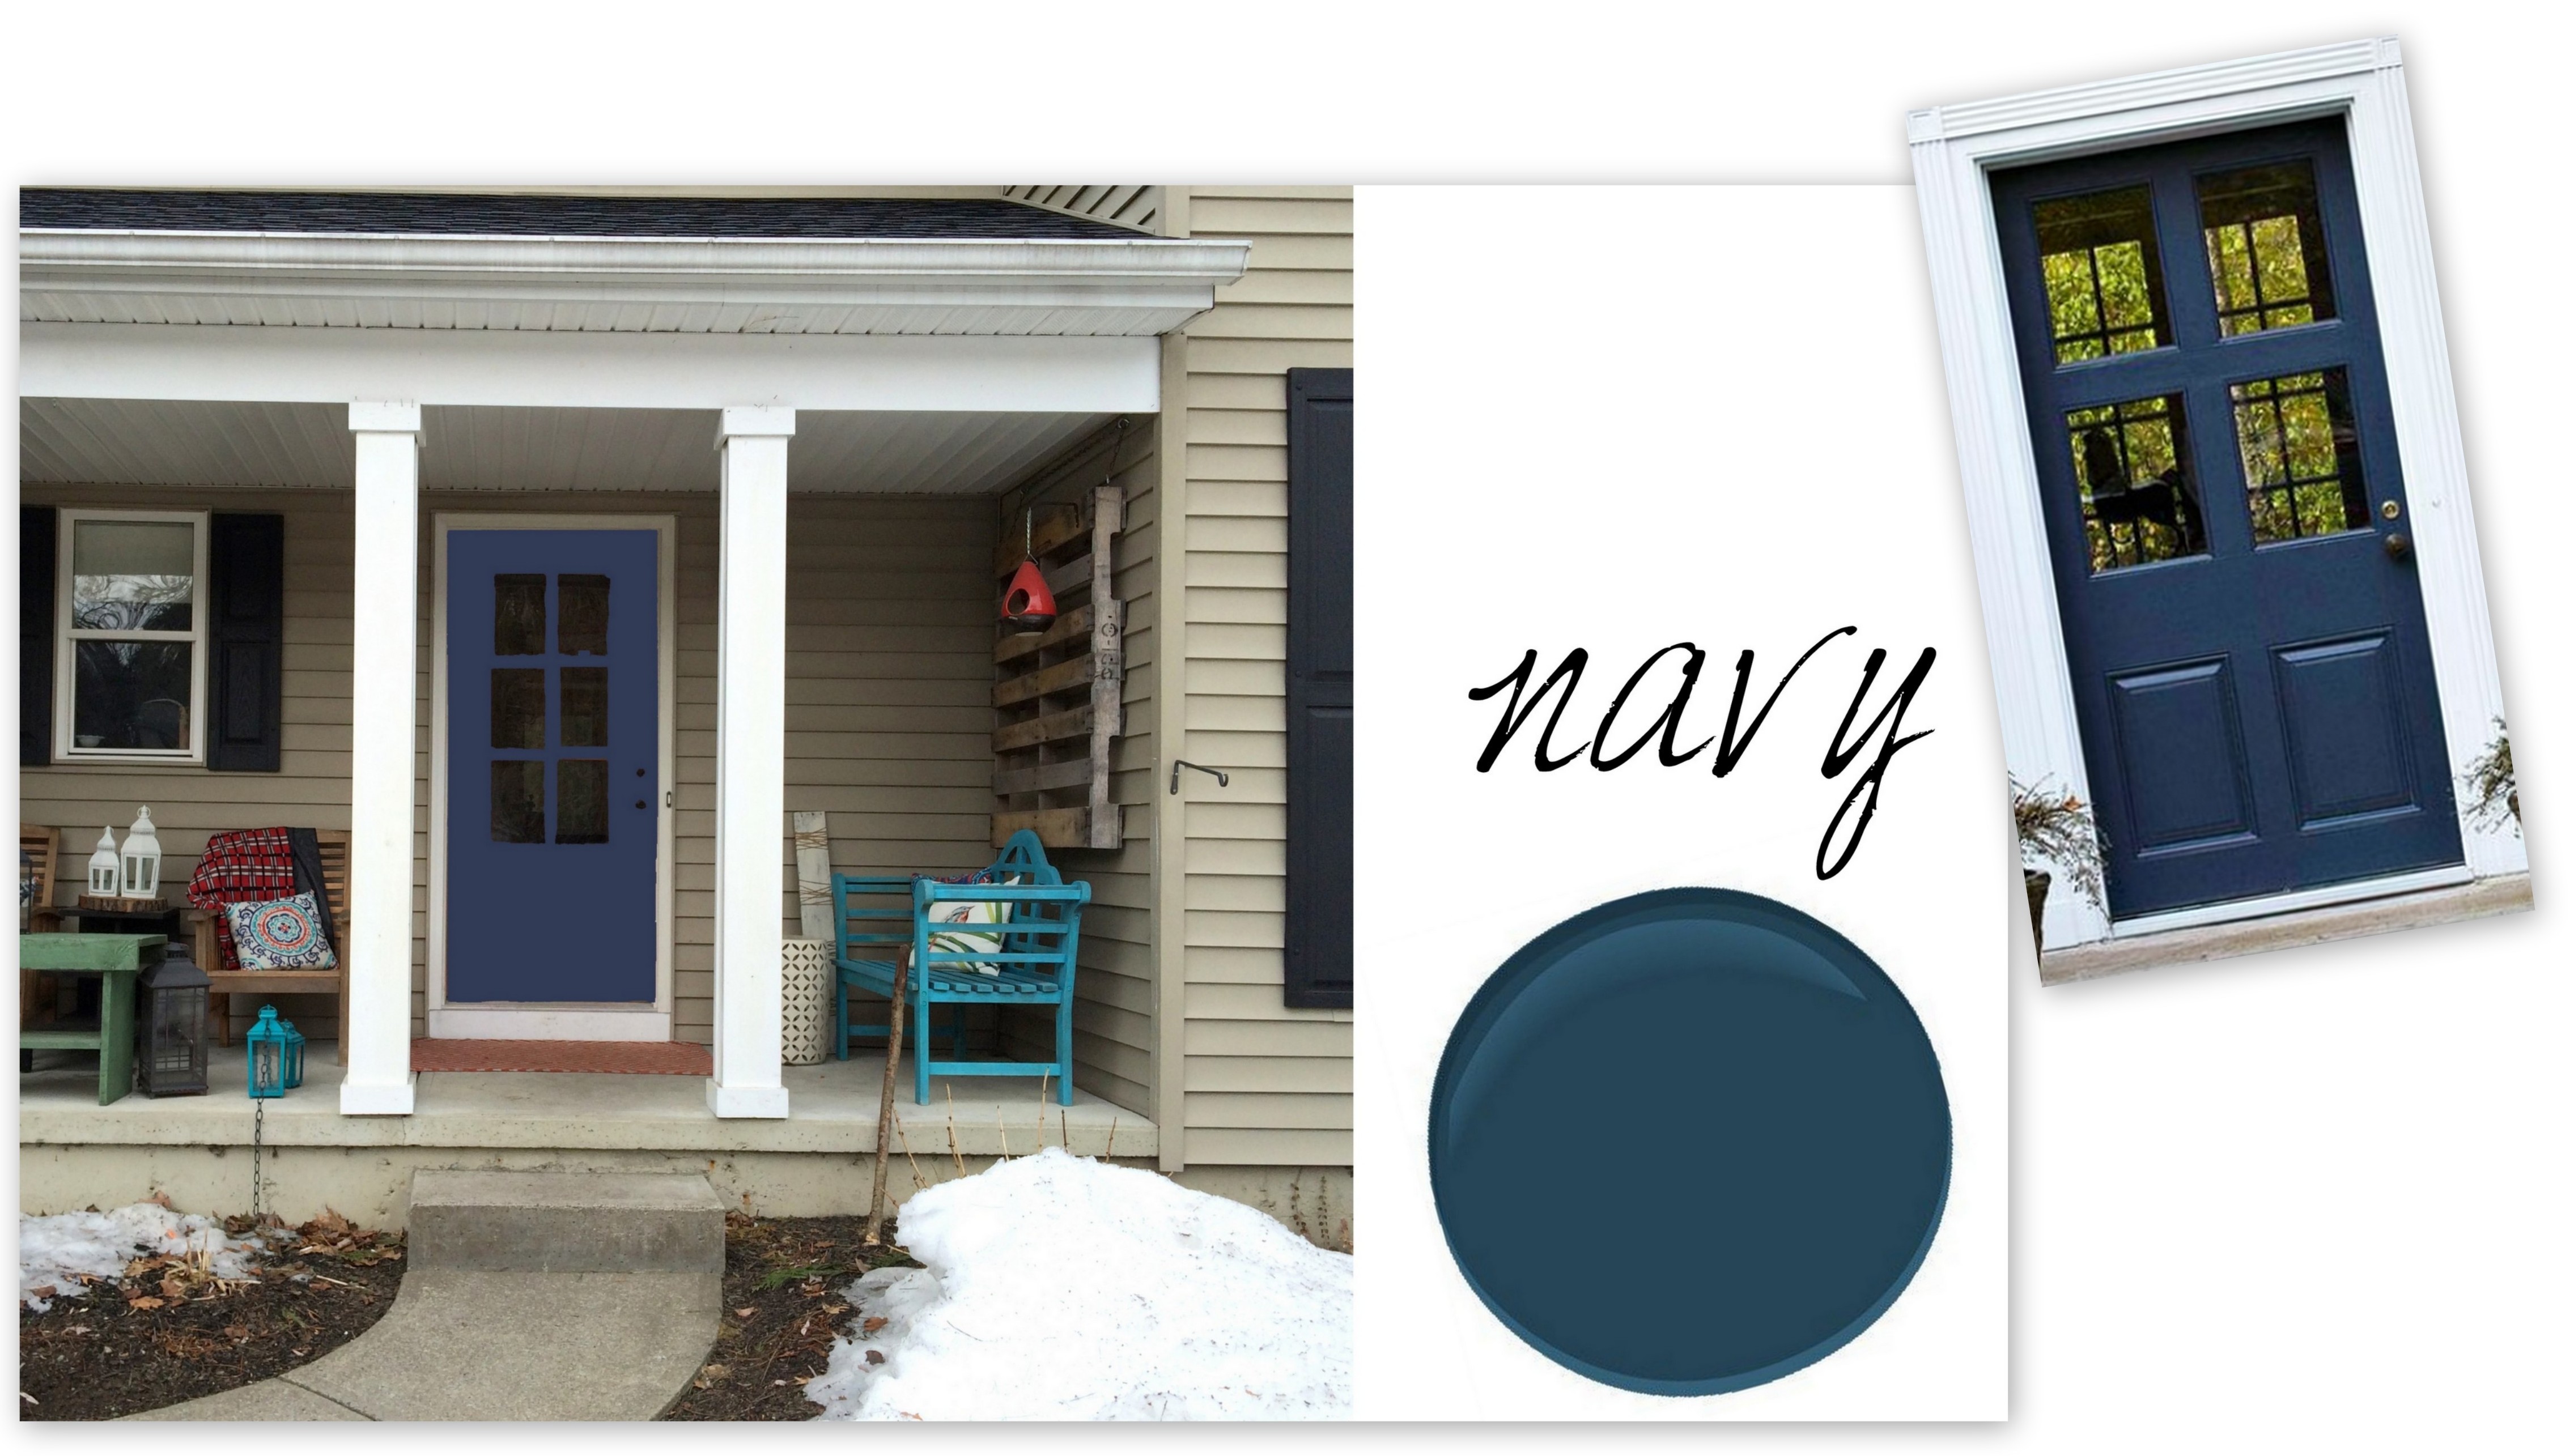
To see how other colors would look, I used photoshop to visually interpret how other door colors would look.

Disclaimer: I am horrible at photoshop & the front porch currently looks pretty sad after the long winter. Don’t judge.

Here are the color options I am thinking…

Coral

Front Door Dilemma... Choosing a new paint color for the front door

Teal / Turquoise

Front Door Dilemma... Choosing a new paint color for the front door

Navy

Front Door Dilemma... Choosing a new paint color for the front door

Red

Front Door Dilemma... Choosing a new paint color for the front door

or my tried & true…

Apple Green

Front Door Dilemma... Choosing a new paint color for the front doorplus there’s also emerald green, yellow, black… decisions. decisions.

What to consider when choosing a front door color

1 / Choose a color that reflects you. The color on the front door is important because it’s the first element of your home that you see.

2/ Make a statement. A statement doesn’t have to be a bold color, but a fun, unexpected hue will surely make for a beautiful entryway and set the tone for what’s to come inside.

3/ Be cohesive. Not sure about a color? Look at your interior decor and choose a color from a pillow or picture to create a cohesive color palette inside and out.

4/ It’s just paint. At the end of the day, it’s just paint. Yes, who wants to waste time or money, but if you paint your front door and you don’t like it a year later, repaint it.

For my front door, I am taking into consideration the colors I have on the porch, but also the colors that are used inside my entry and the adjacent spaces of the foyer.

All my options for color – teal, green, navy, coral – would work as they are all an extension of the hues on the interior. I love them all. I feel overwhelmed, but I’ll get there.

What’s your favorite color? Do you have another color in mind that you think will be even better? or just Go for my favorite apple green?

Getting Organized in the Garage: Ideas for Organization & Storage

As the days are getting warmer, time spent outdoors is about to increase – finally, right?! It’s been a loooong winter.  And lots of fun in the sun, comes months ahead with the garage door open and hours a day playing various sports activities + time spent on the lawn & garden.

While cooped up all Winter, we barely stepped foot in the garage other than to throw out the garbage + recycling.  From remodeling the bathroom to receiving many large packages for the living room makeover (which is almost complete), the garage was totally neglected and got piled high with a lot of stuff.  It was in desperate need of an overhaul + organization!

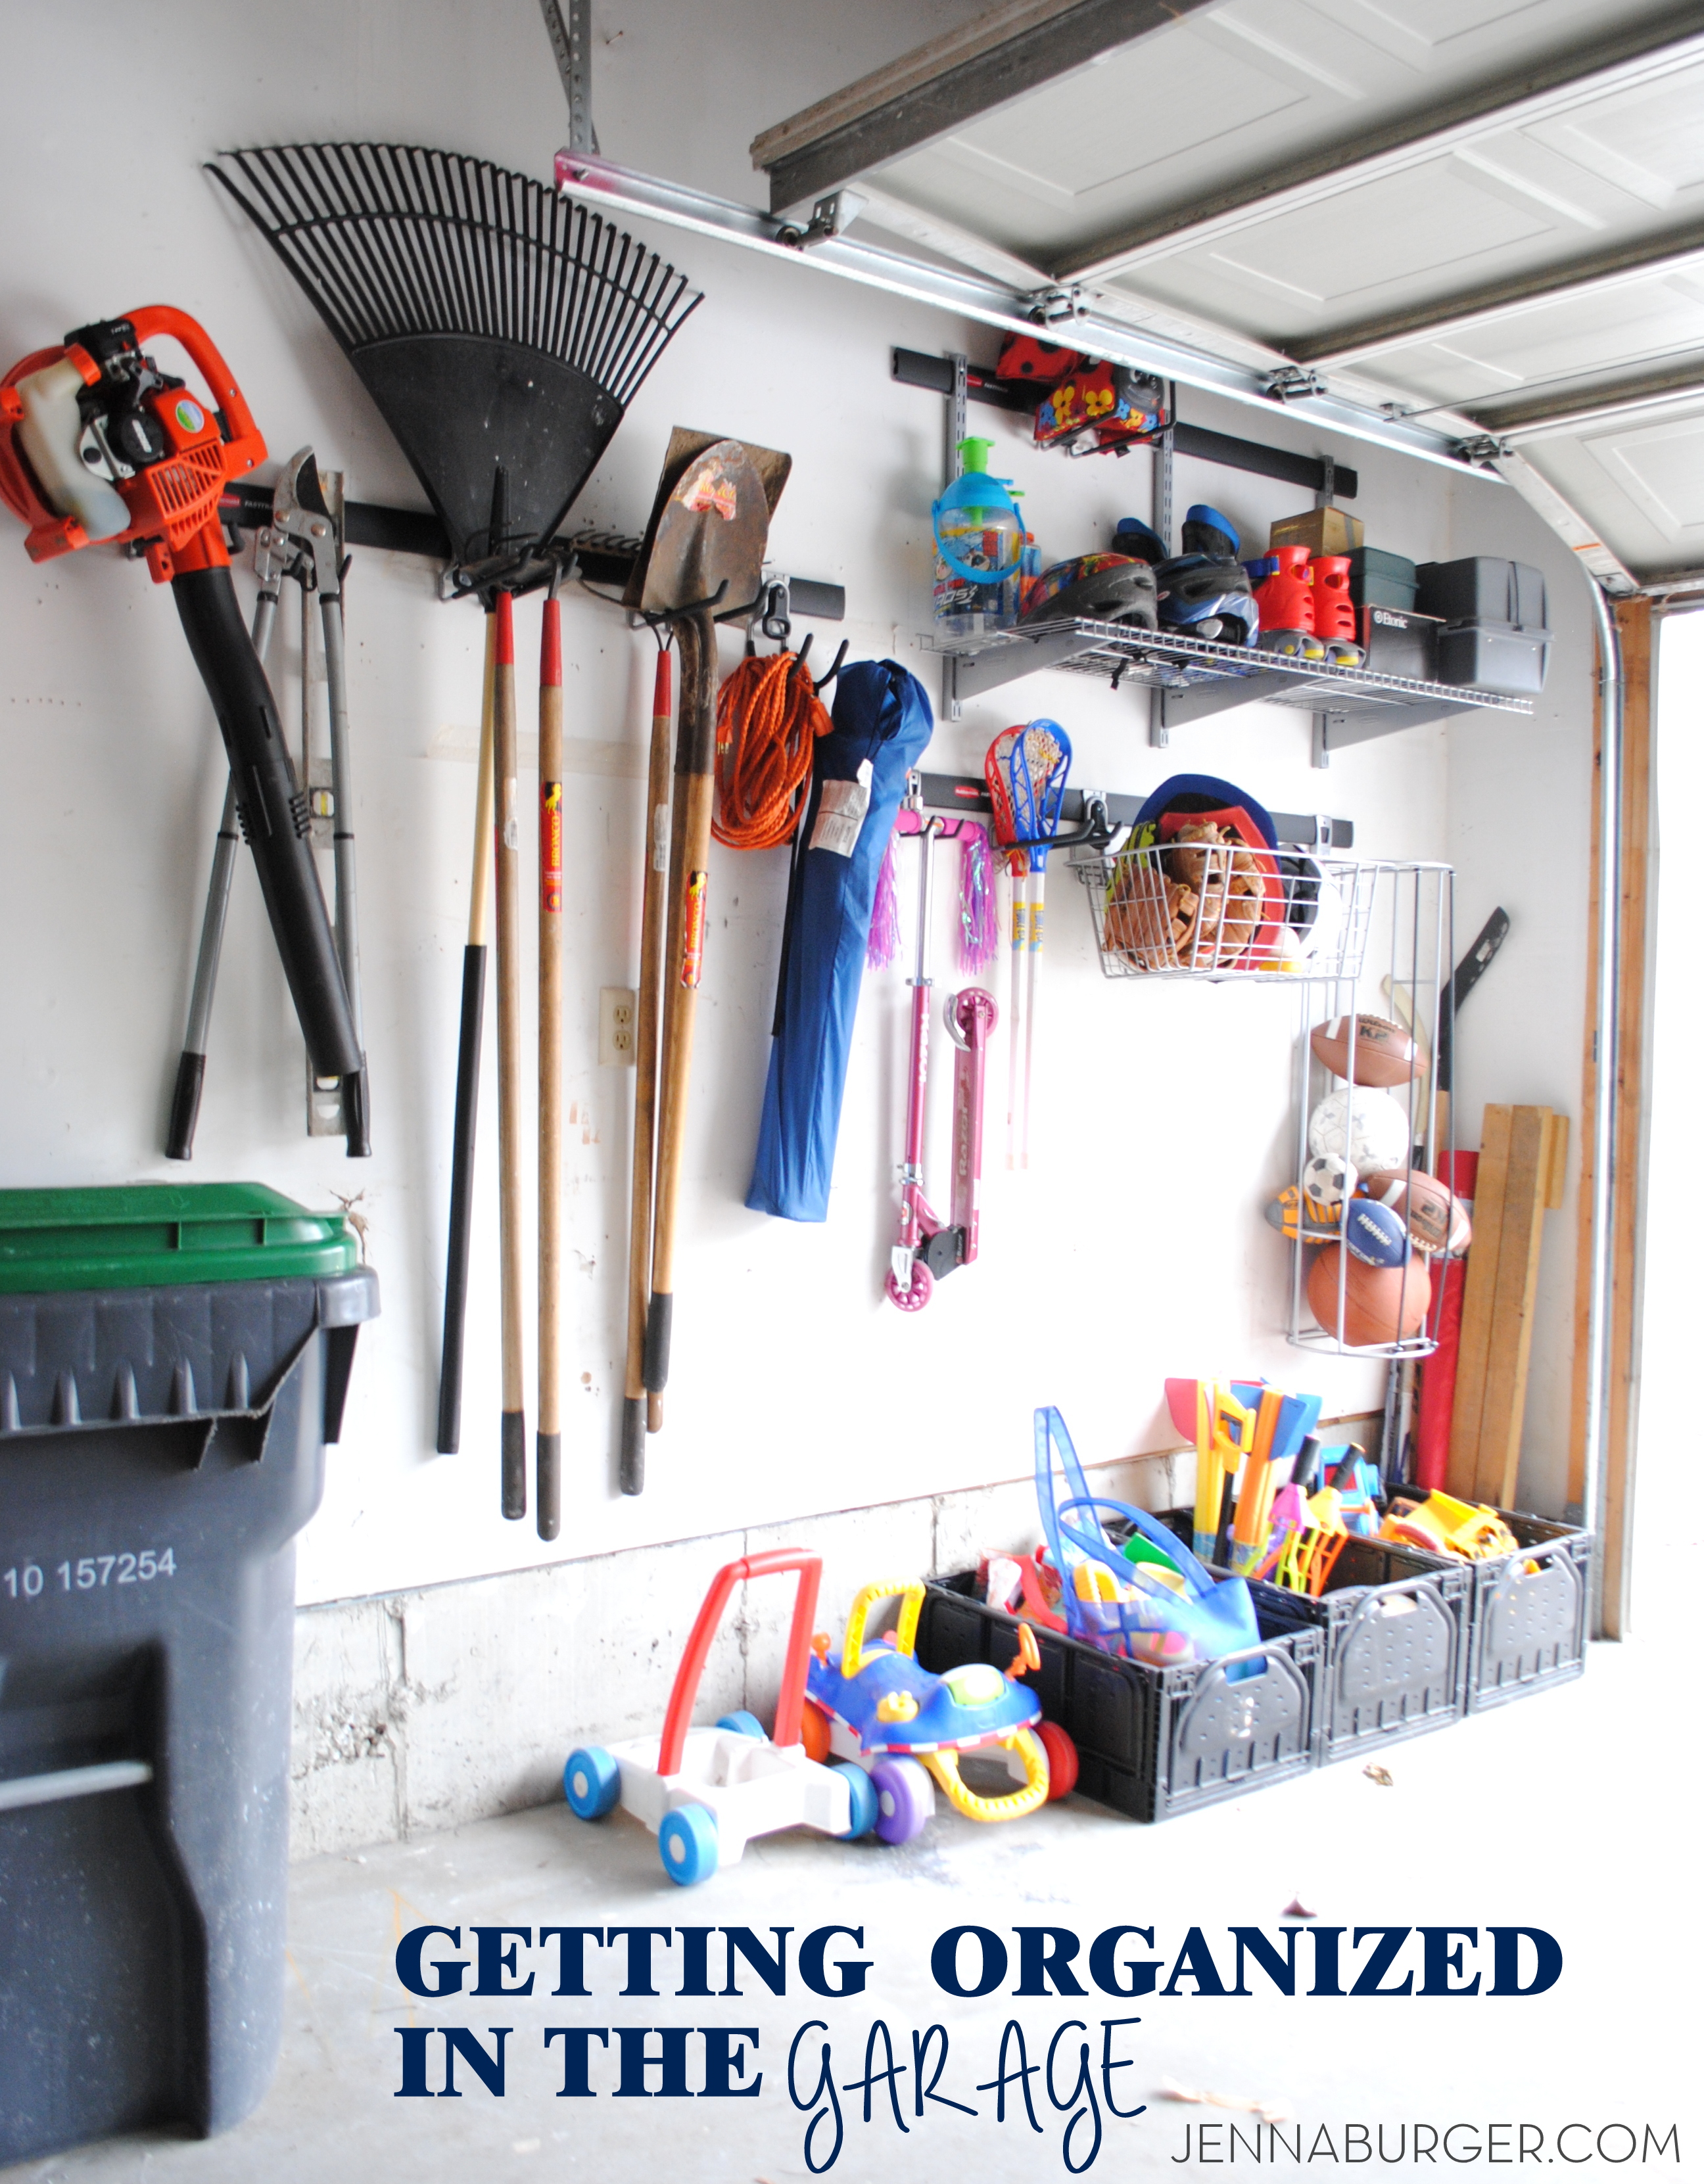
A few weekends ago we got our hands on the mess and started the process of whipping it into shape…

Getting organized in the GARAGE: tips + ideas for garage organization & storage by Jenna Burger Design, www.jennaburger.com

The temps were still a wee bit chilly, but the Mister and I set forth to start taking back our garage space.  It’s definitely going to take time (we are not at all finished – yet), but we had to start someplace and that someplace was the kids stuff + lawn & gardening supplies.

Garage Takeover Step 1, in action…

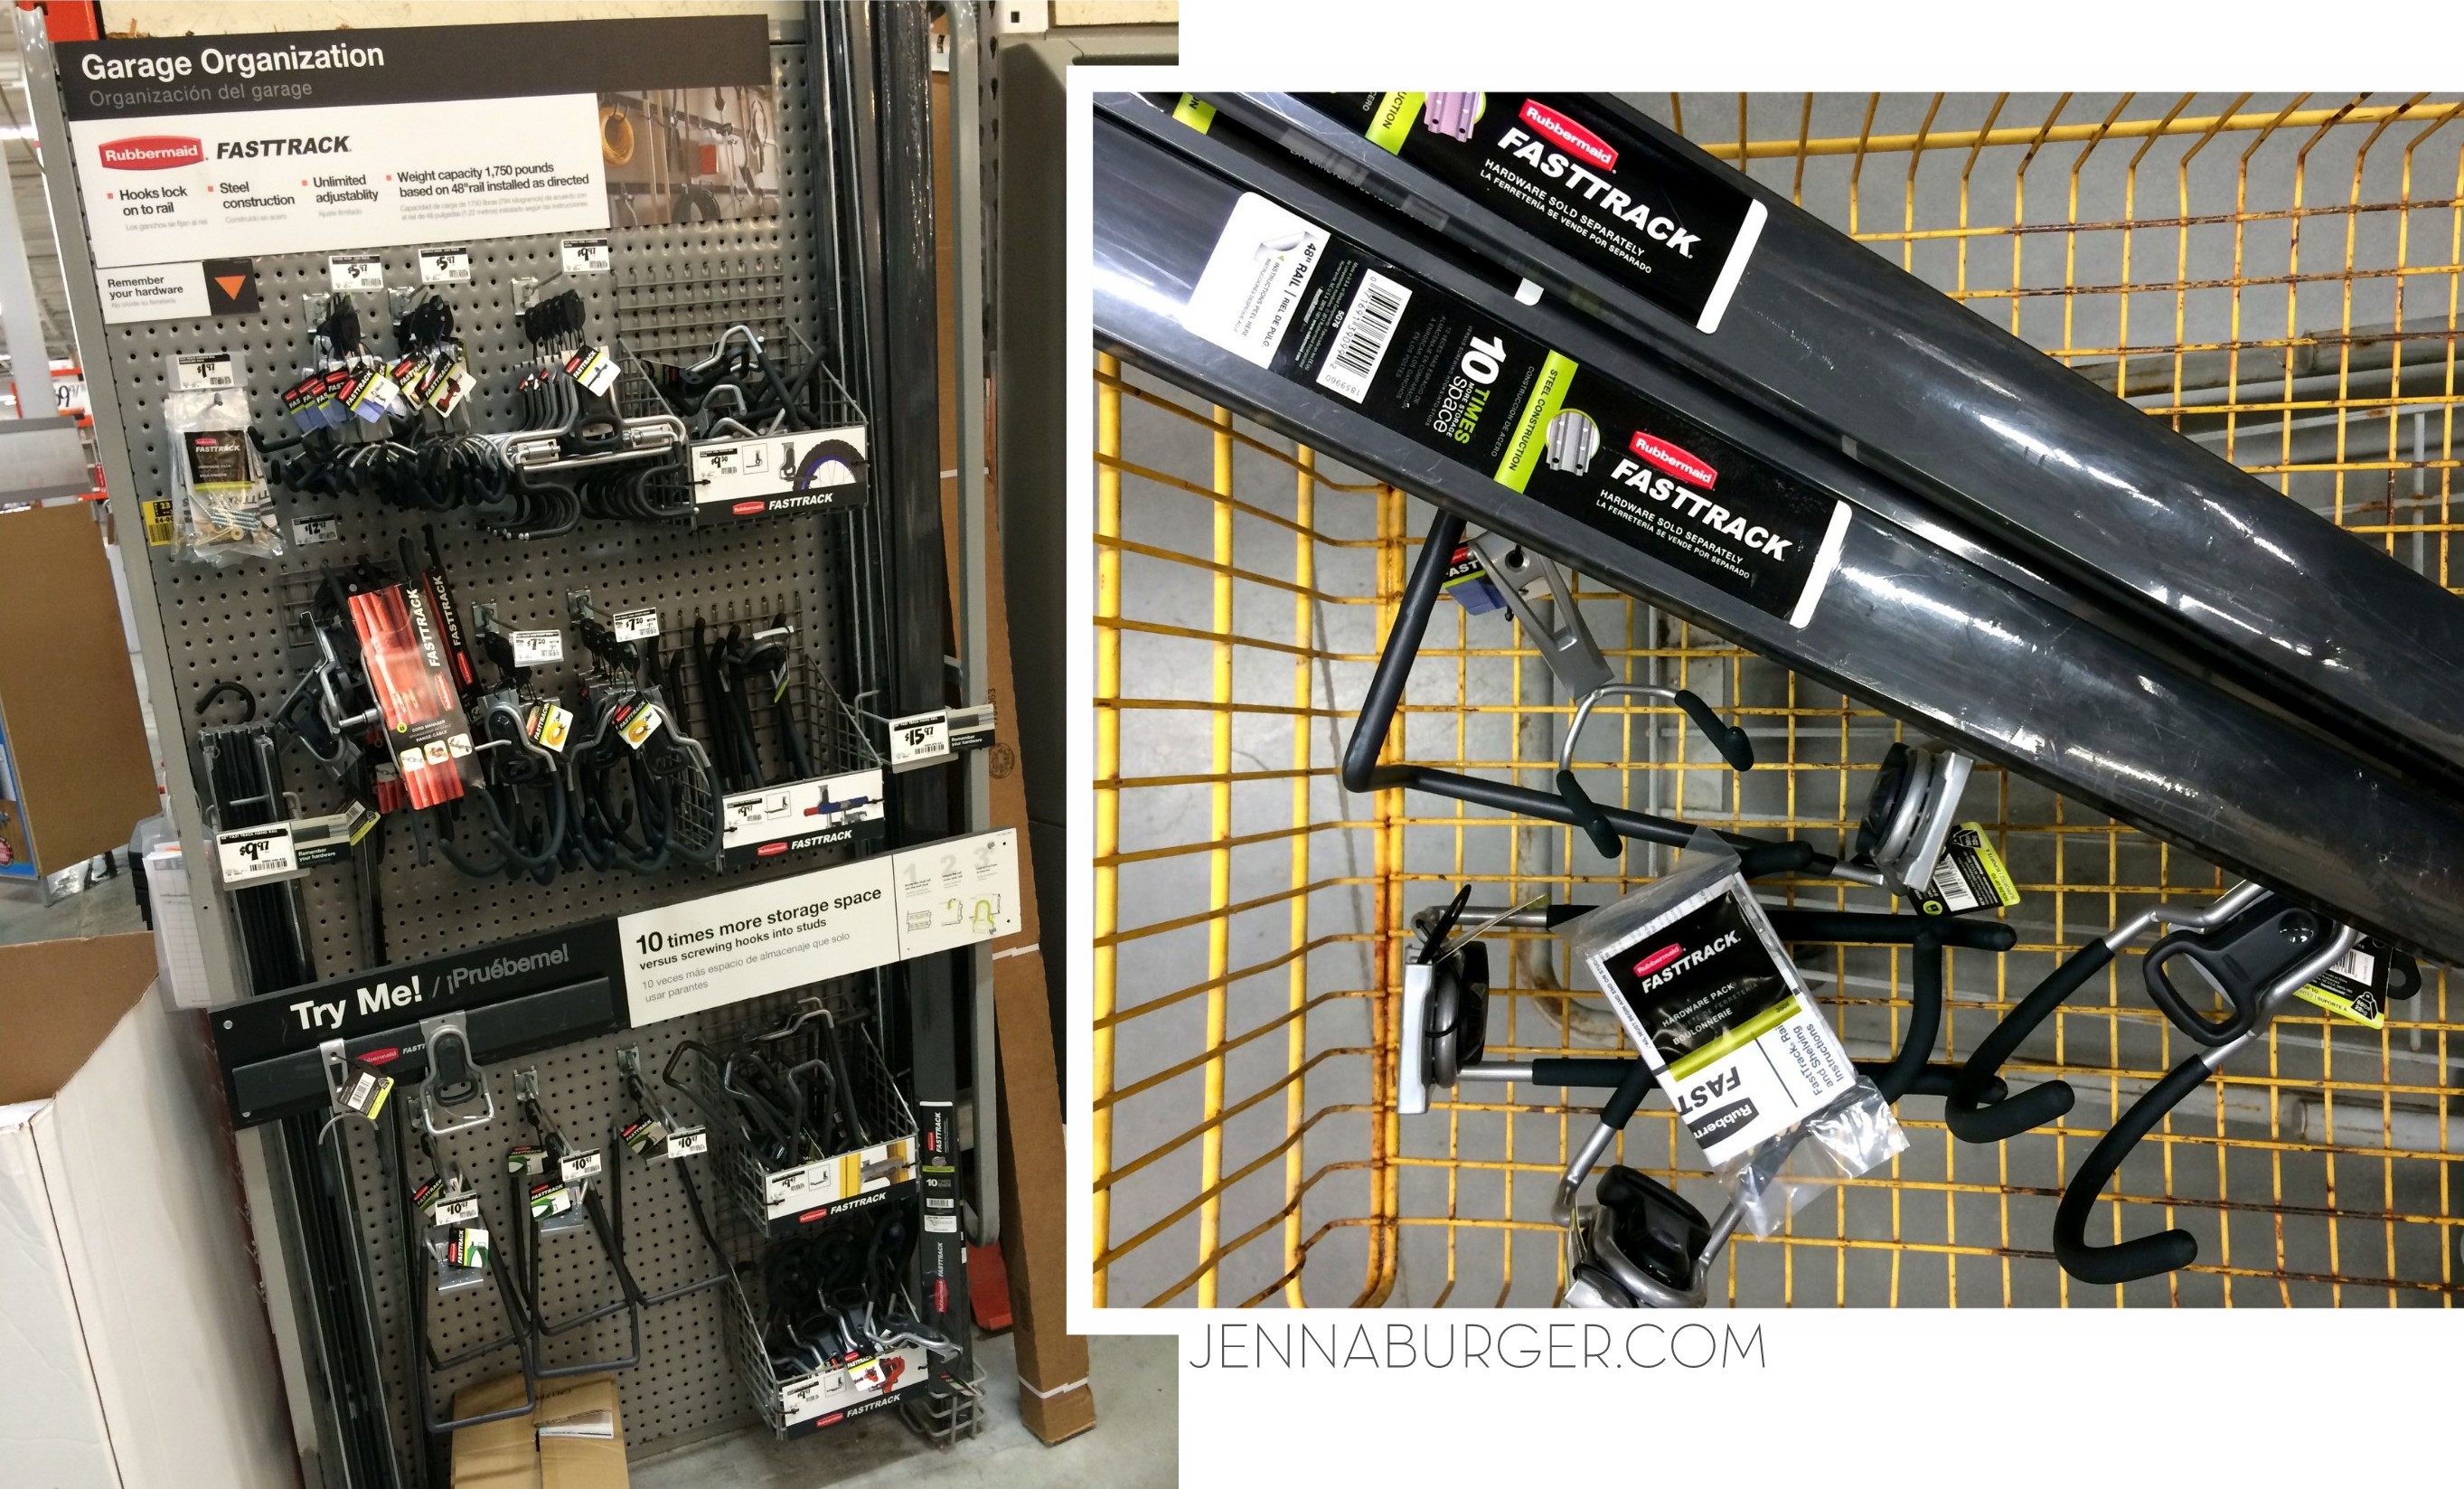
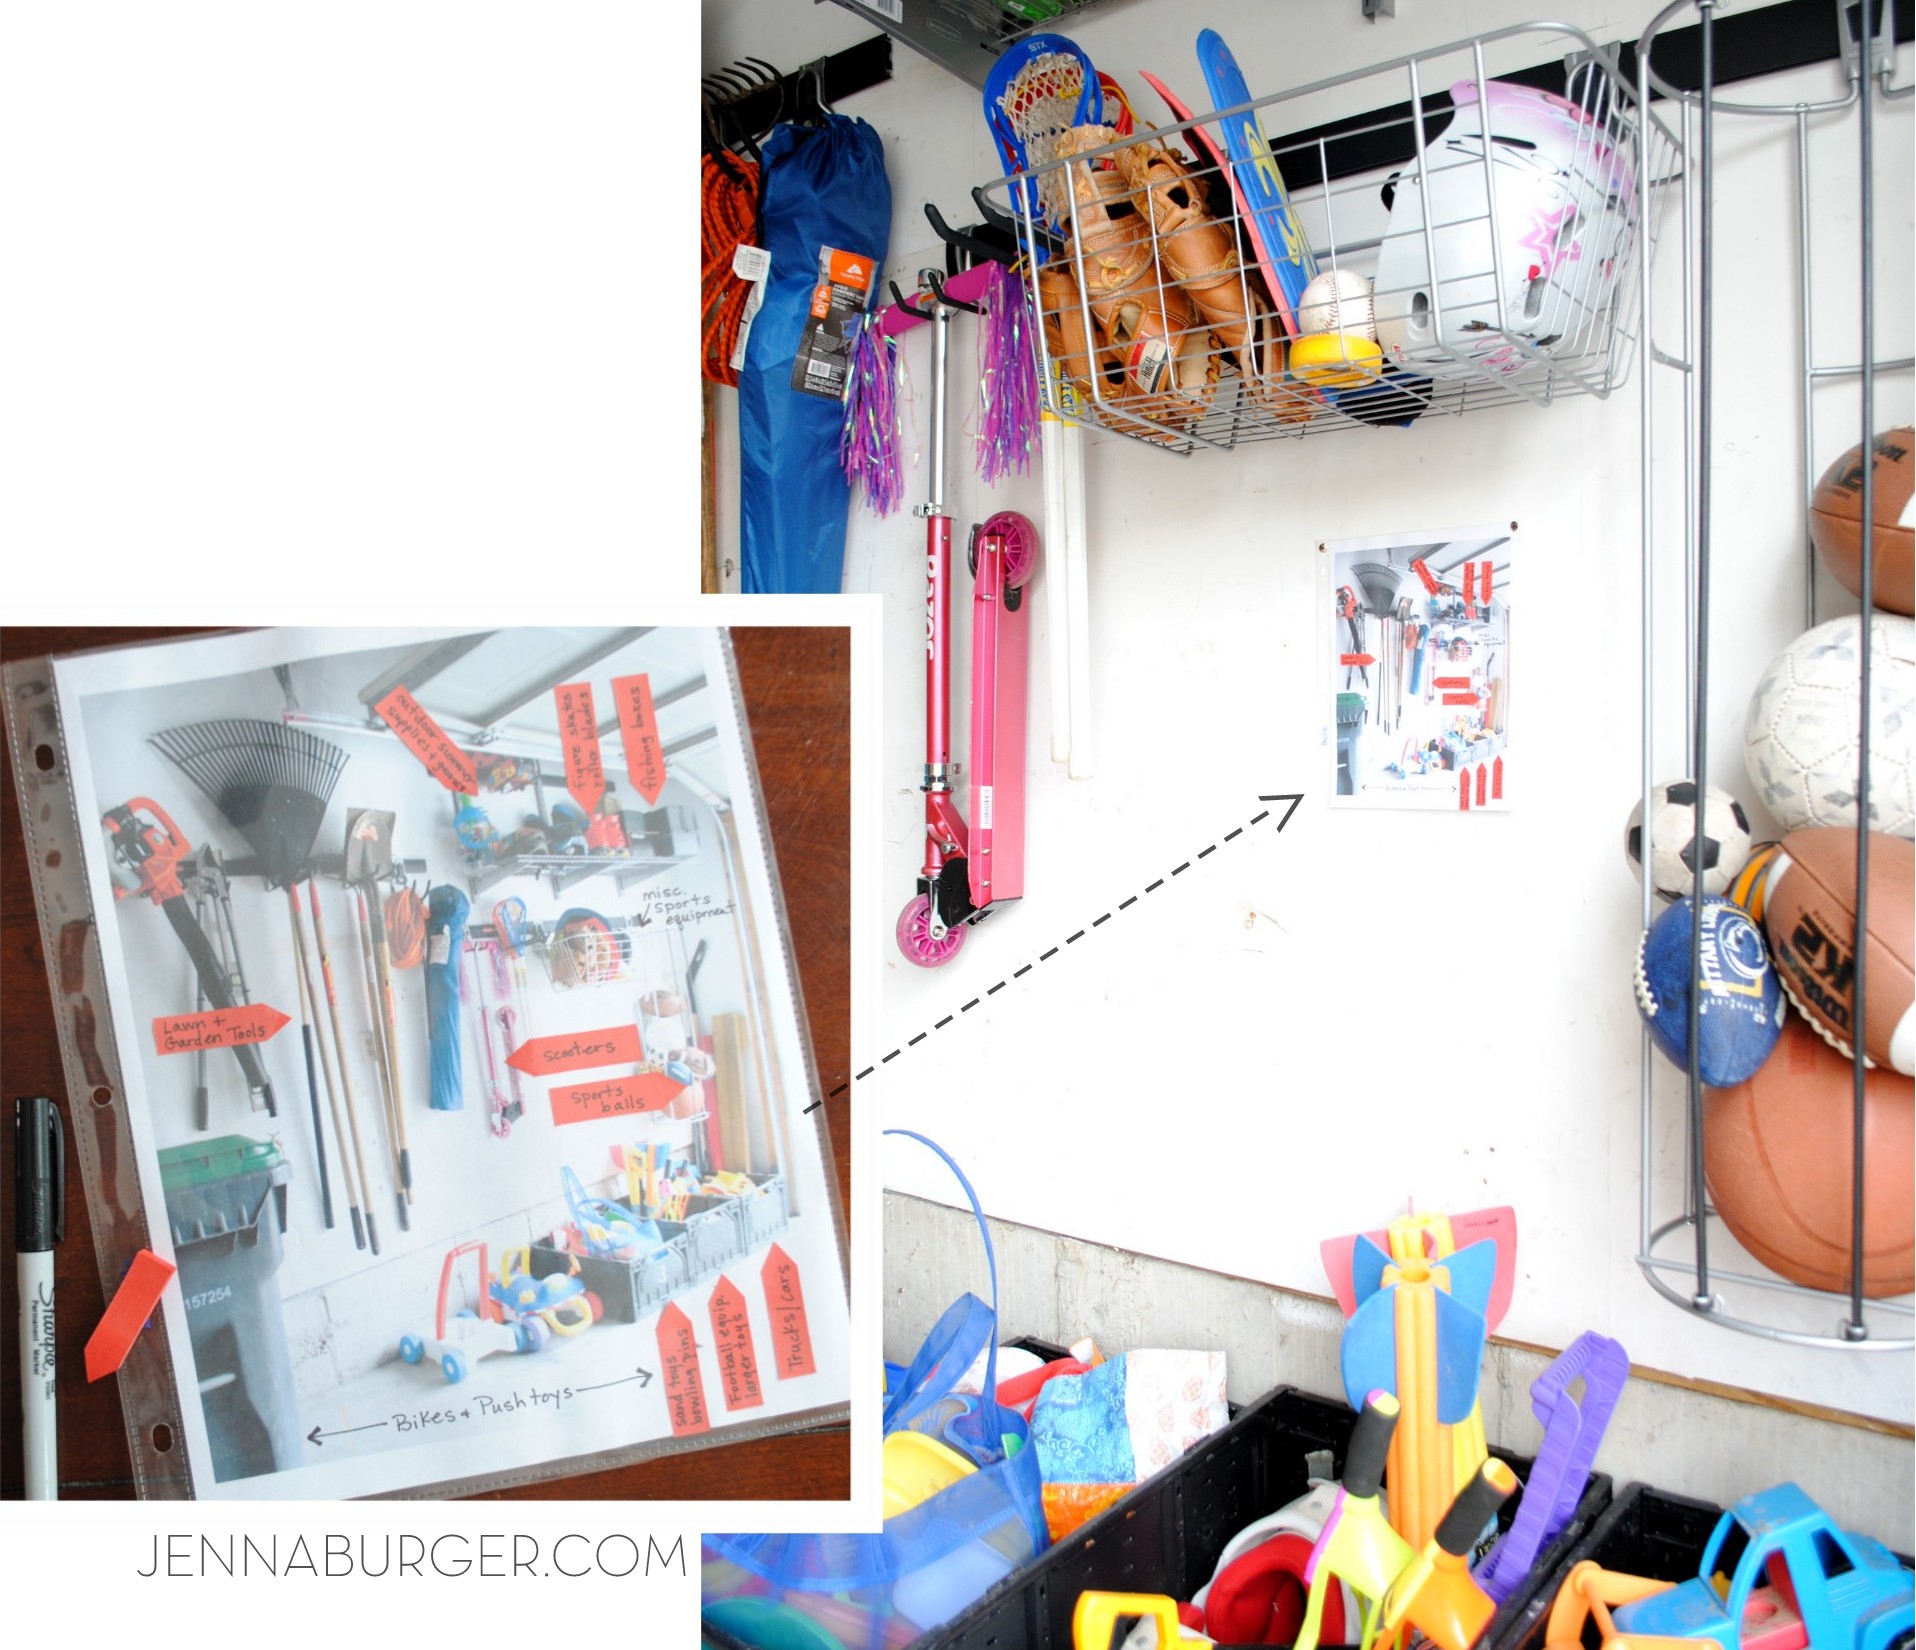
We chose to use a product by Rubbermaid called FastTrack Garage Organization System.  This system is similar to the closet organizational products that Rubbermaid also offers (we have similar systems in the coat closet/pantry + the kids bedroom closets) where there is one track at the top and brackets mount to it to easily add/adjust shelving for storage.  It’s ideal because you only need to screw in the one rail and everything hangs off of it making the install time much quicker + easier.

The FastTrack System has a huge range of products that gets the most out of your vertical wall space to achieve an organized garage.  I shopped at Home Depot for the items and they have a wide selection + a nice display set up.  If there is something you are looking for specifically that they don’t have in the store, I discovered there are even more accessory options for purchase on the website.

Getting organized in the GARAGE: tips + ideas for garage organization & storage by Jnna Burger Design, www.jennaburger.comHere are the accessories that I chose for our garage space…

the vertical ball rack

Getting organized in the GARAGE using Rubbermaid Fast Track Garage Organizational system - vertical ball rack

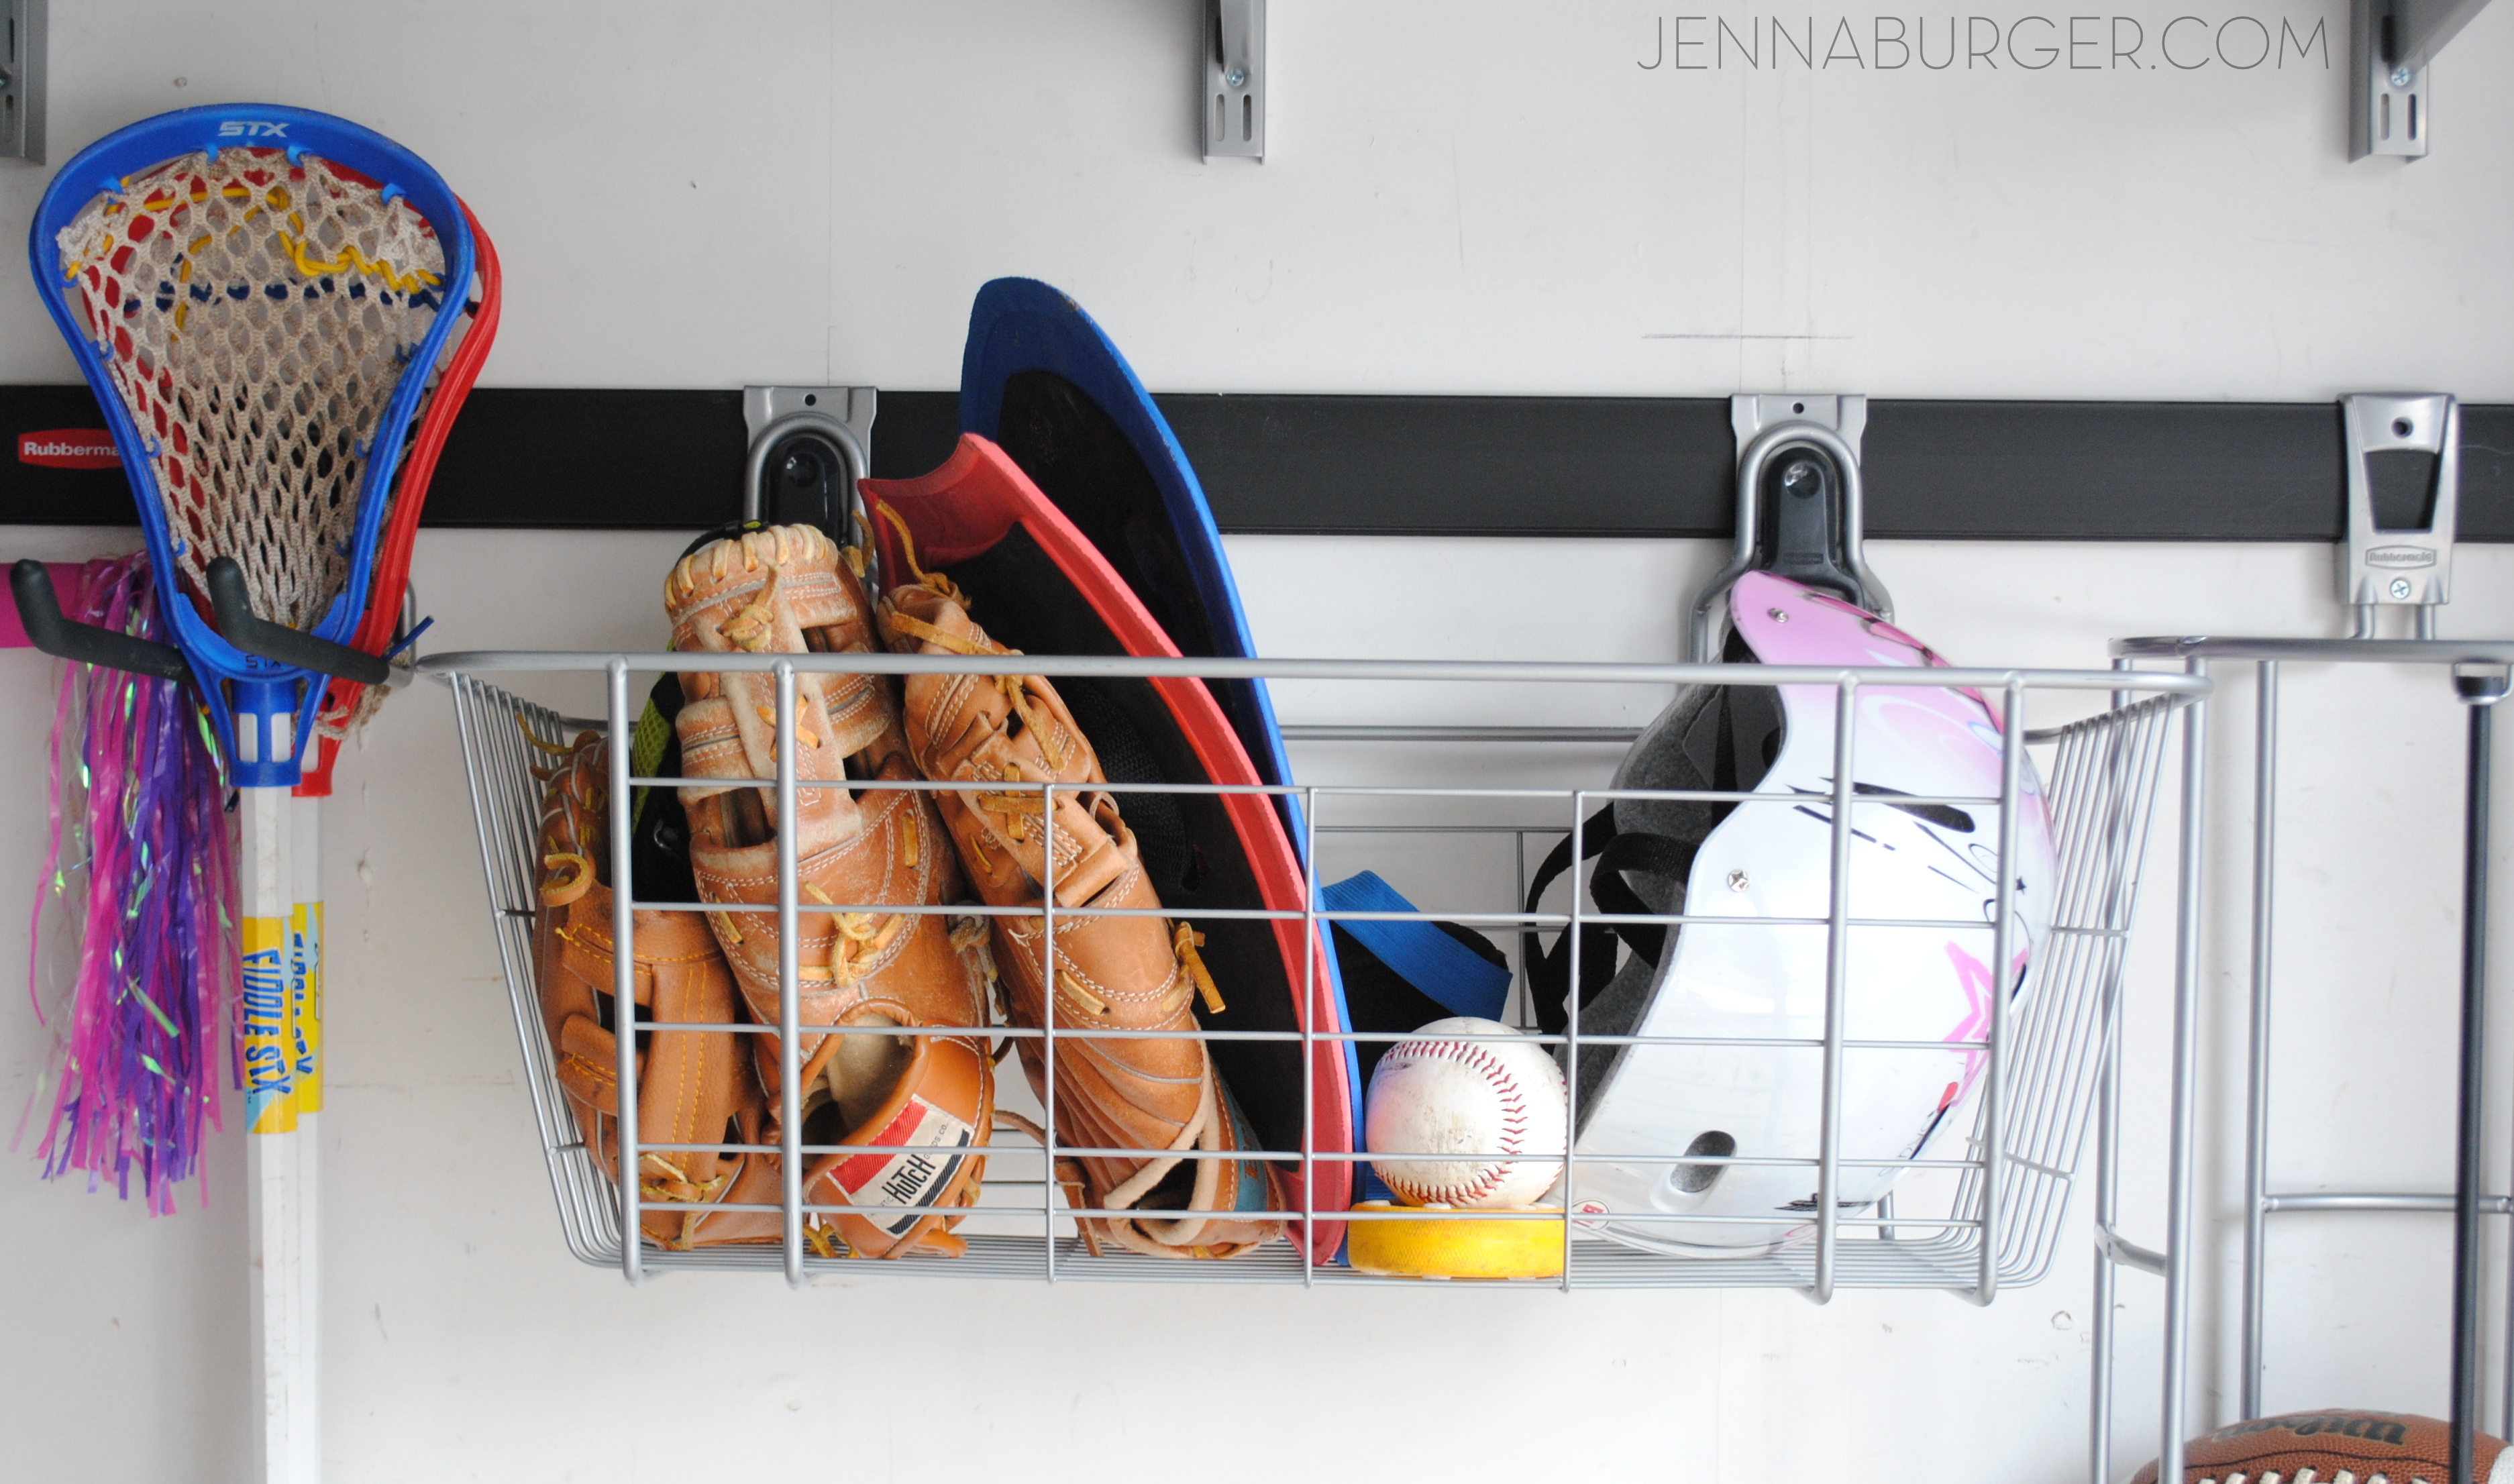
the wire basket which holds up to 50lbs.

Getting organized in the GARAGE using Rubbermaid Fast Track Garage Organizational system - wire basket

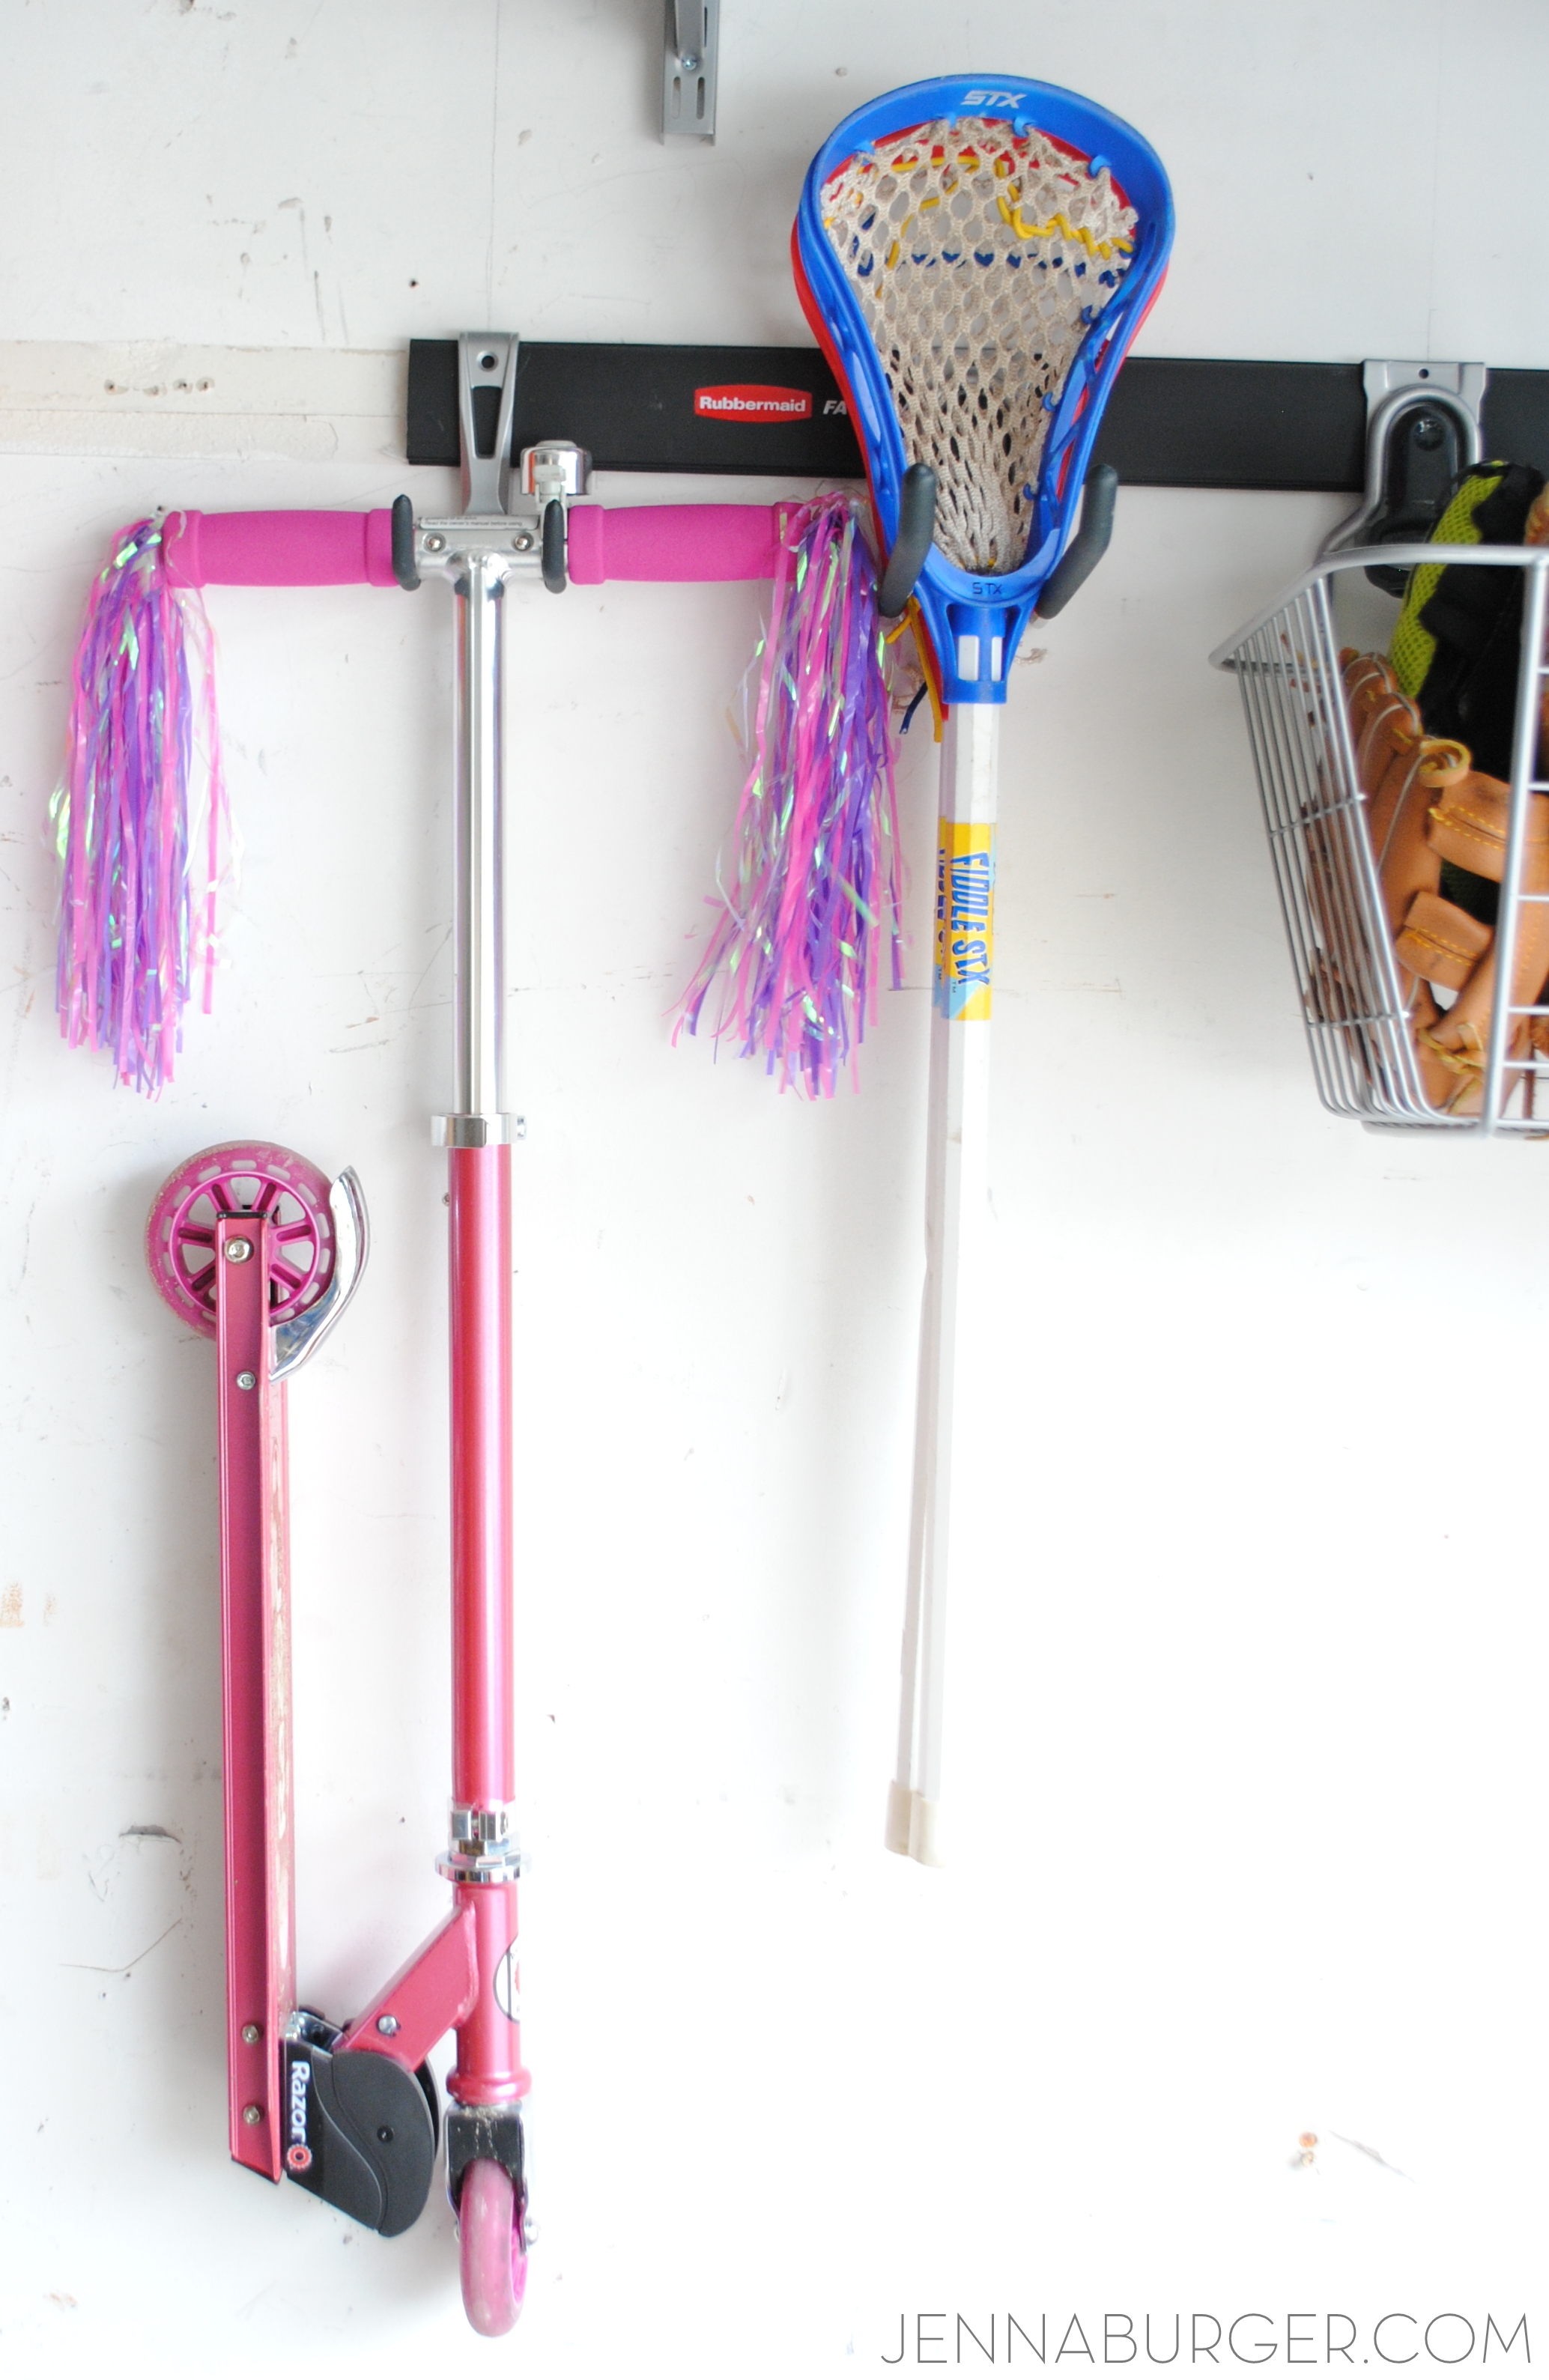
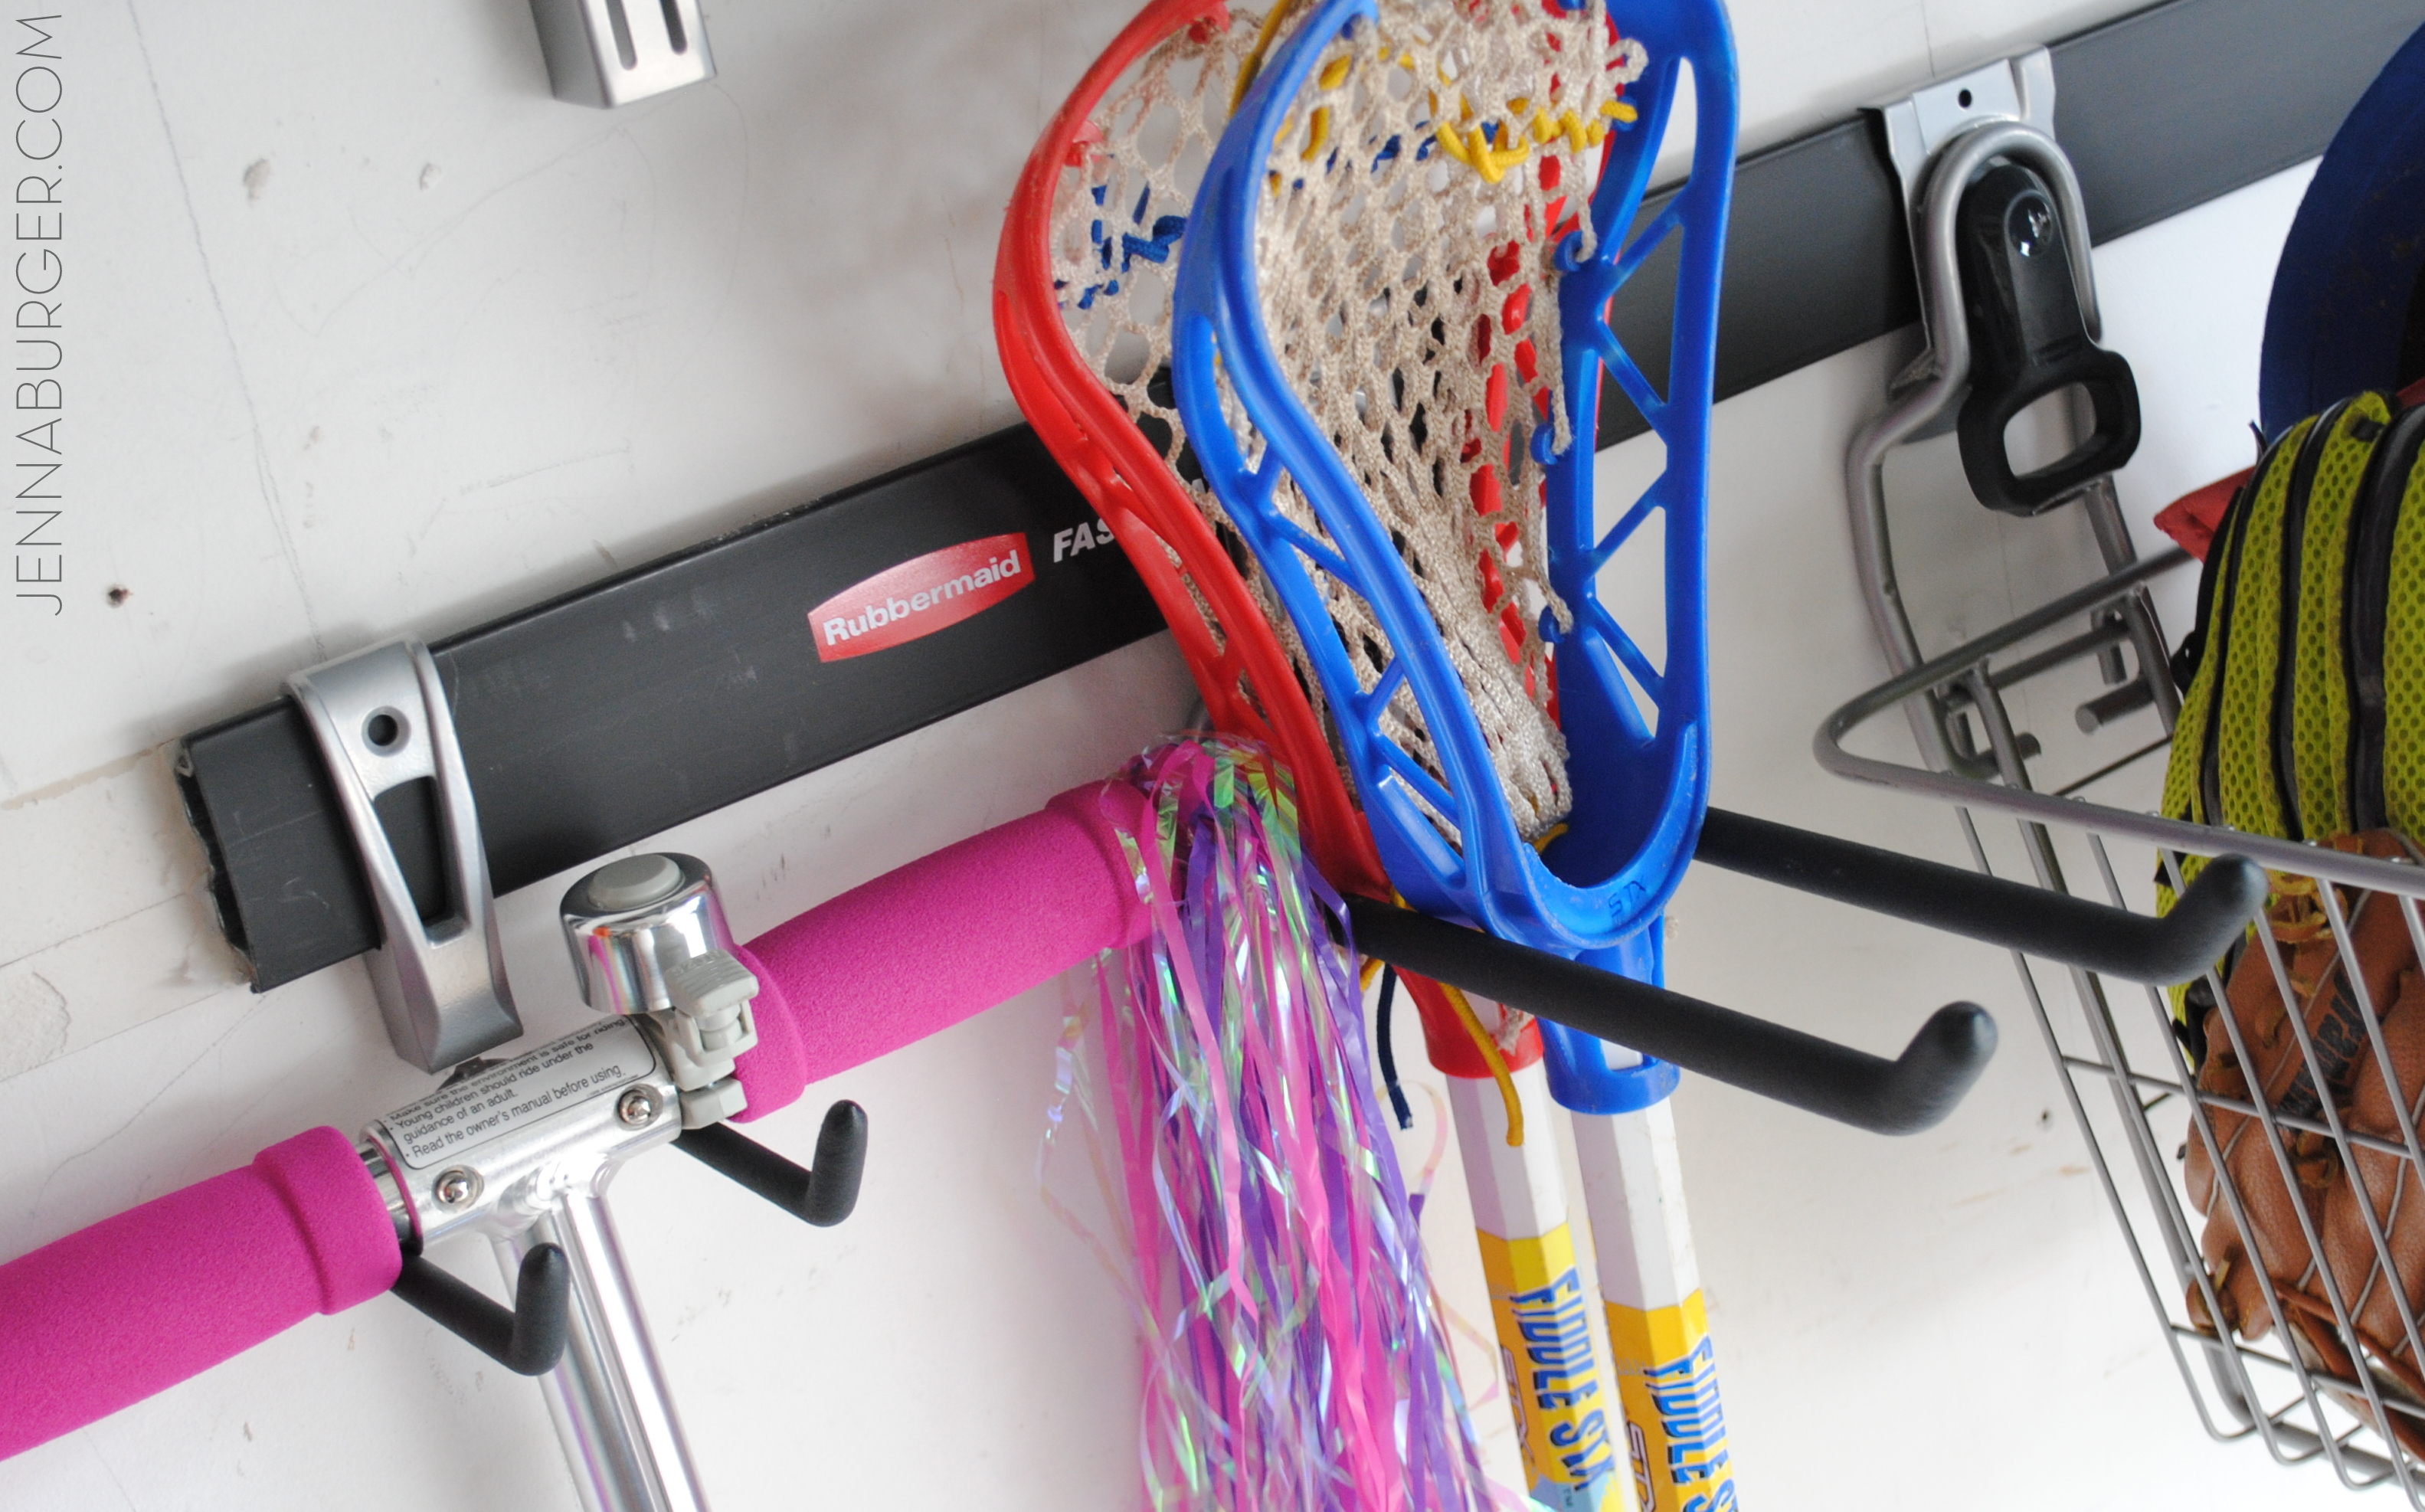
the cooler hook (which is holding the scooter) and the multi-purpose hook (holding the lacrosse sticks)

Getting organized in the GARAGE using Rubbermaid Fast Track Garage Organizational system

Getting organized in the GARAGE using Rubbermaid Fast Track Garage Organizational system

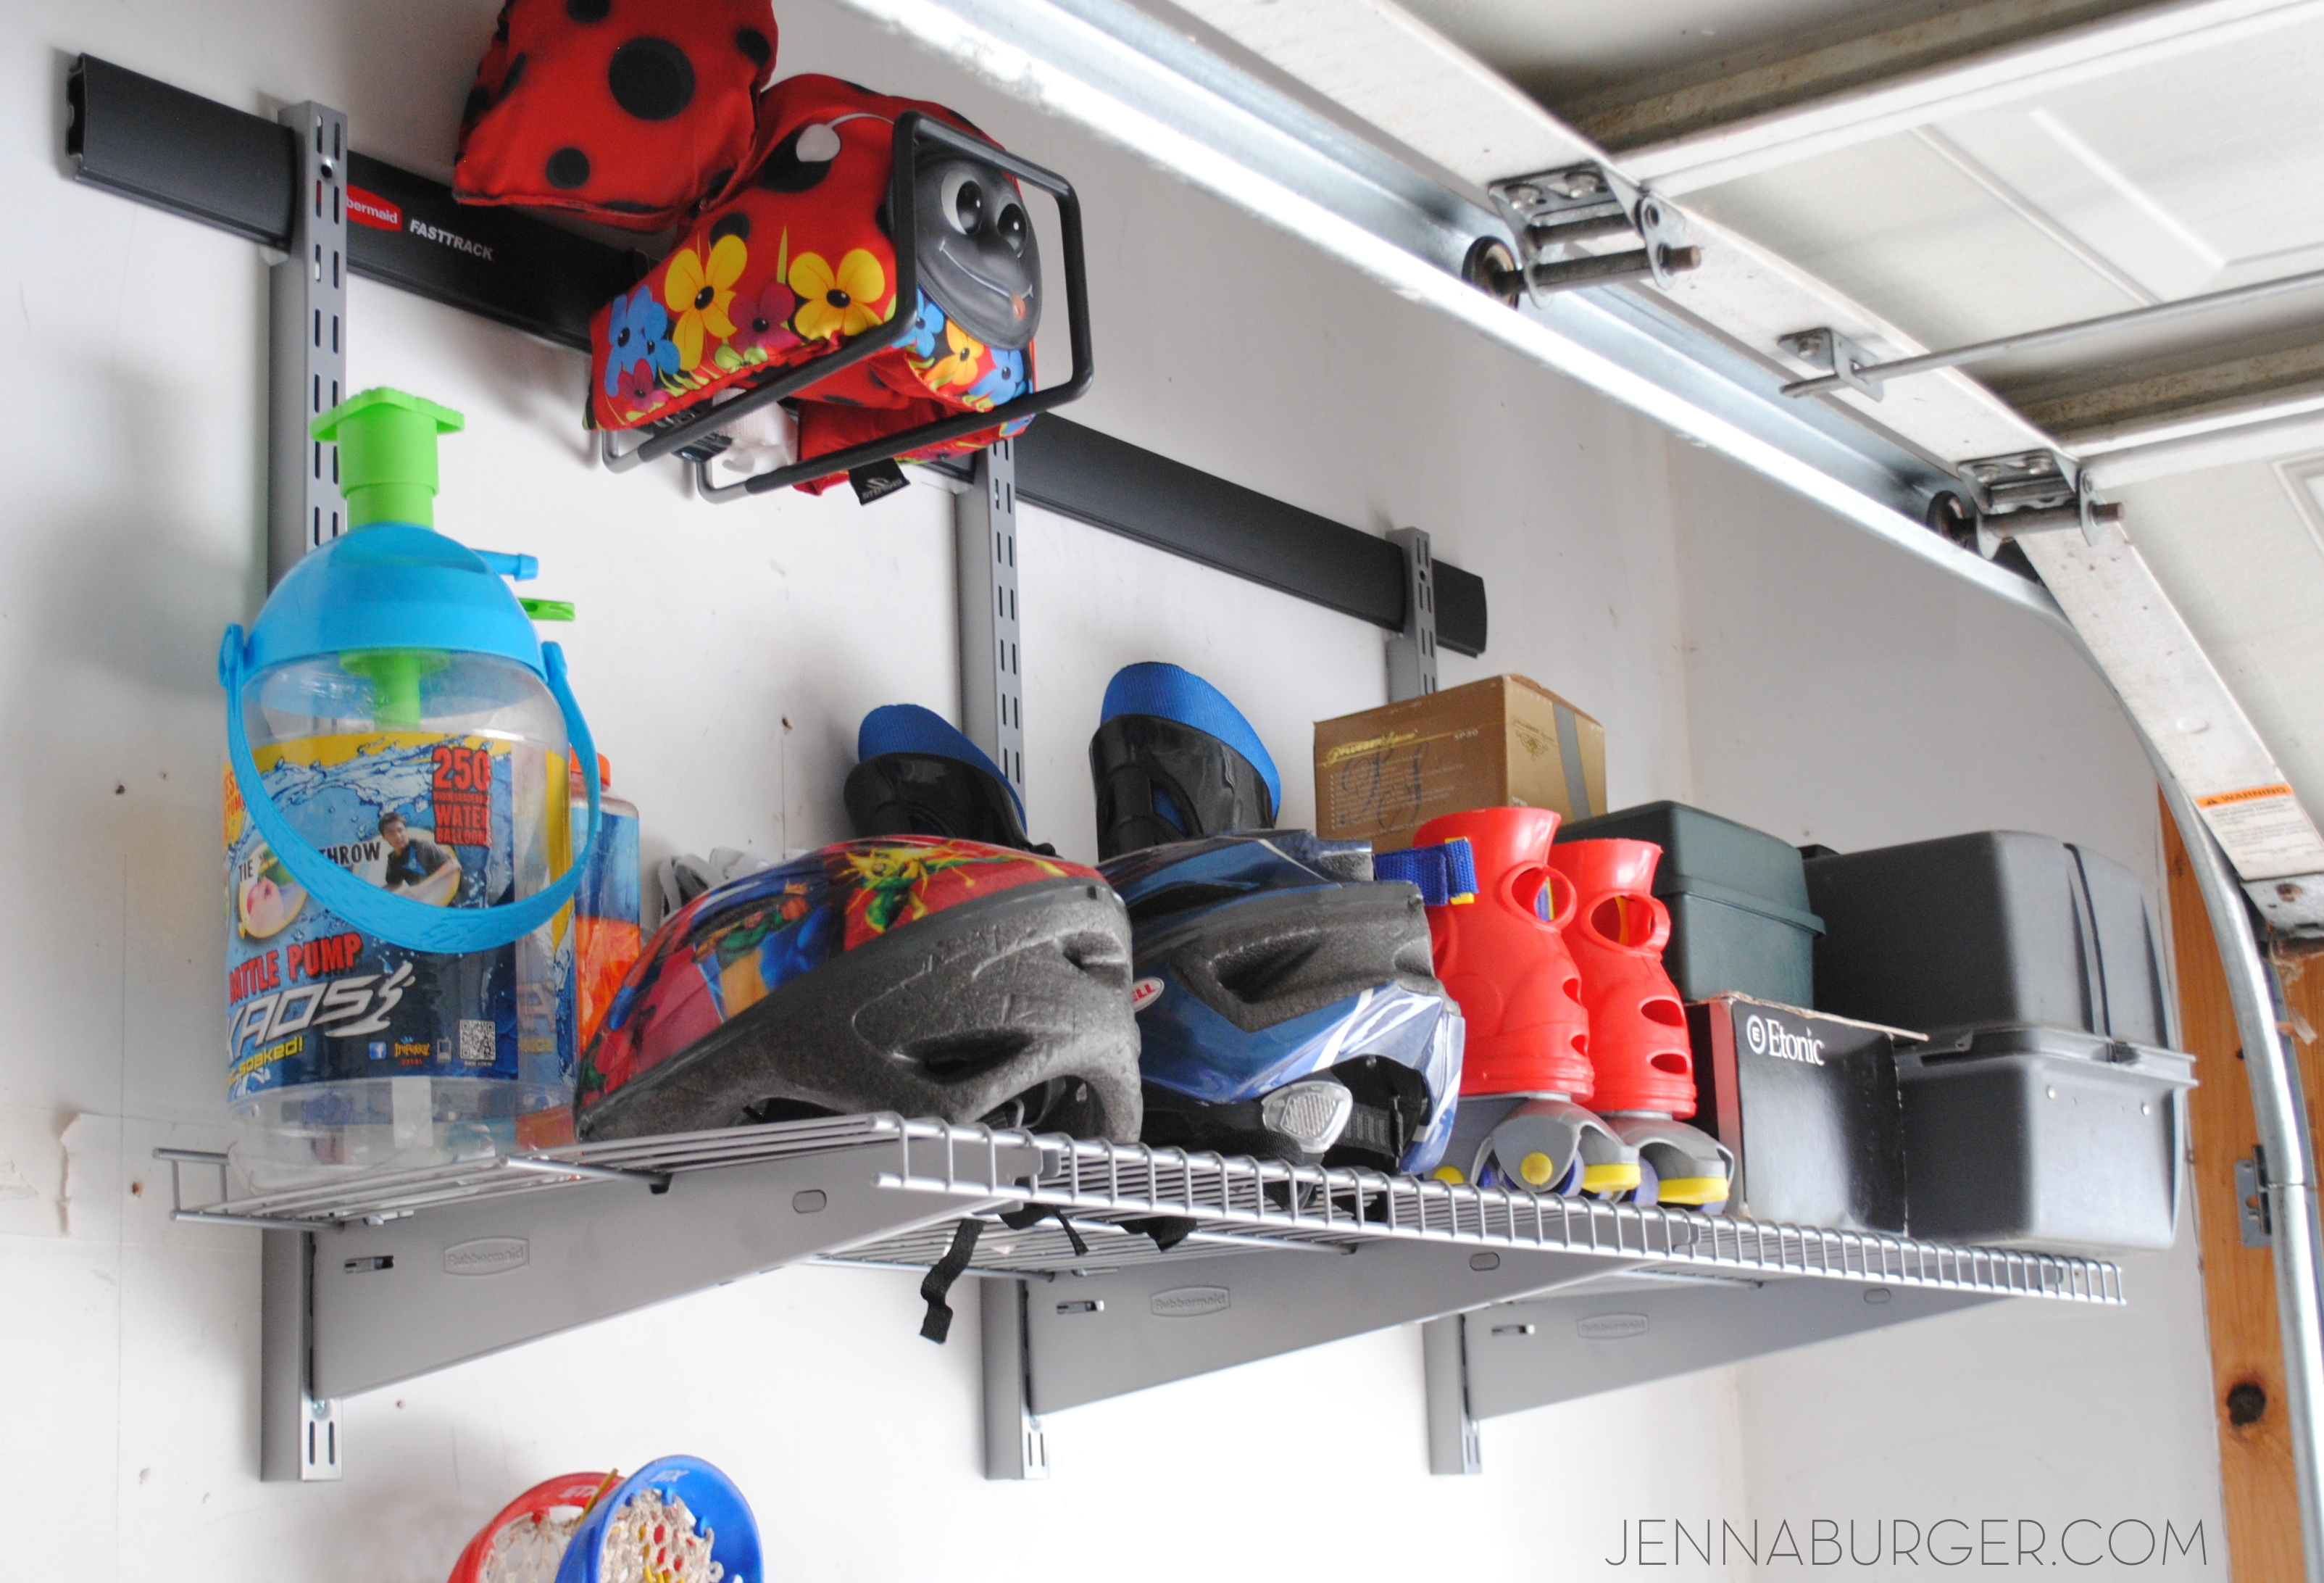
Similar to a closet system, the Fast Track offers uprights + brackets + shelving options to get the most out of a vertical surface.  Being able to have a shelf for storage is a must in the garage.  I’ve loaded this shelf with our fishing tackle boxes, skates, bike helmets, etc.

Getting organized in the GARAGE using Rubbermaid Fast Track Garage Organizational system

Last, but not least we used the track system to hold all of the lawn + gardening supplies…

(left to right) the power tool holder, the cooler hook, the multi-purpose hook, the utility hook

Getting organized in the GARAGE using Rubbermaid Fast Track Garage Organizational system

Getting organized in the GARAGE using Rubbermaid Fast Track Garage Organizational system

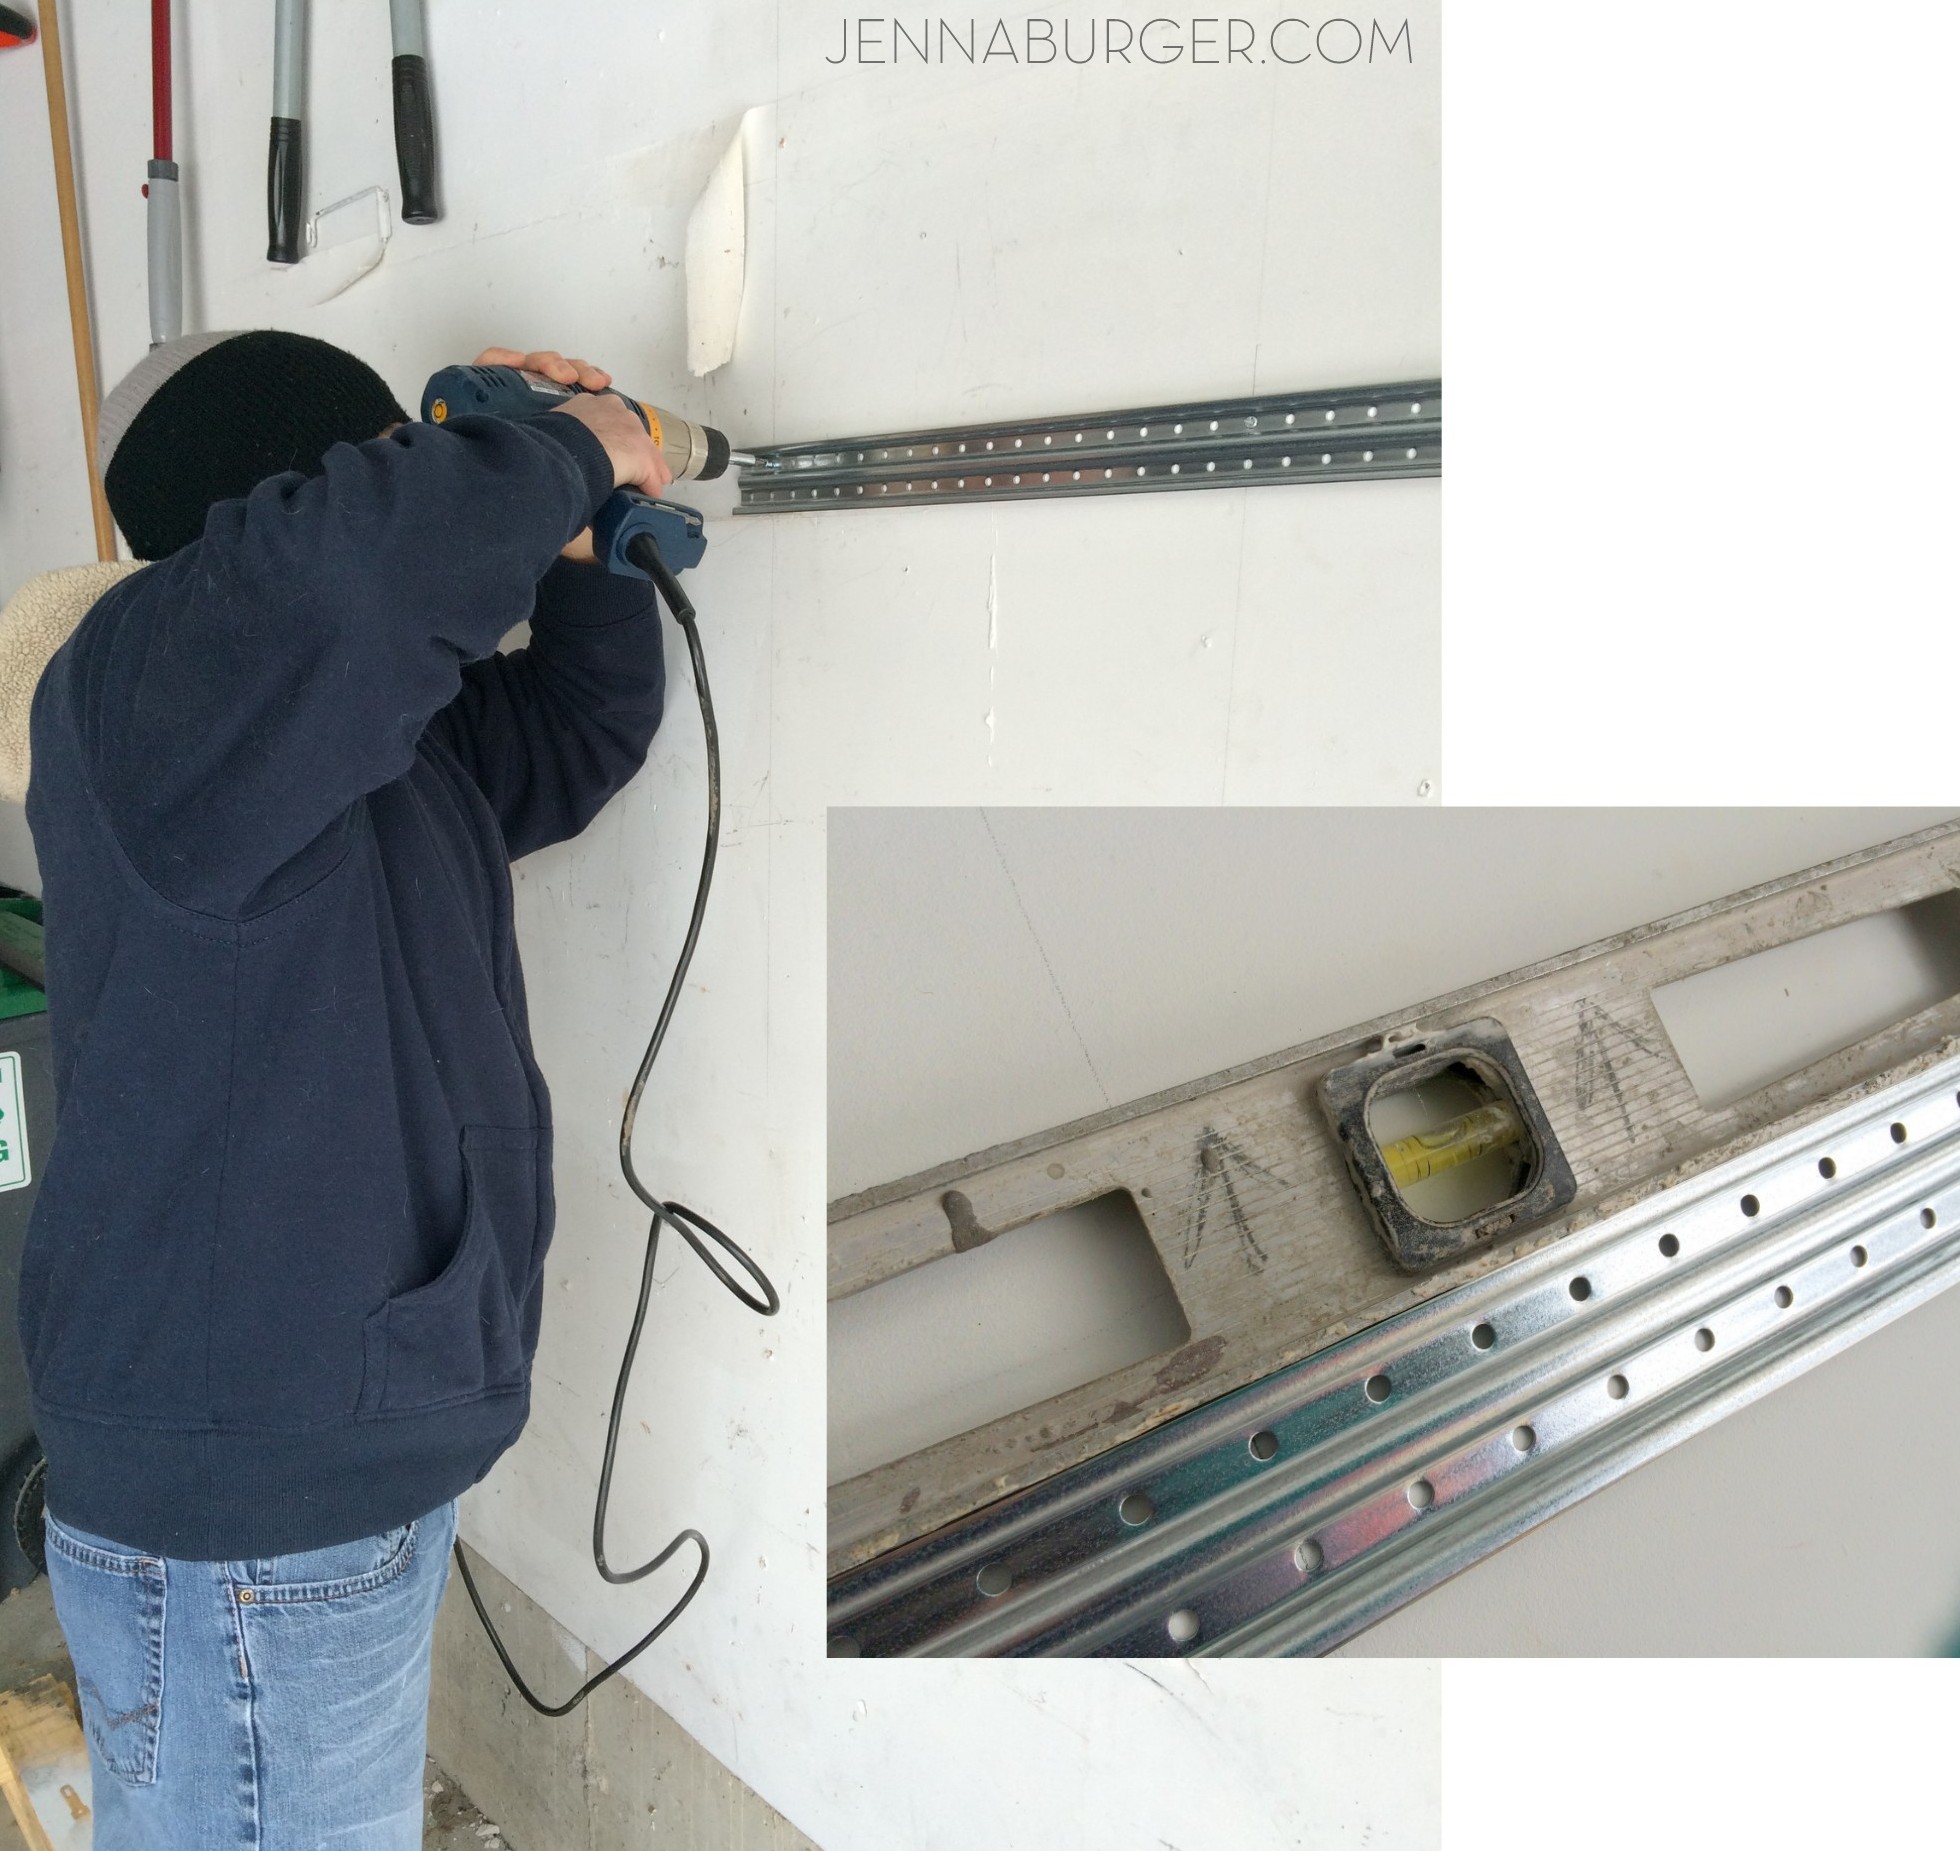
Once I came up with my plan of action for how the organizational components would work best on the wall, the install was very easy & took about 20 minutes – I swear.  It doesn’t take long because all that needs to be installed are the rails.  Once those were up, I was able to hang everything off of them + make adjustments as needed.

We chose (3) 4′ long rails (they also come in an 8′ length), determined where the studs were located, then installed the rails using the FastTrack hardware.  For one rail, we couldn’t locate the stud, so we used the anchors that came with the hardware package. After the rail was in place & level, we slid on the black cover.  Per the FastTrack website, each rail holds 1750 lbs – wow!

Getting organized in the GARAGE: tips + ideas for garage organization & storage by Jnna Burger Design, www.jennaburger.com

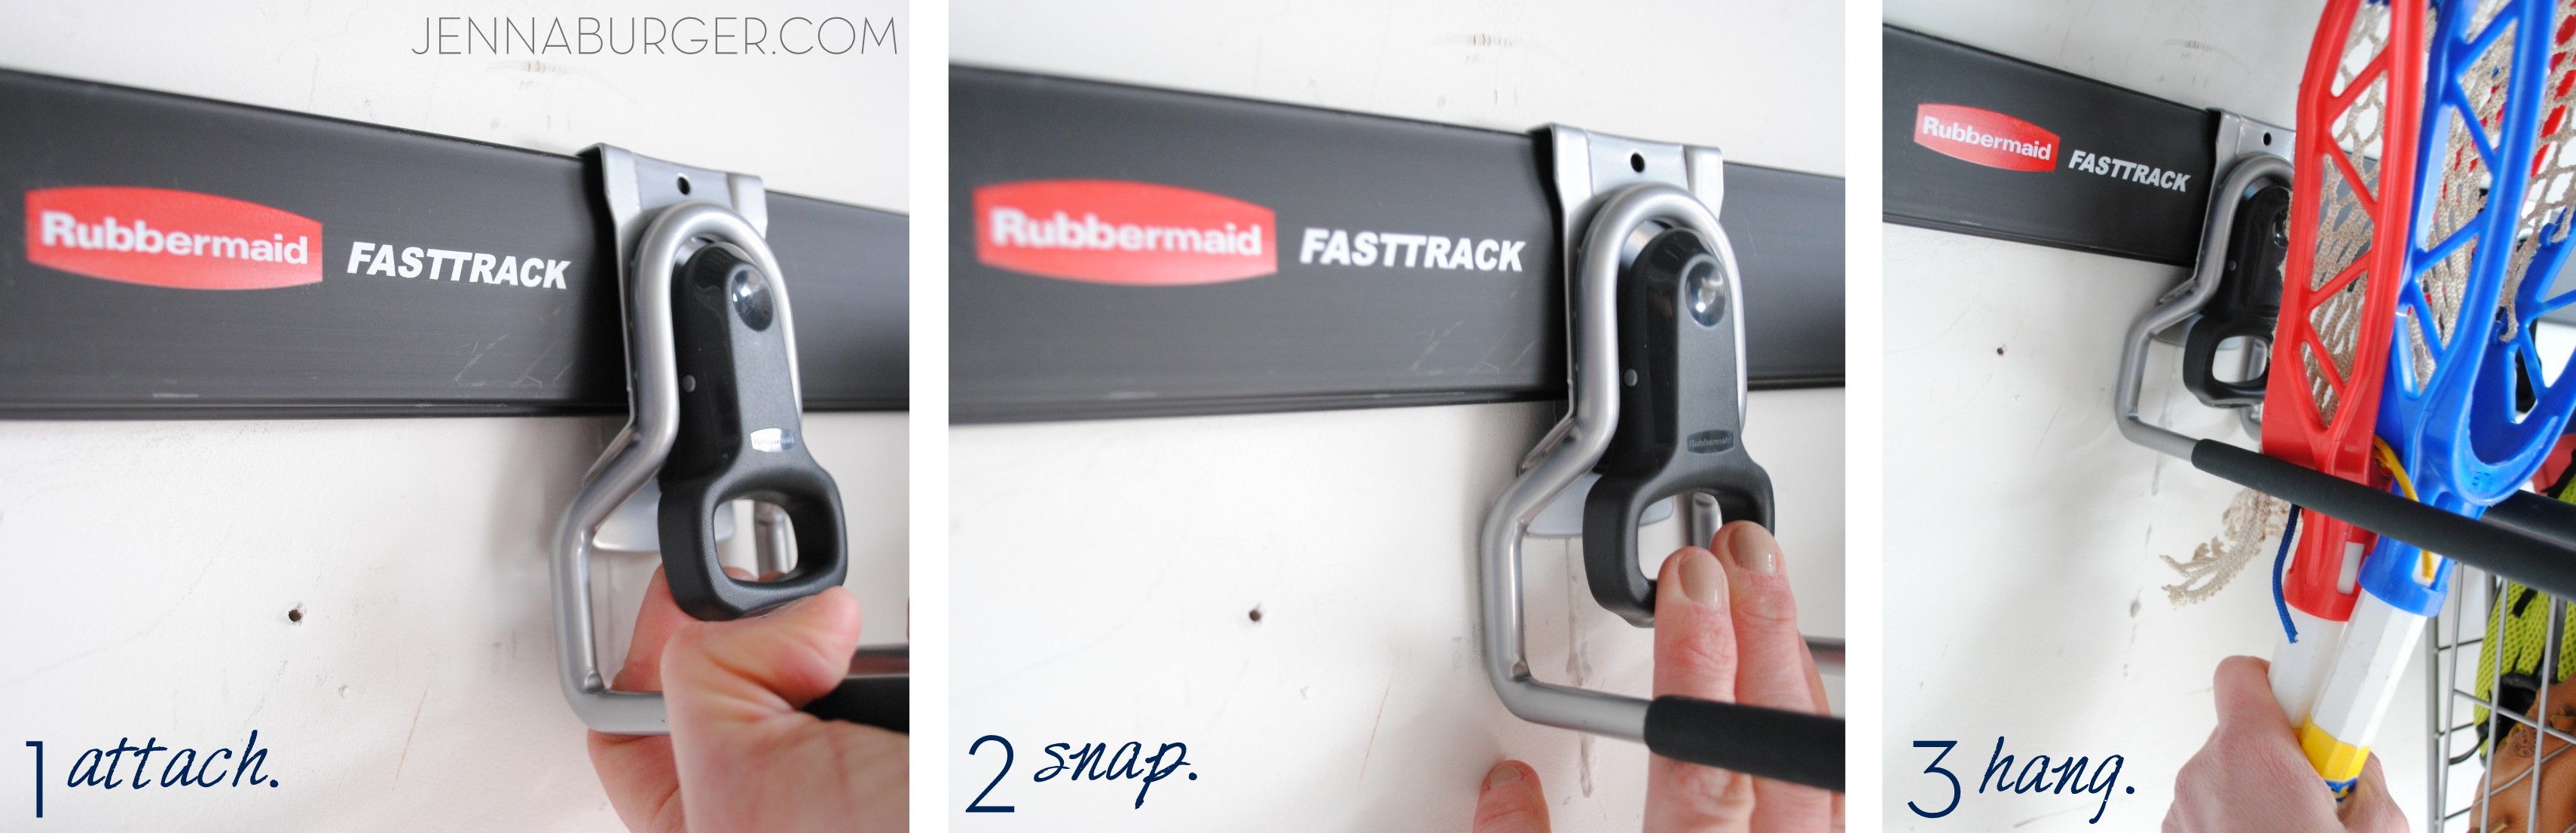
After that, the accessories easily attached to create a truly customized garage storage system.

You simply attach, snap, and hang!

Getting organized in the GARAGE: tips + ideas for garage organization & storage by Jnna Burger Design, www.jennaburger.com

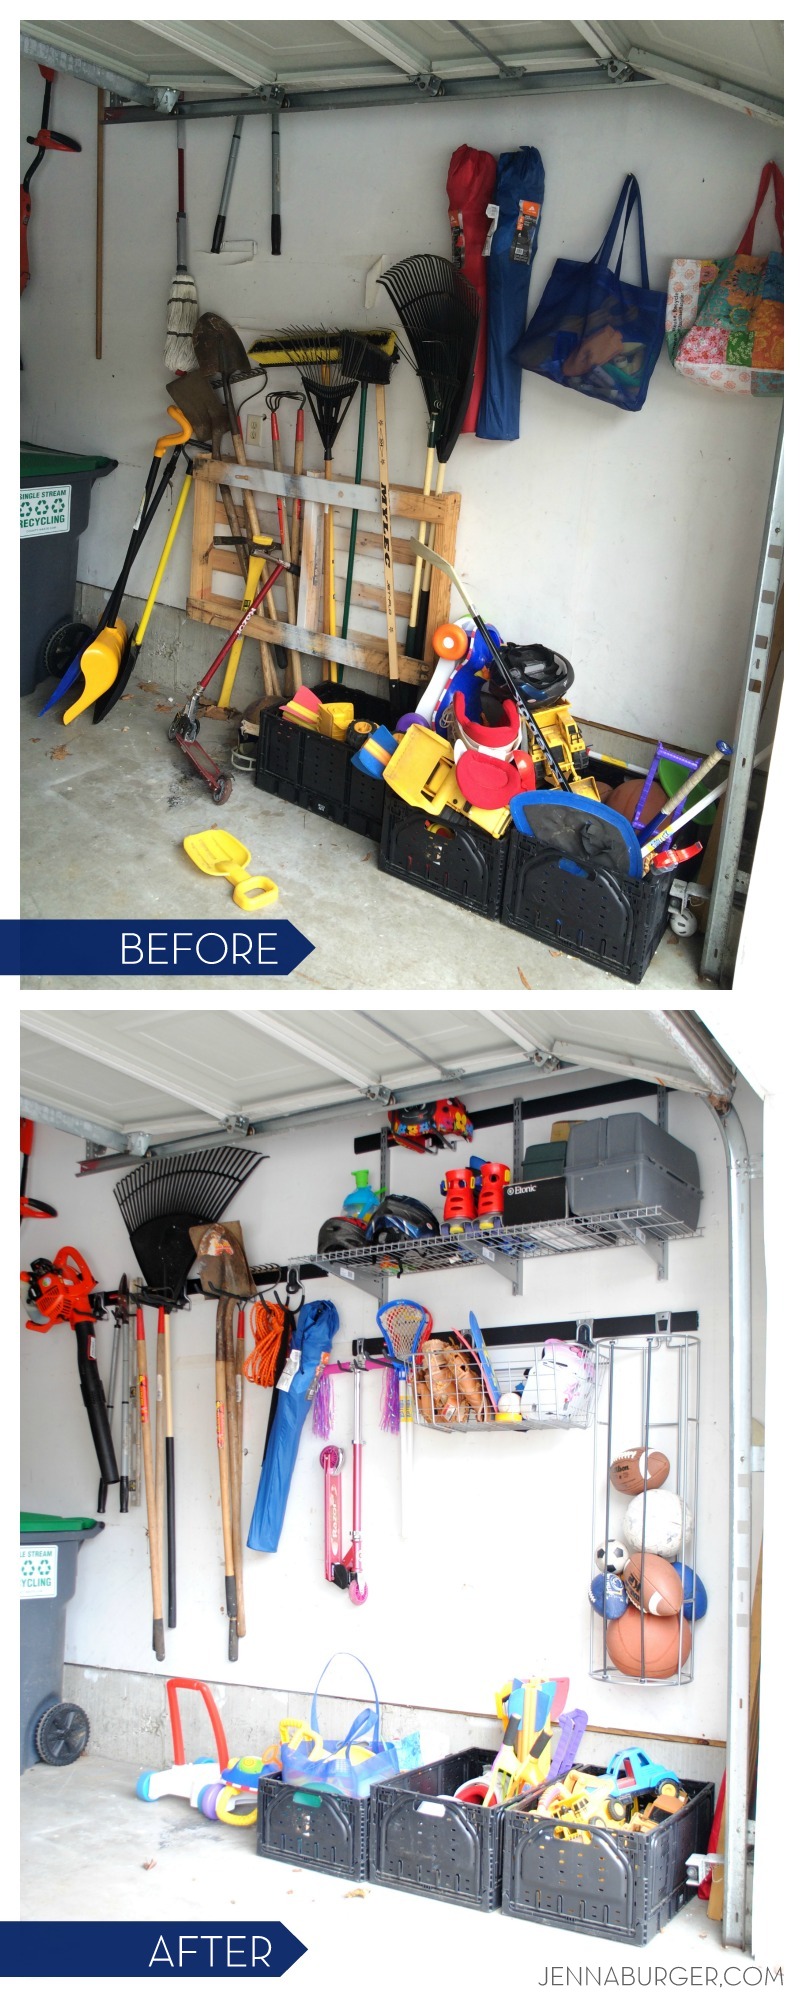
Oh and I never showed you the ‘before’ of the garage – yikes, it looked horrible and SO UNORGANIZED.  Now it’s a completely organized + tidy spot…

Getting organized in the GARAGE: tips + ideas for garage organization & storage by Jenna Burger Design, www.jennaburger.com

Staying Organized

Organizing takes a bit of time + energy, but really isn’t difficult.  What is DIFFICULT though is staying organized… that is always the challenge.  Since this section of the garage is a lot about the kids, I really need them to stay on top of keeping it organized.  I don’t have the time to clean up after them each day AND I want them too take responsibility for putting back what they take out.

Call me crazy, but I snapped a picture, printed it, and put it in a clear sheet protector.  I added a few hand-written labels – nothing fancy – and pinned it to the wall. Now there is no excuse or wonder as to where things are supposed to go.

Getting organized in the GARAGE: tips + ideas for garage organization & storage by Jenna Burger Design, www.jennaburger.com

We shall see if it works…

I’m still making my way around the house, room by room, to get organized using my foolproof steps to home organization!  I realized those same steps can pertain to the garage space too…

> make a list write down a plan of action for what you want to organize and what you need to lose

> get moving now once your plan of action is in place, it’s time to get moving. Don’t analyze (which I’m known to do) Just start.

> purge. toss. donate. start by sorting through the items you no longer need, use, and/or want. Set up 3 boxes or bags (I typically use large heavy-duty garbage bags) to purge, toss, and/or donate.

> organize using shelving with baskets, bins, and other storage caddies are a great way to organize items you want to keep.

> go vertical maximize your storage capabilities by using more wall space – just like I did with the FastTrack system

> commit getting organized is one thing, but staying organized is truly a commitment. Once you’re organized, take the extra few minutes to maintain it.


Getting organized in the GARAGE: tips + ideas for garage organization & storage by Jenna Burger Design, www.jennaburger.com

I am so happy with how this section of the garage turned out.  We have lots more cleanup to do in this neglected space + a whole lotta work outdoors once the snow completely melts, but with warmer days on the horizon, we’ll make our way one day at a time.

Disclosure: This is a sponsored post by Rubbermaid FastTrack.  I chose to work with them because I knew it would help organize my dreaded garage space.  I have been provided with product, but as always I was not told what to write and I only feature companies on my blog that I truly love and believe in 100%.

This is a sponsored conversation written by me on behalf of Newell Rubbermaid. The opinions and text are all mine.

Eclectic Style Kitchen + Living Room Tour

Last year I had the opportunity to work on a kitchen renovation project with a client and the result was incredible. I recently was asked to return to make some updates to the living room and I’d love to show you the before & after of each space.

The house is very charming & unique with high ceilings, wood beams, and an eclectic aesthetic.

Eclectic Kitchen + Living Room House Tour! A before & after kitchen makeover that is a MUST SEE!

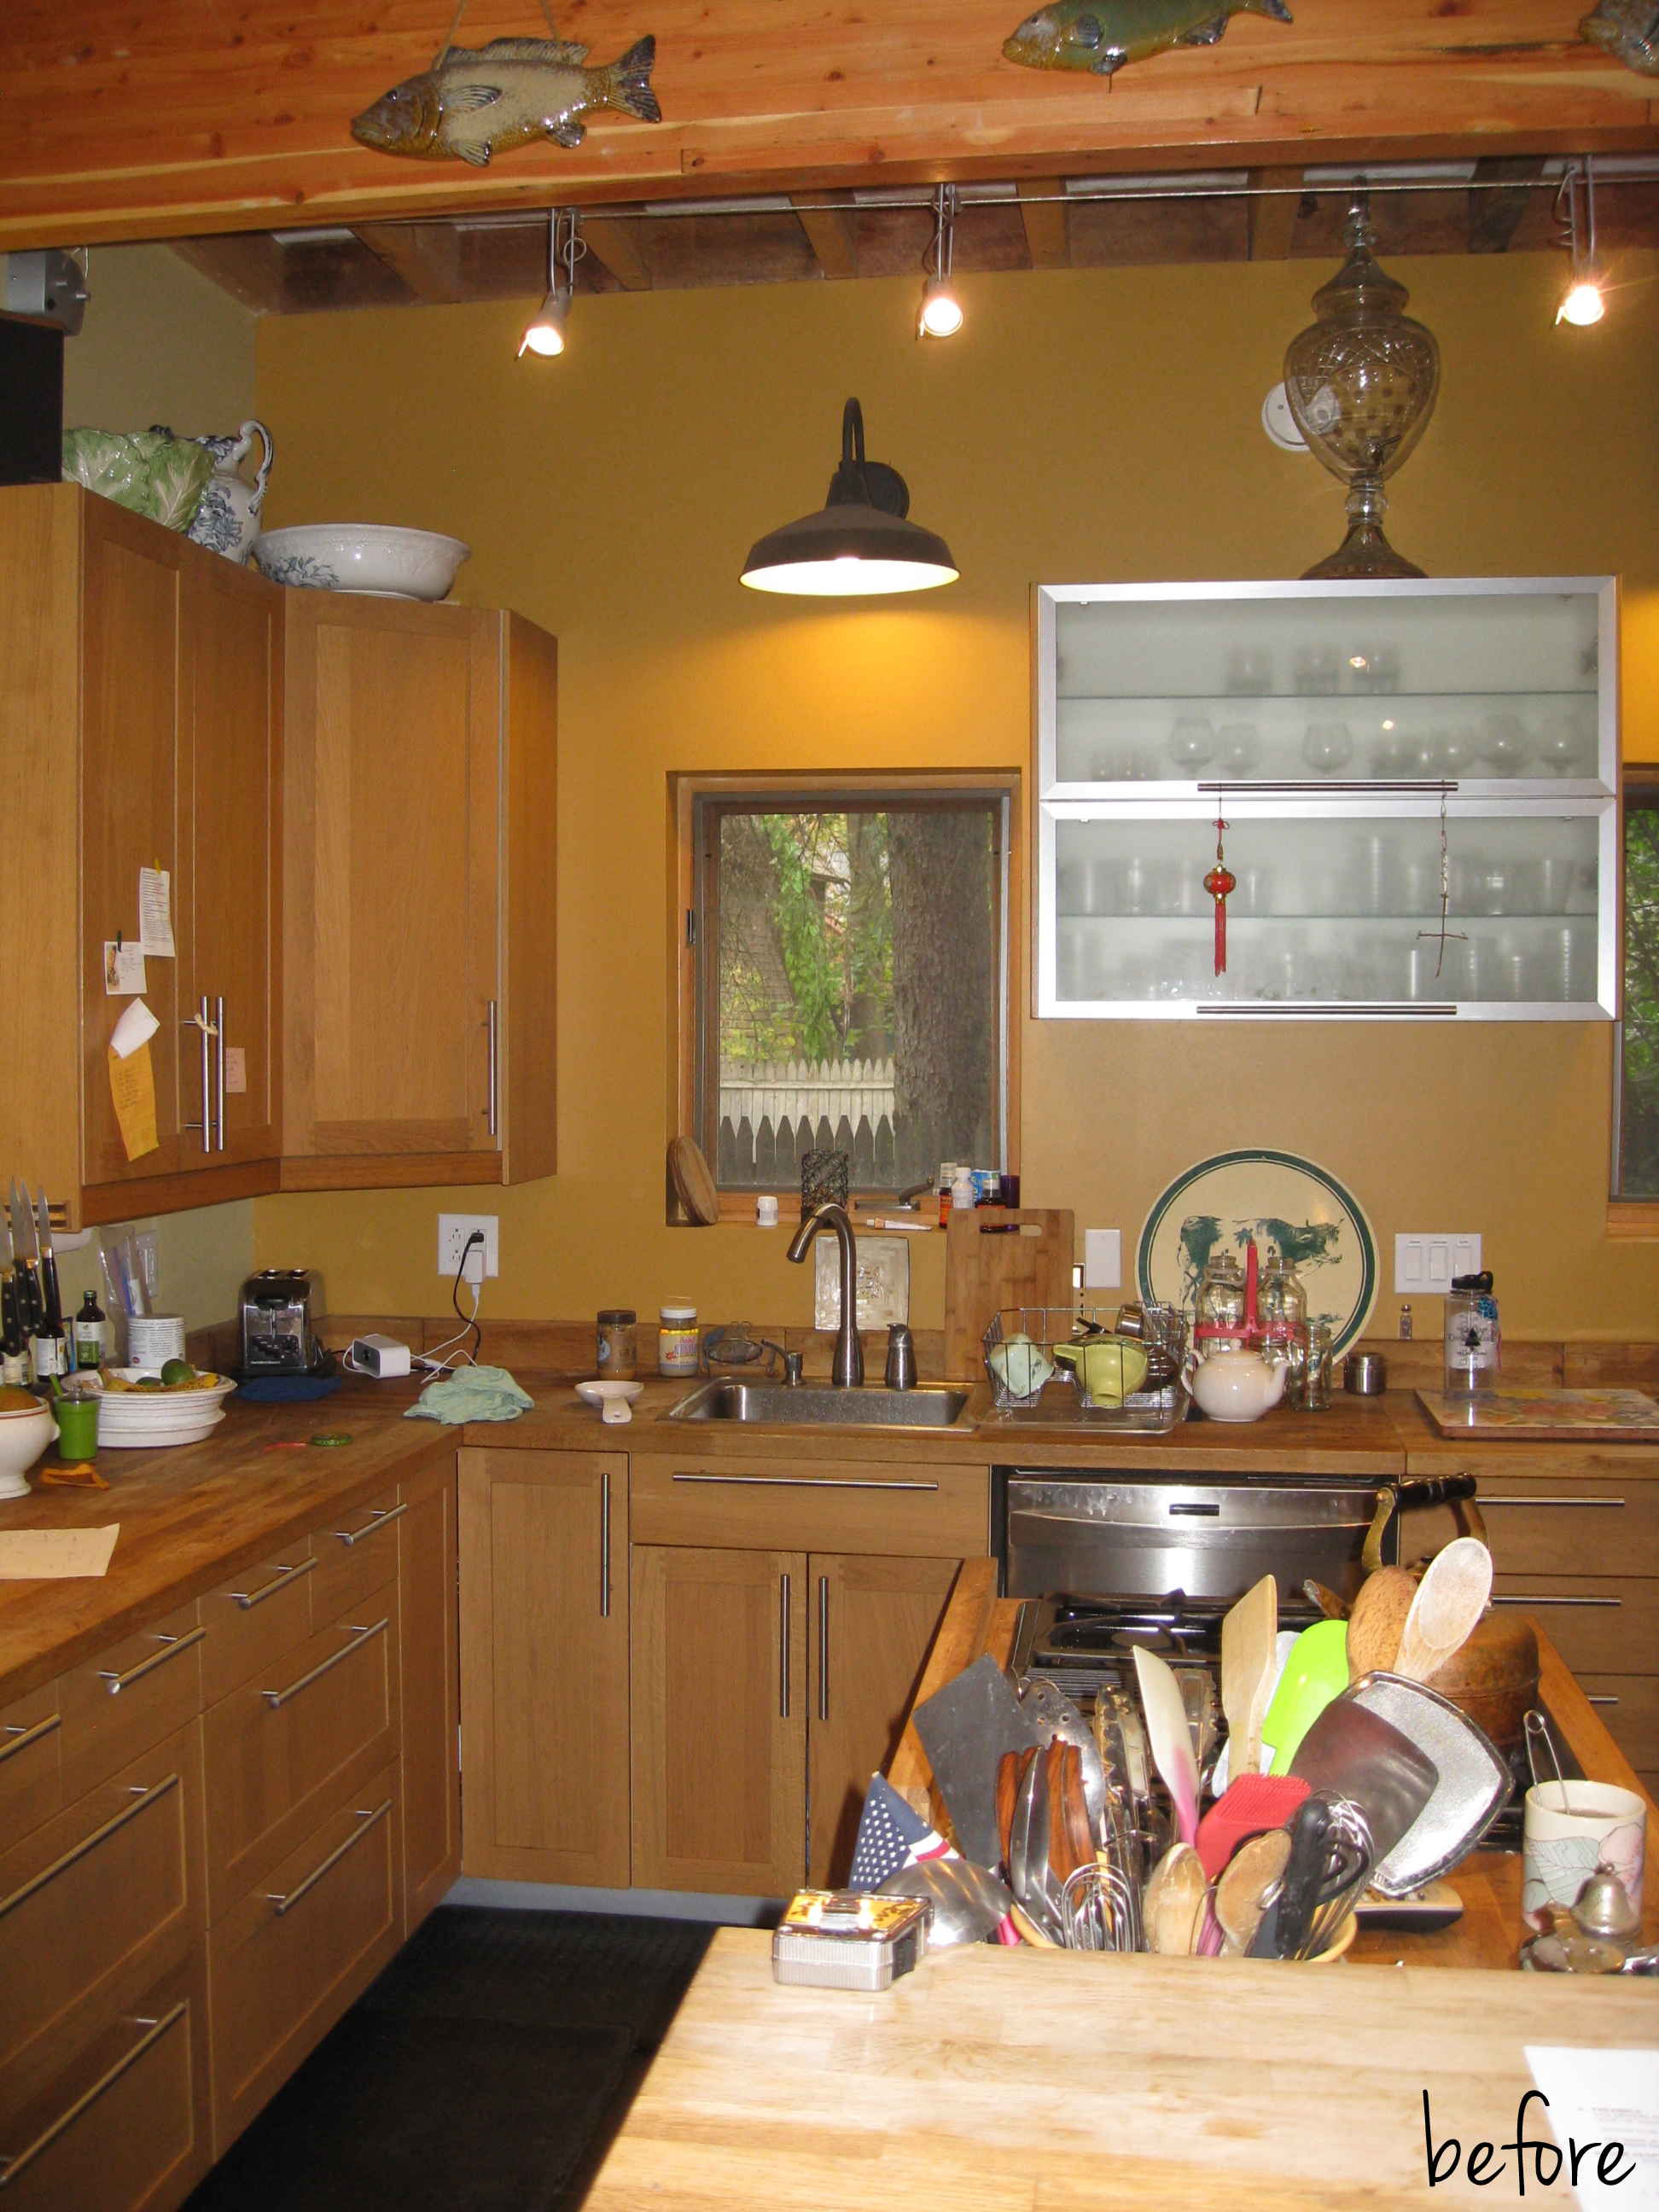
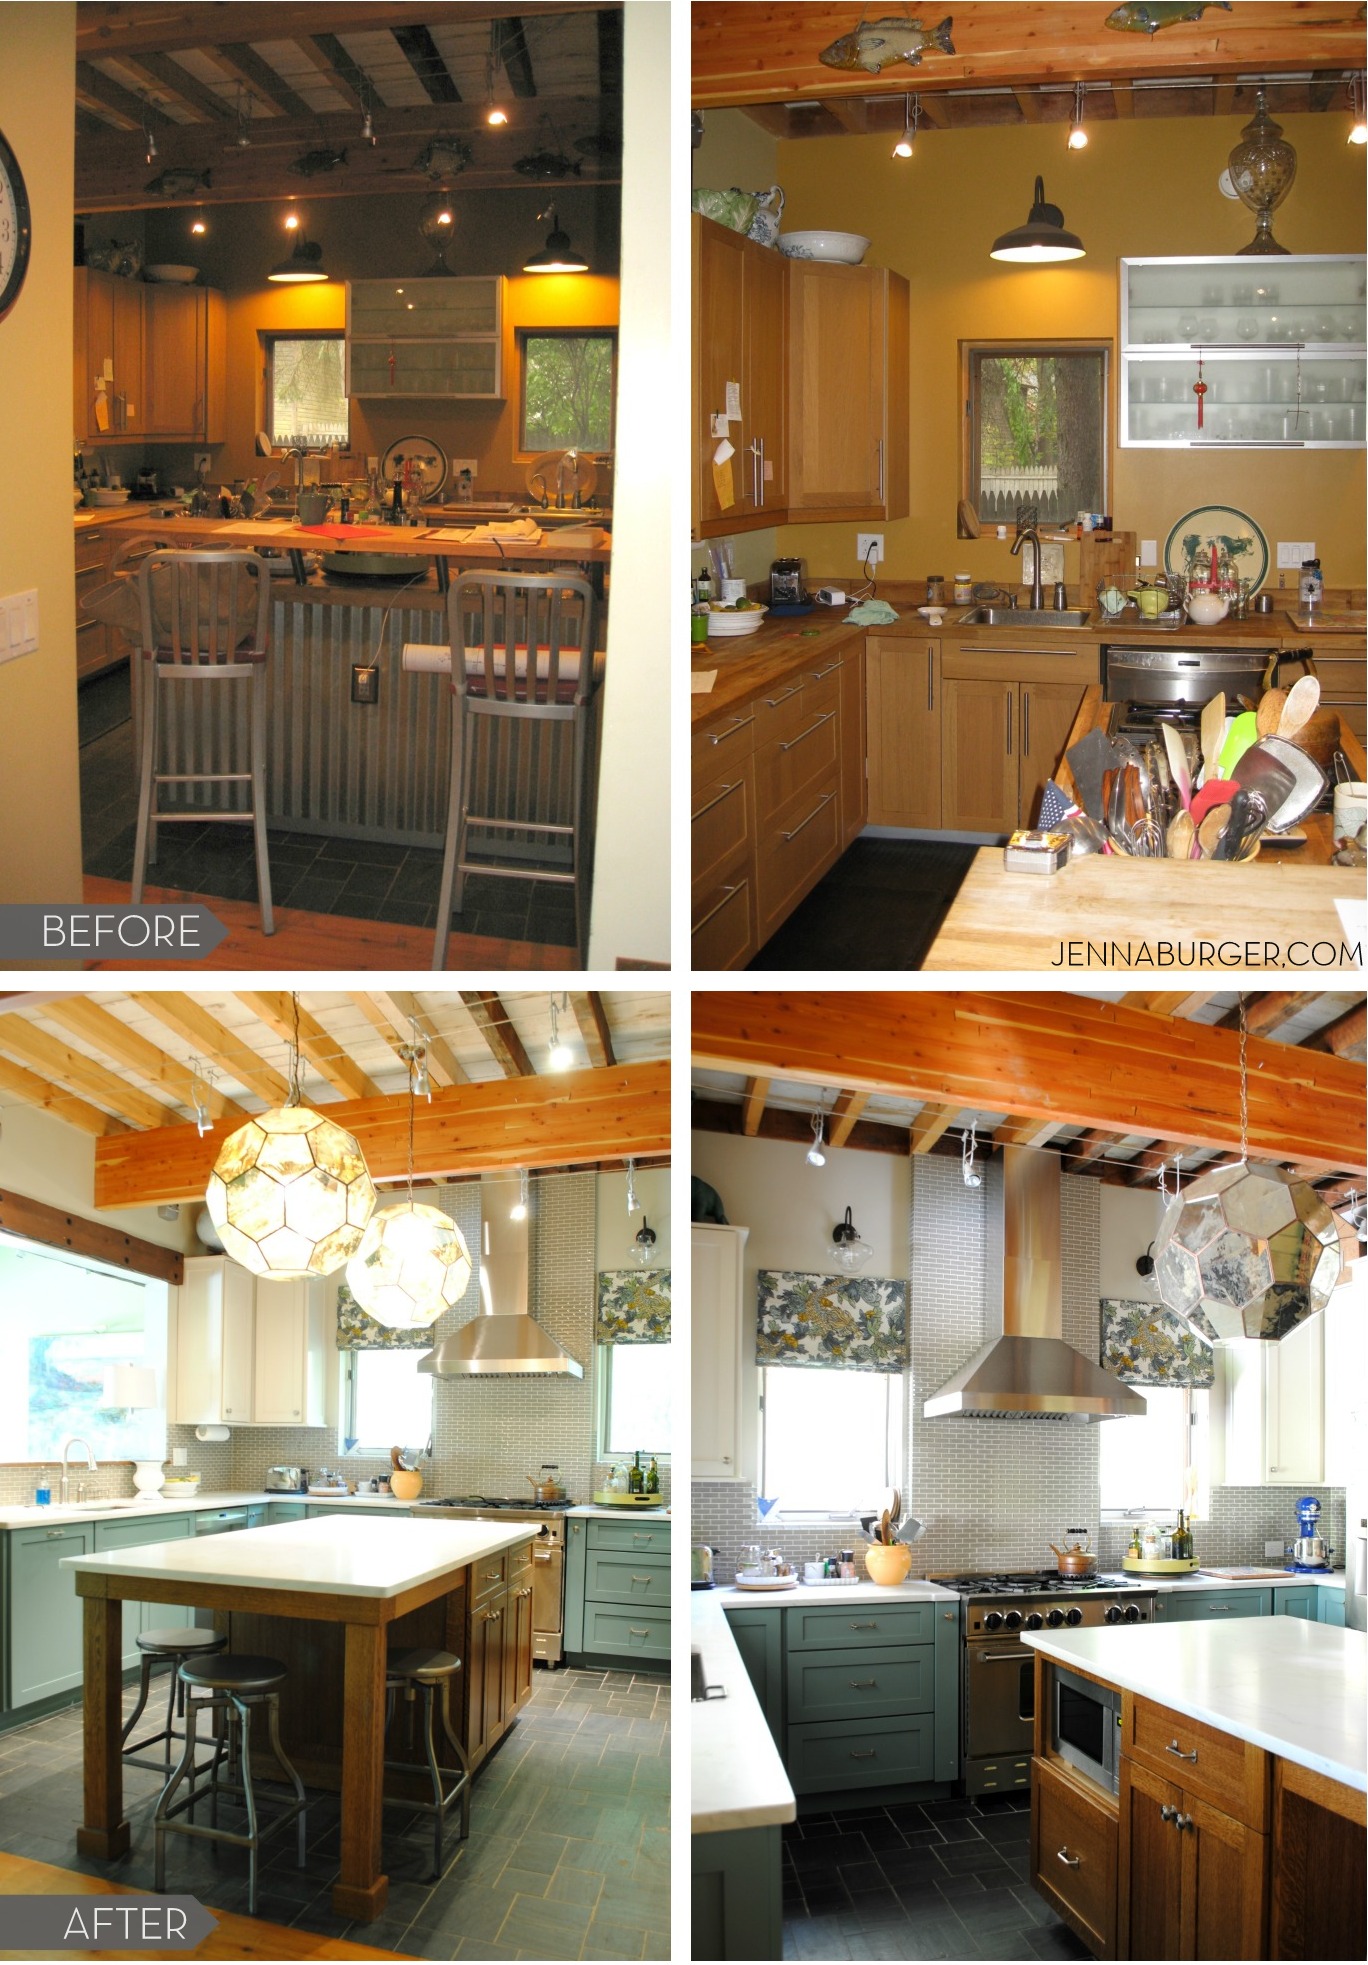
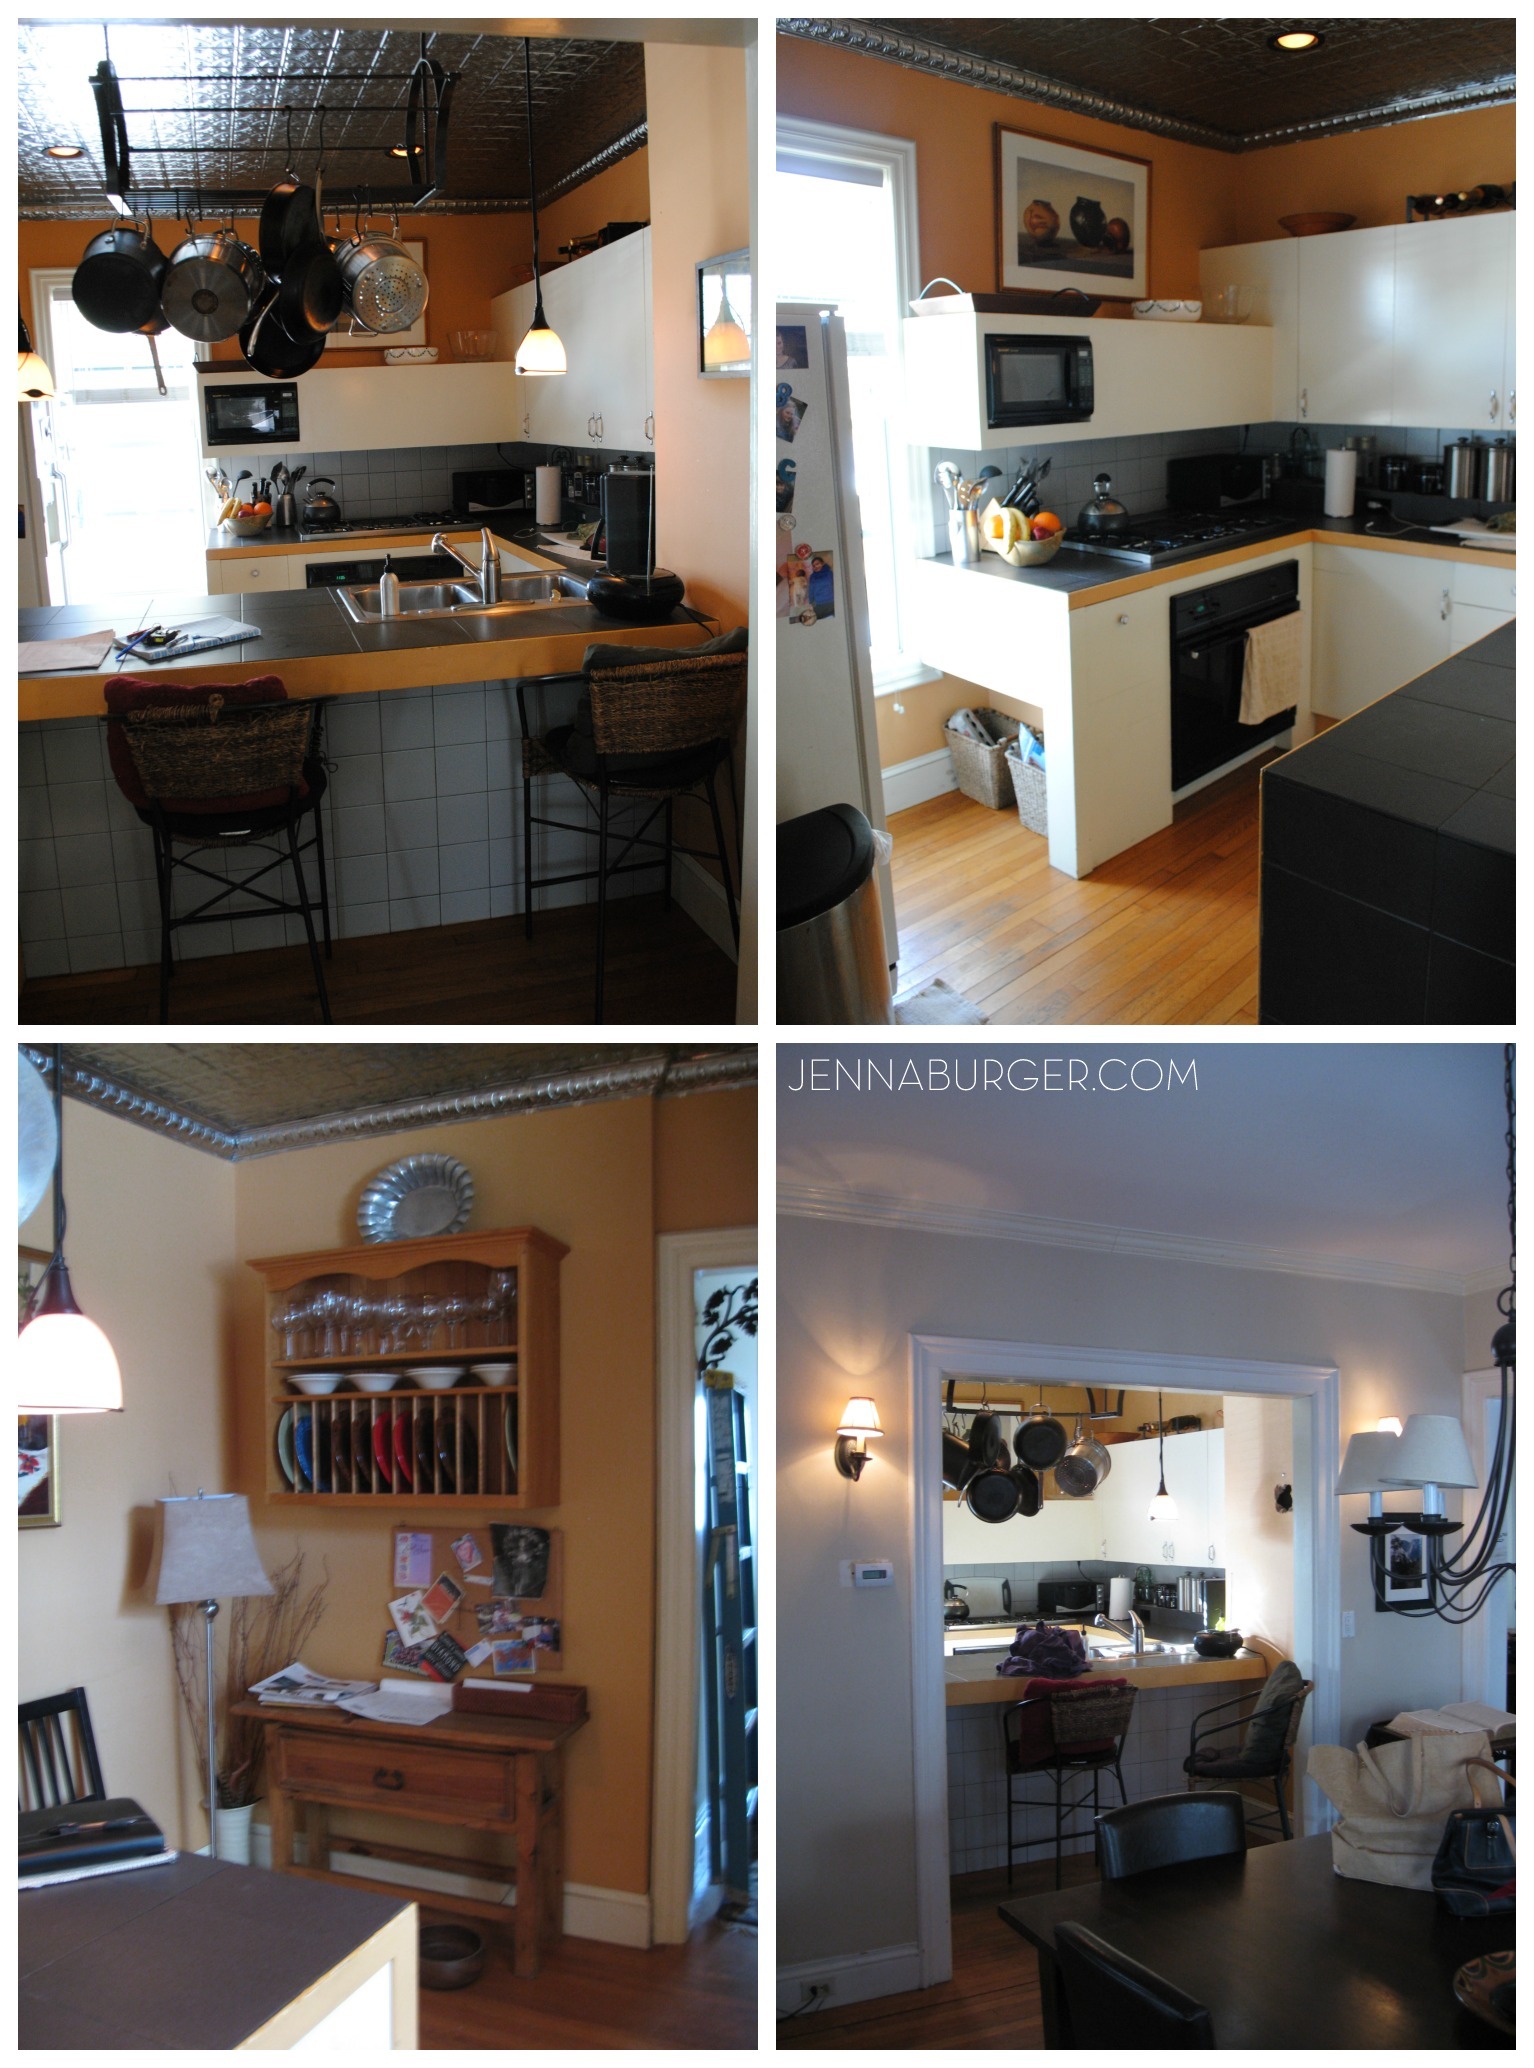
On my first visit to the house to discuss the scope of work with the client, I immediately realized that the kitchen layout was totally wrong. There was so much potential, but the dated cabinets and flow of the space was taking away from it’s true potential + function. The space itself was of a decent size, but the layout with a ying-yang peninsula made the kitchen awkward & tight to maneuver.

the ‘before’…

BEFORE kitchen makeover

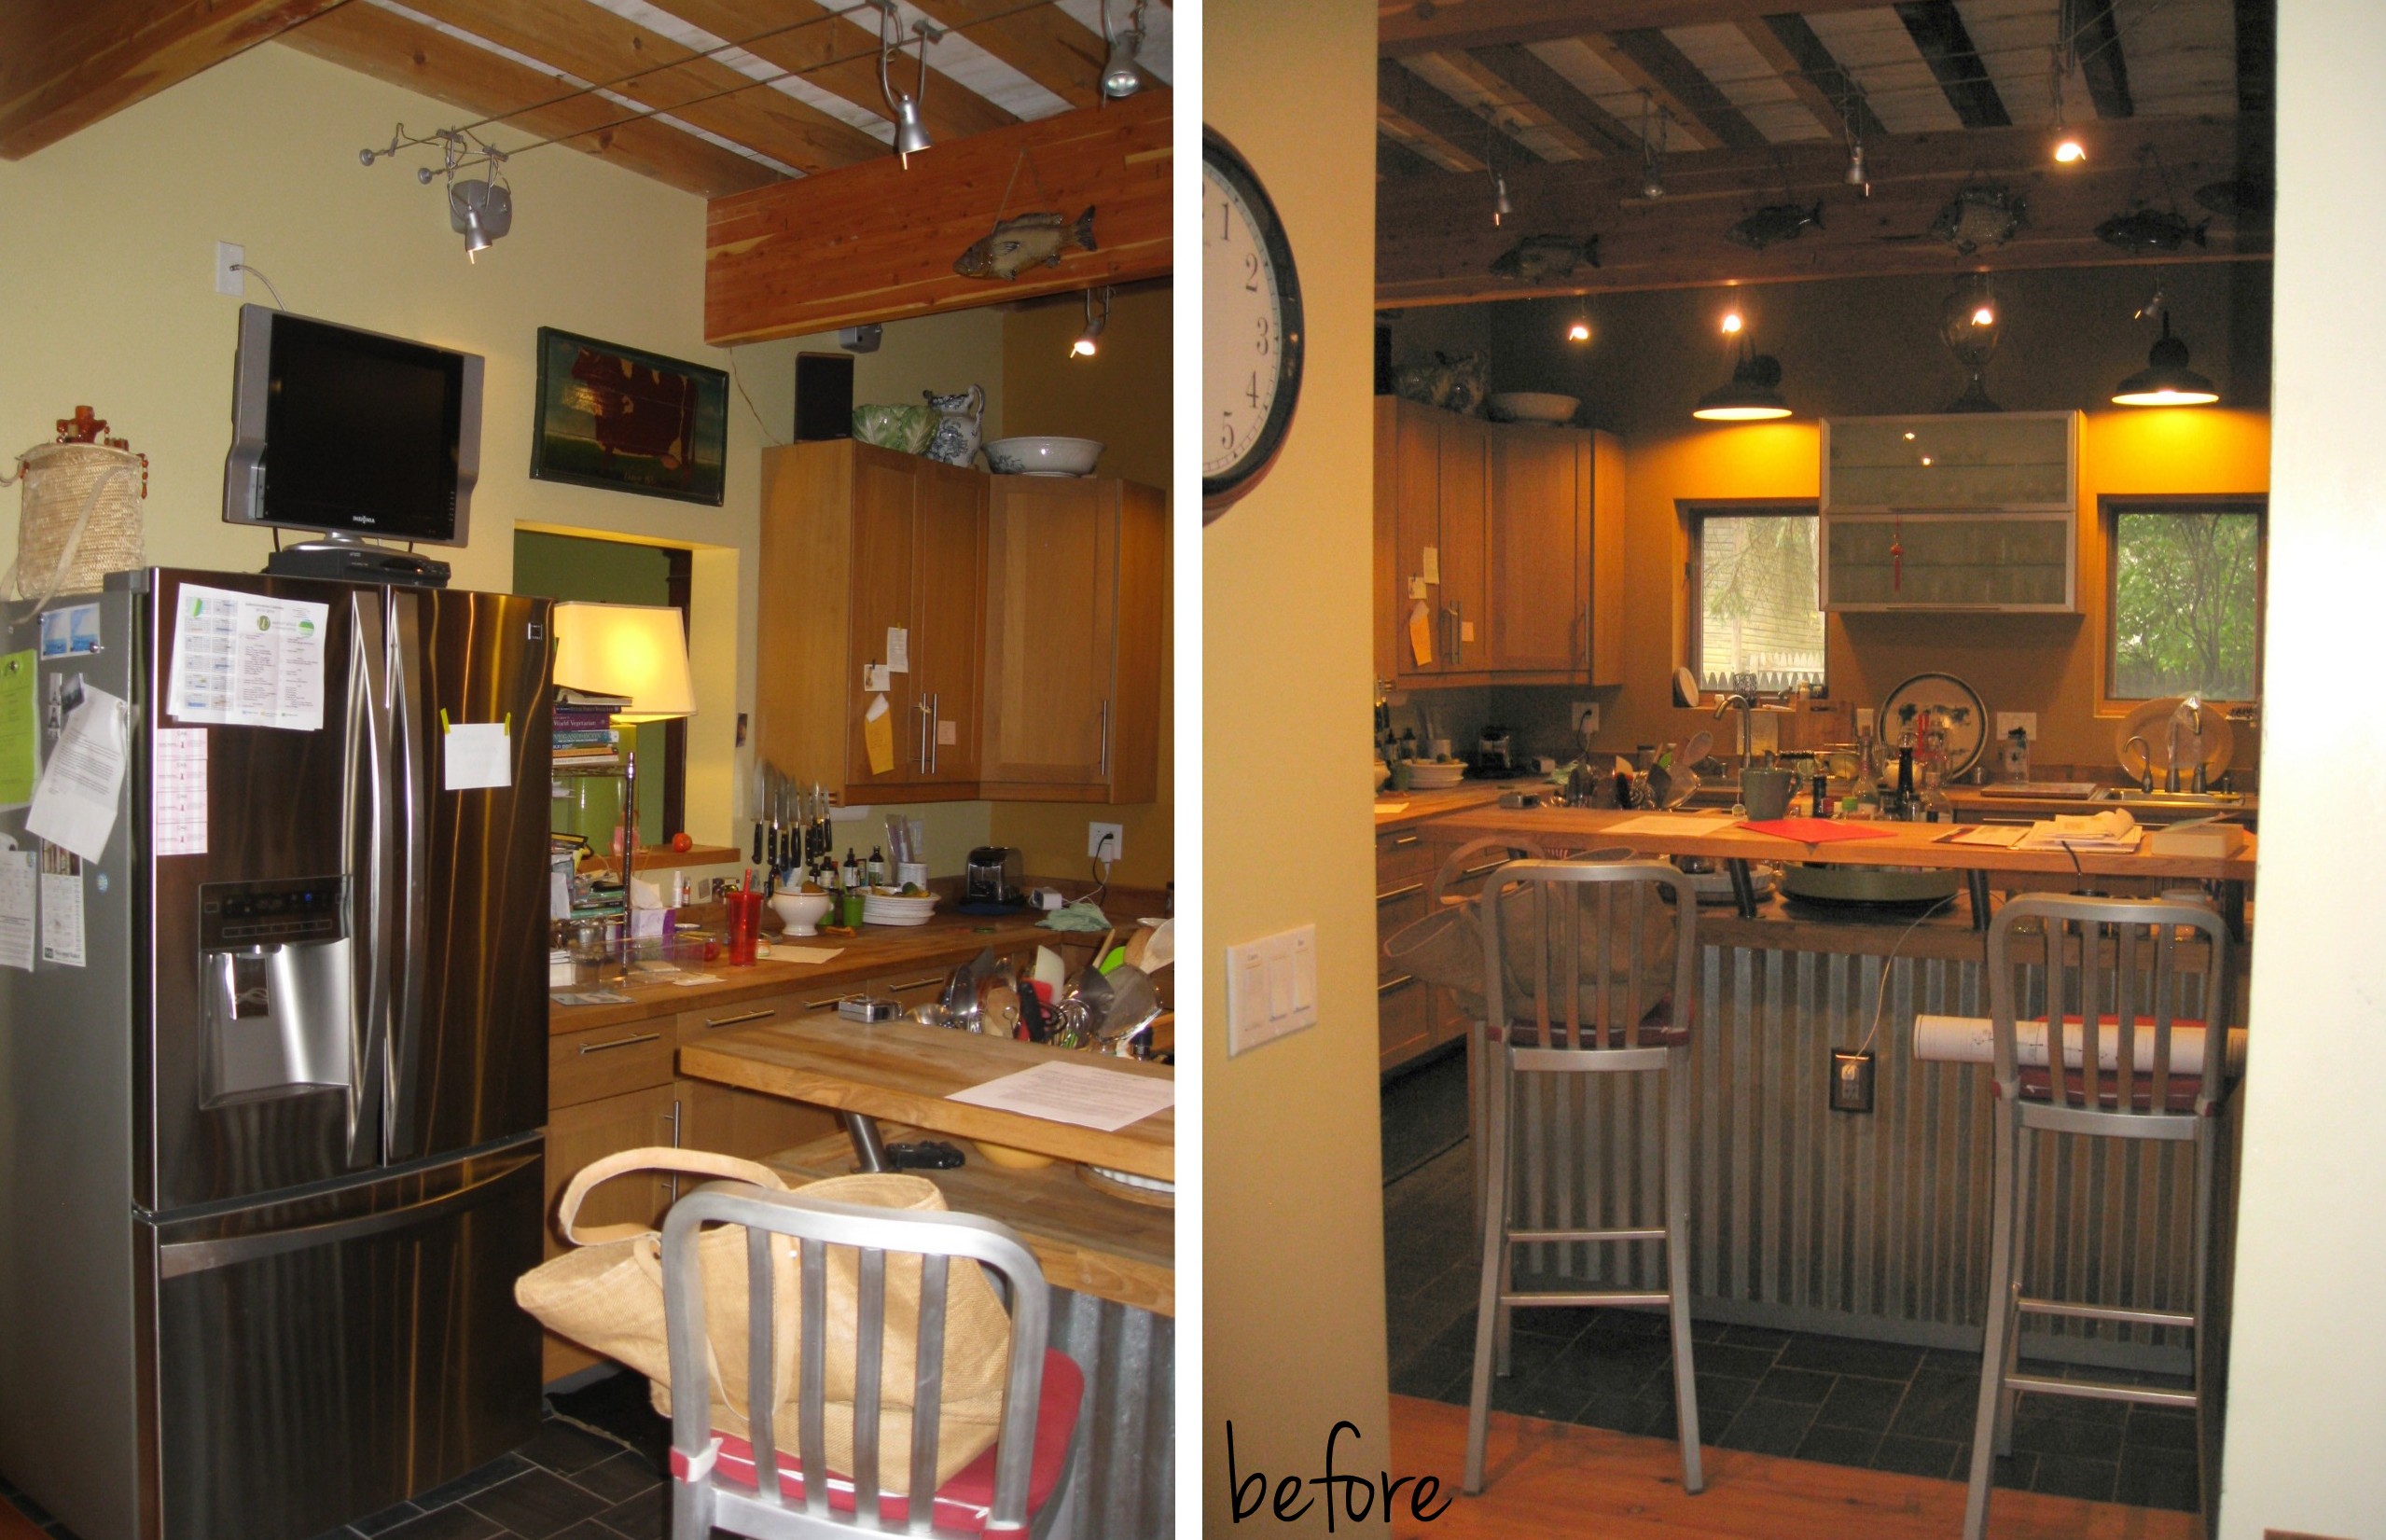
With the kitchen sandwiched between the living room and dining room + with only 2 small windows facing the north, the space was dark and drear – all day the client would leave lights on to make the space look + feel brighter & airier.

Aside from reworking the cabinetry layout, I also needed to figure out a way to bring in light. This space needed it’s moment!!!

another ‘before’ picture…

BEFORE kitchen makeover

We were originally thinking about painting the existing cabinets, but upon further inspection and confirmation from my cabinet guy about their durability + that we had to reconfigure the cabinets, we realized the painting route wouldn’t be worth the effort + cost, so everything got ripped out!

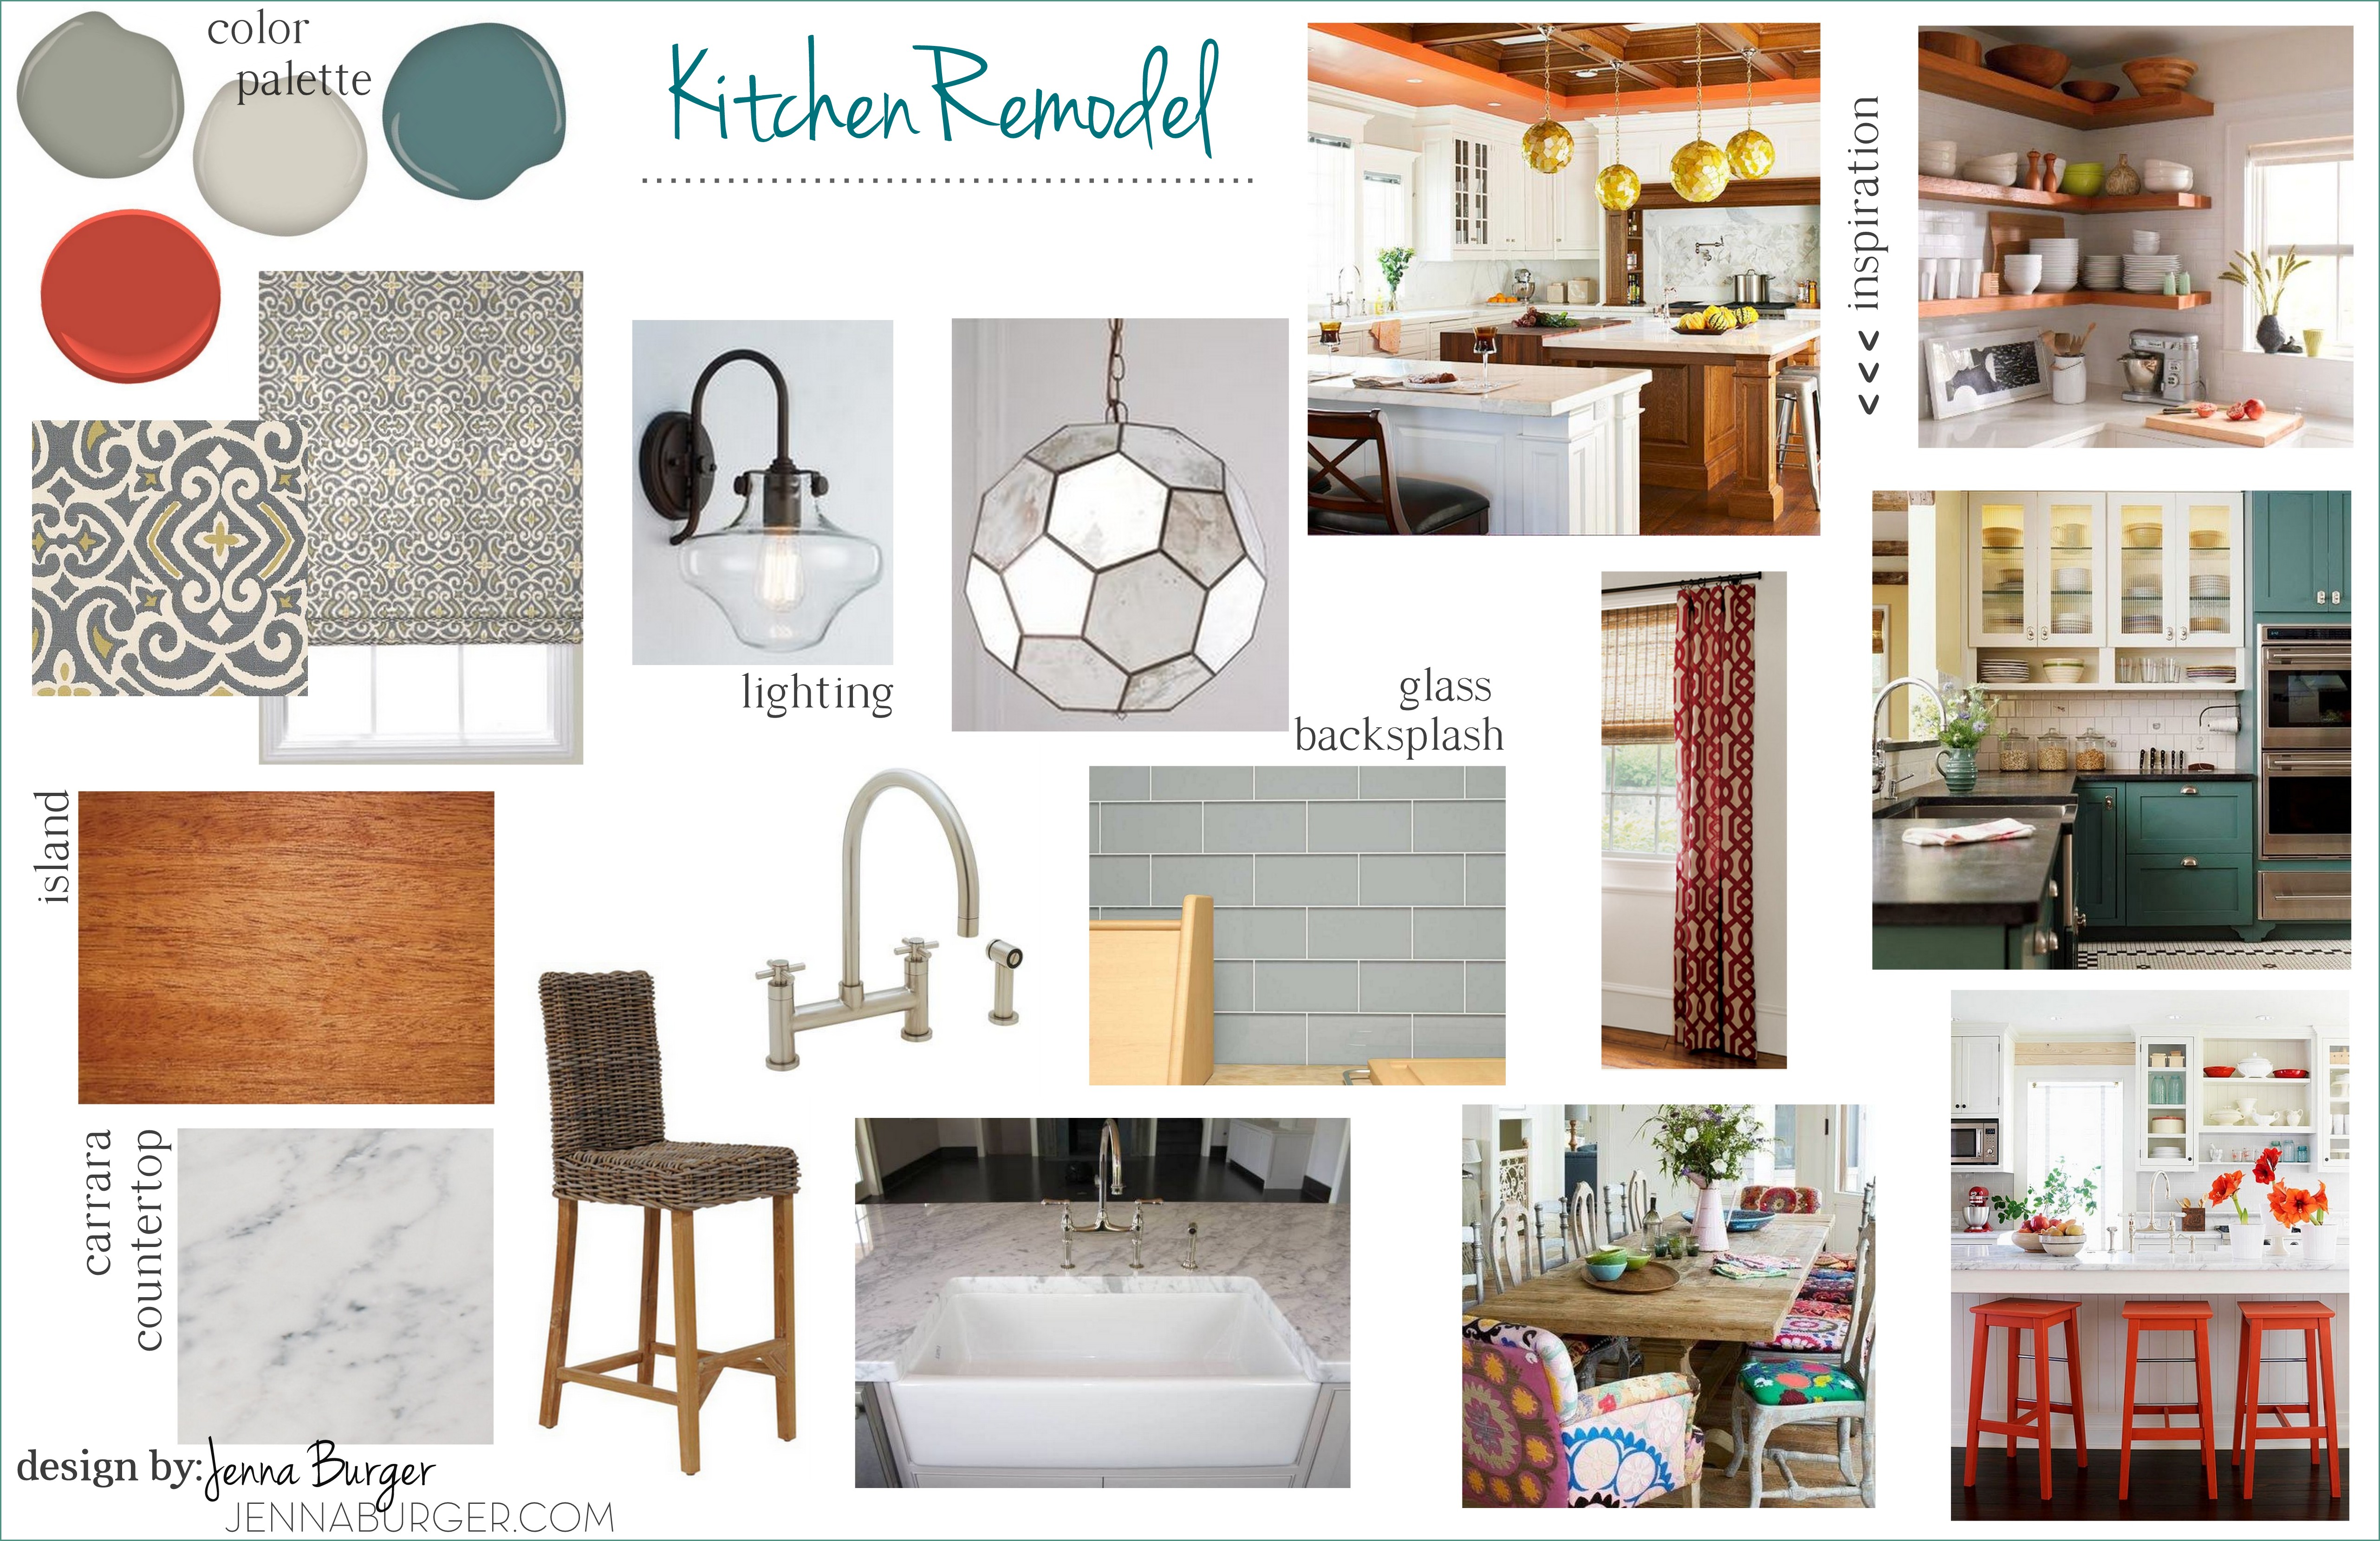
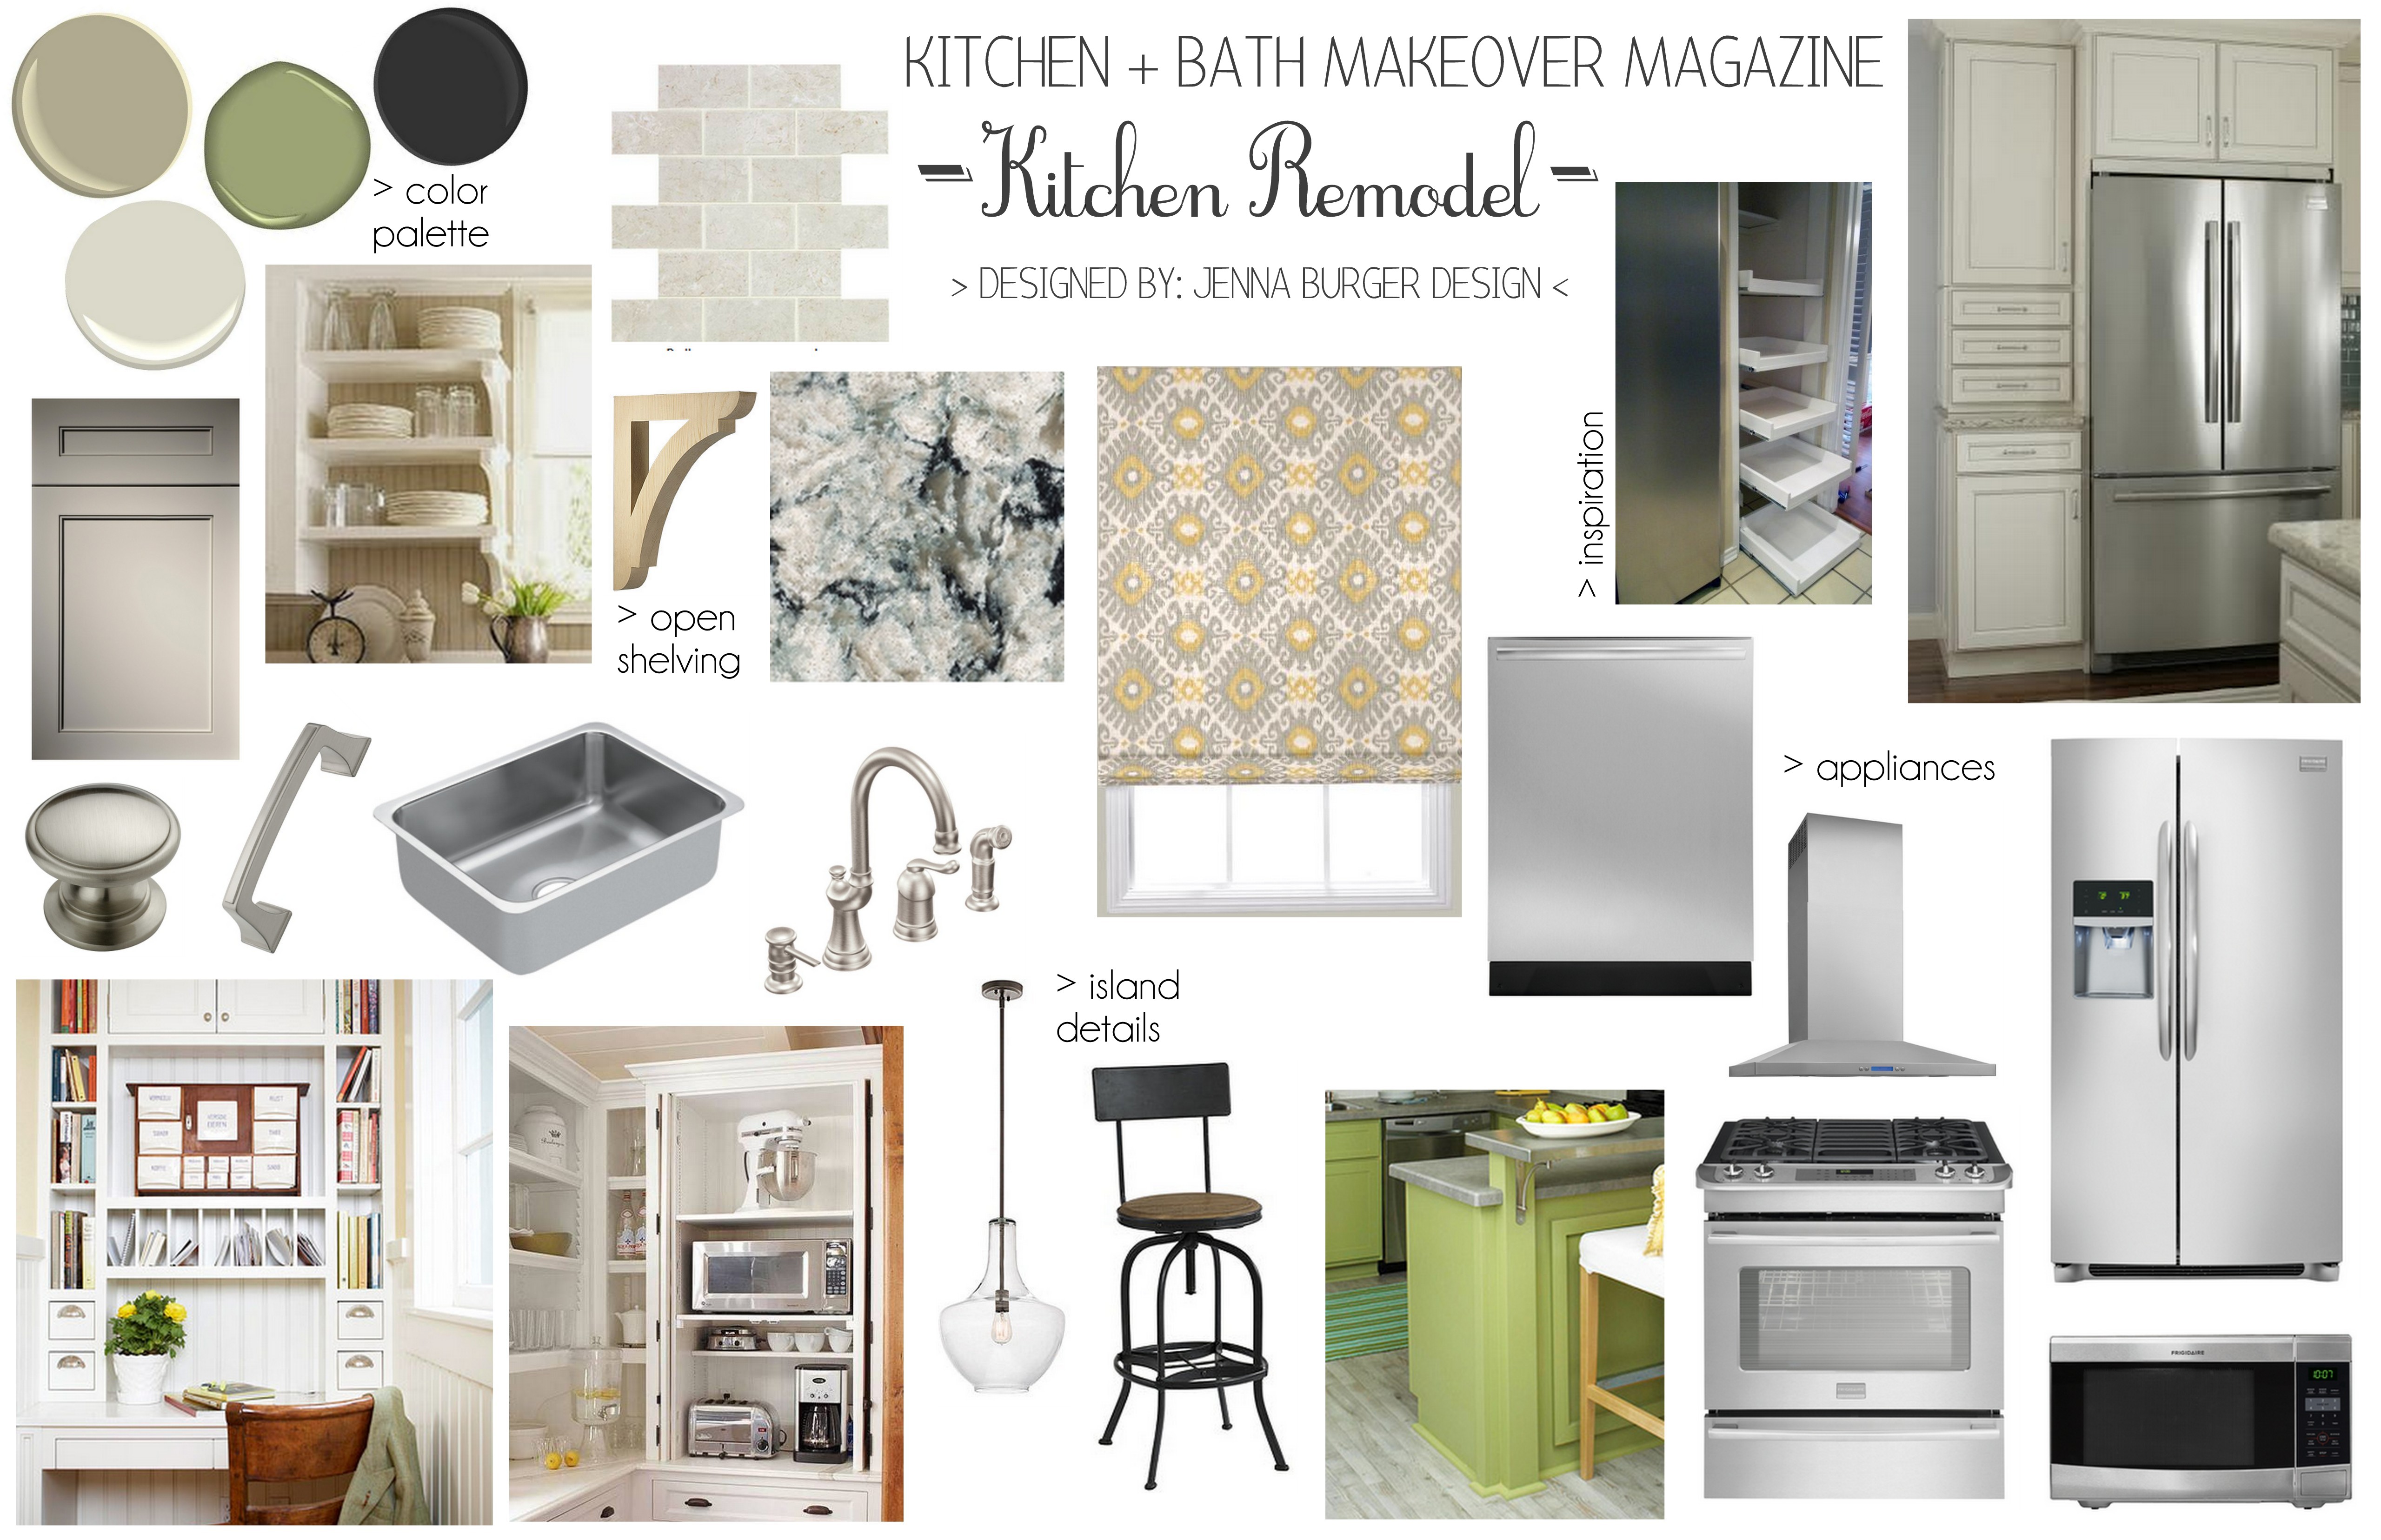
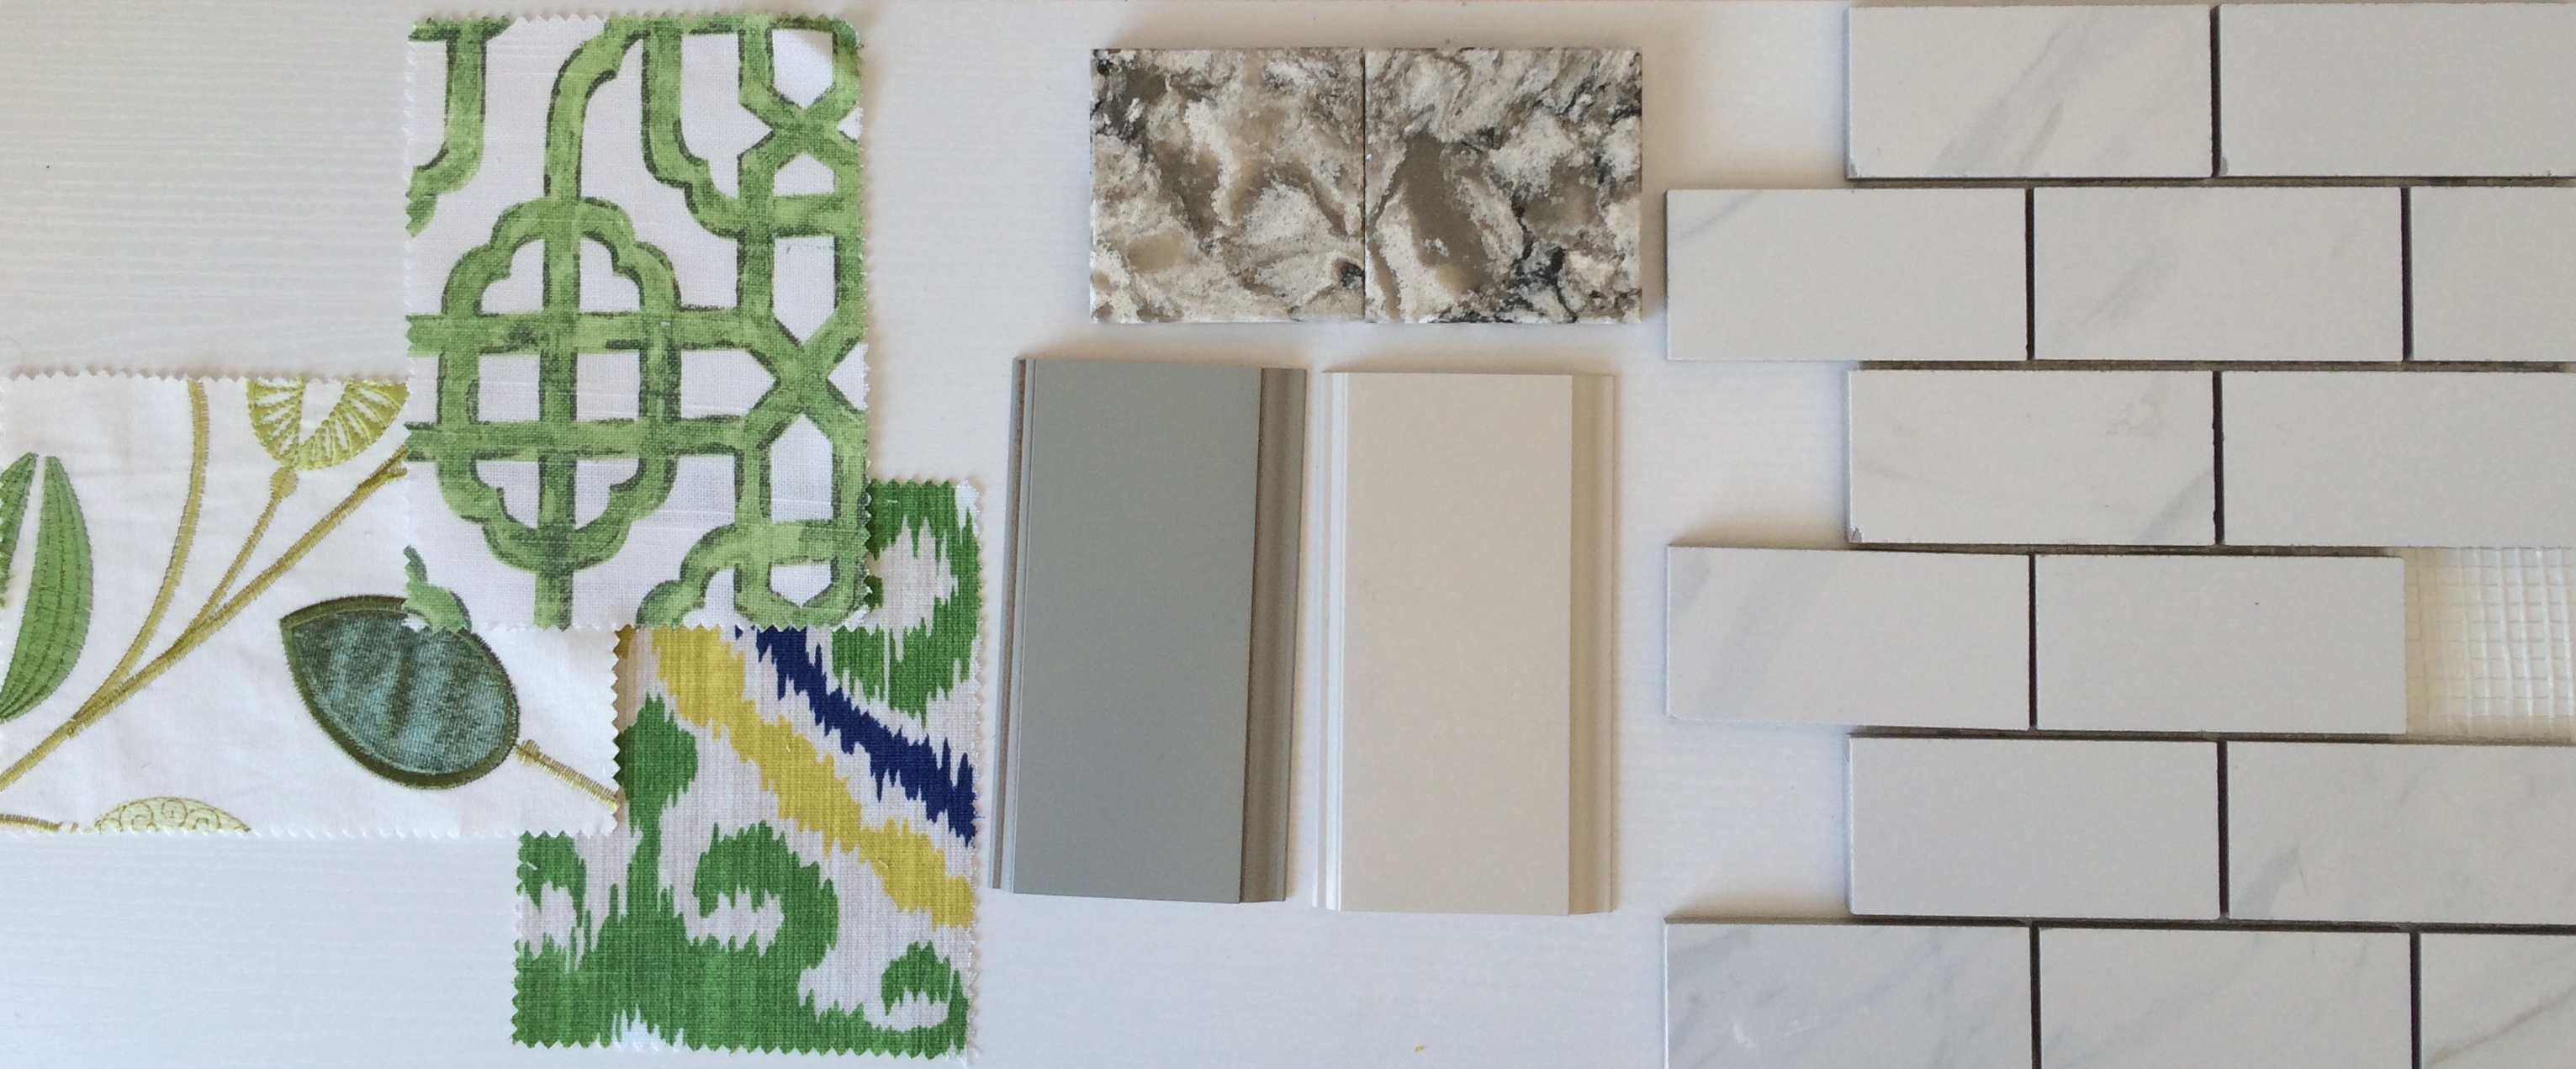
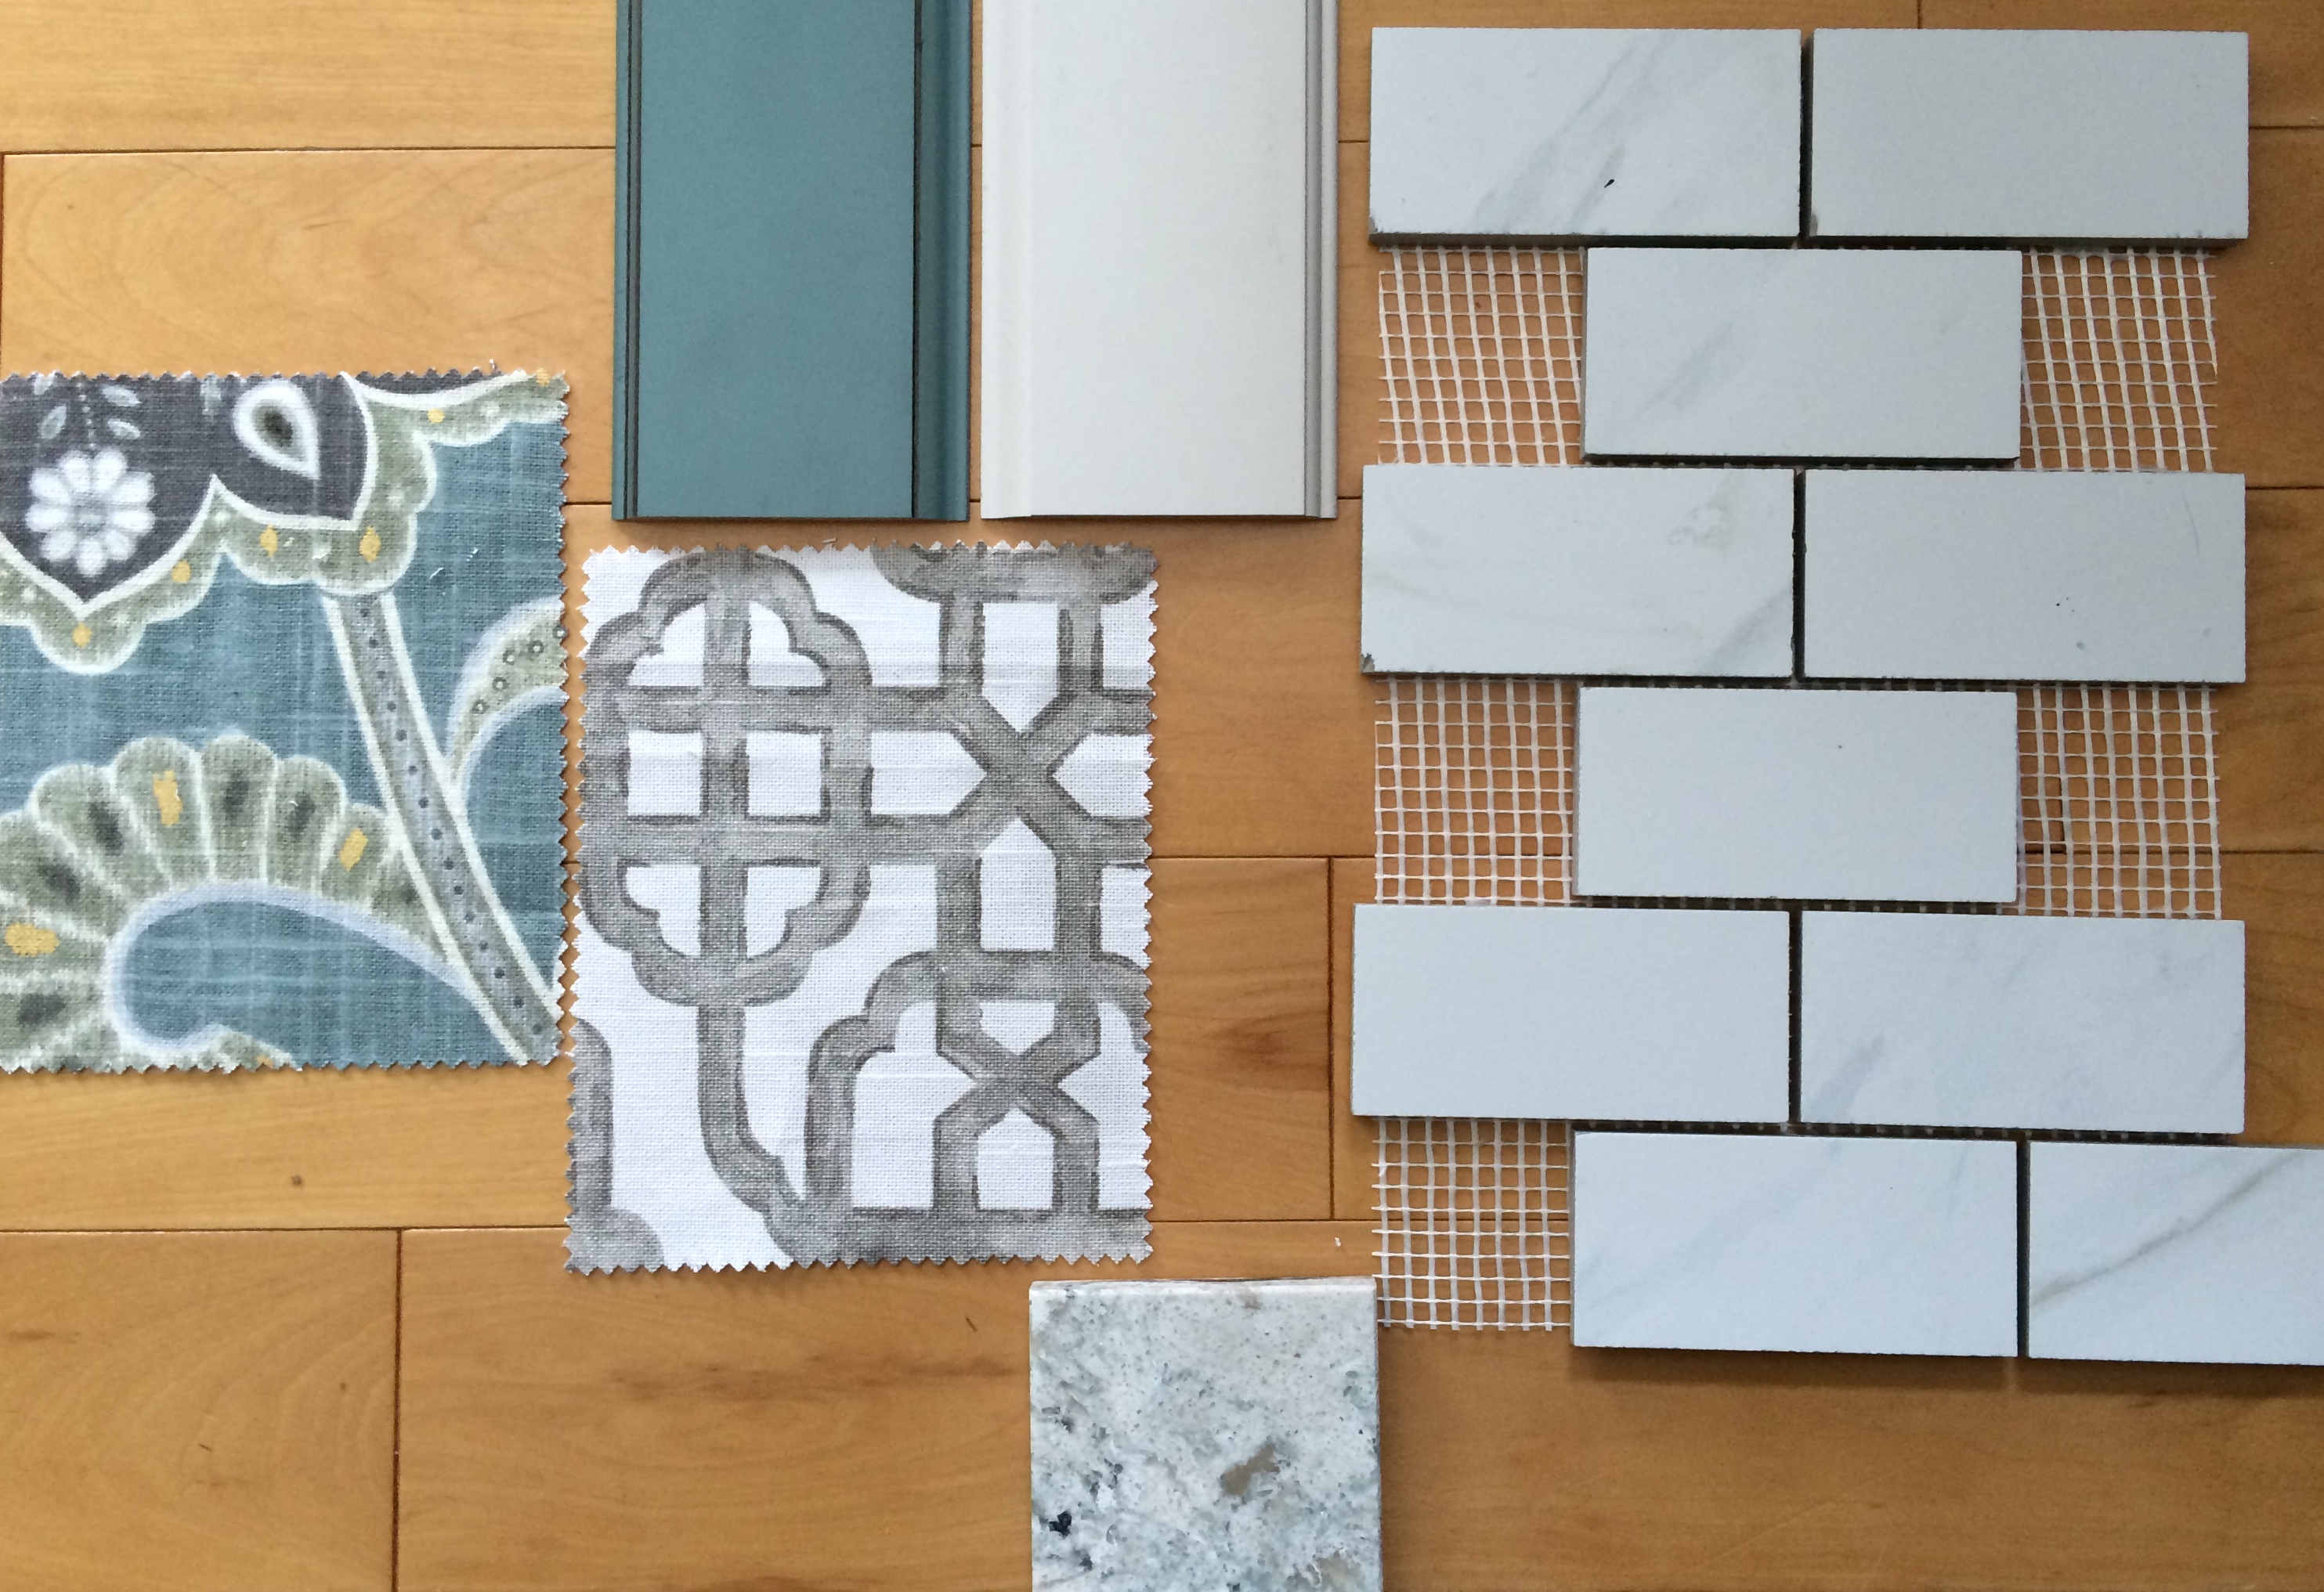
We chose a new palette with a mix of soft gray, light teal, and quarter sawn oak for the cabinets + a gorgeous danby marble countertop. This was the creative vision board/mood board I created for the proposed kitchen…

Mood Board for Kitchen Makeover

New cabinets were built for the perimeter of the kitchen, the refrigerator was relocated, and the sink + stove were moved to locations that made better sense for the function + flow.

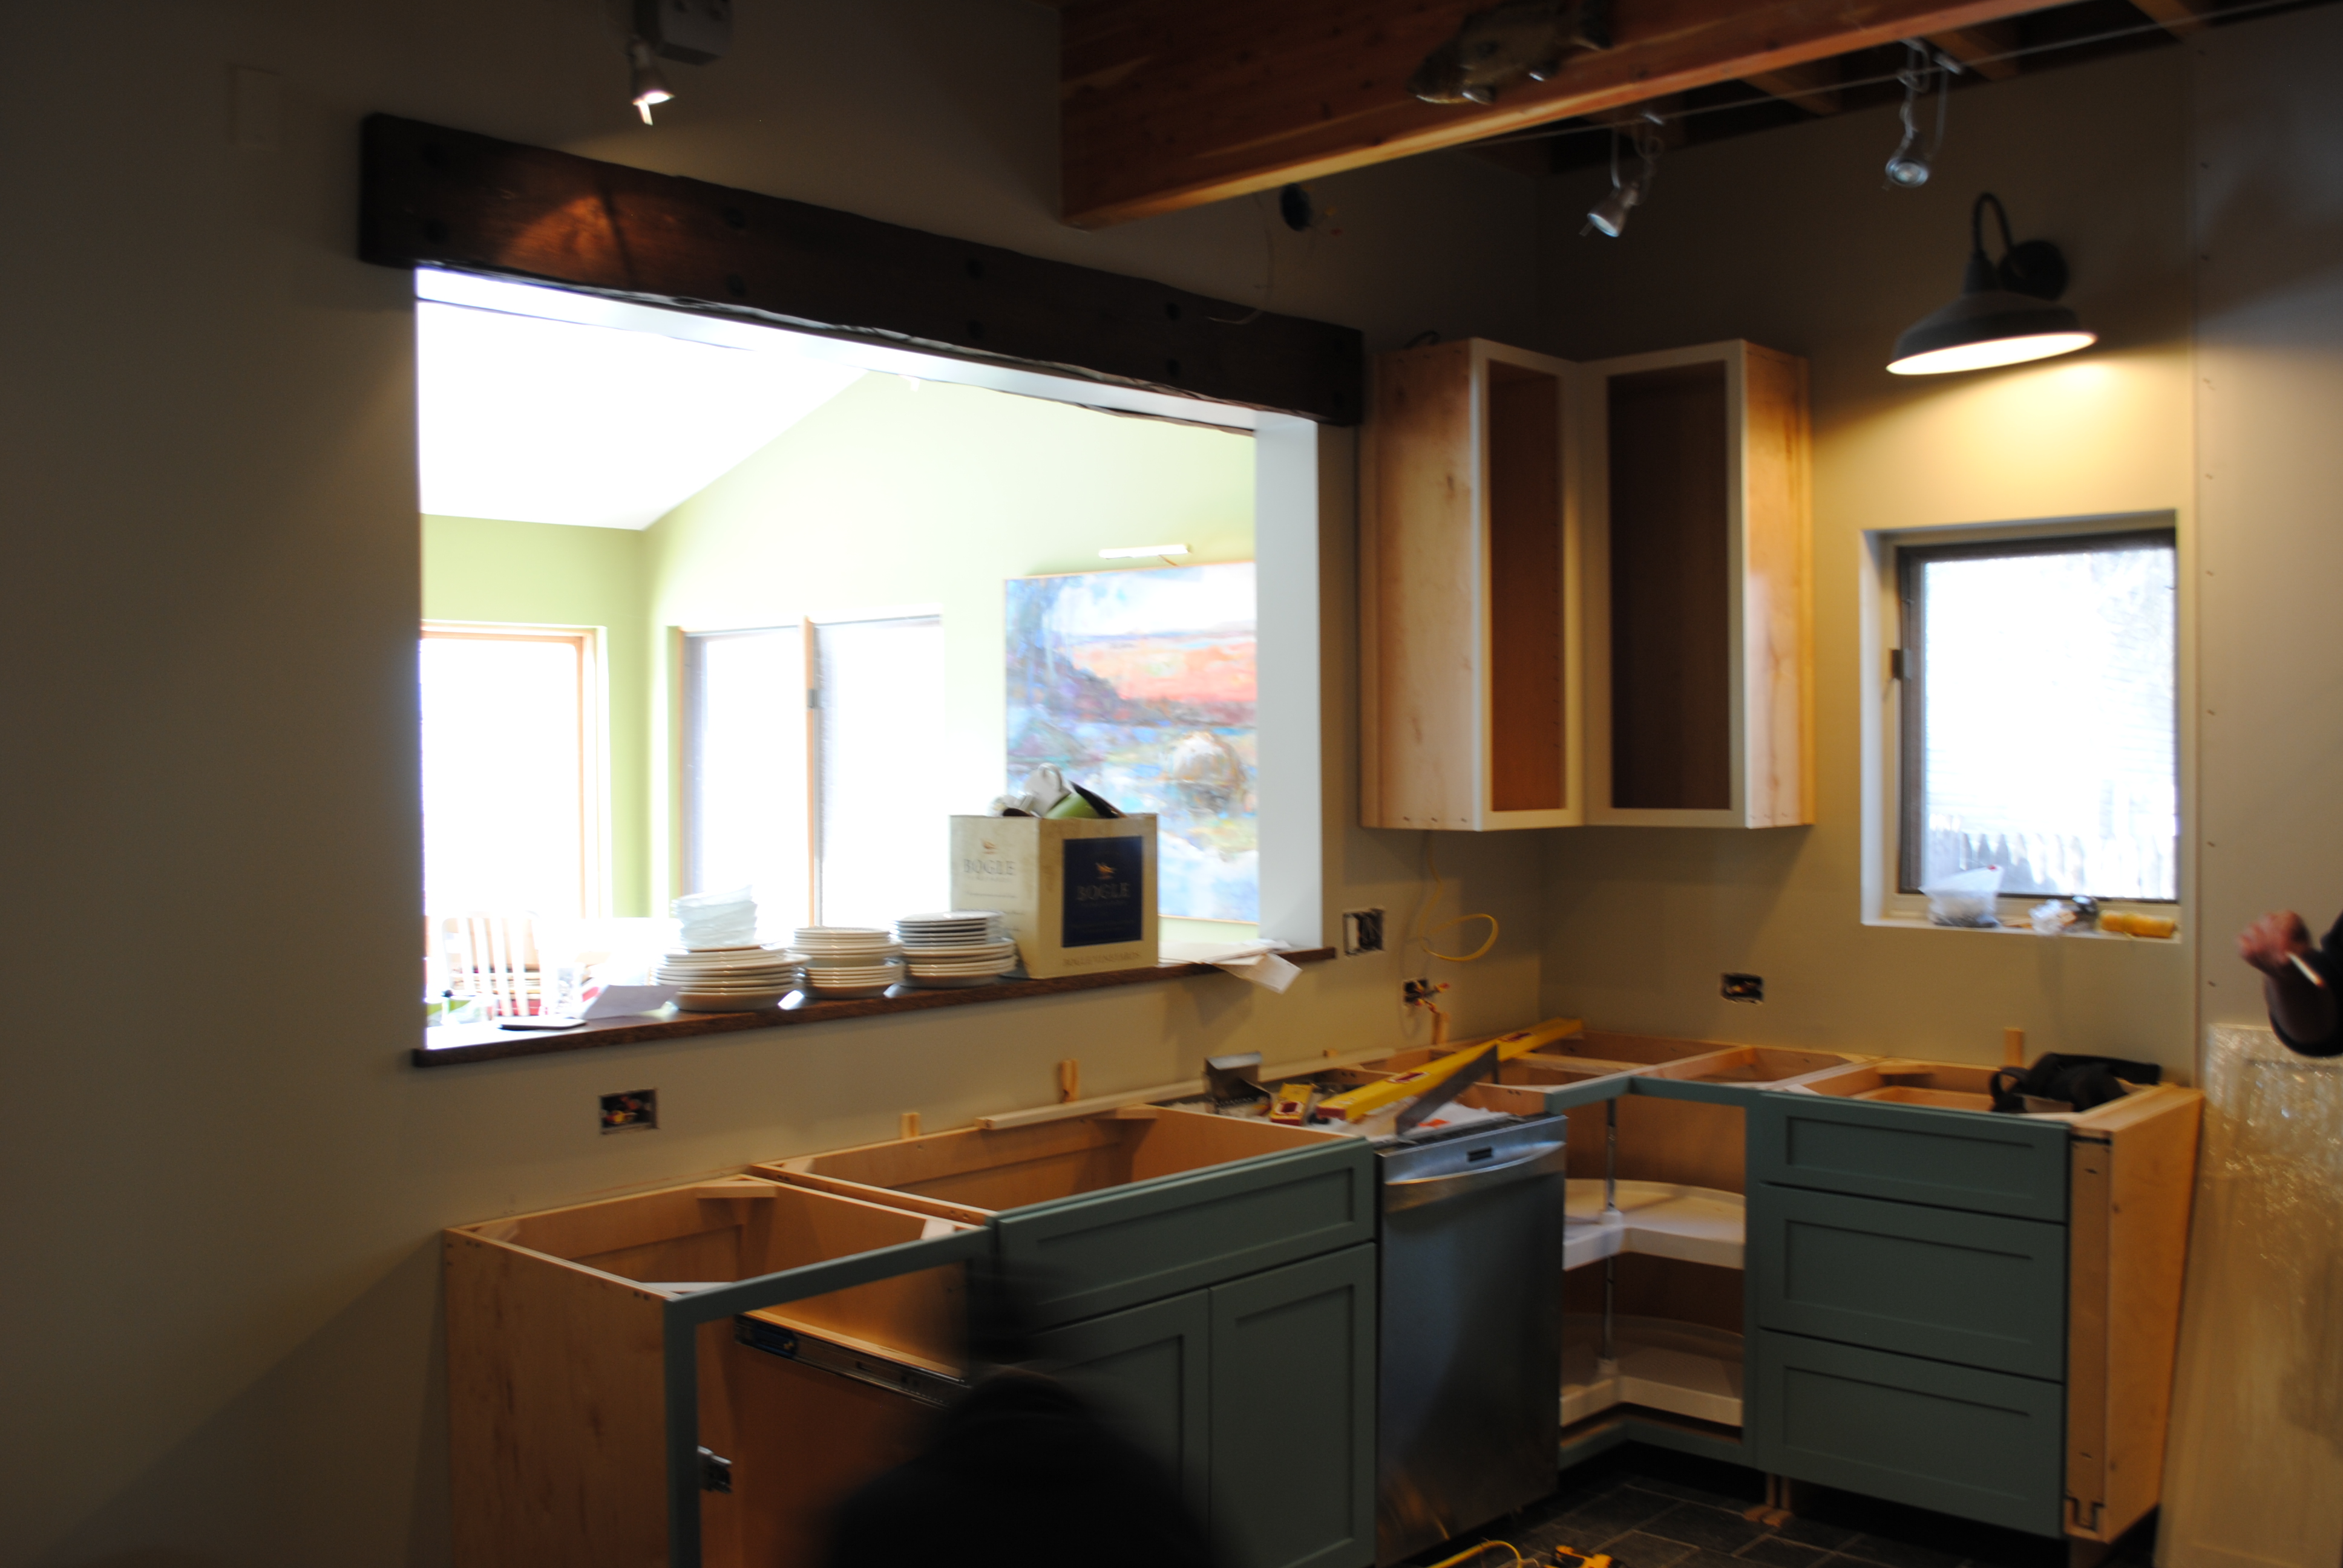
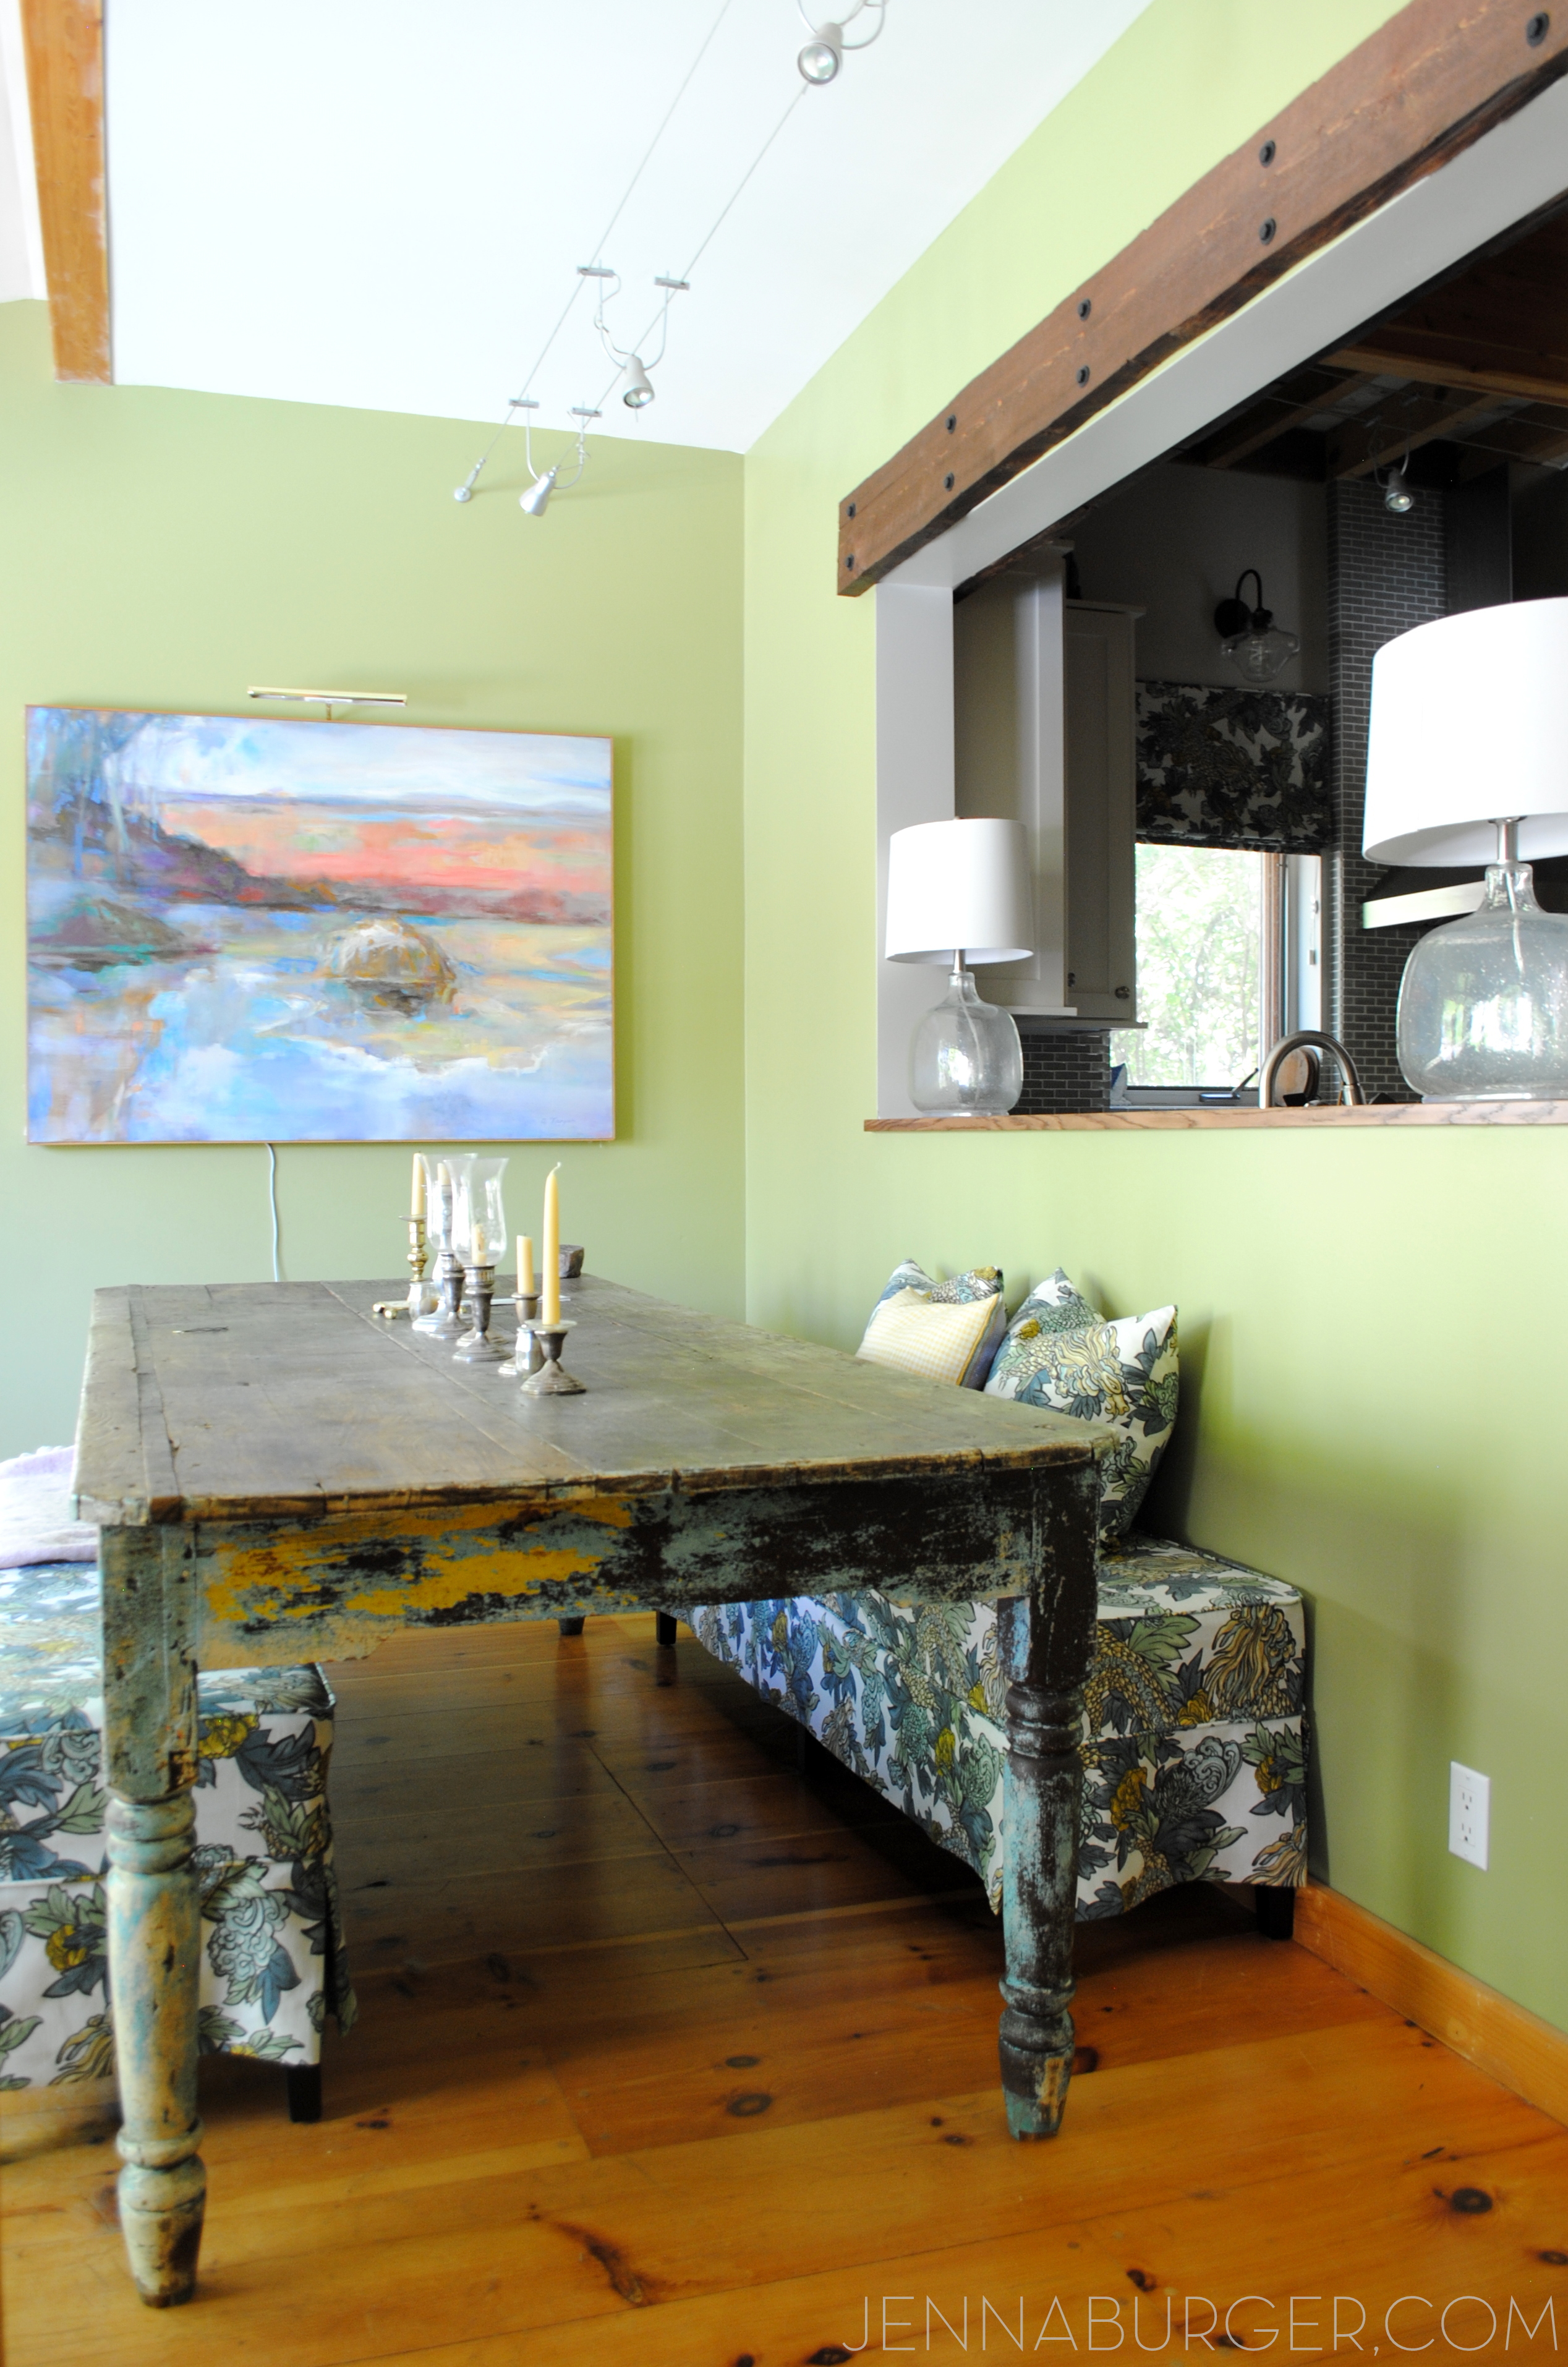
during constructionThe biggest addition was creating a giant opening between the kitchen and dining room to let the natural light shine through! There was previously an opening pass-through to connect the 2 spaces, but it went from 3′ wide to 9′ wide + 2′ higher.

We also added a faux beam above the opening which ties in to other door openings in the home. Continuing the style + making new look cohesive with the existing is very important!

during construction

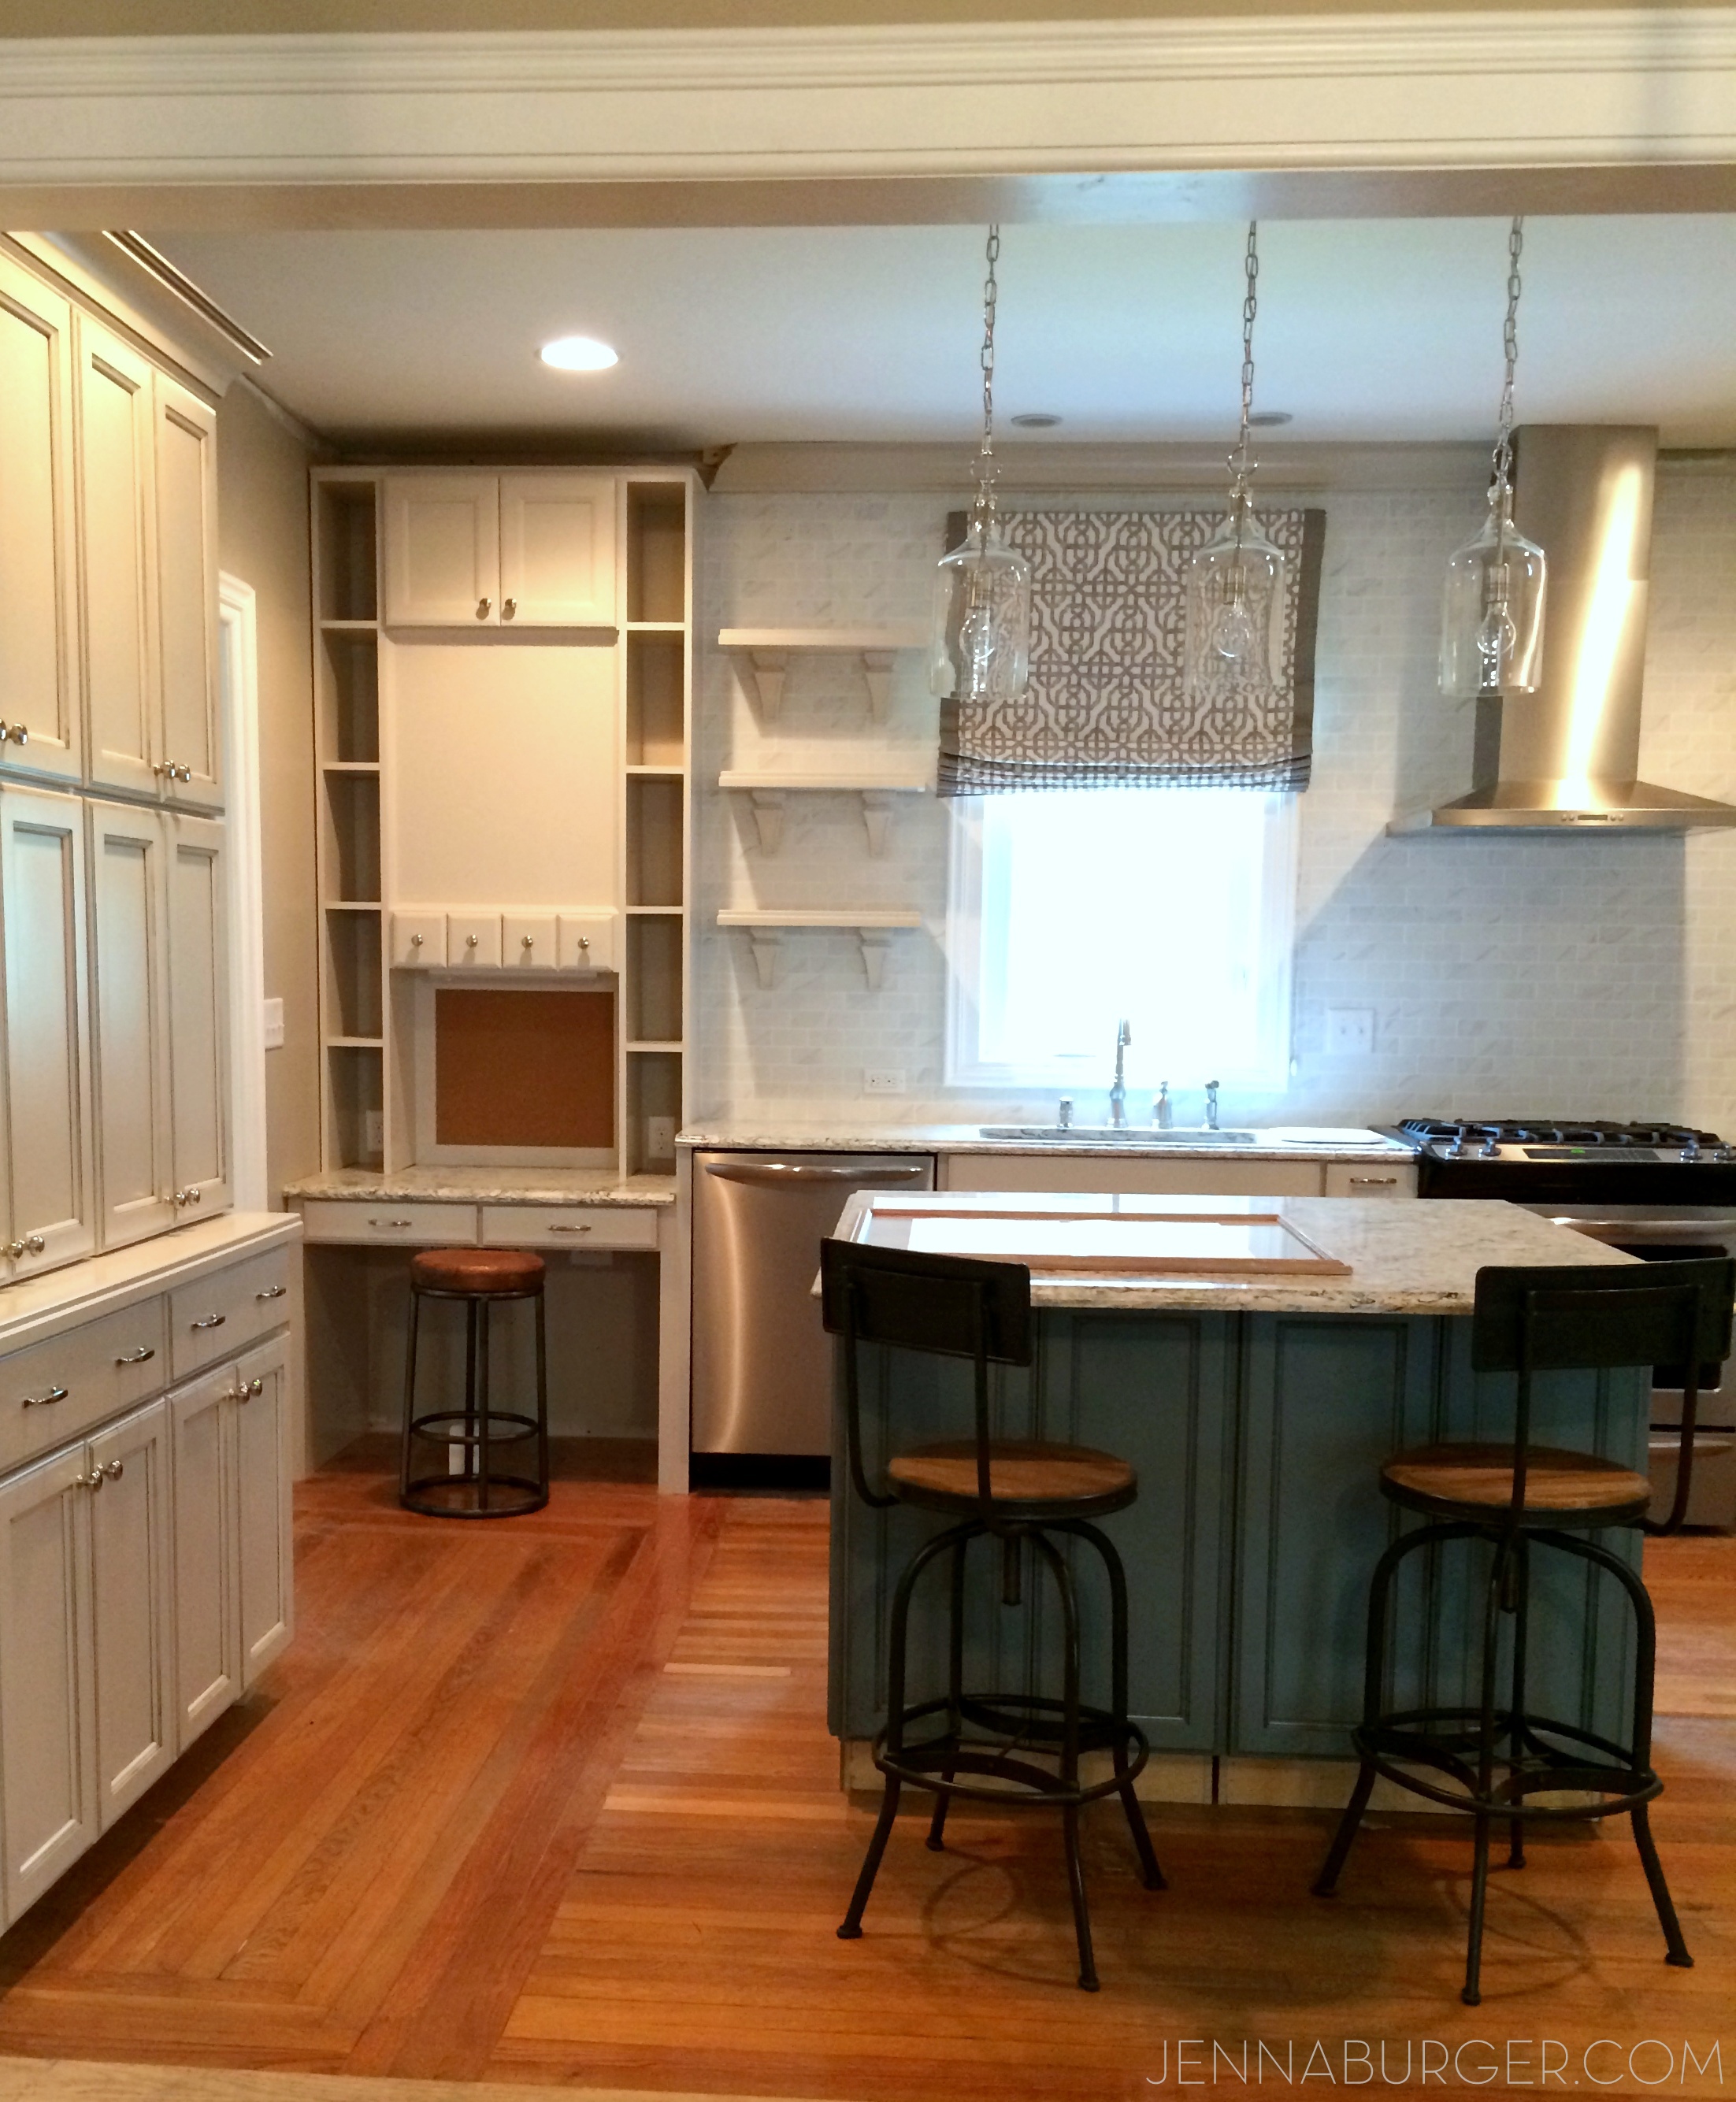
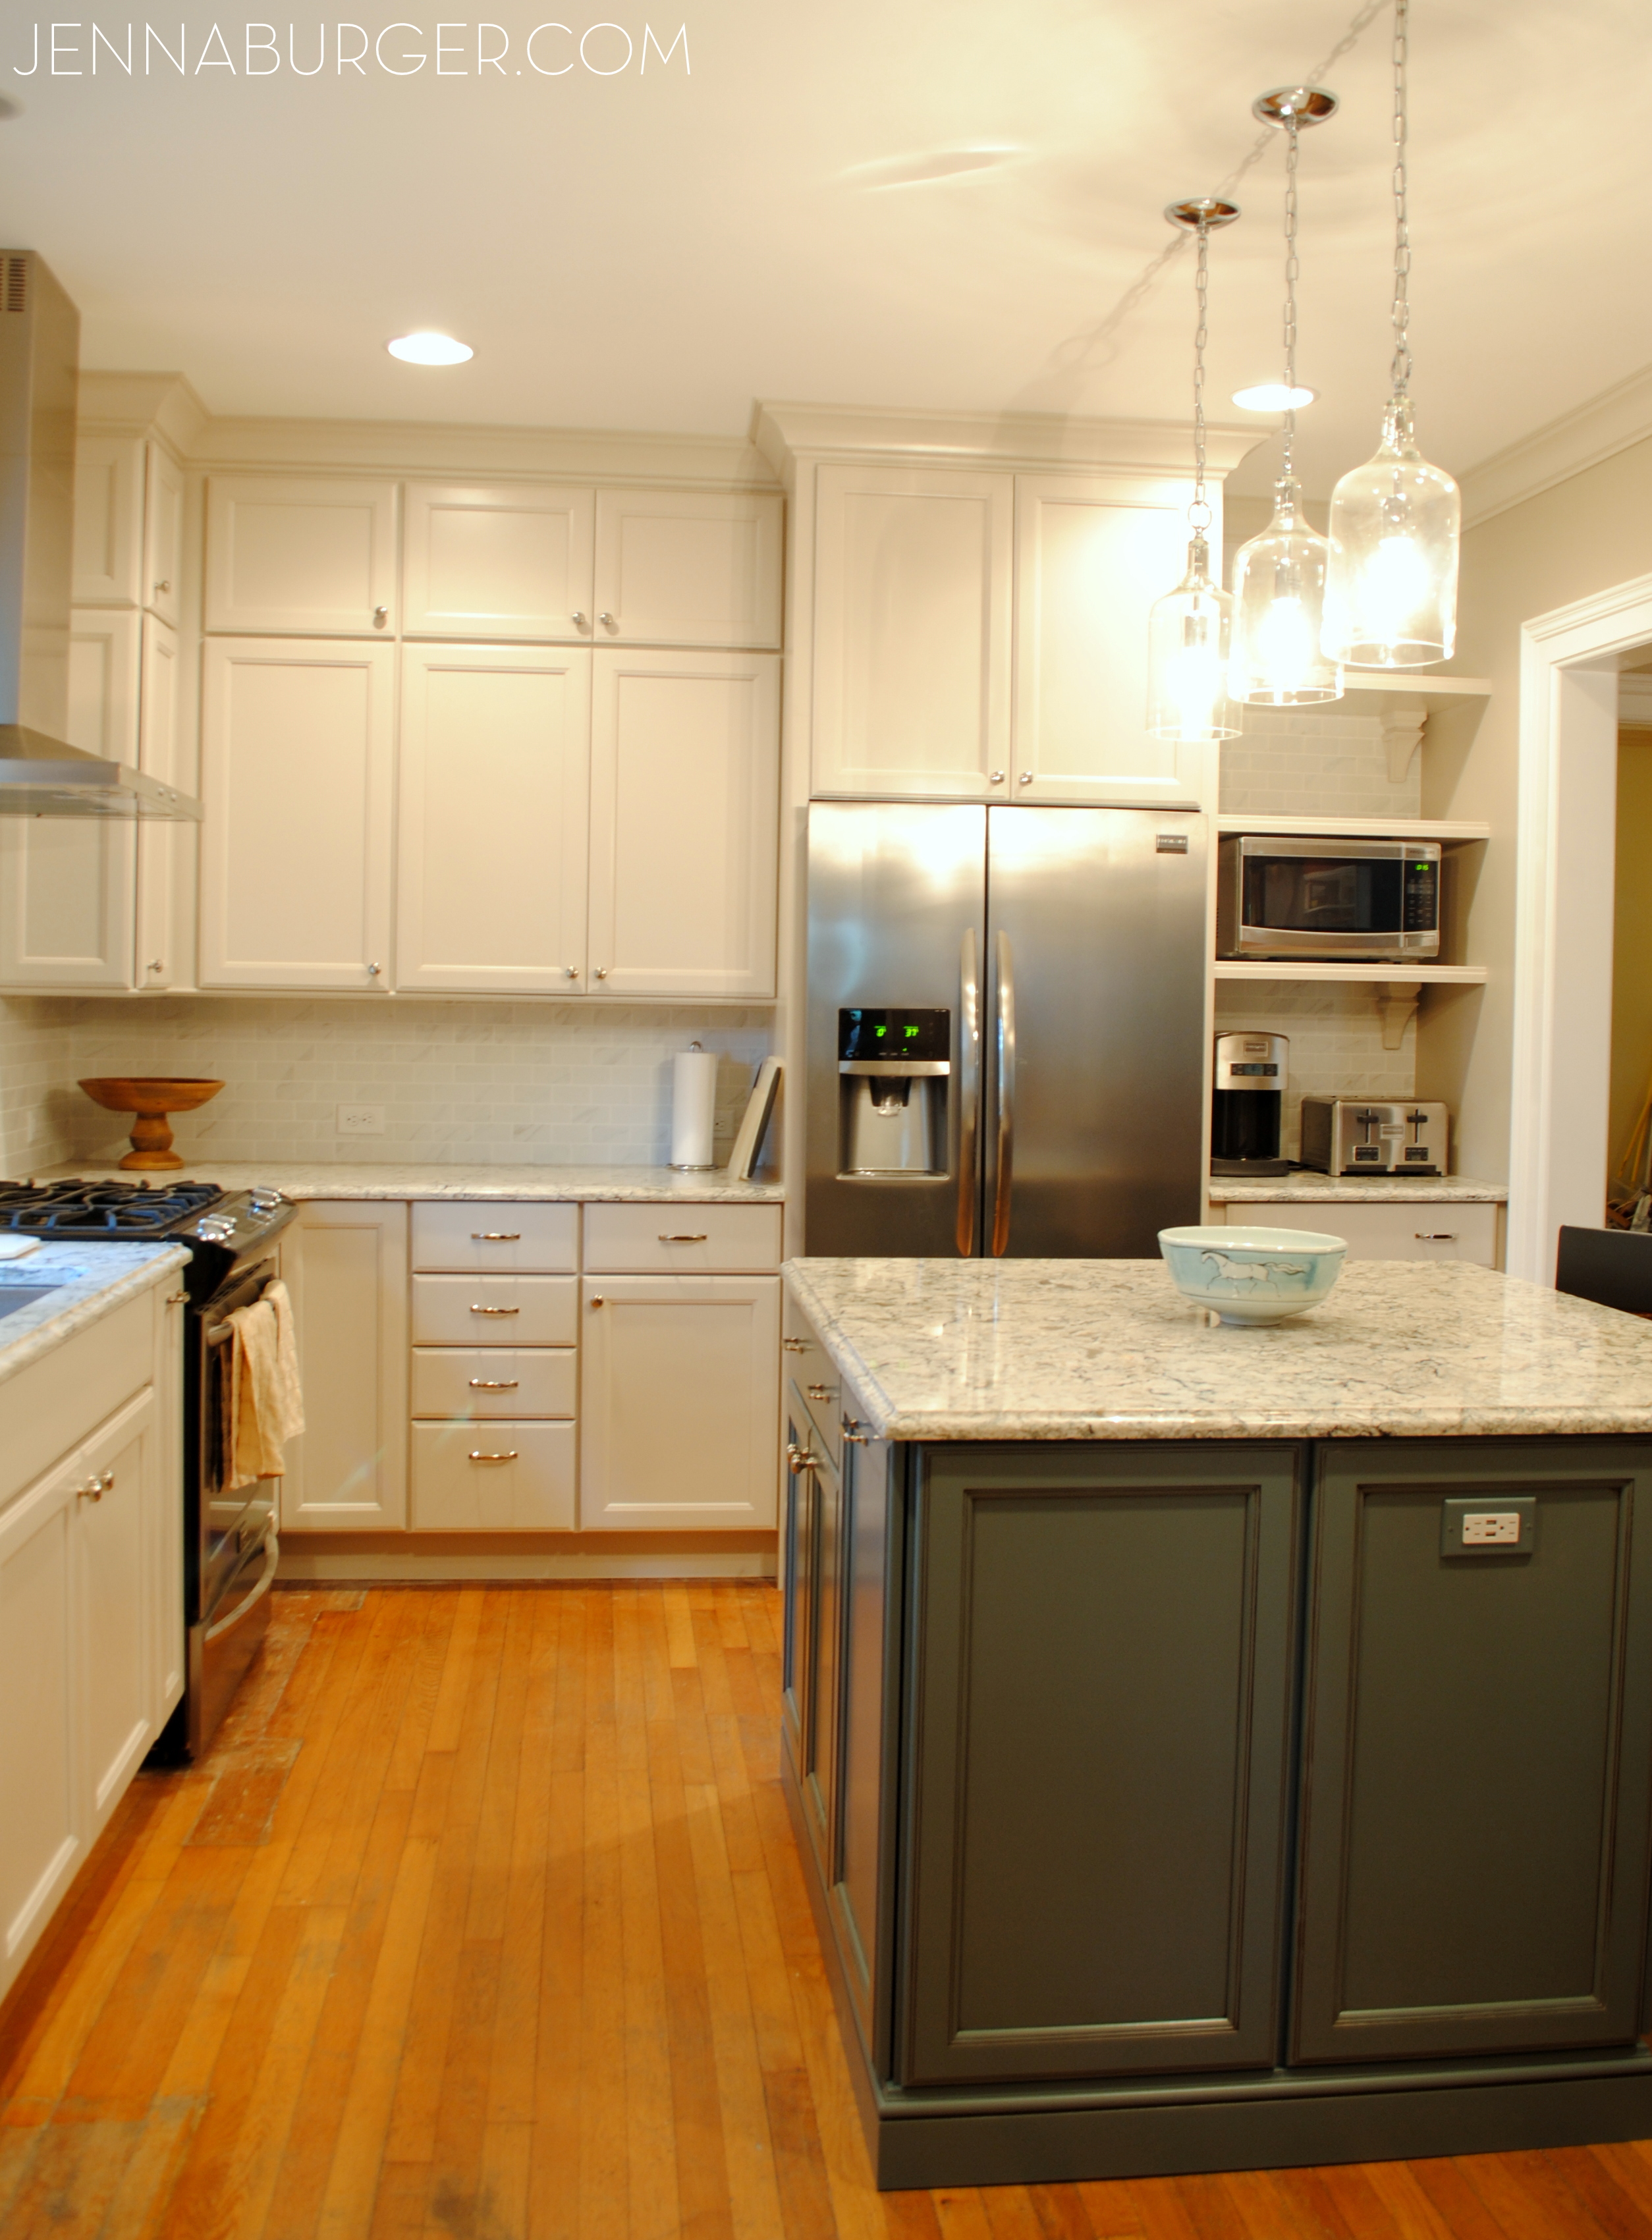
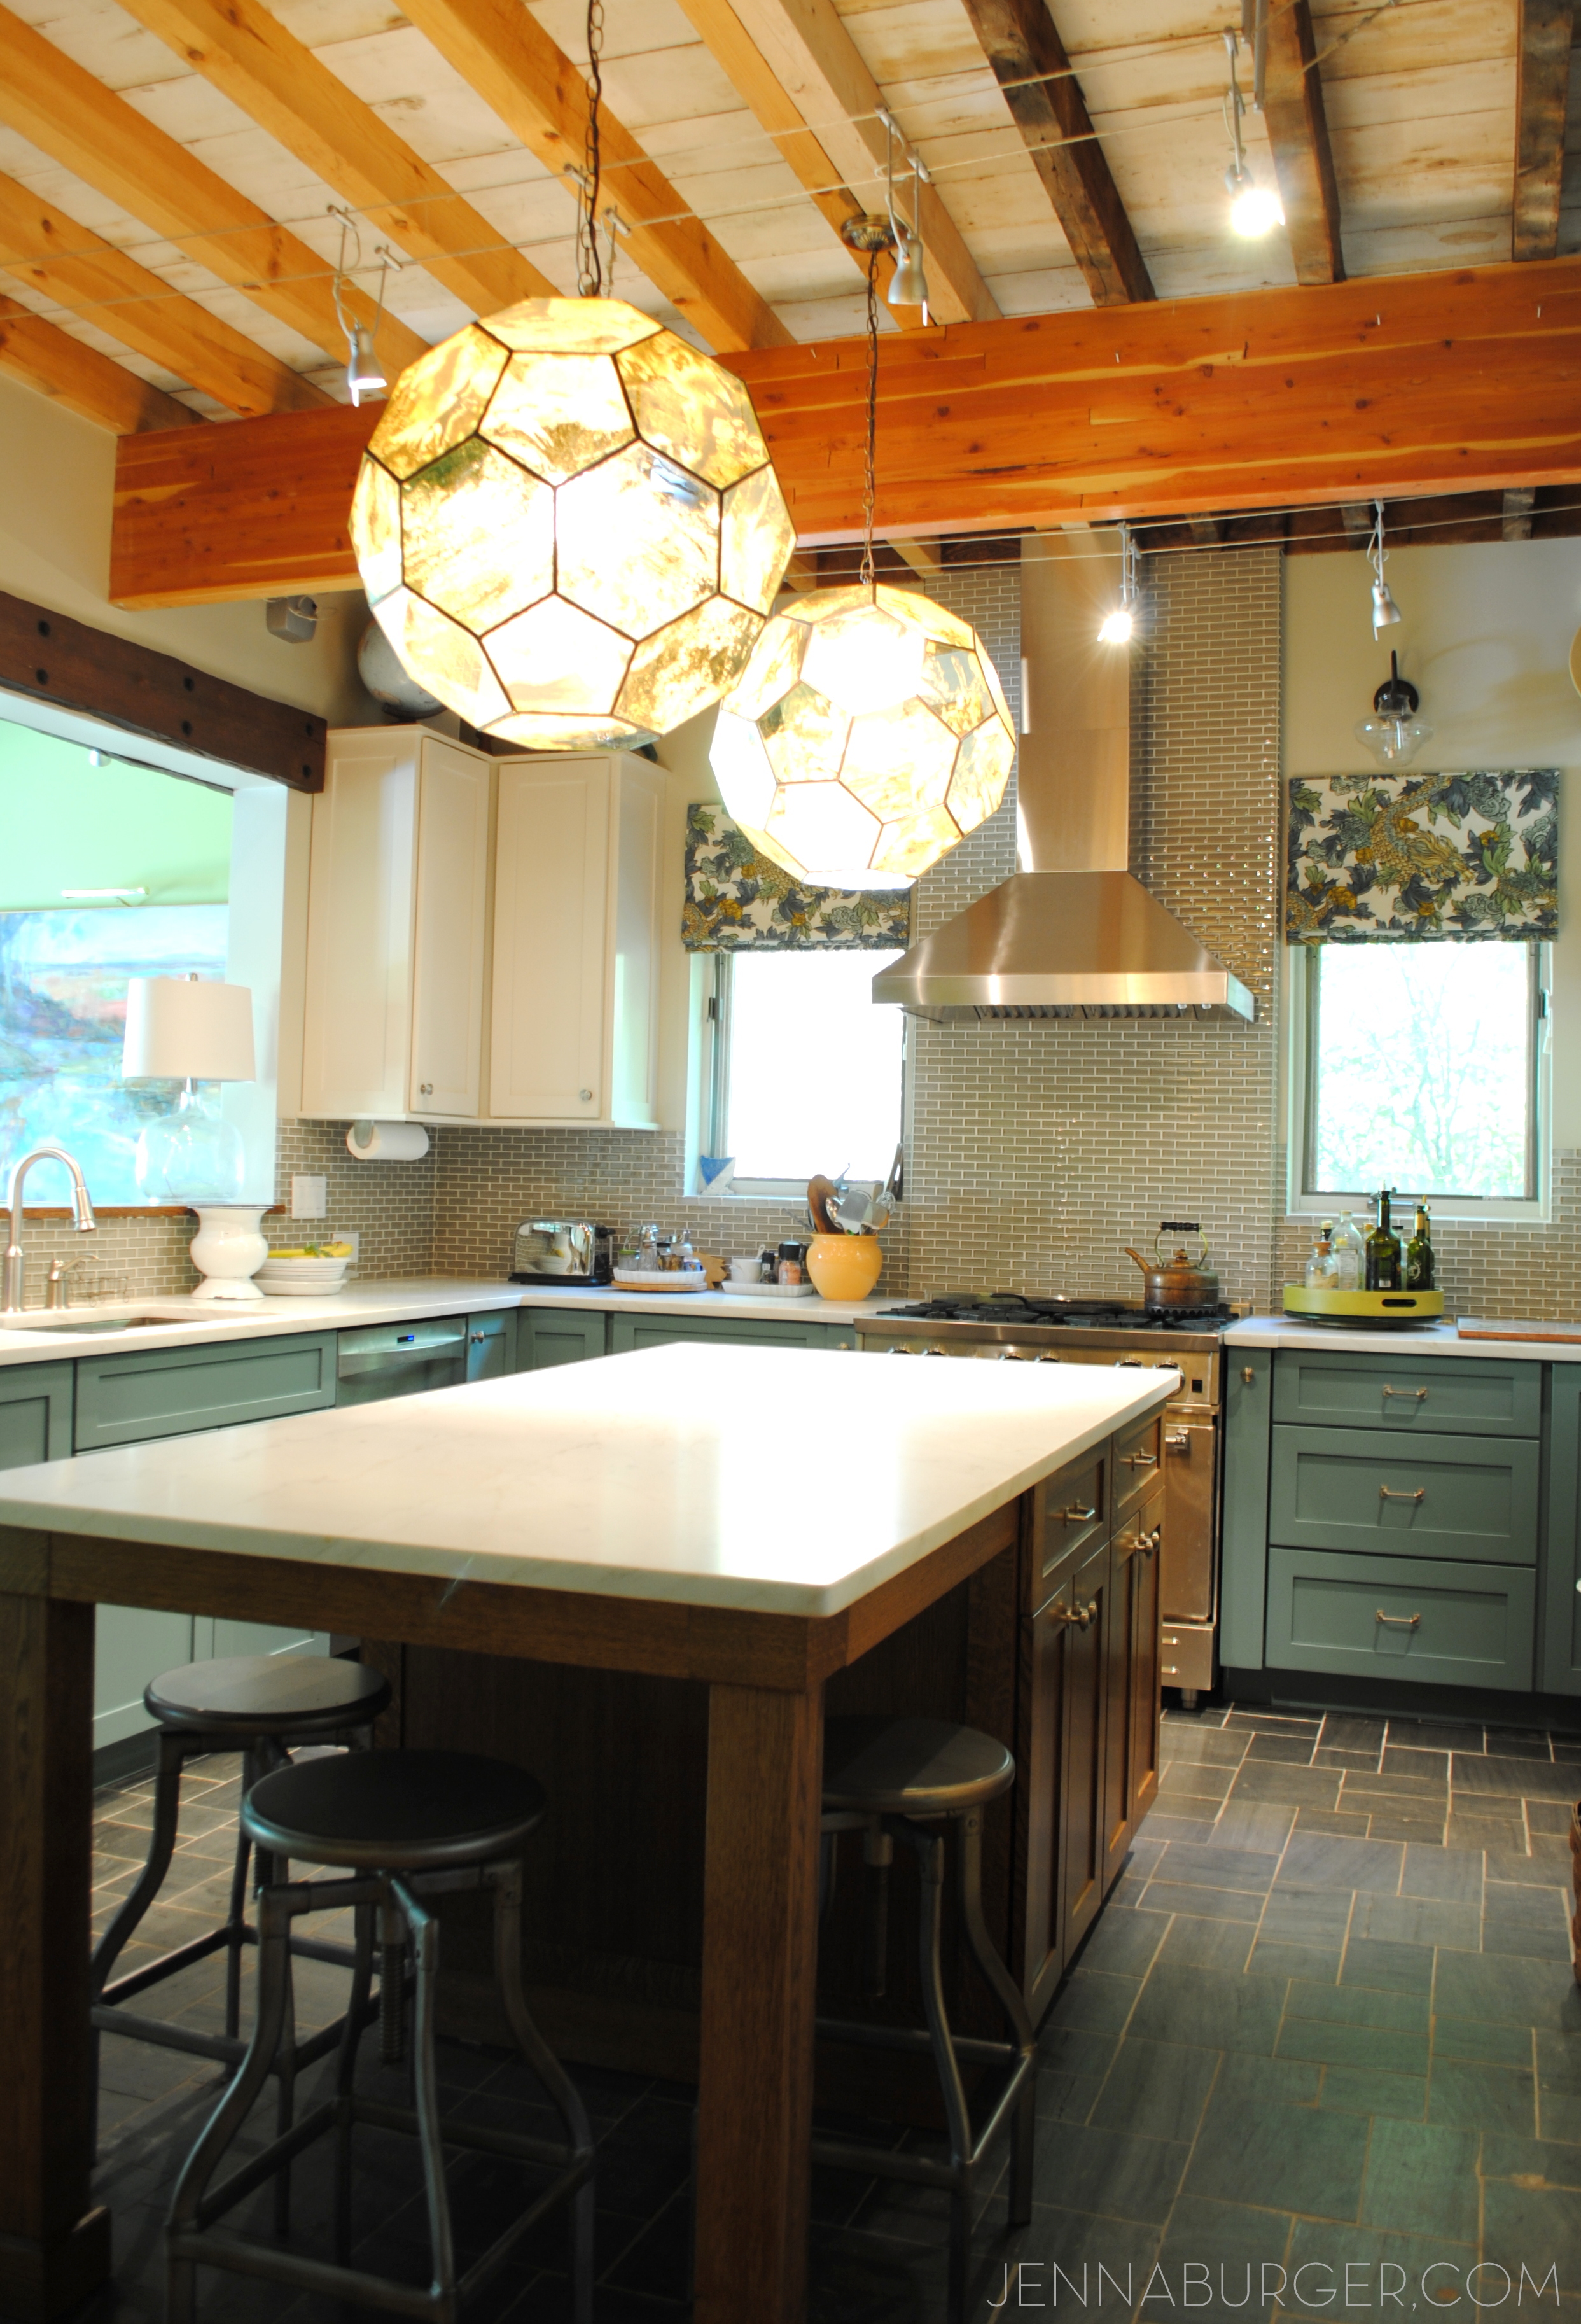
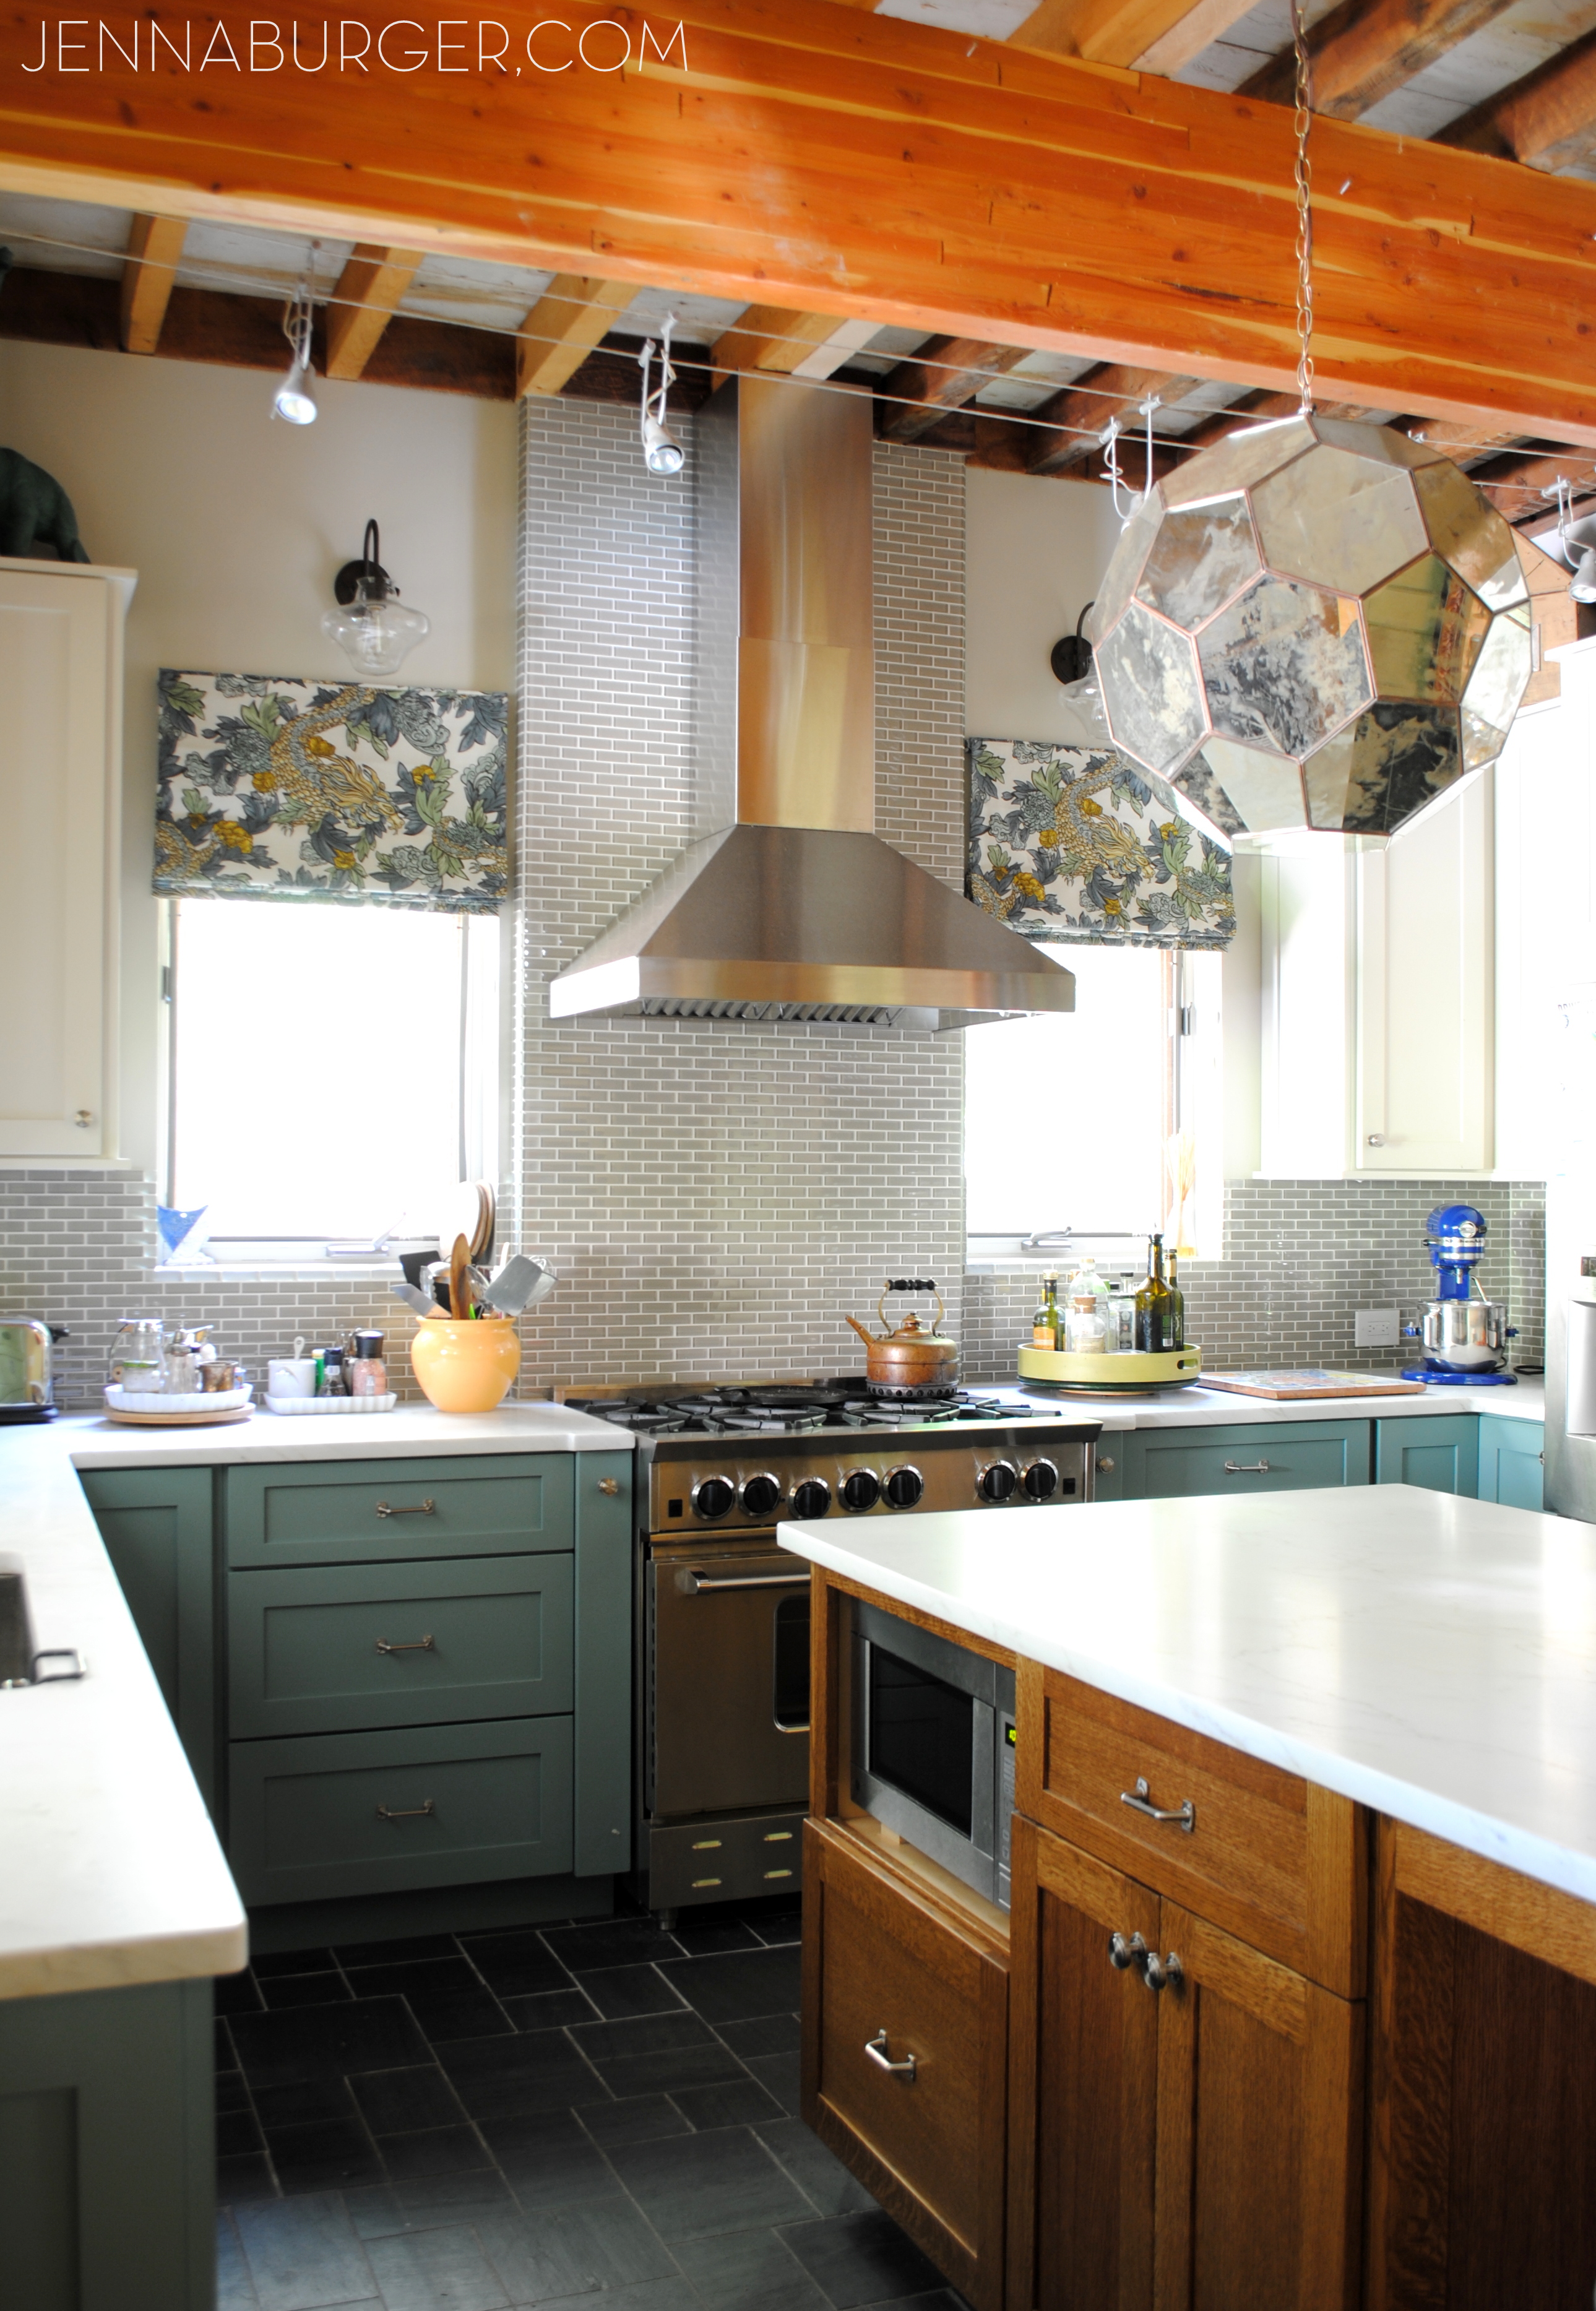
The center peninsula that made the ‘before’ kitchen like a maze was eliminated and in it’s place we decided on a big island that houses the microwave & lots of cabinetry storage. The island countertop was extended to create a seating spot for stools.

So it went from this to this…

Eclectic Kitchen + Living Room House Tour! A before & after kitchen makeover that is a MUST SEE!

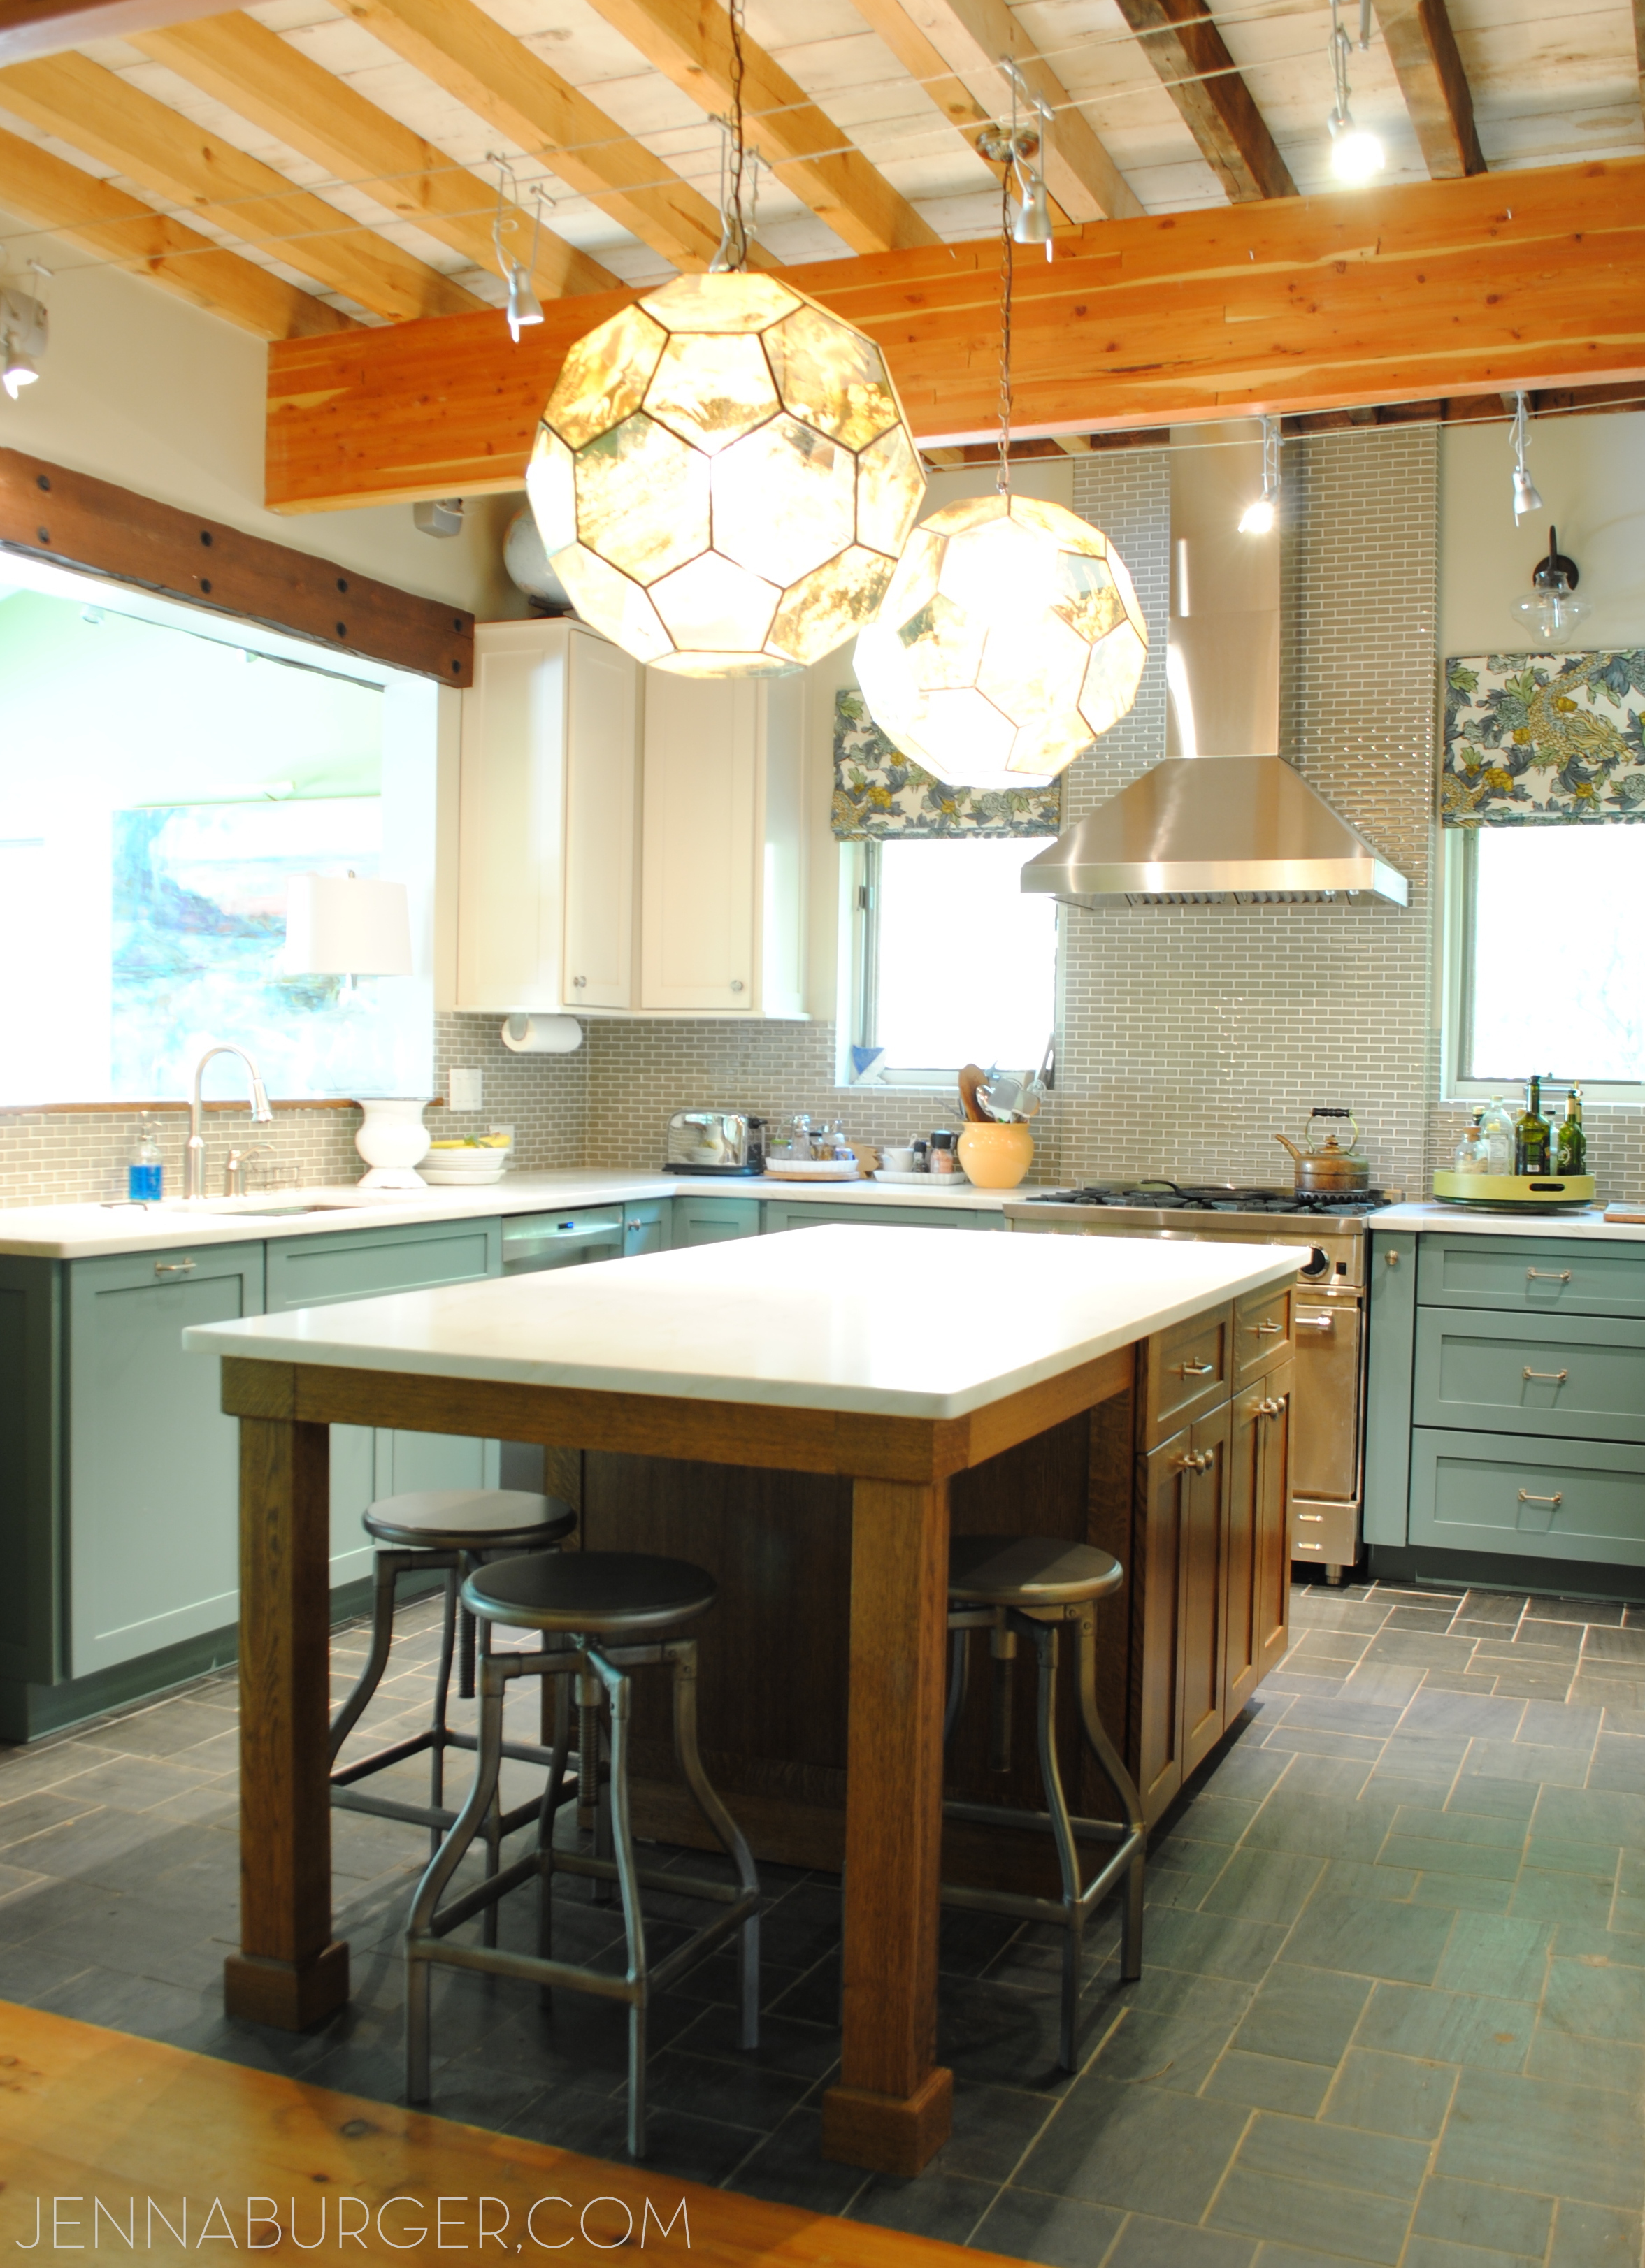
It’s difficult to even believe you are looking at the same space, pretty much from the same angle. Here are more ‘after’ shots.

the ‘after’…

Eclectic Kitchen + Living Room House Tour! A before & after kitchen makeover that is a MUST SEE!

Eclectic Kitchen + Living Room House Tour! A before & after kitchen makeover that is a MUST SEE!

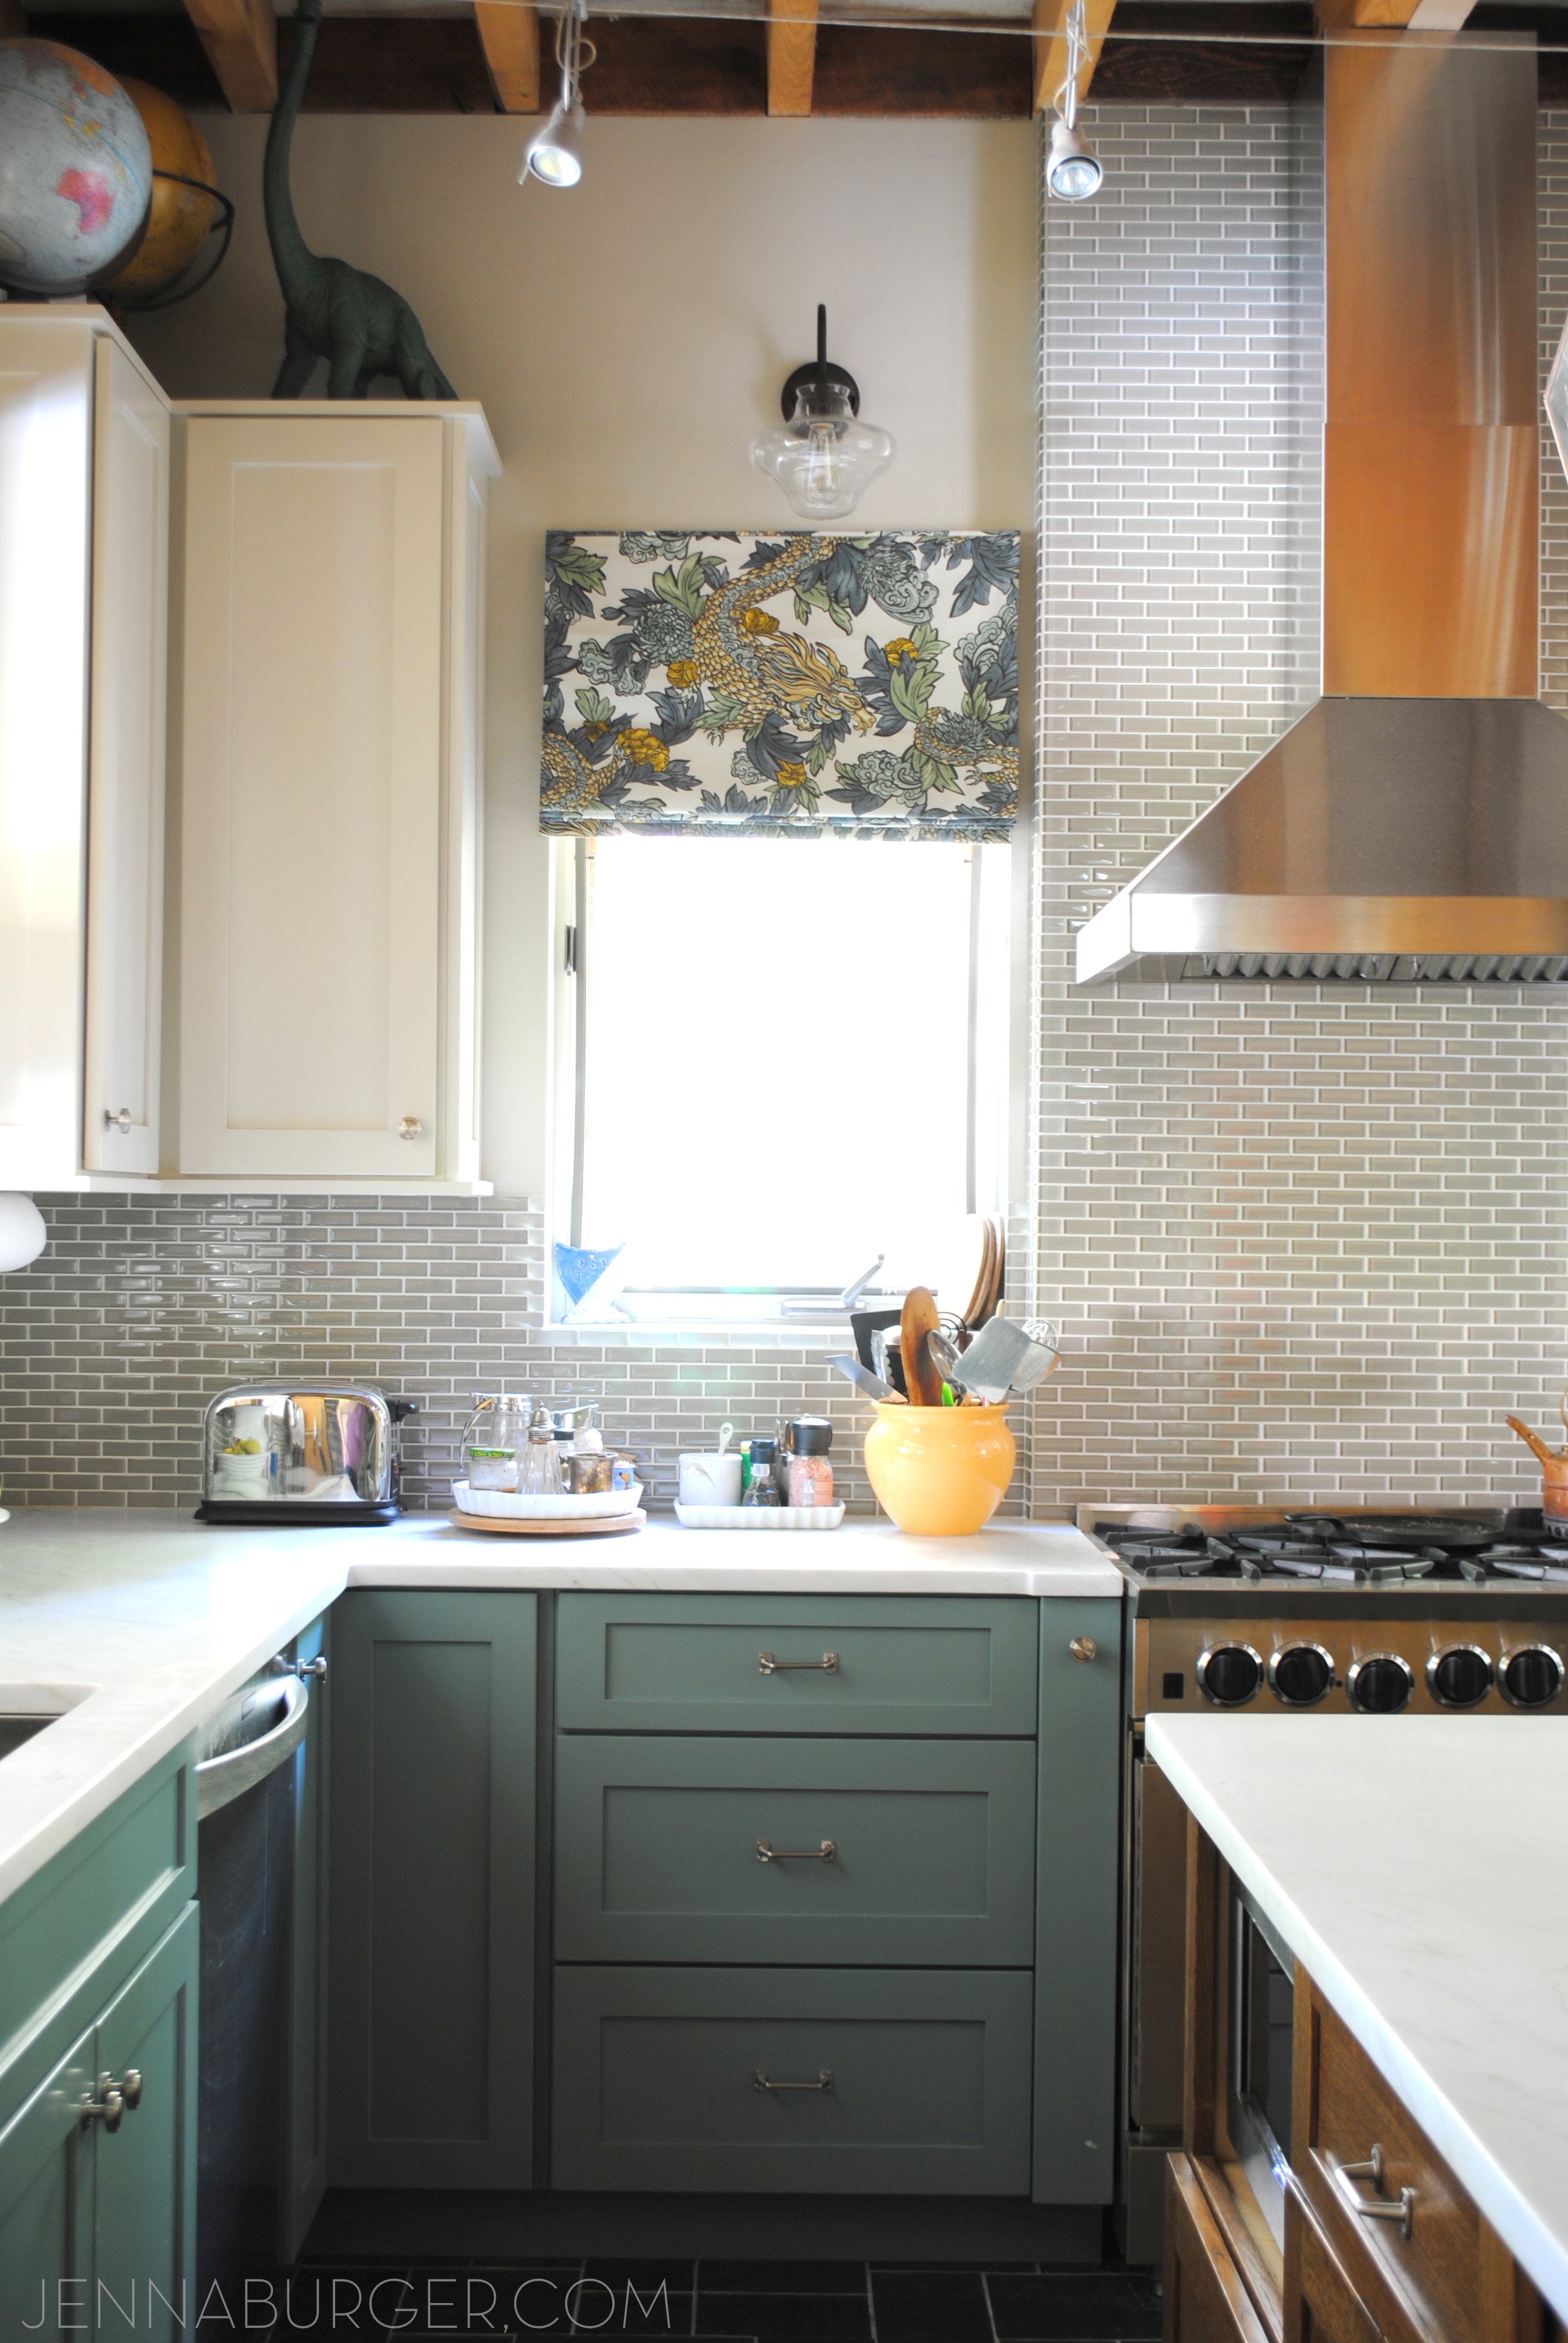
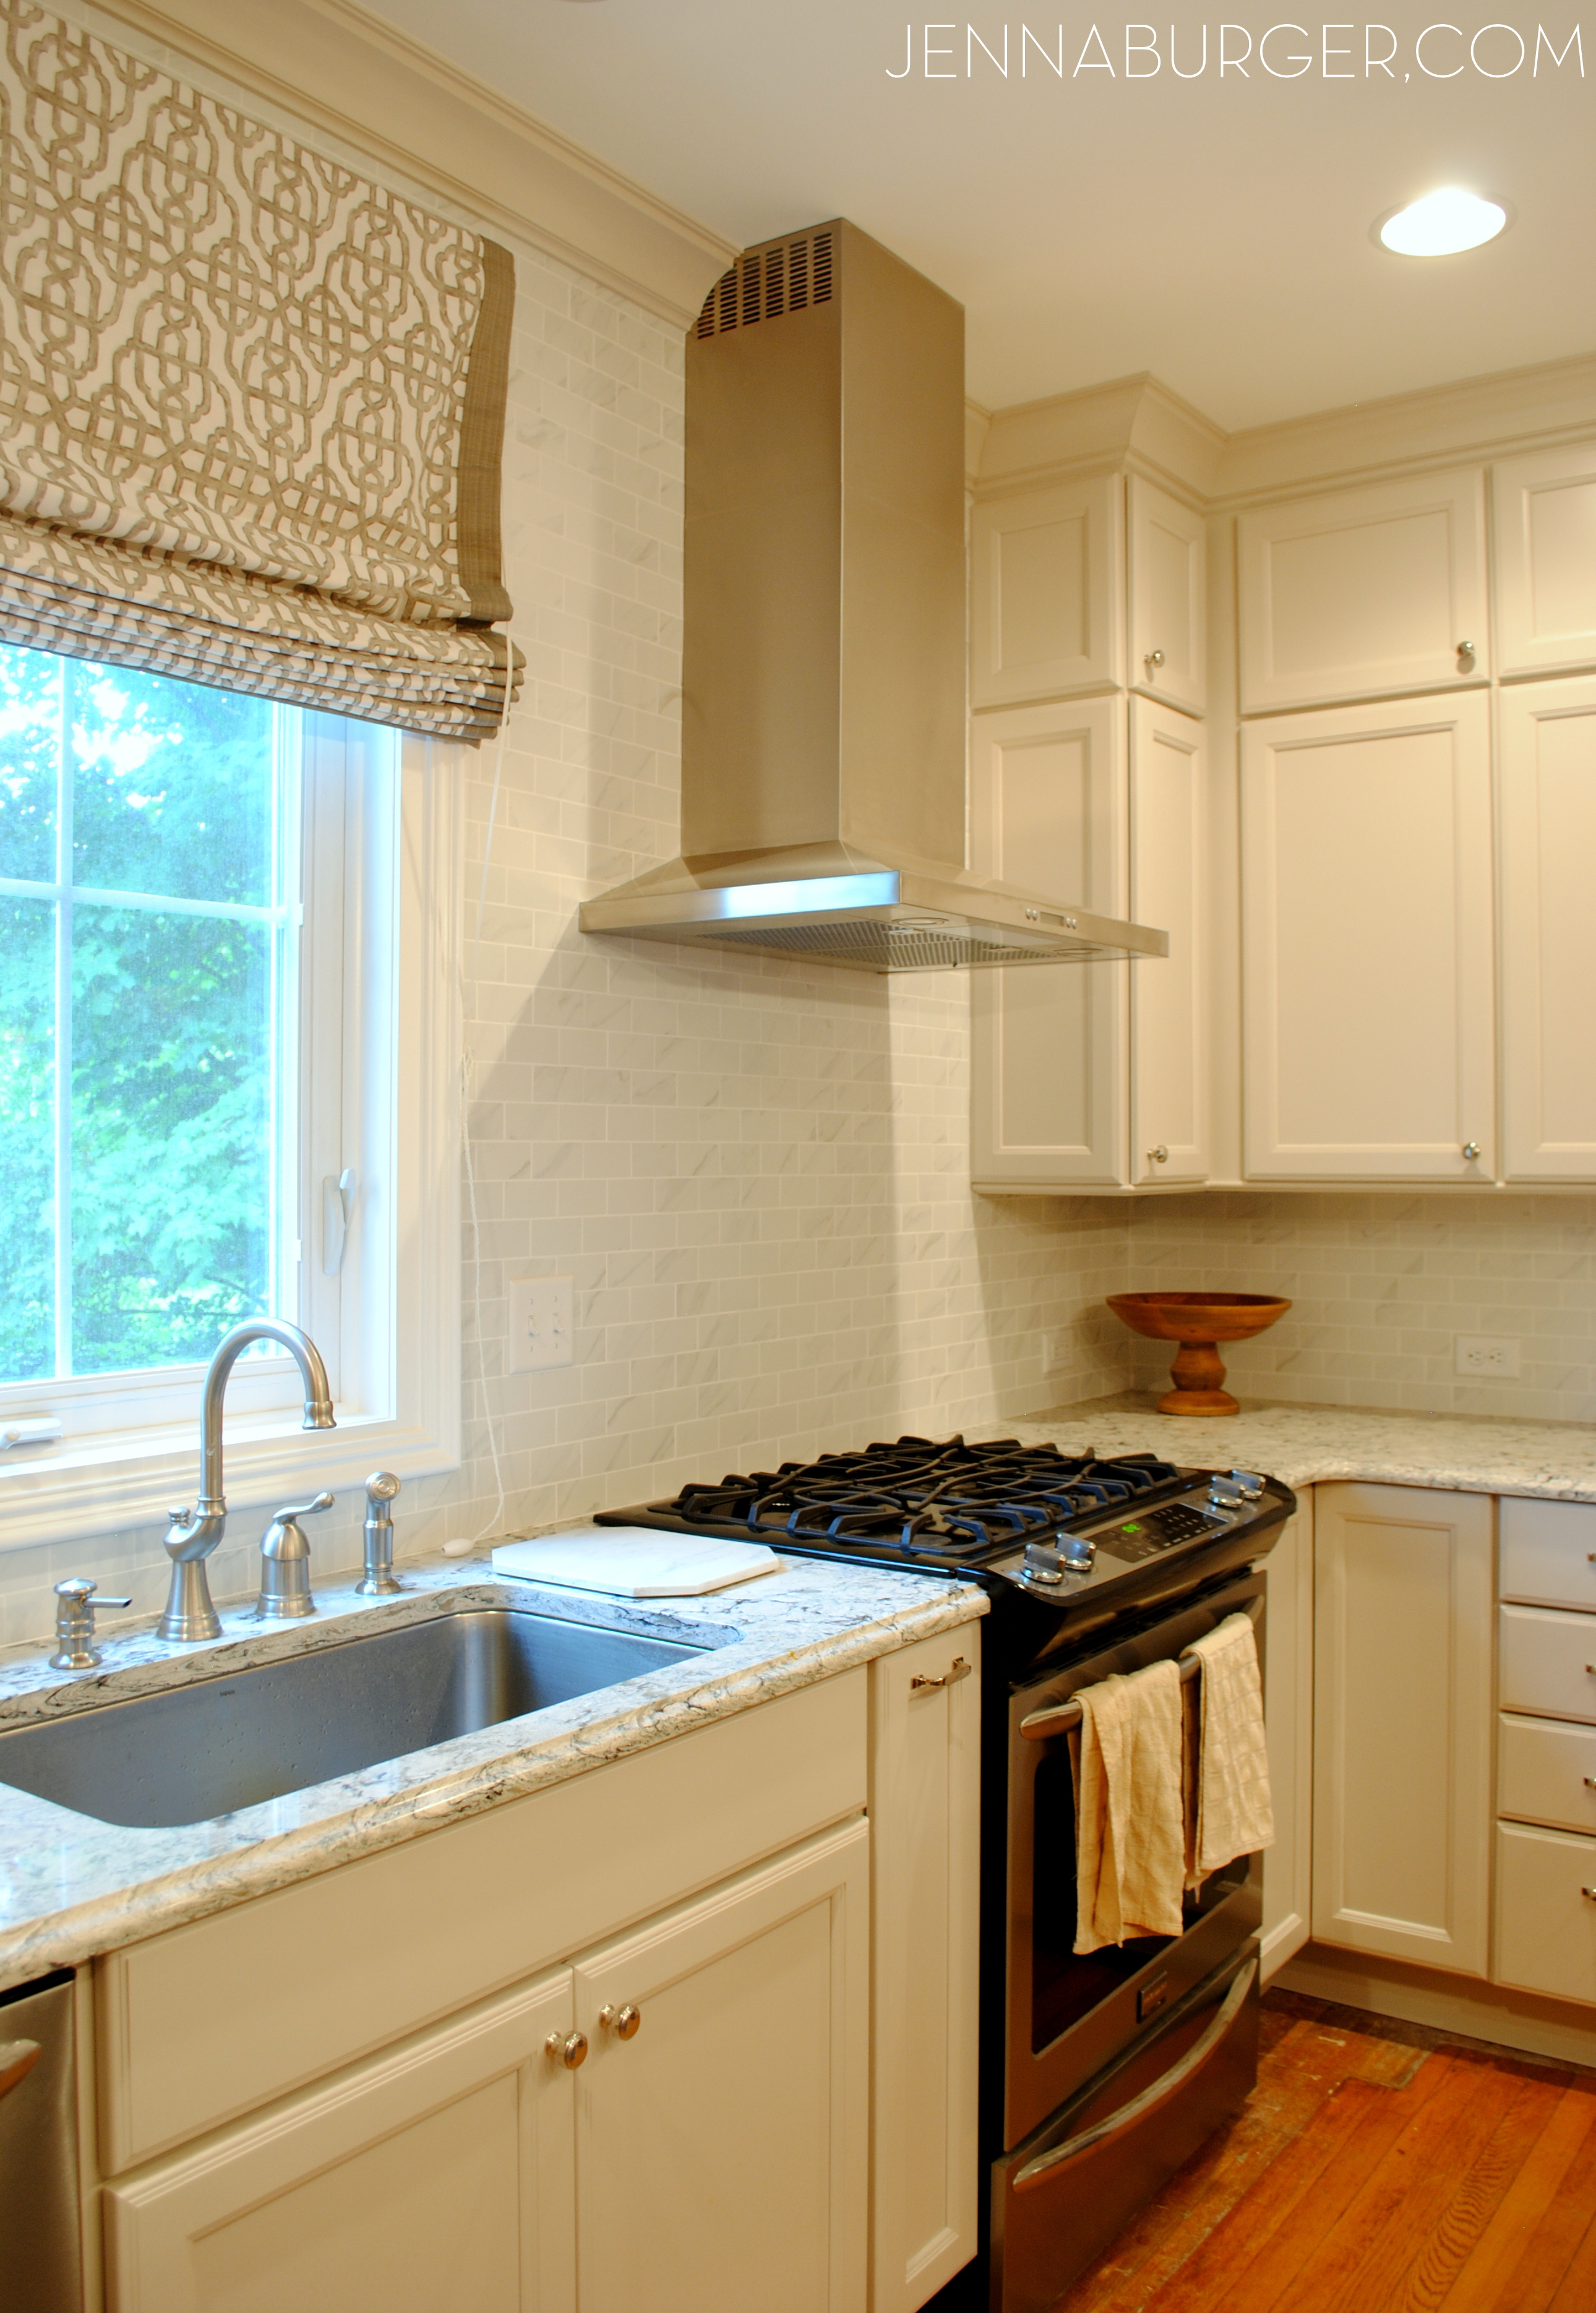
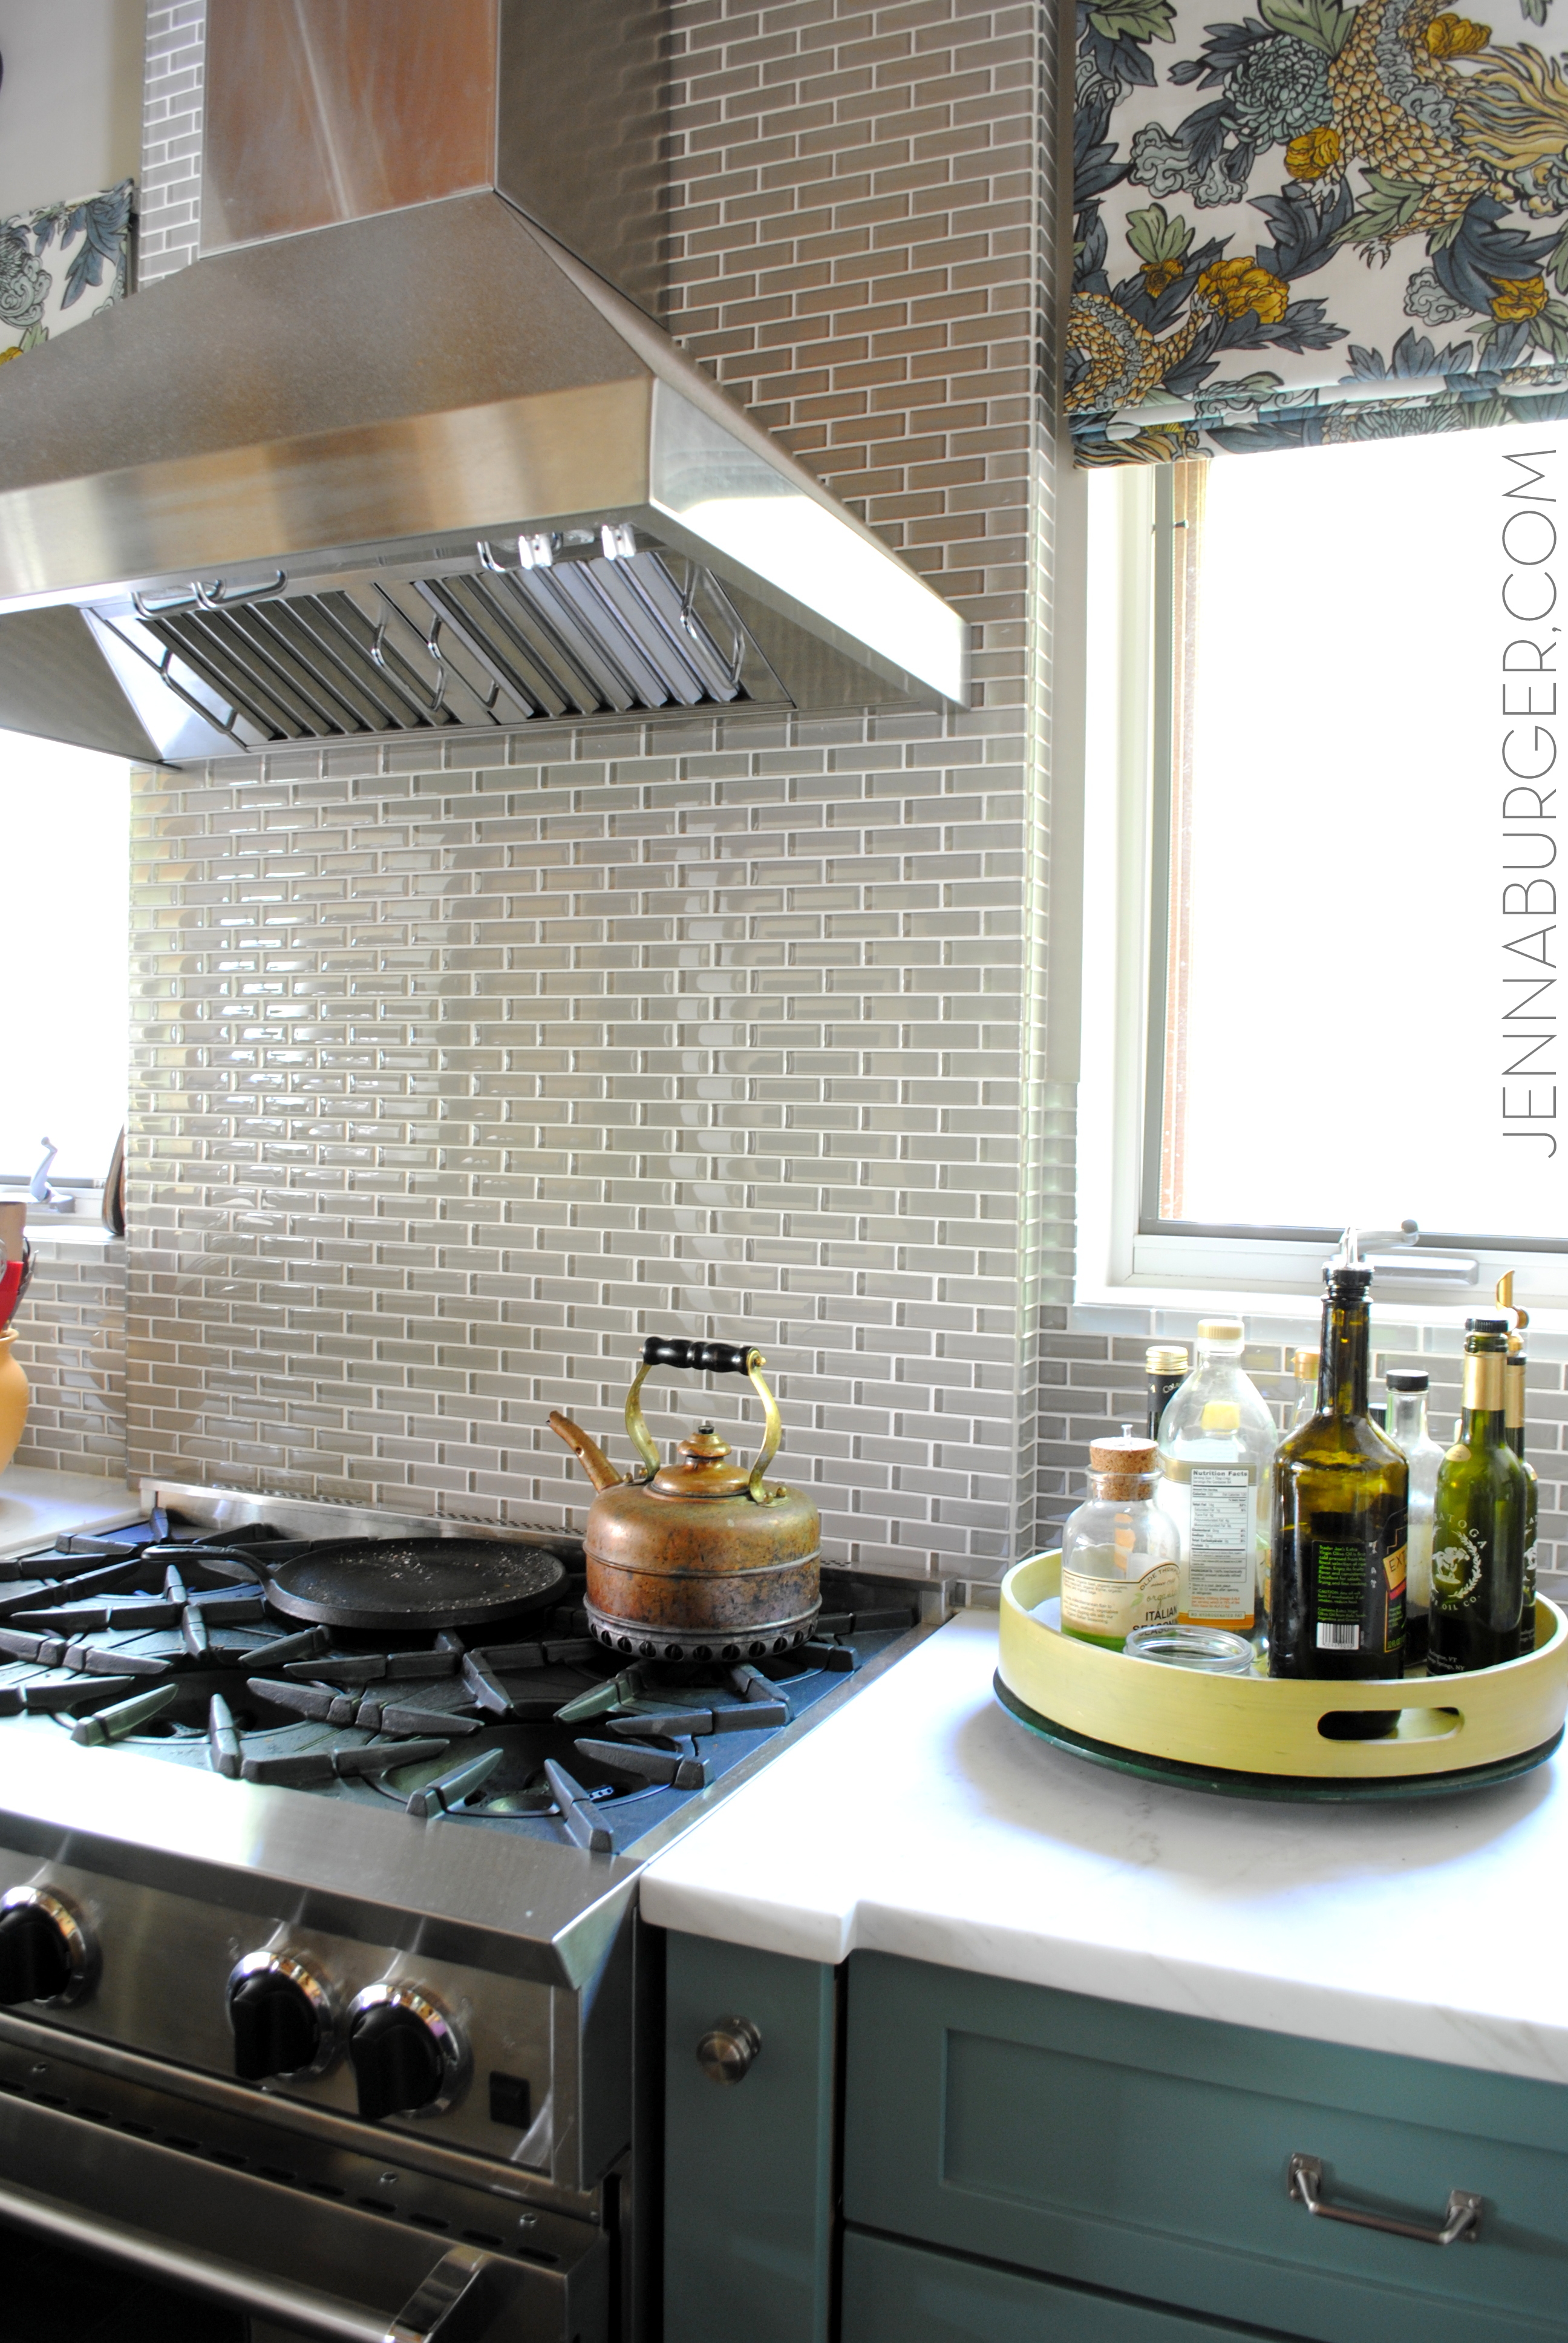
A smaller sized rectangular glass tile in a gray/blue hue was chosen for the backsplash and continues up to the ceiling behind the hood. The section of wall behind the commercial-style range + hood was built out about 6″ to give the wall more depth and prominence.

Eclectic Kitchen + Living Room House Tour! A before & after kitchen makeover that is a MUST SEE!

New sconces were installed above the existing windows & new roman shades were hung high on the wall to give the appearance of a taller window.

It is incredible how much brighter this space is with the lighter hues on the walls + cabinetry & the new larger opening.

Eclectic Kitchen + Living Room House Tour! A before & after kitchen makeover that is a MUST SEE!

Eclectic Kitchen + Living Room House Tour! A before & after kitchen makeover that is a MUST SEE!

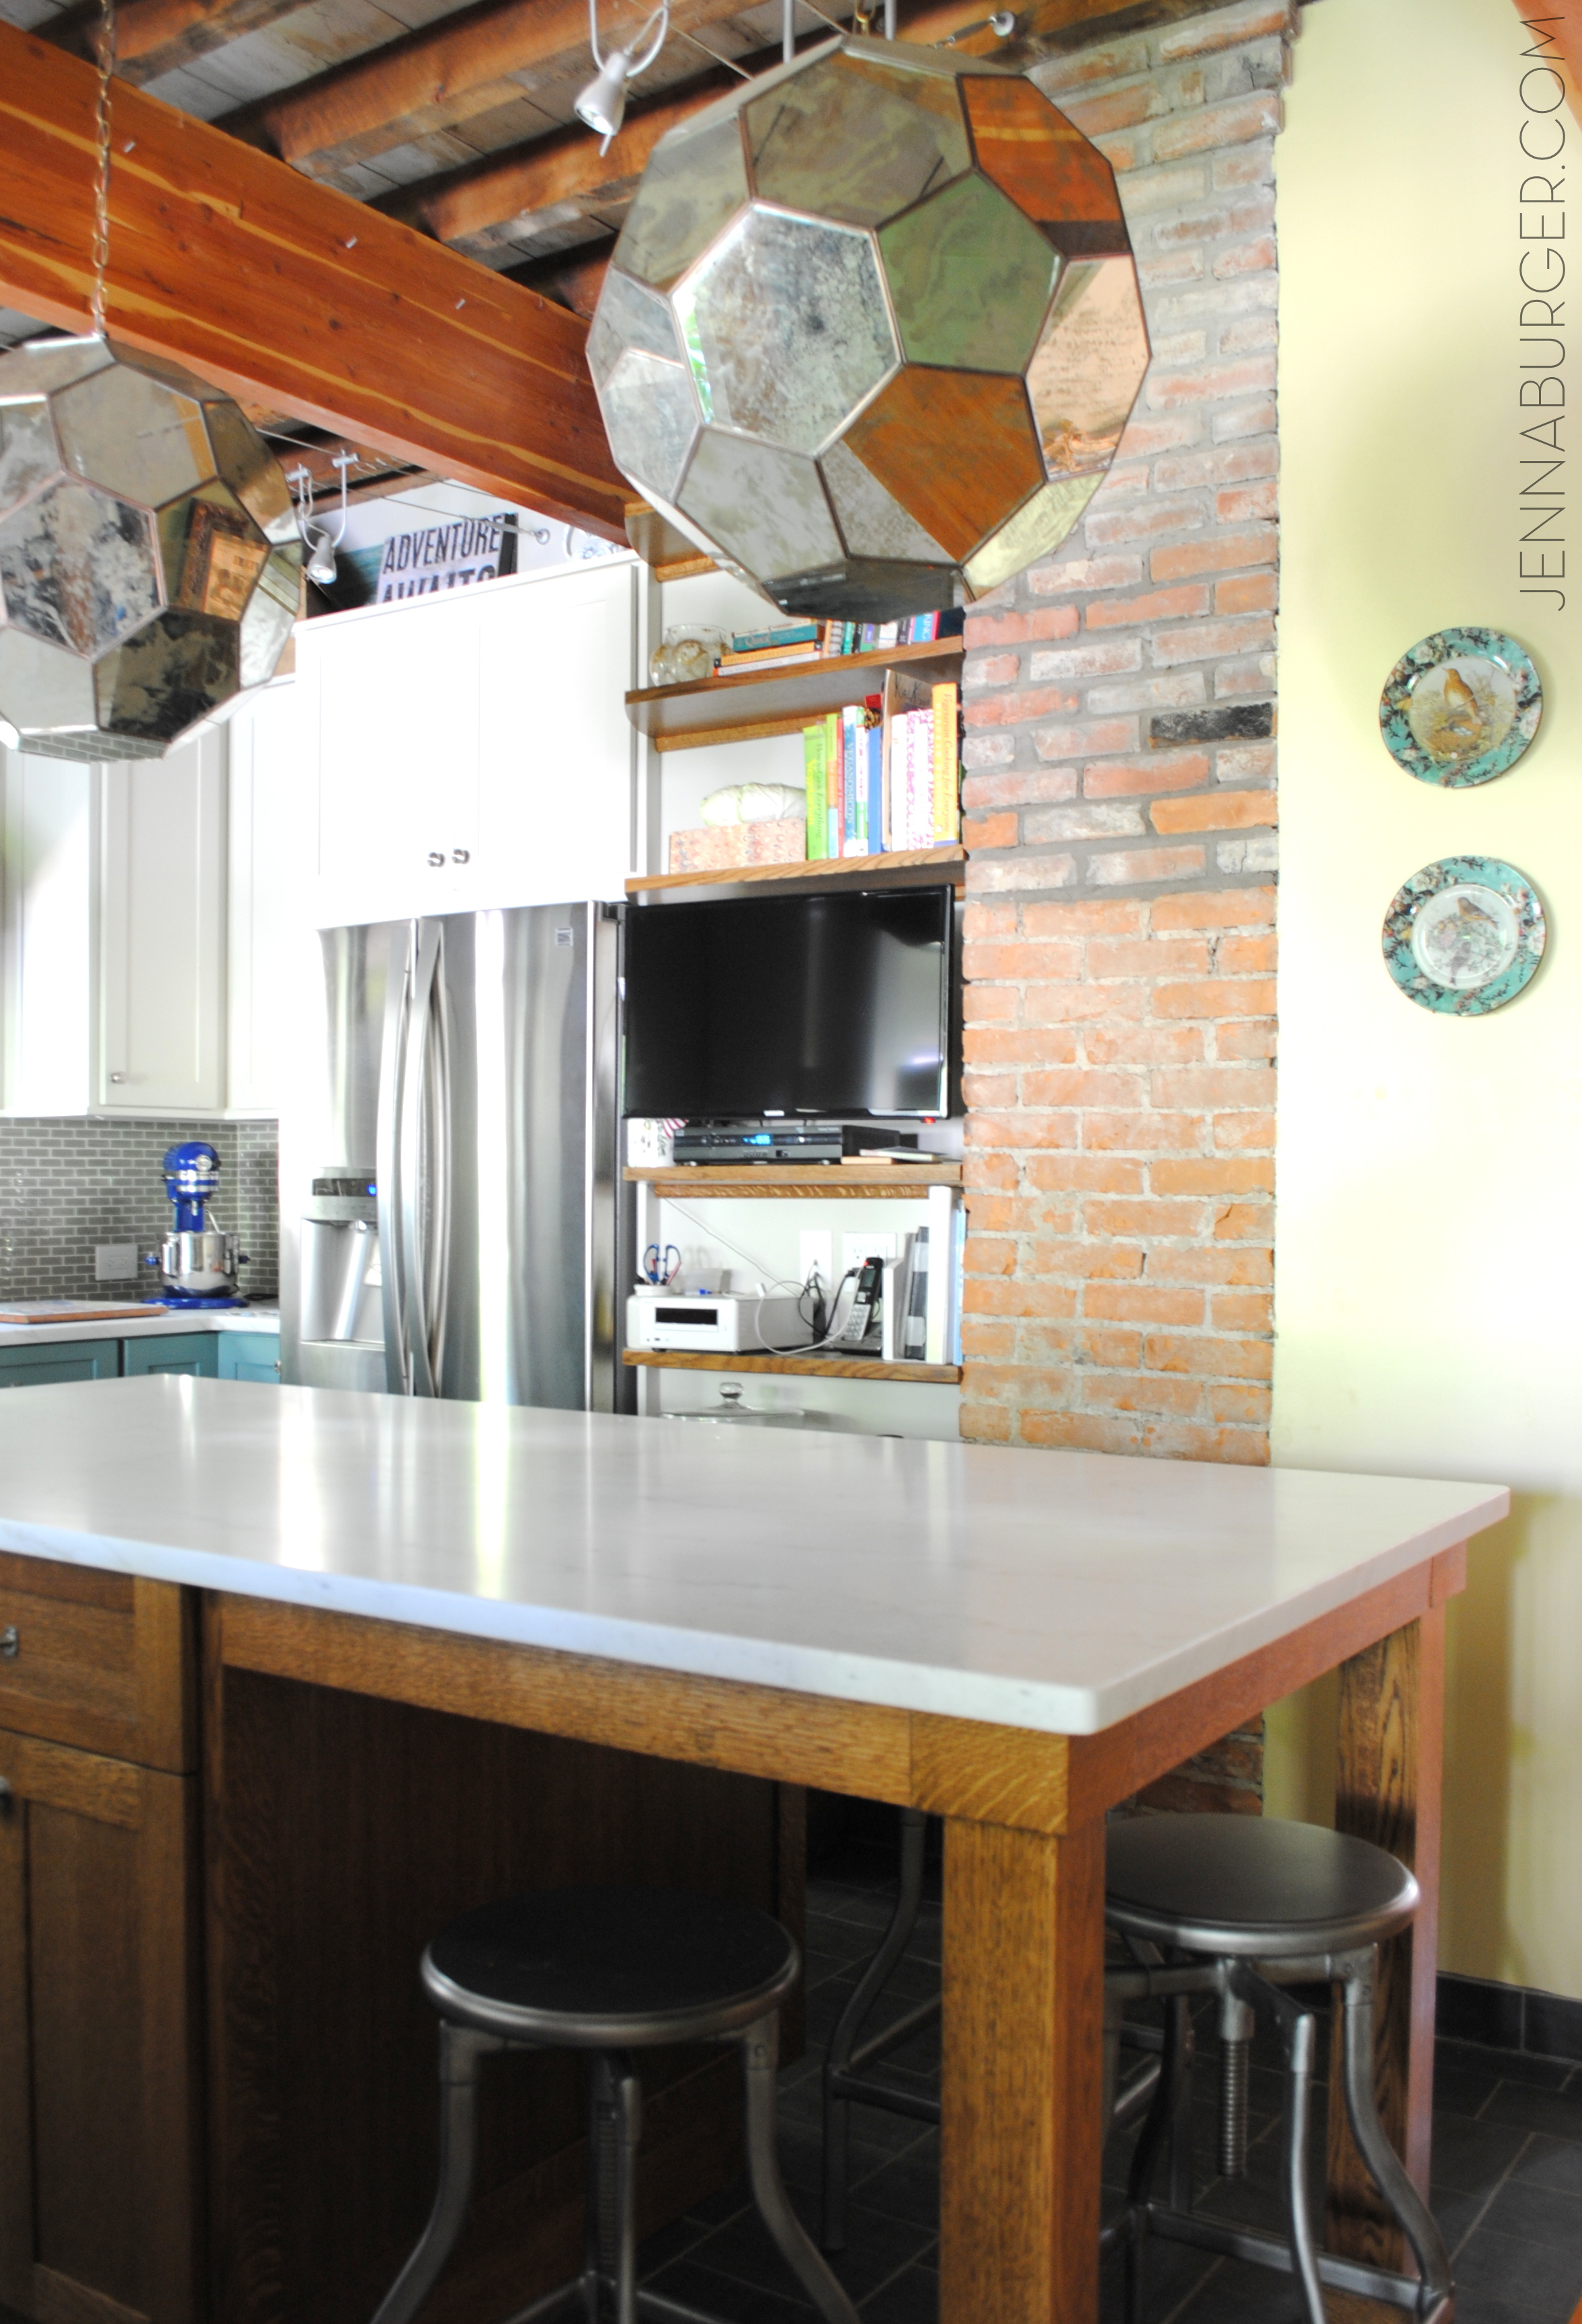
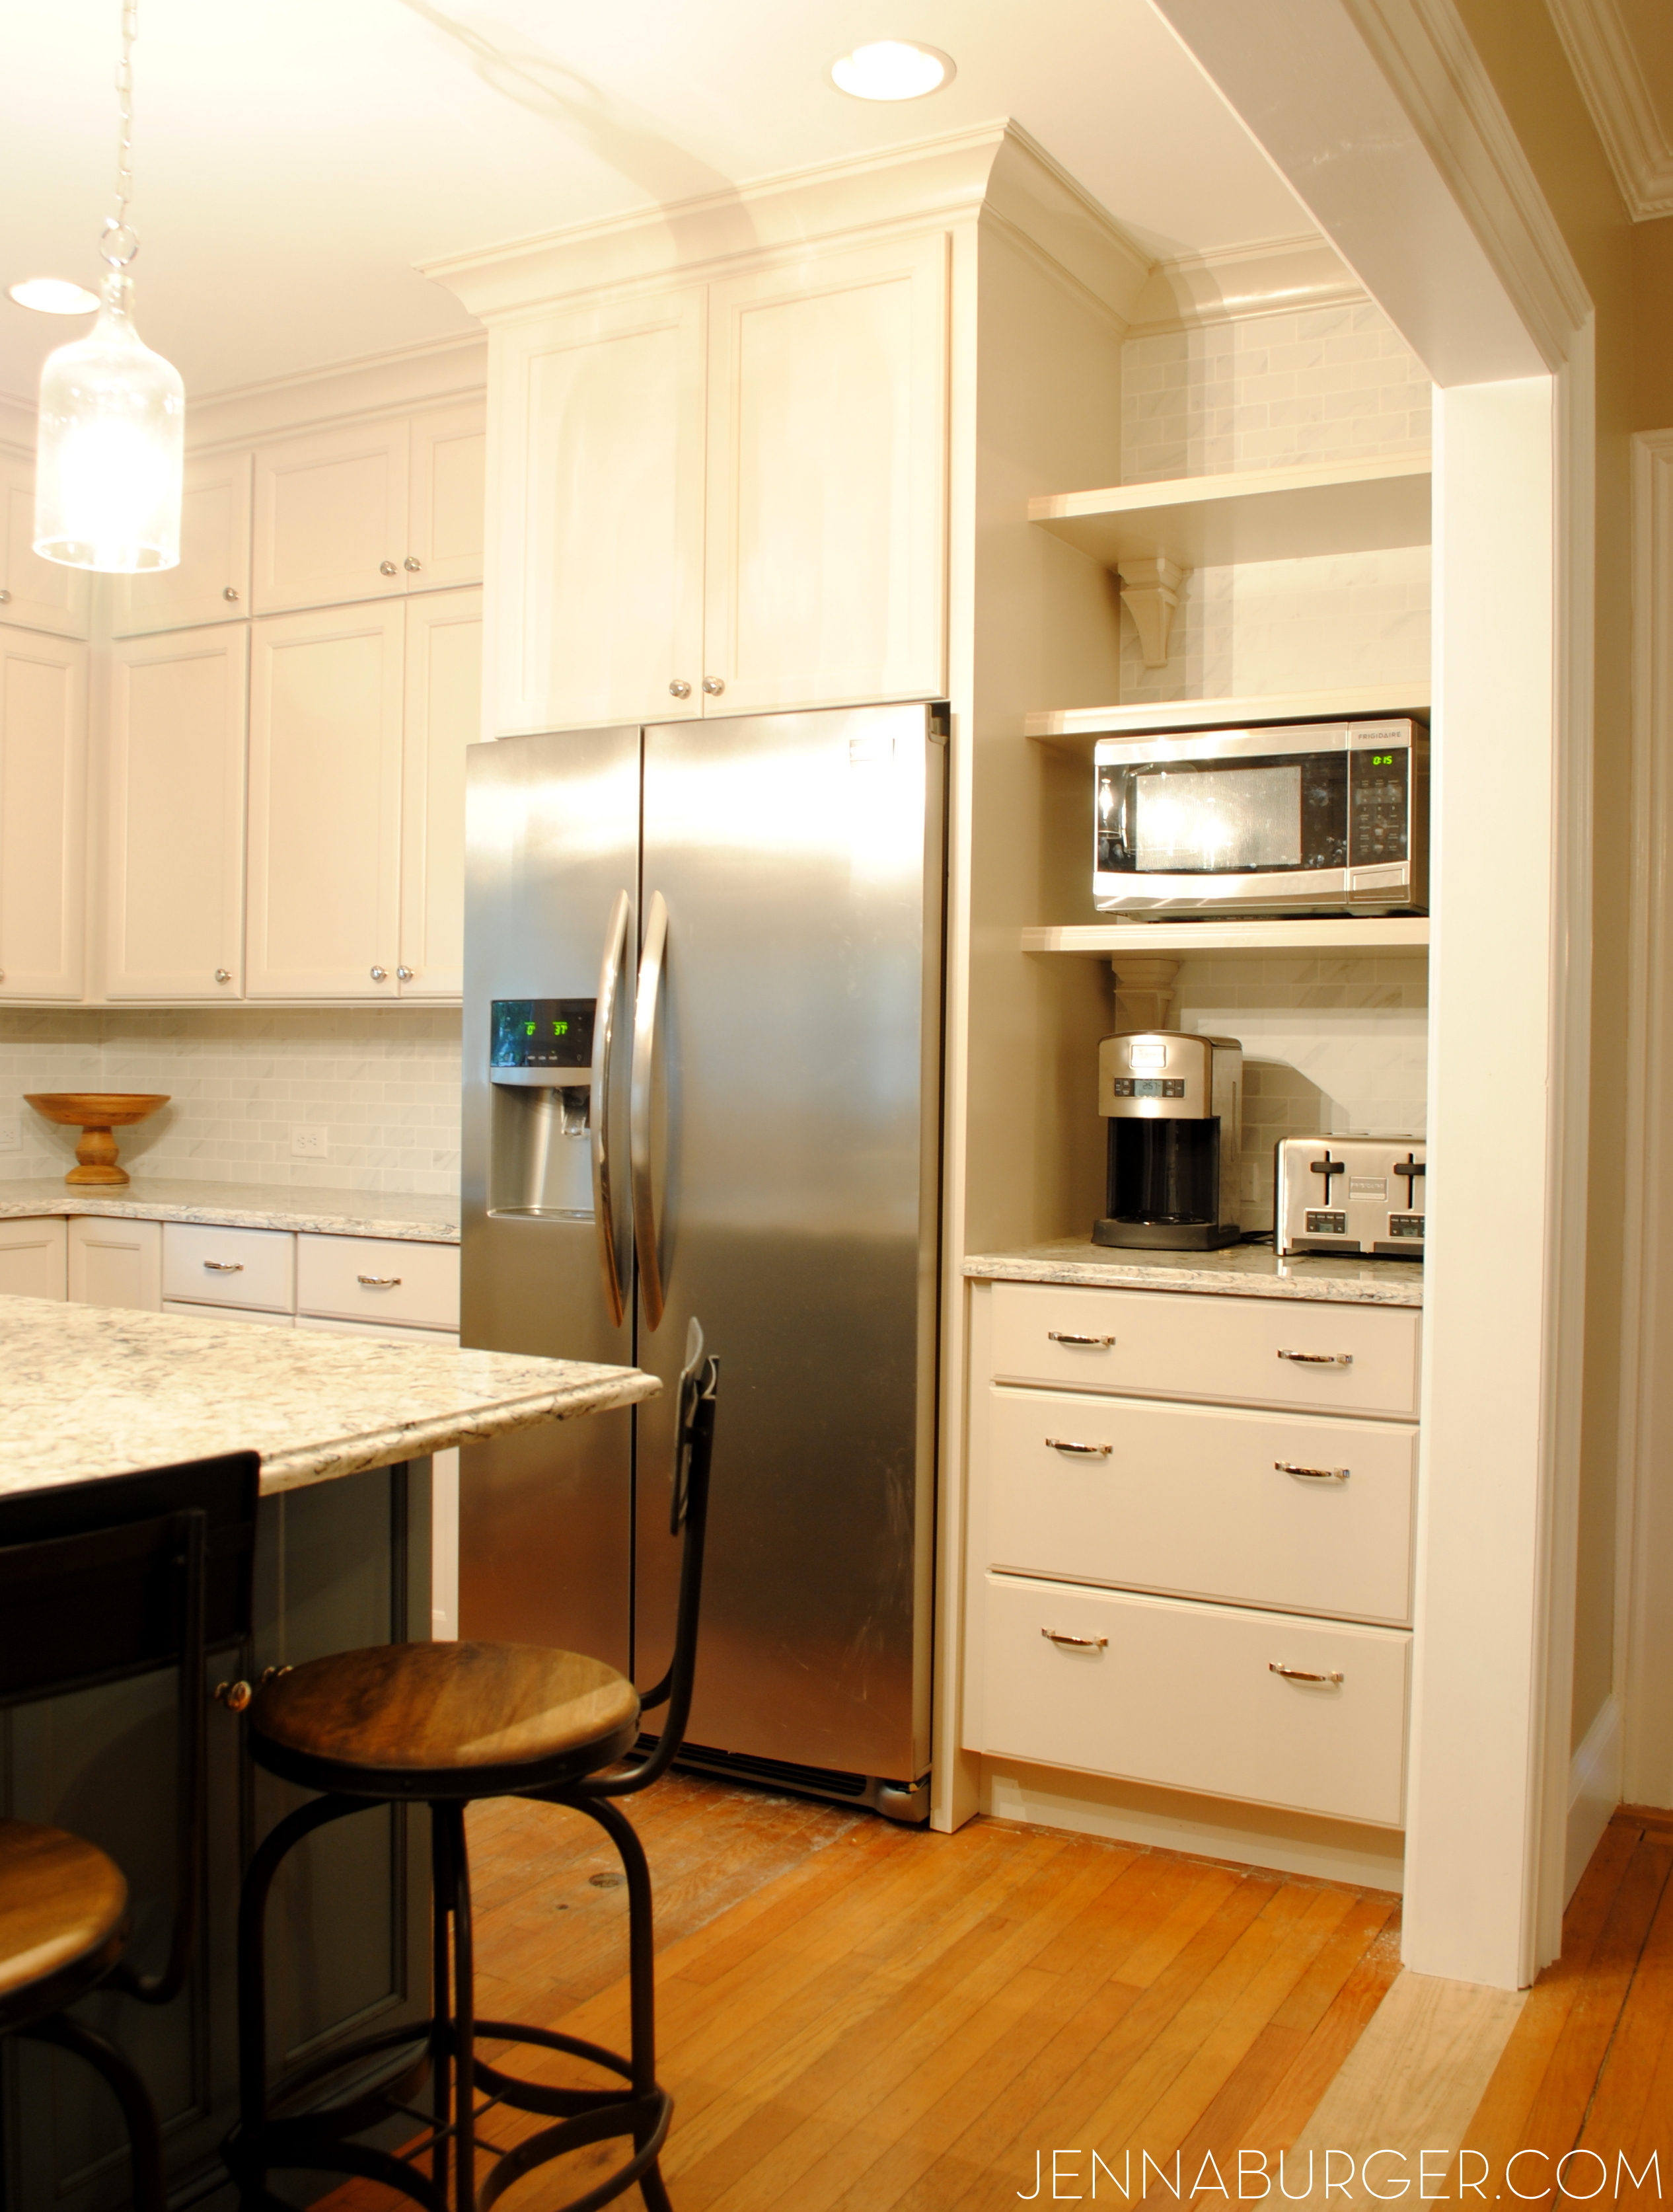
Shelving storage was a must for this kitchen and when it was decided to close up a small passageway between the living room and kitchen, it allowed space for shelves. The shelves are 1.5″ thick and made of quarter sawn oak, which has the most gorgeous grain. The refrigerator now sits on this side of the kitchen – a spot that is much less dominant.

Eclectic Kitchen + Living Room House Tour! A before & after kitchen makeover that is a MUST SEE!

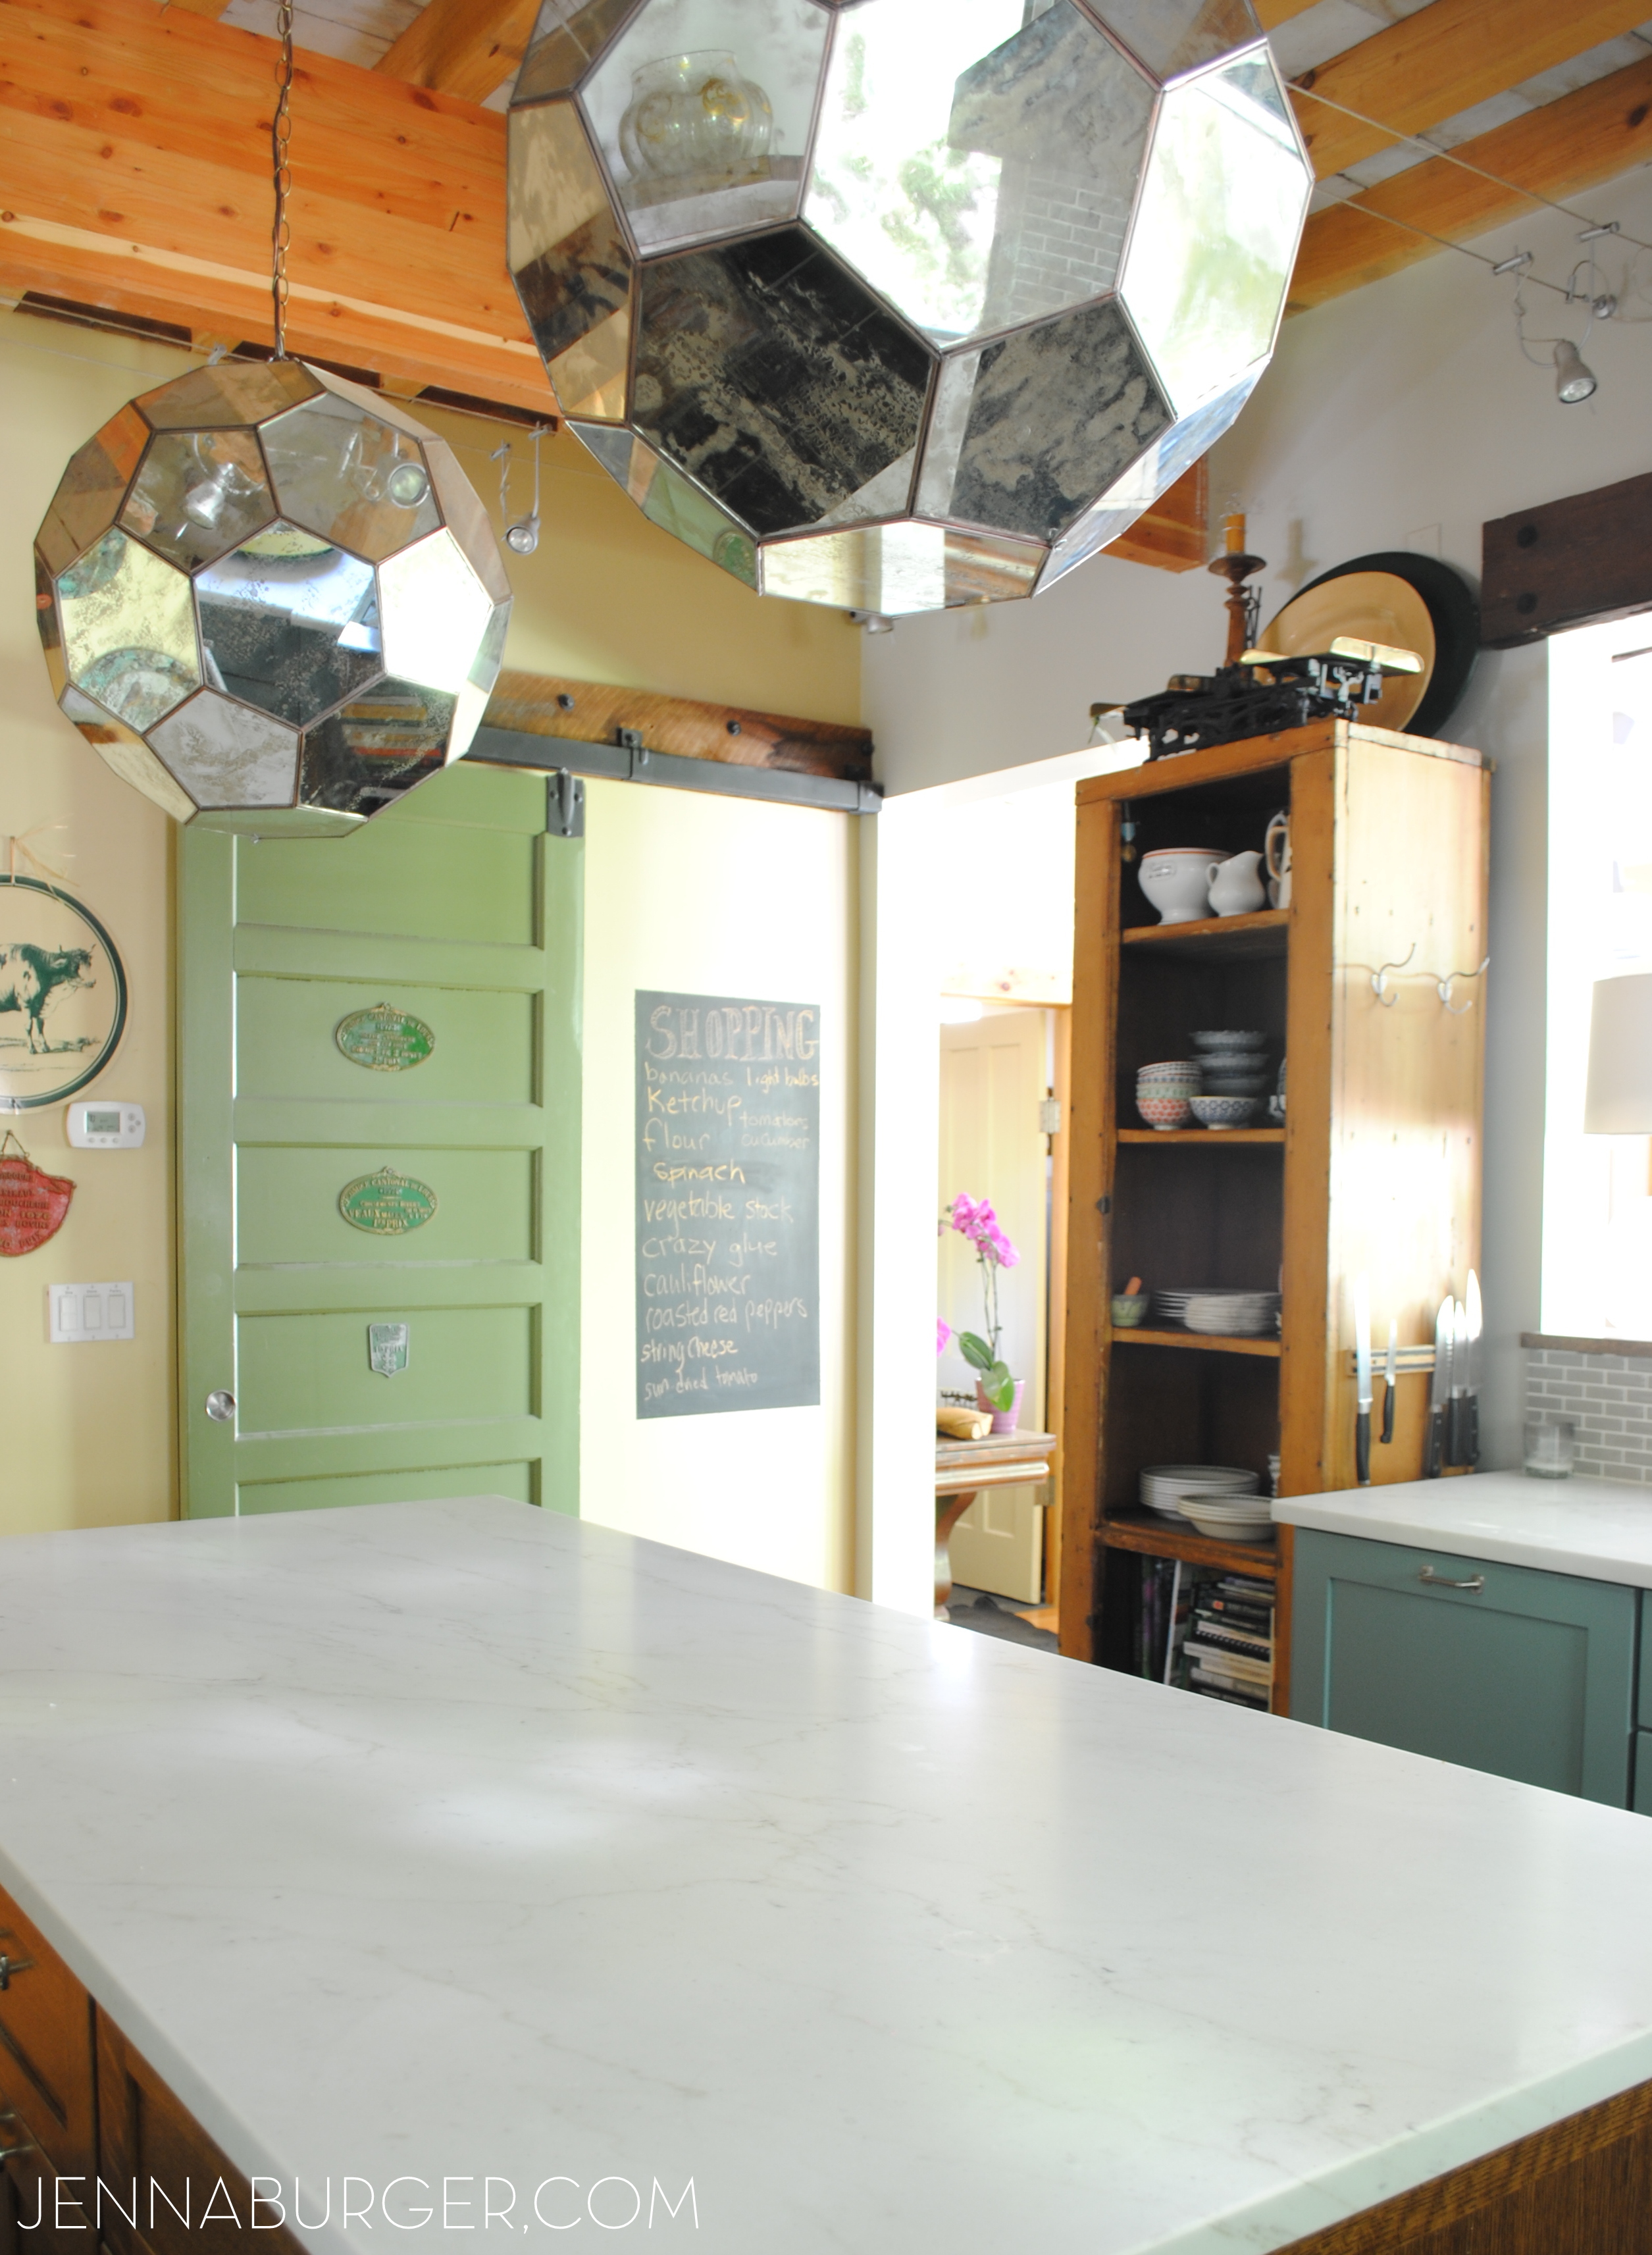
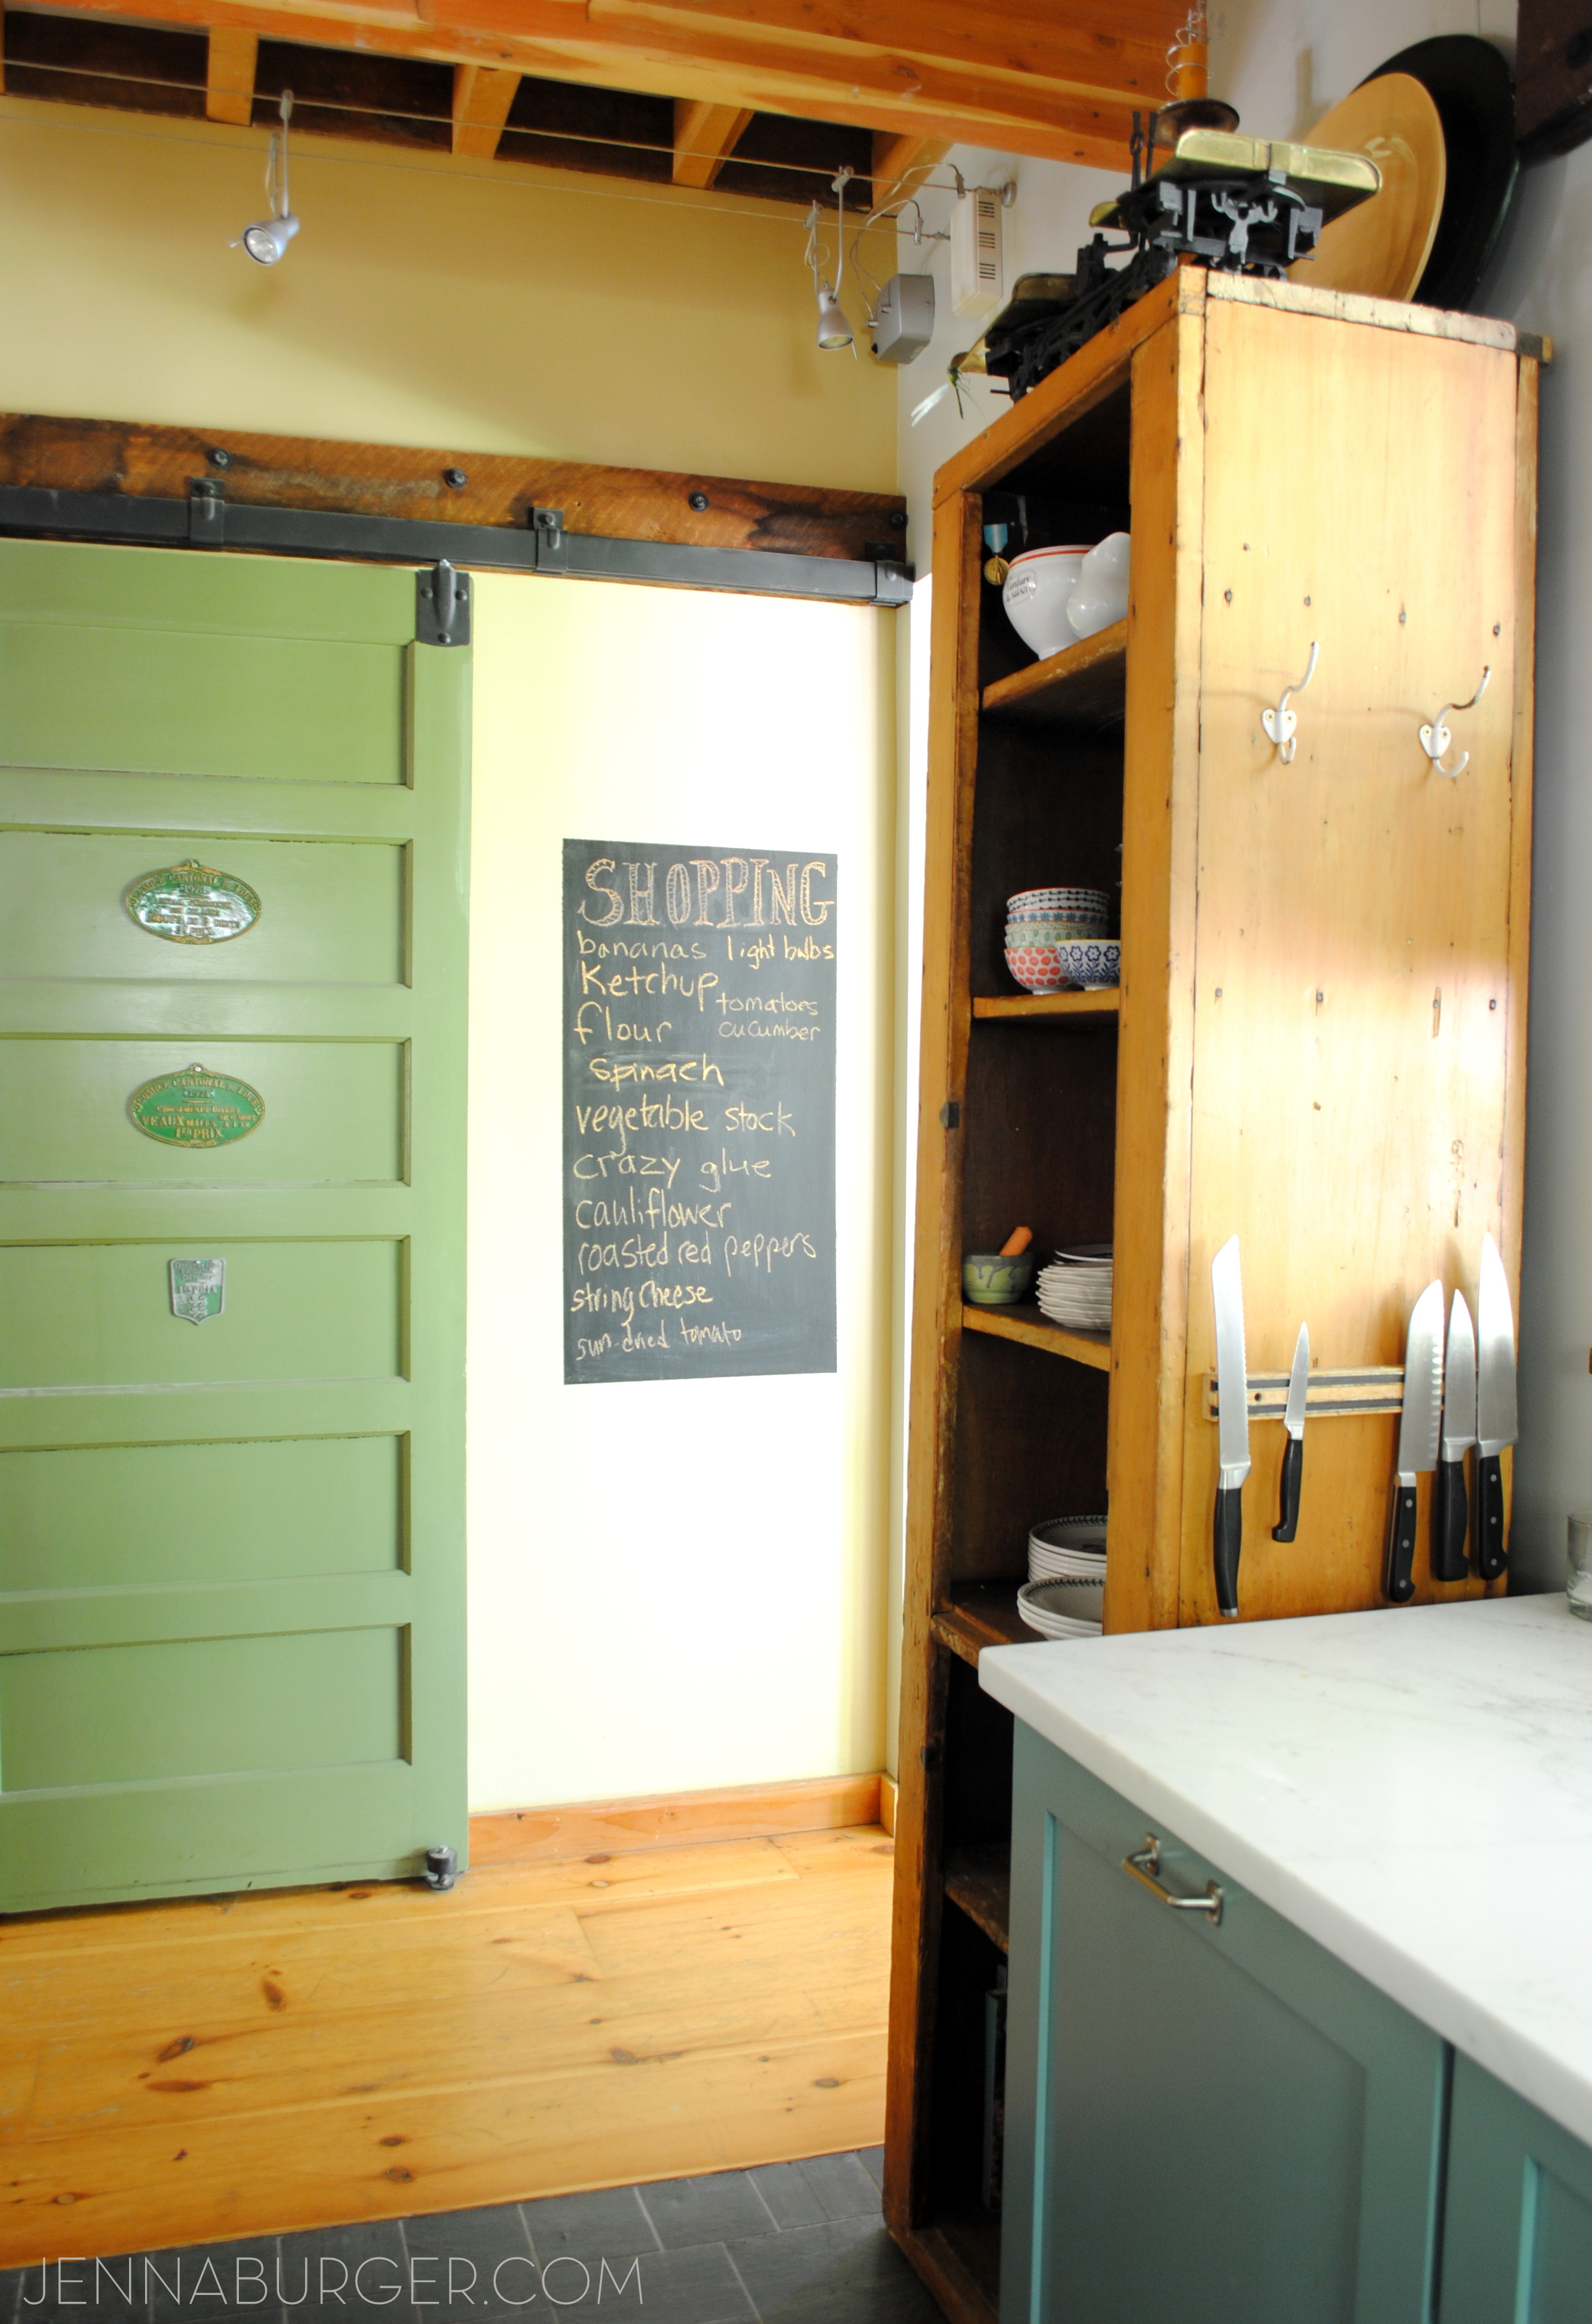
Let’s talk about the island lights since they’ve been in almost every picture. Aren’t they spectacular?!

The pendants are overly large – YES, but this space needed it. The ceilings are high (over 12′) & the kitchen space is big, and there is nothing more near & dear to my heart than adding drama with lighting. These show-stoppers make the kitchen. The space would have been okay without, but they give it the edge needed to stand out & be dramatic!

Way back a long time ago, I shared a sneak peek of these lights on IG & many of you loved them too. The lights are from Shades of Light but unfortunately aren’t available anymore – sorry.

Eclectic Kitchen + Living Room House Tour! A before & after kitchen makeover that is a MUST SEE!

Eclectic Kitchen + Living Room House Tour! A before & after kitchen makeover that is a MUST SEE!

The view from the dining room looking into the kitchen…

Eclectic Kitchen + Living Room House Tour! A before & after kitchen makeover that is a MUST SEE!

On to the living room, the room we recently worked on & wrapped up just a few weeks ago.

The living room has the same high ceilings with cable lighting above, wood flooring, and an eclectic style. The space was challenging the client because the layout (again) of the furniture wasn’t working. The room is not a stand-alone living room, but is the space where you enter in from the front door, the traffic flow that connects to the second floor, and the only real spot for reading + “hanging out” in (which = a need for ample seating). A better layout with more function was needed!

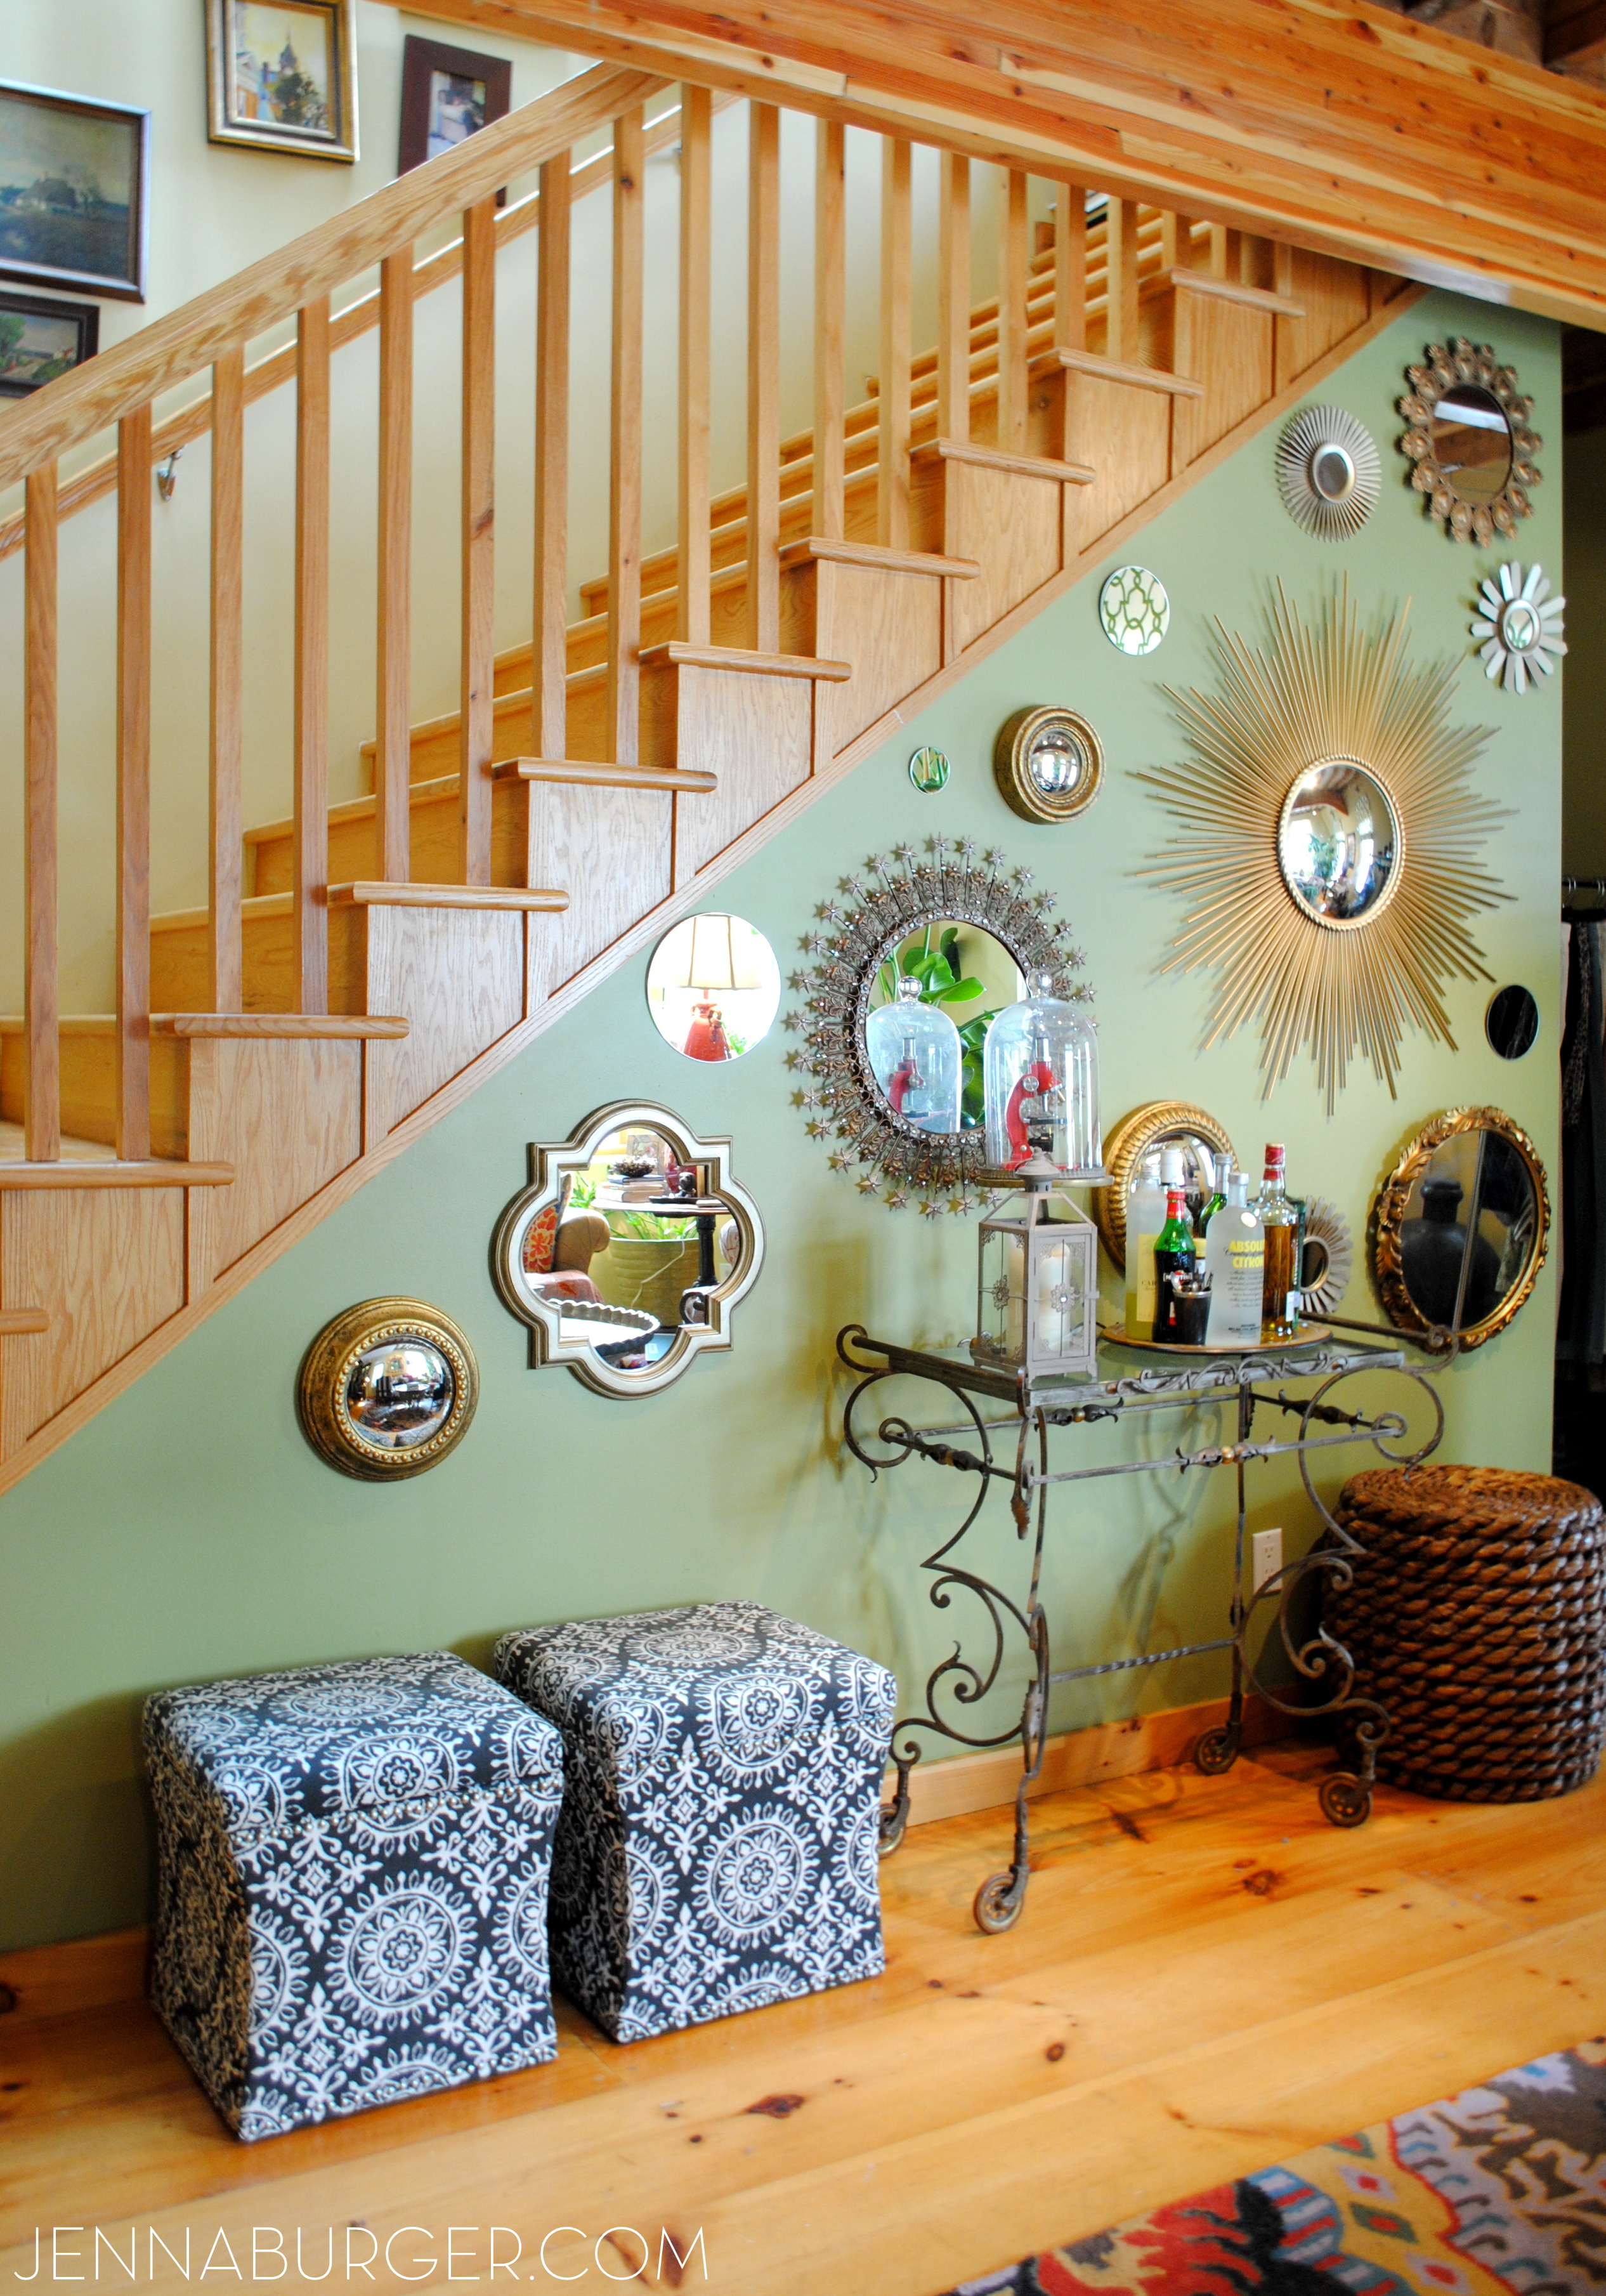
The wall that began with one mirror, now holds a dozen. Stairs can be challenging, so this eclectic mix of mirrors in varying sizes that reflect the light shining through from the windows opposite the wall, was the perfect solution.

Eclectic Kitchen + Living Room House Tour! a MUST-SEE transformation!!

The revamp for the living room was a mix of reusing the old, refurbishing the worn, and layering in some new.

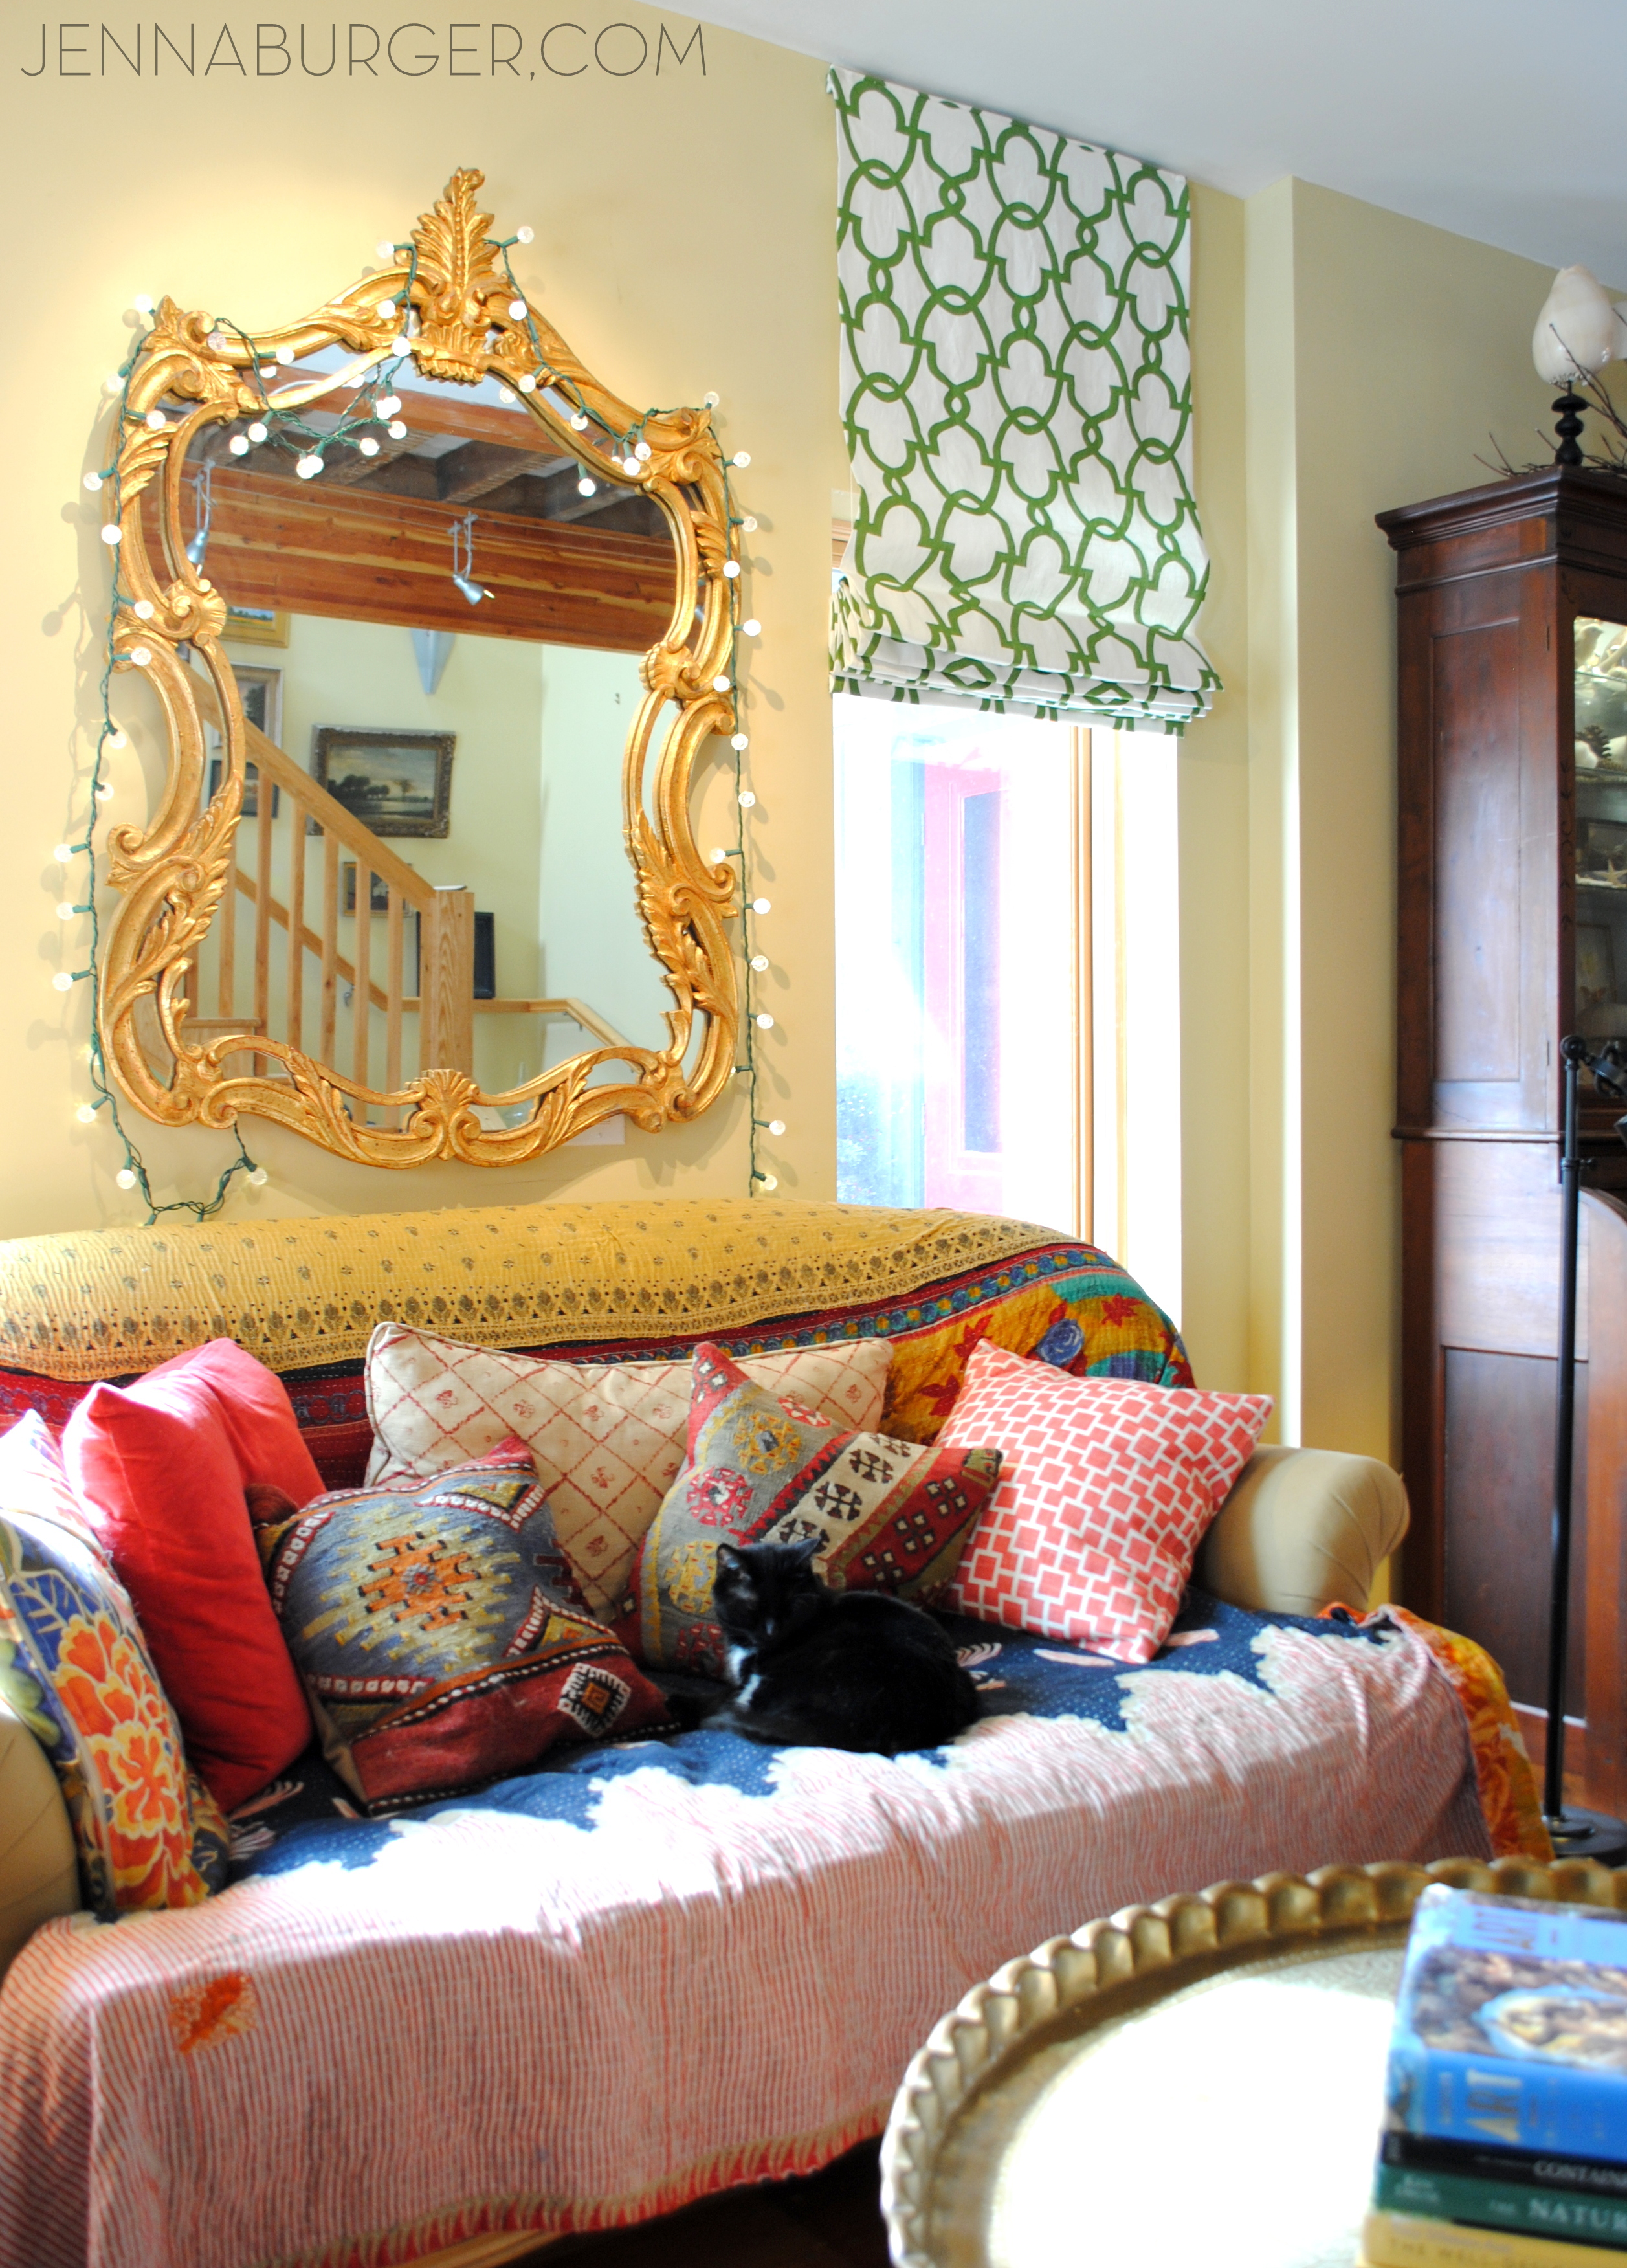
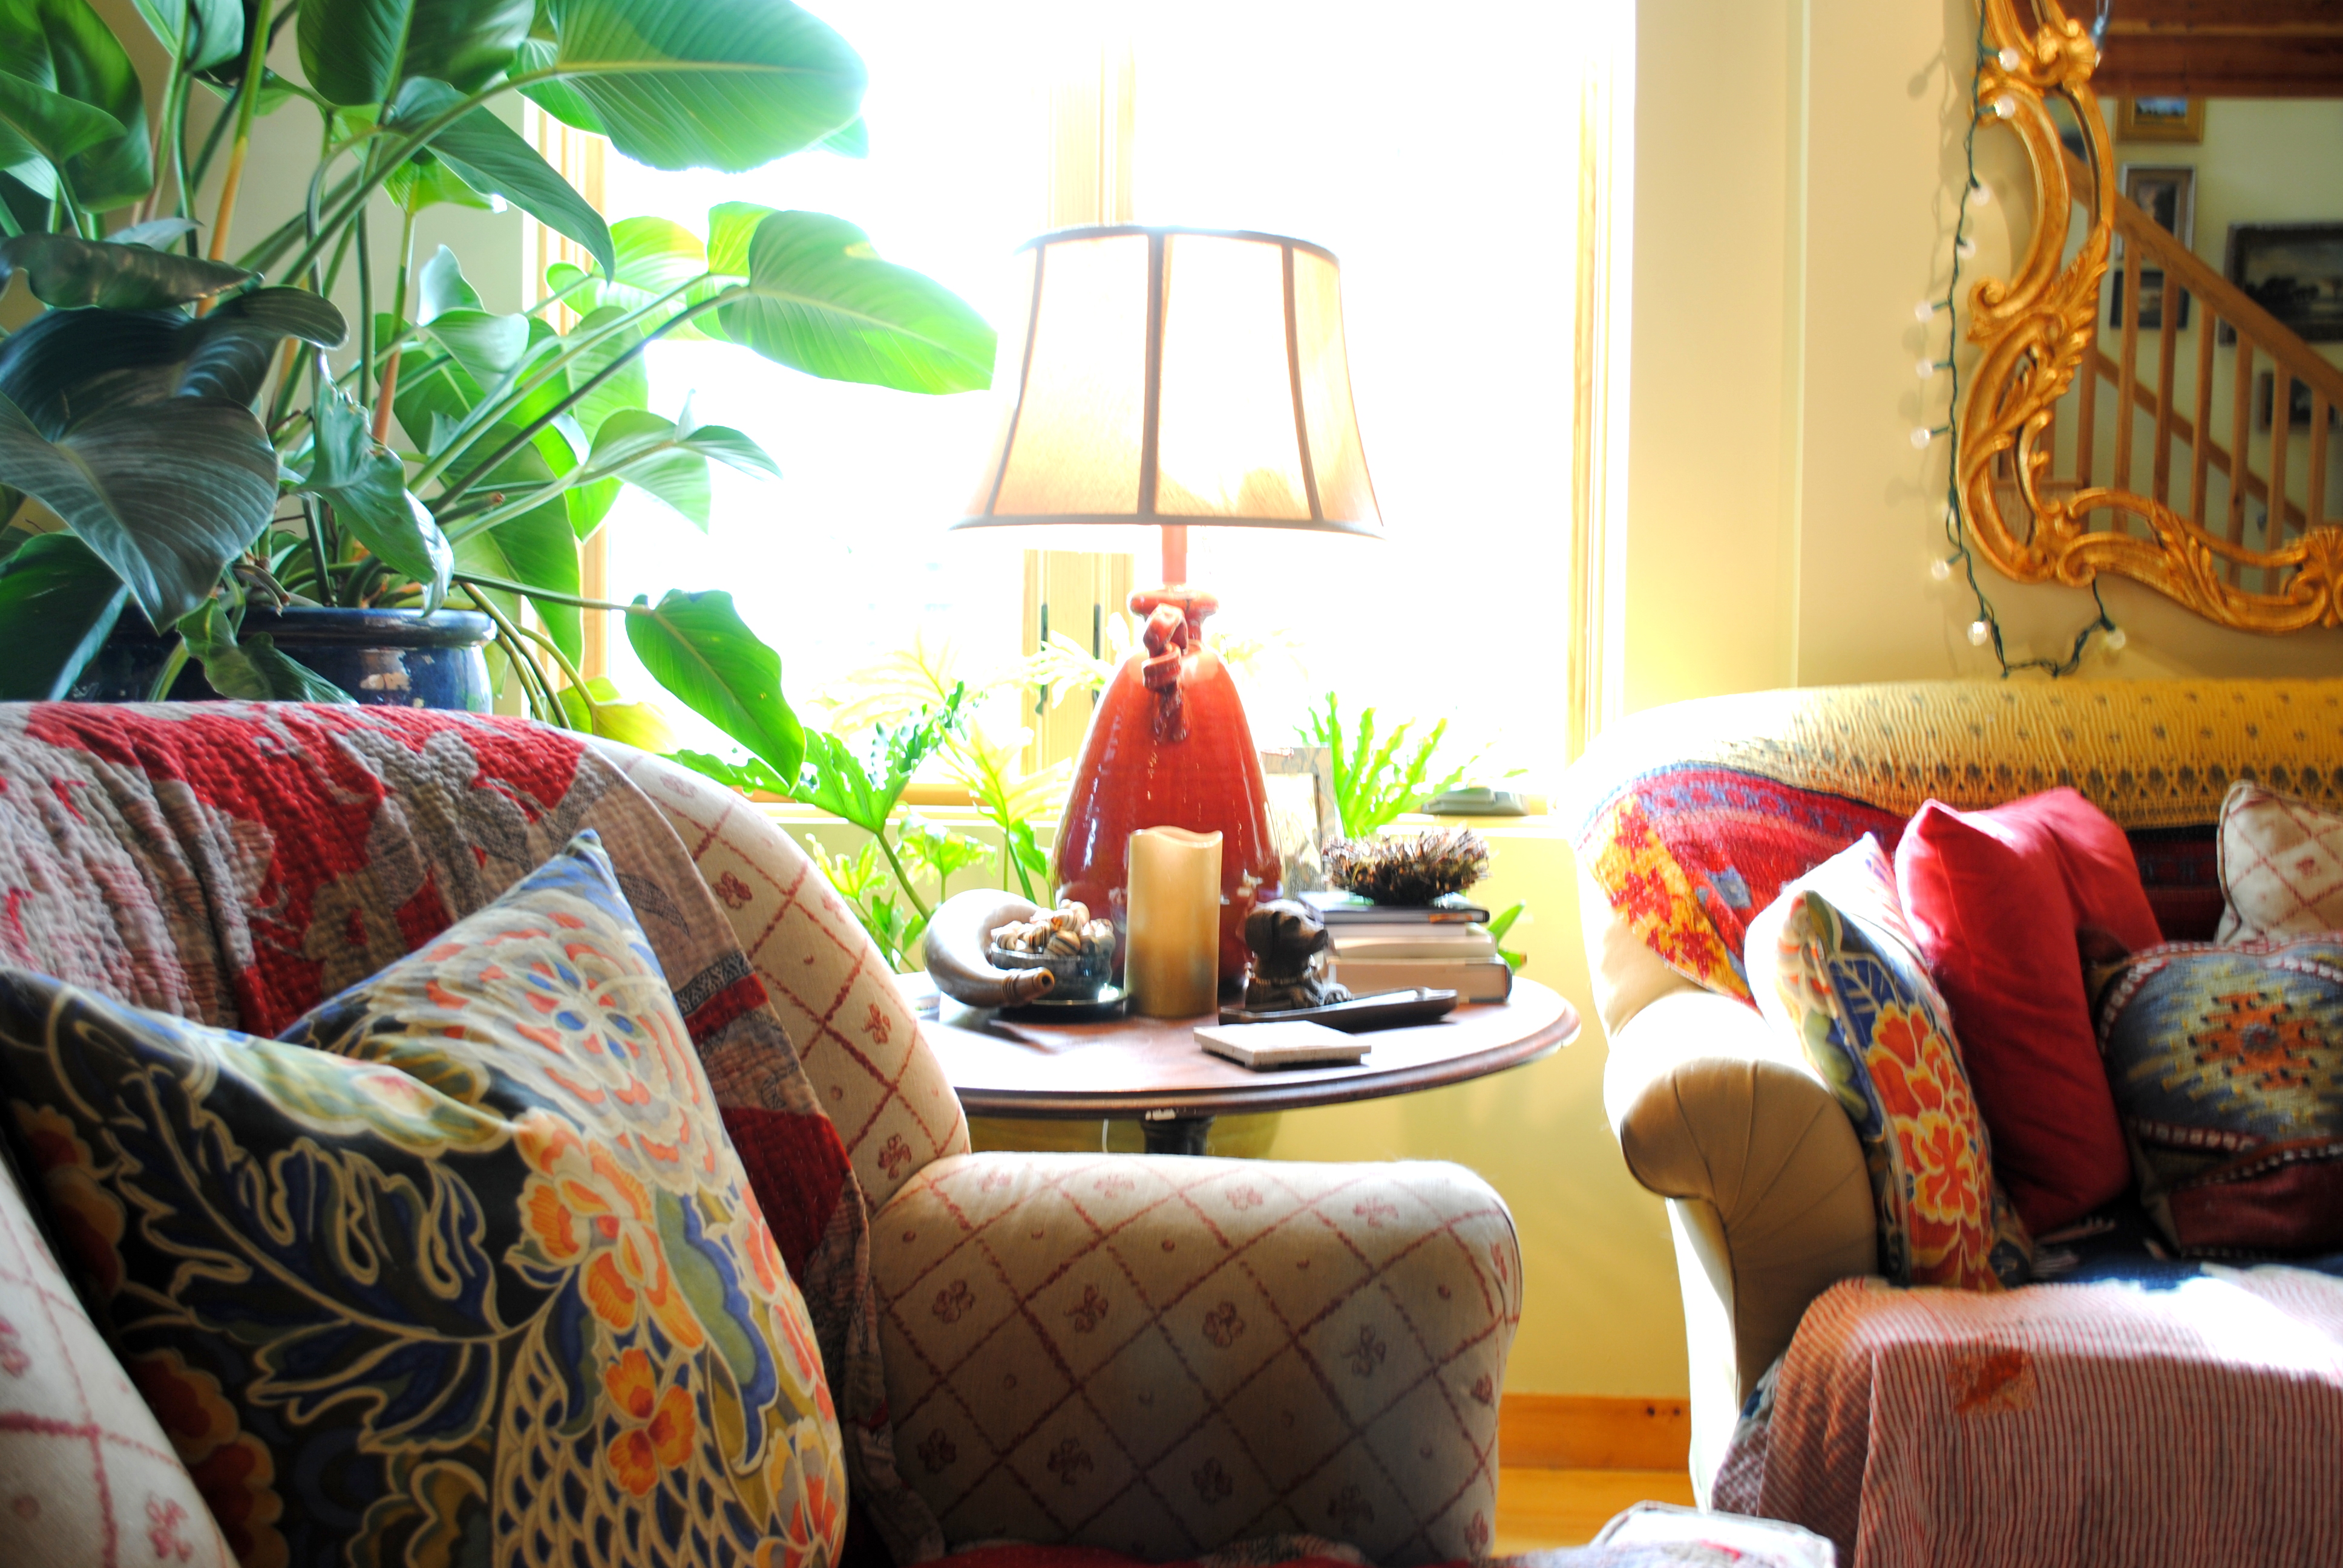
The settee, which the client had mixed emotions about keeping, was given new life when we chose a new vibrant colored rug for it to sit on. Then layers of new pillows were made in fabrics of bright hues including blue, red, orange, and green to give a pop of color & warmth.

One of the many challenges in this space were the windows. There were 4 windows with differing heights, so to tie them together we decided on a common height and had new roman shades made in a geometric pattern of green & white.

Eclectic Kitchen + Living Room House Tour! a MUST-SEE transformation!!

Eclectic Kitchen + Living Room House Tour! a MUST-SEE transformation!!

It’s amazing how this room feels + functions so much better now by simply rearranging the furniture and adding in new layers – a rug, pillows, lighting, mirrors, etc. It truly is a relaxing + inviting space that I would personally love to just sit, read, and soak-up-the-sun in all day.

Eclectic Kitchen + Living Room House Tour! a MUST-SEE transformation!!

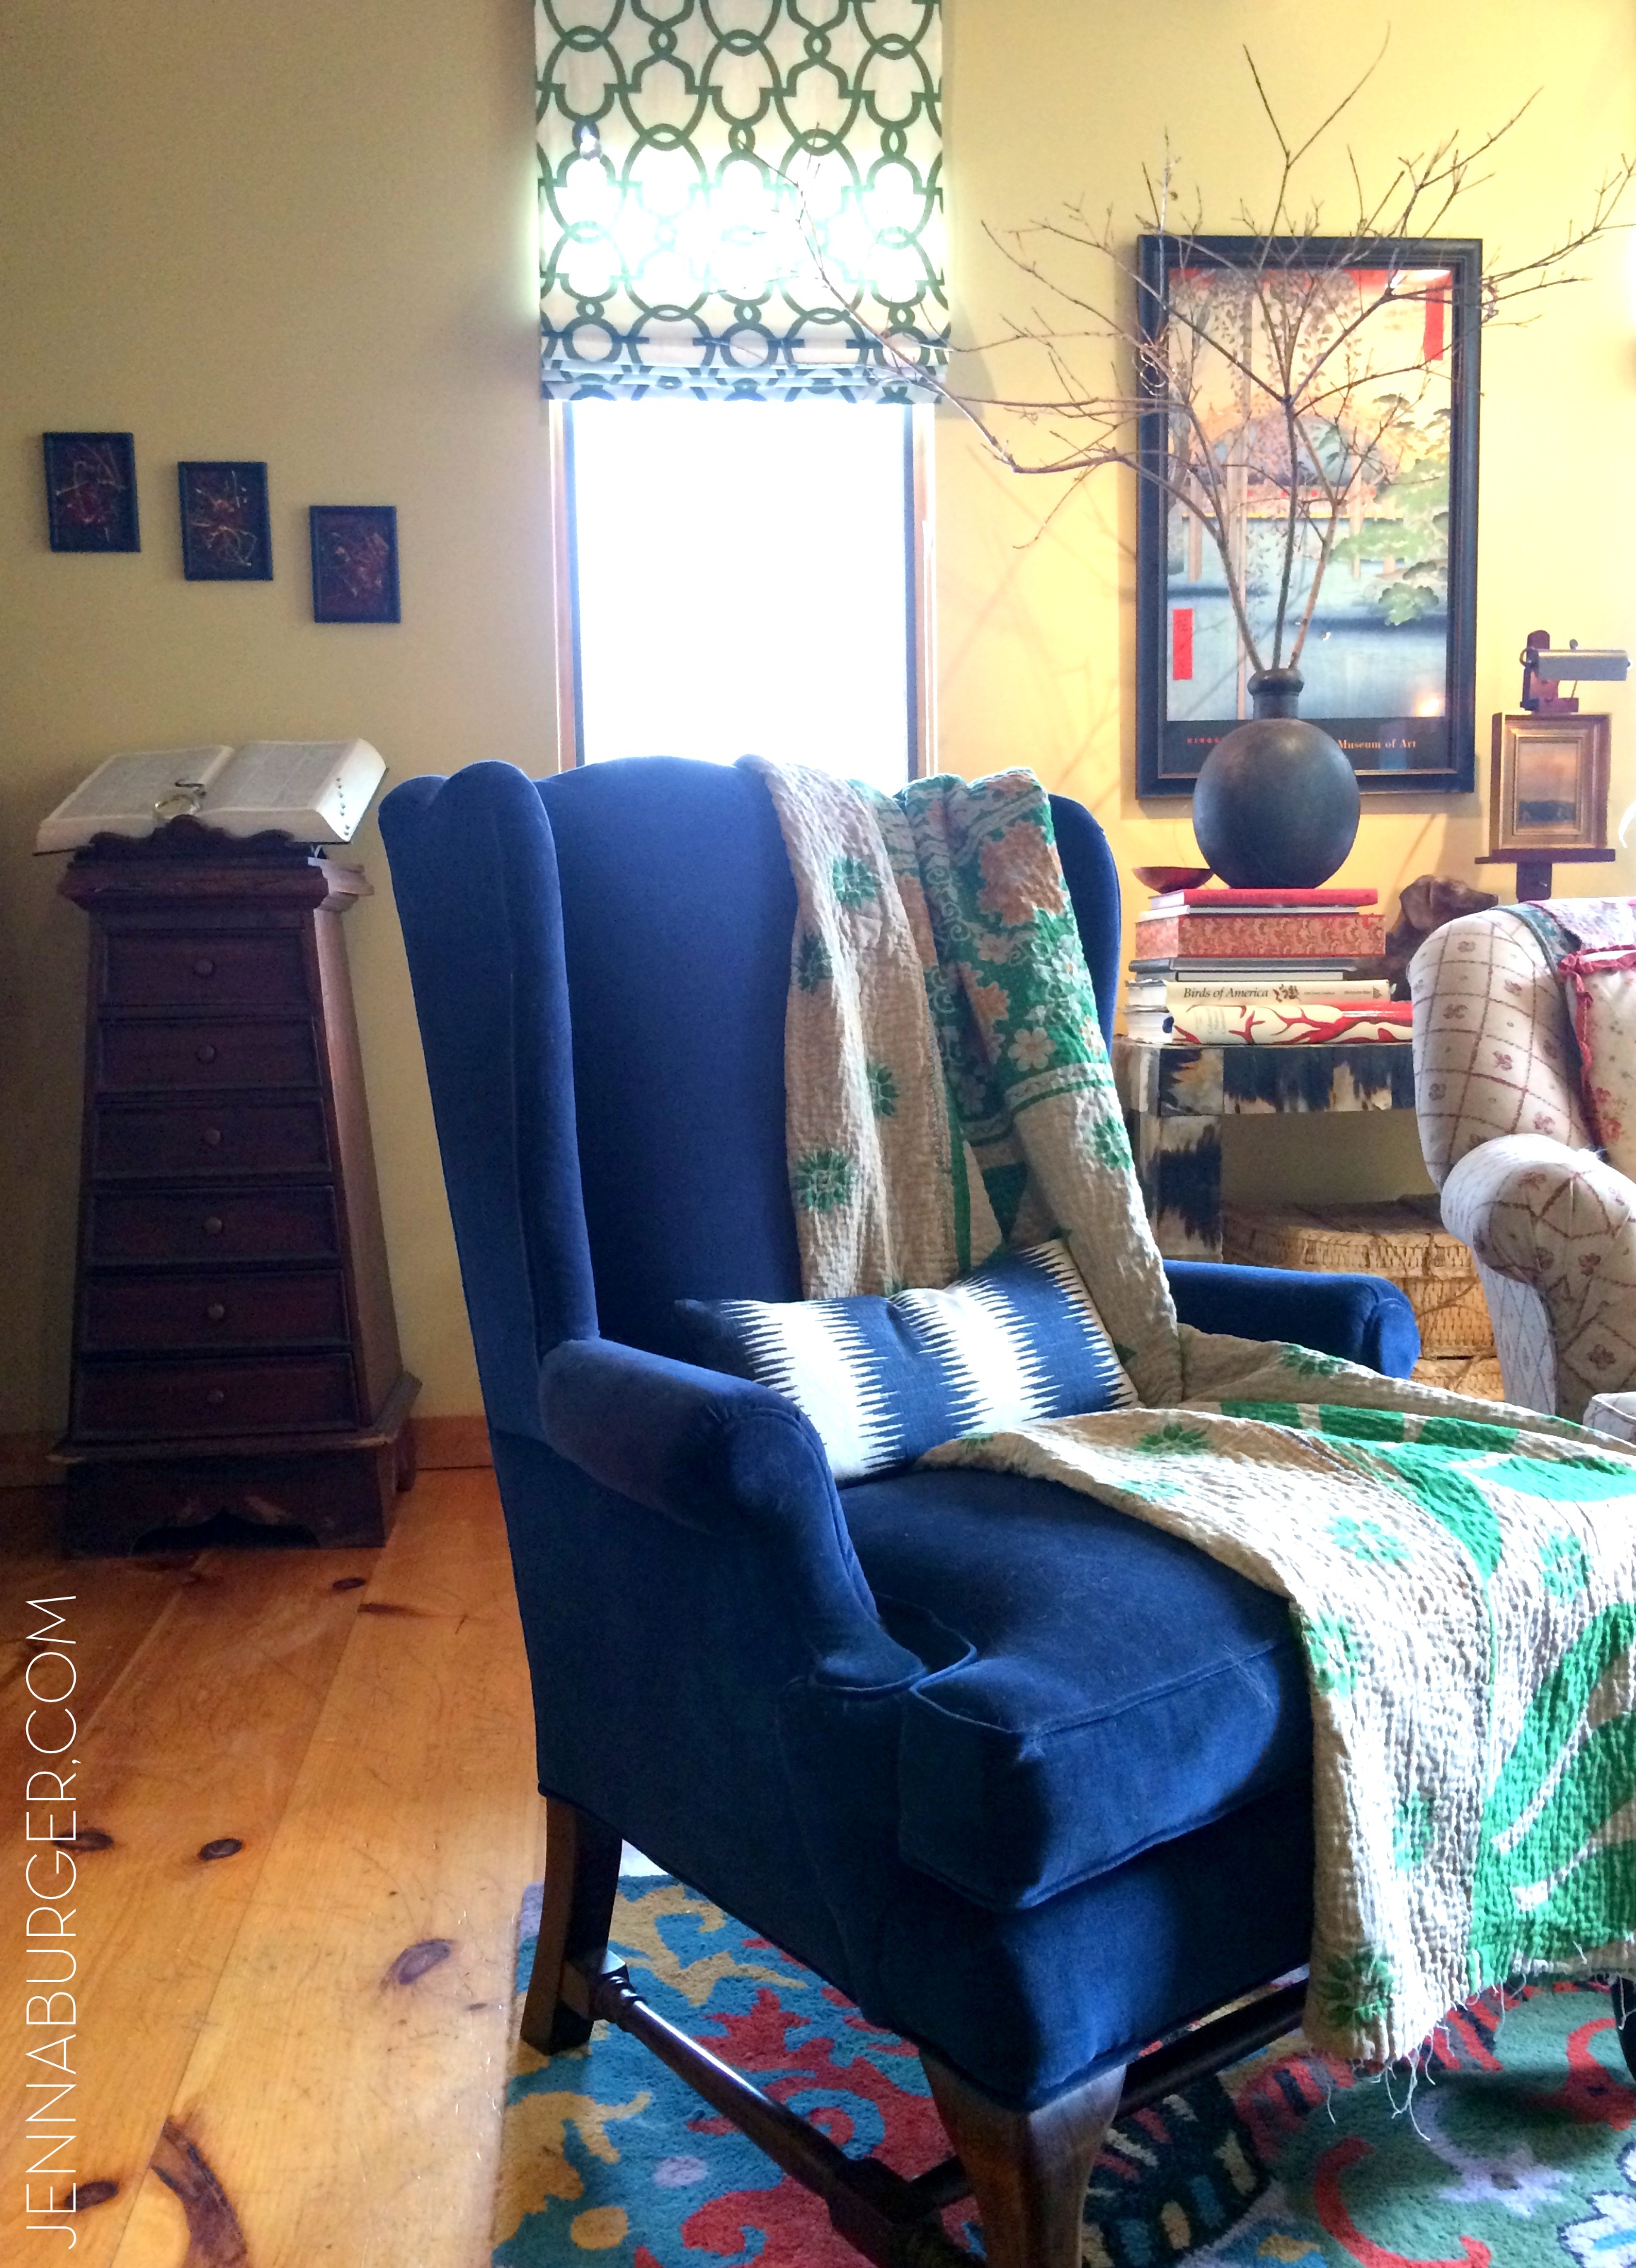
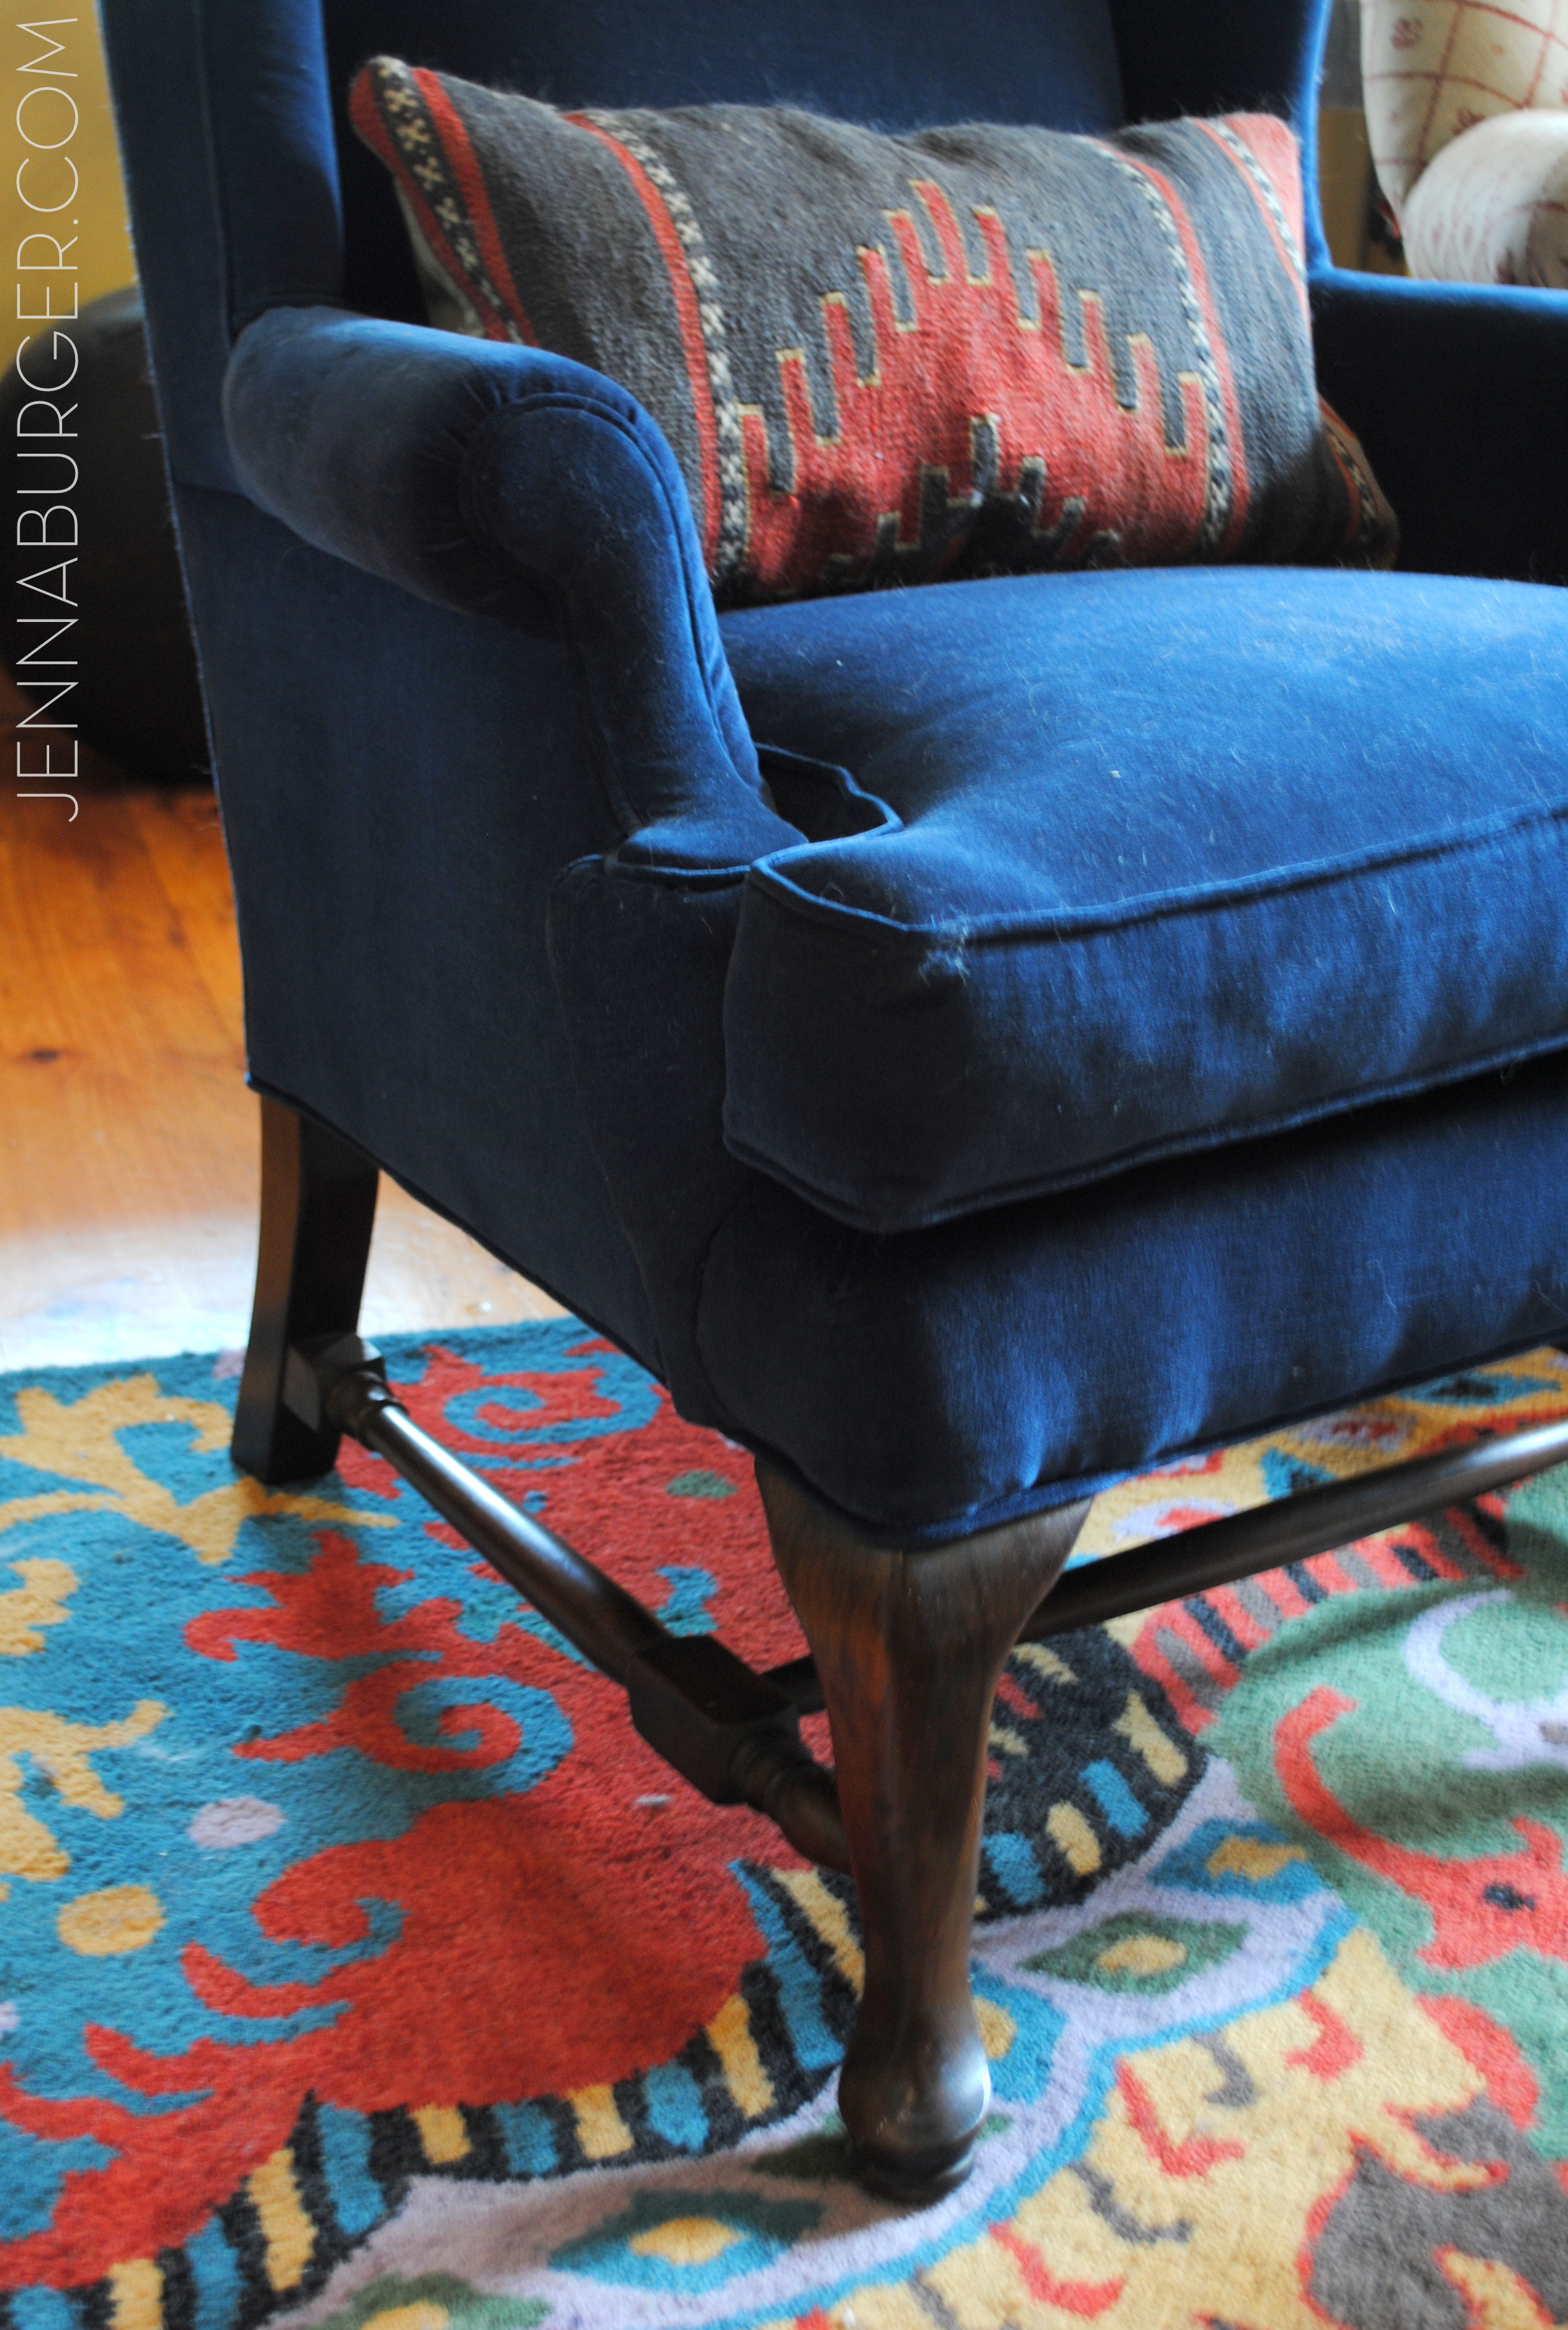
A chair that had been covered with blankets because the fabric was torn underneath was recovered in a deep navy velvet fabric and is now Oh So luxurious!

Eclectic Kitchen + Living Room House Tour! a MUST-SEE transformation!!

Eclectic Kitchen + Living Room House Tour! a MUST-SEE transformation!!

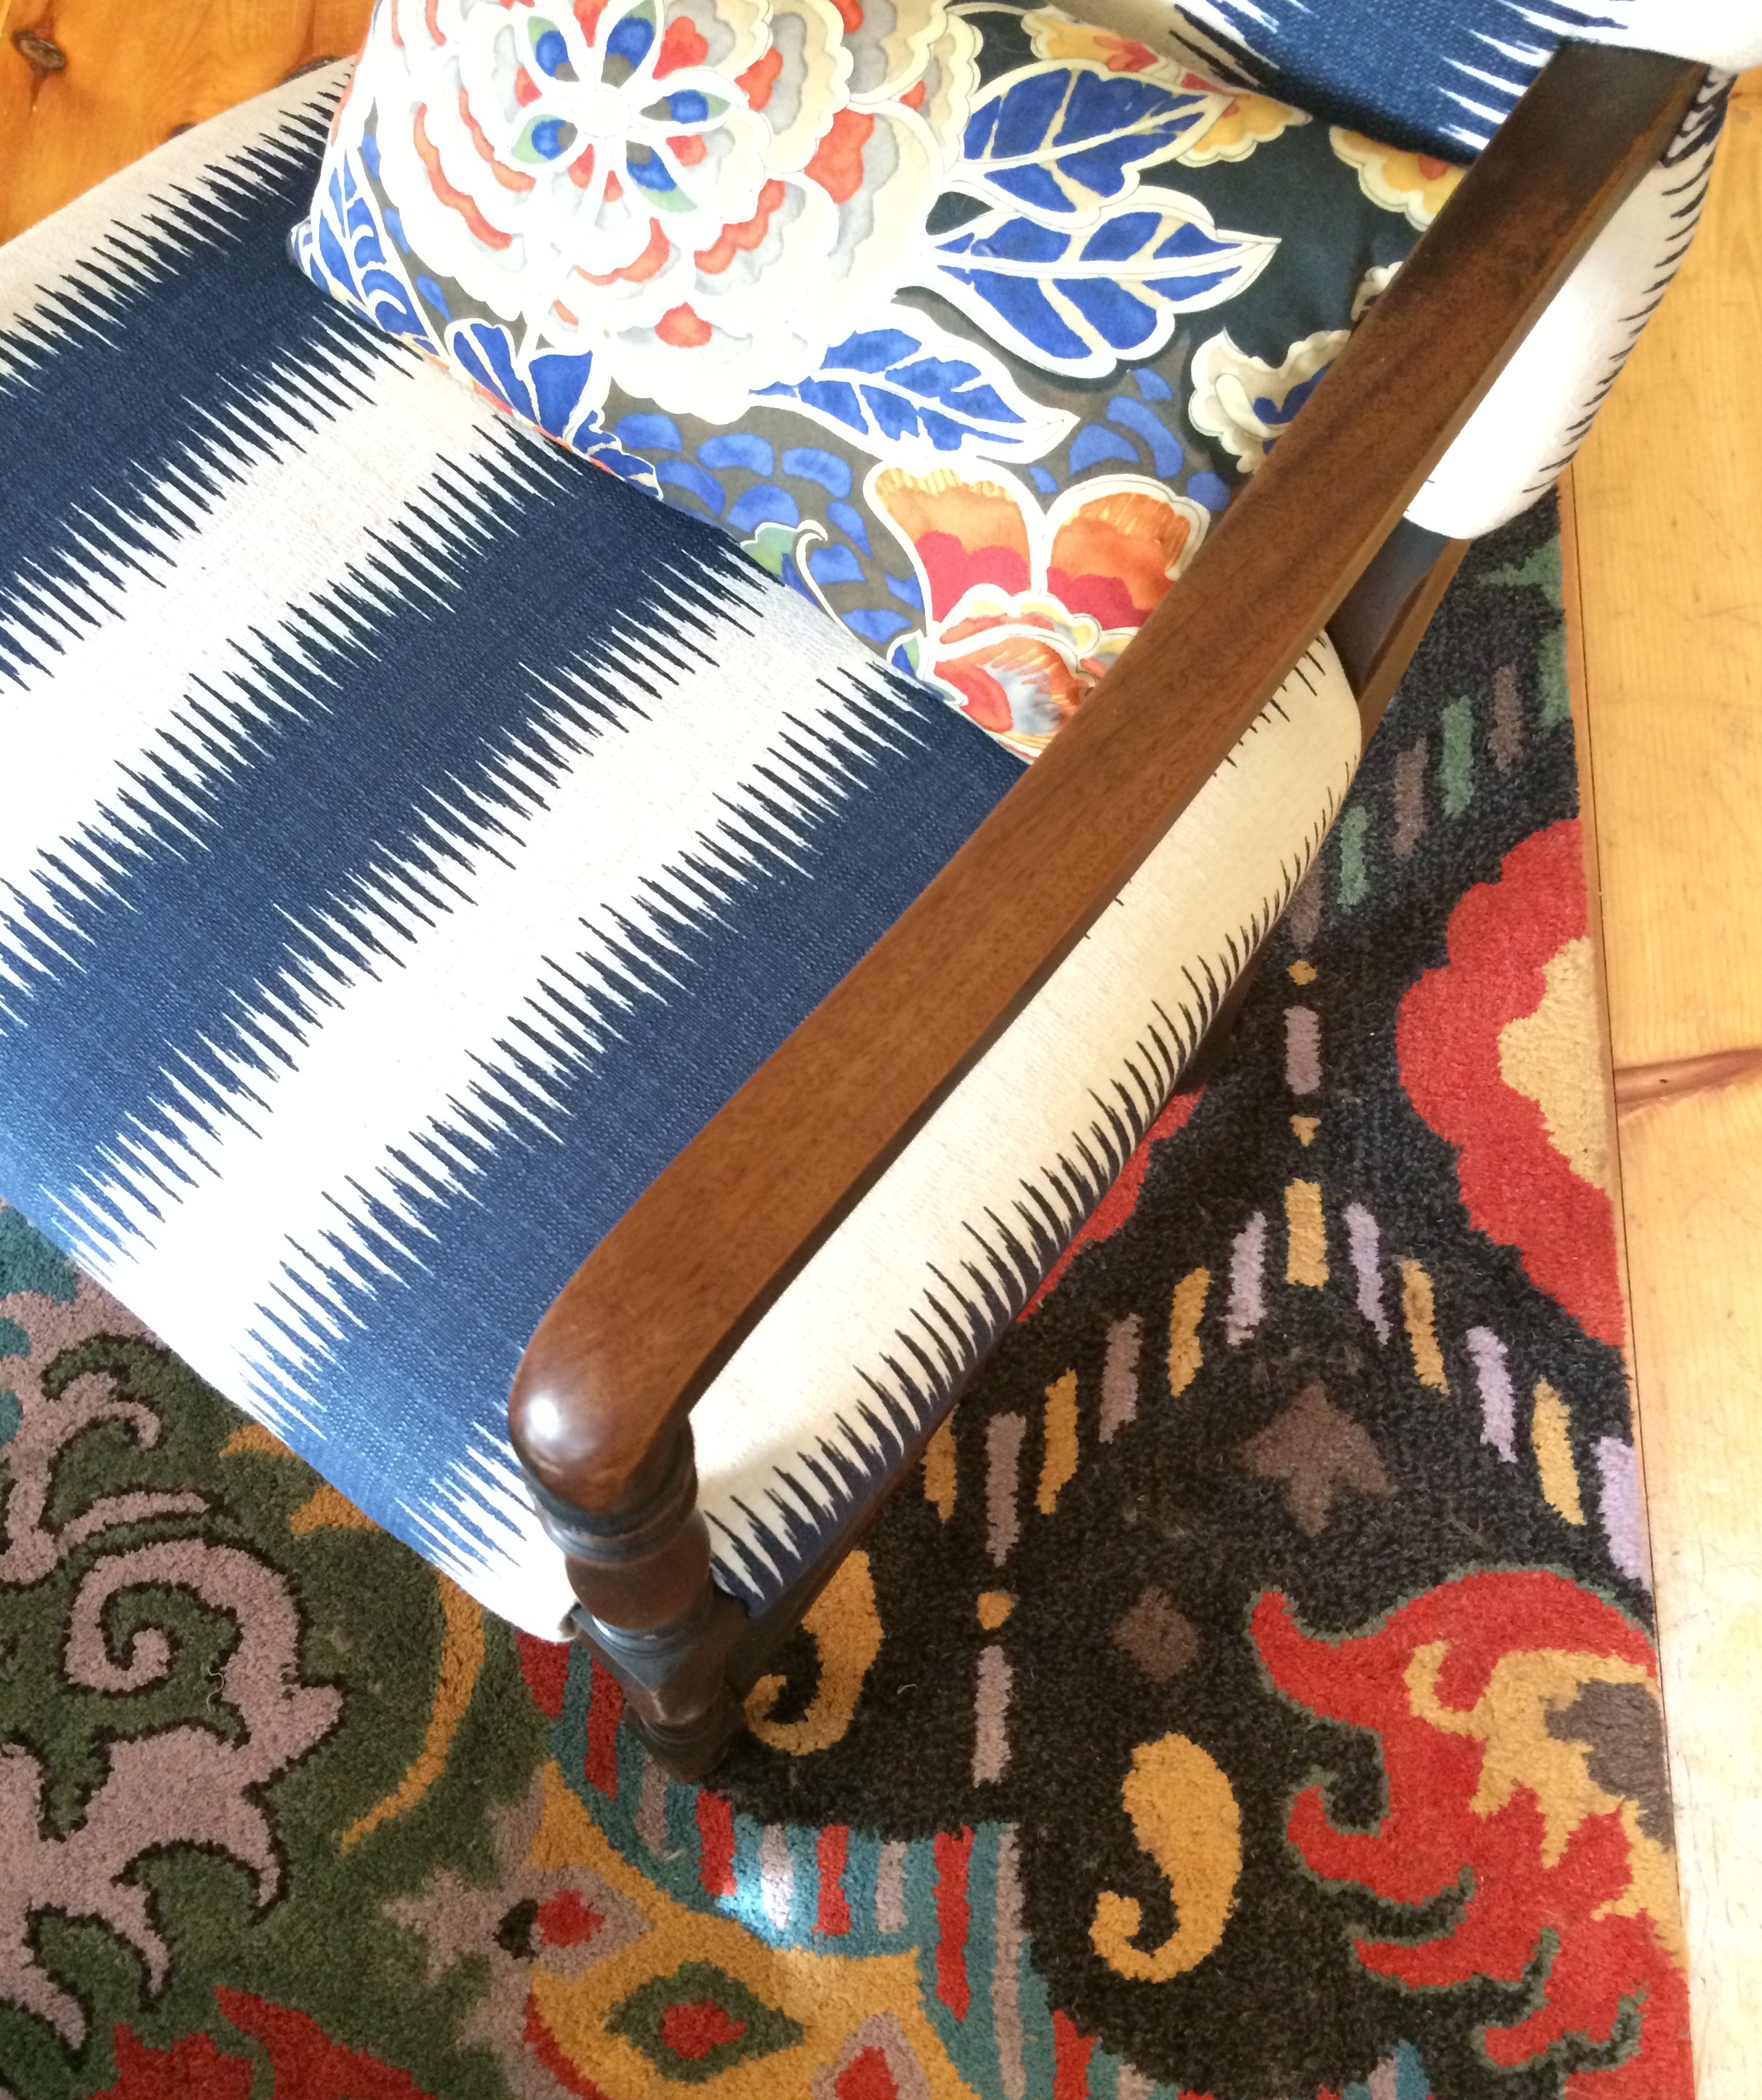
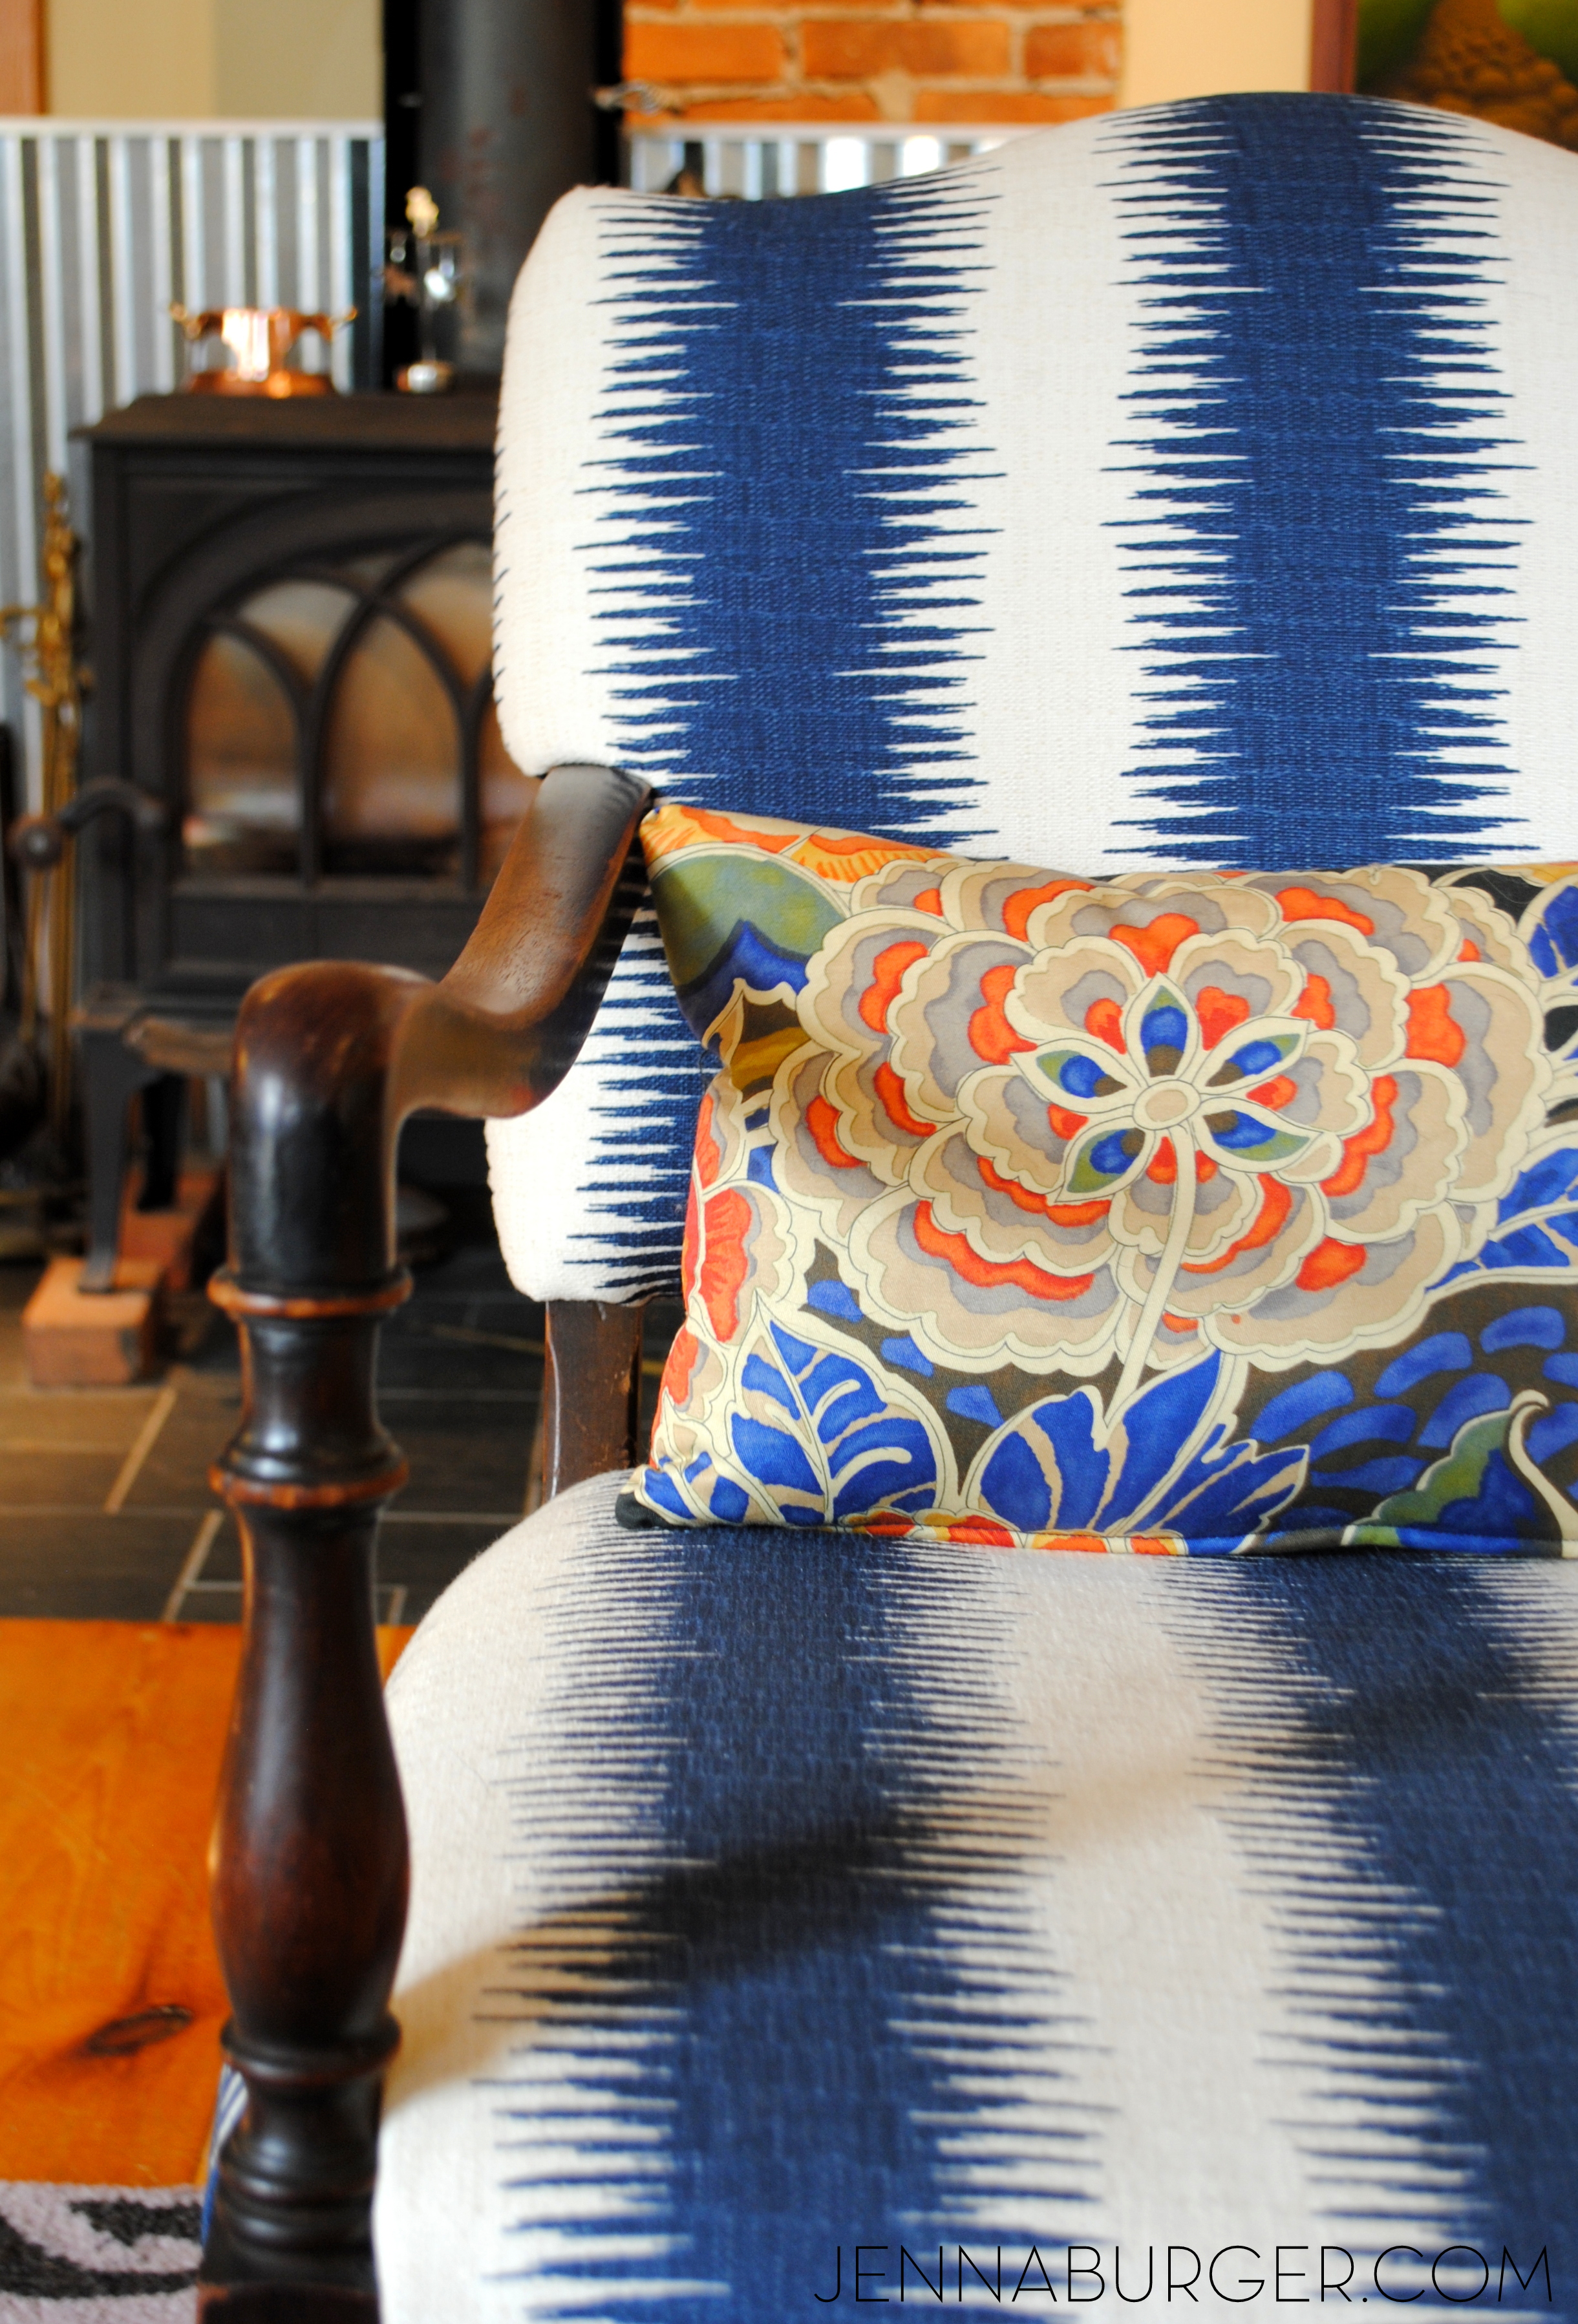
We also brought life back to another chair in the room by reupholstering it in a fun Ikat pattern of navy + white.

Eclectic Kitchen + Living Room House Tour! a MUST-SEE transformation!!

Eclectic Kitchen + Living Room House Tour! a MUST-SEE transformation!!

Eclectic Kitchen + Living Room House Tour! a MUST-SEE transformation!!

I adore the result of these beautiful new rooms (especially the kitchen), and I hope you did too! Thanks for taking time out of your day to take the tour 😉

DIY Hand Painted Wood Sign (using chalk transfer) #LOVEYOURHOMECHALLENGE

Hi there!  Today is a very exciting day.  Not only am I going to share an awesome, easy-peasy DIY project + tutorial, but I also have news about an incredible + talented person you might happen to know.

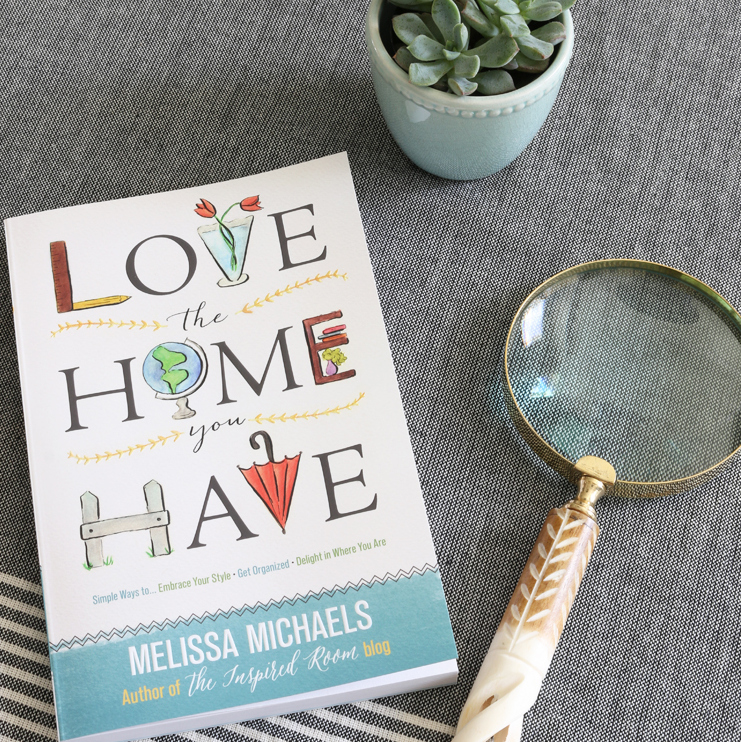
First to the latter… my sweet + uber-talented friend Melissa of The Inspired Room wrote a book which is being released today called Love the Home You Have (< affiliate link).

Love the Home You Have by Melissa Michaels

It is the first of many that she’s got lined up and it’s less about decorating and more about falling in love with your home & what you have now… today.  Some of the topics include: taking care of your home, finding beautiful in the simple things, finding balance between beauty and mess, using what you have to decorate, arranging furniture, decorating with things that mean something to you, finding contentment, and so much more.

If you recall back to last years Creating a Meaningful Home blog series: Year 2, Melissa started off the series with a bang and shared her poetic + inspirational words.  There is not a person more deserving to share thoughts of such meaning and beauty.

To kick off the launch of her first book, Melissa has put me to a challenge along with a bunch of other Blogger friends and has asked us to showcase a project using the 31-day LOVE YOUR HOME CHALLENGE section in the back of her book.  So fun!

31-Day Love Your Home Challenge from the new book Love the Home Your Have by Melissa Michaels of The Inspired Room

Similar to Melissa, I feel that our belongings should honor and reflect who we are, where we are from, and what we love.  A house is the shell, but it’s what we create in the shell that makes it a home.  For my home and the homes that I work on with clients, I always strive to create something that is a reflection of who resides there.

As I am slowly making progress on my living room makeover, I want to adorn the walls with not only prints that I love & have special meaning, but also DIY art that I create.  When this ‘challenge’ came up,  I knew it would be the perfect time + opportunity to share with you a recent creation…

DIY tutorial: HAND PAINTED SIGN using CHALK to transfer design onto wood.   An easy + inexpensive technique to transfer letters or a custom design.  Easy-to-follow step by step by @Jenna_Burger, www.jennaburger.com

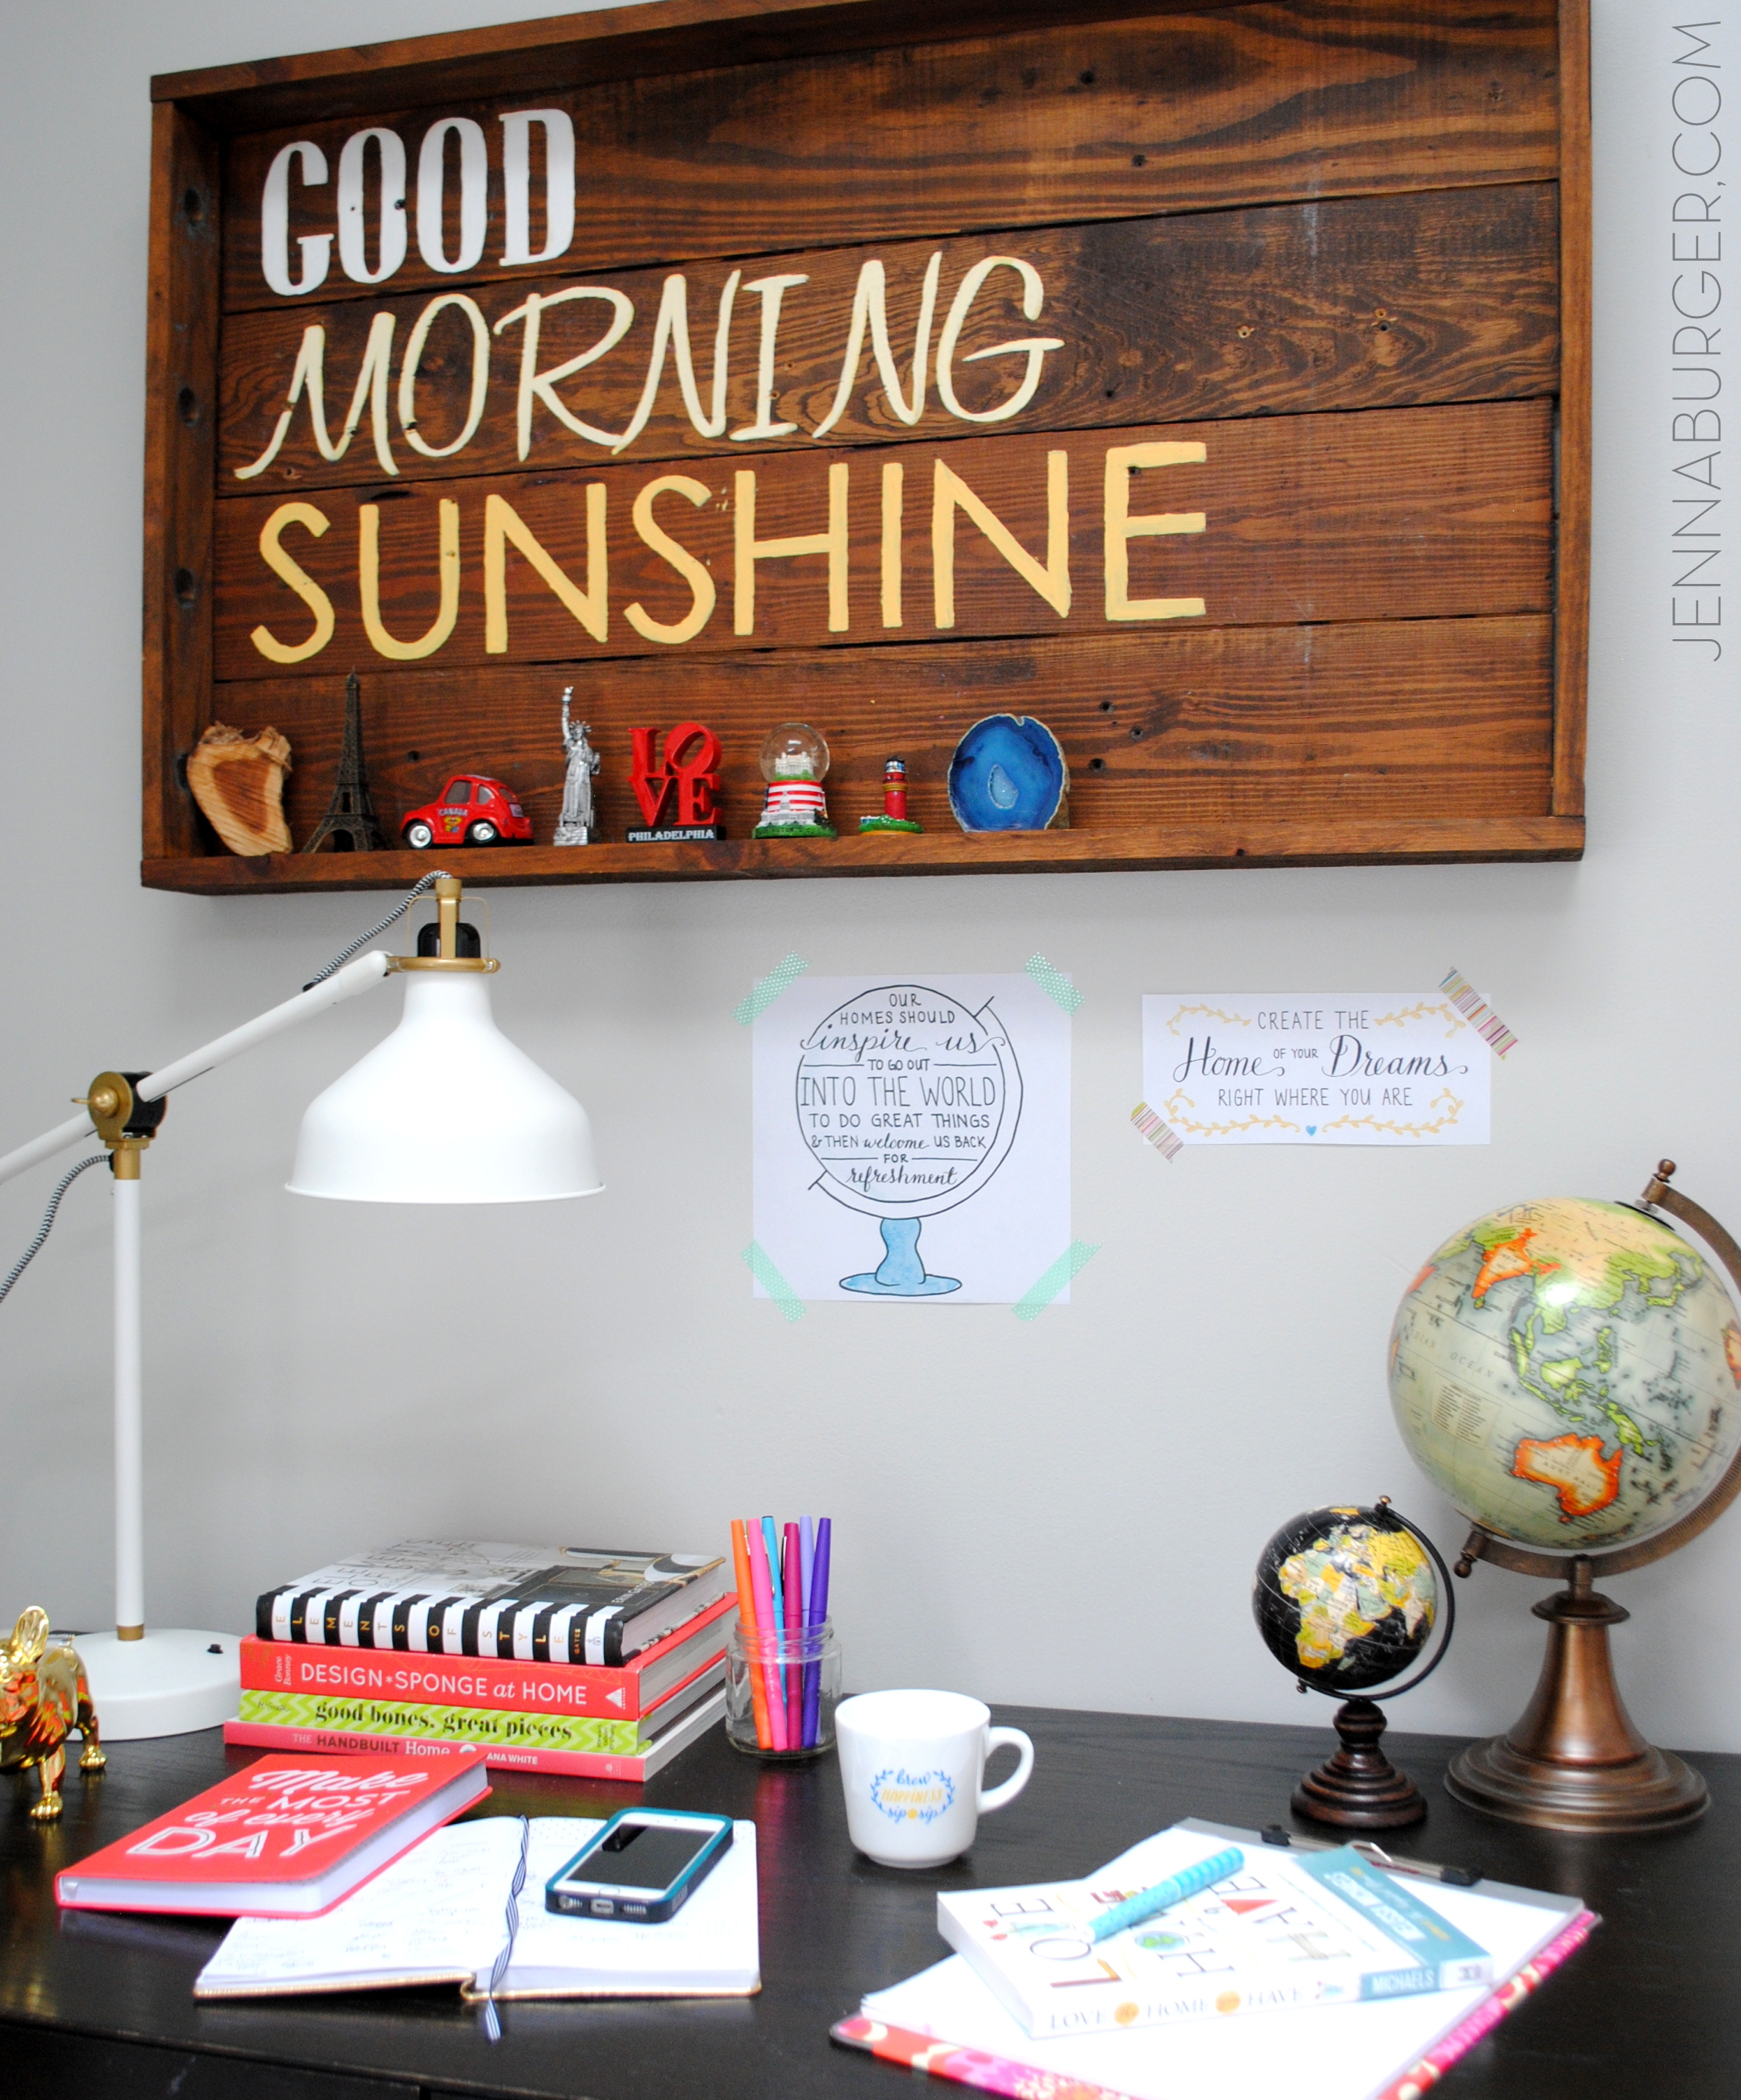
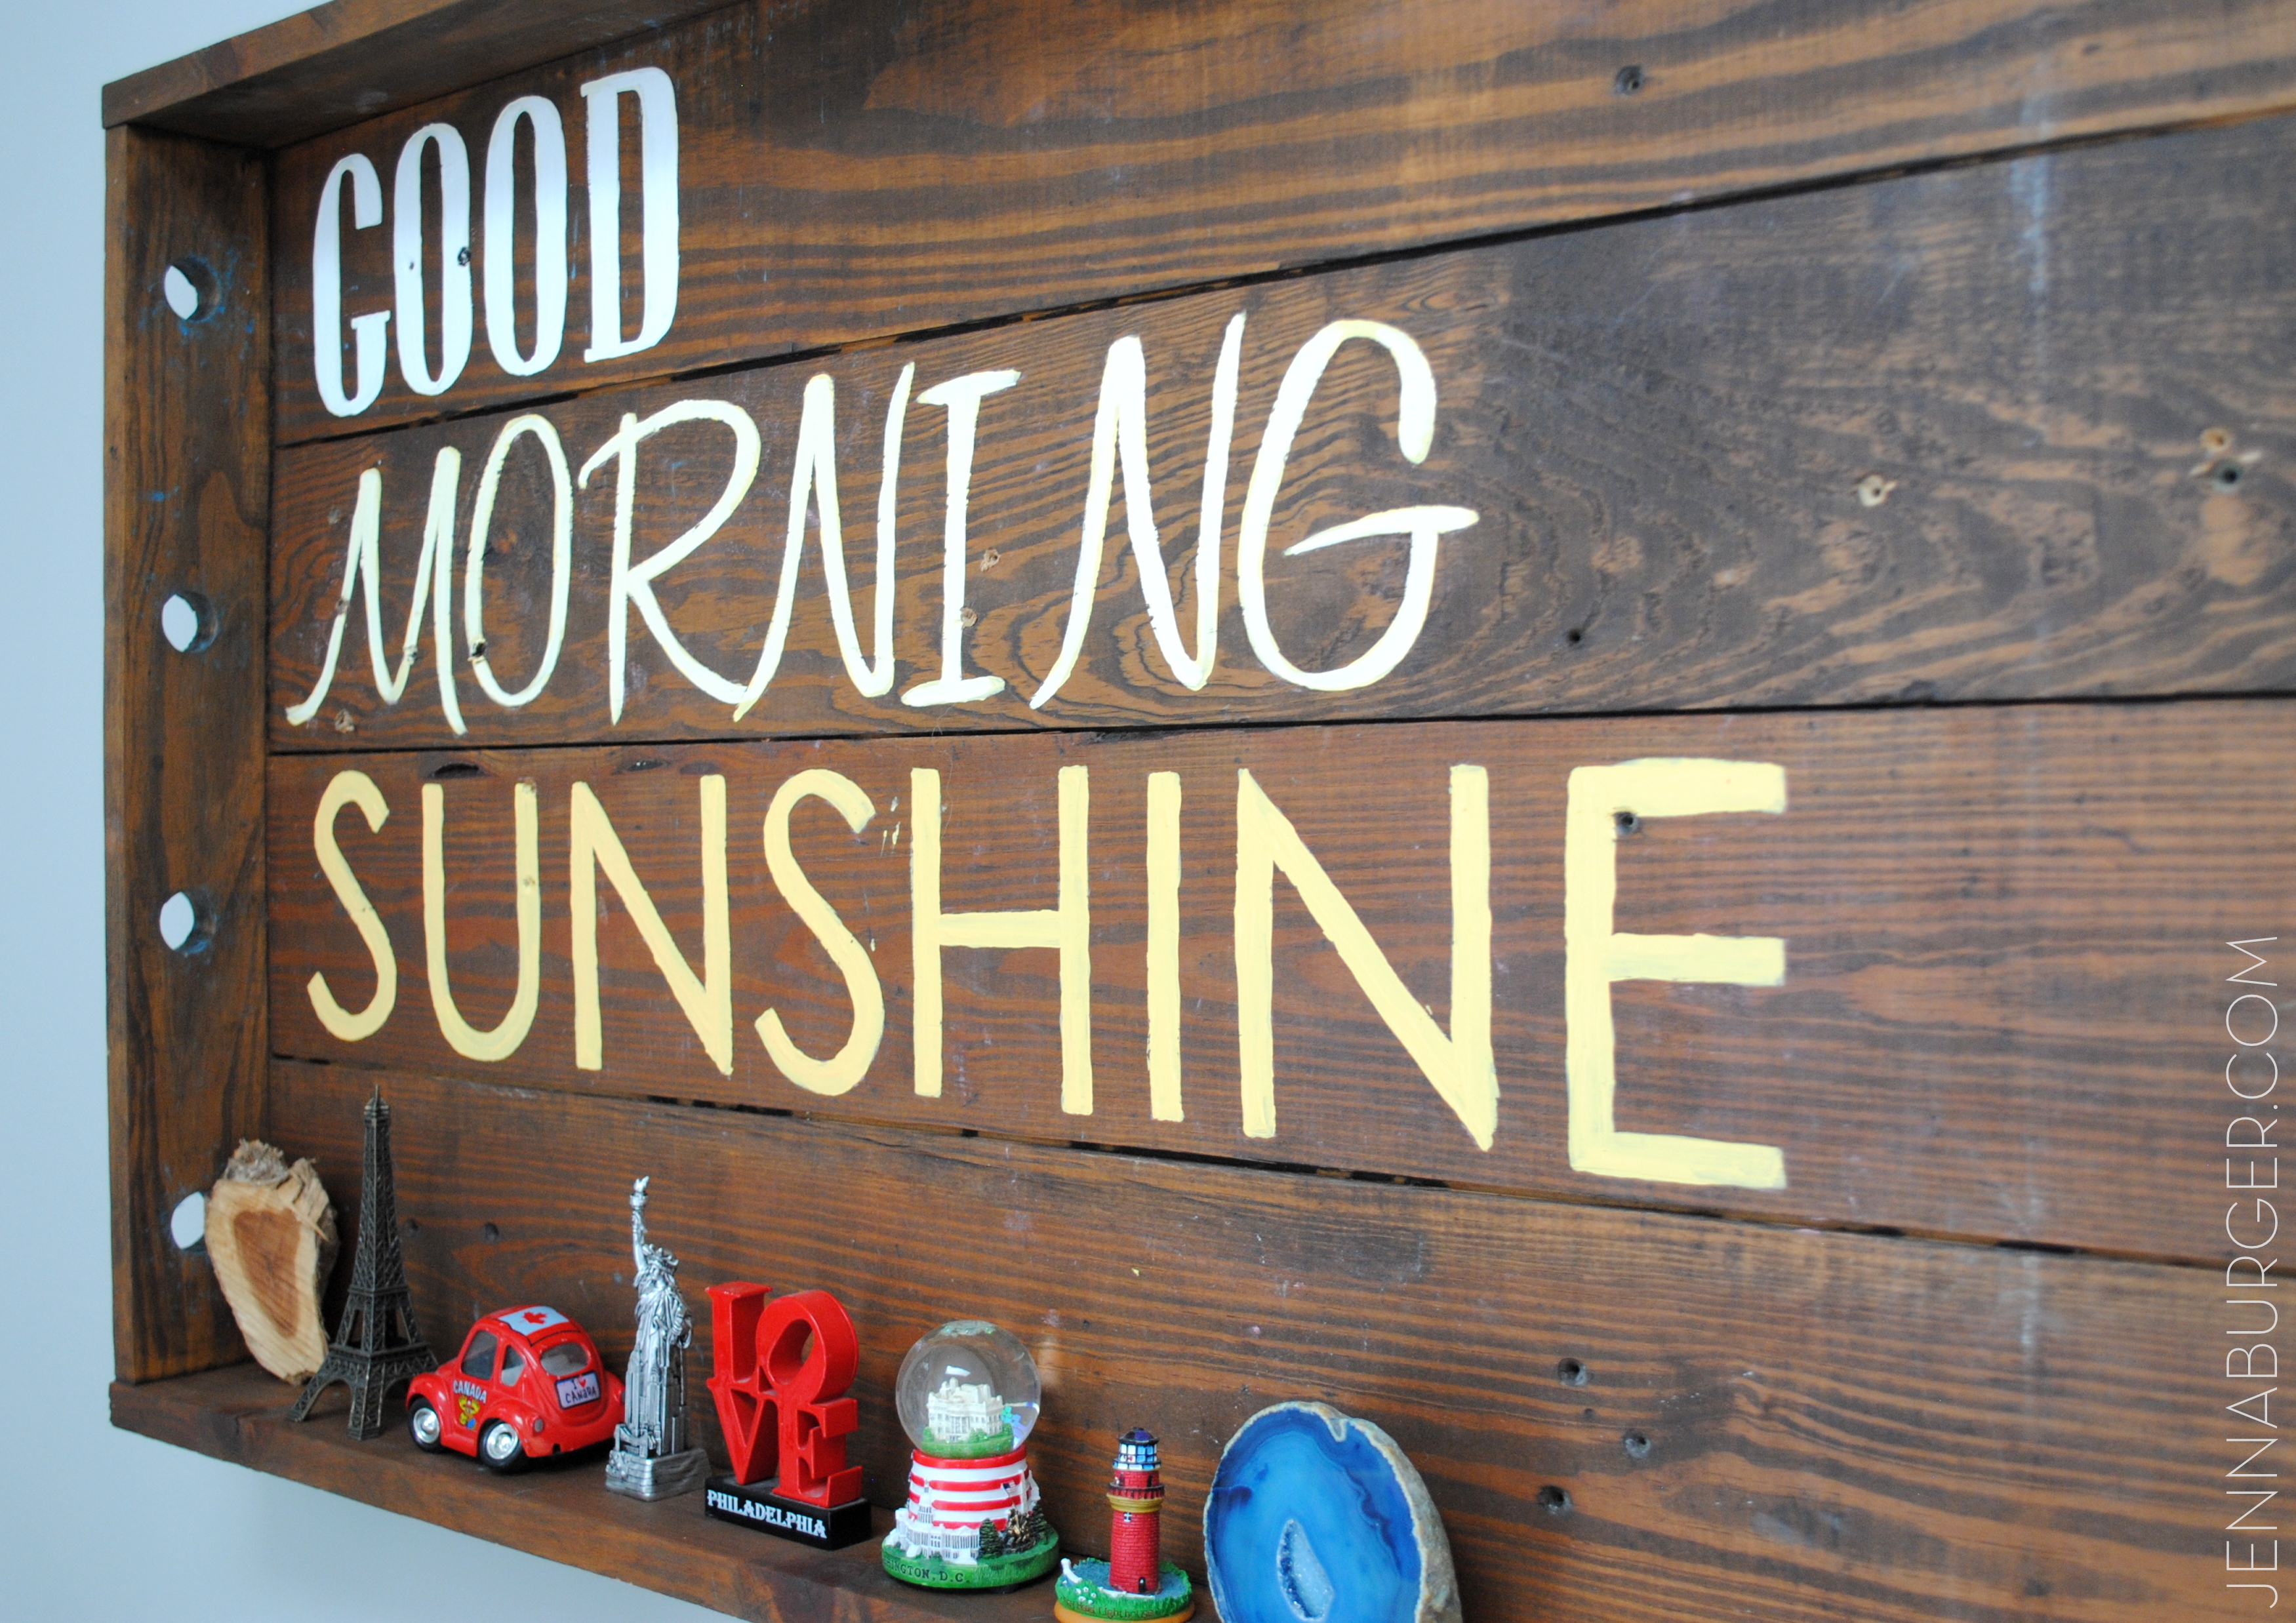
The previous owners that resided in our home, had a pool table in the basement.  While making some changes to create a basement that works + functions for us, I came across a cue stick holder that was tucked away in a closet.  Aside from a few cobwebs in the corners & screws hanging out, it looked like something I could totally make into something else.  An upcycling project was calling my name!  I left it in it’s place, but never forgot about it.  DIY ideas flurried through my head over the months and then I had an ah-ha moment while creating the new room.  It would be perfect for a big ole’ sign & with the 3″ lip, when hung it would create a ‘ledge’… almost like a knick-knack / chachka shelf to display collectibles from trips… we always grab a little something from places we visit to remember our experience – something cute to continue ‘our story’.

I thought and thought about the perfect quote to create on the cue stick holder-turned-DIY art and then Good Morning SUNSHINE came to mind!

Every morning when the kids wake, I always say “Good Morning Sunshine” in this over-the-top, probably annoying-to-them voice.  But it’s just what I do and it’s become a ritual.  I just feel like it’s a great, cheery way to start the day.

how to make a HAND PAINTED SIGN USING CHALK

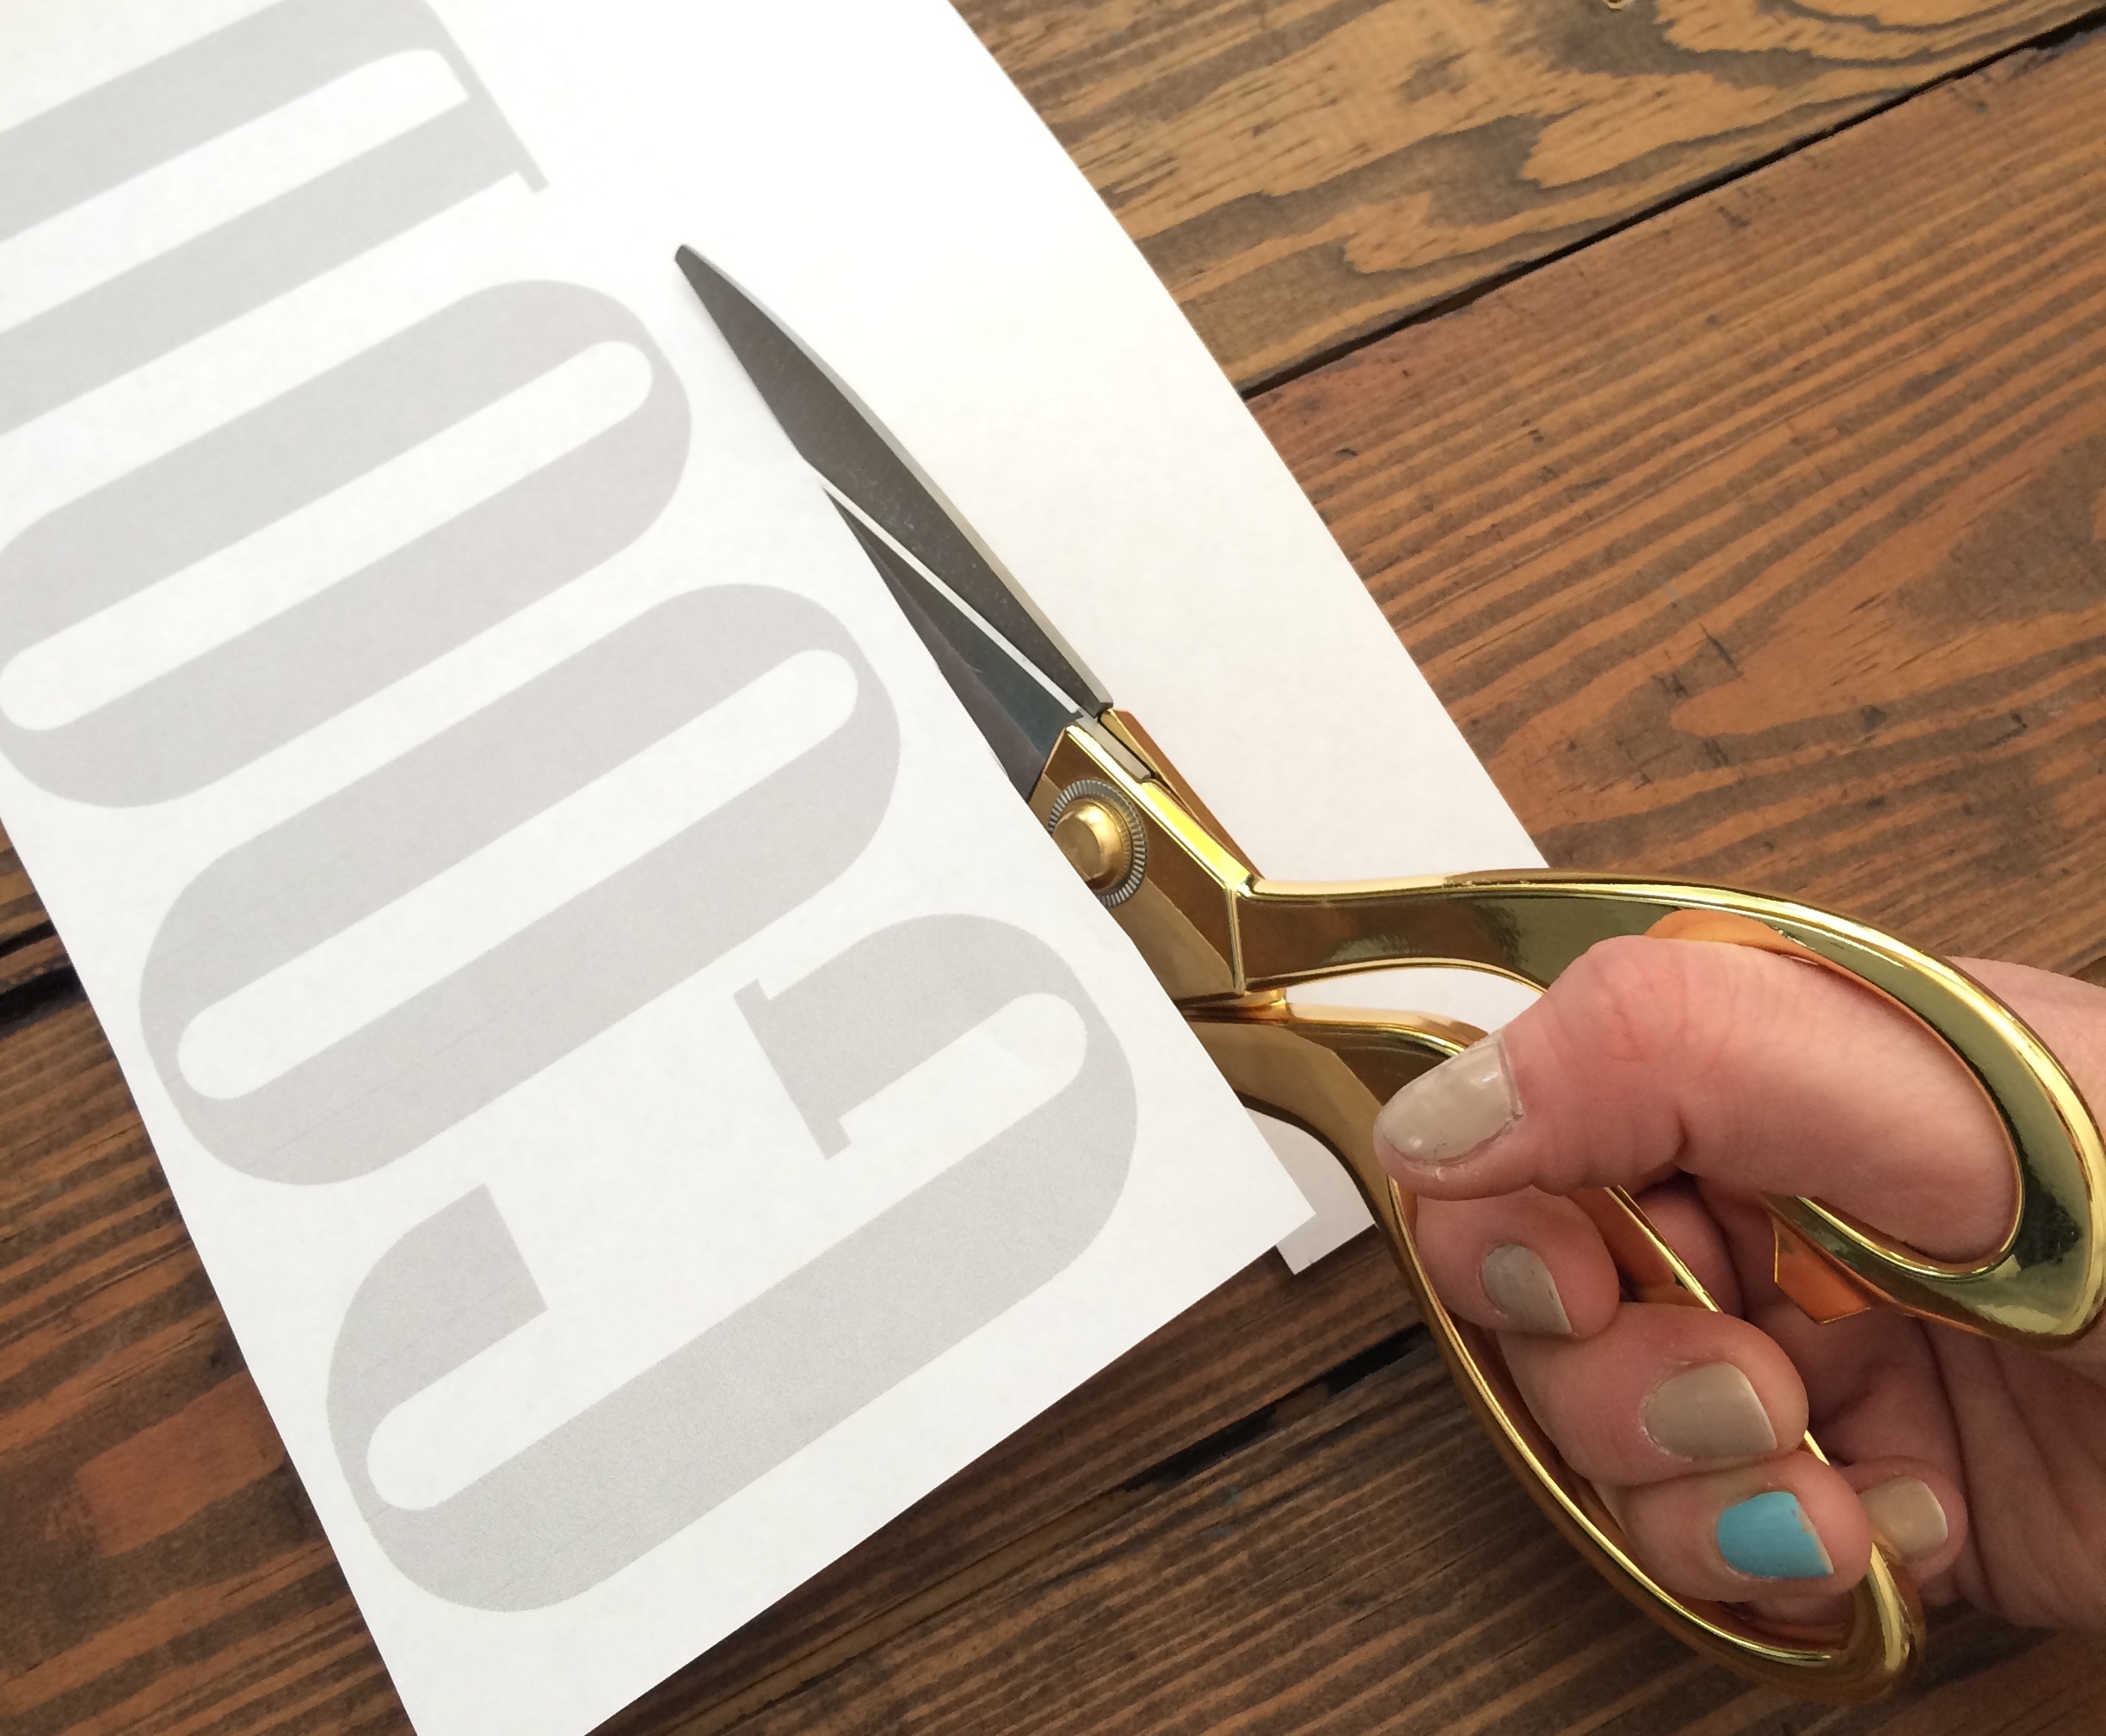
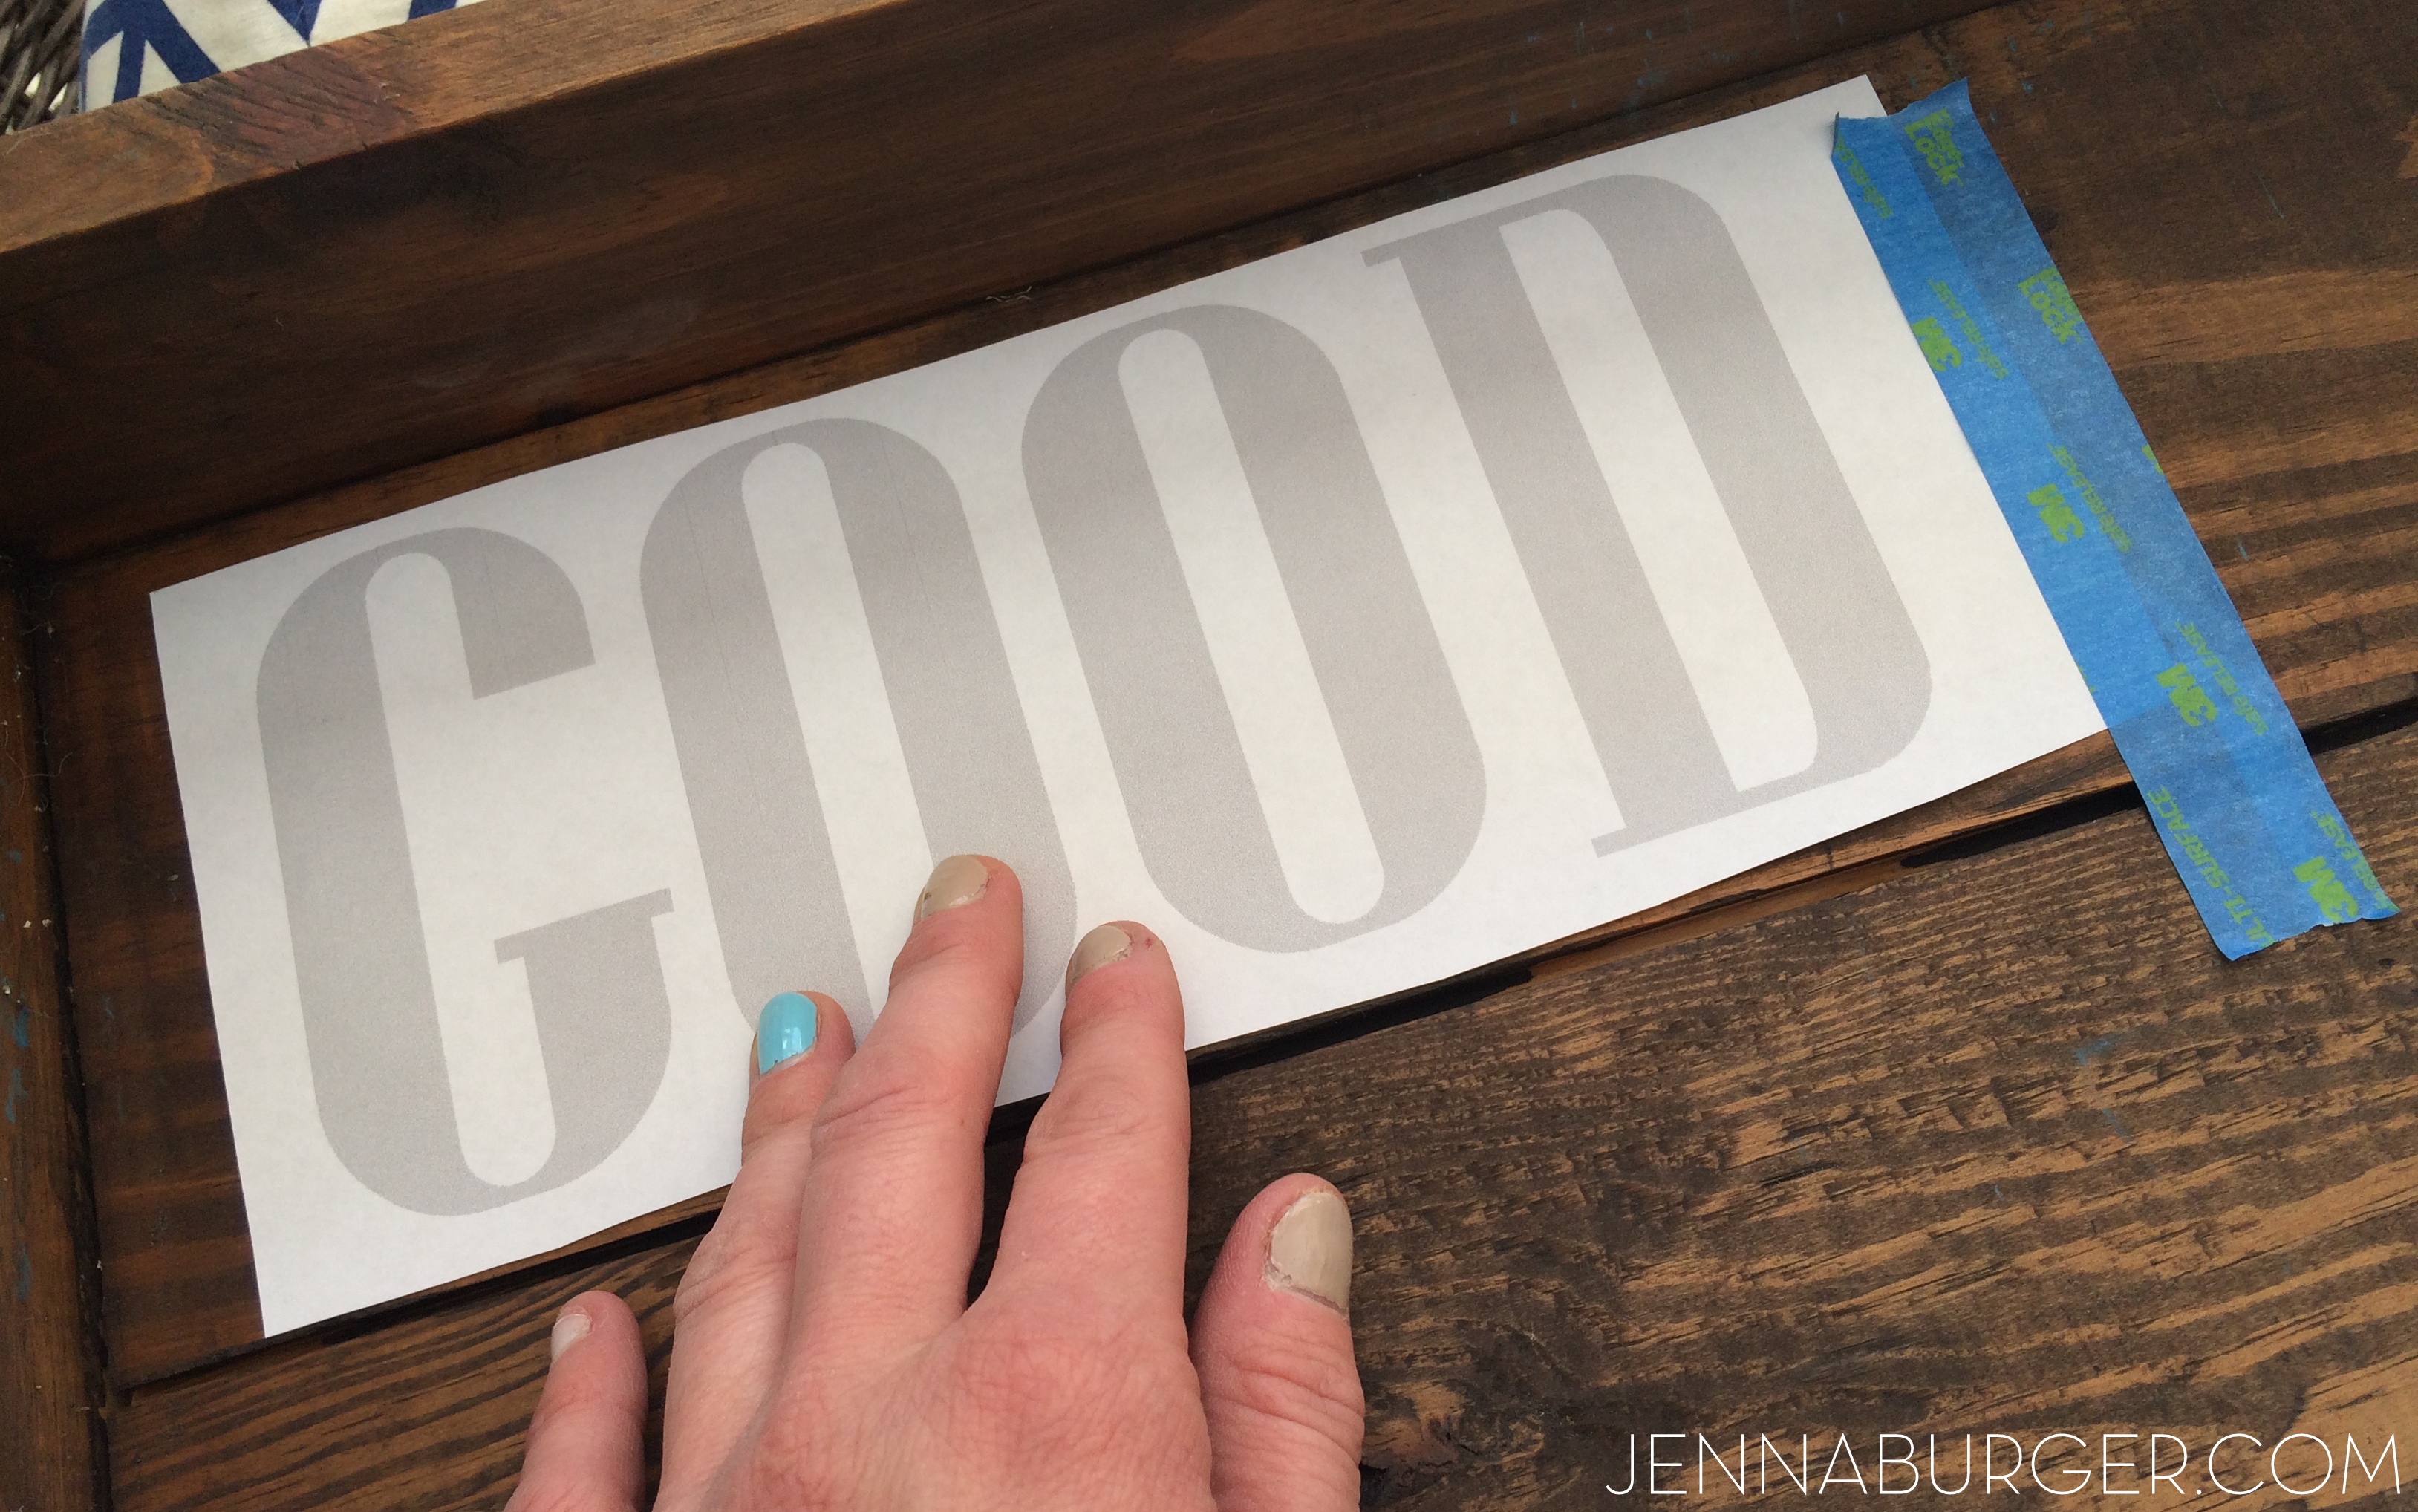
1. To start, I used a new Word doc and created the words to a size I desired (about 4.5″ high), then printed them (I used gray scale on a fast printing setting so I didn’t waste too much ink)

These are the fonts I used:

> GOOD – Pottery Barn font

> MORNING – Honey Script font

> SUNSHINE – Century Gothic font

Once printed the words, I cut around the edges…

DIY tutorial: HAND PAINTED SIGN using CHALK to transfer design onto wood.   An easy + inexpensive technique to transfer letters or a custom design.  Easy-to-follow step by step by @Jenna_Burger, www.jennaburger.com

2. Before placing the paper on the wood, I flipped it over to the back and rolled on the chalk from edge to edge so the letters on the other side would be covered. A colored chalk, like red, works best!

DIY tutorial: HAND PAINTED SIGN using CHALK to transfer design onto wood.   An easy + inexpensive technique to transfer letters or a custom design.  Easy-to-follow step by step by @Jenna_Burger, www.jennaburger.com

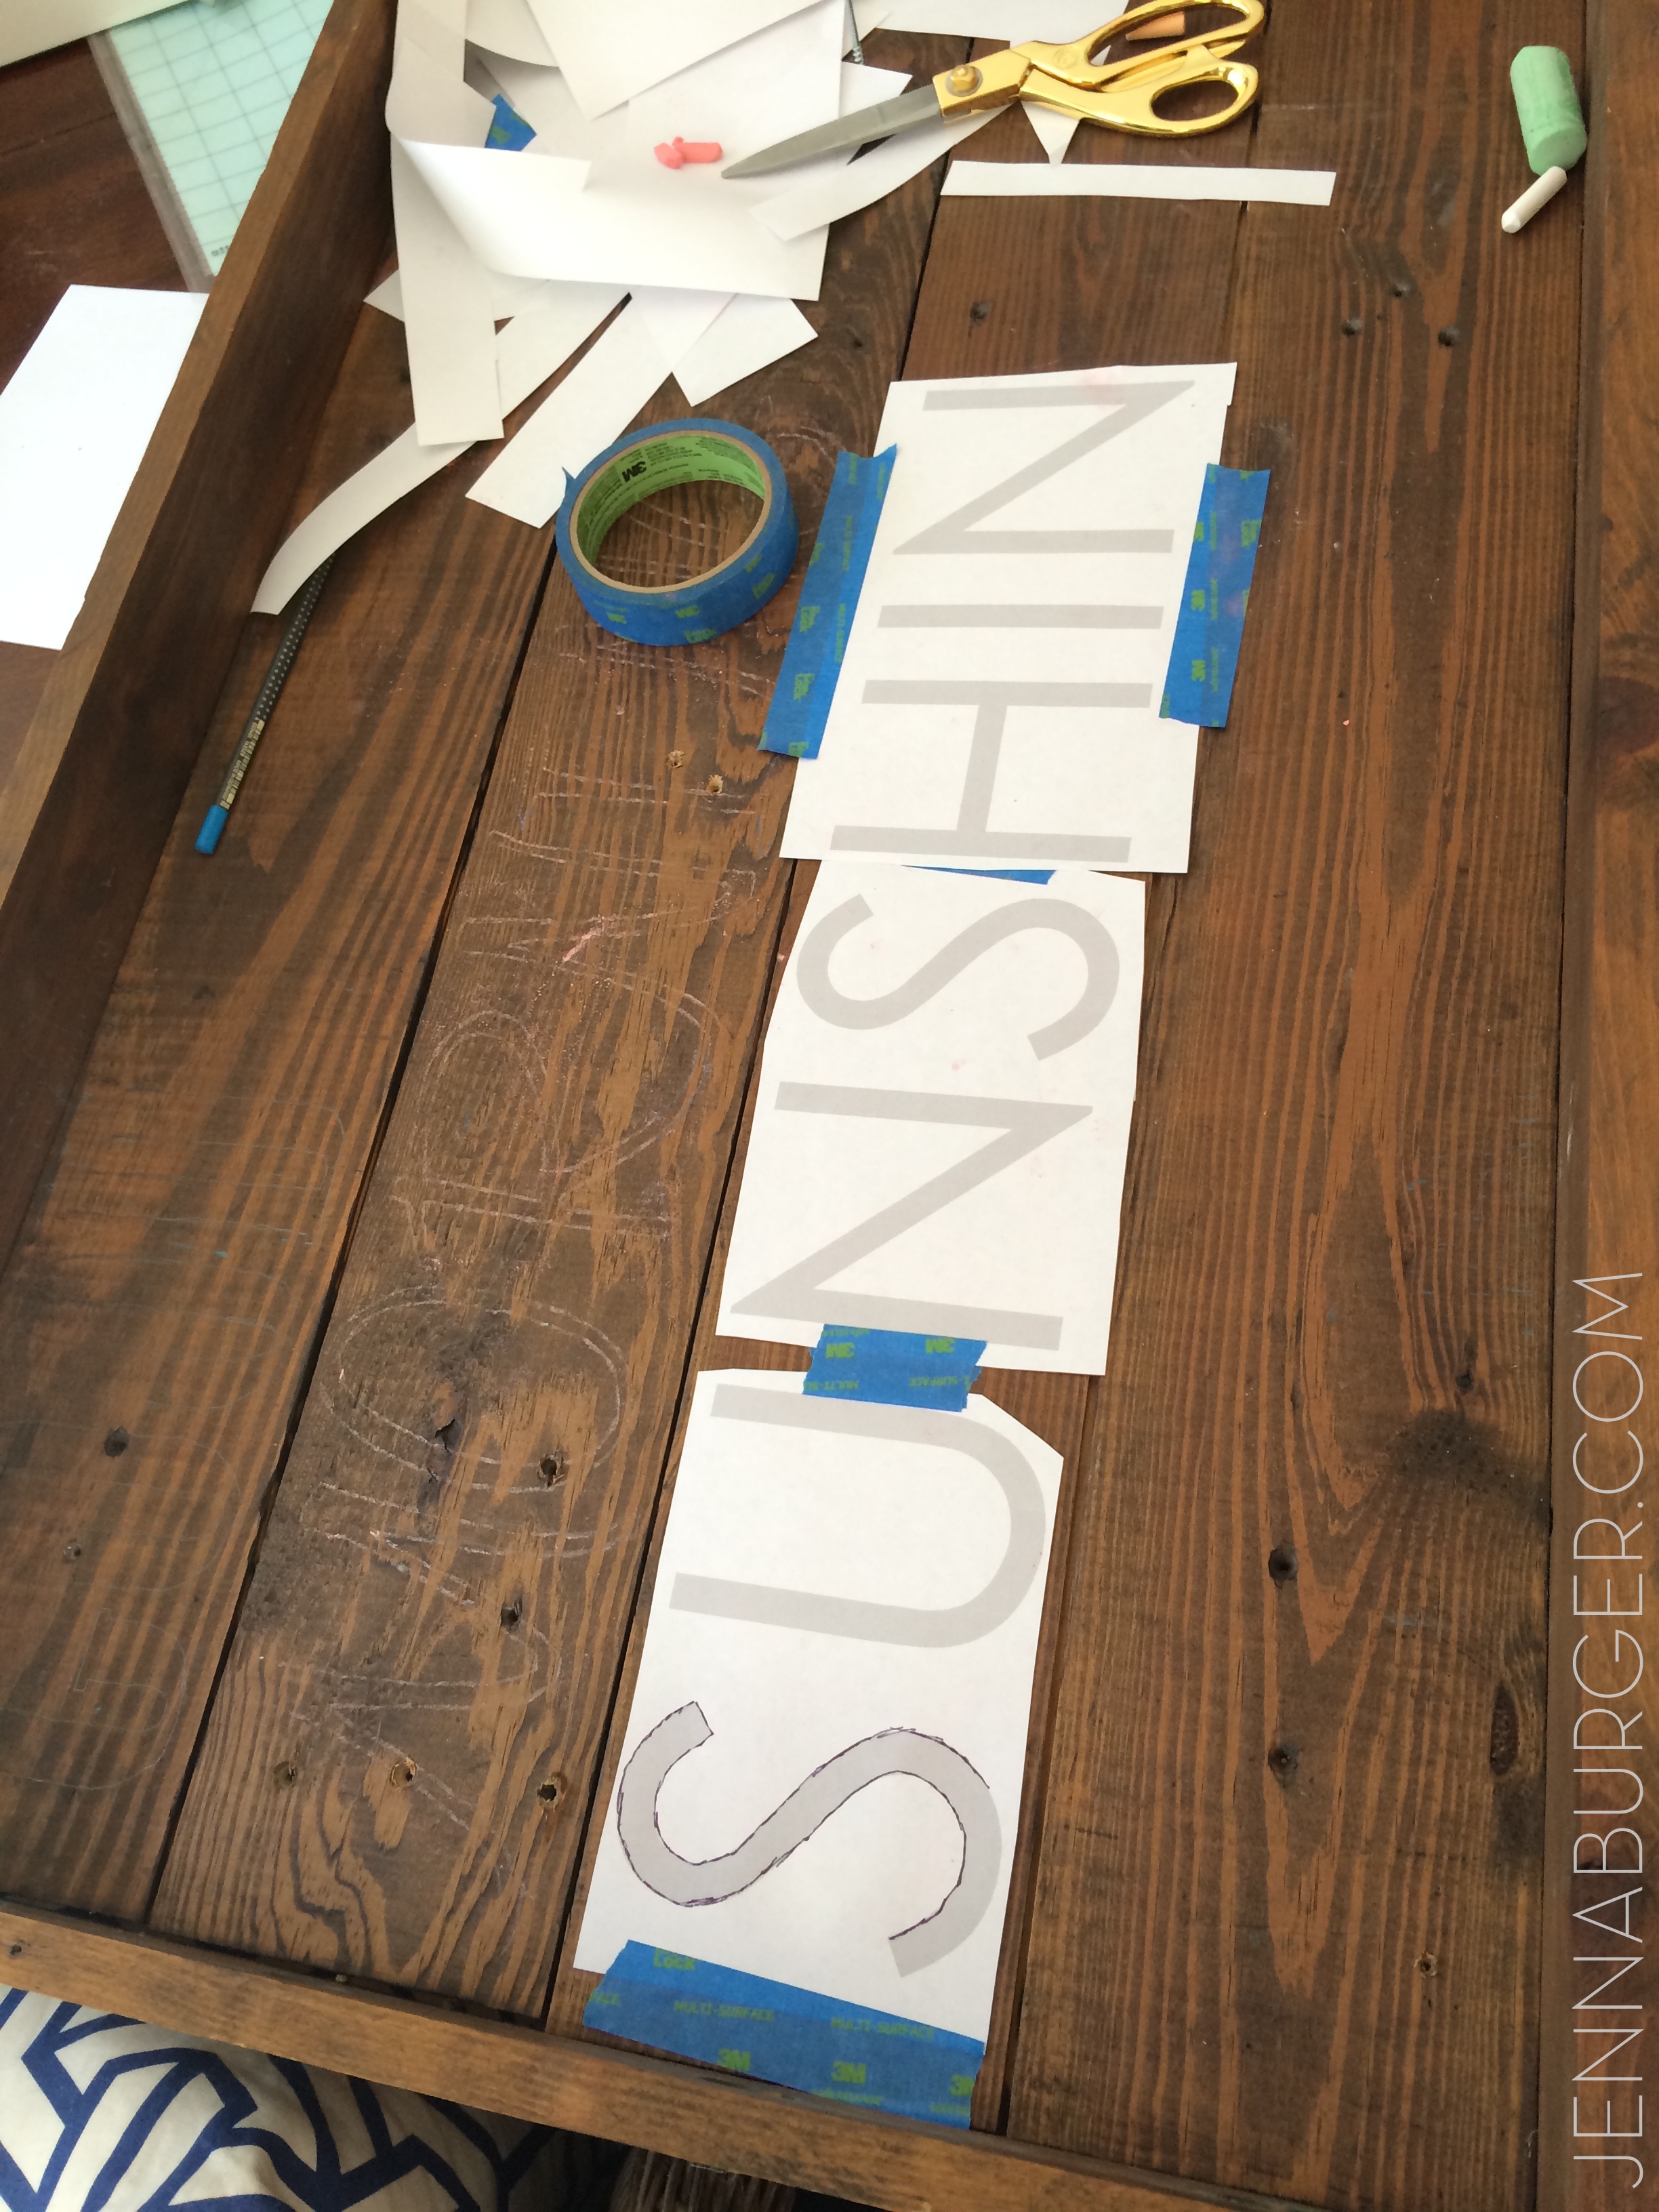
3. Then I positioned the paper on the wood and taped down the edges so it stayed in place.

DIY tutorial: HAND PAINTED SIGN using CHALK to transfer design onto wood.   An easy + inexpensive technique to transfer letters or a custom design.  Easy-to-follow step by step by @Jenna_Burger, www.jennaburger.com

DIY tutorial: HAND PAINTED SIGN using CHALK to transfer design onto wood.   An easy + inexpensive technique to transfer letters or a custom design.  Easy-to-follow step by step by @Jenna_Burger, www.jennaburger.com

3. Using a pen (I found it was better than a pencil because of the hard tip), I traced over the letters.

DIY tutorial: HAND PAINTED SIGN using CHALK to transfer design onto wood.   An easy + inexpensive technique to transfer letters or a custom design.  Easy-to-follow step by step by @Jenna_Burger, www.jennaburger.com

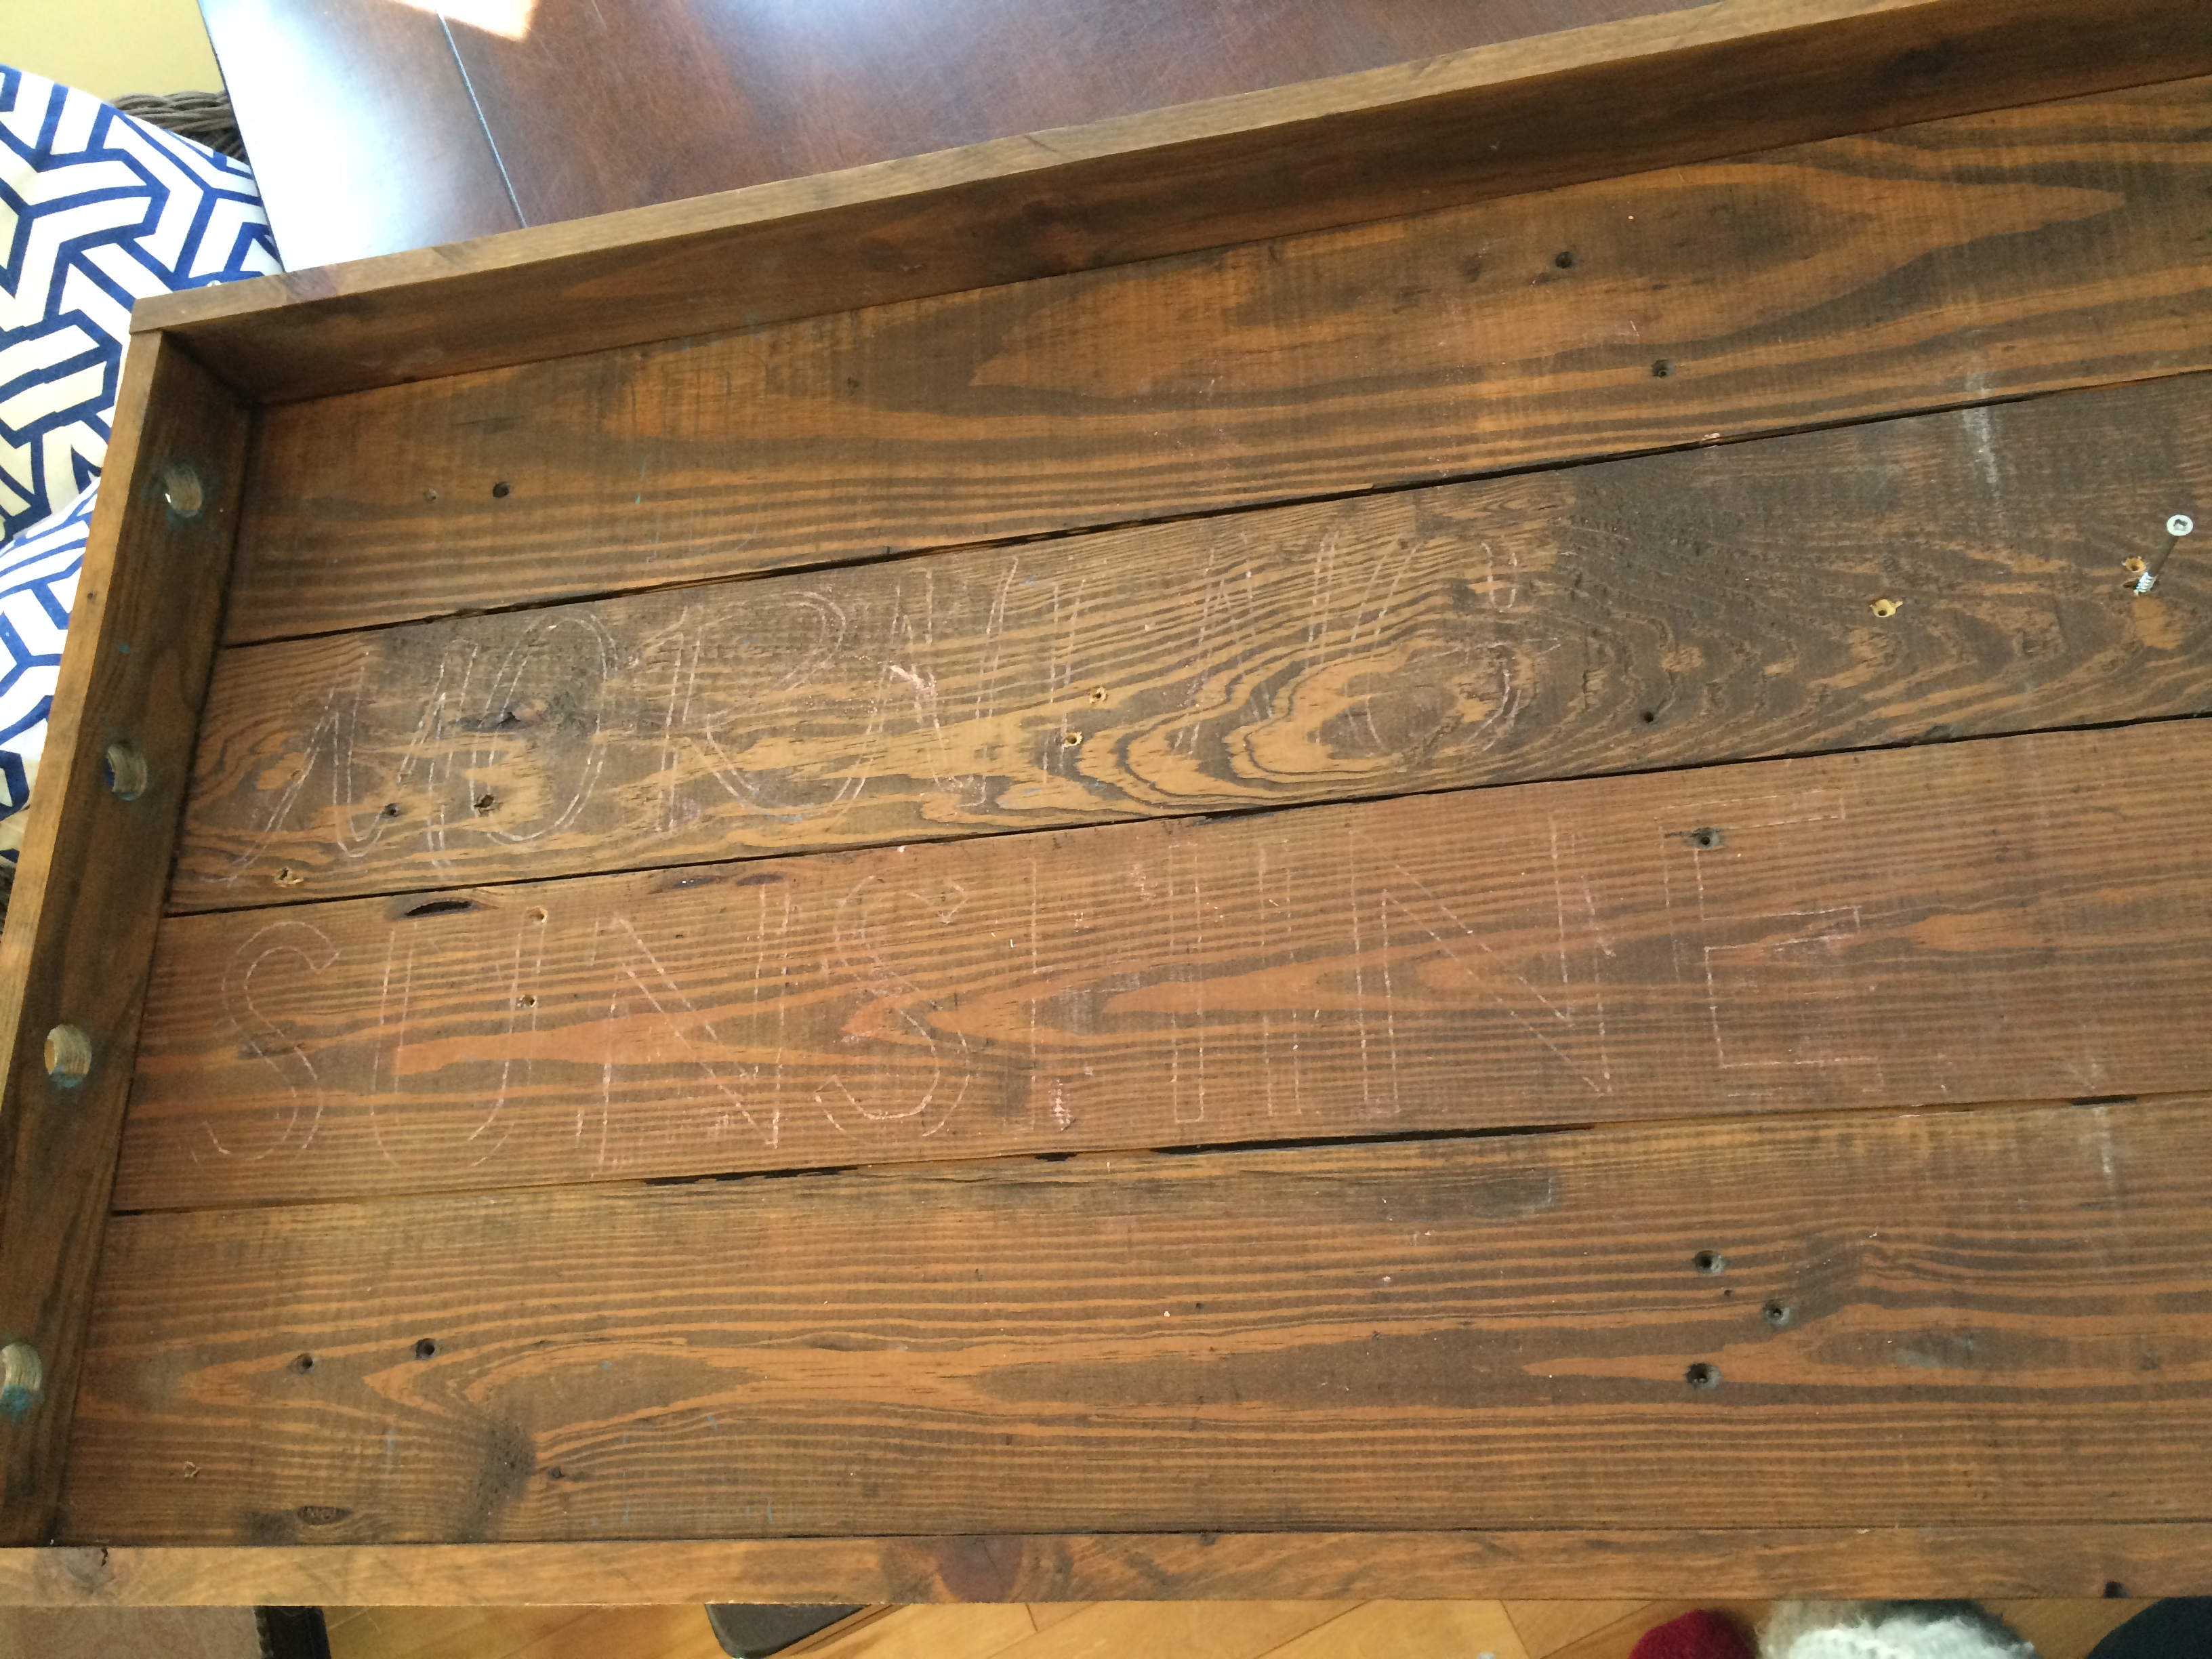
And voila, when you lift the paper, the outline of the letter (or design) can be seen…

DIY tutorial: HAND PAINTED SIGN using CHALK to transfer design onto wood.   An easy + inexpensive technique to transfer letters or a custom design.  Easy-to-follow step by step by @Jenna_Burger, www.jennaburger.com

Here’s the overall design embossed on the wood…

DIY tutorial: HAND PAINTED SIGN using CHALK to transfer design onto wood.   An easy + inexpensive technique to transfer letters or a custom design.  Easy-to-follow step by step by @Jenna_Burger, www.jennaburger.com

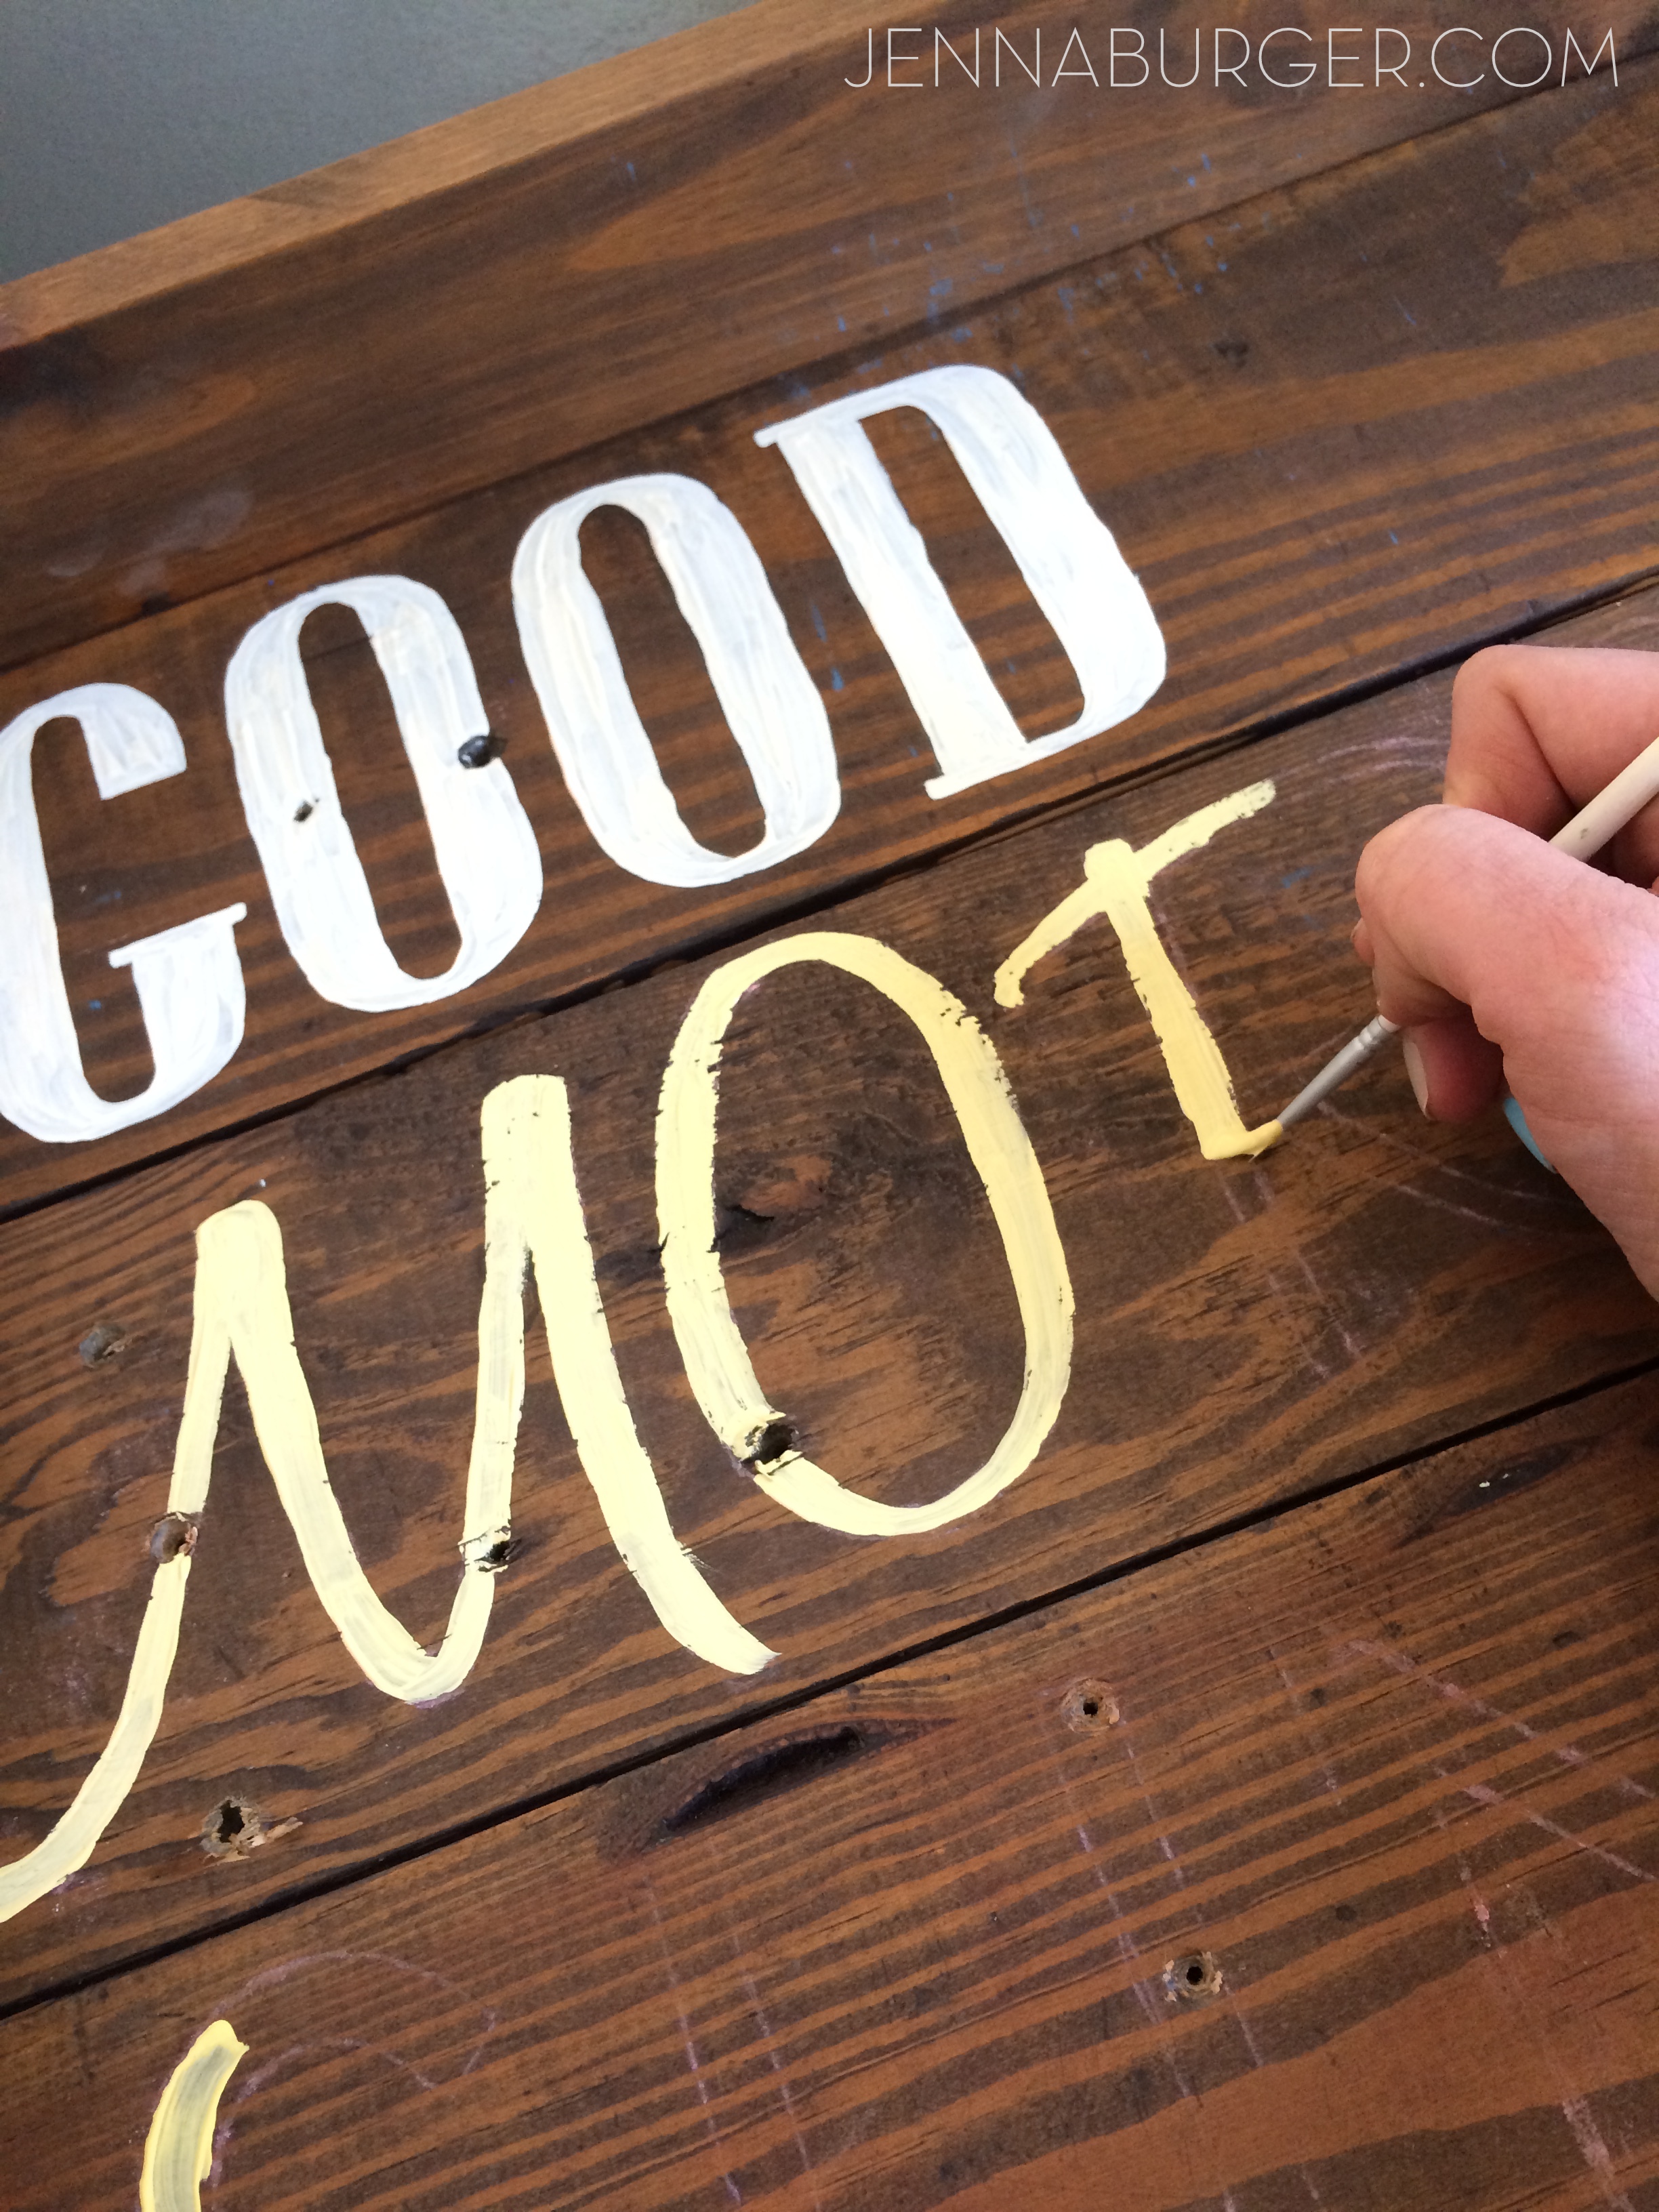
After that, it was time to paint.

Because each word was a different font, I didn’t want to go crazy with different colors as well, but at the same time I didn’t want all one color, so I chose to create an ombre effect with the words starting with a very pale yellow for GOOD, then a light yellow hue for MORNING, followed by a vibrant yellow for SUNSHINE.

I used basic, inexpensive craft paint – wall paint or anything similar would also do just fine – along with a thin brush to be sure to stay within the lines (as much as possible).

DIY tutorial: HAND PAINTED SIGN using CHALK to transfer design onto wood.   An easy + inexpensive technique to transfer letters or a custom design.  Easy-to-follow step by step by @Jenna_Burger, www.jennaburger.com

DIY tutorial: HAND PAINTED SIGN using CHALK to transfer design onto wood.   An easy + inexpensive technique to transfer letters or a custom design.  Easy-to-follow step by step by @Jenna_Burger, www.jennaburger.com

Perfectly in the lines wasn’t important…  Imperfect actually is perfect!

From start to finish, the overall project took about 2 hours to create.  This is who it looks done & hung on the wall…

DIY tutorial: HAND PAINTED SIGN using CHALK to transfer design onto wood.   An easy + inexpensive technique to transfer letters or a custom design.  Easy-to-follow step by step by @Jenna_Burger, www.jennaburger.com

Keepsakes from our travels sit on the ledge of this once cue stick holder, now hand painted sign.

DIY tutorial: HAND PAINTED SIGN using CHALK to transfer design onto wood.   An easy + inexpensive technique to transfer letters or a custom design.  Easy-to-follow step by step by @Jenna_Burger, www.jennaburger.com

DIY tutorial: HAND PAINTED SIGN using CHALK to transfer design onto wood.   An easy + inexpensive technique to transfer letters or a custom design.  Easy-to-follow step by step by @Jenna_Burger, www.jennaburger.comI love how it came out and it truly makes my day a bit sunnier, right SUNSHINE?!

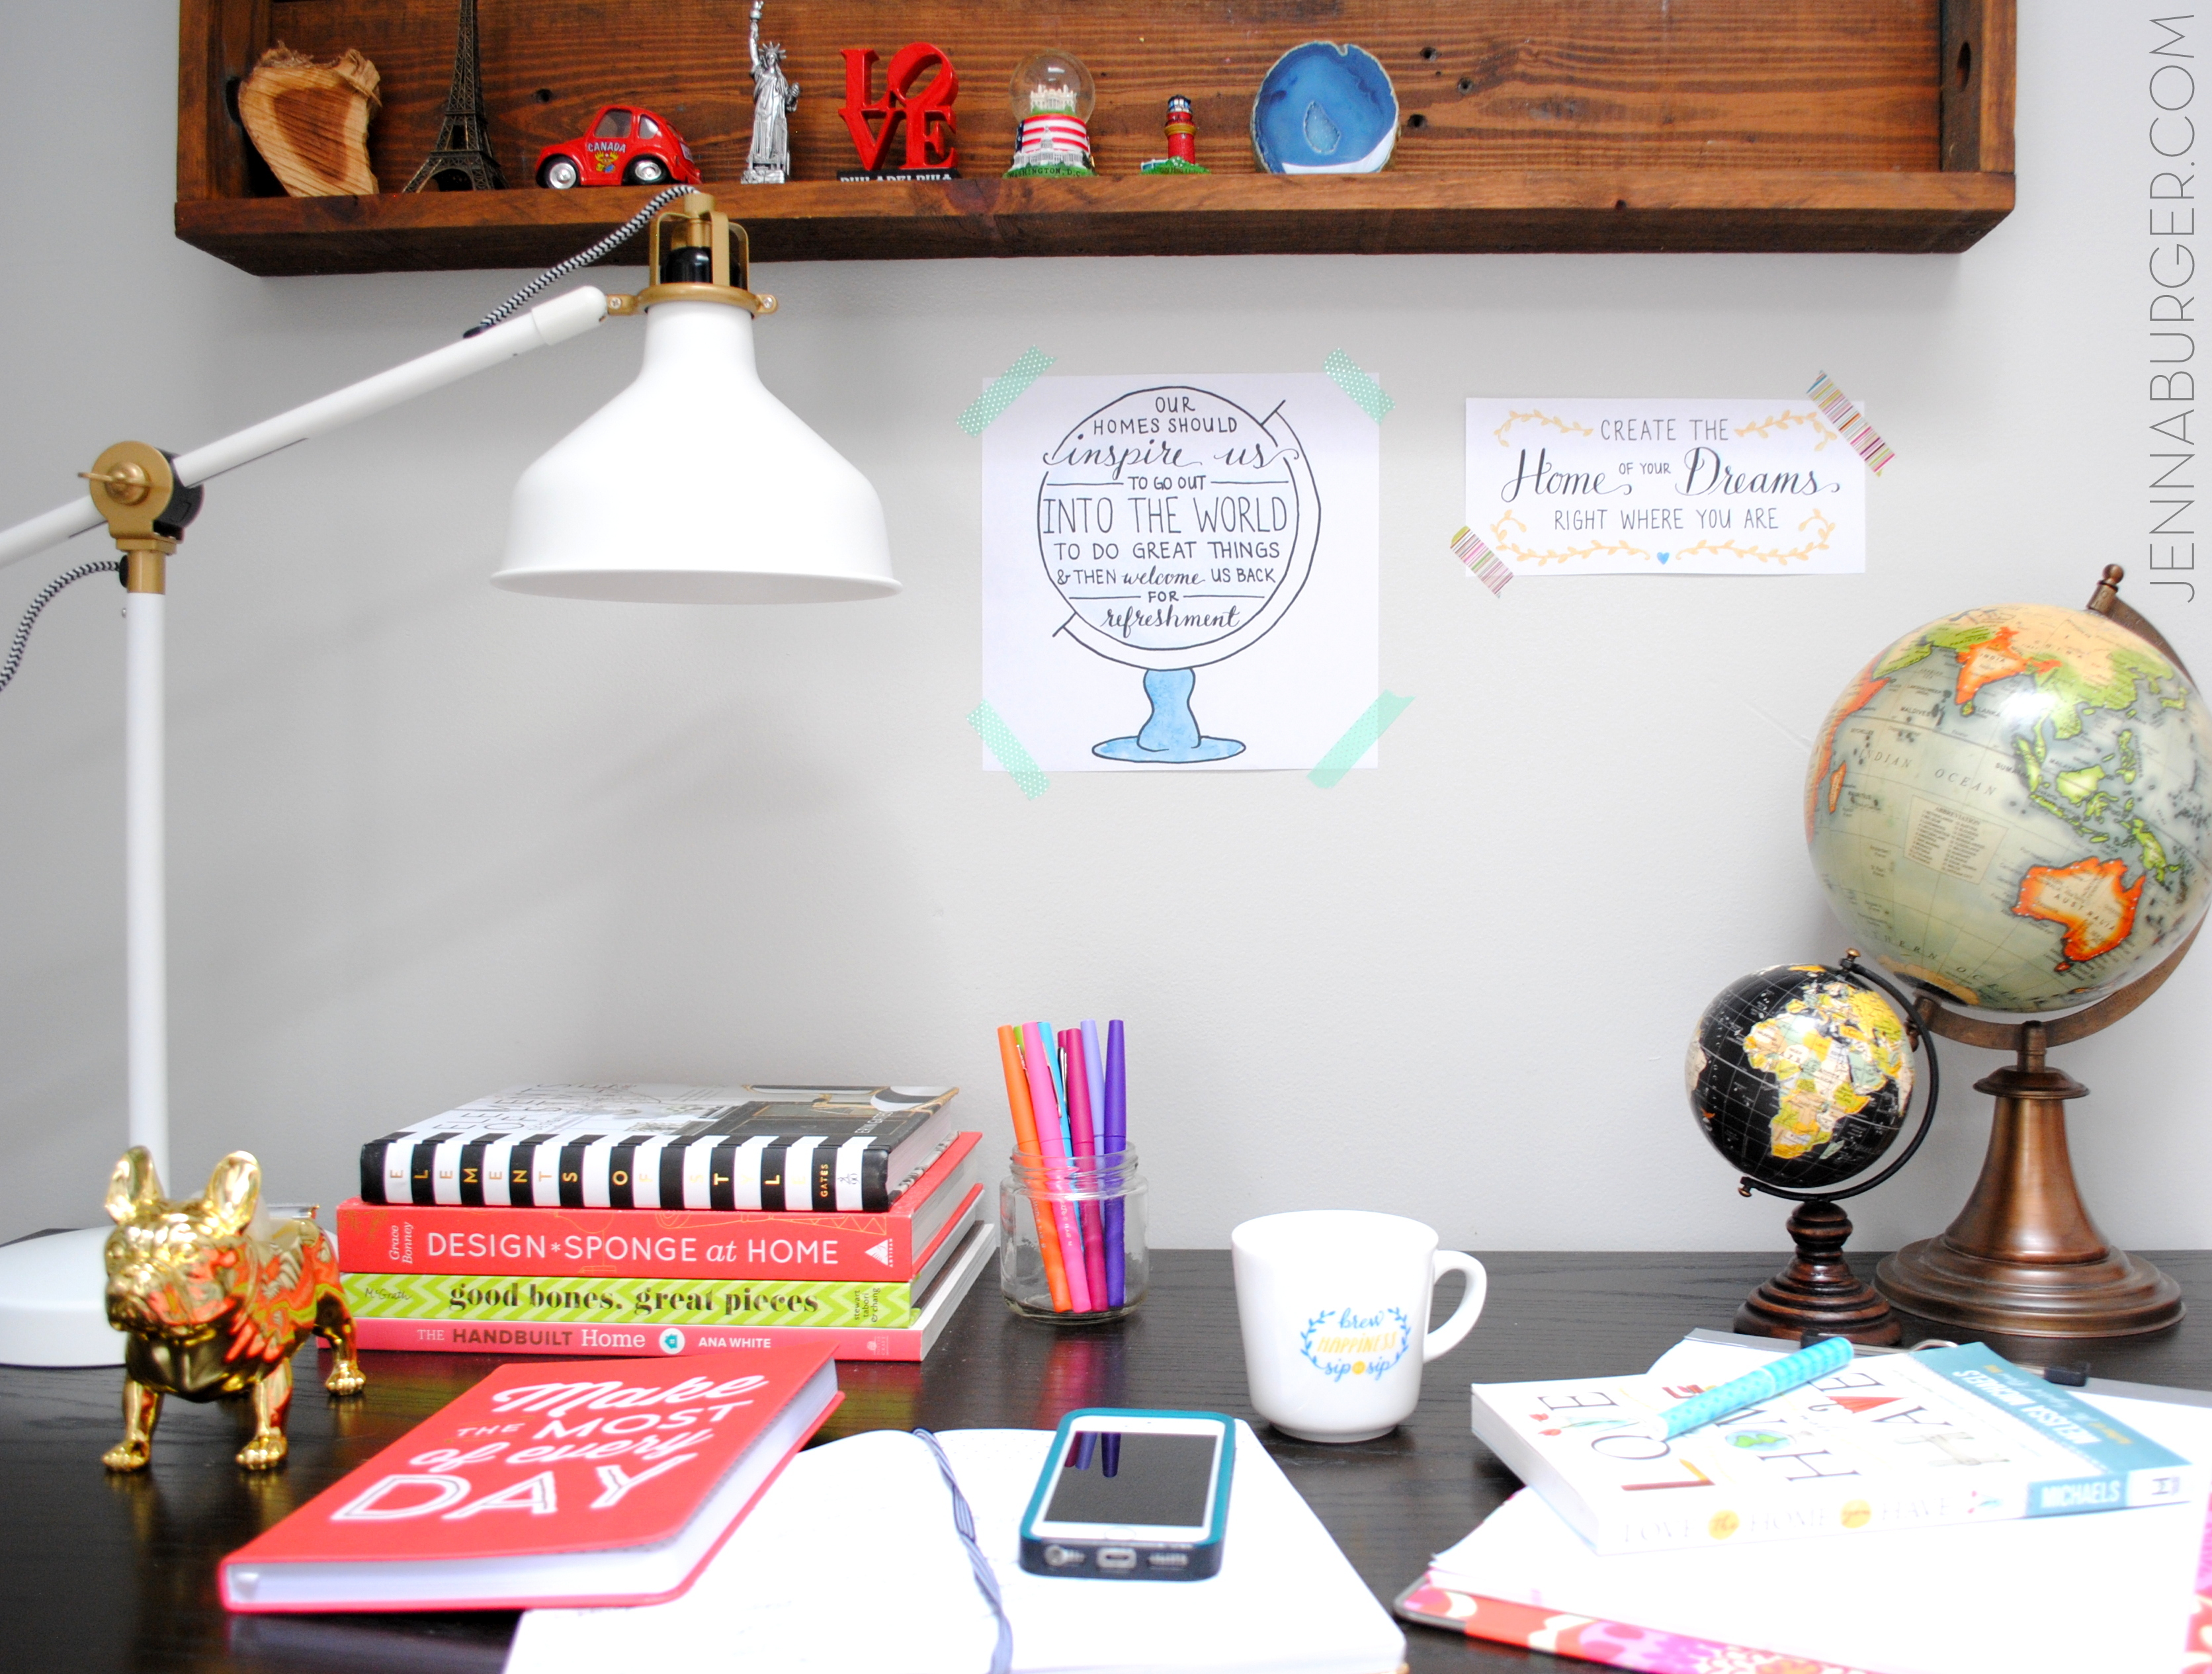
Along with the cute wood sign on this wall, I also added a few of Melissa’s illustrated quotes from her new book + website, and hung them with colorful washi tape.

DIY tutorial: HAND PAINTED SIGN using CHALK to transfer design onto wood.   An easy + inexpensive technique to transfer letters or a custom design.  Easy-to-follow step by step by @Jenna_Burger, www.jennaburger.com

If you’re interested in seeing what other Bloggers created for the #LOVEYOURHOMEchallenge, here is everyone that is included and if you head over to visit Melissa there will be links to all the projects.

Love the Home Your Have - #LOVEYOURHOMECHALLENGEIf you’re interested in joining in on the fun too, Melissa would love to have you share your own Home Love challenges on her new community site Home Love Stories.  If you’d lik, use the hashtag #LoveYourHomeChallenge to follow along and/or share your story.

The new revamped living room is really coming together – finally – and I can’t wait to share the reveal with you very soon!

Planning + Creating an Art Wall

It’s been over a month and there’s been nothing but crickets on the progression of the living room makeover (2 months to be exact).

I guess you could say that I lost my momentum with many other things going on…  By this time last year, I had tackled a slew of diy projects + 2 room makeovers.  All while pregnant. This year, I shared details on the proposed living room space and then nothing – FOR 2 MONTHS. Whether it was nesting or not, this year my game is totally off.  It may be non-motivation with this wicked weather, but honestly I think it’s more distraction and lack of time.

February was an overly busy 28 days. Not only was I in full-swing with 2 client projects, but I was also working on styling + producing my first 2 stories for Do It Yourself magazine. The experience was awesome and I hope to do it again, but it wasn’t just physically exhausting, but emotionally challenging too.  I felt so much pressure, self-induced like always.  And I won’t even go into my lack of time with 3 kids, one of which is now a full-on crawler…  Hello time sucker.  Her pure cuteness is just utterly distracting.

Anyway, as we say by-bye to month 3 and head into April, I am getting my butt back on track and finally getting this living room back-in-business and finished.

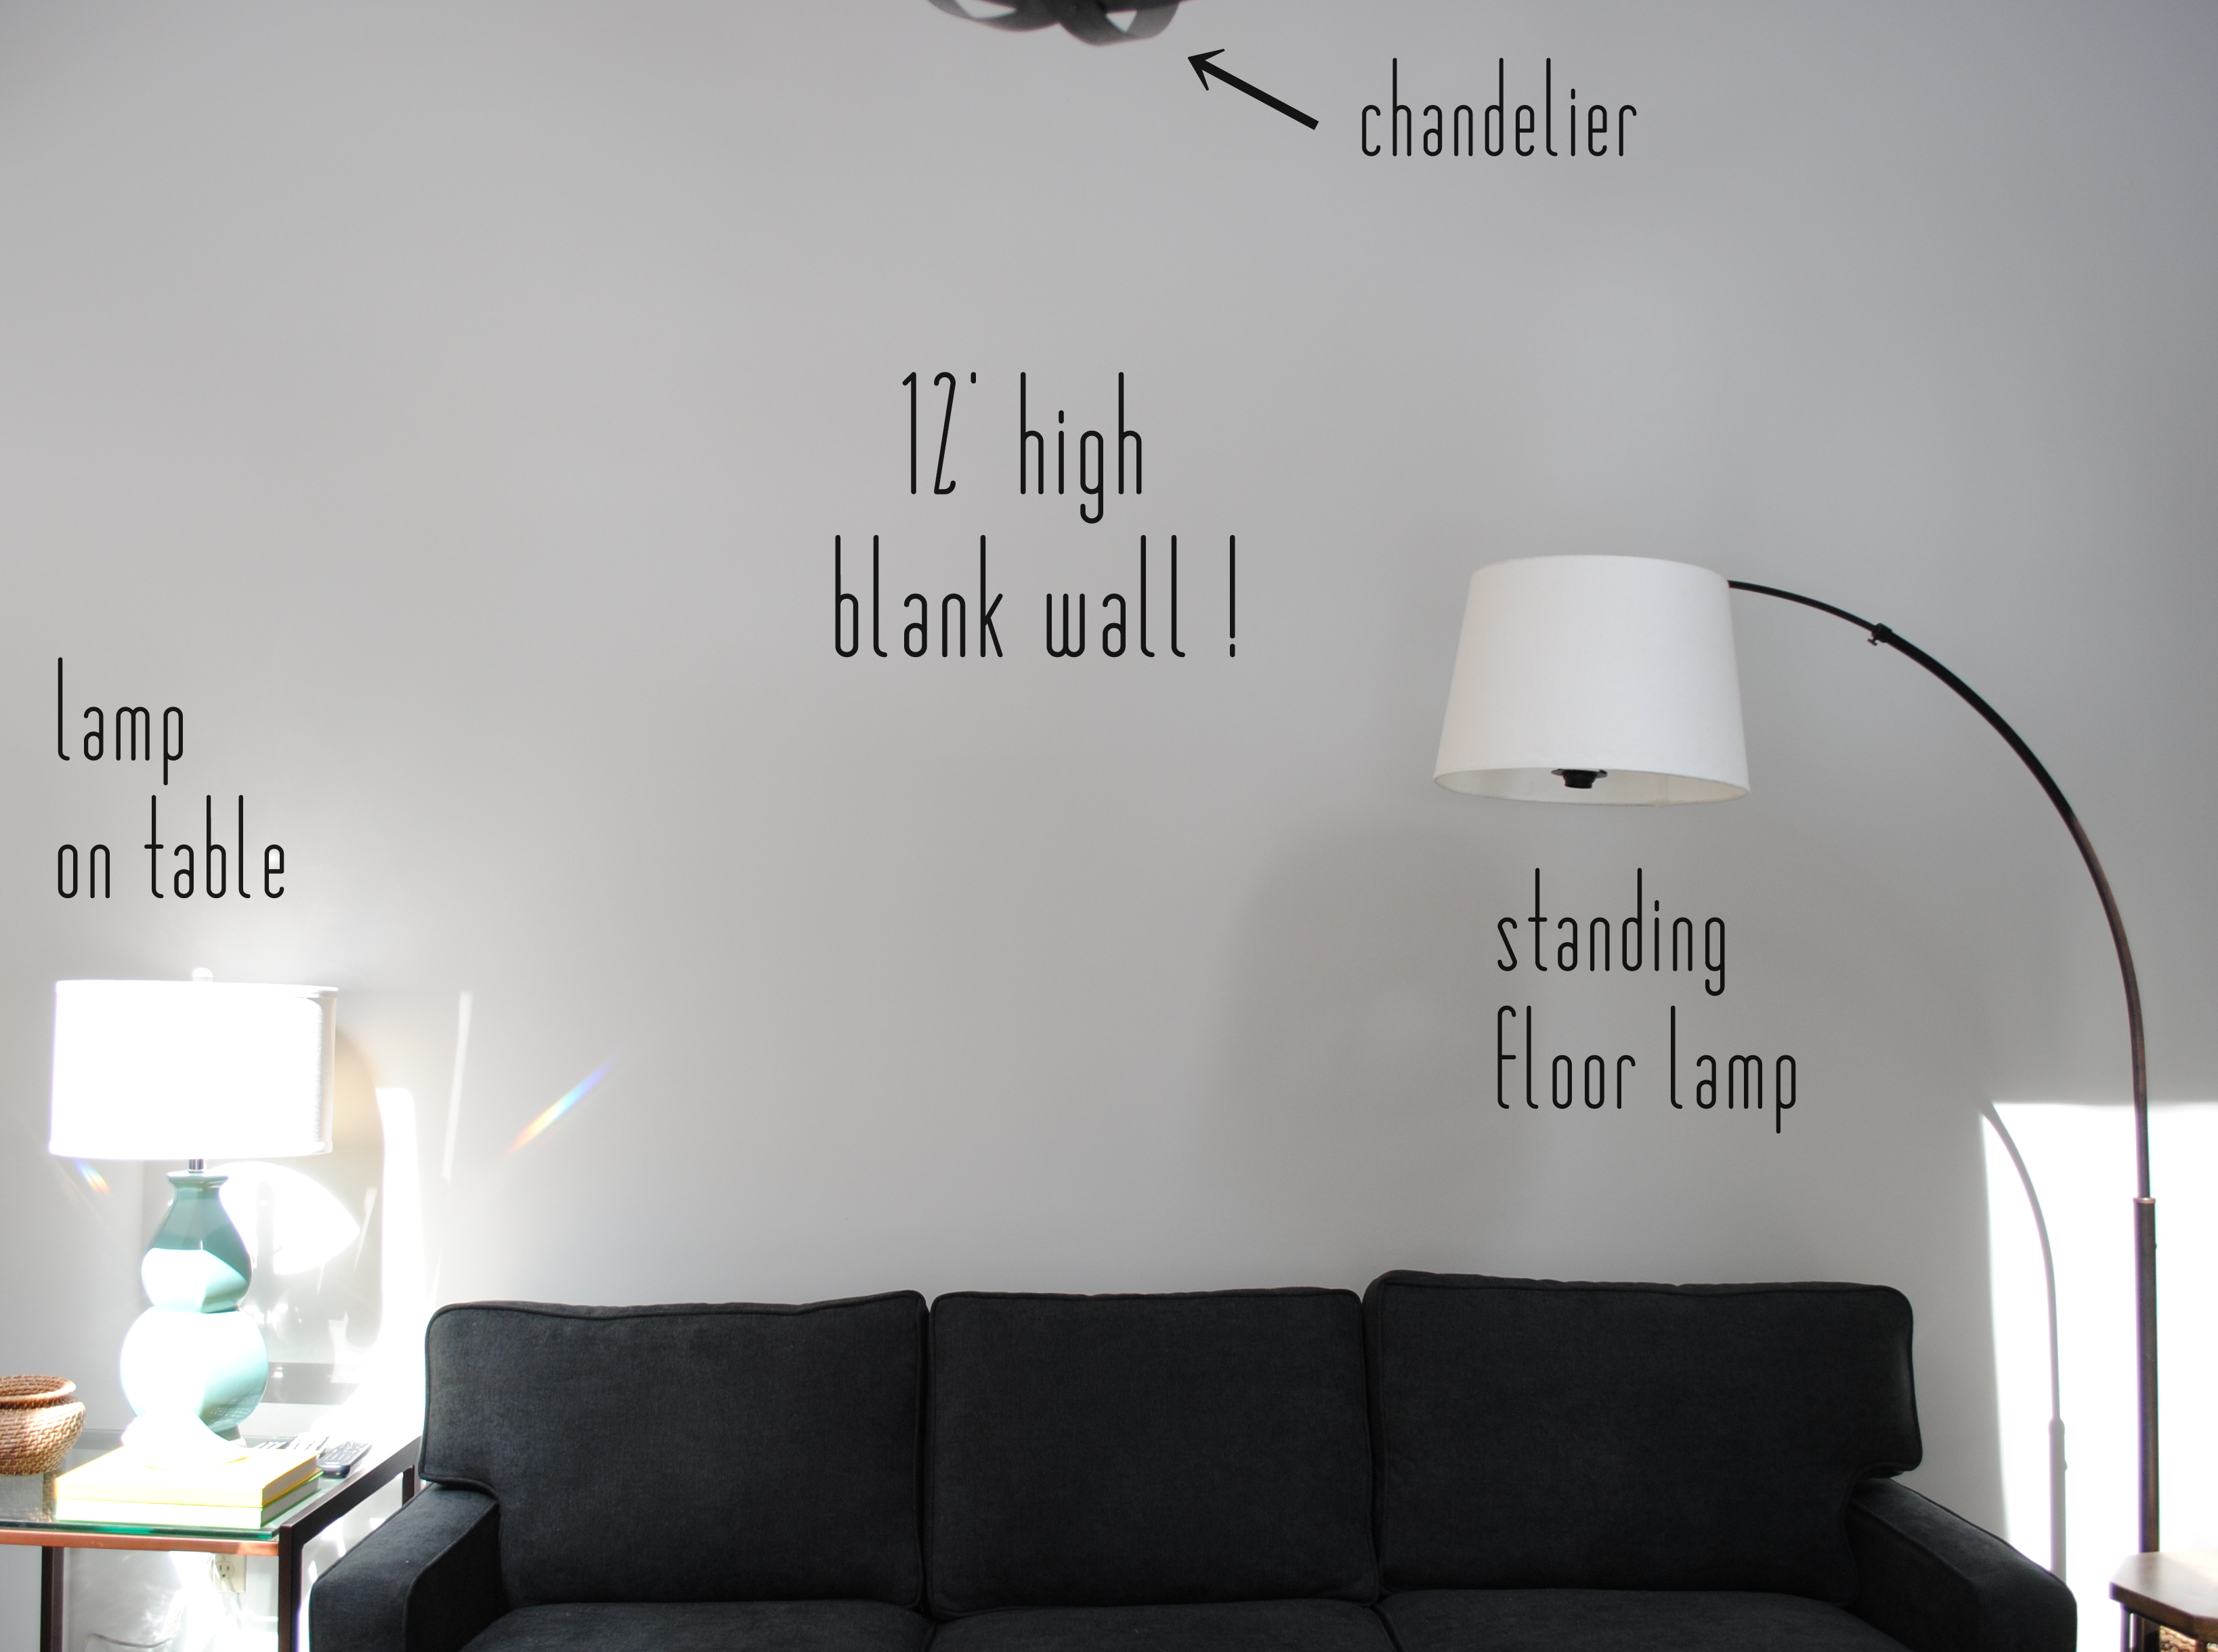
So the new charcoal sofa I ordered was delivered last week {squeal} and against the lighter gray/blue toned wall, it’s a striking contrast.  With the slanted ceiling which is 8′ at one side, and rises to 12′ on the other side, the wall behind the sofa is vast.  And vast begs for drama!  A few pretty pictures won’t do…

I was truly challenged with this blank wall!  There were so many ideas racing through my head – go symmetrical?  how about a family photo collage (but we have SO MANY photos already around the house)?  one large print?  multiple random prints?  DIY something – a map. maybe?

So many ideas, but what would look best + be meaningful + give the drama this space needed?

After much thought & planning, this is my plan of action

ideas & tips for Planning + Creating an Art Wall in your home

For my new art wall, I chose to turn to Minted, an online art shop filled with creations by independent artists.  To put it best… “Minted uses technology to allow consumers to discover great creative talent, making Minted a place where artists can learn, gain exposure, and build their businesses.”

Custom art is unattainable for many because of budget + resources, so Minted connects artists with those looking to fill their walls with beautiful, meaningful custom creations.  A nice bonus is that many of the prints are limited edition art so they only run a certain amount of prints – so you & your neighbor won’t have the same decor on the walls.

This is what the sea of wall currently looks like…

ideas & tips for Planning + Creating an Art Wall in your home

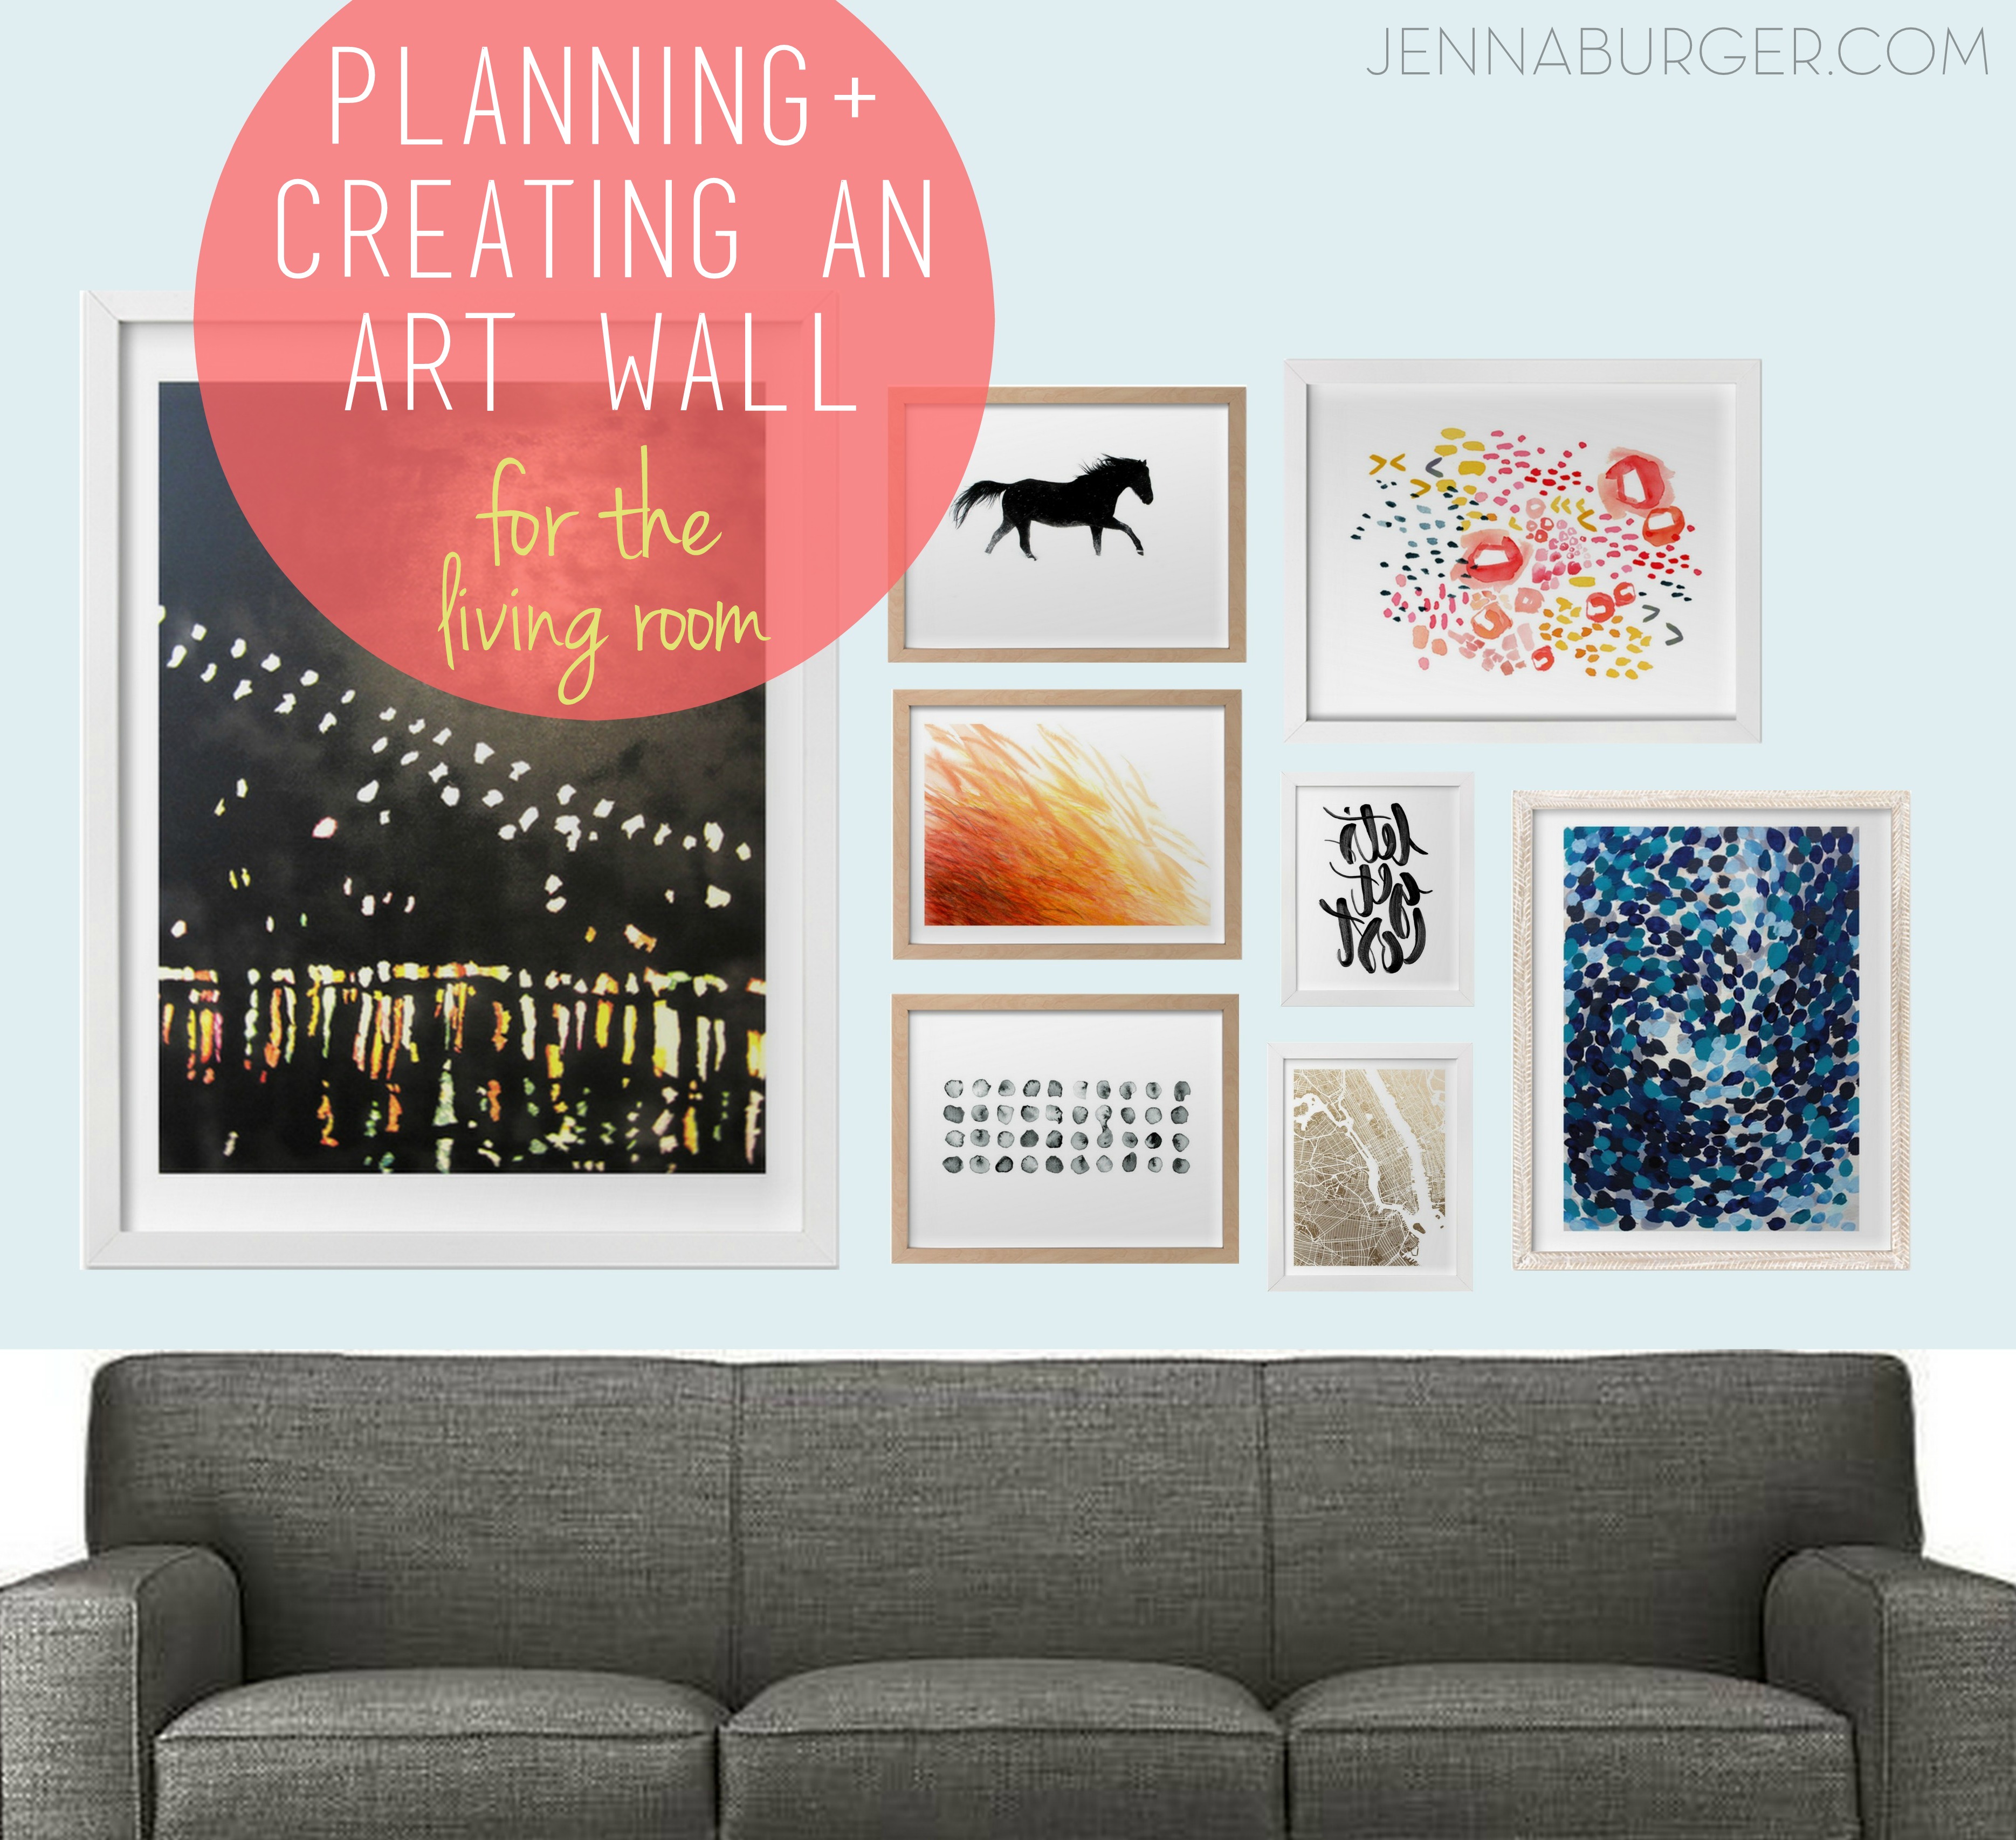
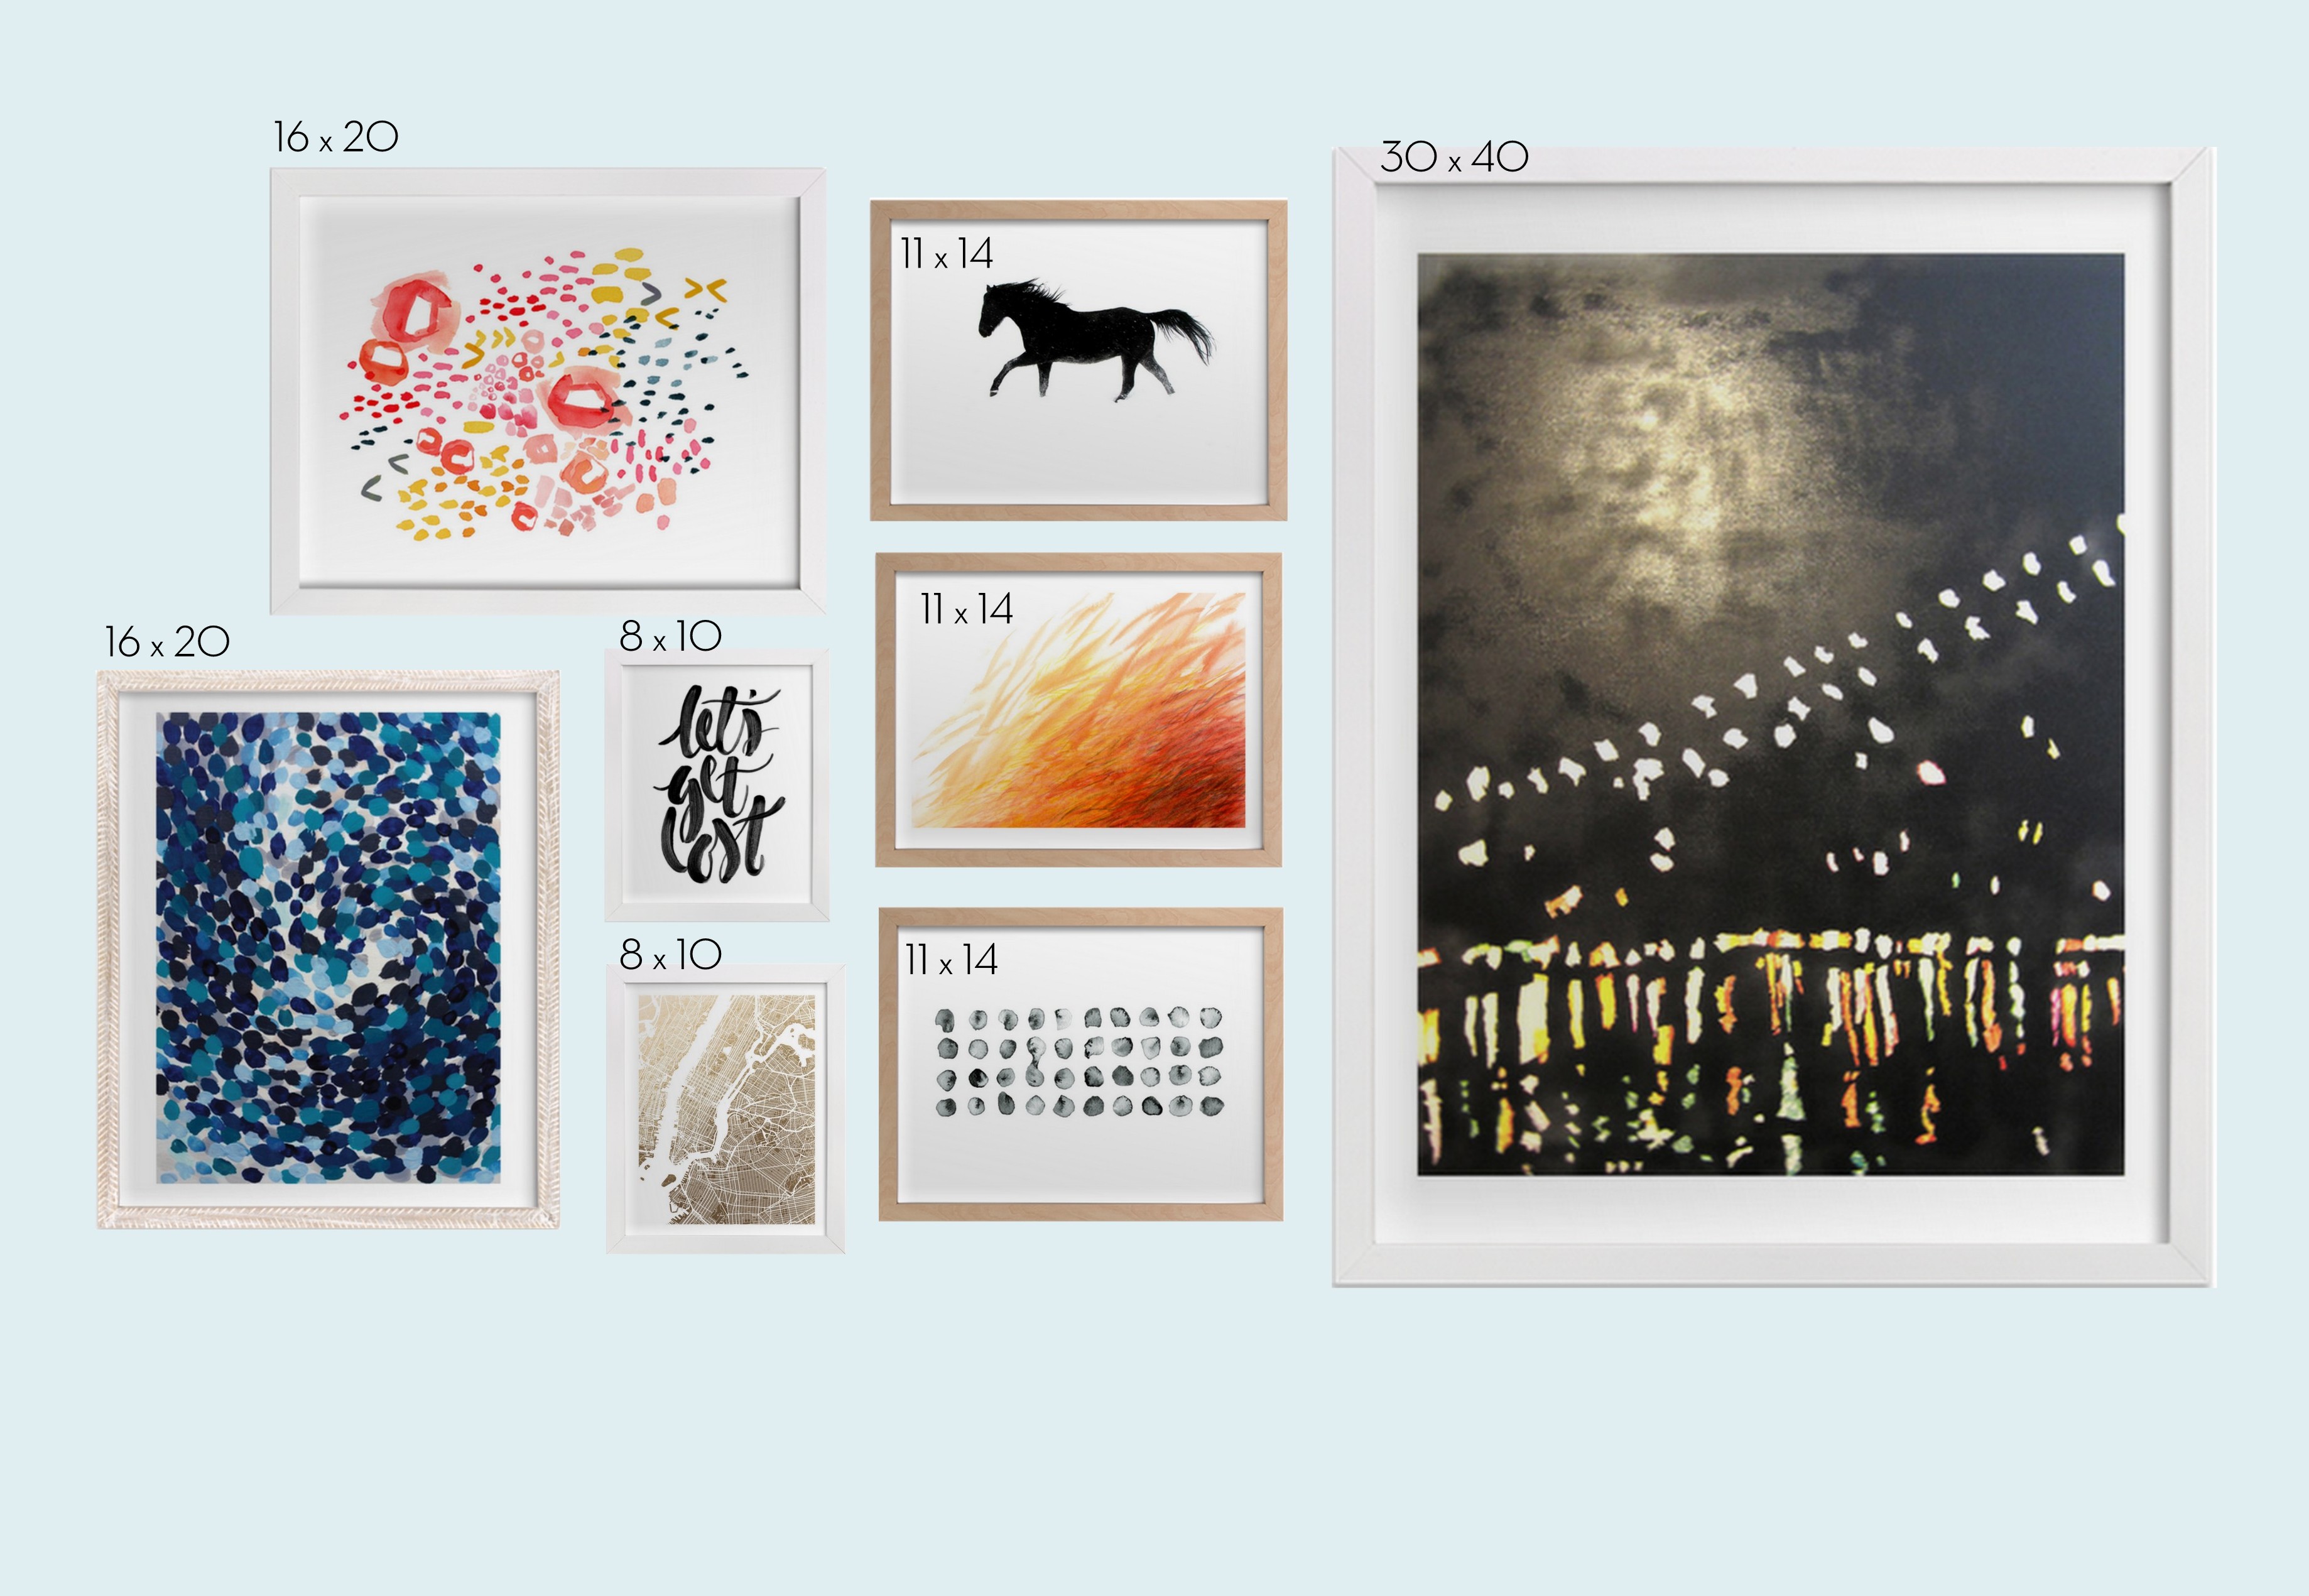
After going through the Minted site over and over and over (no joke, it took me days) finding what prints I loved most (goodness it was difficult), I then figured out what sizes would work best & in what configuration.  After some time, I created this mockup…

ideas & tips for Planning + Creating an Art Wall in your home

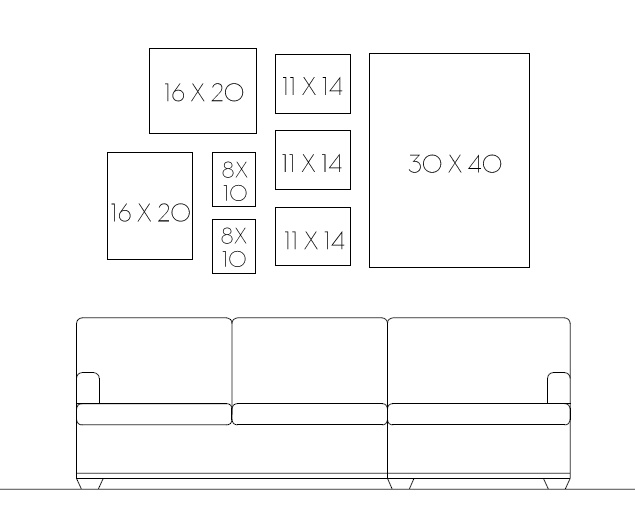
I also used my AutoCAD program to get the sizing + proportions just right.  This is the drawing I created…

ideas & tips for Planning + Creating an Art Wall in your homeIt was time to make these ideas a reality… 

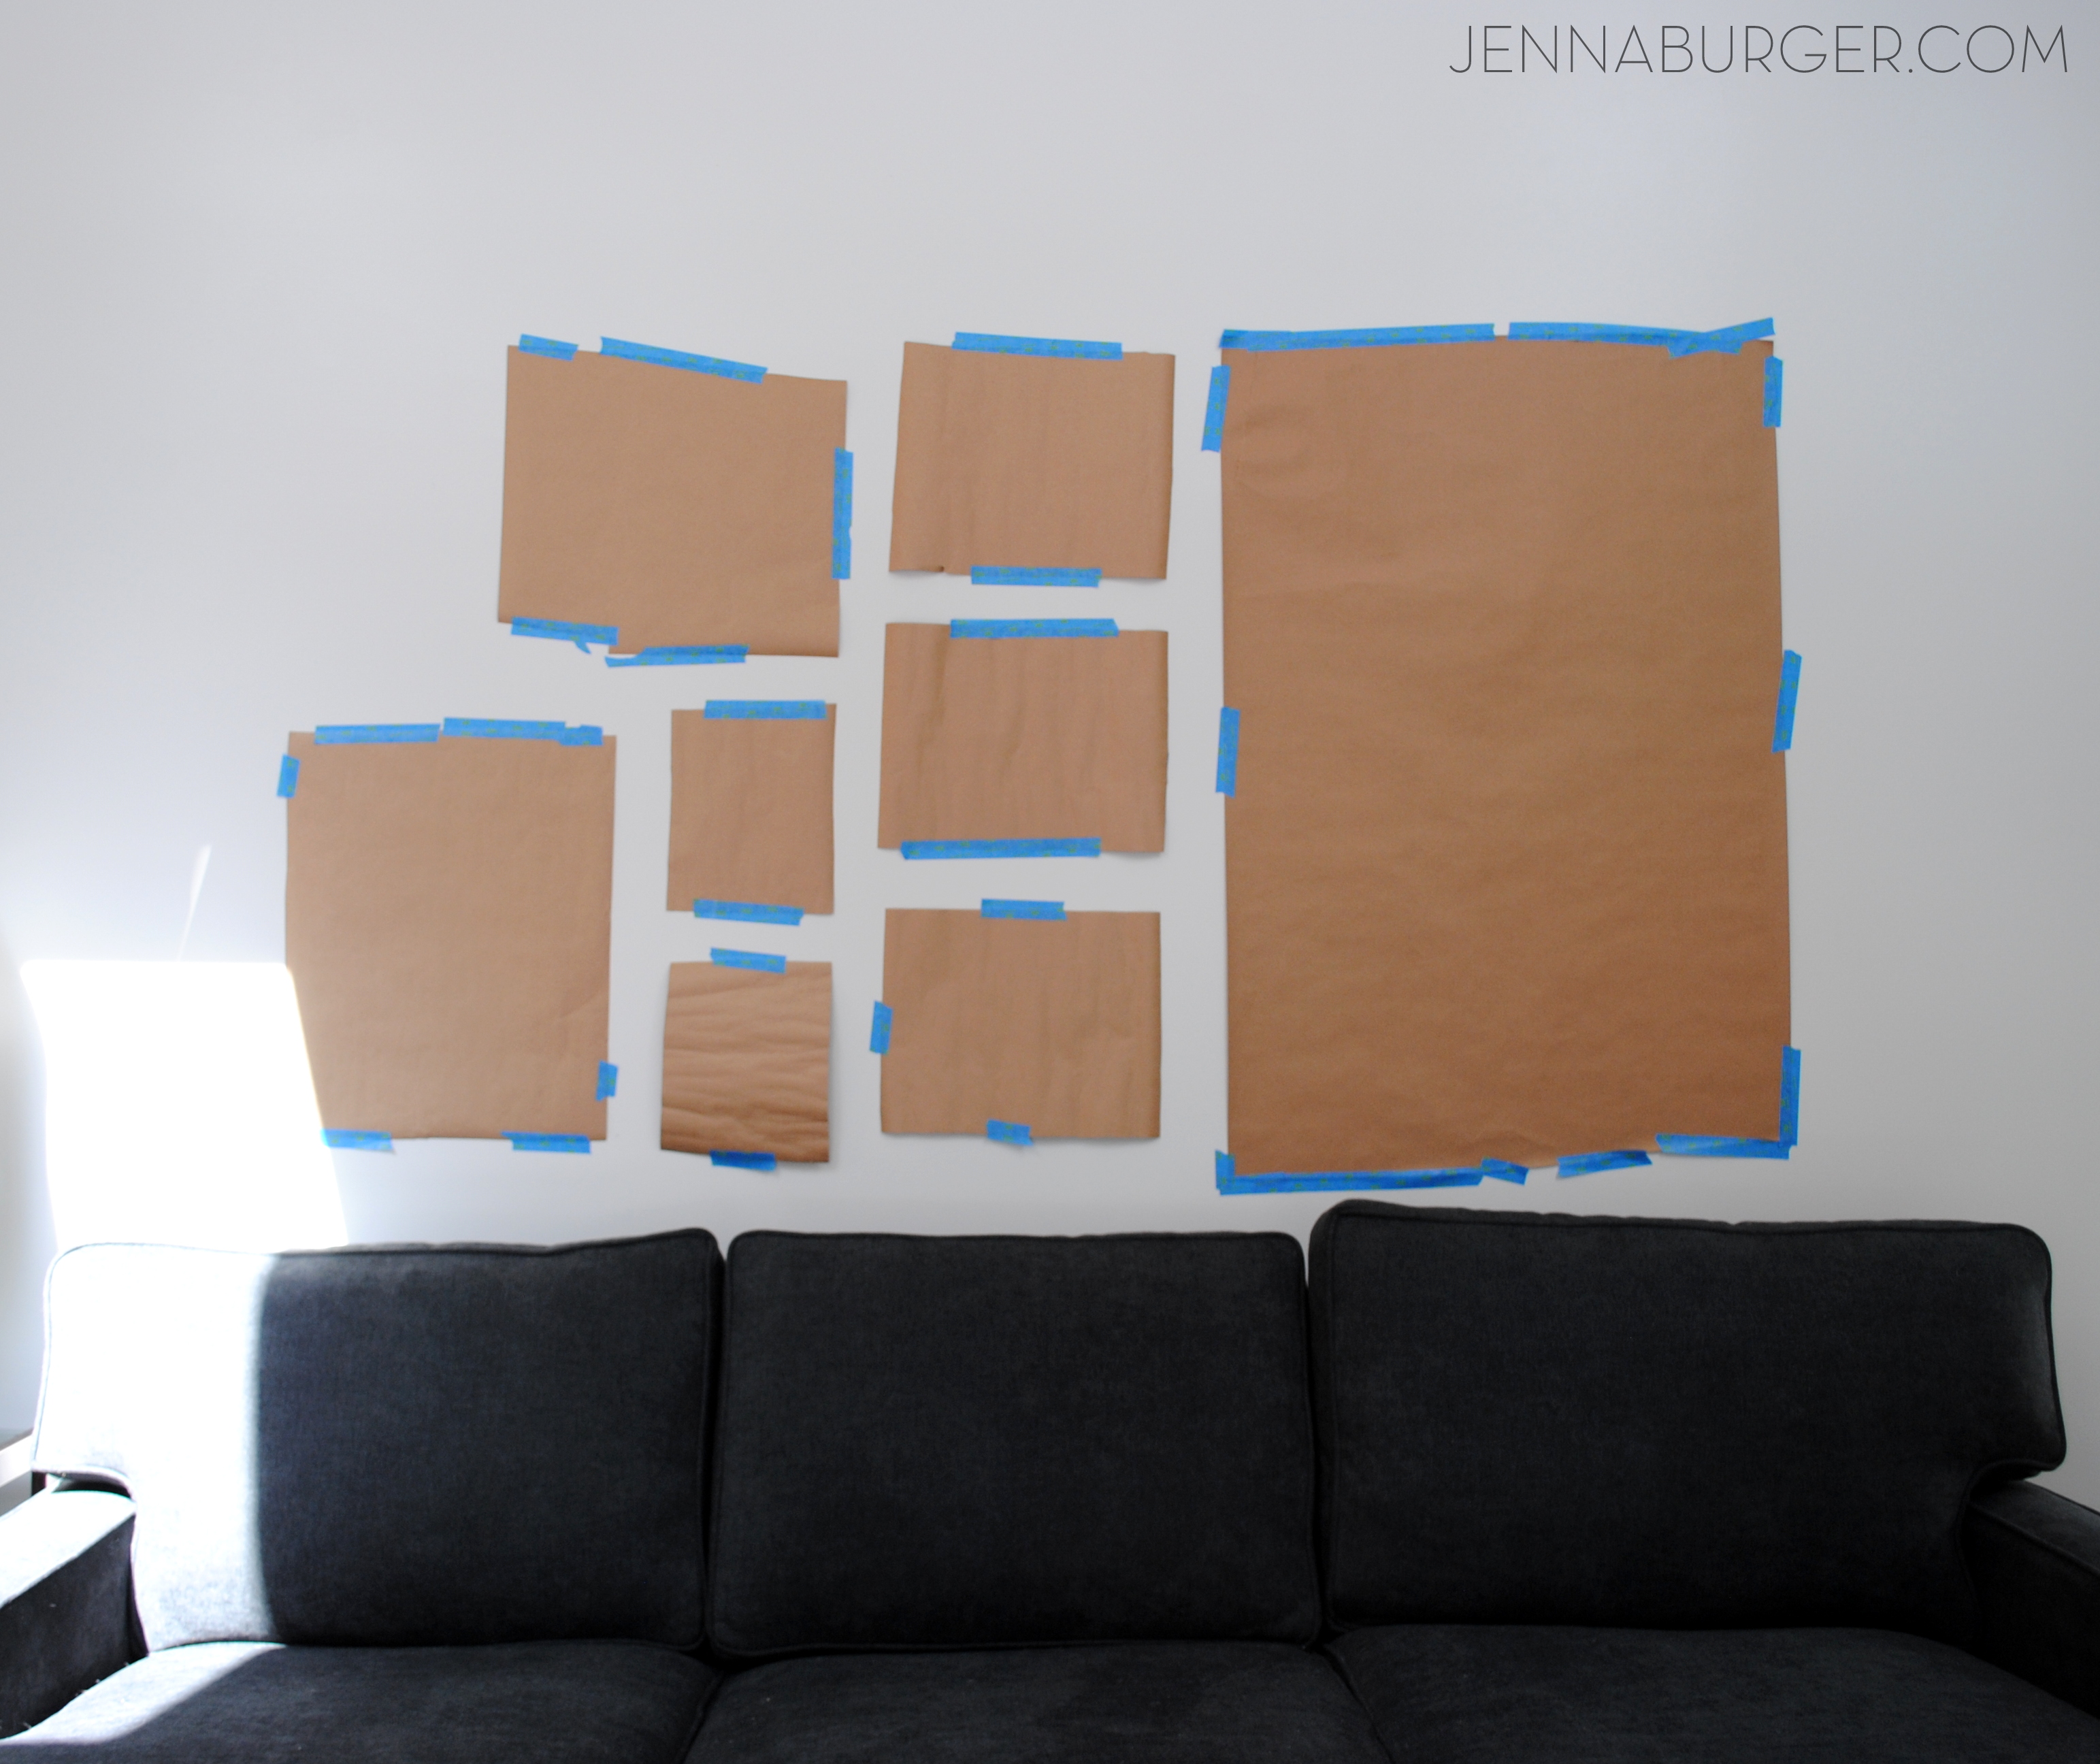
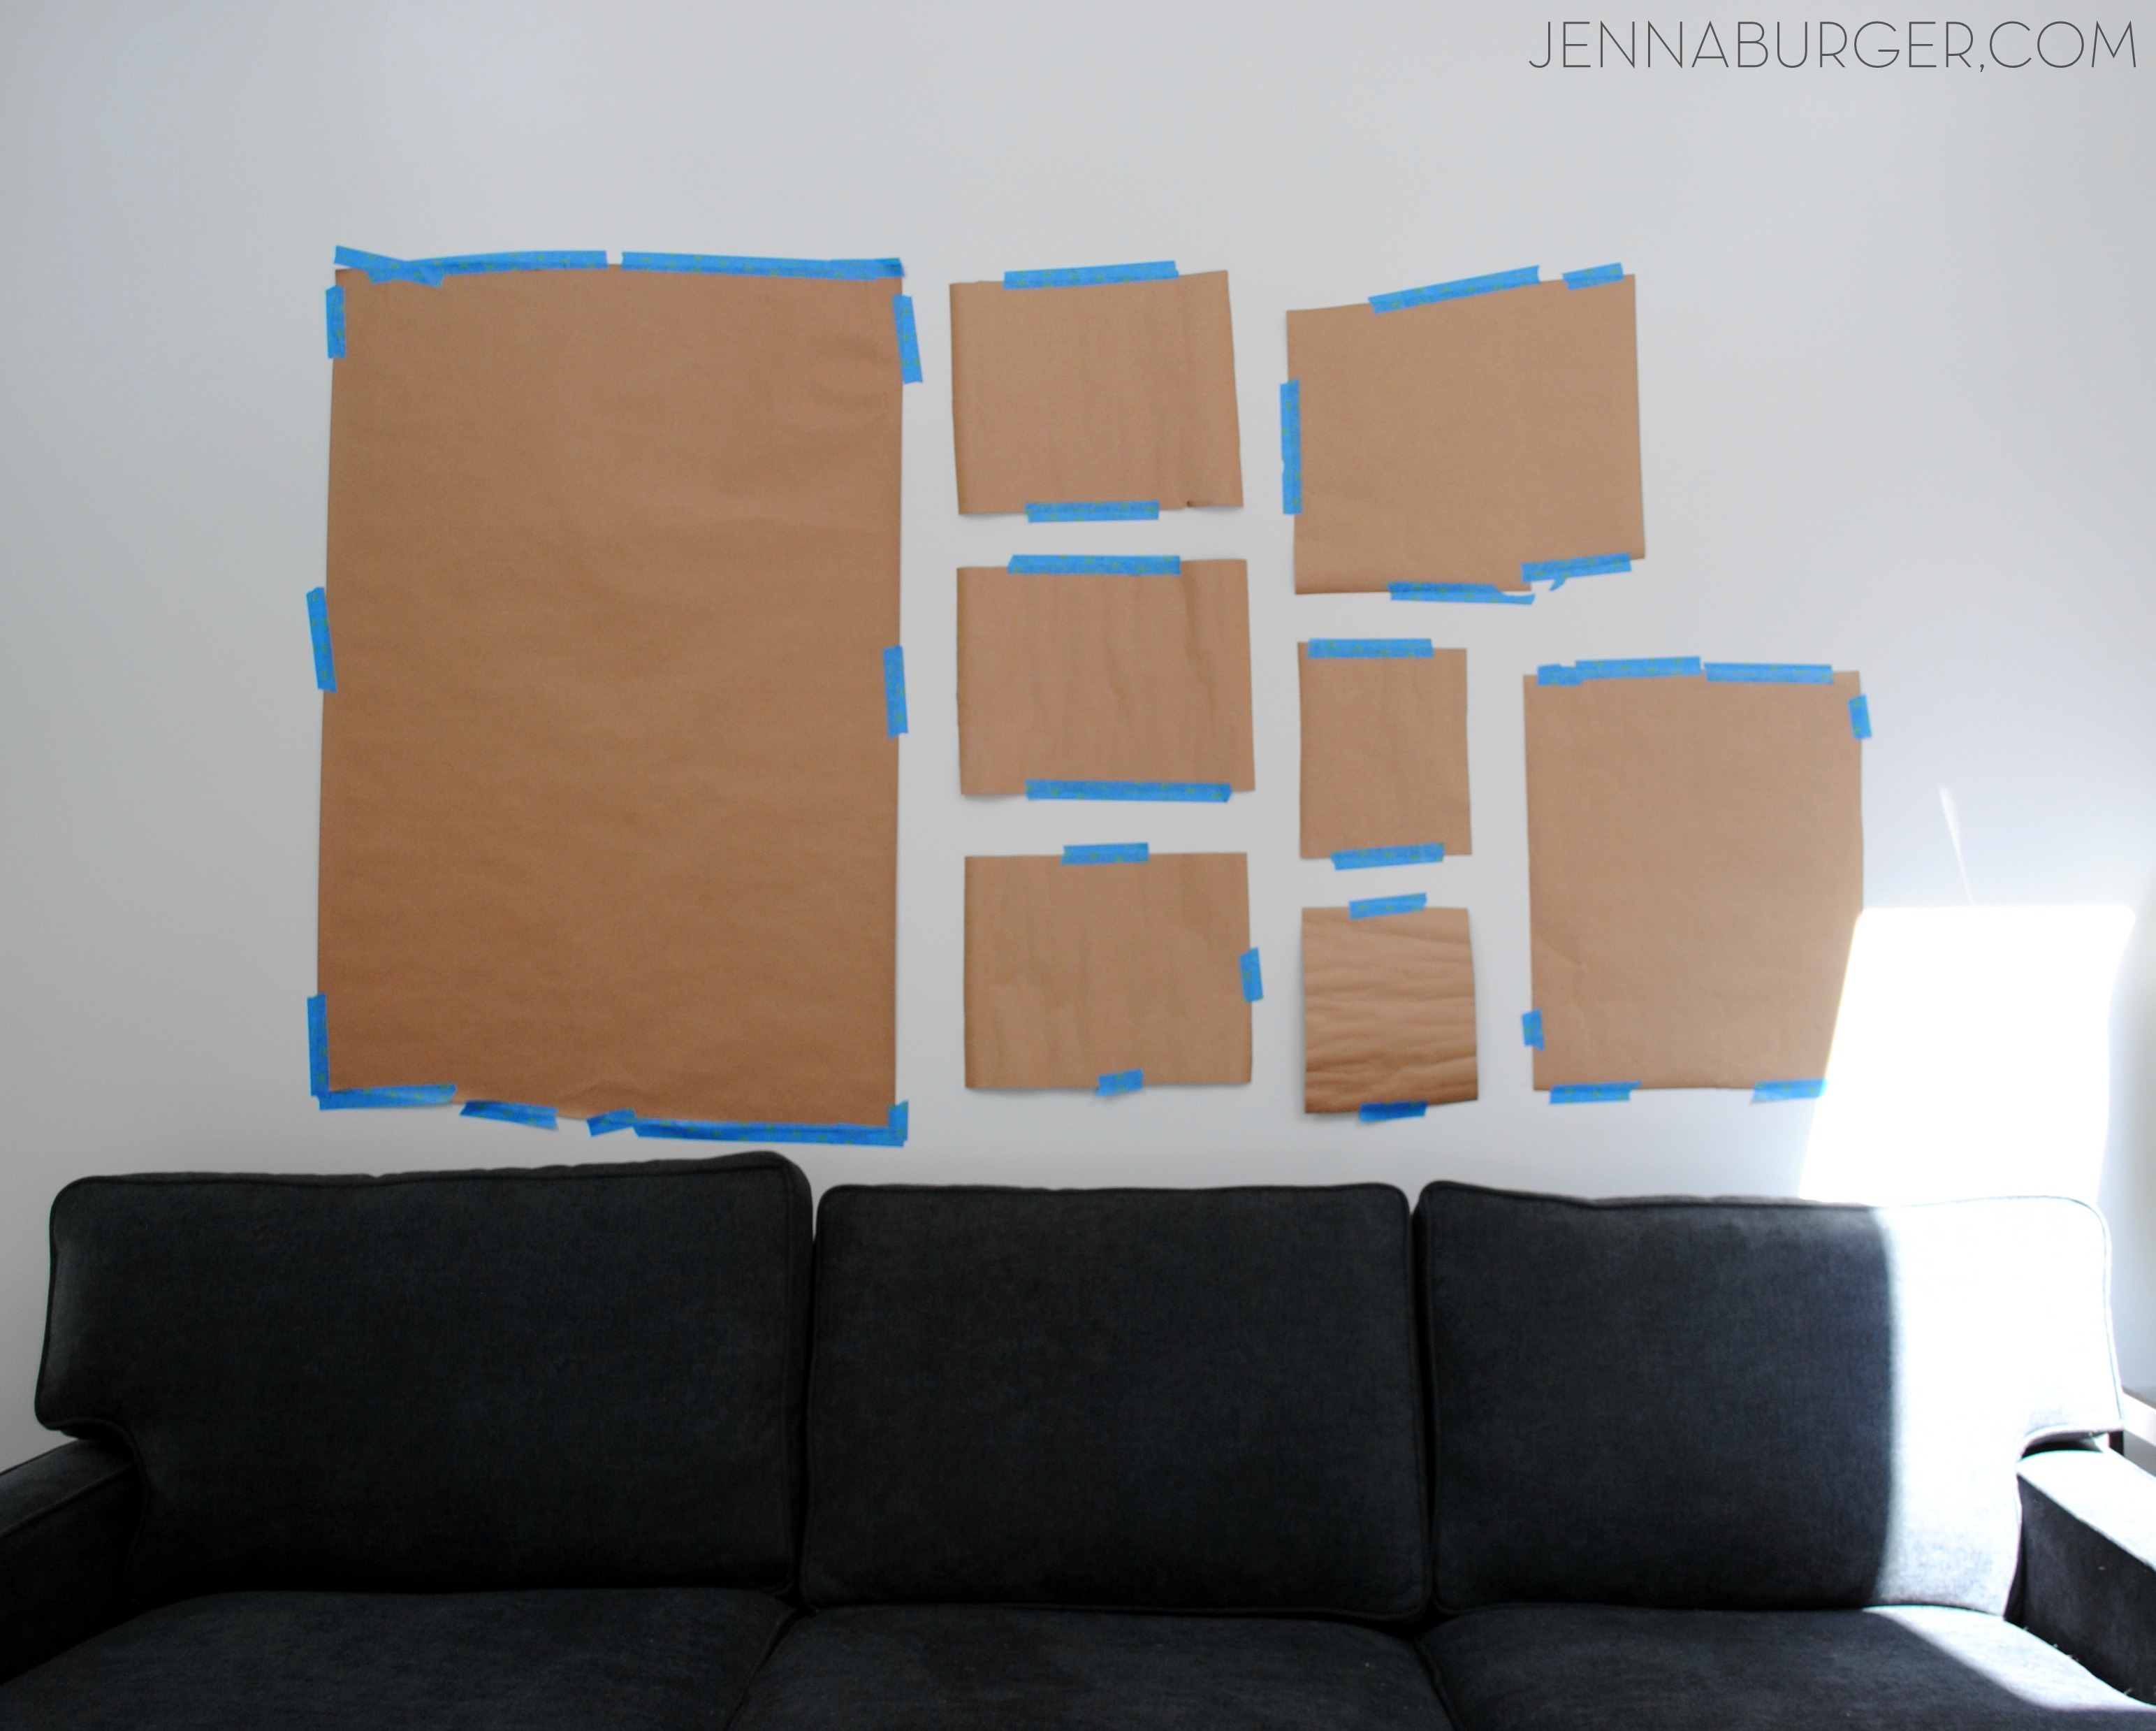
Using brown kraft paper, which I had left over from Christmas wrapping, I cut out the sizes of the proposed prints. Wrapping paper or newspaper could also work – no need to buy anything, use what you have on hand.

ideas & tips for Planning + Creating an Art Wall in your home

Then I arranged the kraft paper on the wall (yes, a few looked a bit wonky) as I worked it out on the mock up…

ideas & tips for Planning + Creating an Art Wall in your home

ideas & tips for Planning + Creating an Art Wall in your home

Once I put the standing floor lamp in place, I realized the shade would really block the large print, so I decided to reverse the design…

ideas & tips for Planning + Creating an Art Wall in your home

Yes, better!

I didn’t actually remove the paper from the wall, but when the prints arrive and I am ready to hang them, I know I will make some tweaks including reversing the design, adding a bit more breathing room between the prints, and hanging them slightly higher on the wall above the sofa.

To be honest, I have never did a mockup like this before, but if I hadn’t gone through the exercise of doing it, I don’t think I would have nailed it (hehe, no pun intended) the first time.  Mistakes would have been made, which results in more time spent!  By creating the mock-up placement of the prints, I can see how the art collage will layout best & hopefully save on time and wall repair.

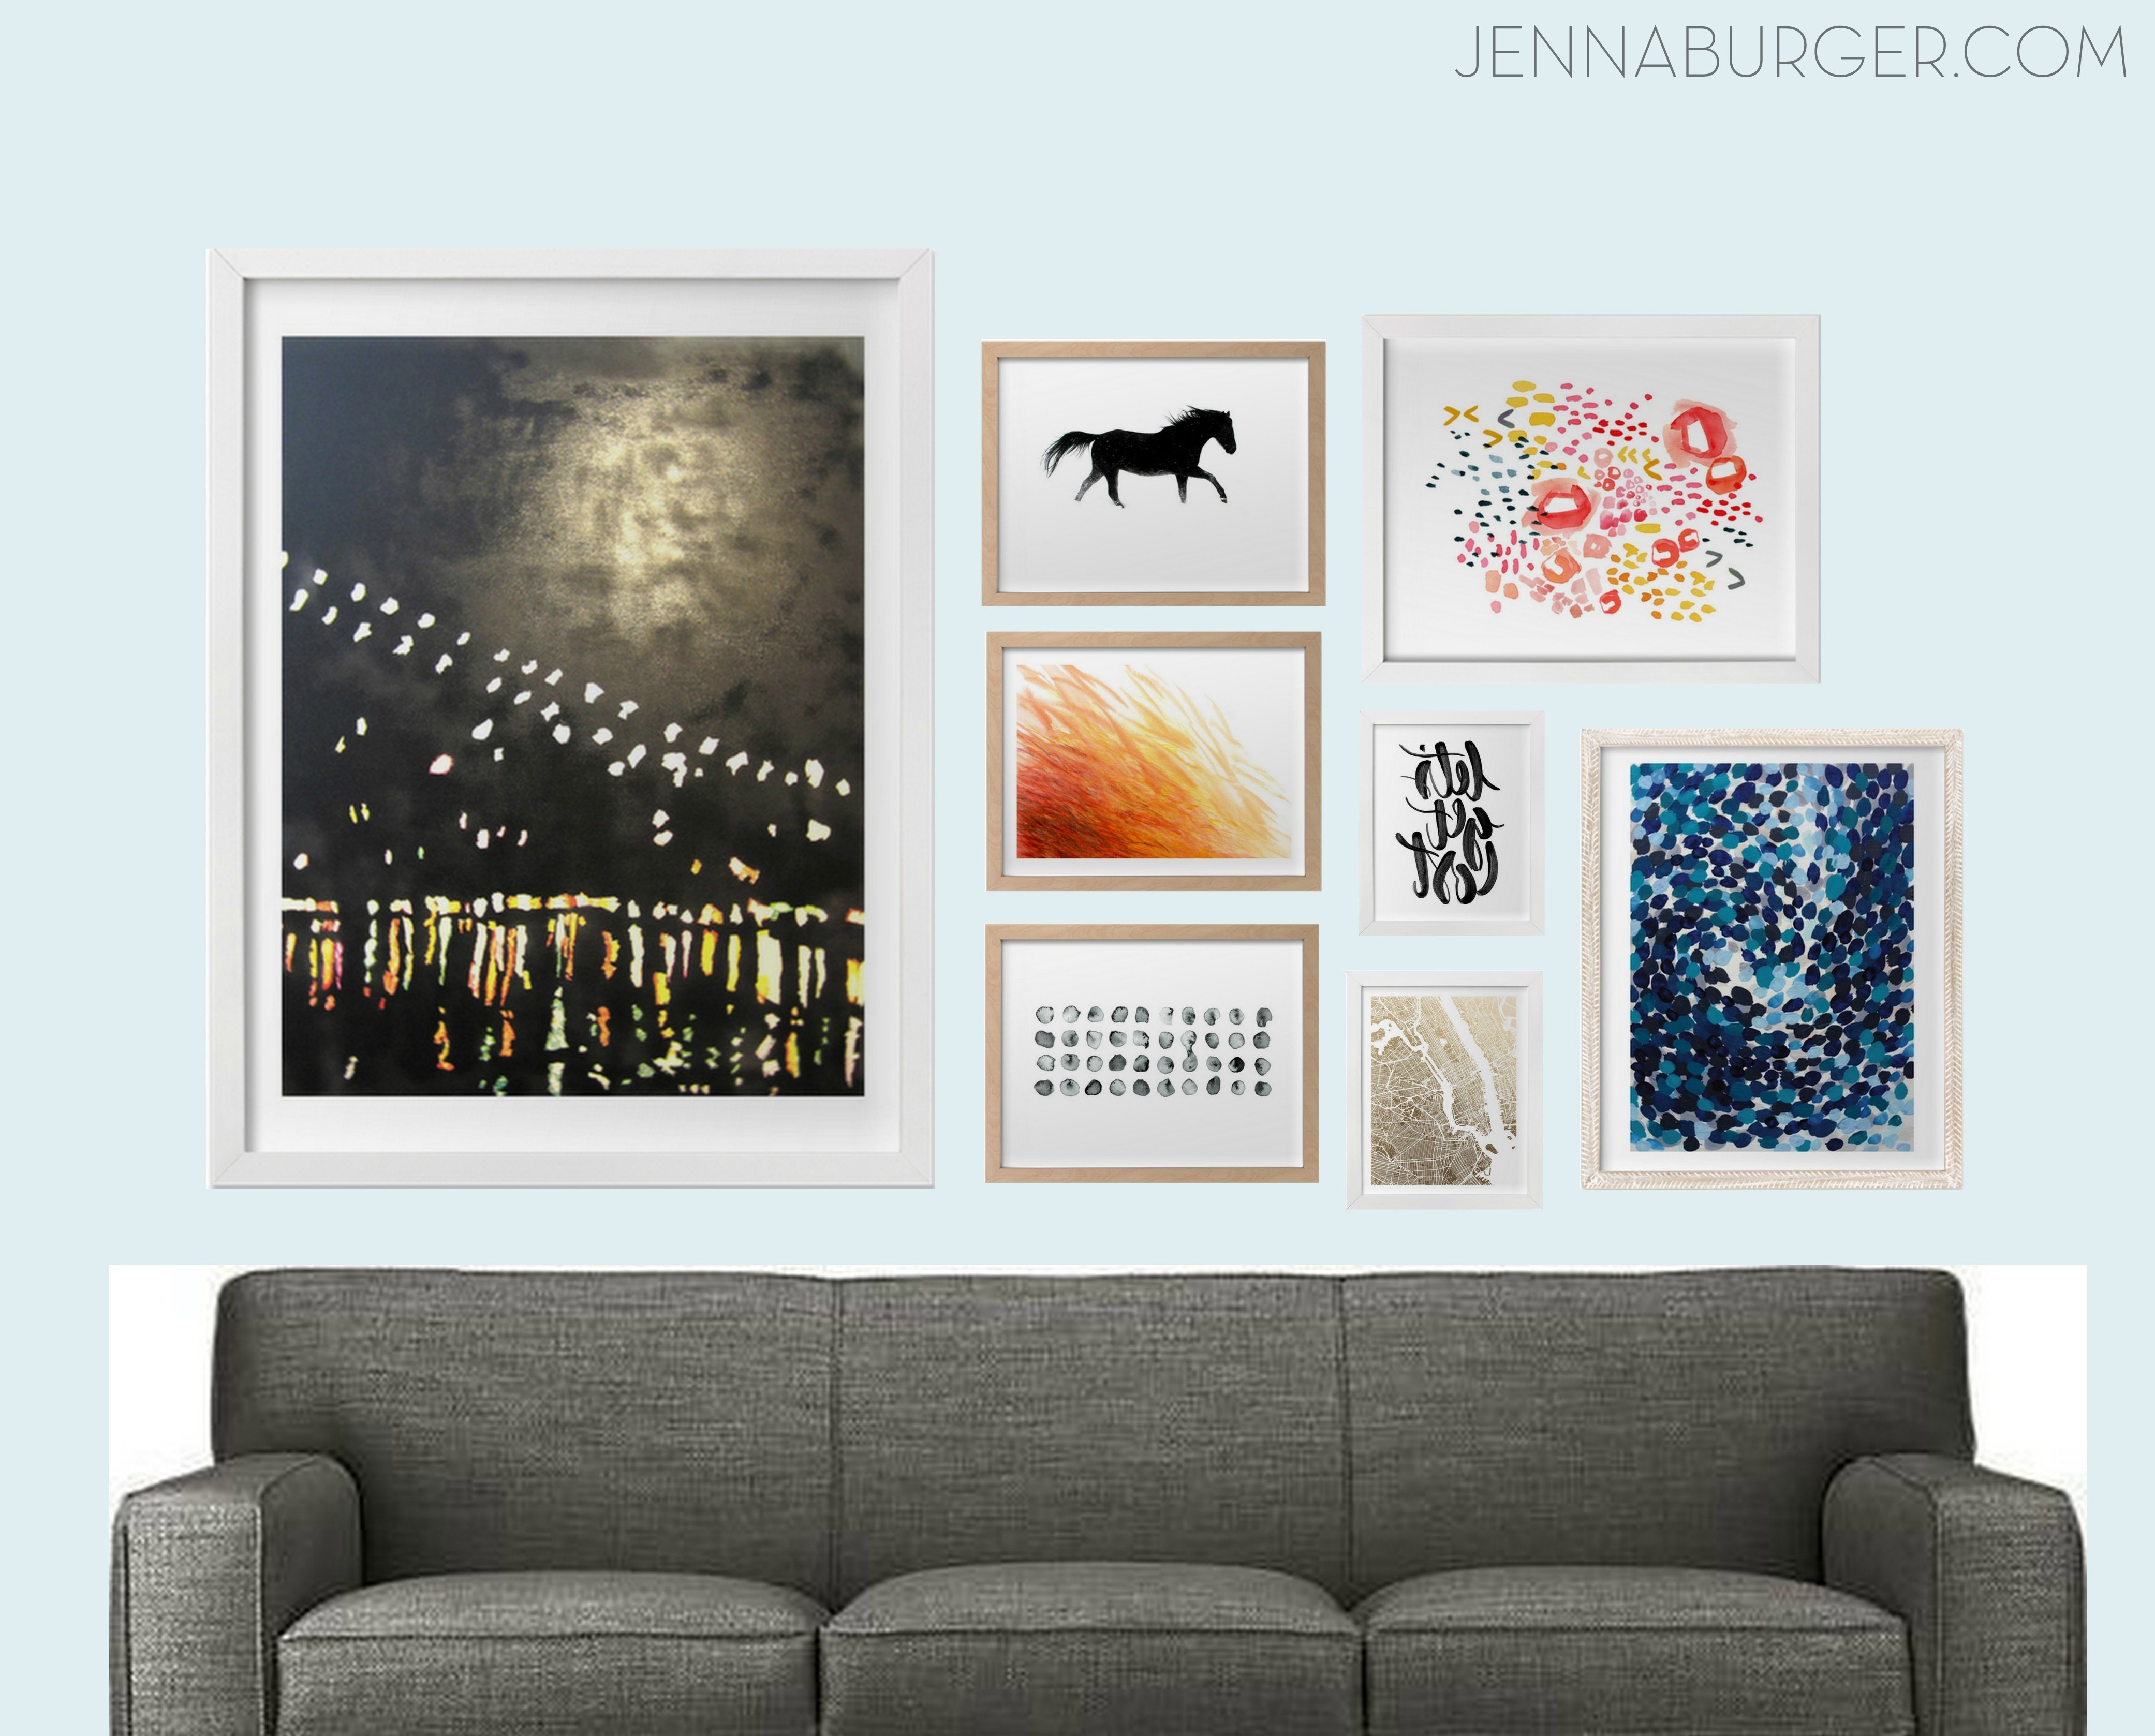
Once the artwork arrives and I hang it, here is how I envision the wall to look… we shall see.

ideas & tips for Planning + Creating an Art Wall in your home

Interested in these prints?  Here’s the info…
Down Under the Brooklyn Bridge
Snow Dancer
Blaze
Calculation
Gesture
Let’s Get Lost
NYC Map (gold foil)
Bits

My tips for creating an art wall you will love.

> Start with one large piece to be the ‘anchor’ for the art gallery wall

> Bring in other art in varying sizes & orientation – not all one size, not all horizontal or vertical!

> Keep at least 3″ between art for breathing room

> Create a continuity/common thread with the art, but mix it up by using 2 or 3 different frames

> Balance the art on the wall – don’t visually hang all ‘heavy’ art on one side & smaller on the other.

> Have fun. Display the unexpected.  Showcase what is most meaningful to you.  Let your art tell a story!

Other posts on creating a gallery wall that may be helpful:

> Gallery Wall Ideas to Transform Any Room
> Useful Ideas and Layouts to Create a Photo Gallery Wall
> Creating a Photo Wall Display

Recap…

IDEAS + TIPS for Planning & Creating an Art Wall in your home.more on the living room makeover coming soon… I promise!

Disclosure: Upon reaching out to Minted, I am thankful that they chose to work with me since I love their limited edition print selection so much.  I have been provided with product, but as always I was not told what to write and I only feature companies on my blog that I truly love and believe in 100%.

Freshen Up The Home for Spring

Freshen up the home for SPRING with room inspiration + 6 items that every room can use to give a freshened look! Easy Inspirational ideas by @Jenna_Burger, www.jennaburger.com

Yes, there is still snow on the ground.  Yes, the temps are still only in the 30s.  But it’s officially SPRING!

It has been a looooong winter with a cycle of sickness that our party of 5 can not seem to break out of.  Thankfully, with 50s in the forecast for later this week I am feeling happy + hopefully that Spring is on it’s way and that of course means I am feeling the itch to freshen up our home for Spring.

As Spring starts to spring (hehe) and we begin the process of coming out of hibernation, it organically feels like the best time of year to freshen things up.  To bring in the spirit of the season, here are some of my favorite spaces for Spring that I am pulling inspiration from…

INSPIRING SPACES.

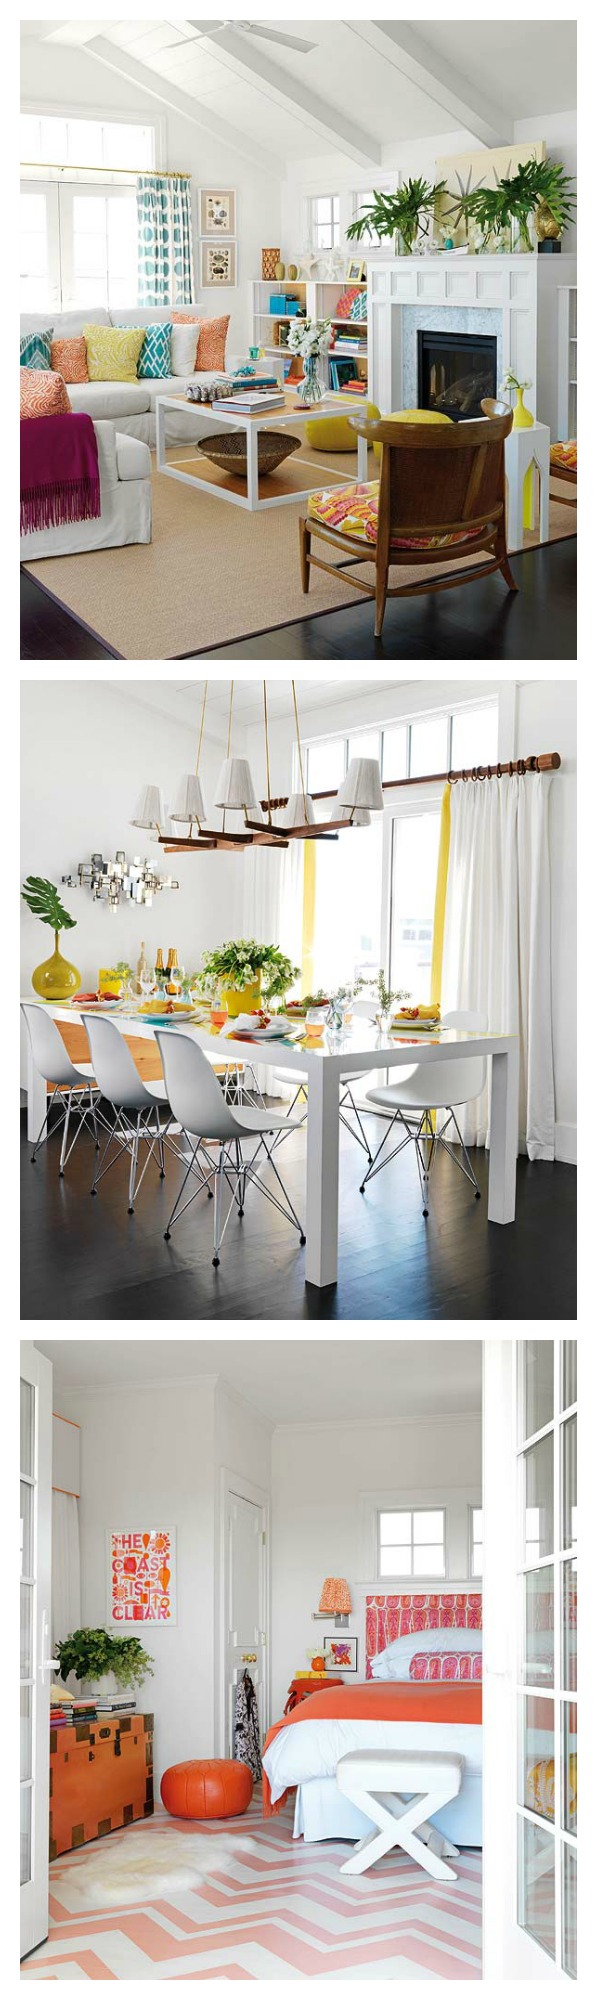
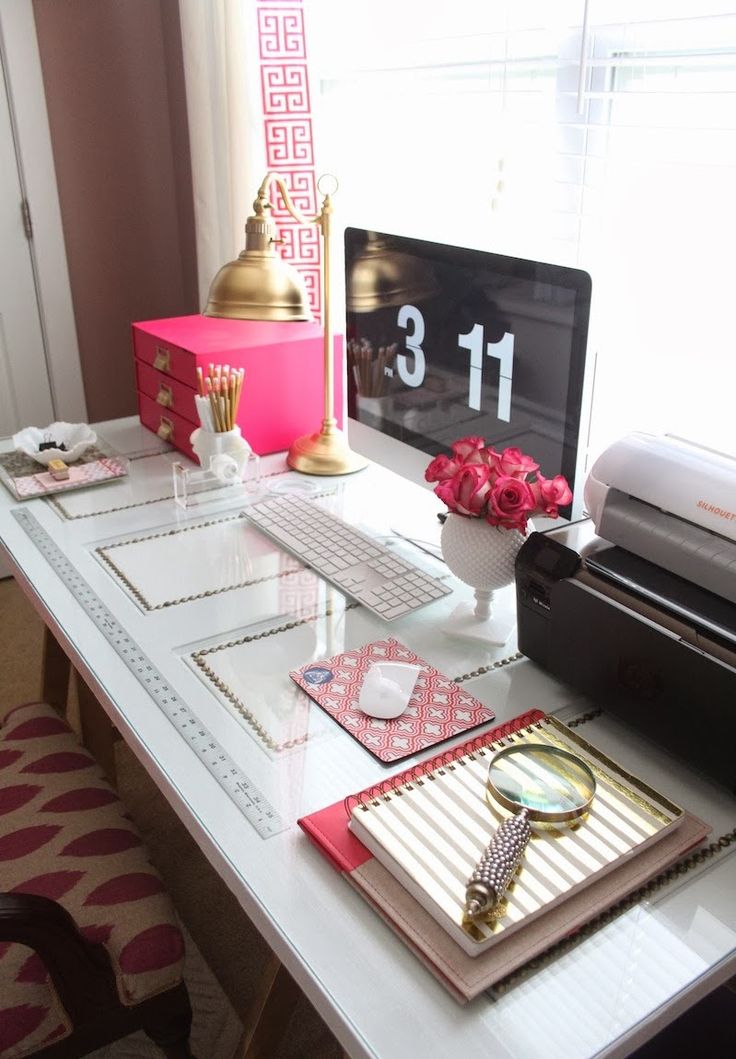
Living Room, Dining Room, and Bedroom spaces filled with a white backdrop + pops of coral, tangerine, yellow, and turquoise – all perfect hues for Spring leading into Summer. Images via HomeditFreshen up the home for SPRING with room inspiration + 6 items that every room can use to give a freshened look! Easy Inspirational ideas by @Jenna_Burger, www.jennaburger.comA dreamy desk for any gal!  via m{pression

Freshen up the home for SPRING with room inspiration + 6 items that every room can use to give a freshened look! Easy Inspirational ideas by @Jenna_Burger, www.jennaburger.com

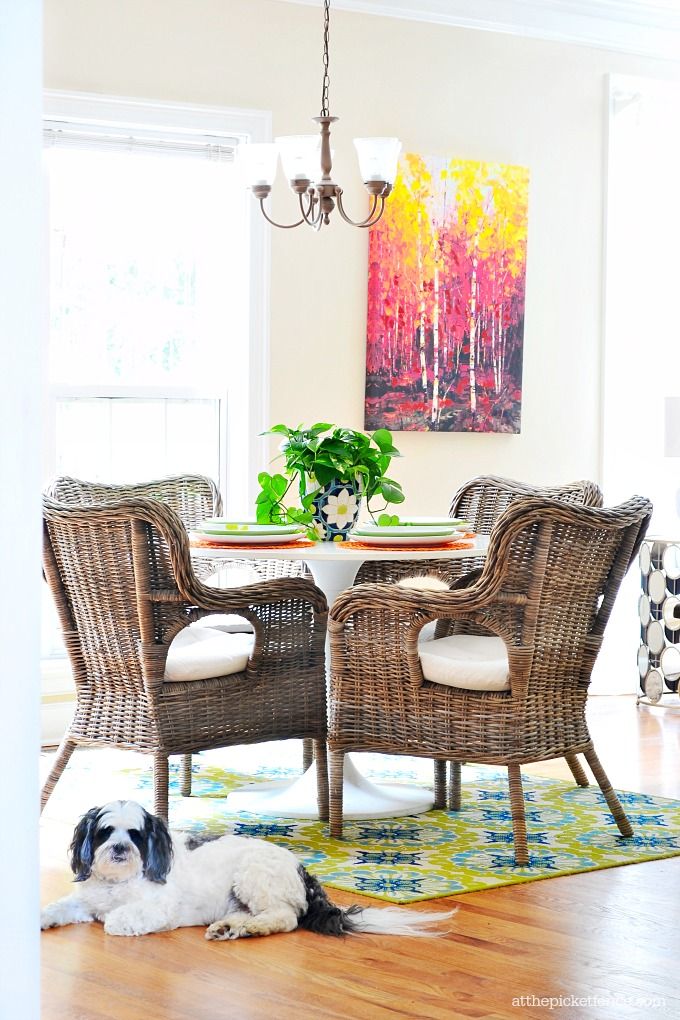
Light & airy is ideal for Spring!  Fresh pops of color in greens & blues makes this breakfast nook so inviting by Heather of At the Picket Fence.

Freshen up the home for SPRING with room inspiration + 6 items that every room can use to give a freshened look! Easy Inspirational ideas by @Jenna_Burger, www.jennaburger.com

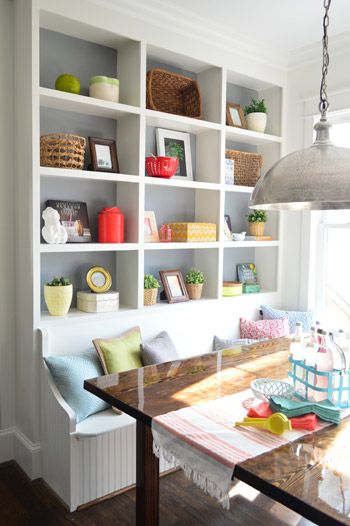
More color + texture in the breakfast room by YHL.

Freshen up the home for SPRING with room inspiration + 6 items that every room can use to give a freshened look! Easy Inspirational ideas by @Jenna_Burger, www.jennaburger.com

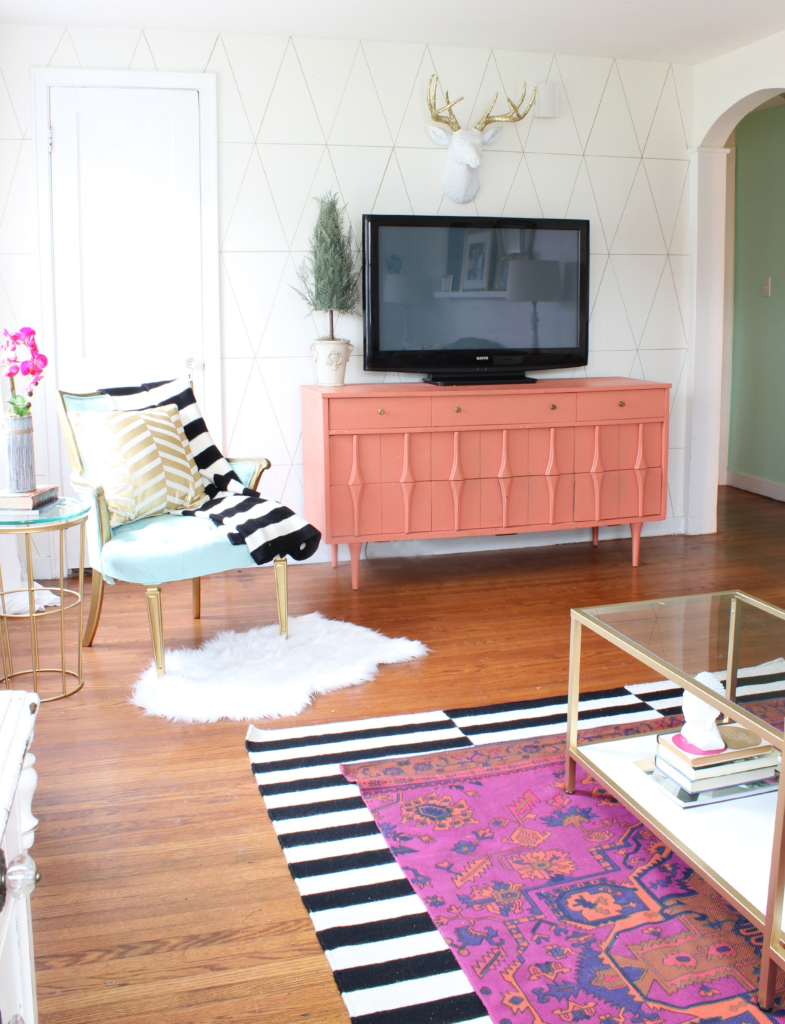
White + black + layers of color make this a favorite space of mine for Spring.  Black can be intense, but when incorporated in small doses, it can give incredible depth to a room! This amazing space was created by the gals of Classy Clutter.

Freshen up the home for SPRING with room inspiration + 6 items that every room can use to give a freshened look! Easy Inspirational ideas by @Jenna_Burger, www.jennaburger.com

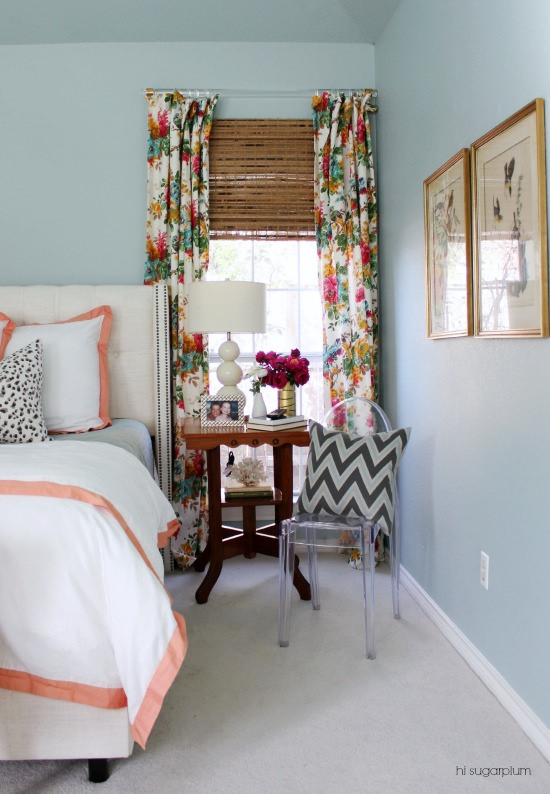
Master Bedroom with soft hues + floral by Hi Sugarplum.

Freshen up the home for SPRING with room inspiration + 6 items that every room can use to give a freshened look! Easy Inspirational ideas by @Jenna_Burger, www.jennaburger.com

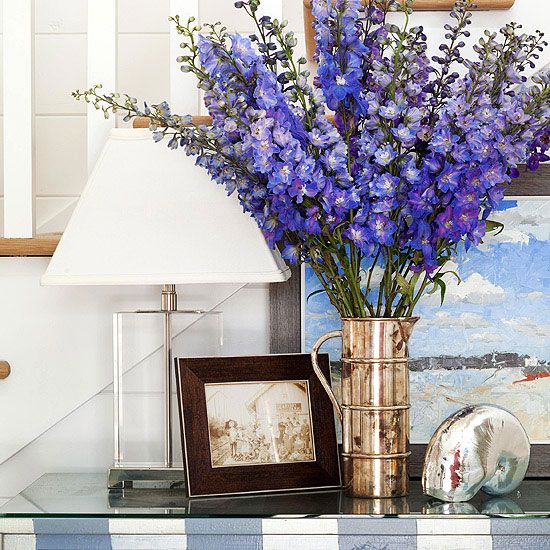
And of course, Spring means flowers and a home filled with flowers of the season is incredibly warm + inspiring…

via BHG

Freshen up the home for SPRING with room inspiration + 6 items that every room can use to give a freshened look! Easy Inspirational ideas by @Jenna_Burger, www.jennaburger.com

For even more inspirational spaces decorated for Spring, you must check out my favorite Pinterest board, Inspirational Spaces & Vignettes!

Freshening up doesn’t mean go out and buy more!  Seasonally, I may snag 1 or 2 new great decor items (that I can’t live without), but I often recycle / restyle what I have on hand to create new vignettes (who really wants to buy more + spend more $$$).  It’s amazing how moving things from one room/space to another makes them look like new!

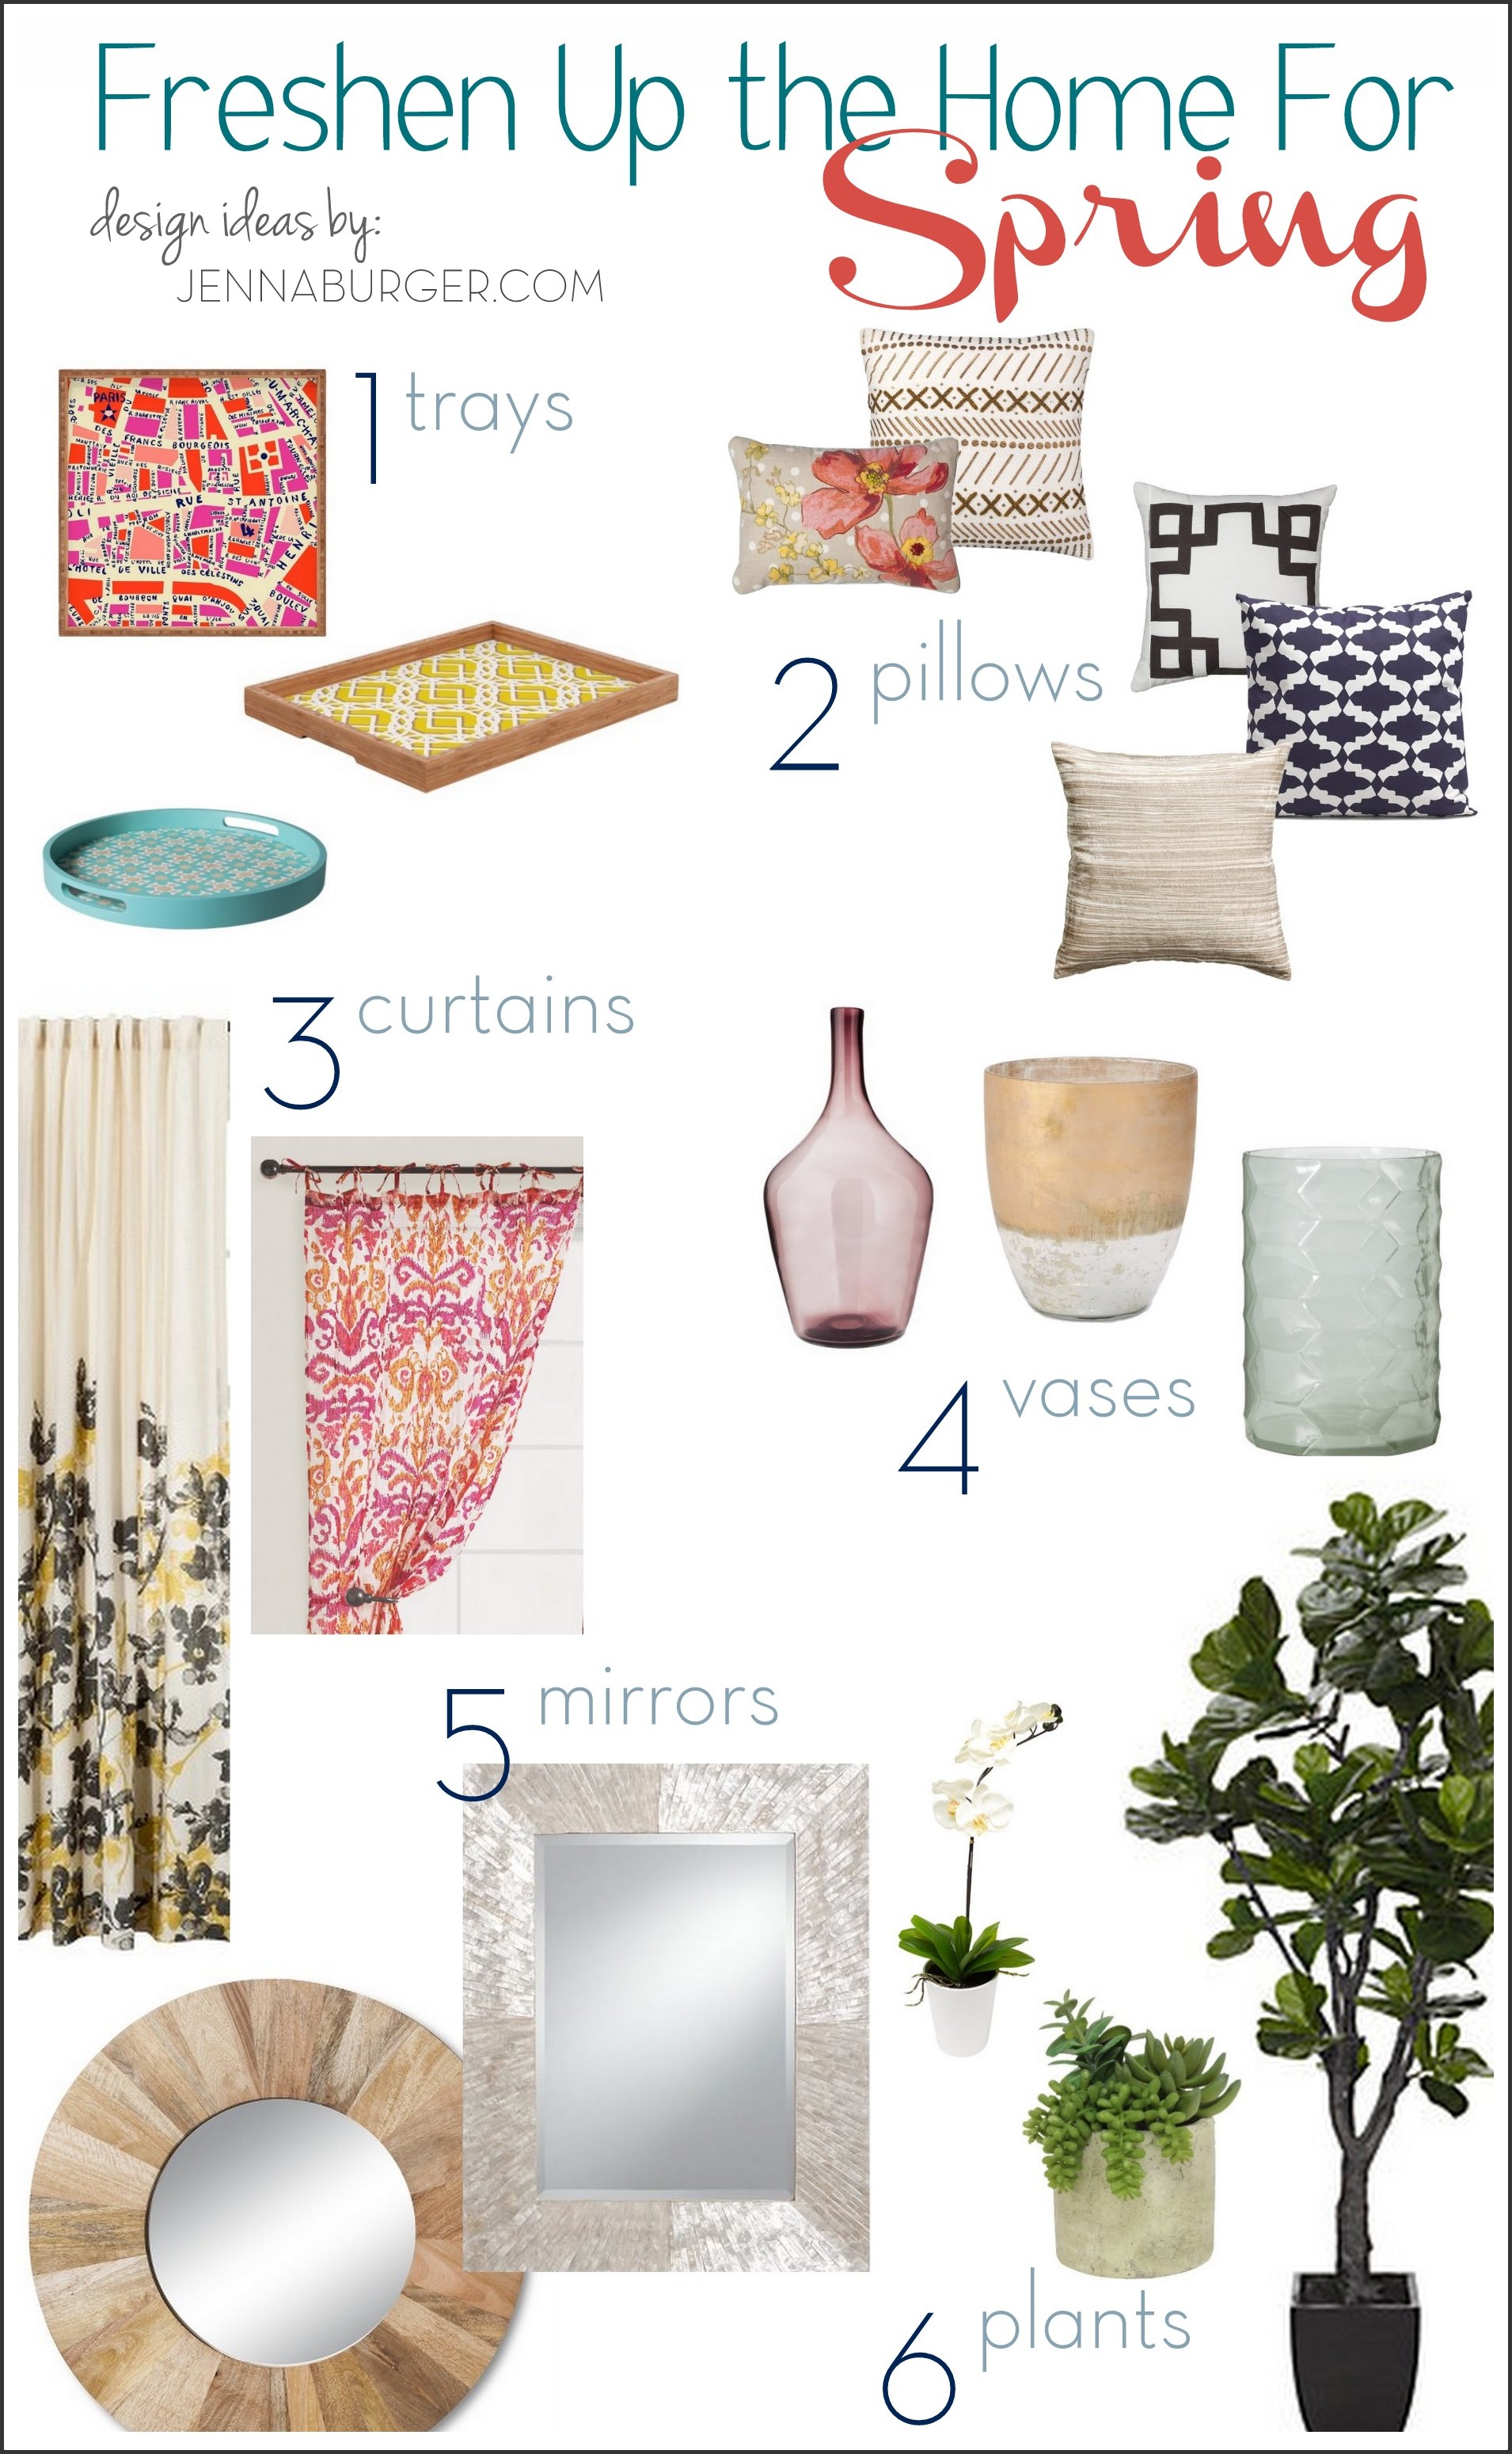
If you are on the search (or want to shop your home) for a few new things for Spring, every room can come together in a snap with these 6 perfect picks

1 / Pillows bold hues mixed with softer Spring tones will make your sofa perfect for season.
Try hues of coral, pink, mint, and gray for a refreshing pick-me-up.

2 / Mirrors the perfect layer to make a space feel larger. 
Try one large mirror on a wall or a collection in varying sizes.

3 / Vases from the mantel to the coffee table to the desk, one vase filled with your favorite flowers or a collection in multiple tones, vases are a beautiful + inexpensive way to update a space & give depth, height, and color.

4 / Curtains changing up curtain panels for the season can give a room an instant update.  From heavy herringbone for the winter to a light & airy floral, a space can feel like Spring in no time & for little money.  On a tight budget? DIY new curtain panels (give this tutorial a whirl) or try using a flat sheet in a pattern you love.

5 / Plants whether real or faux (as long as it looks good), plants or flowers instantly give a fresh look + feel to a space.

6 / Trays my love for trays will never die. I am a tray addict (I have way too many & all are my favorite) because they are not just functional, but give color + texture + interest to a space or vignette.  A tray can break up a vast coffee table surface or can help keep a bedside table organized with books, reading glasses, and more.

Here are my 6 must-have layers for the Spring season in action…

Freshen up the home for SPRING with room inspiration + 6 items that every room can use to give a freshened look! Easy Inspirational ideas by @Jenna_Burger, www.jennaburger.com

Resources: Paris Map Wooden Tray / Diamond Wooden Tray / Geometric Tray / Floral Print Pillow / Nate Berkus Embellished Printed Pillow / Graphic Print Pillow / Velvet + Linen Pillow / Taped Solid PillowPurple Vase / Mercury Vase / Textured Glass Vase / Climbing Vine Curtain / Pink + Orange Ikat Curtain / Wood Circle Mirror / Capiz Mirror / White Orchid / Succulent / Faux Fiddle Fig

Whether you prefer a minimal modern lamp or a traditional print in paisley, these 6 favorite accessories will absolutely create the layers for a freshened space for Spring.  Whether the living room, family room, or bedroom, these items are ideal to make any room in the home instantly come together – you won’t go wrong.

BHG Kitchen + Bath Makeovers COVER Feature: Year 2

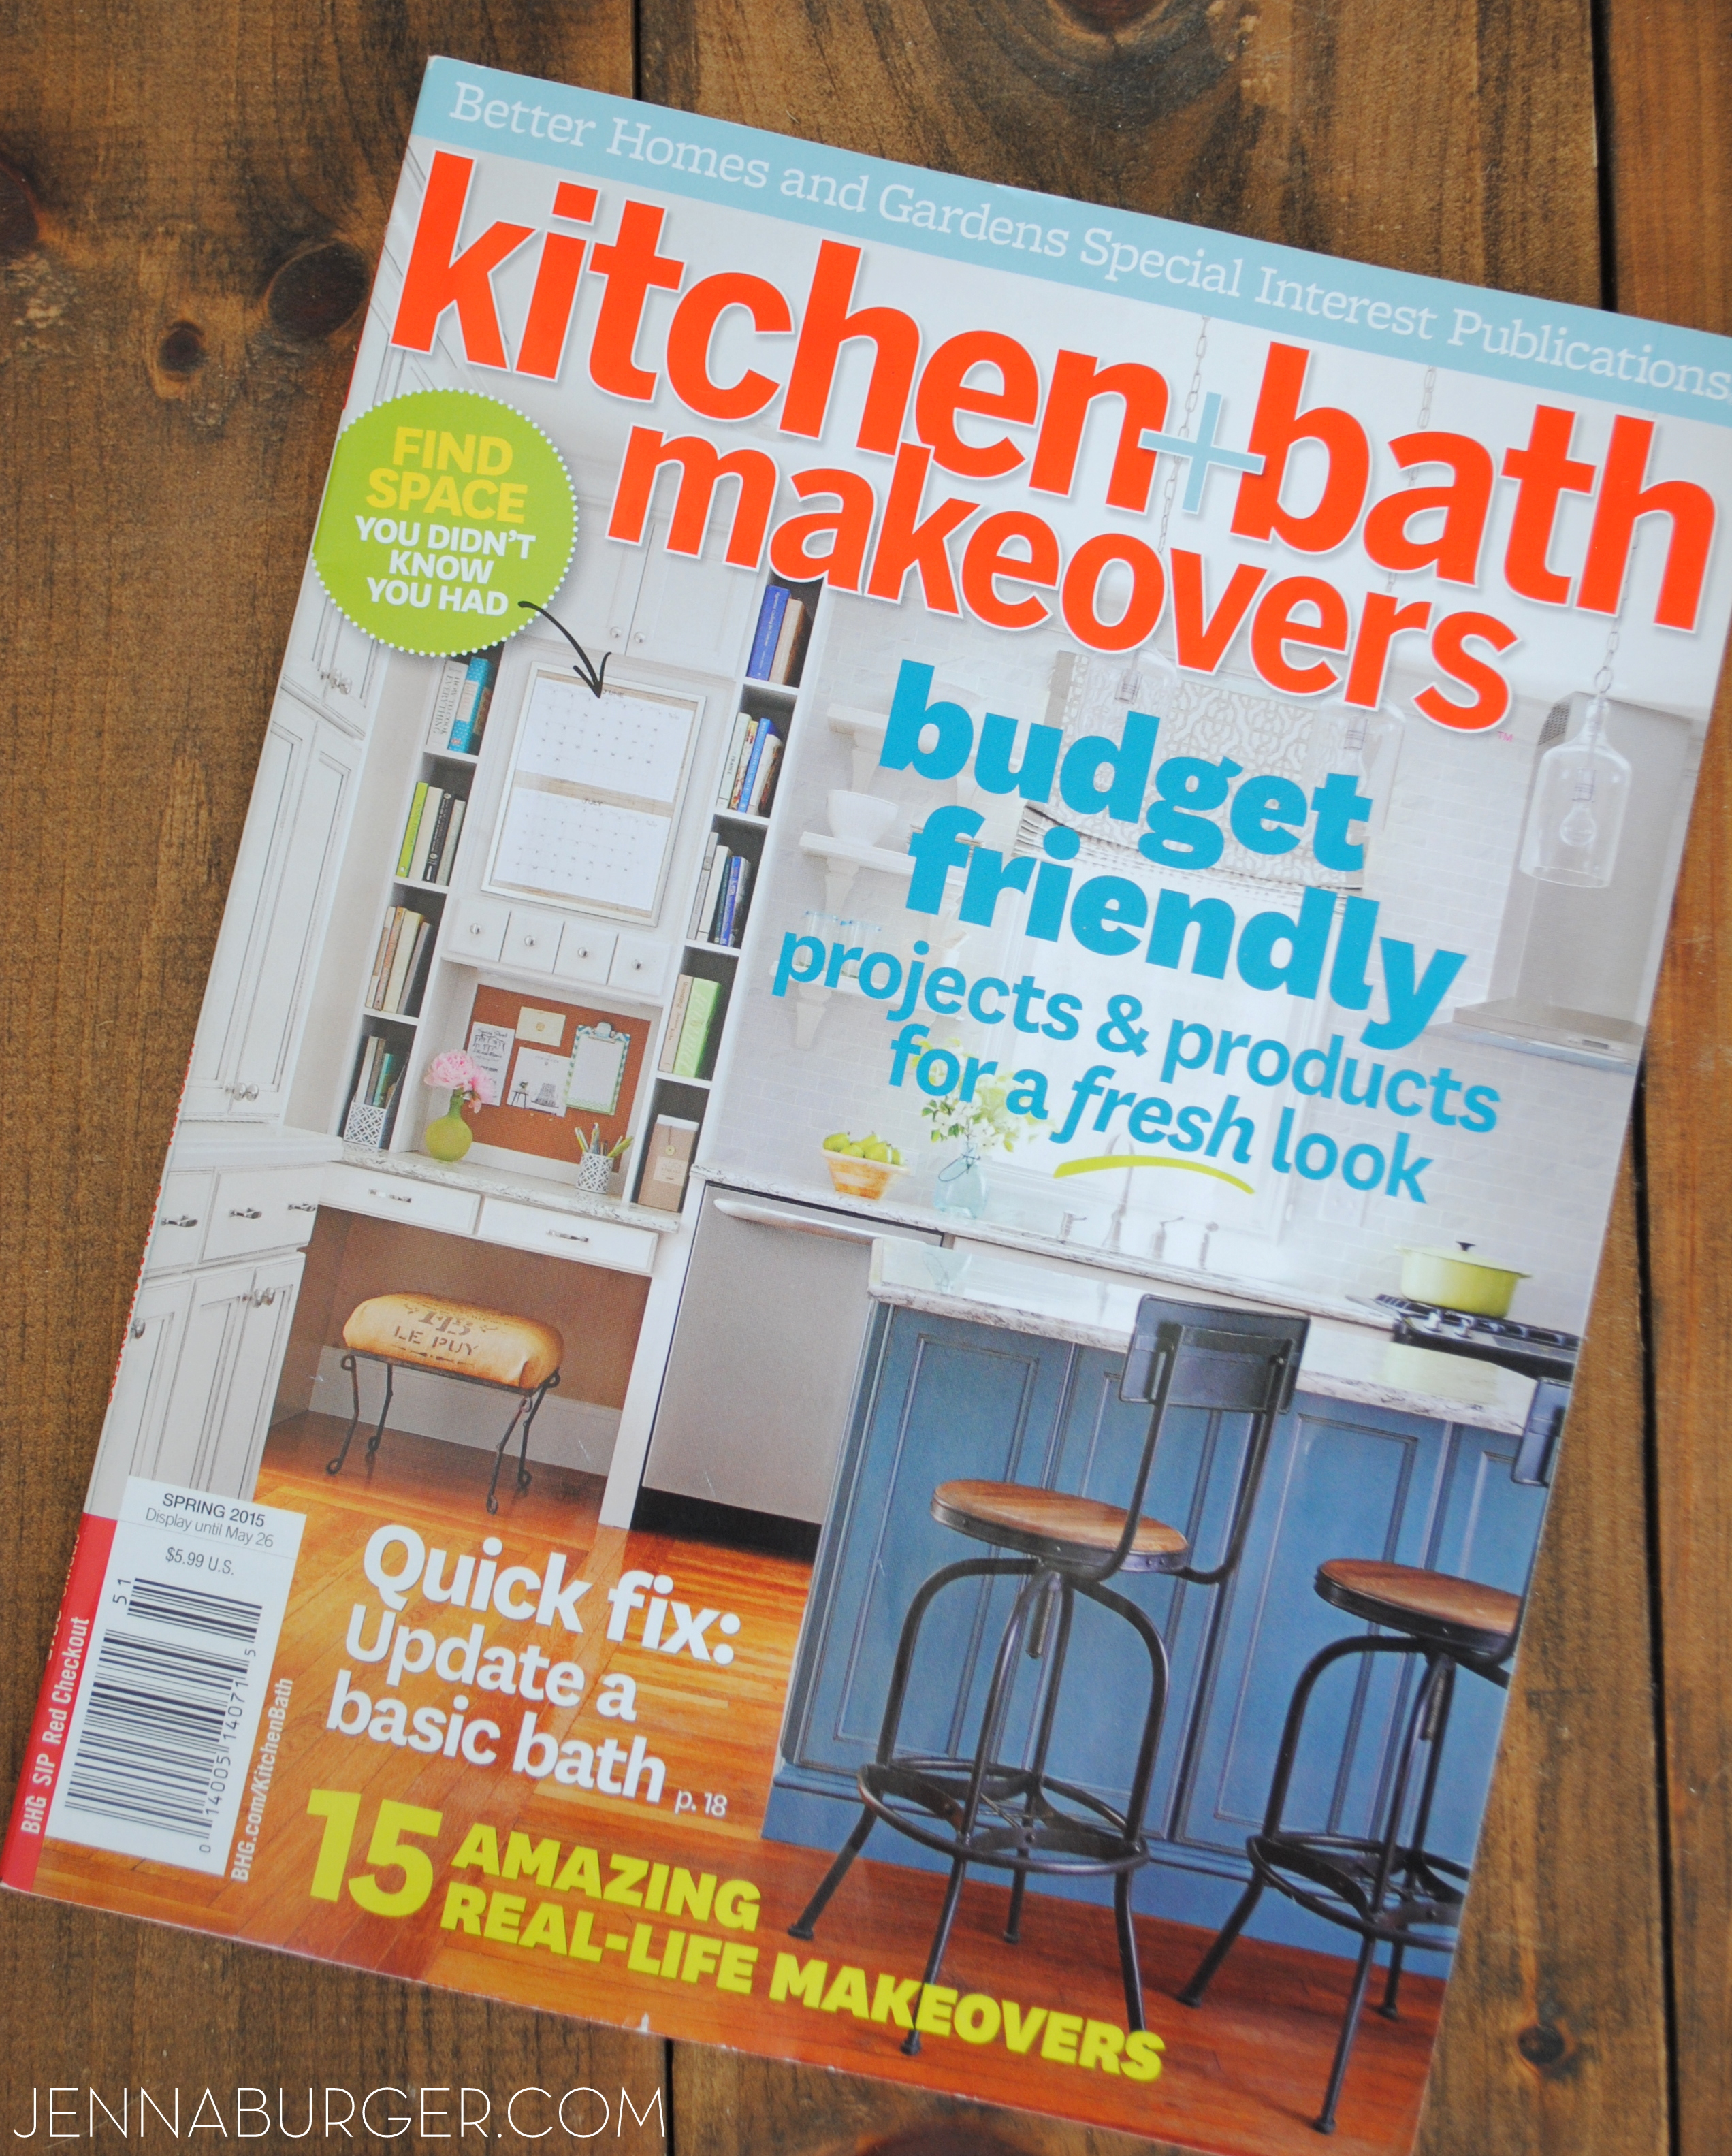
I am so excited to share that for the second year in a row, a kitchen project that I designed is on the Spring cover of the Better Homes & Gardens Special Interest Publication, Kitchen + Bath Makeovers.

How is this possible?! Even though I’ve had over a dozen features in various BHG magazines, the thrill never diminishes. It truly is a pinch-me-moment ever time!

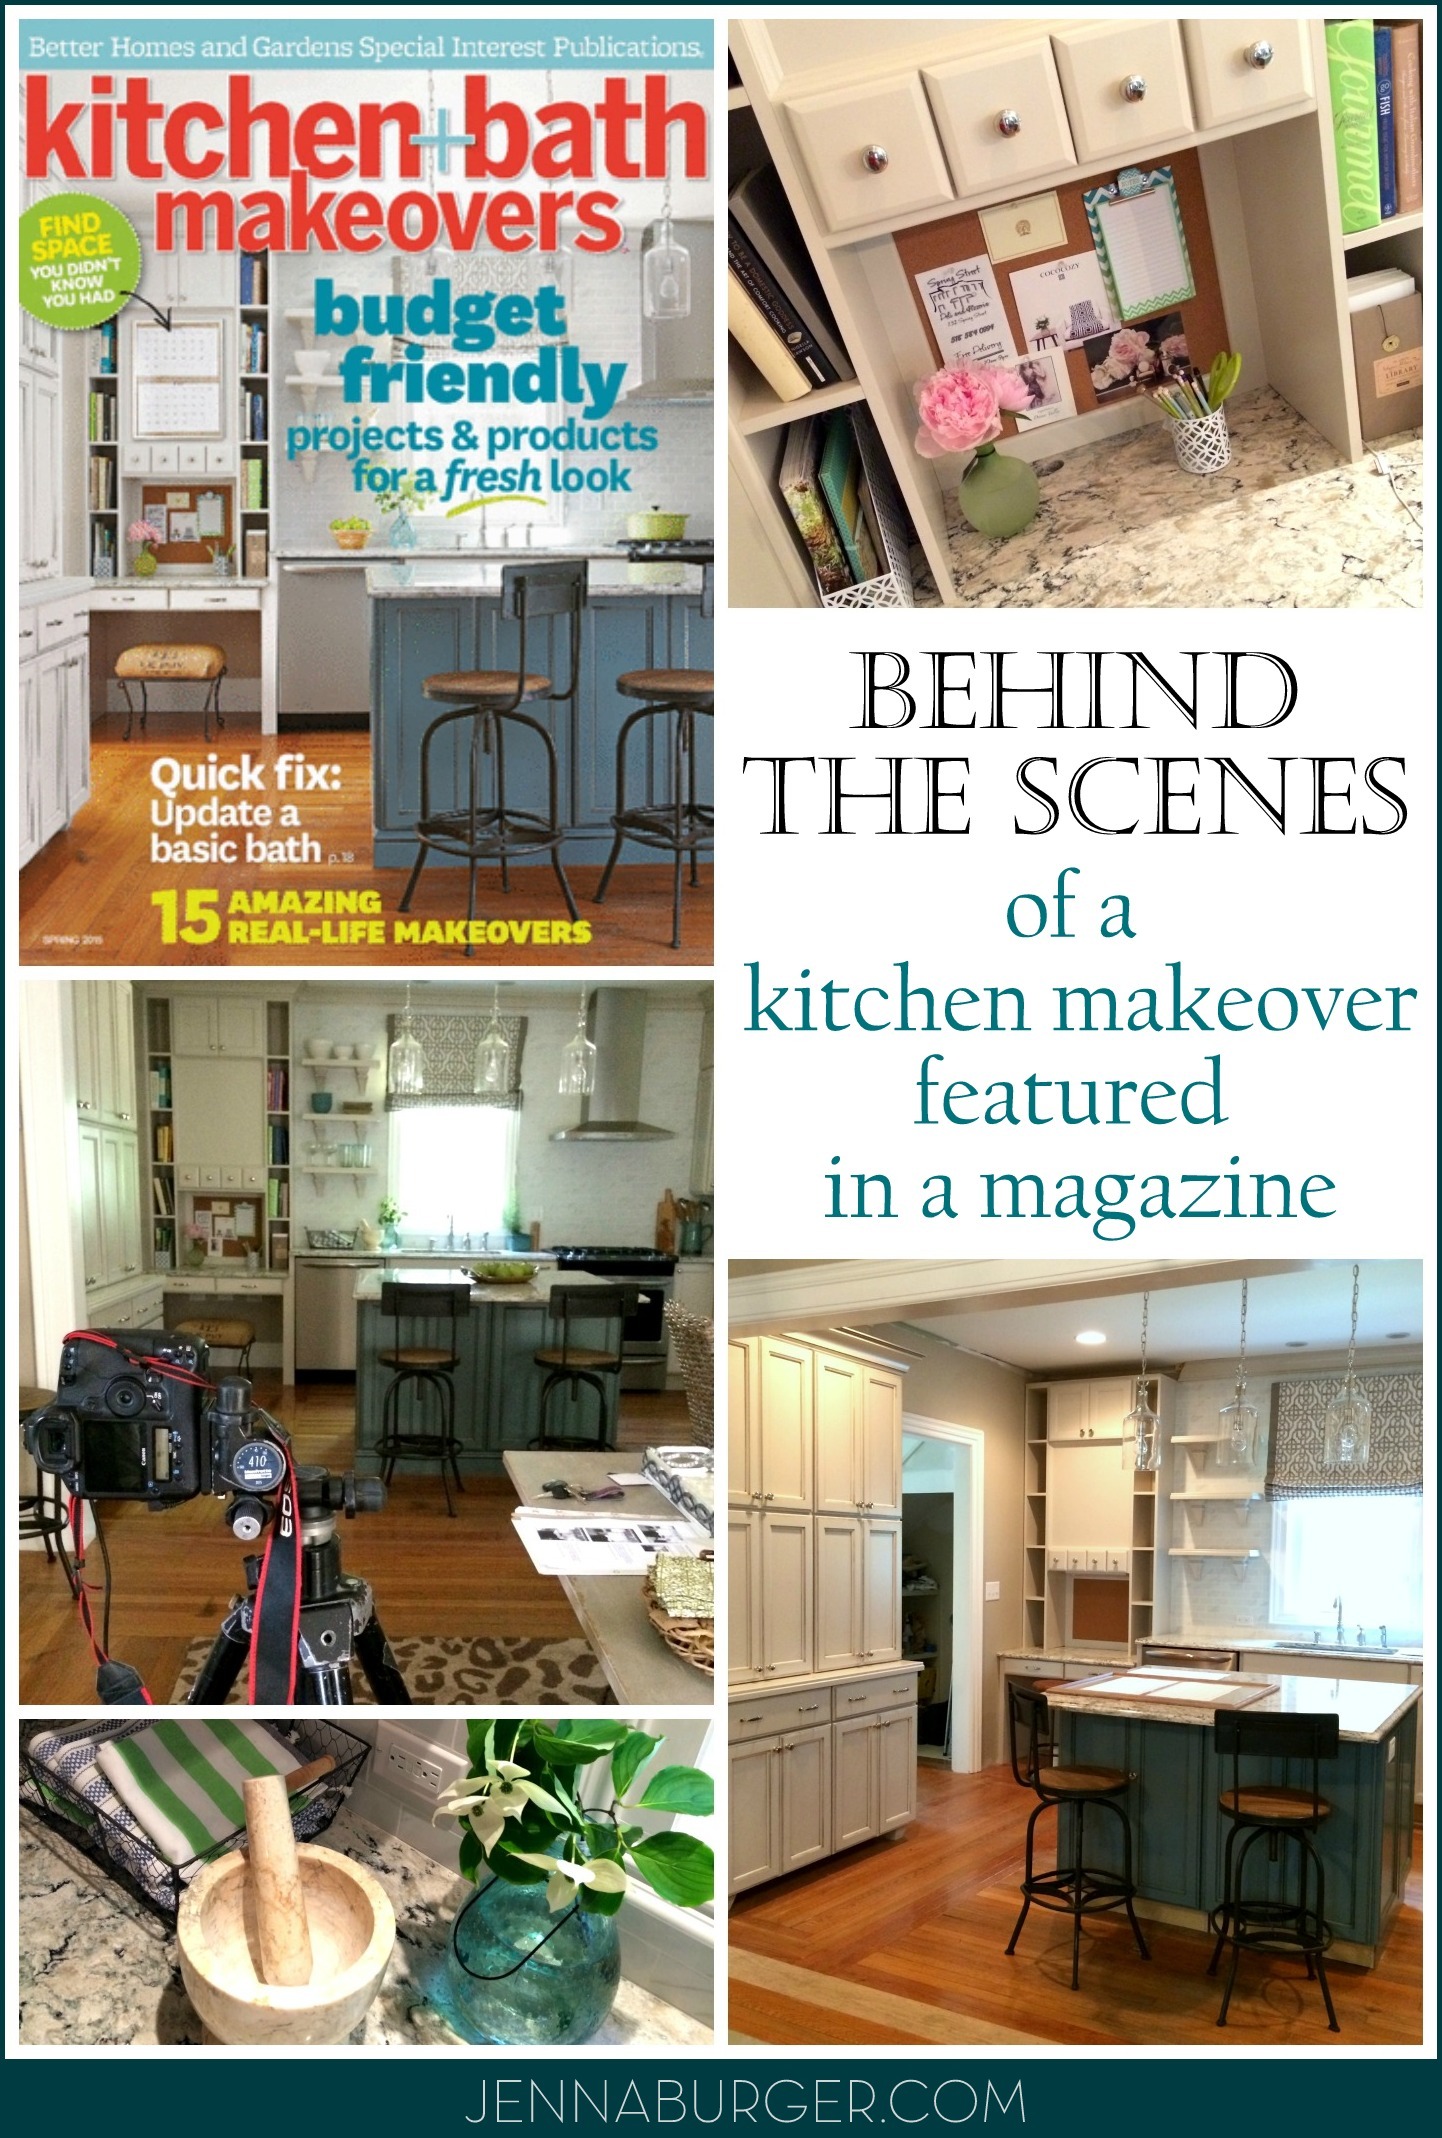
Behind the Scenes + Details of the kitchen featured on the Spring 2015 cover of Kitchen + Bath Makeovers magazine

My last experience collaborating with BHG on a kitchen makeover was fantastic and to see the result on the cover was incredible. From having a project featured in that magnitude, so many doors + new opportunities opened for me. That magazine hit newsstands just about a year ago and shortly after that, I was asked back to do it all again, for this years Spring magazine – magazines work long in advance. If you remember back a year ago, I was about 5 months pregnant at the time. The editors new that and were overly accommodating. I said, as long as we can wrap it up by early June, I’m on board. They were on board too and the ball started rolling from there…

Upon finding the right kitchen that was in desperate need for a makeover, Donna Talley – stylist + producer for BHG – and I partnered to create a makeover that was not only beautiful, but also budget-friendly and had many strategic storage options + ‘look for less’ details.

I love seeing + sharing behind the scenes footage and what goes into the end result, so let’s dissect…

The ‘before’

The ‘before’ kitchen was cramped & completely not functional. The space was of an okay size but with very limited cabinet space, a refrigerator wrongly positioned, and traffic flow problems, a lot needed to change.  Here are a few before pictures…

Pictures of the 'before' kitchen featured on the Spring 2015 cover of Kitchen + Bath Makeovers magazine

Not only were the cabinets dated, but functionally there was a lot of unused space above the upper cabinets. The base cabinets weren’t much better. After working with an architect on a few structural questions, we decided to remove the walls @ the pantry and open up the pass through space to join the kitchen + dining space.

Here was the Creative Vision Board I created for the kitchen + dining room…

The mood board for the proposed kitchen featured on the Spring 2015 cover of Kitchen + Bath Makeovers magazine

The mood board for the proposed kitchen & dining room featured on the Spring 2015 cover of Kitchen + Bath Makeovers magazine

In the end we went in a slightly different direction for the fabrics & layers, but the general aesthetic + style remained. Here are a few outtakes on the options discussed…

Kitchen Palette

Kitchen Palette

In the end, this is what was chosen & is what is seen in the magazine feature…

Kitchen Palette

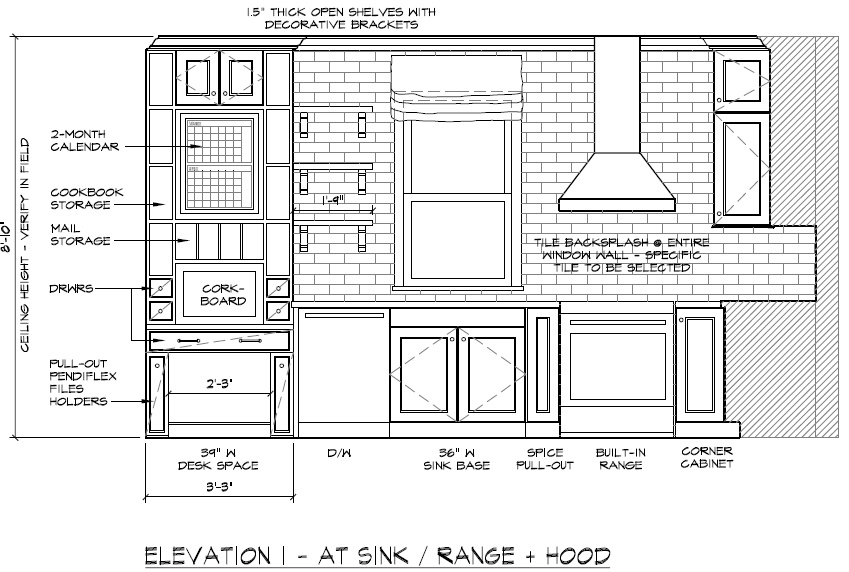
At the same time as the materials + selections were being finalized, I was also working on the architectural drawings of the design, which included the floor plan and the various room elevations needed to execute the fabrication of the cabinetry. This is pretty much the same steps I take for all clients that I work with on a kitchen makeover.

Architectural Drawings…

Architectural drawings for the kitchen featured on the Spring 2015 cover of Kitchen + Bath Makeovers magazine

Architectural drawings for the kitchen featured on the Spring 2015 cover of Kitchen + Bath Makeovers magazine

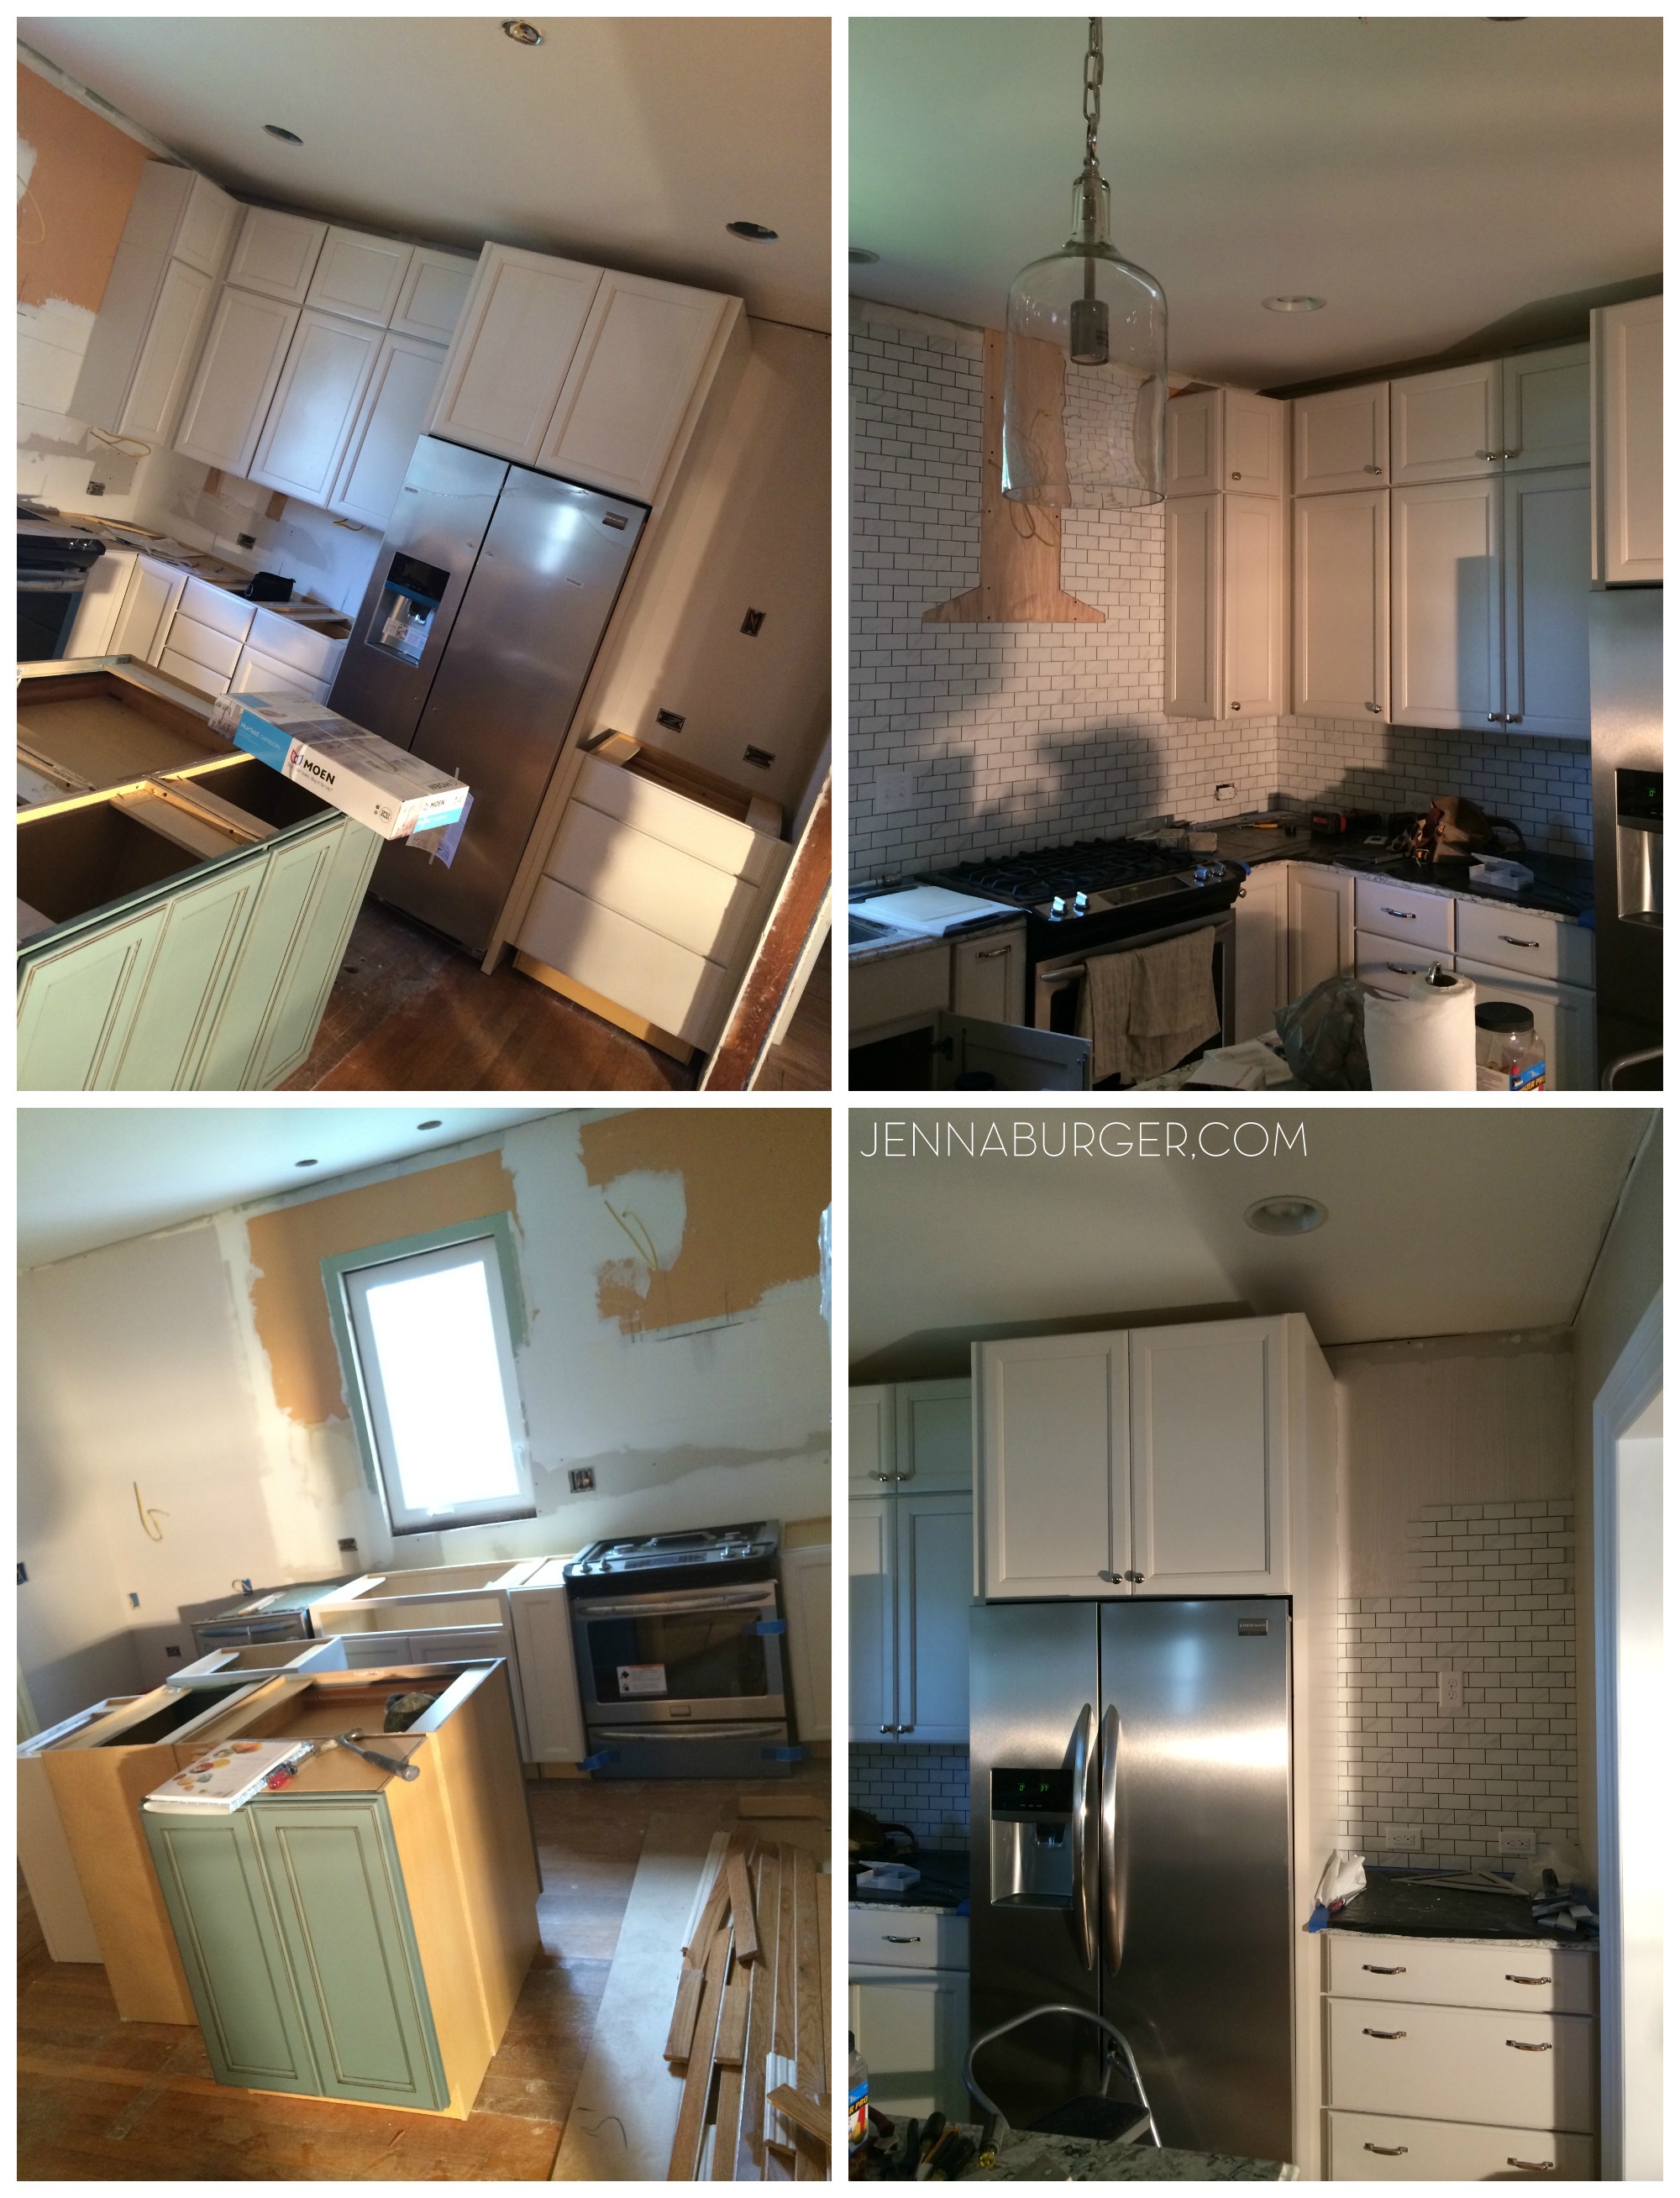
Once the drawings were finished & everyone was on board, about 2 months later construction started and the makeover transformation was in process.

Progress pictures of the makeover…

Pictures during construction of the kitchen featured on the Spring 2015 cover of Kitchen + Bath Makeovers magazine

In the end, this was the result captured through my lens.

The Result…

Pictures of the kitchen featured on the Spring 2015 cover of Kitchen + Bath Makeovers magazine

Pictures of the kitchen featured on the Spring 2015 cover of Kitchen + Bath Makeovers magazine

Pictures of the kitchen featured on the Spring 2015 cover of Kitchen + Bath Makeovers magazine

Pictures of the kitchen featured on the Spring 2015 cover of Kitchen + Bath Makeovers magazine

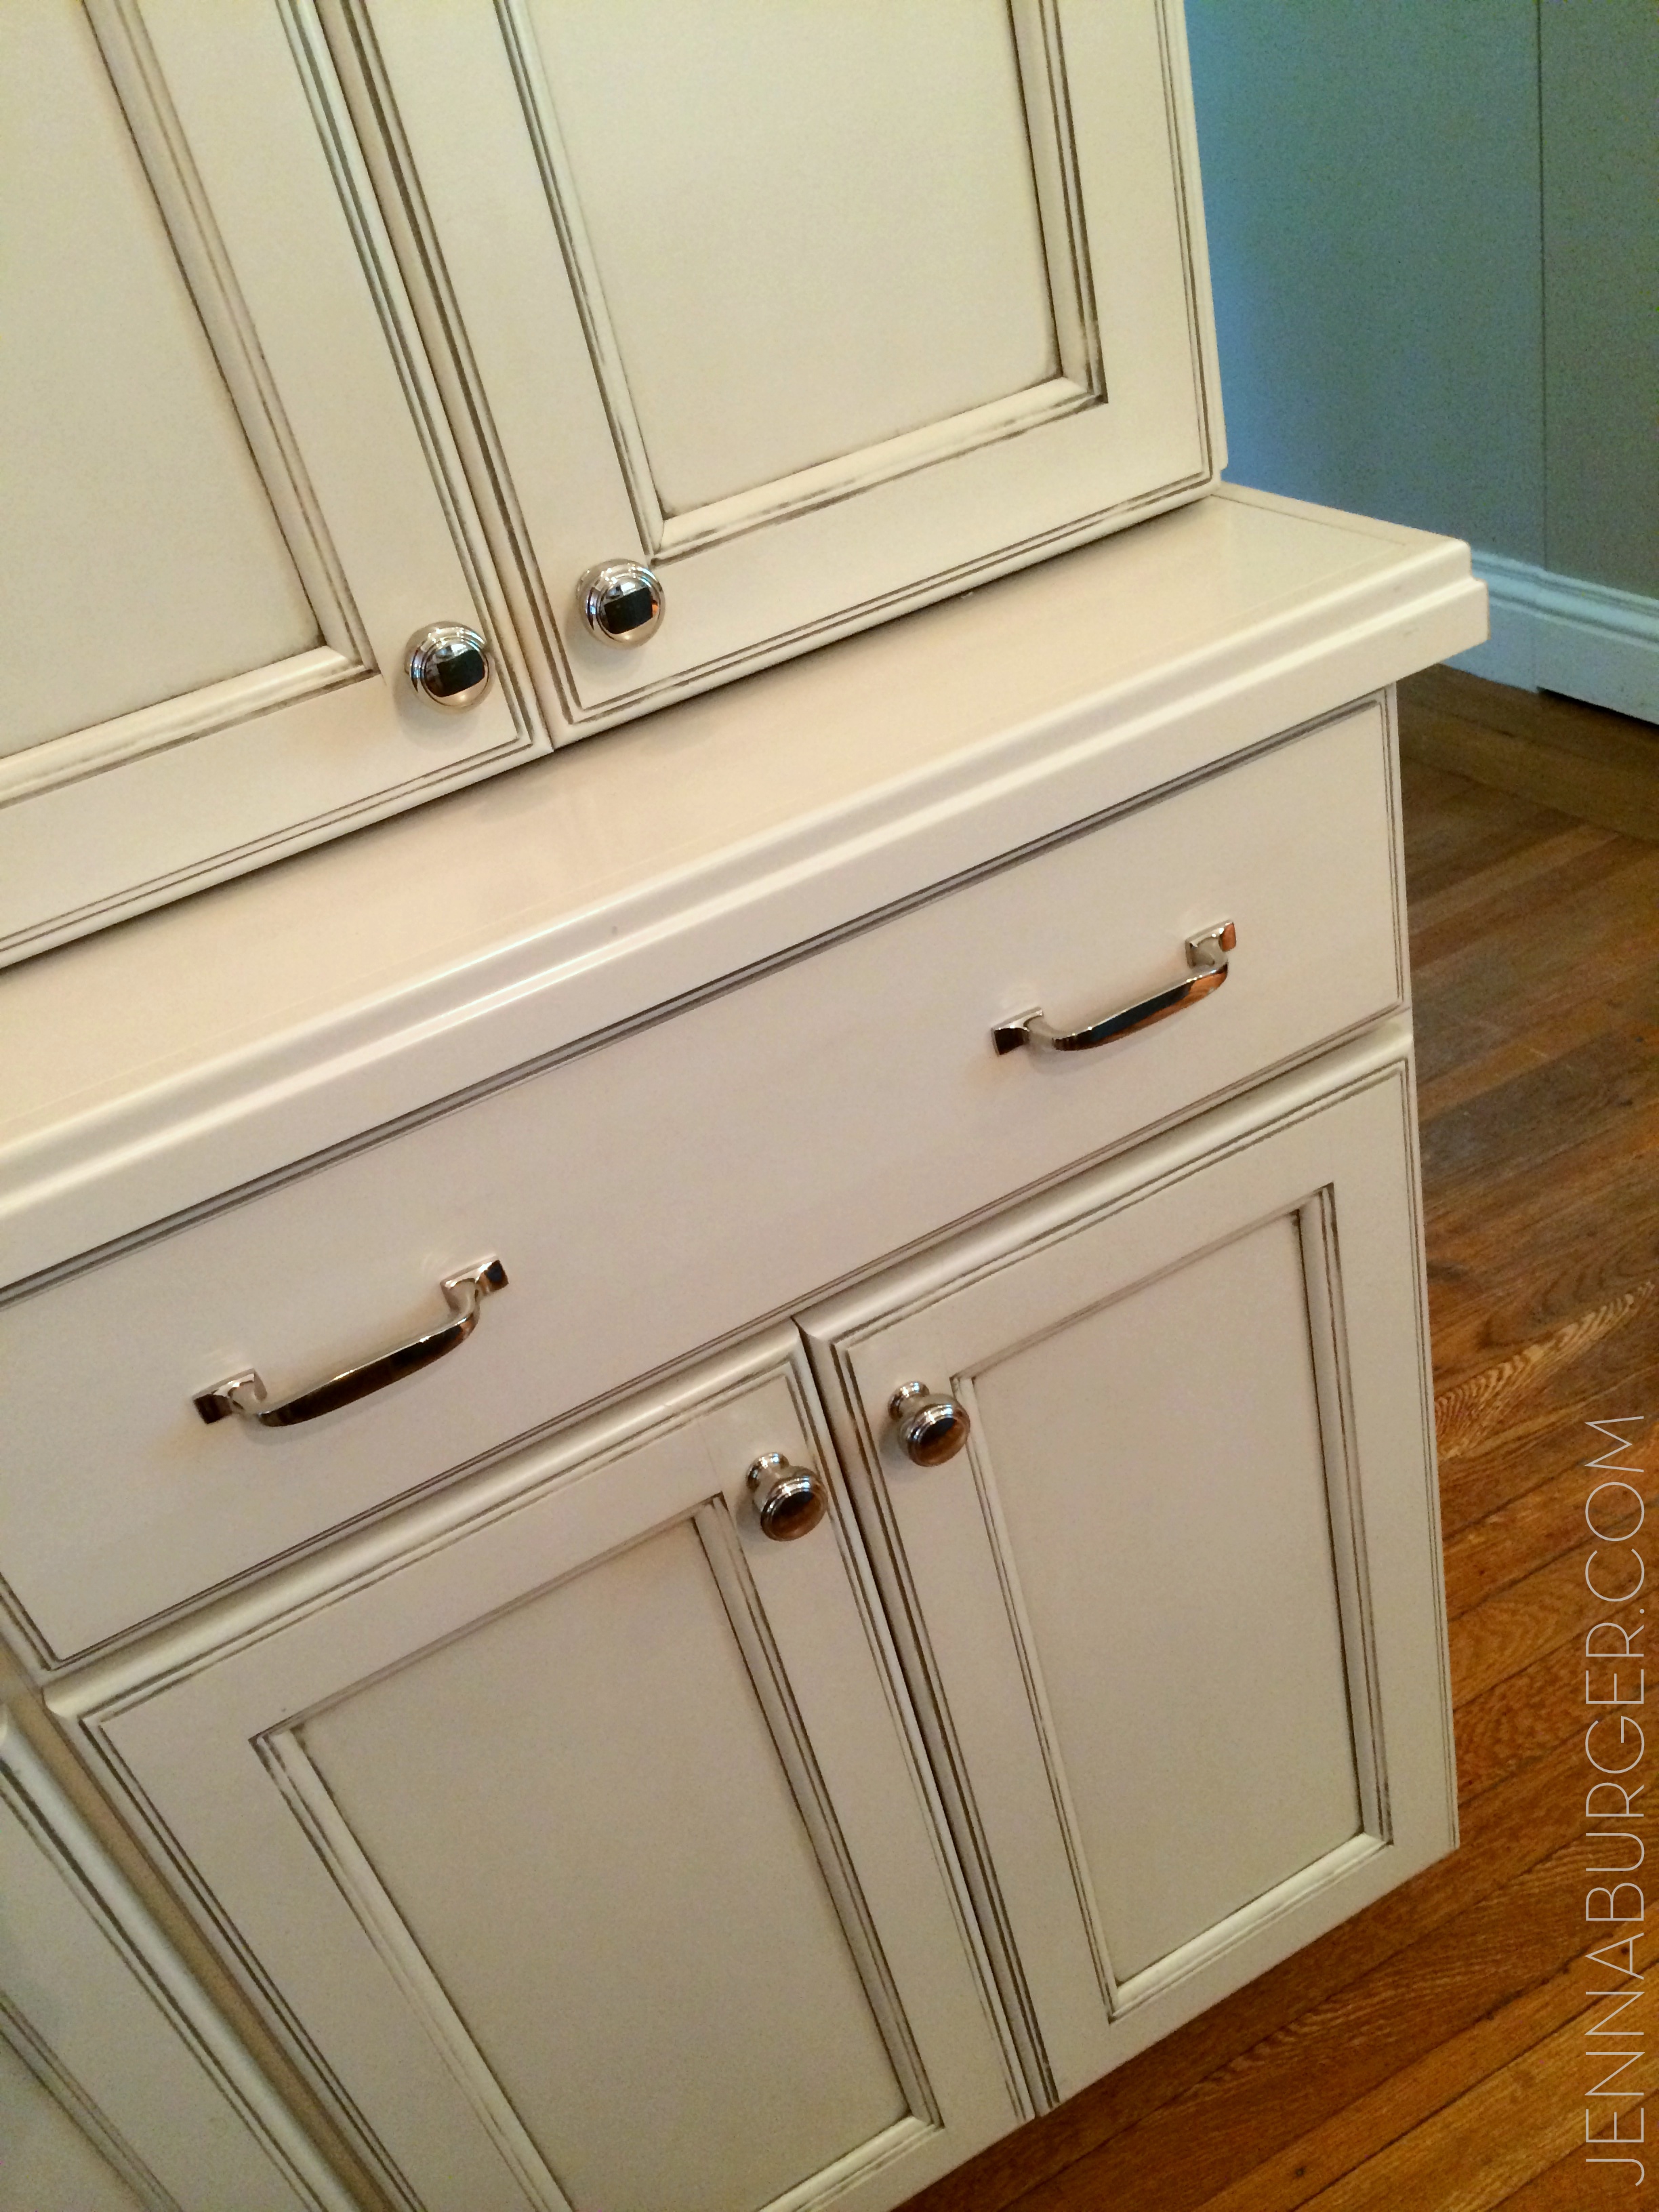
The new cabinets were fabricated by MasterBrands – the island is a teal hue, while the upper + base cabinets are a soft gray, and the “pantry” is the same soft gray with a glaze overlay.

Here’s a detail of the “pantry” that we created using stock cabinets…

Pictures of the kitchen featured on the Spring 2015 cover of Kitchen + Bath Makeovers magazine

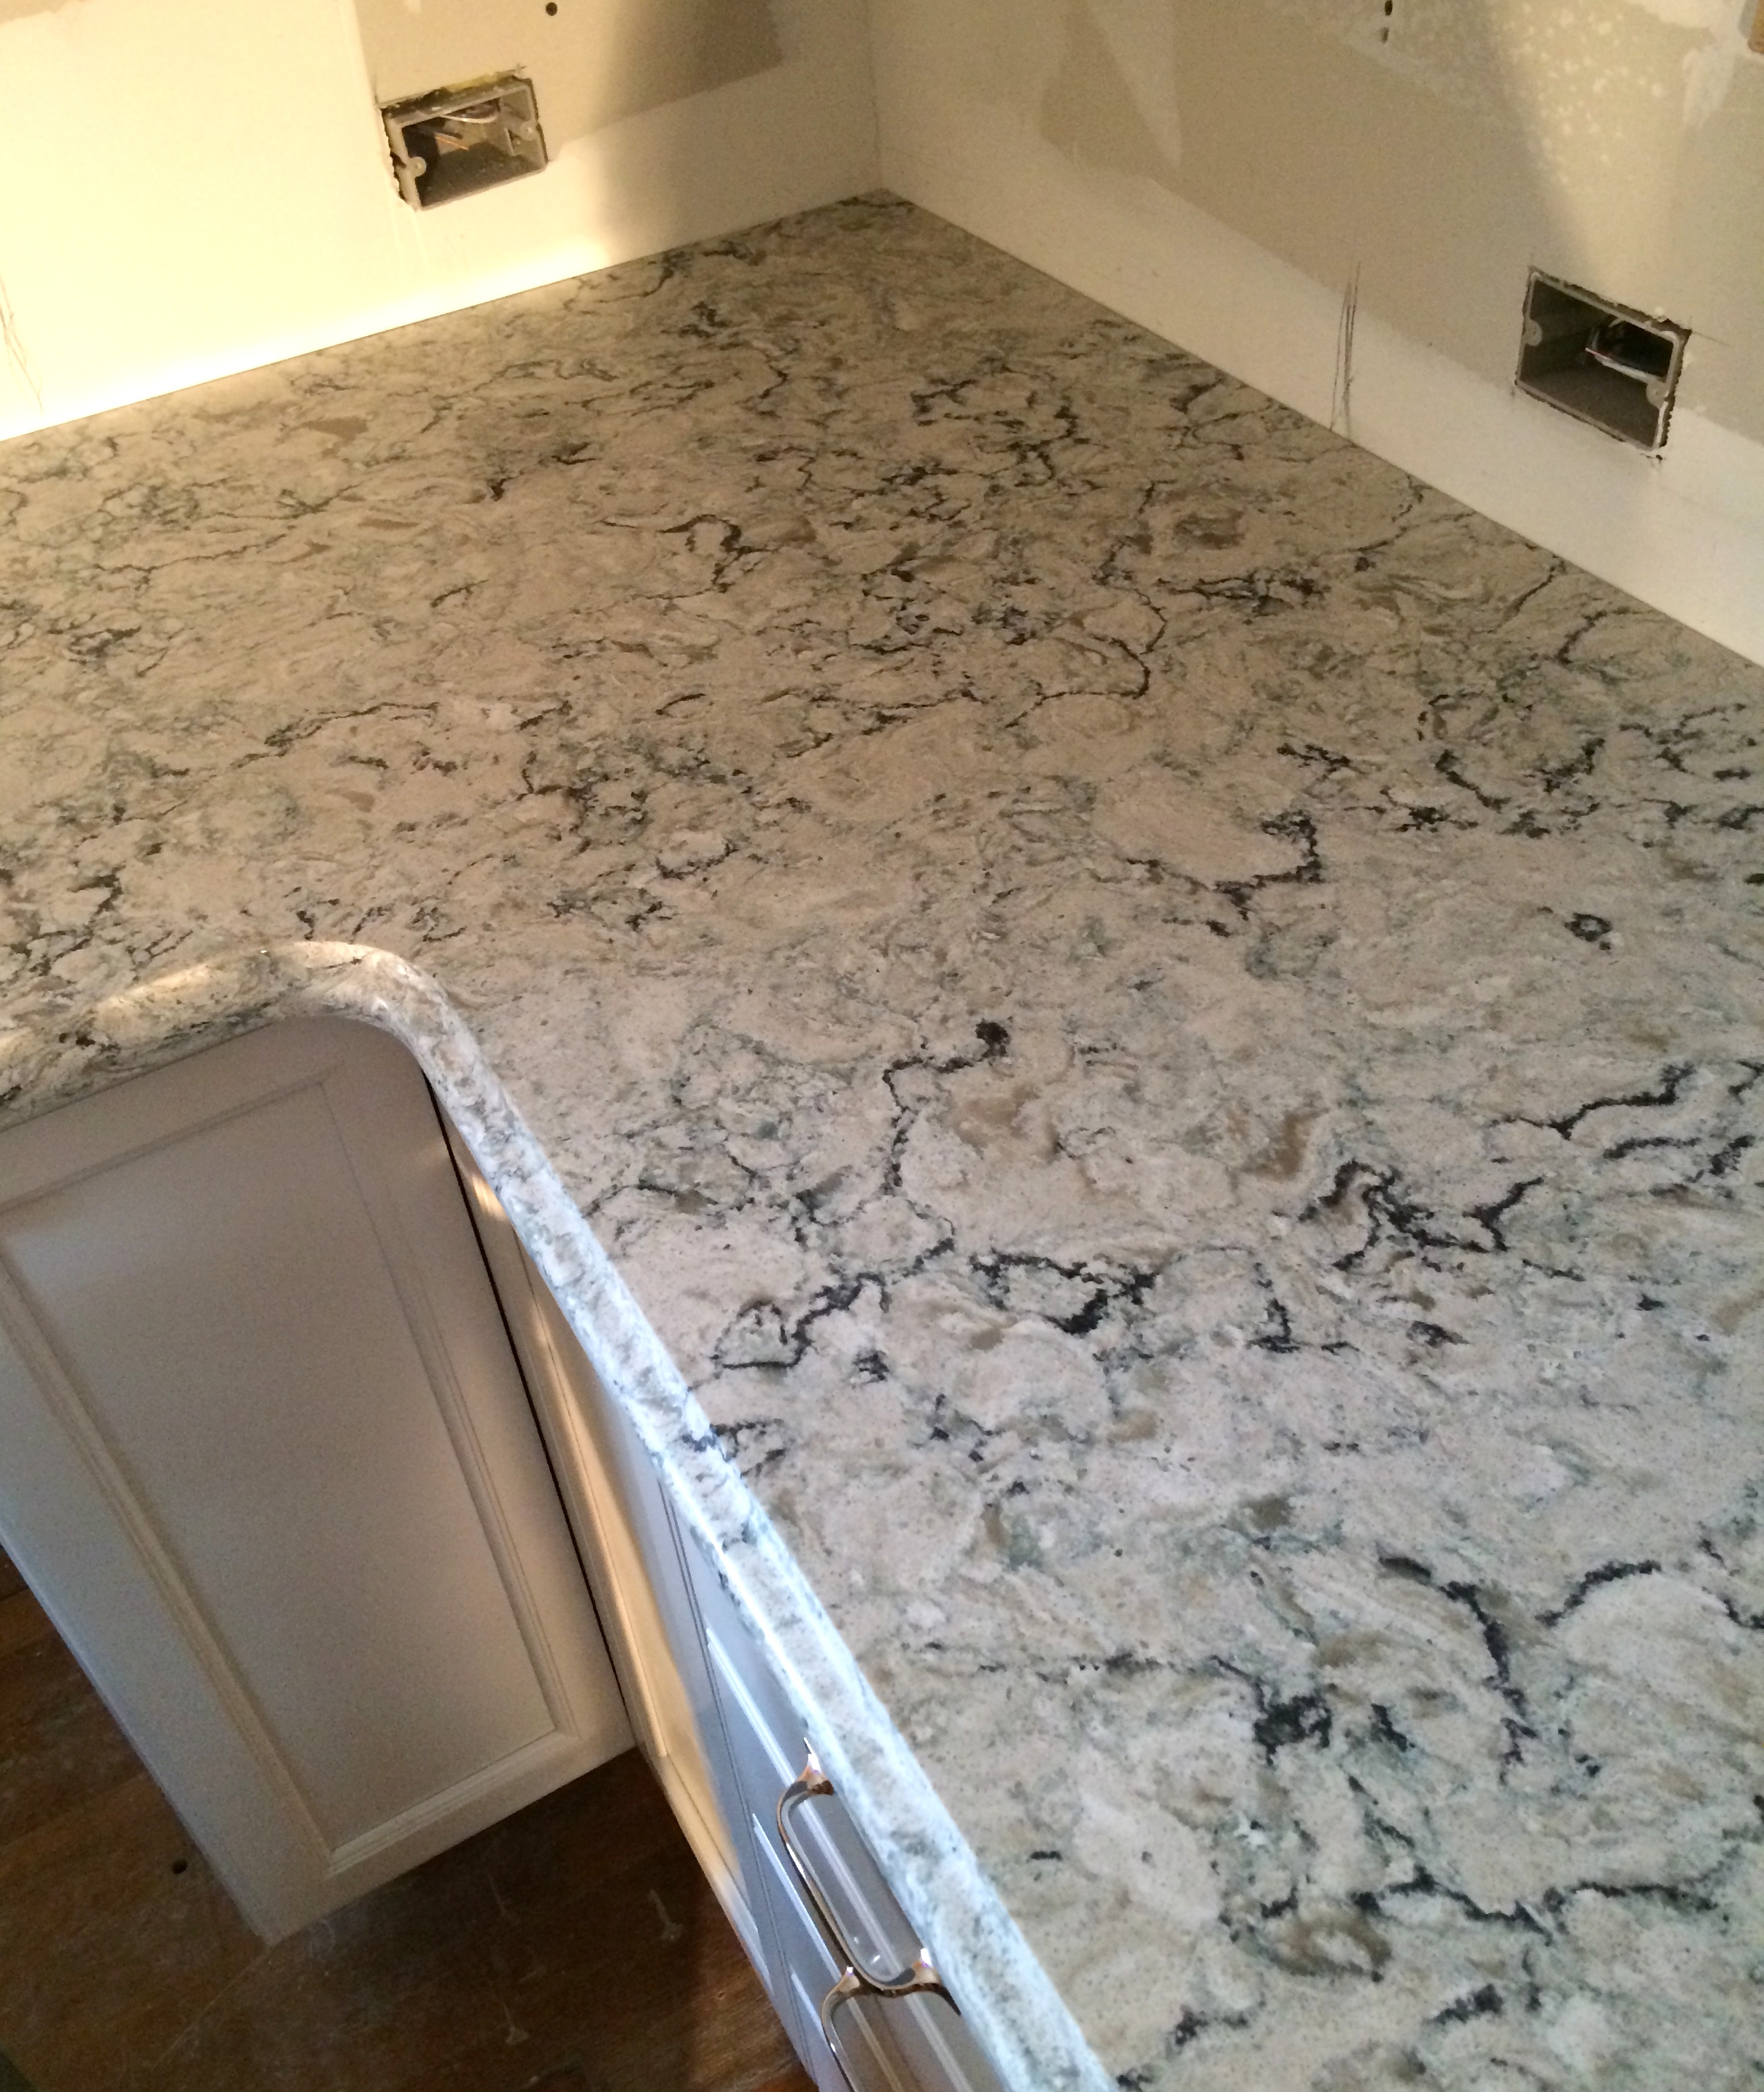
The island is quartz an I was pleasantly surprised by it’s beauty. Before seeing the overall slab, I was planning for it to be faux looking (a knock-off granite or marble), but it wasn’t at all. The veining & movement of the slab was gorgeous. It’s a material I will definitely use again, especially as an alternative to marble since that can be difficult in a kitchen.

Kitchen featured on the Spring 2015 cover of Kitchen + Bath Makeovers magazine

The transformation was incredible and I loved every step of the 1.5-month construction process leading up to photoshoot day which was in mid-June (and less than 2 weeks before I gave birth to baby #3 – thankfully we finished in the nick of time).

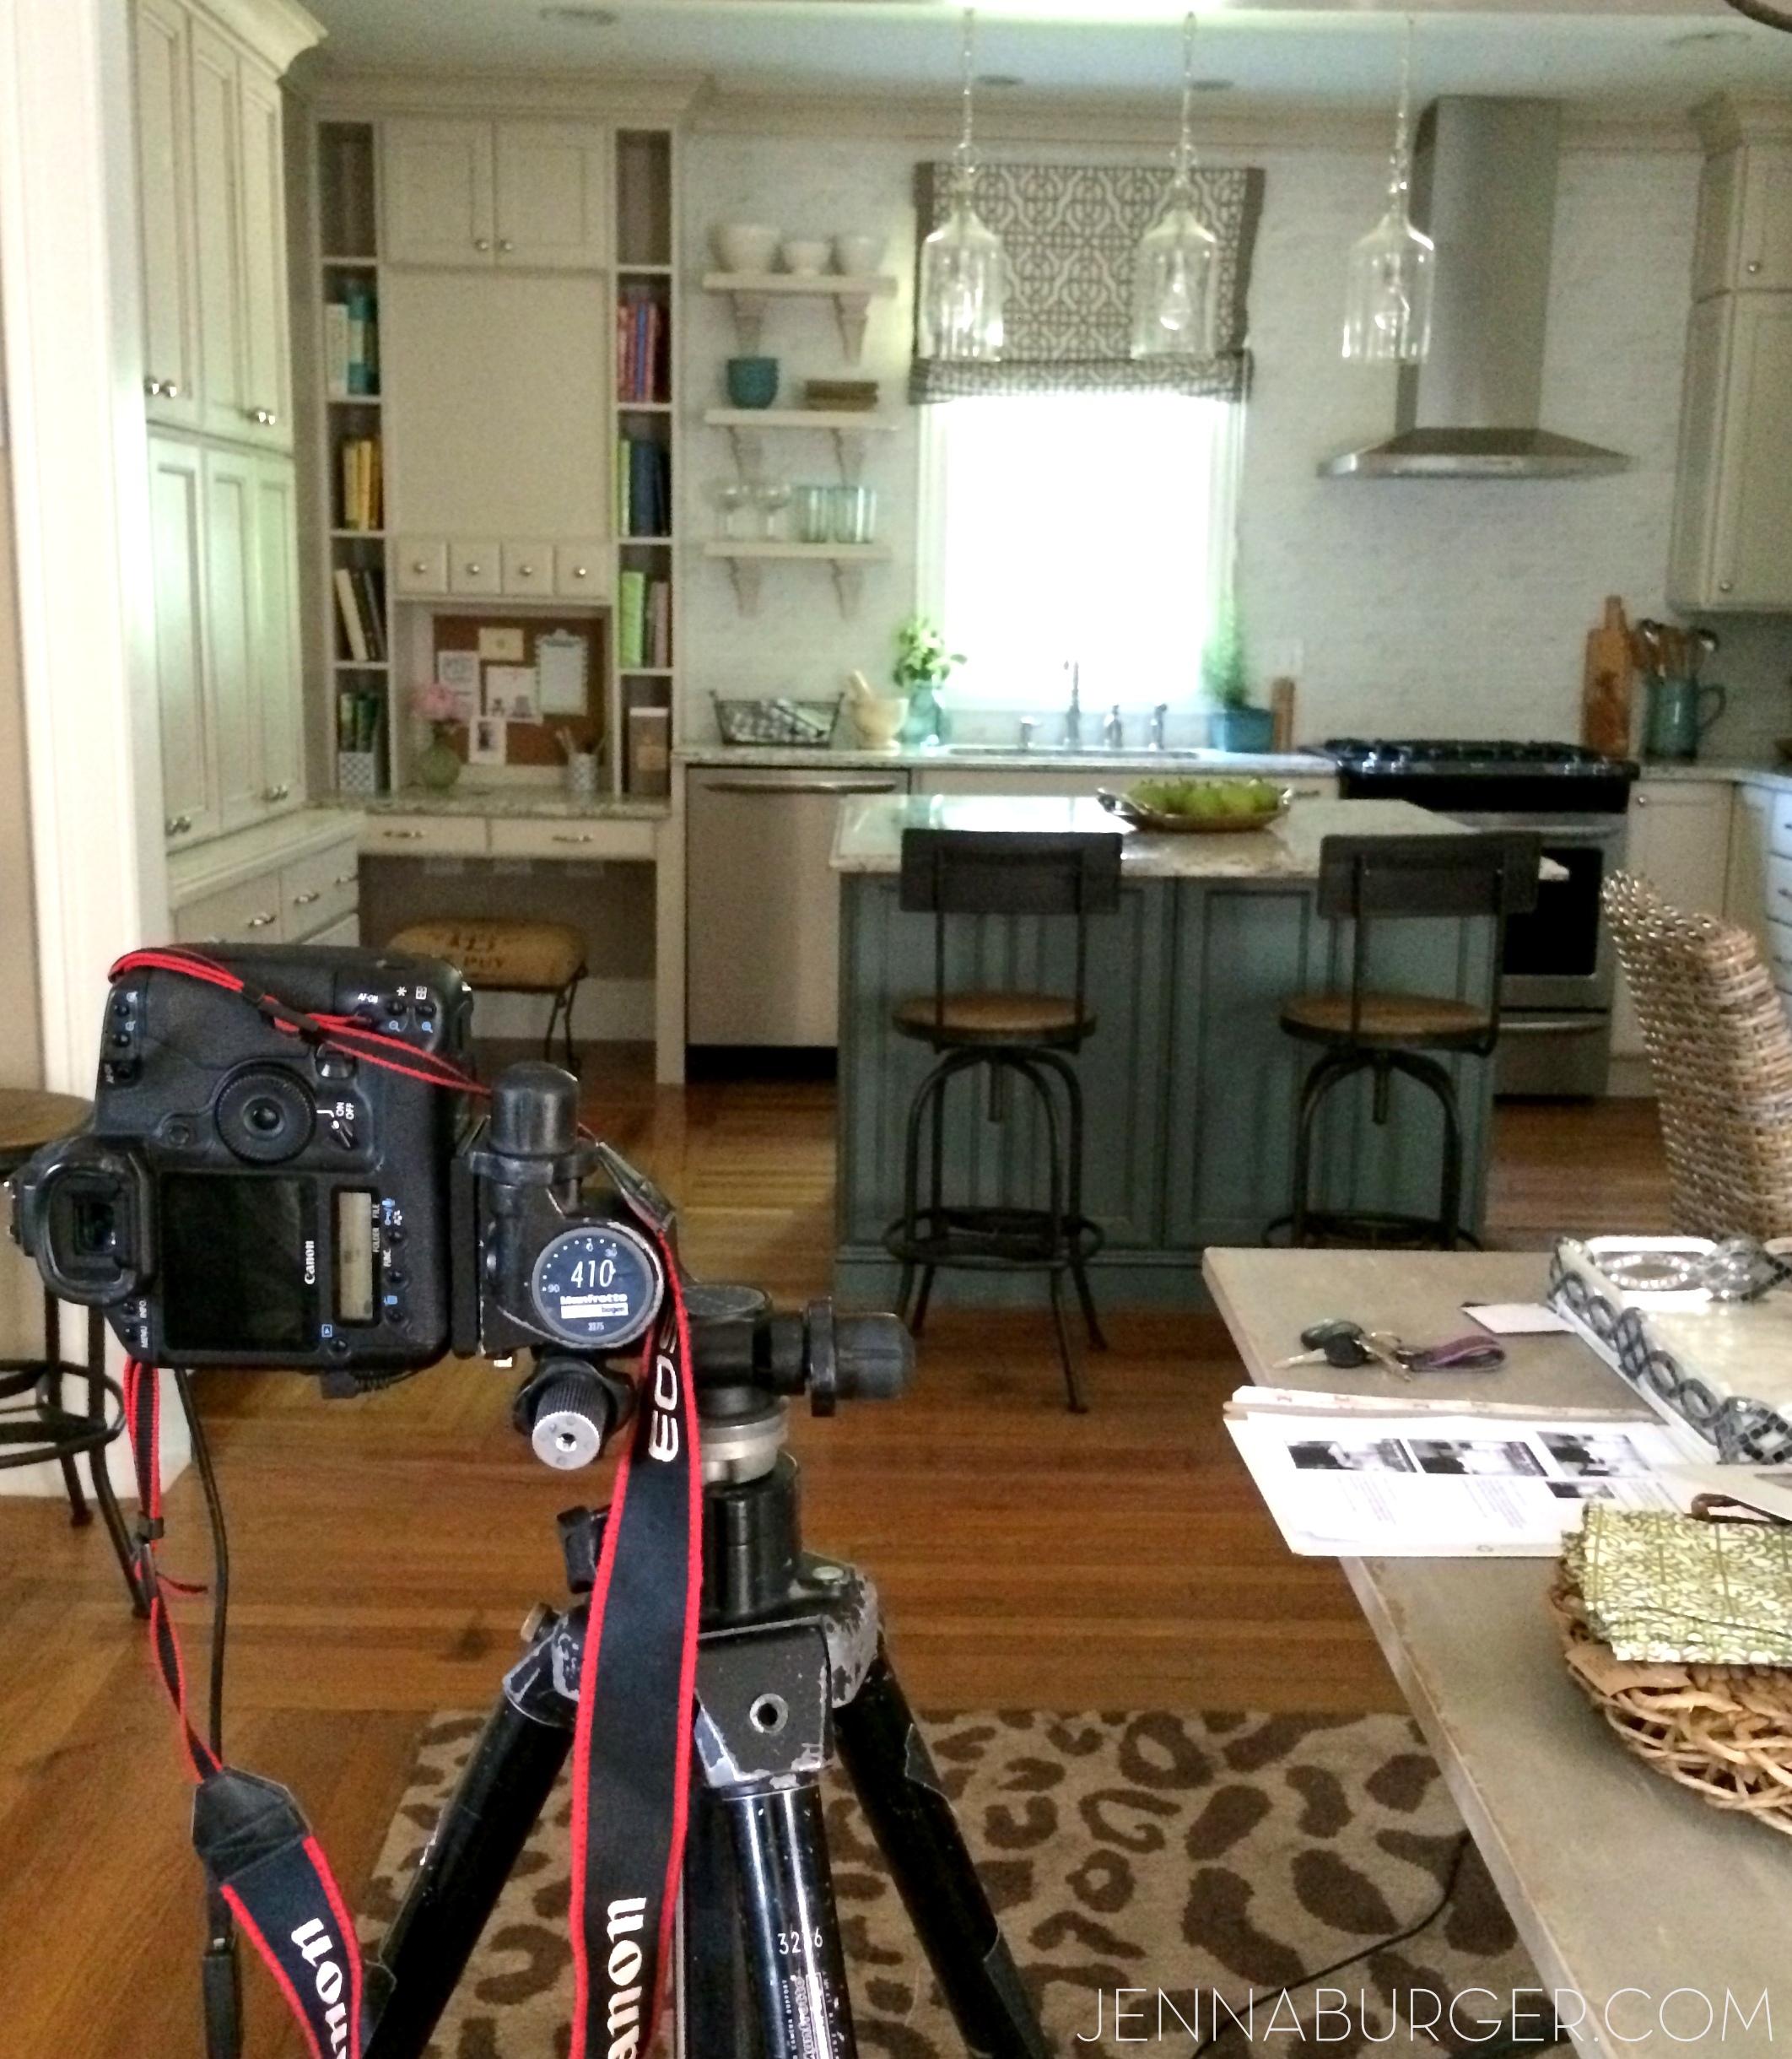
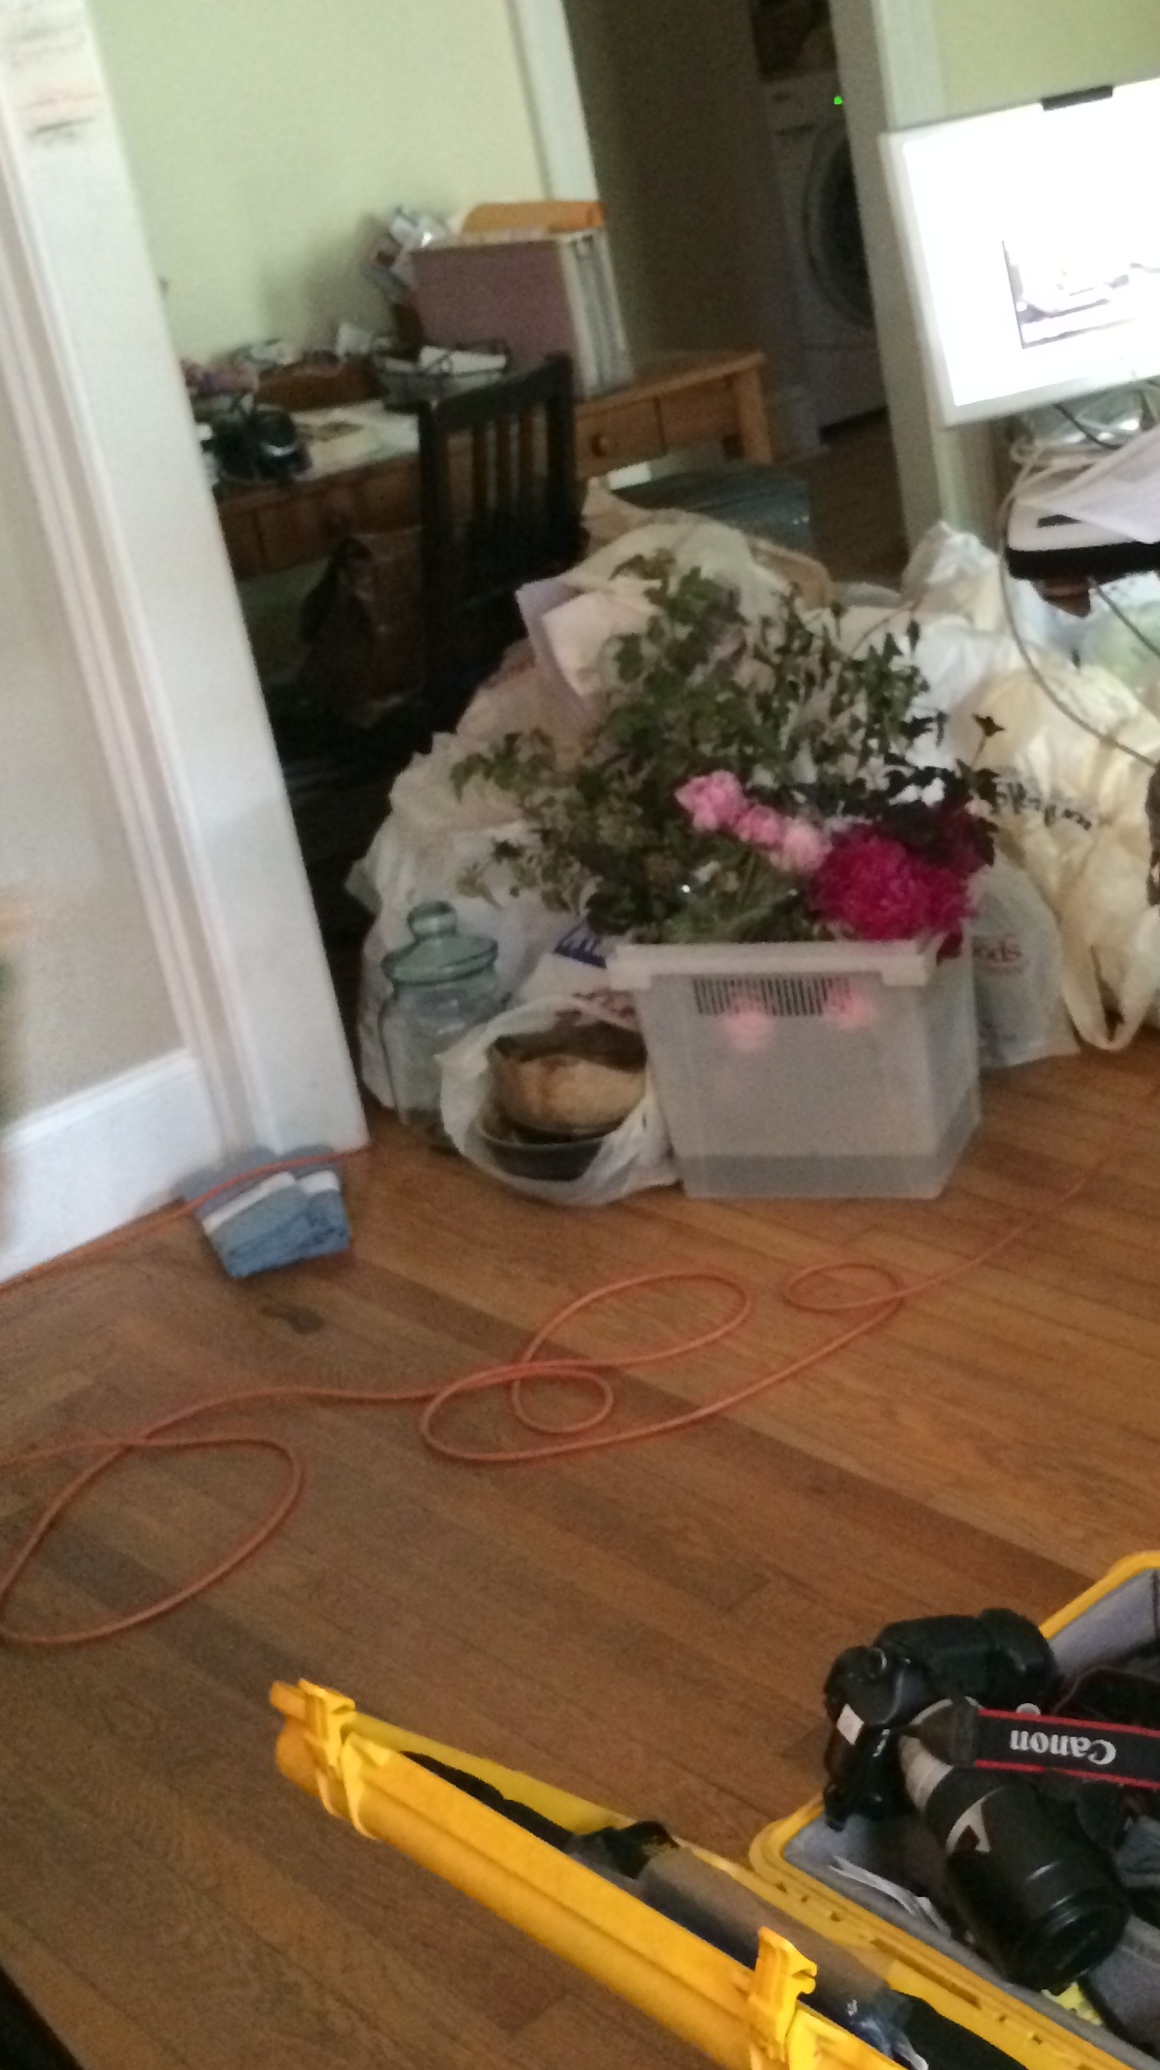
As always photoshoot day is typically mayhem, but Oh SO EXCITING. On the pages of the magazine, all looks calm & serene, but most of the nooks & crannies around the main shot are just the opposite.

Photoshoot day…

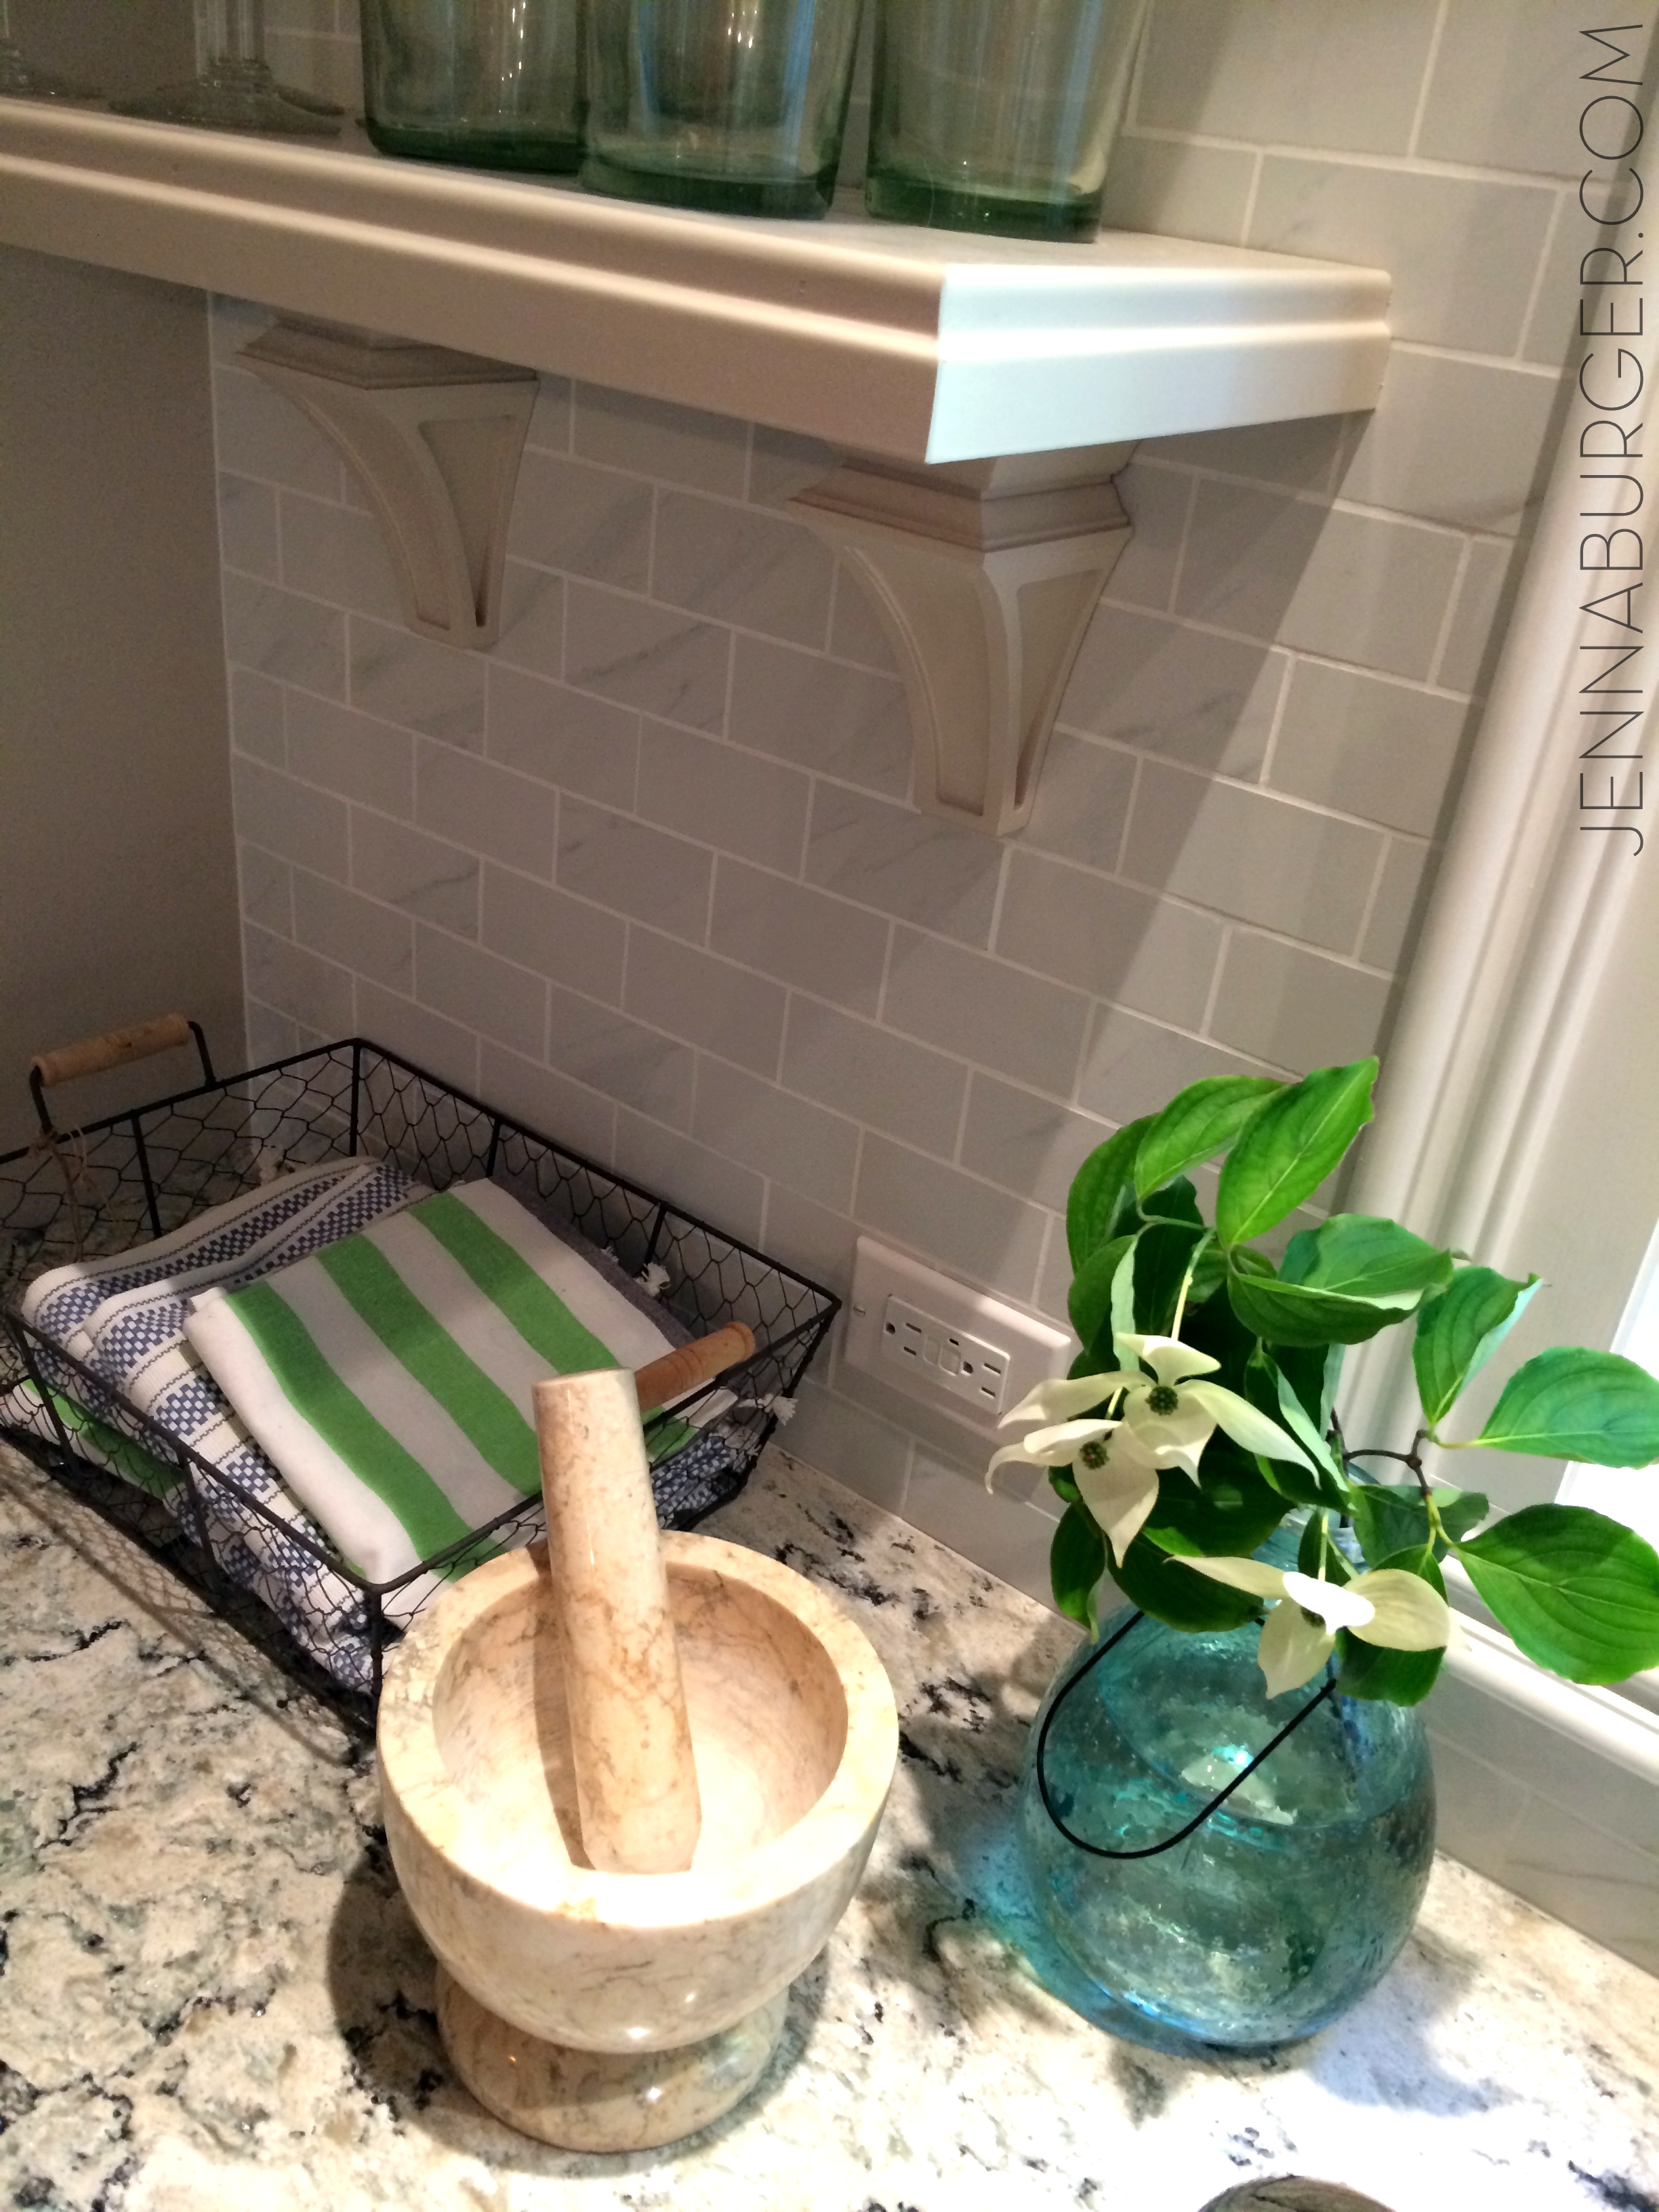
Behind the scenes of the Kitchen featured on the Spring 2015 cover of Kitchen + Bath Makeovers magazine

Behind the scenes of the Kitchen featured on the Spring 2015 cover of Kitchen + Bath Makeovers magazine

Behind the scenes of the Kitchen featured on the Spring 2015 cover of Kitchen + Bath Makeovers magazine

All the props + styling are credited to Donna Talley who produced & put the story together. Michael Partenio was the photographer for the shoot.

Behind the scenes of the Kitchen featured on the Spring 2015 cover of Kitchen + Bath Makeovers magazine

As I mentioned last year when sharing behind the scenes details, I find it incredible how much work goes into creating each shot. The space is overall beautiful, but the added pop layered in through accessories makes the room on the pages of the magazine come alive.

My pictures don’t honestly do a justice. The magazine shares much more beautiful angles + details, along with more of the story about the homeowner & the space. It’s an issue you will absolutely want to pick up. Plus a few of my blogger friends are also featured including Rhoda of Southern Hospitality, Brittany of Pretty Handy Girl, and Marian of Miss Mustard Seed.

Behind the Scenes + Details of the kitchen featured on the Spring 2015 cover of Kitchen + Bath Makeovers magazine

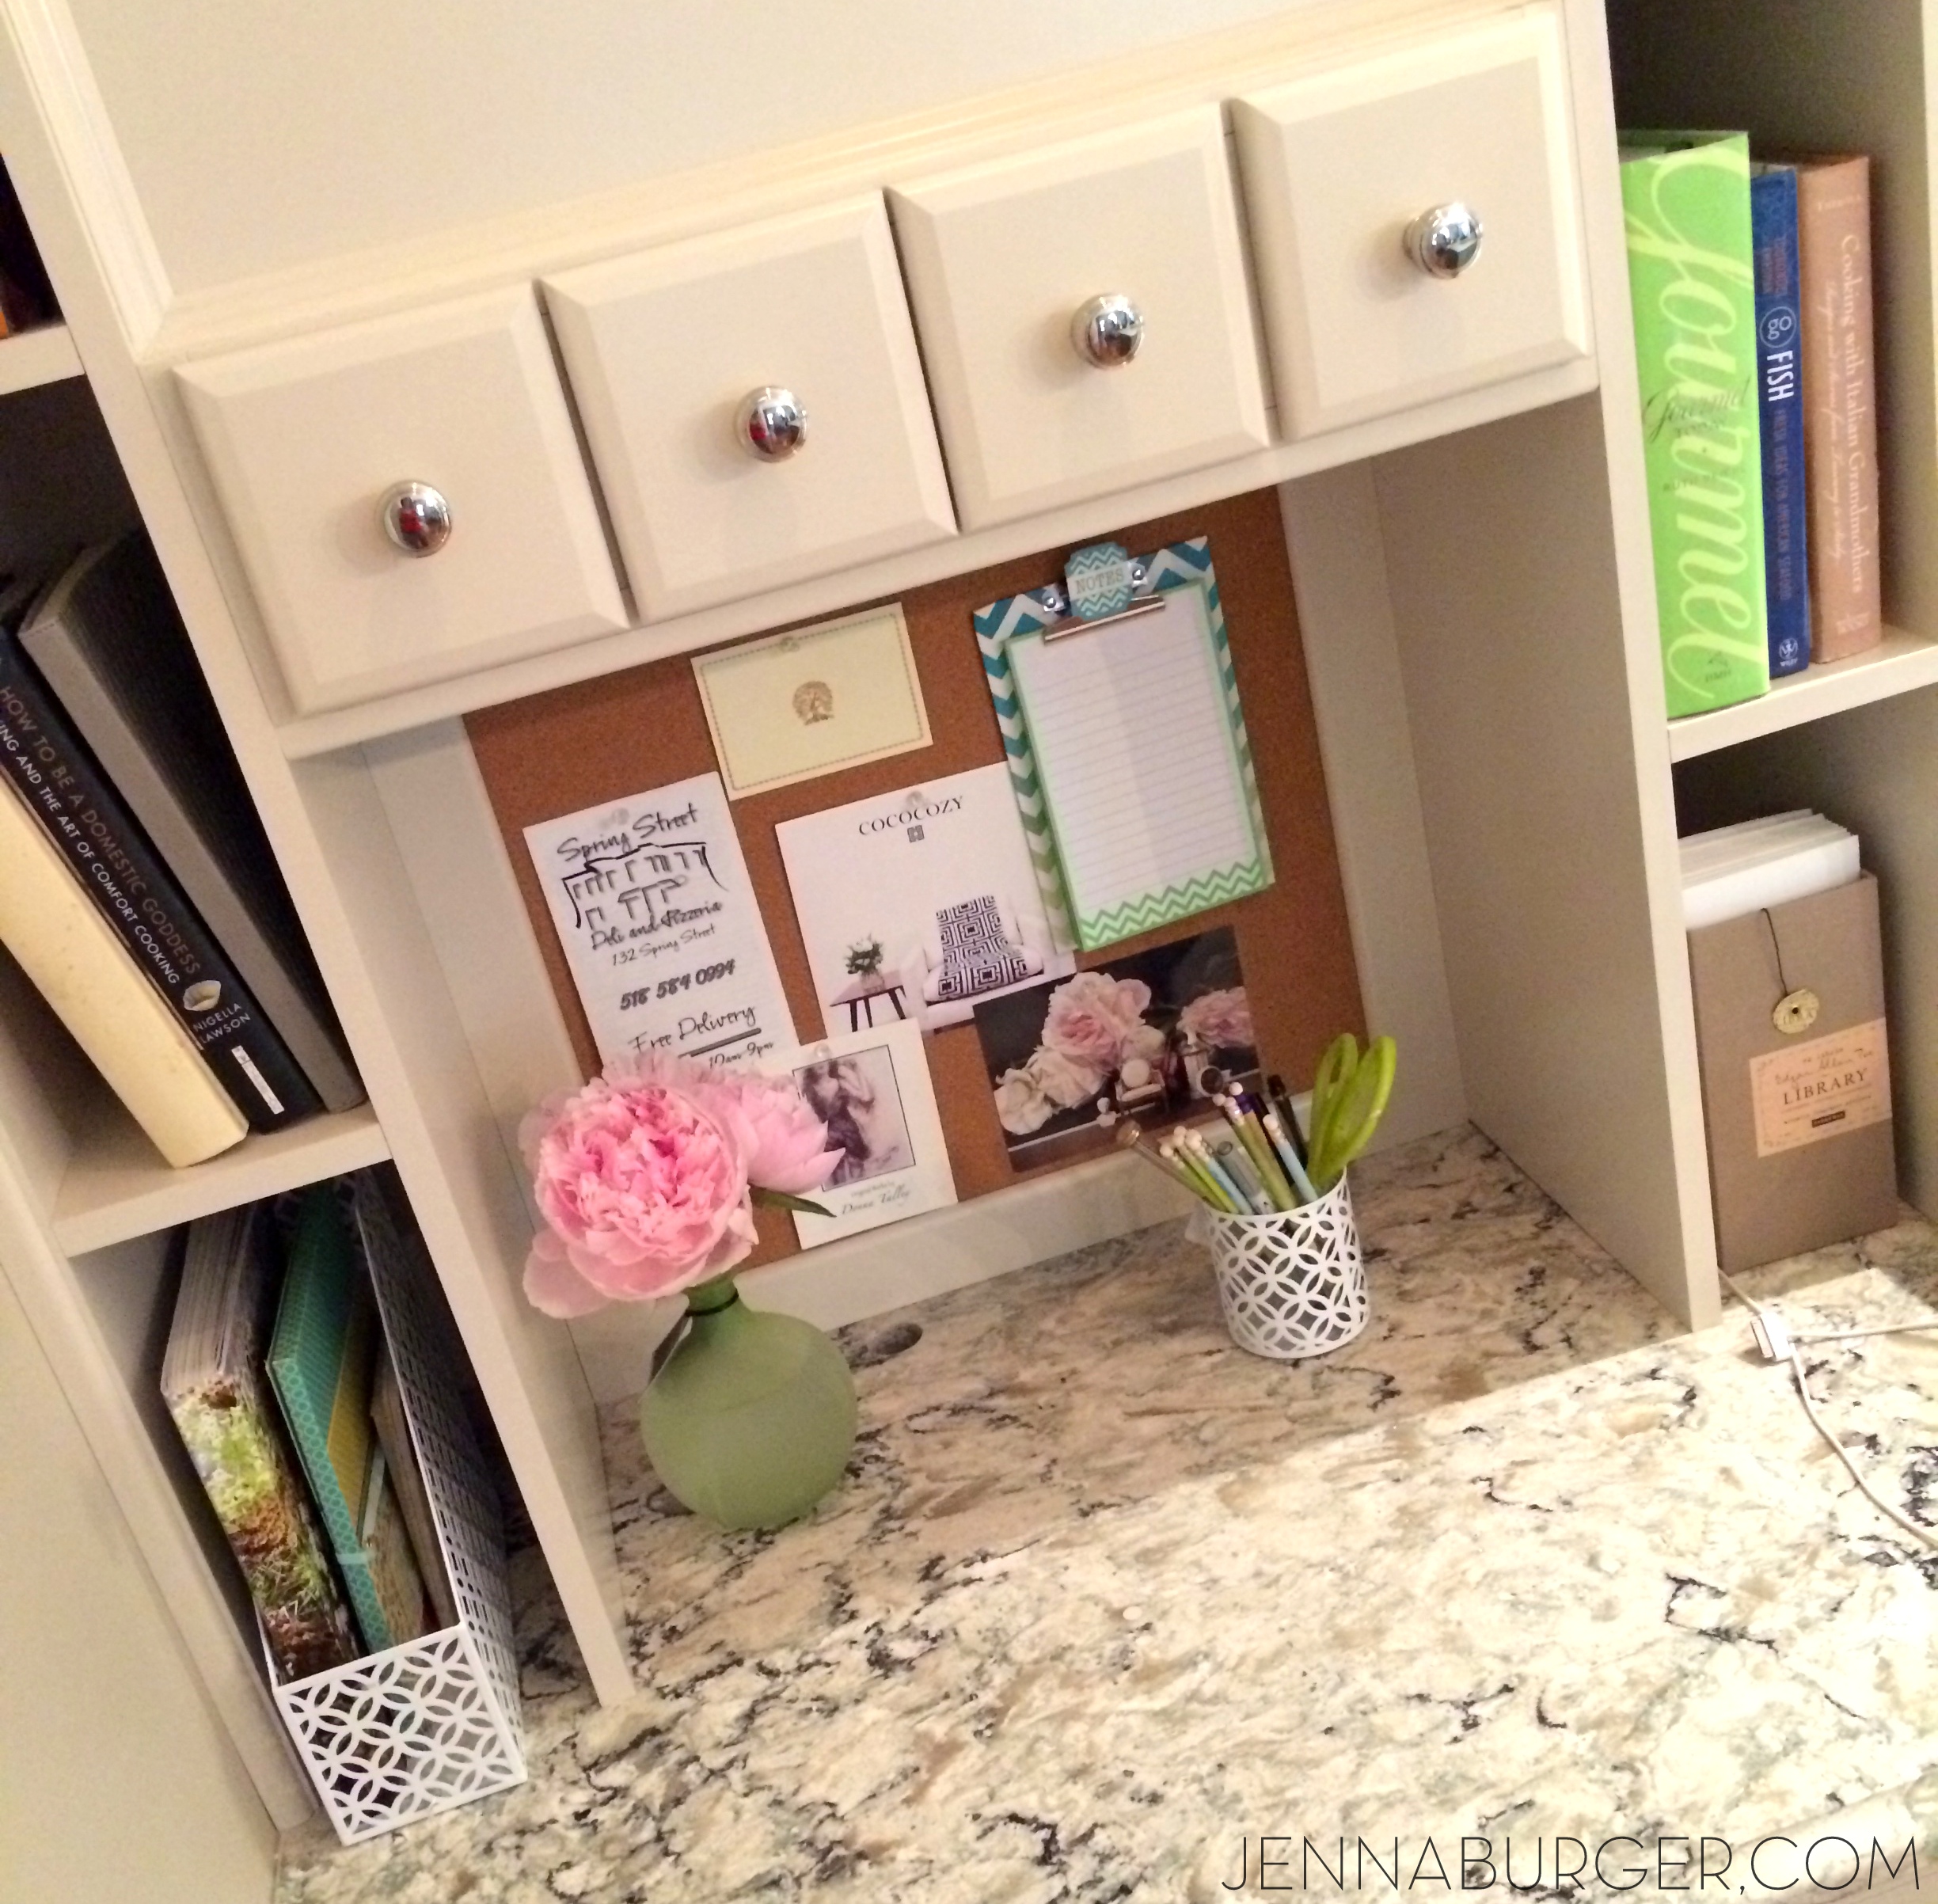
Last, but not at all least, I couldn’t design a kitchen without a central command center and this one does not fail!

From my CCC (that was featured in BHG), to last years kitchen with a CCC, and now this one – all of them are so different.

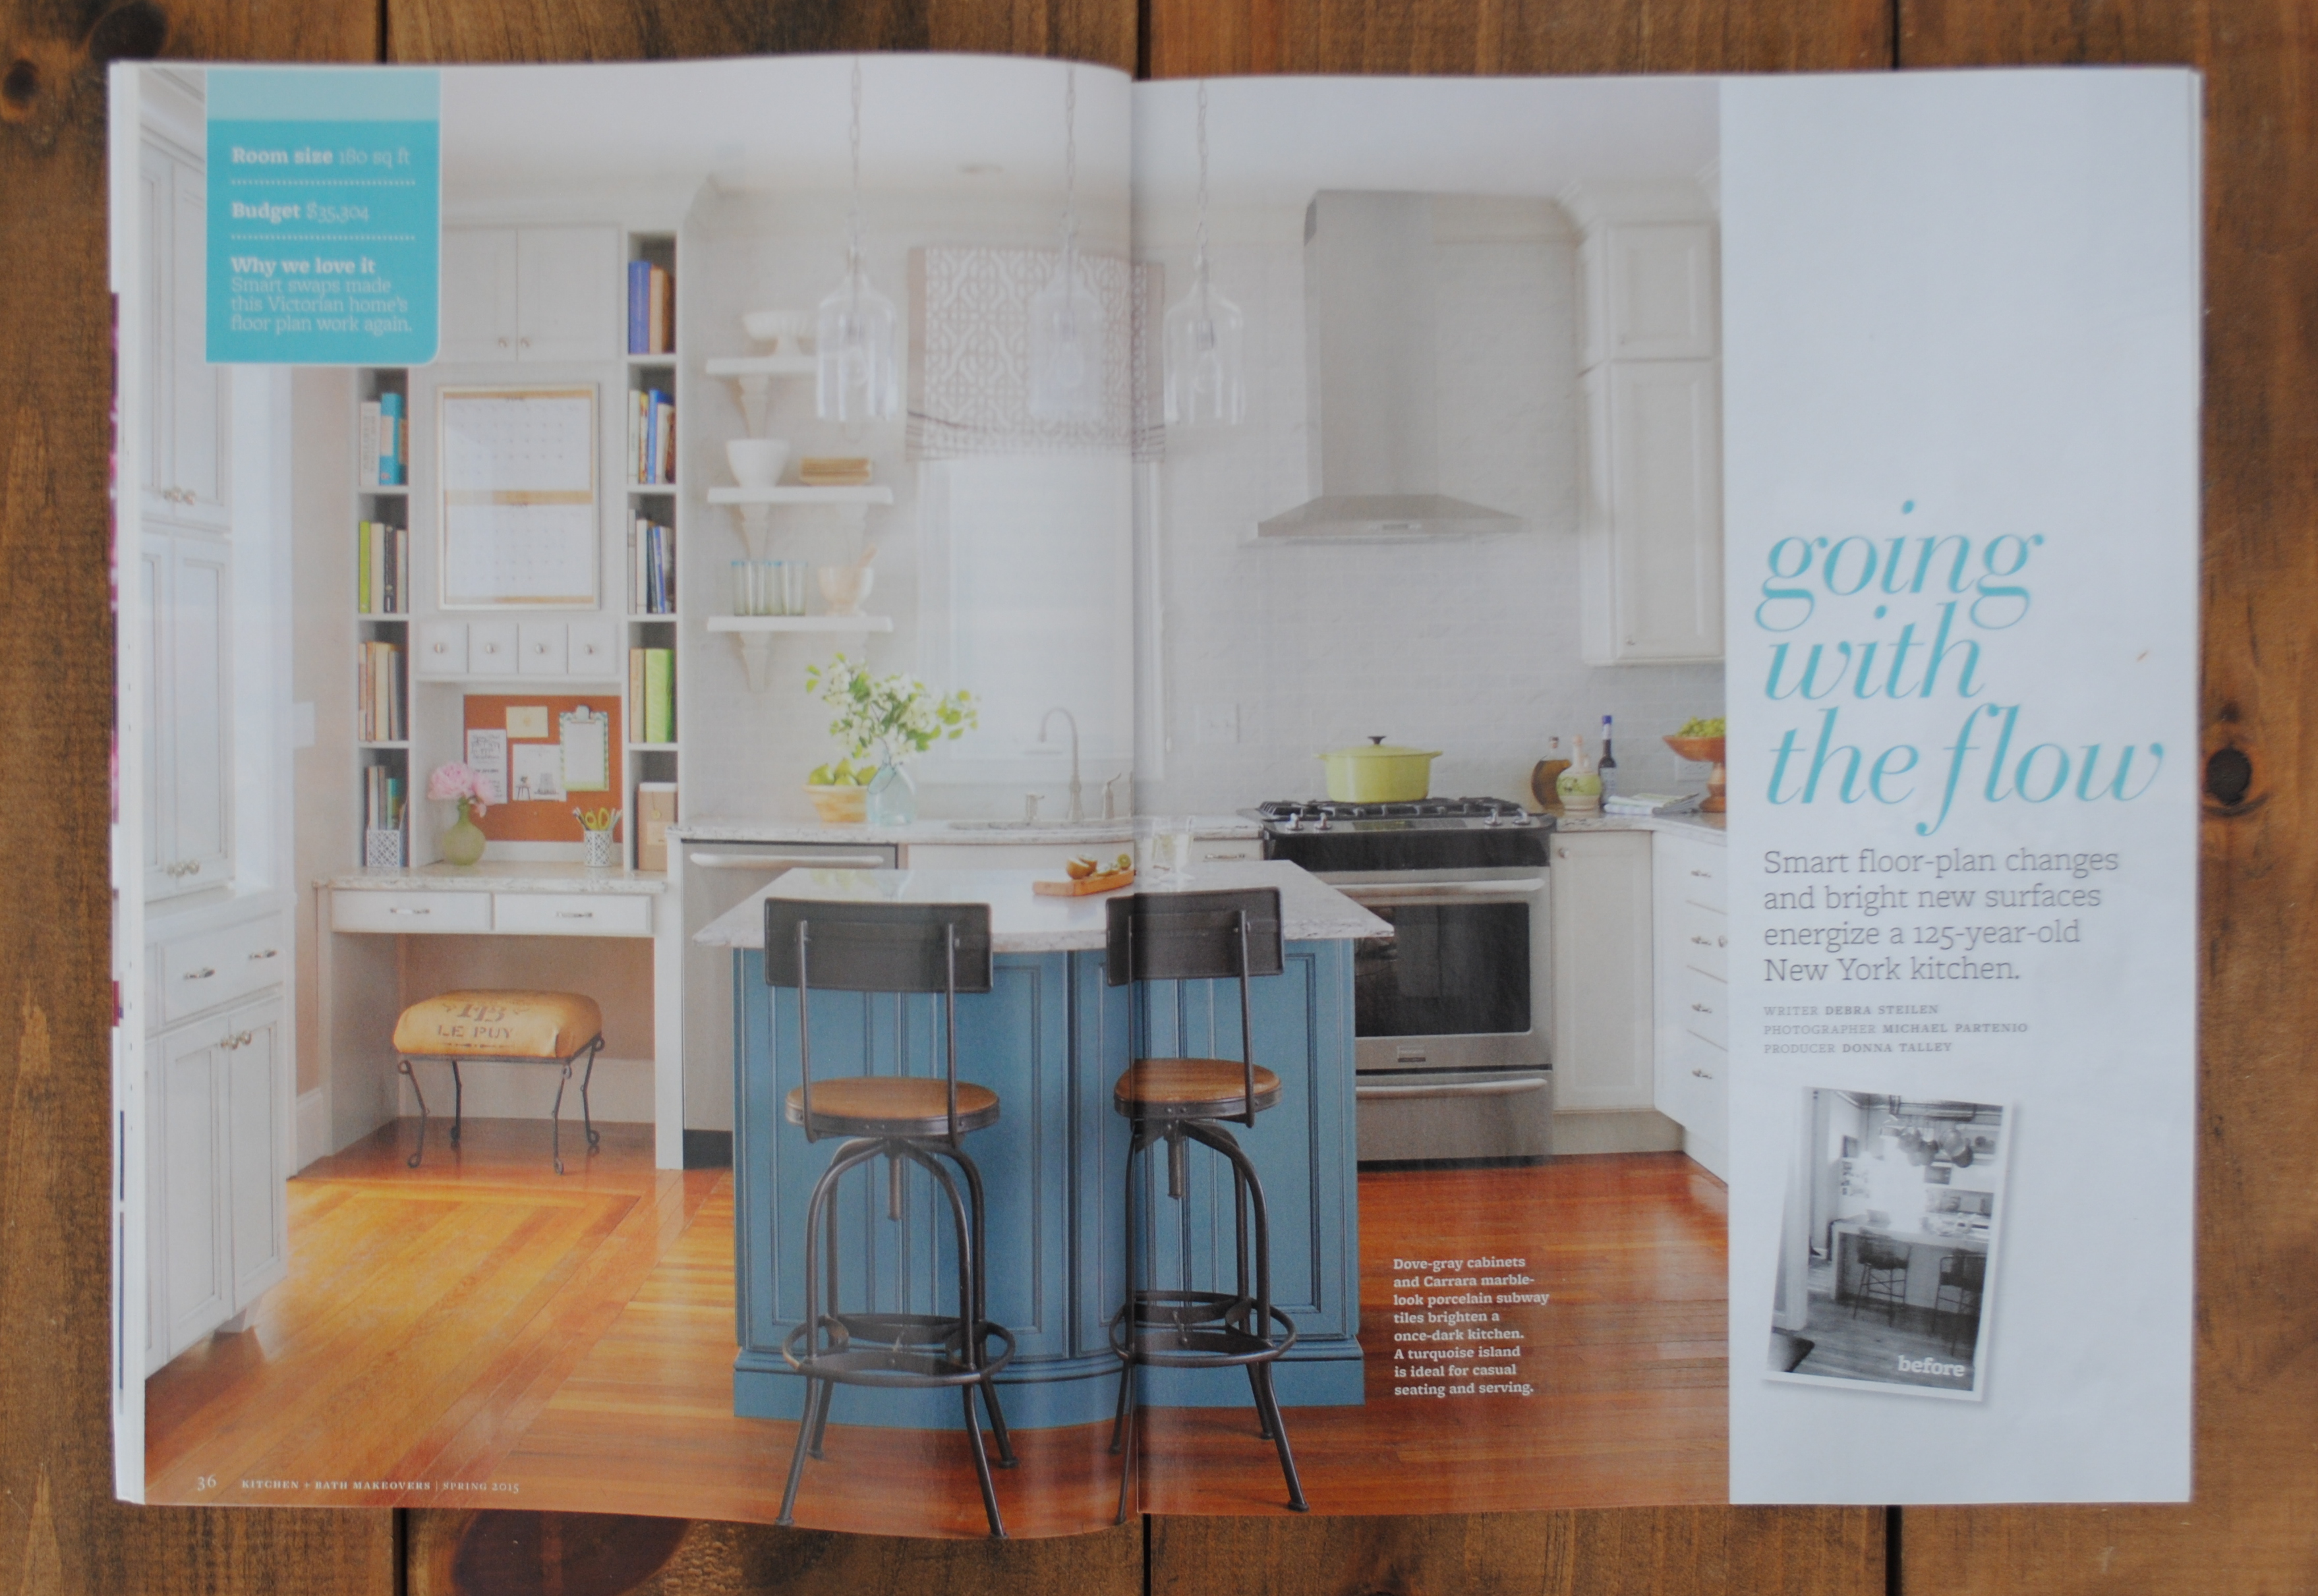
Also in the magazine, a few tips are shared on how to clear the clutter and how it’s stated, “Jenna is on a mission to replace those piles with command centers”…

Behind the Scenes + Details of the kitchen featured on the Spring 2015 cover of Kitchen + Bath Makeovers magazine

So fun! I hope you enjoyed a bit of the behind the scenes details of a kitchen makeover for a magazine. Fingers crossed more opportunities will come about in the future!

Behind the Scenes + Details of the kitchen featured on the Spring 2015 cover of Kitchen + Bath Makeovers magazine

How I Get Inspired + Finding ‘Me’ Time

Disclosure: The post is part of the social shopper marketing insight campaign with Pollinate Media Group, All You, and Real Simple but all opinions are my own, #pmedia #SpringintoMeTime http://my-disclosur.es/OBsstV”

Manageable + Realistic ways to carve out 'me time', get inspired & renew your life...

Happy Monday my friends!  It is early, early on this first day of the week, but I am feeling ready to tackle the days ahead. The Mister & I got away this past weekend and even though it was for a mere 24 hours, taking a step away from the everyday was exhilarating + rejuvenating!

We’re often pulled in so many directions that carving out time for ourselves – me time – can be a struggle.  Our care + needs are often put on the back burner, while we put much of our time & attention on our children. From the moment I wake around 6am I am on the move, not only getting myself ready, but dressing my 3 kids, making lunches, preparing breakfast, and making sure all is set for the day.  A little before 9 we’re all out the door – kids to school, the baby to the sitter (a few days a week), the mister to work, and me to meet clients. After a full day on the road, the routine of mom mode begins again around 4 and by the time the kiddos head to bed at 8, I am pooped & don’t last much longer. On a daily basis, the hustle & bustle around the homestead leaves really no time for relaxing, quietness, and rejuvenating. That being said, I wouldn’t change one minute of it all, because my family is everything to me.

As I mentioned earlier in the year that for 2015 my focus is to live more with intention.  I’ll tell you, it hasn’t been easy, but that’s life and I feel if I keep it my focus at the forefront of my mind, at least I am working on it and that is something to be proud of.  I am continually trying to work towards strengthening myself and to do that, I’m realizing that it means carving out time for me.  The time away this weekend really showed me that I will be a better + stronger person for myself + others if I take more time for me.

For my job as a designer & blogger, I have to continually be inspire. Even though I find inspiration in the everyday beauty that surrounds me, I often have blinders on with so many distractions.  My eyes just can’t capture it all and I am missing what’s beautiful – big and small.  Carving out me time to get inspired, is important to stay fresh and on top of my game – physically, emotionally, and mentally.

As the mister and I got away from the everyday daily grind to focus on ourselves and each other, we realized we hadn’t been out together by ourselves in over 10 months, which is crazy. We went away to one of our favorite B & Bs about an hour away and laughed  + talked as were dating again.  It was so enjoyable and mind clearing.  And we relished in the quietness.  We actually drove home completely quiet and we both loved it. It was great to just clear the mind and take in the beauty of my surroundings.  I was inspired by so much around me.  The architecture.  The people. The smells. The food.  I just soaked up the many details all around…

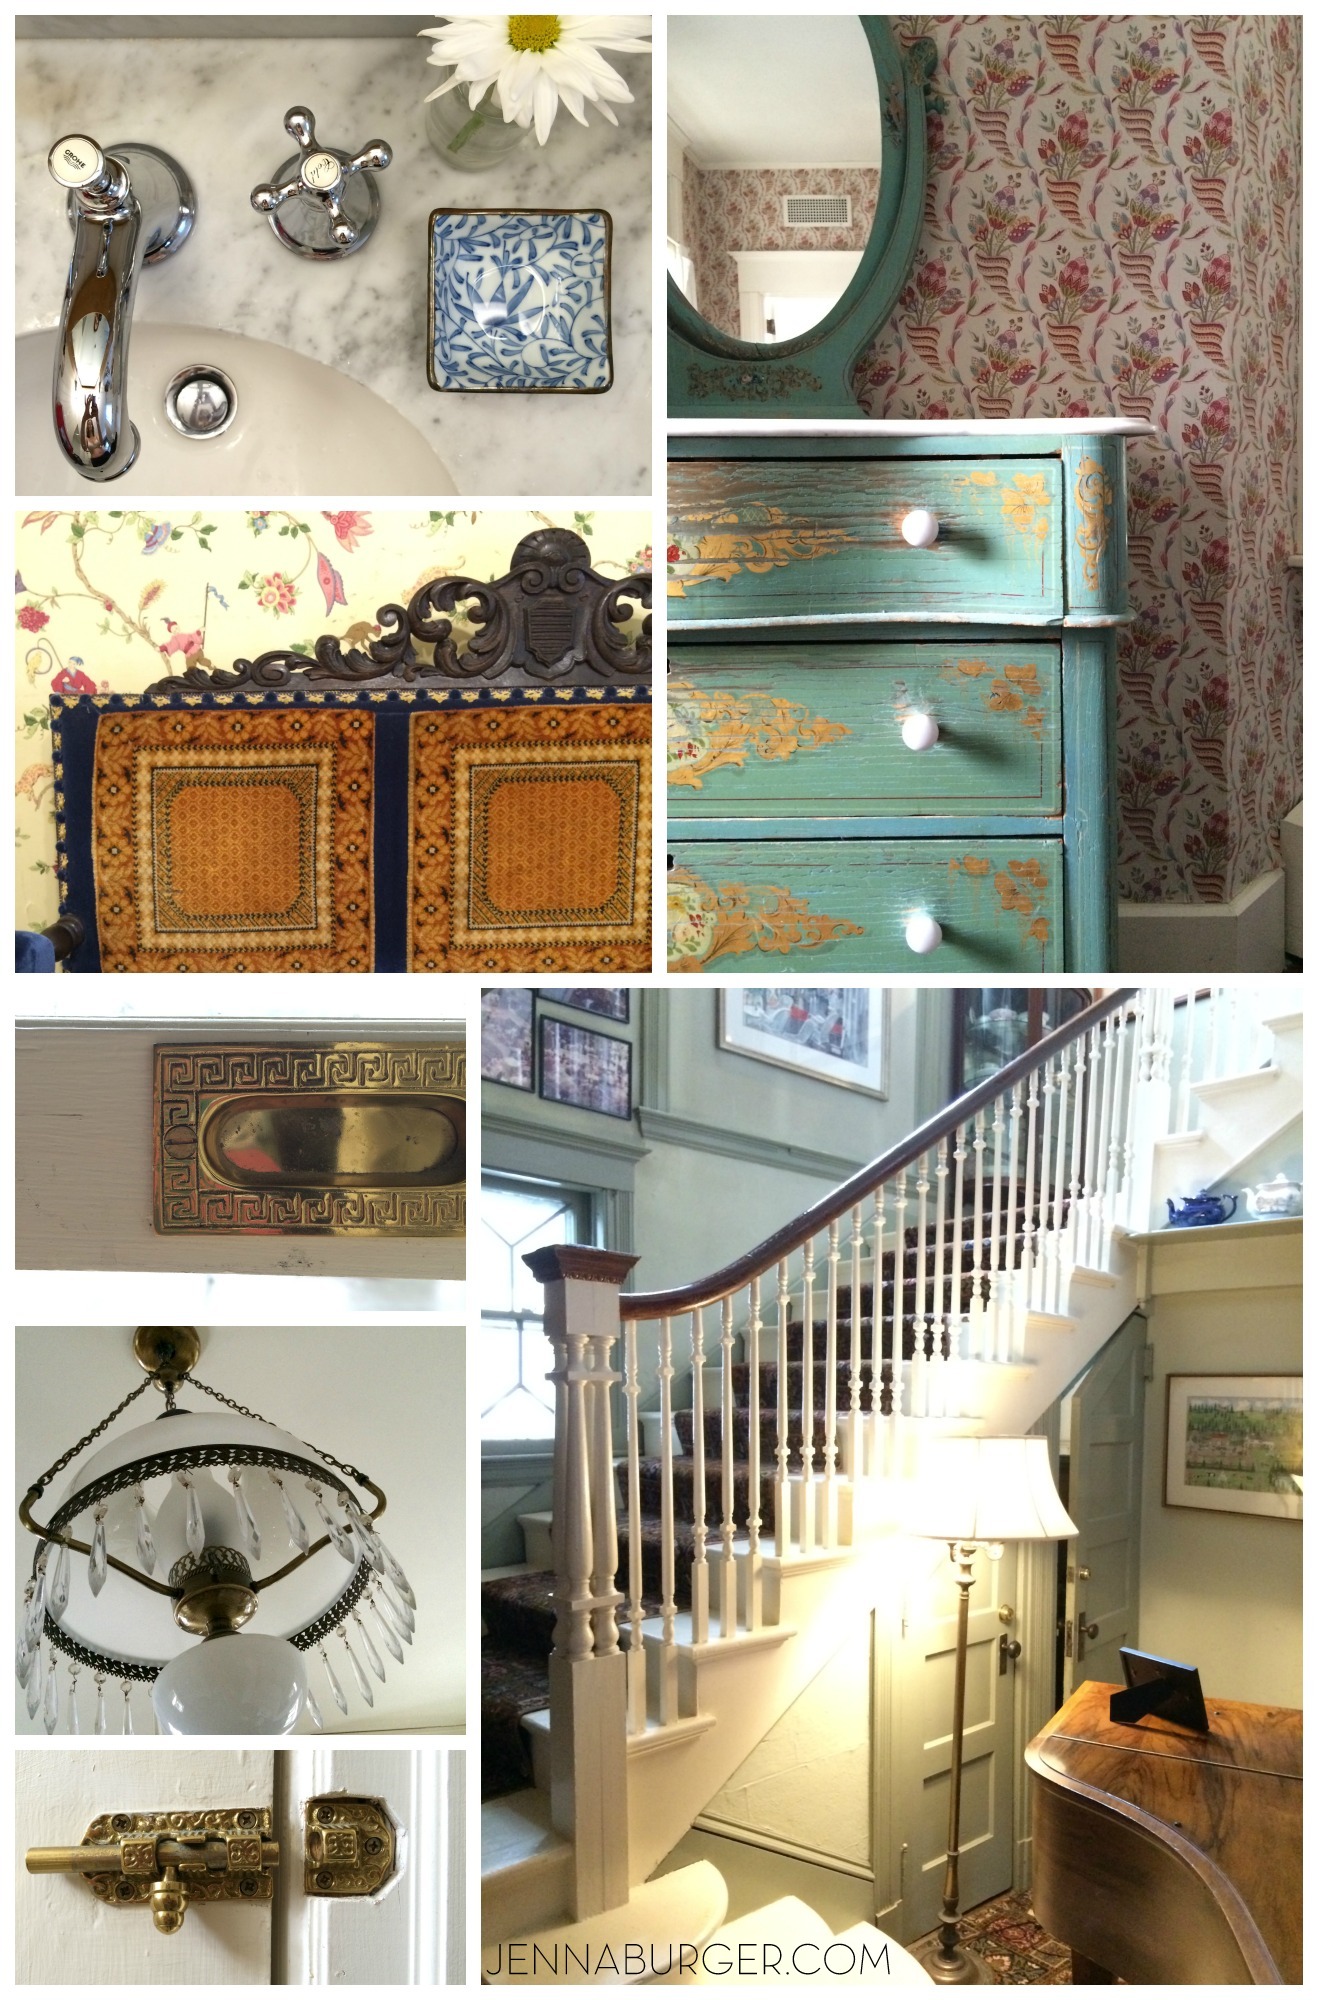
Finding inspiration in the beautiful details around us. A few photos I snapped while at the Red Lion Inn in Stockbridge, MA… so many details.  so much beauty!

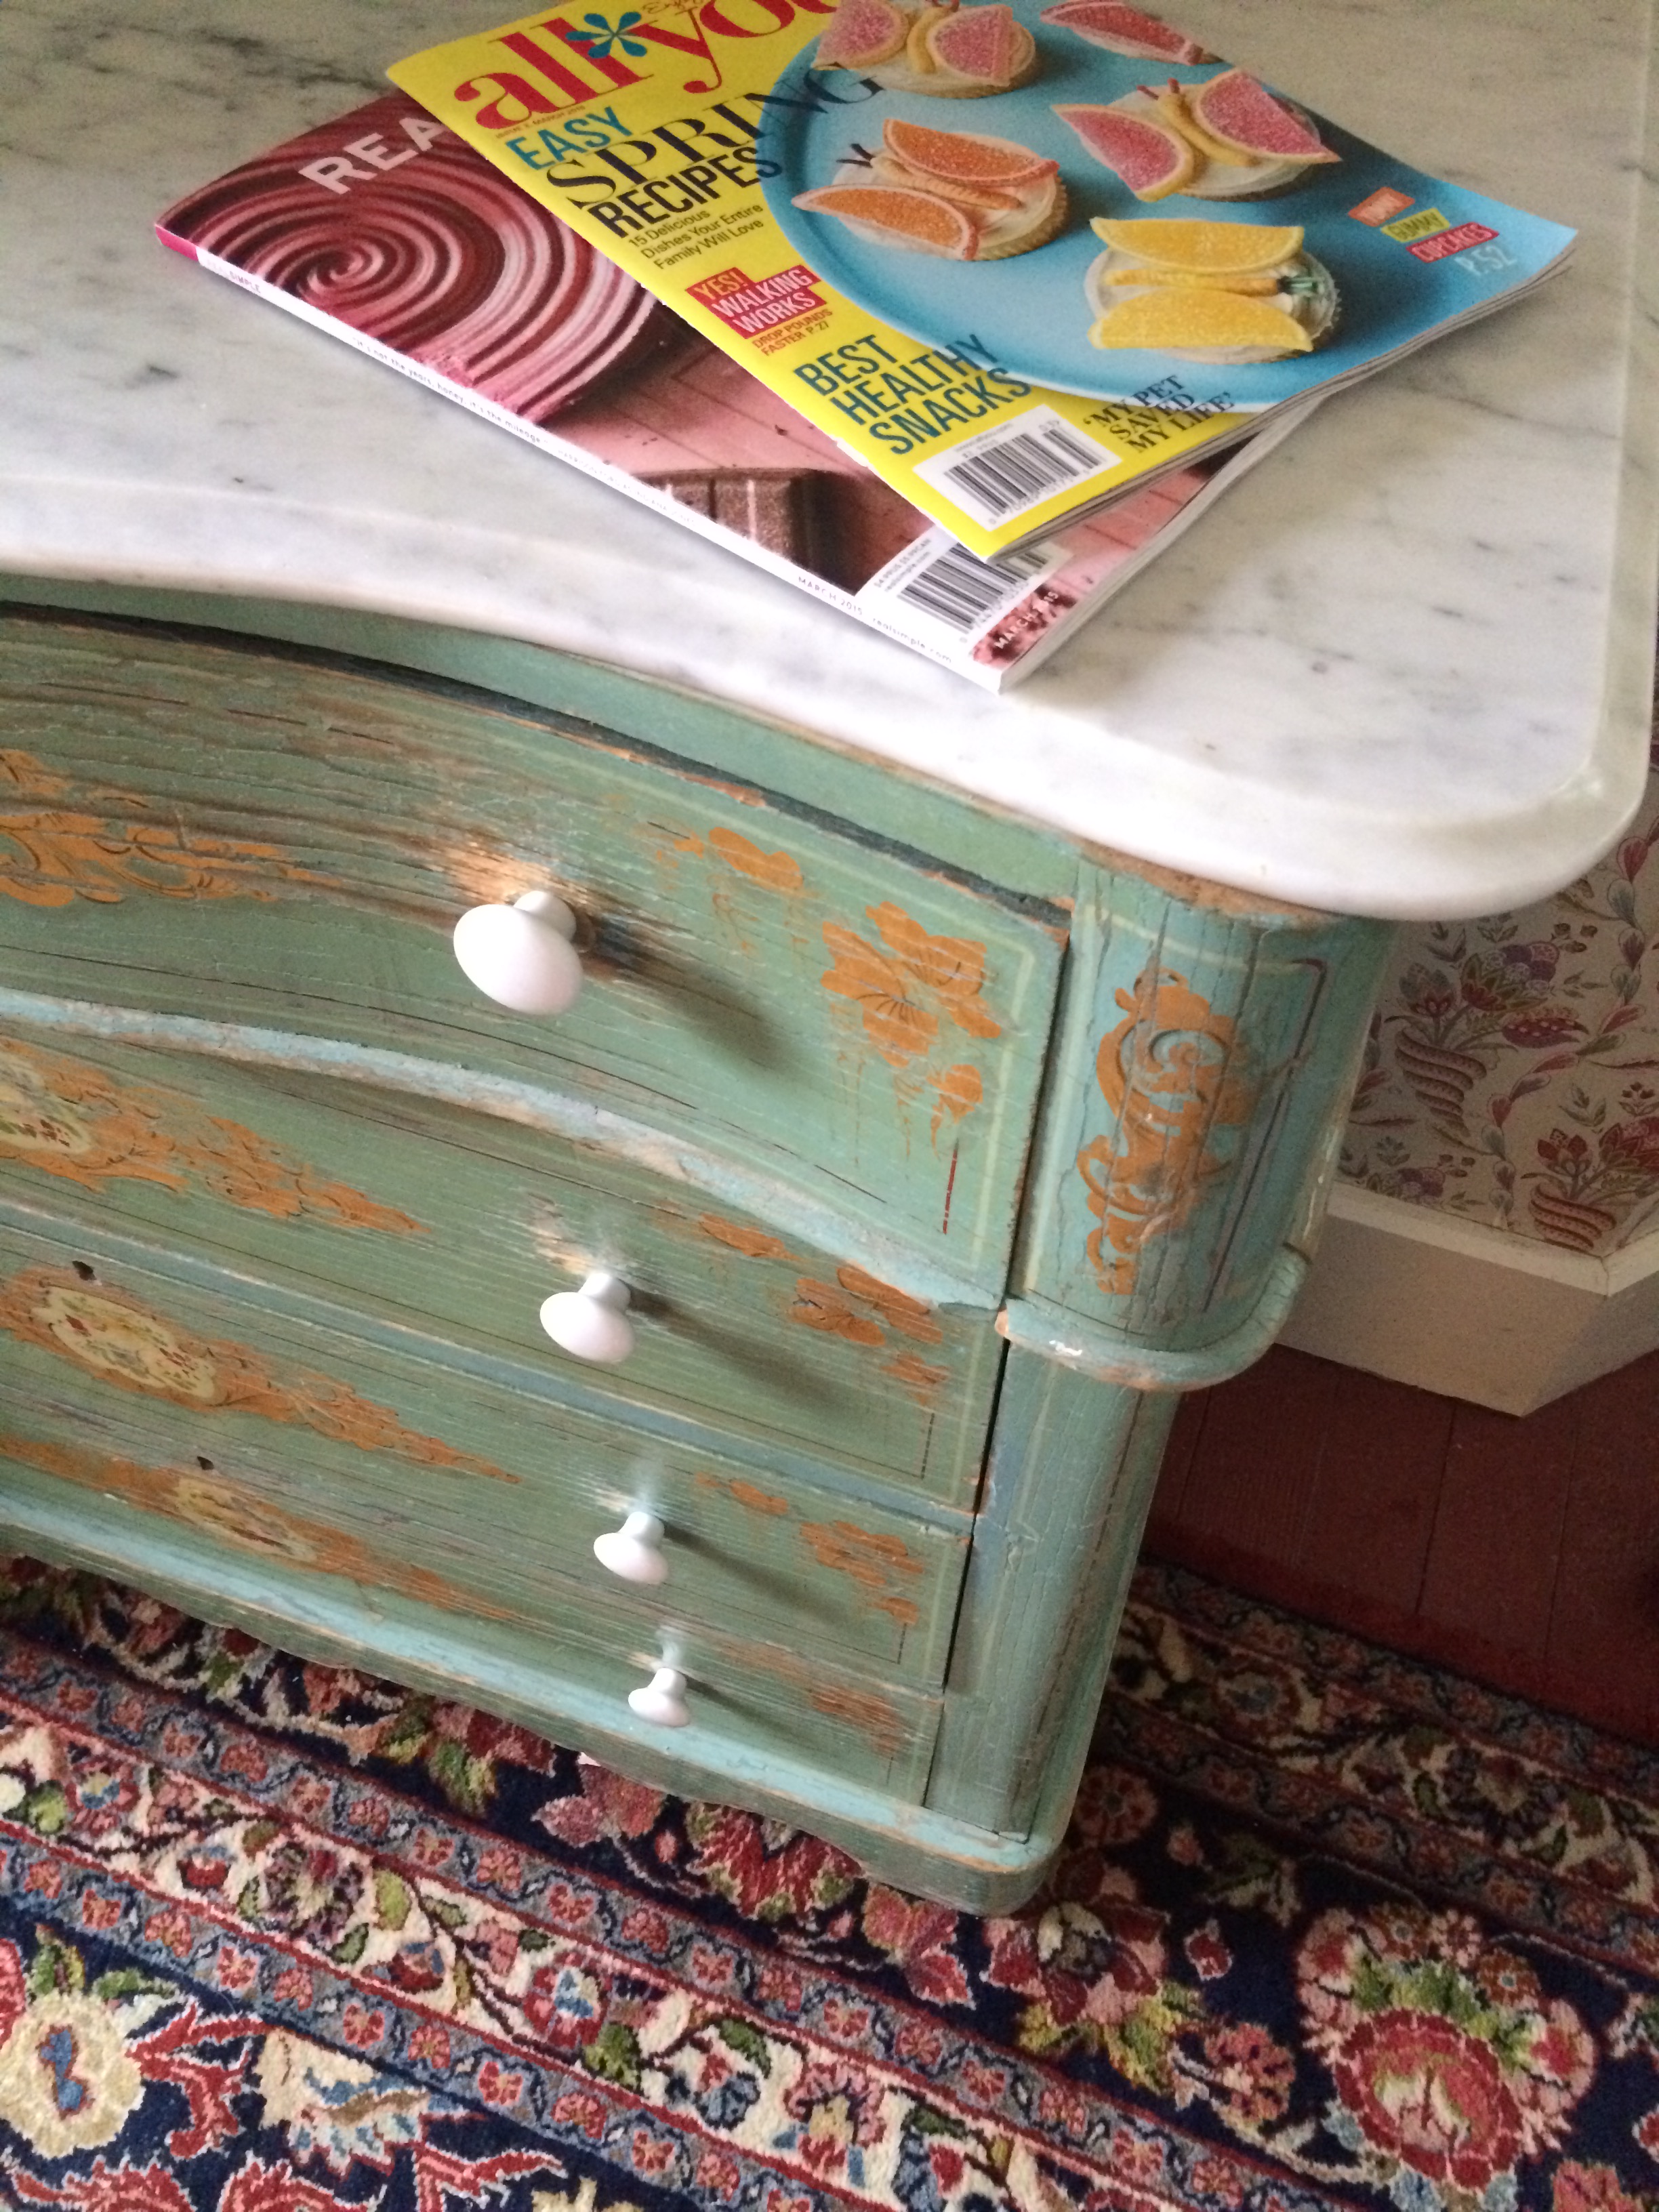
During our downtime I got some moments to flip through the pages of Real Simple, one of my favorite magazines, that I picked up at Target last week before our trip.  There were of course some delicious looking recipes that I am dying to try, but also some inspirational articles on creating beautiful spaces.
Ways to find inspiration & Renew your life...

It got me thinking and I immediately snagged my notepad to jot down some ideas on what I am going to start doing for myself… thoughts on what I want to focus on.

1. Schedule my Time Better.  We’re all pulled in 92 directions at the same time and I rarely say no (#1 should really be to learn how to say no more), but I want to become better at scheduling my time by creating realistic work – home hours. I’ve tried to “balance” my work/home life, but honestly what does that mean? Some days I work way too much and some days I don’t work nearly enough, but in the end it all gets done, I guess…  Instead of walking around like a chicken with its head cut off, I think creating/writing a schedule that is suitable to get it all done will help me stay on track and focused.  I bought a calendar at the beginning of the year with a to-do list for each day – I’m going to use that starting NOW!

2. Don’t Obsess.  I’m a bit of a perfectionist and sometimes need to just let go. The house doesn’t have to be spit-spot clean every day. Recently I embraced some new cleaning regiments to make our home feel cleaner quicker and that has really been helping.  With 3 kids a clean / organized home 24/7 just isn’t possible.  I’ve been designated the 30 minutes before the kids get home to straightening up the house that way when they walk through the door, the focus is on them & their homework.  I really like giving them my 100% attention when they get home from school.  I feel that is important.  Cleaning can wait.

3. Do it NOW.  Often the thoughts that linger in my head are those of things that I need to do, but haven’t yet done – Sign my son up for baseball, call my Aunt, make an appointment for a physical, get an oil change.  Again those 92 different things that have to be done.  I am absolutely going to stop thinking about doing them and instead either do them RIGHT when I think about it or make a to-do list, so the thought leaves my brain allowing the opportunity for more inspiration to filter in.

4. Plan Ahead.  Planning ahead is huge.  One of my big downfalls as of late is meals.  Lately, I’m often found looking in the refrig/freezer at 4:30 for what I should make for dinner. Those nights, I become so stressed because I end up scrambling and the result is often pizza or something I really don’t want our family to eat.  On days when I plan ahead, and I take chicken out to defrost the night before, or better yet, put something in the crockpot at 8am, goodness our nights are so much easier + happier.  This means, planning ahead makes everything run so much smoother.

a few more easy + manageable ways to change + renew your life.  all things I am working on as well…

> read more – trashy. fact. fiction.  who cares, but just read more.  Maybe join a book club…

> eat breakfast – on the days I don’t eat breakfast, I snack and not on good food.  breakfast is important.  eat breakfast.

> say no – saying no can be hard.  learning to say no is important.  say no.

> stop watching the news – the news is an inspirational sucker.  I just can’t deal with the sadness.  news is important, but I never feel good after watching it.

> take a shower – shower + dress every day, even when you have no place to go. it’s important and you really do feel so much better!

> smile – smile. smile more. smile a lot.  it’s important to smile for others but more so for you.

> accept perfect now – today is perfect.  embrace the beauty now.  tomorrow is a gift.  this moment we are living in is the most important.

> rid the guilt – don’t hold on to something that’s not worth the time or effort.  if it’s eating at you, fix it.  if you tried, let it go.

> eat good – real food is so important.  eat good.

> free the mind.  do yoga. meditate. just be. do what is relaxing to you.

> write it down.  keep a notepad closeby.  always.  write it down.  rid it from your mind.

Those are just a few thoughts + ideas of what I plan on focusing on throughout the year to come.  It’s amazing how easy they seem, but how hard they can be to implement.  I am feeling so refreshed + inspired after my time away this weekend and it already has the Mister & I talking about our next get away.

How do you carve out me time? How do you get inspired?  What is your focus for the year?

>>> Deal Watch!

If you’re looking to unwind & spend some “me time” for yourself, right now you can Save $2.00 at Target when you buy any TWO (2) participating magazines titles (All You®, Real Simple®, PEOPLE®) from 3/15-3/28 while supplies last – what a fantastic deal.

Also, Save 15% on select special issue magazines which include PEOPLE® Crimes of Passion, National Geographic® 100 Journeys of a Lifetime, TIME® Mark Twain, LIFE® Lincoln while using the Target Cartwheel app. Available until 4/17/15, while supplies last.

Savvy Storage Solutions using Baskets

Baskets – for toys, laundry, books, and more – are great storage solutions to beautifully organize and give a stylish edge to any space in the home. Baskets not only can control the clutter, but also add a pop of color + texture.

As I look around my home while putting this post together, I realize I have a lot of baskets – all are so different because of the unique purpose each serves.  With so many basket options out there in stores + on the web, it can be a bit overwhelming to decide on what will work best for your needs & space.
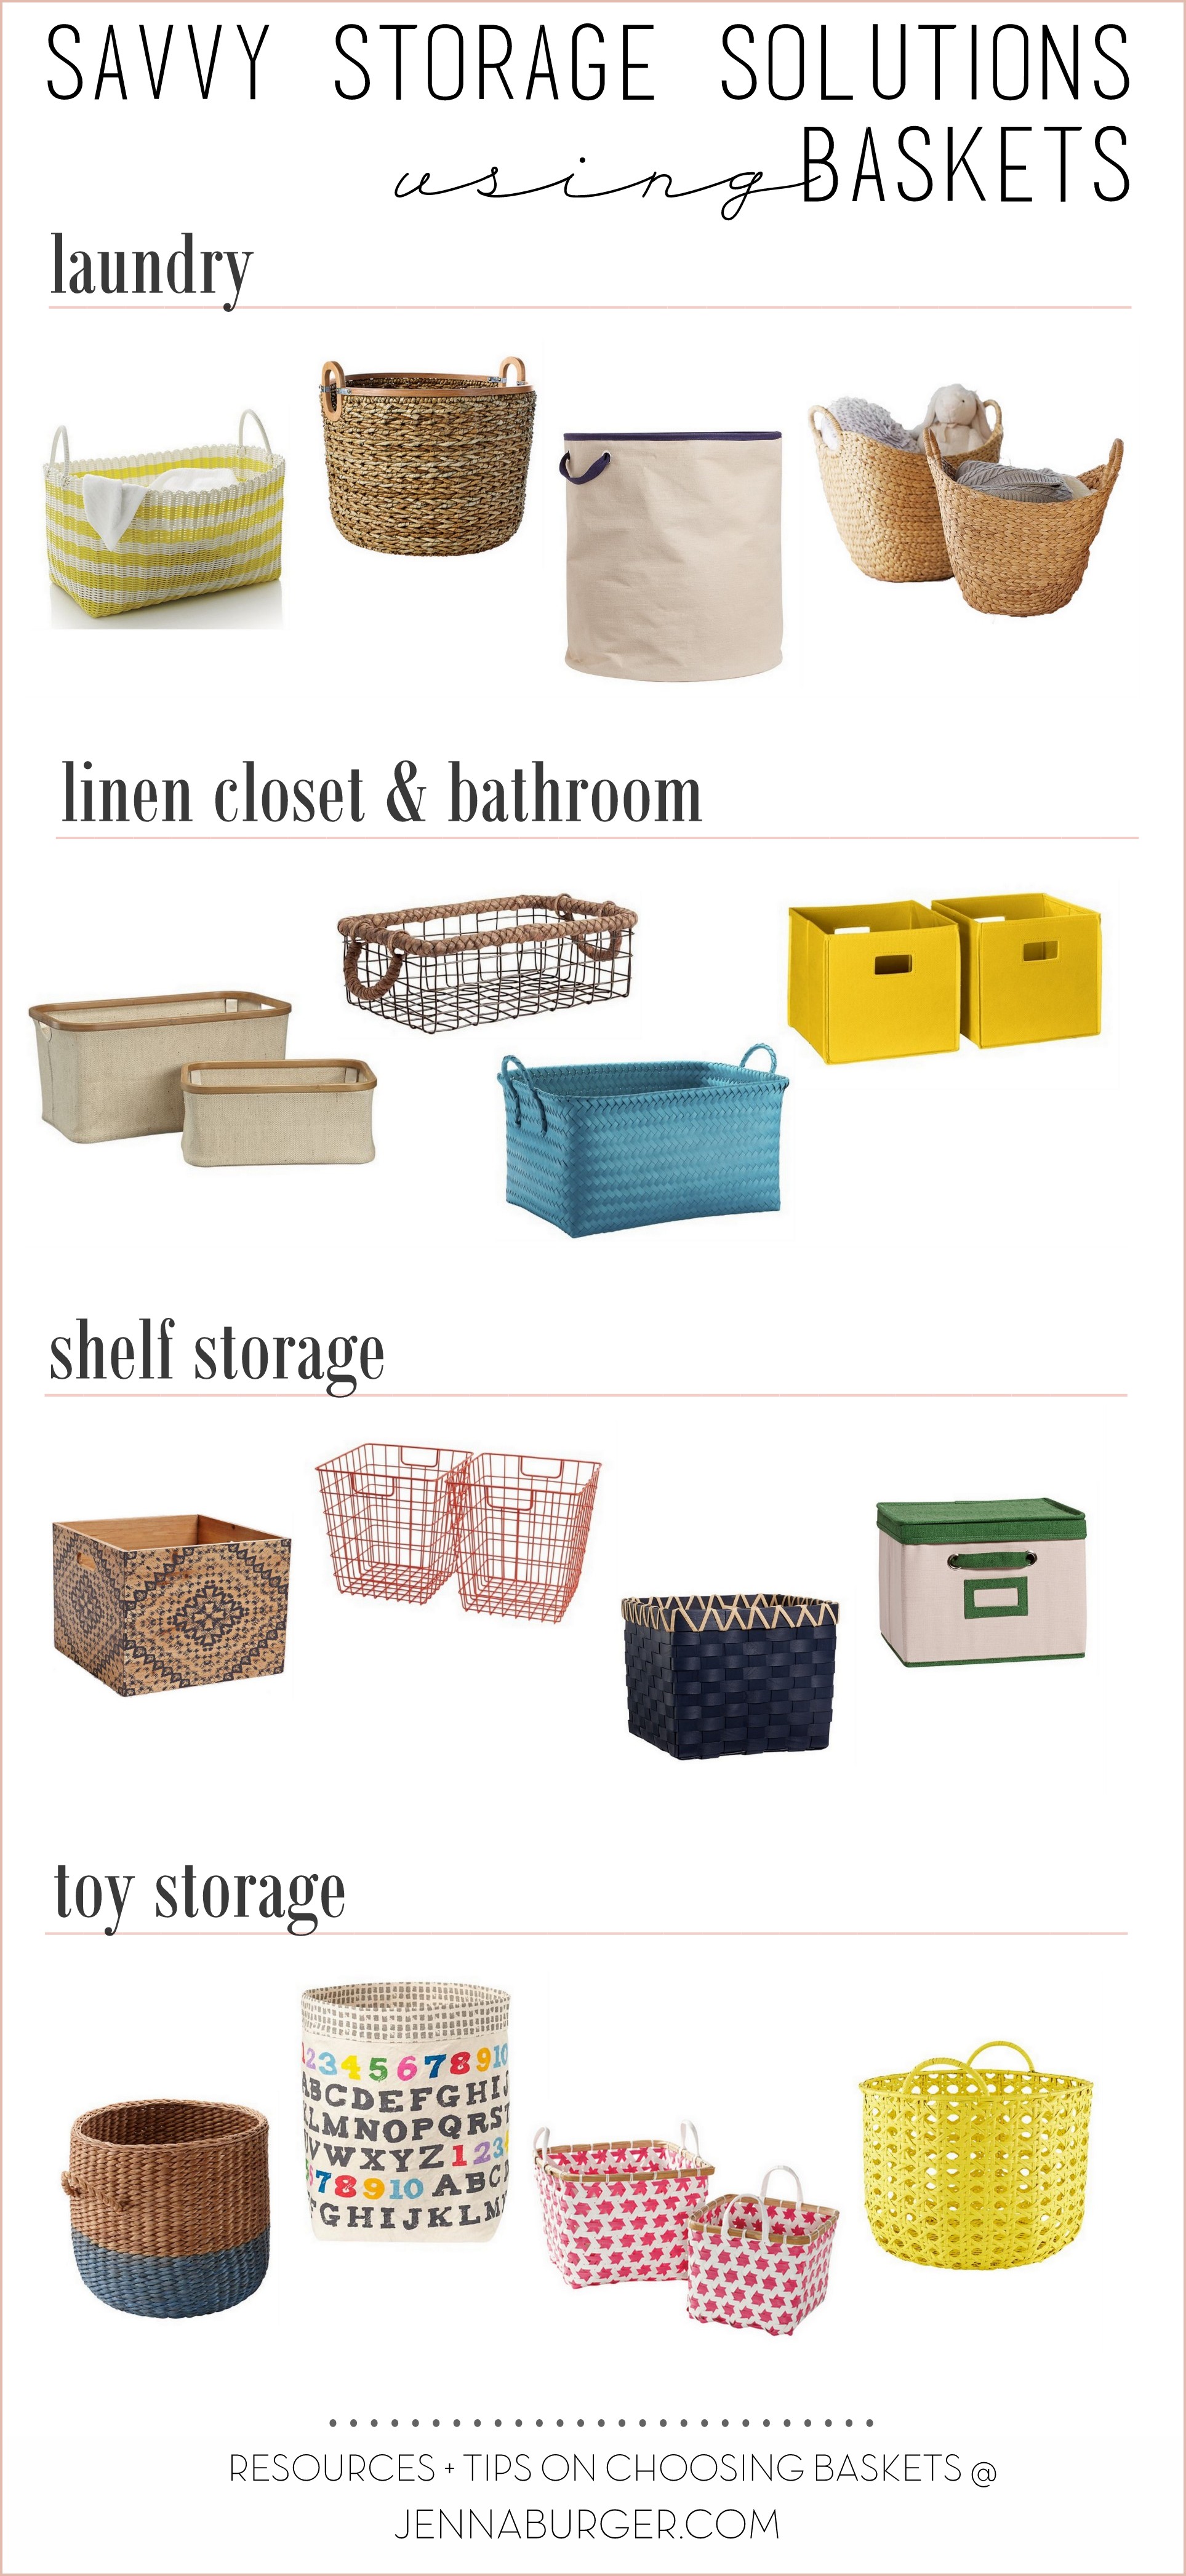
Here are my favorite baskets for the many spaces + uses in the home.

Savvy Storage Solutions using Baskets: Basket resources for the linen closet, shelves, laundry, toys, and more!  Inspiration + Tips on choosing the best basket(s) by Jenna Burger Design, www.jennaburger.com

Resources

> Laundry

Yellow/White Stripe Hamper / Seagrass Basket  / Natural Drawstring Hamper with Border / Nesting Floor Baskets

> Linen Closet / Bathroom Storage

Bamboo/Jute Basket / Wire Utility Basket / Teal Basket  / Yellow Folding Storage Bins

> Shelf Storage

Wood Storage CrateWire Baskets / Emory Basket / Green Lidded Box /

> Toys

  Half Tone Basket / Alphabet Floor Bin / Mercado Basket  /  Yellow Lattice Bin

Aren’t those some beauties?!

All so colorful and unique…  All serving a different purpose!

When on the search for a basket or a collection of baskets, there are a few things to keep in mind…

Purpose / Use

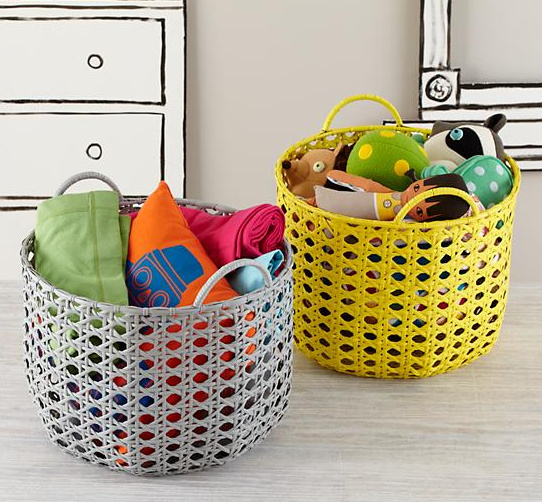
Keep in mind the purpose of  the basket(s) and/or the intended use.  A collection of photos would be best in a smaller + shallow basket / bin, whereas storage for blankets is ideal in a larger + roomier style.  Toys can often be the most challenging items to contain because of the amount and the vast range of sizes.  Have multiple baskets for different sized items. Look for a basket/bin that is deep with a wide opening for larger items (hampers work great for these types of toys), while smaller baskets are perfect for items like Legos, figures, etc.
Savvy Storage Solutions using Baskets: Basket resources for the linen closet, shelves, laundry, toys, and more!  Inspiration + Tips on choosing the best basket(s) by Jenna Burger Design, www.jennaburger.comWith these fun + bright lattice baskets, there is finally a reason to let toys take over!

Size

Depending on what you want to hold will help determine the size of the basket needed.  From large to small depending on the use – towels versus toys – there are a range of shapes and sizes.  Some have flat bottoms, others are rounded.   Some baskets stack, while others can “nest” in each other which will give you a collection of varying sizes. Know the approximate size you need BEFORE you start your search.
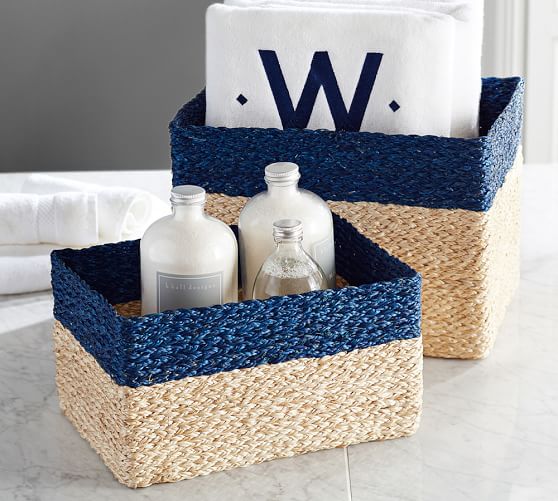
Savvy Storage Solutions using Baskets: Basket resources for the linen closet, shelves, laundry, toys, and more!  Inspiration + Tips on choosing the best basket(s) by Jenna Burger Design, www.jennaburger.comI adore these woven baskets with a pop of blue – perfect for the bathroom or linen closet

Durability

Who wants to buy something that will fall apart in a short time?  Not me!  Baskets can be pricey, but purchasing something that is durable + will last long makes more sense than wasting time & money buying something twice.  Look at what the basket is made – plastic, cloth, wood, jute – for the purpose of your purchase. Keep in mind who is using the basket.  Plastic bins like this are great for toys (easy-to-clean & will keep their shape), where this seagrass basket is the perfect catch-all for laundry.

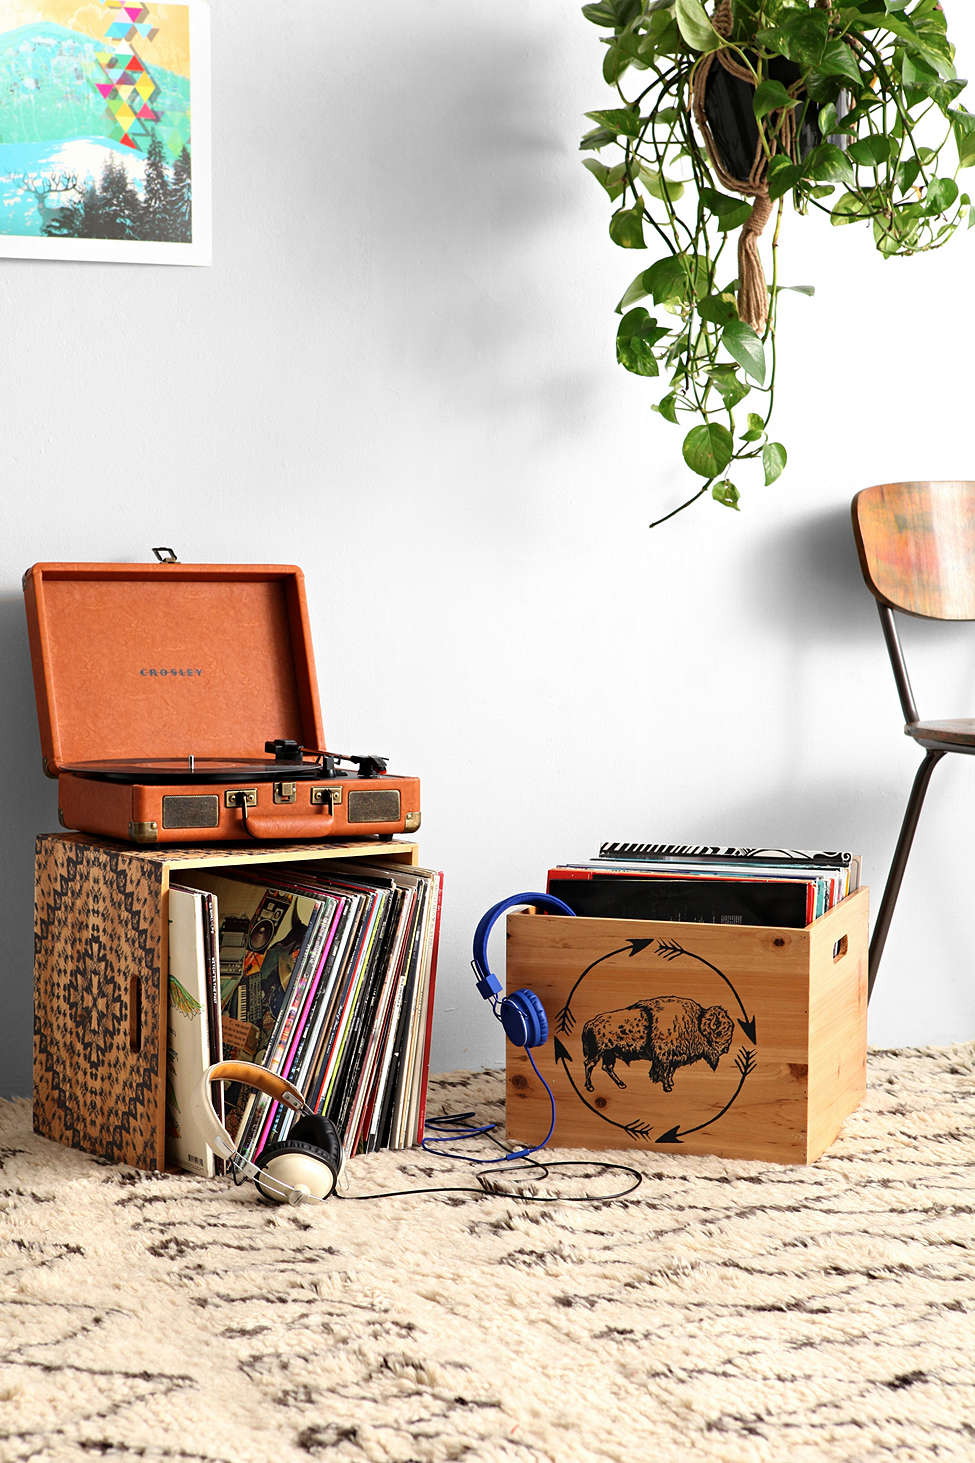
Savvy Storage Solutions using Baskets: Basket resources for the linen closet, shelves, laundry, toys, and more!  Inspiration + Tips on choosing the best basket(s) by Jenna Burger Design, www.jennaburger.comHow fun is this stenciled wood crate. Perfect for the living room shelves to hold CDs, pictures, or your old vinyls!

Color

There is such an amazing selection of storage baskets on the marketplace and not only do they serve the incredible purpose of holding things, but they also bring color + texture + layers to a space.  Adding depth with accessories & layers, is the key to making a room warm + inviting + whole.  No matter what the function, baskets are ideal for bringing a fun pop of color to a space.  Whether on the floor or on the shelf, the addition of colorful basket to hold toys, books, or blankets, can truly enhance and change a space.

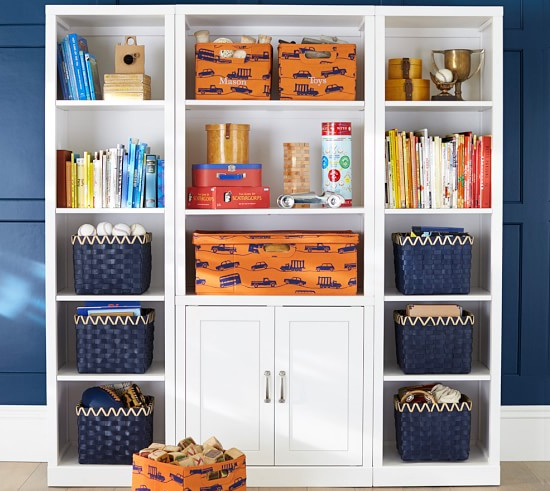
Savvy Storage Solutions using Baskets: Basket resources for the linen closet, shelves, laundry, toys, and more!  Inspiration + Tips on choosing the best basket(s) by Jenna Burger Design, www.jennaburger.comColorful baskets, like the fun style made of balsa wood found on the shelves of this cabinet, not only corral trinkets + toys, but they add depth & texture too.

………………………………………………………………………

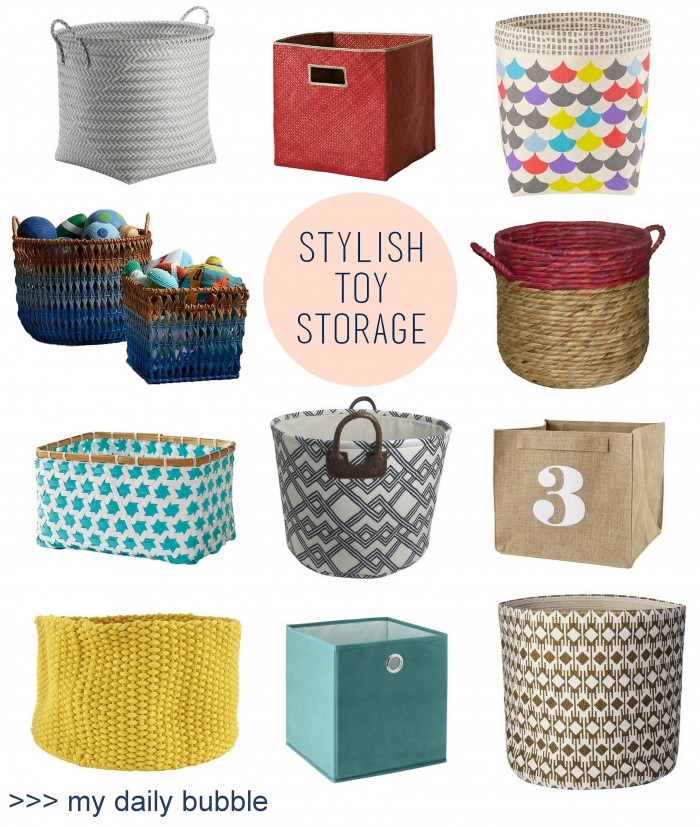
I hope I’ve inspired you with all the possibilities that baskets can bring to the home… not only for function , but also for style!  If you want to see more options specifically for toy storage solutions, pop on over to My Daily Bubble where I am sharing 11 more favorites

11 Options for Stylish Toy Storage