DIY: Faux Roman Shade
 You might think I’ve gone drop cloth crazy (which I have), but this material is truly simple, affordable, and stylish! Plus it’s also durable, chic, and a great neutral palette for any accent color. Lately I’ve been transforming my interiors to look a little more casual. With updated fabrics on the pillows and windows, and some stylish new accessories and repurposed pieces, my interior is changing into my desired style (of the moment…next week it could change again)..haha). My latest drop cloth project was to make faux roman shades for my dining room windows.
Before, the window treatments were dupioni silk drapery panels with detailed sheers to match. I was over the heaviness-look and wanted something to lighten and brighten the space.

I was on a mission to repurpose, so I took the window panels that were in my living room and moved them into the dining room. But it still wasn’t “just†right ~ It needed something. With a little experimentation of fabrics, I thought the drop cloth material would be a perfect neutral accent to the simple burnt orange/red drapes (the roman shades also coordinate quite nice with my table runner).

Supplies needed to create your own faux roman shade
- Fabric of choice
- Double Fold Bias Tape
- Sewing Machine
- Sewing supplies (pins, scissors, measuring tape, etc)
- Velcro
Before I begin the tutorial, I wanted to mention there was an existing honeycomb-style shade where I wanted to install this new faux roman. I removed the fabric shade using a straight edge, but left the bar on in place. This is what I later used to attach the faux roman shade with the Velcro. **If you are starting from scratch, you could put the Velcro directly on the window OR get a tension rod and Velcro the shade to it.

Let’s jump right in
1. Decide how many ‘drops’ you want for your roman shade. I decided on 2 drops, and then I added a Header Flap on the top. Each drop is 5-1/2†and the top flap is 3-1/2â€.

2. Measure the width of your window and cut your material. With regards to the length, I cut mine to be about 36†long. It’s important to leave a lot of extra material on the length, so you have enough to create the drops. (Read on and it’ll help you determine your length).

3. Take your Double Fold Bias Tape and edge the length of the roman shade.


4 and 5. Pin and Sew the bias tape onto your fabric. If your top edge is not finished, fold over and sew, so you have a finished edge.


6. Fold over your fabric to create a 3-1/2†Header Flap; Iron the edge and sew along the top with a ½â€ inseam.

7. It’s time to start your first drop: Measure 9†from the top (3-1/2†for the Header Flap + 5-1/2†for the drop) and then fold the fabric under to create the drop of the roman shade. Bring the fabric all the way to the top of the back.


8a and 8b. Flip over the Header Flap. Pin the drop and sew the fabric underneath the flap (along the pinned line as shown in the picture).


9. Onto the second drop: Measure another 5-1/2†for the next drop (which is now 14.5 from the top). Repeat step 8.

You can make as many drops as you’d like to create a longer roman shade. 2 drops worked perfectly for my size window.
10. When you are complete with your roman shade, flip it over and attach the Velcro to the top edge of the shade.

11. As I mentioned above, I used the existing bar that was already in place. If you are starting new, you can either attach the Velcro right to the window or use a tension rod and attach the Velcro to it.

And here it is …


Here is the overall space: Lighter and Brighter!

Adding a non-functioning roman shade can really jazz up a window. I’ll be honest, this tutorial was a bit difficult to write and I hope I didn’t lose you. It’s actually quite easy to make once you get started. If you have ANY questions, please reach out to me and ask!
* Just a reminder, don’t forget the BIG Blogger Block Party event ~ link up your Summer Space projects to my link party next Thursday, the 23rd! *


 In
In 
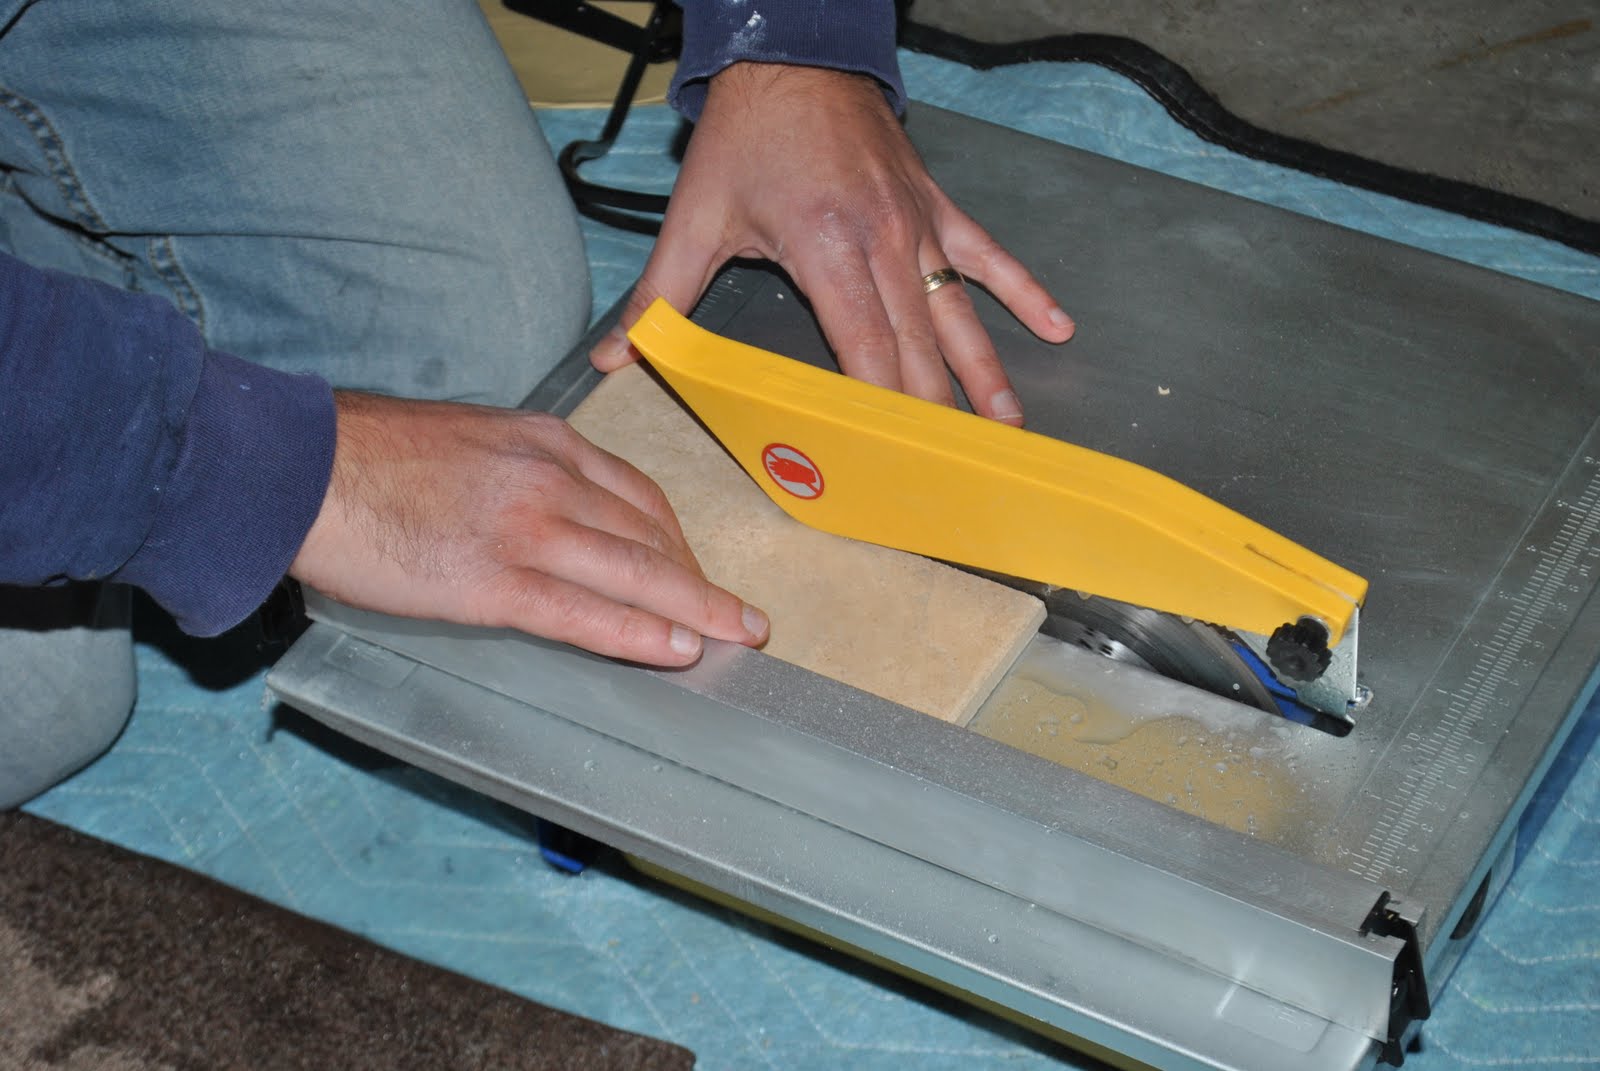
 Are you asking yourself what the clear “thing” is with the yellow on it (at the bottom of the pic)? That’s an adjustable triangle. It adjusts to the angle that you are working with. Most standard architectural triangles are on a 45 degree angle or a 30, 60, 90 degree angle, but this magical instrument lets YOU adjust the angle to whatever you need. It’s actually from my college days in Architecture school and even though I never thought I’d use this tool again, it REALLY came in handy for this project. SIDETRACK, let’s move on…