Blah to Beautiful: Bathroom Makeover on a Budget

I feel like I’ve been talking (and thinking) about this bathroom for decades, but in reality, it’s really only been a few weeks.  Somehow it took longer to execute than anticipated but I can thankfully say….IT’S DONE!

All things considered, this was (simply) a minor bathroom makeover.  Even though I dreamed of new white tile, a dark wood cabinet, and a fresh new sink, I’m very happy with the updates and the outcome.  My “overhaul dream” bathroom will come someday in the future!

SO here it is ~

(sorry for the narrow picture, it’s a bit difficult to take photos in such a small space)

And here it was ~

Do you happen to remember a few weeks ago when I shared my handy dandy Sherwin Williams Paint Visualizer tool?? Well it worked like a charm.  When testing out some paint colors using the visualizer, I really liked how these two options turned out, so I combined the look…

…and this is how it turned out (in real life)~

My inspiration for the space started with this towel rack that I picked up on my first visit to Hobby Lobby.  YES, it was only a few short weeks ago that I went to Hobby Lobby for the first time.  WOW, I know!

I don’t think I mentioned this earlier in the post, but this bathroom is the kids (FYI-I envision my bath to look a bit more lux).  I wanted to make it fun and reflect their personalities.  I liked the colors and style of this numbers towel rack and thought it would be an adorable start to the space. Above the towel rack, my son painted this priceless one-of-a-kind piece of art.  (He had some limitations ~ I only gave him paints that matched the room…I know, I’m sneaky!)

So here’s another view of the before…
Mirror: GONE
Light Fixture: REPLACED
Cabinet: PAINTED
Medicine Cabinet: TRANSFORMED

It went from this…

To this….

With a fresh coat of paint on the walls and the cabinet, the kids bathroom took on a new life!  The before cabinet did not have hardware, so I added new stylish knobs to dress em’ up a bit.  There was also quite a gap between the countertop edge and the wall, so I added a tile sidesplash, and continued two rows at the backsplash.  It was so easy and I installed it the same way as I did for the powder room backsplash.

Did you happen to see the medicine cabinet?  I kind of skipped over that and don’t want to give too much detail away…but I completely transformed it from what it was before.  Stay Tuned for a future post!

As for the mirror, the existing was removed, and in it’s place, I chose a simple frameless oval with a beveled edge. It’s clean and understated (especially next to the medicine cabinet).  With a new lighting fixture (and GFI outlets), the electric is up-to-date and complements this newly modern-edge bathroom.

The finishing touches were topped off with my Comic Art Mod Podge Project.  Another post to come for details!

So that’s it!  A space that I dreaded looking at everyday (well numerous times a day since it’s at the top of the second floor landing) is now fun and refreshing.

O, and the shower curtain…I had it from our old house (bought it at Bed, Bath, and Beyond years ago). No joke, I didn’t even remember I had it until after I chose the paint colors, and realized it coordinated perfectly!

So blah to beautiful is possible on a budget!  From paint to accessories, the total for this bathroom makeover cost about $150 (the mirror and the lighting fixture were the most costly items).  Not bad!

Have you made over your bathroom lately?  Or is there a plan to do so in the near future?

How to Make Fake Flowers Look Real

Even though it’s technically Spring, it’s difficult to believe, with all the snow still on the ground here in NY.  Thankfully my mindset is already on pretty Spring flowers to get me through the final days of the long drawn-out Winter.  I’m continually changing and updating my Dining Room display depending on the season and holiday.  I love the look of fresh flowers (who doesn’t?), but sometimes an artificial arrangement is simpler and more practical to maintain.

When shopping for your arrangement, look for flowers that have a natural, “real” appearance and that hang similar to a real flower.  Vary the size and texture of the faux flowers.  If your chosen flower is in a bunch, separate it, so you have individual stems.  By taking apart the pre-made flower bunch, it’ll give you more freedom to vary the heights and  discard parts of the bunch you may not want to use.

Like always, it’s important to use the appropriate tools for the job! Wire Cutters are perfect for this project.

Let’s get started…

Start arranging your flowers just like you would if using real flowers.  I chose a vase with a small opening, but the look of the arrangement will depend on the size, shape, and opening of the vase you choice.   Hot Tip: If you decide on a vase with a large opening, make a grid using clear tape. This will keep the flowers in place and the arrangement looking full.

I scored this vase at TJ Maxx for less than $4!

Begin by placing a handful of the flowers in the vase.  Then remove and trim them one by one. Vary the heights and sizes to create a balanced arrangement. Remember, just like when arranging “real” flowers, it won’t be perfect and that’s the beauty of it.

With the busy lives we lead, buying and maintaining fresh cut bouquets is sometimes just NOT possible.  If done right,  an artificial arrangement can look just as beautiful and the enjoyment of flowers can still be achieved.

Here is my completed arrangement…

O, I forgot to mention, I made two…

And here is an overall photo of my dining space…

I’m usually a “real” girl, but fake can sometimes do the trick!

I’ll be linking up {here}


Creating a Kids Art Gallery Wall

Over the past month, I’ve been sharing the various steps of my basement transformation. It has taken on a life of it’s own, BUT I can gladly say it is slowly, but surely, nearing the point of completion.  It’s not a perfectly designed masterpiece, but a space that is fun and enjoyable for the kids to hang out and play.  Along with my craft area / mom cave and built-in chalkboard wall for the kids, I recently transformed the scary ugly end feature wall in the room, to create an art gallery to display the kids beautiful creations.

Continue reading

DIY: Turning an Old Rug into a Chevron Beauty!

In yesterday’s post, I shared with you how the classic chevron pattern is back and better than ever with a new twist making a modern and BOLD statement.  I wanted to add the stylish chevron pattern in my own home, so I took the worn and blah sisal rug from  my front foyer and vamped it up with some color and pizzaz!  Inspired by the nursery rug that Miggy of This Little Miggy Stayed Home, I set off to add some chevron into my life!

Here is a before shot of my old, ugly sisal rug that I’ve had for years ~

Let’s start the REVAMP!  First, you need your tools.  Using the right tools  ALWAYS makes the project SO MUCH easier. Figuring out the pattern was a little tricky and I had to do some calculations to make sure the pattern was centered on the rug. (Even with using my handy-dandy calculator and drawing, I STILL made mistakes)…no biggie…it’s handmade, right? That’s the beauty of it….Are you asking yourself what the clear “thing” is with the yellow on it (at the bottom of the pic)?  That’s an adjustable triangle.  It adjusts to the angle that you are working with.  Most standard architectural triangles are on a 45 degree angle or a 30, 60, 90 degree angle, but this magical instrument lets YOU adjust the angle to whatever you need.  It’s actually from my college days in Architecture school and even though I never thought I’d use this tool again, it REALLY came in handy for this project.  SIDETRACK, let’s move on…

I found the center mark with two measuring tapes and using Painter’s Tape started making my zig zag line from that point ~

Once you’ve got the center point and first line complete (which is the most difficult part of the project), you are smooth sailing… I chose a zig zag width of 5″ thick and it made sense for this 5′ x 8′ rug size.  Thinner or thicker stripes could also work.

Continue your zig zag stripes to create your beautiful chevron patterned rug ~

It’s time to start painting!  I chose the colors of chocolate and burnt orange.  Both colors I already had from other painting projects in the house.  At this point, I’ve spent nothing for this project (I even had the painters tape from our recent basement renovation).

Because the rug had a worn look from years of foot traffic, I wanted to create a distressed, non-perfect chevron look. Using a dry brush method, I applied one coat of paint in a stipple style.  Chocolate is FINITO ~ on to the Burnt Orange…

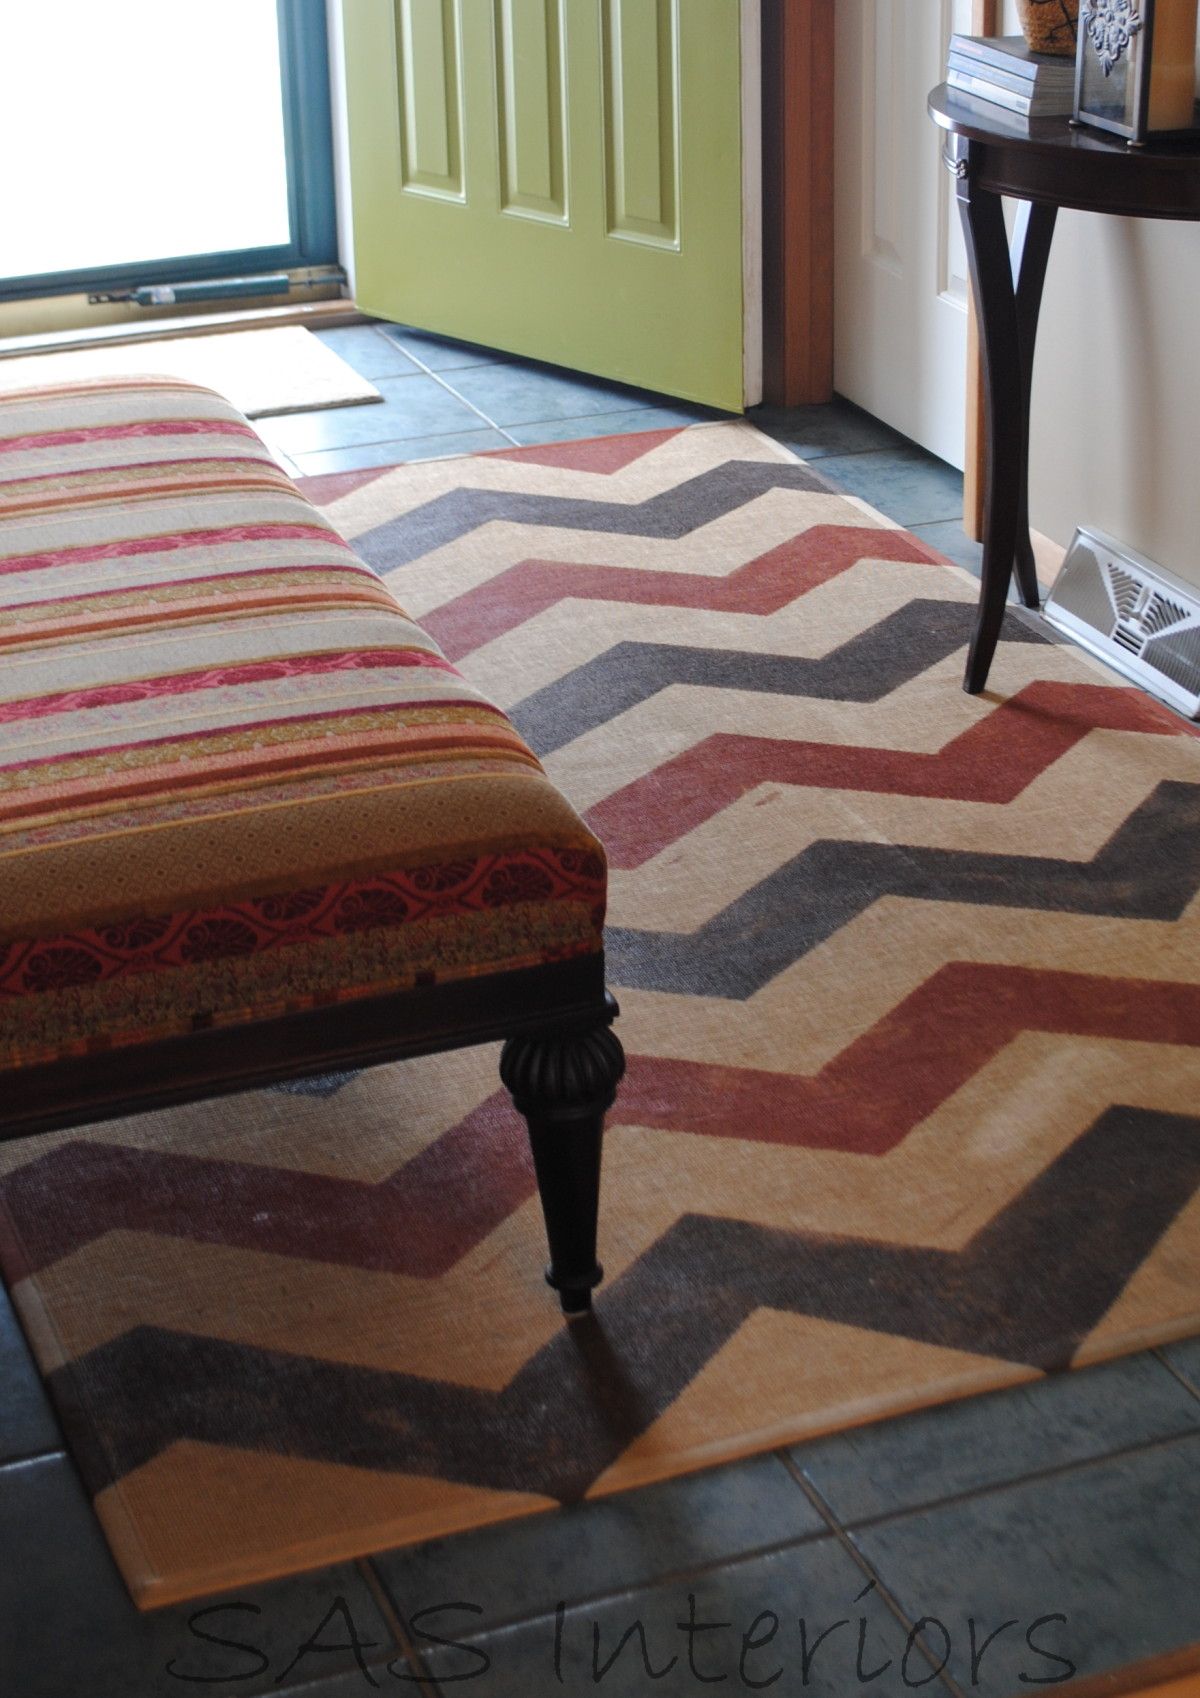
And it’s done!  Looks a little weird with the blue, but just wait…

Beauty! (it doesn’t look amazing against the existing blue tile, but that’s another project for another day…it’s all a work in progress…)

I love how the rug looks with the vibrant colored striped fabric on the bench.  It also works wonderfully with the rug designs in the two adjacent rooms. (The scale of the jacket on the hook looks a little odd ~ guess I should have taken it off, O well…I still love the rug)!

Another view…

I’m in LOVE! With the added pattern in the room, the foyer looks completely different.  I hope you’ve enjoyed my chevron tutorial.  If you have any questions, please feel free to ask!  Do you have any chevron pattern in your home?

DIY: Turning an Old Rug into a Chevron Beauty!

In yesterday’s post, I shared with you how the classic chevron pattern is back and better than ever with a new twist making a modern and BOLD statement.  I wanted to add the stylish chevron pattern in my own home, so I took the worn and blah sisal rug from  my front foyer and vamped it up with some color and pizzaz!  Inspired by the nursery rug that Miggy of This Little Miggy Stayed Home, I set off to add some chevron into my life!

Here is a before shot of my old, ugly sisal rug that I’ve had for years ~

Let’s start the REVAMP!  First, you need your tools.  Using the right tools  ALWAYS makes the project SO MUCH easier. Figuring out the pattern was a little tricky and I had to do some calculations to make sure the pattern was centered on the rug. (Even with using my handy-dandy calculator and drawing, I STILL made mistakes)…no biggie…it’s handmade, right? That’s the beauty of it….Are you asking yourself what the clear “thing” is with the yellow on it (at the bottom of the pic)?  That’s an adjustable triangle.  It adjusts to the angle that you are working with.  Most standard architectural triangles are on a 45 degree angle or a 30, 60, 90 degree angle, but this magical instrument lets YOU adjust the angle to whatever you need.  It’s actually from my college days in Architecture school and even though I never thought I’d use this tool again, it REALLY came in handy for this project.  SIDETRACK, let’s move on…

I found the center mark with two measuring tapes and using Painter’s Tape started making my zig zag line from that point ~

Once you’ve got the center point and first line complete (which is the most difficult part of the project), you are smooth sailing… I chose a zig zag width of 5″ thick and it made sense for this 5′ x 8′ rug size.  Thinner or thicker stripes could also work.

Continue your zig zag stripes to create your beautiful chevron patterned rug ~

It’s time to start painting!  I chose the colors of chocolate and burnt orange.  Both colors I already had from other painting projects in the house.  At this point, I’ve spent nothing for this project (I even had the painters tape from our recent basement renovation).

Because the rug had a worn look from years of foot traffic, I wanted to create a distressed, non-perfect chevron look. Using a dry brush method, I applied one coat of paint in a stipple style.  Chocolate is FINITO ~ on to the Burnt Orange…

And it’s done!  Looks a little weird with the blue, but just wait…

Beauty! (it doesn’t look amazing against the existing blue tile, but that’s another project for another day…it’s all a work in progress…)

I love how the rug looks with the vibrant colored striped fabric on the bench.  It also works wonderfully with the rug designs in the two adjacent rooms. (The scale of the jacket on the hook looks a little odd ~ guess I should have taken it off, O well…I still love the rug)!

Another view…

I’m in LOVE! With the added pattern in the room, the foyer looks completely different.  I hope you’ve enjoyed my chevron tutorial.  If you have any questions, please feel free to ask!  Do you have any chevron pattern in your home?

DIY: Bow Holder

Last week, I shared my son’s DIY Skateboard Shelves, and this week I’m sharing a DIY project that I recently created for my daughter’s room.  She has quite the collection of {pretty bows} and the box that was holding them, just wasn’t cutting it anymore. With little time in the morning, I was tired of looking for the perfect bow to complement her pretty little outfit….until I created this solution~

It was super easy to make…and here’s how:

Supplies

  • Frame: Any picture frame of any size will do ~ whatever works for your space
  • Fabric: Any fabric will do ~ whatever complements your decor
  • Ribbon
  • Staple gun

1. Start off with your frame ~
I used a picture frame that wasn’t being used to create my PER-TAY Bow Display (no need to buy anything)

2. Wrap your fabric of choice around the cardboard and staple it with a staple gun ~ I used the cardboard that came with the frame since it was already the exact size.  It’s important that the cardboard is thick enough for a staple to go through.  If it isn’t, add an additional piece of cardboard.

3. Time to add the ribbon.  Once you determine your ribbon layout, staple it to the back ~There are LOTS of variations on adding the ribbon.  (I also used hot glue to keep my ribbon in place, then stapled) See more ideas below….

Ribbon Ideas

  • Create a diagonal pattern with your ribbon
  • Use different sized ribbon, but all the same color
  • Use the same size ribbon in different colors

4. You’re DONE…admire your masterpiece!

Wait….it’s NOT quite finished yet…It needs {BOWS}

NOW it’s COMPLETE!

Another view…

This was a fun and easy project to create.  Because I used materials that were just layin’ around, the project cost nothing….$0…my FAVORITE kind of project!  AND it makes my life in the mornings a whole lot EASIER!

Skateboard Shelves

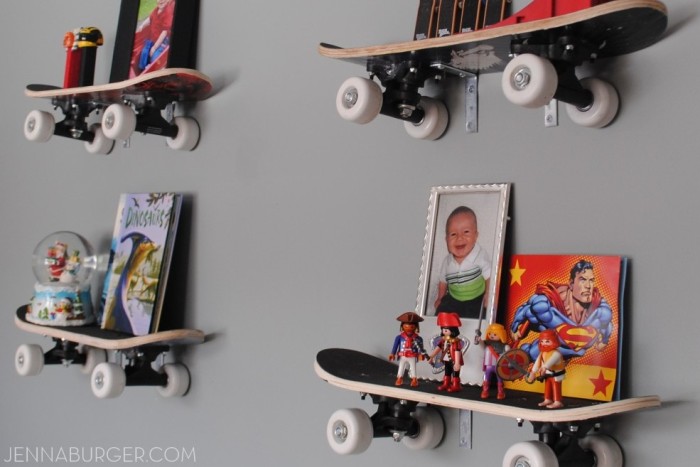
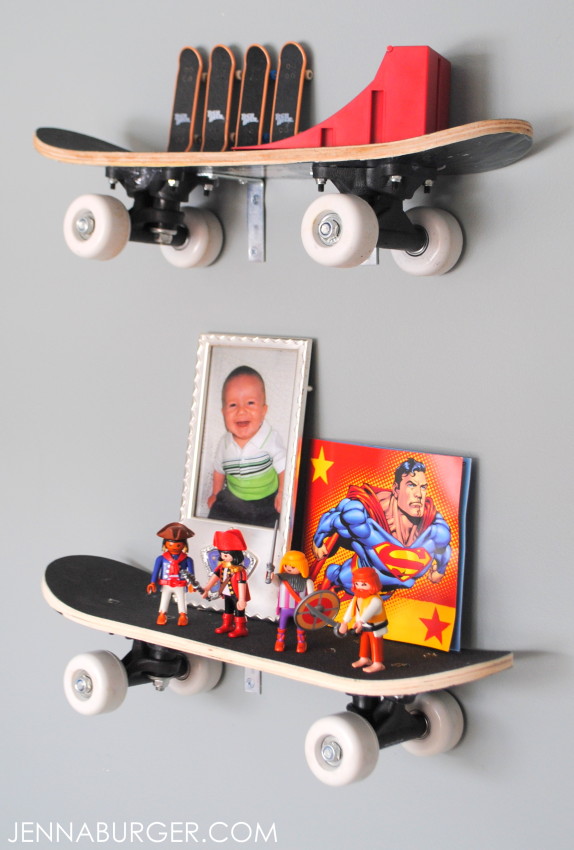
I’ve been meaning to install shelves in my son’s room for awhile, but wanted to do something unique and different.  At four years old, he has SO many interests, but one of his favorites is skateboarding.  So when recently putting the finishing touches on his “space”, I thought making shelves out of skateboards would be the perfect addition!

DIY: Skateboard Shelves - perfect for a boys room, young or old! Super easy to hang & totally rad

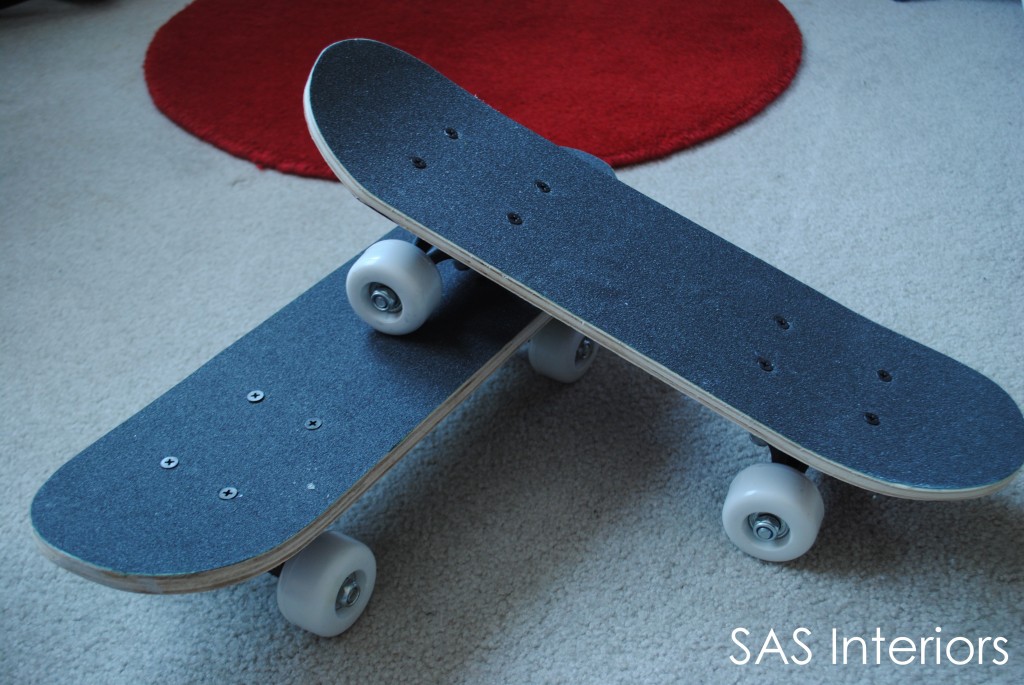
Real skateboard decks can start out around $40+ and there was no way I was purchasing shelves for that amount (I admit, I am frugal)! THANKFULLY, I stumbled upon these mini skateboards at Five Below and just like the name of the store, they were $5.  SCORE!

To start out, I bought 4 mini skateboards that are 17″ long (they are shorter than a typical skateboard deck, but they function just the same).  They were perfect for the size wall that I wanted to put them on.

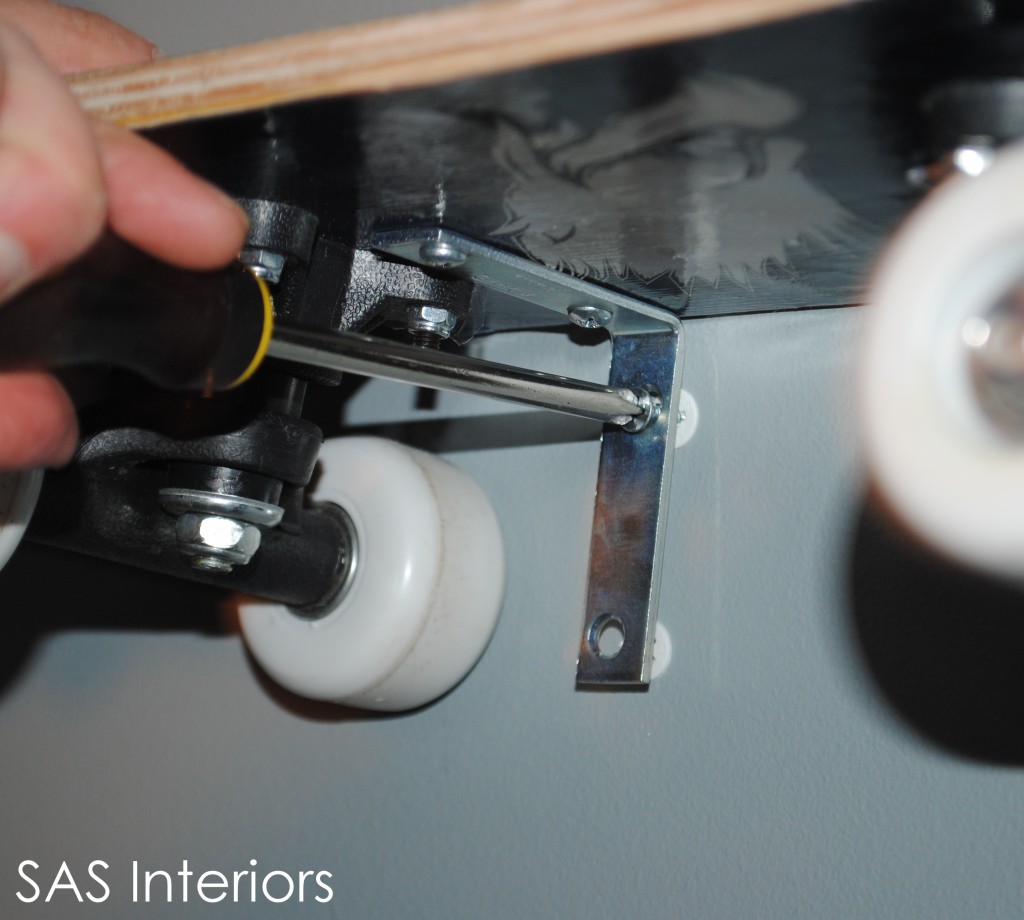
To make sure the skateboards were properly hung, I (along with my husband) used “L” brackets to install the skateboards to the wall. We used brackets that can hold up to 65 lbs….though, I really don’t think something that anything weighing 65 lbs will be sitting on these shelves ~ It’s better to be safe than sorry.

Now, the shelves are ready to be hung…
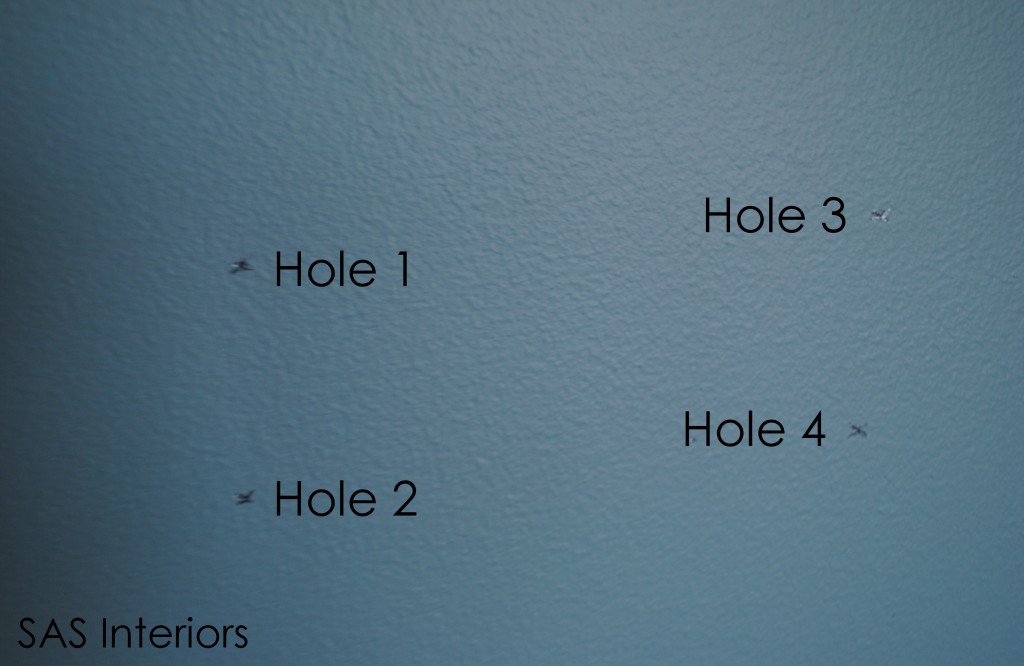
Once the “L” brackets are in place on the skateboard, they are ready to be hung on the wall. We positioned the skateboard on the wall (making sure it was level) and made a pencil mark of the holes on the “L” bracket.  Then, we put in the anchor ~ If there isn’t a stud (I don’t mean your guy…haha, bad joke, I know) behind the wall, your screw will not hold and your shelf will most likely fall out.  MY ADVICE: USE ANCHORS!

Then hang the shelf…

And the shelves are complete…

DIY: Skateboard Shelves - perfect for a boys room, young or old! Super easy to hang & totally rad

SKATEBOARD SHELF INSPIRATION.

How neat!  Great idea to take off the trucks and wheels, and then hang the board on it’s flat on the wall.  Then add the simple shelving.

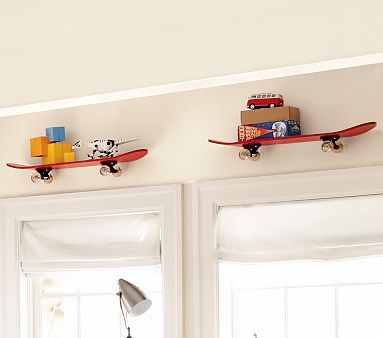
Great idea to add some style above the windows.  It gives the white, neutral room a POP of color!

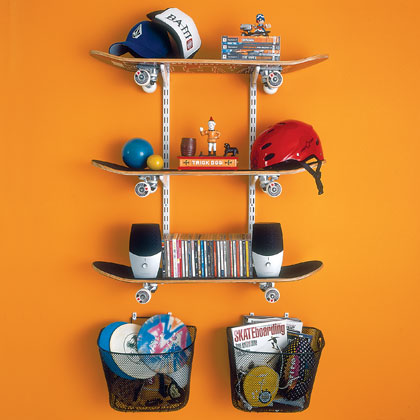
Try regular wiring shelving as I used in my mom cave, and then put the decks on top…totally RAD!  (I had to add some skateboard lingo)

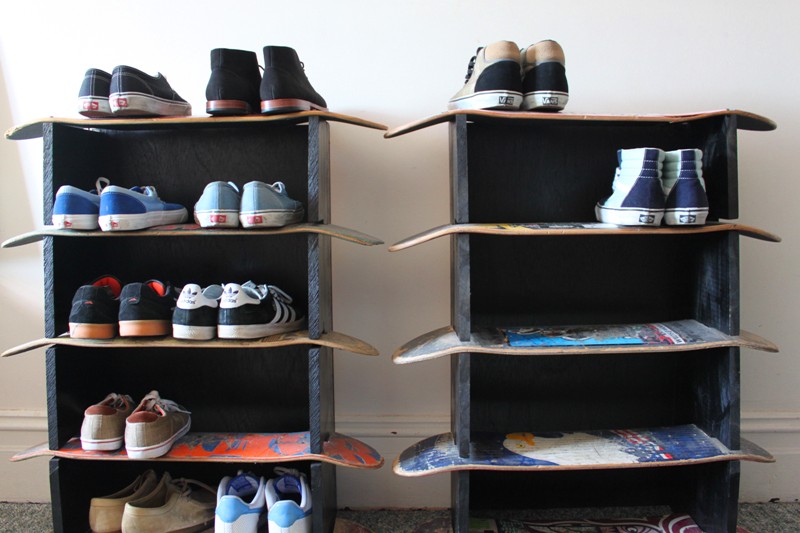
Look at this creative idea…use the skateboard decks as a show rack.

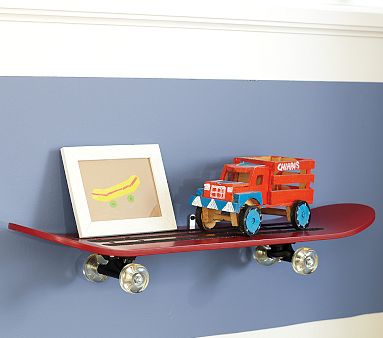
This is the skateboard shelf that is available at Pottery Barn for $70….  I’ll stick with my skateboard shelf for $5!

Do you have shelves in your child’s room?  Did you do anything creative

IMAGES COURTESY OF Home Improve Ideas, Family Fun, Jodeska

Tutorial: How to Hang Wallpaper

For the past few weeks, I’ve been sharing my many recent basement updates with you and today I’ve got another one….  

{How to Hang Wallpaper}

The basement had been the one space in my home that was in major need of sprucing up, hence my many recent DIY project posts.   Last week, I debuted my new Mom Cave / Craft Area that I recently created on a slim budget, and received some amazing and encouraging comments.  BUT, before the new desk went into place and the new shelving was hung, I wanted to give wallpapering a try (this was my first wallpapering experience ~ I know, crazy…who hasn’t hung wallpaper before?!).  I didn’t wallpaper the entire room, just certain walls that were in need of drama and some added interest.  Let’s take a look ~

Supplies
  • Spackle (for repairing any holes & imperfections in the wall)
  • Sandpaper
  • Wallcovering Smoothing Brush and/or Wallcovering SmoothingTool (I recommend the smoothing tool over the brush ~ which you will see in the picture below)
  • Wallcovering Water Bucket
  • Level
  • Tape Measure
  • Sharp blade
  • Scissors (to cut wallpaper)
  • And, lastly but certainly not least ~ Your Wallpaper of choice!
{Step by Step Tutorial}

Most everyone has used regular white spackle to fill a hole or repair a damaged wall.  And in those moments, have you asked yourself,  Is the surface dry yet?  Am I ready to sand?  This spackle product by Dap gives you the answer  ~ the spackle in the container is pink (it was a bit weird to look at) and when it’s dry and ready for sanding, it’ll magically turn completely white (like typical spackle).  No wondering or questions needed!

The most important part of wallpapering (I’m sharing this with you because I found out the hard way) is to make sure your wall is a perfect palette (meaning no holes, no bumps, no nails, etc).  One of the reasons, I intended to use wallpaper was to hide imperfections in the wall.  That didn’t happen.  Every bump will show through.
So let’s get started:

Step 1: Once your wall is completely prepped, you are ready to start hanging the wallpaper.  I used a prepasted wallpaper, which means all I had to do was apply water to the back.  PLEASE, read the instructions carefully for the specific wallpaper you choice for your space ~ the direction for installation may be different!

I first measured and cut my wallpaper piece to fit the size of the wall, leaving a little extra on the top and bottom.  Then I was ready to go.  With the prepasted wallpaper, I dragged it through the Wallcovering Water Bucket until the entire wallpaper backing was covered and wet.

Step 2: Once the wallpaper is entirely wet, fold over the glue sides on each other (as shown above) and let it sit for 5-8 minutes.  This will activate the glue.

Step 3: You’re ready to apply the wallpaper to the wall.  I started the installation from the center of the wall and worked my way out to the edge.  Depending on the space and pattern of your wallpaper, you may want to start in the center of the wall or at the wall edge.  Make sure the wallpaper is plumb by using a level.

Step 4: Once your wallpaper is up, start to smooth it out with your Wallcovering Smoothing Tools.  This will truly adhere the wallpaper to the wall and give you a smooth surface/finish.  The ooey-gooey glue will start to come out the sides (as seen in the picture above)

You are ready for your next piece of wallpaper.  Note: Do not overlap edges!  This is SO important…  I did it at first, and had to remove the wallpaper (which was easy to do ~ at least you have some flexibility with the application).

Step 5: Once your wallpaper is completely hung and dry (if the paper is not dry, it could tear ~ happened to me ), trim the overlapping edges with a sharp razor.

This is the edge where the wallpaper meets the painted wall.  Use a sharp blade to trim the extra wallpaper for a crisp, clean cut.
These are the specific instructions that came with my wallpaper.  My tutorial  above gives a general idea of how to install wallpaper, but it is important to follow the exact directions for your wallpaper of choice.
It went from this… To this….  
{Complete}
This is how the completed wallpapered wall looks.  This is the wall (that had major imperfections before) that is at the landing of the basement.  Believe me, it’s still not perfect, but it is SOOO much better than how it was.  I really disliked opening the basement door before, but now I often open it to sneak-a-peak at this pretty ensemble!
I had been looking for a wallpaper with a simple, yet elegant design.  Even though my new wallcovering is in the basement, I wanted to bring the space up-a-notch and to make it feel as special as the rest of the house!  I looked… and looked… and looked…  I searched high and low to find something that would be affordable and stylish, and then it happened…  

{it was love at first sight}

I truly love the quatrefoil design and never made a purchase so fast.  If this wallpaper appeals to you as well, {here} is the info.

If you haven’t had a chance to check out my NEW Mom Cave  / Craft Area, here are a few pictures of that space with the new wallpaper.

To see the entire look of the new Craft Area and detailed pictures of how I created this space, check it out {here}.

Wallpaper can be a guaranteed show stopper!  The vast selection of wallpapers that are available today, can completely transform any space from blah to beautiful!  I am very happy with the result of 1st wallpapering attempt…I can now say that I am no longer a {Wallpaper Virgin}!  The thought of putting up wallpaper can be a bit daunting, but take your time and have patience…the end result is worth it.  One of my first posts was on my love for wallpaper ~ take a look {here}.

Are you planning on putting up wallpaper in one of your spaces?
Have you hung wallpaper before?   If so, what was your experience and how was the outcome?