My Mom Cave (Craft Area) Reveal!
Over the past year since moving into our home, we’ve had many {guests, parties, and gatherings}. As we’ve enjoyed showing off our new digs, not many people were allowed visited the basement {dun…dun…dun…}. It was the only space we hadn’t focused on until NOW. The basement was a bit of a scary space with semi-gloss yellow colored walls and crap a mish mosh of furniture and disorganization. This past weekend my husband and I, along with our two kids in tow, Seized & Conquered, our basement makeover on a dollar beer budget.
The final touches of pillows, pictures, and personal touches are still being made, BUT I am making the {BIG REVEAL} of my A-M-A-Z-I-N-G new Craft Area!! A true MOM CAVE all to MYSELF!

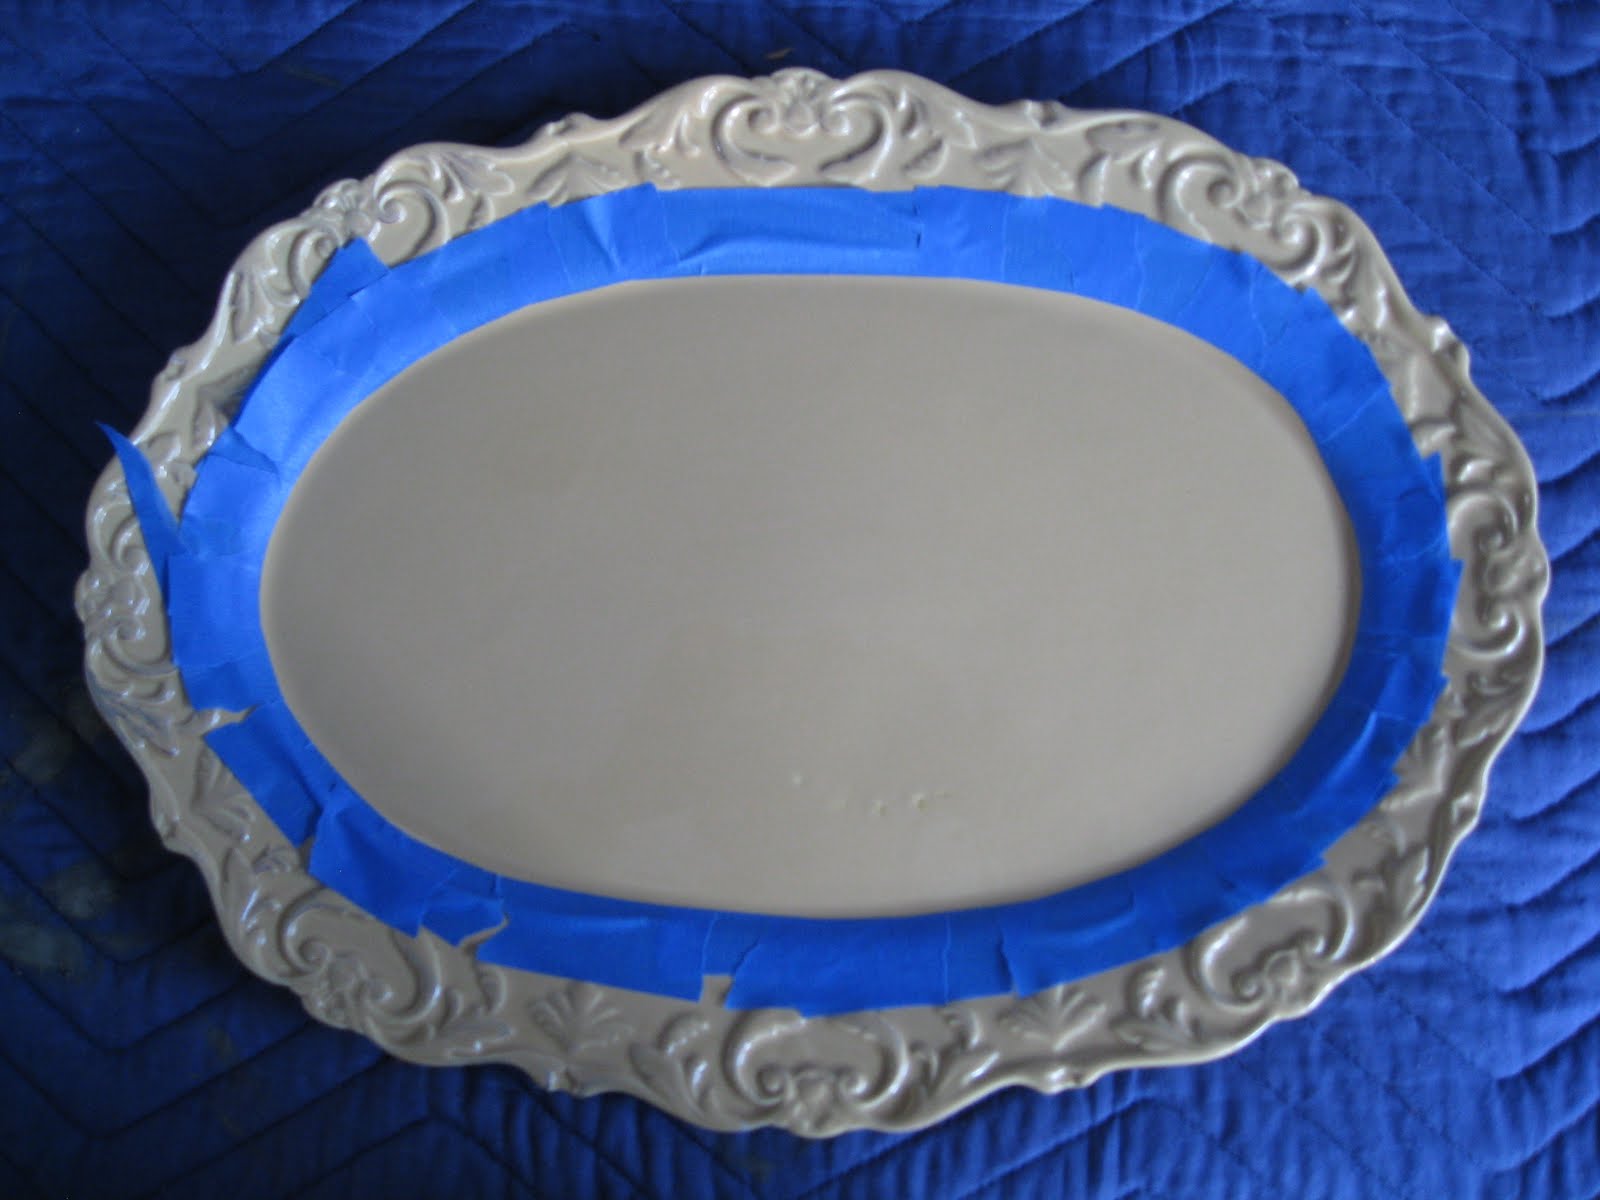
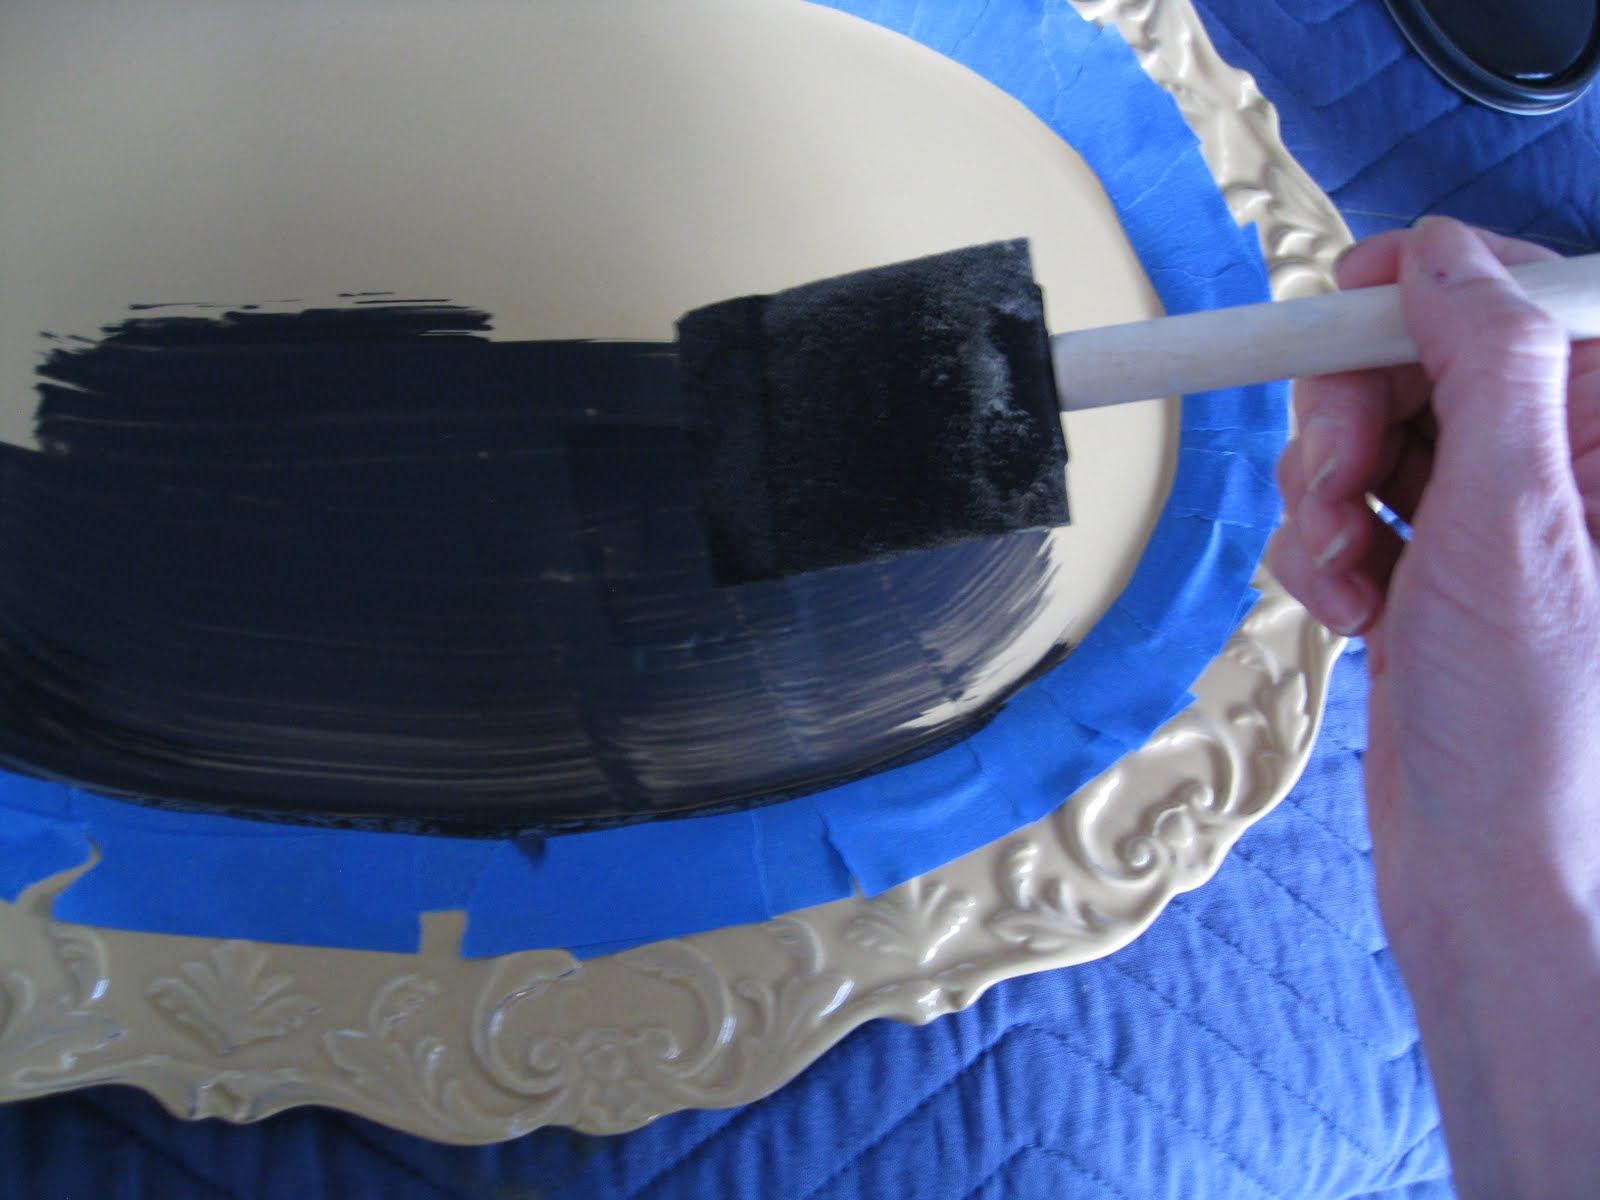
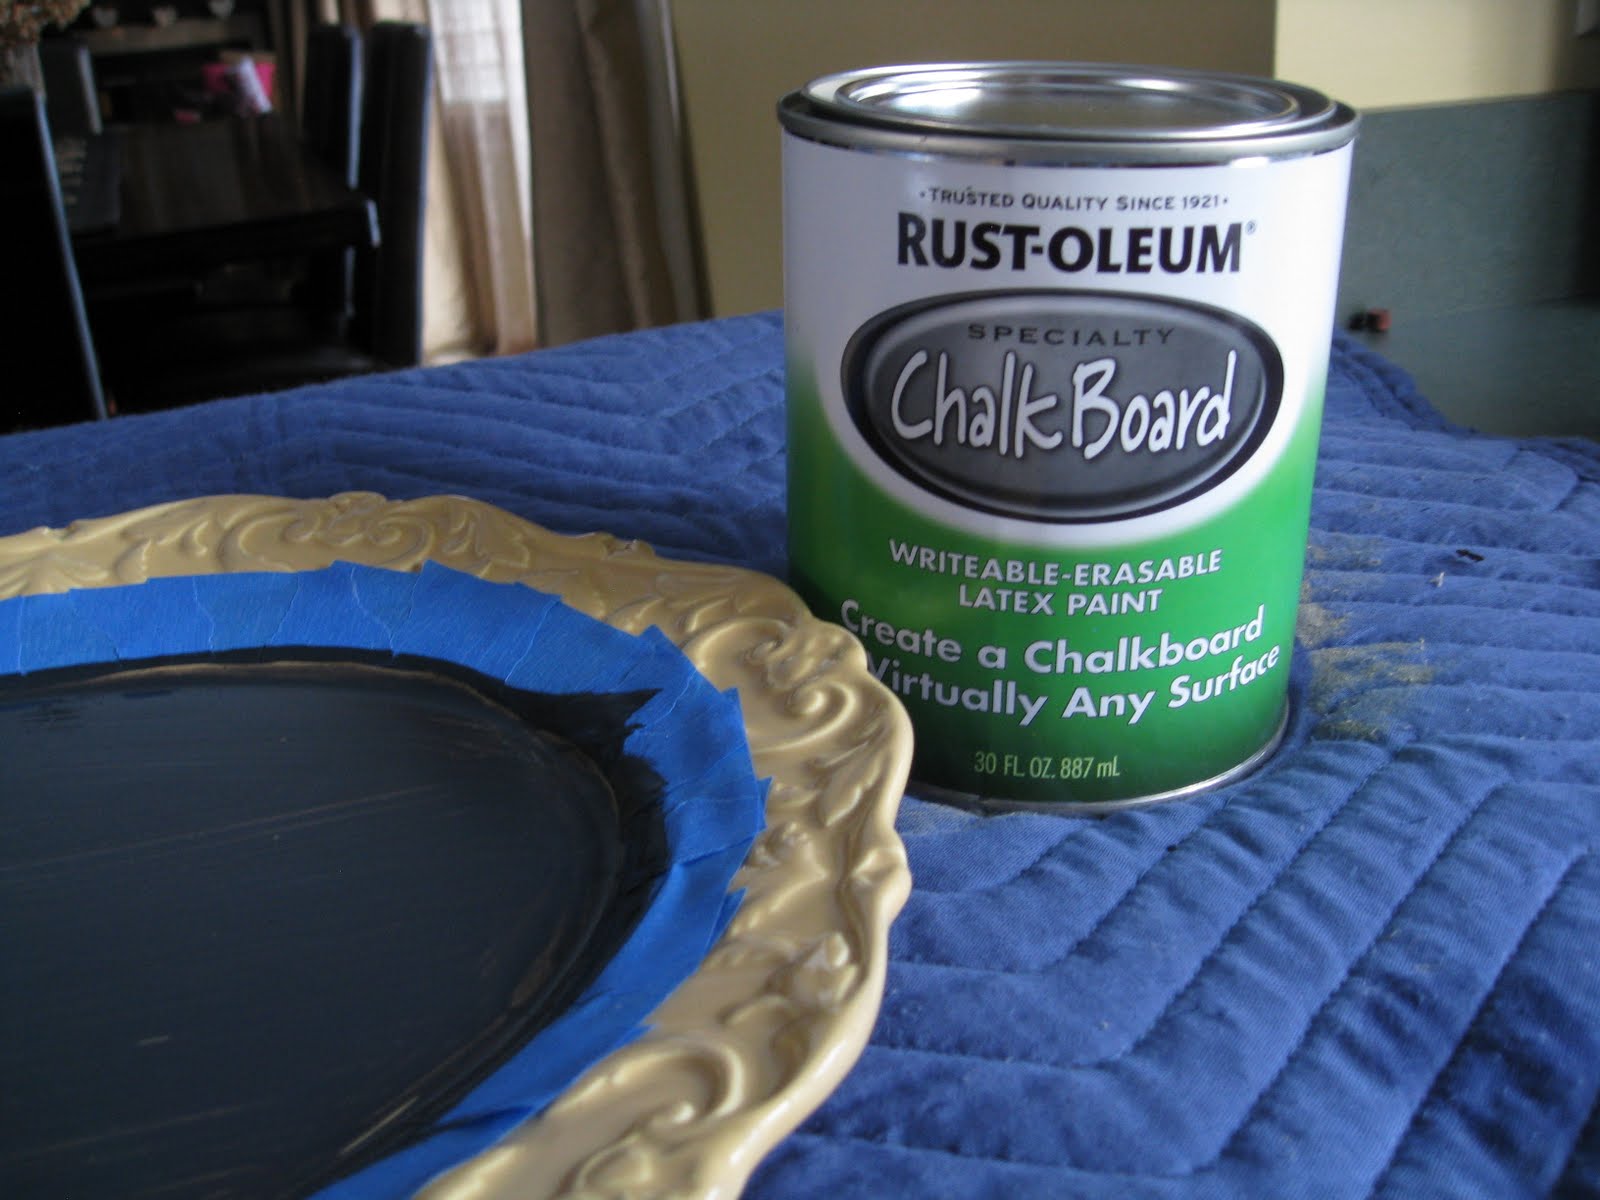
It took a LONG time to get to look like this, so let’s take a step back…
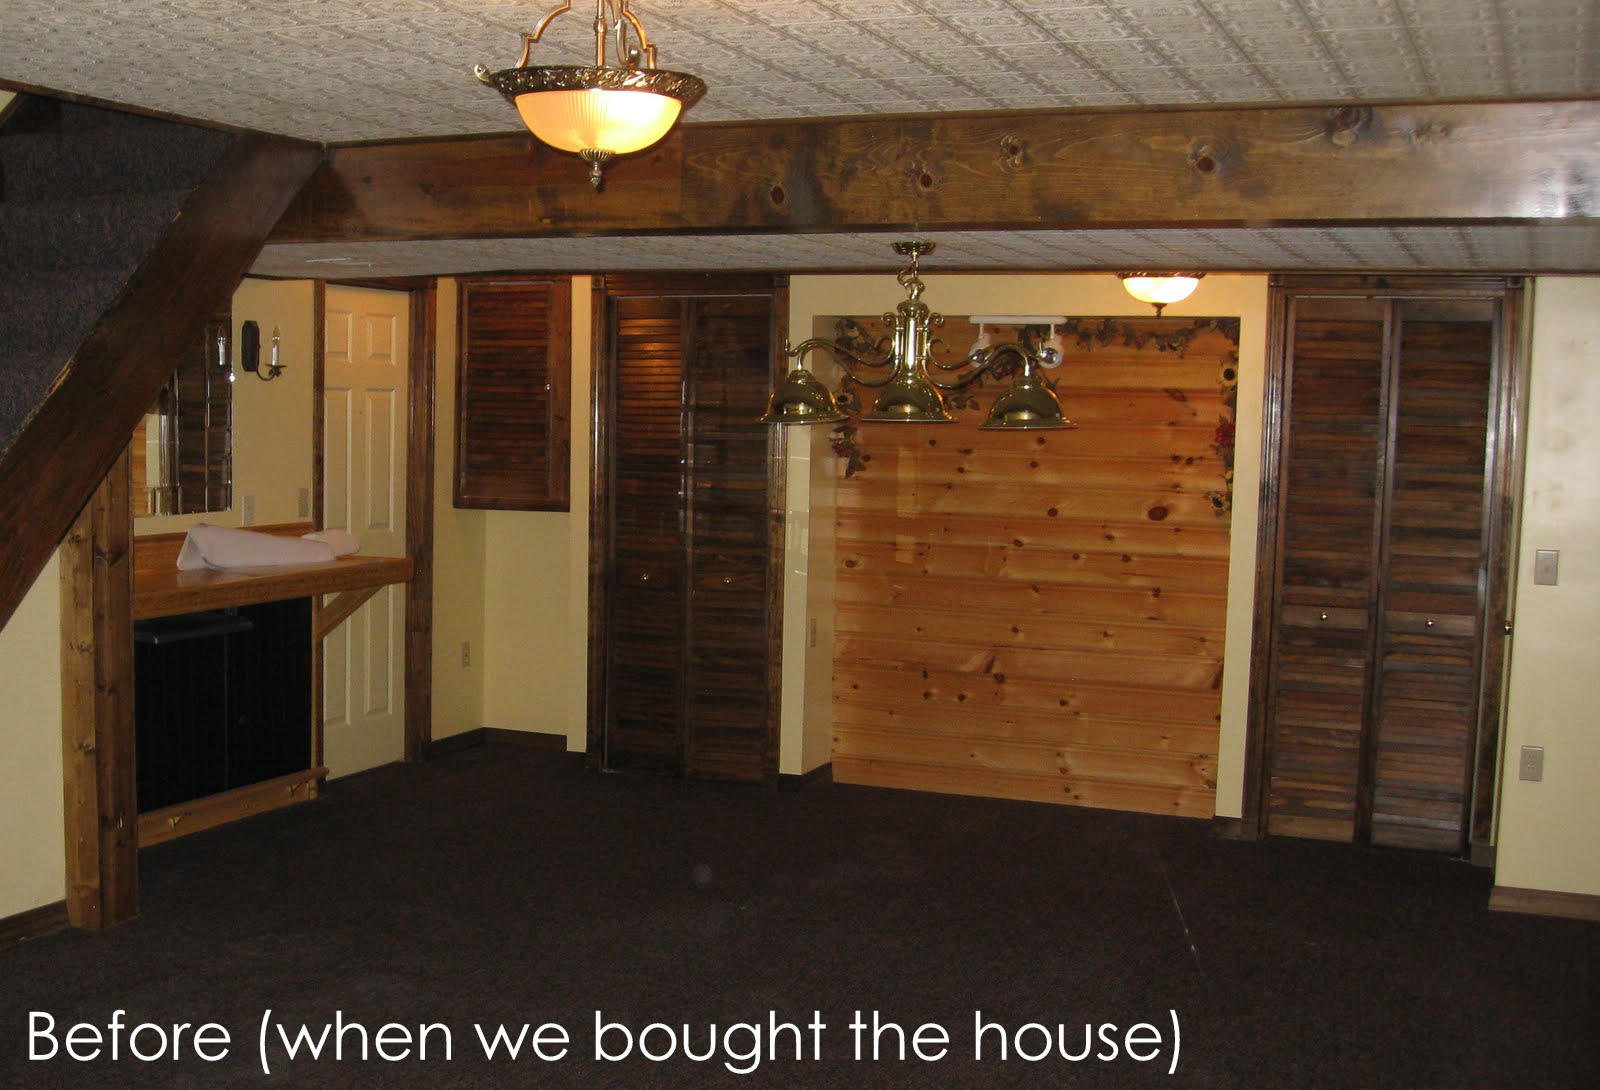
This is a pic from when we moved into the house. The semi-gloss yellow colored walls were so not attractive. The brass hardware just wasn’t cutting it. And what’s up with the pine plank wall? Not so sure…
Unfortunately, I don’t have a great BEFORE shot of my newly created craft area. But do you see where the “bar” is to the left under the stair? That’s the space….it’s unrecognizable now!
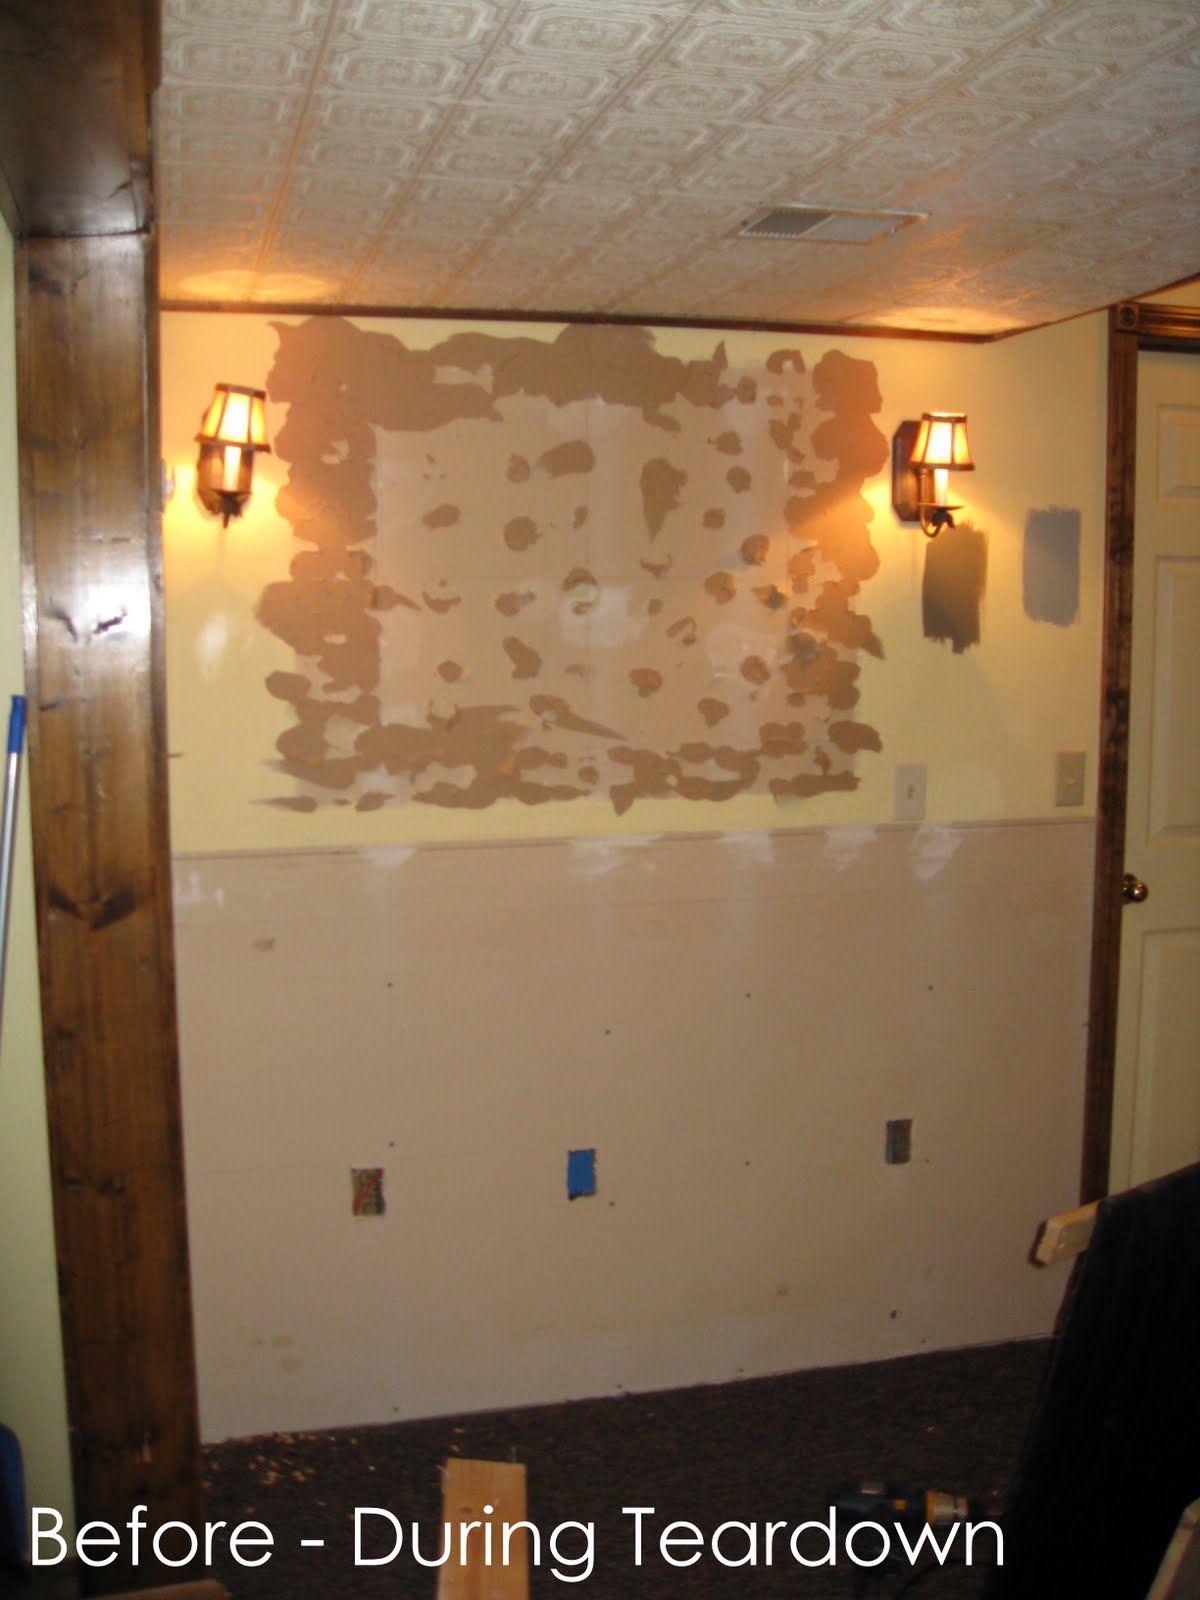
Unfortunately I didn’t take a pic of the “bar” before…it was JUST UGLY! This is a photo of the wall after we took down the “bar” and the wall of stick-on-glass. YES, individual pieces of glass were glued to the wall to create a mirror montage. When we removed each piece, the wall looked like this…AHHHH! There were definitely points through this whole process that my husband wanted to kill me was not happy with me 😉
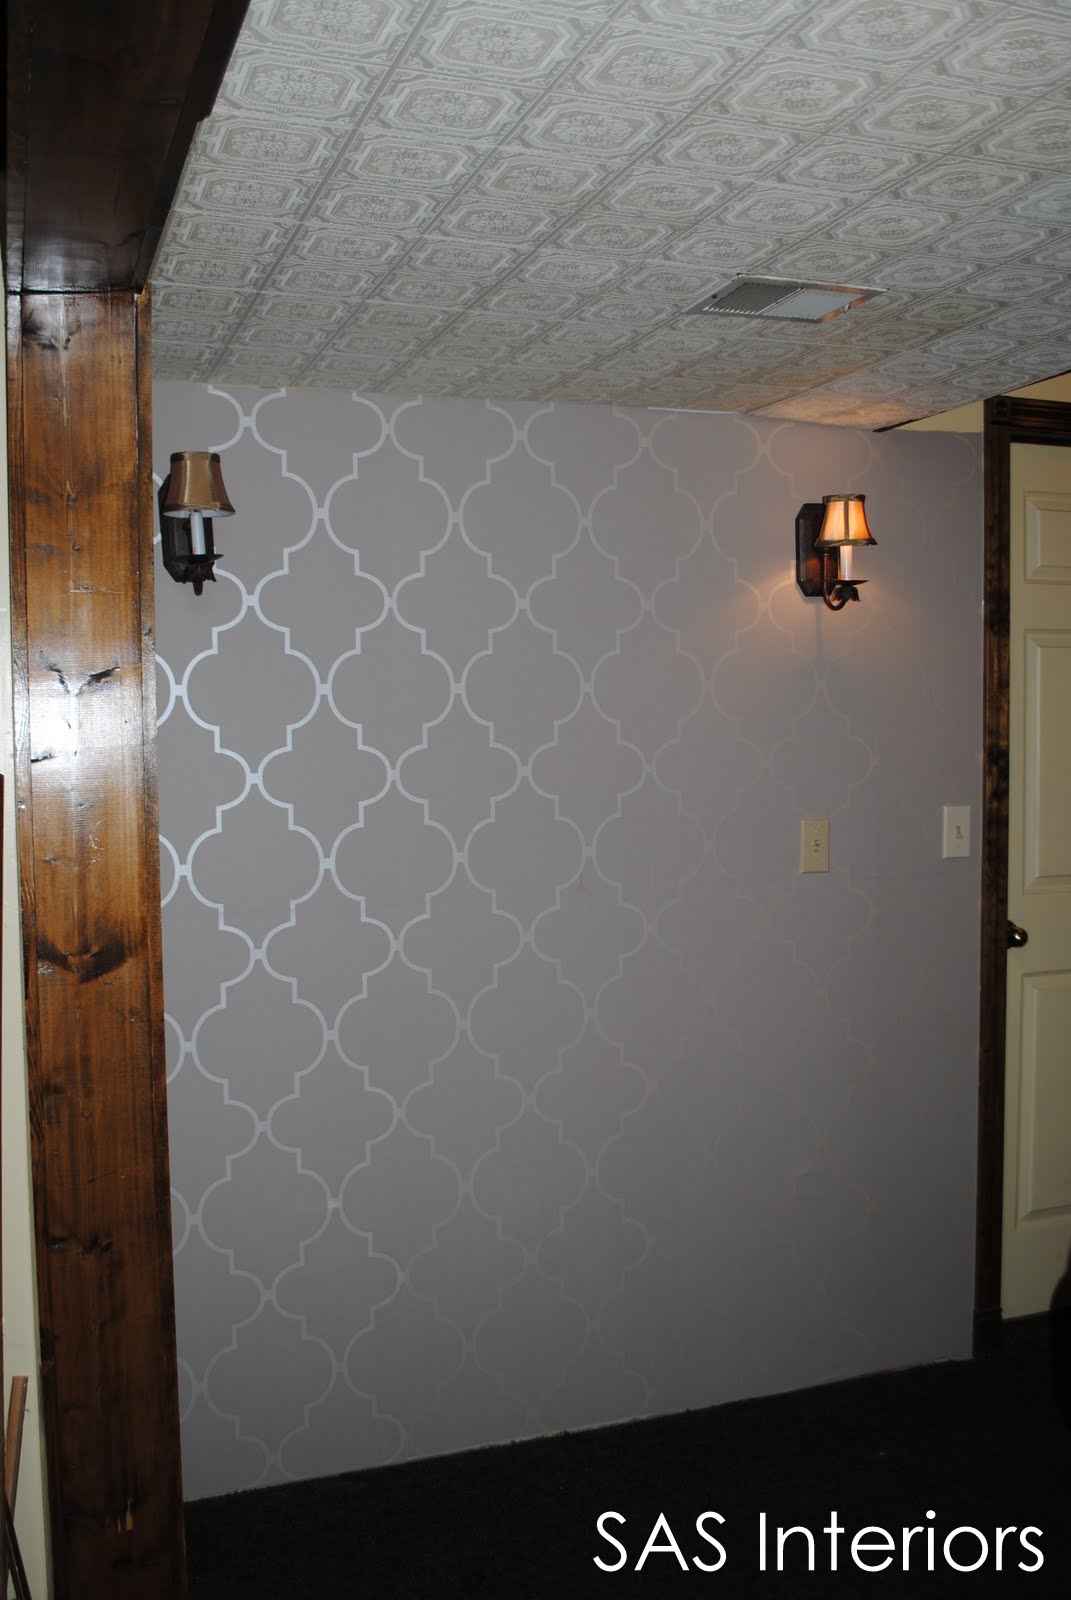
After lots of back and forth on what to do with this VERY MESSED UP WALL, I decided to use wallpaper. Why not, right? (keepin’ it real: just as I went to take the pic, one light bulb blew out)…
Check back next week for a {tutorial on wallpapering}

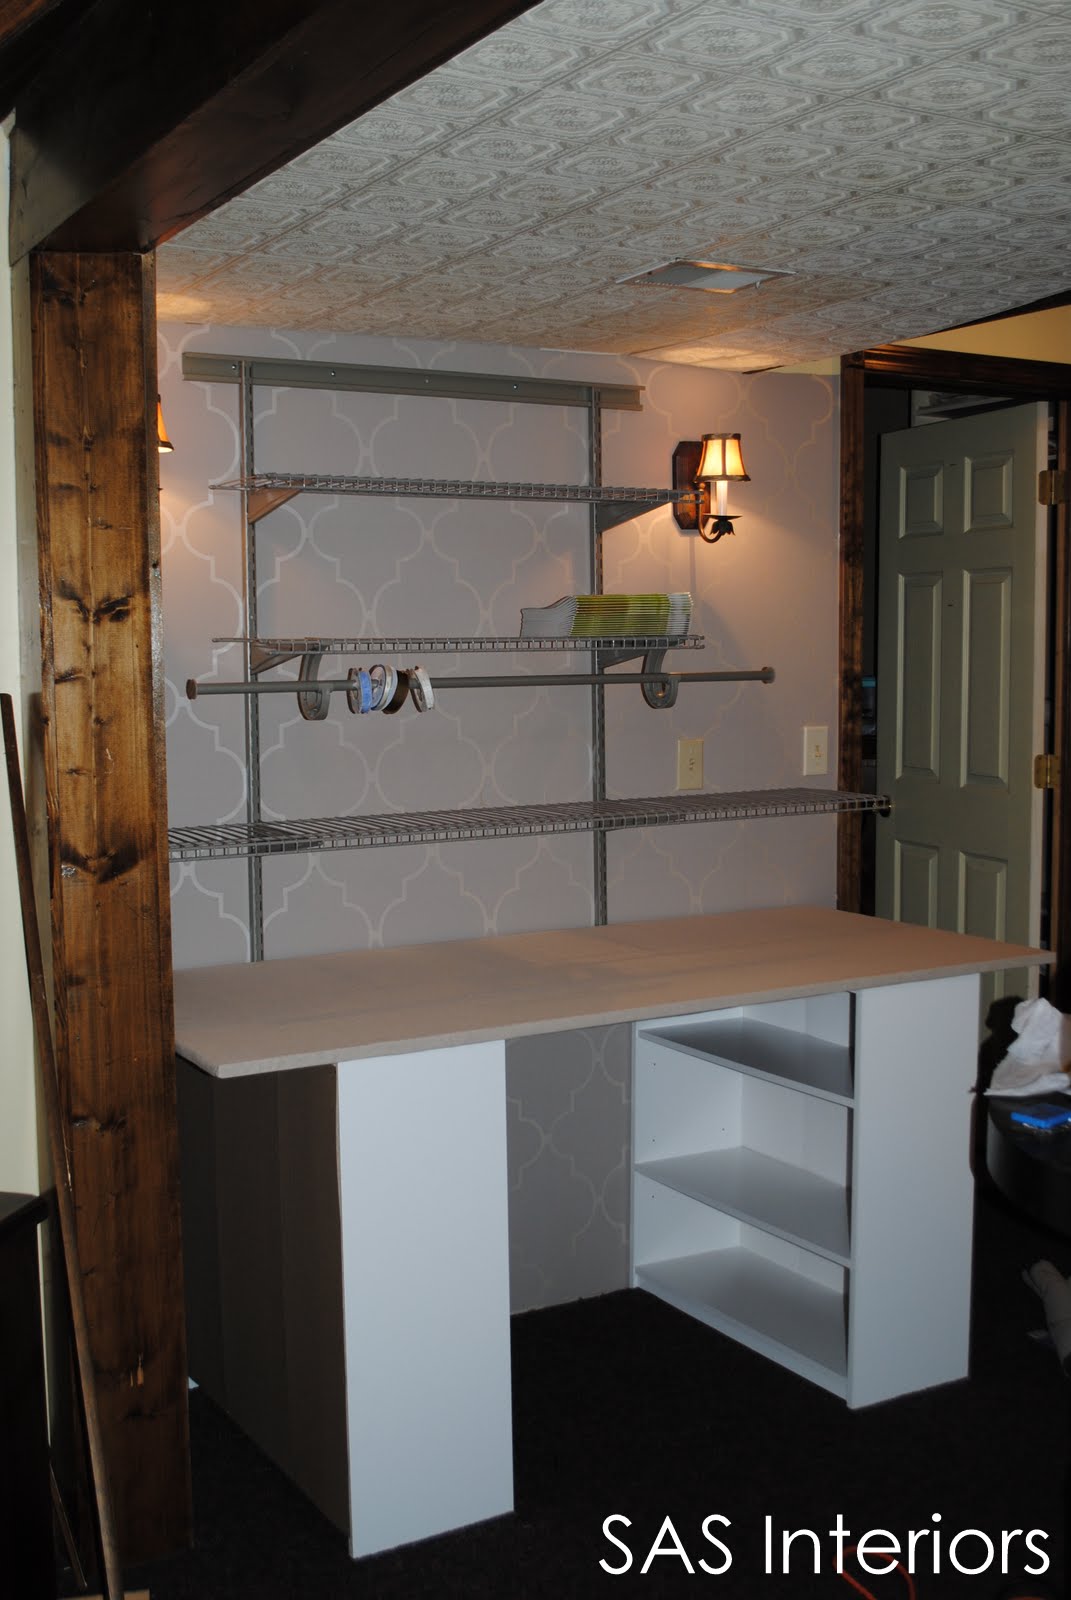
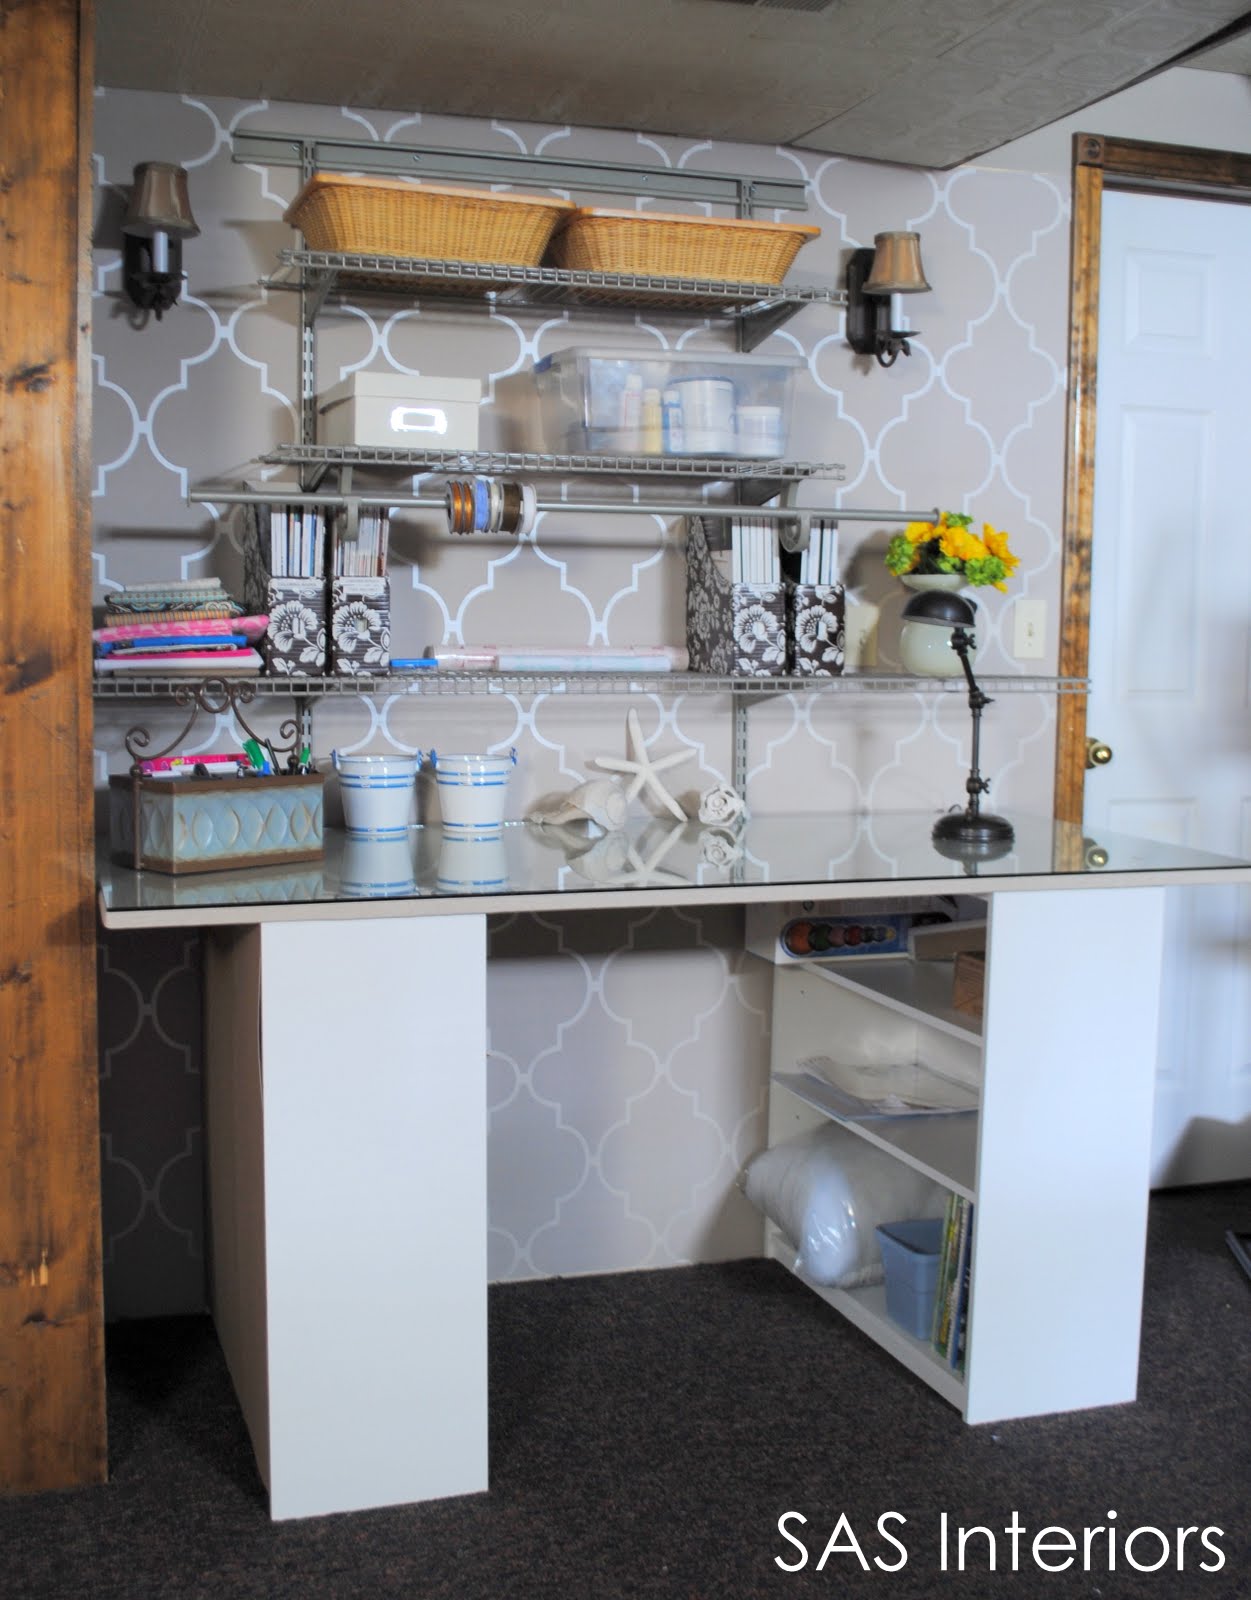
Added some shelving and a desk….

And this is my NEW MOM CAVE!
I created the desk by using melamine book cases (30″W x 12″D x 30″H) as the base, then put a piece of MDF (medium density fiberboard) across the top. The MDF was a 4′ x 8′ piece, that I purchased at HD. I knew the size I wanted, and they cut it to: 30″ x 67″ (the rest I took home for other projects). Once back at home, I covered the MDF with a light-colored linen fabric that I bought for $2.60/yard from Walmart. The finishing touch for the desk ,was a piece of glass that I had custom cut to size (this was the most expensive part of the project).

The shelving above the desk is also from HD and is a basic wire closet hanging system. Instead of the typical white wire shelving, I decided on a taupe color to complement the wallpaper. I love this shelving because it’s SO easy and quick to install. If you’re not familiar with this style system, the only drilling needed for the installation is to attach the bar at the top. The vertical brackets, hang off from the bar, and then you can install and adjust the shelves at any height. Your shelves can be moved up and down at any time.

Now, I have SO much room for all of my miscellaneous crafting supplies. As you can see in the picture, I also purchased/installed a “hanging bar” that sits just below the shelf. Typically used for hanging clothes, I thought it would be great for holding ribbon. NO more lost or straggling ribbon thrown in a box!
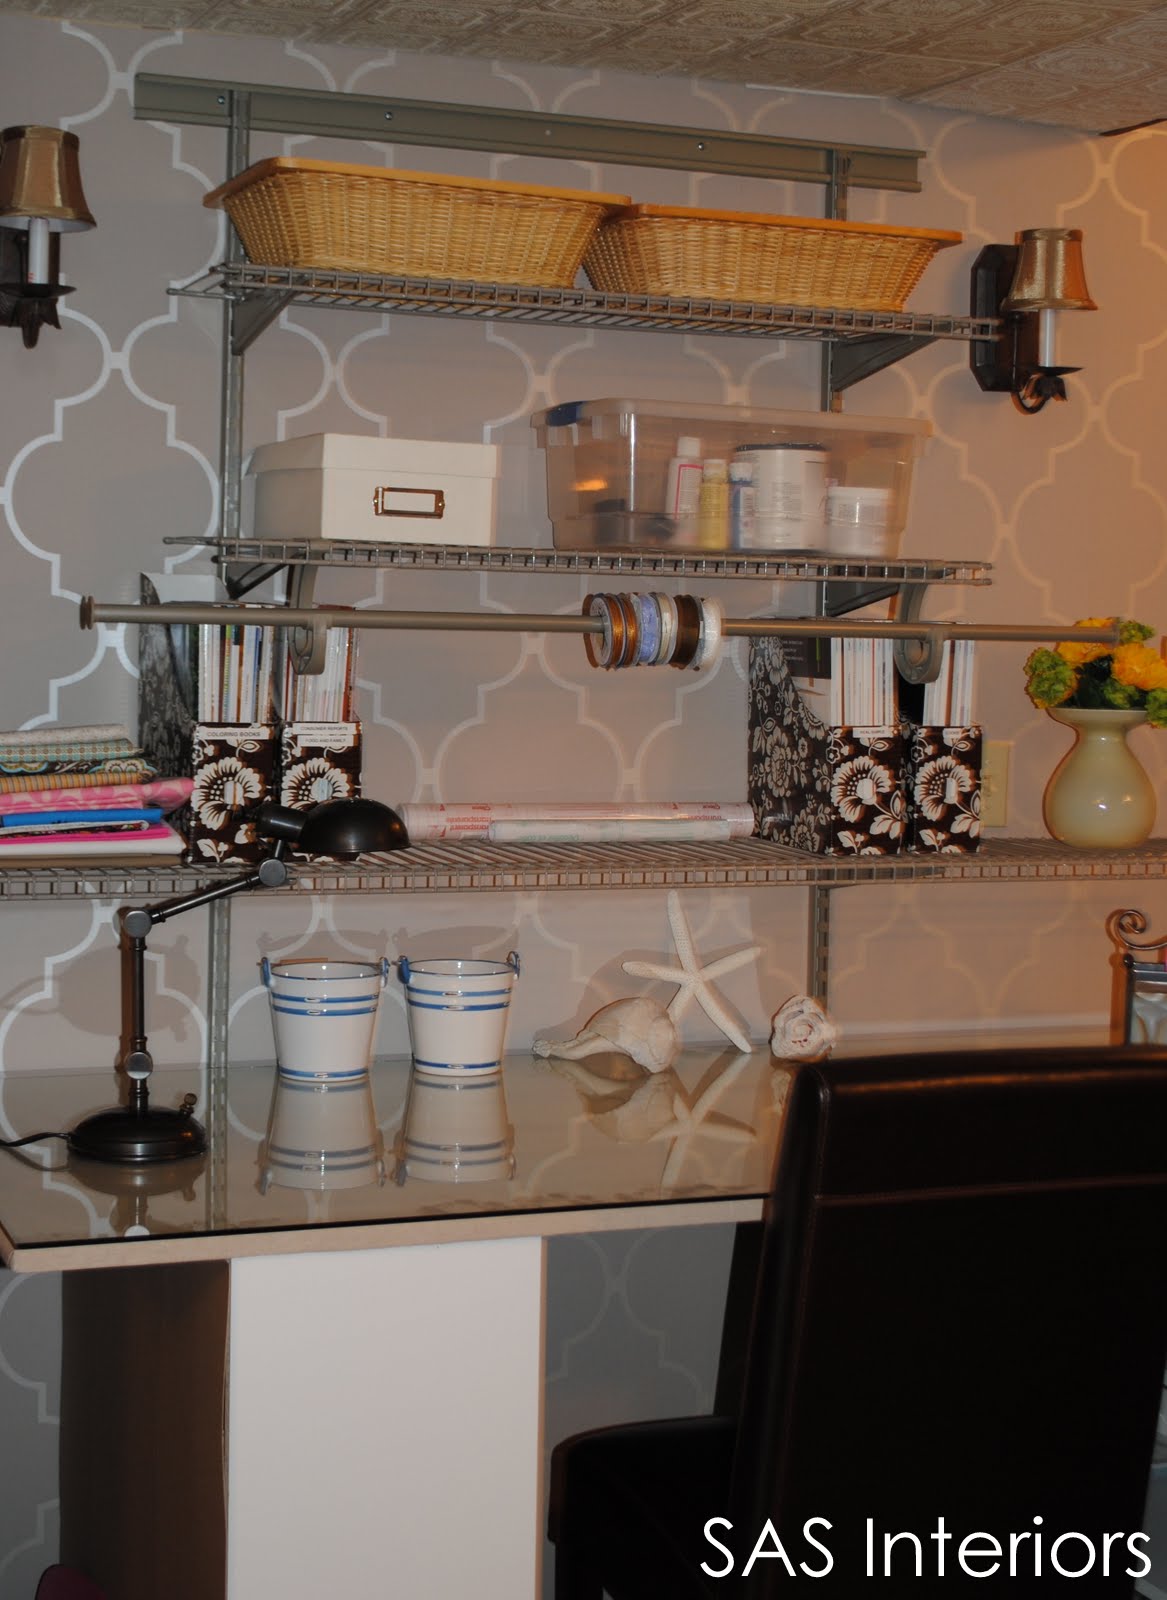
Boxes + Bins = Organizational Bliss
The shelves look fairly bare (and neat), but believe me, they will fill up fast!
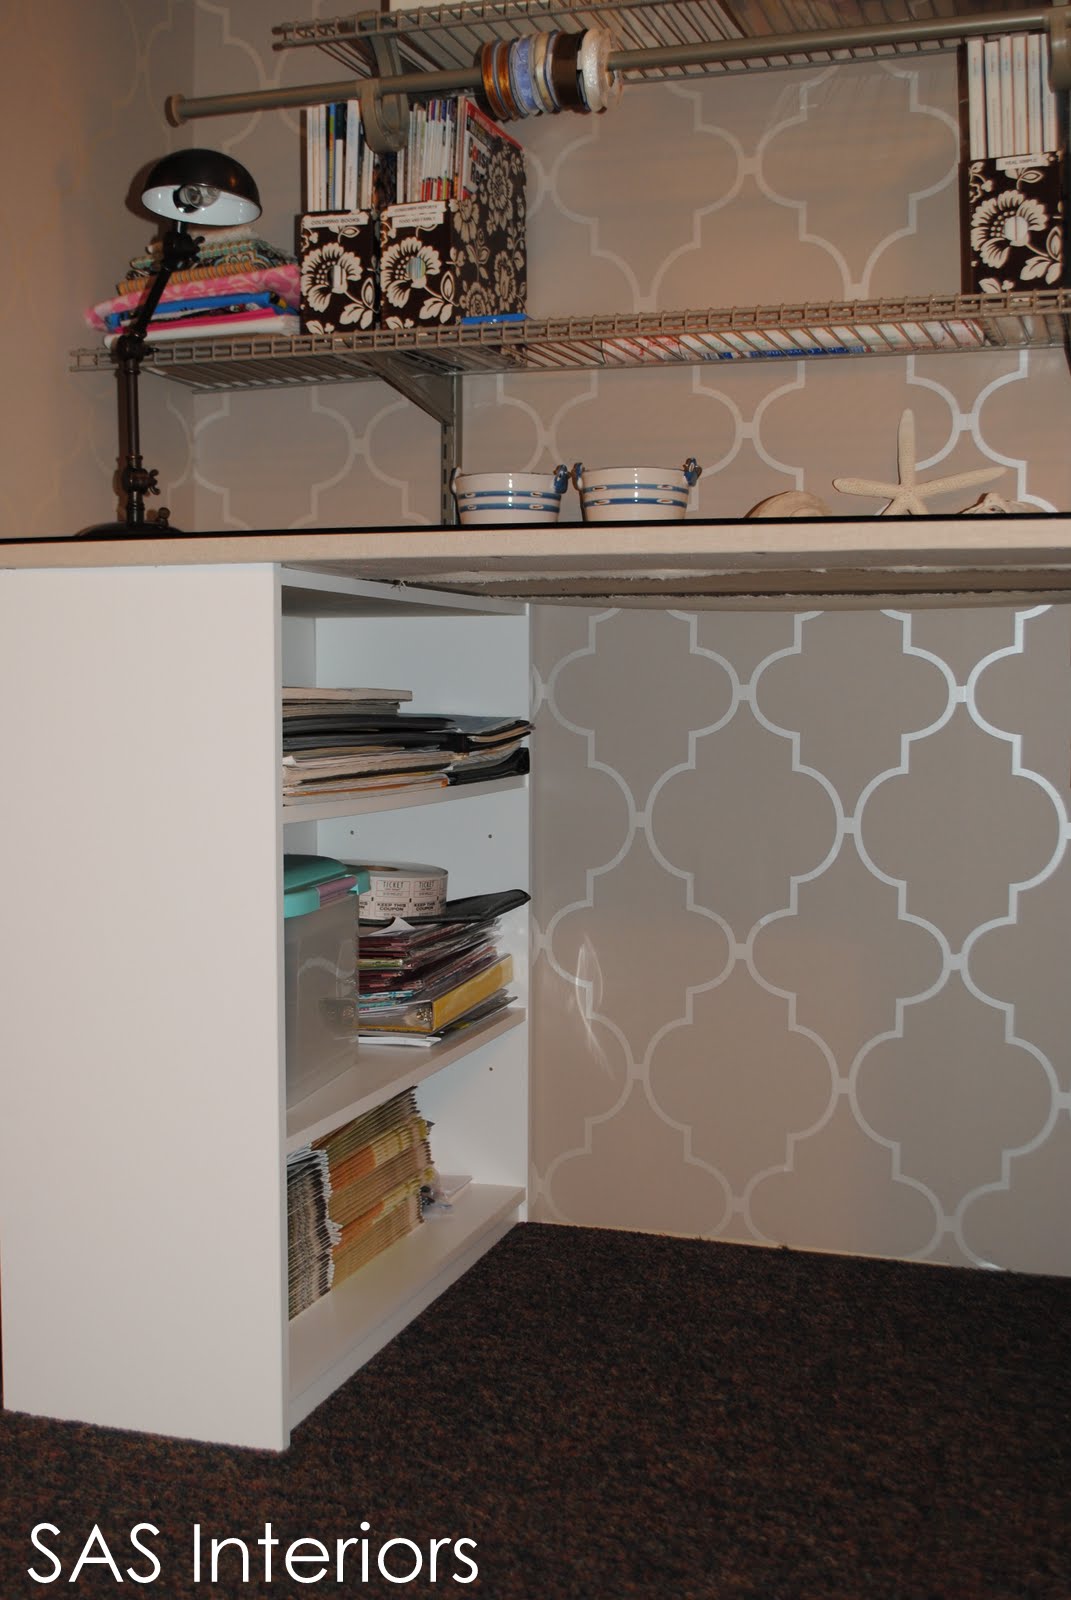
Each of the bookcases at the base of the desk are a great place for MORE storage. Inspirational magazines, portfolios, and supplies filled these shelves in minutes!

And one more reveal….
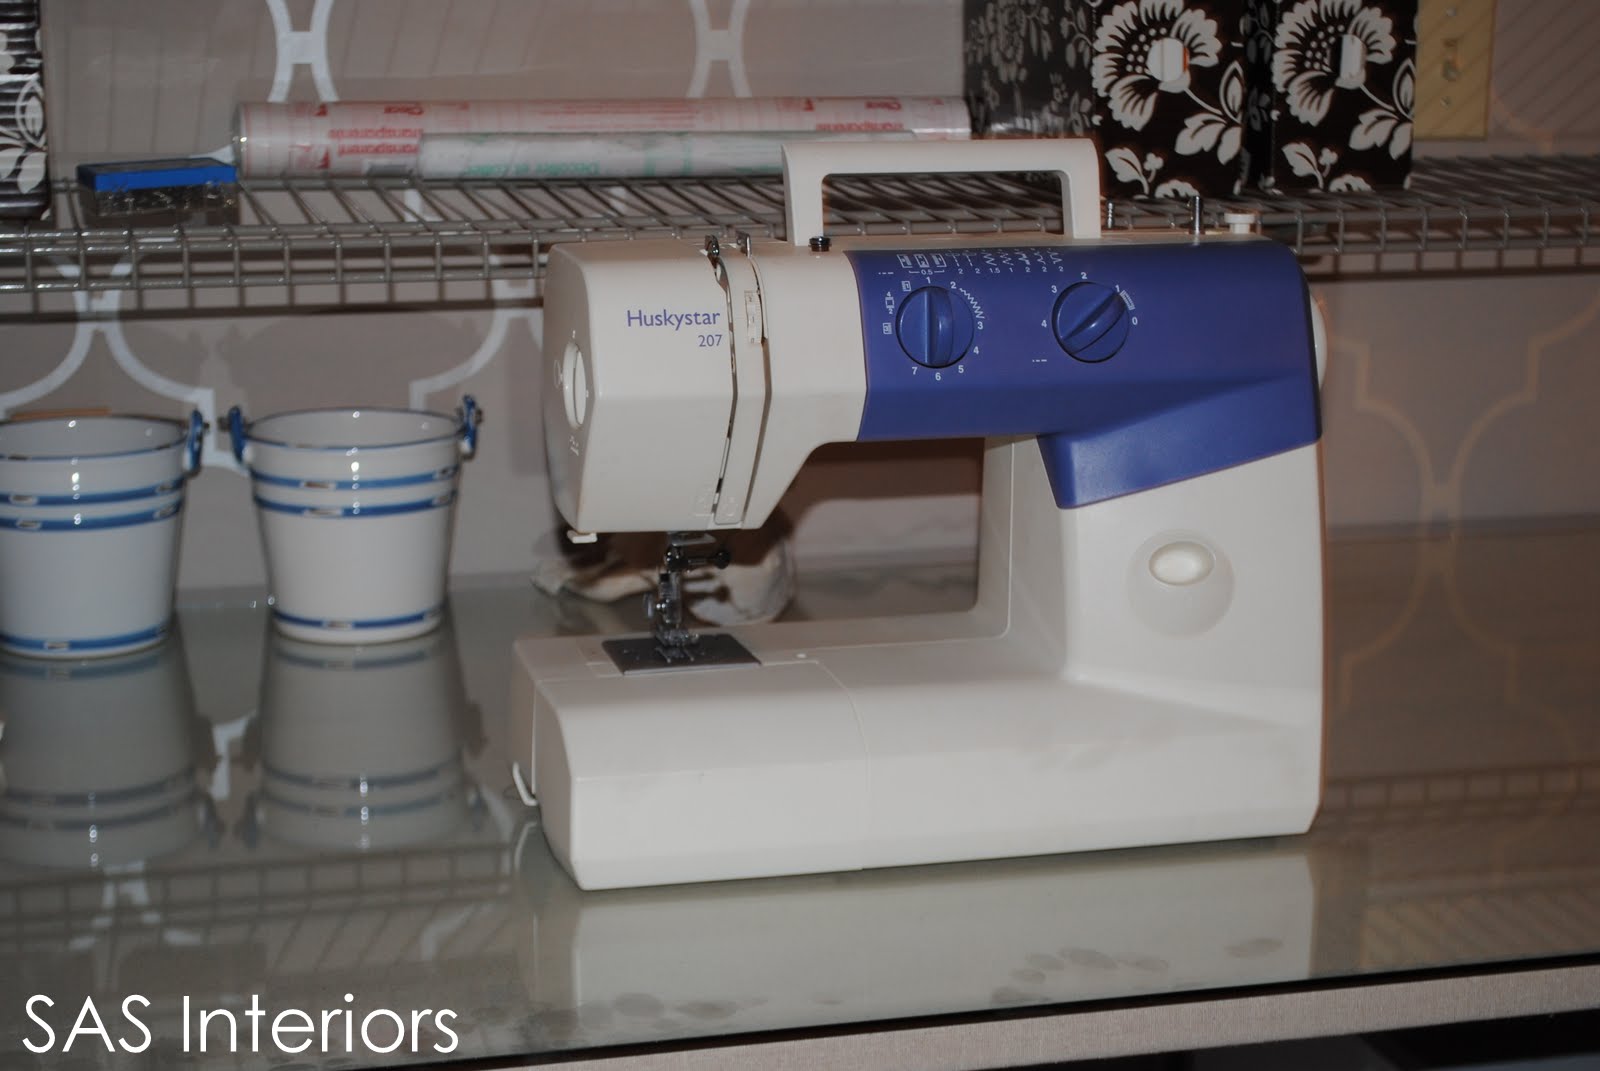
MY SEWING MACHINE.
I vowed (along with Jenn) to learn to sew this year. I’ve had my sewing machine for years, and it’s been in my garage for years (shhh….). Well It’s now on my desk!
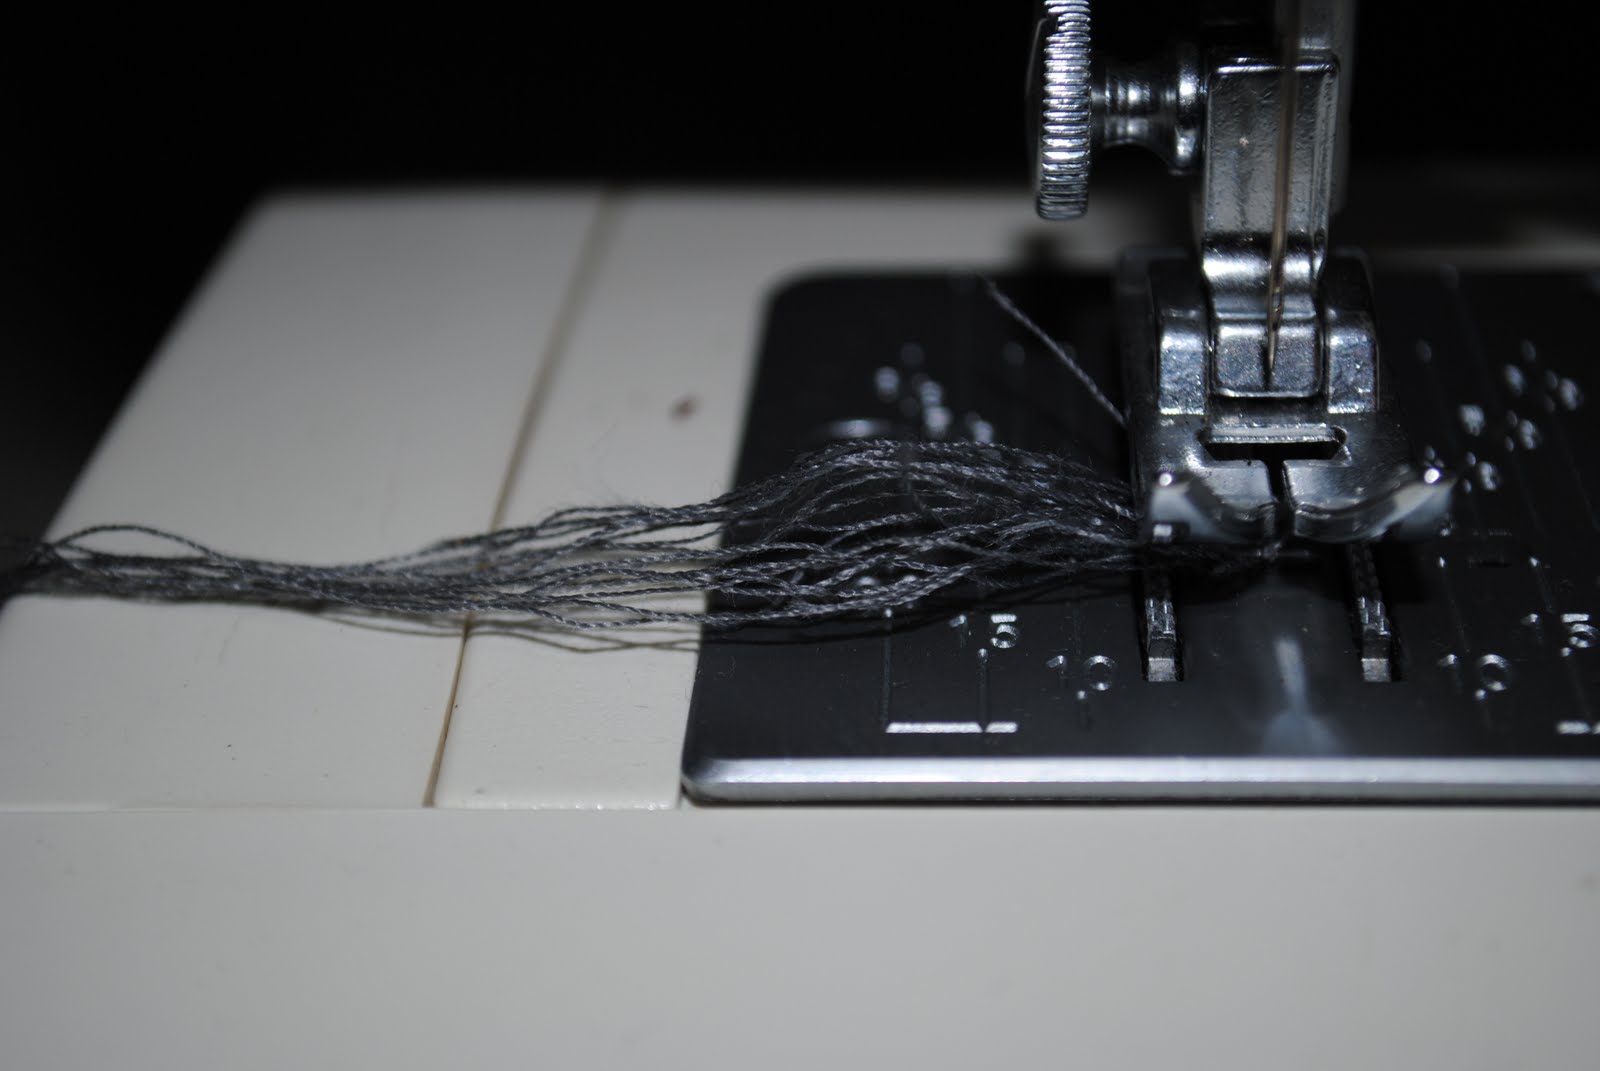
UGH…and this is the mess I left last time I used it. Well I hope to bring you new creations soon.
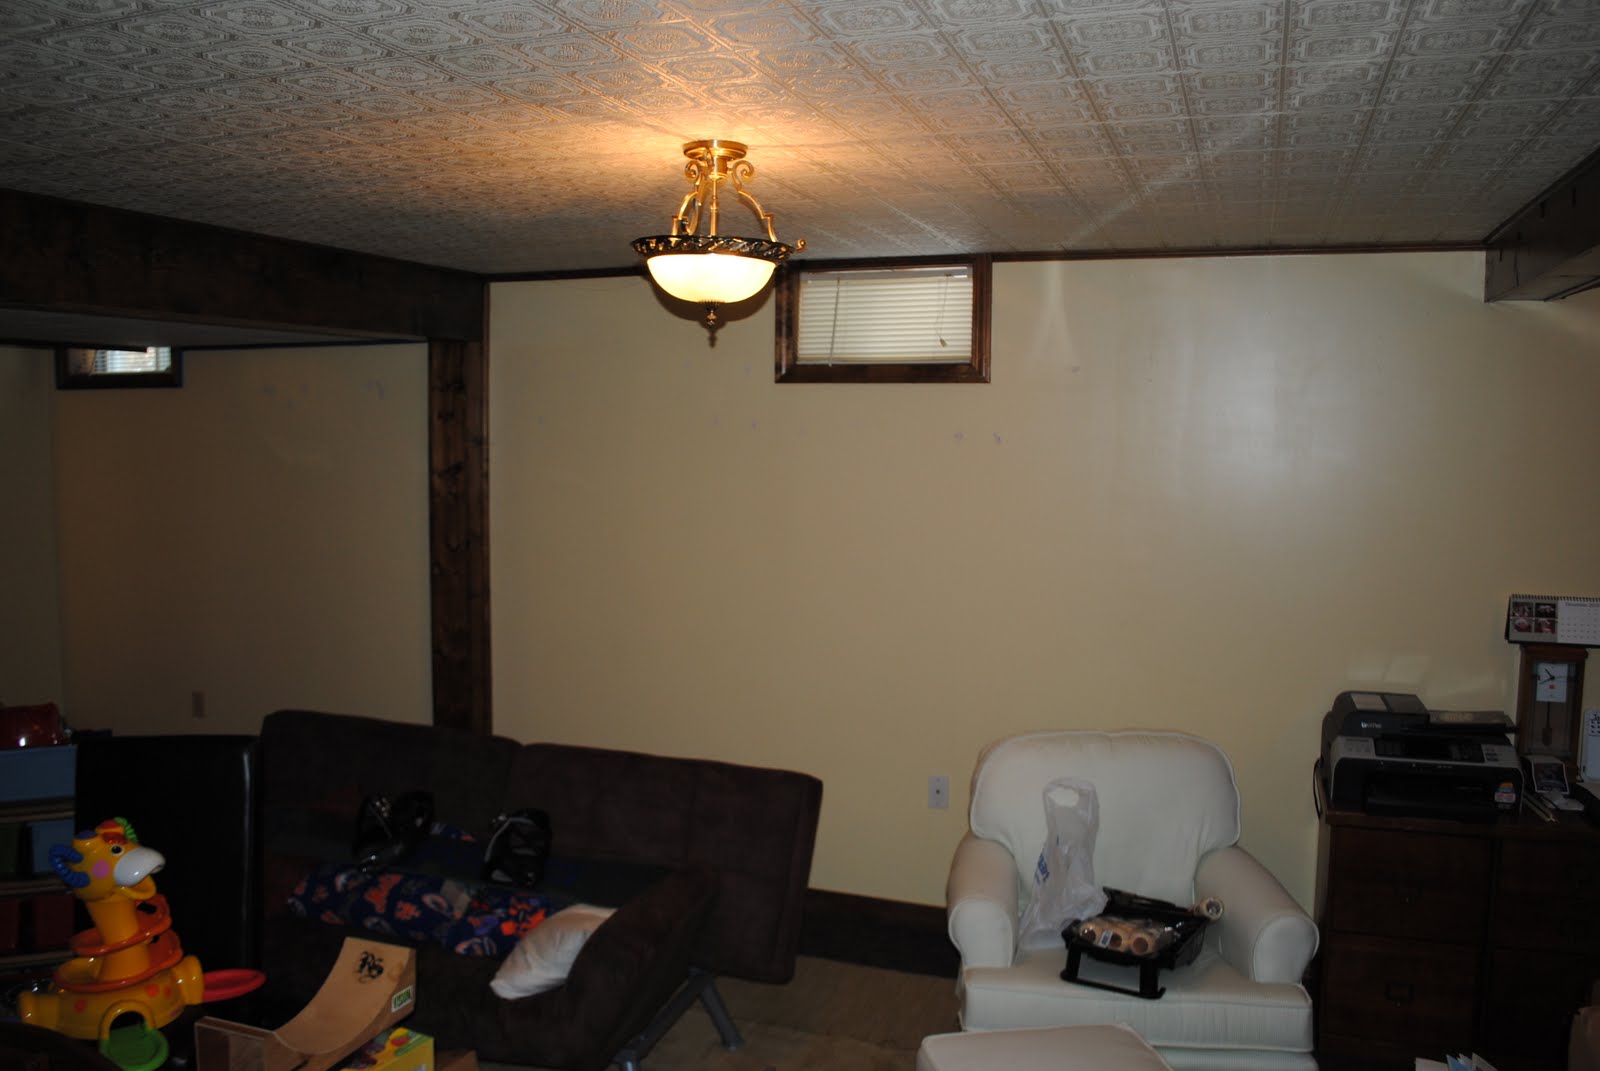
Even though I have some more work to do to complete the basement, here is a peak at the BEFORE.
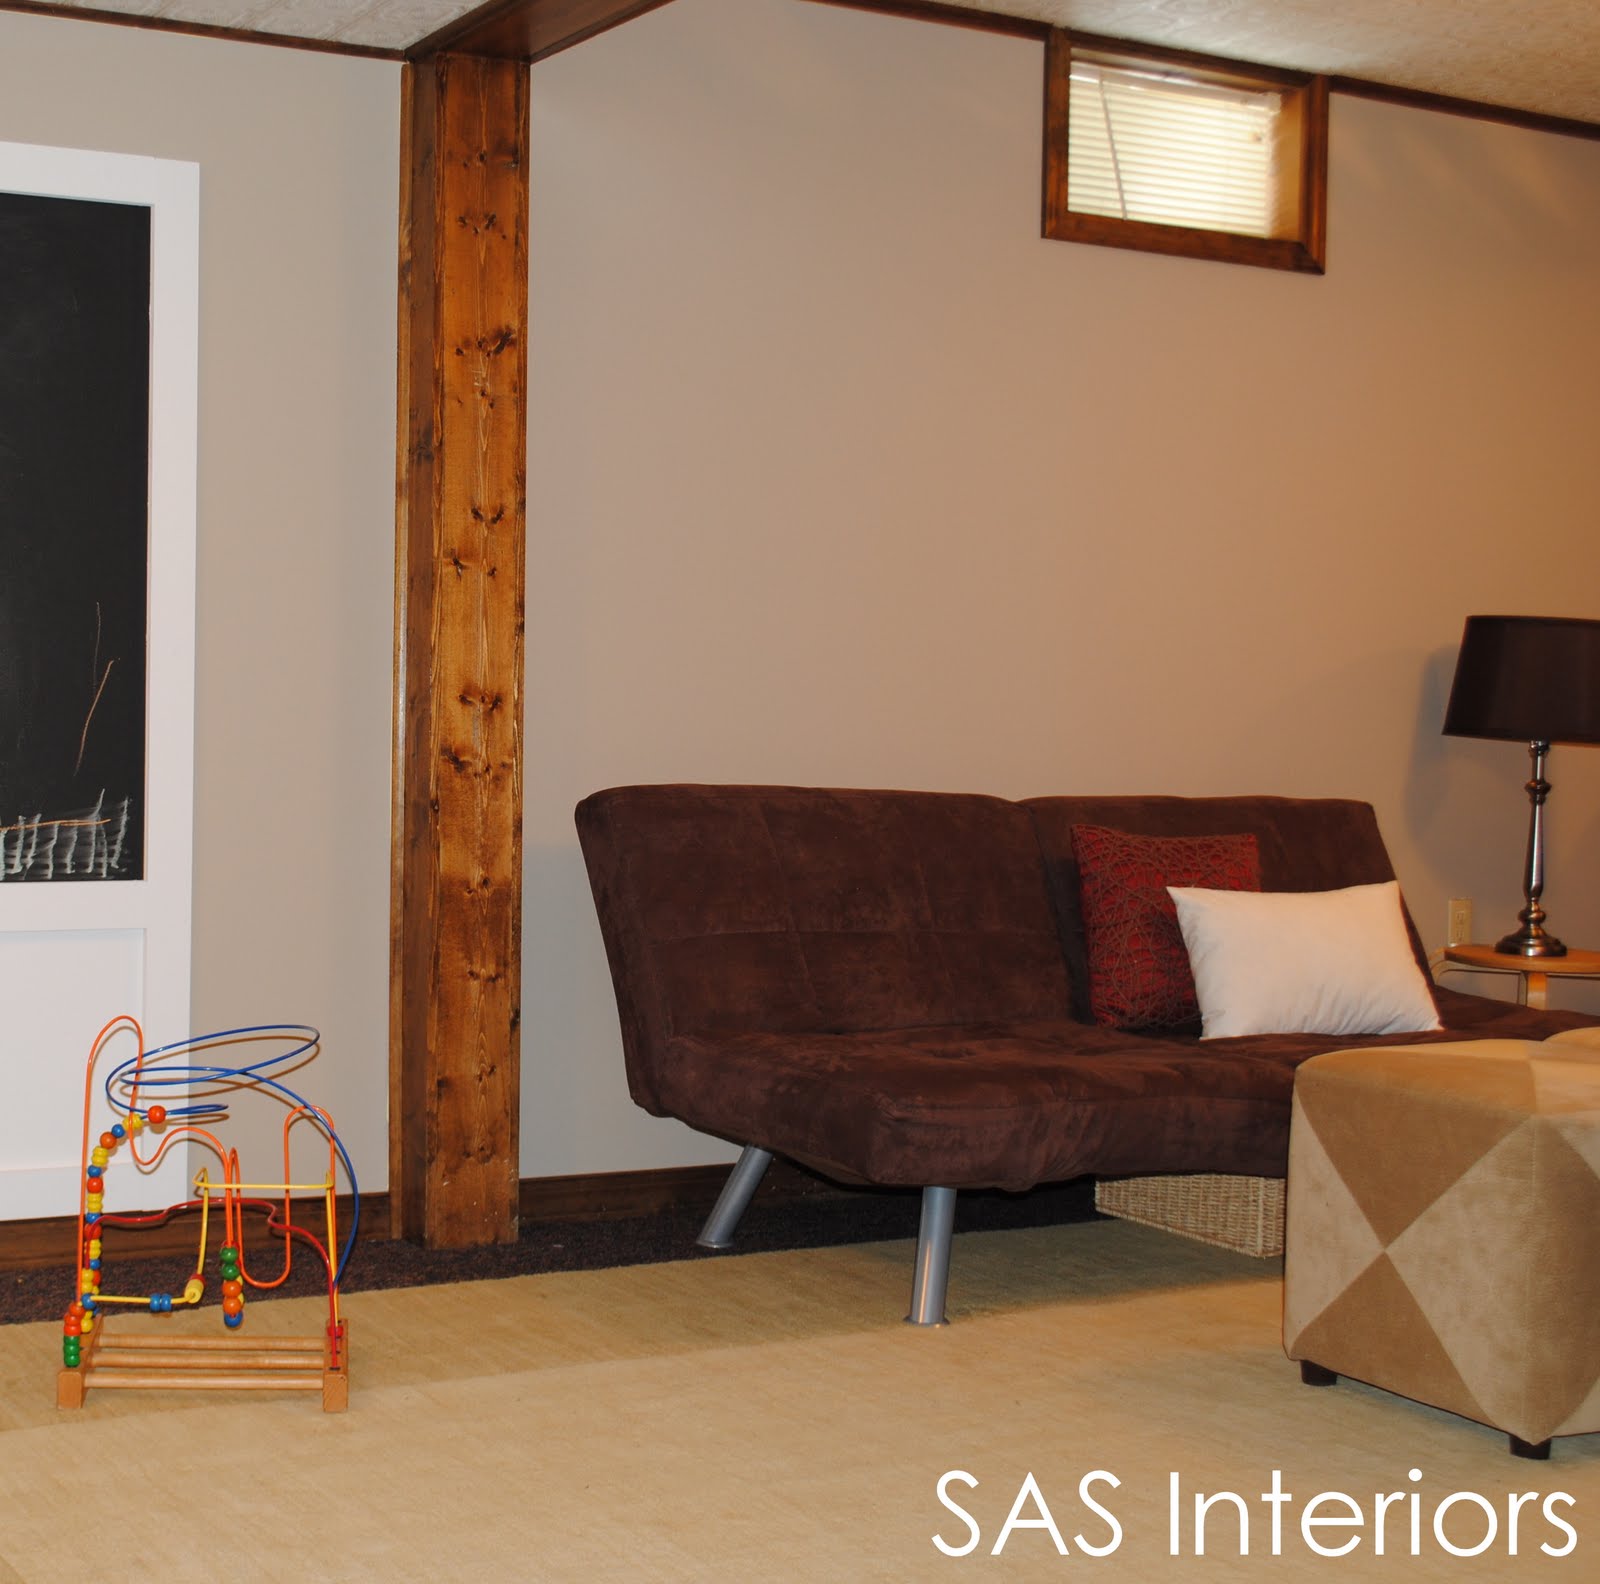
And here it is freshly painted and totally MADE OVER…no more yellow shiny walls….NOW ~ taupe colored beauty! This pic also gives you a little sneak peak of ANOTHER project I will be revealing soon….
I hope you’ve been inspired by my new Mom Cave / Craft Area!
I am so excited to continue my crafty ideas and to start sewing.
Do you have a Mom Cave or Craft Area that you call YOUR OWN?