Tag: saratoga springs interior design firm

Spring Mantel with Shades of Turquoise

Last week here in Upstate NY, the weather was amazing and I soaked up every bit of sun I could get. Now it’s a little chillier, but Spring and Summer will be here before ya know it! In the midst of the gorgeous weather, I took some time to put together my new Spring Mantel.

Over the past few months, I have been introducing more cooler colors than the warmer colors that I’ve lived with for many years. So my latest mantel creation has a whole lotta turquoise, which is a beautiful and dynamic compliment to the burnt orange focal wall.

Here it is… What do you think?

Turquoise is absolutely one of my favorite colors and from my past post, Totally Turquoise, many of you love it just as much!  It was kind of risky to have the mantel be dominant in one color and when planning it out in my head, I wasn’t sure if it was going to work.  I think by including a variety of different turquoise shades, the overall composition has alot of depth and intrigue, especially with the backdrop of the burnt orange wall.  Other textures and muted colors of browns were also added within to break up the monotony.

Here’s an in depth look …

Many of the pieces that make up my new Spring Mantel have been repurposed from around my home or picked up at local stores for very little.  The turquoise glass vase on the left is something new I bought a few weeks ago at TJ Maxx.  I had already had this turquoise-mantel-idea in my head and thought this would make a perfect addition – it was taller and I knew it’d make a great ‘anchor’ piece!  The glass mason jars which I found at an estate sale last year have been showcased on my mantel before and are filled with lentils and a votive candle. To the right is a tall glass jar filled with rocks from last years vacation to the beach.  I love displaying memories and these rocks are a beautiful and quiet shade of blue…  a perfect compliment to the other bold and vibrant colors.

One of my favorite upcycling things-to-do is paint old, used glass jars – tomato sauce jars, apple sauce jars, jelly jars, any jar will do! It’s so easy and unexpected.  In the Blue Label wood box stand two sauce jars that I added a little color to (it’s actually the leftover paint from my kids bathroom cabinet).  My mantels are always about layering, so in front of the wood box is a cute little turquoise pitcher and to the right is a lantern, both of which I purchased at Homegoods.

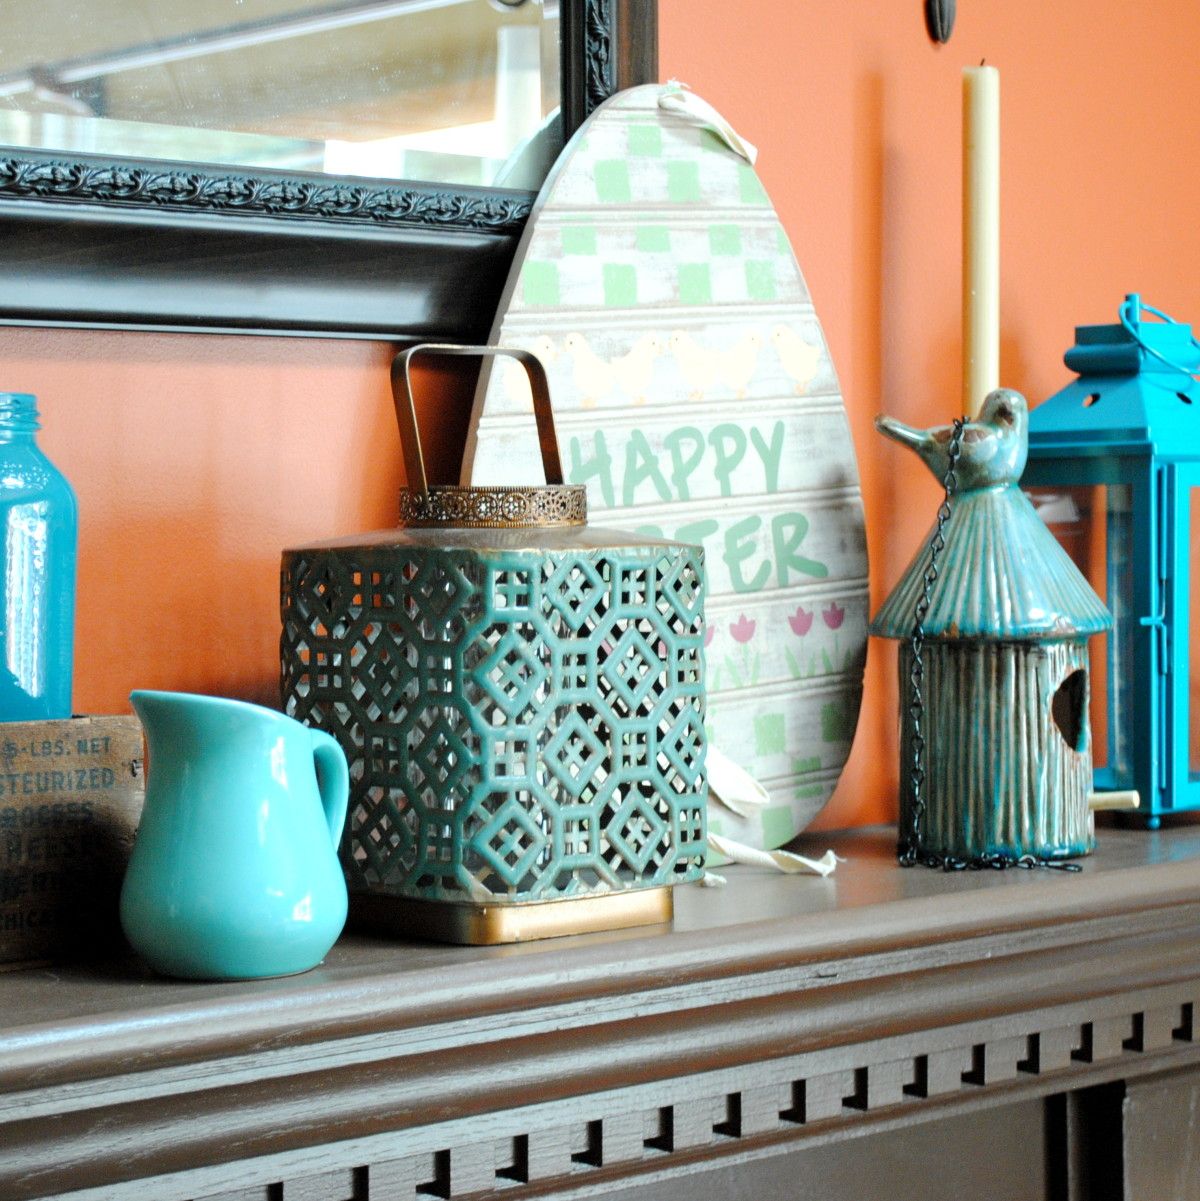
Of course, I had to add a touch of Easter decor within my Spring mantel.  I love this egg shaped Happy Easter sign that I’ve had for years (forget where I got it), but in a few weeks once the Holiday is over, it’ll be swapped out with a new Spring sign (not sure yet what it’ll be).

Continuing to the other side of the mantel, I added a sweet distressed turquoise ceramic bird feeder.  Originally intended for my daughter’s room, its so cute and fit perfectly amongst the like colors. To “anchor” the other end, I finished the mantel with two different sized bold turquoise lanterns that I purchased from Target.  They have some awesome colors this season like lime green, hot pink, and of course turquoise.

I also whipped up some fun new pillows with accents of turquoise.

Isn’t that owl fabric so cute?!  Love it with the brown and white chevron.

And this is how the entire room looks all pulled together for Spring.  It’s so different from last year’s quieter, frappe colors.

I think this is my favorite mantel design yet!  What do you think?

Do you love turquoise just as much as I do? 
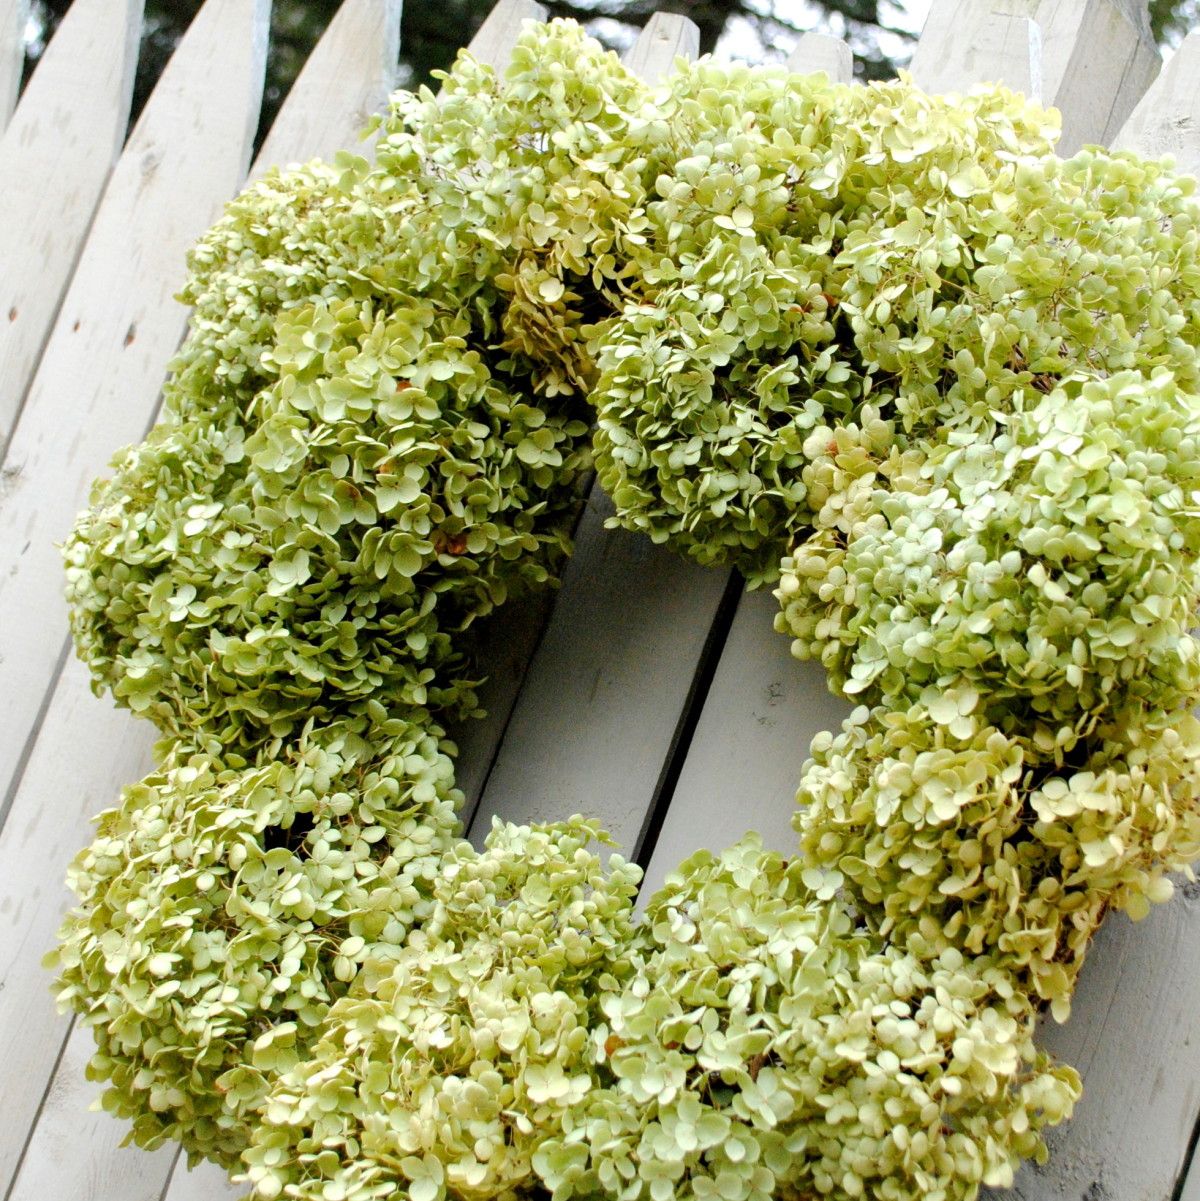
Dried Hydrangea Wreath

It’s officially Spring! This is definitely a favorite time of year for me when the days are longer and the temps are warmer.  The winter was pretty non-existent in Upstate NY this year, so thankfully a lot of projects that were on the backburner till Spring, already got finished. Over the weekend when the weather was in the 60s and sunny, we started tackling our first outdoor project of the year, but I stepped away from the cutting and hammering for a moment to make this beautiful Dried Hydrangea Wreath.

I had anticipated making this wreath in the Fall and cut off a bunch of hydrangea flowers from my mom’s garden before the first freeze last year.  Unfortunately, I never got around to it, so the hydrangeas sat in my garage since then, but I knew they’d make a beautiful Spring wreath when the time came.

I started off with a grapevine (or twig) wreath that I purchased for $2.88 at AC Moore.  That was the only part of this project that I had to purchase, so essentially it cost me less than $3 to make – no $40 wreath for this girl!

The key to making a full, yet balanced dried hydrangea wreath is to start with the larger flowerheads as the base around the wreath, and then add in smaller flowerheads.

Starting with larger hydrangea flowerheads, I gently threaded the stems through the grapevine wreath.

I then added the medium sized flowerheads and filled in the areas around.

I finished the wreath by adding the smallest flowerheads to any of the open gaps.  The smallest size is really the most important because it really completes the fullness of the wreath.

Note: As you’re threading the stems through the wreath, you may need to secure them with floral wire.  I didn’t need much since the stems were long enough and were tucked fairly tight between the twigs of the grapevine wreath.

Once all of the dried hydrangea flowerheads were added to the wreath, I trimmed the stems in the back of the wreath with a scissor.

And it was complete.  The entire wreath cost less than $3 and took me about 15 minutes to create – simple and inexpensive!  How much better can you get?!  And here’s the result…

I want to mention that the hydrangea leaves are fragile, so it’s important to create this wreath with a gentle hand.  This wreath is also not great for a high traffic place or door (ie: front door).  I’ve got the perfect spot for it though… stay tuned!

Have you made a new wreath for the Spring?

I link my projects to some of these parties: Skip to My Lou, Dittle Dattle, Between Naps on the Porch, Today’s Creative Blog, Stories of A to Z, All Things Heart & Home, Savvy Southern Style, House of Hepworths, Finding Fabulous, Creation Corner, The Shabby Nest, Tatertots and Jello, Thrifty Decor Chick, Tip Junkie

How To Glaze a Cabinet Using Stain

I’ve glazed, antiqued, and distressed furniture for a few projects that I’ve featured in the past, but during the makeover of my master bathroom, I tried a completely new and different way of glazing.  Instead of using my water/paint technique, this time I used stain.

As I mentioned in the master bathroom reveal, I had envisioned a slightly darker cabinet with a light colored glaze.  I had anticipated painting the cabinets, then instead of using my watered-down-brown-paint technique like I’ve done in the past for my cabinet and chair, I thought it would be interesting to try a watered down white paint technique.  In my head it was the perfect idea, but unfortunately it didn’t work – URGH!  I was knee deep already into the project, so I needed to come up with some sort of resolution to turn it around. But how? (that was the million dollar question brewing in my head)

I had remembered that I read a post that Kristi wrote on How to Paint and Glaze a cabinet, in which she used stain to age the piece of furniture.  So I went with it… how much harm could stain over paint do? (it can do alot, but what the heck, I gave it a try)…

So let me step back and share the play-by-play.

I started off by removing the attached toilet paper holder and sanding the entire cabinet with my electrical sander (I also manually sanded the crevices). Plus, I taped the freshly painted walls with painters tape.

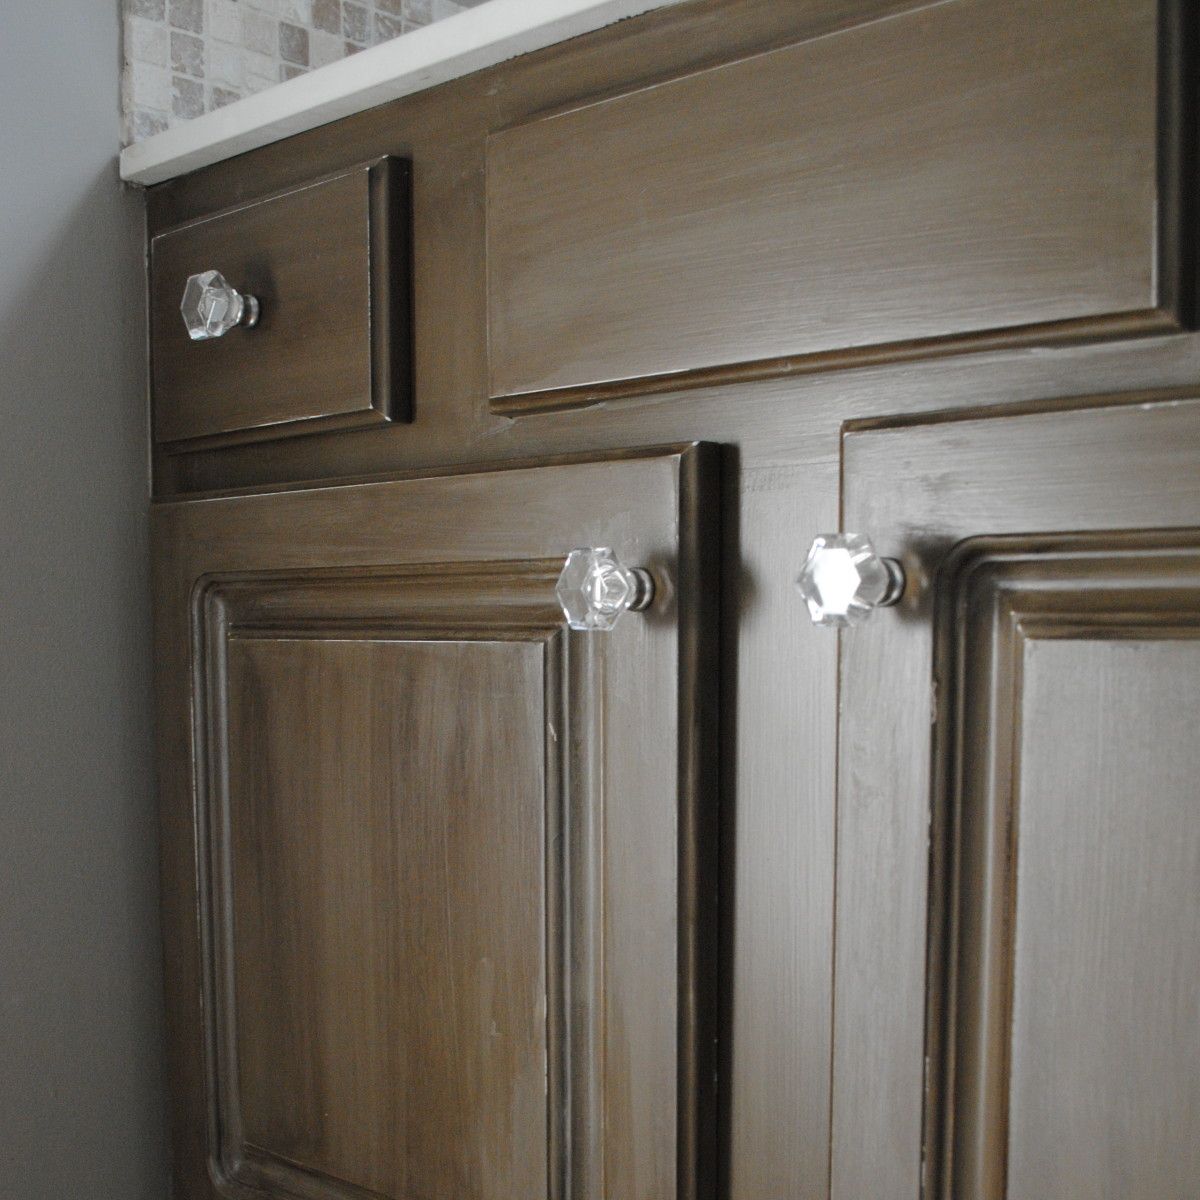
I then primed the cabinets using the one-and-only Kilz Primer, and followed it by painting them a darker taupe color, BM Texas Tan, using my awesome Purdy Brush 😉

Ok, here comes the fail part {tears and frustration} well not really… just annoyance that it didn’t work as desired.

So after removing the white mixture (and some of the base coat too), which I thankfully only tried on a small area of the cabinet, that idea was ditched.  I repainted those areas and started with the stain.

Glaze is meant to be imperfect and give the look of age.  More or less stain can be used depending on the degree of “age” you desire.  If you’re looking for a really antiqued look, you can add “wear” marks to the edges using sandpaper and natural looking dents by using a hammer or chisel.  Also to add more definition to the overall look, add extra glaze in the crevices of the cabinet or piece of furniture.  You can use a smaller brush to get into the indented areas or brush on a second coat of stain in the crevices, and follow it up by gently wiping away so more stain remains.

After completing the entire cabinet, take a look at the result:

Once the entire piece was “stained”, I went back and added some slight distressing.  Not as much as the glazed turquoise chair, but just a little to add some faux “aging”.  And of course to top it all off, I added two coats of polyurethane.  And voila.  The cabinet that I never envisioned creating turned out pretty good, wouldn’t ya say?!

Looking for more tips and tricks on how to age, antique, or distress furniture, check out this post I wrote: 5 Tutorials on How To Distress Furniture

Have you ever had a project FAIL that you turned around to create something you love? How have you added “age” to your furniture transformations?

I link my projects to some of these parties: Skip to My Lou, Dittle Dattle, Between Naps on the Porch, Today’s Creative Blog, Stories of A to Z, All Things Heart & Home, Savvy Southern Style, House of Hepworths, Finding Fabulous, Creation Corner, The Shabby Nest, Tatertots and Jello, Thrifty Decor Chick, Tip Junkie

How To Achieve a Well Styled Bookcase

There is truly nothing like a well styled bookcase filled with books, accessories, collectibles, and photos that add warmth, intrigue, and uniqueness to a space.  I’ve been doing some styling lately for a few clients, and it’s been so enjoyable to start with a blank slate and build from the ground up by adding different elements and layers to create an engaging and interesting composition.

Whether built-in or freestanding, bookshelves can represent and showcase you and your families passions, interests, and hobbies.  They can make a bare wall go from blah-to-beautiful and make an overall space feel larger and taller.  No matter your budget, a well-styled bookcase can be achieved using random accessories from around your home, discount store finds, collectibles, and do-it-yourself creations.

The key to the overall look is how to pull the accessories together to create an aesthetically pleasing result, yet not add too much so it looks cluttered and not add too little so it appears bare.

So how do you achieve a well styled bookcase?
And how do you create an aesthetically pleasing result?

Let’s take a tour of some amazingly well styled bookcases and dissect ~

This is one of the BEST styled bookcases that I’ve ever seen – by Jennifer of Dimples and Tangles.  It has the perfect balance of books, accessories, collectibles, and pictures. The overall setting is engaging, intriguing, and has just the RIGHT amount – not too much, but not too little.

The key to good balance is layering from front to back and adding elements at varying heights. For instance, let’s take the bottom shelf…  The tray is propped up and leaning on the back of the bookcase.  Layered in front of it, is a horizontal pile of books with a filled bowl on top.  An appropriate balance of books and accessories has been achieved and the differing elements are of varying sizes.

The other interesting part of this bookcase is that two of the shelves on the right side were removed, which allowed for taller accessories to be added.  A tray has been turned into art by adding the ‘&’ symbol and hung at the back of the bookcase.  Layered in front is a slightly turned birdcage, a photo, and a small accessory.  Then behind that is a small pile of books with a slender, yet tall lamp – all creating a balanced composition.

In all, this small space has so much interest! Let’s pick apart another example ~This bookcase styled by Cassie of Hi Sugarplum is another awesome example of how to achieve a well styled bookcase.  Instead of leaving the backs of the bookcase white, a fabric back with a small geometric patten was added, which gives an unexpected and unique pop.  Using the same layering technique that I mentioned before, Cassie has a good balance between books, accessories, and pictures.  There’s not too much or too little of any element.  By adding framed art to the bookcase surround, another layer has been added giving the overall bookcase even more depth than before!

Want to take a look at another example?

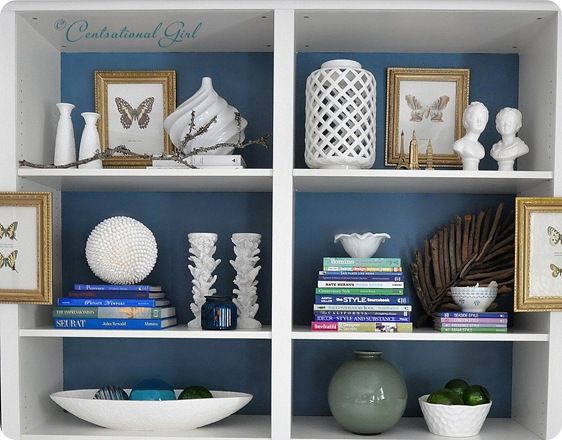
Another great example of a well styled bookcase is the wall-to-wall built-in by Kate of Centsational Girl.  After building this bookcase using 4 Ikea Billy bookcases, Kate used her amazing talents to accessorize the entire wall – WOW, what a task!

Instead of wallpapering the bookcase back like Cassie, Kate decided to paint them which allowed for books and accessories (ie: the white vases) to “speak”. Using a combination of horizontal and vertical layed books, Kate layered them with ceramic bowls, vases, diy creations, and personal momentos.  She also added framed art to the backs AND the fronts of the bookcase, which like Cassie’s composition, made the bookcase appear even deeper.

I think you get the picture by now, but here’s a quick recap on the key elements to achieve a well styled bookcase!

  1. Layer – Add elements to the back of the bookcase and continue it to the bookcase frame.
  2. Add Varying Heights – Incorporate elements with varying heights.  Display smaller accessories in front and graduate to taller and larger pieces behind.
  3. Mix it up – Display a mixture of books, accessories, collectibles, DIY creations, and photos
  4. Books Become Art – Books are beautiful.  From their color to their typography, books are truly art, so let them tell a story.  Display them horizontally and vertically, by color, or by subject.

Here are a few more of my favorite well styled bookcases.

White walls and a white bookcase, allow books and accessories to pop – via BHG

The dark painted bookcase back allows for the books and accessories to “have a voice” – via YHL

Even if you have alot of books, alternate their position between laying horizontal and vertical, then add accessories throughout – via The Art of Doing Stuff

A good balance between books, accessories, and photos is key to achieving a well styled bookcase – via Cottage and Vine

This bookcase has a good mixture of accessories at varying heights – via I Suwannee

Books become art!  This well styled bookcase has some leaning books against a high pile behind to show their beautiful covers.  Accessories are added to give scale and break up the monotony – via Lonny Mag

I’ve always loved this bookcase composition and shared it in a previous about creating a dazzling display. This white bookcase was dressed up with the addition of grasscloth wallpaper at the bookcase back.  It adds an unexpected touch to a typical built-in – via Cottage and Vine

The beauty of this bookcase display is the common thread of color in the books and the accessories.  The hues of gold, white, and varying shades of blue create a cohesive composition – via HGTV

This backless bookcase allows for the vibrant wall color to pop through the color coordinated books – via Style at Home

Creating a well styled bookcase can be tricky and a challenge for some, but with practice and patience a beautiful display can be achieved.  If you have no idea where to begin- no problem!  I love styling bookcases, fireplace mantels, tops of cabinetry, and truly any place in the home.  Read more about my Interior Design Services and Contact ME – I’ll be glad to help no matter where you live.

What do you display on your bookshelves?  Do you find it difficult to know where to begin and what to display?