
Tag: Jenna Burger Design

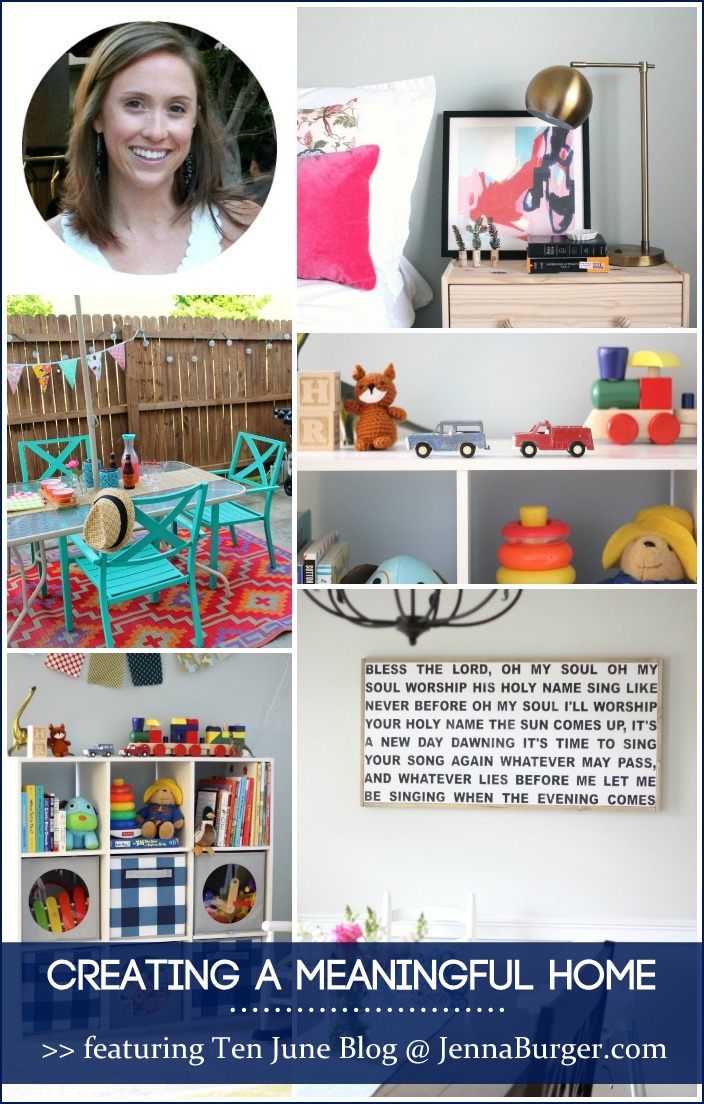
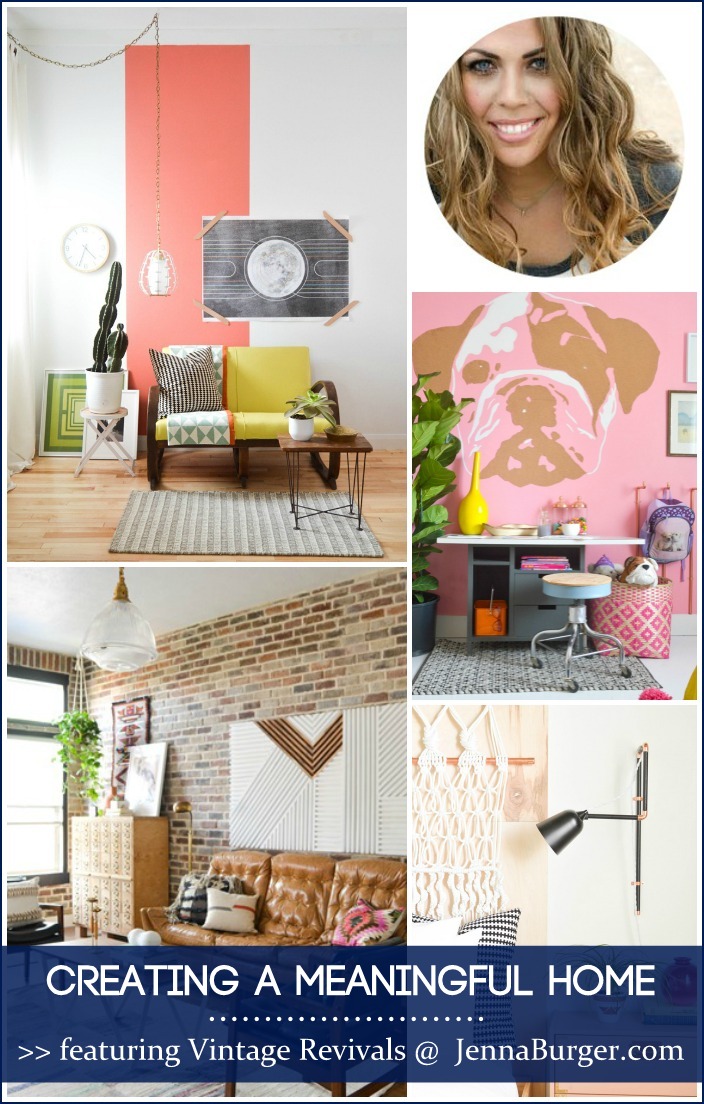
Creating a Meaningful Home: A Girl and A Glue Gun

CREATING A MEANINGFUL HOME blog series featuring Bloggers sharing the story of their home: FEATURED is Kimbo of A Girl and a Glue Gun - a MUST READ story!

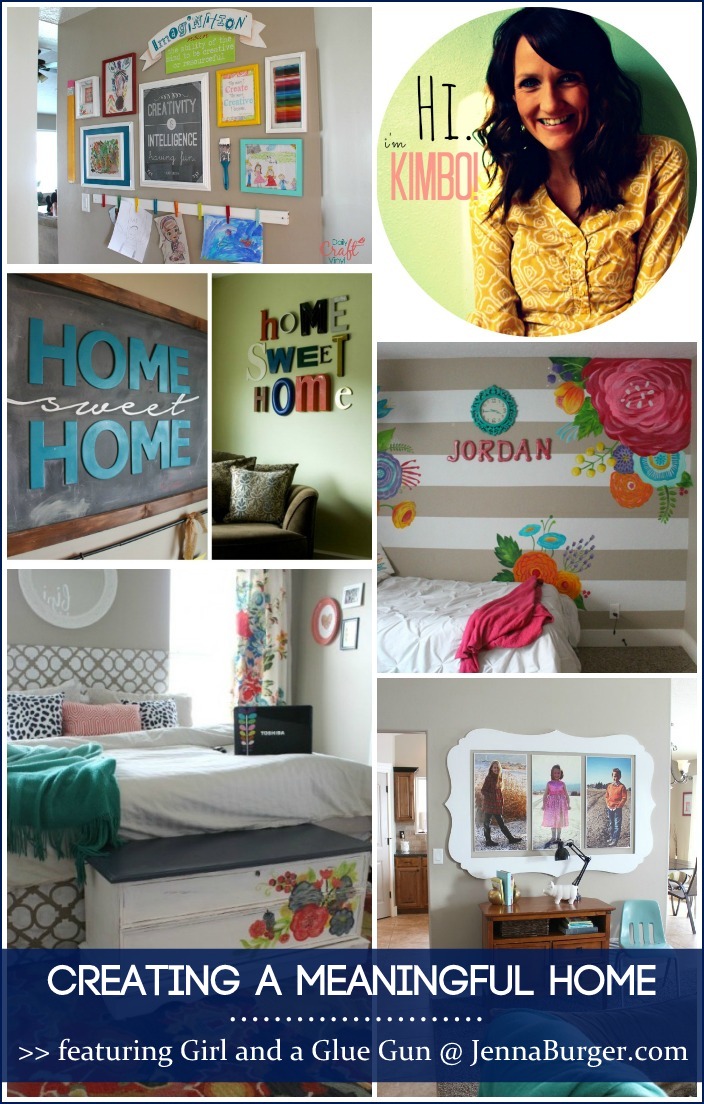
Today’s guest post for Creating a Meaningful Home blog series: Year 3 is Kimbo of a girl and a glue gun. Welcome Kimbo…

Hi! I’m Kimbo from a girl and a glue gun

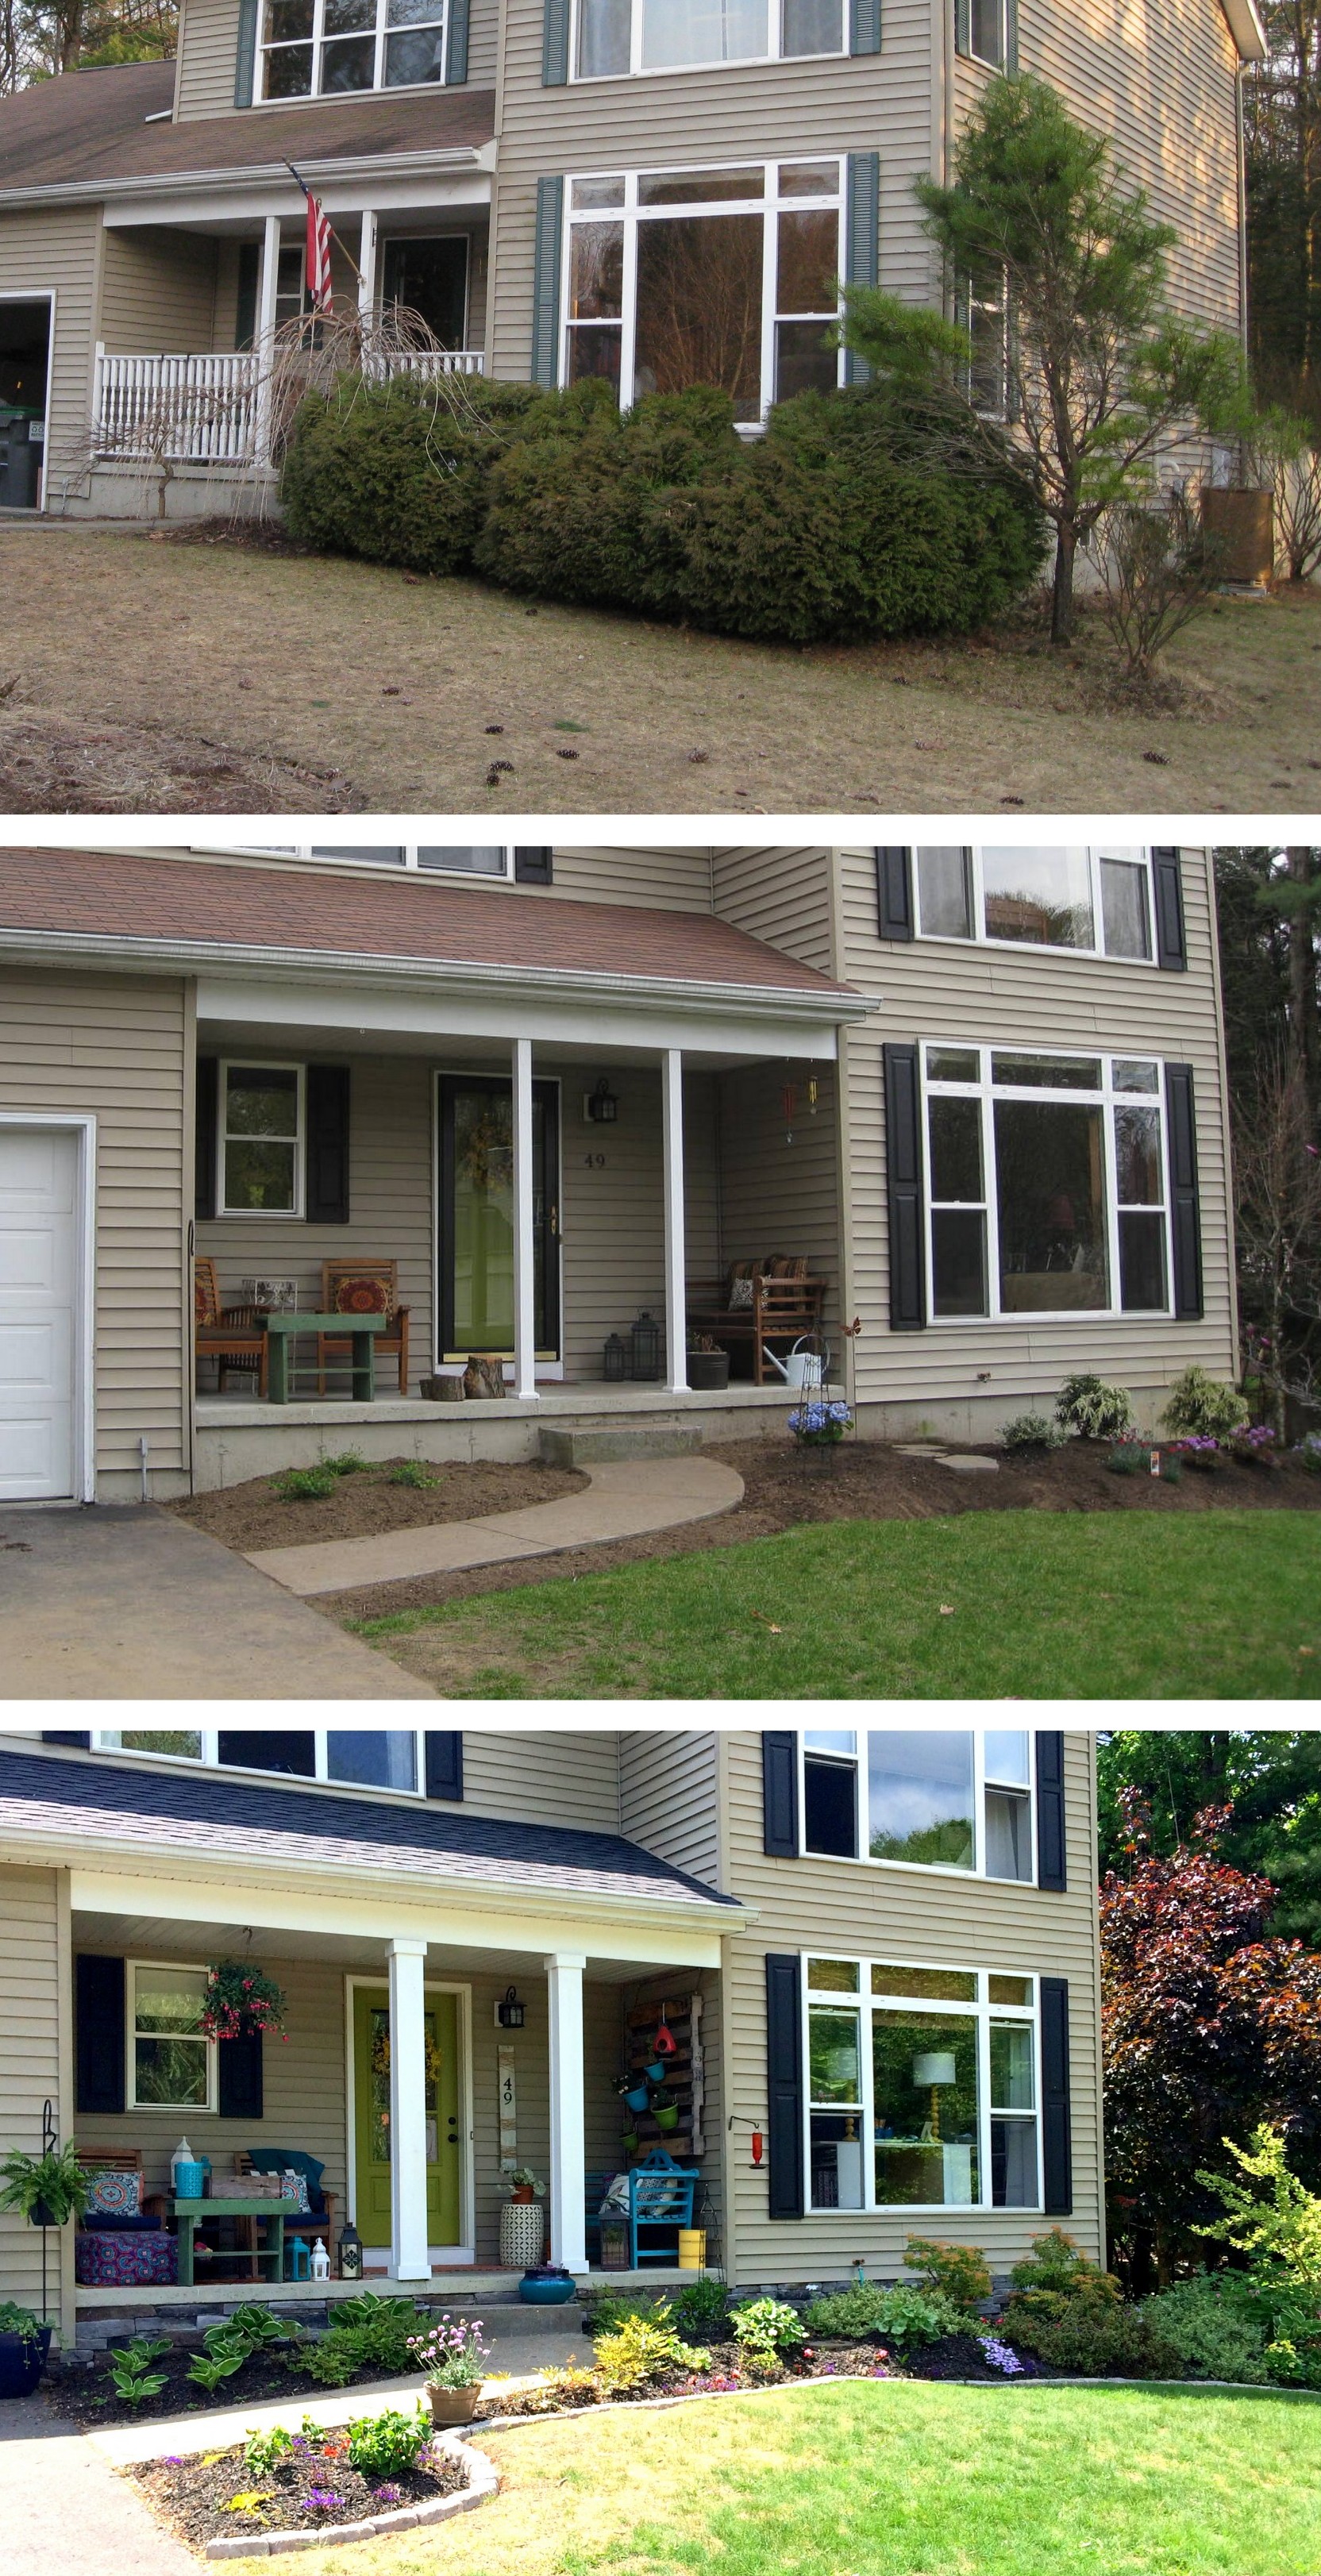
My house has been an uphill battle. I have really struggled because I know it’s a permanent home and I really want to make it MINE. I’m not going to spout off on interior design rules and guidelines…cause I don’t think there are any. You can do matchy matchy. you can do random colors everywhere. You can have white clean walls with no color. You can do hot pink walls! But I do want to share some things that I do that make my home a meaningful home that screams KIMBO.

1. Put your own spin on things

Pinterest is awesome. I love the wealth of inspiration that comes from it. I have way to many pinterest boards full of the coolest things. But I always try to put my own twist on the ideas that I see and love. I like things to be my own. Here are some pictures of the inspiration pictures I have found that spurred me making my own! home sweet home

source source

inspiration picks

source source

photo ledges

source source

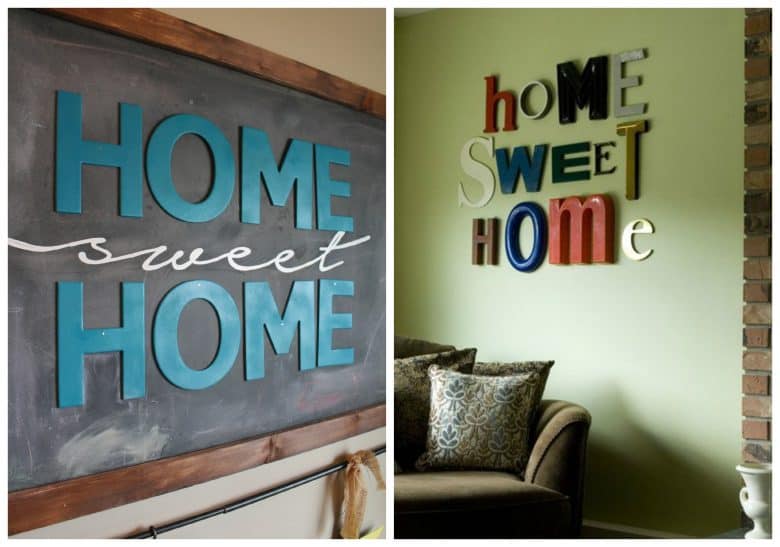
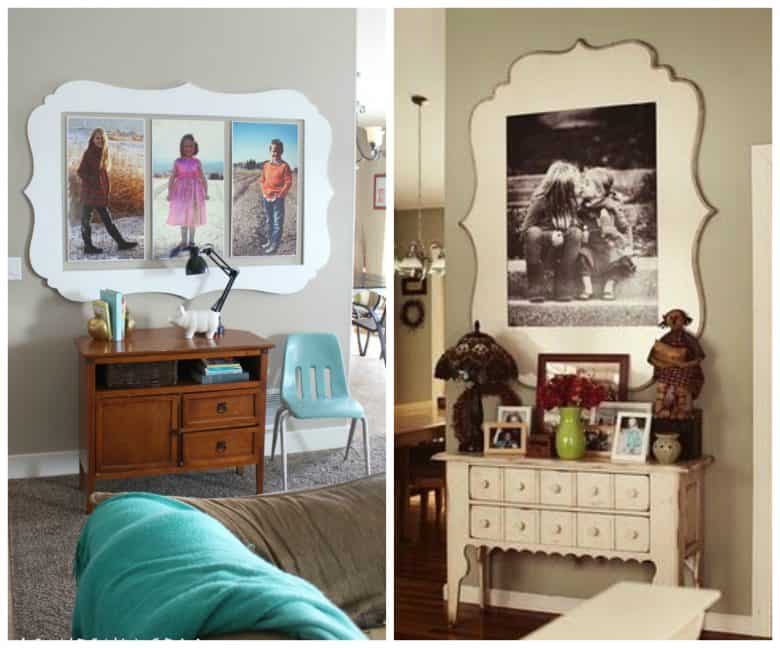
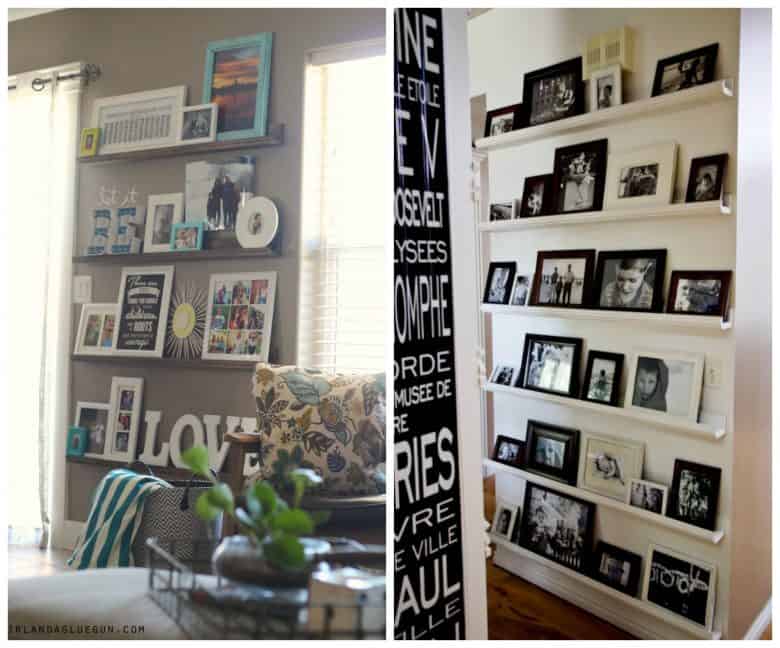
The basics are there…but I truly feel like they are unique to me.

 2. LOVE your crap—-

Let me tell you about steve. I love him.

IMG_6475-682x1024

source

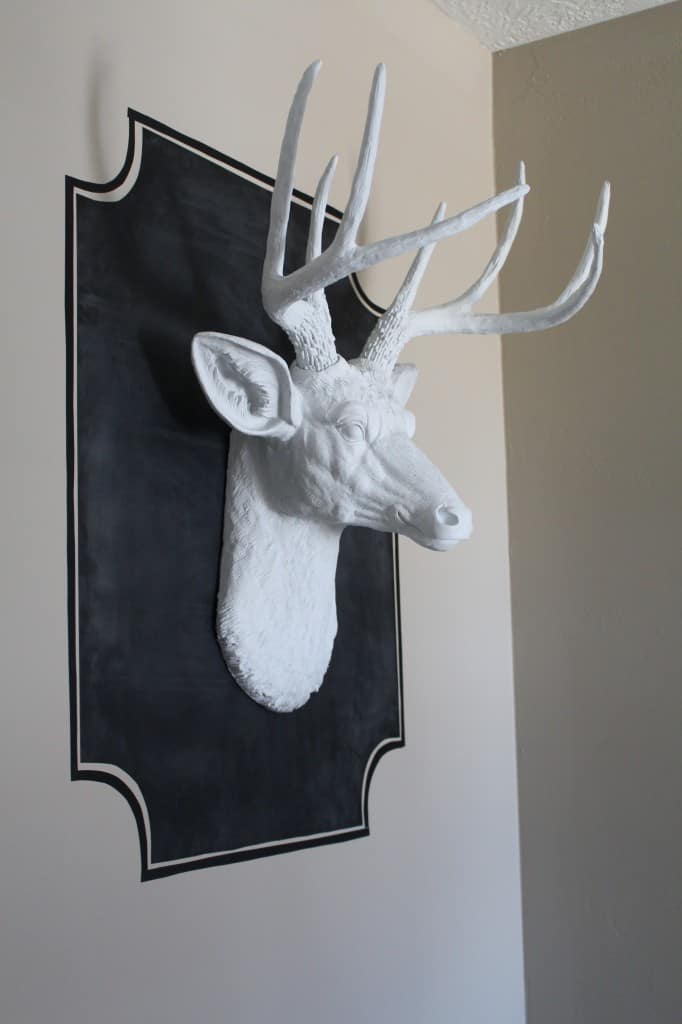
I think he’s totally awesome I want about 45 of steve’s cousins (the unicorn and the shark are my fav) And when people come in my house I either get, “oh. love him.” or “oh. that’s….interesting.”

Steve is not everyone’s cup of tea. My husband thinks I should paint him to look real (even though if I found one that was painted real I would spray paint him white) But I love him even though not everyone does. So don’t try to decorate for everyone’s style….Just buy or make things that YOU love…cause you have to see it every day!!!

on air sign

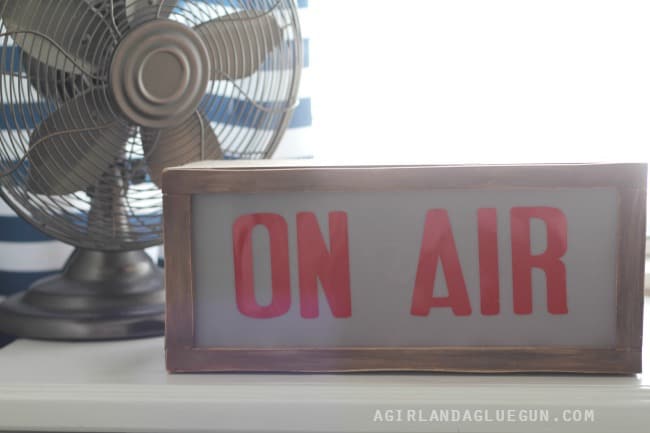
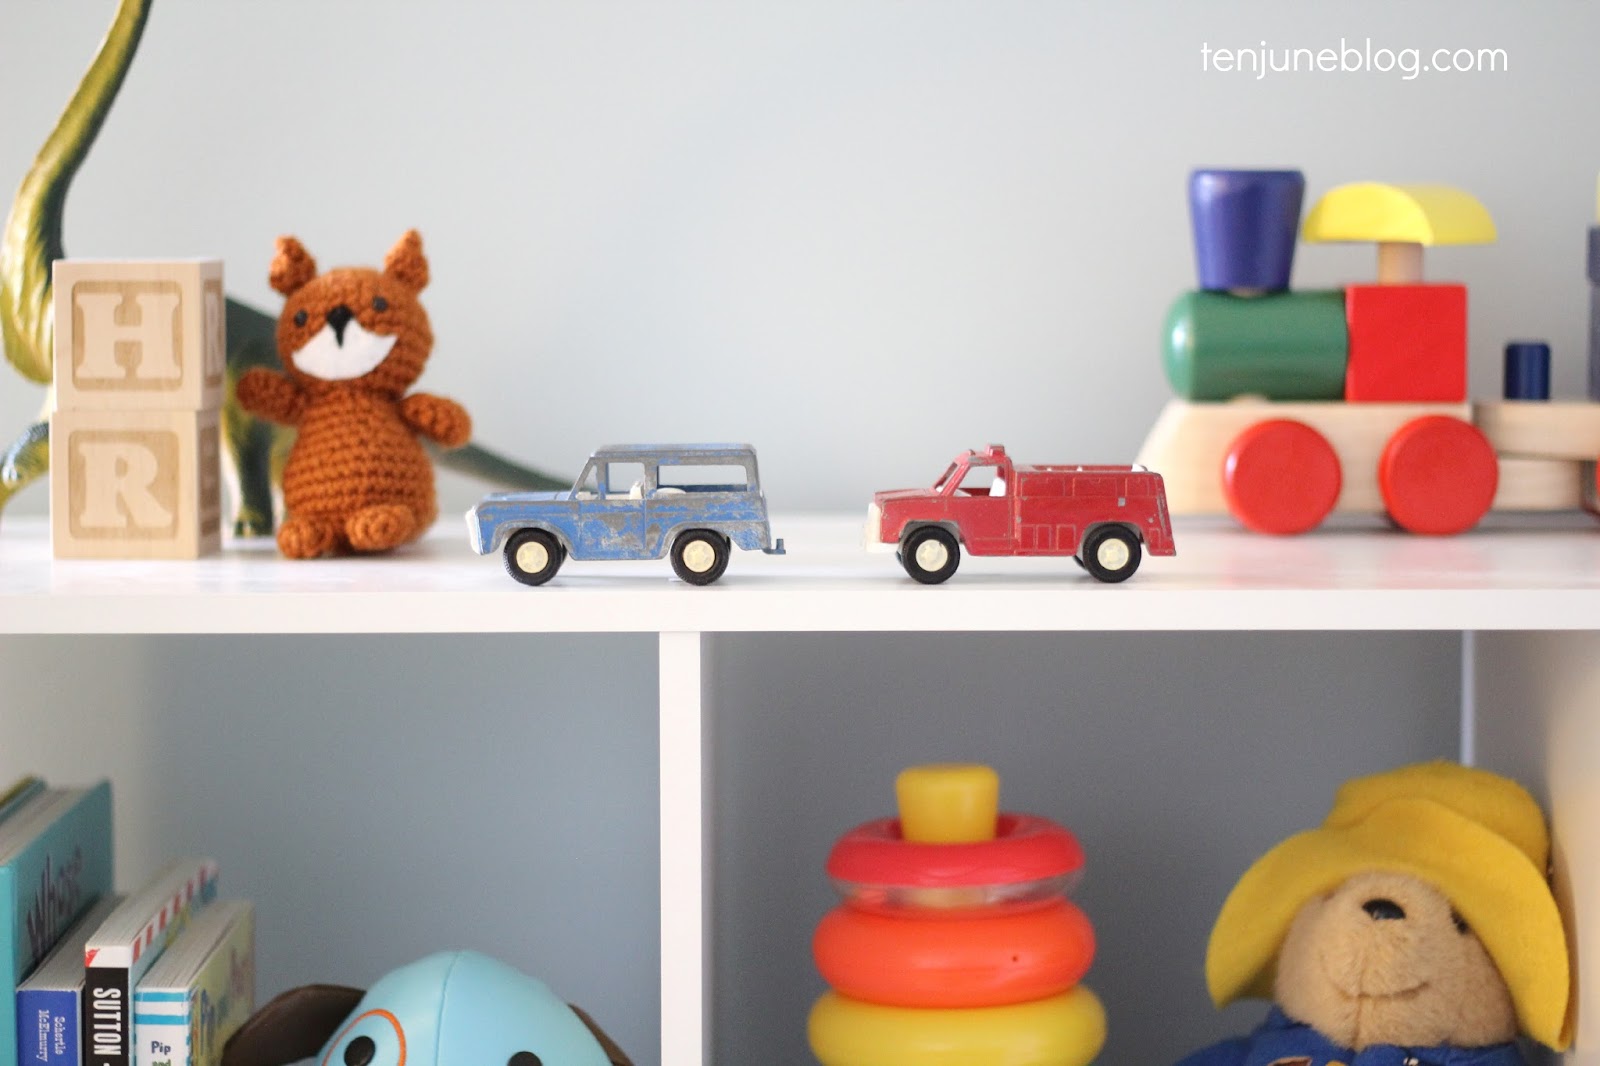
I try to fill my house with everything that makes me happy..down to the smallest tchotchke . I know where and when and how much each little thing costs or how long it took to make.
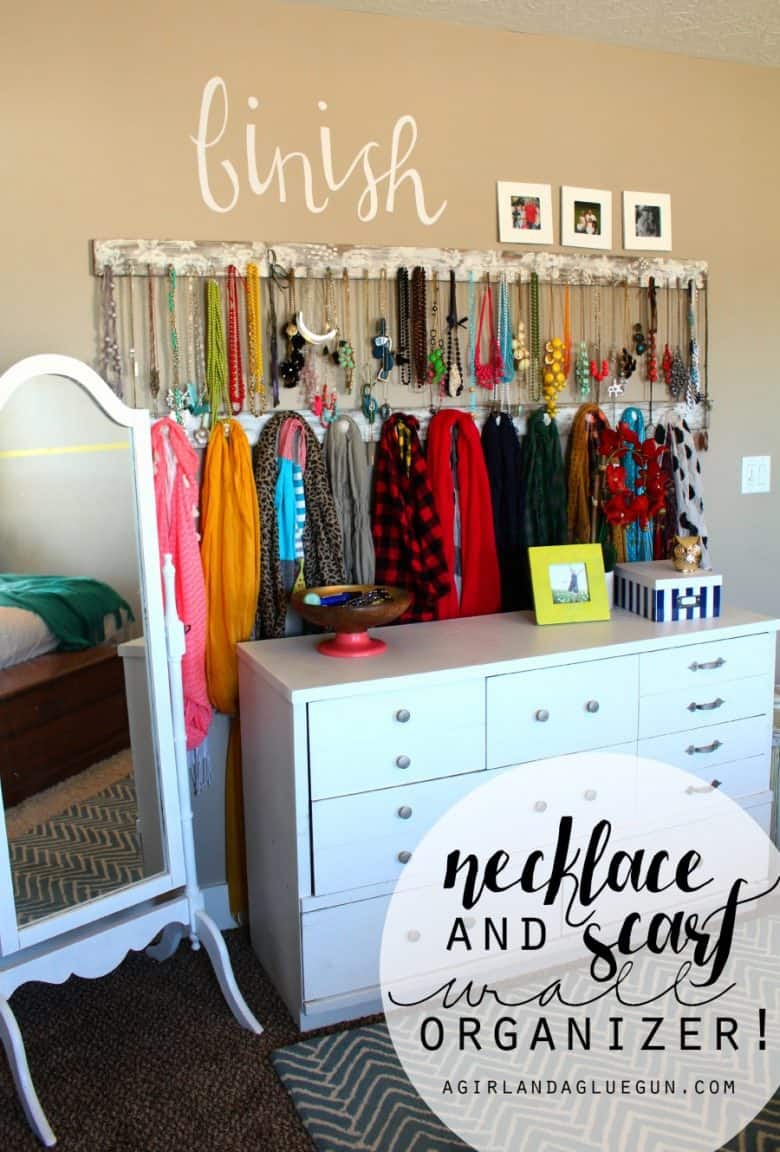
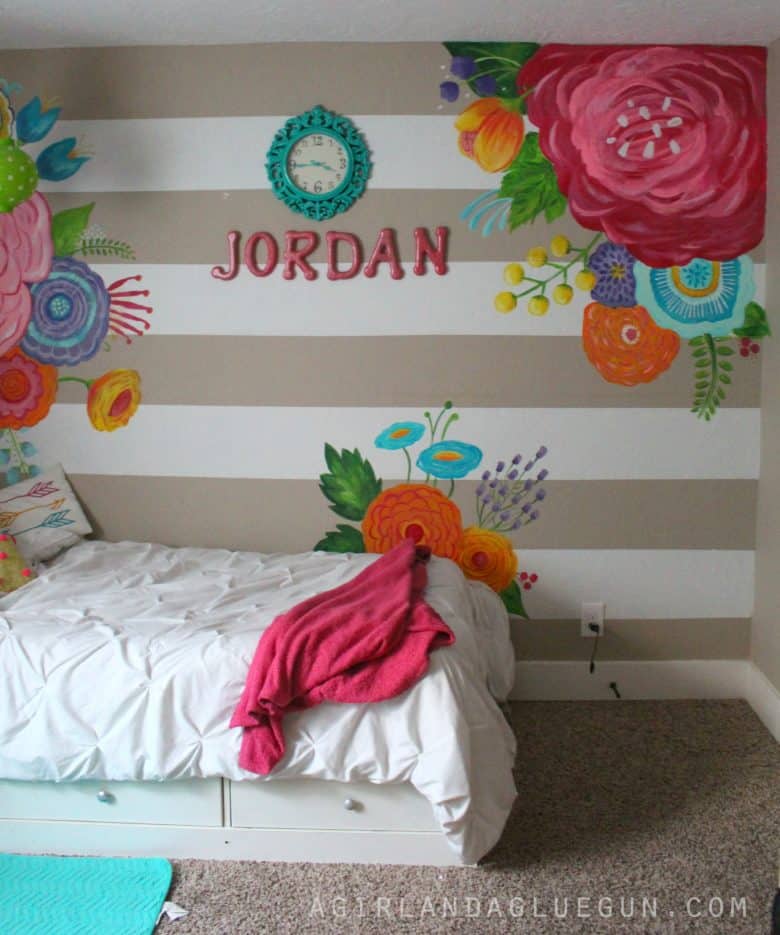
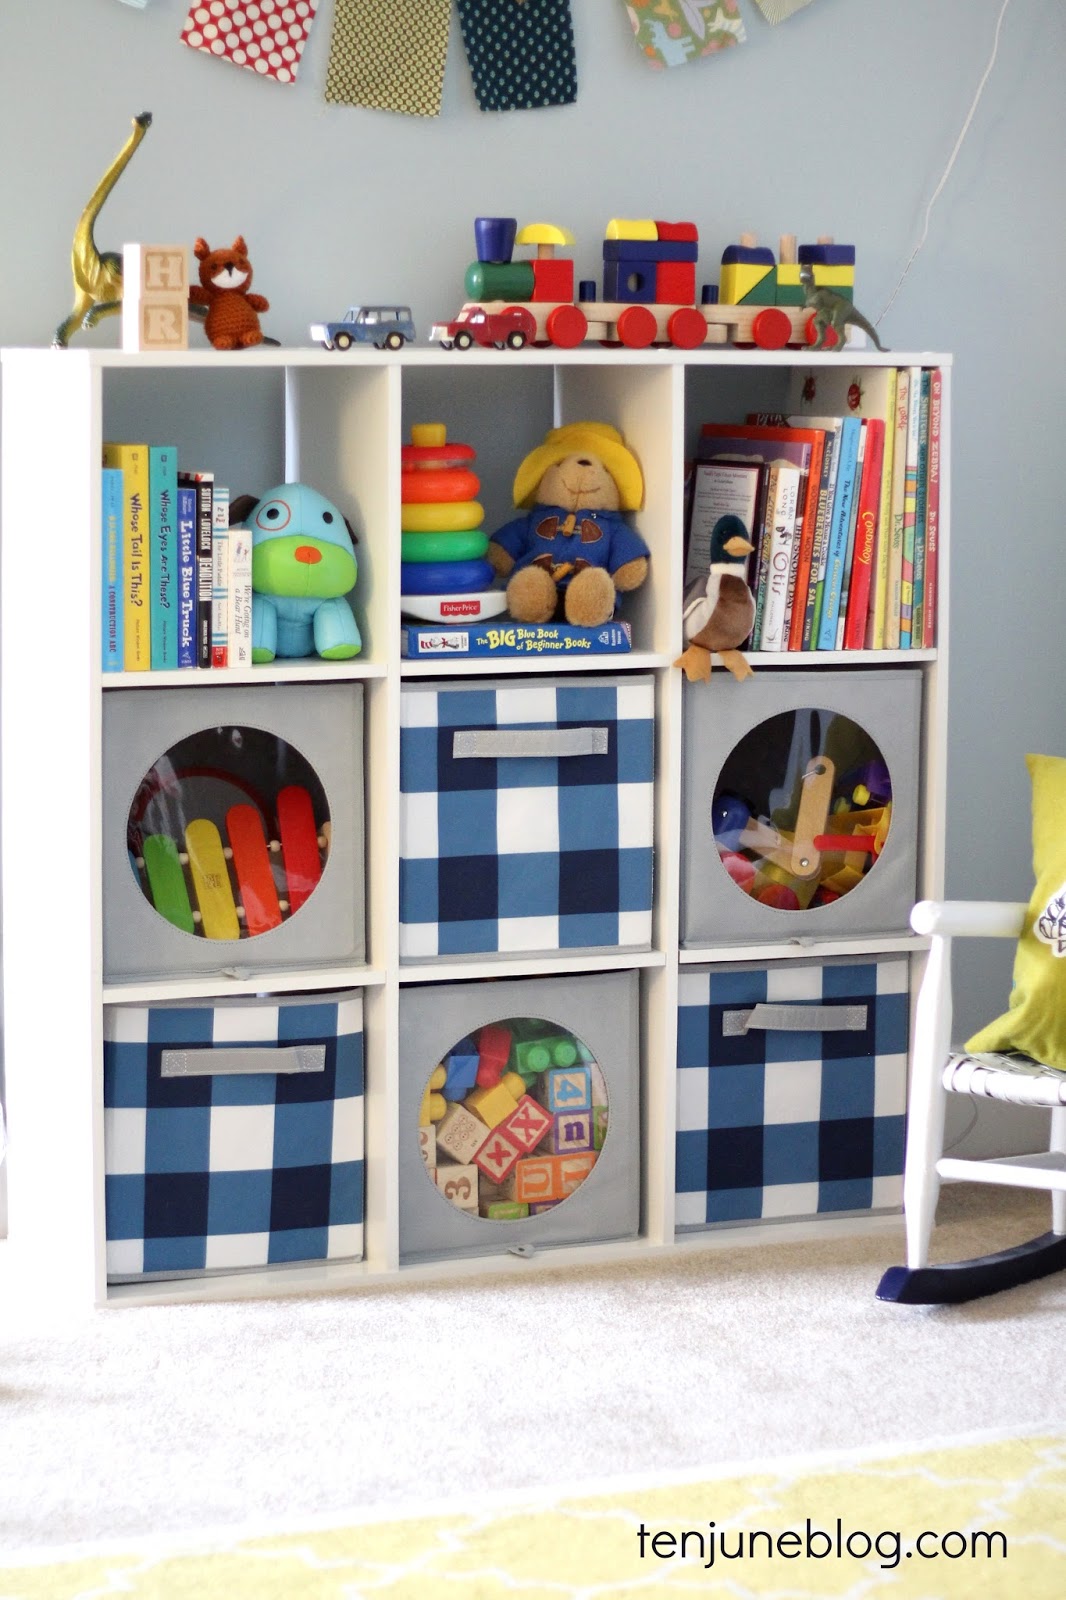
3. FUNCTION

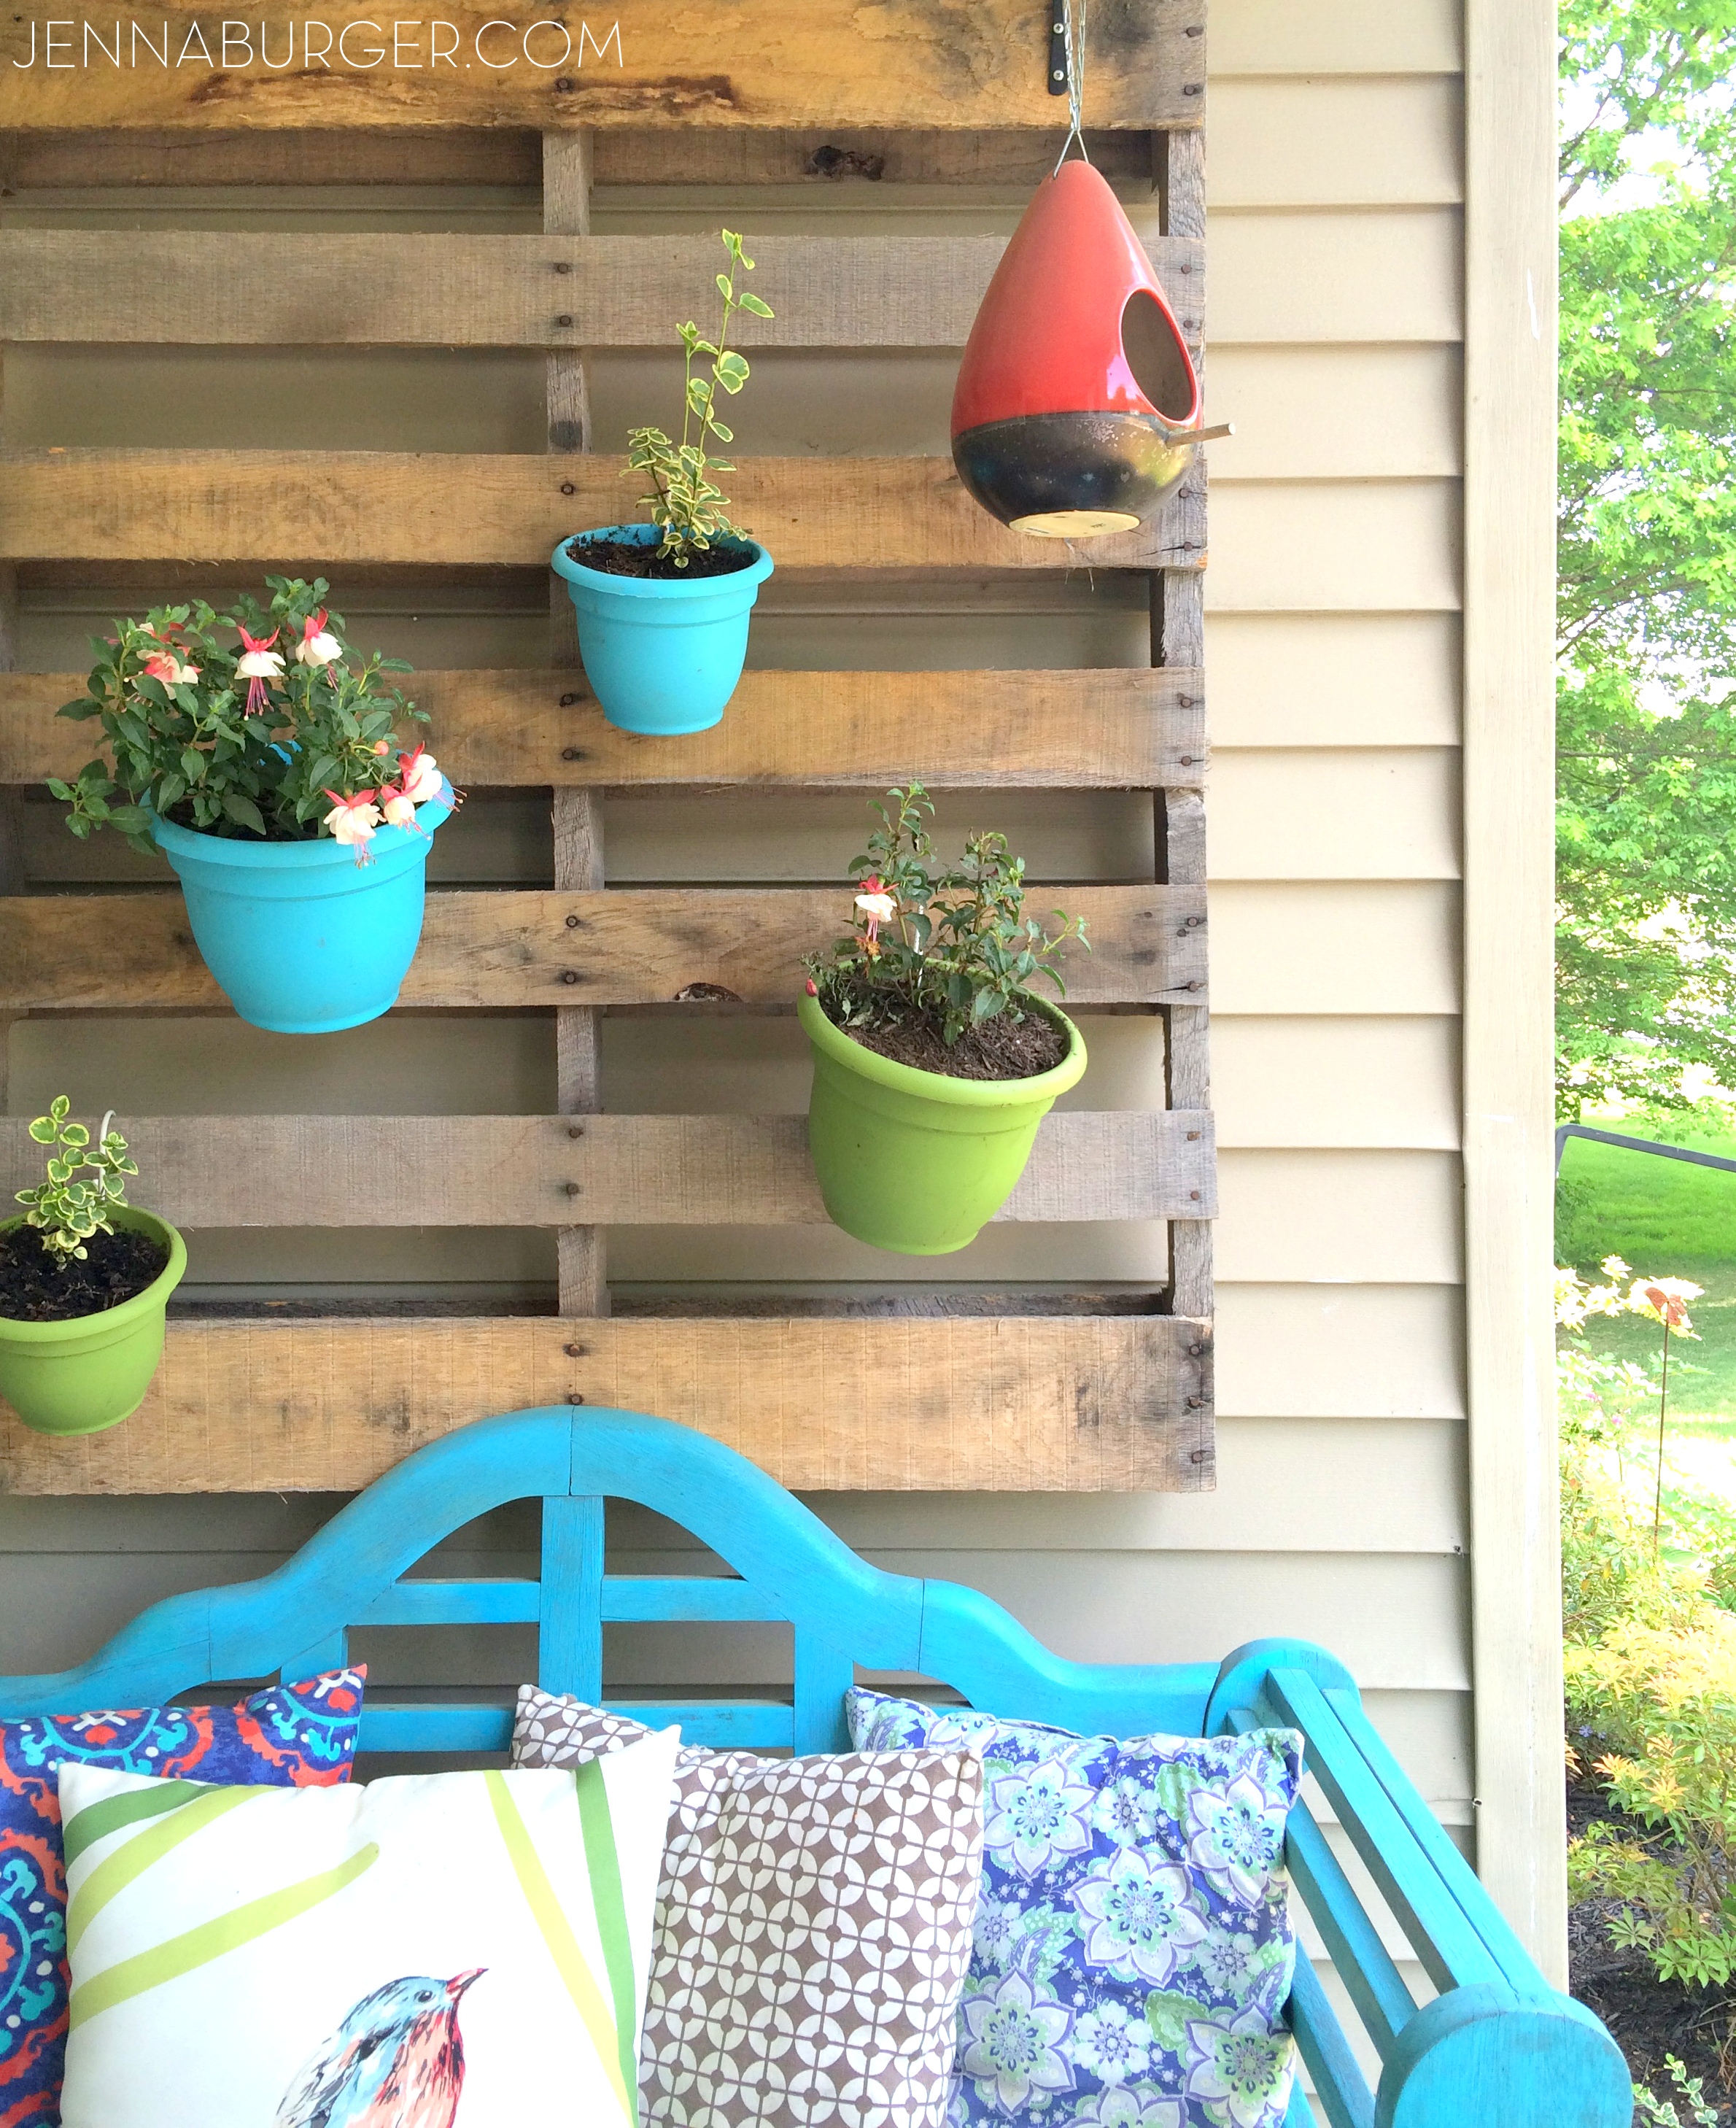
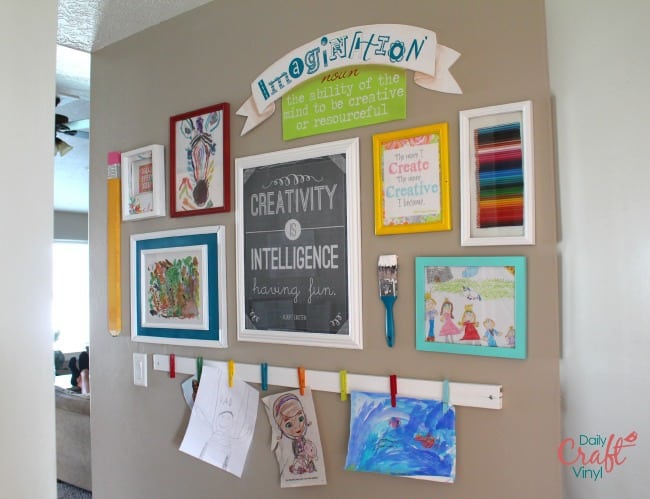
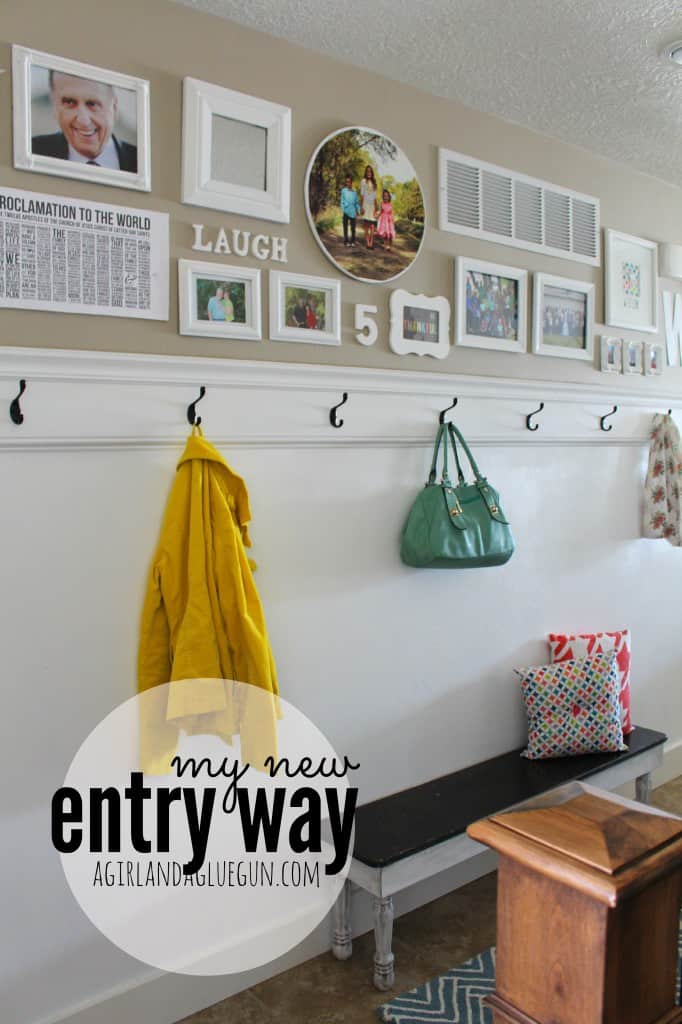
Function is HUGE for me. mostly cause I’m a hoarder and have tons of stuff! So it needs to be organized well so Husband doesn’t throw it away! But just because it’s functional…doesn’t mean it can’t be like the cutest thing ever! Like this wall that holds my accessories…

necklace-and-scarf-wall-organizer-a-girl-and-a-glue-gun--900x1329source

or a fun place to hang all my kids artwork

art-wall-with-vinyl-saying-and-definition-

source

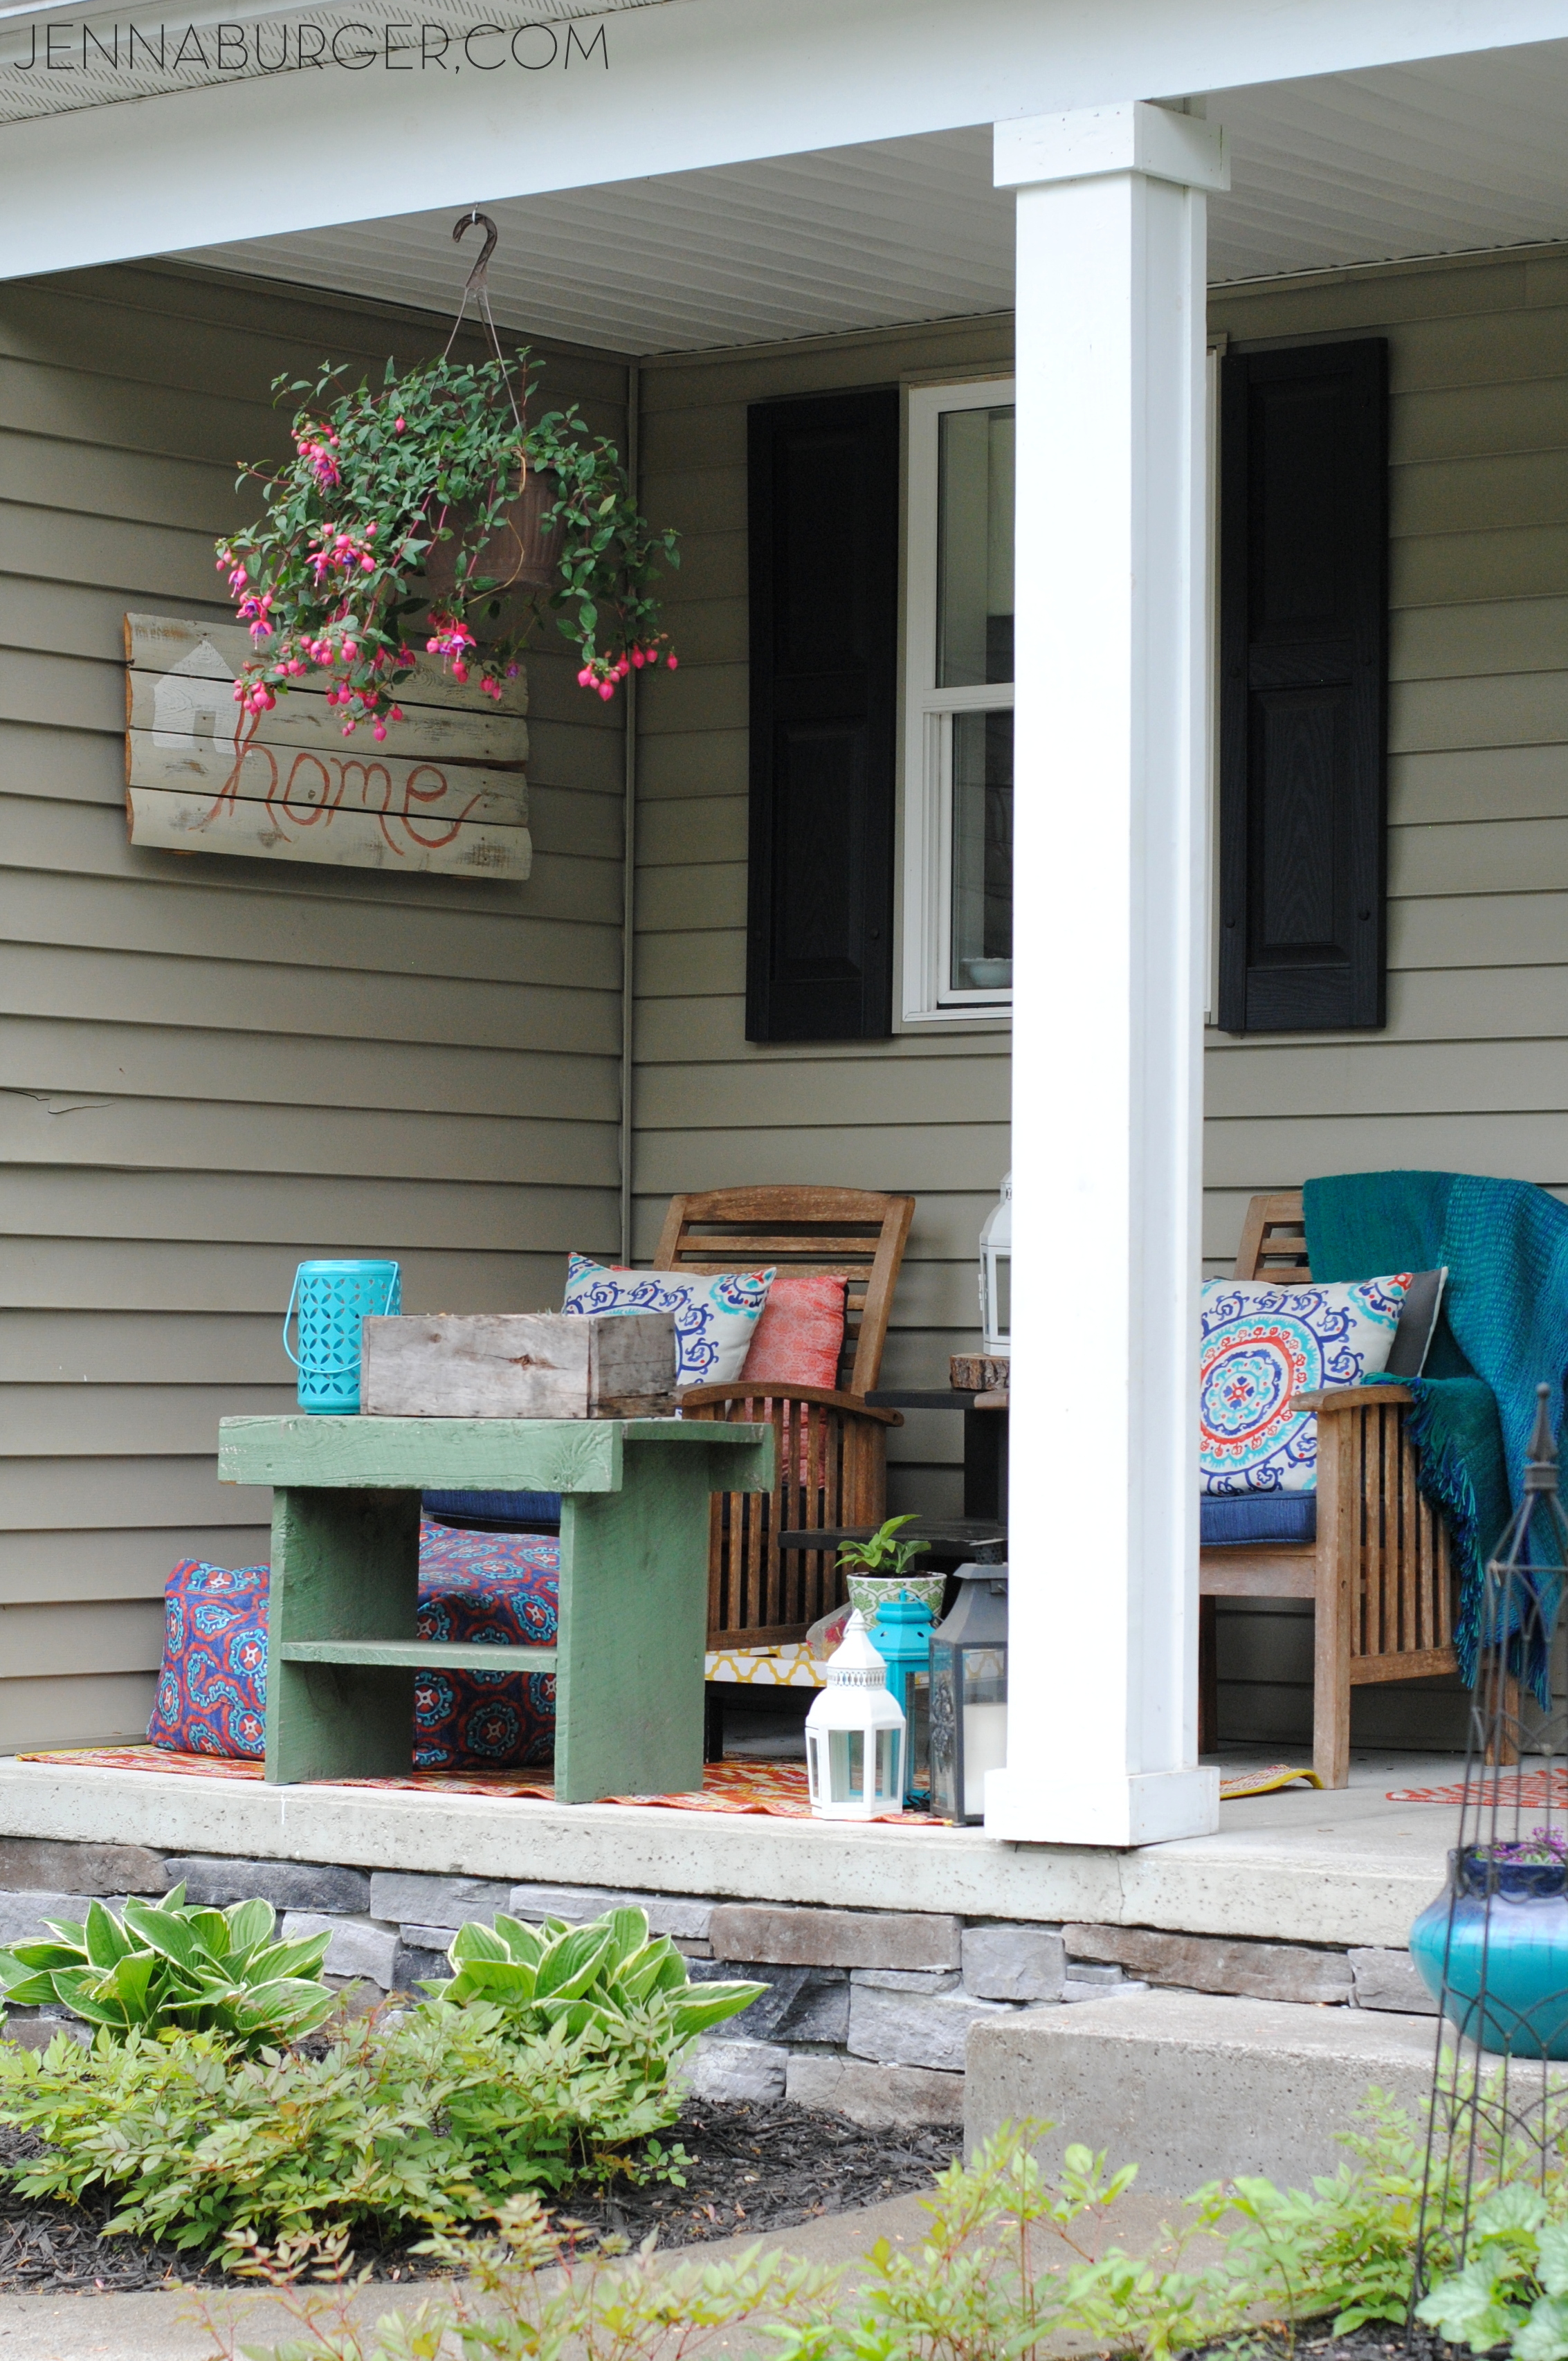
this entry way was a big blank wall! I knew it needed hooks–I was sick of coats all over the floor! before-and-after-entryway-1024x708
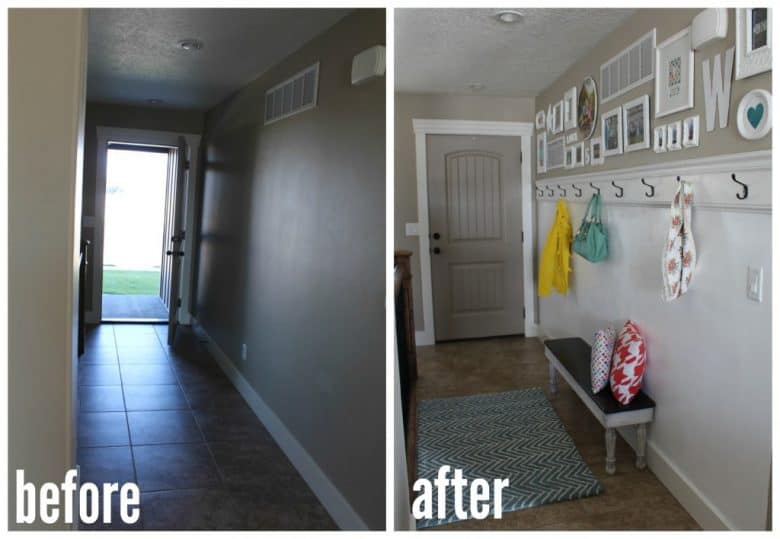
function and cute. and it has a story with it (like me trying to find hooks I want and 3 trips to home depot and all the frames used to be brown.)
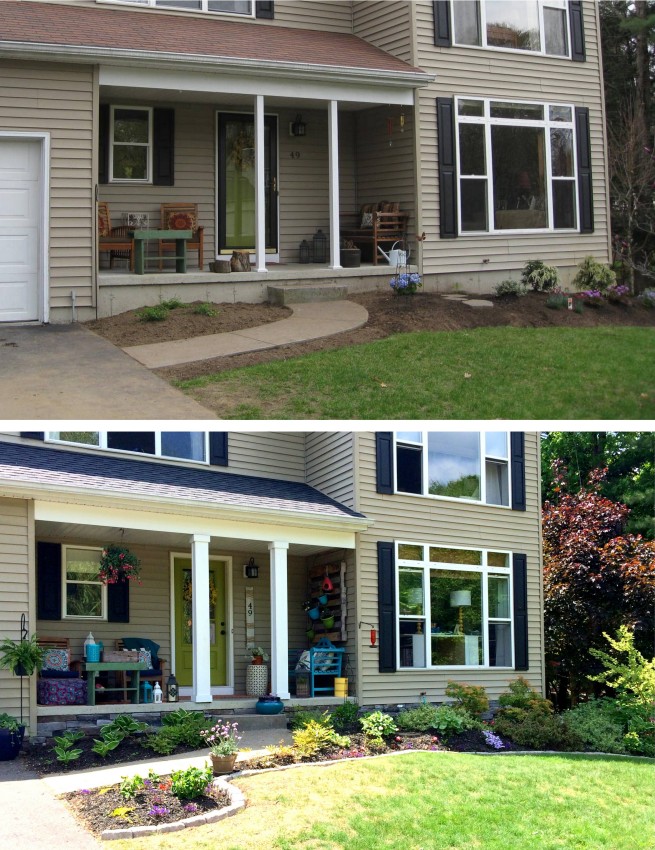
my-new-entryway-a-girl-and-a-glue-gun-682x1024source

4. Take your time.

It’s a slow process. I don’t want to settle. and I don’t want to spend a fortune. So I know it will take time to get exactly what I want for the price I want…

giant-wall-decorating-with-pictures-and-cut-it-out-frames-682x1024 (1)

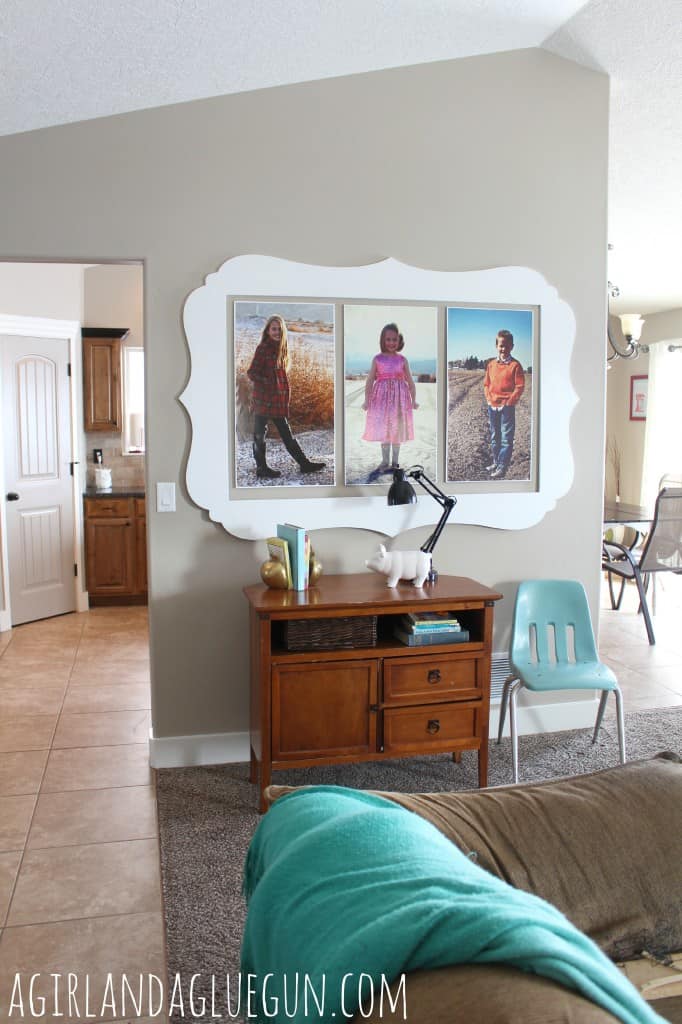
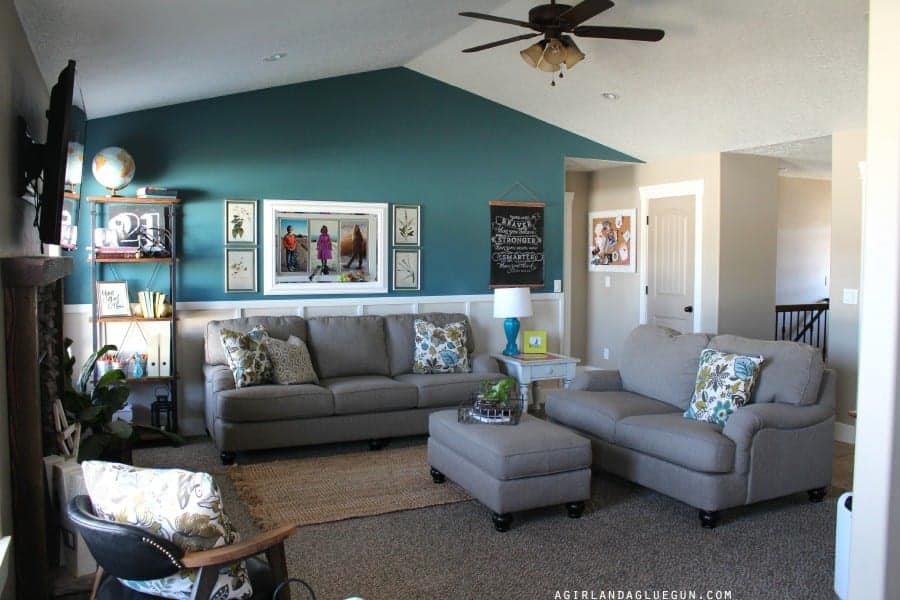
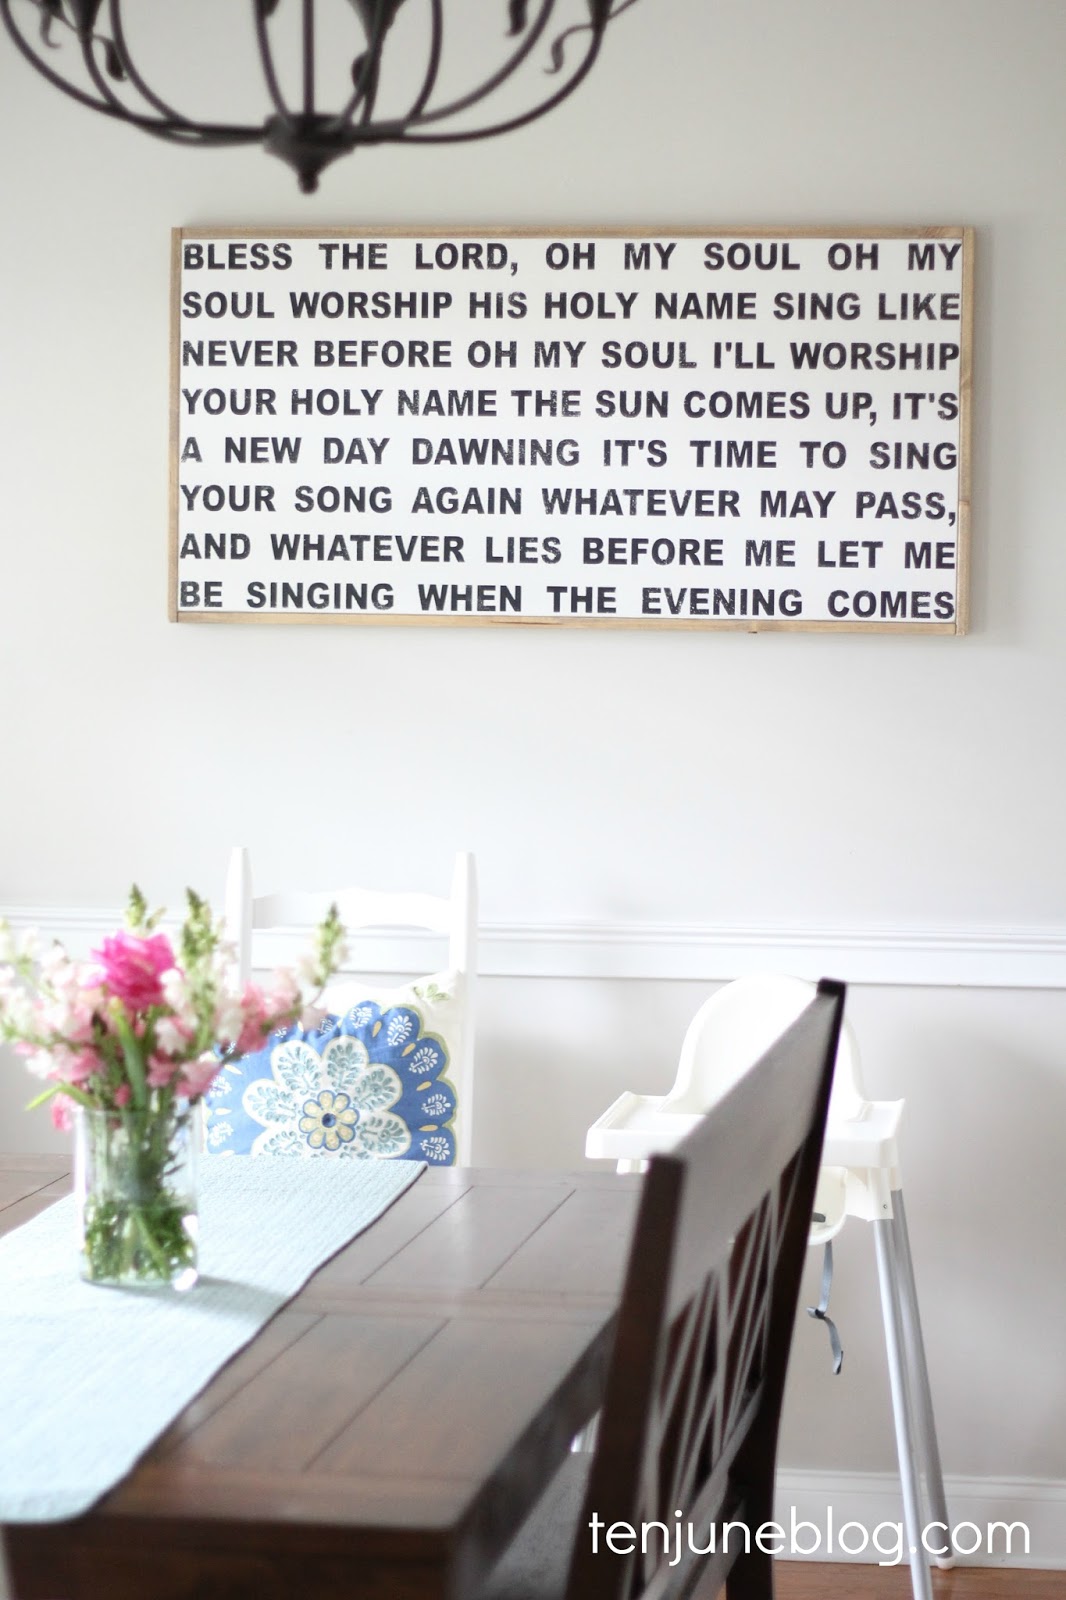
I have been on a hunt for a perfect buffet/dresser/ credenza thing for underneath this big frame for about 2 years. I’ve yet to stumble on exactly what I want that is the right size. and that’s okay. When I do find it, it will be make this wall complete! and me sooo giddy!
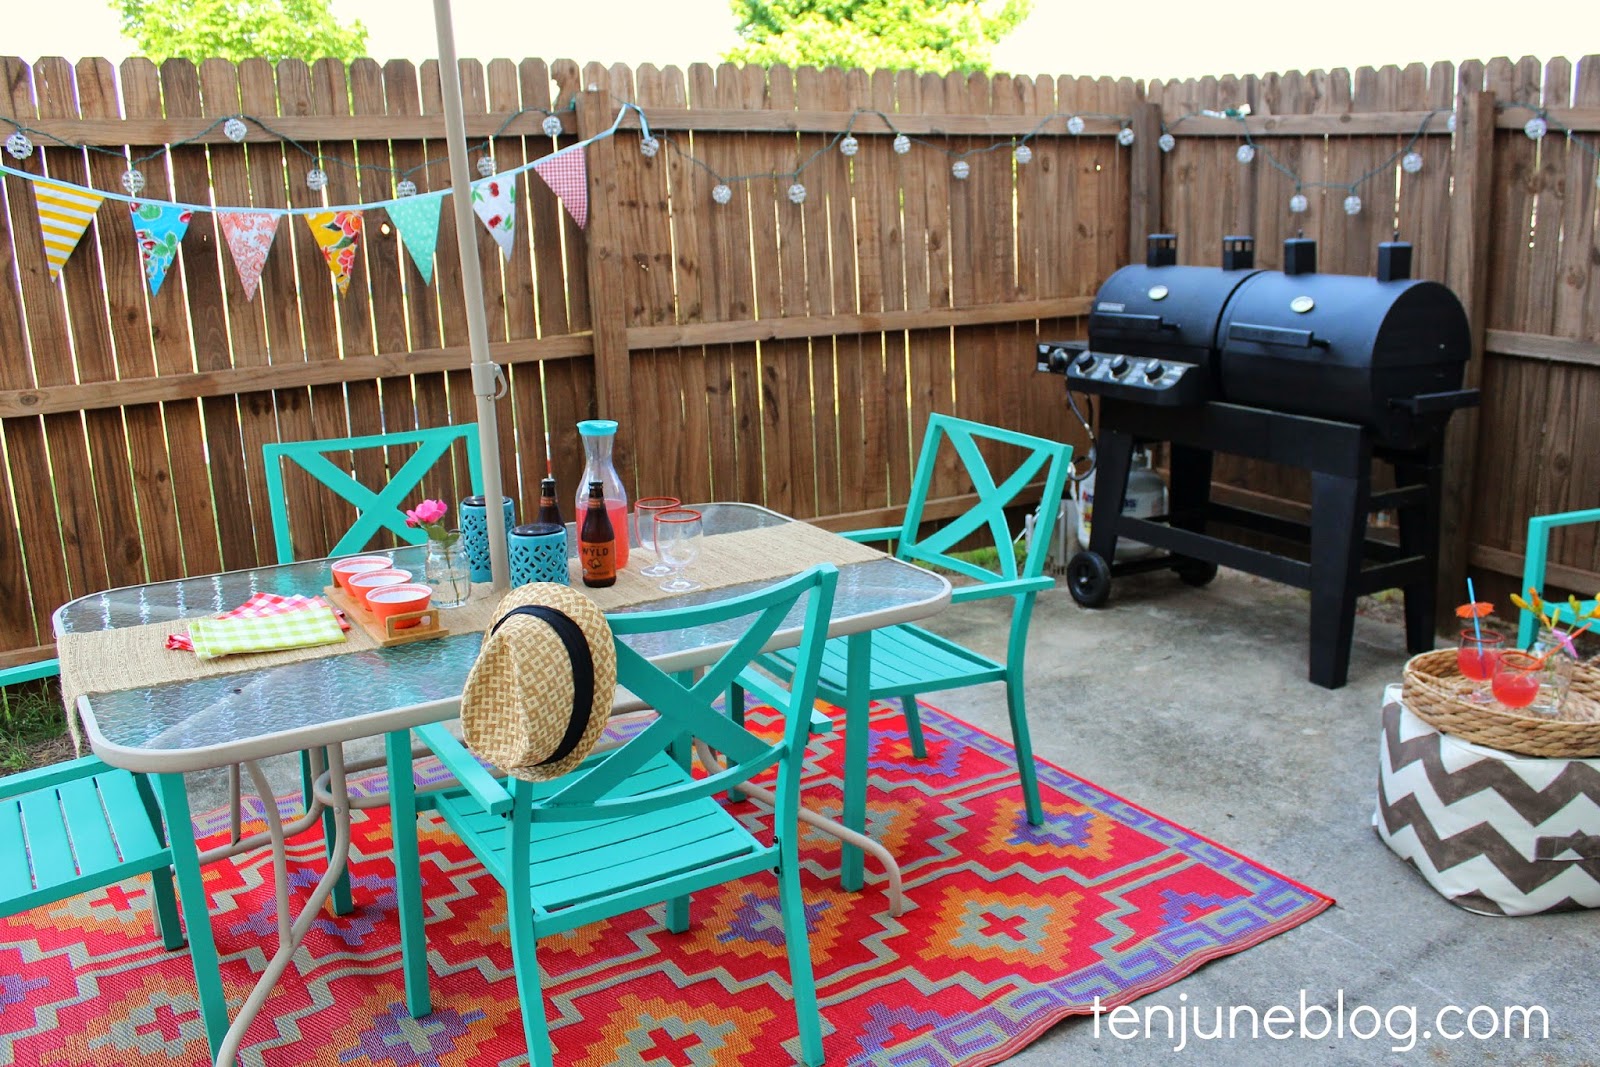
source

5. Paint

Paint is a cheap and an awesome way to freshen up and redo any room. Even if it’s painting it a nice bright white. I love color…so I find it the easiest way to add fun pops!inside-painted-dresser-drawers-agirlandagluegun-682x1024

source

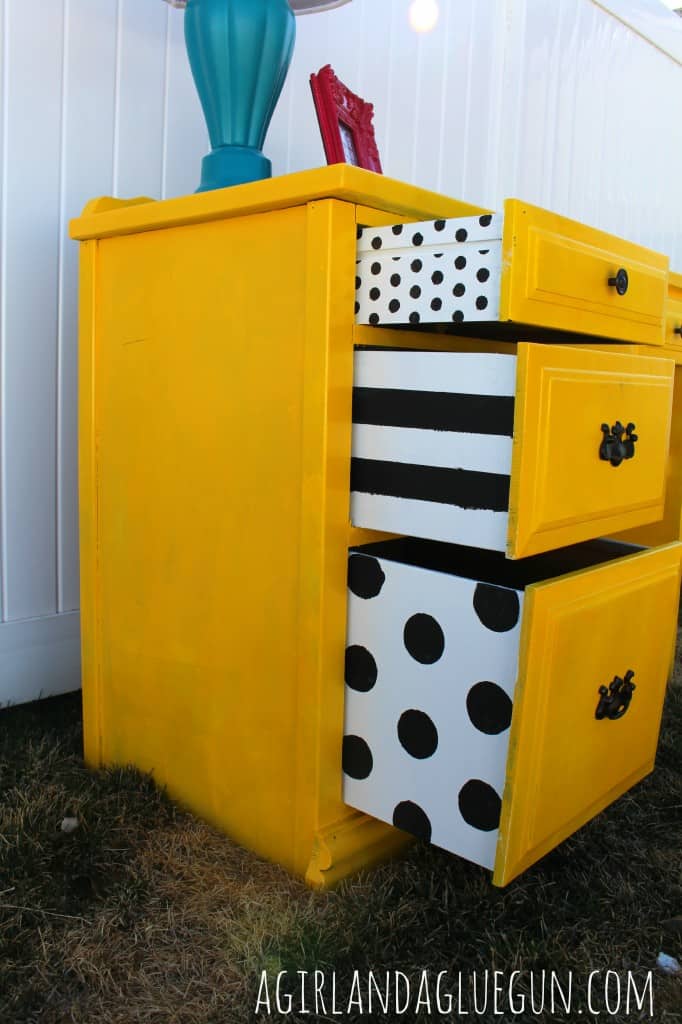
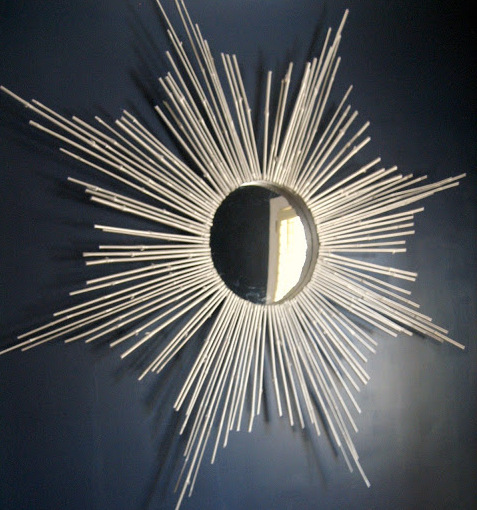
I can redo a whole room for pretty cheap by repainting frames, figurines, headboards, dressers.
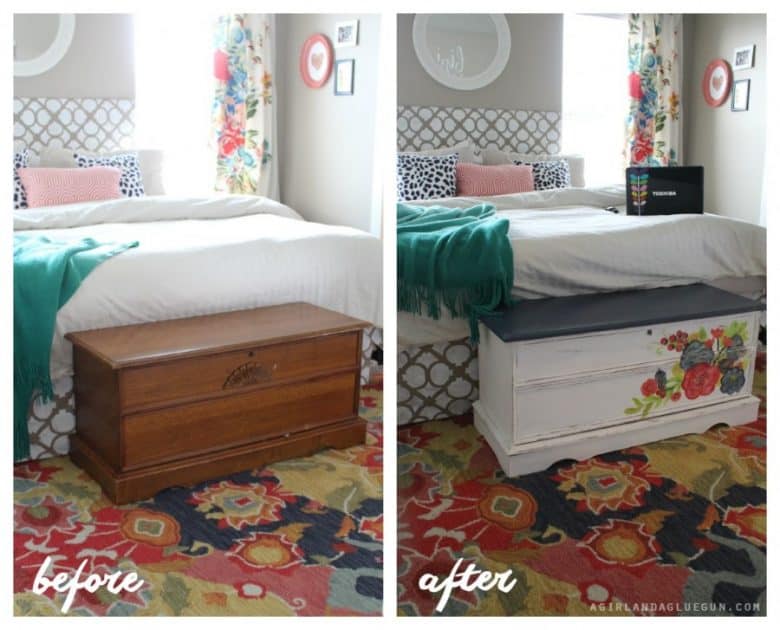
before-and-after-of-chalk-paint-cedar-chest-900x727source

and paint is pretty cheap so if you don’t love something, you can easily try again!

painted flower wall

So that’s it! my top 5 ways to make your house yours.

I love that I can look around my house and see the things that I have carefully found and scoured thrift stores for —

home decorations diy

or old hand me downs from family, or hand made stuff from my kiddos. Even though I have a long ways to go before I will have it “finished” (if there is such a thing in home decor.)

plaid wall

I can sit down and look and around and it feels like home.

my living room, a girl and a glue gun

What wonderful words Kimbo shared and I love her mindset about the home she’s created, “Don’t try to decorate for everyone’s style….Just buy or make things that YOU love…cause you have to see it every day!!!” That’s what makes a home meaningful.

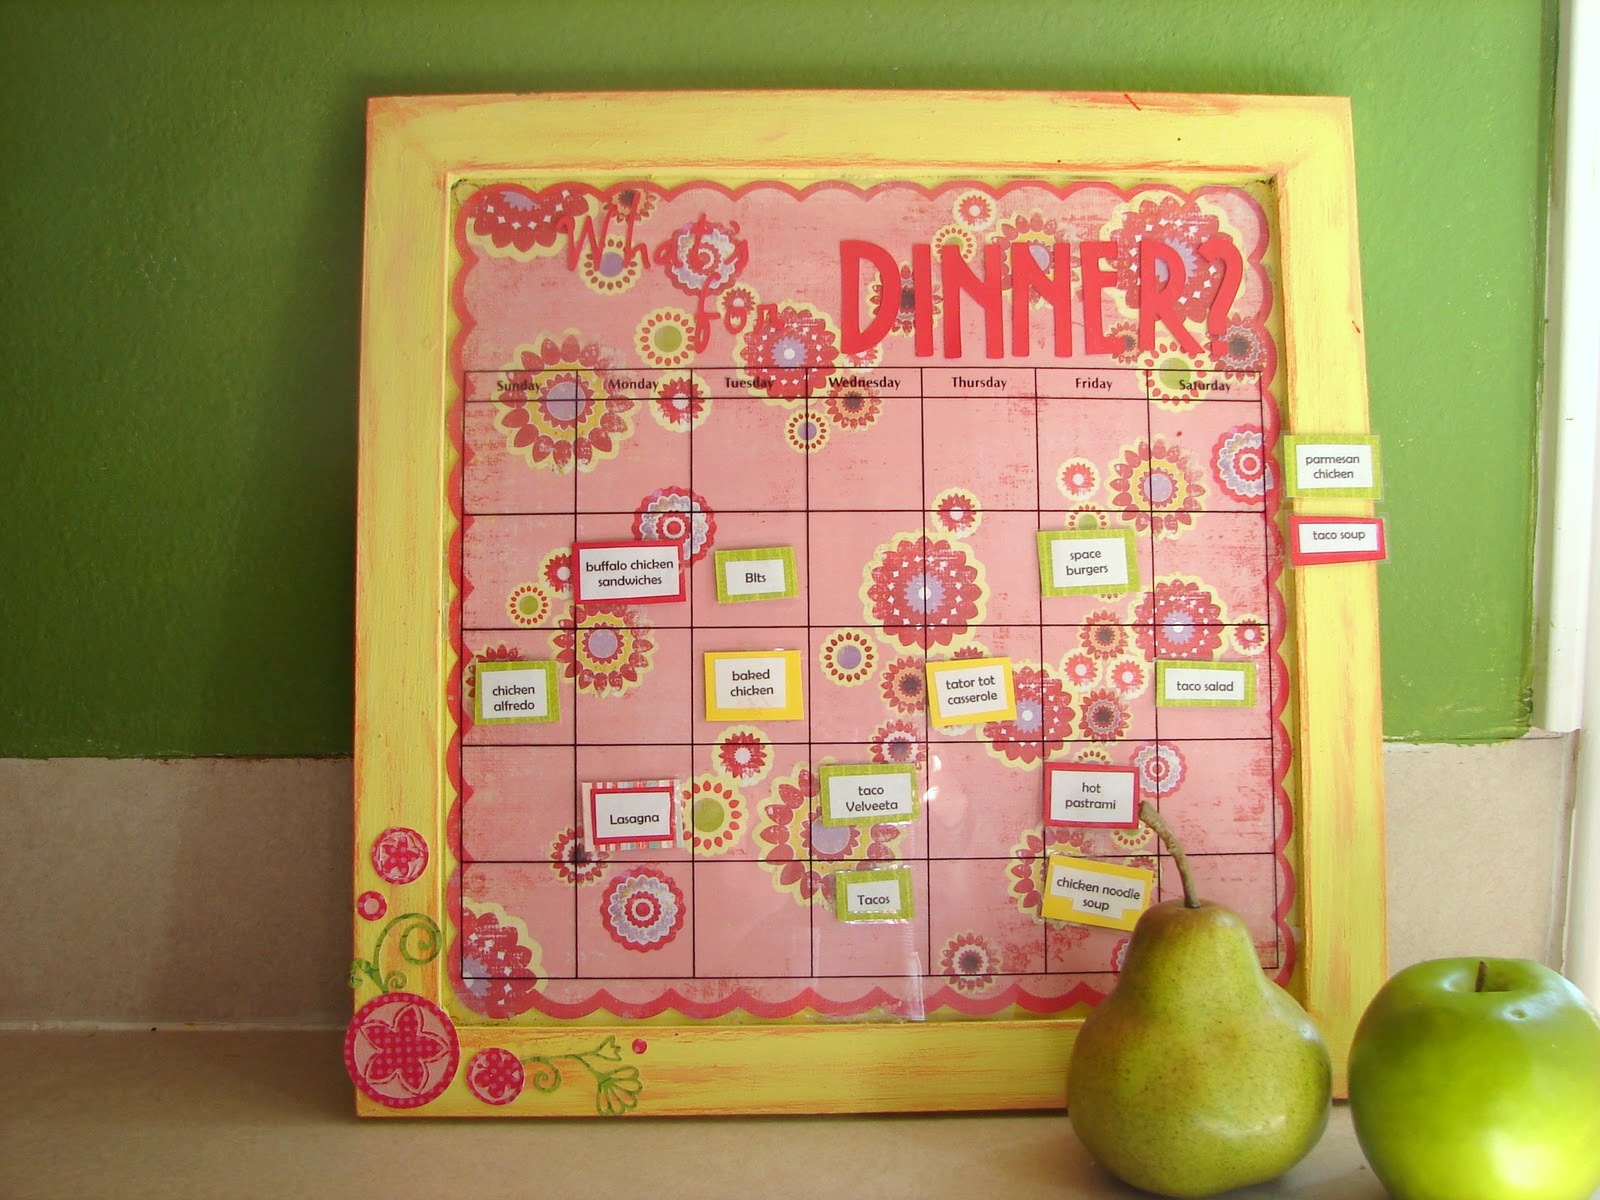
Kimbo has a slew of do it yourself projects, crafts, printables, and recipes on her blog (check out all her tutorials here).  One of my favorites is the “What’s For Dinner” Menu Board she created to take the guesswork out of what she’s making for dinner. This will be a project you’ll definitely want to tackle!

"What's for Dinner" Menu Board! Take the guesswork out of what you are making tonight.

Head on over to a girl and a glue gun and give Kimbo a BIG HELLO!

Check out all the Bloggers that have contributed to this series on
Creating a Meaningful Home

Plus don’t miss out on all the previous Bloggers who contributed to this series in 2013 and 2014!


Creating a Meaningful Home: Rooms For Rent

CREATING A MEANINGFUL HOME blog series featuring Bloggers sharing the story of their home: FEATURED is Bre of Rooms For Rent - so inspiring & fresh design... a MUST READ story!

Today’s guest post for Creating a Meaningful Home blog series: Year 3 is Bre of Rooms For Rent. Welcome Bre…

I am so thrilled to be here with all of you today! I was honored Jenna asked me to join her series, it is one that I could totally relate with, and close to my heart. If you haven’t popped by my corner of the blog sphere yet, I’m Bre and I blog over at Rooms FOR Rent! Sharing my passion for interior decor, and most importantly inspiring others to Love the space they Live in!

Relaxed with farmhouse flair!  The beautiful living room designed by Bre of Rooms for Rent

Long before I blogged, or even knew about blogs, creating a meaningful home was always on the forefront of my mind. As a child I dreamed about being an interior decorator, but it wasn’t until I had my very own place, as a young, newly married bride, that I was able to really put into practice putting thought behind the items I decorated with. It was so much more than just filling a room with pretty things. I wanted our home to be inviting and welcoming, not only to guests, but to my husband as well. Establishing a retreat from the rest of the world that was personable to just us. Once we had kids, and I was home full time, it was time to shake off the dust of that dormant dream of being an interior decorator.

Relaxed with farmhouse flair!  The beautiful Entry + Gallery Wall designed by Bre of Rooms for Rent

Our home is layered with items of great meaning to us. I love covering our walls with family photos, it’s like a warm hug with happy memories of the family we’ve started. Our kids love to see pictures of themselves as chubby babies, and wobbly toddlers, and pictures of our wedding. To them it’s like looking through a photo album everyday around the house.

Relaxed with farmhouse flair!  The beautiful living room designed by Bre of Rooms for Rent

As newlyweds starting off we had very little furniture of our own. We inherited furniture pieces from our families that have become staples for us, and remind us of where we’ve come from. The cedar chest you see in the photo above, has played many roles in each place we’ve lived. Last year I sanded it down and re-stained it to give it new life, my husbands grandfather made it back in the 50’s, and my husband has fond memories of it as a boy, and always wished that one day he could be the rightful owner. When we see it, we think fondly of his grandfather and his fine craftsmanship.

Relaxed with farmhouse flair!  The beautiful dining room buffet by Bre of Rooms for Rent

Another hand-me-down that adds meaning for us, is this dresser I use as a buffet in our dining room. It was a hand me down from my mother, her first furniture set when she married my dad, and I used in my bedroom as a teenager. It was the first DIY the hubby and I did together 10 years ago, and recently, last year, I sanded it down again and re-stained it, but it’s one of my most asked about pieces, and whenever I look at it, I think of my mom, and when she first acquired the dresser decorating her new home as a young bride.

Relaxed with farmhouse flair!  The beautiful dining room + living space designed by Bre of Rooms for Rent

I want our home to tell a story, Our story. While I love finding great buys at HomeGoods and Marshalls, my favorite things to decorate with are those that have a story. It’s a heritage that I get to pass onto my children. Repurposing items and giving them new life, shows that we care for the things around us, and take pride in where we came from. You can never go wrong when you decorate with items you truly love, and mean something to you. It’s the personal touches that create meaning in our lives, and touch those around us.

Stay in touch!

Instagram / Pinterest / Facebook

Have a design question? Visit Doucette Design Co. for all your design needs!

437BD274C822D62F40FE96412813D923

Thank you Bre for sharing your beautiful thoughts on how you’ve created a home that tells Your Story!

I love these words that Bre shared, “Our home is layered with items of great meaning to us. I love covering our walls with family photos, it’s like a warm hug with happy memories of the family we’ve started.” and “To them it’s like looking through a photo album everyday around the house.”  Absolutely!

Every project Bre creates is “her”. Bre’s style of relaxed with a farmhouse flair is spot on in what the rooms of her home evoke.  One of my favorite parts of Bre’s home is her gray chalkboard wall in the kitchen. In this post, Bre shares a great tutorial on how to make chalkboard  wall paint in any color.

Make your own Chalkboard Wall paint in ANY COLOR - tutorial by Bre of Rooms for Rent

Head on over to Rooms For Rent, and give Bre a BIG HELLO!

Check out all the Bloggers that have contributed to this series on
Creating a Meaningful Home

Plus don’t miss out on all the previous Bloggers who contributed to this series in 2013 and 2014!

Creating a Meaningful Home: Ten June Blog

CREATING A MEANINGFUL HOME blog series featuring Bloggers sharing the story of their home: FEATURED is Michelle of Ten June Blog - so inspiring & REAL!

Today’s guest post for Creating a Meaningful Home blog series: Year 3 is Michelle of Ten June Blog. Welcome Michelle…

Creating a meaningful home is a really important topic to me. No matter how many design magazines we browse through or DIY blogs we read, nothing matters more in your home than meaningful moments. It’s your home, right? So it needs to look like you and your family. What inspires you? What makes you smile? What reminds you of those special moments in your life? In my opinion, decorating with those types of things is what makes your home meaningful.

For years, my husband and I lived in our “dream home” that we renovated and put a lot of love, blood, sweat and tears into. We moved from that dream home a couple of years ago due to my husband’s job relocation and we’re actually in a rental house right now. It’s pretty crazy to go from a home that we painted every square inch of (like our son’s baby nursery room makeover, still my favorite room I’ve ever designed!), renovated portions of to the studs (like our amazing master bathroom renovation!) and really felt like we made “ours” to a home that we can’t even paint the walls or do anything permanent to without permission! Needless to say, making this rental home a “meaningful home” in small ways has become very important to us. Here are a few small things we’ve done around our little rental house to make this temporary space feel more like our special home.

Pull out your sentimental pieces to display.

Creating a Meaningful Home: Pull out your sentimental pieces to display

Creating a Meaningful Home: Pull out your sentimental pieces to display

The vintage fire truck and blue station wagon that sit on top of my son’s storage shelf in his bedroom were passed down to my husband from his grandfather. It’s such a fun reminder to have a piece of Pop in our little guy’s room and truly makes for a special reminder of our family every time we see the little cars. More on my son’s nursery/bedroom space here

Choose art that is special to your family.

Creating a Meaningful Home: Choose art that is special to your family

Matt Redman’s “10,000 Reasons” song is really special to our family- in fact, it’s become our family anthem! I had this sign custom made to hang in our dining room. It’s so great that it sits as a backdrop to our family dinners, parties and other events. This sign truly makes this space more meaningful. For more on our dining room, head here.

If you want bold, go bold.

Creating a Meaningful Home: If you want bold, go bold

Don’t be afraid to stand out or make a bold design choice just because it’s not necessarily in style or a big trend. If it’s something that you and your family like, then go for it! That choice will make your space more personal, for sure. Take this patio makeover I did. While my neighbors might not have chosen a wild patterned red outdoor rug and bright turquoise chairs, they were the perfect fun additions to make our outdoor space more homey. More on this outdoor space here.

Add decor pieces that are important and functional to you.

Creating a Meaningful Home: Add decor pieces that are important and functional to you

While it’s a lot of fun to have pretty things on your nightstand, the typical magazine nightstand with it’s flowers and frilly decor pieces just won’t cut it for me. I’ve got to have my Bible and whatever book I’m reading within arm’s reach. So you make it work and take functional items like that, whether they’re pretty or not, and integrate them into your decor as I’ve done here with my nightstand. That trick might not work quite as well with your baby monitor, ha. Let’s be honest, mine is being hidden in that top drawer.

The ideas I shared are certainly not mind-blowing new ideas for decorating your home, but they are really great small touches that have truly made my home meaningful for me. I’m sure the concept of a “meaningful home” means something different to everyone- what do you bring into your home to truly personalize your space?

What a great story, thanks Michelle for sharing!  I can’t imagine getting uprooted from a dream home to a rental, but if it’s what has to happen, then you make the most of it – and Michelle has.  No matter the style or size of your home (whether you own it or rent it), there is always a way to introduce meaning & purpose.  Little ways make a big impact.

One favorite project that Michelle created is this bamboo stick mirror.  Sunburst mirrors have been all-the-rage for a while and this do it yourself creation is so beautiful + bold AND looks great on the black wall of her dining room (in her previous house)…

DIY: Bamboo Stick Mirror created by Michelle of Ten June Blog

Head on over to Ten June Blog, and give Michelle a BIG HELLO!

Check out all the Bloggers that have contributed to this series on
Creating a Meaningful Home

Plus don’t miss out on all the previous Bloggers who contributed to this series in 2013 and 2014!

Creating a Meaningful Home: Year 3

Ever since the beginning of time with cavemen writing on the walls of caves depicting their adventures and stories, we’ve communicated how we live by the things we surround ourselves with.   Yes, ‘home is where the heart is’, but creating a home with meaning that reflects YOU and YOUR STORY is just as important to honor where you’ve been, what you love, and what’s most valuable to you.

“We love that our belongings honor where we are from and where we have been.  Our home houses our story.”

Great quote on Creating a Meaningful HomePhoto Credit: home of Hanni Liliedahl and Jesse Silacci, featured on Design Sponge

I am over-the-moon happy to announce the start of Year 3 for the CREATING A MEANINGFUL HOME blog series which will feature fellow bloggers over the coming 2-3 months who will open their homes and share the story they’ve created on the walls + in the spaces of their homes.

I am thrilled to have created a platform to inspire and share my thoughts on design and decorating a home.   With this blog series, even more great ideas + personal stories are shared about how a meaningful home can be created. Whether a thrift store treasure, a garage sale find, or hand-me-down ‘something’, anything that catches the eye and reflects YOU is something that should be incorporated in your space.

Can you believe it is YEAR 3 of this special series?!

Check out the past Bloggers who contributed to the series in 2013 + 2014

The talented Blogger and now Author (of the fantastic book Love the Home You Have), Melissa of The Inspired Room, kicked off last years blog series with her beautiful story.

This year, the equally incredible Blogger + Designer Mandi Gubler of Vintage Revivials is kicking off the series.  I am so thankful to her for taking the time to share her homes story with us.  Mandi has impeccable style and was voted one of Better Homes and Gardens Top 10 DIY Bloggers this year.  She’s been on Nate Berkus, has had countless magazine features, has a huge blog following of DIY enthusiasts, and is just fun + fearless.

Here is a picture of her and I when we met at a blogging conference a few years back…

Picture with Mandi of Vintage Revivals at the Haven blogging conference in 2013

Without further ado, here’s Mandi’s story…

CREATING A MEANINGFUL HOME blog series featuring Bloggers sharing the story of their home: FEATURED is Mandi of Vintage Revivals - a MUST READ story!

Oh my gosh you guys, I am so excited to be here today! I am Mandi from Vintage Revivals and I am thrilled to chat with you about something that is so near and dear to my heart! Creating a meaningful home.

Macie After

| Buttoned Up Boho Bedroom Makeover

I have a story for you about a girl. For some reason this girl had this preconceived notion that creating a meaningful beautiful space required 2 things, money and an interior designer. One random day 5 years ago she stumbled upon the world of DIY blogging and was BLOWN AWAY. It shattered every idea that she had about decorating. And even though she had literally no idea how to do any of it, she jumped in with both feet. That is how Vintage Revivals was born. The undaunted motivation of a spray paint virgin.

Along the way I’ve found that while there are a million different ways execute making your space feel like home, that feeling that we are all trying to capture is the same. Safety, comfort, a place that we can feel like ourselves.

Loft Living Room Makeover vintagerevivals.com-2

| Loft Living Room Makeover

For me this means that I can be creative, wherever the mood strikes.

It means that my kids have bedrooms that feel like childhood.

Dylan After 2

| Dylan’s Dream Room

And the biggest thing is that it is always changing and feeling different.

I feel like there is this gaping chasm between the beautiful images that we see on the internet and the boring beige, boob light infested places we deal with in real life because they are good enough.

SherwinWilliamsColoroftheYear2015vintagerevivals.com17

| S-W Color of the Year 2015

Get inspired and do something exciting to your house, I know you wont regret it!

And have you checked out Mandi’s latest love… The Nugget.  A complete trailor renovation filled with DIY inspiration + creations!  Goodness, my wheels are spinning with love & ideas.

Vintage Trailer Renovation Makeover by Mandi of Vintage Revivals.com

“Safety, comfort, a place that we can feel like ourselves.” … That’s it, that captures what WE ALL WANT.  No matter our style or size, we are all trying to capture the same essence of home.  It’s truly about the feeling that is conveyed on the walls of our home + the things in our home. I’m always in awe of what Mandi creates and I am overjoyed that she is kicking off this annual series of Creating a Meaningful Home.

A home should tell the story of who you are and what’s in the home should have purpose.

Later this week and continuing over the next few months, I have an amazing lineup of inspirational friends / Bloggers who will be opening up their homes to share ideas and show you how they’ve created a meaningful home.

Same as in 2013 + 2014, once a Blogger has shared their story, a snippet to the post will be added below. I encourage you to check back often to find new Bloggers and to learn about their story…

Let’s get started!

[dopwgg id=”16″]

Publication Features + Happenings on the Homestead

As the Summer approaches, my plan was to *try* to slow down since the kids will be out of school in less than a week, but once the warm weather hit this year, everyone & their moms seemed to come out of the woodwork wanting to revamp their homes.  To say the last weeks have been busy, is an understatement.  Certainly no complaints though  – busy is good in my book.

Before I share more news on what’s been happening on the homestead, I am excited to tell you that there a few publications currently on newsstands that I am featured in…

NATIONAL PUBLICATION FEATURE

First up, the June issue of This Old House magazine has an article on E-design and since I offer virtual design services to anyone in the US of A, they reached out to me a few months back gathering some insight on how it works and it’s success.

Publication Feature in This Old House magazine on E-Design

My “feature” is small (3 lines on page 28), but a quote or 2 in a national publication is pretty rad! The whole article is about a homeowner in California who worked with an E-Designer to create a new kitchen space, which in my opinion came out gorgeous.

Publication Feature in This Old House magazine on E-Design

I loved this thought by the homeowner…

“I didn’t need a full-service designer to hold my hand, but I did need someone experienced to give me good, solid answers.”

YES!  That’s it.  I’ve worked with many folks around the country through email, skype, and phone that share the same thoughts on working with me.  I love pointing homeowners in the right direction to get them on track to revamp their space.

[Learn more about my E-Design services here]

Publication Feature in This Old House magazine on E-Design

LOCAL PUBLICATION FEATURES

Onto the next 2 features, which are in local (to me) publications… Saratoga Mama + Simply Saratoga

Simply Saratoga and Saratoga Mama publication feature

Both of these magazine features are articles I wrote.

In Saratoga Mama, I shared my DIY Kids Tent tutorial that I made for my kiddos a few Summers back.  The entire issue is based on Summer Unplugged, so these fun & simple-to-make tents seemed like the perfect addition.  And they really are easy to make!

If you’re local, definitely snag a copy of this Summer staple.

Saratoga Mama magazine featuring my DIY kids tents

[click to check out the full tutorial on making these DIY Kids Tents]

DIY Kids Play Tent

For Simply Saratoga magazine, I wrote a feature on Creating an Outdoor Oasis, which is similar to the post I shared a few weeks back here on the blog.

Simply Saratoga magazine featuring an article on Creating an Outdoor Oasis

About a month ago, I was full-steam ahead with getting the outdoors spruced up for the Summer and creating an outdoor living space on the patio, porch, and deck.   I’ve calmed a bit since…

[Check out more ideas on Creating an Outdoor Living Space]

Creating an Outdoor Living Space

It’s always amazing to me and such a blessing to be featured in a magazine!

onto other things…

HAPPENINGS ON THE HOMESTEAD

What’s on the boards?  I am working on a slew of exciting projects – more for clients than myself.

I just finished up 3 teen rooms (all siblings), which was a first for me.  Their parents wanted to give them the opportunity to create a space that truly reflects them & their unique style.  Before our initial meeting, I took pictures + measurements of the 3 rooms, and each teen wrote a list of wants / needs.  I met with each of them to discuss their vision and then created these mood boards…

Teen Room 1

Teen Room - Creative Vision Board

Teen Room 2

Teen Room - Creative Vision Board

Teen Room 3

Teen Room - Creative Vision Board

They’re going to do most of the “shopping” so I am excited to see how it’ll come together!

Along with those 3 rooms, I am also working on 2 kitchens, one of which is almost done – countertop is being installed tomorrow!

Kitchen Remodel

So crisp + fresh with new white and gray.  It’s a whole lot different than the dated look of the wood in the “before” space.

Here was the vision board I created for the kitchen…

Kitchen Remodel creative vision board

Plus I have an exciting restaurant project I am working on – pinch me – with a rustic industrial aesthetic… It’s going to be awesome.  More on that in the near future

As you can see, a lot is happening!  All good things which is wonderful.

LAST BUT NOT LEAST

One more bit of “what’s happening”, Year 3 of the Creating a Meaningful Home Series starts next Monday the 22nd!  I’m screaming from the rooftops with excitement.  Can you believe this is the 3rd year of the series?!

Creating a Meaningful HomePhoto Credit: home of Hanni Liliedahl and Jesse Silacci, featured on Design Sponge

“We love that our belongings honor where we are from and where we have been.  Our home houses our story.”

If you haven’t been following along with the blog for that long (shame, shame, lol), the CAMH blog series is a 2-3 month long series that I host where other Home + Design Bloggers share a guest post on my blog featuring their homes and how they’ve created meaning in their space!  It’s a wonderful series on a subject near & dear to my heart.  This years lineup of guest bloggers is pretty awesome.

[Click here to see & read all the Blogger stories from Year 1]

[Click here to see & read all the Blogger stories from Year 2]

Last year, the incredibly talented Melissa of The Inspired Room (not only a fellow Blogger, but Author of the beautiful book, Love The Home You Have ) kicked off the series and this year I have a very different, but equally talented friend who will be starting the series.

SO DON’T MISS IT! The series kickoff will be next Monday, the 22nd!

Well that’s just a bit of what’s happening on the ole’s homestead, along with a million other things… 

What’s happening in your neck of the woods?

How-To Make a Laminate Bookcase Look Like a Built-In Bookshelf

Now that the outdoor spaces are pretty much complete for the Summer season, today I want to jump back indoors to share a project with you that I worked on when revamping the living room earlier this year.  This DIY endeavour was something I had always dreamt about, but never had the guts courage to tackle.  If you remember back just a day ago… being afraid of failure can put a hinderness on creating something really great. There’s no reward without risk!

When the time came to jazz up the wall of the fireplace, I knew it had to be built-ins.  But custom built-ins are major money!  Believe me, I’ve designed many for my design clients and they can cost thousands…  I had seen other blogger friends give the very affordable Ikea Billy bookcases a custom look, so I thought I’d give it a try myself.  Thus the creation of how I made this laminate bookcase look like a custom built-in bookshelftimes 2.

#DIY #Tutorial How-To Make a Laminate Bookcase Look Like a Custom Built-in Bookshelf.  A $1000 or more bookshelf for just about $100  - Similar Look, HUGE SAVINGS! Tutorial @ www.jennaburger.com

#DIY #Tutorial How-To Make a Laminate Bookcase Look Like a Custom Built-in Bookshelf.  A $1000 or more bookshelf for just about $100  - Similar Look, HUGE SAVINGS! Tutorial @ www.jennaburger.com

I’m forewarning you… this is a long tutorial (not difficult, just lengthy), but if you’ve ever dreamt of having custom built-ins for your office, living room, or bedroom, then it’ll be worth reading from start to finish.

WHAT I BOUGHT

> 5-shelf laminate bookcase (no Ikea near me, so I purchased this bookcase @ Lowe’s for about $90)

> Multipurpose Tool Kit or small cutting saw (this will be used to cut the existing base moulding)

> Hammer & Crow Bar

> Decorative Moulding for base and crown

> Compound Miter Saw (or miter box)

> Primed lattice slats (1.5″ w X 1/4″ thick)

> Wood glue

> Basic tools

ASSEMBLING + INSTALLING THE BOOKCASE

I ordered the (2) 5-shelf bookcases from Lowe’s and about a week later they arrived.  Assembly was very easy – with just 5 parts, there wasn’t too much that could go wrong.  Once the top, bottom, and sides were put together, we attached the back so they were ready to set in place.

#DIY #Tutorial How-To Make a Laminate Bookcase Look Like a Custom Built-in Bookshelf.  A $1000 or more bookshelf for just about $100  - Similar Look, HUGE SAVINGS! Tutorial @ www.jennaburger.comcom

I’m going to pass right on over my major project fail of installing grasscloth wallpaper to the backs.  If you want to read more on that DIY blunder, check out yesterday’s post

Once the bookshelves were assembled, they were ready to attach to the wall – permanently like a custom bookcase!

I measured the side of the bookcase (11.5 deep) and the width (30.75 wide).  Then I measured & marked those measurements on the wall.  Using a multipurpose tool (like a dremel), I made a clean cut in the existing moulding and with the help of a hammer and crow bar, the moulding came right off the wall.

#DIY #Tutorial How-To Make a Laminate Bookcase Look Like a Custom Built-in Bookshelf.  A $1000 or more bookshelf for just about $100  - Similar Look, HUGE SAVINGS! Tutorial @ www.jennaburger.com

Soon the bookcase would be freestanding no more!  We set the bookcase in place, and using the “L” brackets that came with the piece, we installed /attached them to the top of the bookcase with a cordless drill.  This baby is going no where!

#DIY #Tutorial How-To Make a Laminate Bookcase Look Like a Custom Built-in Bookshelf.  A $1000 or more bookshelf for just about $100  - Similar Look, HUGE SAVINGS! Tutorial @ www.jennaburger.com

This is what the bookcase looked like installed and totally bare…

#DIY #Tutorial How-To Make a Laminate Bookcase Look Like a Custom Built-in Bookshelf.  A $1000 or more bookshelf for just about $100  - Similar Look, HUGE SAVINGS! Tutorial @ www.jennaburger.com

Not bad, but very plain and typical!

Here comes the good part…

ADDING MOULDING TO THE BOOKCASE

I thought it would be best to go from the bottom up, so the Mister and I started with installing the base moulding first.  I measured and cut the moulding for the length of the bookcase (the left side had a straight cut, the right side was a 45 degree angle as it wraps around the side).

I added wood glue to the back of the moulding, then using finishing nails, I lightly tapped the base into place.

#DIY #Tutorial How-To Make a Laminate Bookcase Look Like a Custom Built-in Bookshelf.  A $1000 or more bookshelf for just about $100  - Similar Look, HUGE SAVINGS! Tutorial @ www.jennaburger.com

That was followed by cutting the other leg for the base moulding and fitting it into place.  To “drive home” the finishing nails, I recommend using a nail punch set.  This will allow the head of the nail to be deeper than the moulding, which then can be filled in with wood putty before painting.

#DIY #Tutorial How-To Make a Laminate Bookcase Look Like a Custom Built-in Bookshelf.  A $1000 or more bookshelf for just about $100  - Similar Look, HUGE SAVINGS! Tutorial @ www.jennaburger.com

And this is the result of the base moulding…

#DIY #Tutorial How-To Make a Laminate Bookcase Look Like a Custom Built-in Bookshelf.  A $1000 or more bookshelf for just about $100  - Similar Look, HUGE SAVINGS! Tutorial @ www.jennaburger.com

Working our way up to customizing this bookcase, we added sides to the shelf to give it a more bolder, prominent look.  I had intended on using 1 x 2’s but was concerned that they would stick out too much.  My savior of a husband, found white primed (that saved a step) fencing lattice.  THEY WERE PERFECT.  The depth is only 1/4″ and the width is about 1.5″ – perfect for the sides!

Because the lattice is thin, we predrilled the holes before nailing them into place –  This avoided possible splitting of the wood because it’s thin. Once the holes were drilled, we added wood glue to the back, and nailed them home!

#DIY #Tutorial How-To Make a Laminate Bookcase Look Like a Custom Built-in Bookshelf.  A $1000 or more bookshelf for just about $100  - Similar Look, HUGE SAVINGS! Tutorial @ www.jennaburger.com

Once the sides were complete, this is what it looked like…

#DIY #Tutorial How-To Make a Laminate Bookcase Look Like a Custom Built-in Bookshelf.  A $1000 or more bookshelf for just about $100  - Similar Look, HUGE SAVINGS! Tutorial @ www.jennaburger.com

Last moulding steps… The Crown.

For the crown moulding on the built-in bookshelf, we used the same base moulding but inverted it (flipped it around) and also added an additional piece of moulding to make it stand out more.

The “crown” (actually base moulding) isn’t a true crown moulding so there are no special angles to figure out – thank goodness!  After measuring the length, we simply had to cut the moulding on a 45 degree angle using the compound miter saw.

#DIY #Tutorial How-To Make a Laminate Bookcase Look Like a Custom Built-in Bookshelf.  A $1000 or more bookshelf for just about $100  - Similar Look, HUGE SAVINGS! Tutorial @ www.jennaburger.com

Again when it came to installing, we first predrilled the holes using a cordless drill, then nailed it into place.

#DIY #Tutorial How-To Make a Laminate Bookcase Look Like a Custom Built-in Bookshelf.  A $1000 or more bookshelf for just about $100  - Similar Look, HUGE SAVINGS! Tutorial @ www.jennaburger.com

Adding this crown moulding also made the bookcase even taller = bonus!

It looked like a mess after installing, but it’s amazing what wood filler + sanding + painting can do!

#DIY #Tutorial How-To Make a Laminate Bookcase Look Like a Custom Built-in Bookshelf.  A $1000 or more bookshelf for just about $100  - Similar Look, HUGE SAVINGS! Tutorial @ www.jennaburger.com

For the paint, I chose a color that was very close to the laminate, so I only painted the new moulding + trim, not the entire built-in.  That would have been A LOT OF WORK and you can not even tell there are differing materials (laminate and wood).

#DIY #Tutorial How-To Make a Laminate Bookcase Look Like a Custom Built-in Bookshelf.  A $1000 or more bookshelf for just about $100  - Similar Look, HUGE SAVINGS! Tutorial @ www.jennaburger.com

Sidenote: If you are interested in painting an existing laminate piece of furniture, you should take a look at this tutorial of mine…

How-To Paint laminate furniture: tutorial with step by step instructions on painting laminate material

THE RESULT

#DIY #Tutorial How-To Make a Laminate Bookcase Look Like a Custom Built-in Bookshelf.  A $1000 or more bookshelf for just about $100  - Similar Look, HUGE SAVINGS! Tutorial @ www.jennaburger.com

We didn’t build just one.  There’s 2.

#DIY #Tutorial How-To Make a Laminate Bookcase Look Like a Custom Built-in Bookshelf.  A $1000 or more bookshelf for just about $100  - Similar Look, HUGE SAVINGS! Tutorial @ www.jennaburger.com

Check out the completed living room {reveal}

#DIY #Tutorial How-To Make a Laminate Bookcase Look Like a Custom Built-in Bookshelf.  A $1000 or more bookshelf for just about $100  - Similar Look, HUGE SAVINGS! Tutorial @ www.jennaburger.com

I certainly don’t want to downplay the work of a true millworker / cabinet maker.  Their work far exceeds what I created, but since my option was nothing or DIYing a bookshelf (a $1000 bookshelf is not within my budget), I went with the latter.

Want to save this project for later? Pin It!

#DIY #Tutorial How-To Make a Laminate Bookcase Look Like a Custom Built-in Bookshelf.  A $1000 or more bookshelf for just about $100  - Similar Look, HUGE SAVINGS! Tutorial @ www.jennaburger.com

I am very happy with the result of my built-in version!  It certainly isn’t perfect.  There are mistakes (remember failures happen), but it’s only something my eyes can see.  I hope I’ve inspired you with this do it yourself project.

If you’ve never thought a built-in was possible in your home due to budget constraints, think again!

DISCLOSURE: I am part of the Lowe’s Creative Team and was provided with a Lowe’s gift card to purchase items for my project.  I was also compensated for my time to use the products.  No one told me what to create, what to buy, how to use the product, or what to write.  All opinions are 100% mine!

Adding Stone Veneer to a Concrete Foundation Wall

#DIY Tutorial for Adding a Stone Veneer to a Concrete Foundation Wall: Give a bare, untreated foundation wall a finished look with an affordable stone facing!  Easy-to-Follow tutorial @ www.jennaburger.com

May was A-MAY-zing (hehe, corny but true)! Really though, it was a wonderful month of sunshine + warmer temps for us in the North Country of New York – June not so much as of yet…

Anyway, with the warm, beautiful days last month we were able to tackle most of our yearly outdoor maintenance work + had some time to fit in a few new projects.  While the Mister worked on the grass, I spruced up the front porch (which I shared last week), then we both came together to tackle the new stone garden border + the DIY project featured today of adding stone veneer to the concrete foundation wall...

#DIY Tutorial for Adding a Stone Veneer to a Concrete Foundation Wall: Give a bare, untreated foundation wall a finished look with an affordable stone facing! Easy-to-Follow tutorial @ www.jennaburger.com  #DIY Tutorial for Adding a Stone Veneer to a Concrete Foundation Wall: Give a bare, untreated foundation wall a finished look with an affordable stone facing! Easy-to-Follow tutorial @ www.jennaburger.com

It’s typically for many homes – new and old –  to have a bare, “naked” foundation wall at the gap between where the siding stops and the ground starts.  Depending on the grade of the land, as little as a few inches or as much as 2’+ may be exposed giving an unattractive, unfinished appearance.

One way to make the plain wall look more finished is to add stone veneer to the foundation walls surface.

Stone veneer products, which are made from concrete, come in a range of colors + shapes and can be used for a variety of projects.  Their ‘pro’ is that they are lighter weight than real stone, less expensive, and only about 1″ – 2″ thick. And the best part of all… You really don’t need ANY EXPERIENCE to apply / install them.

Check out the before & after on the far side of our front facade where over 2 feet of bare foundation wall was previously exposed.  What a difference!

#DIY Tutorial for Adding a Stone Veneer to a Concrete Foundation Wall: Give a bare, untreated foundation wall a finished look with an affordable stone facing!  Easy-to-Follow tutorial @ www.jennaburger.com

The stone veneer I chose is StoneCraft Pennsylvania Ledgestone Flats from Lowe’s.  The coloring has touches of grays & blues, with a medium-range stone size in a horizontal, linear pattern.

MATERIALS + COST

For the front facade only, I calculated about 45 square feet would be needed.   All the stone veneers at Lowe’s are special order and I ordered 6 boxes (@ 9 sq.ft. /per box), which gave me quite a bit extra for mistakes.  In the end, I had a full box and a half leftover.   Additionally, I ordered one box with corner pieces only.  Each of those boxes covers 7 linear feet, but I only needed about 3′-4′ linear feet.

Each box (which covered 9 sq. ft. + the corners which covered 7 linear ft.) was about $72, so the total was about $630

Other materials needed:

>  Circular Saw

> Masonry Blade

> Trowel (same as when tiling)

> Large bucket (to mix mortar)

> Type S mortar (this is similar to what I purchased)

> Water (to mix mortar)

mortar

CREATING A PATTERN

The most difficult challenging part of this entire project wasn’t the actual install, but instead creating a pattern with an even mix of sizes & colors.  There was no tutorial or “how-to” for this so it took some thinking, looking, and analyzing along the way.

It’s important to vary the colors (in our case there was a mix of grays, taupes, blues, and blacks) and to vary the size + shapes of the stones.  With the pattern we chose, we stuck with a linear, horizontal direction, but it was kind of like a jigsaw puzzle.

As we worked along from one end to the other, we would “dry install” a few stones, confirm we liked how it looked, then removed them to add the mortar.

#DIY Tutorial for Adding a Stone Veneer to a Concrete Foundation Wall: Give a bare, untreated foundation wall a finished look with an affordable stone facing!  Easy-to-Follow tutorial @ www.jennaburger.com

Important note: If you have corners, start with them first, then work your way over!

MIXING MORTAR

Using a large bucket (I used a 5 gallon bucket), add the mortar “powder”, then the water to make a mix that is pasty and that stays on the trowel without falling off when vertical.  If there is not enough water in the mix, the mortar will not join the stone to the wall, but if it’s too watery, the mix will run right off.

Sorry that I can’t be more specific or share an exact ratio, but it’ really trial and error.  There is a mixing ratio on the back of the bag, but it’s for the entire bag at one time and I don’t recommend doing that unless you work fast, have a large area to cover, and plan on using it all at one time.

This is a picture of the mortar mix just as I was about to begin the install of the stone…

#DIY Tutorial for Adding a Stone Veneer to a Concrete Foundation Wall: Give a bare, untreated foundation wall a finished look with an affordable stone facing!  Easy-to-Follow tutorial @ www.jennaburger.com

Once the mortar mix is ready, take a trowel and add a good amount to the back of the stone (the beauty of veneer is that the back is completely flat).

#DIY Tutorial for Adding a Stone Veneer to a Concrete Foundation Wall: Give a bare, untreated foundation wall a finished look with an affordable stone facing!  Easy-to-Follow tutorial @ www.jennaburger.com

Spread out the mortar so the entire stones back is covered, then run the grooved section of the trowel over the mortar to create “ridges” which gives the stone a better adhesion to the foundation wall.

#DIY Tutorial for Adding a Stone Veneer to a Concrete Foundation Wall: Give a bare, untreated foundation wall a finished look with an affordable stone facing!  Easy-to-Follow tutorial @ www.jennaburger.com

Then stick the stone in place…

#DIY Tutorial for Adding a Stone Veneer to a Concrete Foundation Wall: Give a bare, untreated foundation wall a finished look with an affordable stone facing!  Easy-to-Follow tutorial @ www.jennaburger.com

If you’ve ever tiled before, it’s a very similar process!  [tutorial on How-To Tile + Grout a Bathroom]

CUTTING STONE VENEER

Just as with tiling a bathroom, it’s inevitable that some stones will need to be altered / cut.

We used a Circular Saw (see my favorites tools) with a new Masonry Blade (it has an abrasive edge with no teeth) to cut the stones.  It was fairly easy to do and took little time to make cuts.  Be sure to clamp the stone down so it’s secure and slowly make the cut.

#DIY Tutorial for Adding a Stone Veneer to a Concrete Foundation Wall: Give a bare, untreated foundation wall a finished look with an affordable stone facing!  Easy-to-Follow tutorial @ www.jennaburger.com


#DIY Tutorial for Adding a Stone Veneer to a Concrete Foundation Wall: Give a bare, untreated foundation wall a finished look with an affordable stone facing!  Easy-to-Follow tutorial @ www.jennaburger.com

A Masons Chisel also comes in handy to cut small edges and/or make minor alternations.

Masons Chisel

#DIY Tutorial for Adding a Stone Veneer to a Concrete Foundation Wall: Give a bare, untreated foundation wall a finished look with an affordable stone facing!  Easy-to-Follow tutorial @ www.jennaburger.com

Check out the difference with part of the stone installed & the other side with the bare foundation wall…

#DIY Tutorial for Adding a Stone Veneer to a Concrete Foundation Wall: Give a bare, untreated foundation wall a finished look with an affordable stone facing!  Easy-to-Follow tutorial @ www.jennaburger.com

The total project took about 6 hours.  At times it was tiring being on the ground so long + our backs and knees were quite sore the next day, but it was really all worth the effort!

#DIY Tutorial for Adding a Stone Veneer to a Concrete Foundation Wall: Give a bare, untreated foundation wall a finished look with an affordable stone facing!  Easy-to-Follow tutorial @ www.jennaburger.com

THE RESULT

This was a 2 thumbs up project in our book.  Curb appeal is so important to how it ‘speaks’ to those visiting your home (and of course to those that live there).  Yes for many, $700 is a lot of money, but in the long term the addition of the stone veneer to the front of our home has made a big impact on the overall look.

#DIY Tutorial for Adding a Stone Veneer to a Concrete Foundation Wall: Give a bare, untreated foundation wall a finished look with an affordable stone facing!  Easy-to-Follow tutorial @ www.jennaburger.com

#DIY Tutorial for Adding a Stone Veneer to a Concrete Foundation Wall: Give a bare, untreated foundation wall a finished look with an affordable stone facing!  Easy-to-Follow tutorial @ www.jennaburger.com

#DIY Tutorial for Adding a Stone Veneer to a Concrete Foundation Wall: Give a bare, untreated foundation wall a finished look with an affordable stone facing!  Easy-to-Follow tutorial @ www.jennaburger.com

#DIY Tutorial for Adding a Stone Veneer to a Concrete Foundation Wall: Give a bare, untreated foundation wall a finished look with an affordable stone facing!  Easy-to-Follow tutorial @ www.jennaburger.com

The new stone veneer absolutely enhances the front facade of our home and looks like it’s always been there.   It’s a beautiful complimentary addition to the other changes we’ve made!

#DIY Tutorial for Adding a Stone Veneer to a Concrete Foundation Wall: Give a bare, untreated foundation wall a finished look with an affordable stone facing!  Easy-to-Follow tutorial @ www.jennaburger.com

#DIY Tutorial for Adding a Stone Veneer to a Concrete Foundation Wall: Give a bare, untreated foundation wall a finished look with an affordable stone facing!  Easy-to-Follow tutorial @ www.jennaburger.com

BEFORE + AFTER

In just a few years, here’s the progress…

#DIY Tutorial for Adding a Stone Veneer to a Concrete Foundation Wall: Give a bare, untreated foundation wall a finished look with an affordable stone facing!  Easy-to-Follow tutorial @ www.jennaburger.comone more…

#DIY Tutorial for Adding a Stone Veneer to a Concrete Foundation Wall: Give a bare, untreated foundation wall a finished look with an affordable stone facing! Easy-to-Follow tutorial @ www.jennaburger.com

Can I say, ‘I think we’re done outdoors?’…  Not quite yet.  All the big + more involved outdoor projects we wanted to tackle this year are finished, but I do have a few ideas that I want to focus on for the deck in the back of our house.  That will be a in a few weeks. For now, I just need to put my feet up & take a breather so I can truly enjoy what’s been accomplished.

I hope I’ve inspired you to look at what you have and enhance it to make it even more beautiful!  Curb appeal at it’s finest…


Spring + Summer Front Porch

I can not be more excited that the warm weather is here!  Over the last few weeks, it’s been hot.  Spring skipped right over us this year, but after that brutal winter, who cares.  As I’ve mentioned once or twice, we’ve been working hard on vamping up the outdoors for the warmer days ahead.

A lot of work has gone into the front of our home this year… curb appeal at it’s finest.  The porch got quite a few updates.  Here is this years Spring-right-into-Summer Front Porch…

Spring + Summer Front Porch: A small space filled with lots of colors and layers that create a welcoming entry.  See the rest of this porch + how it's evolved over the years! www.jennaburger.com

I feel lucky to have so many spots around our homestead to chill + put our feet up (the patio / the deck), but the one spot (which is by far the smallest of all) our clan of 5 always seems to choose to relax is the front porch.  Maybe it’s because the kids are often riding their bikes on the road or playing basketball in the driveway, but even when we’re playing a game of Uno, all of us pretty much always choose the front porch.

It certainly is quaint + cozy…

Spring + Summer Front Porch: A small space filled with lots of colors and layers that create a welcoming entry.  See the rest of this porch + how it's evolved over the years! www.jennaburger.com

…with lots of color + texture.

Spring + Summer Front Porch: A small space filled with lots of colors and layers that create a welcoming entry.  See the rest of this porch + how it's evolved over the years! www.jennaburger.com

Pillows on the porch: Blue Multi / White Medallion / Bird

Carpet @ chairs: $5 polypropylene mats from Five Below

Mat @ front door: Target – similar to this

Pouf: Lowe’s

Front Door color: Valspar Crushed Oregano in semi-gloss

A few upgrades from when we first moved in – enlarging the columns, adding the vertical pallet, installing the new front door – have all made a big impact to the entry of our home. psst, another fairly easy DIY project with a big impact look coming your way next week.

Spring + Summer Front Porch: A small space filled with lots of colors and layers that create a welcoming entry.  See the rest of this porch + how it's evolved over the years! www.jennaburger.com

EASY DO-IT-YOURSELF PROJECT

Dress up your house numbers…

Using a board from an old pallet, I brushed on a light coat of white paint.  I installed the house numbers (that used to be attached to the house) on the board about 3/4 up from the bottom. Then I took jute cord and wrapped it around to create an interesting design. Simple & not a penny spent!

Spring + Summer Front Porch: A small space filled with lots of colors and layers that create a welcoming entry.  See the rest of this porch + how it's evolved over the years! www.jennaburger.com[The stone edging at the garden beds are a new addition this year. Check out the tutorial on creating the perfect border for your beds]

And pretty flowers do make a BIG difference.  This porch looked far from how it does now only a few short weeks ago…

All of my flowers for this years porch came from Lowe’s.  They always have such a great variety of flowers + plants!

Spring + Summer Front Porch: A small space filled with lots of colors and layers that create a welcoming entry.  See the rest of this porch + how it's evolved over the years! www.jennaburger.com

Spring + Summer Front Porch: A small space filled with lots of colors and layers that create a welcoming entry.  See the rest of this porch + how it's evolved over the years! www.jennaburger.com

Not much is new; most of the furniture and layers on this years Spring + Summer front porch we’ve had for years.  With some little updates, it’s amazing how old can look new in a snap.

The side chairs are inexpensive teak bought about 8 years ago from the Christmas Tree store.  I thought about getting rid of them many times, but last year I added new cushions + a few vibrant pillows from Lowe’s and all of a sudden, they looked great again.

The lutchens bench used to be stained, but then I got my hands on a can of turquoise spray paint and it took on a new life!

The vertical garden pallet is a DIY creation from a few years back and it’s still a show-stopper on the porch.

Spring + Summer Front Porch: A small space filled with lots of colors and layers that create a welcoming entry.  See the rest of this porch + how it's evolved over the years! www.jennaburger.com

It is such a wonderful way to add height to a vertical space (and height = drama!).  From herbs to succulents to vines, I’ve hung many different types of plants on this vertical pallet over the years!  For this Spring season, I chose to plant Variegated Vinca Vines in the smaller pots and Fuchsia in the larger pots – they are both shade annuals.

Spring + Summer Front Porch: A small space filled with lots of colors and layers that create a welcoming entry.  See the rest of this porch + how it's evolved over the years! www.jennaburger.com

Fuchsia is also what I chose for the hanging plant over the porch since this side of the house gets no sun.

Spring + Summer Front Porch: A small space filled with lots of colors and layers that create a welcoming entry.  See the rest of this porch + how it's evolved over the years! www.jennaburger.com

Spring + Summer Front Porch: A small space filled with lots of colors and layers that create a welcoming entry.  See the rest of this porch + how it's evolved over the years! www.jennaburger.com

Ferns are another great shade choice and I have that hanging from a tall hook next to the porch.  It’s such a beautiful, hardy Summer staple.

Spring + Summer Front Porch: A small space filled with lots of colors and layers that create a welcoming entry.  See the rest of this porch + how it's evolved over the years! www.jennaburger.com

Can you see why this spot is our favorite to spend those long dog days of Summer?  Do you blame us?!

Spring + Summer Front Porch: A small space filled with lots of colors and layers that create a welcoming entry.  See the rest of this porch + how it's evolved over the years! www.jennaburger.com

Lastly, I love seeing + sharing how our front facade has evolved over the years…

Spring + Summer Front Porch: A small space filled with lots of colors and layers that create a welcoming entry.  See the rest of this porch + how it's evolved over the years! www.jennaburger.com

Crazy, right?  All this TLC has been tackled with our own hands!

Thanks for taking the tour of our favorite Summer Space!  And by the way, did you catch anything different about this years porch from years past – if you’ve been following along with me for over the years, you might have noticed.  Well if not, I’ll give you a hint… we jazzed up the ugly foundation with new stone veneer.  More on that + a tutorial on how we installed it coming up next week.

Cheers to a fantastic summer! 

So tell me, are you more of a front porch sitter or a back deck lounger?

DISCLOSURE: I am part of the Lowe’s Creative Team and was provided with a Lowe’s gift card to purchase items for my project.  I was also compensated for my time to use the products.  No one told me what to create, what to buy, how to use the product, or what to write.  All opinions are 100% mine!

The Perfect Border for your Beds

As I mentioned last week while sharing ideas on creating an outdoor oasis, we’ve been fast + furious over the past few weeks on sprucing up the outdoors of our humble abode.

It’s what’s happening around our little ole’ homestead in the North Country and I am excited to share the updates we’ve been making!  First up, the garden beds in the front yard…

Granted the front beds have received a whole lotta TLC over the 5 years we’ve lived here, but I still felt like there needed to be more definition between the grass and the gardens.  After cleaning out the beds and before laying the mulch, I installed a stone garden edge that not only defines the line between the grass & garden, but gives character and texture…

The Perfect Border for your Beds: Defining a gardens edge with inexpensive stone that fit any shape or size garden bed.  Details @ www.jennaburger.com

This is the garden bed that is against the front of our home and it looks much different than when we moved in a few years ago.  It’s had quite the transformation…

Garden before

Without giving too much away (the full ‘tour’ of this years Spring porch coming later this week), this is how the front of the house looks now…

The Perfect Border for your Beds: Defining a gardens edge with inexpensive stone that fit any shape or size garden bed.  Details @ www.jennaburger.com

One of the many reasons I love having a blog is documenting the evolution of our home. It’s wonderful to look back and see how much we’ve done!

So back to…

CREATING A GARDEN EDGE USING STONE

I found these edging stones at Lowe’s for $1.28 each.

Stone to edge garden beds

These stones are a trapezoid shape – about 7″ long on one side, about 5″ long on the other side.  Because of the stones shape, they can be layed in a straight line (by changing the direction with each one) OR on a curve (tight curve or gradual curve) to border a garden.  One row high is just enough (that’s what I did) or these inexpensive stones can be stacked (staggering the joint) to create a taller garden border or retaining wall.  They can also be used to create a firepit.

The best part about these stones aside from the price is that there is truly no installation!  You simply set it & forget it (I sound like an infomercial, but it’s really that easy).

The Perfect Border for your Beds: Defining a gardens edge with inexpensive stone that fit any shape or size garden bed.  Details @ www.jennaburger.com

The garden beds bordering the front of the house & in the yard had a natural trench at the edge, so I followed the line and layed the stones in place.  A few tweaks needed to be in some spots to create a nicer curve but in all it took minutes to lay them all.

BEFORE & AFTER

Just a few weeks ago before the flowers started coming to life & before the mulch was added, I snapped the before picture.  Now look how the new stones define the garden…

The Perfect Border for your Beds: Defining a gardens edge with inexpensive stone that fit any shape or size garden bed.  Details @ www.jennaburger.com

The Perfect Border for your Beds: Defining a gardens edge with inexpensive stone that fit any shape or size garden bed.  Details @ www.jennaburger.com

Once the stone edge was set, I planted a few annuals amongst the growing perennials and filled in the garden with mulch.

The Perfect Border for your Beds: Defining a gardens edge with inexpensive stone that fit any shape or size garden bed.  Details @ www.jennaburger.com

The Perfect Border for your Beds: Defining a gardens edge with inexpensive stone that fit any shape or size garden bed.  Details @ www.jennaburger.com

And it was complete…

The Perfect Border for your Beds: Defining a gardens edge with inexpensive stone that fit any shape or size garden bed.  Details @ www.jennaburger.com

The Perfect Border for your Beds: Defining a gardens edge with inexpensive stone that fit any shape or size garden bed.  Details @ www.jennaburger.com

It’s far from an award-winning garden, but it’s ours that we created.

The Perfect Border for your Beds: Defining a gardens edge with inexpensive stone that fit any shape or size garden bed.  Details @ www.jennaburger.com

Each day the flowers show more of their beauty.

The Perfect Border for your Beds: Defining a gardens edge with inexpensive stone that fit any shape or size garden bed.  Details @ www.jennaburger.com

I’ll admit, because I am a bit Type A & love instant gratification, gardening isn’t top on my list of favorite things to do.  I often get frustrated & annoyed each Spring season not knowing what will bloom again. Thankfully looking back on old pictures, I am able to truly appreciate all the hard work we’ve put into creating a home we love.  What an incredible lesson of patience, right?!

This stone edge was truly a simple + high impact DIY project to jazz up the front of our home.  I am thrilled that it was inexpensive + easy to do – how much better does it get?!

The Perfect Border for your Beds: Defining a gardens edge with inexpensive stone that fit any shape or size garden bed.  Details @ www.jennaburger.comThe front facade of our home also got another big upgrade.  More on that coming soon…  In the meantime, if you have garden beds that merge into the grass, adding a stone edge will surely create the definition needed to add character & texture to your landscaping beds!

DISCLOSURE: I am part of the Lowe’s Creative Team and was provided with a Lowe’s gift card to purchase items for my project.  I was also compensated for my time to use the products.  No one told me what to create, what to buy, how to use the product, or what to write.  All opinions are 100% mine!

Creating an Outdoor Living Space

I don’t know about you, but around our homestead, it takes a solid 3 weeks to get the outdoors prepped + spruced to enjoy for the coming warmer months ahead.

As the final piles of snow melted only a little over a month ago, work began on Summerizing the exterior.  FINALLY after many trips to the garden center, the last flowers & plants were purchased yesterday, so our exterior living spaces are almost complete and I can’t wait to share them with you… coming soon.

In the meantime, I’ll inspire you with fresh ways + ideas to bring the indoors out with budget-friendly ideas for creating an outdoor living space

Bring the indoors OUT... Helpful budget-friendly ideas to create an outdoor oasis!

Whether a deck, porch, or patio there are ways to bring the indoors out to create a beautiful, serene, and inviting outdoor oasis. With comfortable seating, stylish layers, and lots of flowers and greenery, your outdoor space will become the most used “room” in, and outside, of the home for the Summer months.

BRING THE INDOORS OUT
Surround yourself with what you love by bringing the indoors out. Creating an outdoor living room that is truly an outdoor oasis is similar to designing an interior haven. Surround yourself with things that are most meaningful to you and elements that bring you happiness.  Make an outdoor space fun and unexpected by introducing a pretty patterned table cloth, wind chimes that blow in the breeze, and pops of color through pillows.

Bring the indoors OUT... Helpful budget-friendly ideas to create an outdoor oasis!

Similar to a room inside your home, once you have your basics, add in layers – lanterns, candles, flowers, and plants.

Our Summer Deck 2014Bring the indoors OUT... Helpful budget-friendly ideas to create an outdoor oasis!

COMFORTABLE SEATING
An outdoor oasis isn’t complete without lots of comfortable seating. Once the summer months arrive, almost every waking moment will be spent outdoors soaking up the sun. Be the house where everyone gathers on weekend evenings.

Bring the indoors OUT... Helpful budget-friendly ideas to create an outdoor oasis!Our Patio Paradise 2014

Bring the indoors OUT... Helpful budget-friendly ideas to create an outdoor oasis!

Either individual oversized Adirondack chairs or an outdoor sofa fit for two (or more) is a necessity for outdoor living. Load up on comfy pillows and you may never head back indoors.

Put your feet up by adding a few outdoor ottomans that are waterproof to truly create an outdoor living room.

There are many local furniture stores and online shops that have a wide selection of outdoor sofas and chairs that are similar to the comforts of your living room. Or make your own, like I did with shipping pallets.

Bring the indoors OUT... Helpful budget-friendly ideas to create an outdoor oasis!Tutorial for DIY Pallet Sofa

STORAGE
Similar to the indoors, space for storage is a must. No matter if you’re an empty nester or a family of 5, it’s essential to have a spot to store the outdoor pillows, BBQ necessities, and sand toys.

Many outdoor furniture pieces have built-in storage compartments or a stylish storage box that compliments the setting. Alternatively, try an outdoor ottoman flip top that duals as storage.

Outdoor Storage ideasleft to right: resin wicker box / wicker storage chest / wood storage bench

LAYERS
An outdoor setting isn’t complete without a stylish rug. Adding a rug to a porch or patio isn’t just needed to make a space pretty, but it also provides a comfy spot to kick off the flip flops without the fear of a stubbed toe or unwanted splinter. Kids can walk around barefoot (which most love to do in the summer months) while having a barrier between their toes and the hard surface.

Outdoor rugs are a favorite because they can live outdoors for the summer and be brought indoors during the winter. Rugs made for the elements, are also ideal for foyers, mudrooms, and even under dining room tables (especially with youngsters in the home).

I am loving the outdoor rugs made of polypropylene because they are super easy to clean, fold up tight for storage, and are fairly inexpensive!

Bring the indoors OUT... Helpful budget-friendly ideas to create an outdoor oasis!

A sneak at this years front porch with a new 3′ x 6′ rug (upper left) that I found at Five Below for $5…

Bring the indoors OUT... Helpful budget-friendly ideas to create an outdoor oasis!

FLOWERS
Last, but certainly not least, an outdoor oasis isn’t complete without surrounding it with greenery. Whether your favorite spot is in the sun or the shade, surround your exterior setting with lush plants and colorful flowers in varying sized pots.

Bring the indoors OUT... Helpful budget-friendly ideas to create an outdoor oasis!Potted herbs are a great alternative to flowers. Or try perennials in a pot, then transfer them into the ground at the end of the Summer season so they can be enjoyed again next year.

And there you have it…  5 ways to extend the beauty on the inside to the outdoors.  I’m off to finish up the last potted plants, lay mulch in the side garden, and finally snap some pictures so I can share what I’ve been working on for the last weeks.

Have a wonderful memorial day weekend!