Author: Jenna

An Outdoor Deck for Outdoor Living
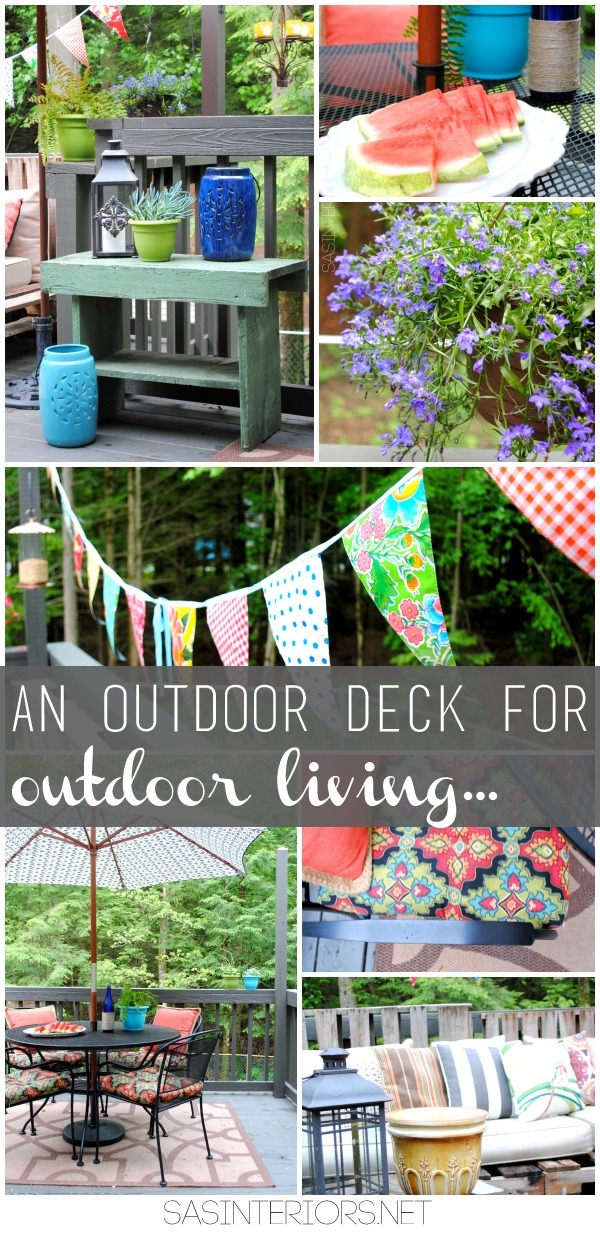
An Outdoor Deck for Outdoor Living: sharing our outdoor oasis where we'll be spending lots of time over the next few months! If there were no mosquitos and if there were a teeny-tiny bathroom, my outdoor deck would be just the spot for me to live for the next 3 months.  O, and maybe a small spot for me to cook – but wait, that’s covered…  we have a grill!

Our newly revamped deck is filled with many comfy spots to sit, relax, eat, and simply soak up the sun over the coming Summer months.  It’s a vibrant and welcoming oasis for outdoor living.  But like I said, I’m not a huge fan of mosquitos – who is – so unfortunately I will have to come indoors, but not for long.

Let me show you around.  Will you join me on the deck…

An Outdoor Deck for Outdoor Living: sharing our outdoor oasis where we'll be spending lots of time over the next few months!

Along with the Patio Paradise I am in the midst of finishing up, this is another outdoor space that we’ve revamped for the coming Summer months.  Since we’ll be spending lots of time at home this Summer with the new baby, it was important for us to create multiple outdoor spaces that we will really enjoy & use.  And hopefully in the meantime, we’ll get a handle on the mosquitos…

As you step outside the dining room slider, I welcome you to our new outdoor dining space.  I am in love with the metal table + chairs we just got from Lowe’s.  We used to have a rectangular table on the deck, but it really was too large for the space.  This new round table is just the right size and we’ve already sat out here many of times for a quiet, delightful lunch and our daily family dinners.

With our deck being newly stained last year, the lighter-colored rug which I got from Home Decorators a few years ago is a great contrast.

An Outdoor Deck for Outdoor Living: sharing our outdoor oasis where we'll be spending lots of time over the next few months!

If you’re interested, the Ikat patterned umbrella is from last years Target collection (I haven’t seen anything similar this year, which is a bummer) and the seat cushions + pillows are a recent purchase from Kirklands.  A few weeks ago they had some great deals so I got all 6 pieces for around $100.

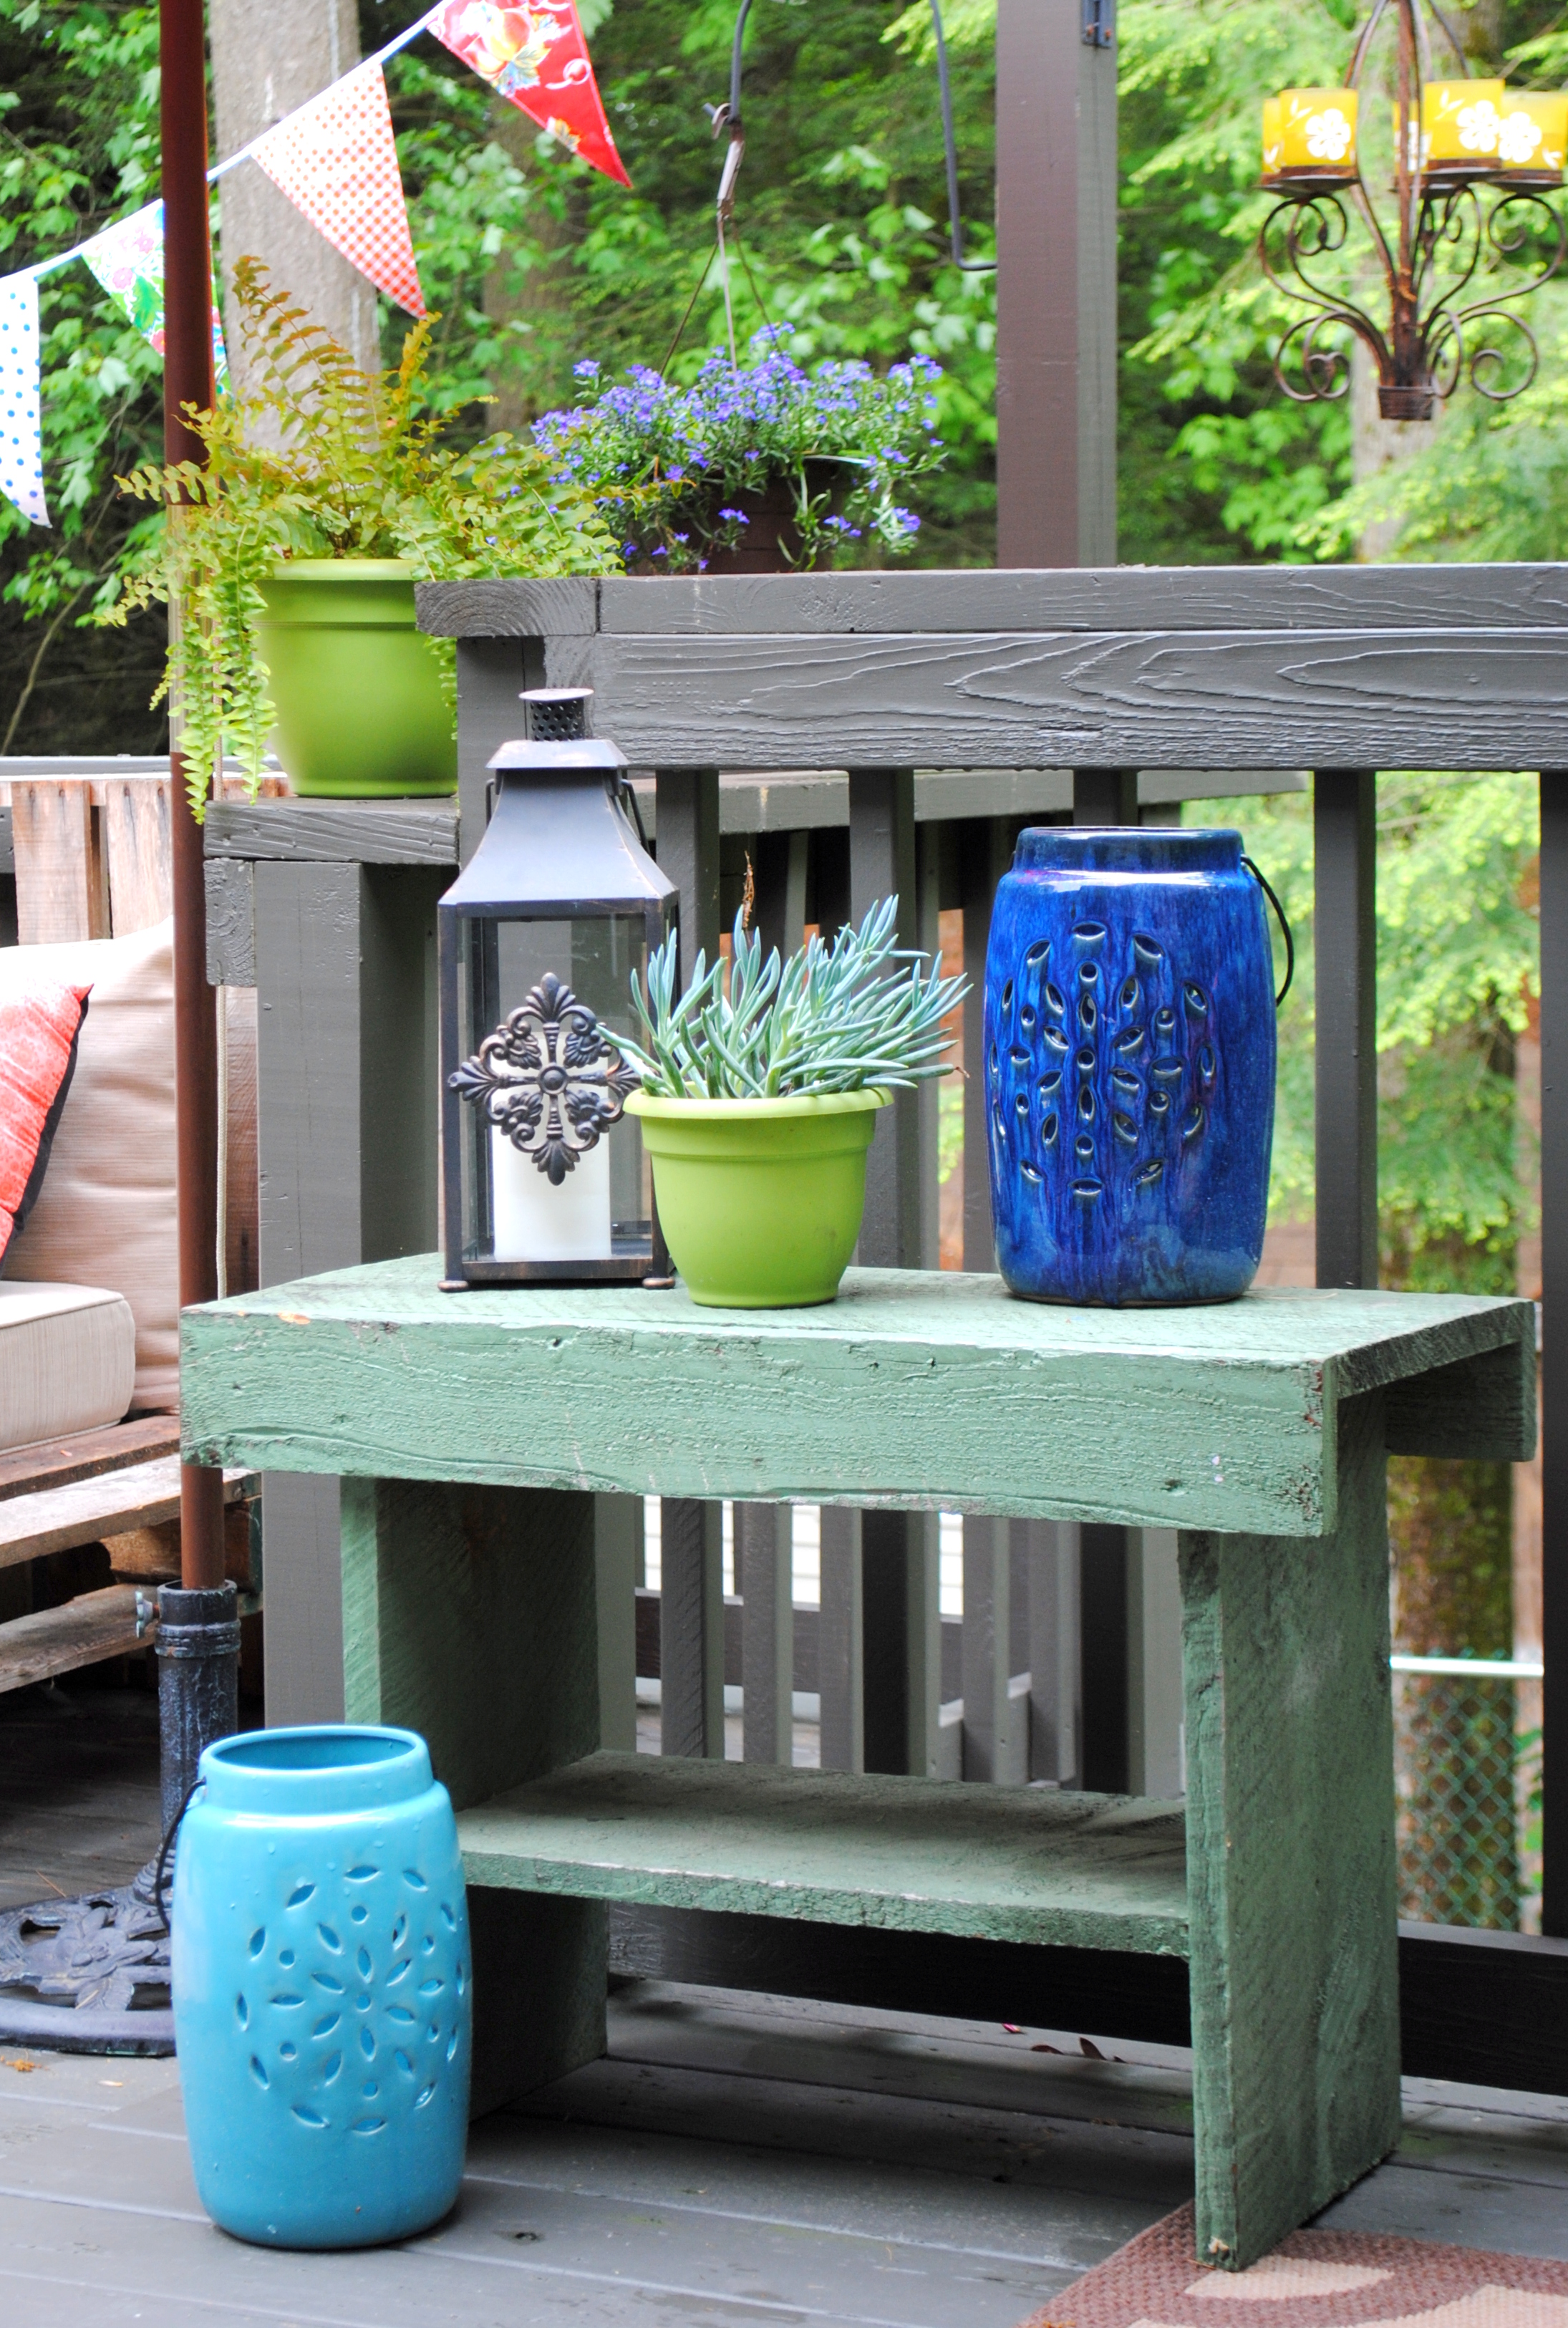
I love surrounding the deck and our other outdoor spaces with plants and flowers that are easy to maintain.  I really try to find things that are low-maintenance and don’t need a lot of sun because as you can see from the photos, we are surrounded by lots of trees.  This fern beauty is new and it’s doing well so far…

An Outdoor Deck for Outdoor Living: sharing our outdoor oasis where we'll be spending lots of time over the next few months!

One part of this deck that I love is that it’s two levels, so it kind of creates two distinct sections, yet they still read as one.  The ‘dining’ section is what you step out to from the house and then you step down to the ‘living’ section.  This is the first year it’s set up like this – we used to have it reversed as you may have noticed the change from last year.

An Outdoor Deck for Outdoor Living: sharing our outdoor oasis where we'll be spending lots of time over the next few months!

An Outdoor Deck for Outdoor Living: sharing our outdoor oasis where we'll be spending lots of time over the next few months!

An Outdoor Deck for Outdoor Living: sharing our outdoor oasis where we'll be spending lots of time over the next few months!

An Outdoor Deck for Outdoor Living: sharing our outdoor oasis where we'll be spending lots of time over the next few months!

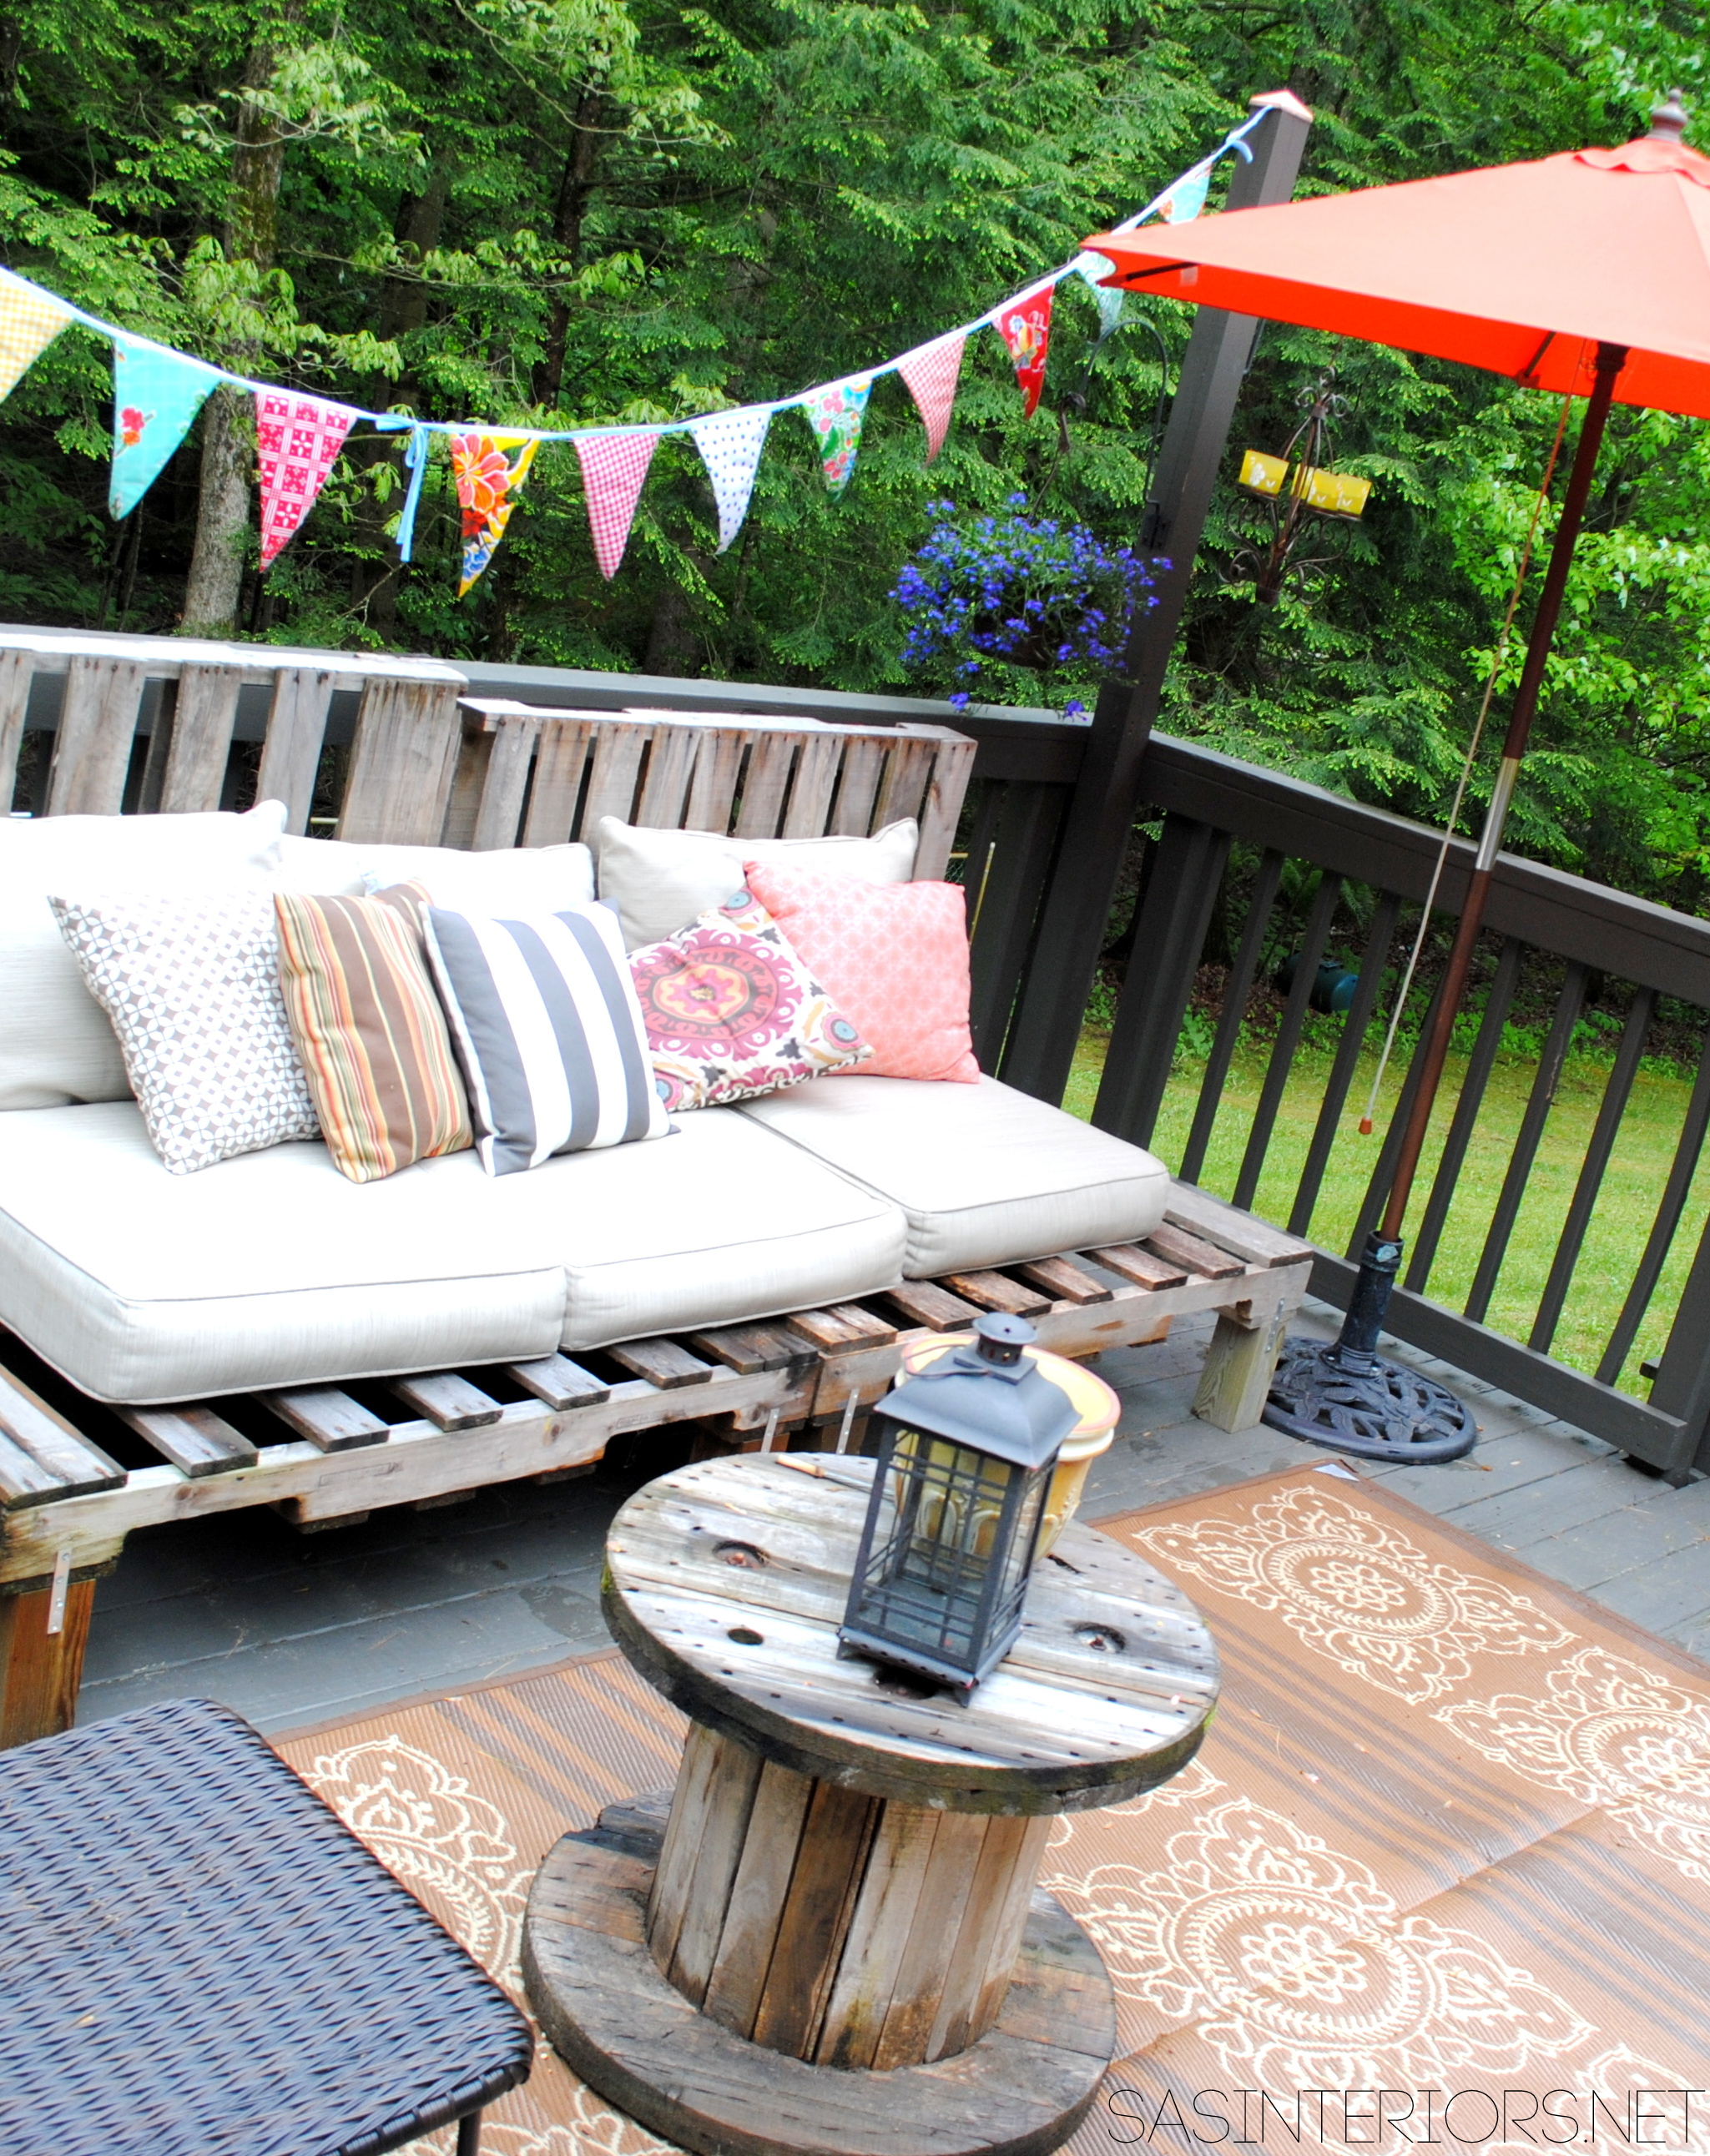
The ‘living’ space is where we have the pallet sofa and other spots for sitting + relaxing.  We still ADORE our outdoor sofa because it’s oversized and O, SO Comfortable!

Because of the sun that shines for some parts of the day, we have another umbrella that is slightly smaller that gives the coverage needed.  It’s a bright orange hue and is a great compliment to the other bold + vibrant colors used on the deck.  It’s a Pier One find that I scored 2 years ago during a very hot, scorching week.  I’ll just say, I wasn’t the only one in the store looking for outdoor umbrellas, but I got to it first and snagged the last one {pat on the back for me}…
An Outdoor Deck for Outdoor Living: sharing our outdoor oasis where we'll be spending lots of time over the next few months!

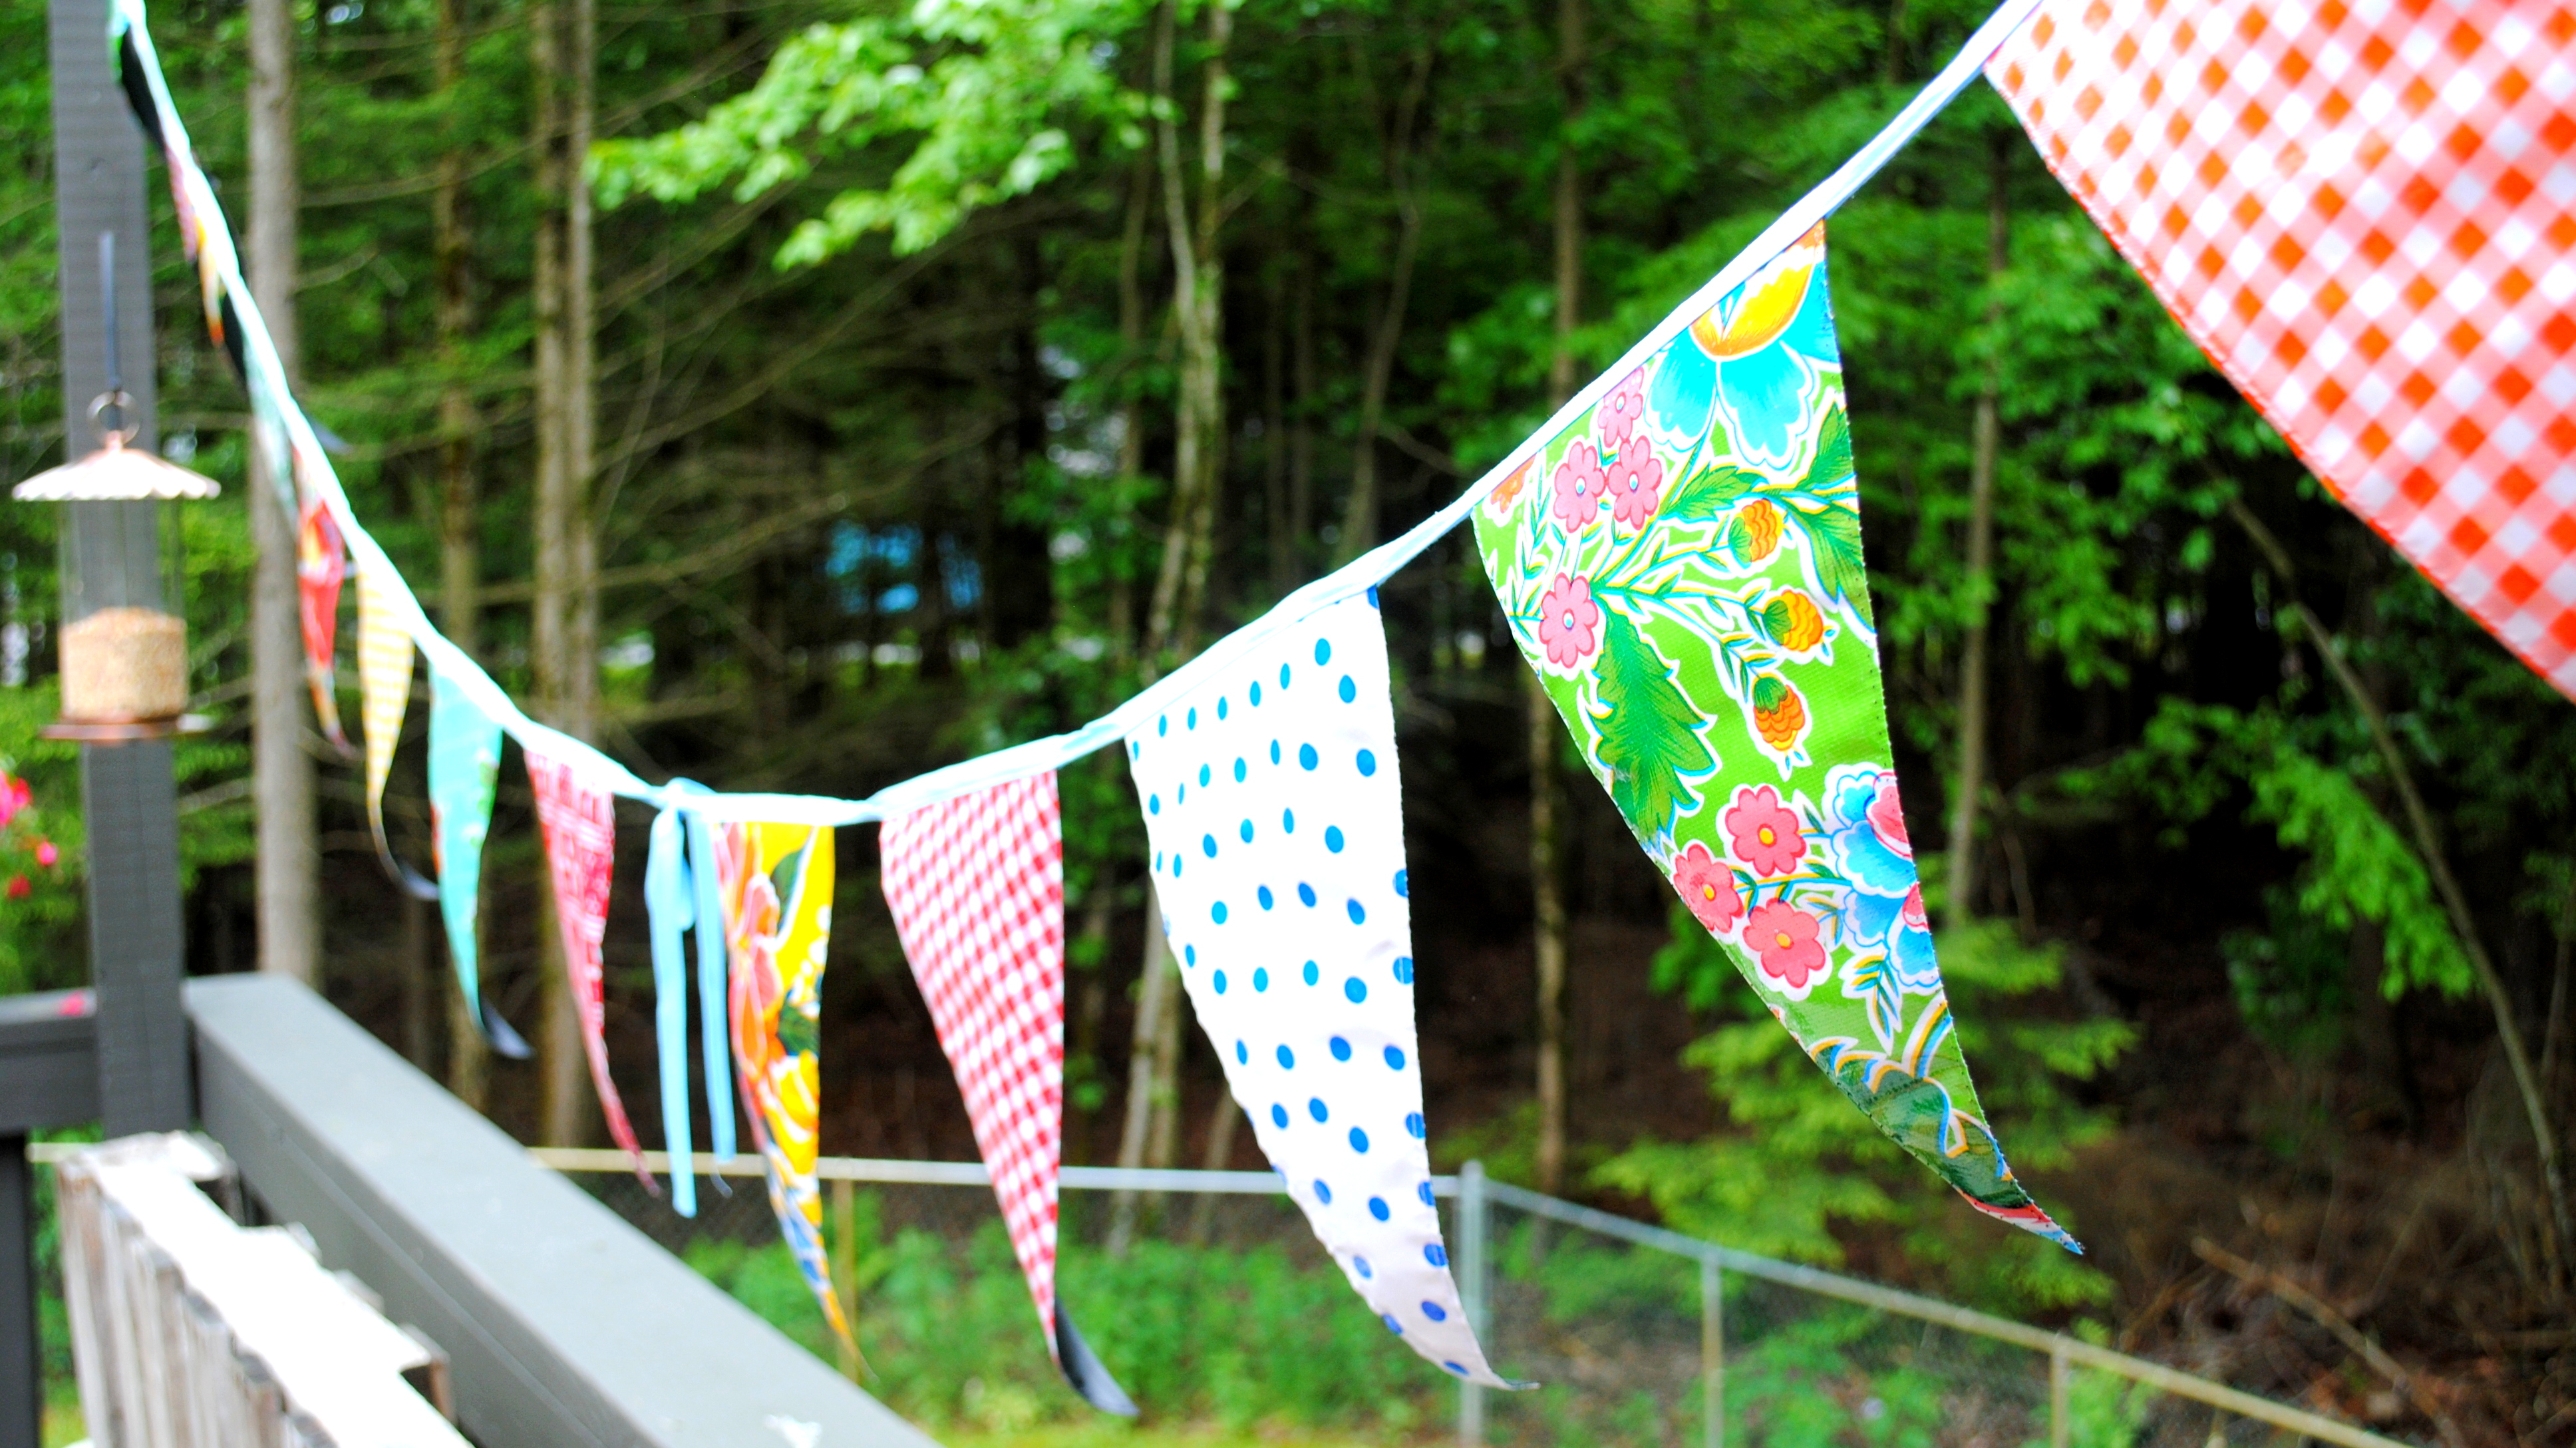
How can I go any further without talking about the focal point of the deck…  The adorable pennant banner.  The fabulous + talented Kelly of The Modern June sent them to me and I am forever gracious.  I met her last year at the Country Living fair and sadly, the last pennant was purchased right under my nose (by who of all people, one of my besties).  Even though I missed out, in the end I am blessed to have these beauties swaying in the wind.  And you know what the best part of these cute oilcloth banners / buntings are???  they have chalkboard fabric on the other side.  How much better does it get?!

An Outdoor Deck for Outdoor Living: sharing our outdoor oasis where we'll be spending lots of time over the next few months!

The burning question you may be thinking…  Where is that round table from?  O, that lil’ ole’ thing…  That’s a roadside find.  It’s actually a wire spoil for electrical lines.  You never know what you’ll find when you’re driving along with 2 kids + a trunk load of groceries.  Ya, that was an interesting day.

An Outdoor Deck for Outdoor Living: sharing our outdoor oasis where we'll be spending lots of time over the next few months!

An Outdoor Deck for Outdoor Living: sharing our outdoor oasis where we'll be spending lots of time over the next few months!

What makes this deck oasis complete? The layers.  Accessories like plants, flowers, lanterns, urns, stools, blankets, candles, etc make any space warm + inviting.  Layers are the key to giving dimension to every space – inside the home or out!

An Outdoor Deck for Outdoor Living: sharing our outdoor oasis where we'll be spending lots of time over the next few months!

Opposite of the pallet sofa is another seating vignette.   Not every day is hot, so for those cooler nights a warm blanket is a must.  Of course, it doesn’t stay outside overnight, but it’s brought outside often.

If you’re wondering, the pillows are a new addition.  I found them while shopping for the new patio and they are all from Lowe’s.  The pouf is from last year’s Target summer collection and the yellow garden stool is a Homegoods find.

An Outdoor Deck for Outdoor Living: sharing our outdoor oasis where we'll be spending lots of time over the next few months!

An Outdoor Deck for Outdoor Living: sharing our outdoor oasis where we'll be spending lots of time over the next few months!

An Outdoor Deck for Outdoor Living: sharing our outdoor oasis where we'll be spending lots of time over the next few months!

As much as I would have liked to show you around in person, I hope you enjoyed the tour of our new outdoor deck oasis.  If you’re looking for us, you know where we’ll be…

Happy Spring & Summer!

Patio Paradise: The Plan + Mood Board

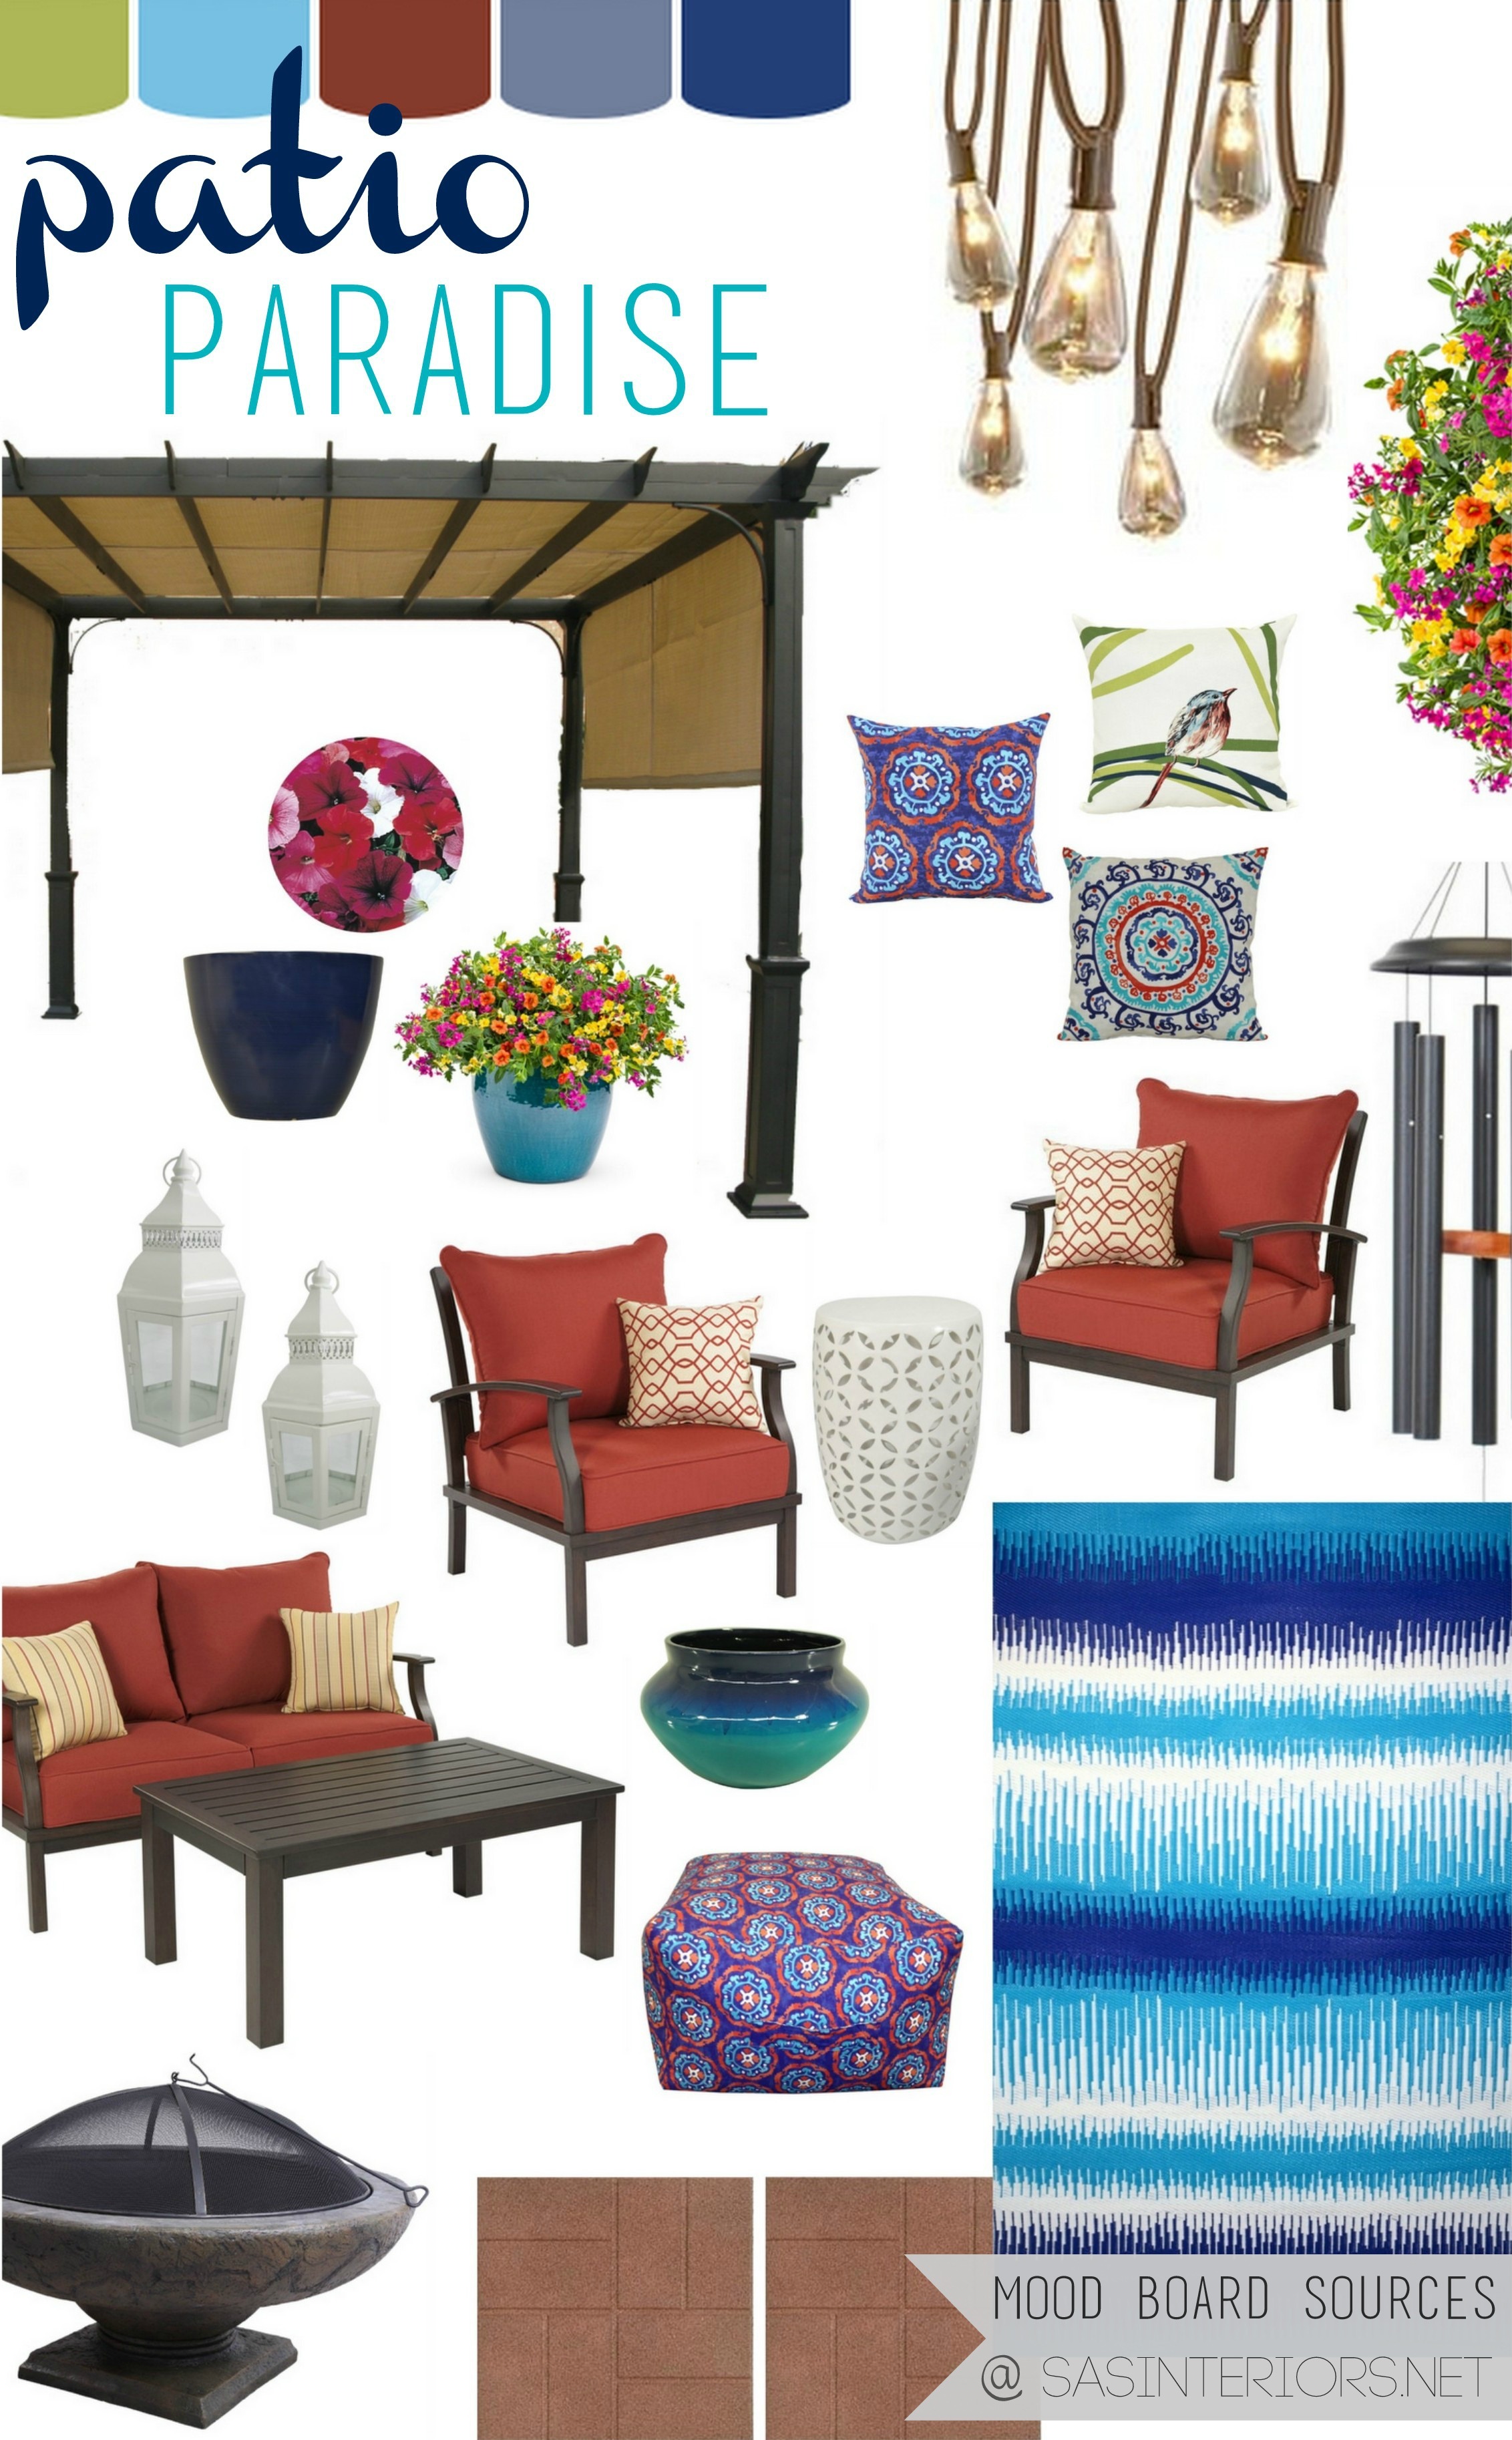
Patio Paradise Mood Board: Creating an inviting, relaxing patio oasis

I hope you had a fabulous Memorial Day weekend!   Not only did we spend time thanking those who served our country, but we enjoyed much of the long weekend soaking up the sun + enjoying the beautiful outdoors.  BUT like always, with playtime comes worktime.  Before setting our sights on BBQing & the beach, we worked all day Saturday on the outdoors.

Over the past month, we have been spilling hours into transforming our sideyard into a Patio Paradise!  I’m thrilled to be partnering with Lowe’s on this project to create a space that is inviting, relaxing, and truly a magical oasis.  With the new baby coming in just a few short weeks, I am banking on this new area being our stay-cation spot for the Summer.

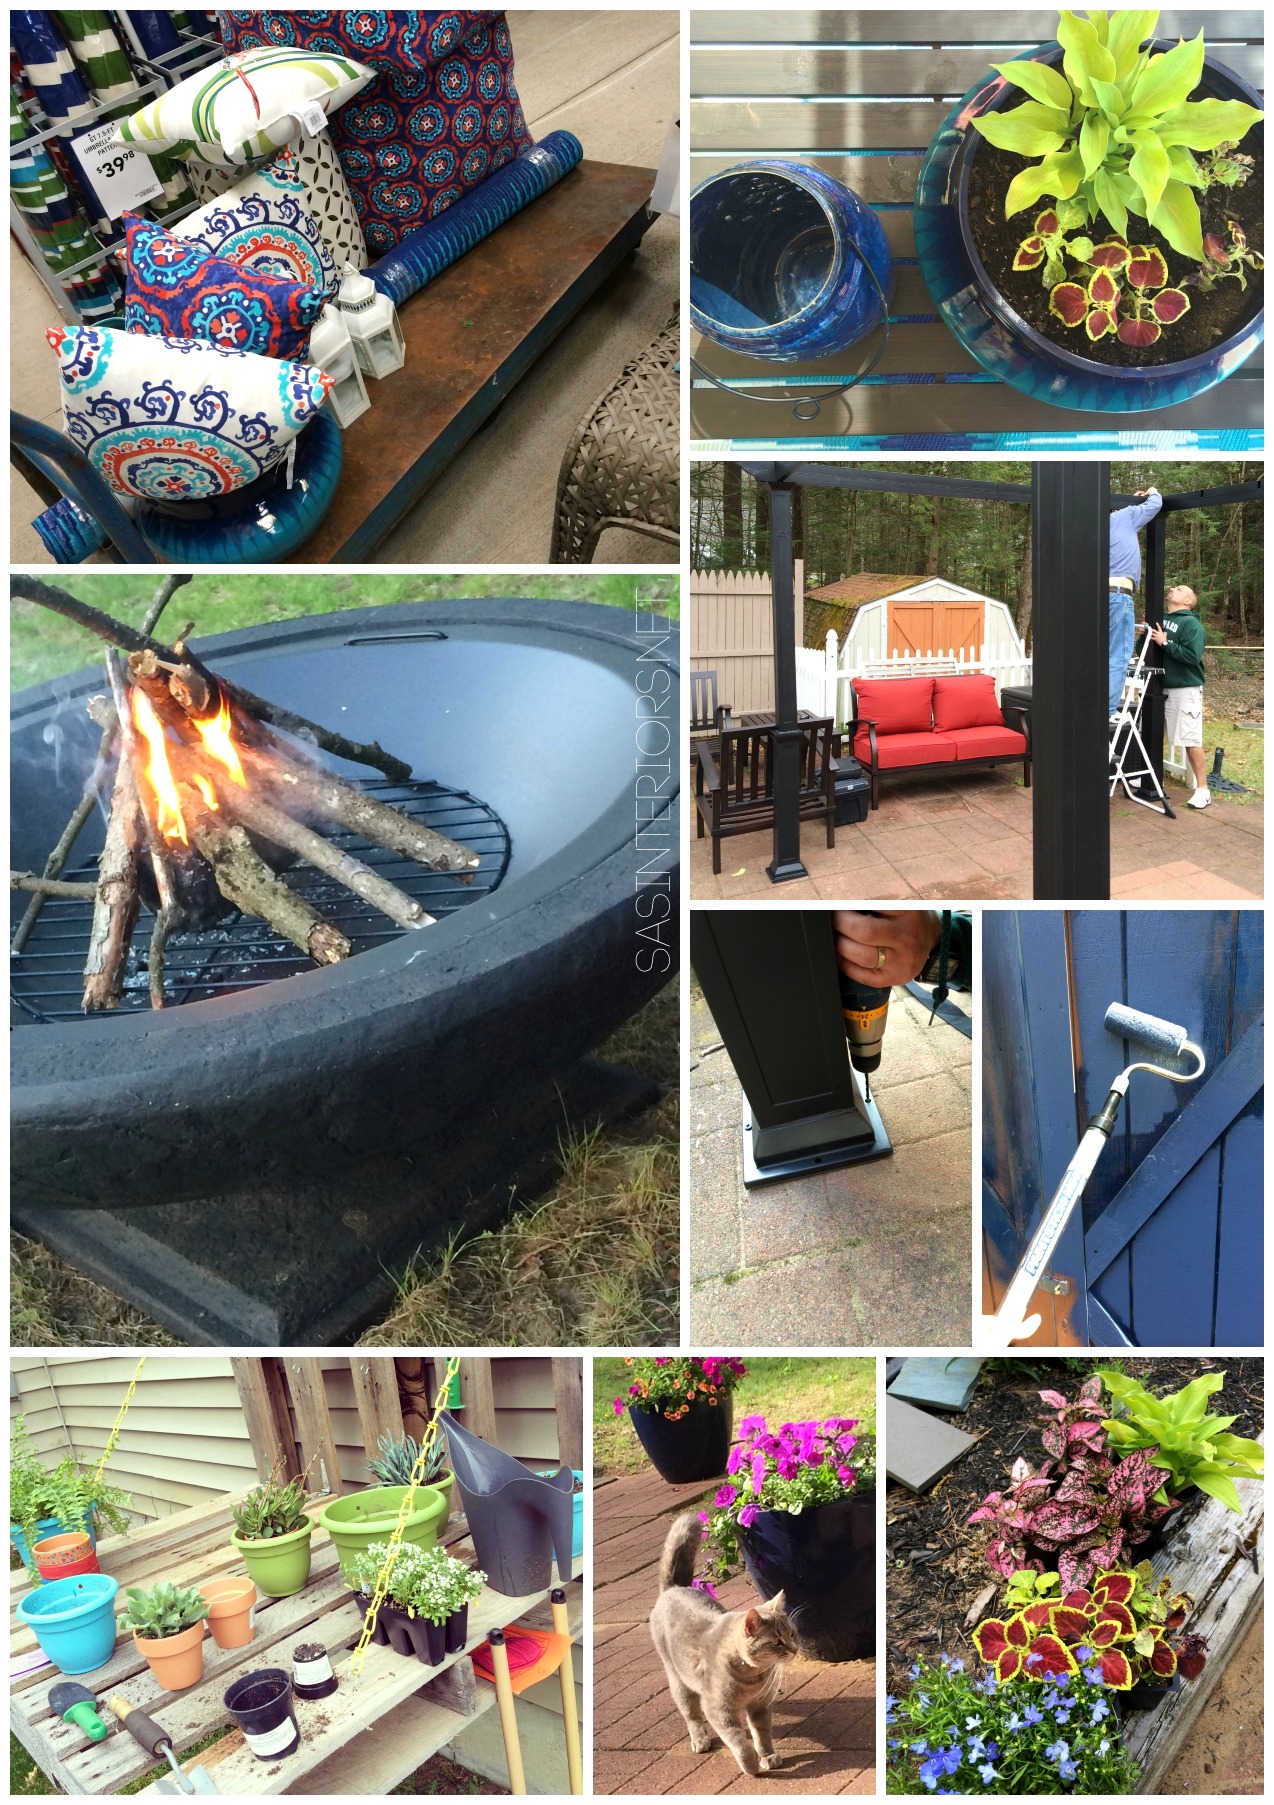
Here’s a peek at the shopping and prepping that has gone into to making this Patio Paradise come to fruition…

Progress on creating a Patio Paradise

When you have a blah blank slate, there is alot that can be done. Only a few years ago, the area where our new oasis now sits was filled with a dilapidated above-ground pool + 15 overgrown trees.  It surely has taken a turn (for the better) since then!

Before

Before

I’m super excited for this outdoor space to be done & to share it with you.  As I’ve mentioned once and again (and maybe 48 other times), I don’t have a green thumb + many perennials are difficult to grow in my neck of the woods because of the long winters.  But, I can say that new buds are popping each day.  In no time, this space will be done and I’ll be able to share with you my new Patio Paradise!  In the meantime, if you’ve got your eye on any of the elements in my mood board, here are direct links to the sources…

Patio Paradise Mood Board: Creating an inviting, relaxing patio oasis

1. Outdoor Lights
2. Pergola
3. Garden Pot (navy)
4. Lanterns – Large & Small
5. Pillows – Blue Multi / White Medallion / Bird
6. (2) Side Chairs + Pillows
7. Loveseat + Coffee Table
8. White Garden Stool
9. Planter
10. Outdoor Rug
11. Pouf
12. Outdoor Fireplace

Once our Patio Paradise is complete, we’ll be ready for a big ole’ bash!  I wish you could all come.  The reveal + party pics coming soon.  In the meantime, later this week (or possible next week) I’ll be sharing the other outdoor spaces around our home.  Along with the patio, we’ve been busy updating the back deck + the front porch.  I better get back to work…

What updates have you made to your outdoor spaces this Spring?

Disclosure: I am super excited to be partnering with Lowe’s on this outdoor project.  I love working with Lowe’s because they offer a range of items with great design qualities.  As always, they did not tell me what to write, what to choose, and all thoughts are 100% my own.  They gave me free-reign on everything so my design ideas + thoughts are 100% genuine.

Easy Project, Big Impact: Reupholstered Chair Seat

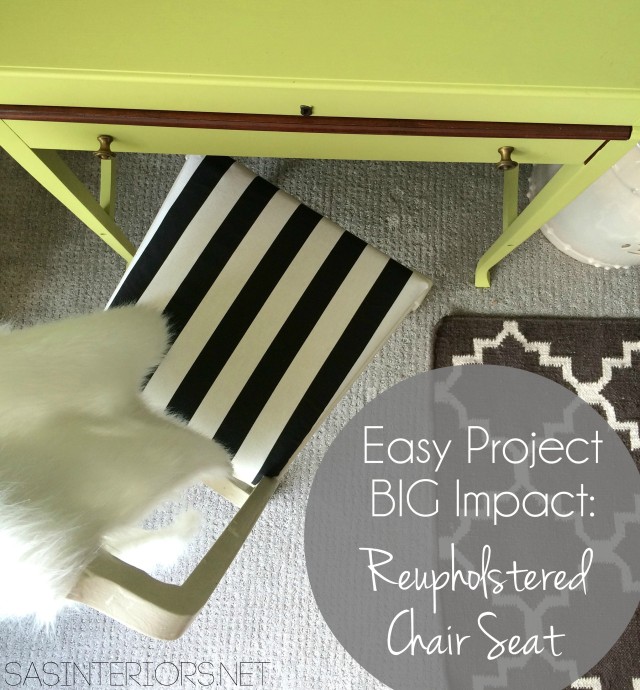
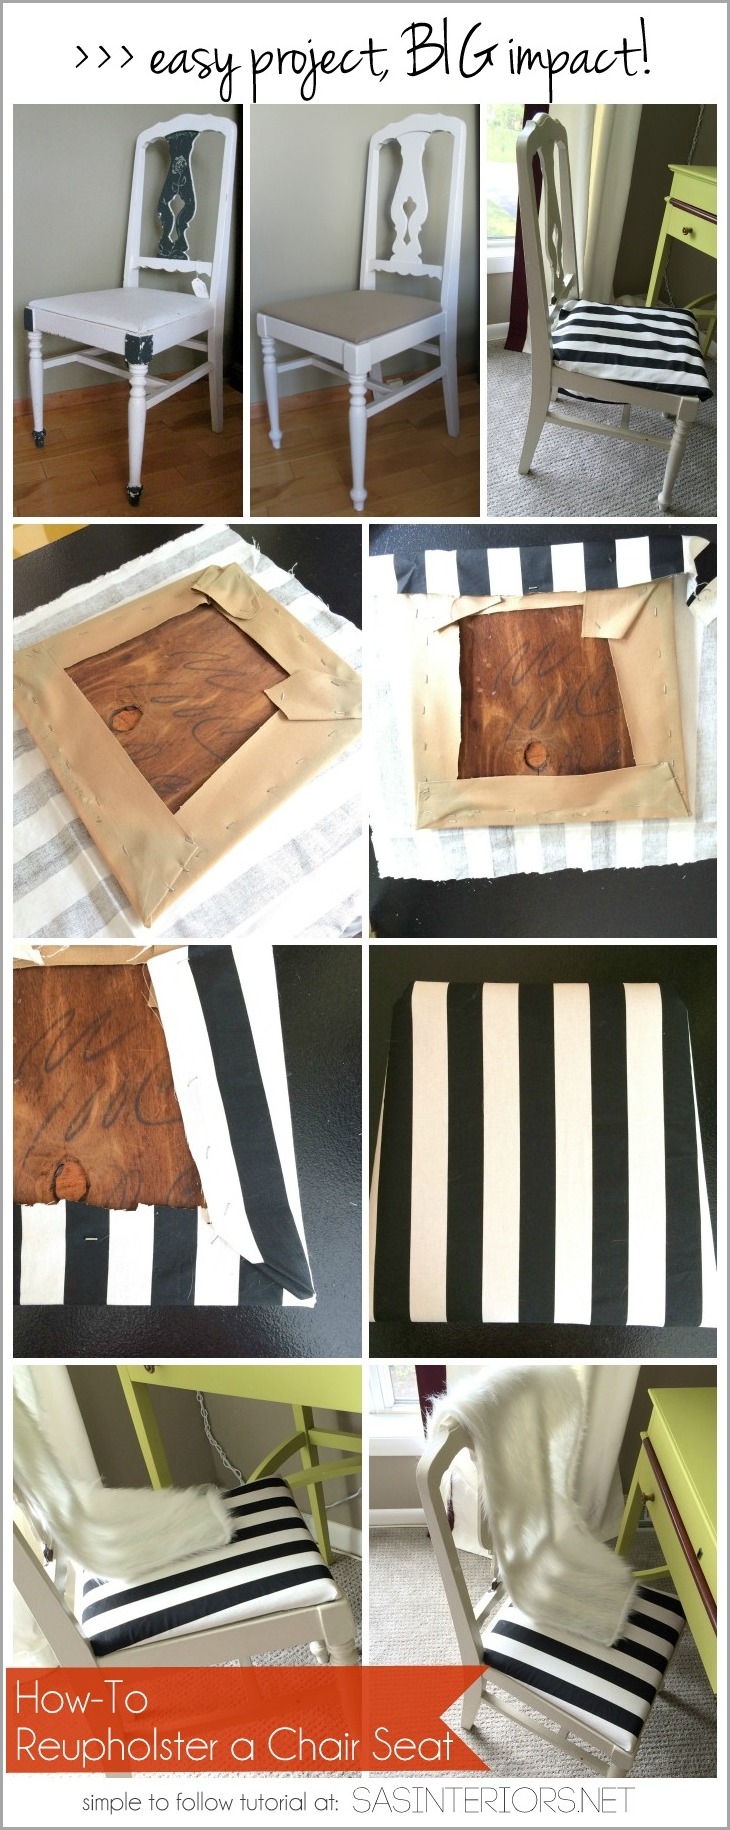
Easy Project, BIG IMPACT RESULT: Reupholstered Chair Seat. Completely NO EXPERIENCE NEEDED! All you need is a scrap piece of fabric (about 1/4 yard) + a staple gun. 2 minutes later, you're done. Change any chair NOW!

Most posts I have planned out a few days, or at least a day, before going live.  But not today’s.  I have been trying to check things off my to-do list and this project, start to finish, literally was done just a few minutes ago.  I posted a pic on Instagram (I’d love for you to follow along if you’re not already) and I thought I’d share a blog post about it.

Ready for a super easy, yet BIG IMPACT project?  Check out how I brought this old chair alive again with a simple change of fabric.  It’s so simple and I swear that ANYONE can do this.  Even if you’ve never DIYed anything in your life, you can do this.

Ready?  Here goes…

(By the way, these aren’t the best pics because they were taken with my iphone.  That’s how quick this project + post was pulled together)

Easy Project, BIG IMPACT RESULT: Reupholstered Chair Seat. Completely NO EXPERIENCE NEEDED! All you need is a scrap piece of fabric (about 1/4 yard) + a staple gun. 2 minutes later, you're done. Change any chair NOW!

I’m sure you can pretty much “get it” from the picture, but basically you’ll need about 1/4 yard of fabric (this 1″ black & white striped fabric I snagged from the Online Fabric Store while at Haven Conference last year).

1. Lay the fabric right side down on a hard surface, then set the seat face down.  Rearrange the fabric as needed so it’s positioned as you’d like.  I wanted to make sure my stripes were even, so I adjusted the seat positioning accordingly.

2. Then, using a staple gun, start with one fabric edge, pull taught and staple.  Then work your way around the entire seat.

And voila, 2 minutes later or less, you’re done!

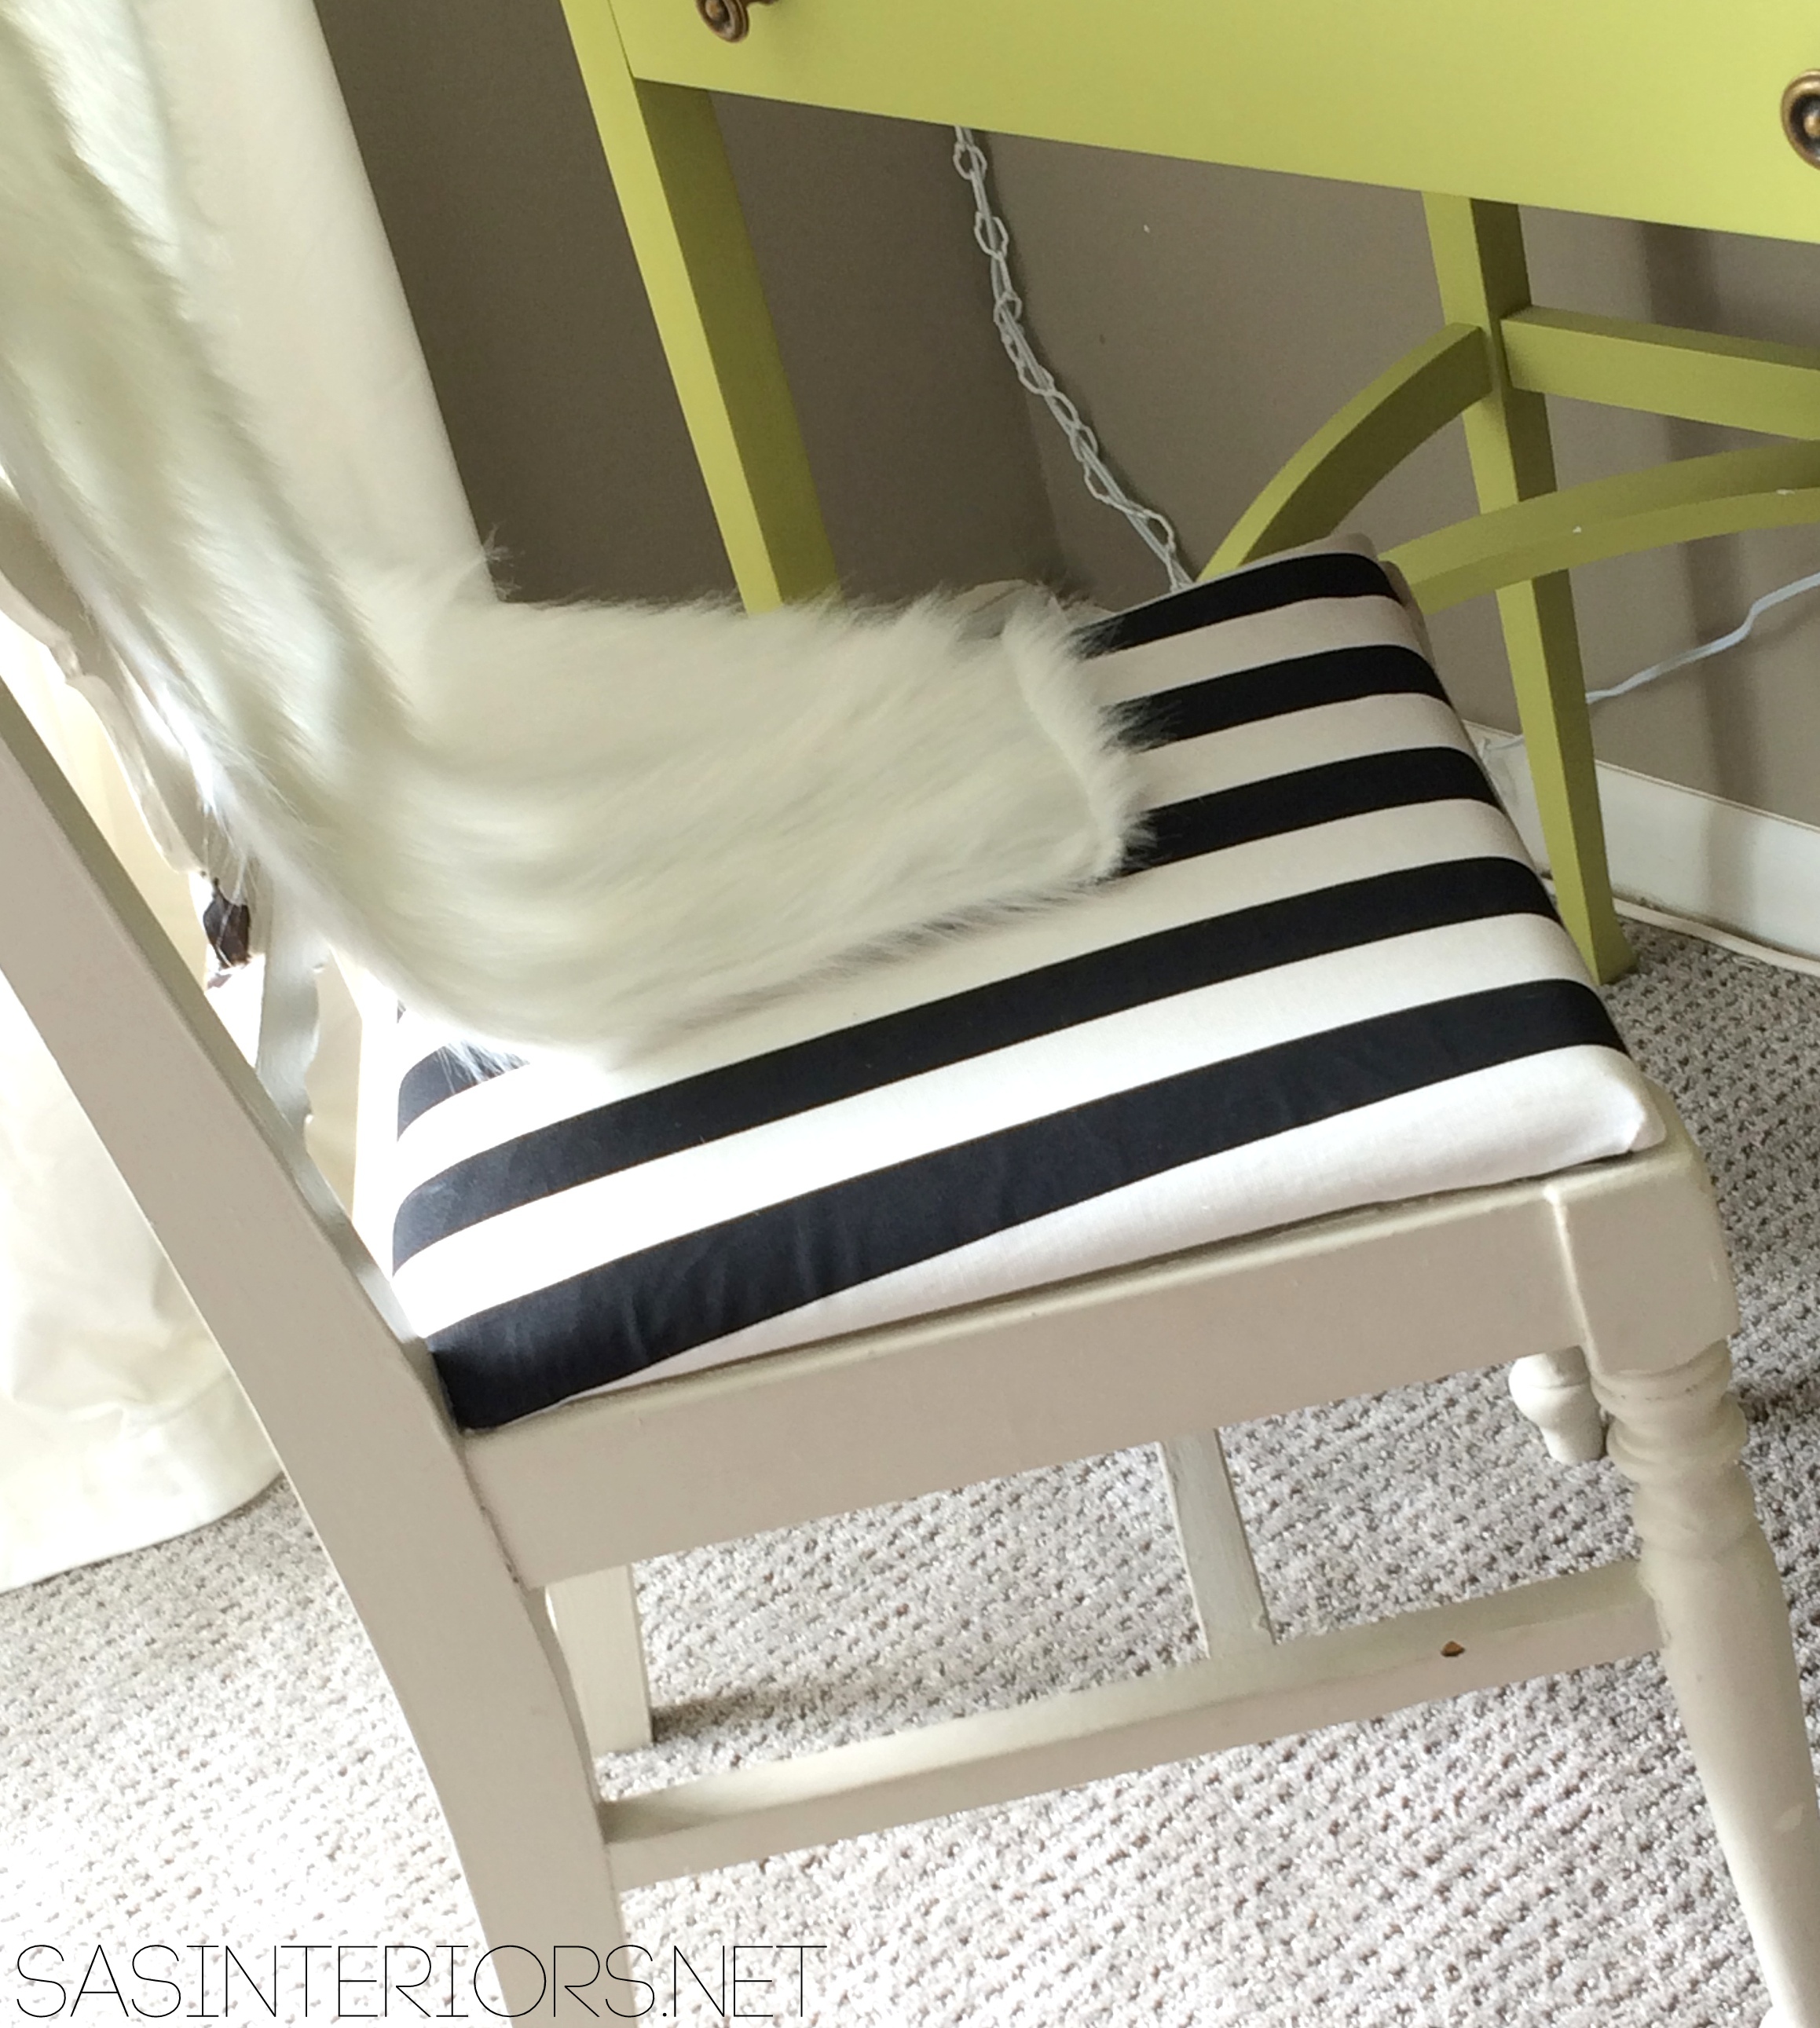
Super easy and look how much of an impact a simple seat cover makes!

A few years ago the seat started out like this after finding it at a thrift store…

BEFORE: Side Chair

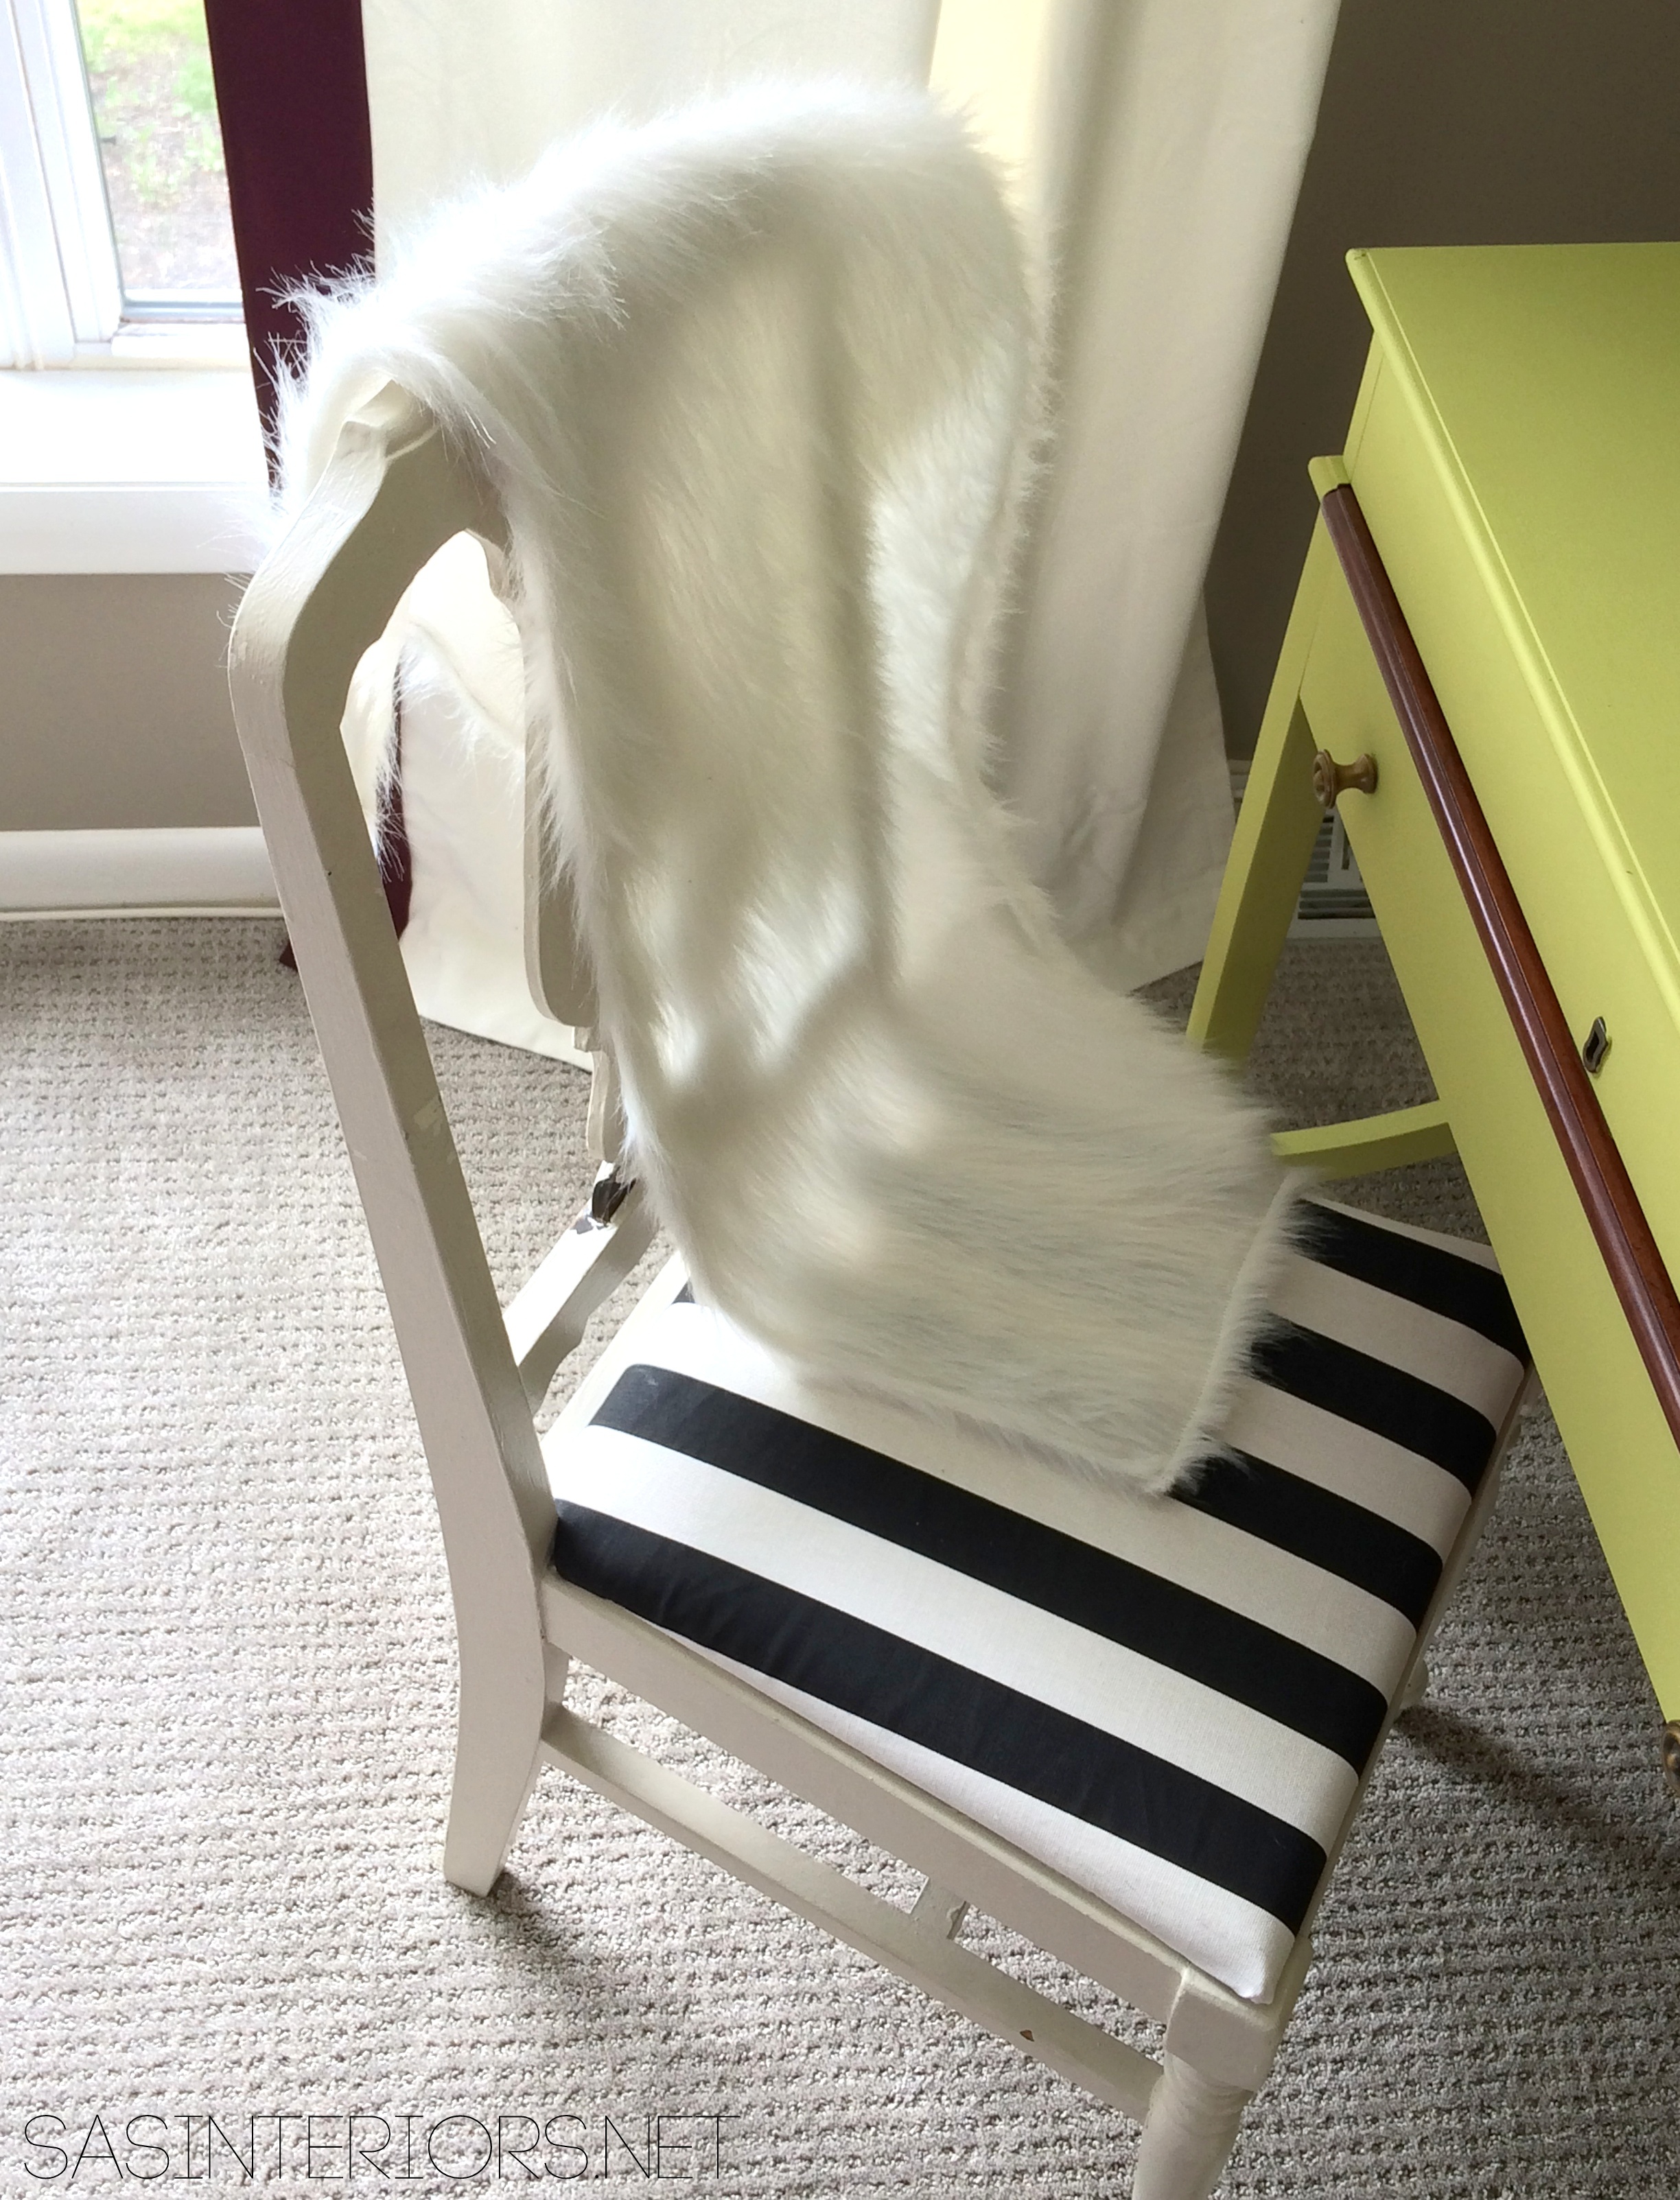
After a little paint + a new seat cover, it looks totally fabulous & updated…

Easy Project, BIG IMPACT RESULT: Reupholstered Chair Seat. Completely NO EXPERIENCE NEEDED! All you need is a scrap piece of fabric (about 1/4 yard) + a staple gun. 2 minutes later, you're done. Change any chair NOW!

Easy Project, BIG IMPACT RESULT: Reupholstered Chair Seat. Completely NO EXPERIENCE NEEDED! All you need is a scrap piece of fabric (about 1/4 yard) + a staple gun. 2 minutes later, you're done. Change any chair NOW!

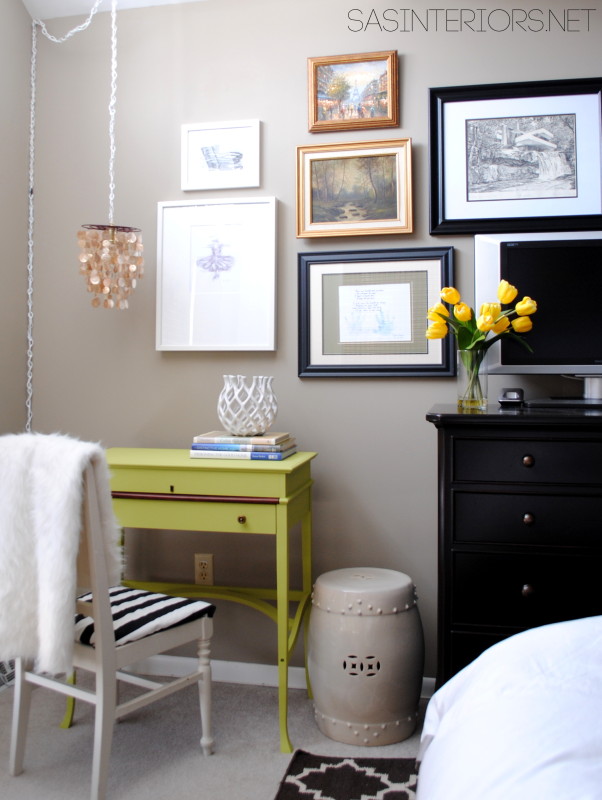
Now the chair sits beautifully in my master bedroom

Easy Project, BIG IMPACT RESULT: Reupholstered Chair Seat. Completely NO EXPERIENCE NEEDED! All you need is a scrap piece of fabric (about 1/4 yard) + a staple gun. 2 minutes later, you're done. Change any chair NOW!

Projects don’t always have to be difficult and timely.  Sometimes the projects with the best +biggest results are the easiest!  Cheers to a fabulous Memorial Day weekend!

What has been your simplest and/or easiest DIY project, craft, or upcycle?

Toy Animal Instagram Photo Holder

I’ve been a little slow on sharing the progress of my boys room makeover, but believe me it’s almost done!  Except for the window panels that are still plain white (an idea will come to me at some point to jazz them up), the room is about 96.74% complete.  From the new wall color + the wallpaper, to the honeycomb shelves + the wood rolling toy bins, to the new leaning shelves, this room has been fully transformed from what it looked like before

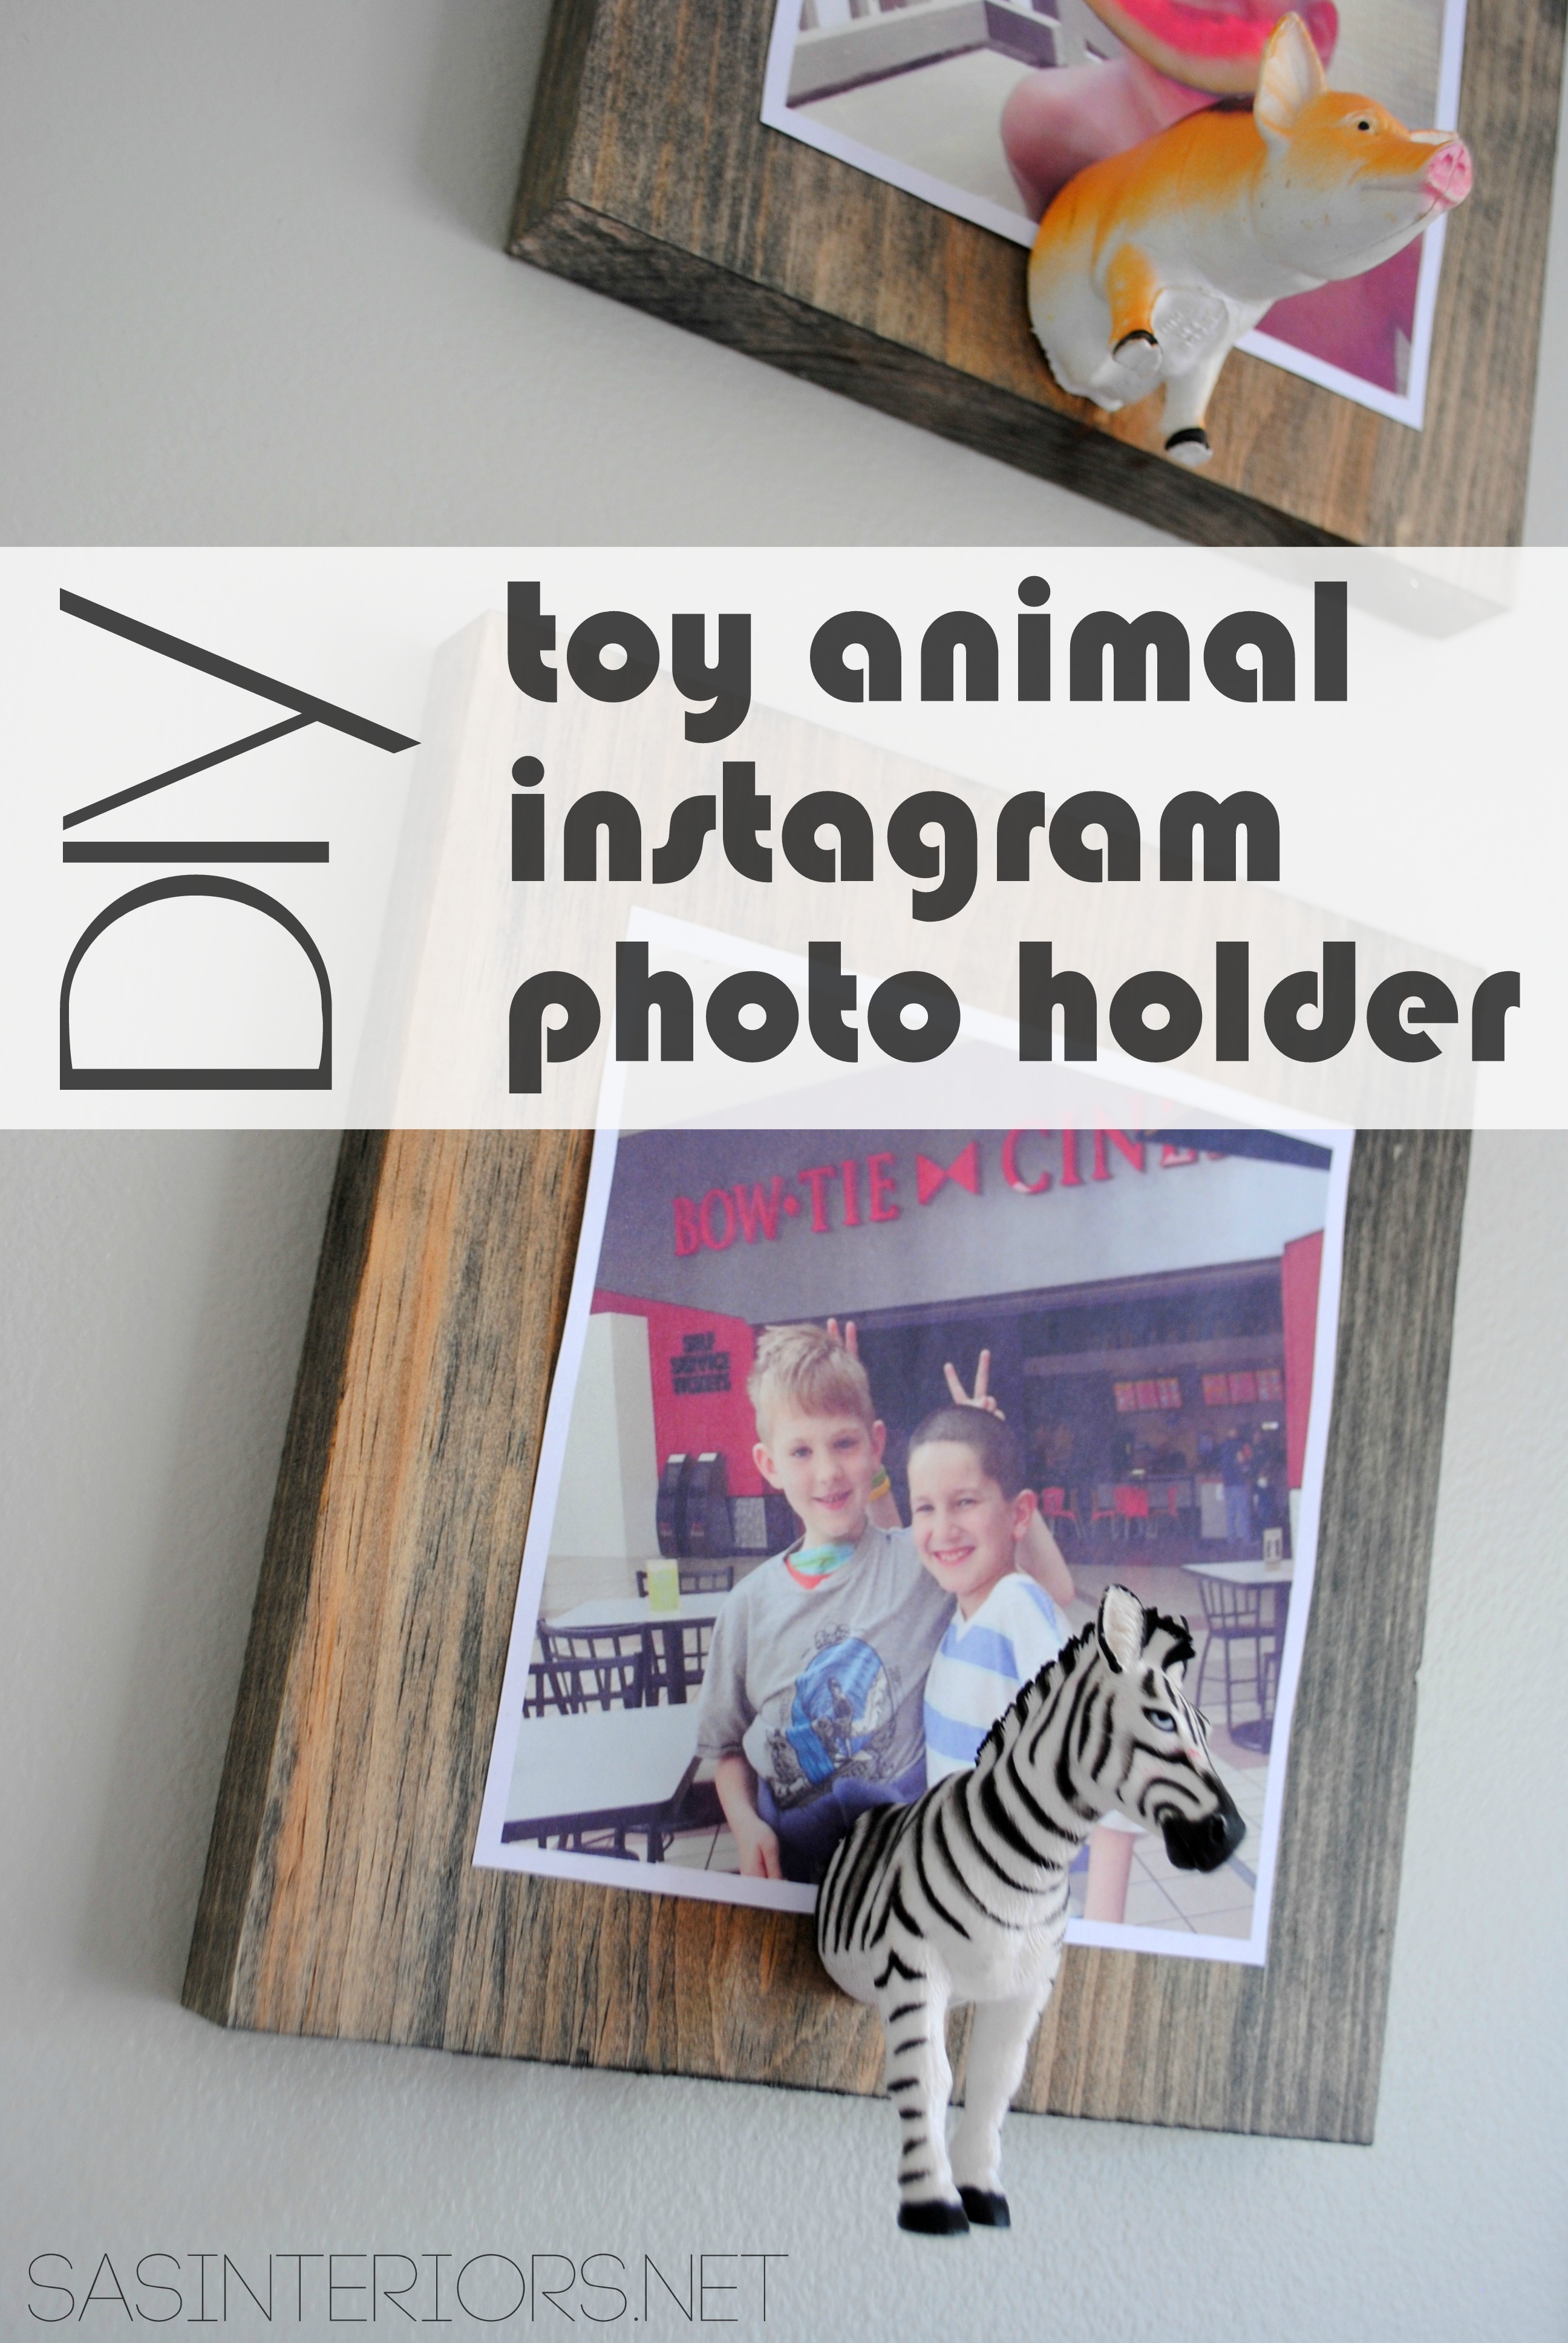
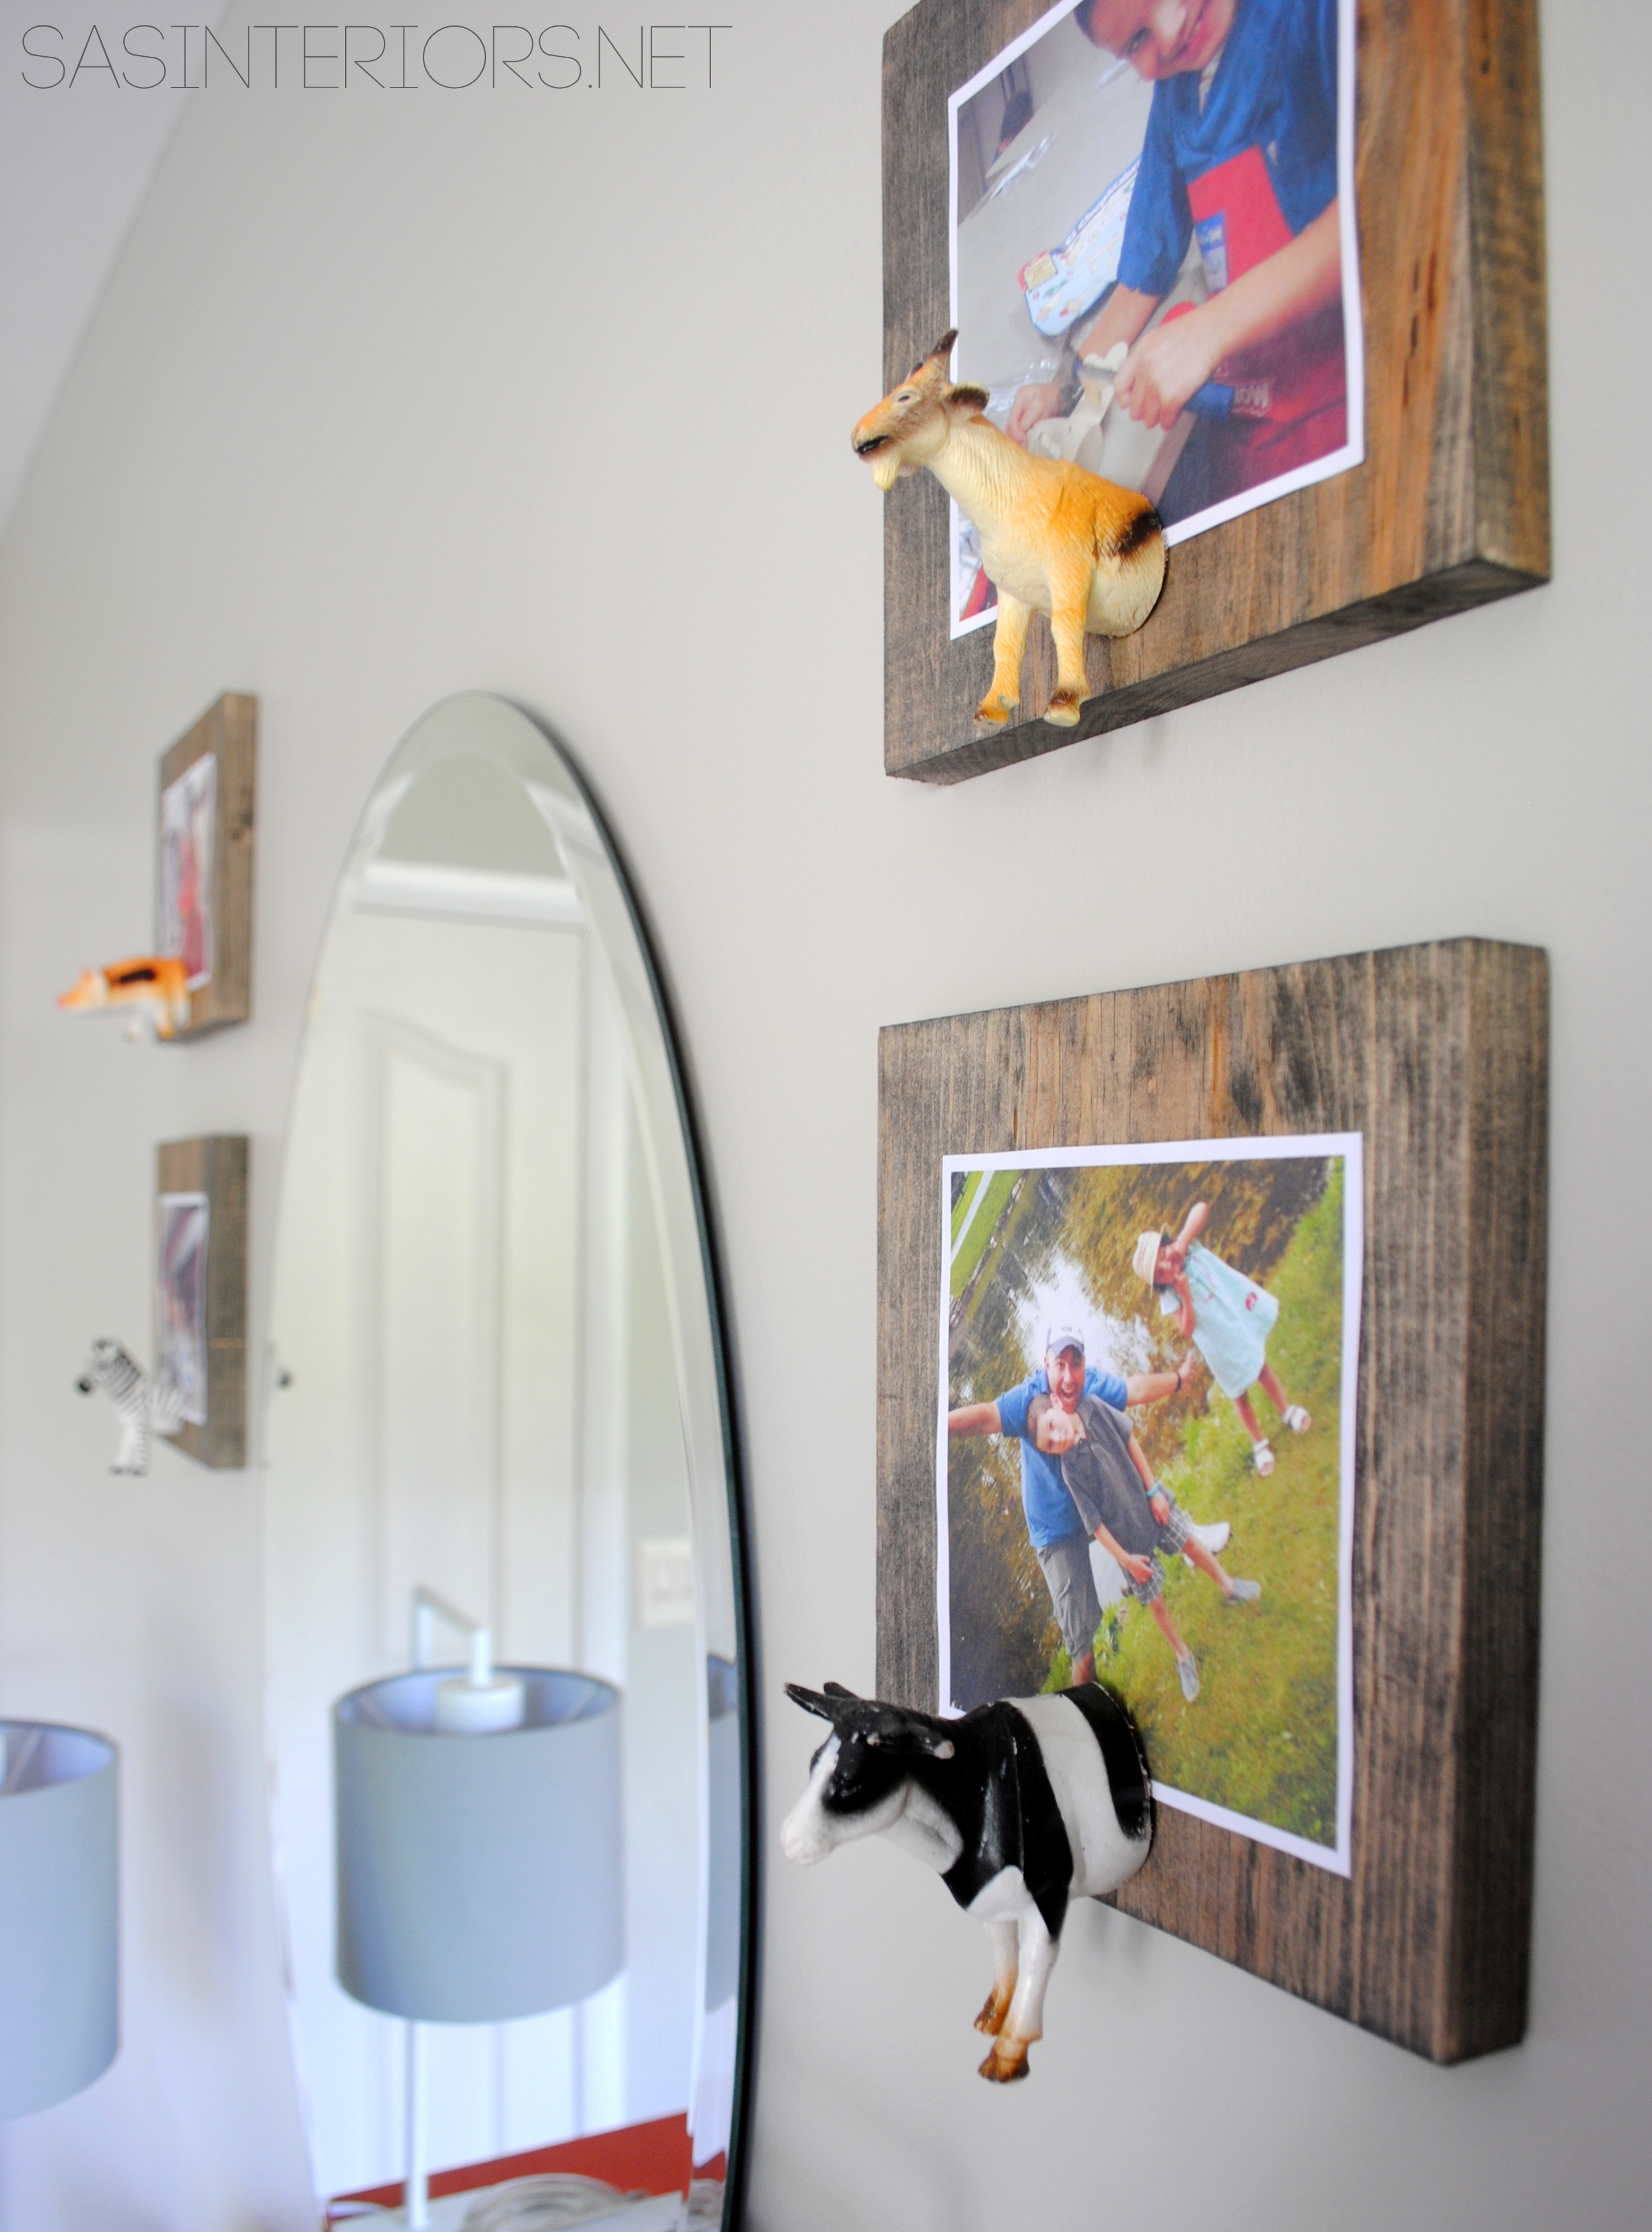
One of the first DIY ideas that I thought about for this makeover (after seeing these animal photo holders) was to create something cute that could hold instagram pics (or any adorable picture for that matter).  It had to be something that pictures could easily be changed / swapped out.  And I loved the idea of using toy animals since we have a gazillion..

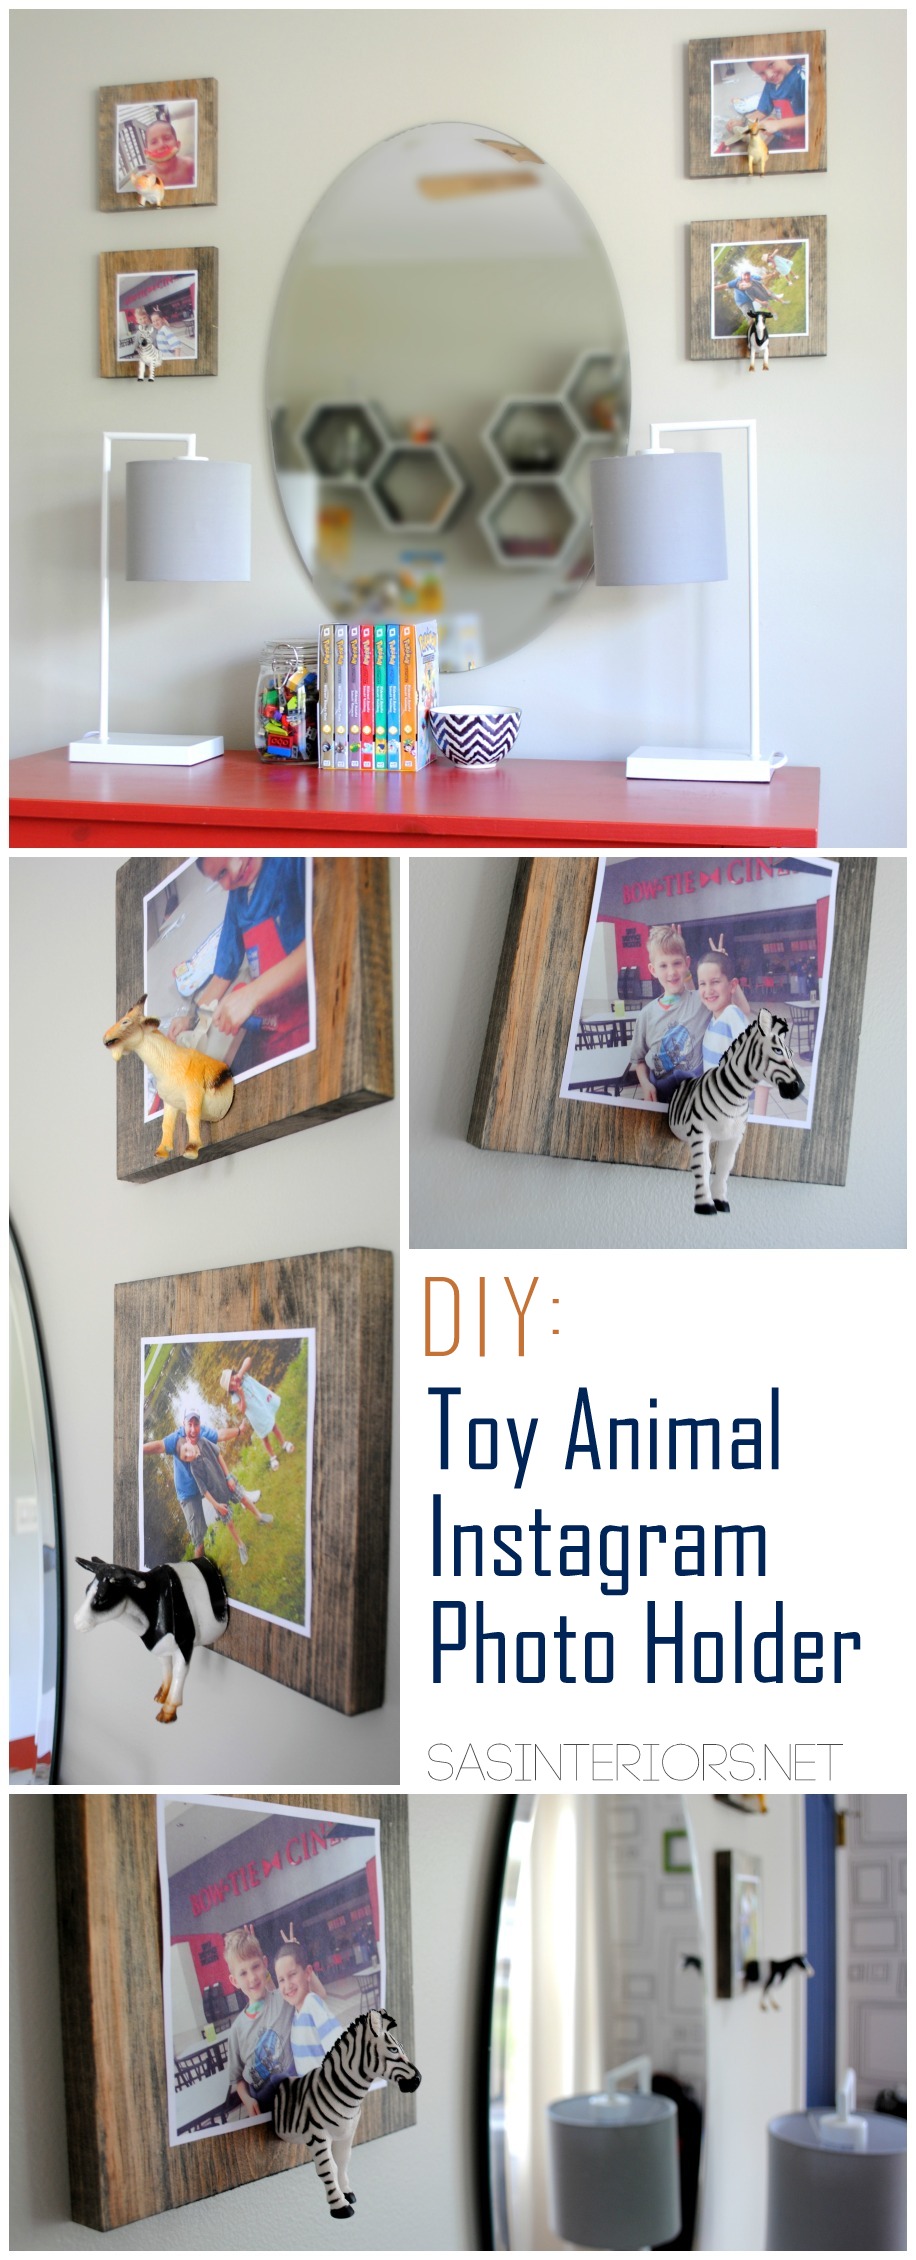
Voila, the creation of the Toy Animal Instagram Photo Holder

DIY: Toy Animal Instagram Photo Holder. So cute & easy to make. Perfect for a kids room or any eclectic space! Full tutorial at www.jennaburger.com

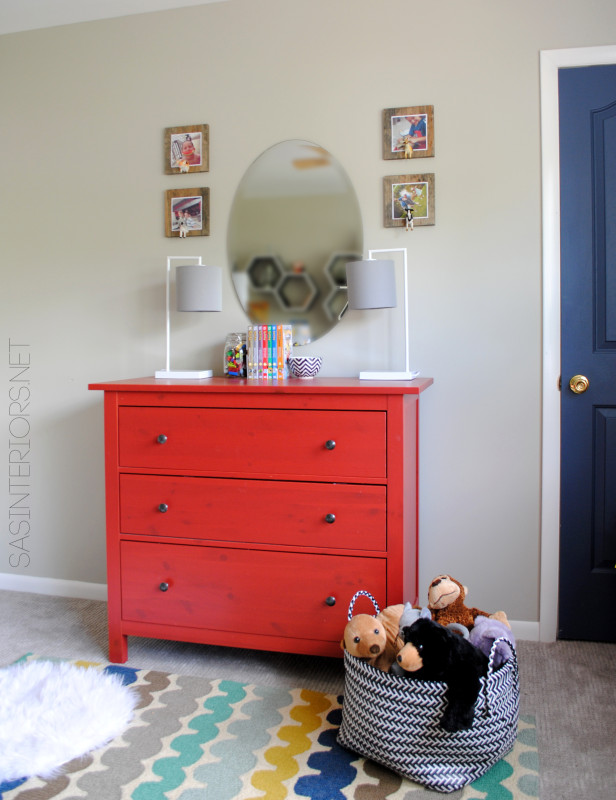
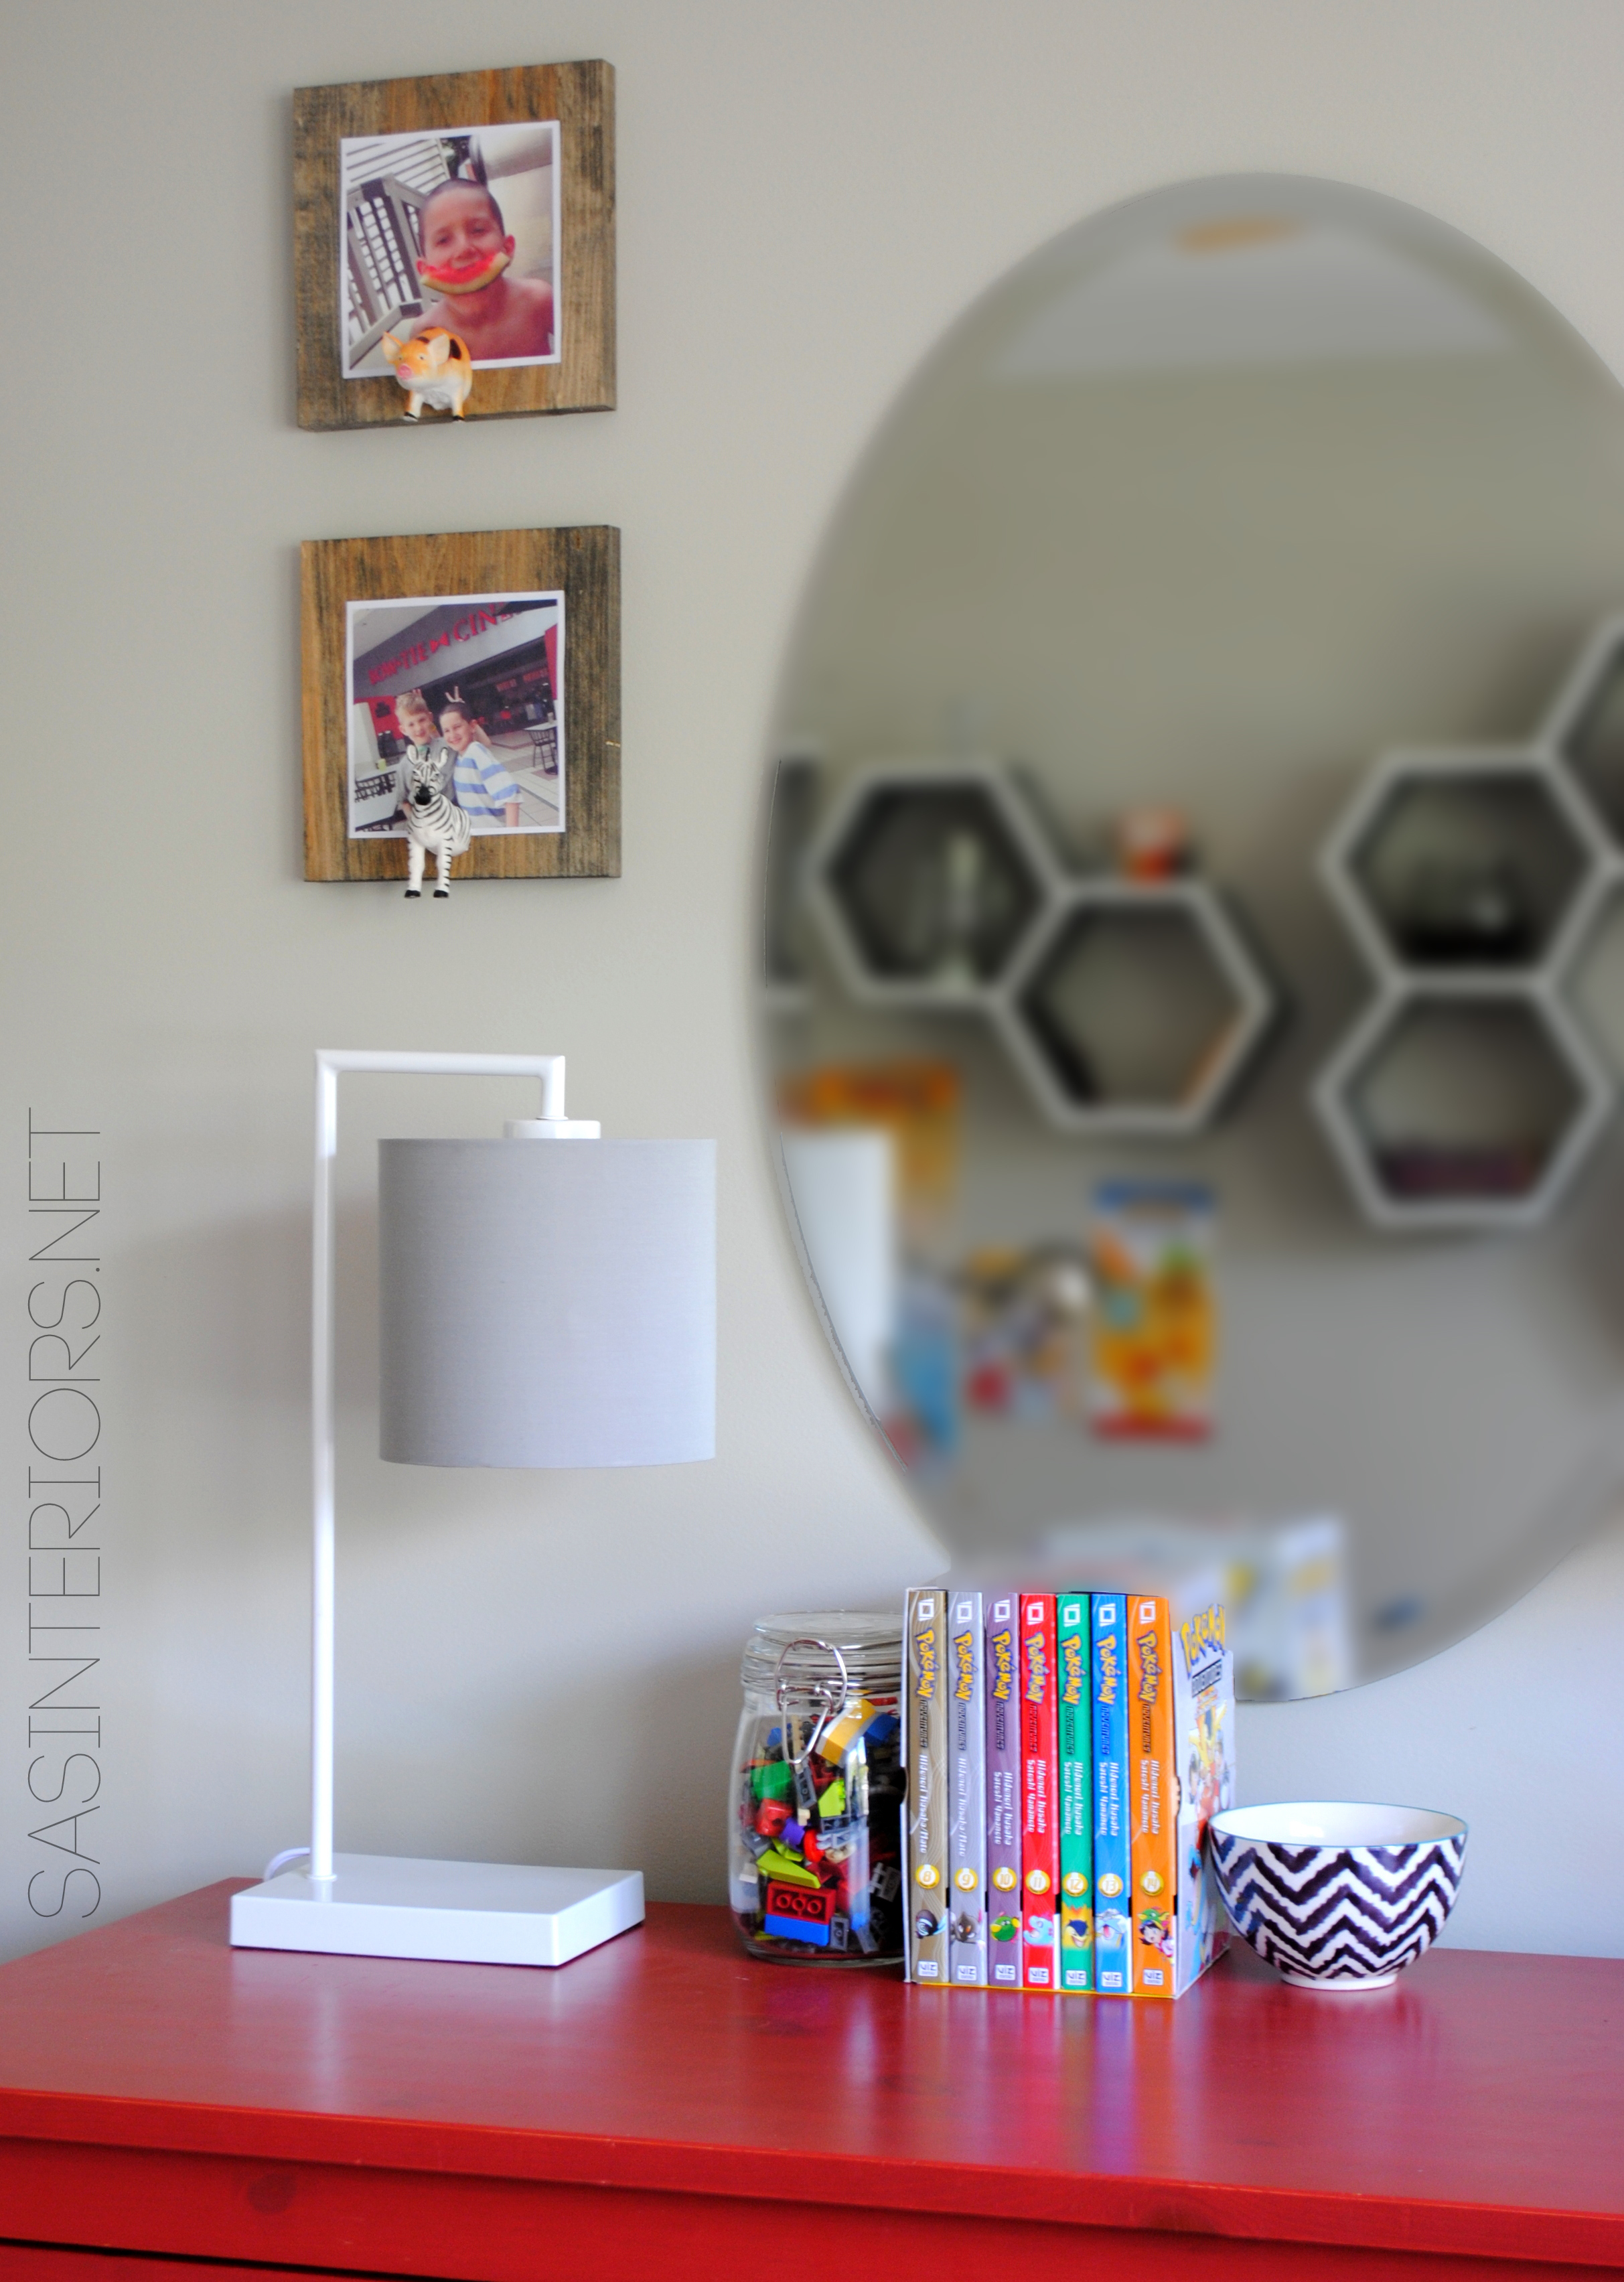
These cute little picture holders were pretty easy to make and I love how they give a new look to this part of my boys room.  The Ikea dresser was something we’ve had since he was about 2 years old, the mirror was repurposed from the kids bathroom (now they are mirror-less, o well), and the lamps were a recent clearance find at Target.

A few other accessories + layers and this space is coming together…

DIY: Toy Animal Instagram Photo Holder. So cute & easy to make. Perfect for a kids room or any eclectic space! Full tutorial at www.jennaburger.com

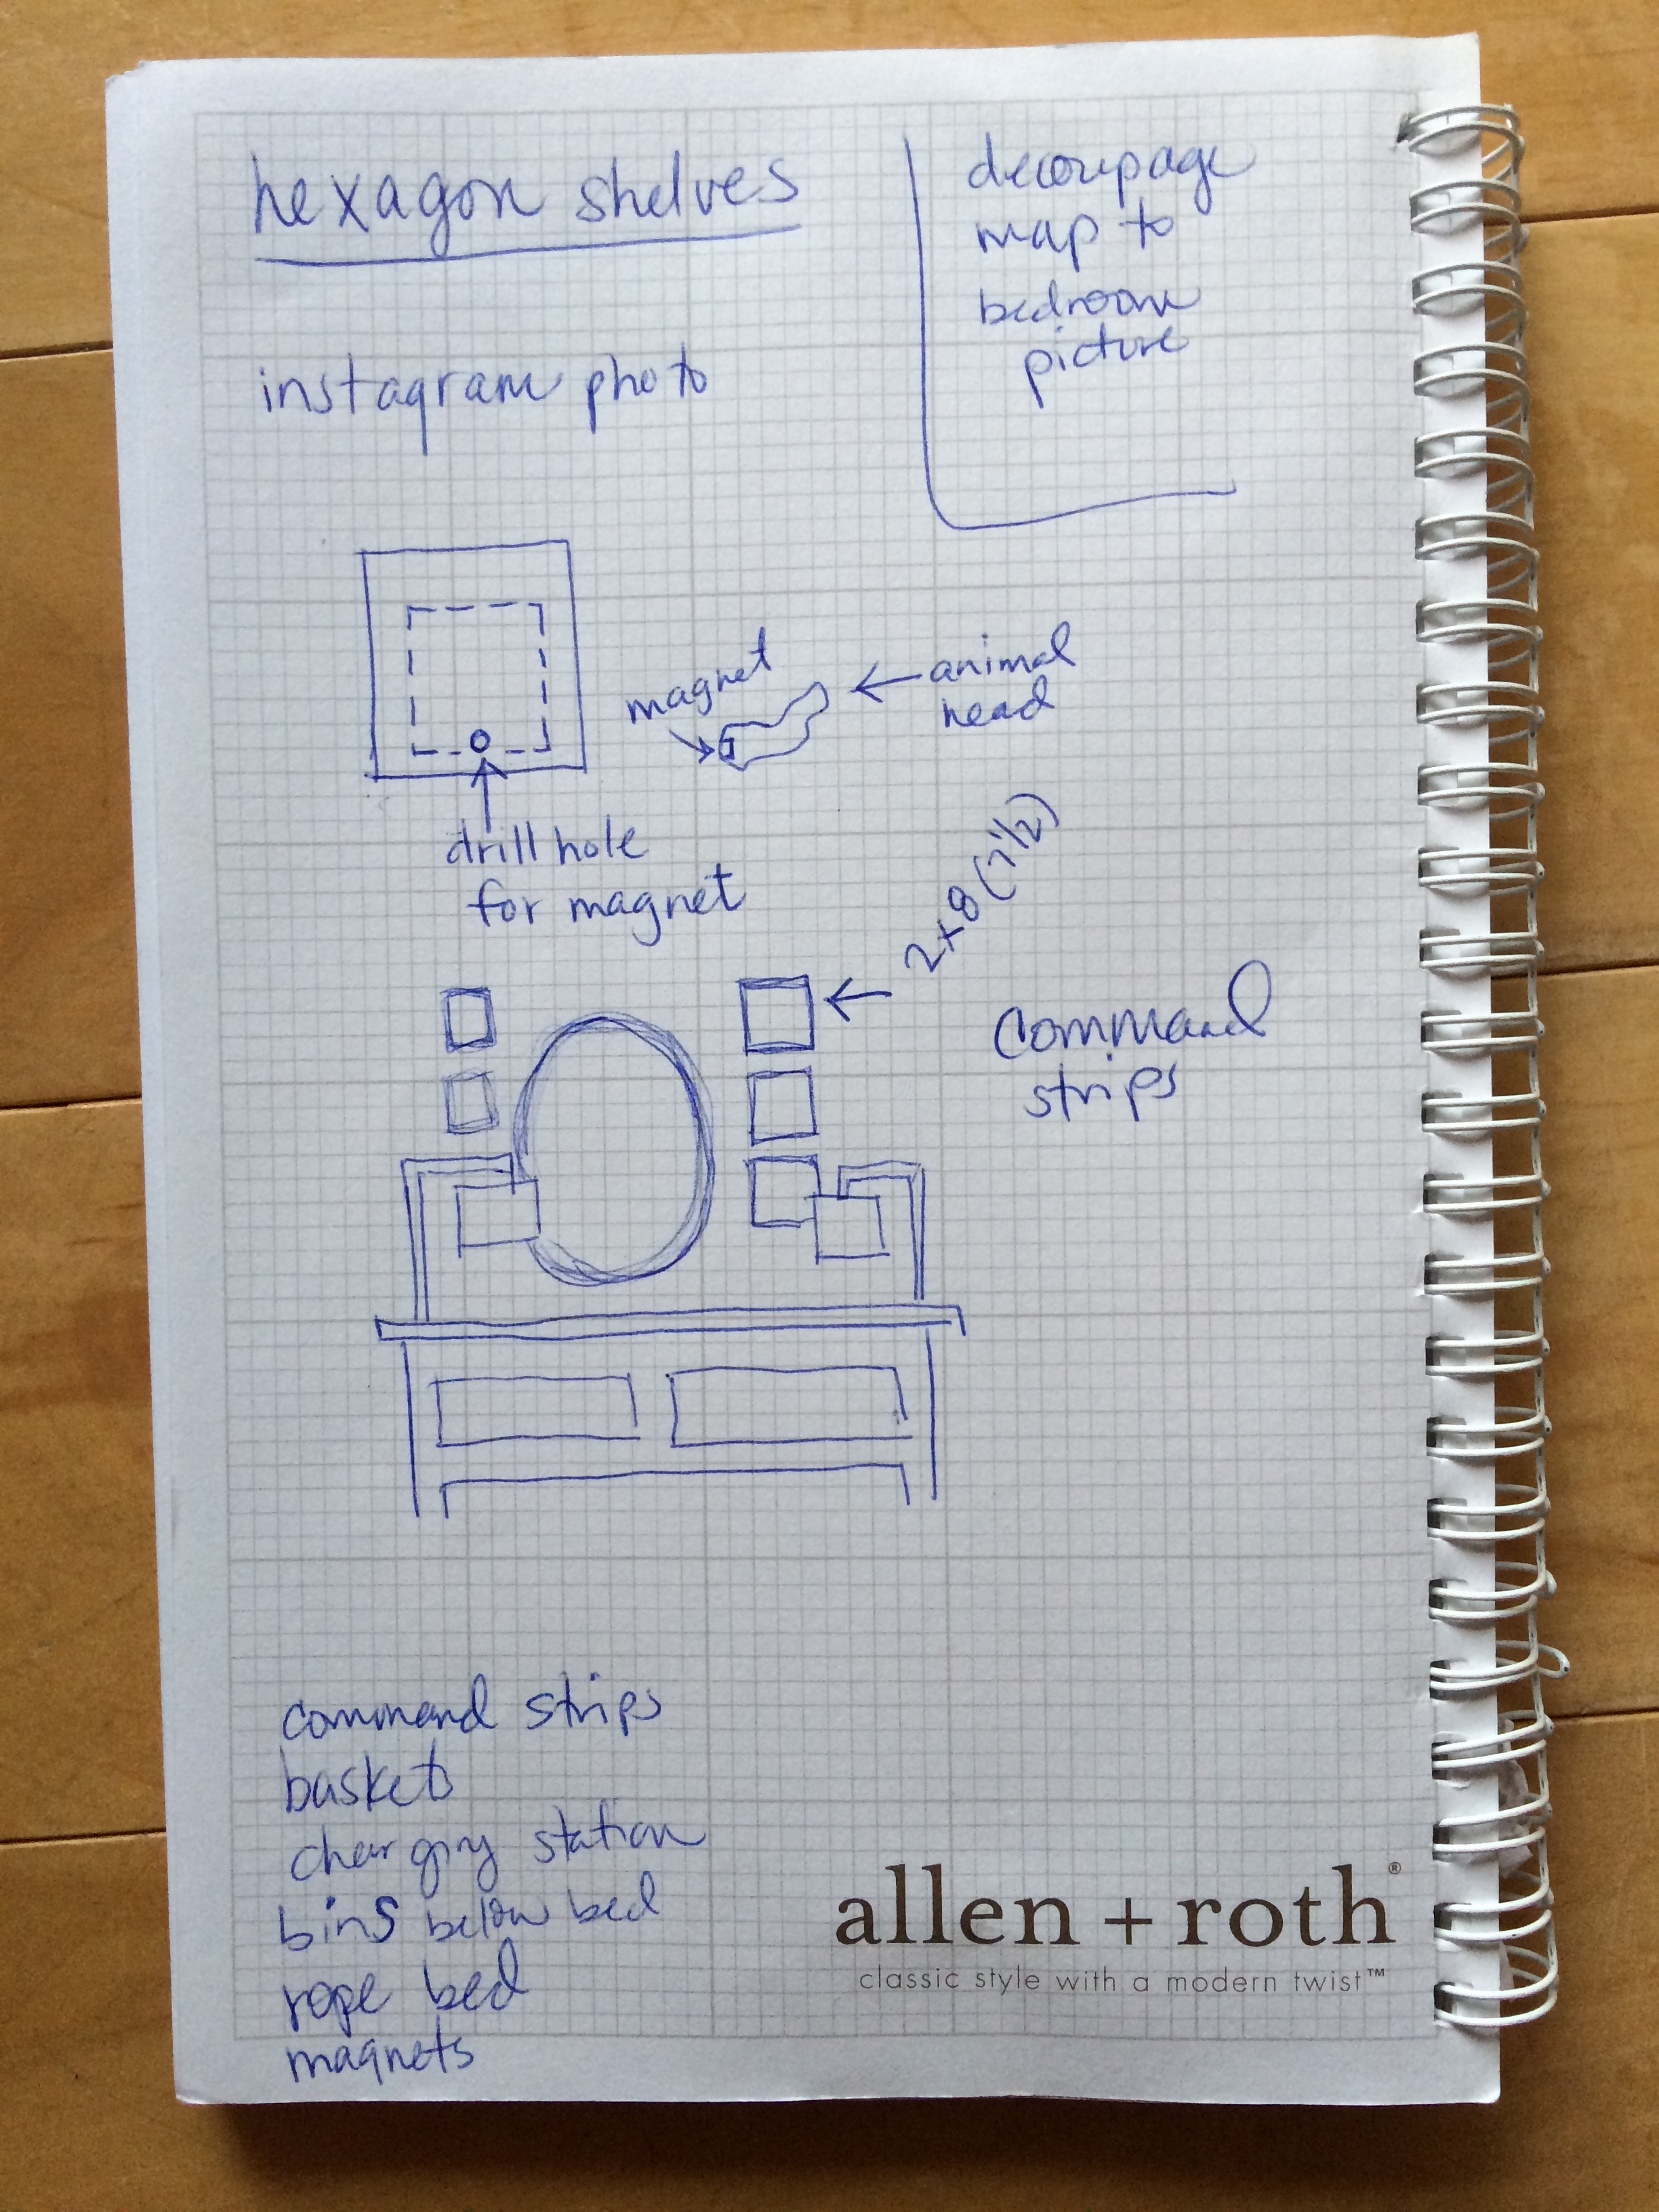
Want to see how I made them?  This is my original sketch, along with my supply list…

supply list

Here’s the supplies I used:

  • 2″ x 8″ x 4′ cut into into 8″ x 8″ squares (there will be wood leftover)
  • 3/4″ Round Magnets
  • Gorilla Glue (or any heavy duty, super sticky glue)
  • Toy Animals (I ransacked my kids toy bin, but you can find similar animals in the dollar bin or toy section)
  • Stain (I used leftover stain I had on-hand)
  • Command Strips
  • Level
  • Miter Saw (or have Lowe’s or other big box store cut the squares)
  • Coping Saw

DIY: Toy Animal Instagram Photo Holder. So cute & easy to make. Perfect for a kids room or any eclectic space! Full tutorial at www.jennaburger.com

Here’s the tutorial:

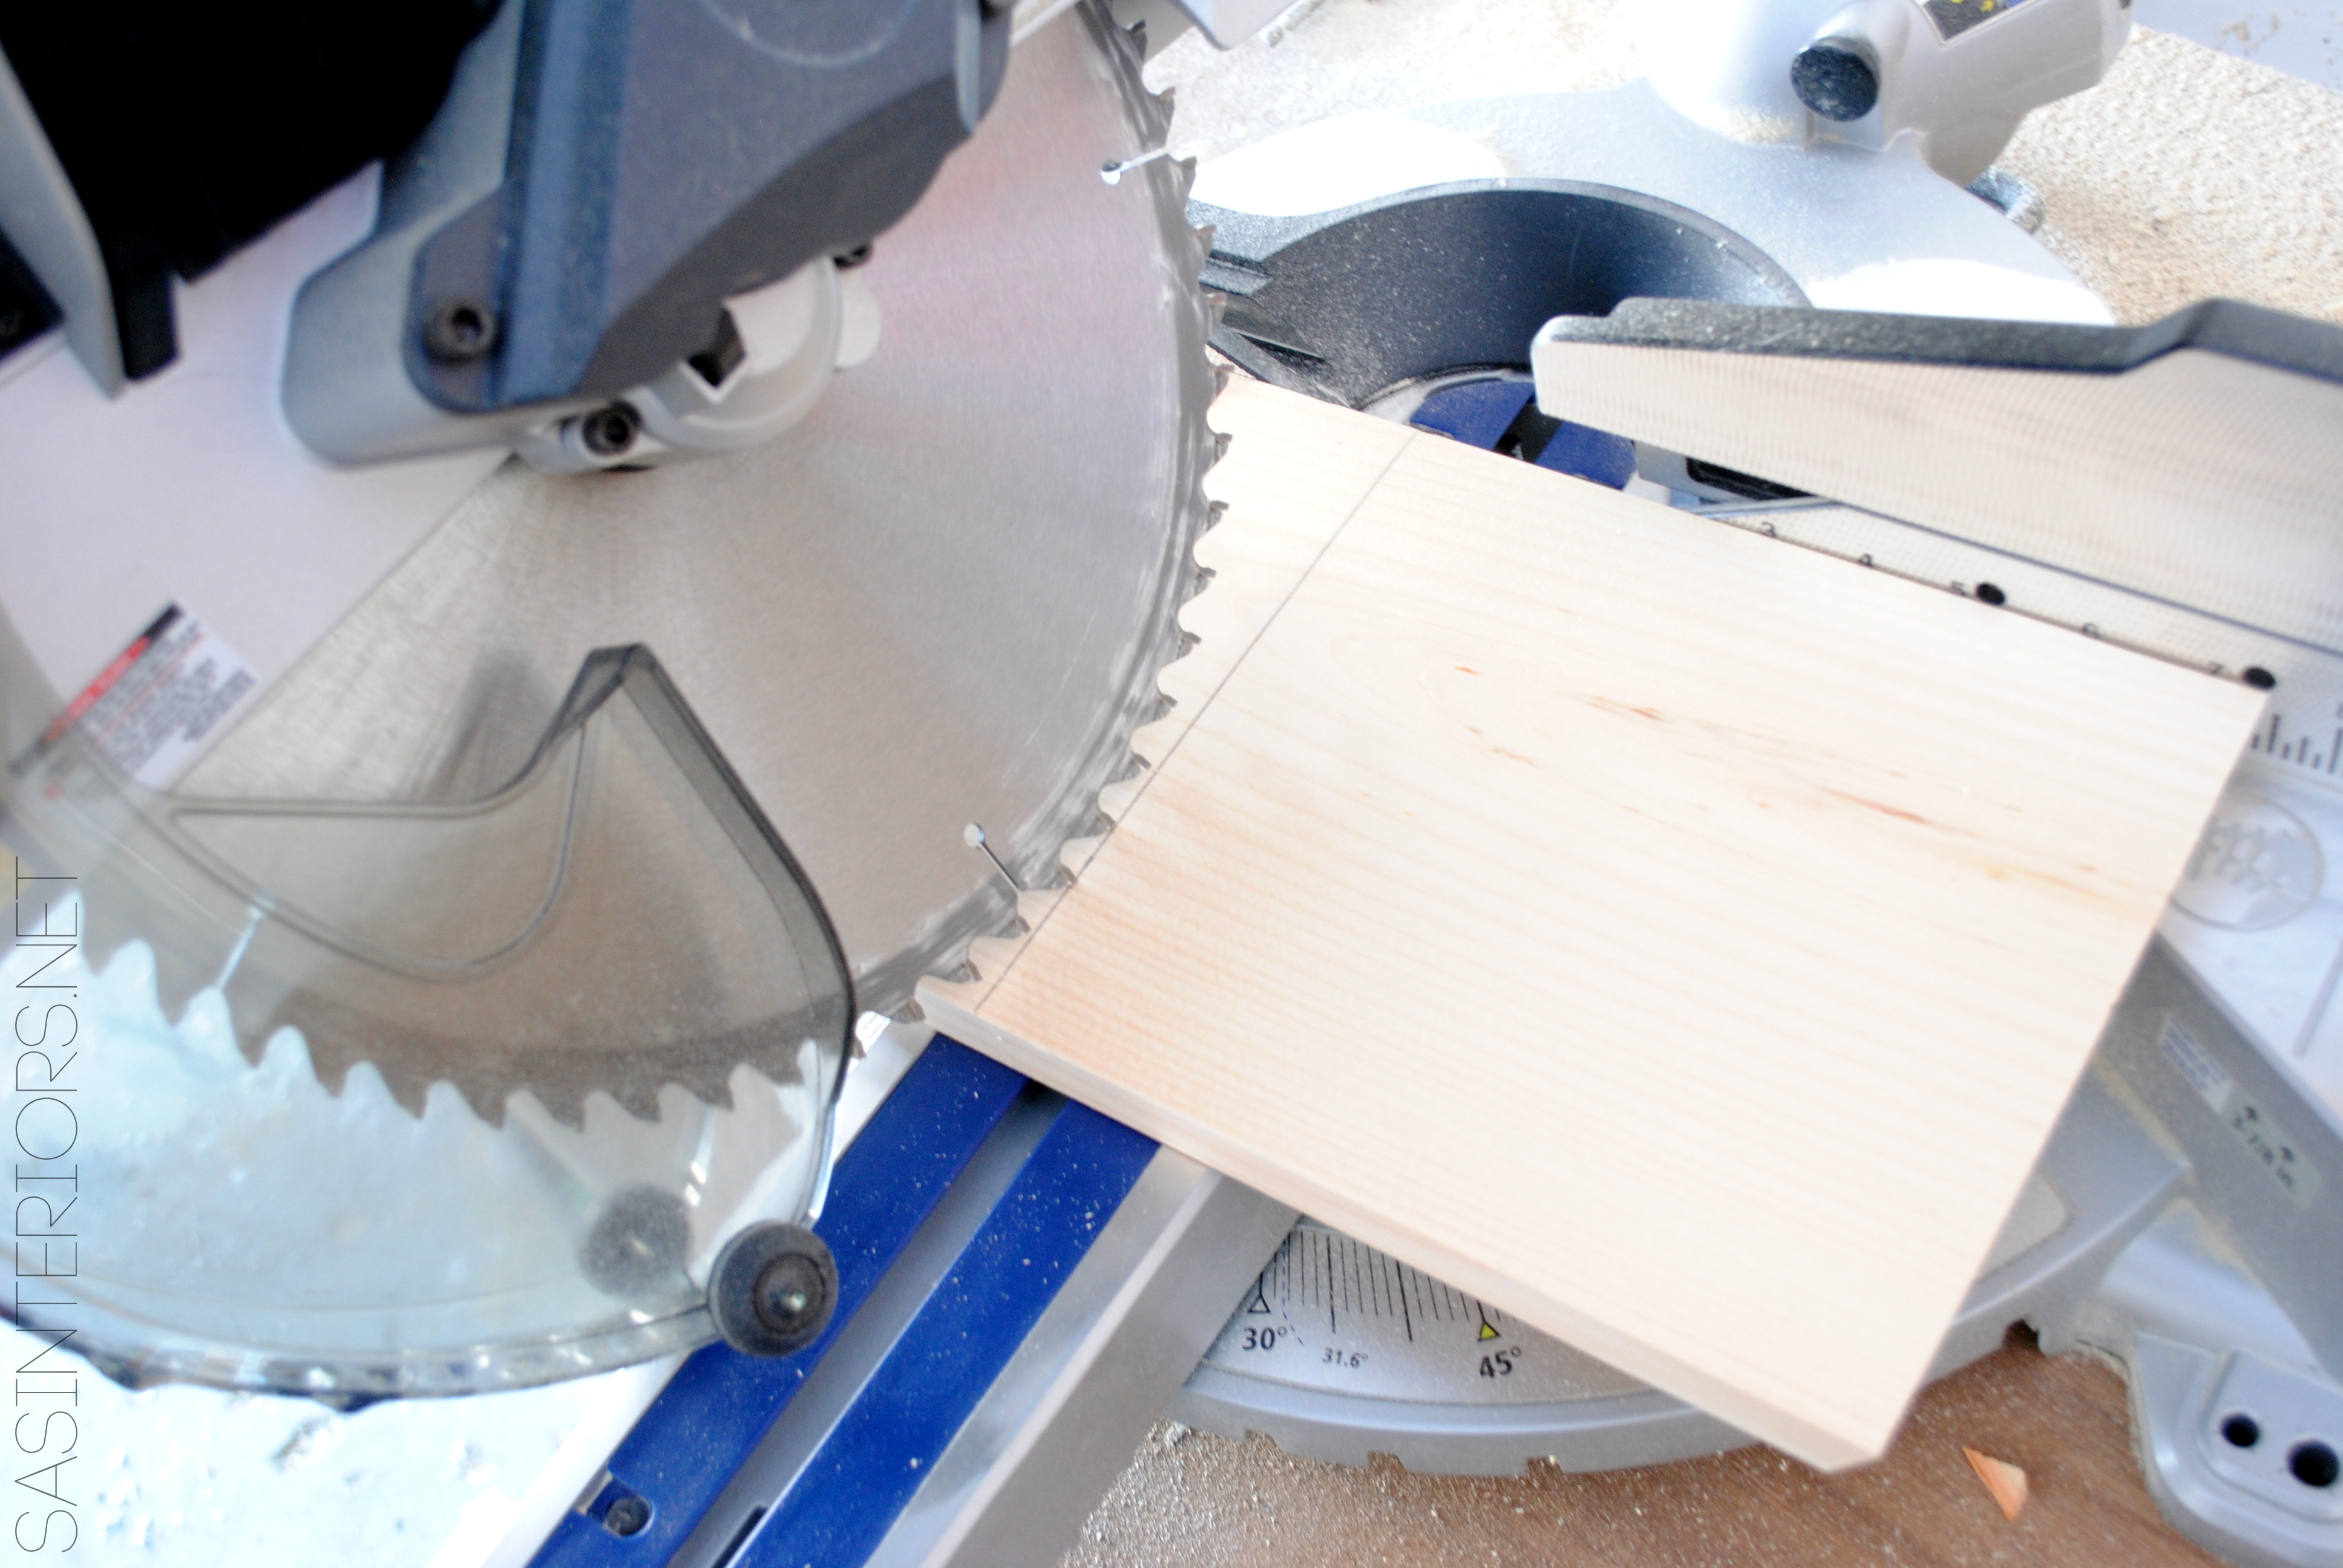
1. Using the miter saw, I started off by cutting the 4′ long wood board into (4) 8″ x 8″ squares.

DIY: Toy Animal Instagram Photo Holder. So cute & easy to make. Perfect for a kids room or any eclectic space! Full tutorial at www.jennaburger.com

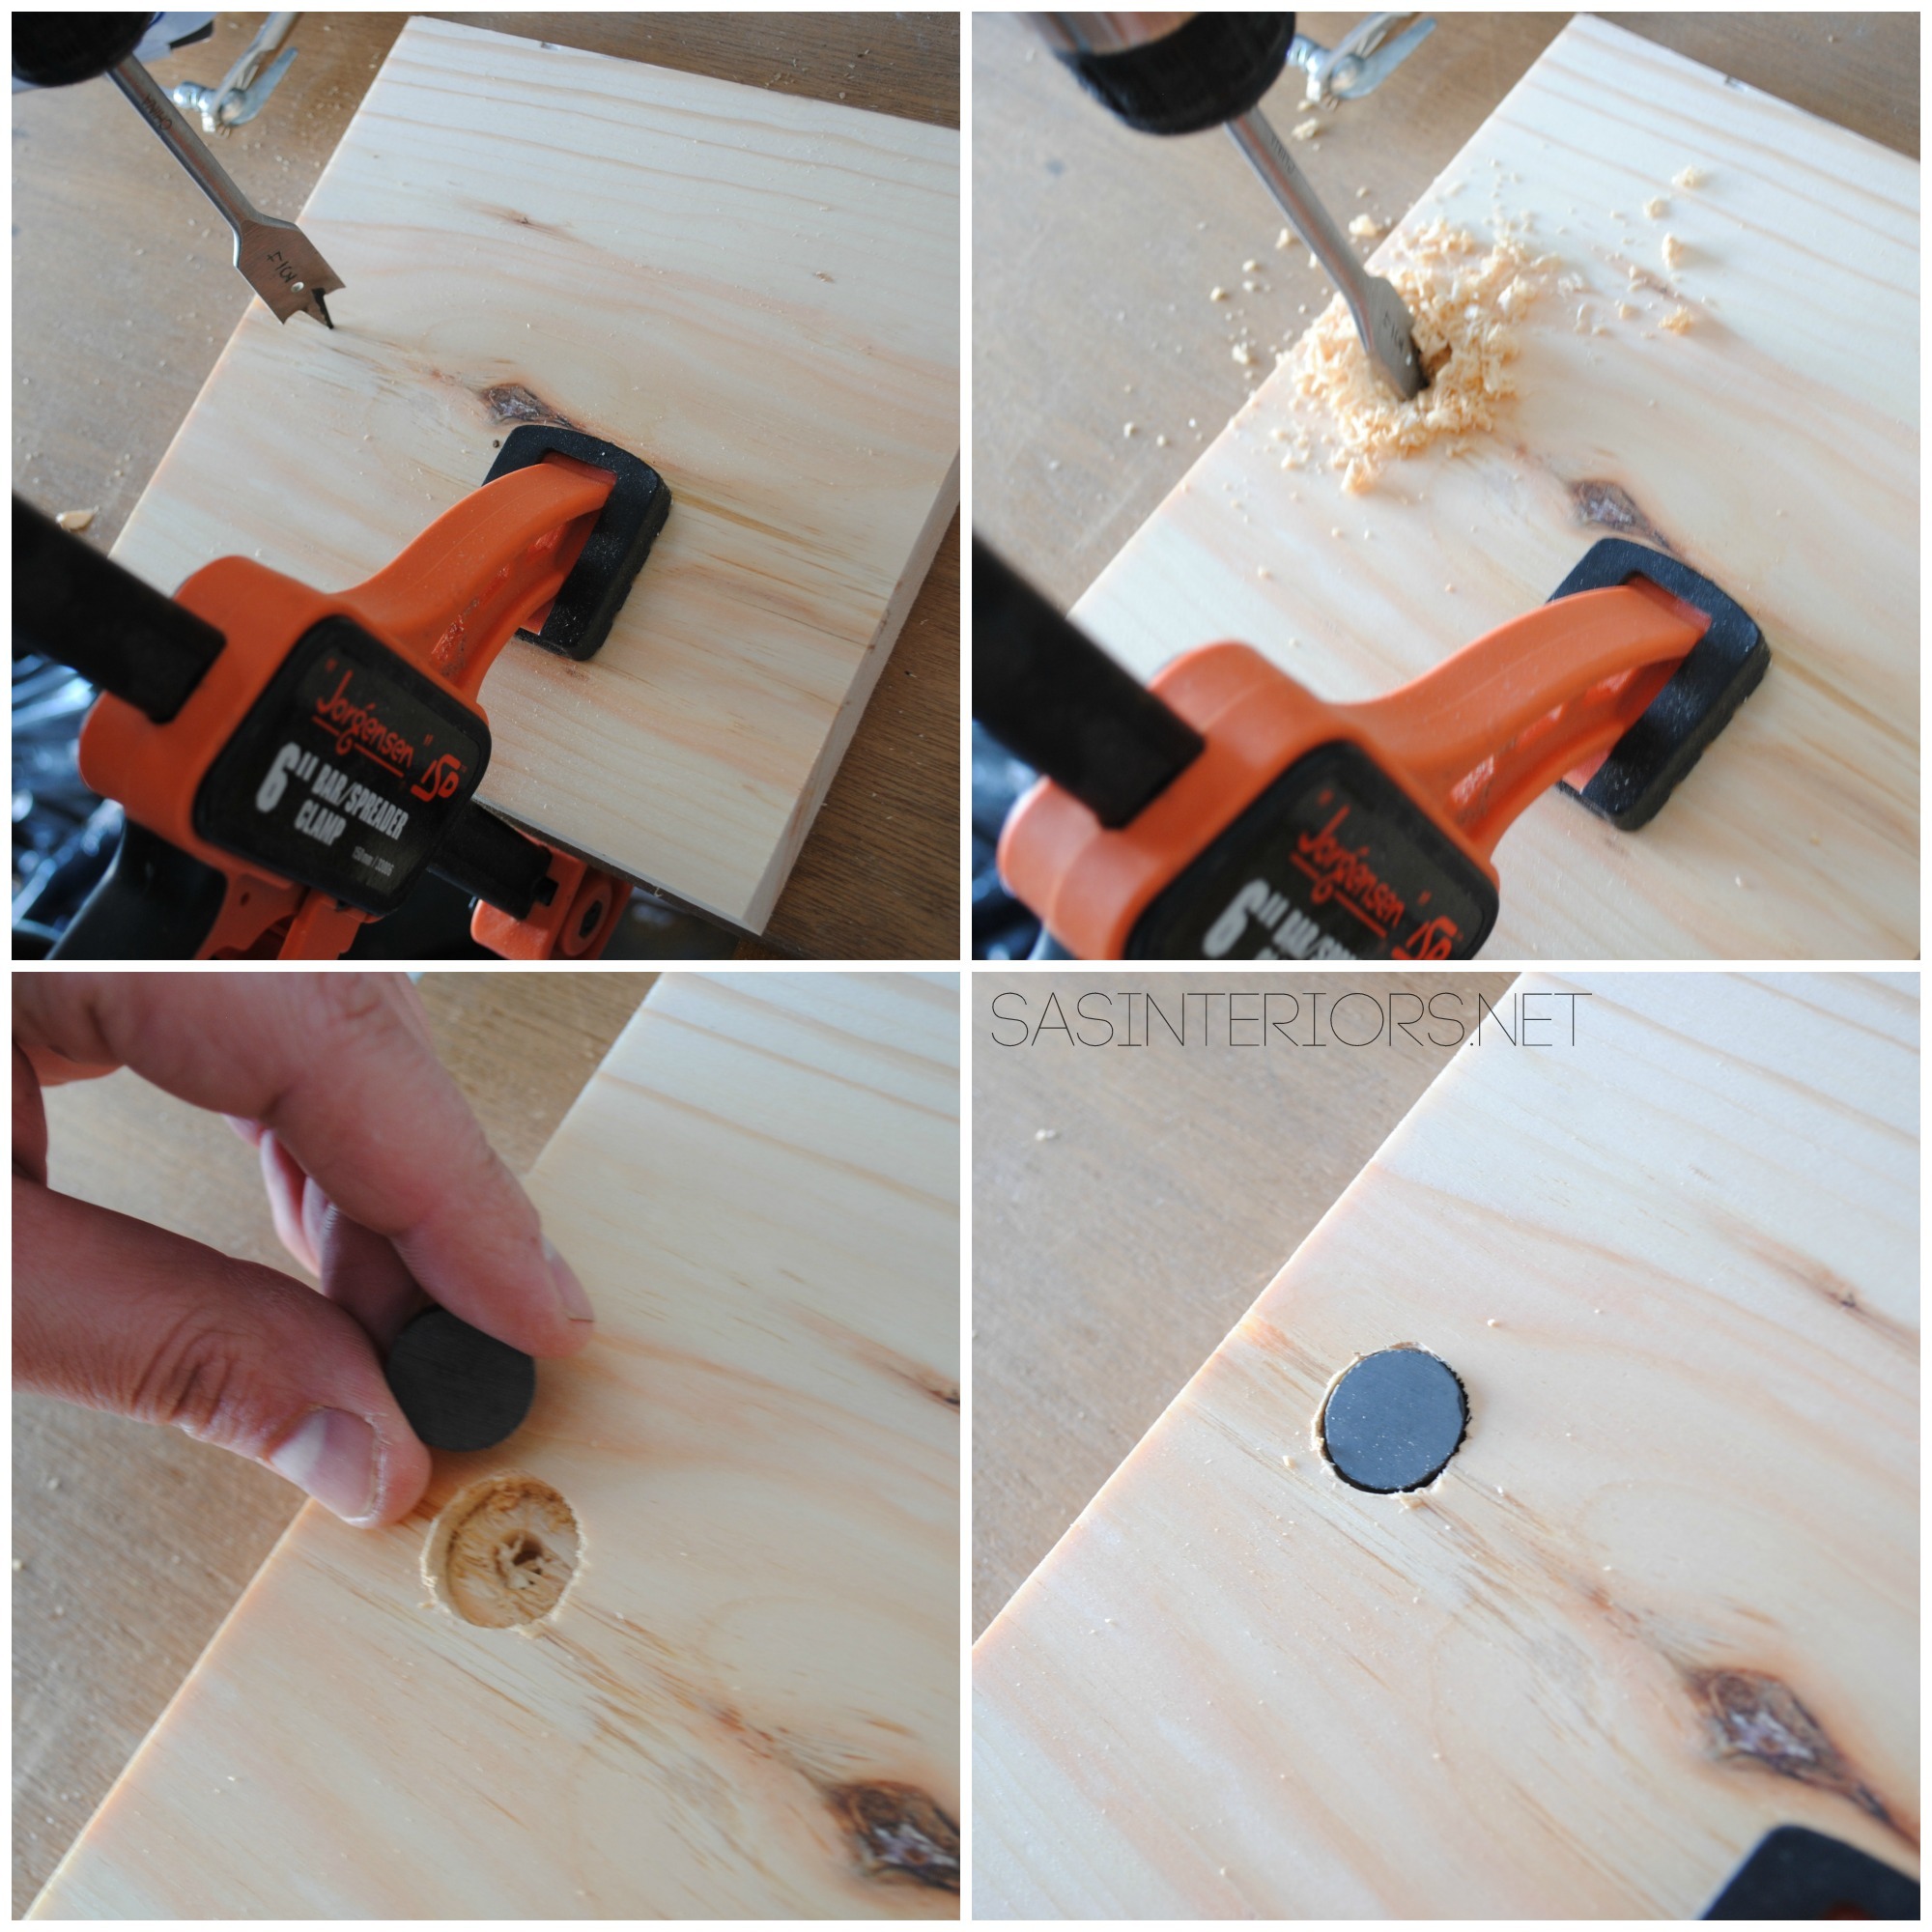
2. Once the 4 squares were cut, I drilled a 3/4″ diameter hole (same size as the magnet) about 1.5″ from the edge. The hole only needs to be the depth of the magnet (don’t drill all the way through the wood) so it sits flush with the wood.  Once drilled, I placed the magnet in the hole to see if it was a good fit.

DIY: Toy Animal Instagram Photo Holder. So cute & easy to make. Perfect for a kids room or any eclectic space! Full tutorial at www.jennaburger.com

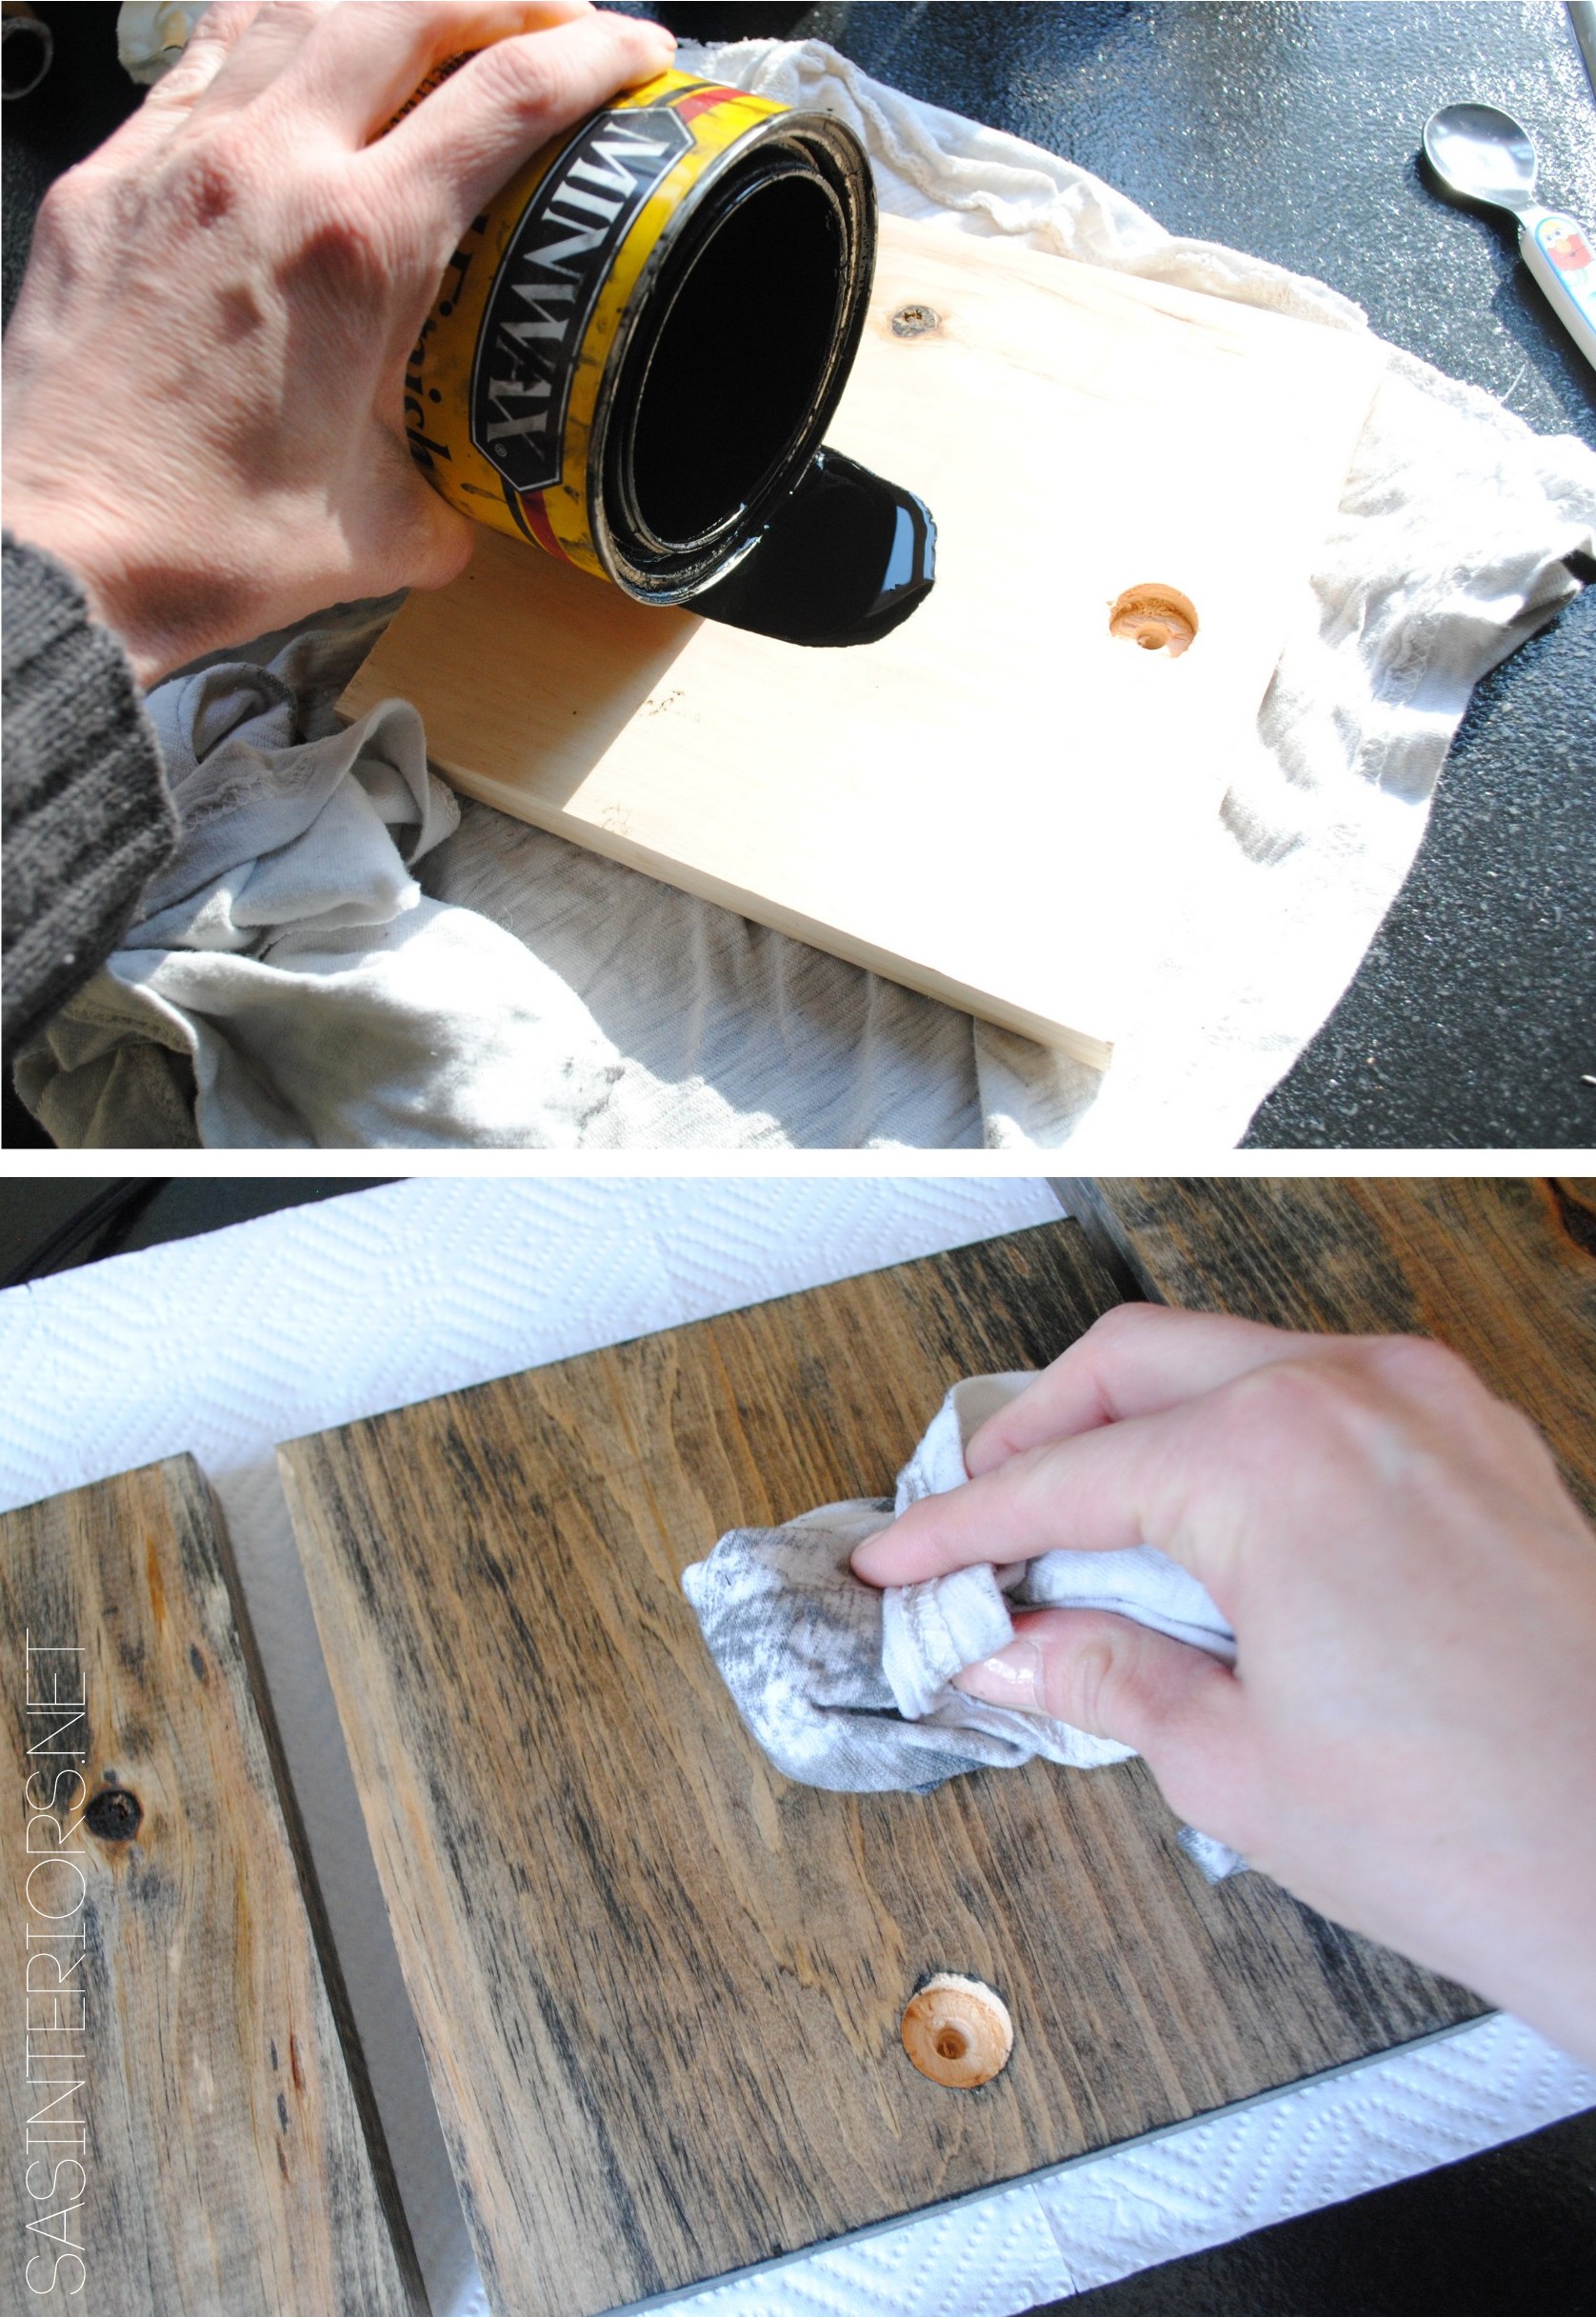
3. After all 4 squares had the magnet holes, I gave the surface a quick wipe-on / wipe-off staining.  I used espresso stain that I had on hand.  As soon as I poured it on, I wiped it away with a piece of lint-free cloth.  I still wanted to see the beauty of the grain, which is why I used stain versus paint.

DIY: Toy Animal Instagram Photo Holder. So cute & easy to make. Perfect for a kids room or any eclectic space! Full tutorial at www.jennaburger.com

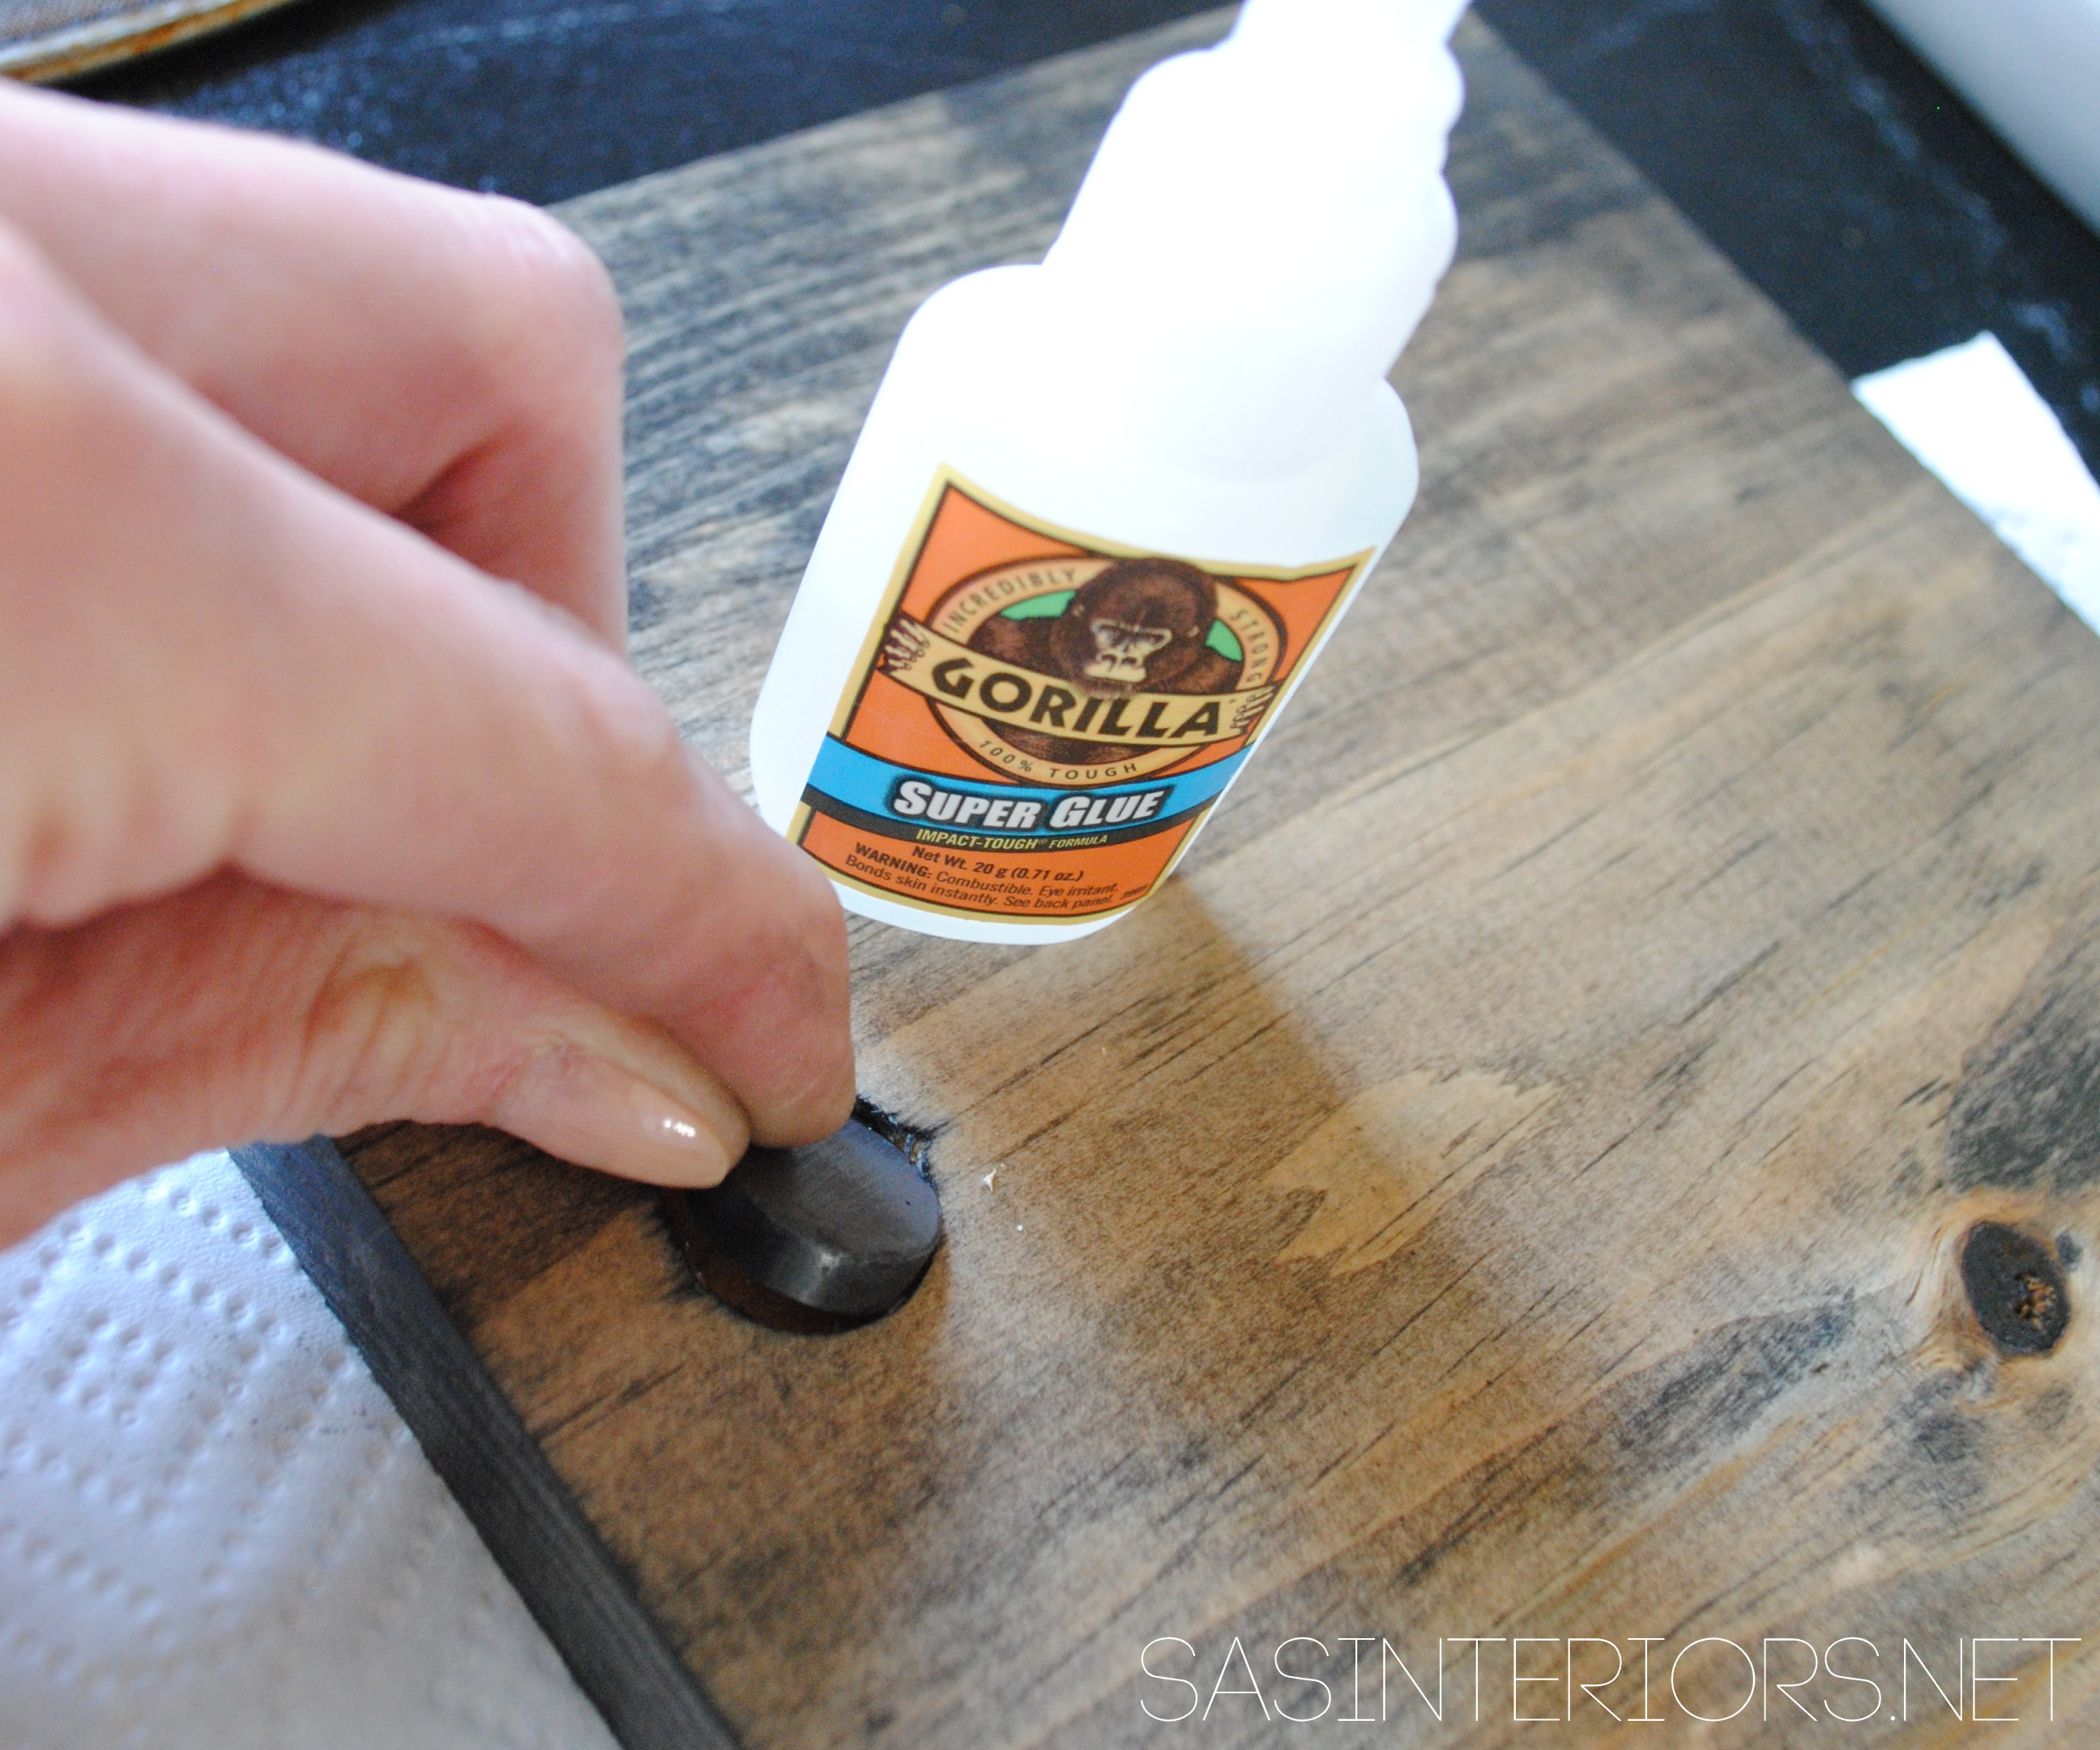
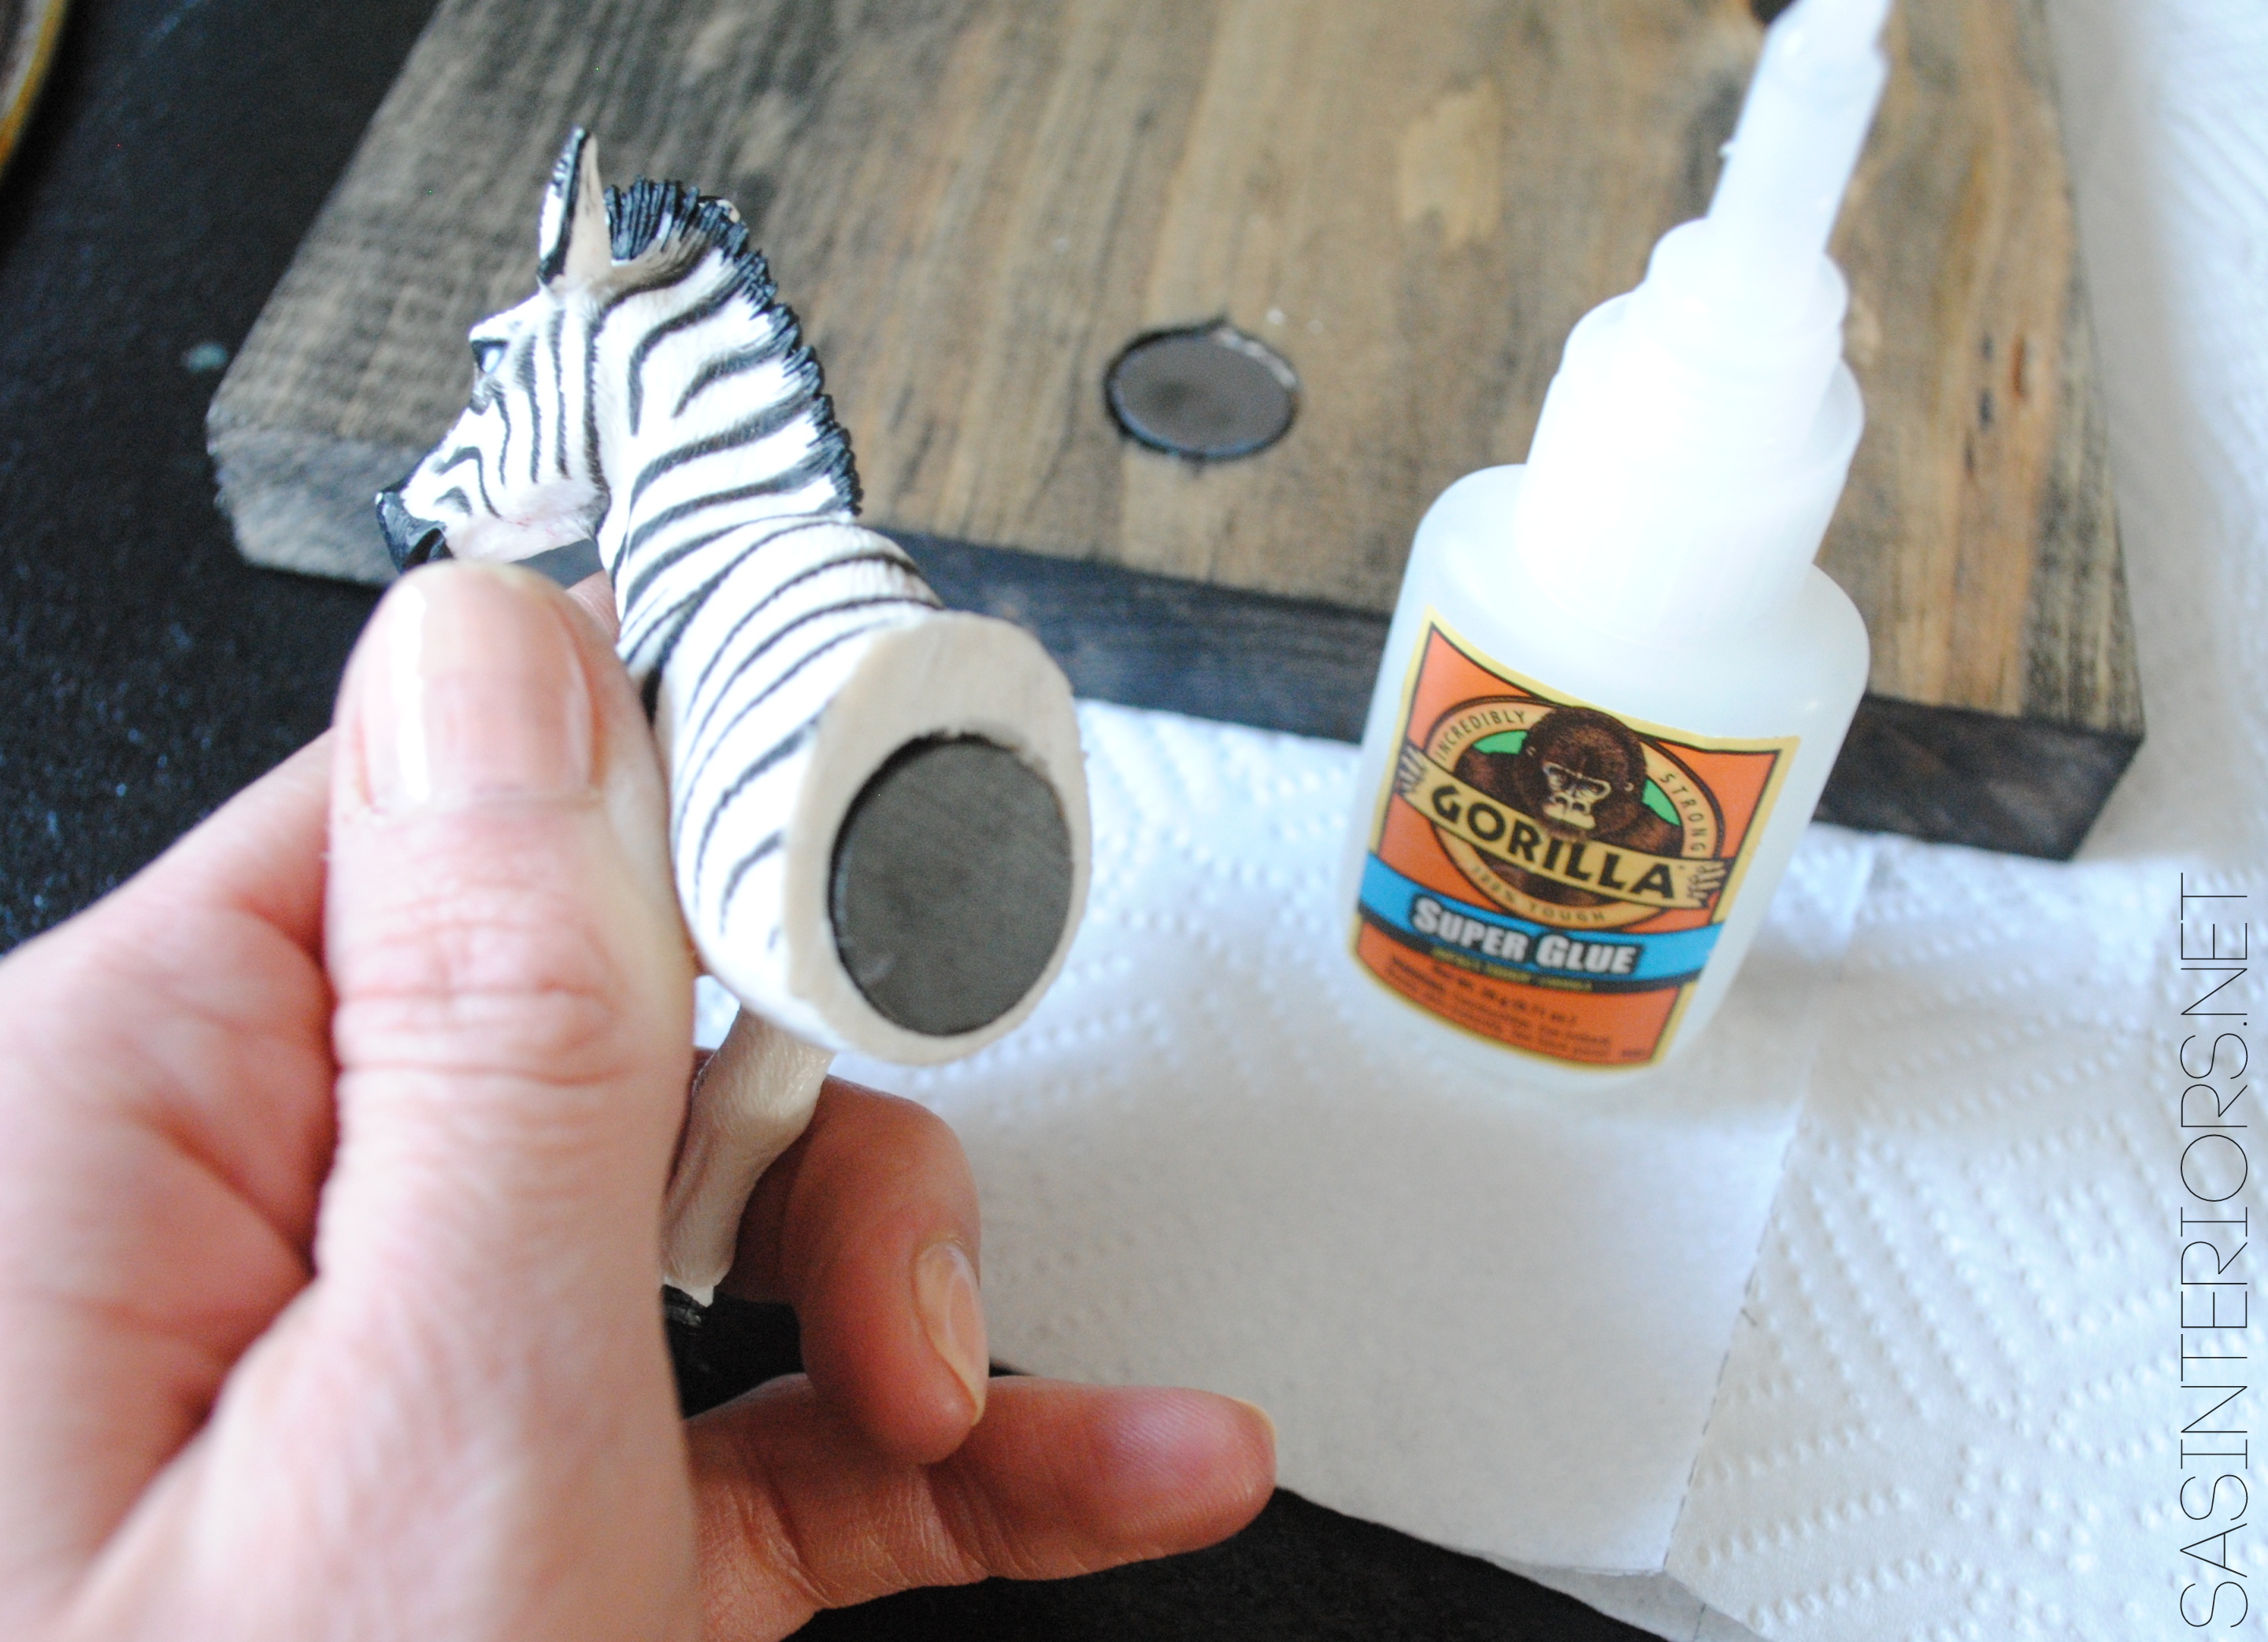
4. Once the stain was dry, I adhered the magnet to the hole with Gorilla Glue.

DIY: Toy Animal Instagram Photo Holder. So cute & easy to make. Perfect for a kids room or any eclectic space! Full tutorial at www.jennaburger.com

Onto the toy animals…

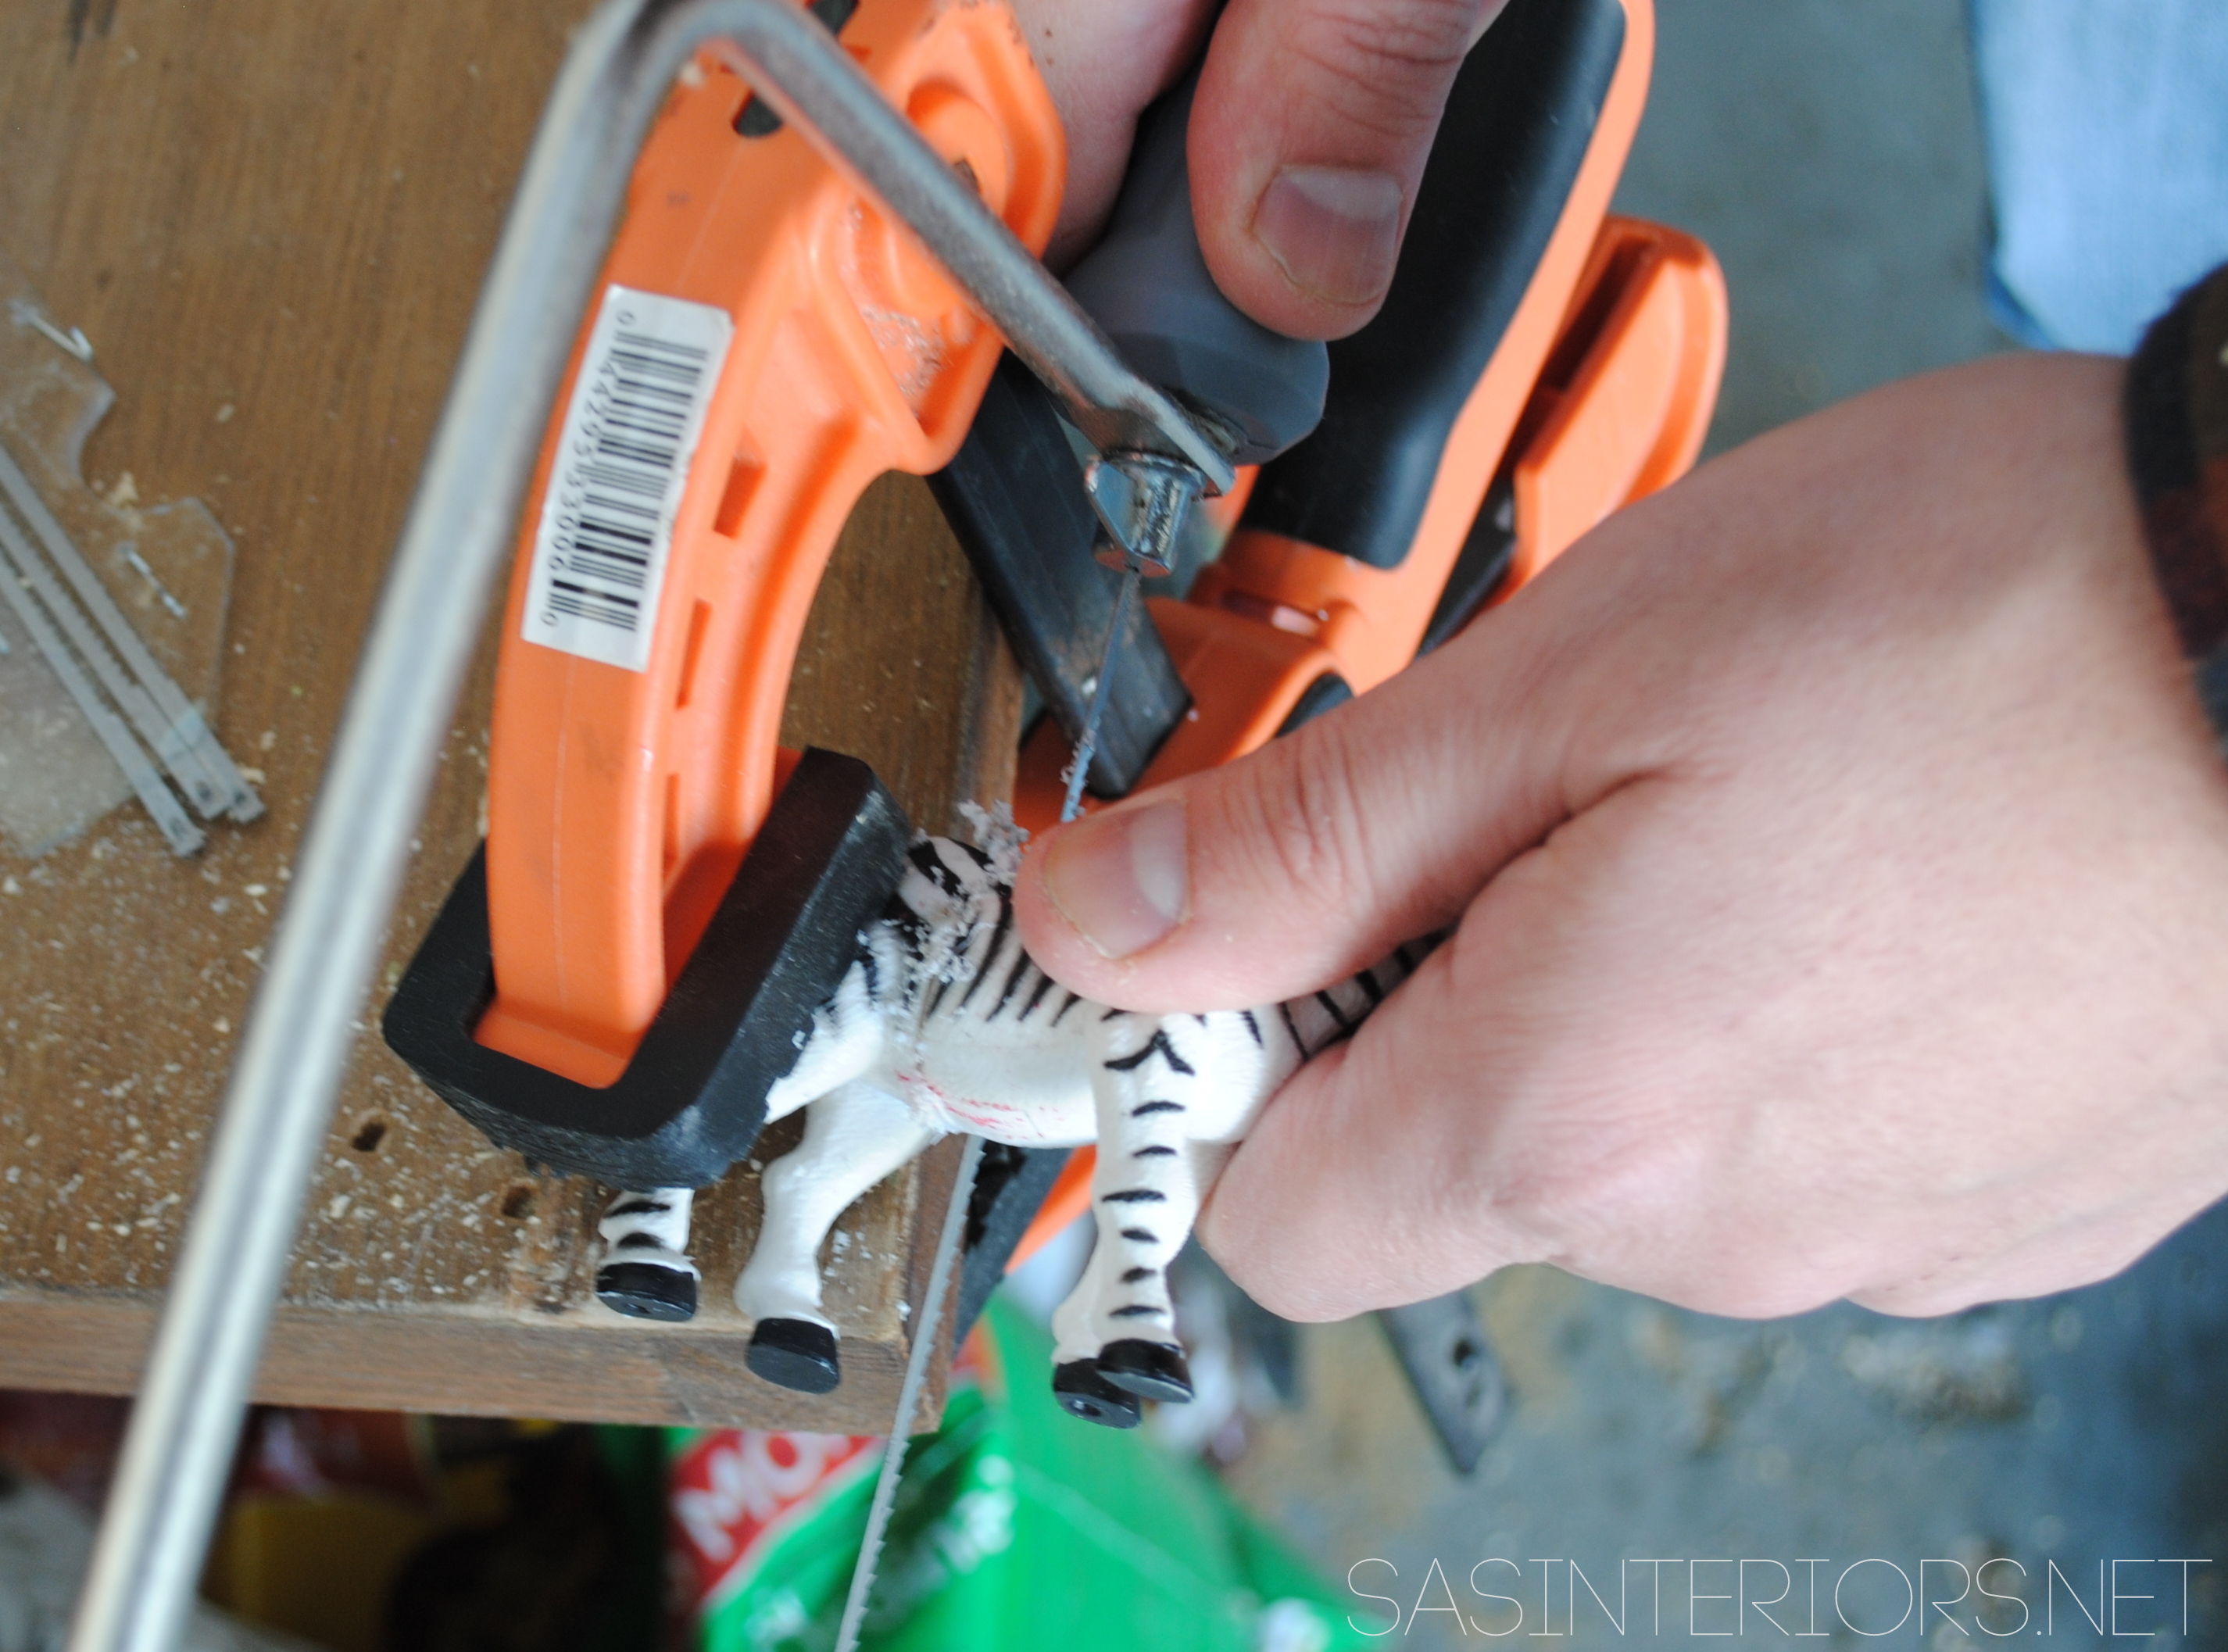
5. Using a coping saw, the mister cut the animals in half.  It was a little weird & sad to chop these little guys in half, but it was all for good reason…

Tip: Toy animals that have a solid inside work best.  2 of the animals we cut were solid, 2 were hollow.  For the hollow animals, I packed them with play-doh, then inserted the magnet so it sit flush with where it was cut.  A few days later, the playdoh was completely hardened and the magnet fit snug inside just like the solid animal.  If needed, once the play-doh is hard, remove the magnet and add some gorilla glue or crazy glue.

DIY: Toy Animal Instagram Photo Holder. So cute & easy to make. Perfect for a kids room or any eclectic space! Full tutorial at www.jennaburger.com

6. Once the animal was cut, I drilled a 3/4″ diameter hole (same as the wood) for the magnet to sit inside.  Then I secured it with Gorilla Glue.

DIY: Toy Animal Instagram Photo Holder. So cute & easy to make. Perfect for a kids room or any eclectic space! Full tutorial at www.jennaburger.com

Let’s hang it!

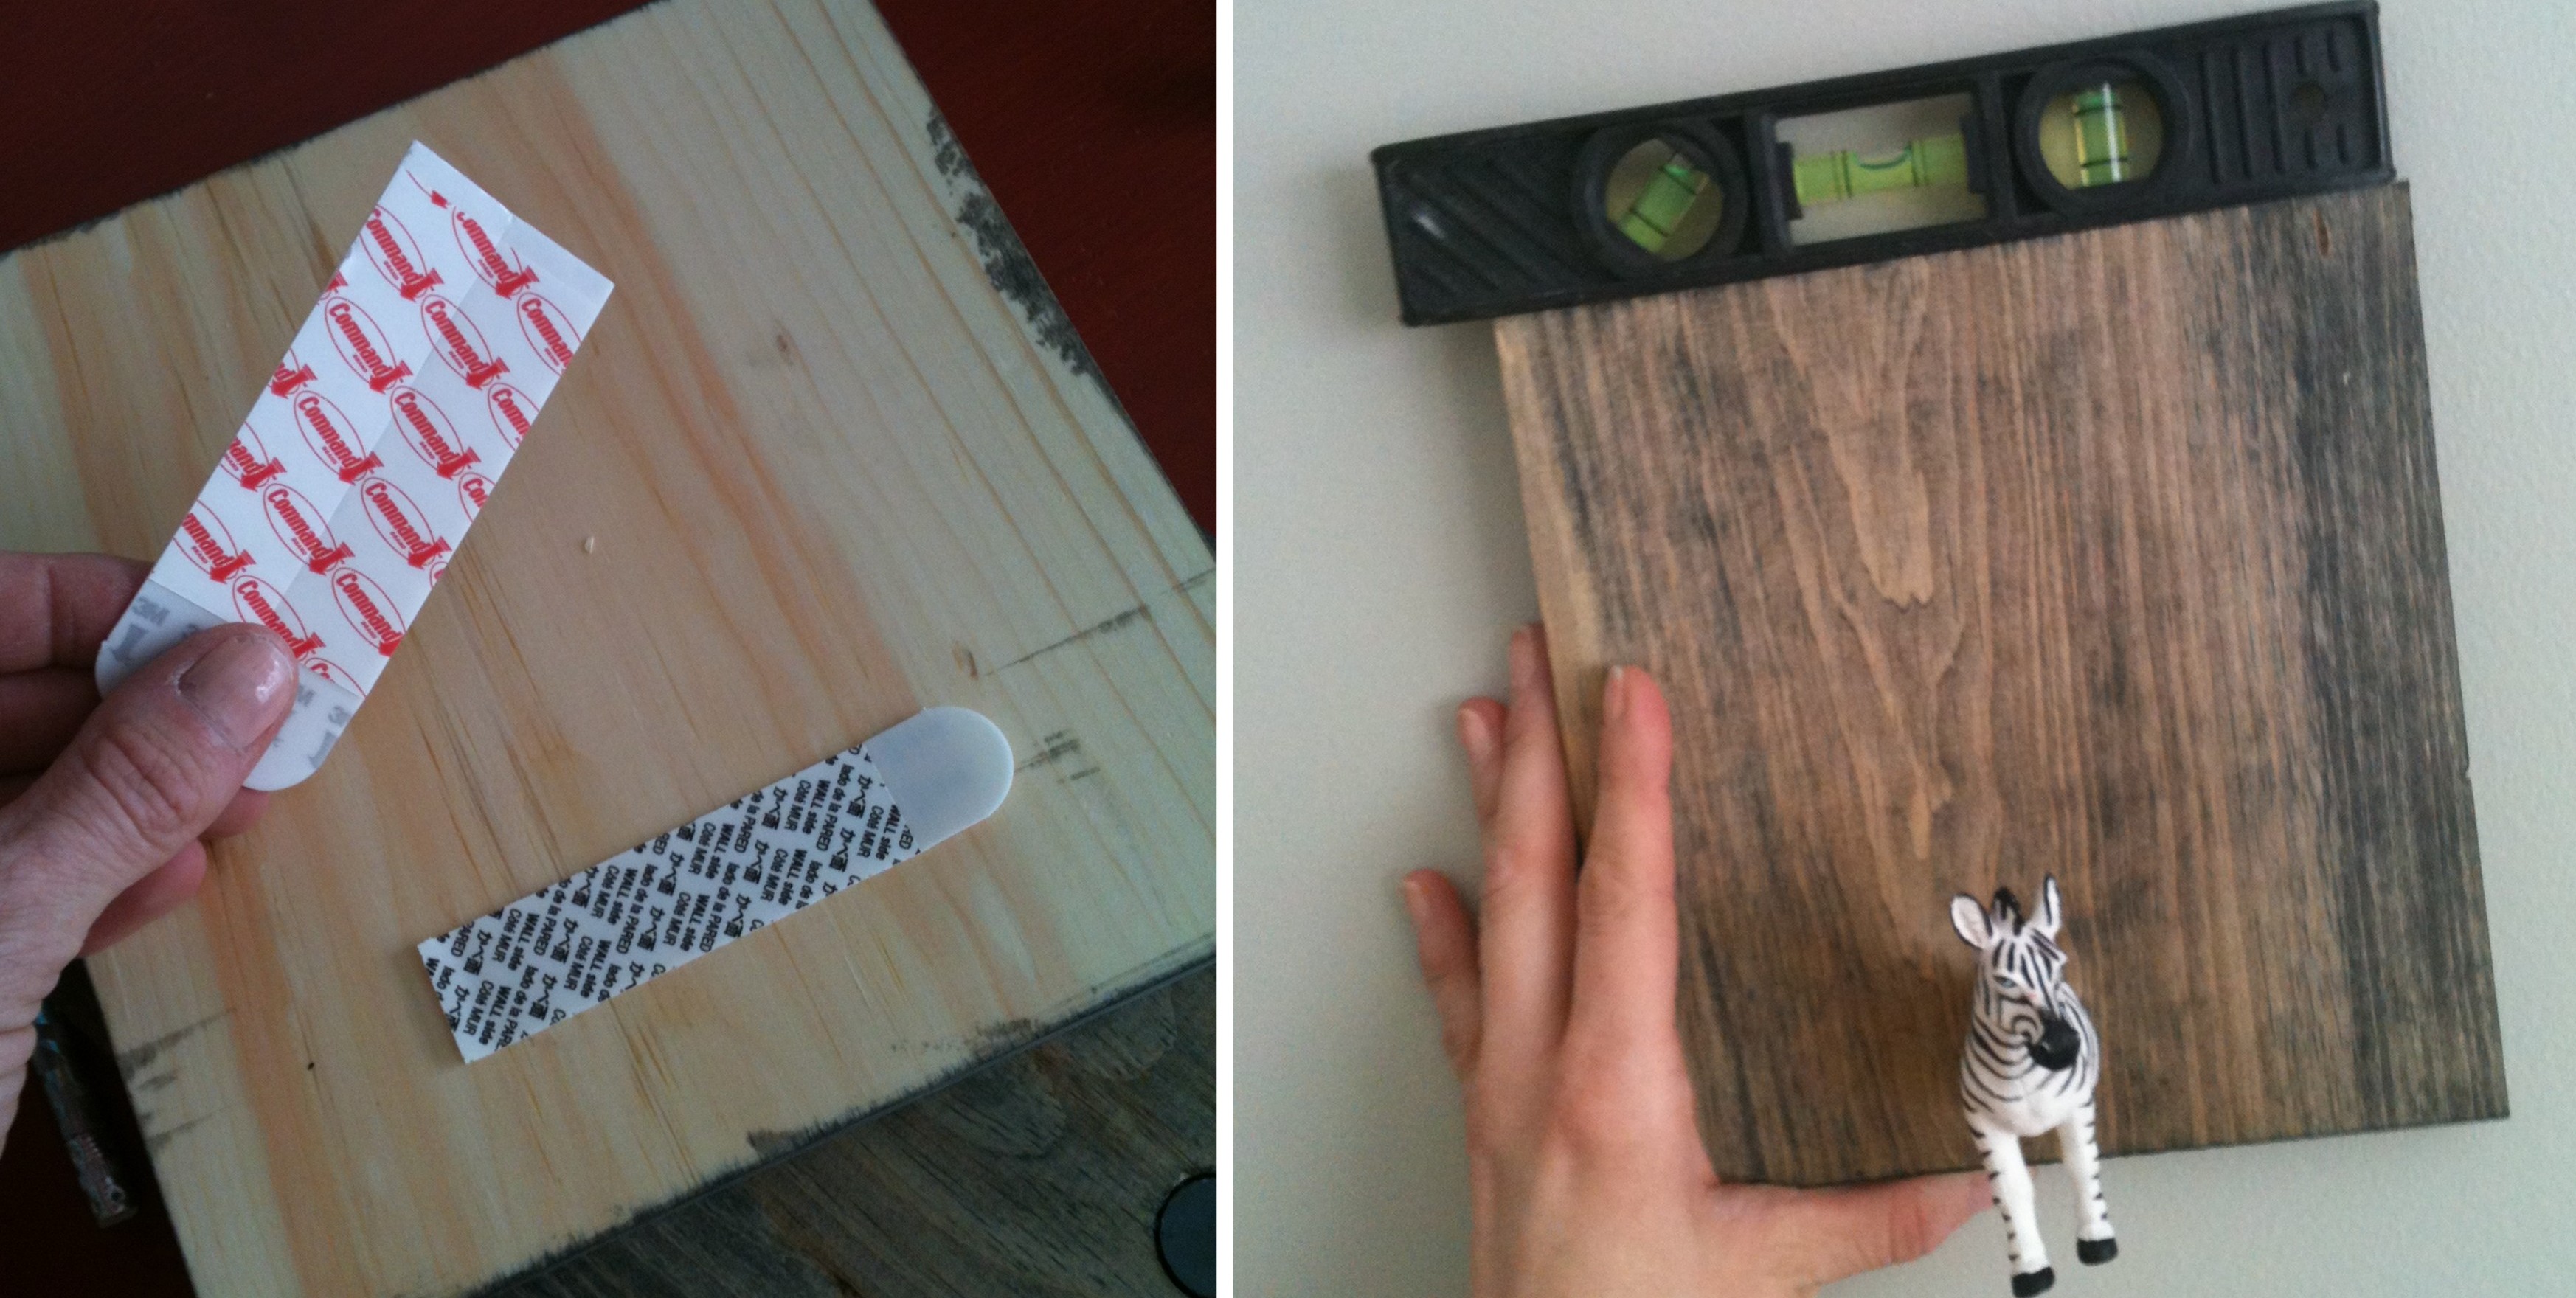
7. I wanted the wood squares to sit flush with the wall versus using a picture hook, so I used Command Strips to hang them. And of course, I made sure they were level…

DIY: Toy Animal Instagram Photo Holder. So cute & easy to make. Perfect for a kids room or any eclectic space! Full tutorial at www.jennaburger.com

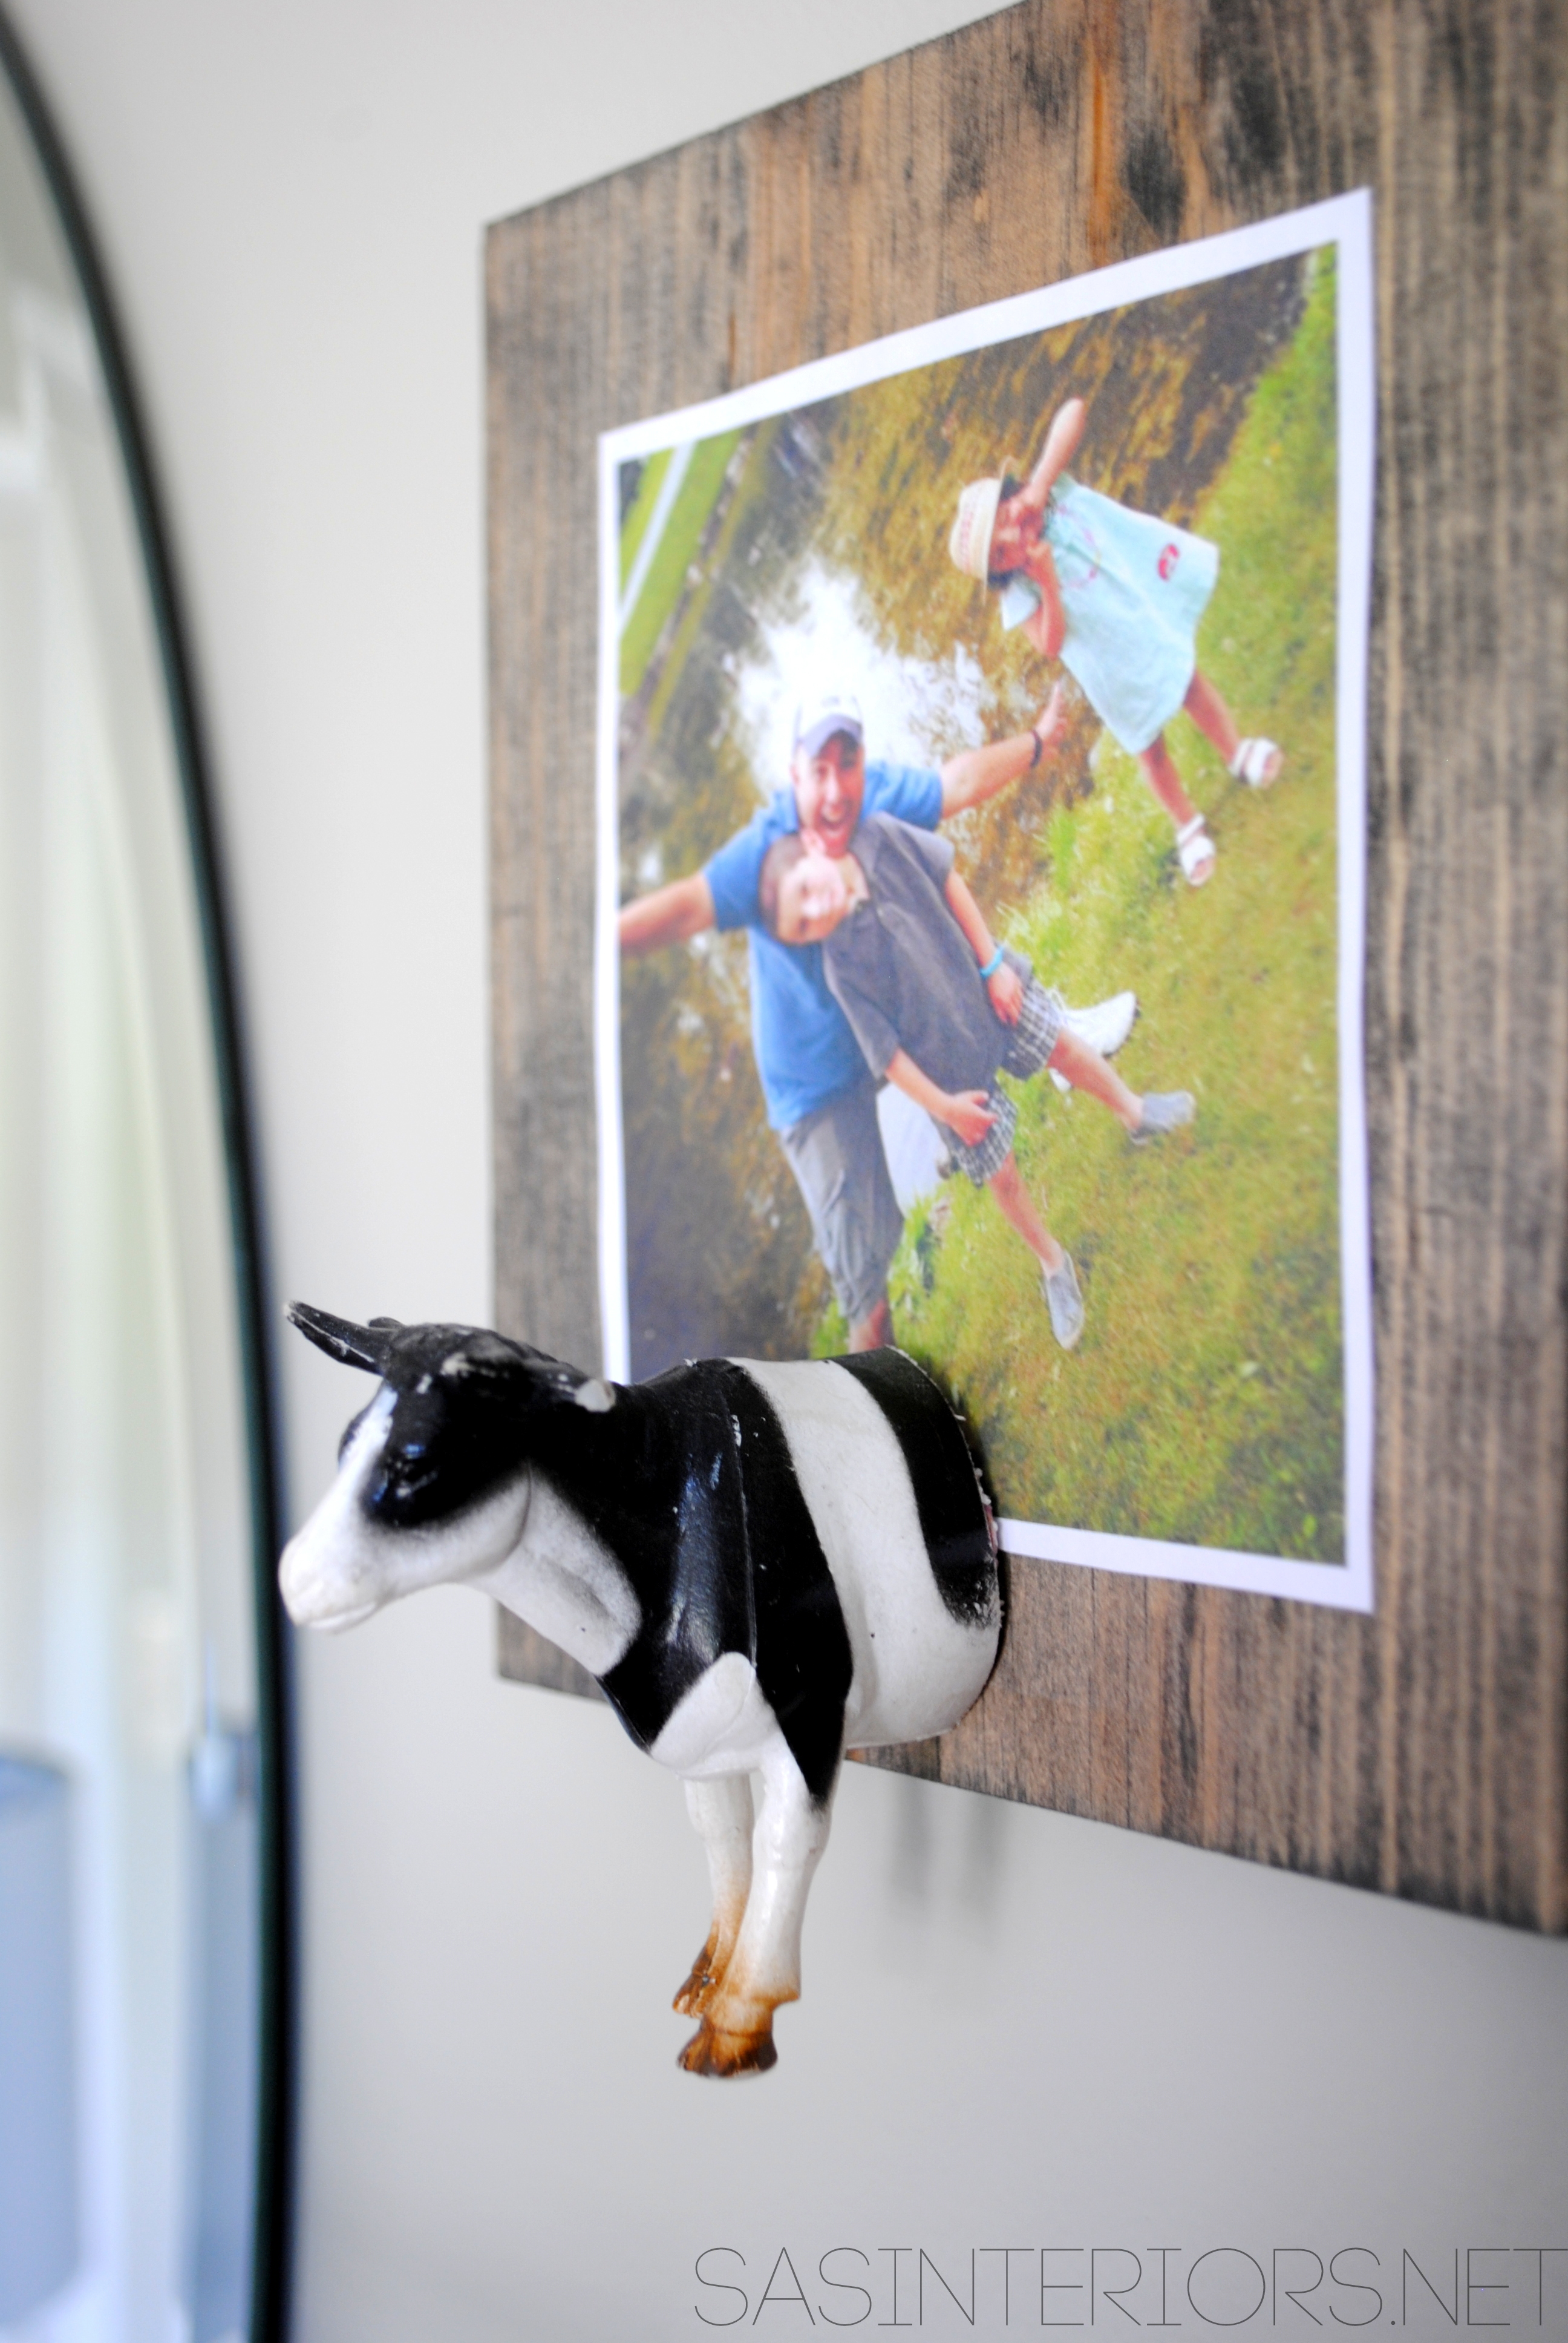
Once hung, the toy animal instagram photo holders were complete…

DIY: Toy Animal Instagram Photo Holder. So cute & easy to make. Perfect for a kids room or any eclectic space! Full tutorial at www.jennaburger.com

I filled the wood boards with a few of my boys favorite + funny instagram pics.  I actually just printed them from my computer, but there a bunch of places that develop instagram photos.  Or regular 4 x 6 or 5 x 7 photos will work too.

DIY: Toy Animal Instagram Photo Holder. So cute & easy to make. Perfect for a kids room or any eclectic space! Full tutorial at www.jennaburger.com

DIY: Toy Animal Instagram Photo Holder. So cute & easy to make. Perfect for a kids room or any eclectic space! Full tutorial at www.jennaburger.com

I love how this space turned out.  Here’s an overall…

DIY: Toy Animal Instagram Photo Holder. So cute & easy to make. Perfect for a kids room or any eclectic space! Full tutorial at www.jennaburger.com

DIY: Toy Animal Instagram Photo Holder. So cute & easy to make. Perfect for a kids room or any eclectic space! Full tutorial at www.jennaburger.com

Think this tutorial is fun + you may just want to try it?  Pin It or Save It for later…

DIY: Toy Animal Instagram Photo Holder. So cute & easy to make. Perfect for a kids room or any eclectic space! Full tutorial at www.jennaburger.com

Never thought you could do something with toy animals?  O, there are lots of ideas.  I have more interesting creative ideas coming soon… Stay Tuned!

5 Ways to Update a Bathroom on a Budget

There have been some really qualified “entries” for the ugly bathroom makeover.  I’m not going to lie…  some of you are in desperate need of direction & a plan on how to jazz up your bathrooms.  Most of the bathrooms I received pictures for, have good bones and are similar in layout of many homes, but they need to be taken to the next level to be practical and pretty!

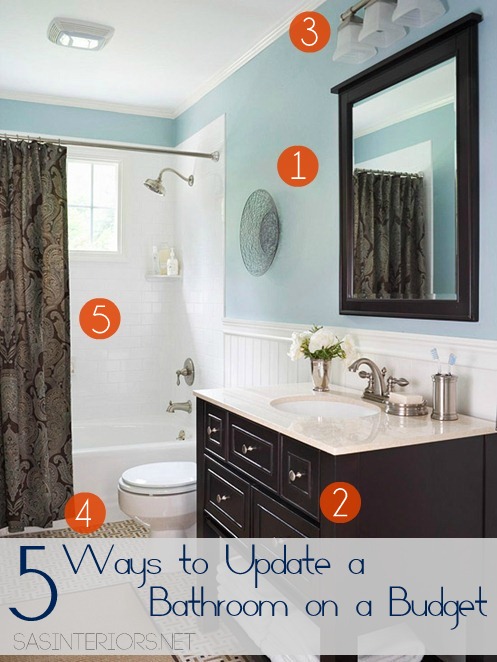
Lowe’s and I are going through the pictures and next Monday will be the day when you’ll get to see what reader submitted bathroom we chose, along with a Creative Vision Board + ‘plan of action’ for the space.  In the meantime, I wanted to share my thoughts + ideas with ALL of you on 5 Budget-Friendly Ways to Update a Bathroom

5 Ways to Upgrade a Bathroom on a Budget: Don't neglect a needed bathroom revamp because of cost + no-experience. Instead, embrace what you have and revamp the layers of the existing!

I’ve been working on my fair share of client kitchens lately, which I adore, but I’m equally obsessed with revamping bathrooms.  Having an educational and professional background in architecture and interior design, I love how all the components- cabinetry, hardware, and all the details in between – come together and interlink to create an incredible result.  Even more so, I love all the added layers + color that can be brought into a bathroom to make it not only a functional space, but a magical oasis – remember I said last week, who doesn’t sneak away to the bathroom here and there for some peace + quiet?!

Unlike a typical 4 walled room in a house, bathrooms (as well as kitchens) can seem daunting when thinking about a makeover.  There’s plumbing, electrical, tile, and more that is involved in changing.  BUT, instead of neglecting the idea of an overwhelming revamp, embrace what you have and revamp the layers of the existing.  Not only will a budget-friendly bathroom makeover increase the value of your home, but it will also simply make you happy!

Ditch those apprehensive, scary thoughts and let me share my 5 Ways to Update a Bathroom on a Budget…

1. Paint

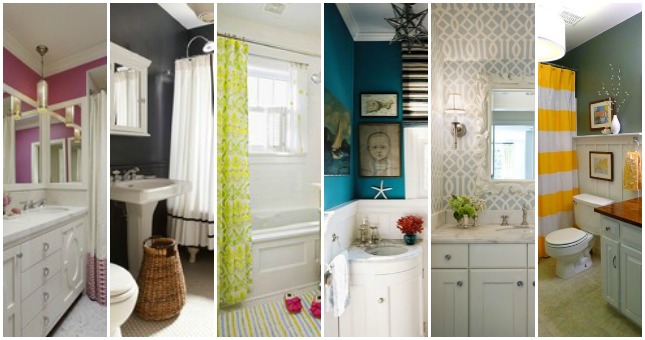
Easy (well fairly easy) and cheap!  There is nothing like a fresh new coat of paint on the walls!  And for a typical bathroom, from start to finish, it should really only take a few hours. Since the fixtures of a bathroom are often white or light-colored, think about adding a pop of color on the walls.  Or, if you’re desiring a serene and calming space, go light  – not white, but light.

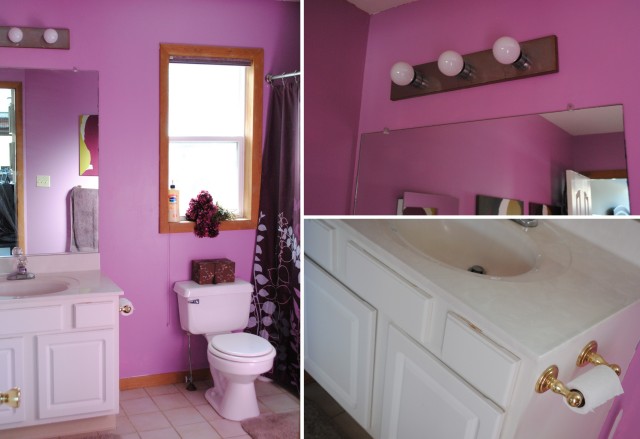
Let’s start off with a bang.  Check out one of my all-time favorite before and after bathroom makeovers that incorporates a splash of color + fun on the walls, via BHG

Splash of color on the walls of the bathroom

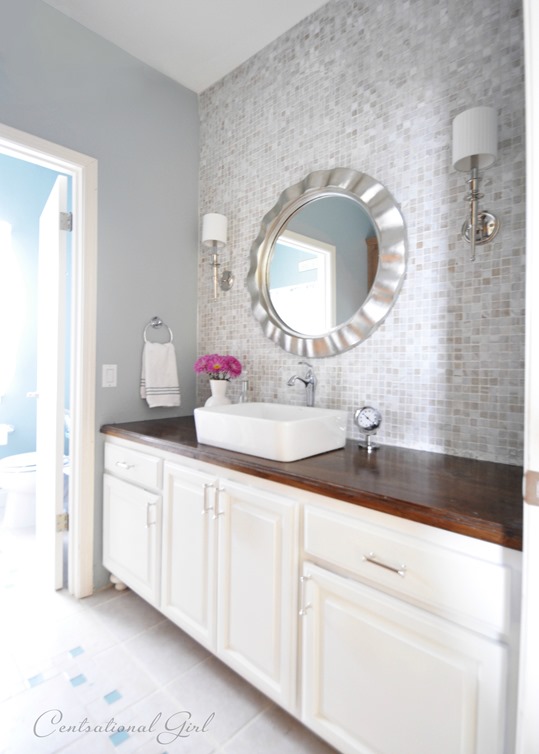
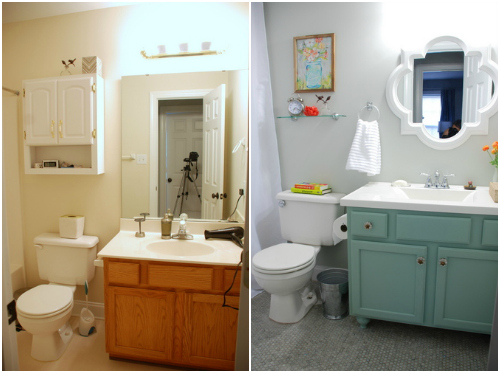
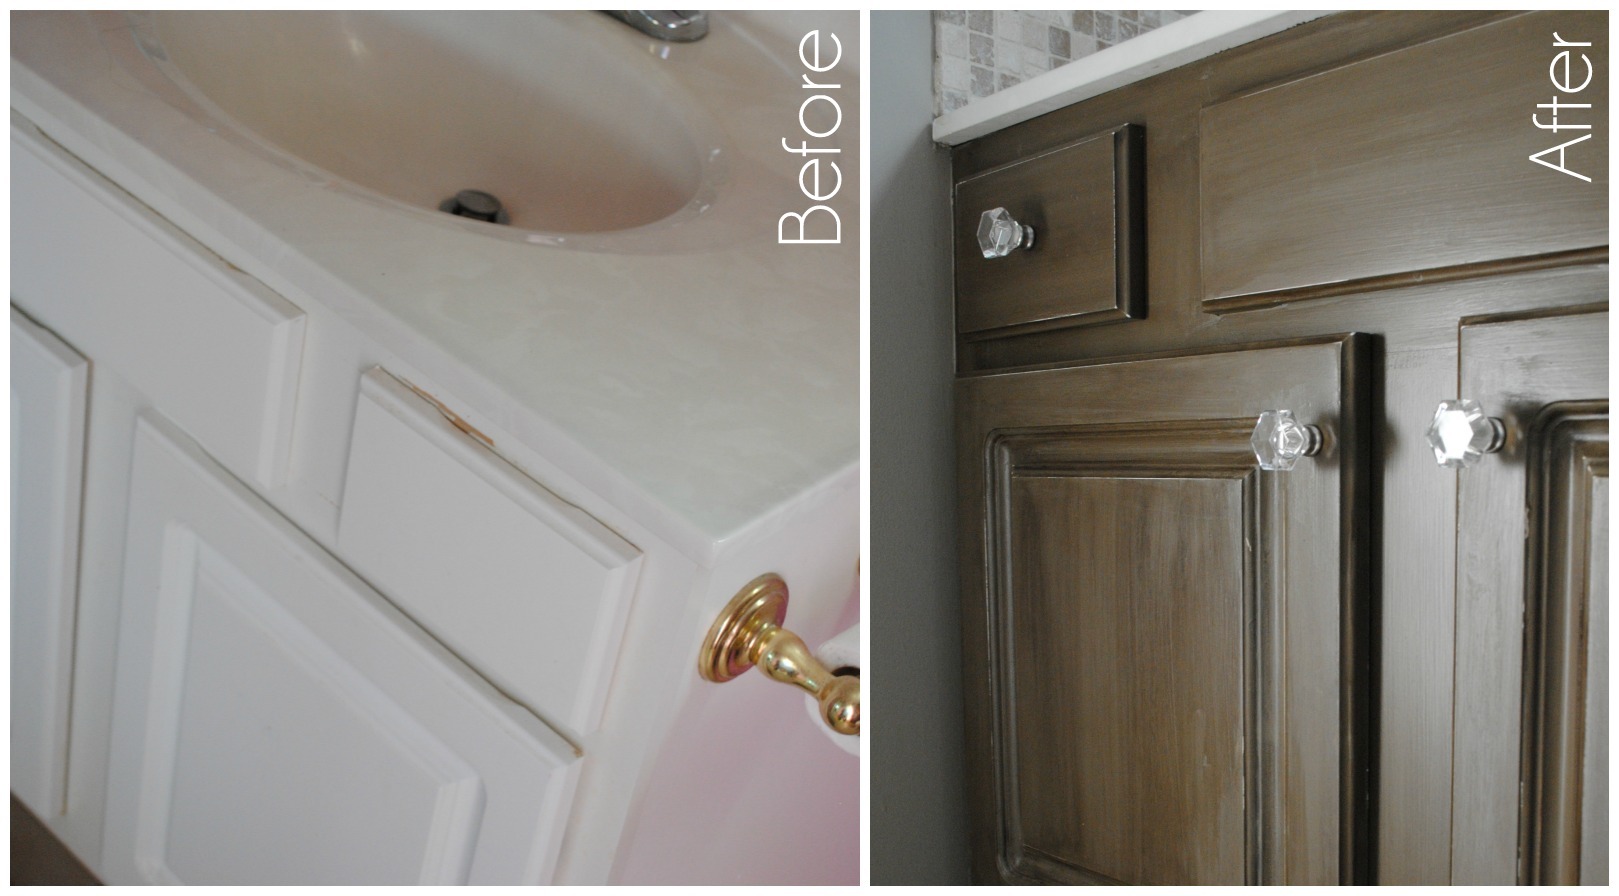
To step it up a notch, consider painting the existing bathroom cabinet.  It’s not uber difficult to remove / upgrade a bathroom cabinet, but it does involve plumbing and the possible install of a new countertop and/or sink.  If that’s not within your wheelhouse, a new coat of paint will be the answer.

Whether wood or laminate, the bath cabinet can most likely be revamped.  If it’s not structurally stable or you don’t love the look, ditch it, but if it can be used there is a little prep work before you paint…  Start by removing the doors and give them a good cleaning (diluted all-purpose cleaner, wood cleaner, or white vinegar with a little warm water usually works). Lightly sand the surface – using a hand sander is best.  Then add a primer to seal the wood underneath and to give a solid base coat for the paint to adhere to. Then using a roller / brush combination or a hand sprayer, apply at least two coats of paint (read all instructions ahead of time and follow the directions on the product). The transformation will be breathtaking.

Check out this awesome bathroom upgrade with a newly painted cabinet…

hall-bathroom

5 Ways to Upgrade a Bathroom on a Budget: 'After' picture of a newly painted cabinetBefore and After Bathroom space by Centsational Girl

2. Hardware

The layers of any space are key to making it unique and interesting.  An easy upgrade in a bathroom is adding or changing the hardware on the bath cabinet.  I’ve found that bath cabinets often don’t have any knobs or pulls, and once added the cabinet always comes alive.  The cheap builder-grade vanity in my master bath had no hardware, so using a drill, I drilled 2 holes, added crystal knobs, and now the “black dress” is accessorized!

Jazz up an old cabinet with new hardware!

Check out how great this bathroom upgrade looks by The Turquoise Home

Jazz up an old cabinet with new hardware!

Jazz up an old cabinet with new hardware!

I love the new paint color on that cabinet & the new hardware looks fabulous!

3. Lighting

I feel the light fixture in a space is so important.  A fixture can truly make or break a room, and typically I live by the motto GO big, or GO home!  How many of you have those old eye-ball style fixtures with 3 or 5 or 7 bulbs across and every time you walk into the bath you cringe because it’s so bright? {It’s okay to raise your hand}.  Ditch em’!  I’m all for good light in a bath space, but you don’t need a blinding light that is glaring into your eyes every time you enter.  Upgrade to a fixture(s) that is different and maybe not typical for a bathroom.

I’m still loving the $17 light that I found at Lowe’s for my powder room.  The ‘before’ light was fine, but expected.  This light is functional + exciting >

DSC_0165

Unique + Functional lighting in a bathroom can "make" a space!

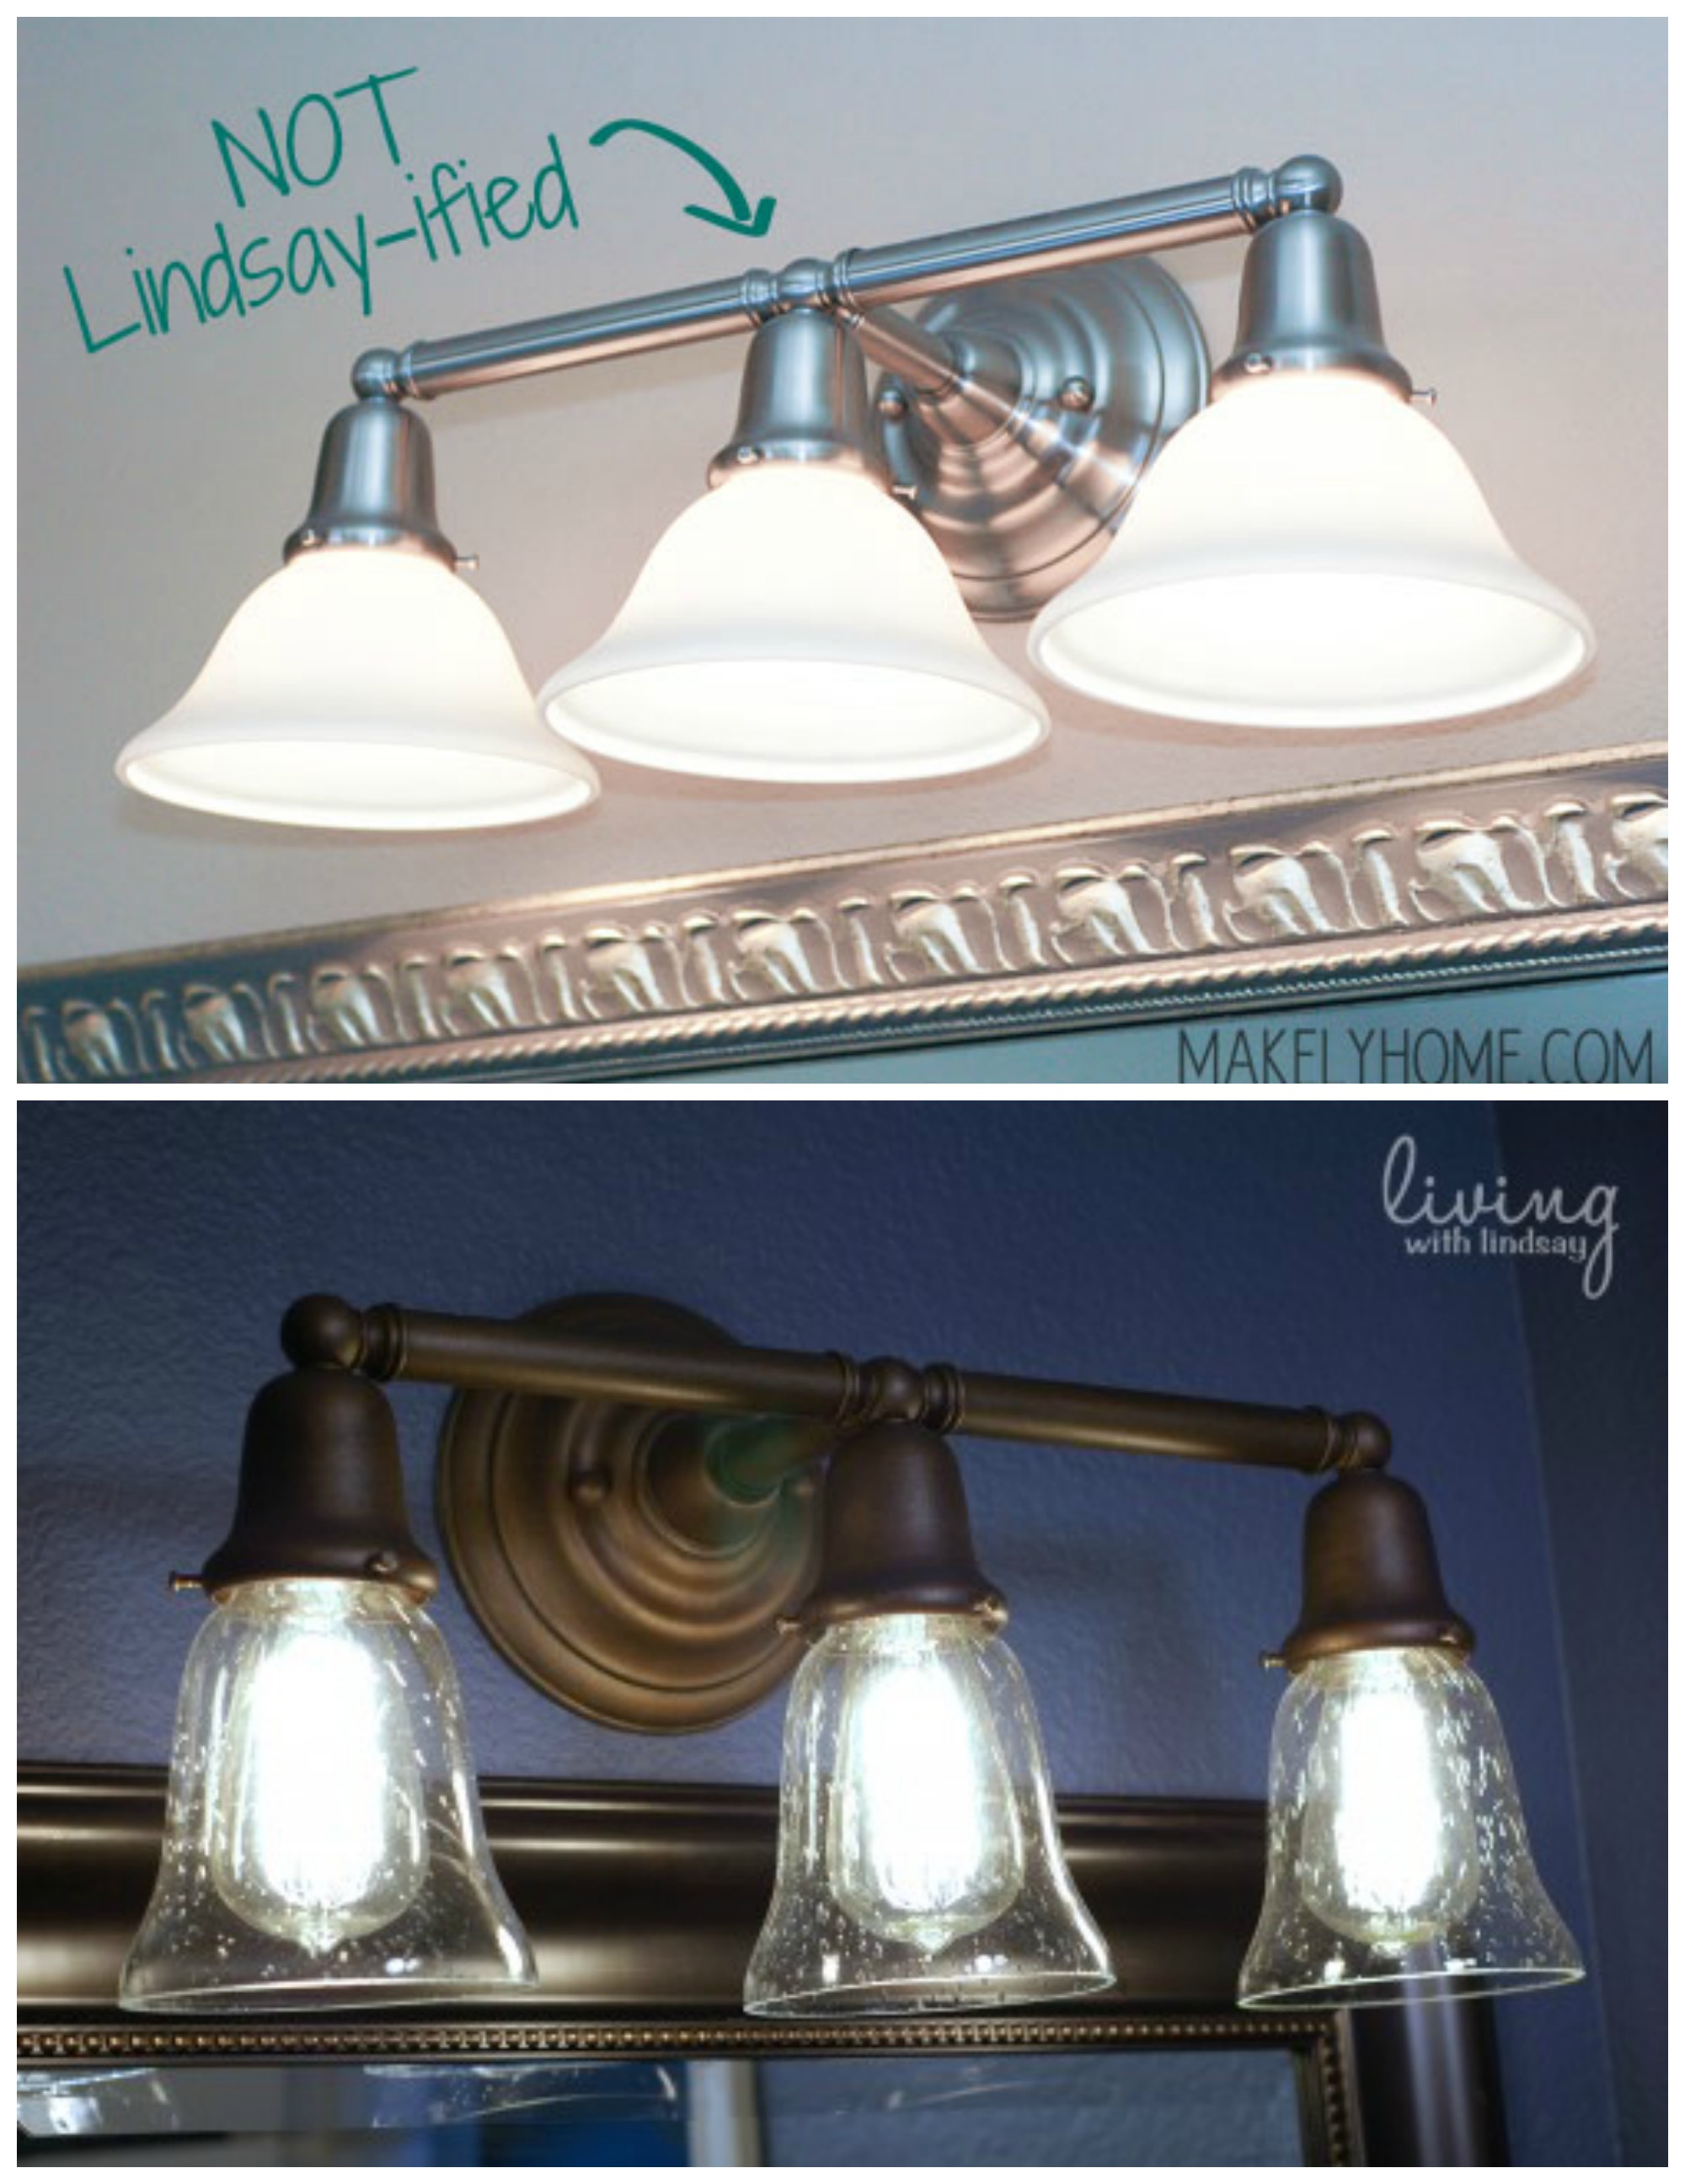
If you’re on a tight budget for your bath, grab a can of spray paint + a few new glass bulbs, to revamp an old, drab fixture. Check out how Lindsay of Makely Home transformed her bath light >

If you're on a tight budget for your bath, grab a can of spray paint + a few new glass bulbs, to revamp an old, drab fixture.Lindsay also has a great post on finding the perfect bathroom light!

4. Flooring

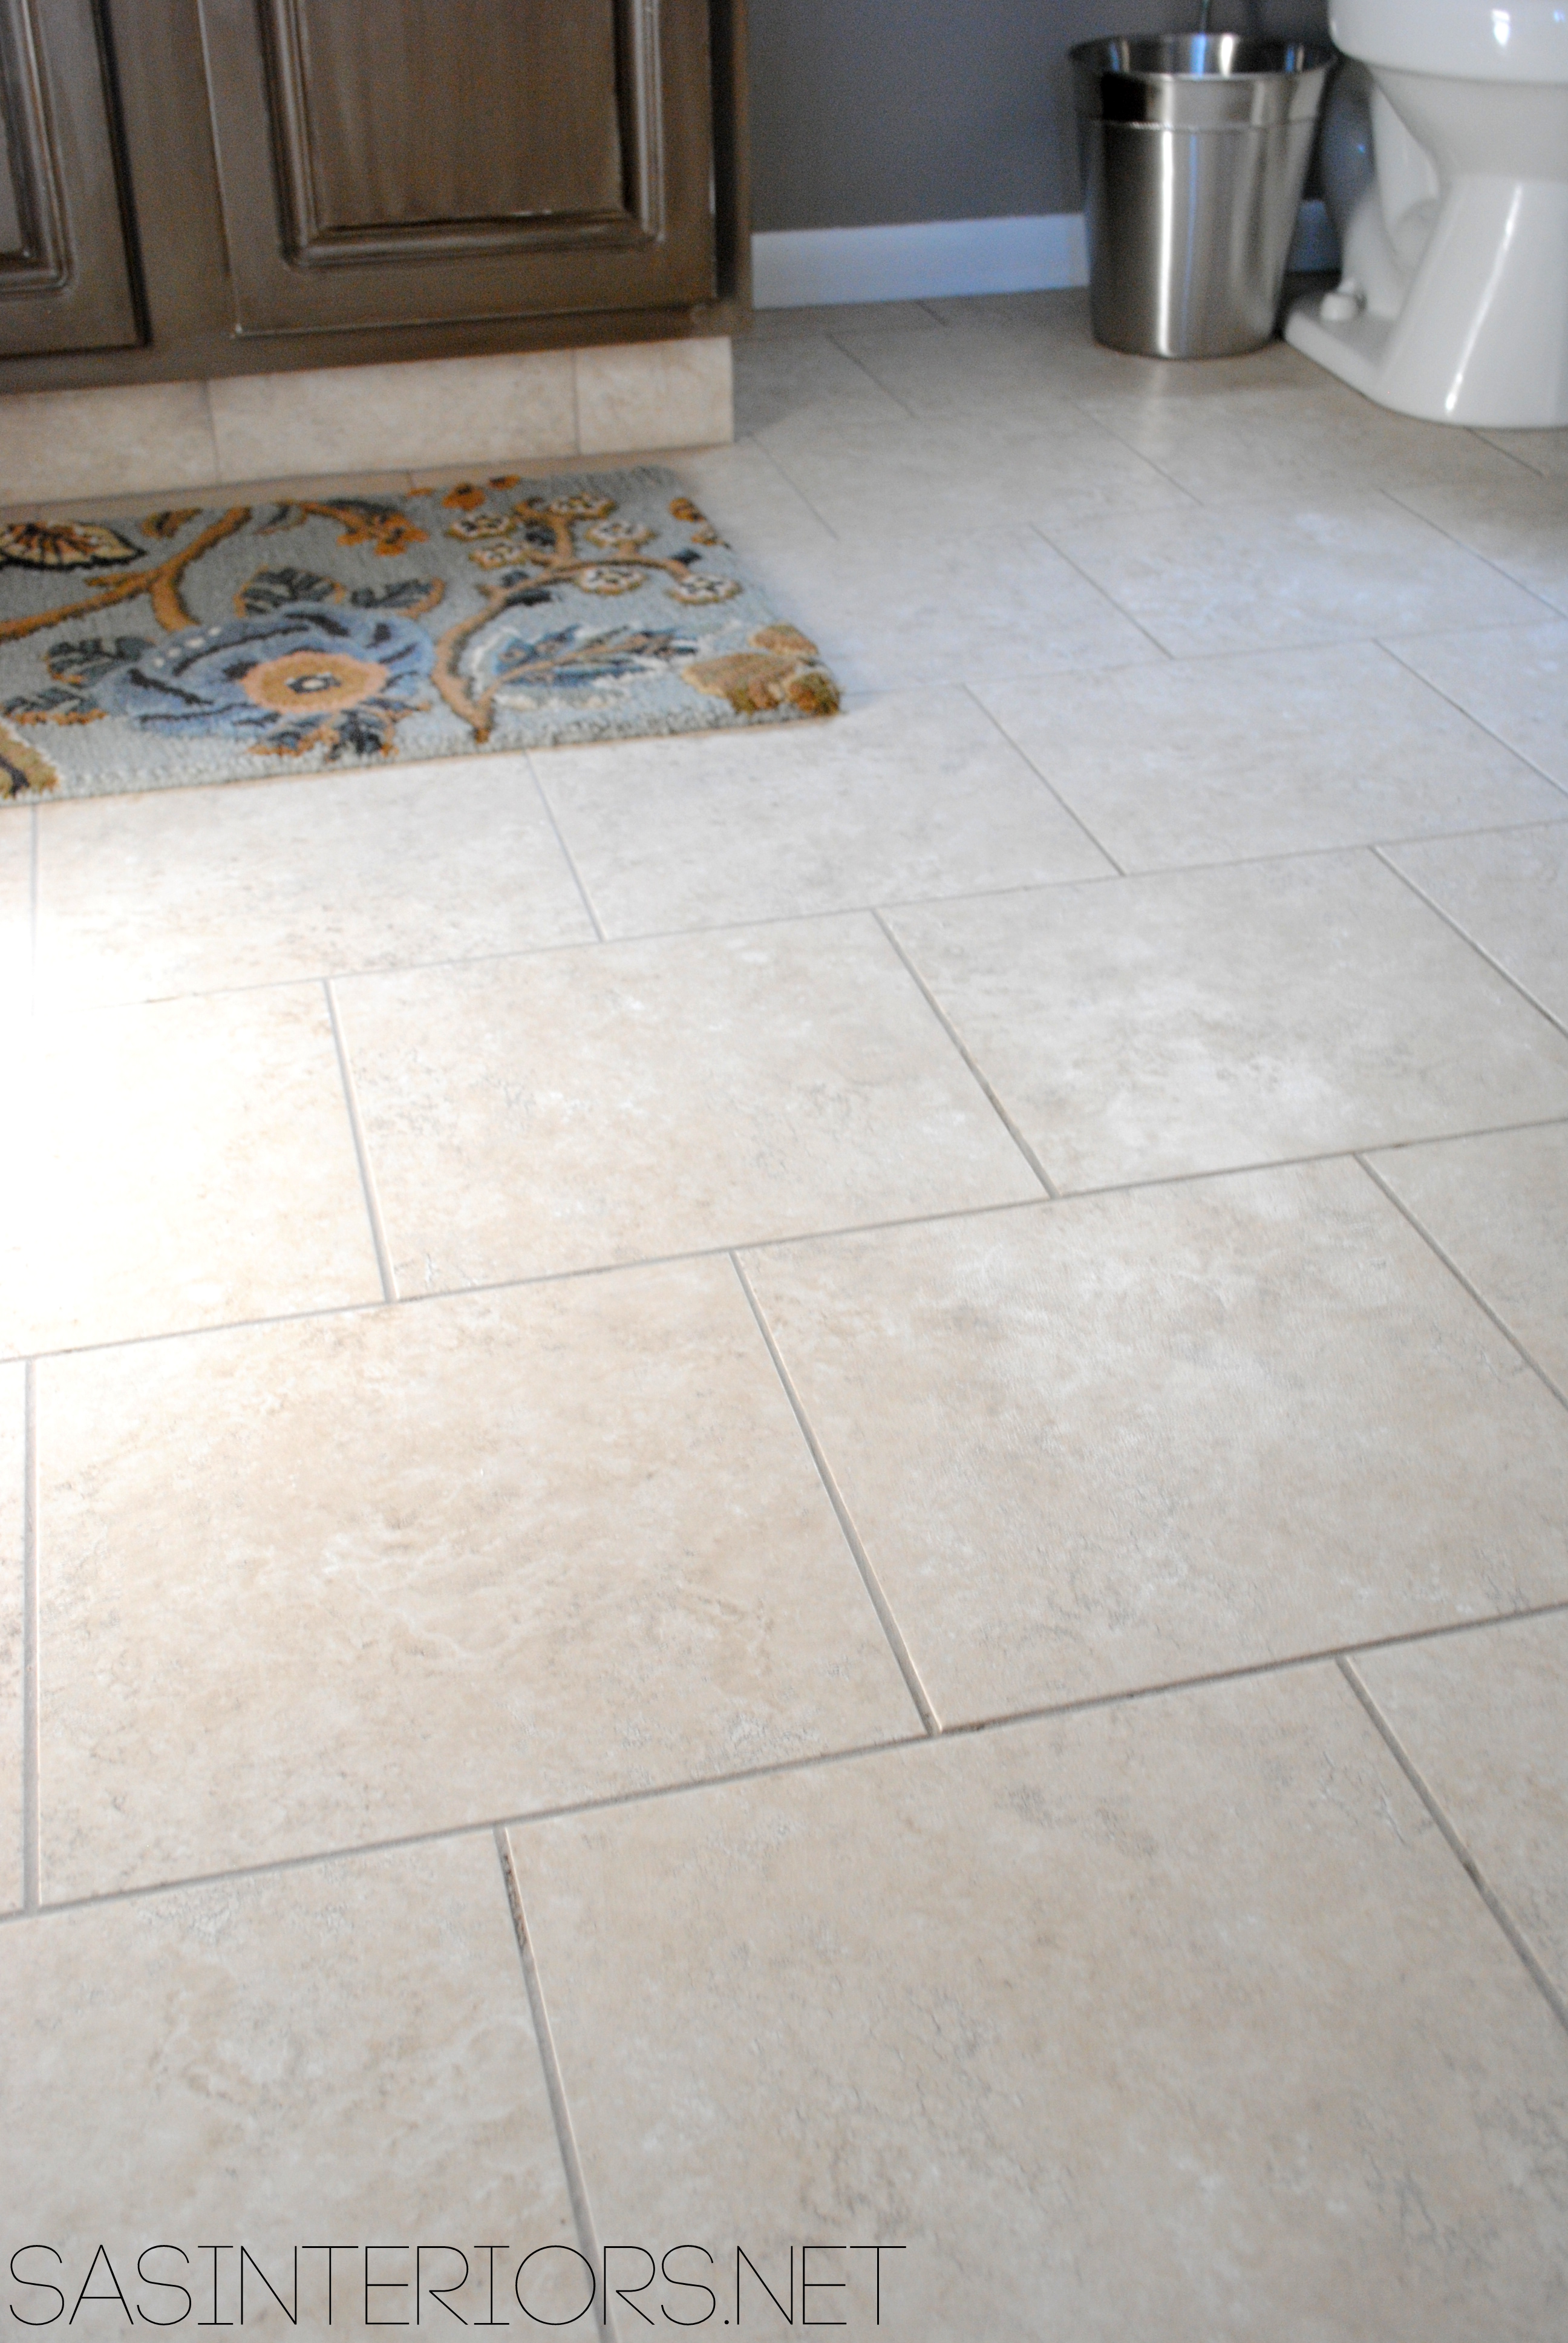
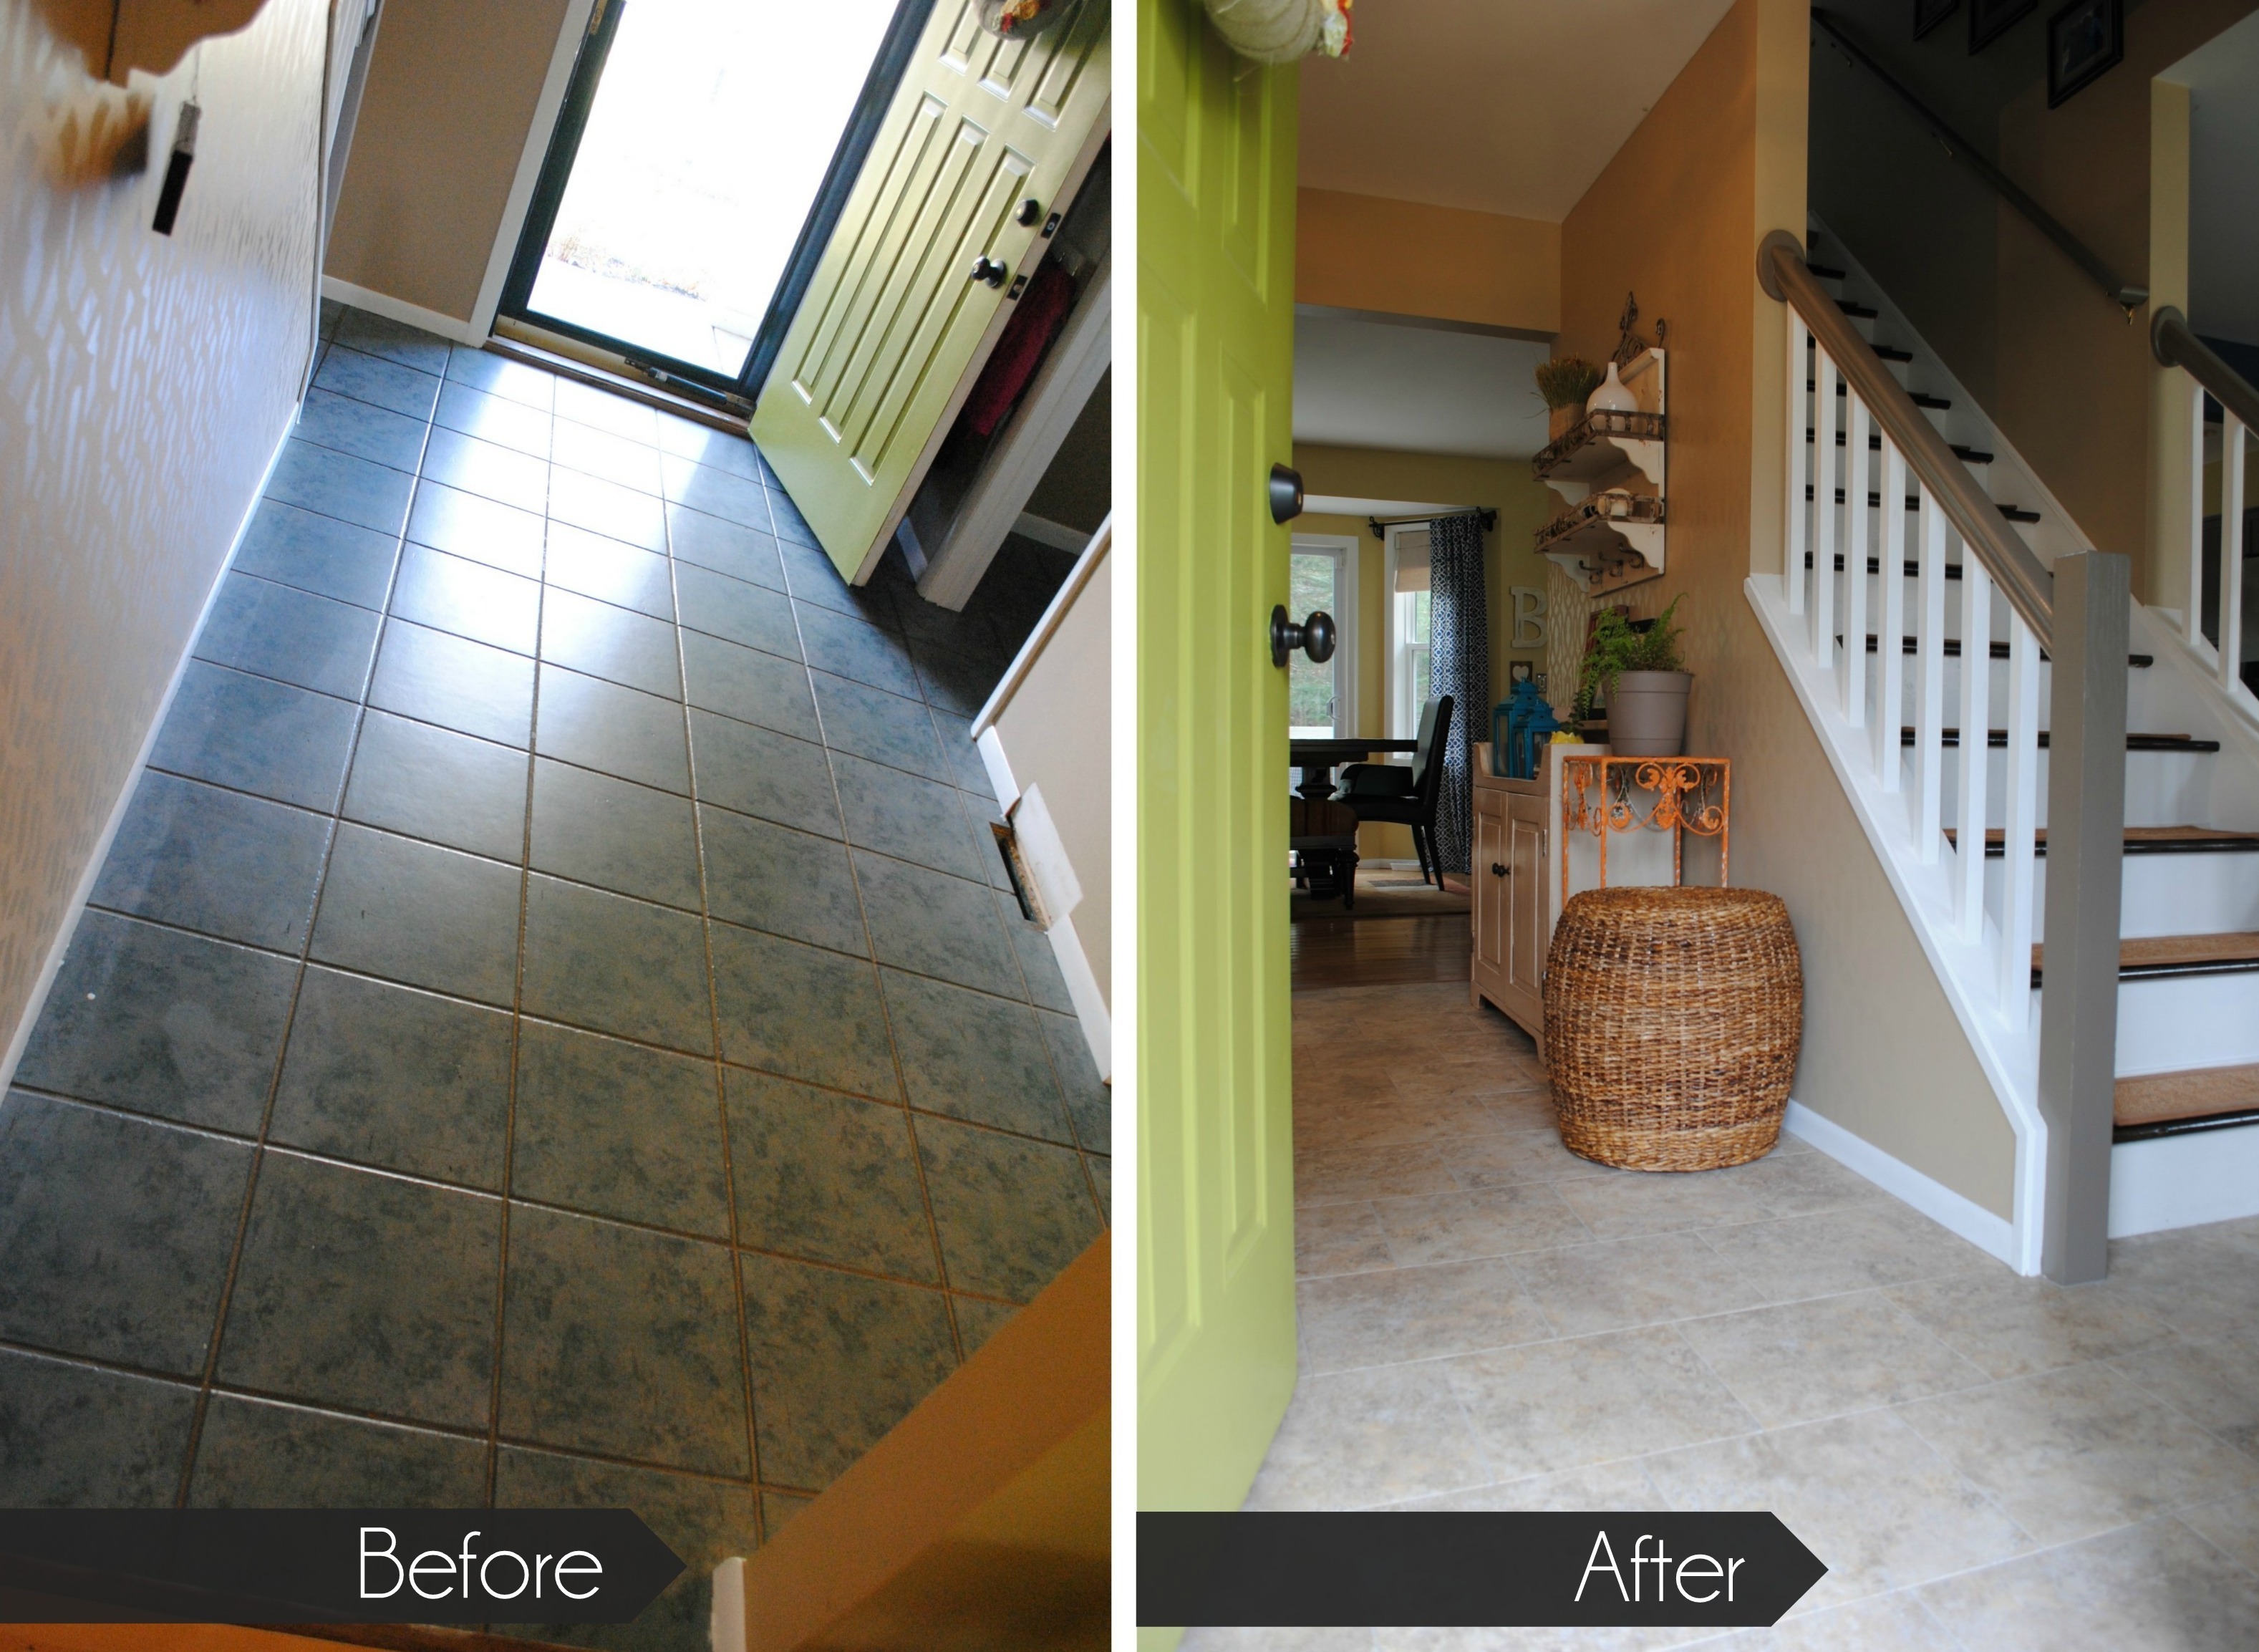
I know, it sounds like a big, scary project, but it doesn’t have to be!  As you may know, I continually profess my love for groutable luxury vinyl tile (LVT).  It’s a quick, easy (no experience needed), and budget-friendly way to cover up the ugly mess of a floor that you may have.  And if you don’t have an ugly mess of a floor, you might just want a change and LVT flooring is the answer.   There are also a bunch of other flooring out there that you may love and adore, but either way, new flooring will truly jazz up a bathroom hands-down!

Here’s a recent update I shared on how the groutable luxury vinyl tile floor has held up after 2 years.  If you’re thinking of installing this type of flooring in a bath or any space of a home, this is a must-read!

master bathroomm floor

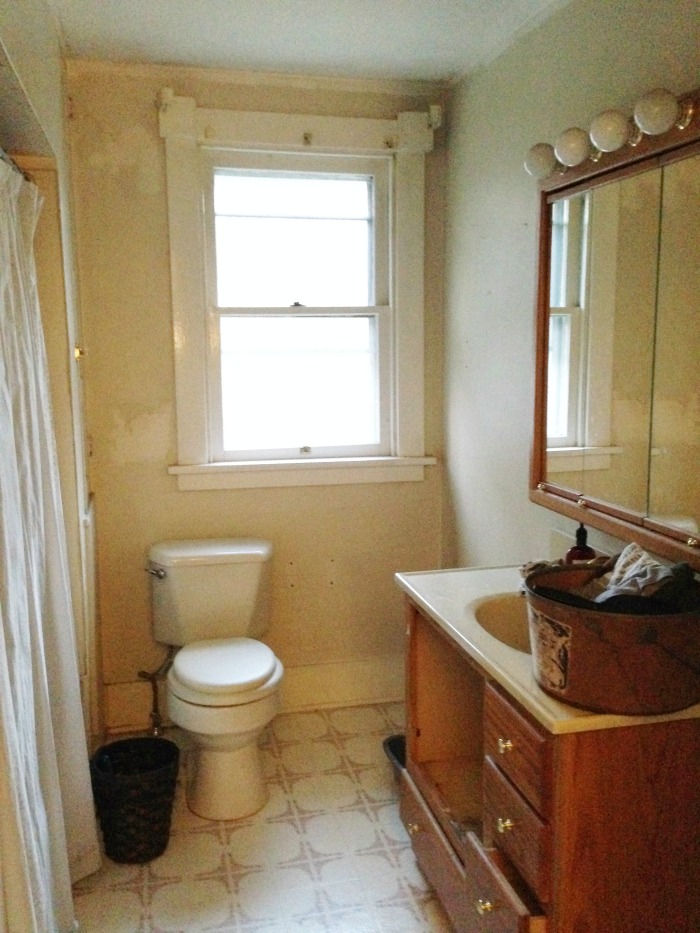
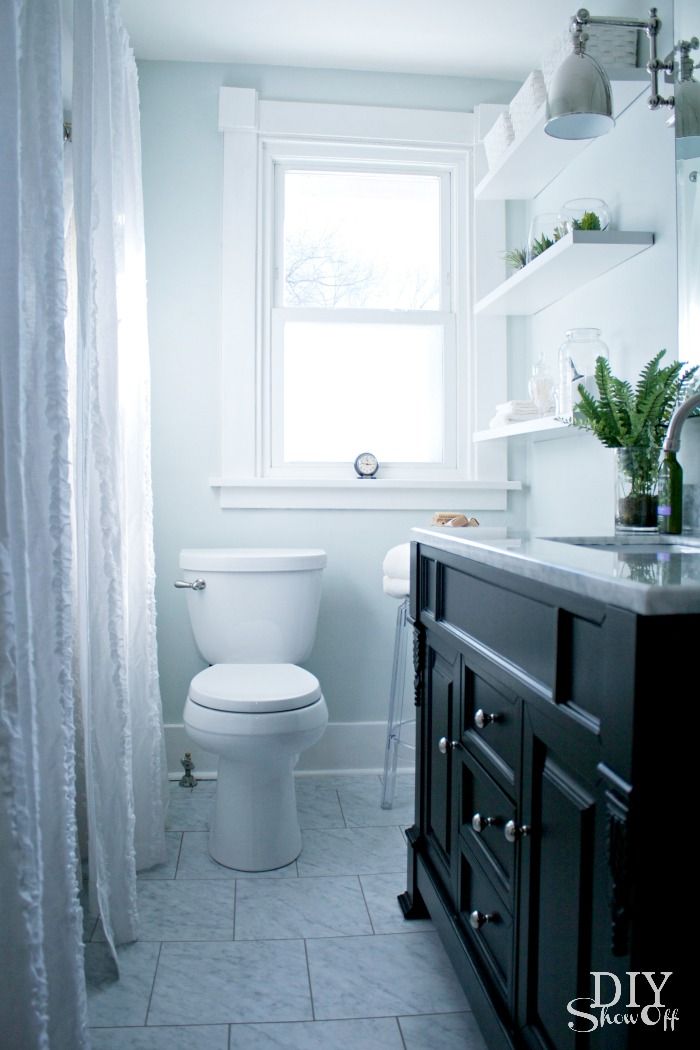
Want proof that a new floor can make for a killer new bathroom, take a look at this before and after bathroom transformation by Roeshel of DIY Show Off

bathroom-makeover-before

New Groutable Luxury Vinyl Tile transforms this blah bathroom into an incredible space

Another idea for an easy flooring upgrade is wood laminate, which most of the time can be installed directly over your existing floor.  Take a look what Jen of I Heart Organizing did with her bathroom reno…

New Groutable Luxury Vinyl Tile transforms this blah bathroom into an incredible space

5. Layers

Last, but certainly not least, but actually the most important…  The Layers!  If you’re on a bare bones budget and have very little to spend, focus on the layers.  What layers? a pretty shower curtain, a simple window treatment (if you’re bath has a view of the exterior), artwork, hooks, shelving, etc.  The layers in any room of the home speak your style and share the story of who you are.

You saw a peek of Jen’s bathroom above, and here is the finished revamp >

The layers of a space are the most important. In a bathroom, incorporate a pretty shower curtain, shelving, artwork, and anything that simply makes you happy.How fabulous of a space and it ‘s mostly all existing and/or DIY!

Another amazing transformation is Paige’s hall bath of Lively Green Door >

The layers of a space are the most important. In a bathroom, incorporate a pretty shower curtain, shelving, artwork, and anything that simply makes you happy.

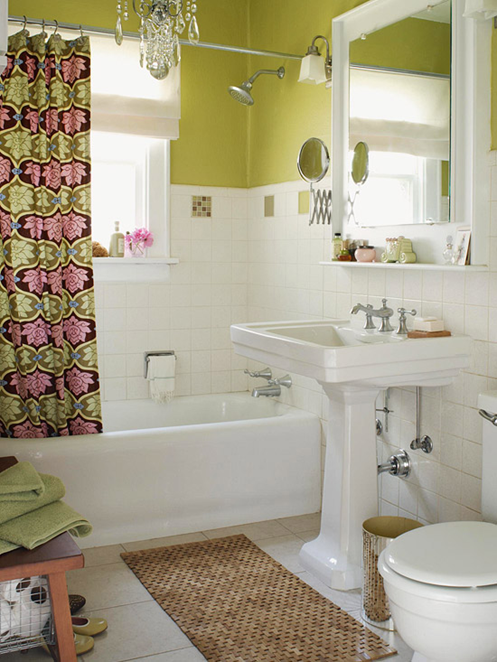
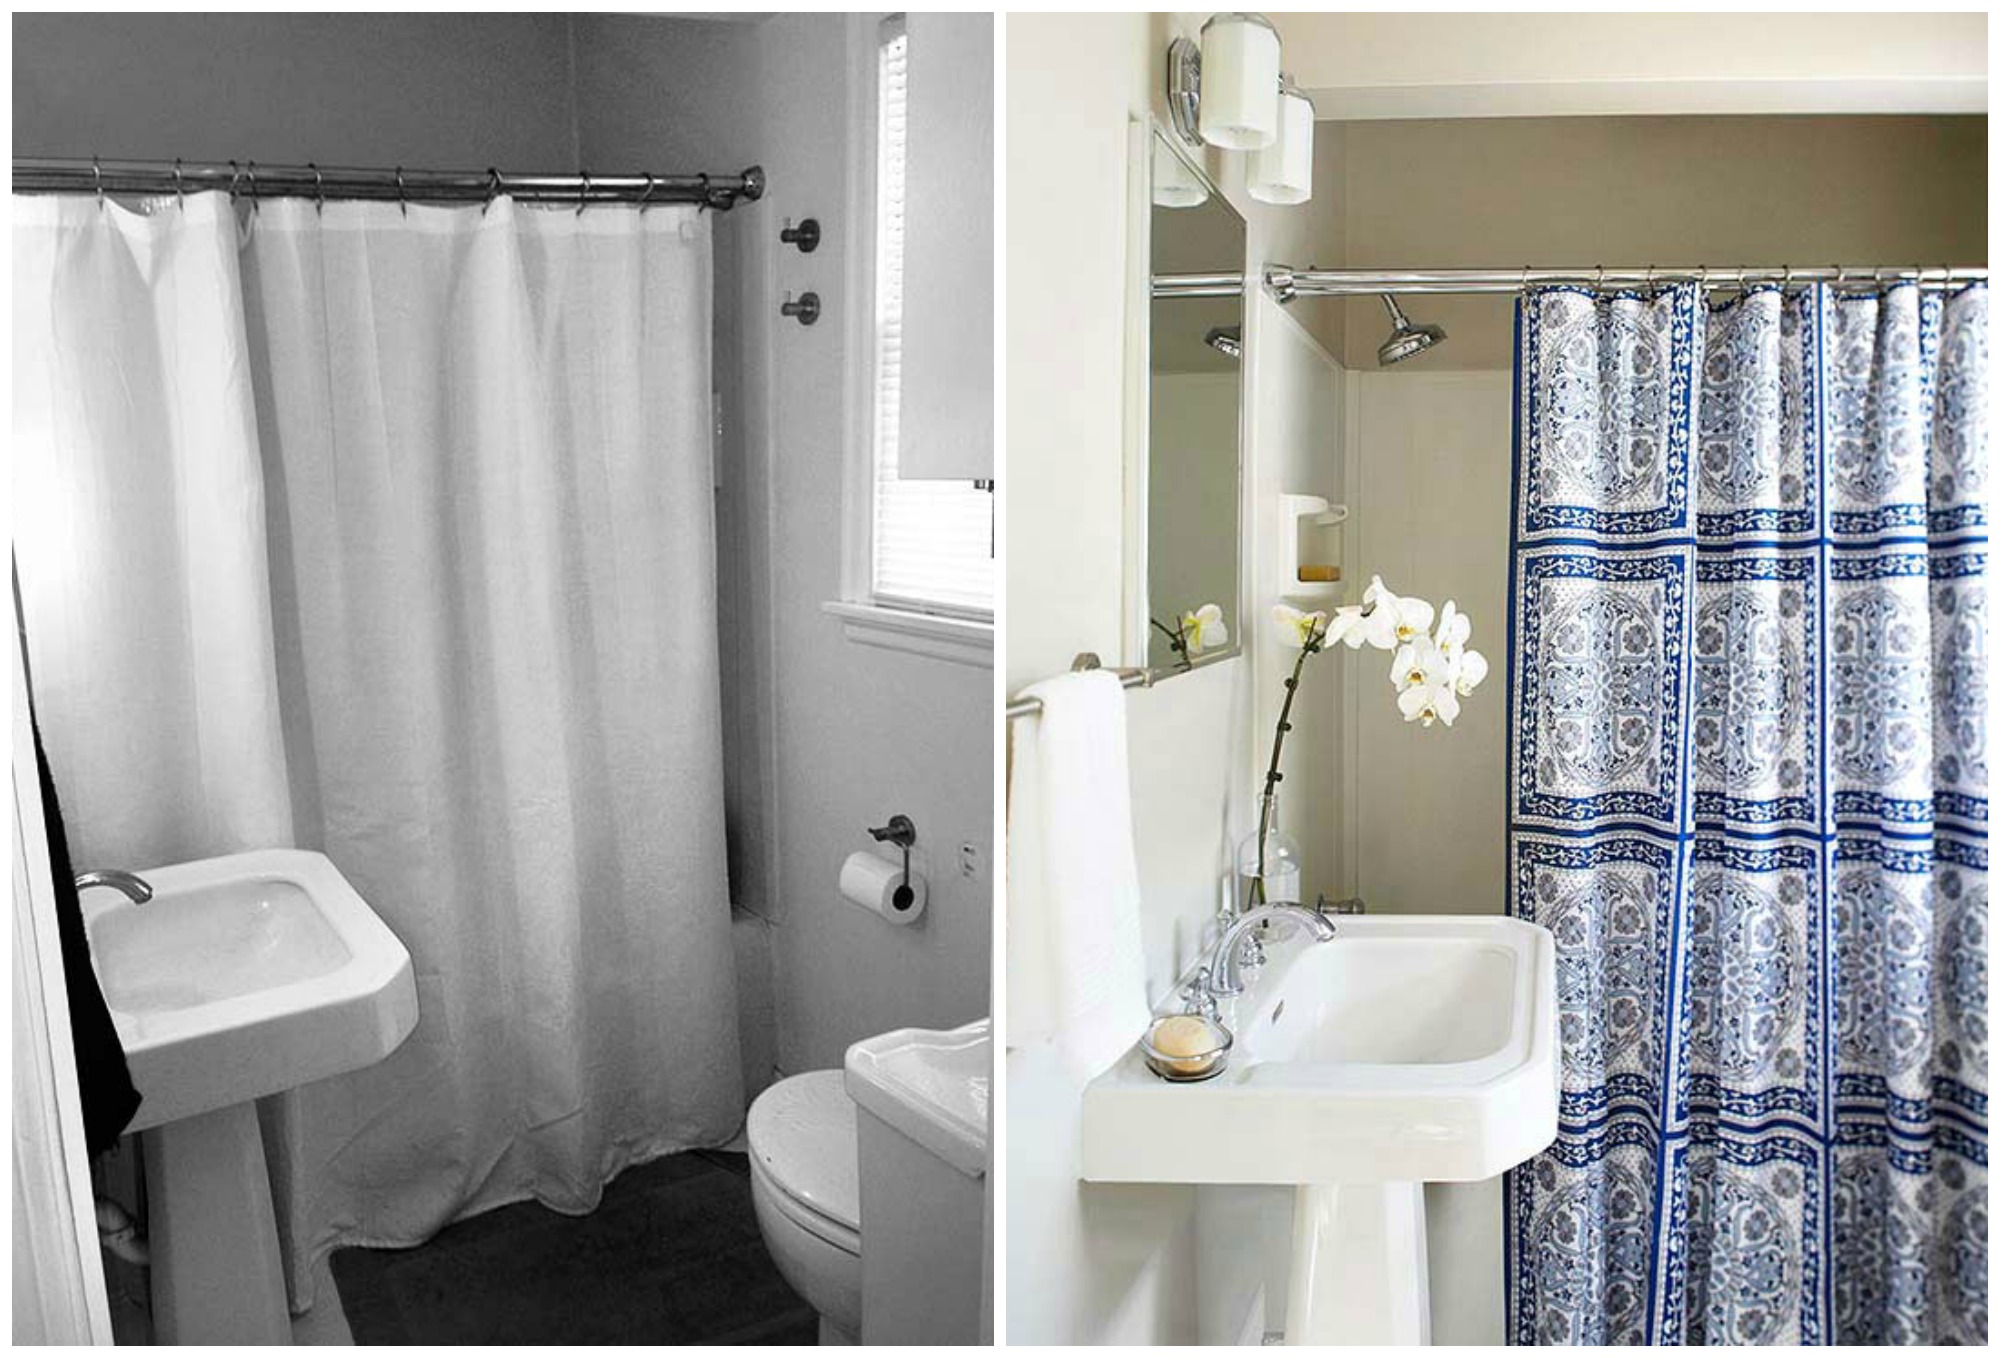
And lastly, check out this fun bathroom space.  With a few new elements (no fixture changes), look how it has come alive with new paint, a killer light fixture, and a gorgeous shower curtain.

The layers of a space are the most important. In a bathroom, incorporate a pretty shower curtain, shelving, artwork, and anything that simply makes you happy.via BHG

Are you now convinced that a bathroom doesn’t need a full gut to be fabulous?  Who’s ready for a makeover? 

As always, incorporate elements you love & those that are truly meaningful.  Look for inspiration around you before executing, and remember it’s not a race.  Now I’ve gotta get back to looking through all those ugly bathrooms to see which would be perfect for a makeover!  Be sure to check back on Monday to see if it’s yours!
Want to pin & save for later, here you go…

5 Ways to Upgrade a Bathroom on a Budget: Don't neglect a needed bathroom revamp because of cost + no-experience. Instead, embrace what you have and revamp the layers of the existing!

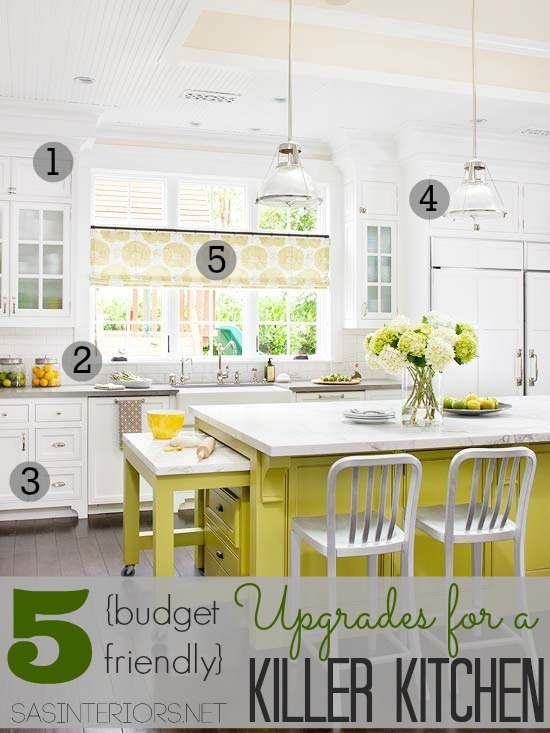
Kitchens are another space in the home that homeowners fear to upgrade because of time and budget.  Totally understandable!  BUT just as the bathroom can be revamped on a budget, so can a kitchen.  Check out my thoughts for 5 Upgrades to a Killer Kitchen

5 Upgrades for a Killer Kitchen

Pop of Color: How-To Paint a Door

I’m still working on my boys room. It’s almost done, but it’s probably been the longest room makeover in history (well maybe not, I think that was the master bedroom which I am happy to say is complete – well 95% complete).  Even though I want to call this latest makeover DONE, a room often does AND should take time to create and come together. The transformation of a space is like a 1000 piece puzzle, it takes time and patience to get all the pieces just right and often, it’s the final stretch that takes the longest.  And that’s okay.

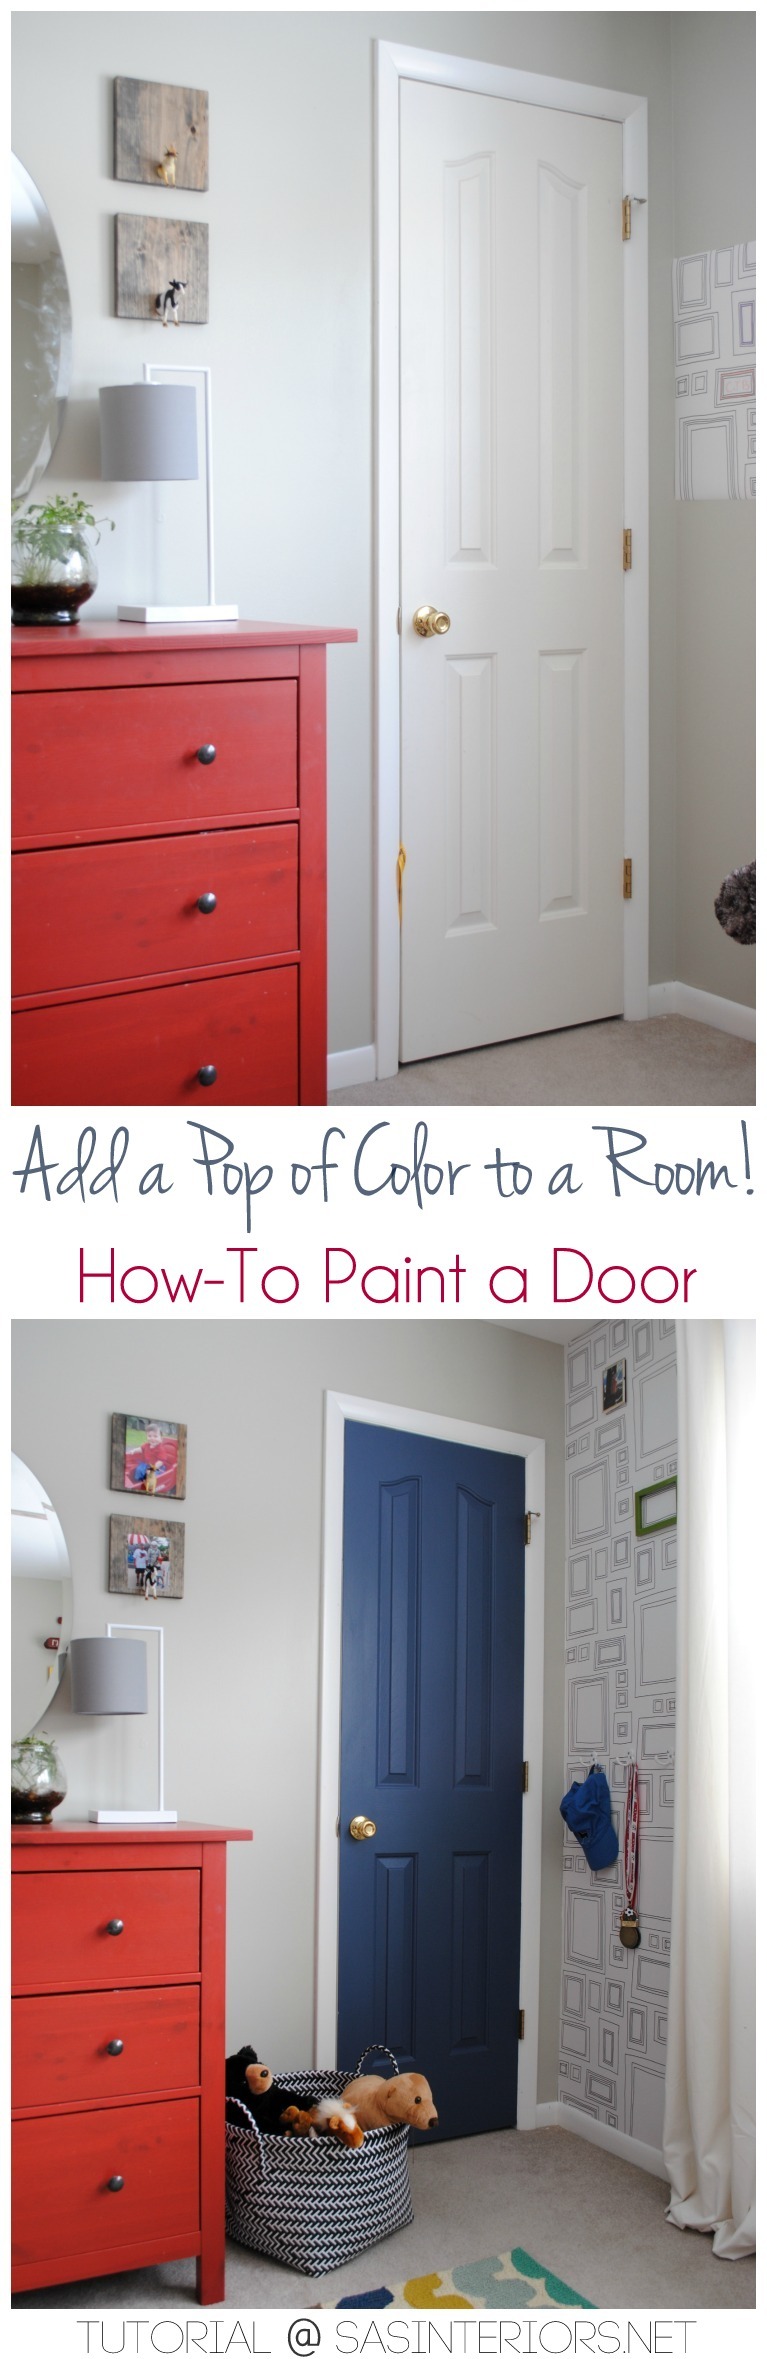
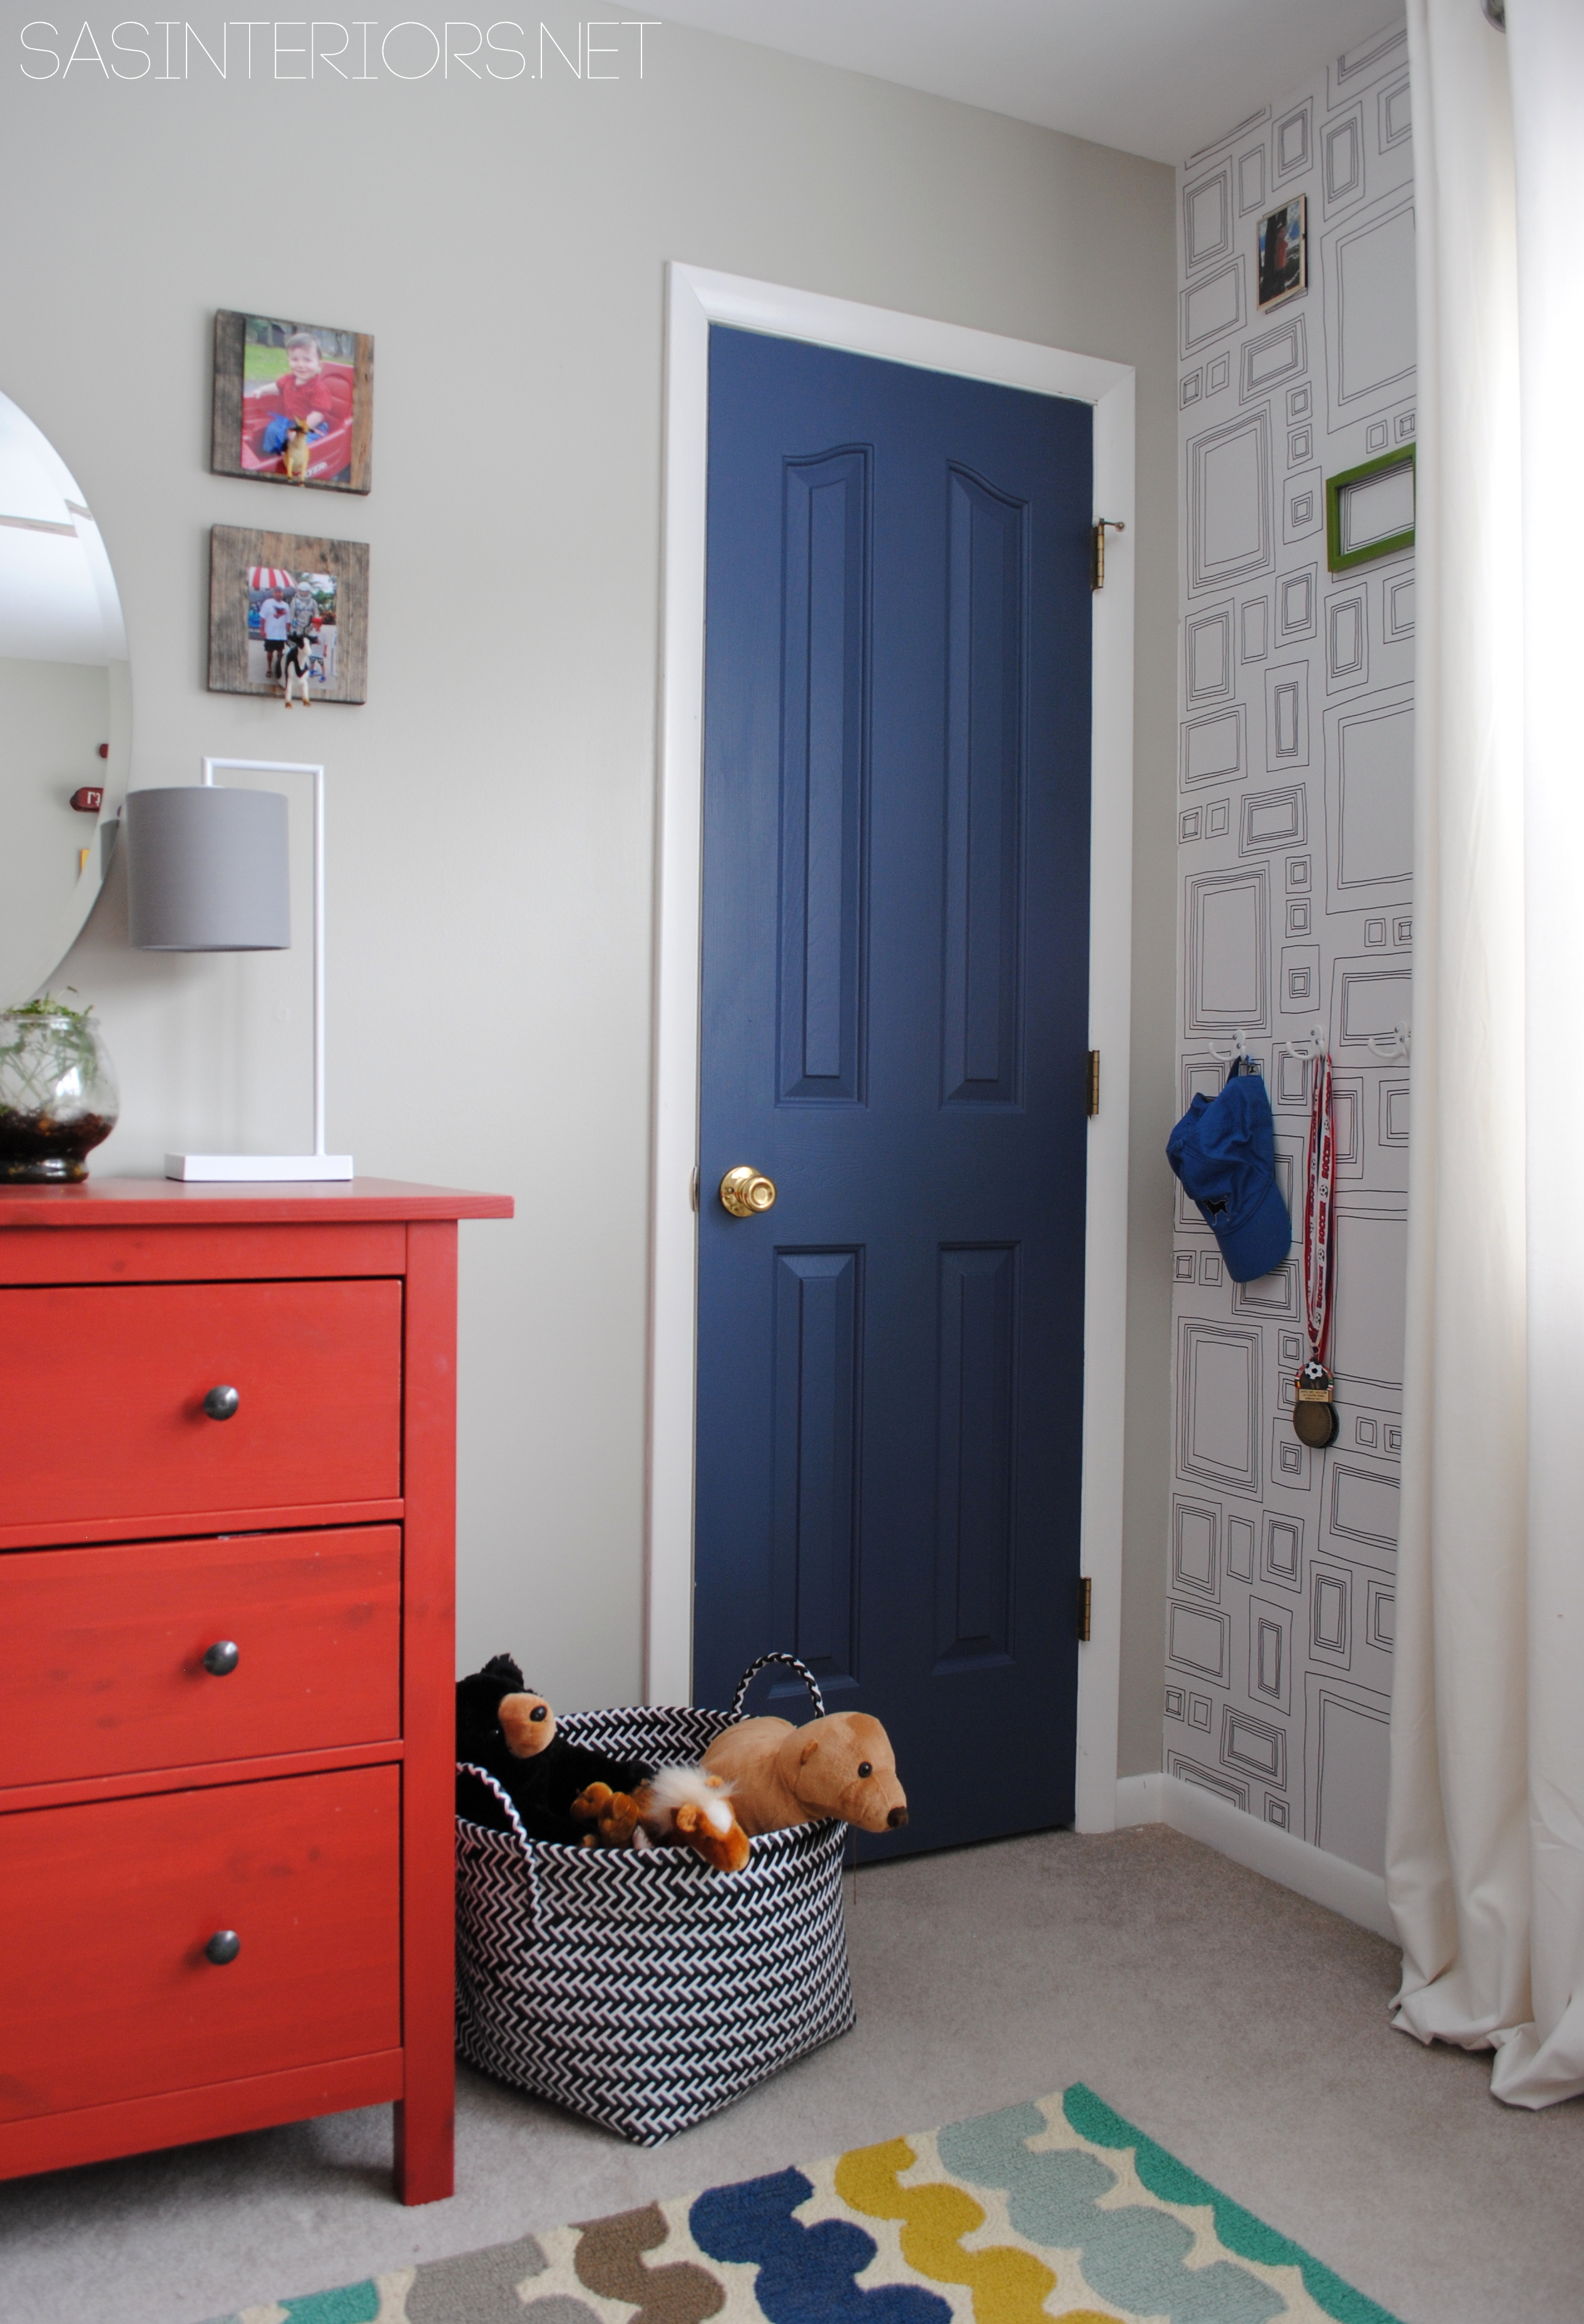
As I am rounding up the room finishing up the final details (the window treatments are the last element which I’m just not feelin’ yet), I wanted to share one element that has really given the space added color + the punch it needed… a newly painted closet door.  It’s amazing how the wall (and actually the overall room) came alive with a new hue.

Take a look…

Add a Pop of COLOR by painting the door. Ditch the typical white (interior or exterior) door and add a splash of color. Check out this great how-to with 5 easy steps to transform a door!

Adding a pop of color was my Lowe’s Challenge for this month and I think I surely succeeded.  Huge difference, wouldn’t you say?!

Updating a door (interior or exterior) is super easy and if a space is fairly neutral, painting the door will make a huge impact.  If you happen to remember, I initially wasn’t overly fond of this very neutral / light wall color, BUT now I am loving it.  WHY?  It’s been able to provide a neutral backdrop for lots of color in all the layers like the red dresser to the left + the fun Frames Wallpaper + the honeycomb shelves on the opposite wall.

Choosing the RIGHT COLOR for the door!

When shopping for a color for the door, choose something that picks up on other colors in the room.  Also a semi-gloss finish is best (so marks can easily be wiped away), but eggshell or satin will also work.

For my boys closet door, I picked up a color from the new rug and chose a deep blue hue (which was leftover paint from my office makeover – Benjamin Moore Van Deusen Blue) in an eggshell finish.

Benjamin Moore Van Deusen Blue HC-156

Inspiration for the new Blue Hue on the closet door!

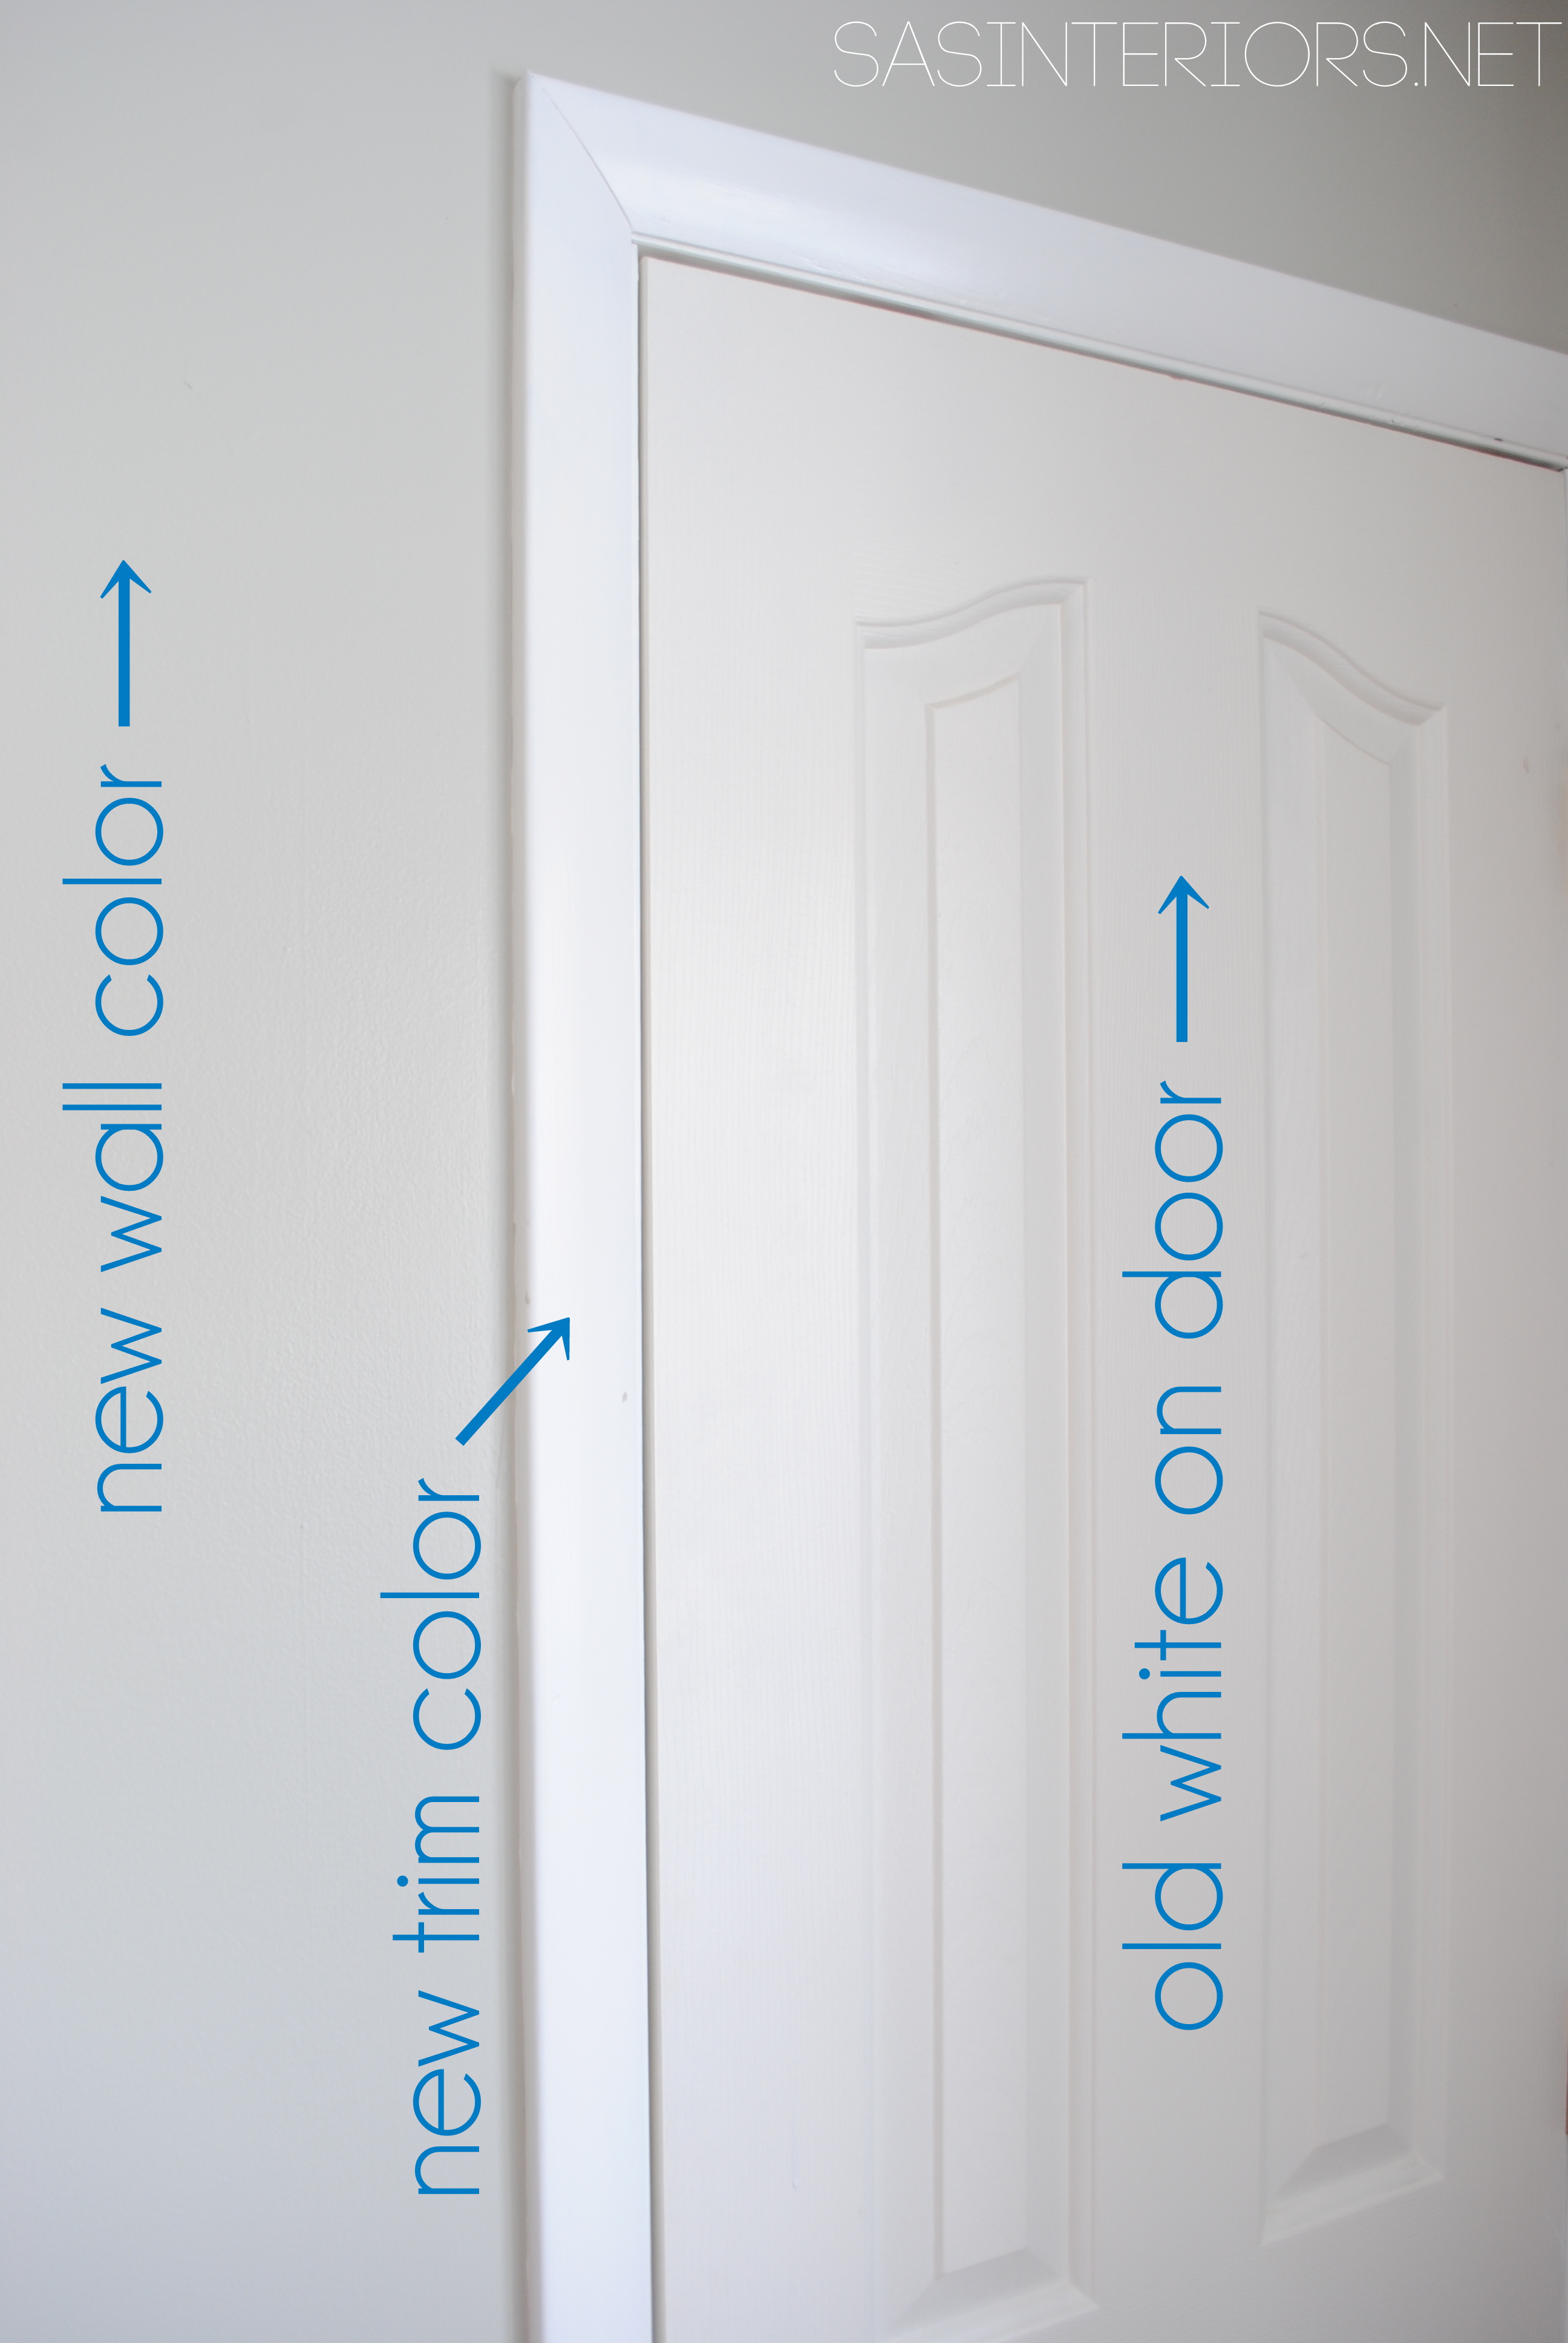
Along with wanting to add a pop of color to the room, the new trim/moulding color and the old door color were 2 very different and competing whites.  So it was in good reason that this door needed a makeover!
Here’s a closeup:

Steps to take for Painting a Door - Add a Pop of COLOR by painting the door. Ditch the typical white (interior or exterior) door and add a splash of color. Check out this great how-to with 5 easy steps to transform a door!

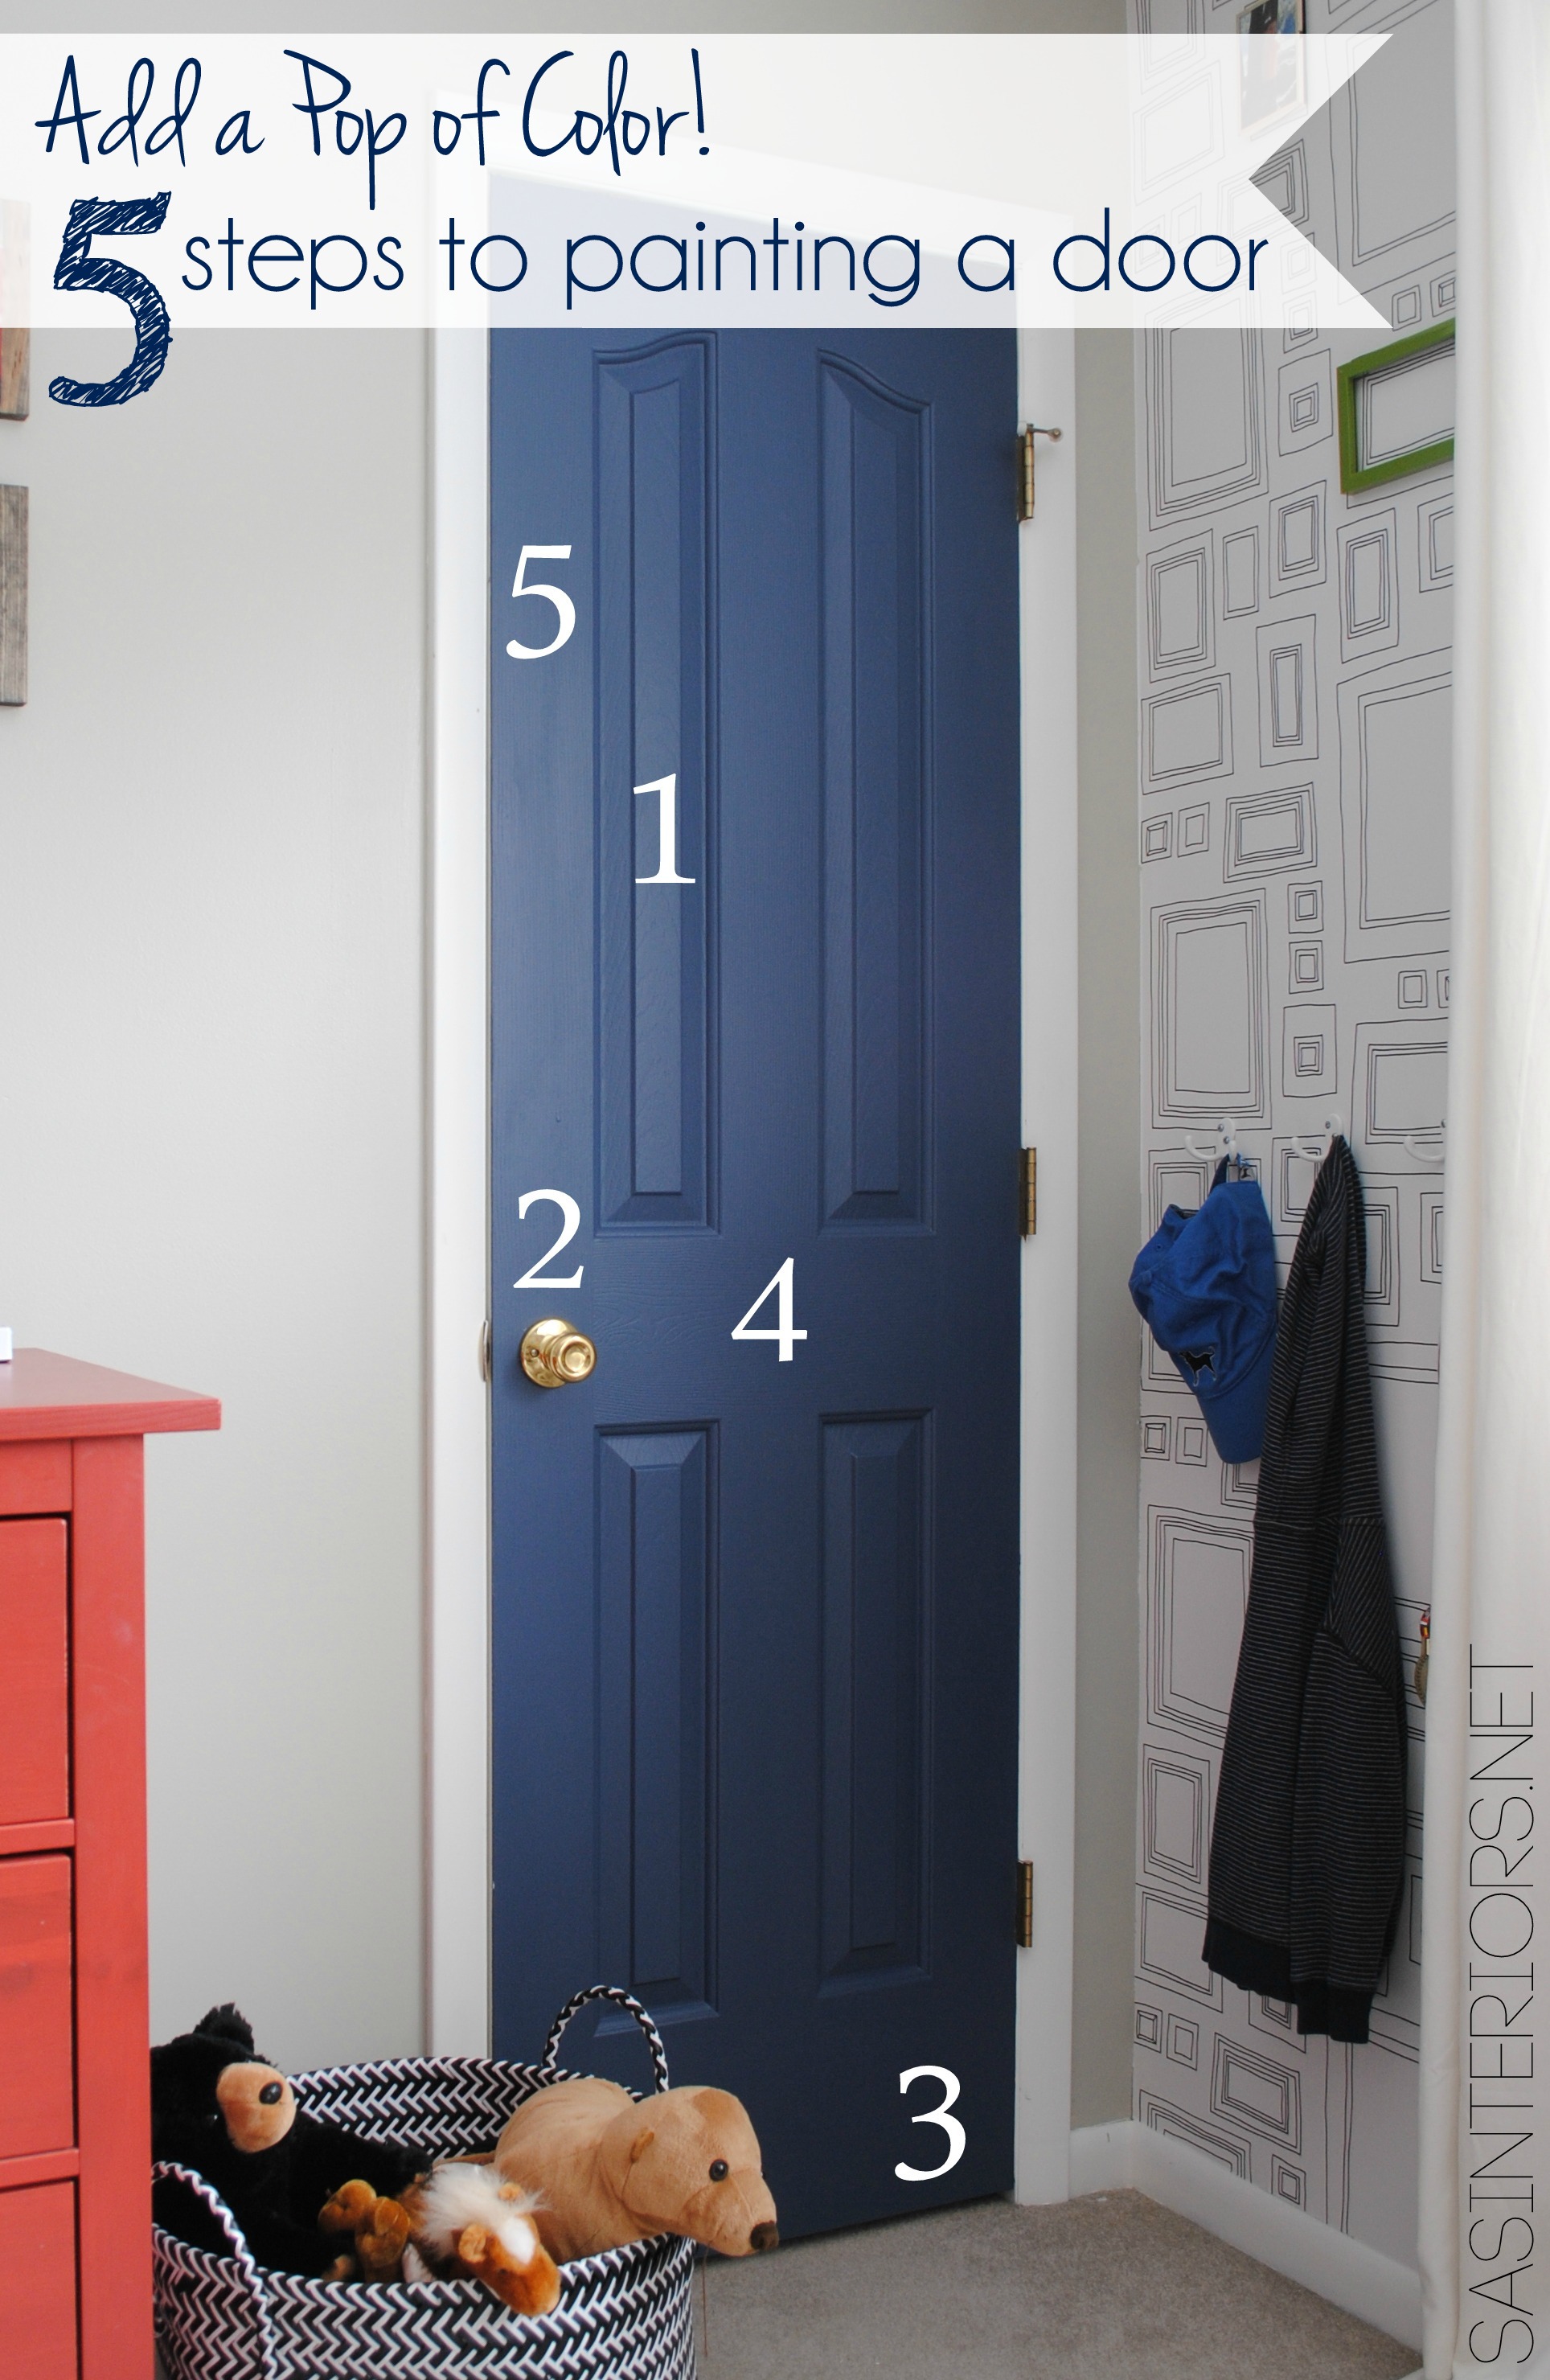
Here are the easy-peasy steps to adding a pop of color on a door:

Add a Pop of COLOR by painting the door. Ditch the typical white (interior or exterior) door and add a splash of color. Check out this great how-to with 5 easy steps to transform a door!

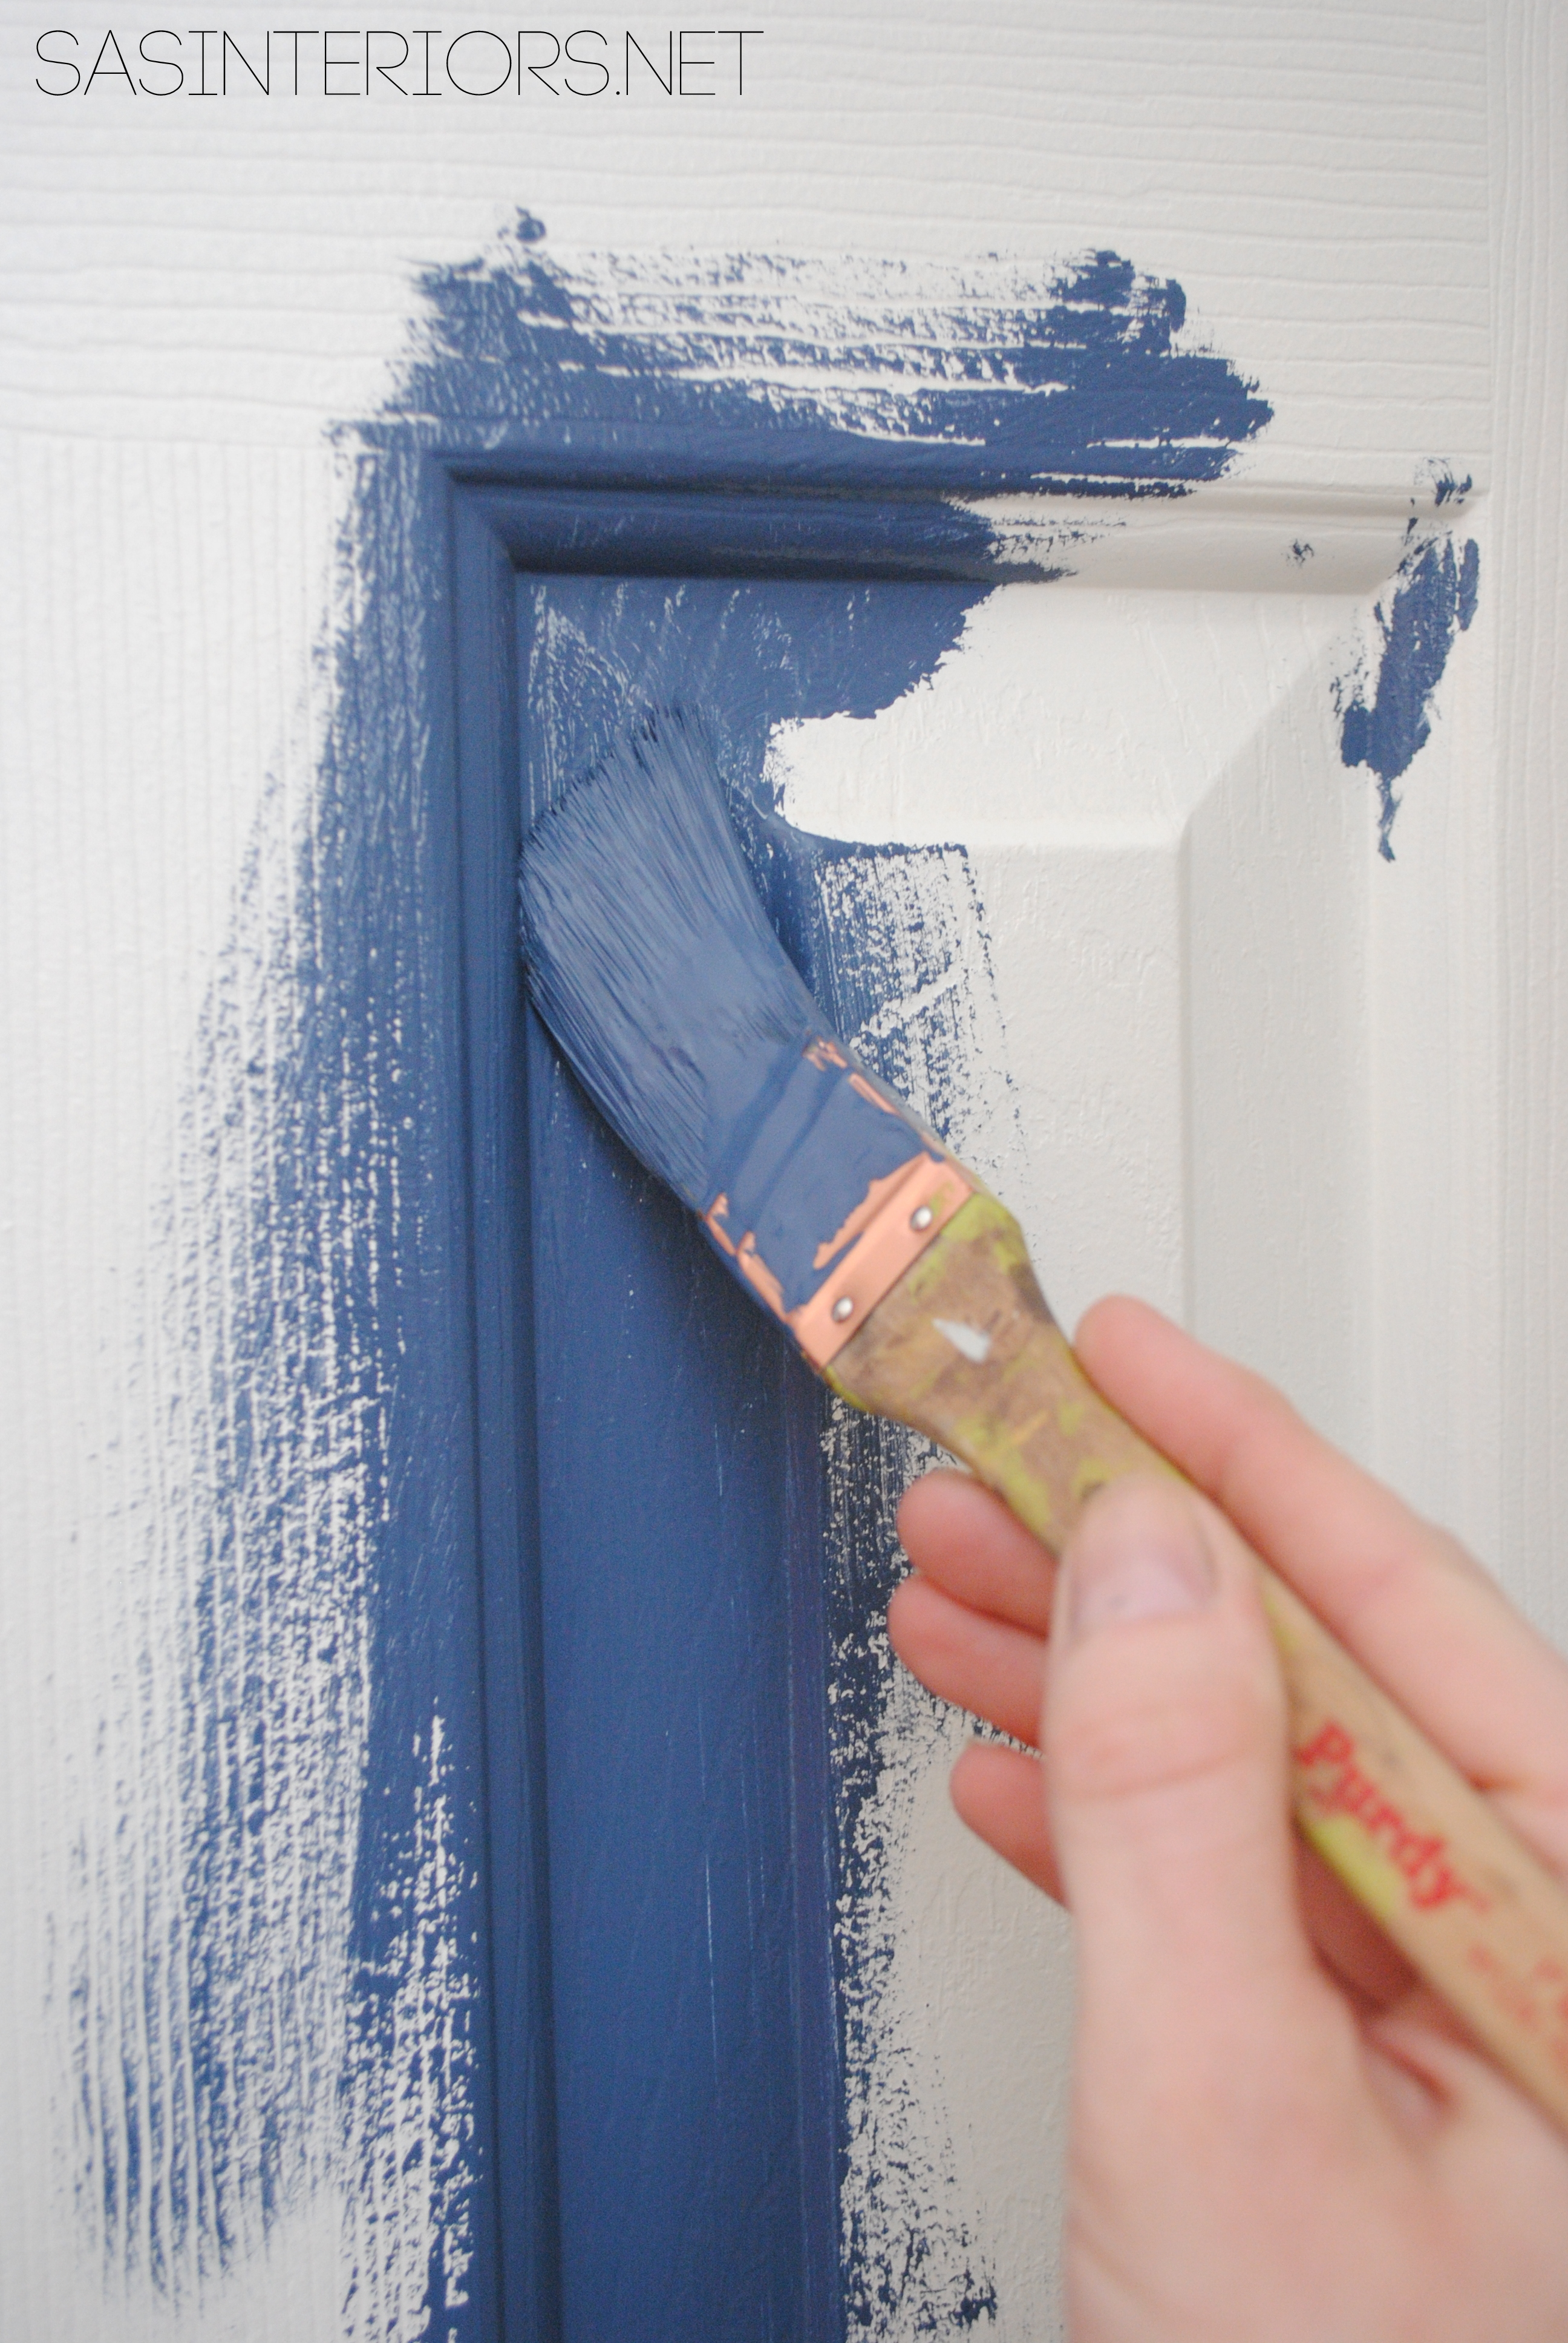
1. PANELS: No matter what style doore, start off with the crevices / nooks-and-crannies.  Using a quality brush (a 1″ or  1-1/2″ Purdy angled brush is my favorite) start with the panels of the door.

Steps to take for Painting a Door - Add a Pop of COLOR by painting the door. Ditch the typical white (interior or exterior) door and add a splash of color. Check out this great how-to with 5 easy steps to transform a door!

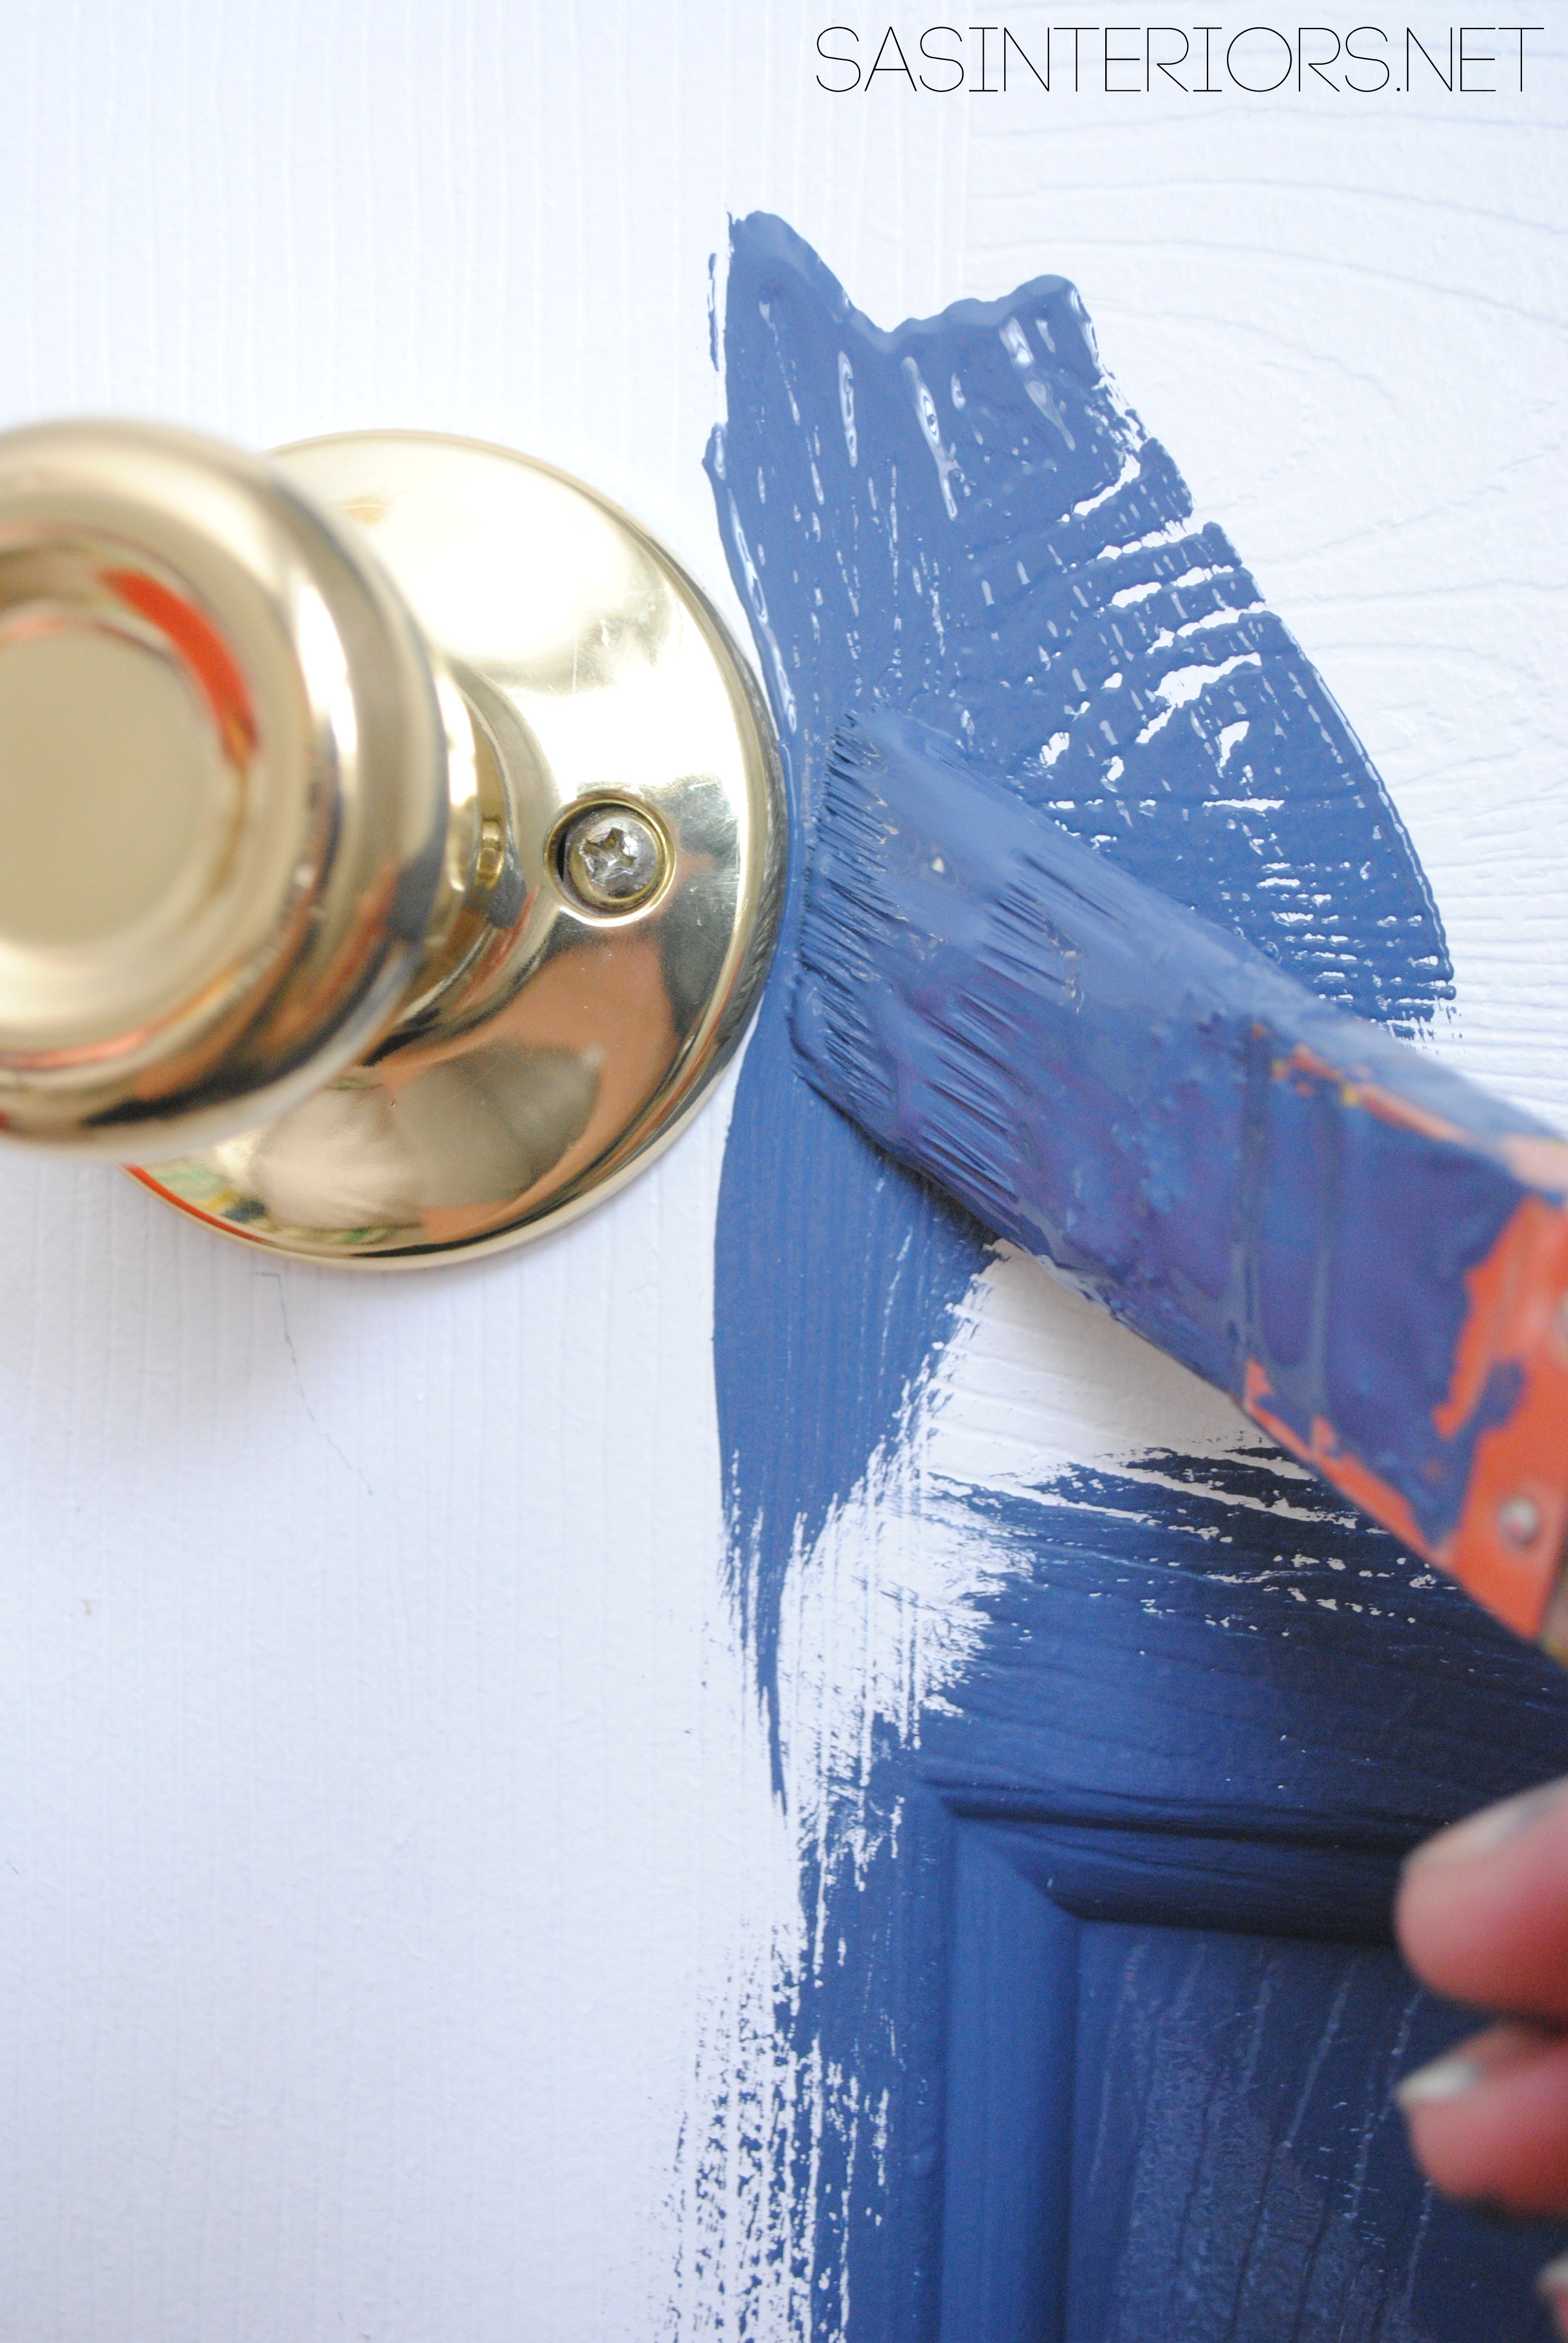
2. HARDWARE: I decided not to remove the hardware before painting (because of pure laziness) and painted around the door knob using my angled brush. The result was great…

Steps to take for Painting a Door - Add a Pop of COLOR by painting the door. Ditch the typical white (interior or exterior) door and add a splash of color. Check out this great how-to with 5 easy steps to transform a door!

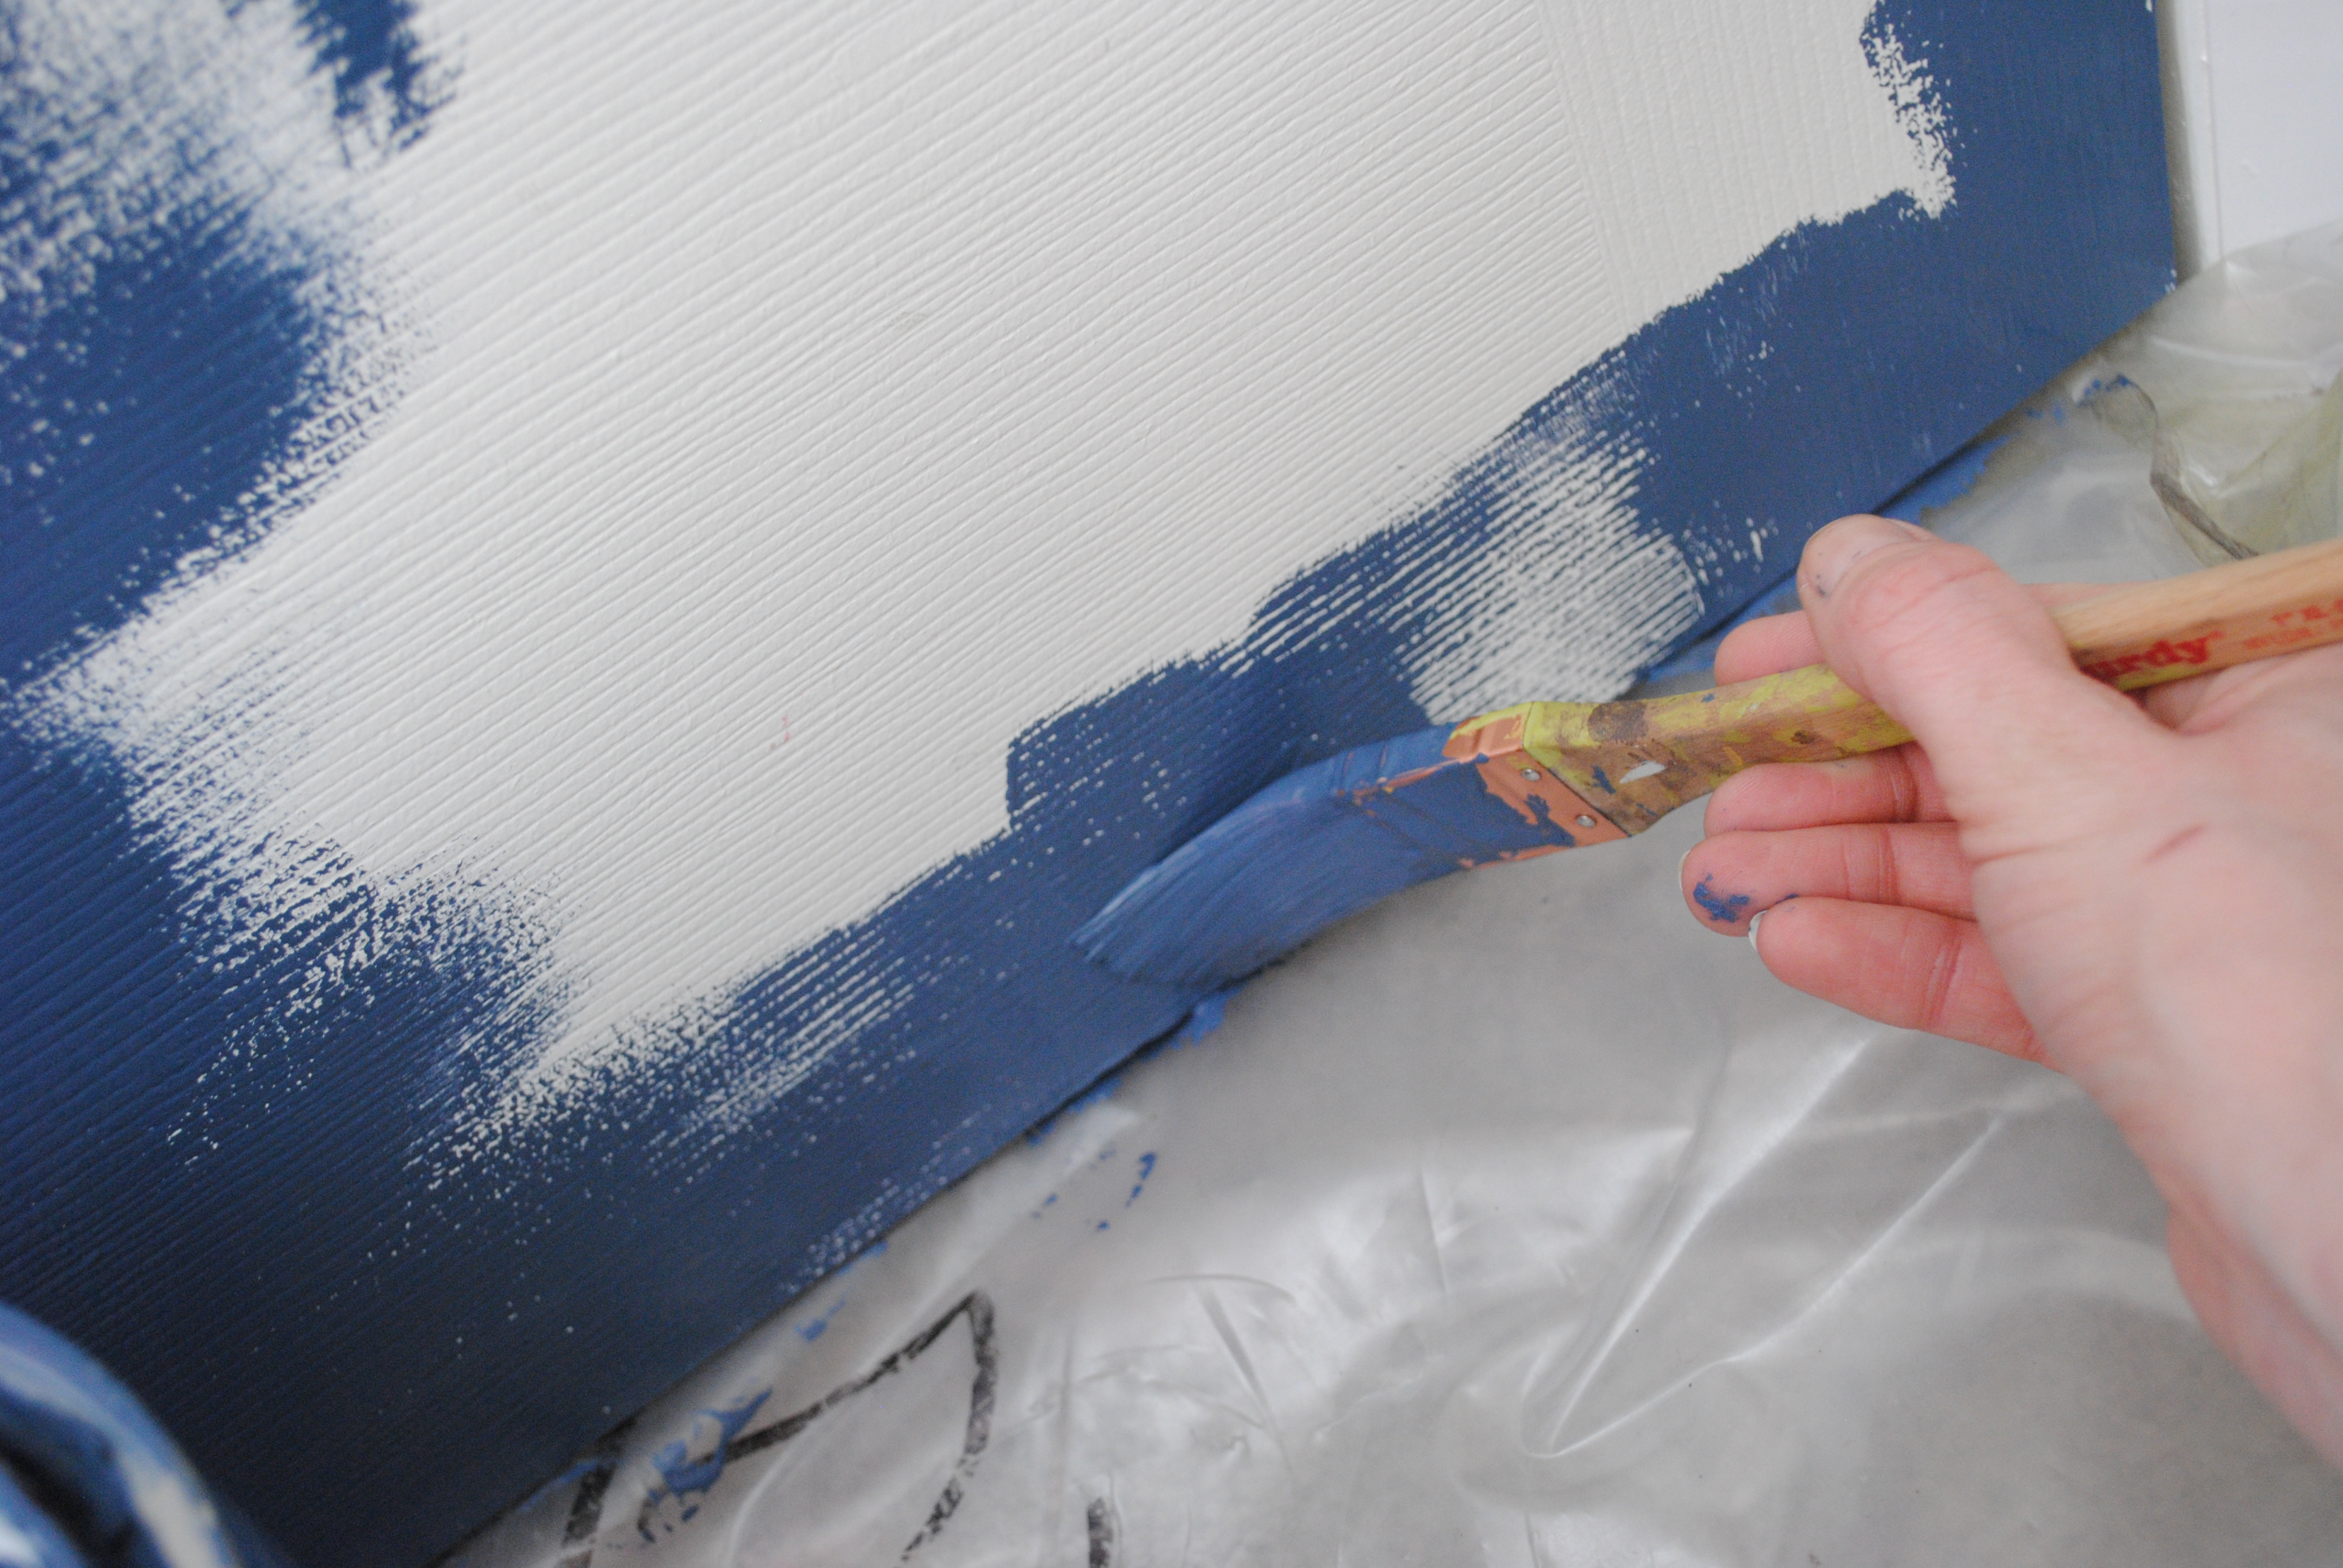
3. EDGES: After the panels an the hardware, comes the edges of the door.  Be sure to lay a dropcloth or plastic under the door so paint doesn’t get on the floor.  Also, it’s best to open the door so no paint gets on the door frame.  When painting the side edges, don’t drag the brush, but instead start from the door center and pull away to get a nice clean edge and no paint on the side of the door.

Steps to take for Painting a Door - Add a Pop of COLOR by painting the door. Ditch the typical white (interior or exterior) door and add a splash of color. Check out this great how-to with 5 easy steps to transform a door!

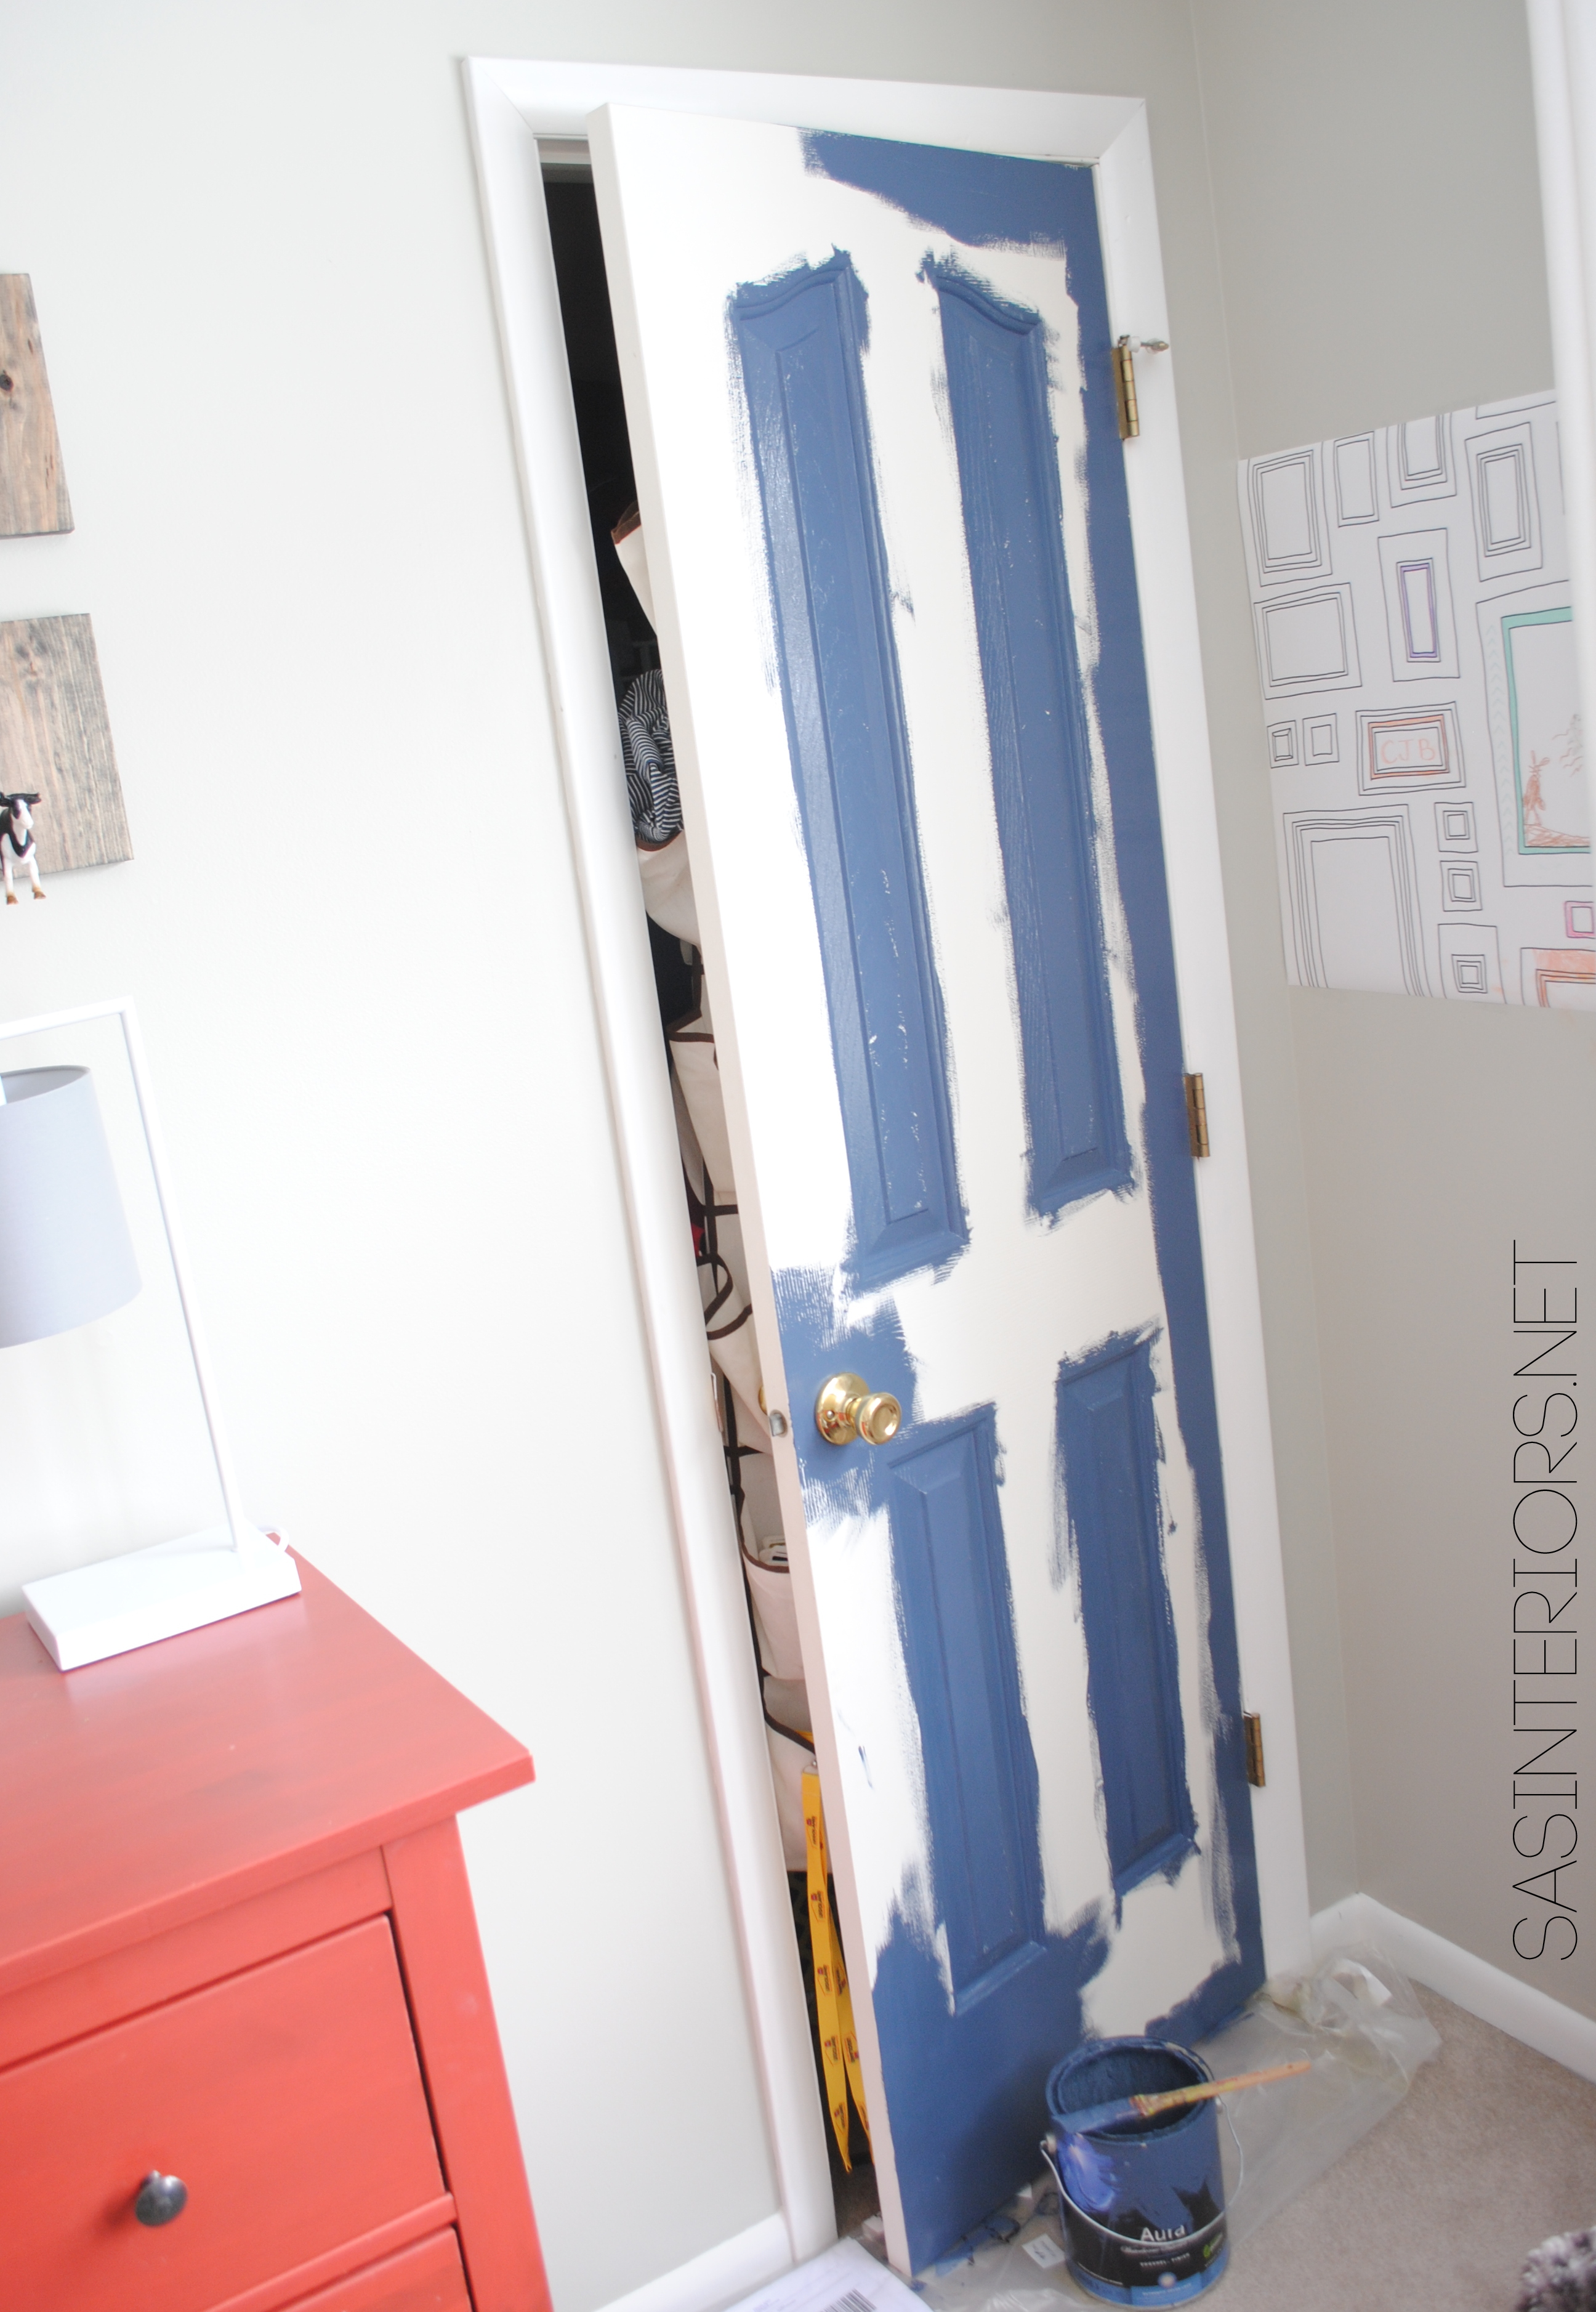
Once all the panels + hardware, and most of the edges were done, here’s how the door looked…

Steps to take for Painting a Door - Add a Pop of COLOR by painting the door. Ditch the typical white (interior or exterior) door and add a splash of color. Check out this great how-to with 5 easy steps to transform a door!

The next  + last steps are the rails…

4 & 5. RAILS: Use a brush or roller for the rails.  If the door has a slight texture to it (like mine) then a brush will do fine because you won’t see brushstrokes, but if the door is smooth, you’ll want to choose a small roller.  You can also use floetrol, an additive that can be mixed with paint to avoid brushstrokes.  I didn’t use it for this project, but I did for my kitchen cabinets.

It’s one of my favorite products.

flood-floetrol-02

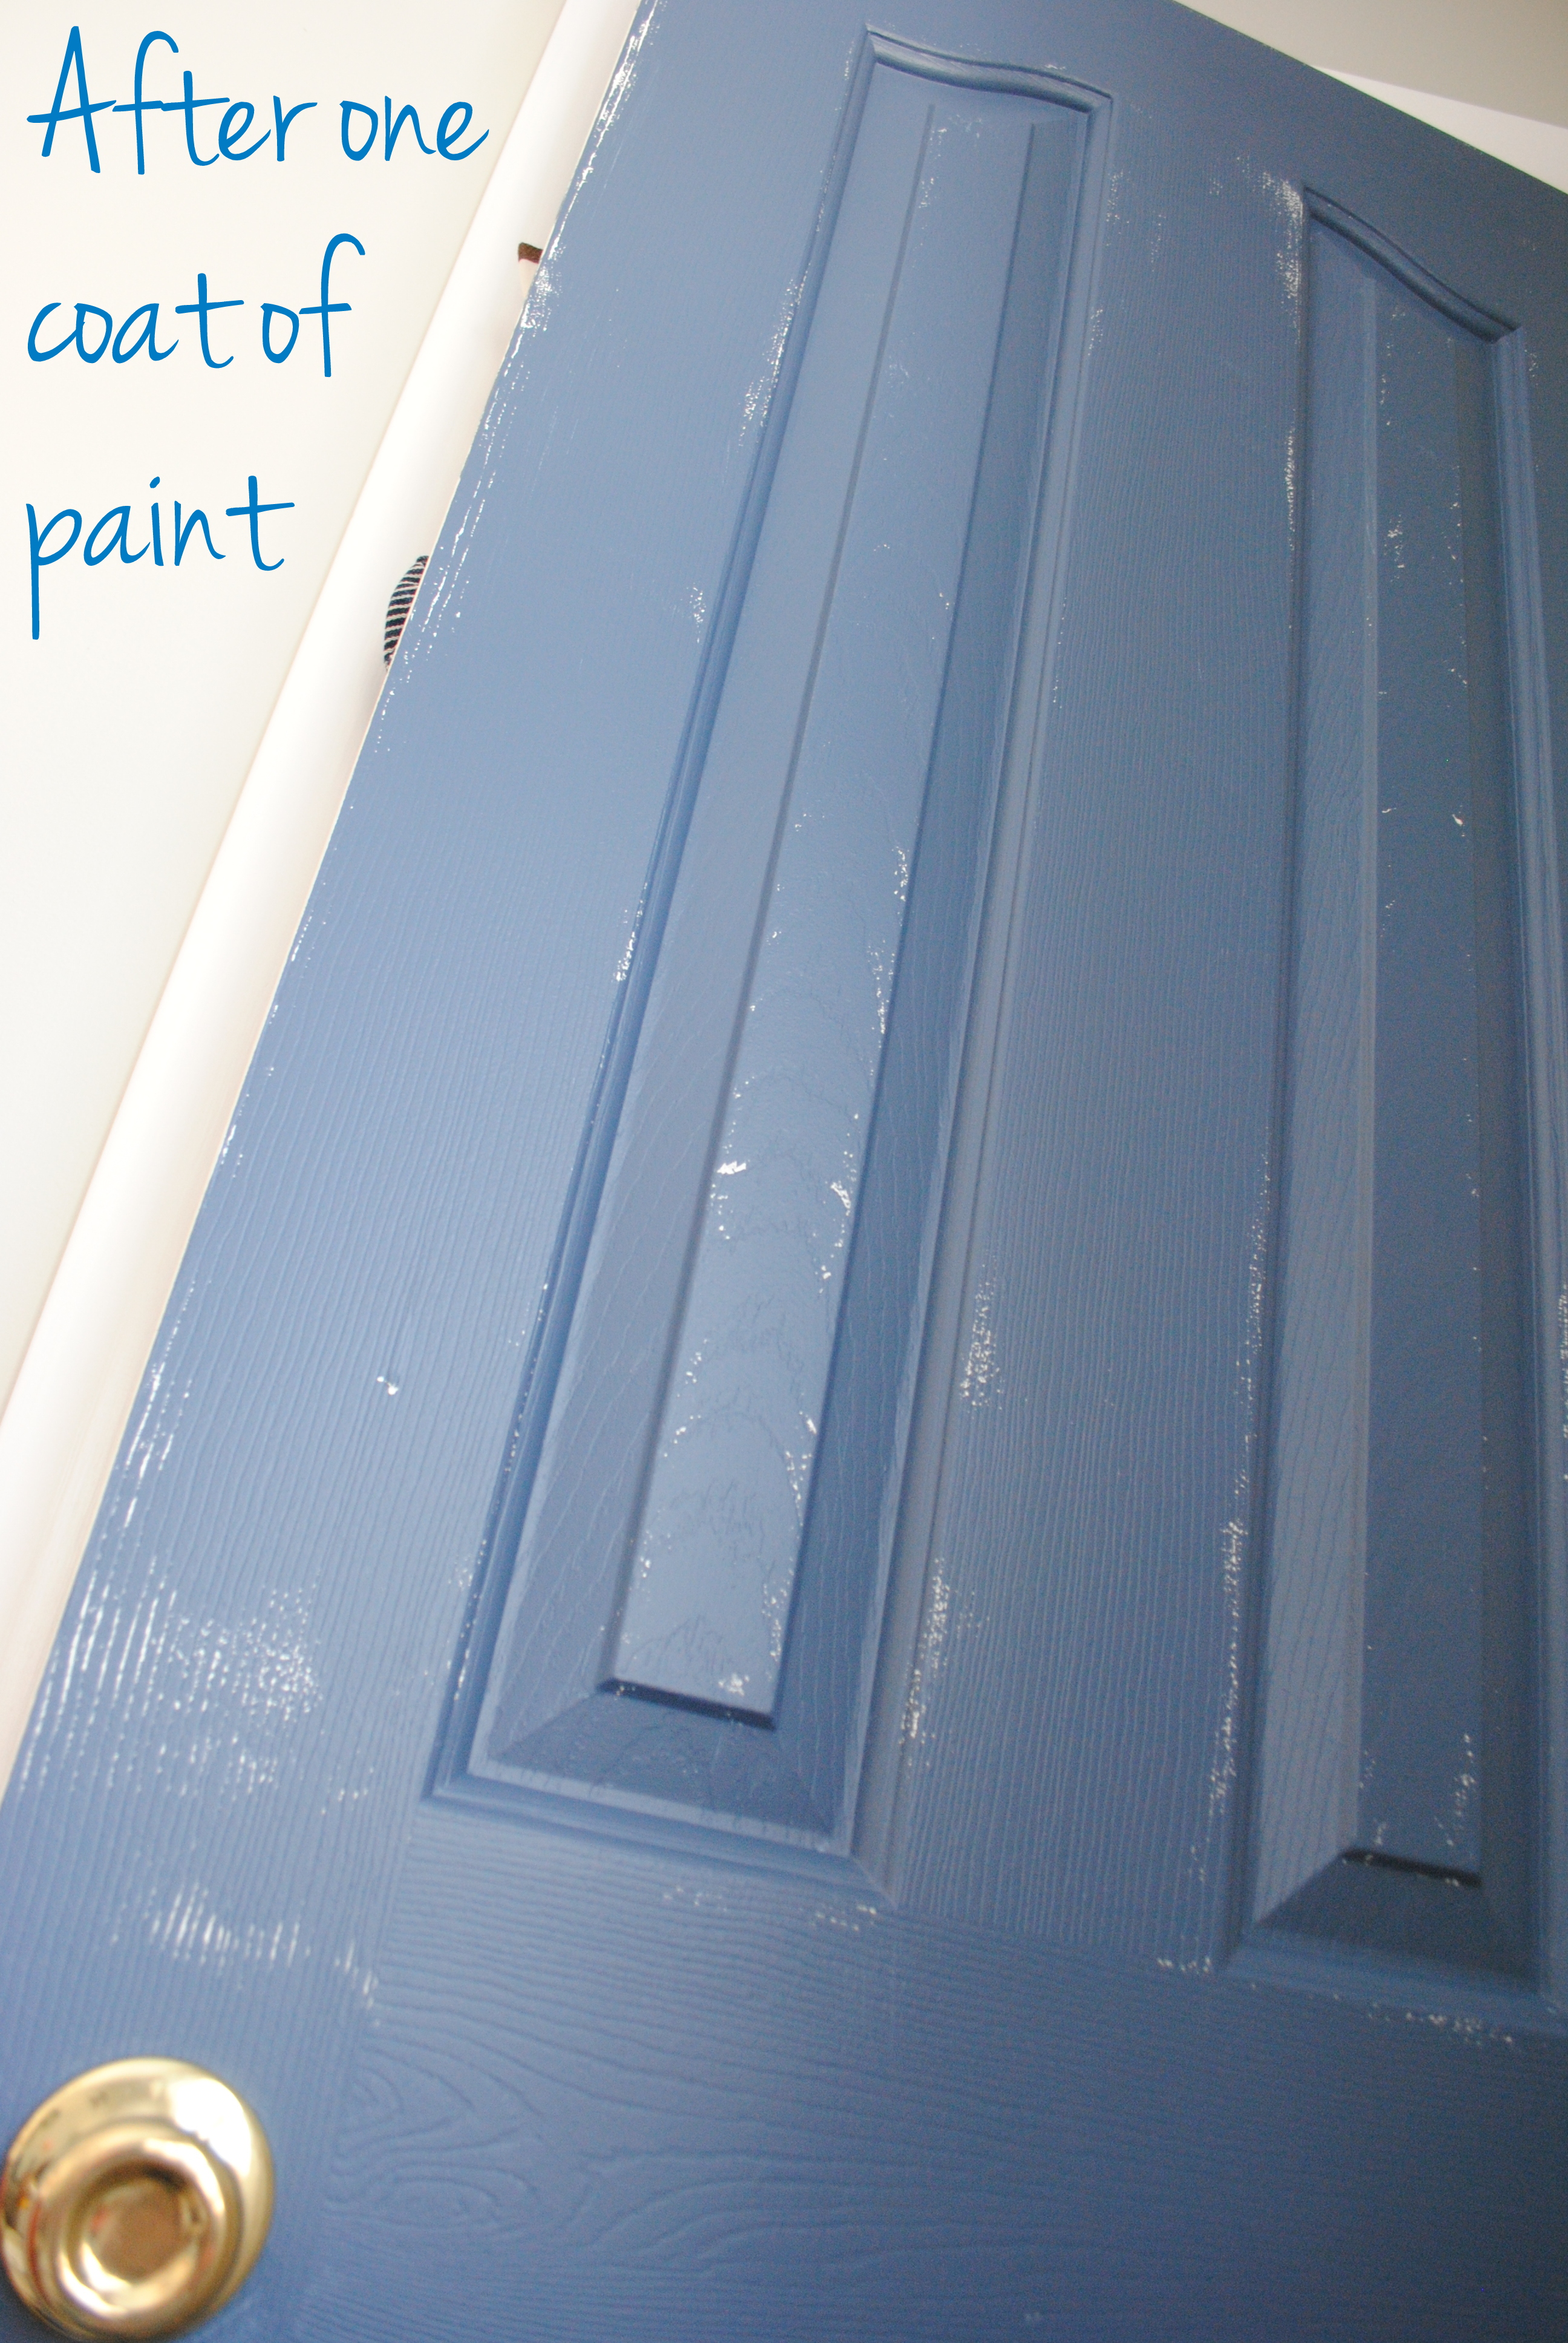
Once the first coat of paint was finished, this is how the door looked.

Steps to take for Painting a Door - Add a Pop of COLOR by painting the door. Ditch the typical white (interior or exterior) door and add a splash of color. Check out this great how-to with 5 easy steps to transform a door!

After another coat of paint using the same steps above, the door was done…

Add a Pop of COLOR by painting the door. Ditch the typical white (interior or exterior) door and add a splash of color. Check out this great how-to with 5 easy steps to transform a door!

Pretty big change for no money & very little time.

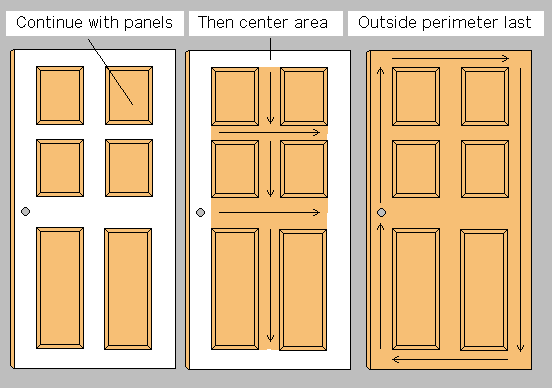
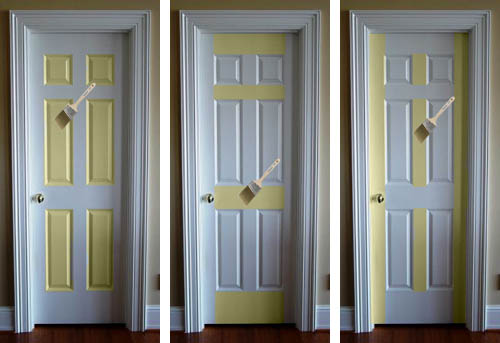
When looking around the net at other homeowner door makeovers, I found 2 helpful tutorials that you might benefit from if you’re looking to add a pop of color to your door(s)…

Steps to take for Painting a Door - Add a Pop of COLOR by painting the door. Ditch the typical white (interior or exterior) door and add a splash of color. Check out this great how-to with 5 easy steps to transform a door!via

Steps to take for Painting a Door - Add a Pop of COLOR by painting the door. Ditch the typical white (interior or exterior) door and add a splash of color. Check out this great how-to with 5 easy steps to transform a door!via

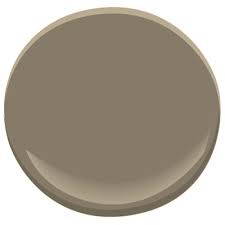
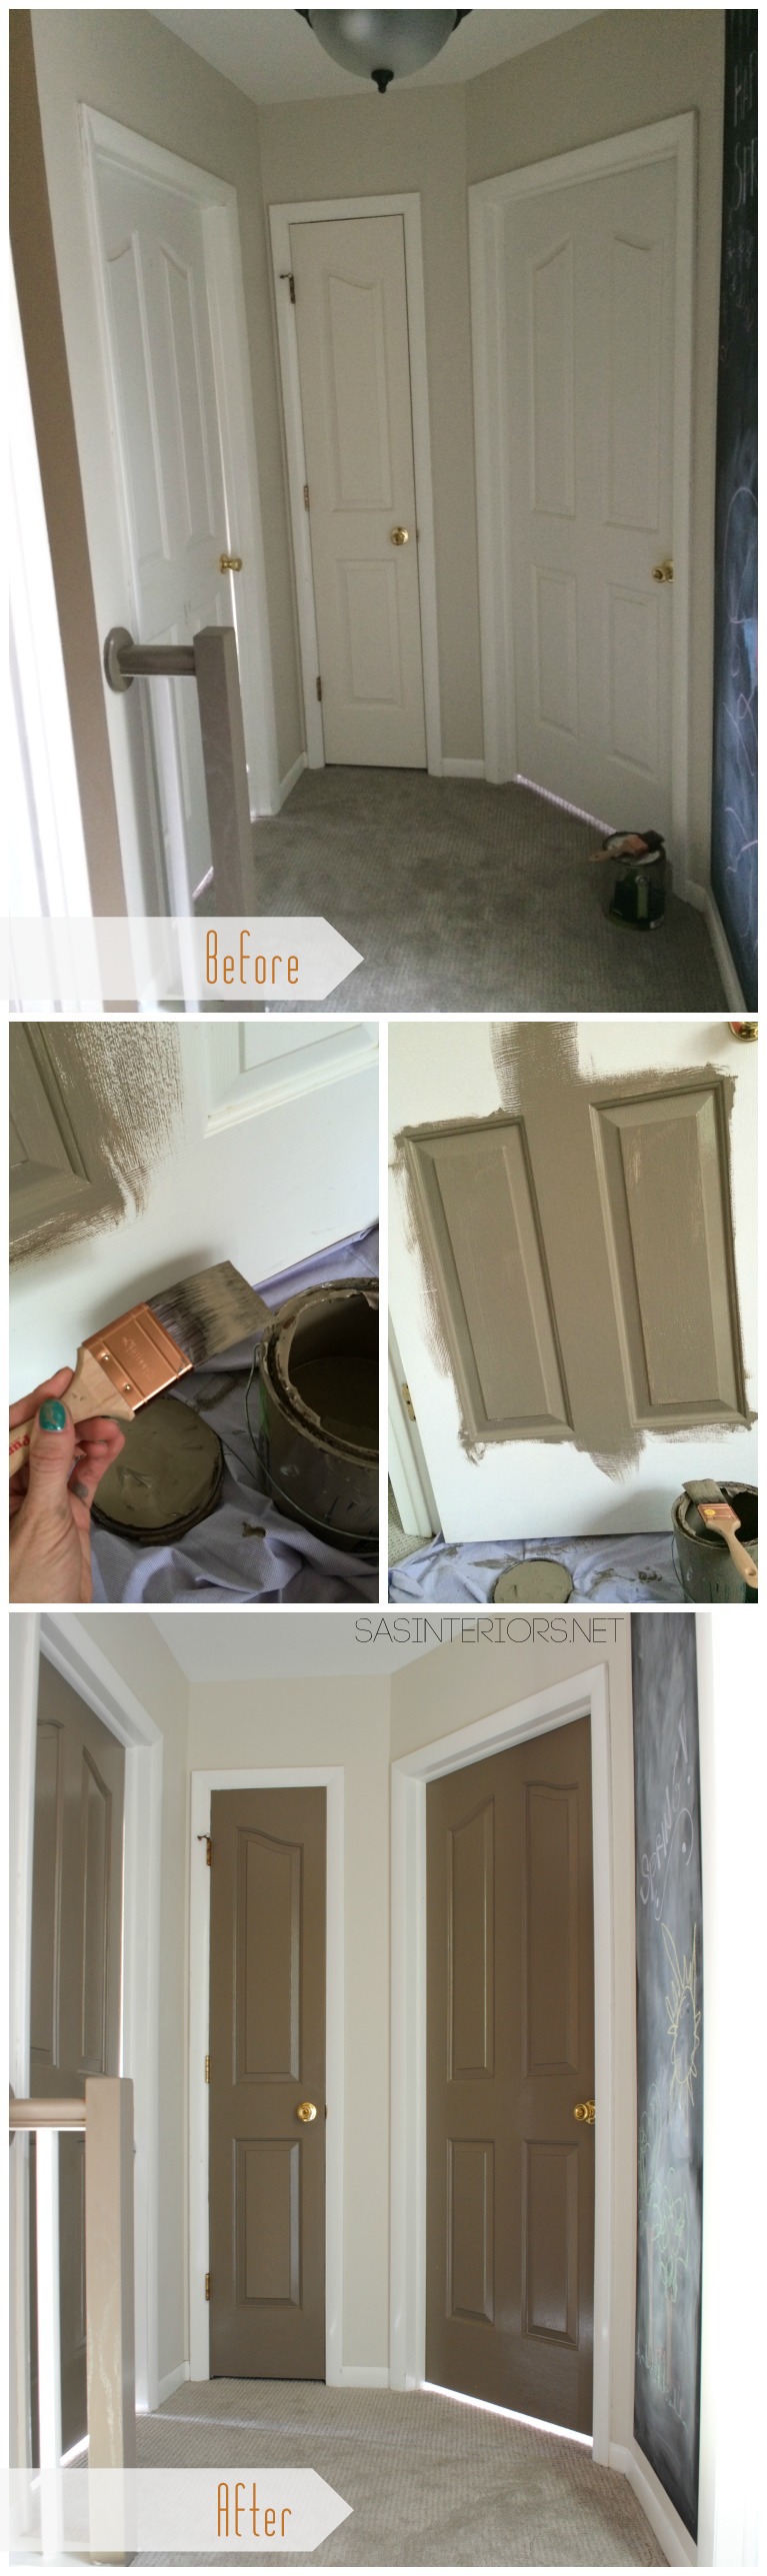
O, and one more place in my home where I decided to add some color to the doors…  the upstairs hallway.   Just last week, I shared how I updated the space with a new chalkboard wall, but to also add some color in, I chose to paint the doors my favorite Benjamin Moore Texas Leather.

Benjamin Moore Texas LeatherHere’s how the hallway evolved…

Add a Pop of COLOR by painting the door. Ditch the typical white (interior or exterior) door and add a splash of color. Check out this great how-to with 5 easy steps to transform a door!

Add a Pop of COLOR by painting the door. Ditch the typical white (interior or exterior) door and add a splash of color. Check out this great how-to with 5 easy steps to transform a door!

What a huge difference painting a door makes, especially when the walls of a space are neutral.  This was a fun project to work on and once again, it shows that with a little effort, a space can surely be transformed in no time and with little or no money.

Have you ever thought on painting your interior or exterior door(s)?

Lowes Creative Team Member Badge - Spring 2014

To gather even more unique, fun, and creative ideas for your indoor and outdoor Spring spaces, I would definitely suggest downloading the Lowe’s Creative Ideas app on your iphone and/or ipad.  I’m always checking out the FREE app for great seasonal + do-it-yourself inspiration.

Disclosure: I am part of the Lowe’s Creative Team and was provided with a Lowe’s gift card to purchase items for my project.  I was also compensated for my time to use the products.  No one told me what to create, what to buy, how to use the product, or what to write.  All opinions are 100% mine!

Taking over & Transforming the ‘Ugly Bathroom’

Let’s talk bathrooms…

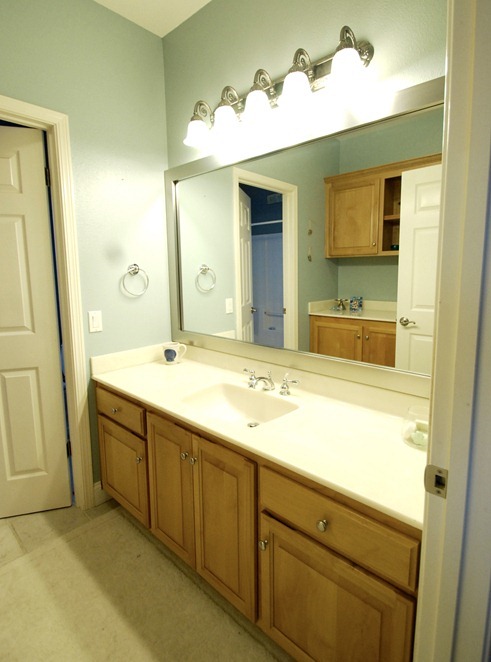
They’re one of those spaces in the home that often gets neglected, yet should get the most attention.  Whether just moving into a home that has a bathroom in dire need of a makeover or a bathroom that’s gone too long without a refresh, revamping a bathroom doesn’t have to be overwhelming or expensive.

Let’s face it, who doesn’t duck away from it all for a few minutes of peace and quiet in the bathroom (especially when you have kids).  And who doesn’t relish in a long, hot shower after rolling out of bed to actually feel fully awake.  No moments of any day should be spent in a blah bathroom.

The bathroom is truly a space that should feel like a fresh, calming oasis to start the day.

Ugly Bath Makeover {call for action}. Submit your pictures today and I will choose and create a design board + plan of actionall images taken from a previous post on Real-Life Sensational Standard Sized Bathrooms.

Having said that + sharing glimpses of amazing bathrooms, you have to start somewhere.

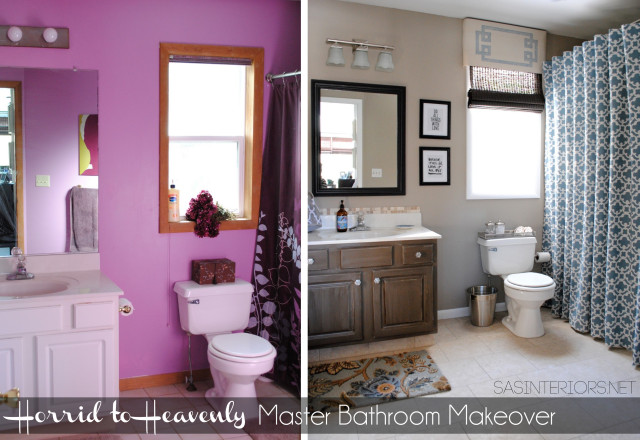
Do you remember the master bathroom we started with when we moved into our home 4 years ago?  It surely wasn’t pretty and it was the last space in the house to get a transformation…

Ugly Bath Makeover {call for action}. Submit your pictures today and I will choose and create a design board + plan of action

Were we overwhelmed? YES!

Could it have been expensive? YES!

But we ‘took it over’ and made it ours on a very slim budget of less than $500.

Here is the before & after

DIY: Master Bathroom Makeover - This entire bathroom transformation cost less than $500!

If we could do it, so can you!

I’ve transformed my fair share of bathrooms and even though the task of a makeover may seem daunting + expensive, there are many ways to give this important space in the home a refresh WITHOUT spending a huge amount of money or time!   That’s why I was super excited when Lowe’s reached out to me about partnering together to share my design expertise + budget friendly ideas with YOU, my fabulous followers.  They have put me up to the task of giving my design advice + a plan of action to a reader who is in need of a bit of help & a “point in the right direction” for transforming their ugly bathroom.

I’m here to help rid you of your ugly bathroom…

Ugly Bath Makeover Challenge {ENTER NOW} to be a lucky winner to receive a FREE BATH DESIGN + "Plan of Action' to fix up an ugly bathroom! Enter @ WWW.JENNABURGER.COM

The Lowe’s team + I will choose one space for which I will create a Creative Vision Board + a ‘plan of action’ for, and it will be showcased on the blog.  As always, I will share doable do-it-yourself ideas + affordable, but stylish design suggestions to transform the bathroom using some of my favorite items from Lowe’s!

Ugly Bath Makeover {call for action}. Submit your pictures today and I will choose and create a design board + plan of action

Disclosure: By submitting your images to Lowe’s Companies, Inc, including any of its subsidiaries or affiliated companies (“Lowe’s”), you acknowledge that you have read and agree to the following terms, grants, and conditions.

You agree that (i) any images you submit are voluntarily provided; (ii) you have no expectation of compensation from Lowe’s or otherwise; (iii) you own all right, title, and interest in and to the images free and clear without any encumbrance whatsoever and (iv) no relationship of trust or confidence, whether express or implied, exists between you and Lowe’s in connection therewith. In addition, if any of your images references or includes any copyright-protected content, any invention or any other intellectual property, you hereby grant to Lowe’s an irrevocable, perpetual, transferable, and royalty-free license, with the right to sublicense others, to make, have made, use, sell, offer for sale, import, distribute and promote products (including packaging) and services that incorporate in whole or in part your patent, copyright, trademark, trade dress, or other intellectual property rights referenced or included in any one or more of your image(s). You also hereby grant to Lowe’s an irrevocable, perpetual, transferable, and royalty-free license, with the right to sublicense others, to use, reproduce, modify, perform, distribute, and create derivative works based on, any content included or contained in any one or more of your images. The rights you grant herein are for the purposes stated by Lowe’s and, at a minimum, for use in accordance with any of Twitter’s terms of service/rules and in accordance with the Lowe’s privacy statement (located at http://www.lowes.com/cd_Privacy+and+Security+Statement_137461171_ ). You understand and agree that Lowe’s may be working on or may already know of such images. You also understand and agree that Lowe’s is free to disclose or use the images as it deems fit.

Old Lamp. New Life.

One of my Saturday favorites is to hit up some local thrift stores for unusual finds and inspiration.  Unfortunately it doesn’t happen as often as I’d like, but a few weeks ago when the kiddos were with the grandparents, the Mister and I hit up one of my go-to places.

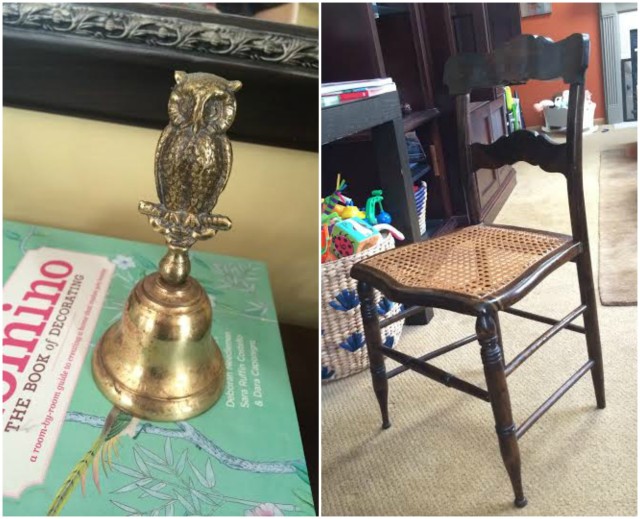
We scored a couple of cute things, like a brass owl bell (which my kids love to ring) + a new chair (which will soon get a spray paint makeover)…

Thrift Store Finds

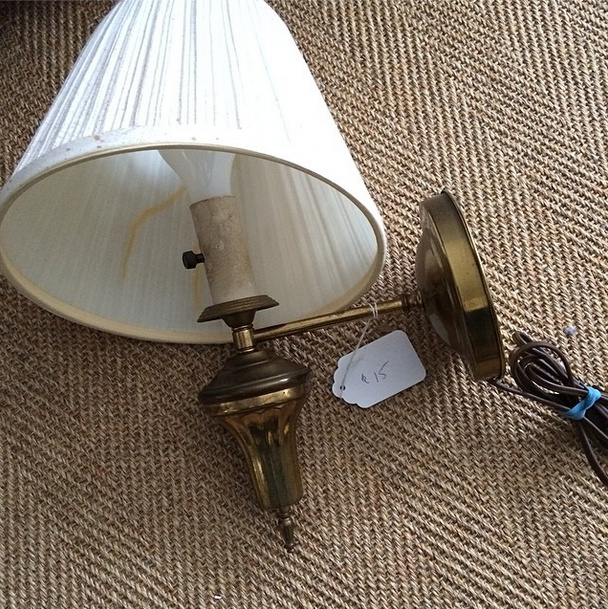
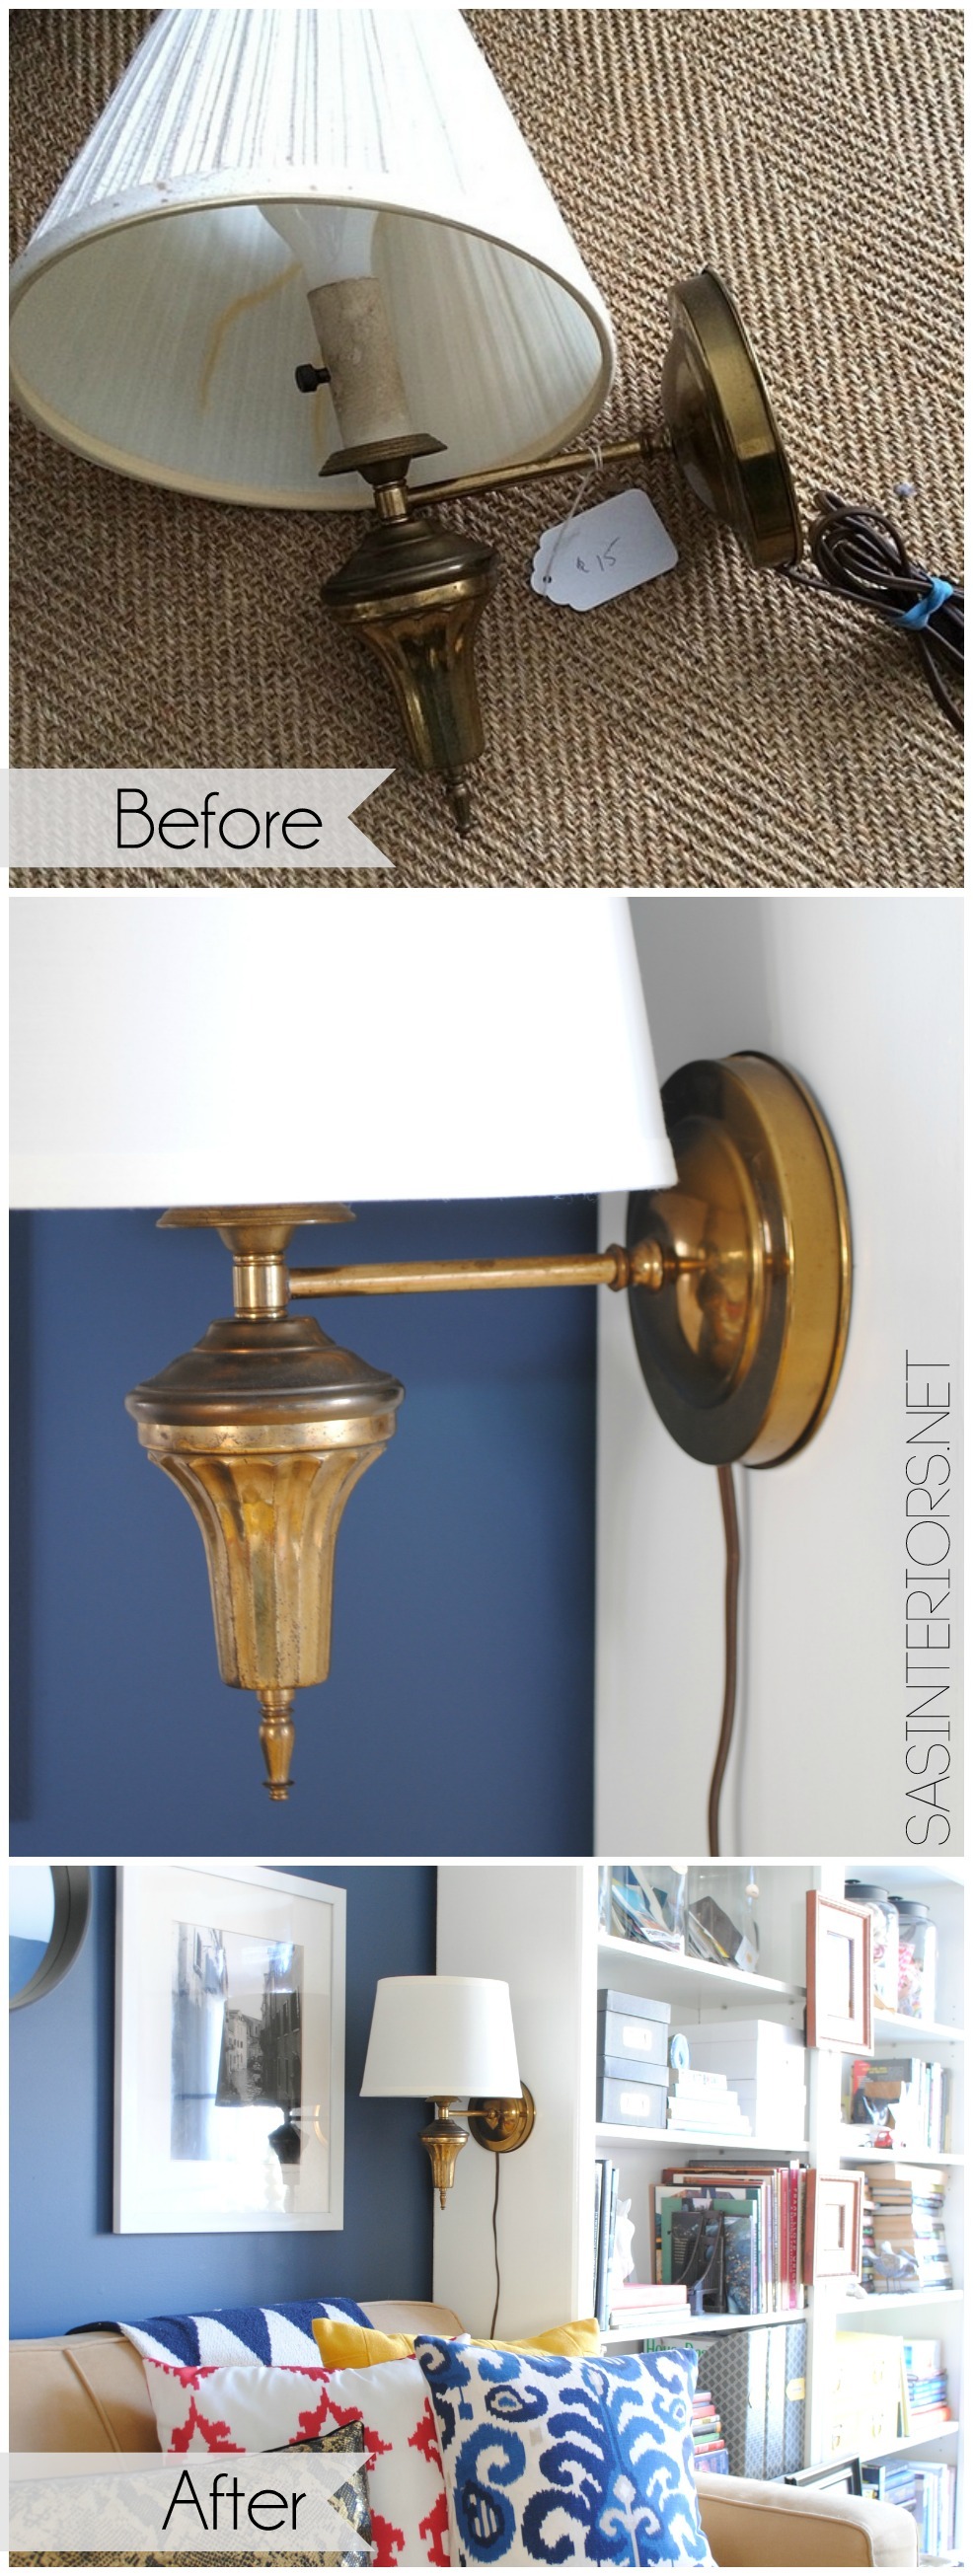
…as well as this brass wall sconce for $15.  It was something that I’ve been searching for, but others I almost bought (new and old) were much more expensive.  I was thrilled to find this treasure and I knew the perfect place for it!

Wall sconce - thrift store find

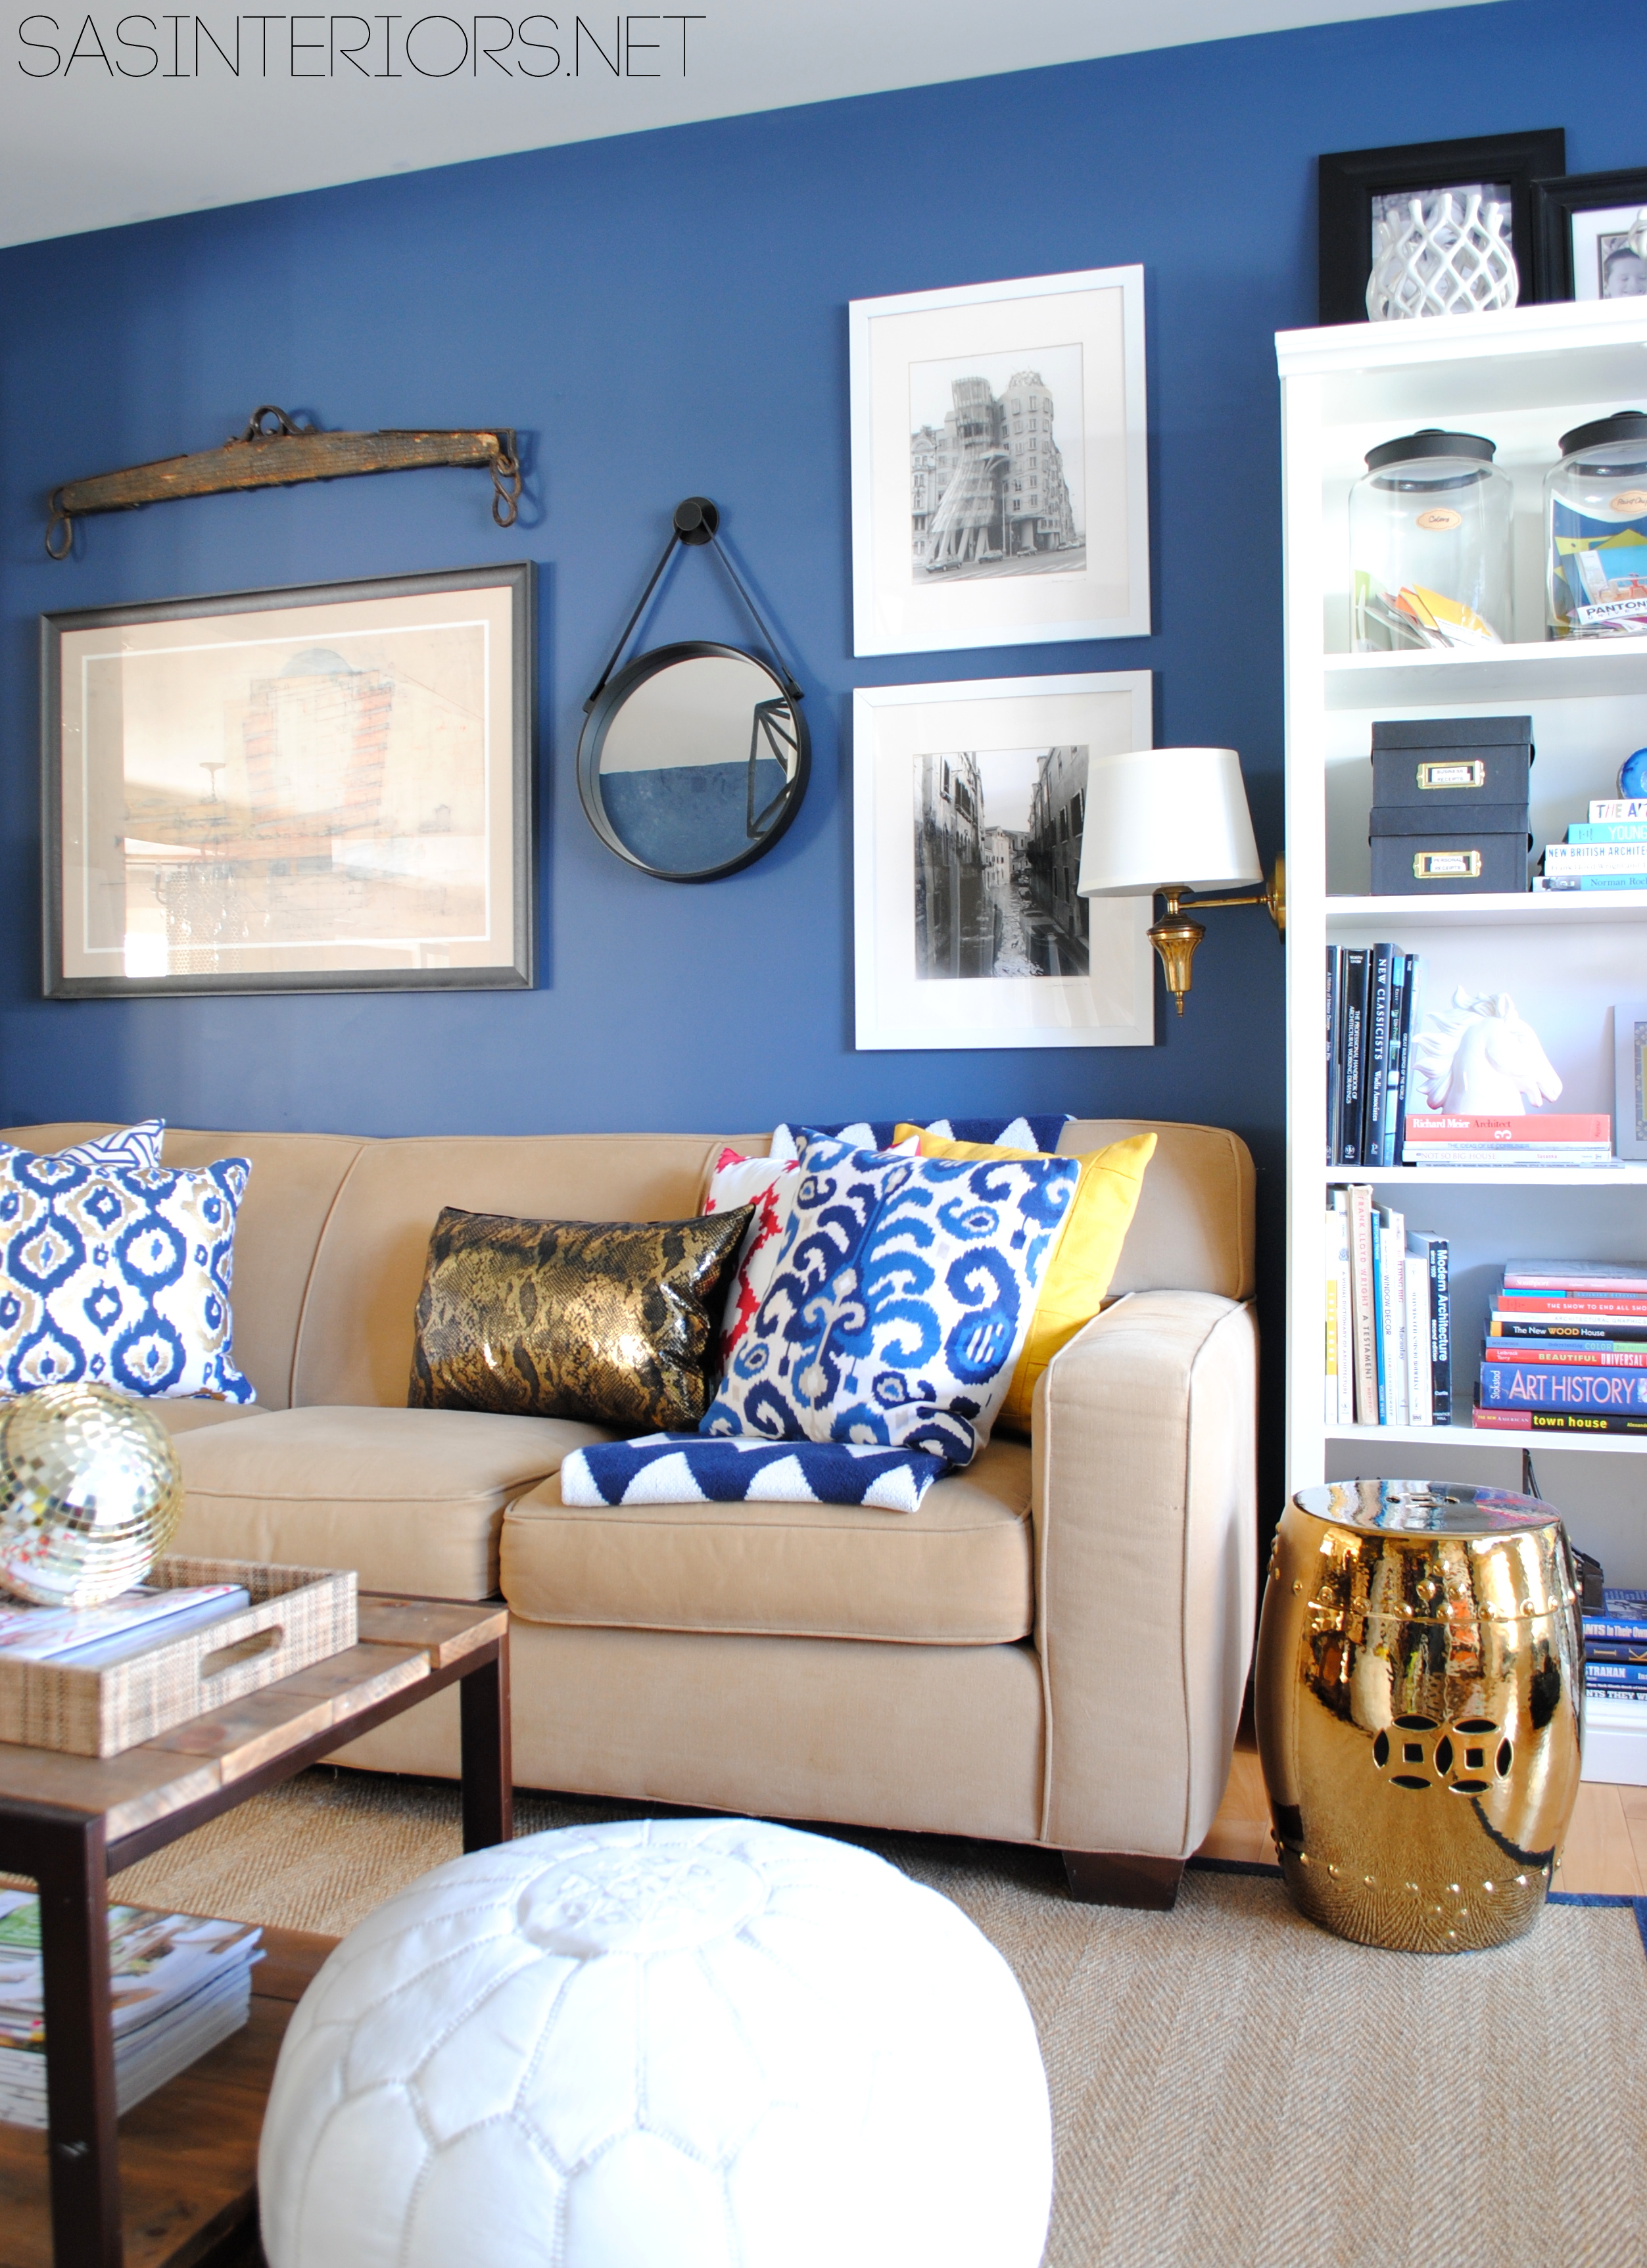
The blue room (a.k.a. my home office / family room) has been complete for over a year, but I’m always ‘changing things up’ and switching out the layers of pillows + accessories.  One element that I was on the search for since finishing the space was a wall sconce to attach to the side of the painted bookcases.

My new found treasure worked out perfectly…

Home Office / Family room with new wall sconce on the side of the bookcase. The perfect thrift store find brought back to life!

Here’s how I gave this old lamp new life…

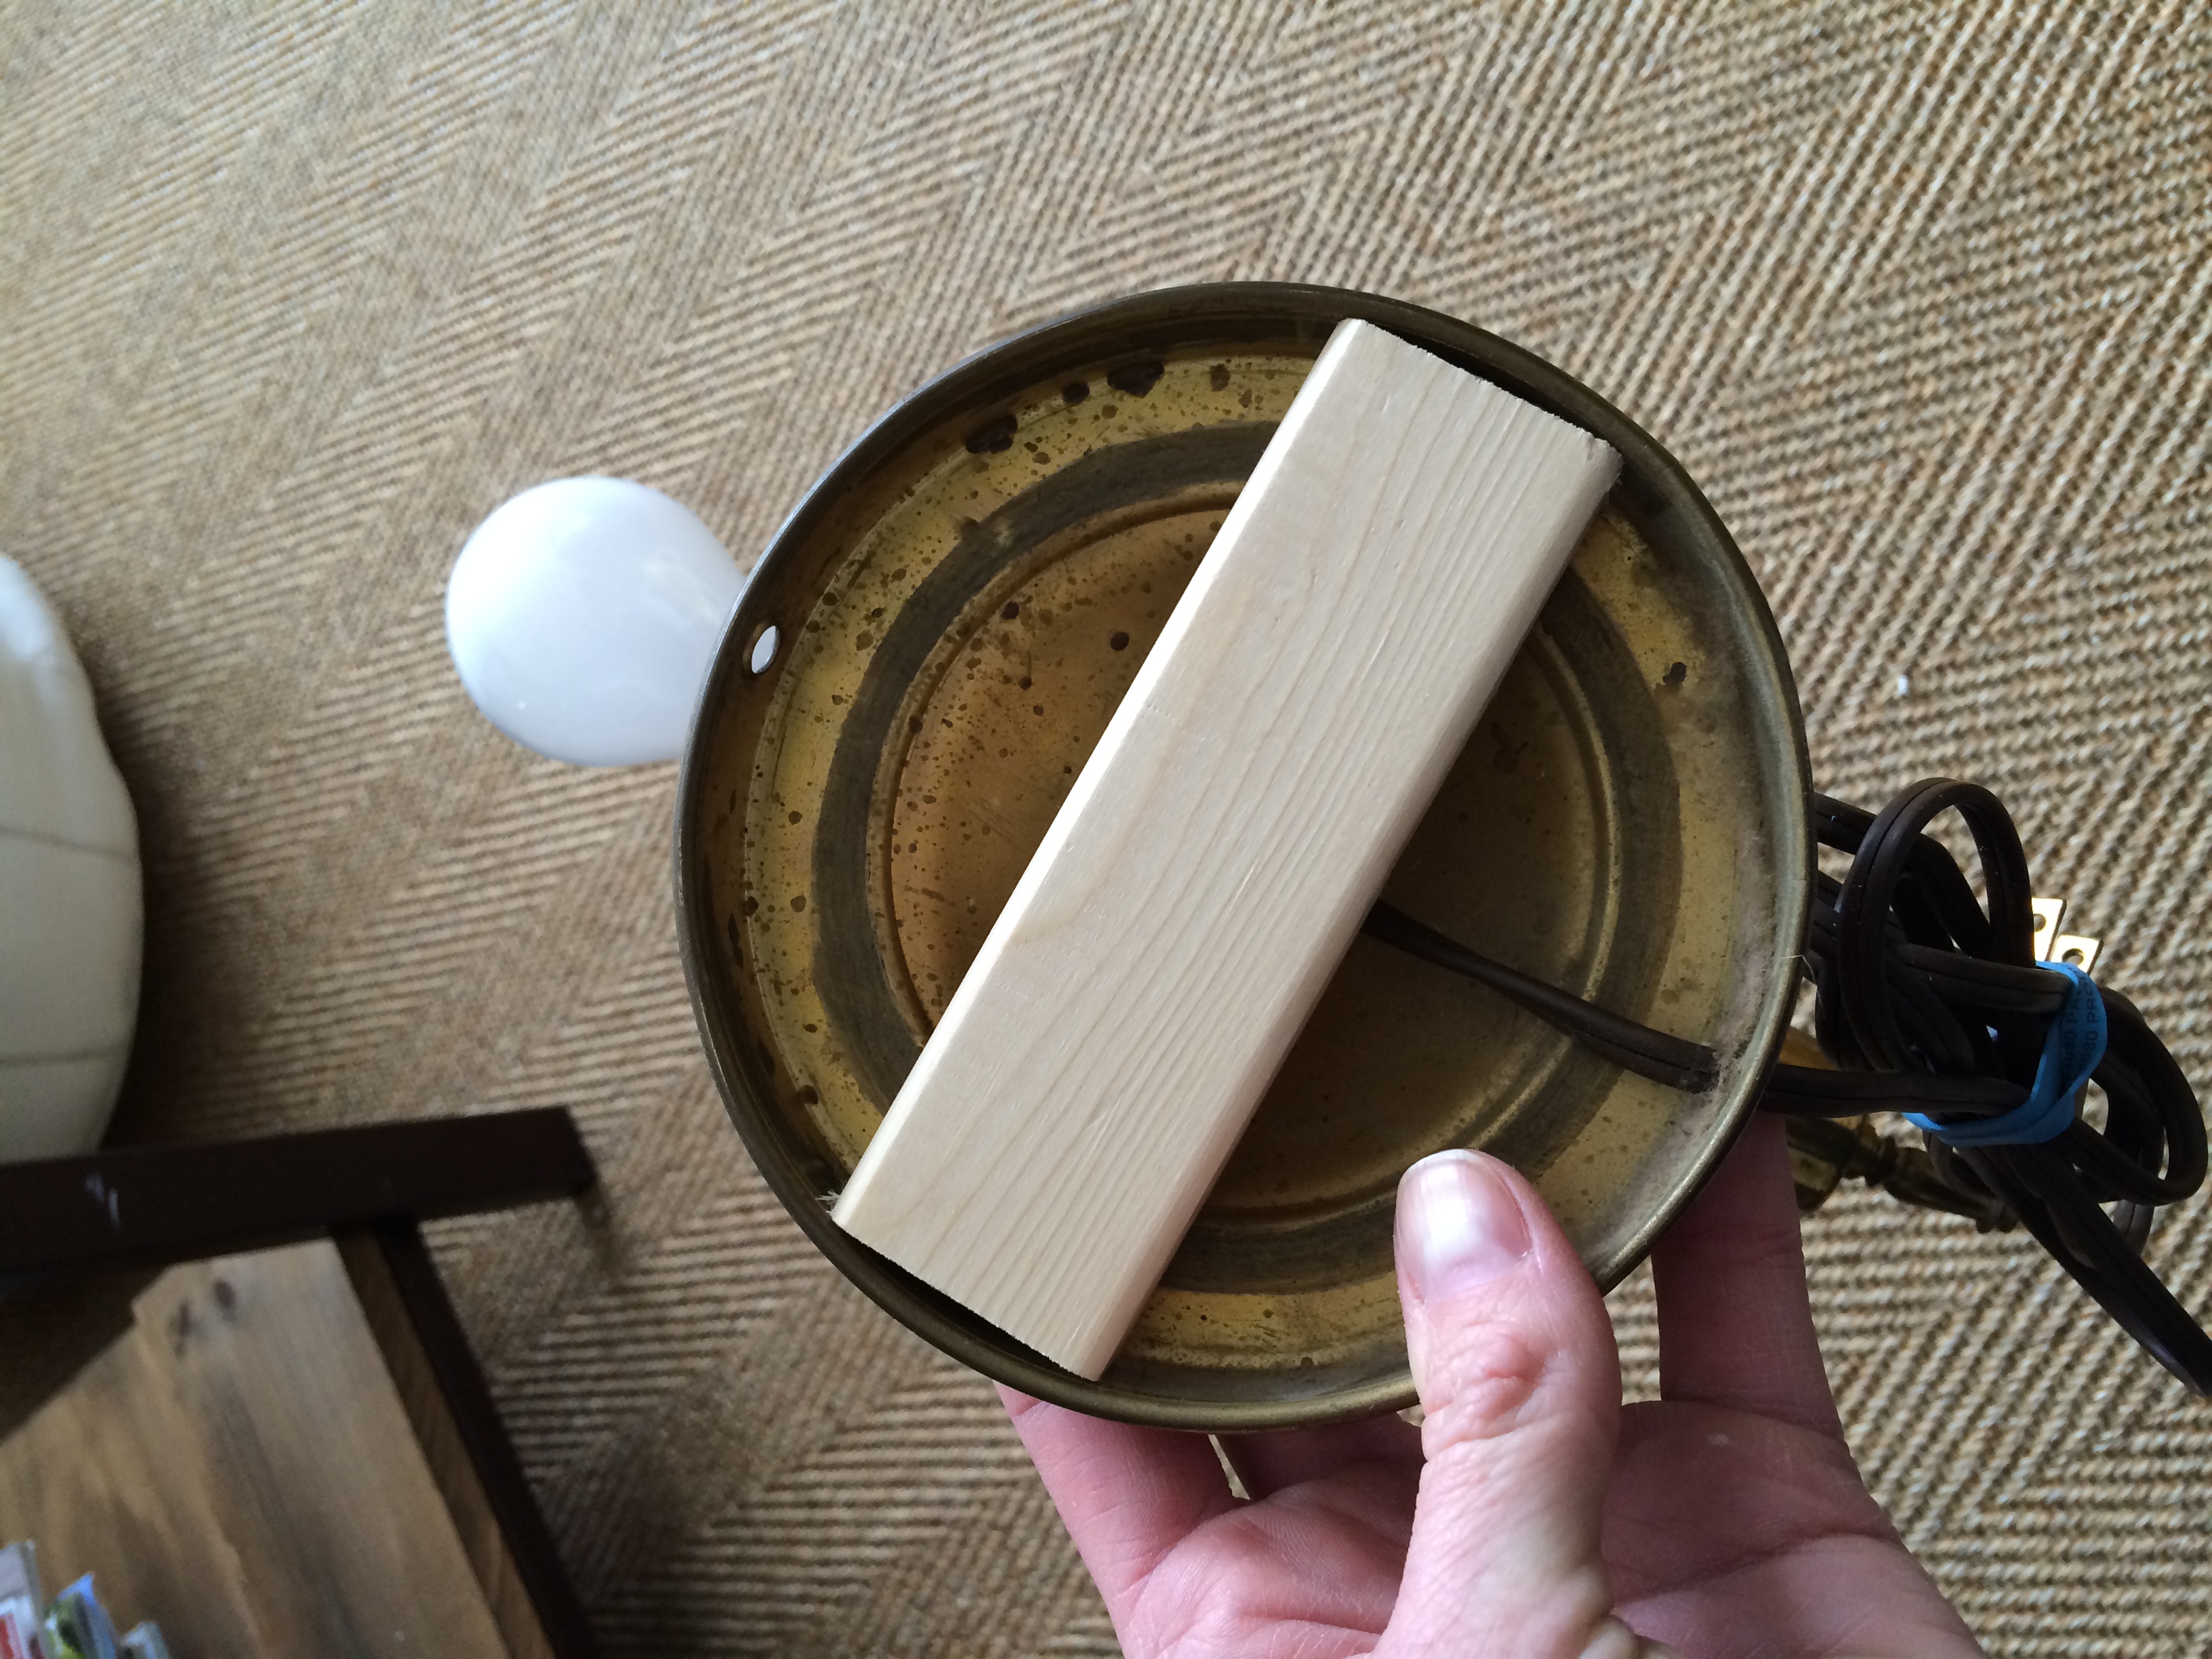
The back of the lamp had no “guts”, which worked fine for me because I took a piece of scrap wood and cut it to fit snug inside the round plate.

Thrift Store sconce

Thrift Store sconce

Once I knew the fit was just right, I took the piece of wood out of the lamp.  I determined where I wanted the lamp to sit on the bookcase, and then attached the piece of wood to the side of the bookcase with wood screws.

Once the wood was secure, I stuck the lamp base onto the wood.  The round base fit so snug that there was no additional screws needed.  The base simply is held in place by tension…

And voila, it was complete (almost)…

Process of bringing a thrift store found wall sconce back to life...

After giving the brass a good shining + adding a new lampshade (the old one was garbage bound), this was the result…

Home Office / Family room with new wall sconce on the side of the bookcase. The perfect thrift store find brought back to life!

Home Office / Family room with new wall sconce on the side of the bookcase. The perfect thrift store find brought back to life!

And how the room looks now with this new found treasure…

Home Office / Family room with new wall sconce on the side of the bookcase. The perfect thrift store find brought back to life!

And the best part, it works…

Home Office / Family room with new wall sconce on the side of the bookcase. The perfect thrift store find brought back to life!

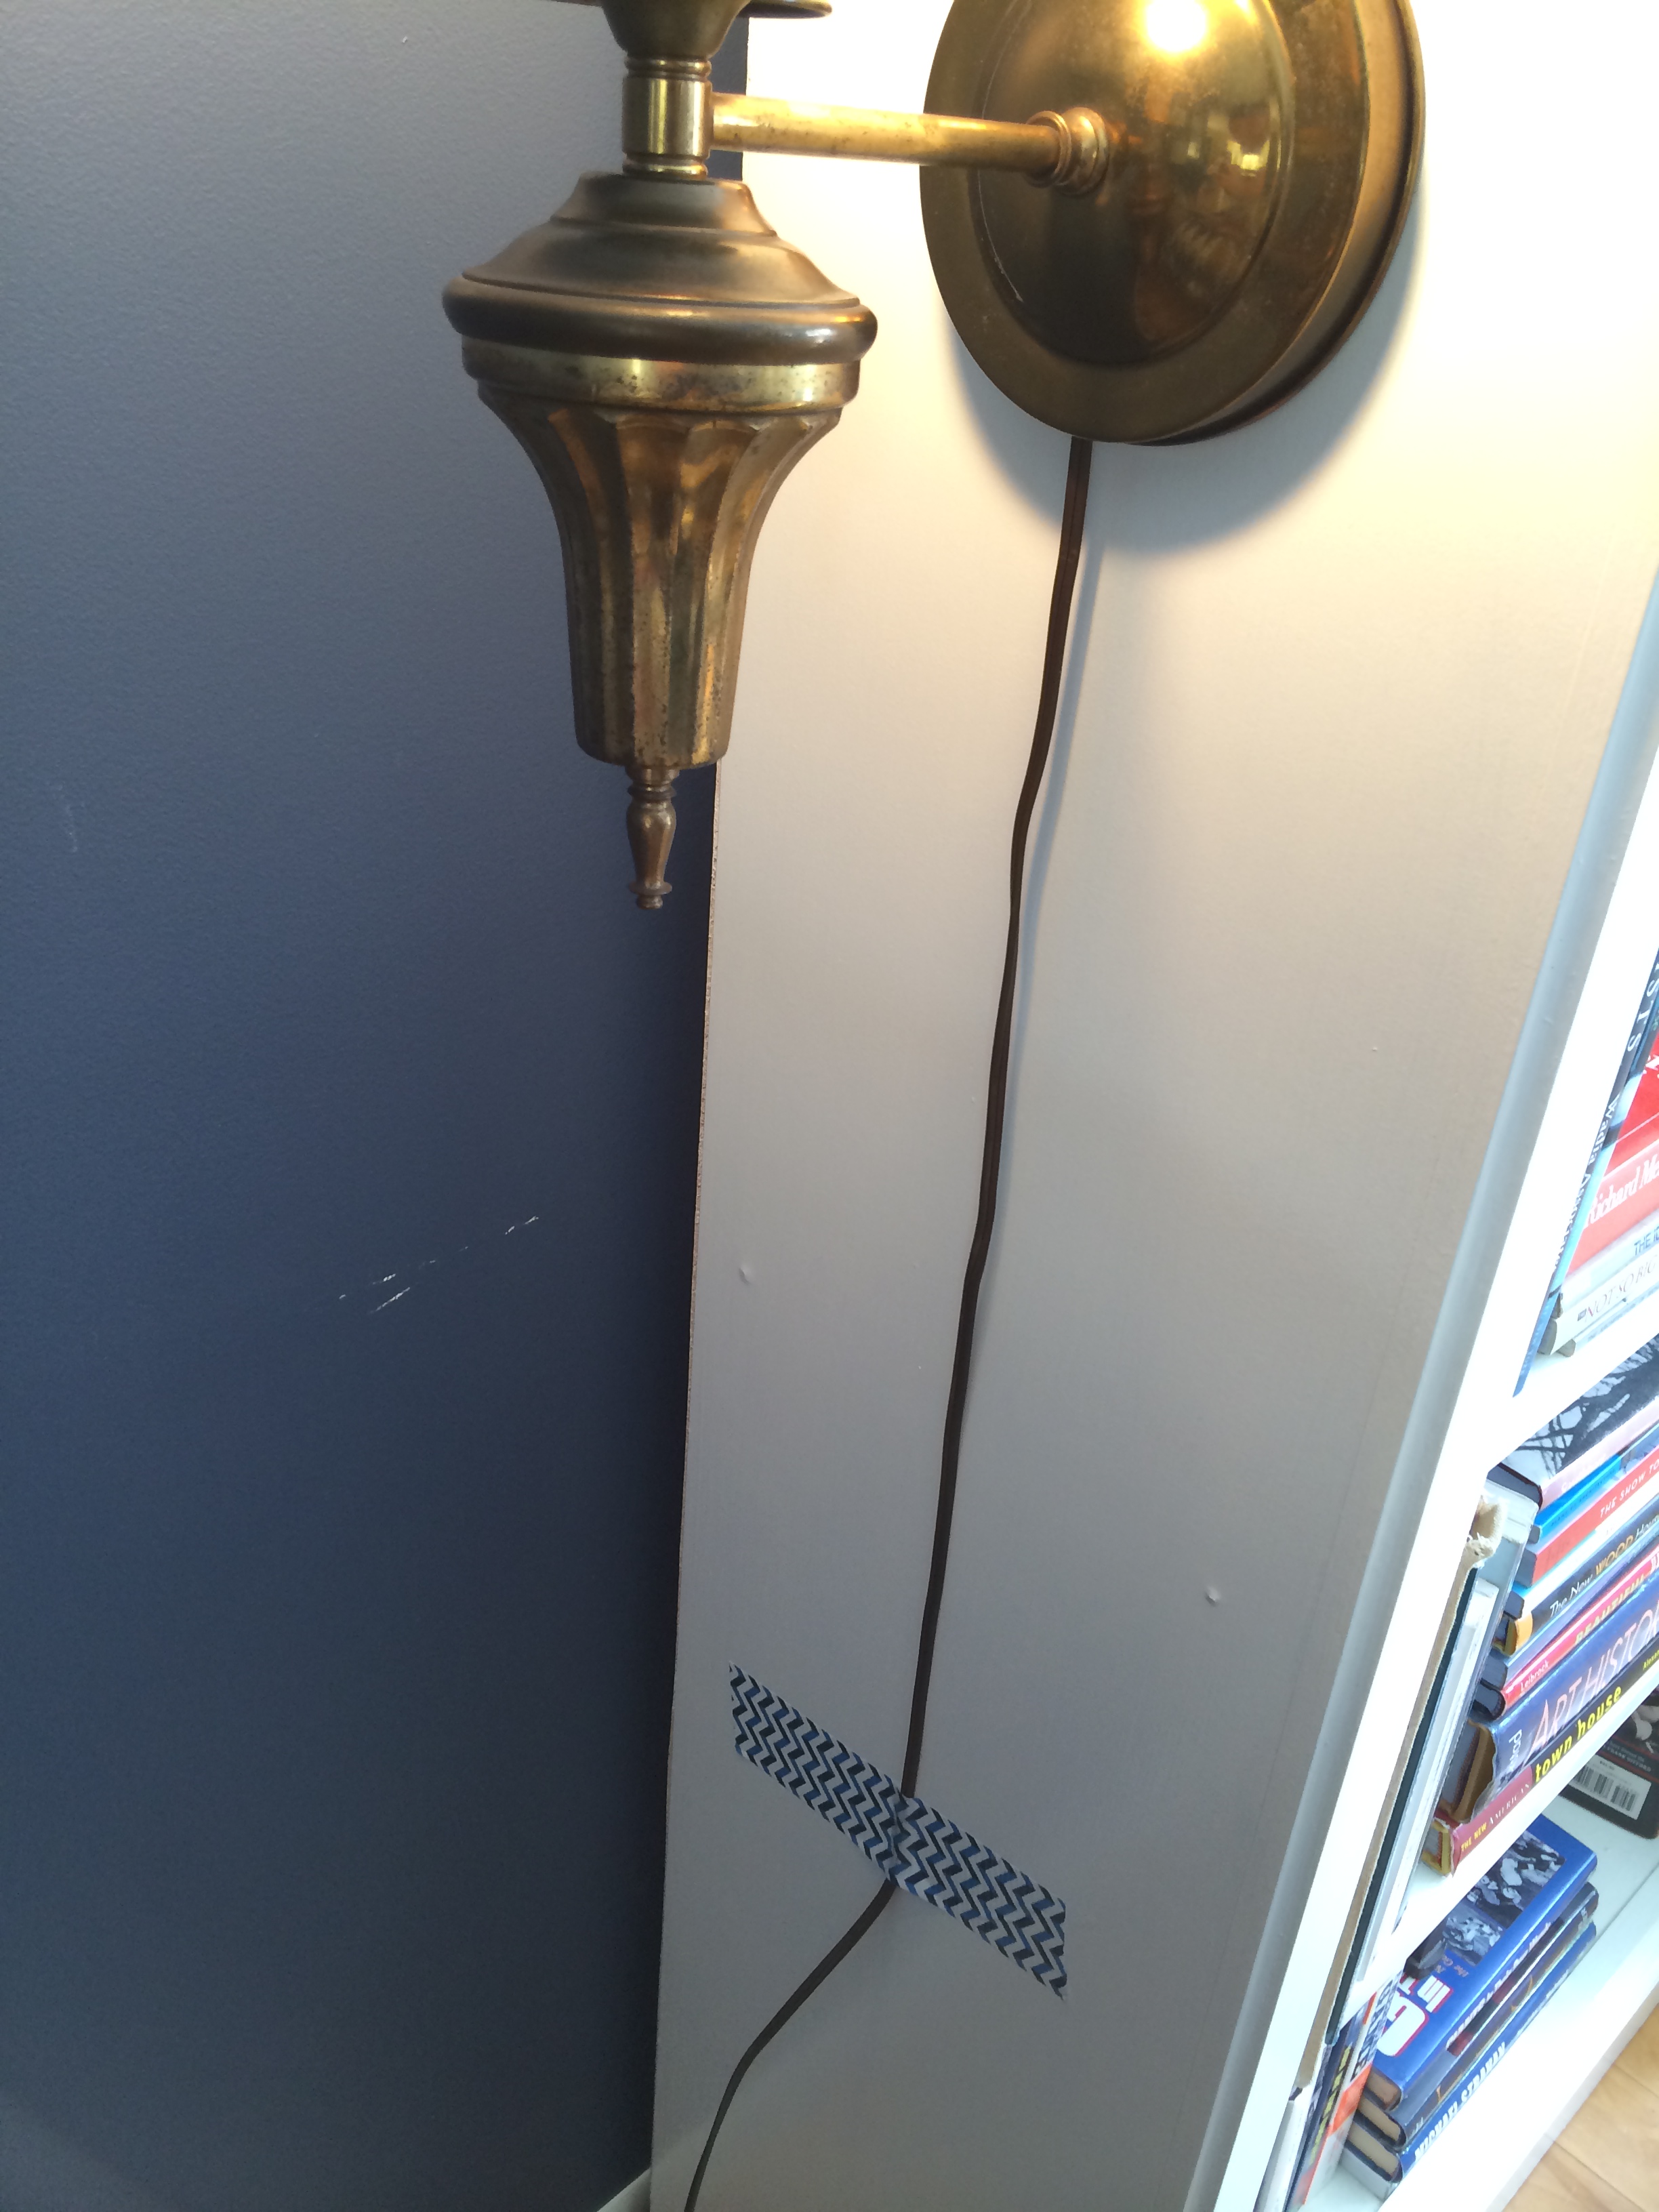
From start to finish, the lamp literally took minutes to install + there was no electrical needed.  The cord was attached to this thrift store find and all I had to do was plug it in.  And a little tid-bit ~ to keep the cord taught on the bookcase, I used a piece of duct tape to keep it in place.

Thrift store wall sconce

I’m simply smitten over my new trash to treasure!

Home Office / Family room with new wall sconce on the side of the bookcase. The perfect thrift store find brought back to life!

It’s amazing what a little outside-of-the-box thinking can do.  I’m thrilled that I waited it out to find just the right piece and in the end, it only cost $15!

What have been your favorite trash to treasure finds either from a garage sale, thrift store, or on the side of the road?

Groutable Luxury Vinyl Tile Floor {an Update}

In the 400+ posts I’ve shared over the years there are a select few that I receive questions about on a daily basis.  Which, by the way, I love!  Reader inquiries + questions make me so happy 🙂

One post, in particular, that many readers are interested in is my experience with groutable luxury vinyl tile flooring.

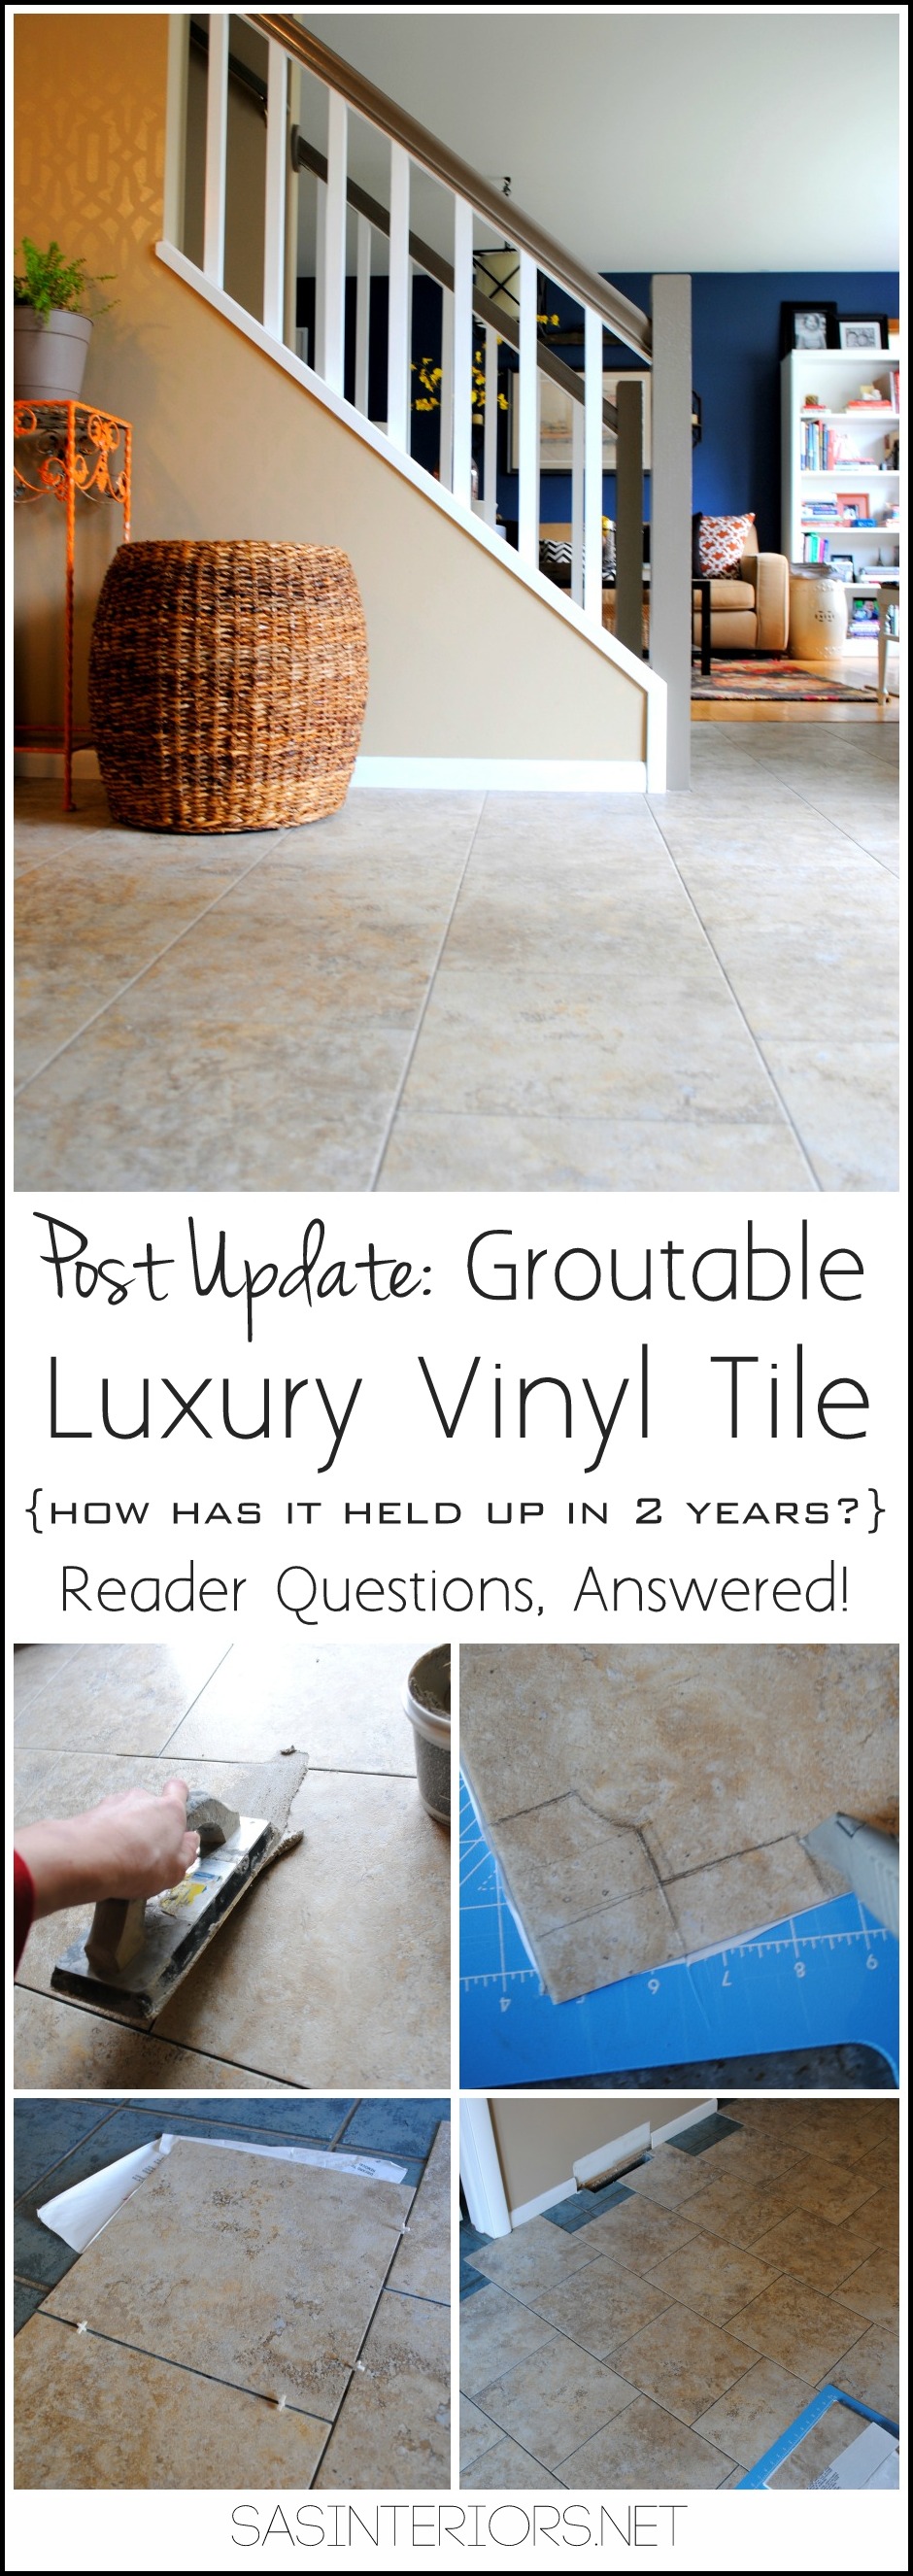
Post Update: Groutable Luxury Vinyl Tile, an amazing alternative to cermamic tile. How has it held up in 2 years? Reader Questions, ANSWERED! You will not believe how this flooring will change your life.

I’ve installed groutable LVT  in my parents floor + my foyer + my master bath + in the kids bath, so I can officially say I’ve had some experience with the product.

So the basic question I continually get asked is:  Has your vinyl tile held up + How is it today?

Here are just a few of the reader questions I’ve received:

From Rachele
> Hi!  I just came across you on pinterest about the groutable vinyl floor tiles I was curious how they hold up over time? I never knew you could do this so of course I’m thinking tomorrow we will go buy flooring and get busy! LOL but I wanted to ask over time how it held up? Thank you so much.

From Shirley
> I’m in the process of installing vinyl groutable tile in a kitchen and dining area. The area already have vinyl square tiles on the floor. My question is, do I need to install a sub-floor/wood boards before installing the vinyl tile ?

From Kamie
> Hello,  I came across your post about the installation of peel and stick vinyl tiles in January of 2012.  I found this same product today on my hunt for new flooring for my kitchen.  My question to you is, how has it held up so far?  Is it durable?  Are you still satisfied with the product?  You response and insight are greatly appreciated.

From Cathy
> I saw these vinyl tiles at Lowe ‘s and read the box, but it didn’t have a lot of details.  For example, we want to put these in our kitchen which has vinyl sheeting glued on concrete. Should we remove the old vinyl first or put these tiles directly ver the old vinyl.  I’m sure it will be extremely difficult to get the old stuff up.  Then there will be old glue to also get up. Another question I have is should you put  down additional glue besides the glue on the back of the tile?  If so, what kind?  These do appear to be easier than wood, cork, or porcelain tile.  We’ve used the old peel and stick before in other homes.  Thanks for your info.

From Carrie
> I am researching groutable tile and came across your blog. Now that it has been down for a year how is the grout holding up? We are thinking about putting this in our kitchen and keep going back and forth on whether or not we want to grout it. It seems like the people who put it over pre-existing ceramic tile or cement have the best results. Ours is just a lauan subfloor and we live in an old house (1870’s) so it is hard to have  perfectly level floor. Just wondering your thoughts of the durability. Right now in our renovation we are at the end of our budget so we wanted something we can do by ourselves but also looked good in the end. I am just terrified of having the grout crack and pull away. The tiles we are looking at are beveled so we could do it without grout, but that makes me worried that dirt and liquid could cause a problem.

From Joseph
> I came across your web page while looking for groutable vinyl tile and I was just curious how is it holding up 2 years later? Would you do it again.  Are there any cons to it that you have come across? Thanks

> Hello Jenna – I was so glad I found your great DIY on groutable vinyl floor tiles – this is exactly what I want to do for my kitchen floor. I will also be covering
smaller square ceramic tiles with larger vinyl tiles. My question is, did you have to put extra adhesive down in the lower grout lines of the ceramic floor to eliminate any “sunken” or dip lines in the finished vinyl tile floor?

From Janet
> Thank you for you thoughts. What you did for your parents foyer looks great and you have me very psyched to do this!!

And there are many more, but these are the general questions readers have asked & this post is dedicated to answering them all (or as much as I can…)

Post Update: Groutable Luxury Vinyl Tile, an amazing alternative to cermamic tile. How has it held up in 2 years? Reader Questions, ANSWERED! You will not believe how this flooring will change your life.

My Overall Thoughts on Groutable Luxury Vinyl Tile

I am very satisfied! Overall, all of the LVT floors I have installed have held up amazingly.  There has not been one issue with the flooring cracking, settling, sinking, etc.  With all the floors I have installed, I DID NOT remove the existing floor, but all the floors ‘before’ were ceramic and in good condition with no cracking.  In none of the spaces did I fill in the existing joints and none of the luxury vinyl floor tiles have “sunk” in those crevices.  LVT floor is thick and really not bendable as in typical vinyl tiles.  You can definitely tell the difference between the two and the cost reflects that.  LVT is more expensive than a typical vinyl tile, but it is absolutely worth the additional cost.  I still feel that using groutable luxury vinyl tile is a wonderful long-term solution for a floor.  The look is very similar to ceramic tile & the turn-around time and ease of installation is incredible.  A floor that can be done in one day (install + grout) with no prior experience is pretty great, don’t you think?!

Post Update: Groutable Luxury Vinyl Tile, an amazing alternative to cermamic tile. How has it held up in 2 years? Reader Questions, ANSWERED! You will not believe how this flooring will change your life.Luxury Vinyl Tile in the Master Bathroom

Now that I’ve shared my overall thoughts on LVT, here are answers to the Top TEN Questions that have been asked:

1. How has the tile held up over time?

Fabulous.  As I said in my overall thoughts, there has not been one issue in any of the spaces that I have installed the LVT.  With the use of grout, the tiles are very sturdy and there have been no issues with loosening of the glue or the tile shifting over time.  Once the grout hardens, the tile is fully adhered to the floor below.  When I remodeled the powder room and replaced the toilet, a few of the tiles had to be fixed because I had originally cut the tile around the base of the bowl.  The LVT and grout were installed so well to the floor below that it was actually difficult to lift the tiles. They eventually came up, but it took some muscle.

2. Do I need to install a sub-floor/wood boards before installing the vinyl tile?

This is a difficult question to answer because every floor, in every home is different and I’m sharing my experience and the installation process I took.  BUT, here is my thought… If the floor you are working with is in good condition – no cracks, lifting, etc – you should be okay to install the LVT directly on top.  So basically you are purely changing the floor because of how it looks versus because it is damaged.  If the floor you are covering has issues and/or is damaged, then it would be best to remove the floor, install / patch the existing subfloor, and then install the luxury vinyl tile.

3. Is it durable?

I think the product is very durable, especially with the use of grout.  All of the spaces (foyers + bathrooms) I have installed the LVT are high-traffic areas and the tile has been exposed to water, mud, wet shoes, and more. No where have I seen issues with lifting or general wear.

4. Why do you love LVT?

4 reasons…

> The ease of install – it’s a one day job (depending on the size of the space of course). Yes, I have tiled before, but I do not feel that installing LVT was difficult at all.  I think a person with little experience can complete this project with ease.  Measuring and cutting is really the most difficult part of the project, so take your time and measure correctly!  Installing ceramic tile is not difficult, but it is tricky and experience is helpful.  Cutting ceramic tile can often be difficult and time consuming.  For prior ceramic tile projects, I’ve used tile snips, a tile cutter, and a wet saw.  A wet saw is the best for cutting ceramic tile, but it’s not easy – I’ve made alot of mistakes.  In my estimation, ceramic tile would take about double the time for installation compared to installing groutable vinyl tile.

> No prior experience installing a floor is needed.

> The cost is more than half of ceramic tile. A standard 40-50 sq. ft. space is fairly inexpensive.  The typical luxury vinyl tiles that I purchased from Lowe’s were $1.08 and the premixed grout cost $7.  The total cost of an entire project for this square footage would cost about $65.  Ceramic tile is available in a range of prices, but usually starts at $2 per sq. ft., so the savings right there is 50%.

> Luxury vinyl tile is flexible + forgiving.  I’ve installed ceramic tile before and within a few months it started cracking in some areas because the subfloor wasn’t level.  I’m not a professional and don’t have the budget to pay a professional, yet I wanted change.  LVT is a great solution because it provides the flexibility for a slightly uneven floor below.  YET, by adding the grout, the result is a sturdy, durable finished product.

5. Should you put  down additional glue besides the glue on the back of the tile?

I never used additional glue.  I felt the glue that was on the back of the tile was enough for it to adhere to the floor below.  The glue on the back of the tile is very sticky and once the paper backing was removed, I immediately laid it into place.  IF the tile isn’t used right away and over time the back is exposed to air, additional glue might be needed.  I can not recommend a glue to use since I have never used one.

6. The tiles we are looking at are beveled so we could do it without grout?  What are your thoughts?

I don’t prefer the look of a beveled LVT because to me it defeats the purpose of them looking like ceramic tile and that is the reason I like LVT.  If you use a beveled tile and don’t use grout, I do not think you will get the same result as I did.  The finished look won’t be the same and durability could be compromised because the addition of the grout really keeps the tiles in place.  I would suggest if you are spending the money and taking the time to install a vinyl floor, the luxury vinyl tile + the grout is your best option for a long-lasting result.

7. Did you have to put extra adhesive down in the lower grout lines of the ceramic floor to eliminate any “sunken” or dip lines in the finished vinyl tile floor?

I did not.  In my foyer I was going to add a skim coat before installing the LVT but decided against it.  The grout lines were very large and deep which is what I was worried about, but I decided to move forward with the LVT.  After 1.5 years, there have been no issues and no “sinking” / dip lines.  Again, this is my experience with the LVT and I feel that because it’s thicker than typical vinyl tile, it holds up extremely well.

8. Where do I buy Luxury Vinyl Tile?

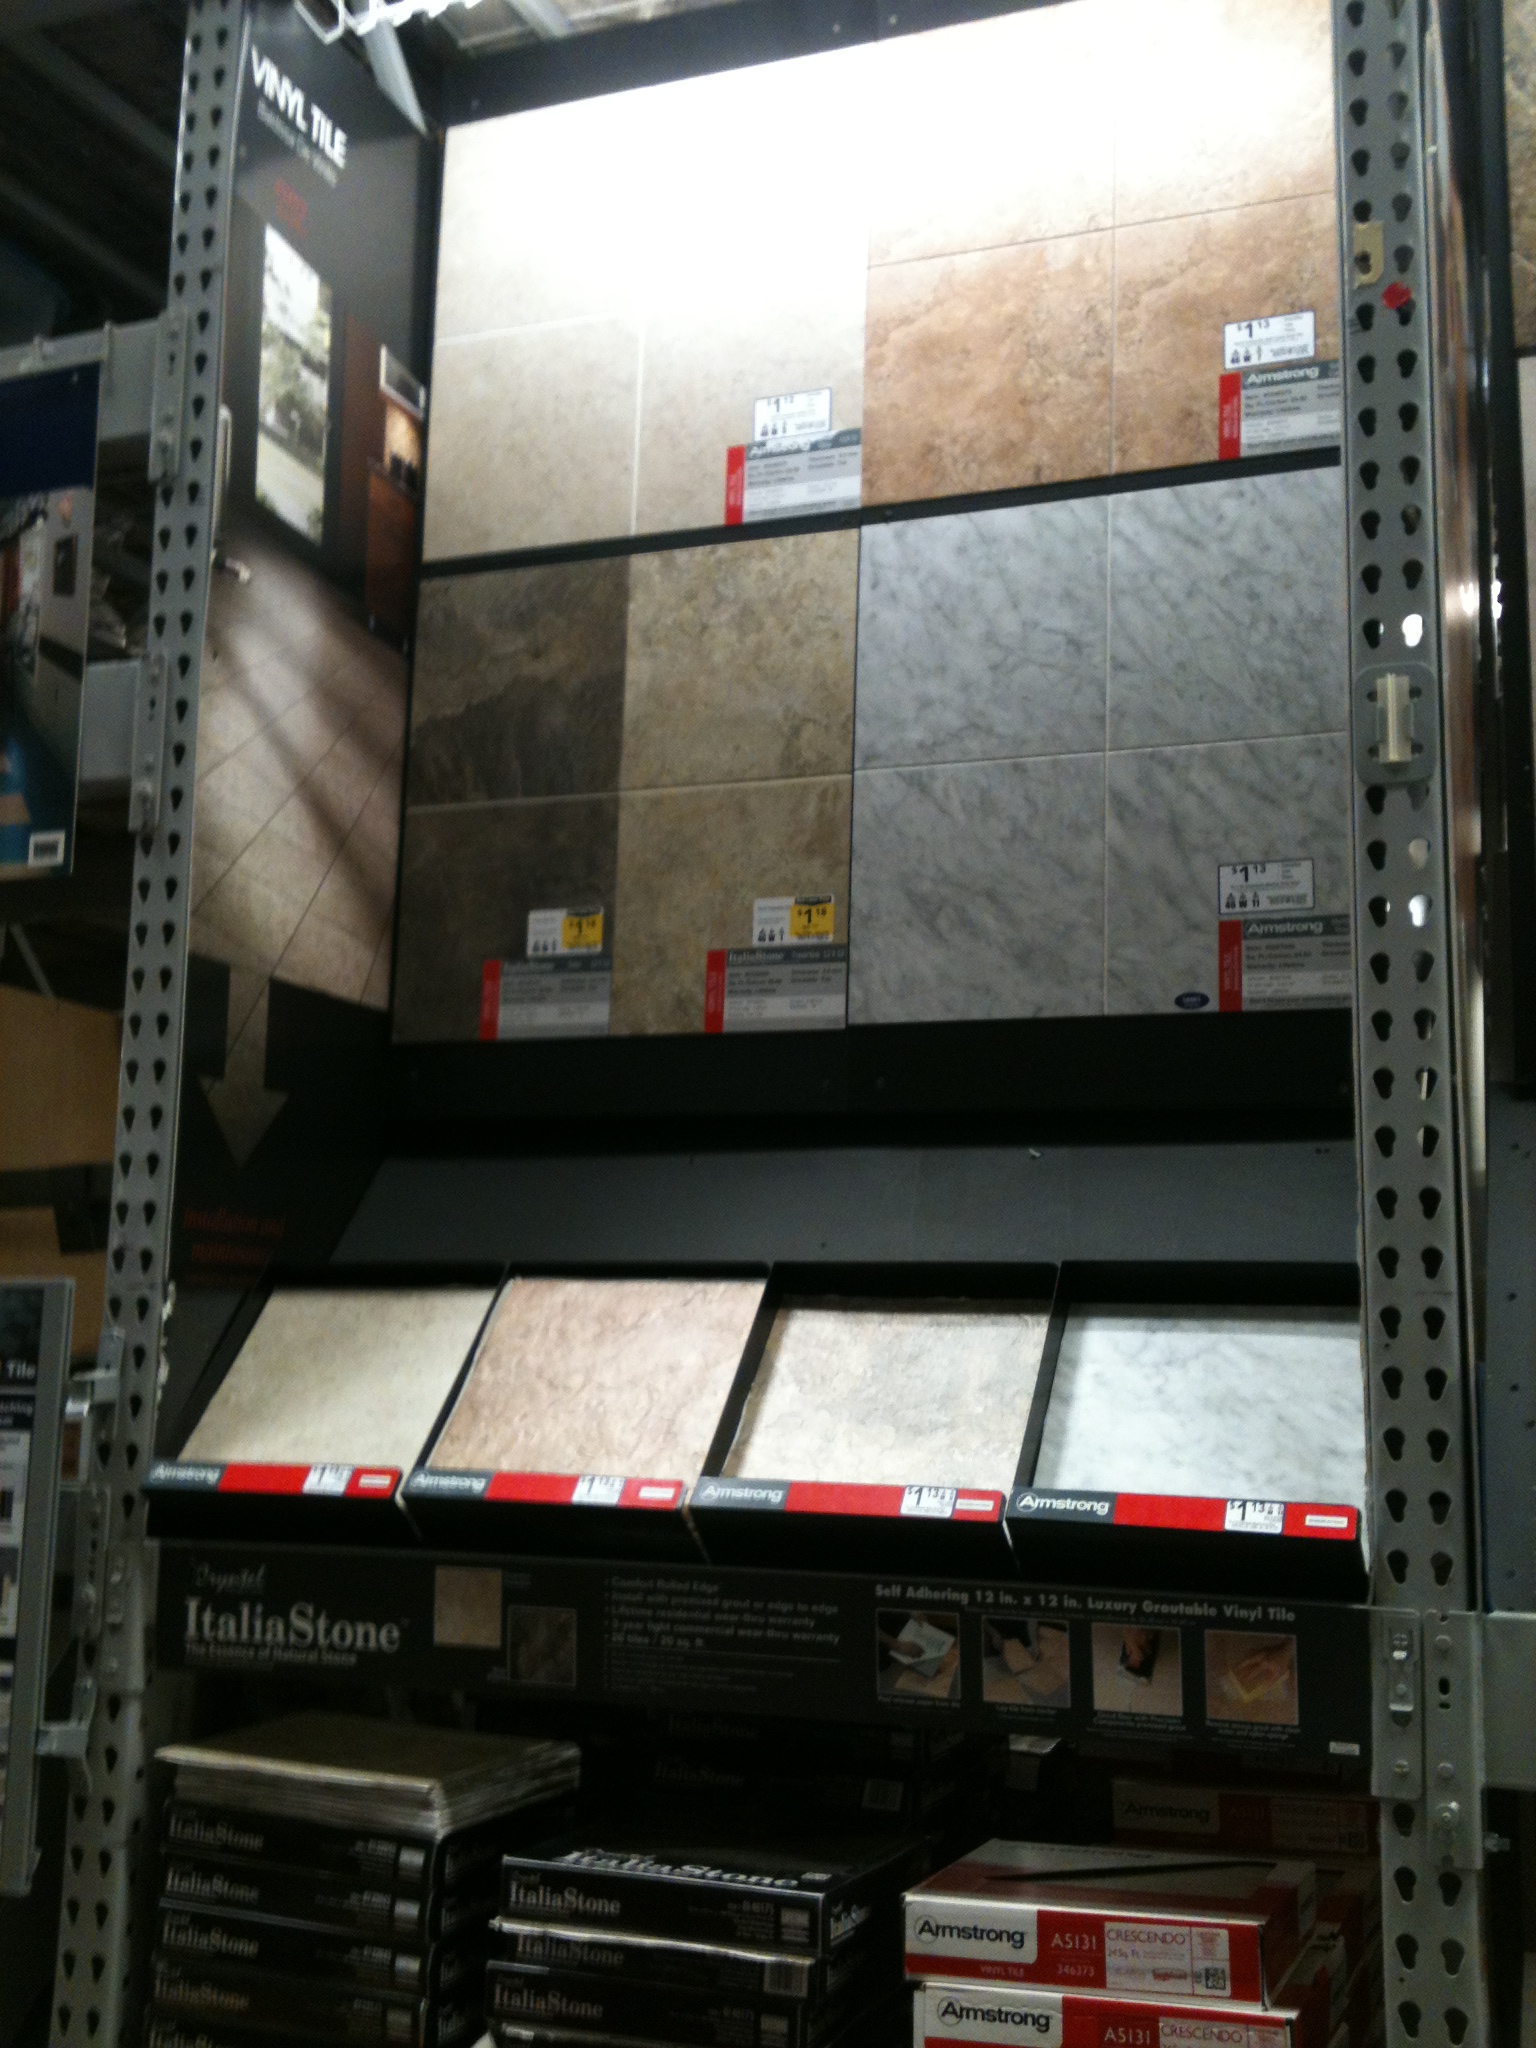
I purchased the luxury vinyl tile for my projects at Lowe’s.  There are a few companies that sell LVT and there is a special section with these specific tiles.  LVT is the general name, but don’t get them confused with other names like high-end or something else.  You will definitely know the different between LVT and regular vinyl tile – they feel much more durable.

Post Update: Groutable Luxury Vinyl Tile, an amazing alternative to cermamic tile. How has it held up in 2 years? Reader Questions, ANSWERED! You will not believe how this flooring will change your life.

9. How long do I have to wait to grout after the tile is installed?

0 minutes.  There is no “set time” with LVT as is with ceramic tile. As soon as your tiles are installed, you can immediately get to grouting!  How fab is that?!

10. Name 1 Con!

That’s a tough one…  I guess I would say, the one con is the color selection.  I have purchased groutable luxury vinyl tile at Lowe’s, but other home improvement stores also offer similar products.  The selection is not as vast as ceramic tile (which is a con), but I was surprised by the wide range of colors and textures.  When I was at the store making my purchase, I was told by a sales rep that any peel-and-stick vinyl tile is groutable, except for the styles that have the faux grout look around the edge.  I don’t know if this is true or not, but it’s what I was told.

Have more questions? Please Ask!

I’ve tried to cover it all.  How did I do??

Check out these posts on how-to install groutable luxury vinyl tile floor:
DIY: Installing Groutable Luxury Vinyl Tile {my foyer}
How-To Install Groutable Luxury Vinyl Tile {my parents foyer}

Since groutable vinyl tile takes no experience, is half the cost, and takes half the time, what will use for your next tile project?

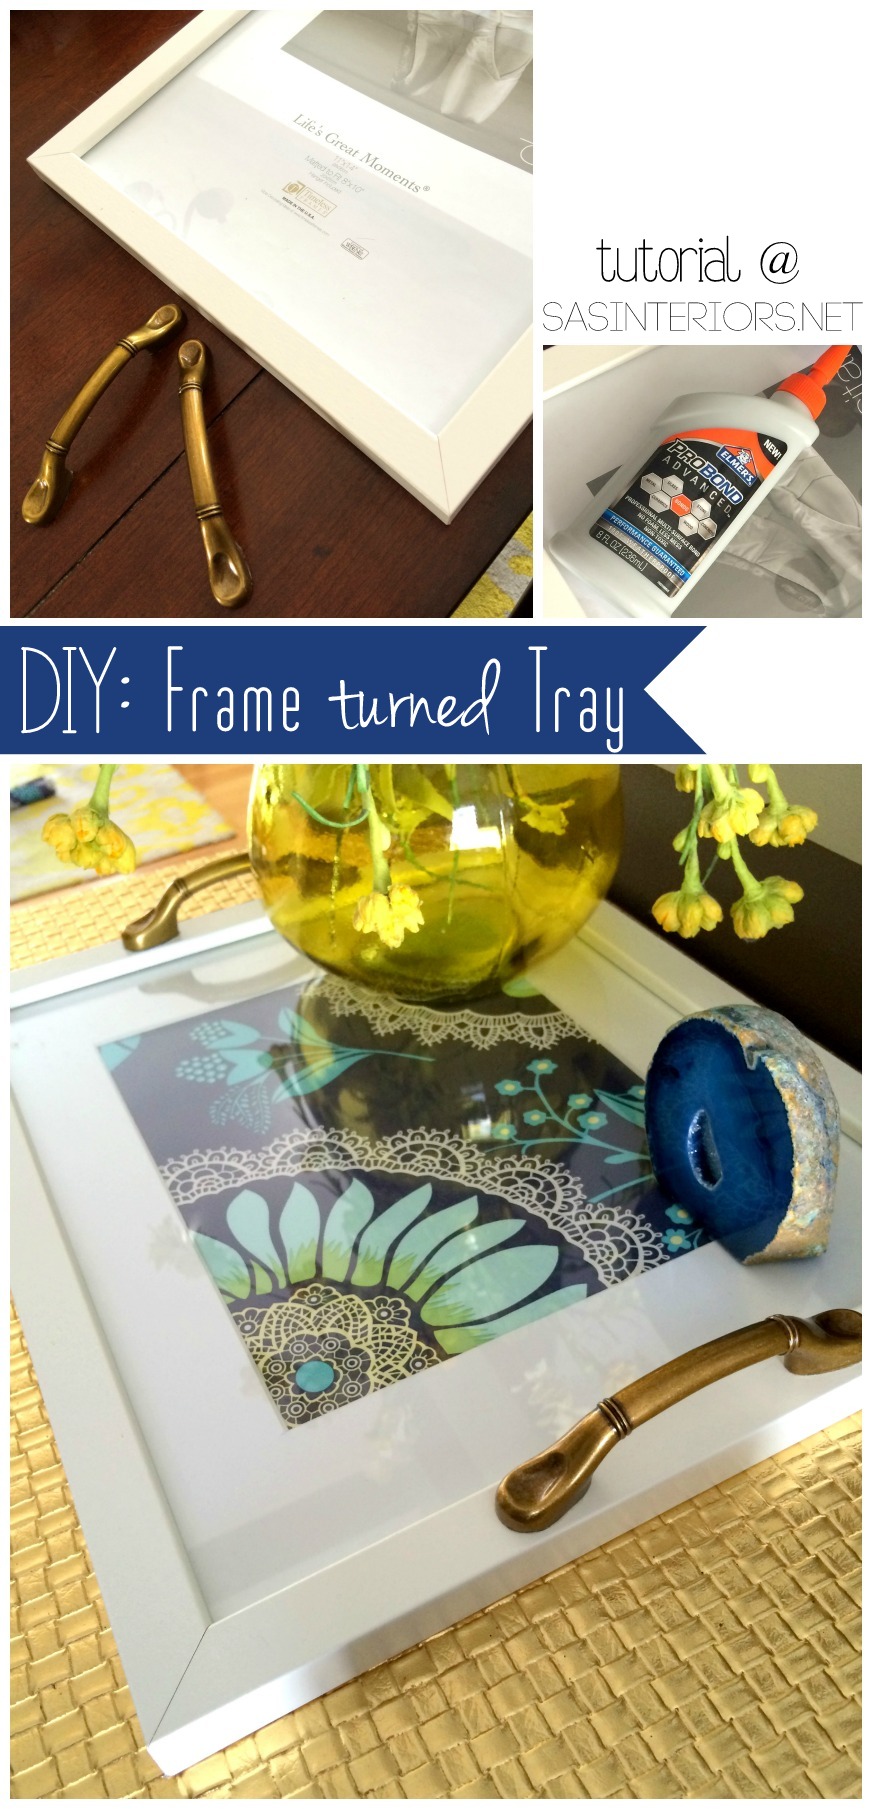
DIY: Frame Turned Tray

DIY: Frame Turned Tray; perfect for tabletop Spring vignette. So easy + affordable!

This post brought to you by Elmer’s ProBond Advanced. All opinions are 100% mine.

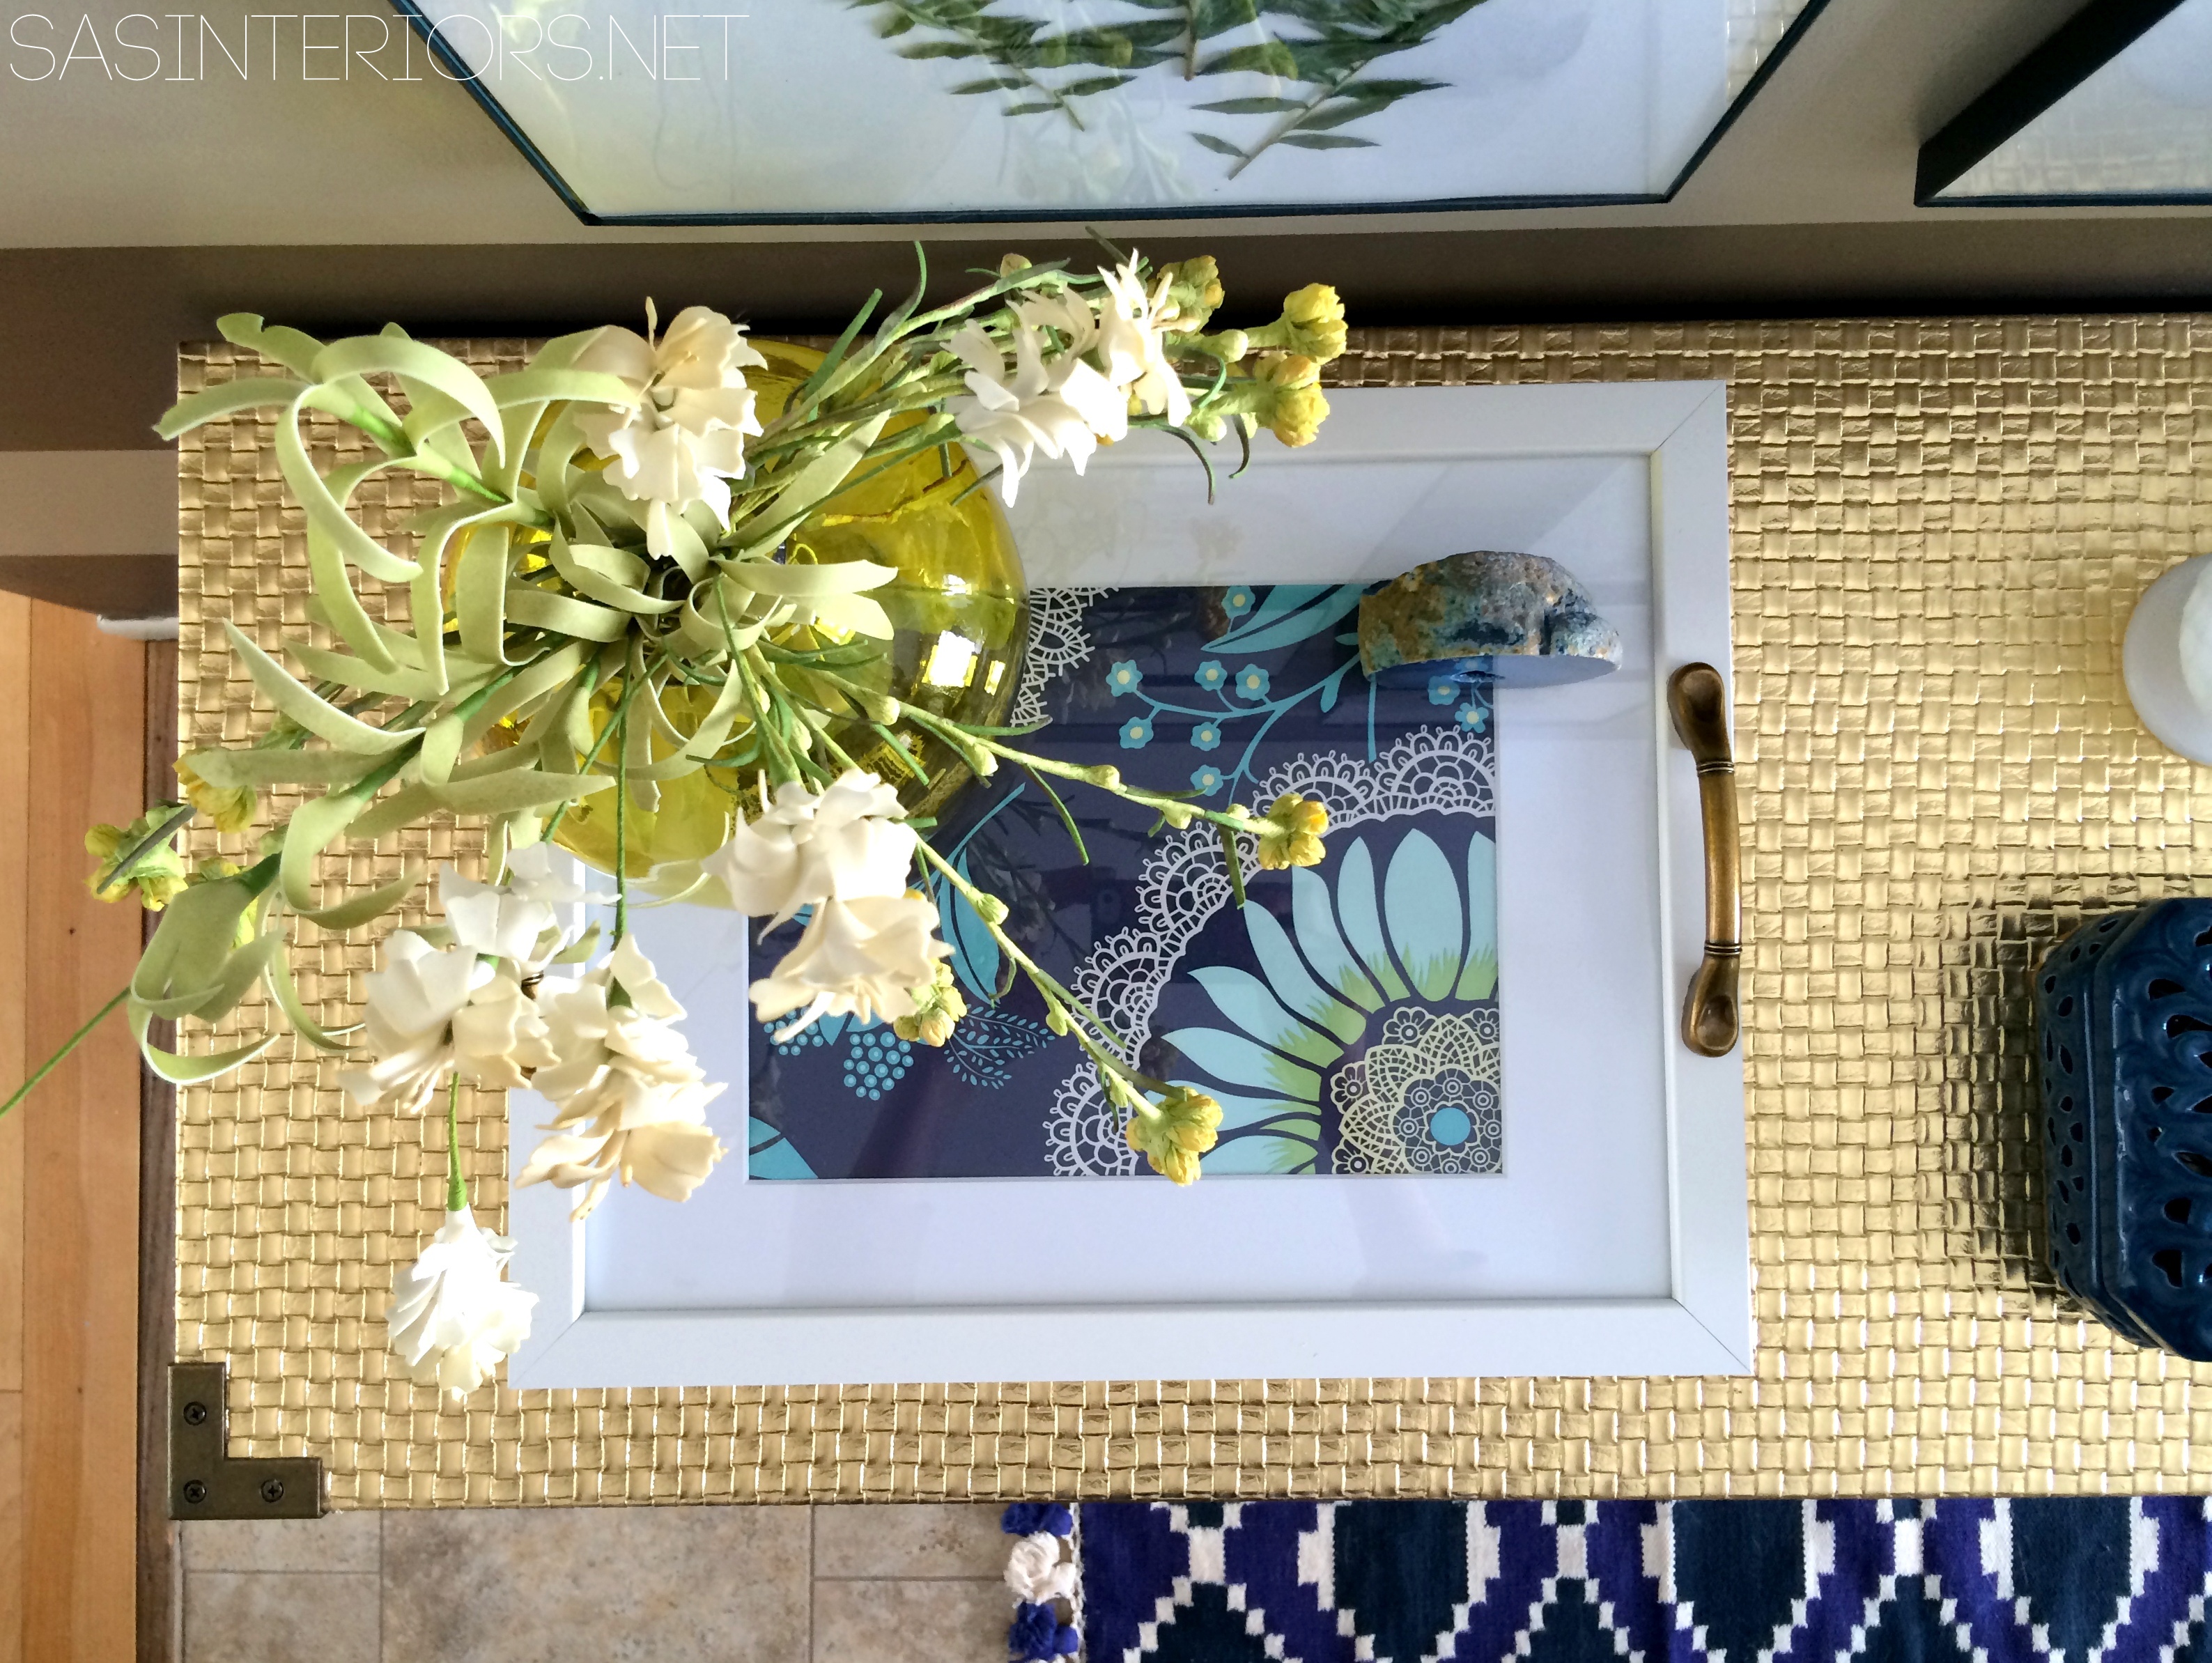
With the excitement of Spring finally here (our snow is almost all melted), I started spicing up the house with a few lighter + brighter elements.  The first area that I started with… The Foyer!  The entryway of the home is the perfect place to get the Spring time decor rolling.  Incorporating trays are a design-must in my book for styling tabletops + vignettes.  After clearing off the top of the gold dresser to start with a fresh palette, I knew I needed a new tray.   So I made one…

From Frame to Tray, check out my new Spring entry vignette. It’s simple, but fresh…

DIY: Frame Turned Tray; perfect for tabletop Spring vignette. So easy + affordable!

This frame turned tray took no time at all to create + the cost was much less than any trays I’ve recently seen or purchased in the past.  Plus, the beauty of it is, it’s customizable.  More on that in a minute…

For this project, these are the materials I used:

> Frame – I simple picture frame with a flat, simple edge is a must for the hardware to lay flat.  The size frame I chose fits an 11 x 14 picture

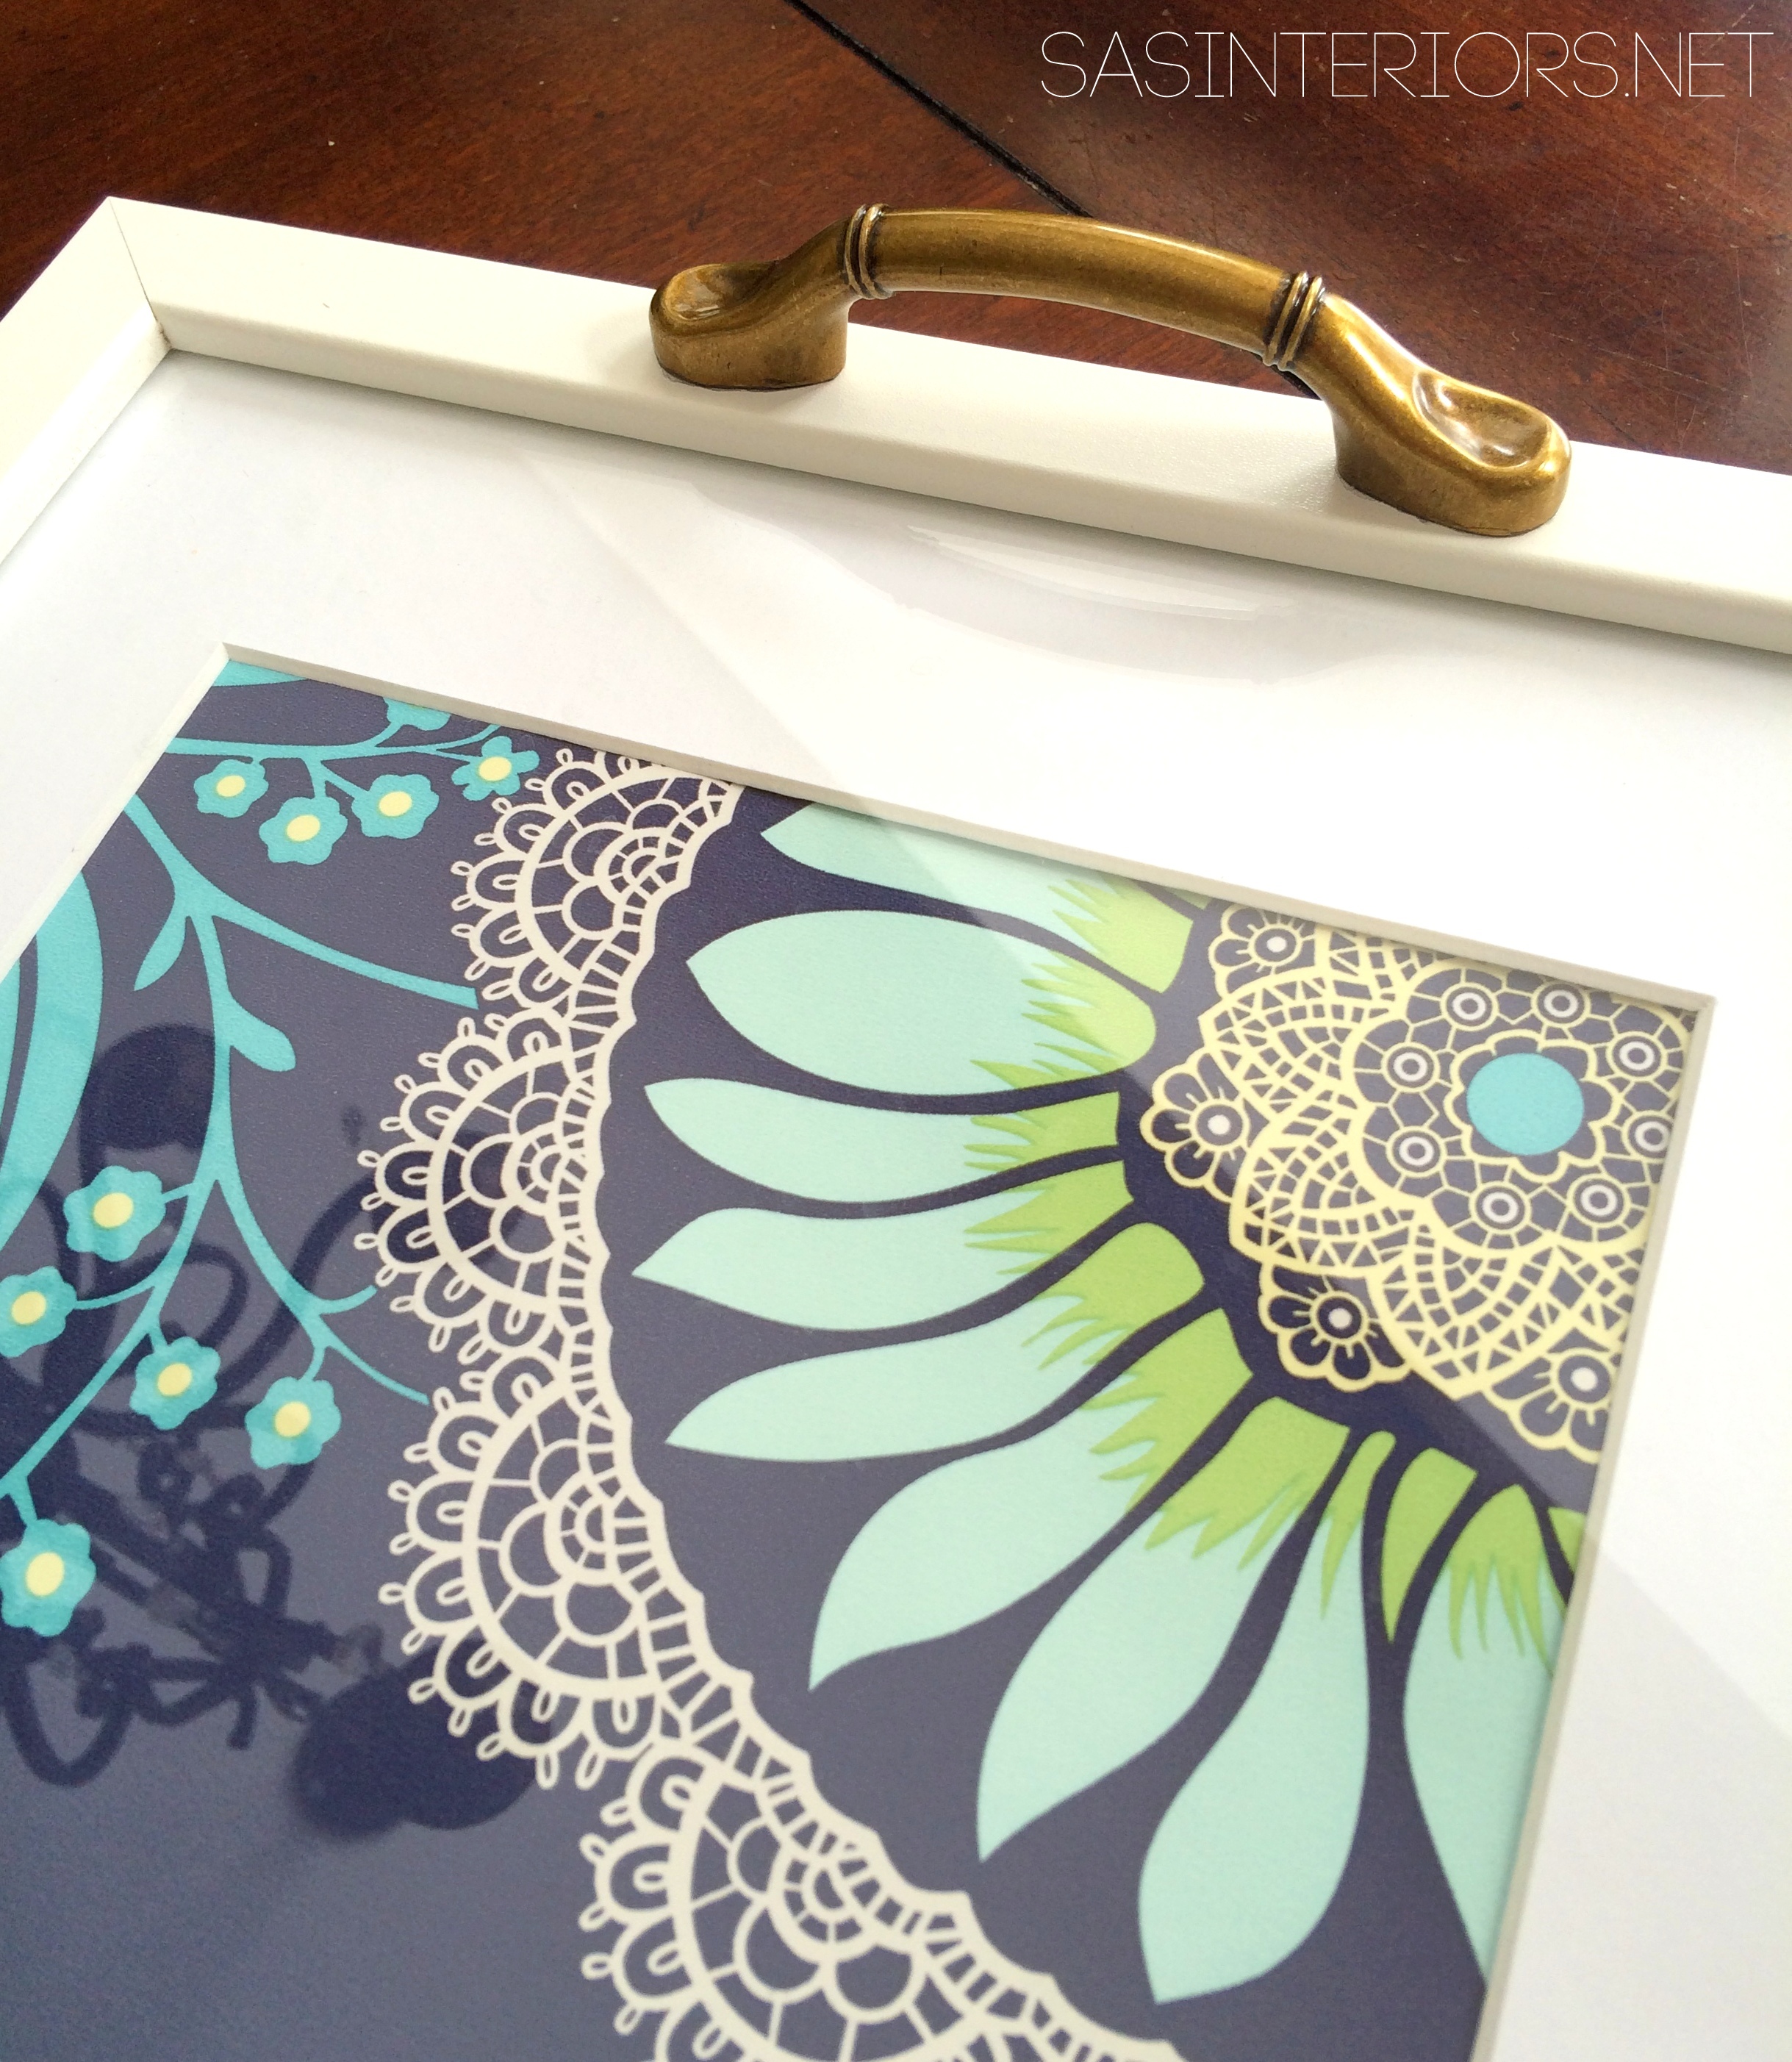
>Cabinet Pulls (for the kitchen or bath – I got these gold pulls from Lowe’s)

> Something special to display – I chose to use a piece of leftover wallpaper from my powder room, but try a family picture, kids artwork, or anything that is meaningful to you.

Last, but most important for this project is Elmer’s ProBond Advanced!

Materials needed to turn a frame into a tray!

This project literally took minutes to make.

Using the amazing formula, Elmer’s ProBond, which is magical when it comes to adhering a porous material with a non-porous material (Mixed Materials like wood to metal for this DIY project), I added the “glue” to the metal pull.DIY: Frame Turned Tray; perfect for tabletop Spring vignette. So easy + affordable!

DIY: Frame Turned Tray; perfect for tabletop Spring vignette. So easy + affordable!

Then I “eyed it” and placed the pull in the center of the frame surround.  Same with the second pull, and voila, the frame instantly became a tray. From vertical to horizontal…

DIY: Frame Turned Tray; perfect for tabletop Spring vignette. So easy + affordable!

The next step was the fun part, customizing the tray with leftover wallpaper scrap (from the powder room).

After figuring out what I wanted to see within the matting space, I cut a piece of wallpaper to size.


DIY: Frame Turned Tray; perfect for tabletop Spring vignette. So easy + affordable!

And the result…

DIY: Frame Turned Tray; perfect for tabletop Spring vignette. So easy + affordable!

With the Elmer’s ProBond Advanced there was no messy foam residue, as sometimes found with other glues.  Just as we’re used to the plain ole’ white Elmer’s glue (yup, the kind our kids use), the ProBond didn’t run at all.  Once I attached the pull to the frame, there was a little “seepage” that I simply used a paper towel to clean up around the edges.

Think about all the projects – big and small – you could tackle with this magical formula?!

DIY: Frame Turned Tray; perfect for tabletop Spring vignette. So easy + affordable!

DIY: Frame Turned Tray; perfect for tabletop Spring vignette. So easy + affordable!

Taking a step further, I created another Spring tabletop vignette using the Frames Wallpaper that I used in my boys room and shared a few weeks ago…

DIY: Frame Turned Tray; perfect for tabletop Spring vignette. So easy + affordable!

DIY: Frame Turned Tray; perfect for tabletop Spring vignette. So easy + affordable!

DIY: Frame Turned Tray; perfect for tabletop Spring vignette. So easy + affordable!

And there it is.  A 10-minute DIY creation using a magic formula like no other!

Be sure to check back next week for the result of another DIY project I am working on.  It involves the Elmer’s ProBond Advanced again, but on a larger scale project.  Like I said, for big or small, this glue is awesome.

Visit Sponsor's Site