


Bathroom Makeover: Tiled Niche {Day 19 + 20}
The last few weeks have been a whirlwind with decking the halls and preparing for the Christmas season, resulting in the bathroom makeover being put on the backburner. BUT, progress is still being made and it is almost complete – YAY!
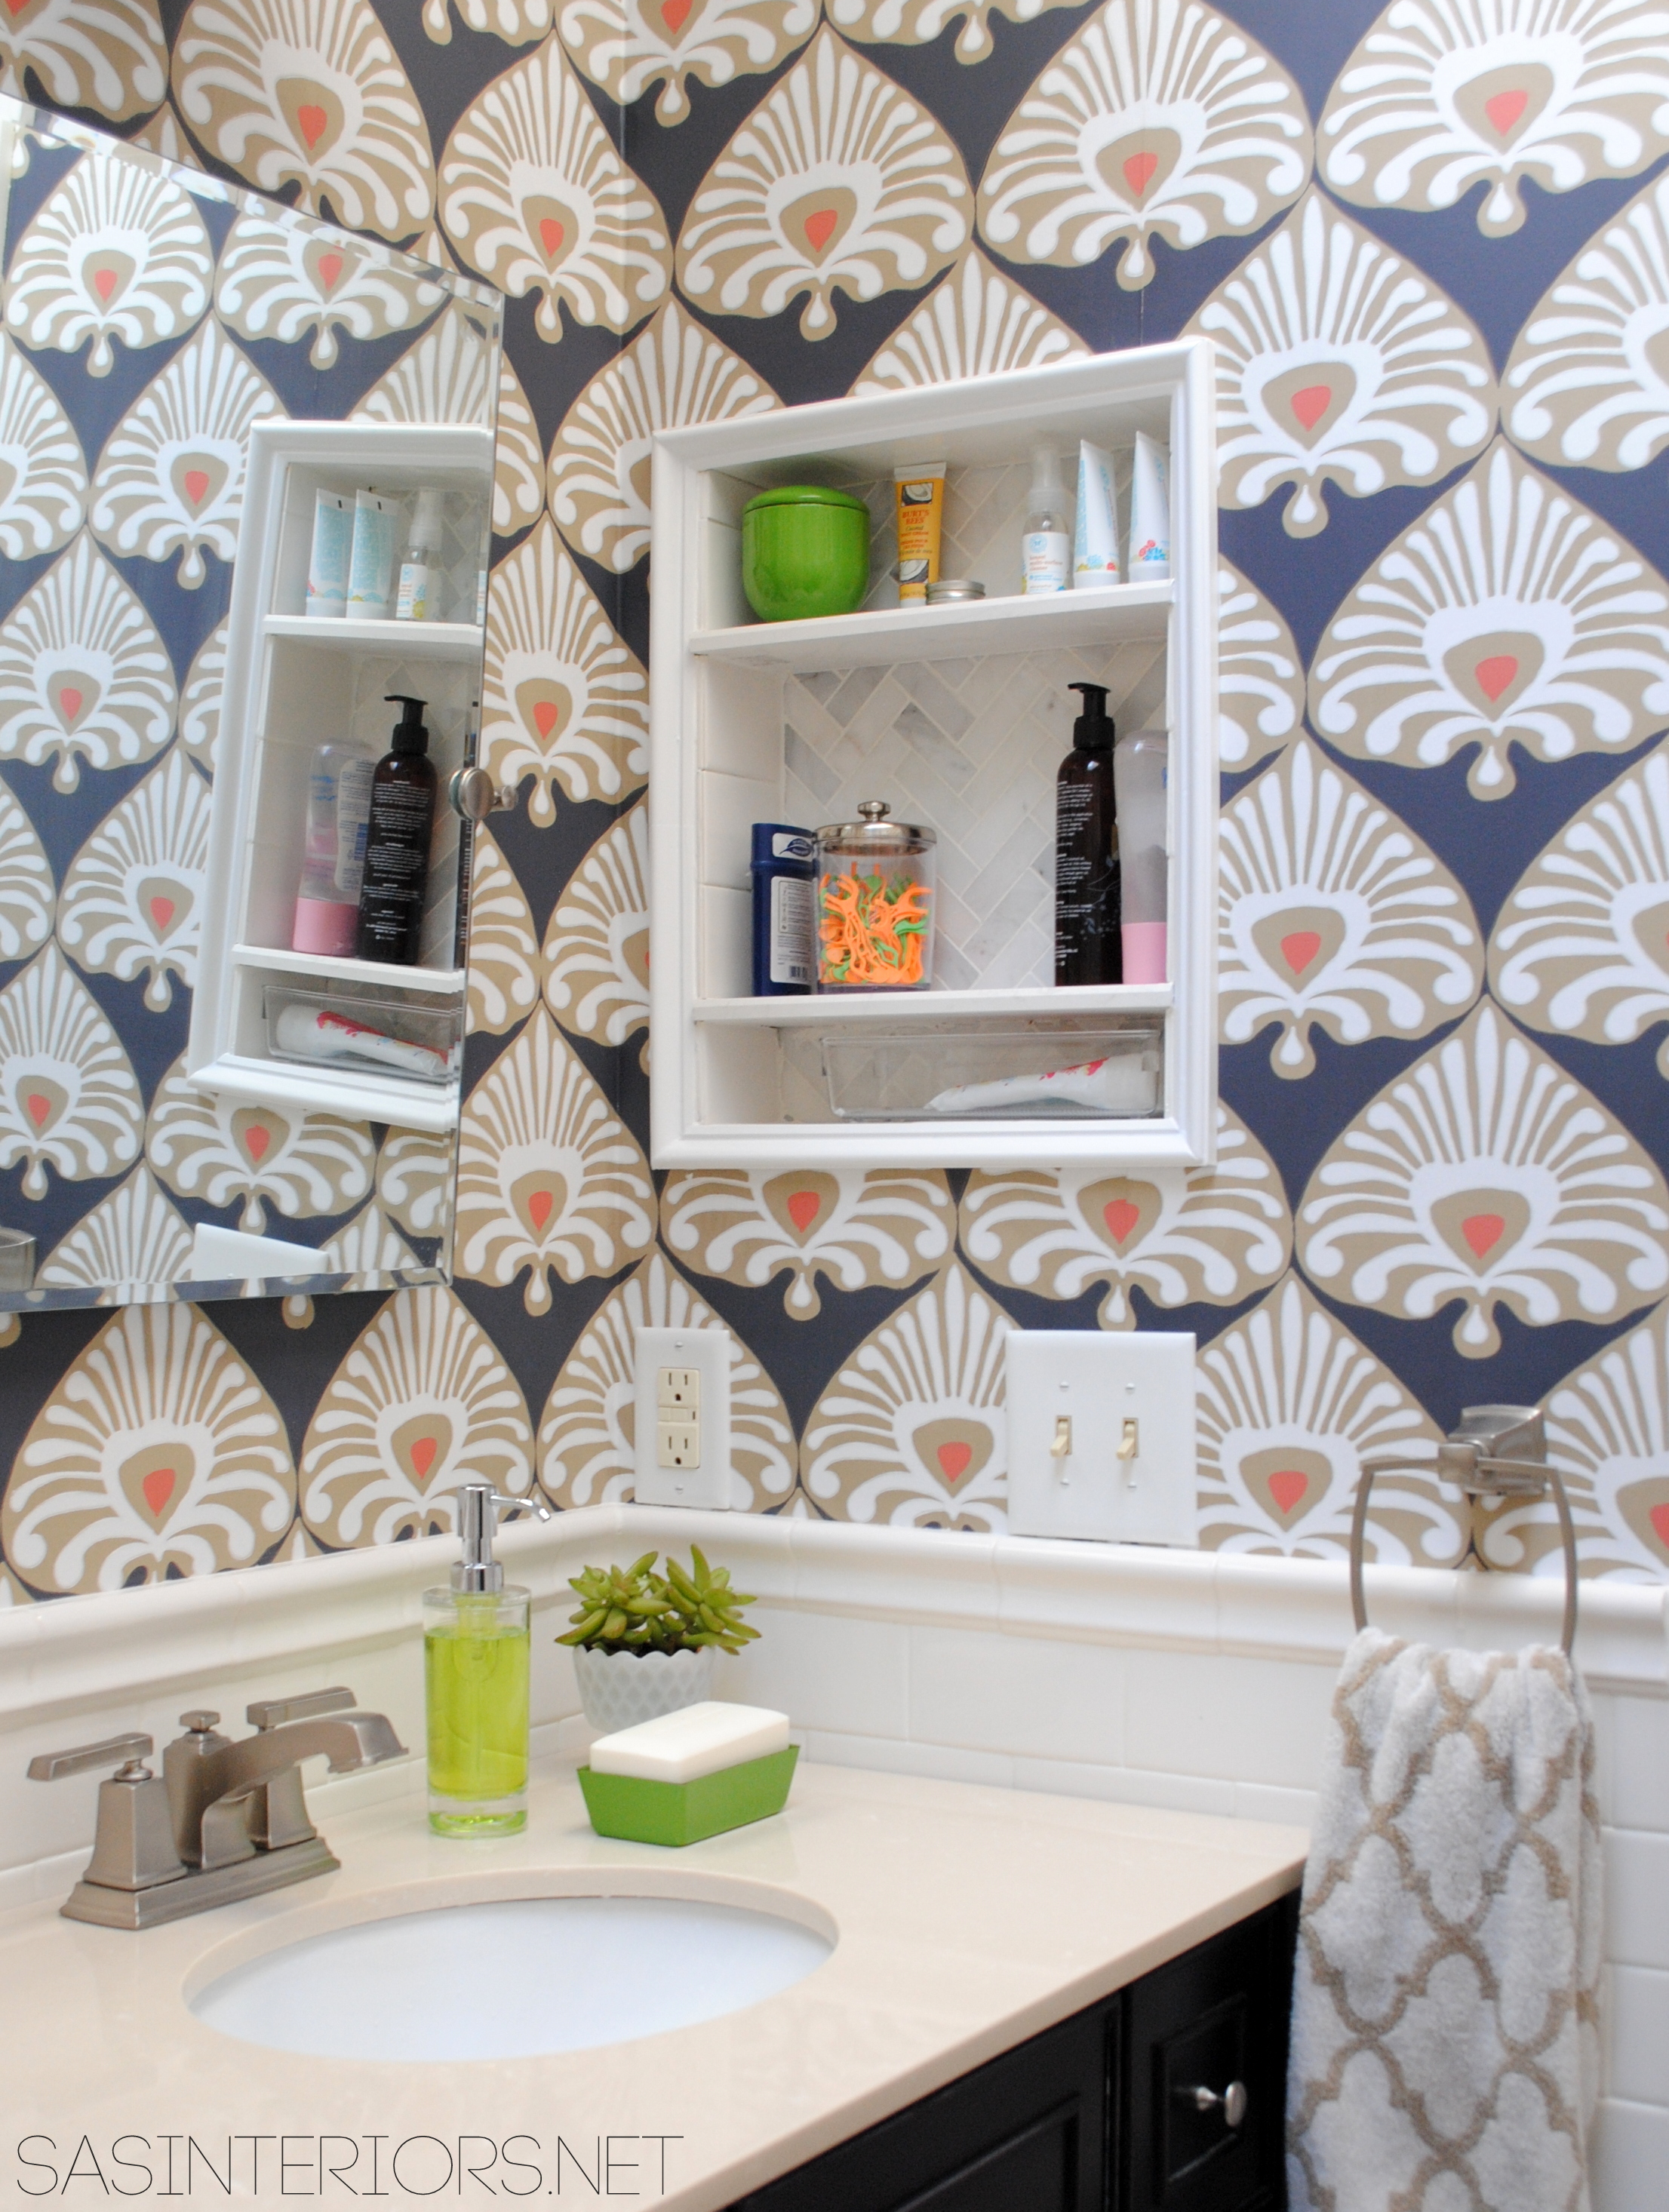
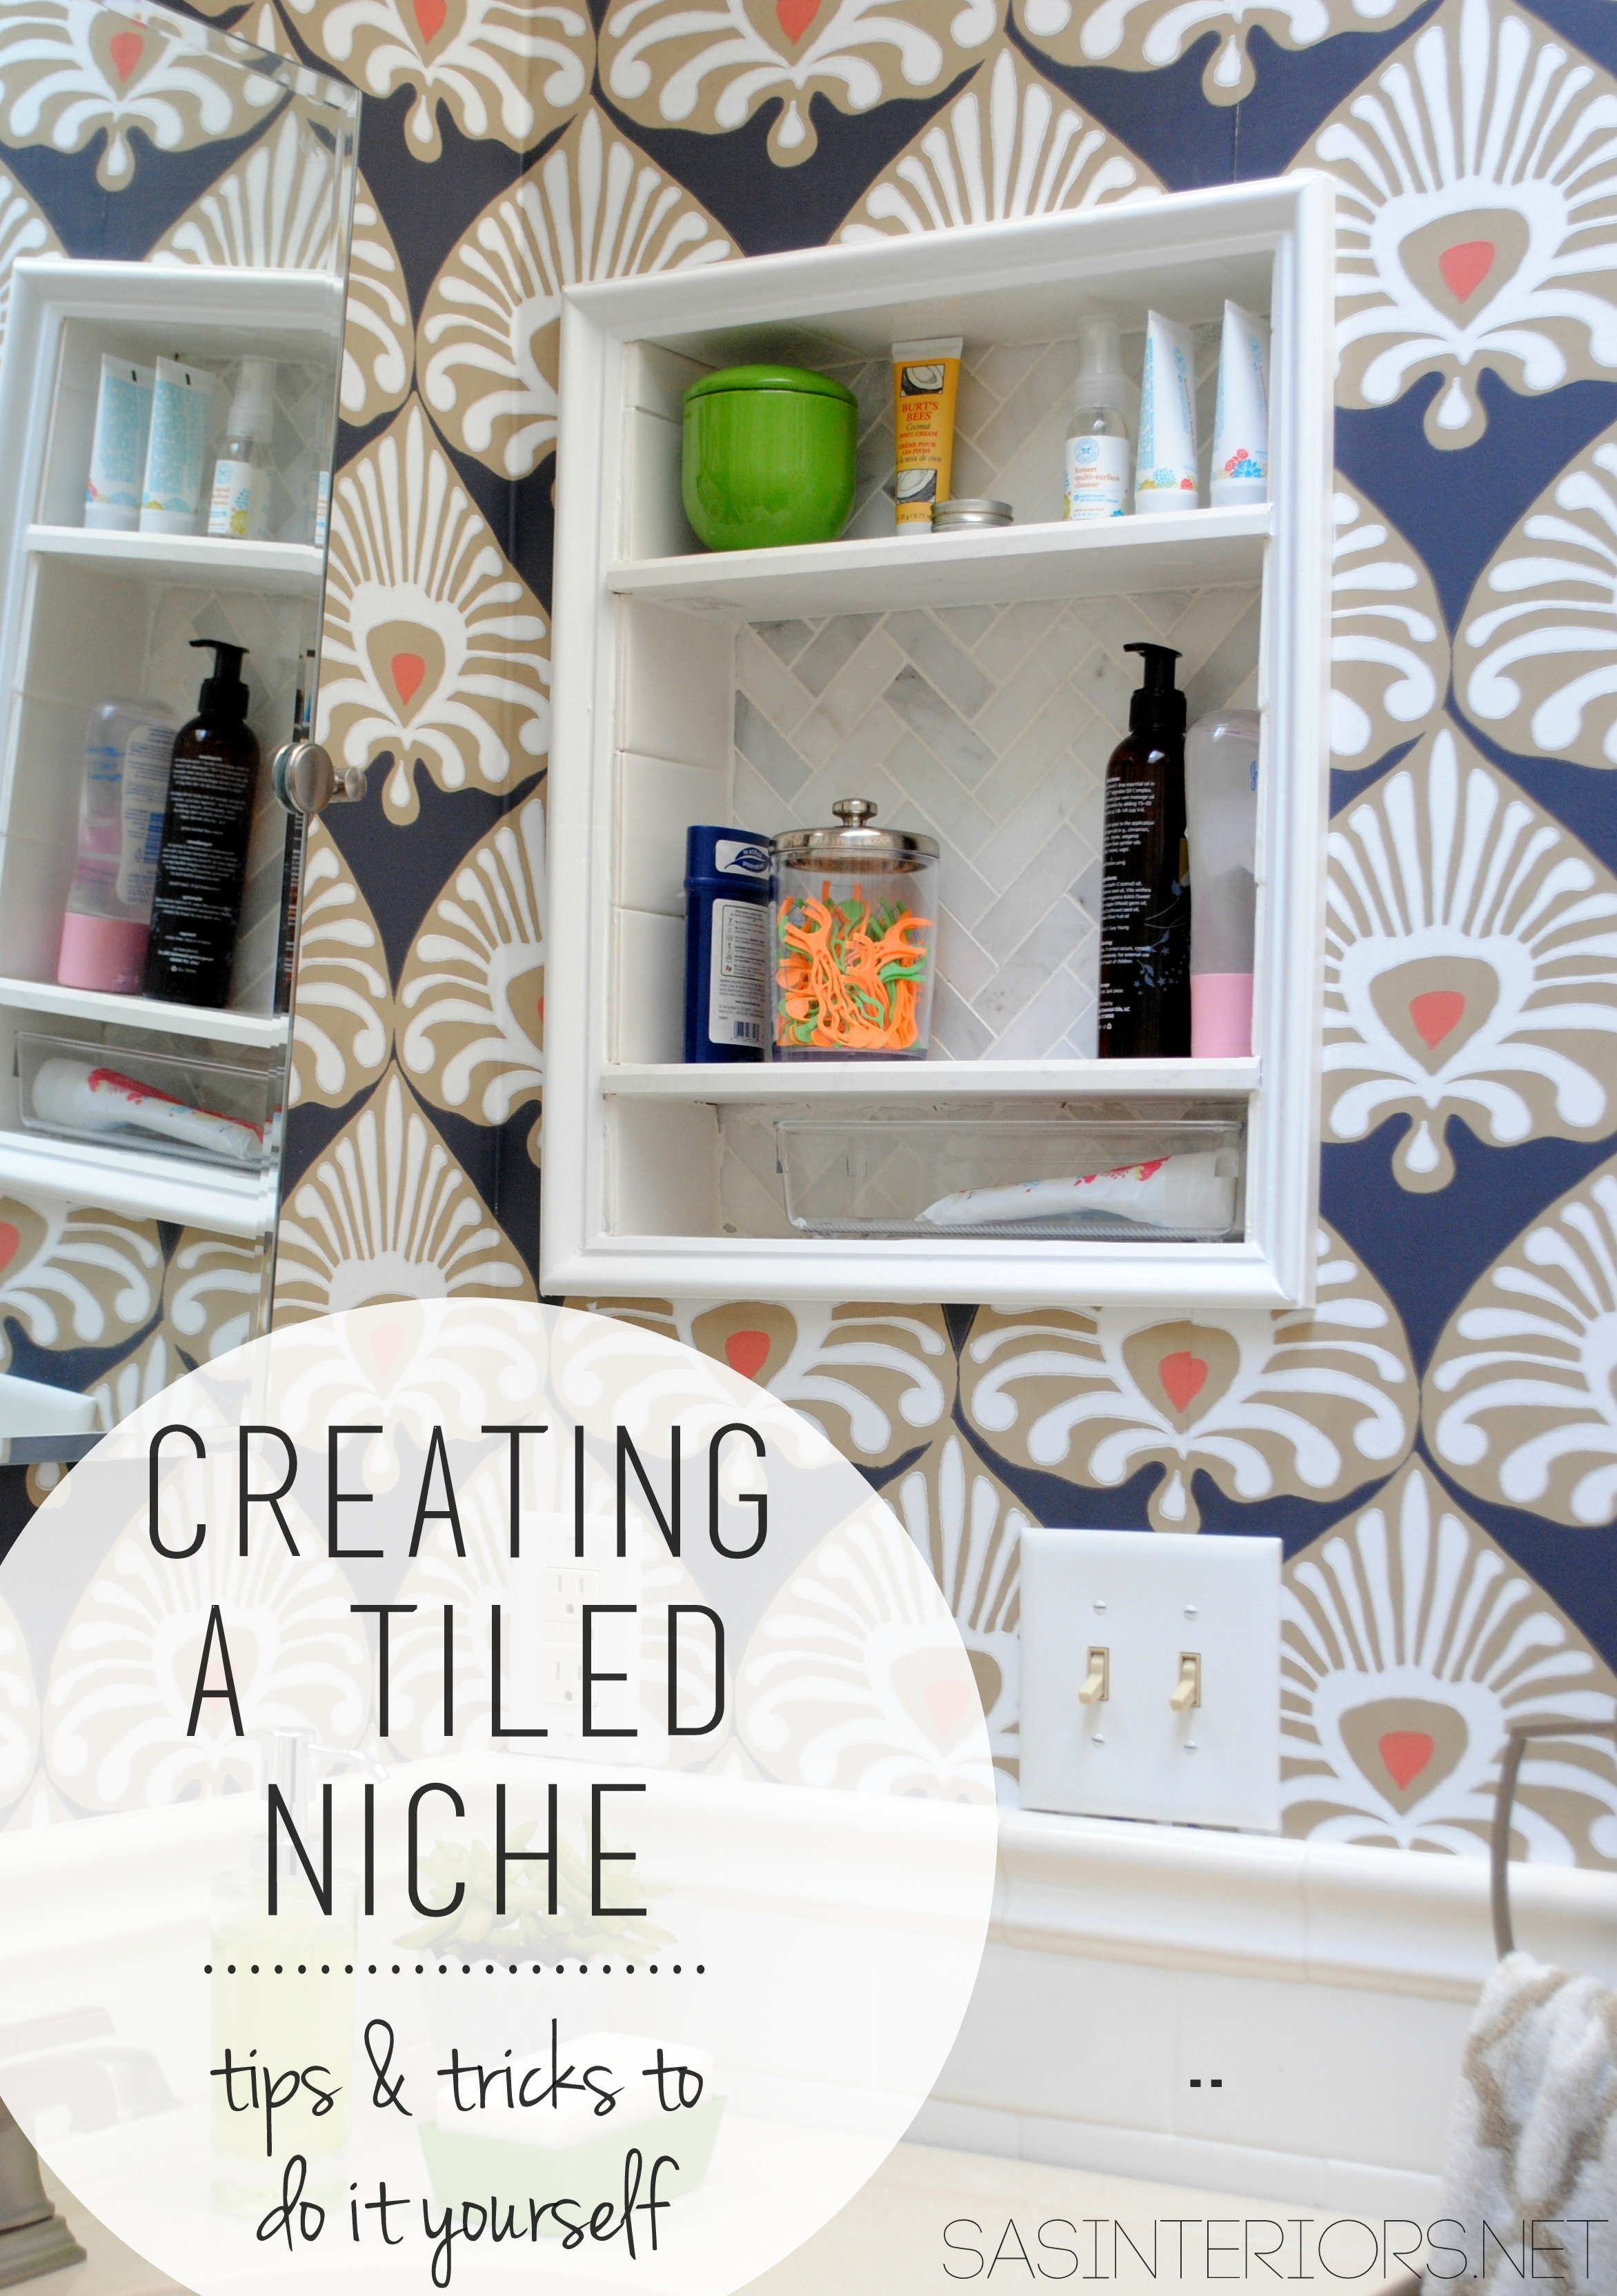
I can officially say, the walls are complete. Last I shared, I had finished the install of the wallpaper & the tile accent border. It’s Day 19 & 20 of this Bathroom Makeover in 30 Days Challenge and it’s focused on creating a tiled niche near the vanity. Here is the result…

Before this niche was created, there was a medicine cabinet in this space. This is how it looked when we moved into our home about 5 years ago…

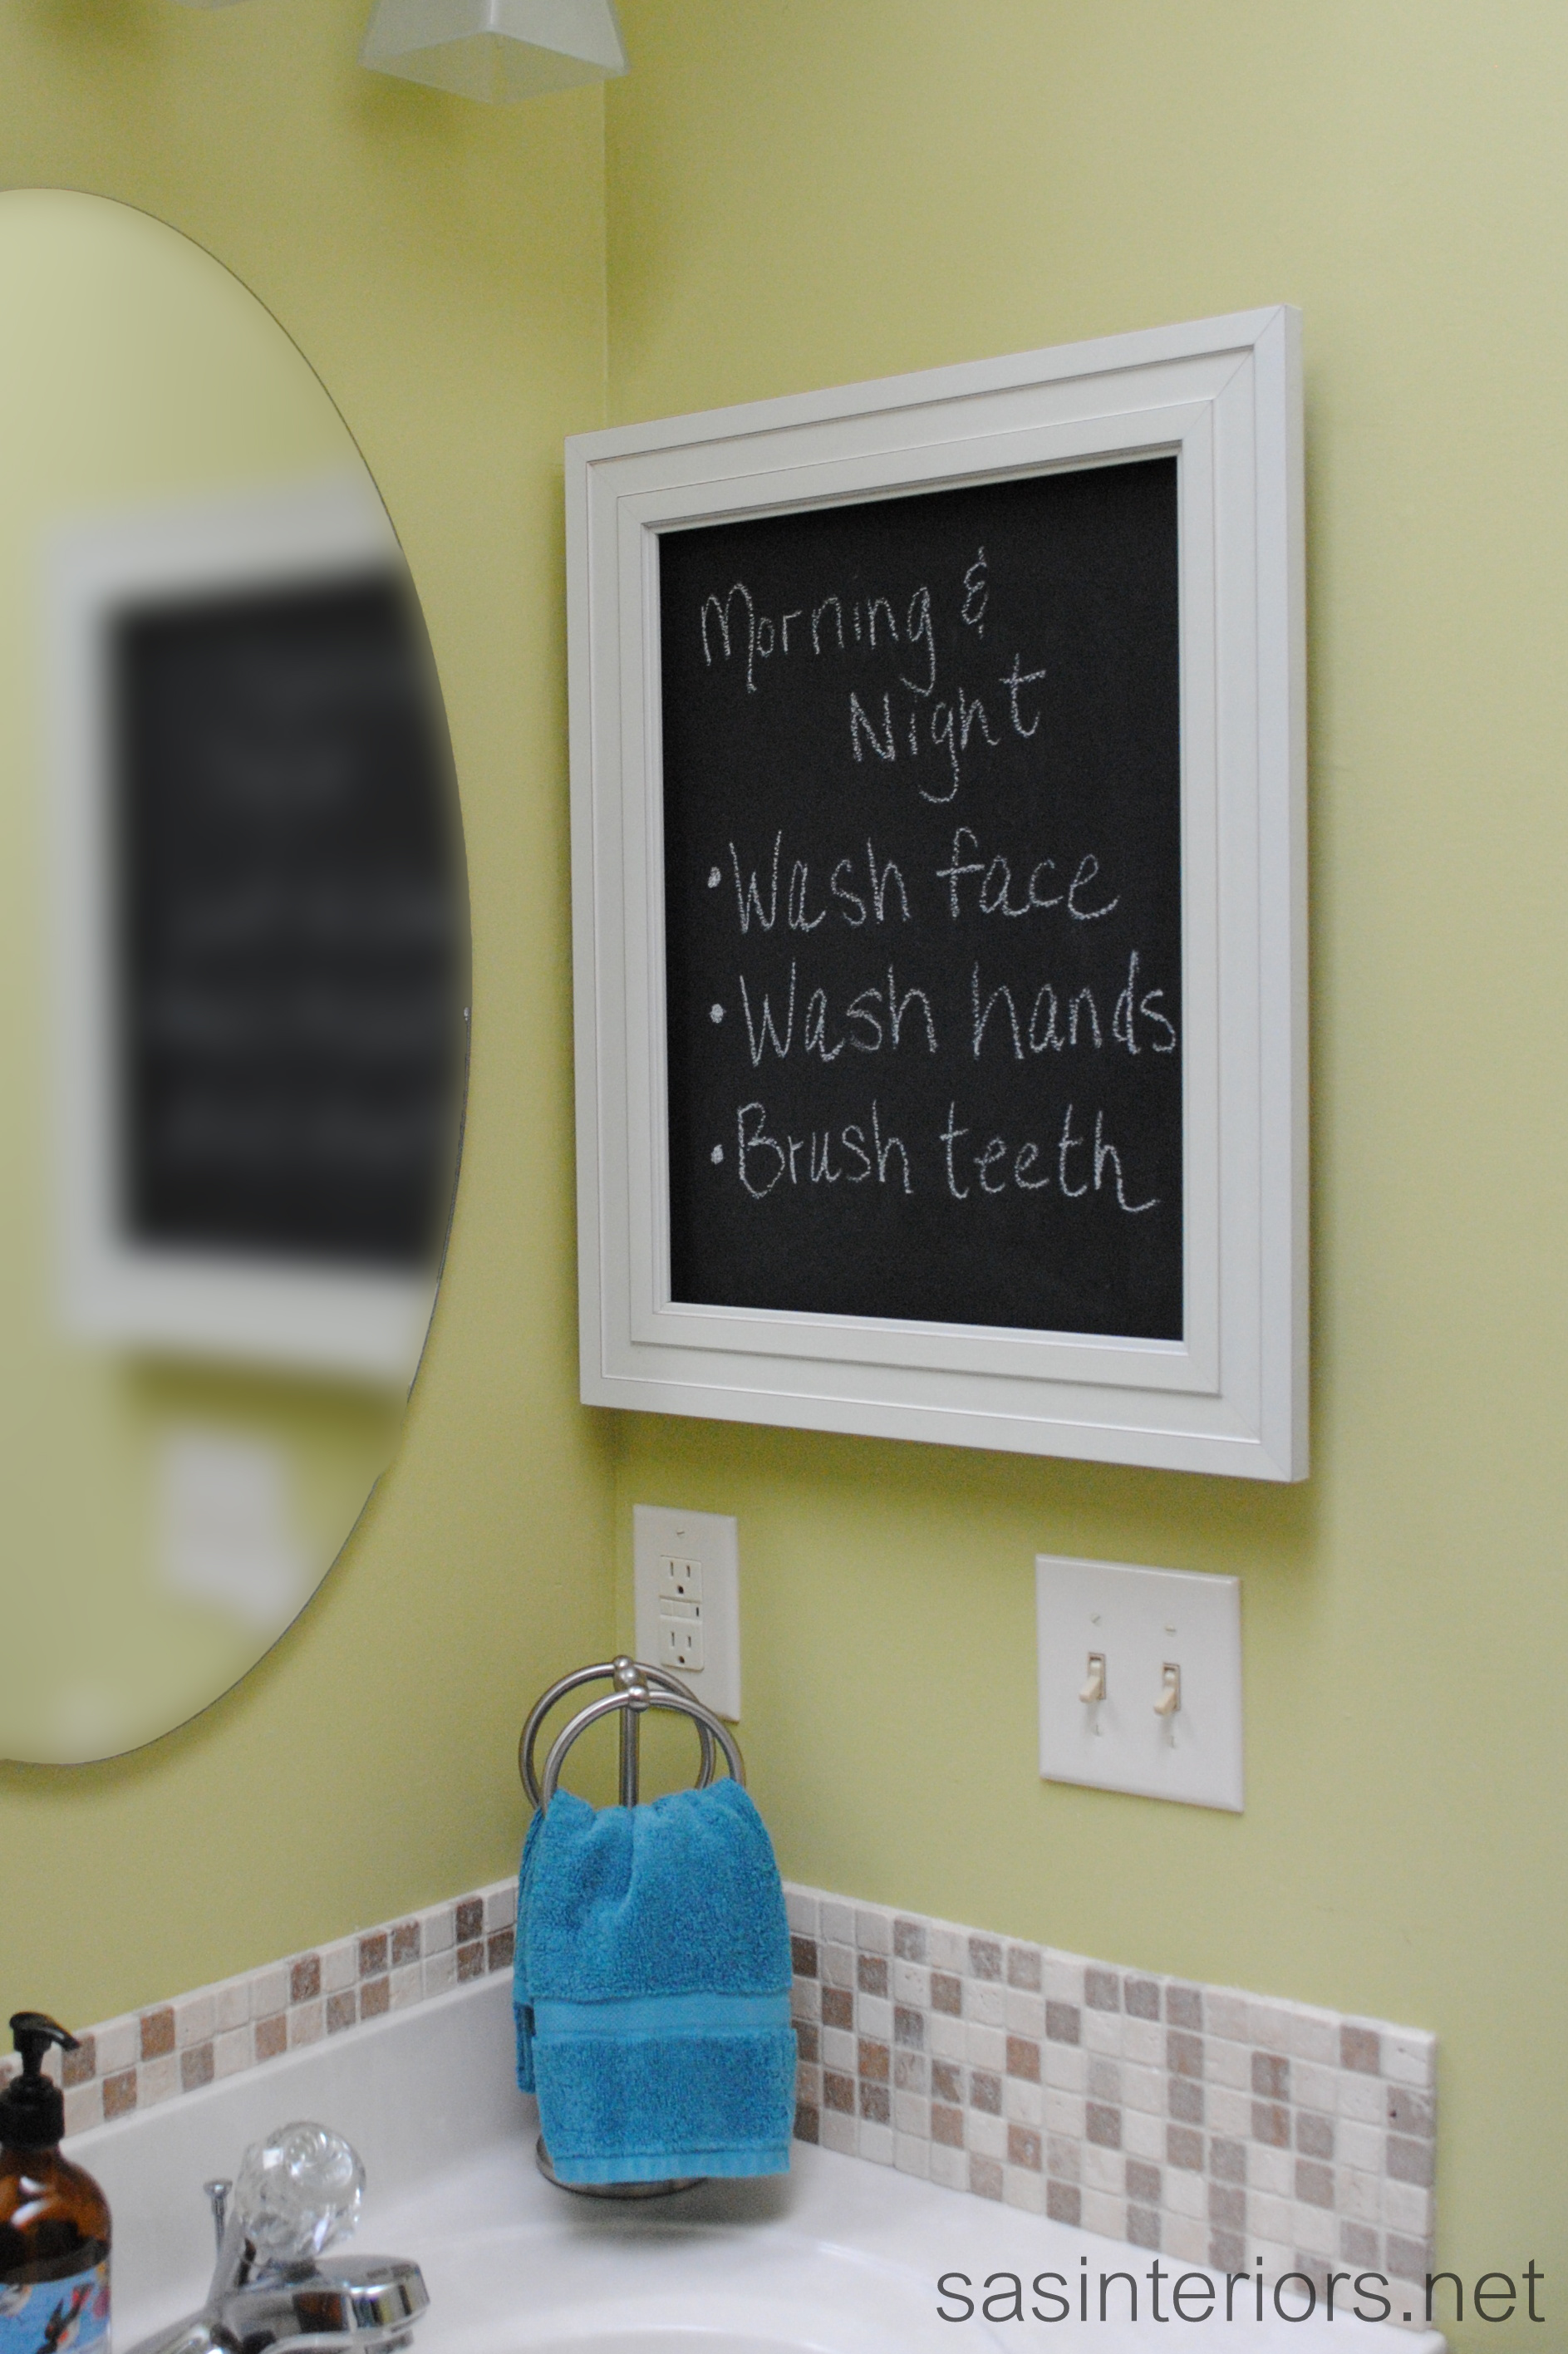
Then about 3 years ago when I gave this bathroom a refresh, I painted the glass of the medicine cabinet with chalkboard paint and added a frame…
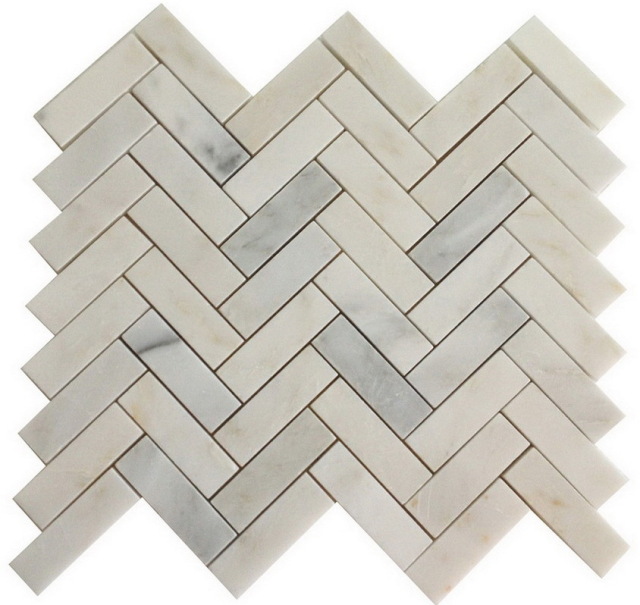
While creating the plan of action for this bathroom makeover, I had the idea of removing the medicine cabinet to create a niche – the perfect small storage solution. Since I already had the natural stone herringbone tile planned for the shower, I thought the niche would be another ideal spot for it. Unexpected & a great tie-in.
During the demo phase of the bathroom, I removed the medicine cabinet from the wall by unscrewing a few screws. It was much easier than I thought it’d be. In the end I was left with a sheetrocked cavity.
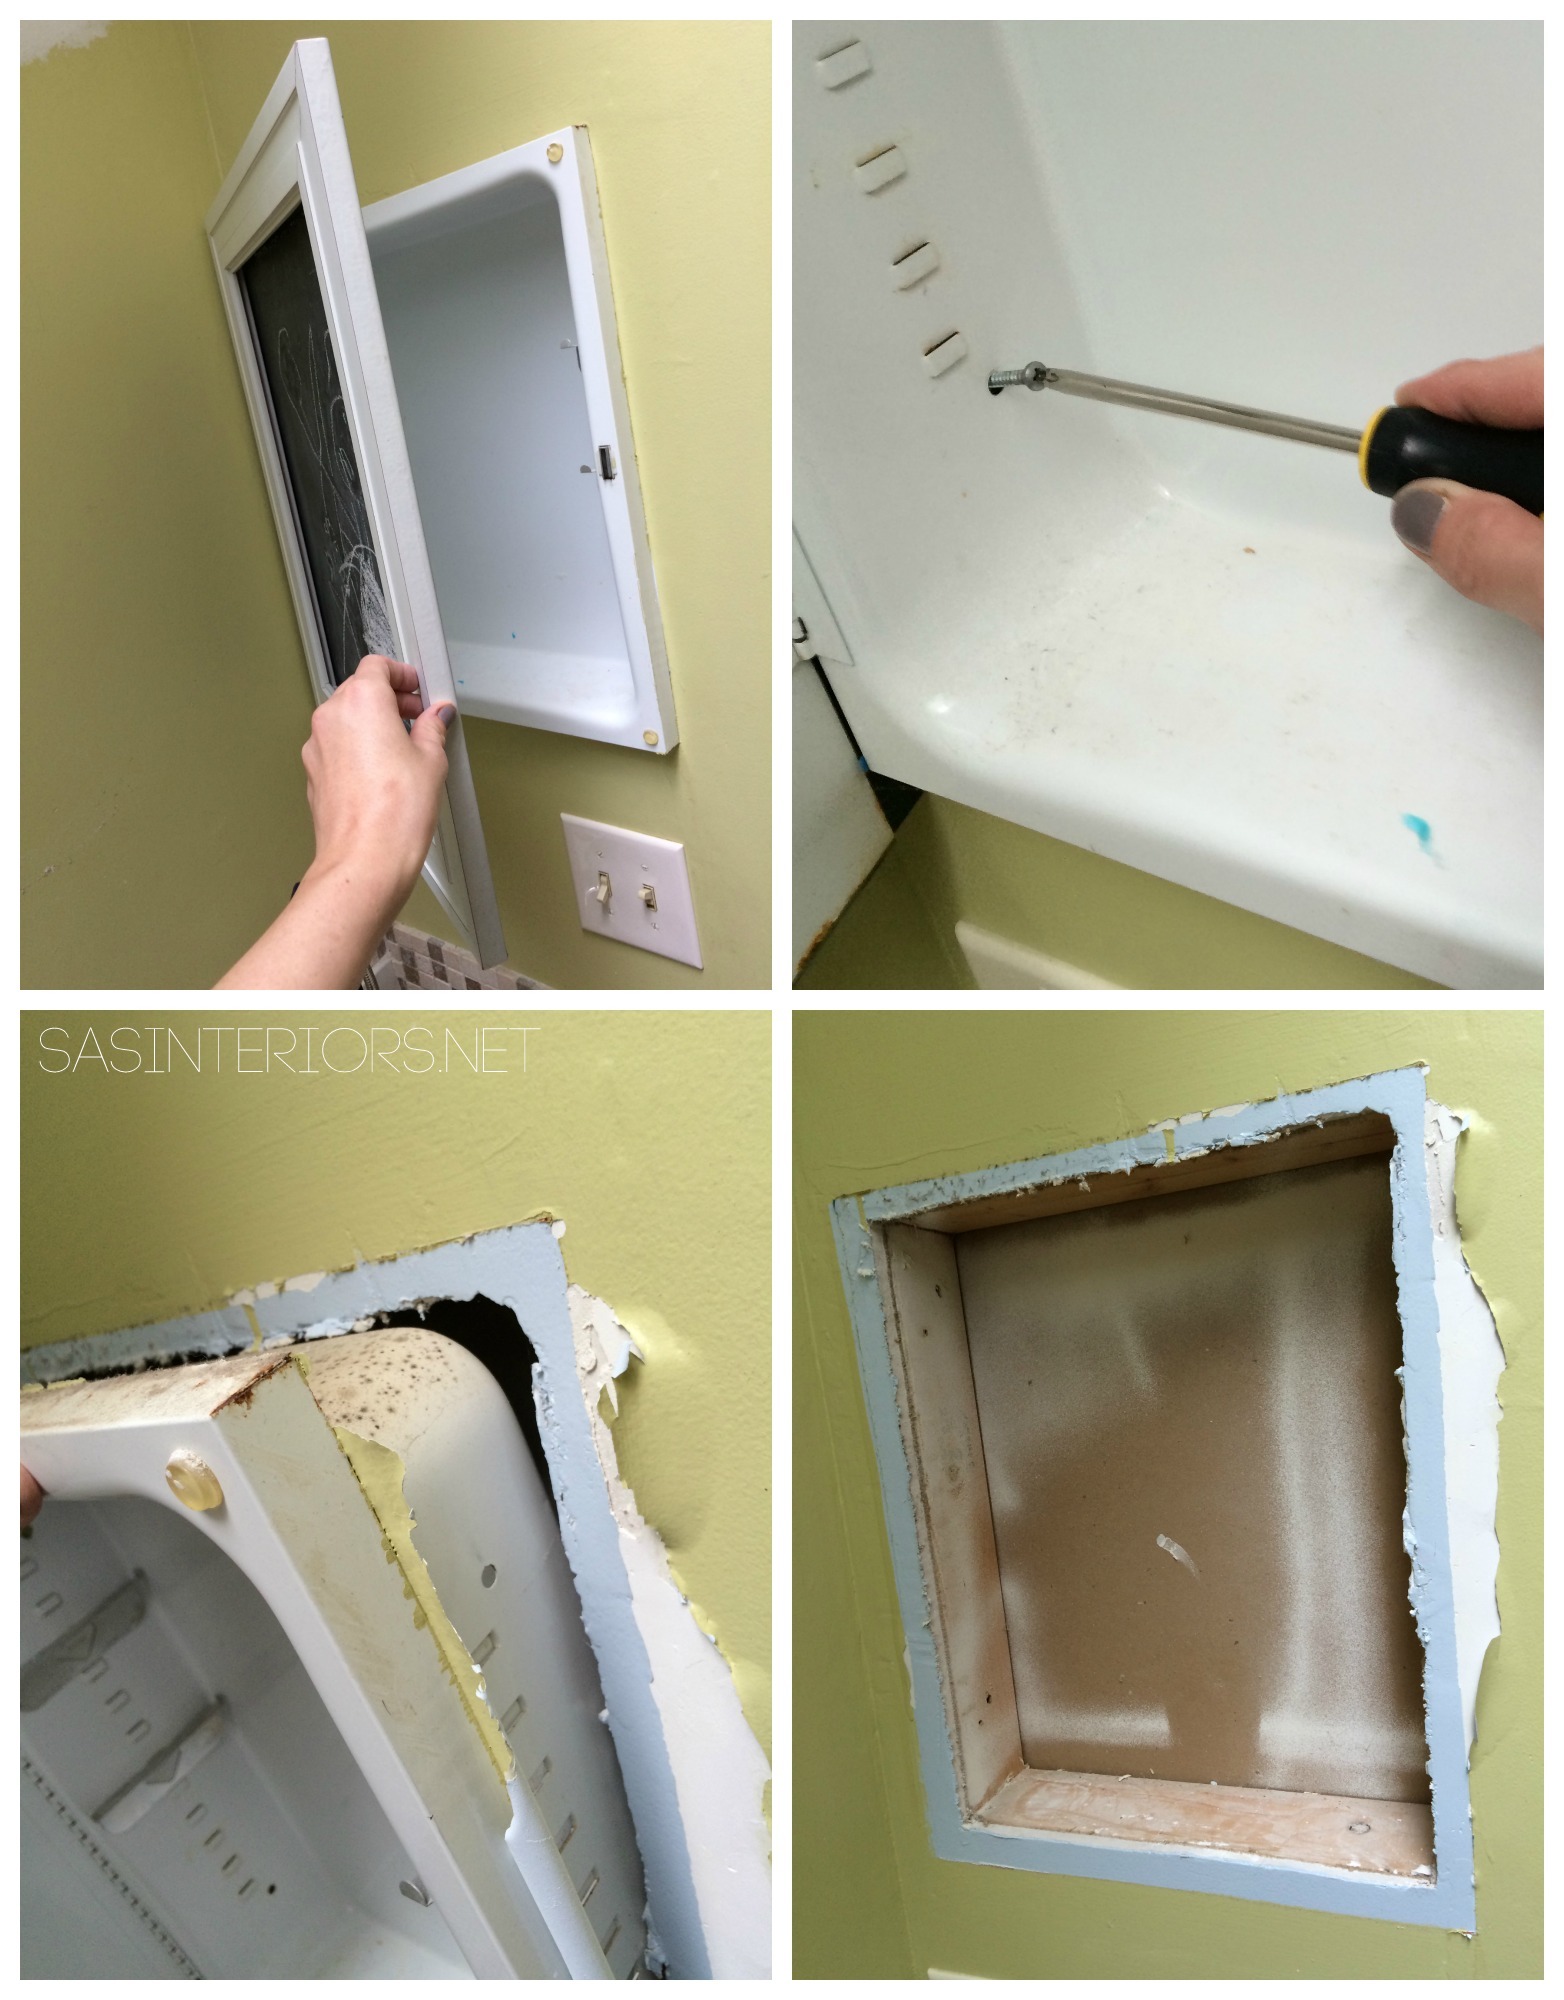
I wasn’t expecting “the hole” to be sheetrocked and was originally planning on needing to create a box to fit in the hole. Upon removing the cabinet and discovering this, I was pleasantly surprised. I was able to install the tile directly on the sheetrock that was already in place.
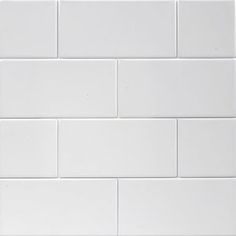
To create the tiled storage niche, I used the beautiful 13″ x 13″ natural stone herringbone mosaic and the 3 x 6 white subway tile that I found at Lowe’s.
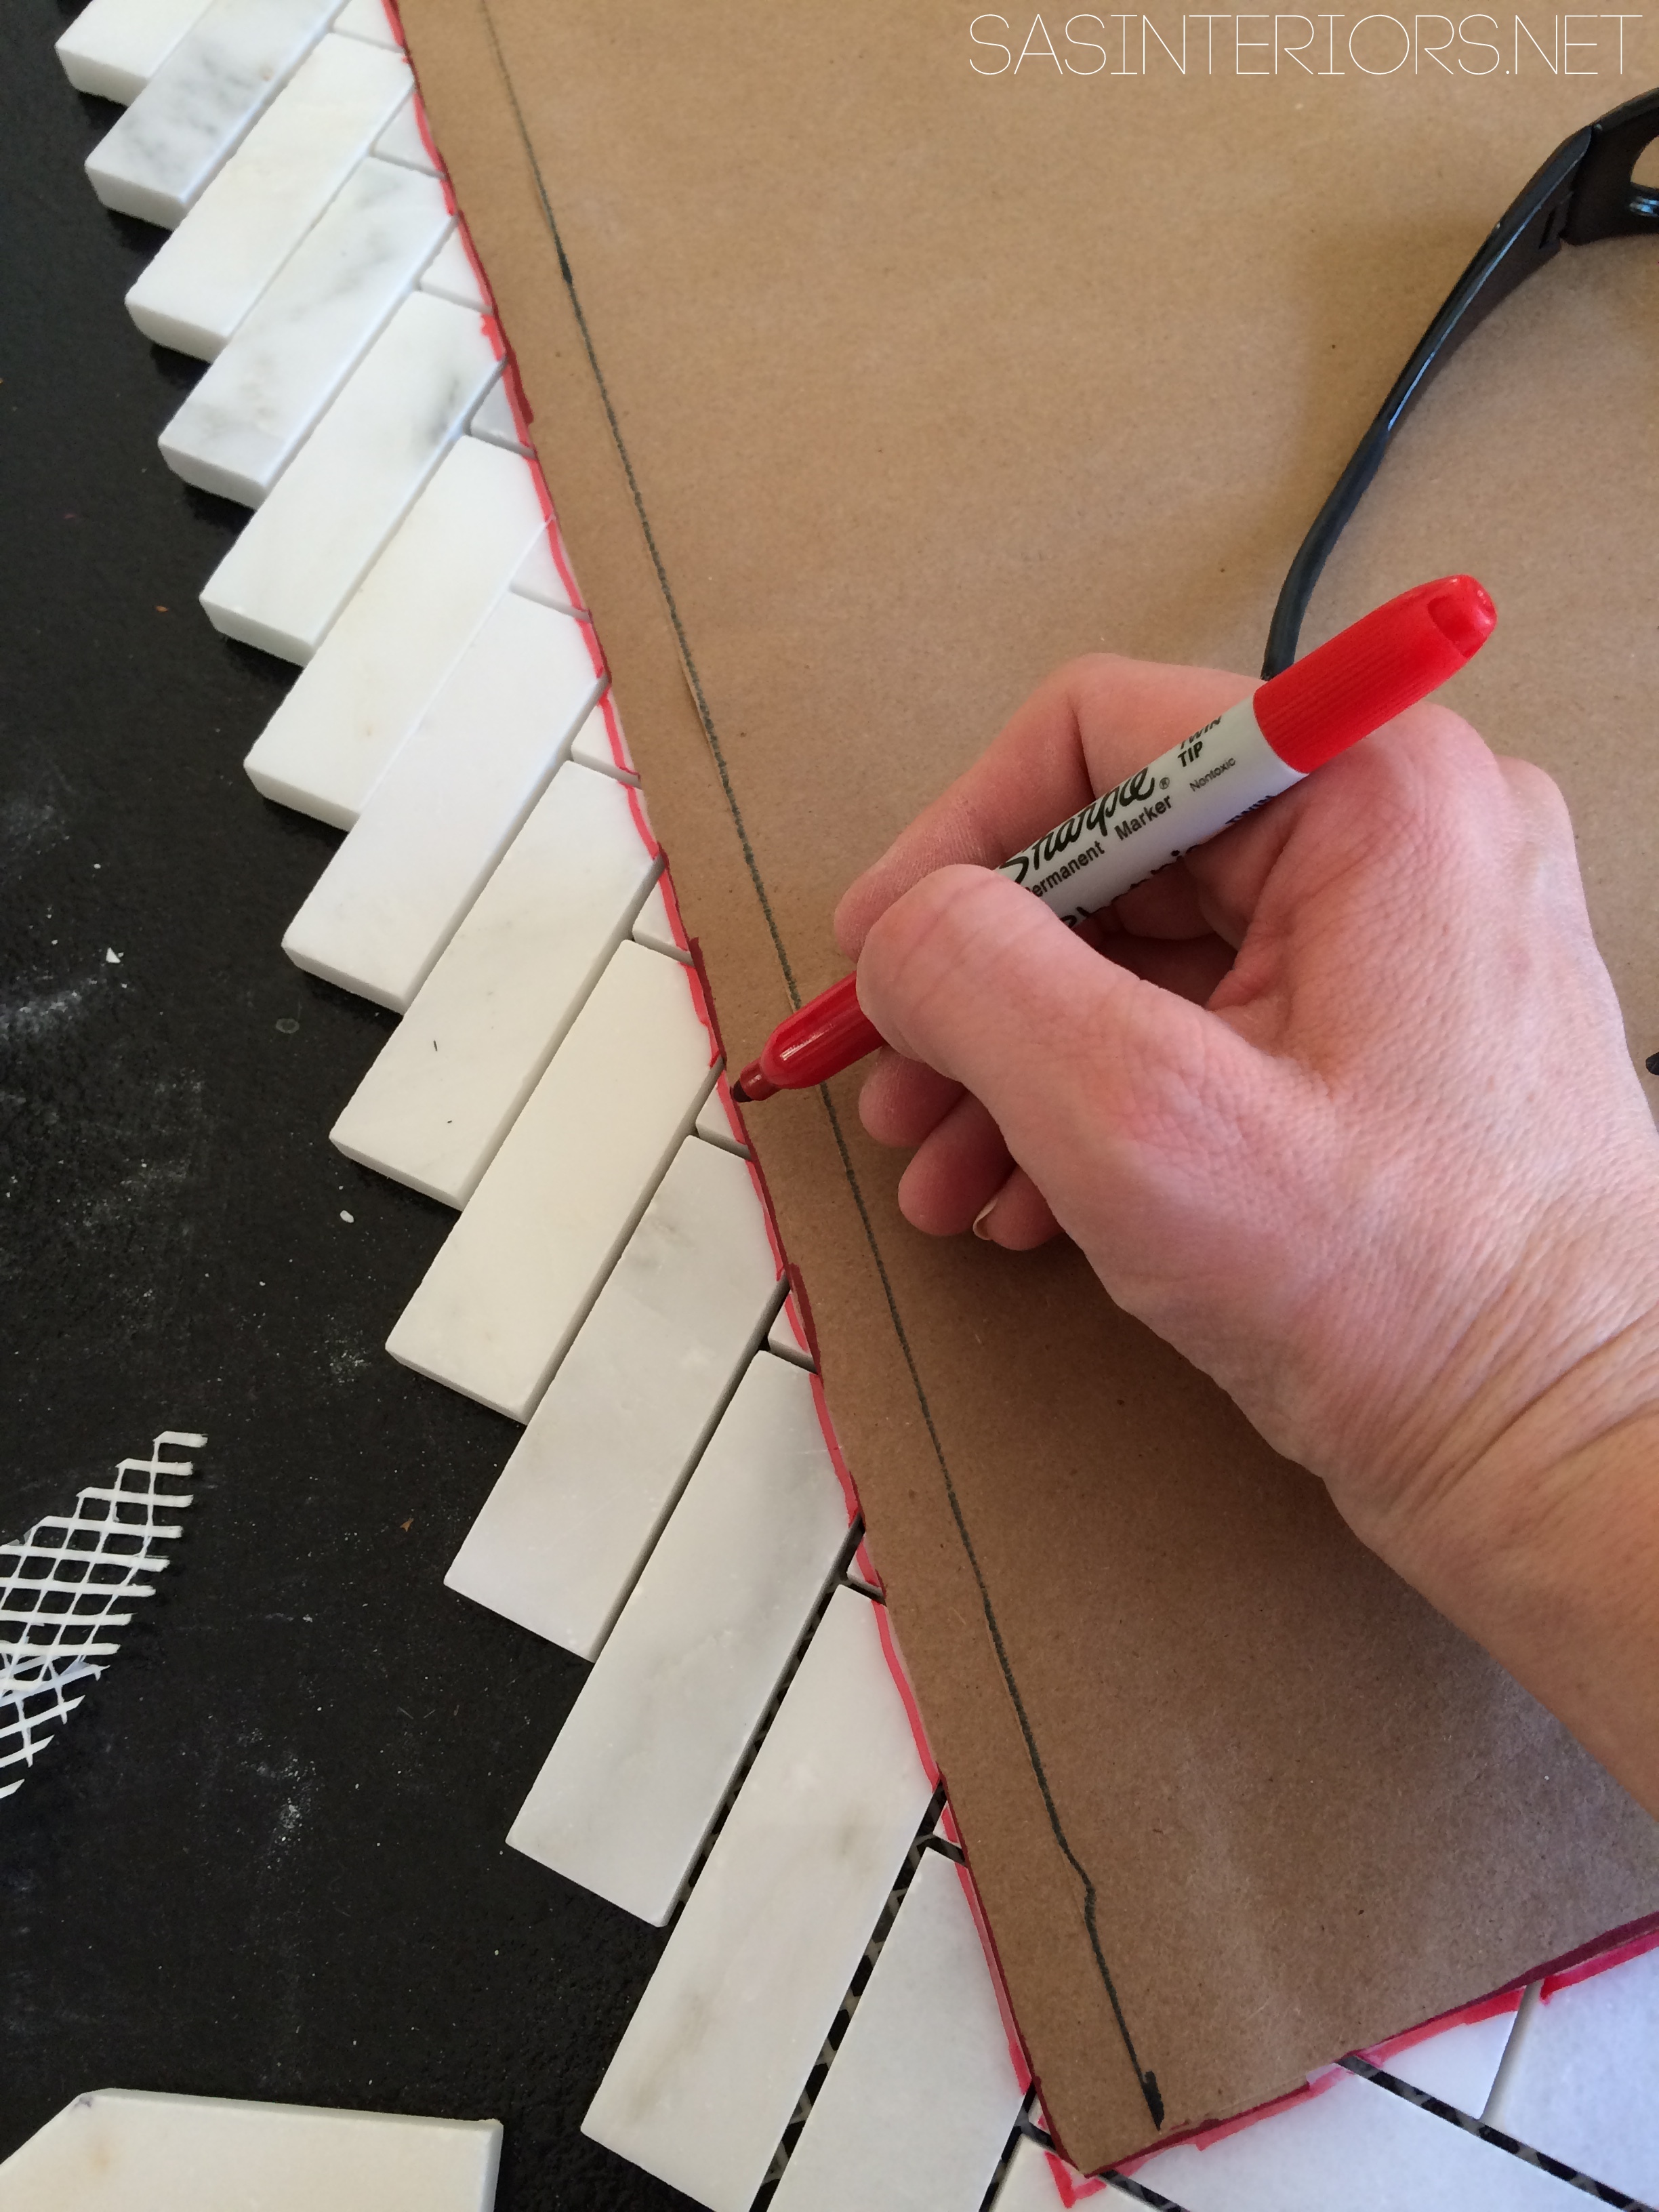
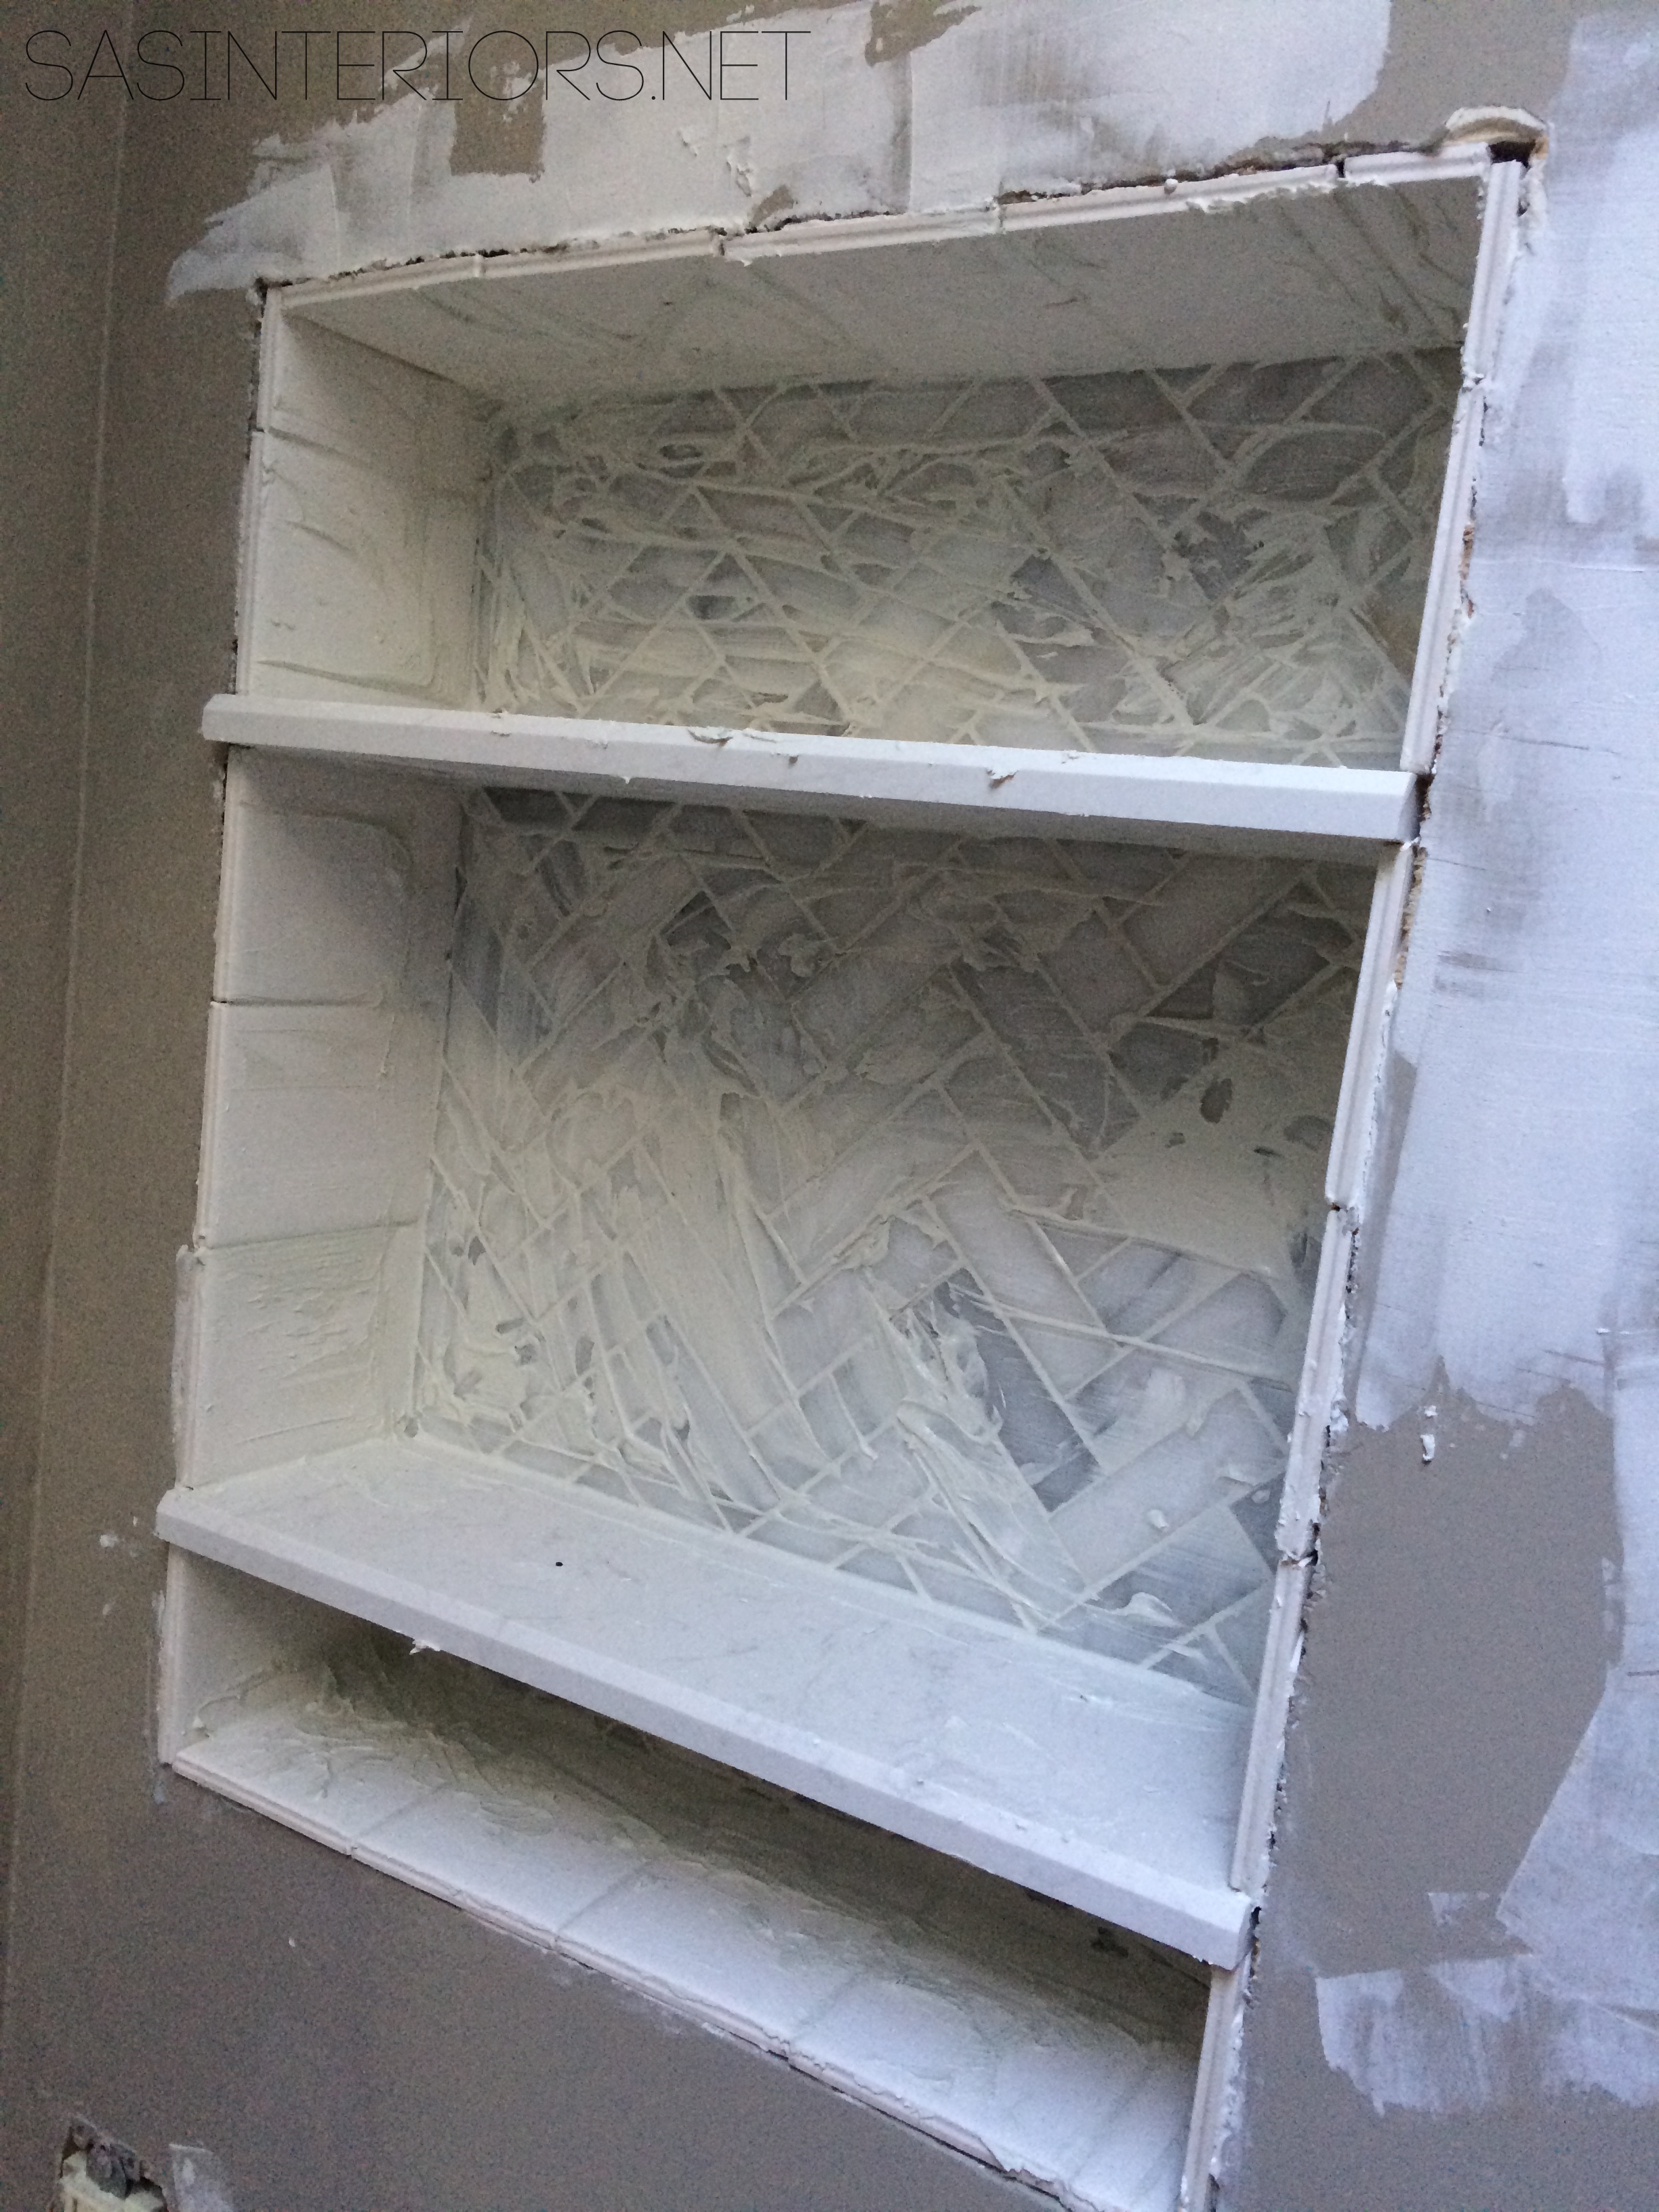
1. To start, I created a template of the back surface of the niche using craft paper. Then I layed it on the herringbone tile and traced the outline using a marker.
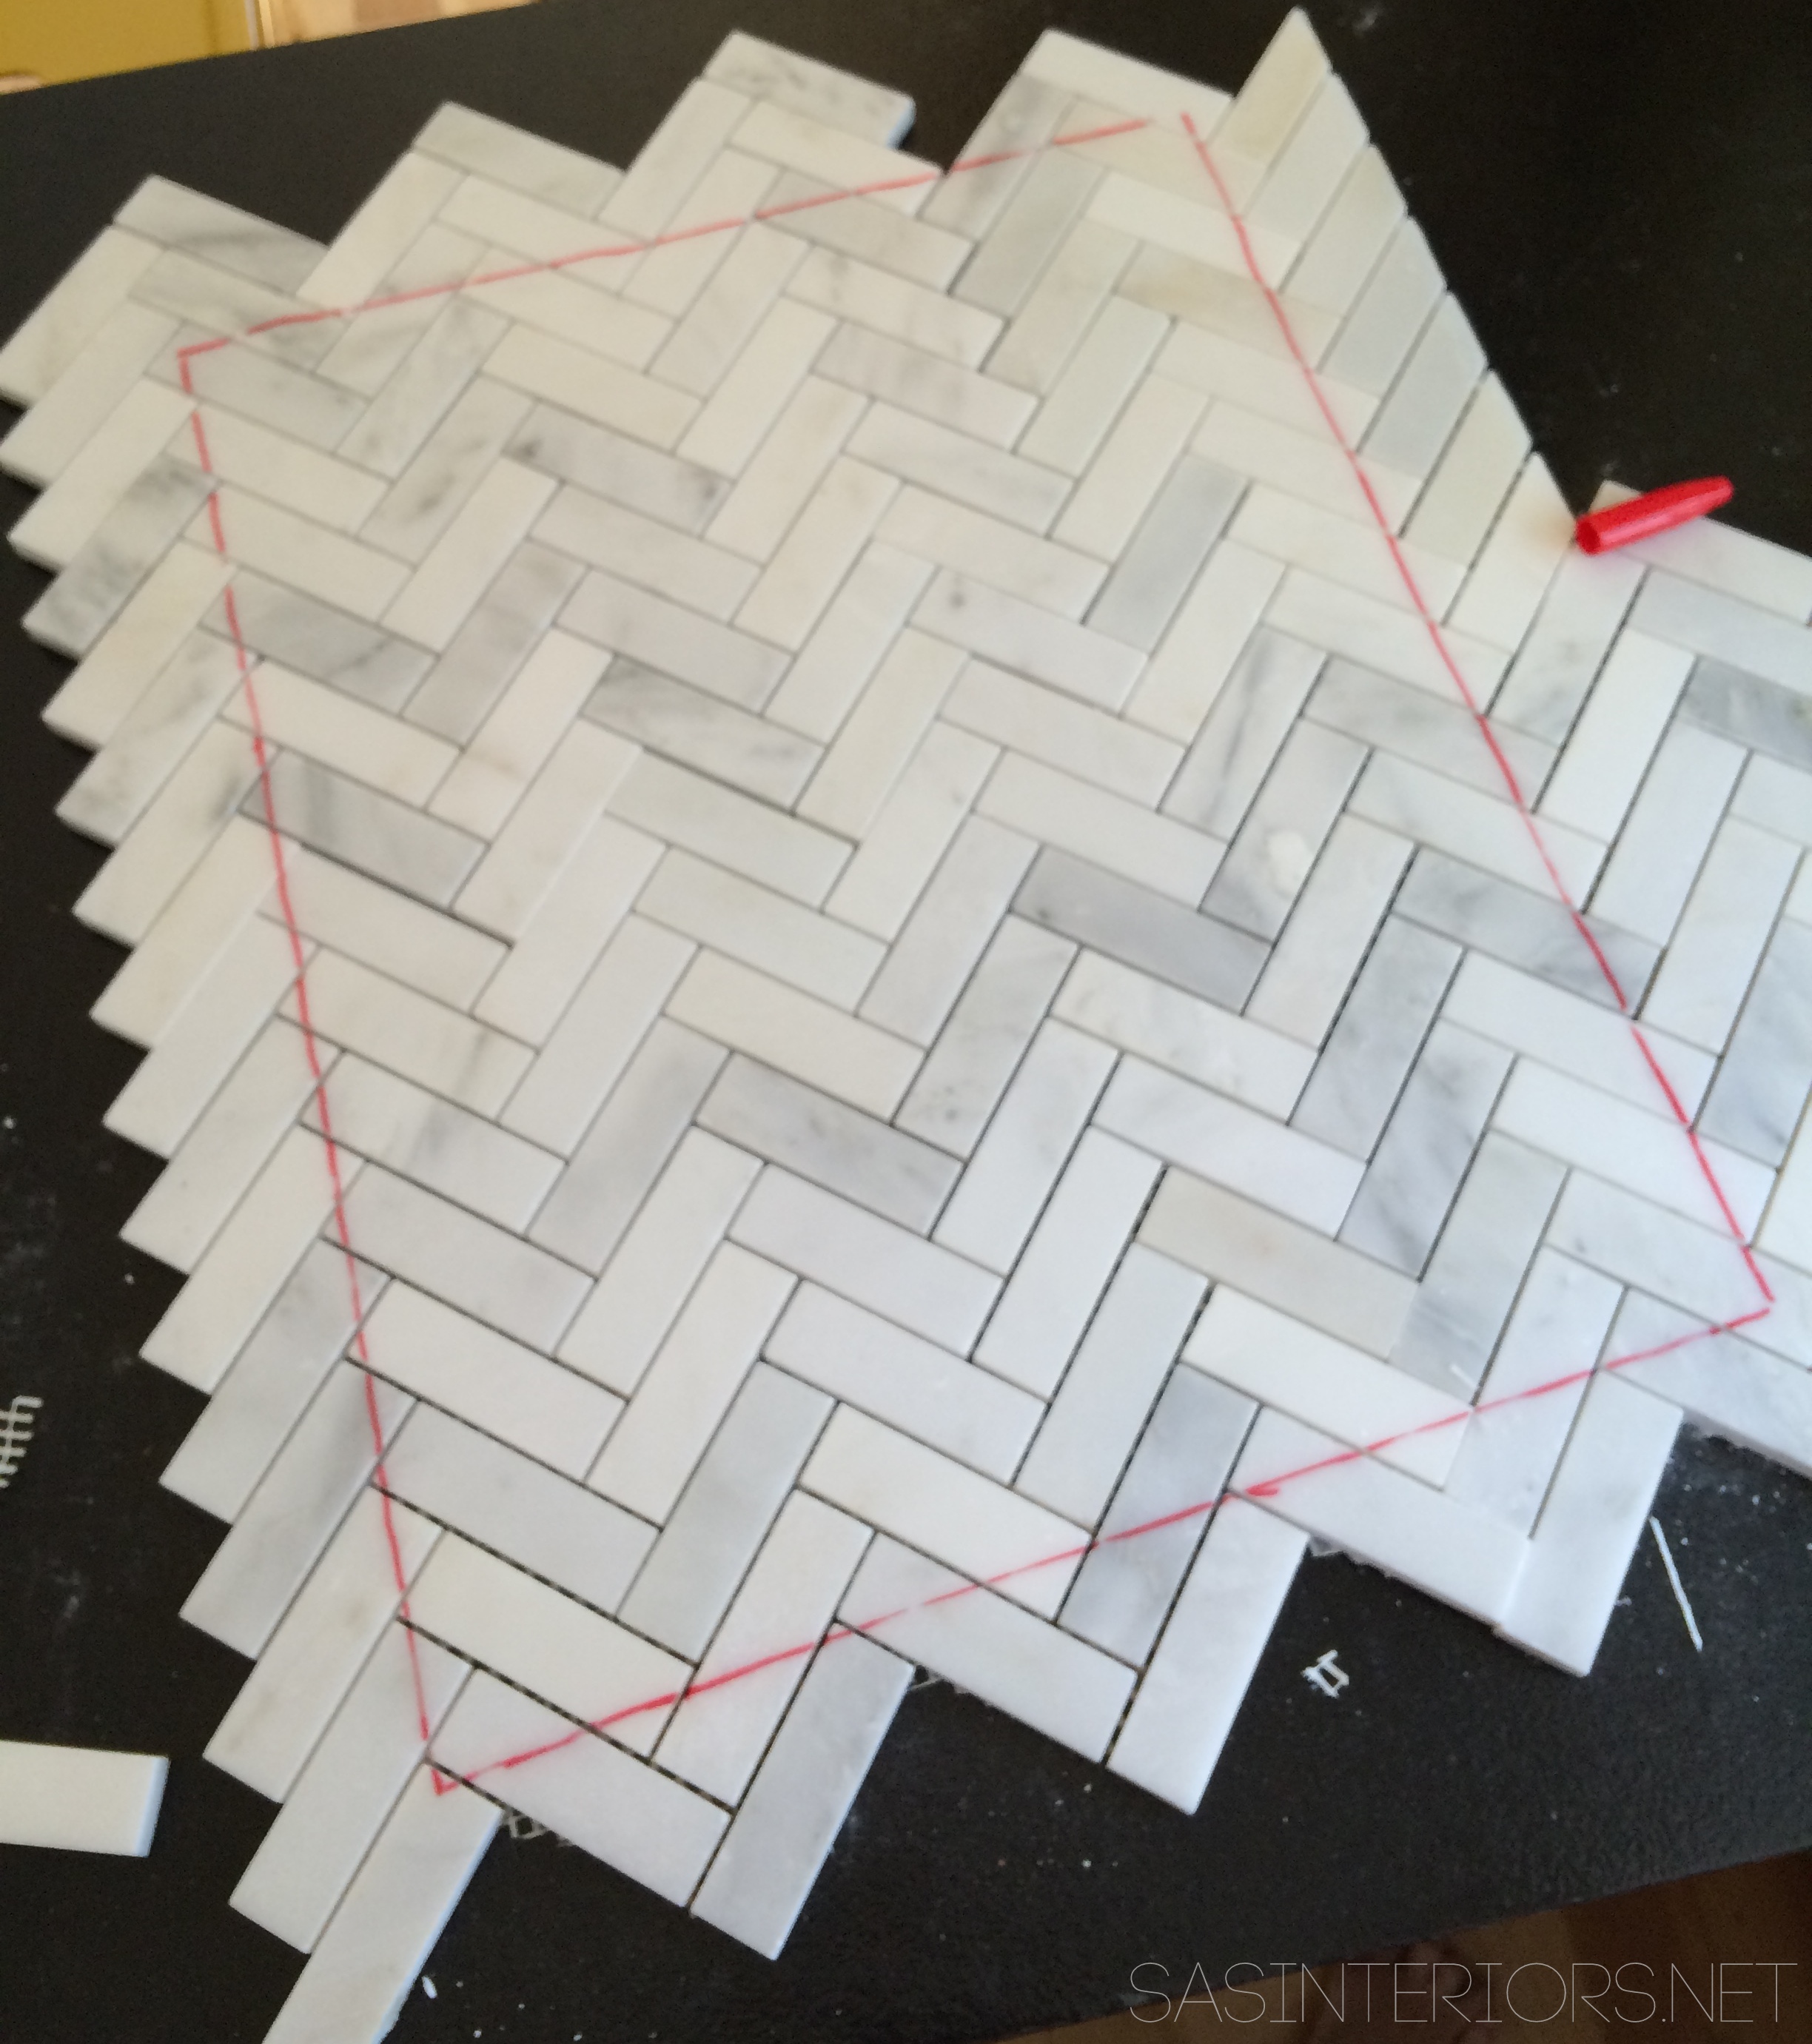
2. Then using the wet saw, the Mister (gotta give him credit – wink, wink) cut along the line.
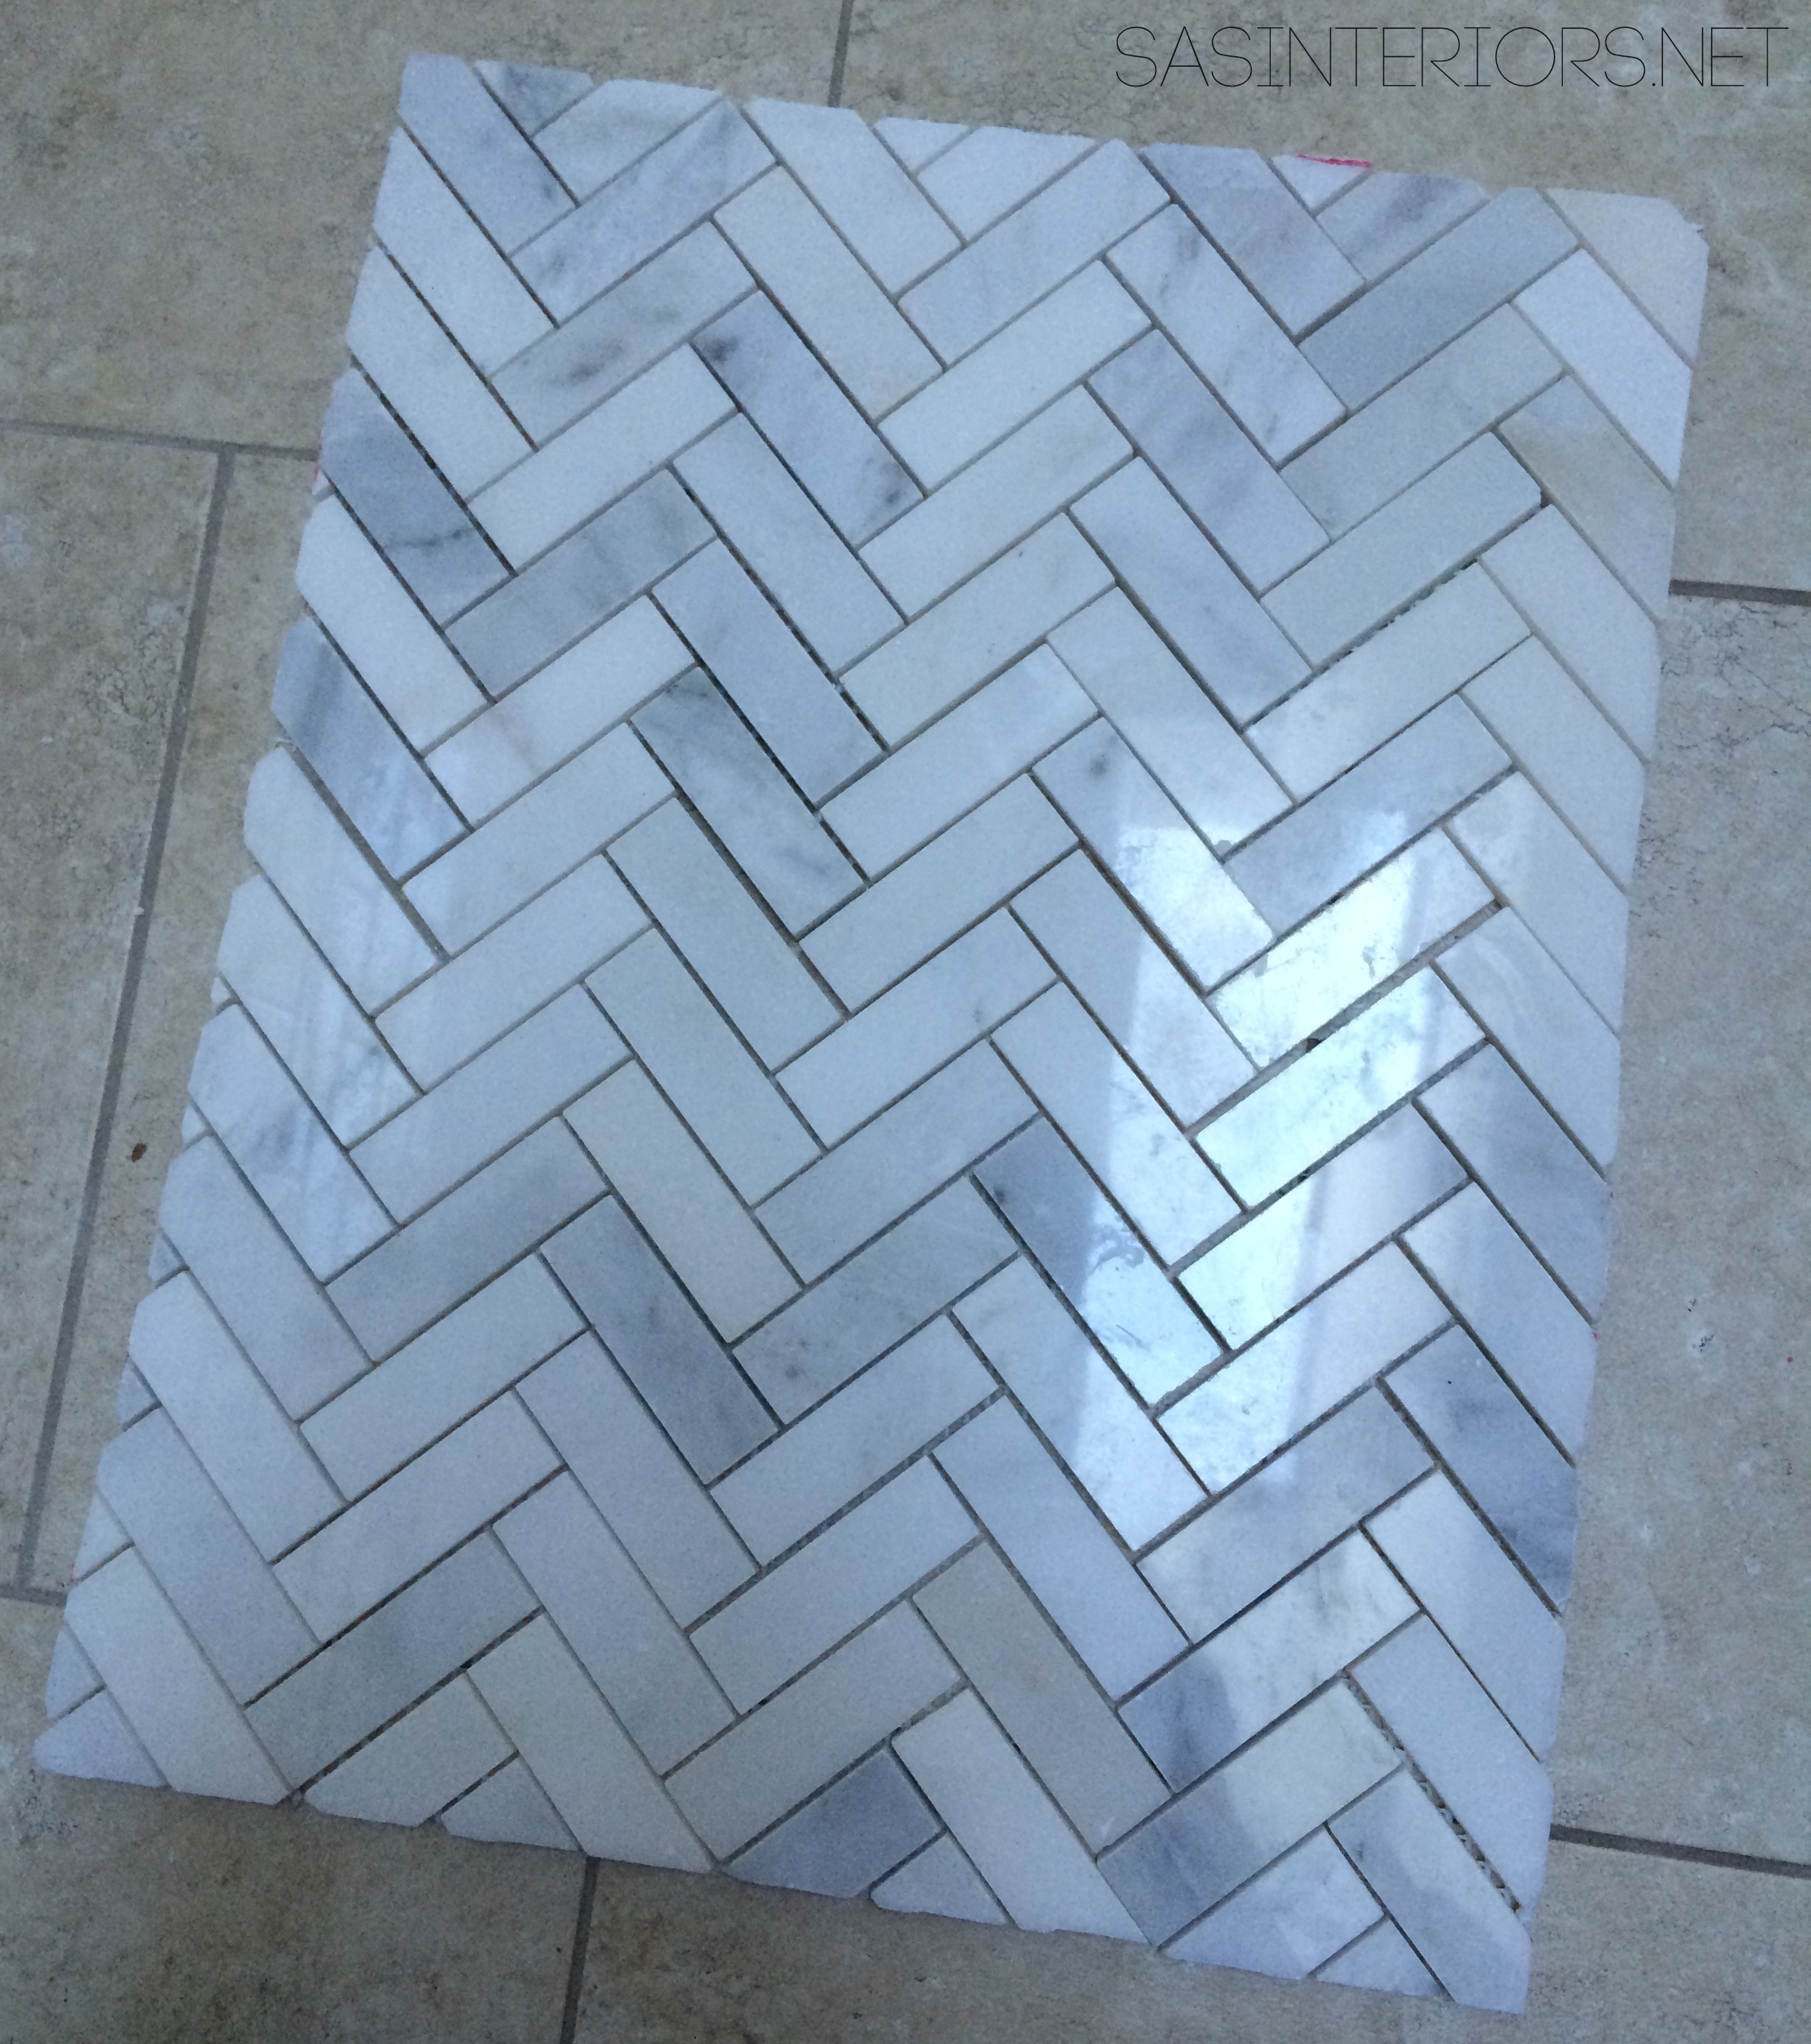
3. Then I layed the tile inside the niche to make sure it was the right size (it wasn’t perfect, but I knew the grout would “hide” any imperfections). It fit – yay – so using adhesive (the same method I used to install the wall tile), I added the herringbone accent tile to the back surface of the niche.
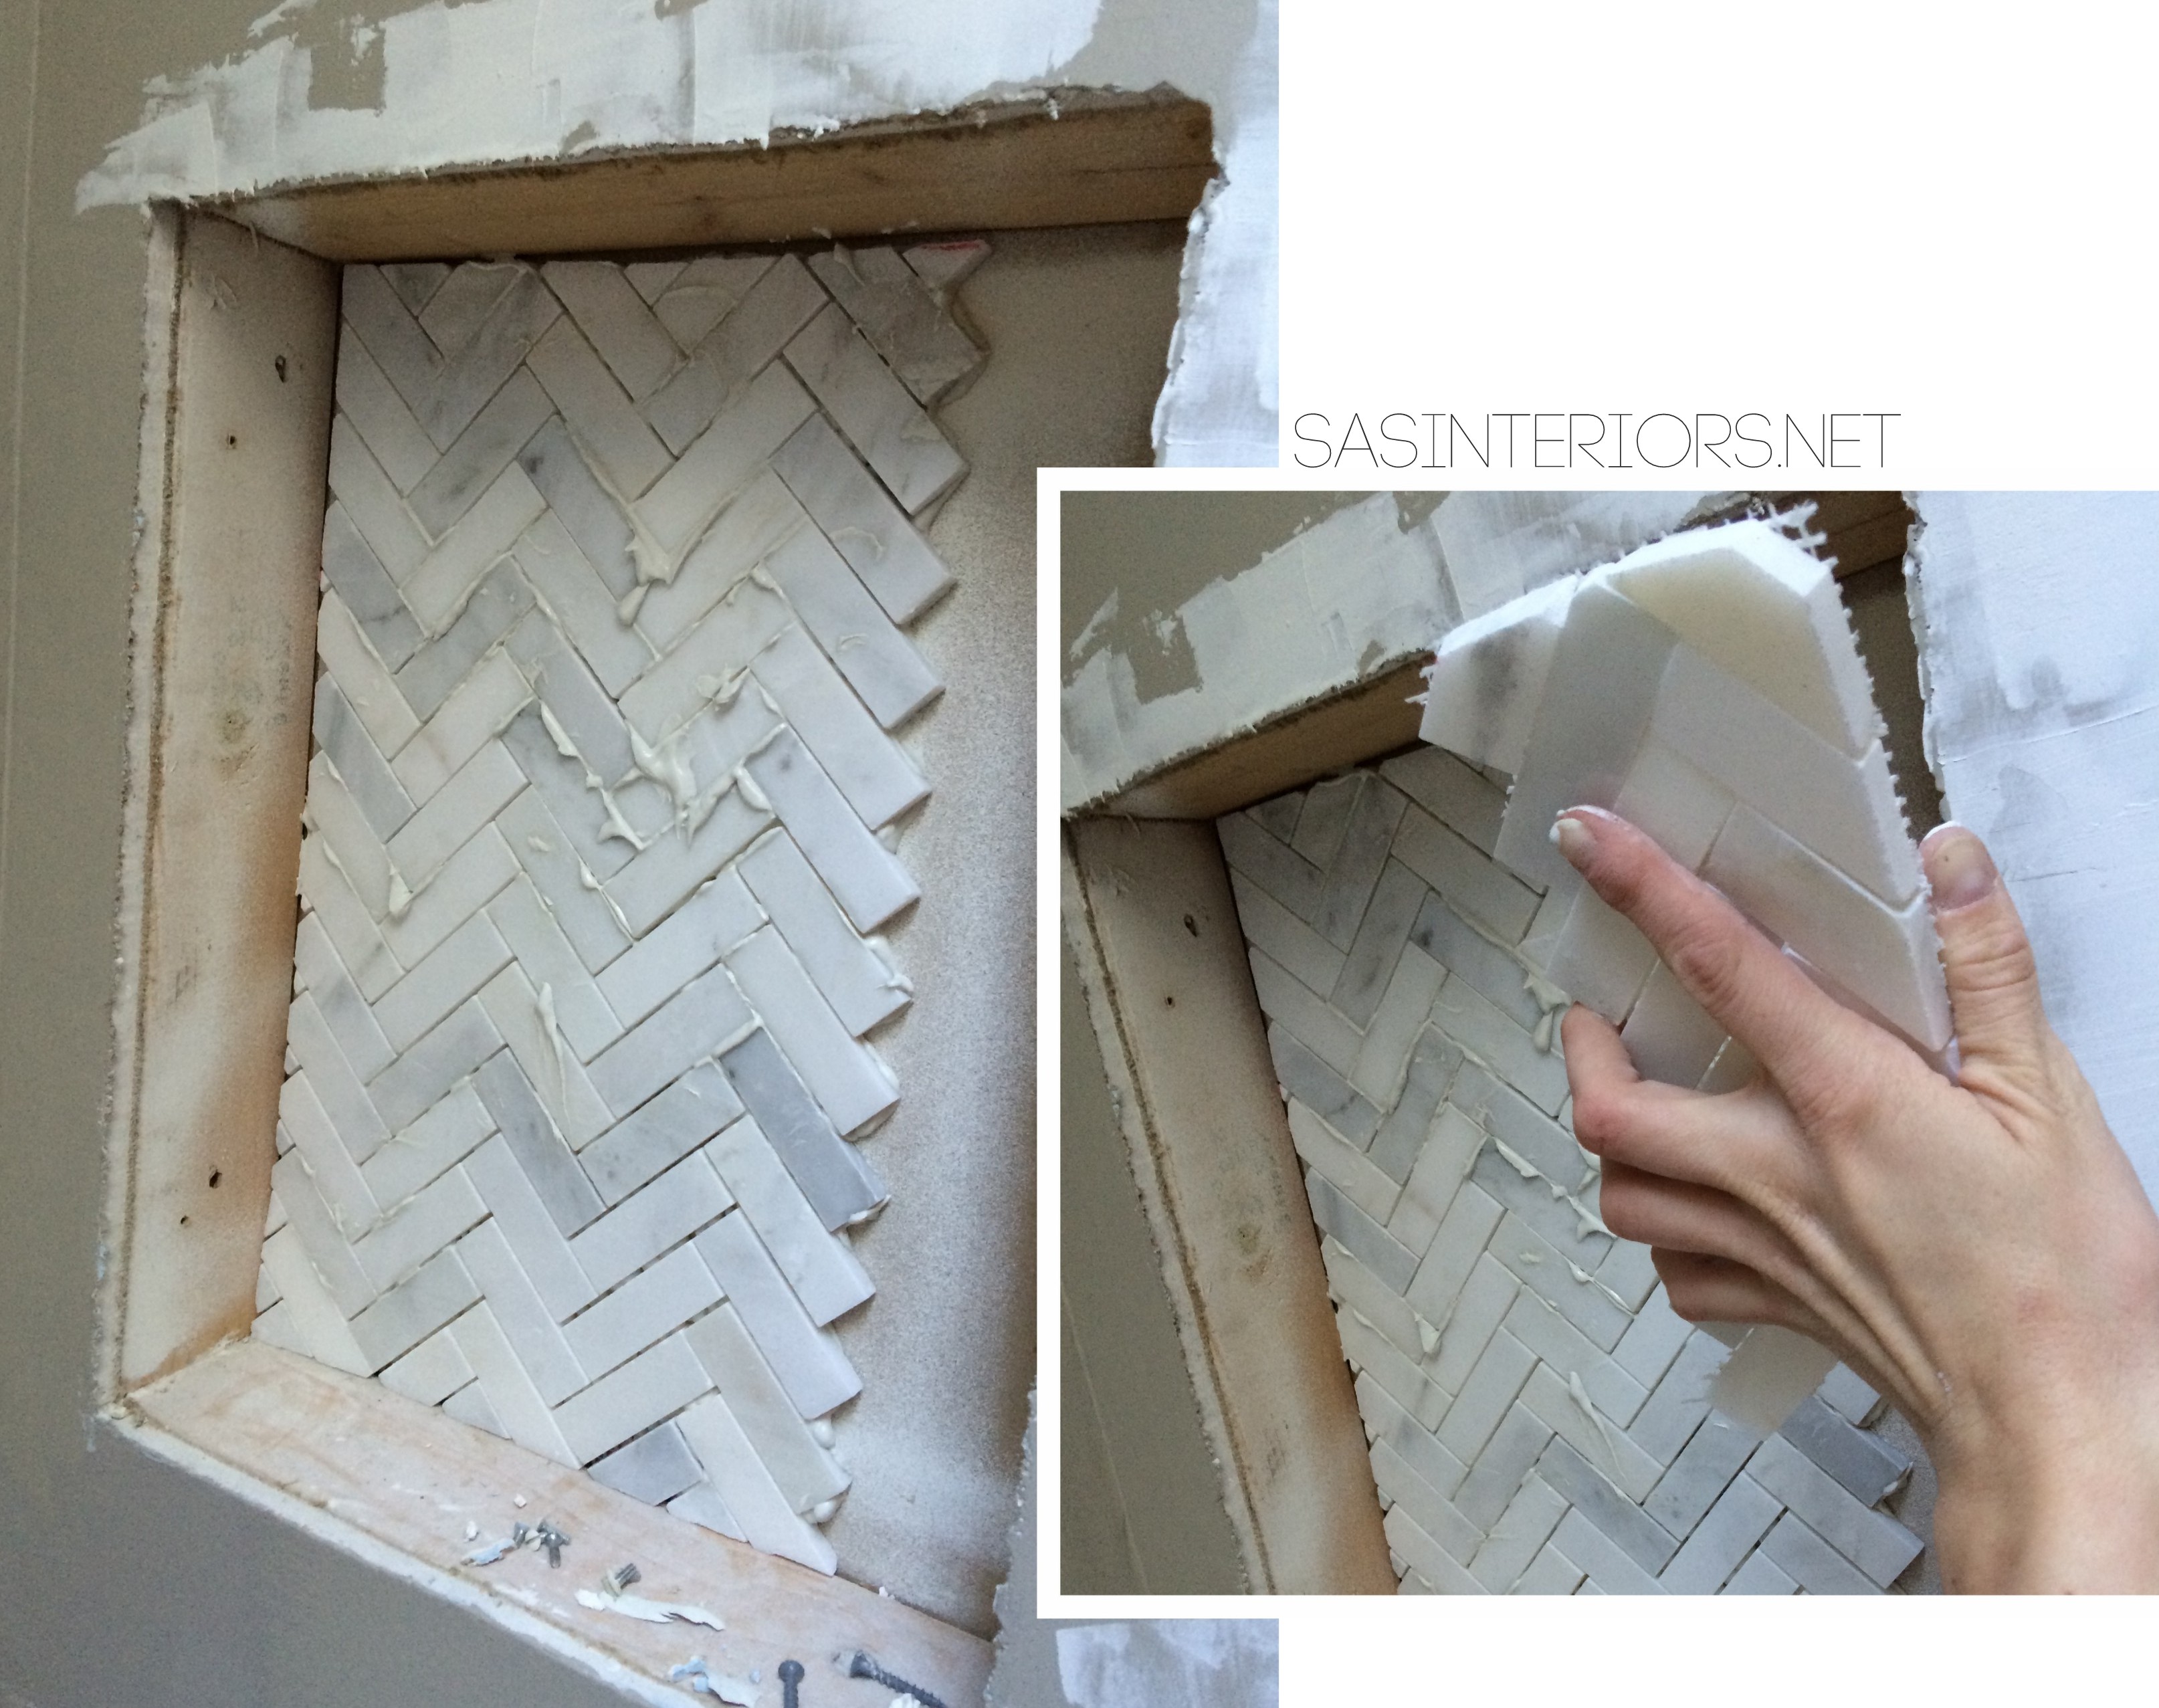
4. When the back was finished, I cut and added 3 x 6 subway tiles (same tile as shower) on the sides, top, and bottom.
As I was working from bottom to top on the sides, I cut and added (2) shelves (marble slabs typically used for a door threshold) at varying heights. The Mister cut it to the right length using the wet saw and we made sure it was long enough so it fit between + sits on the subway tiles.
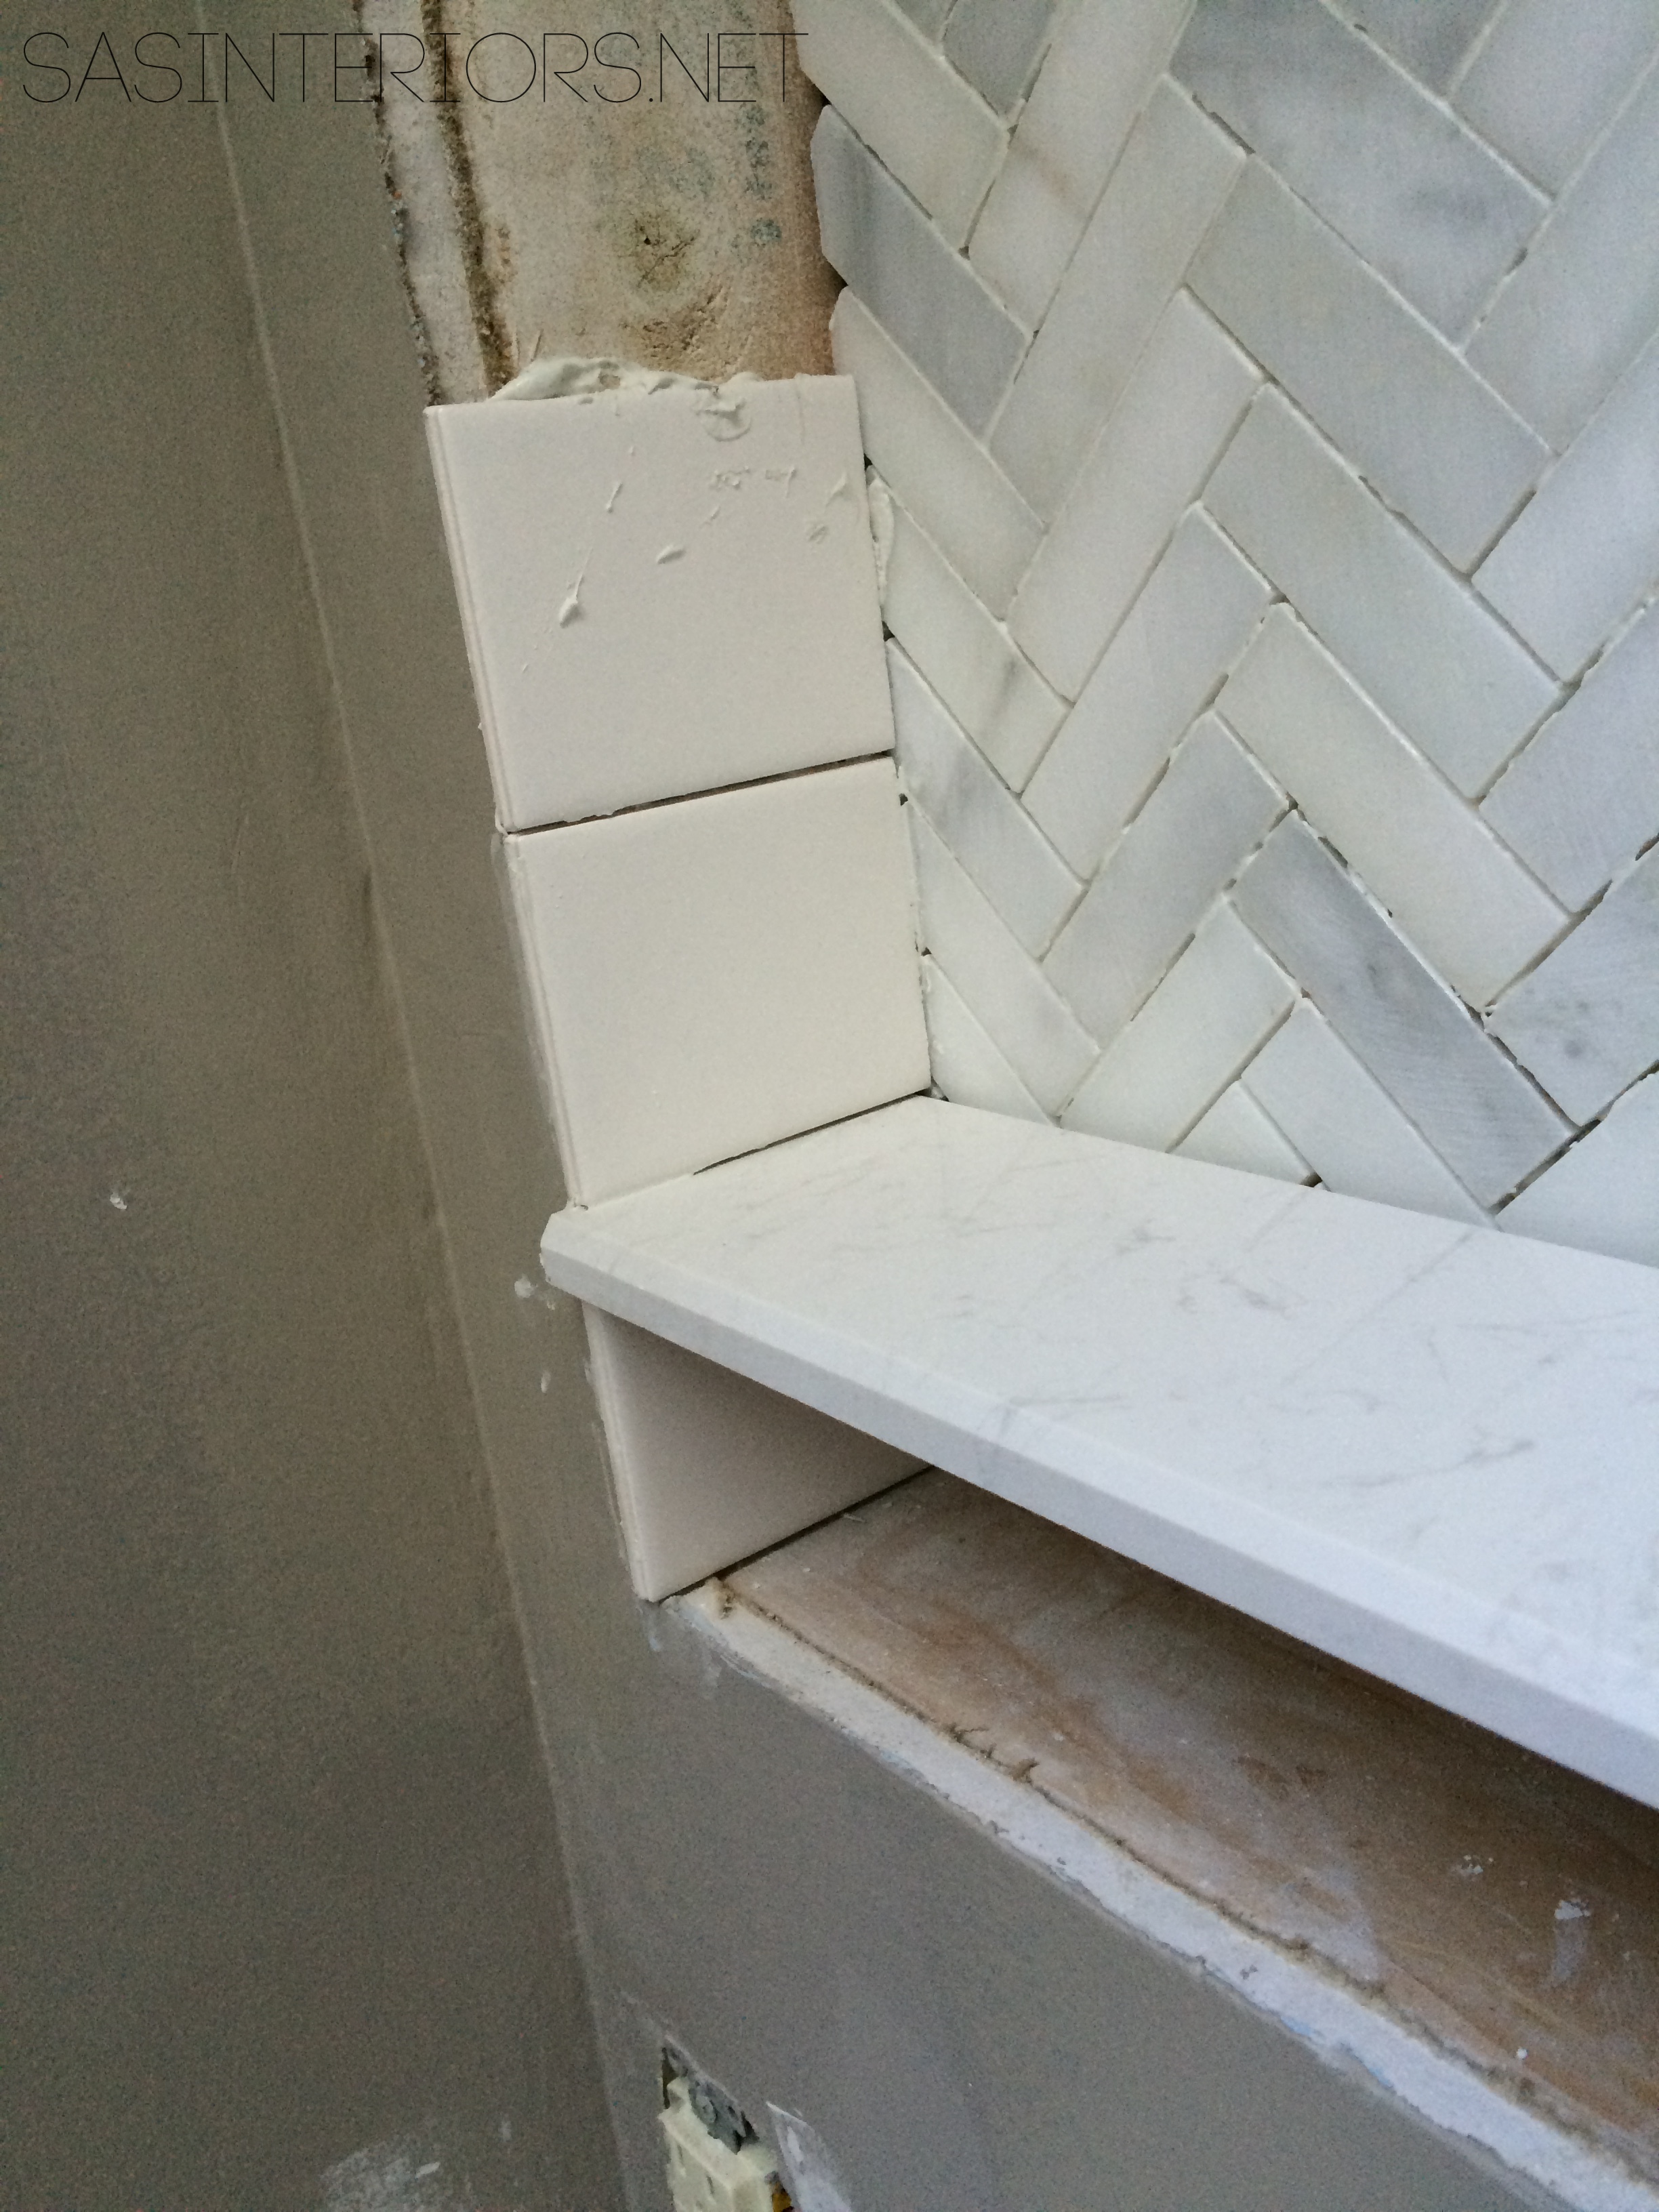
5. Once the tiles were in place, I grouted all the joints using the same method as the wall tile.
6. After the joints were filled and the tile was cleaned off, I added trim around the edges using a 3/4″ decorative moulding. It was basically like creating a picture frame surround. I cut all the pieces using the miter saw and nailed them in place with finishing nails. To give an extra tap in place I also used a nail punch to drive home the nails – love that tool.
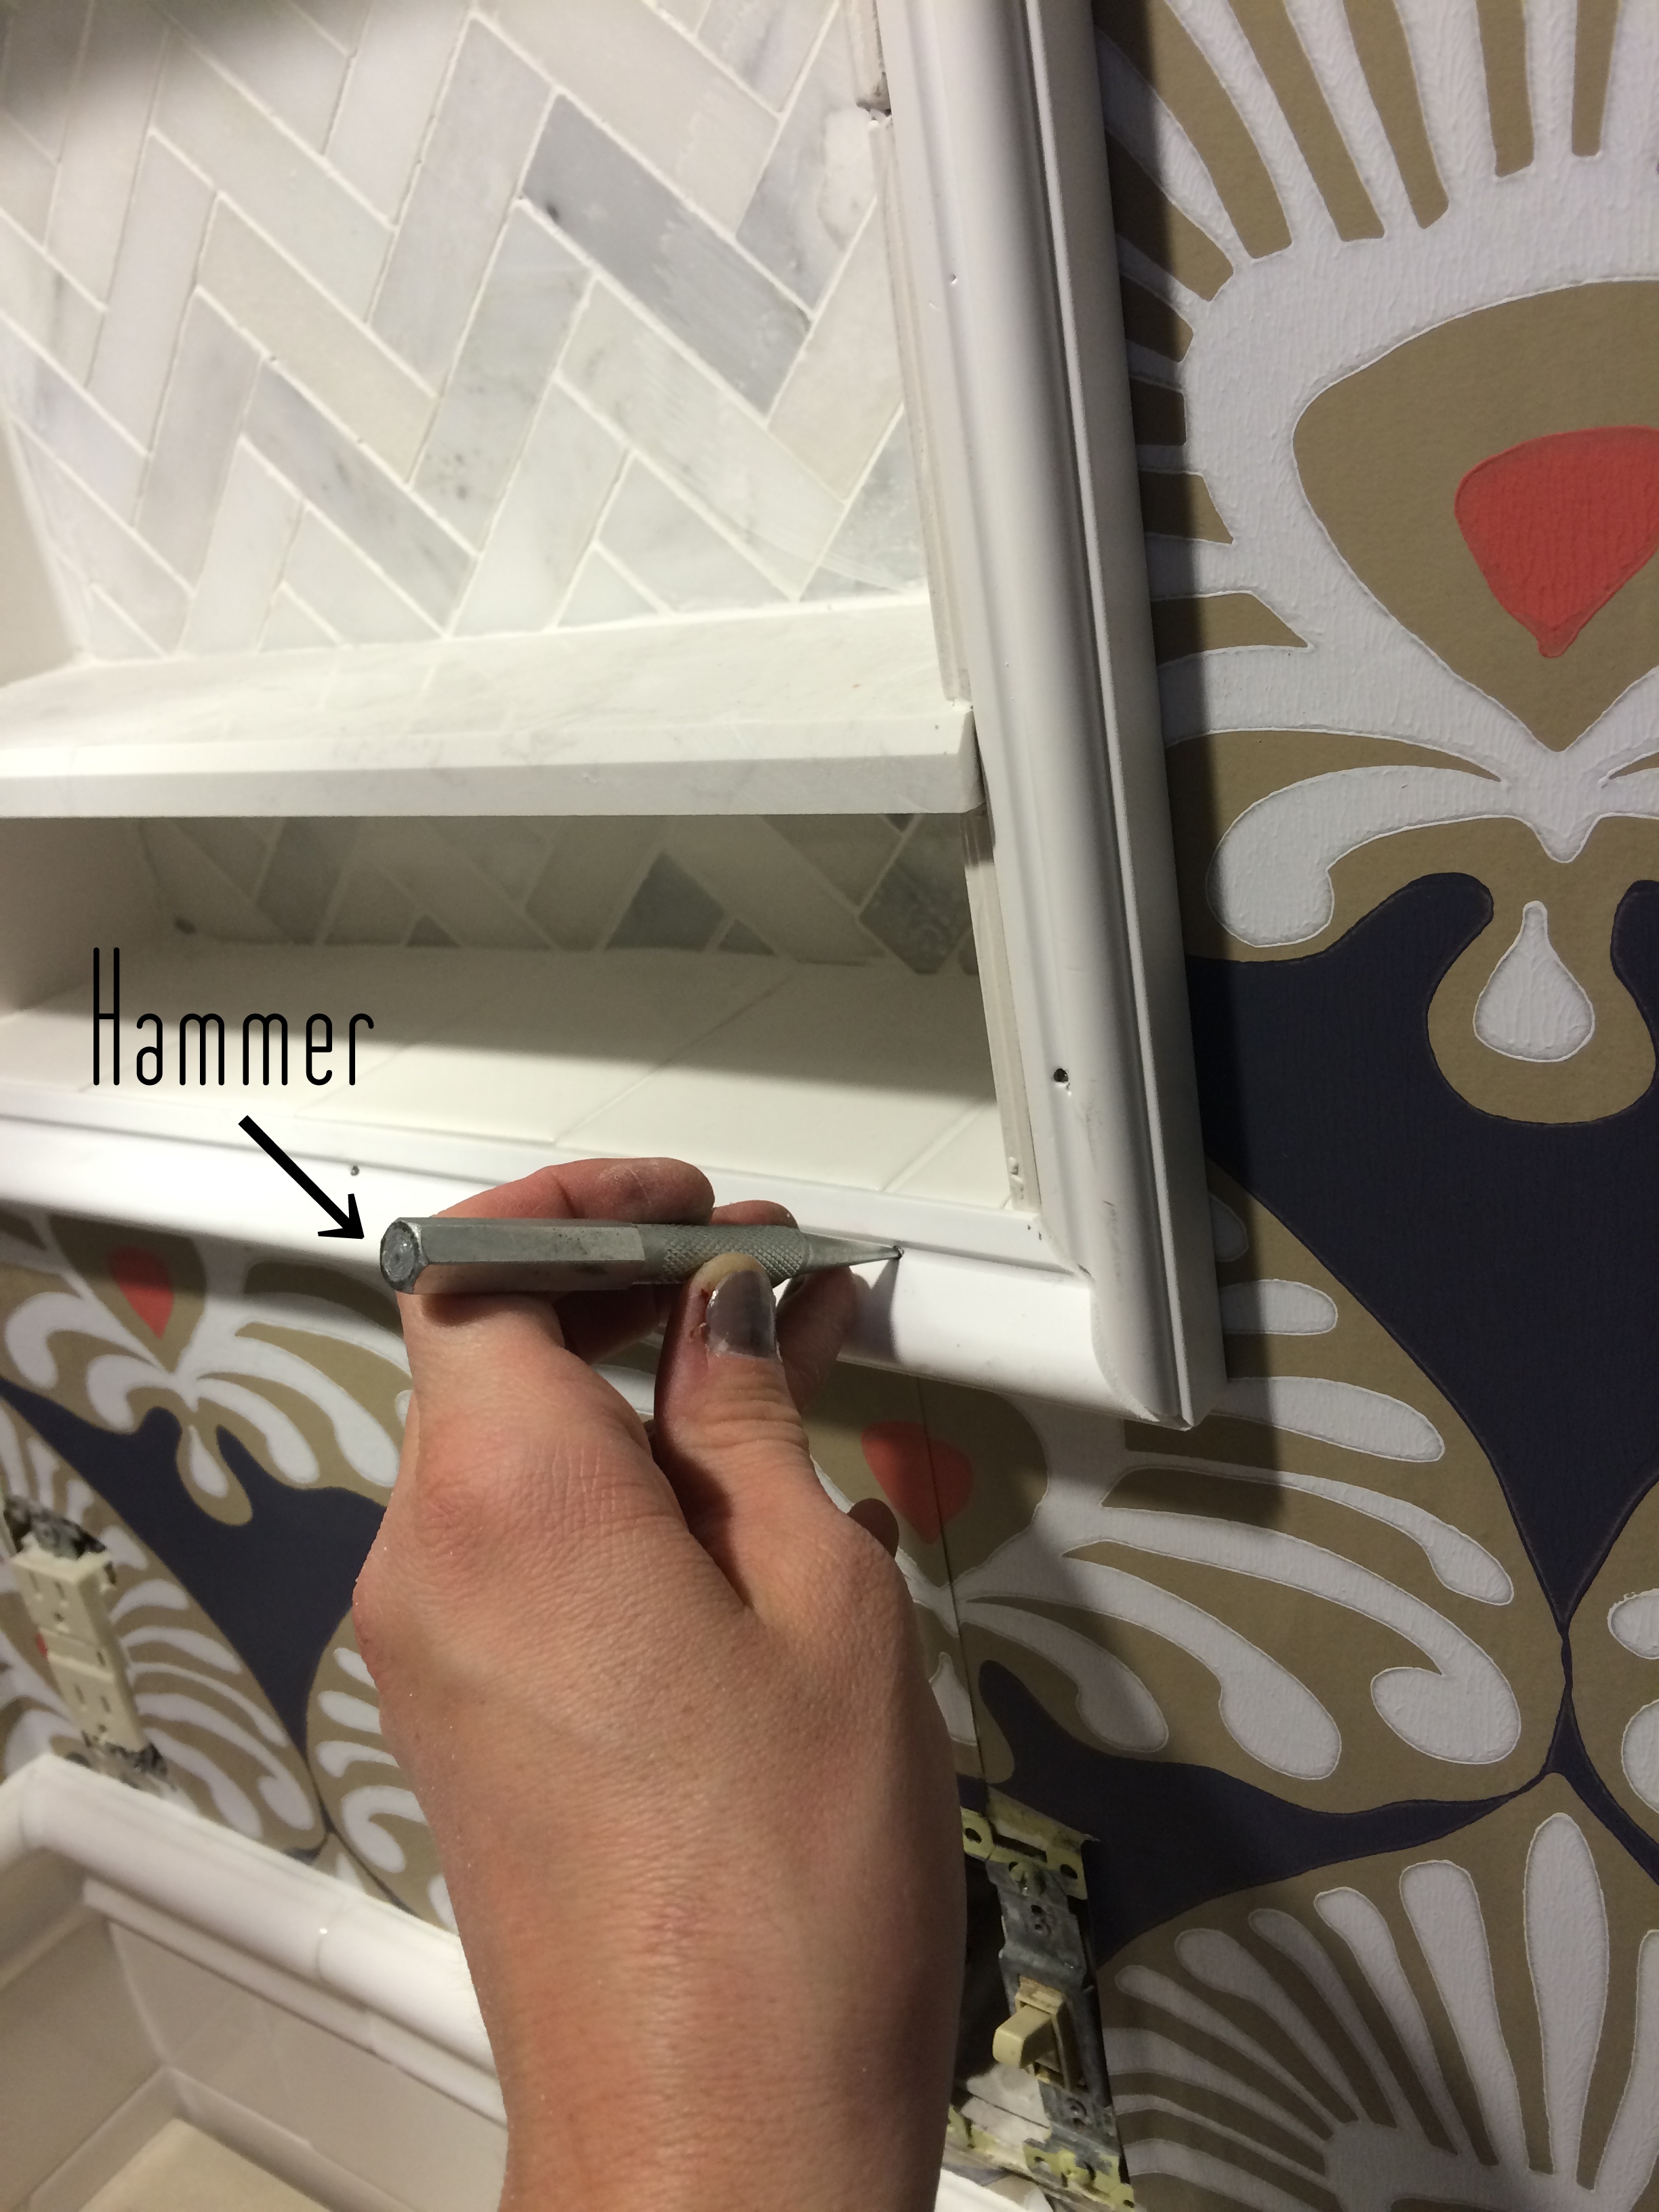
7. Then I filled in all the holes using wood filler.
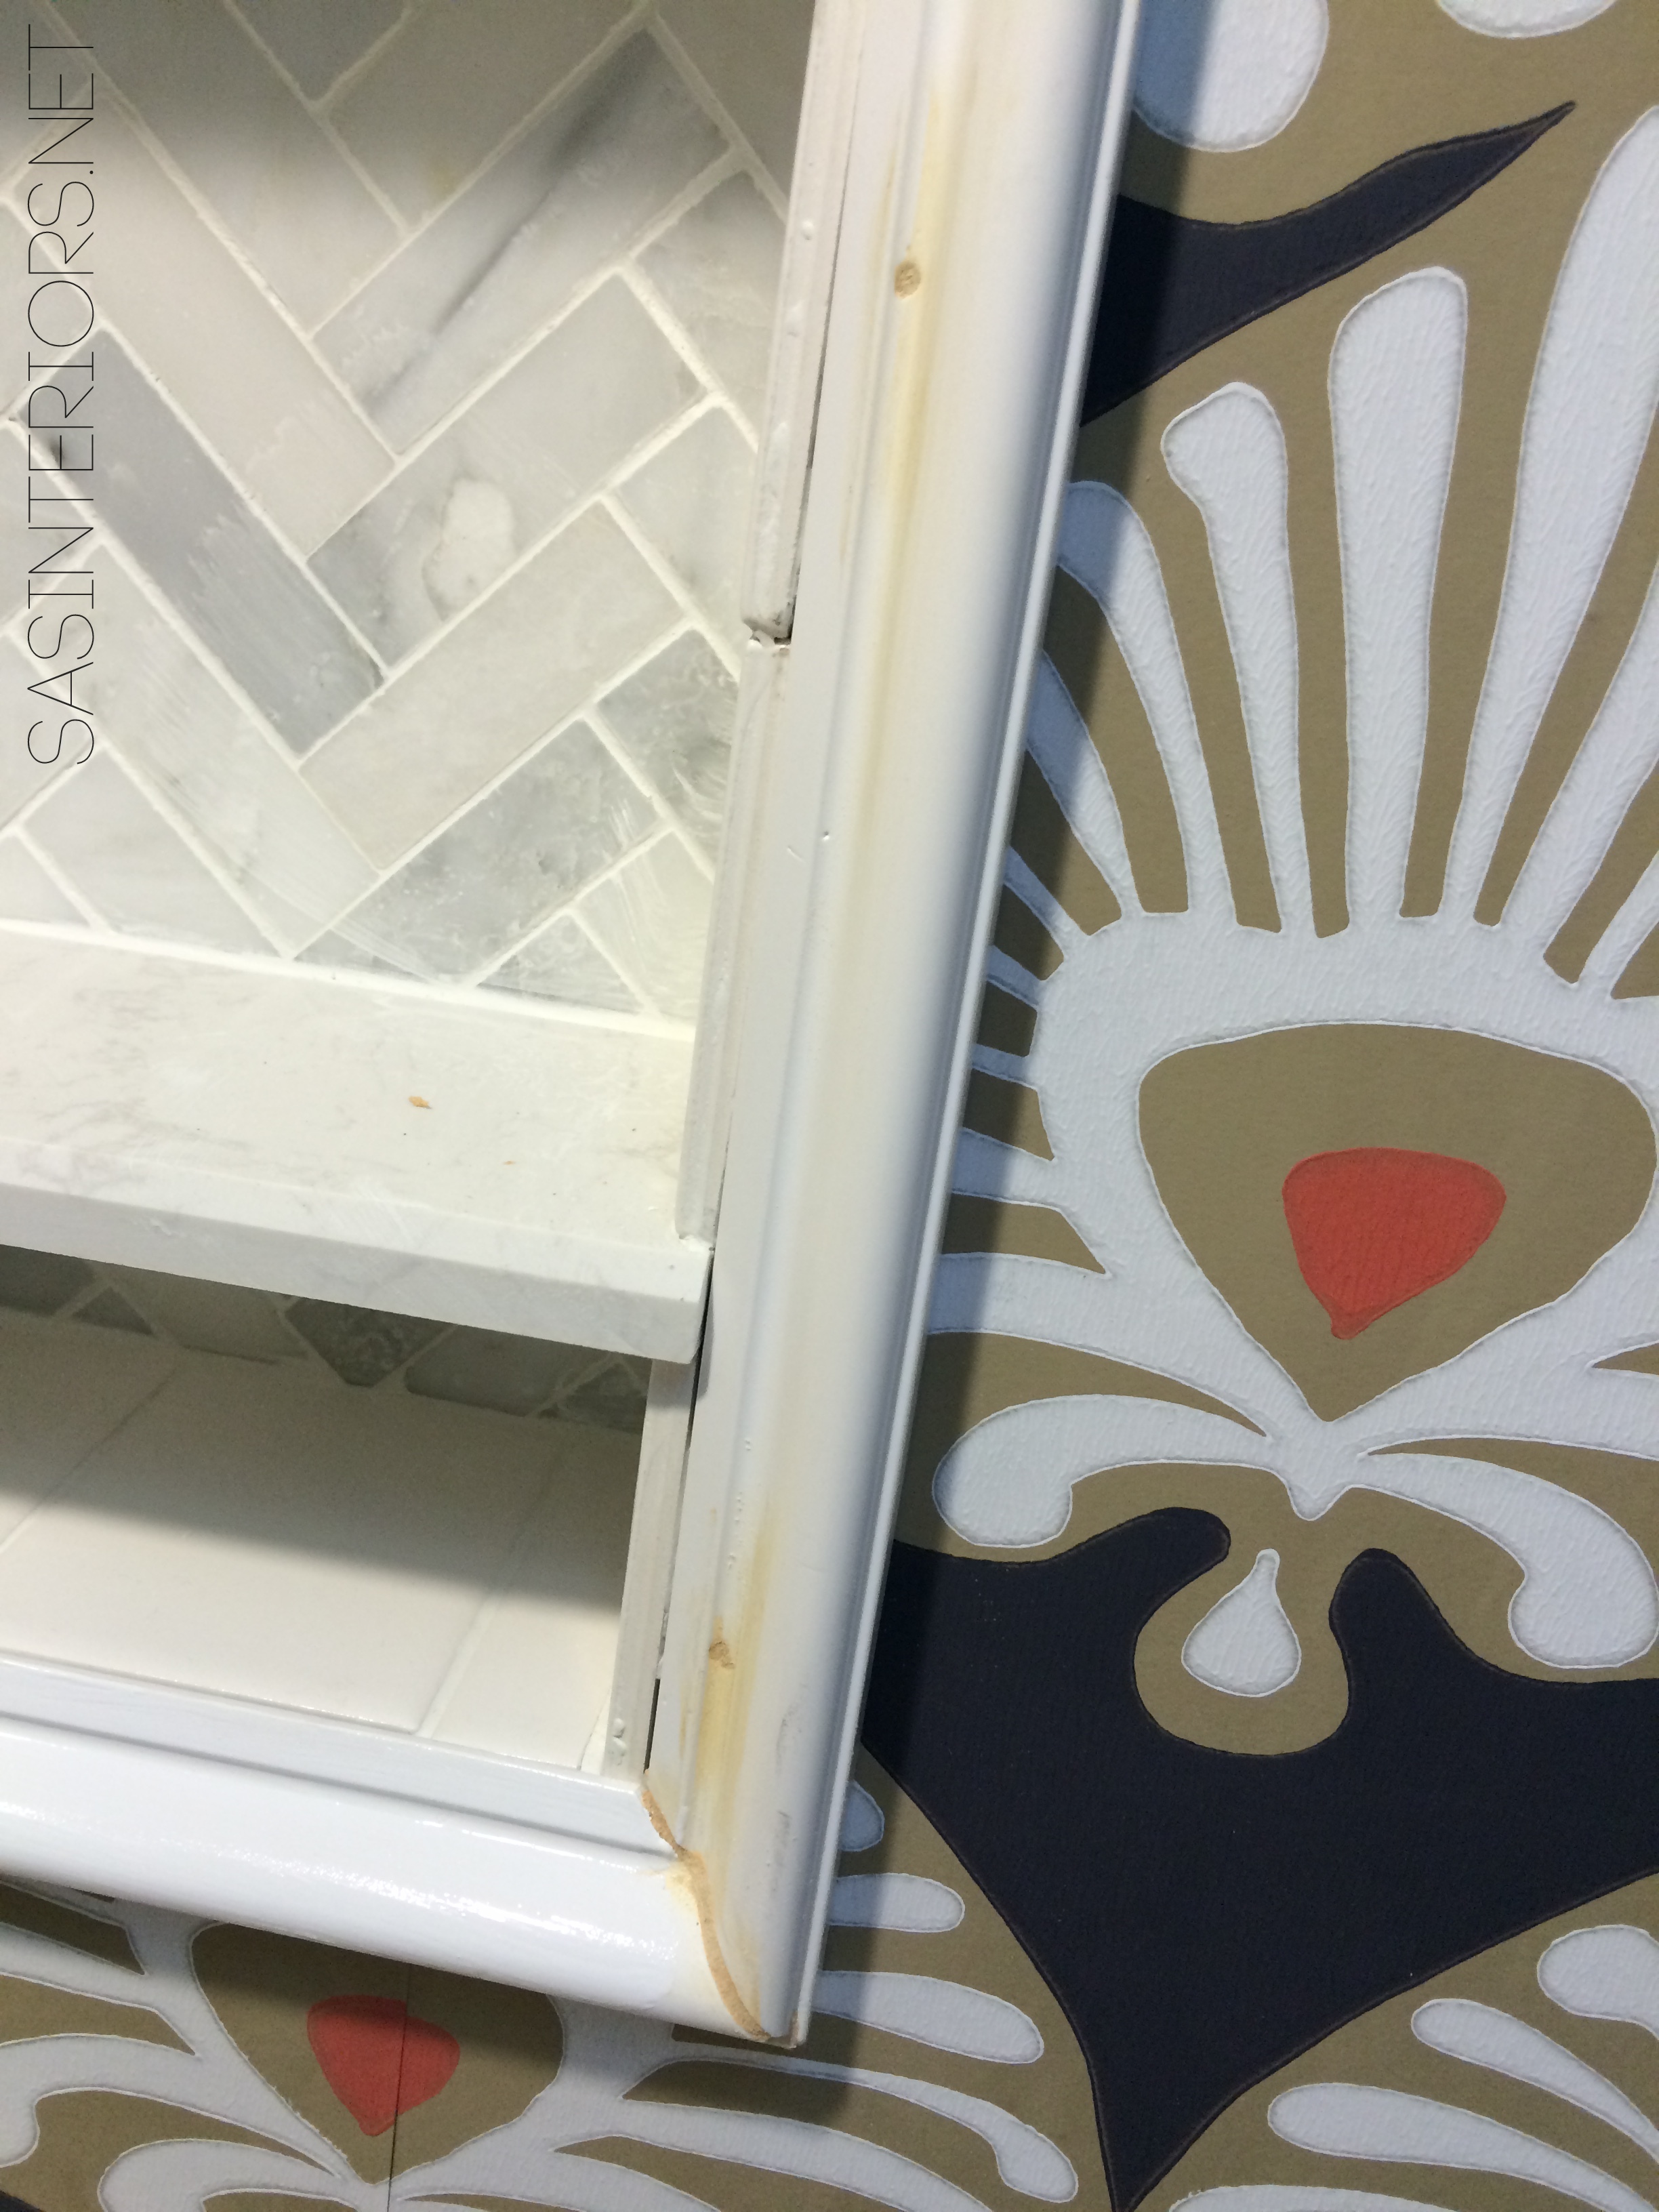
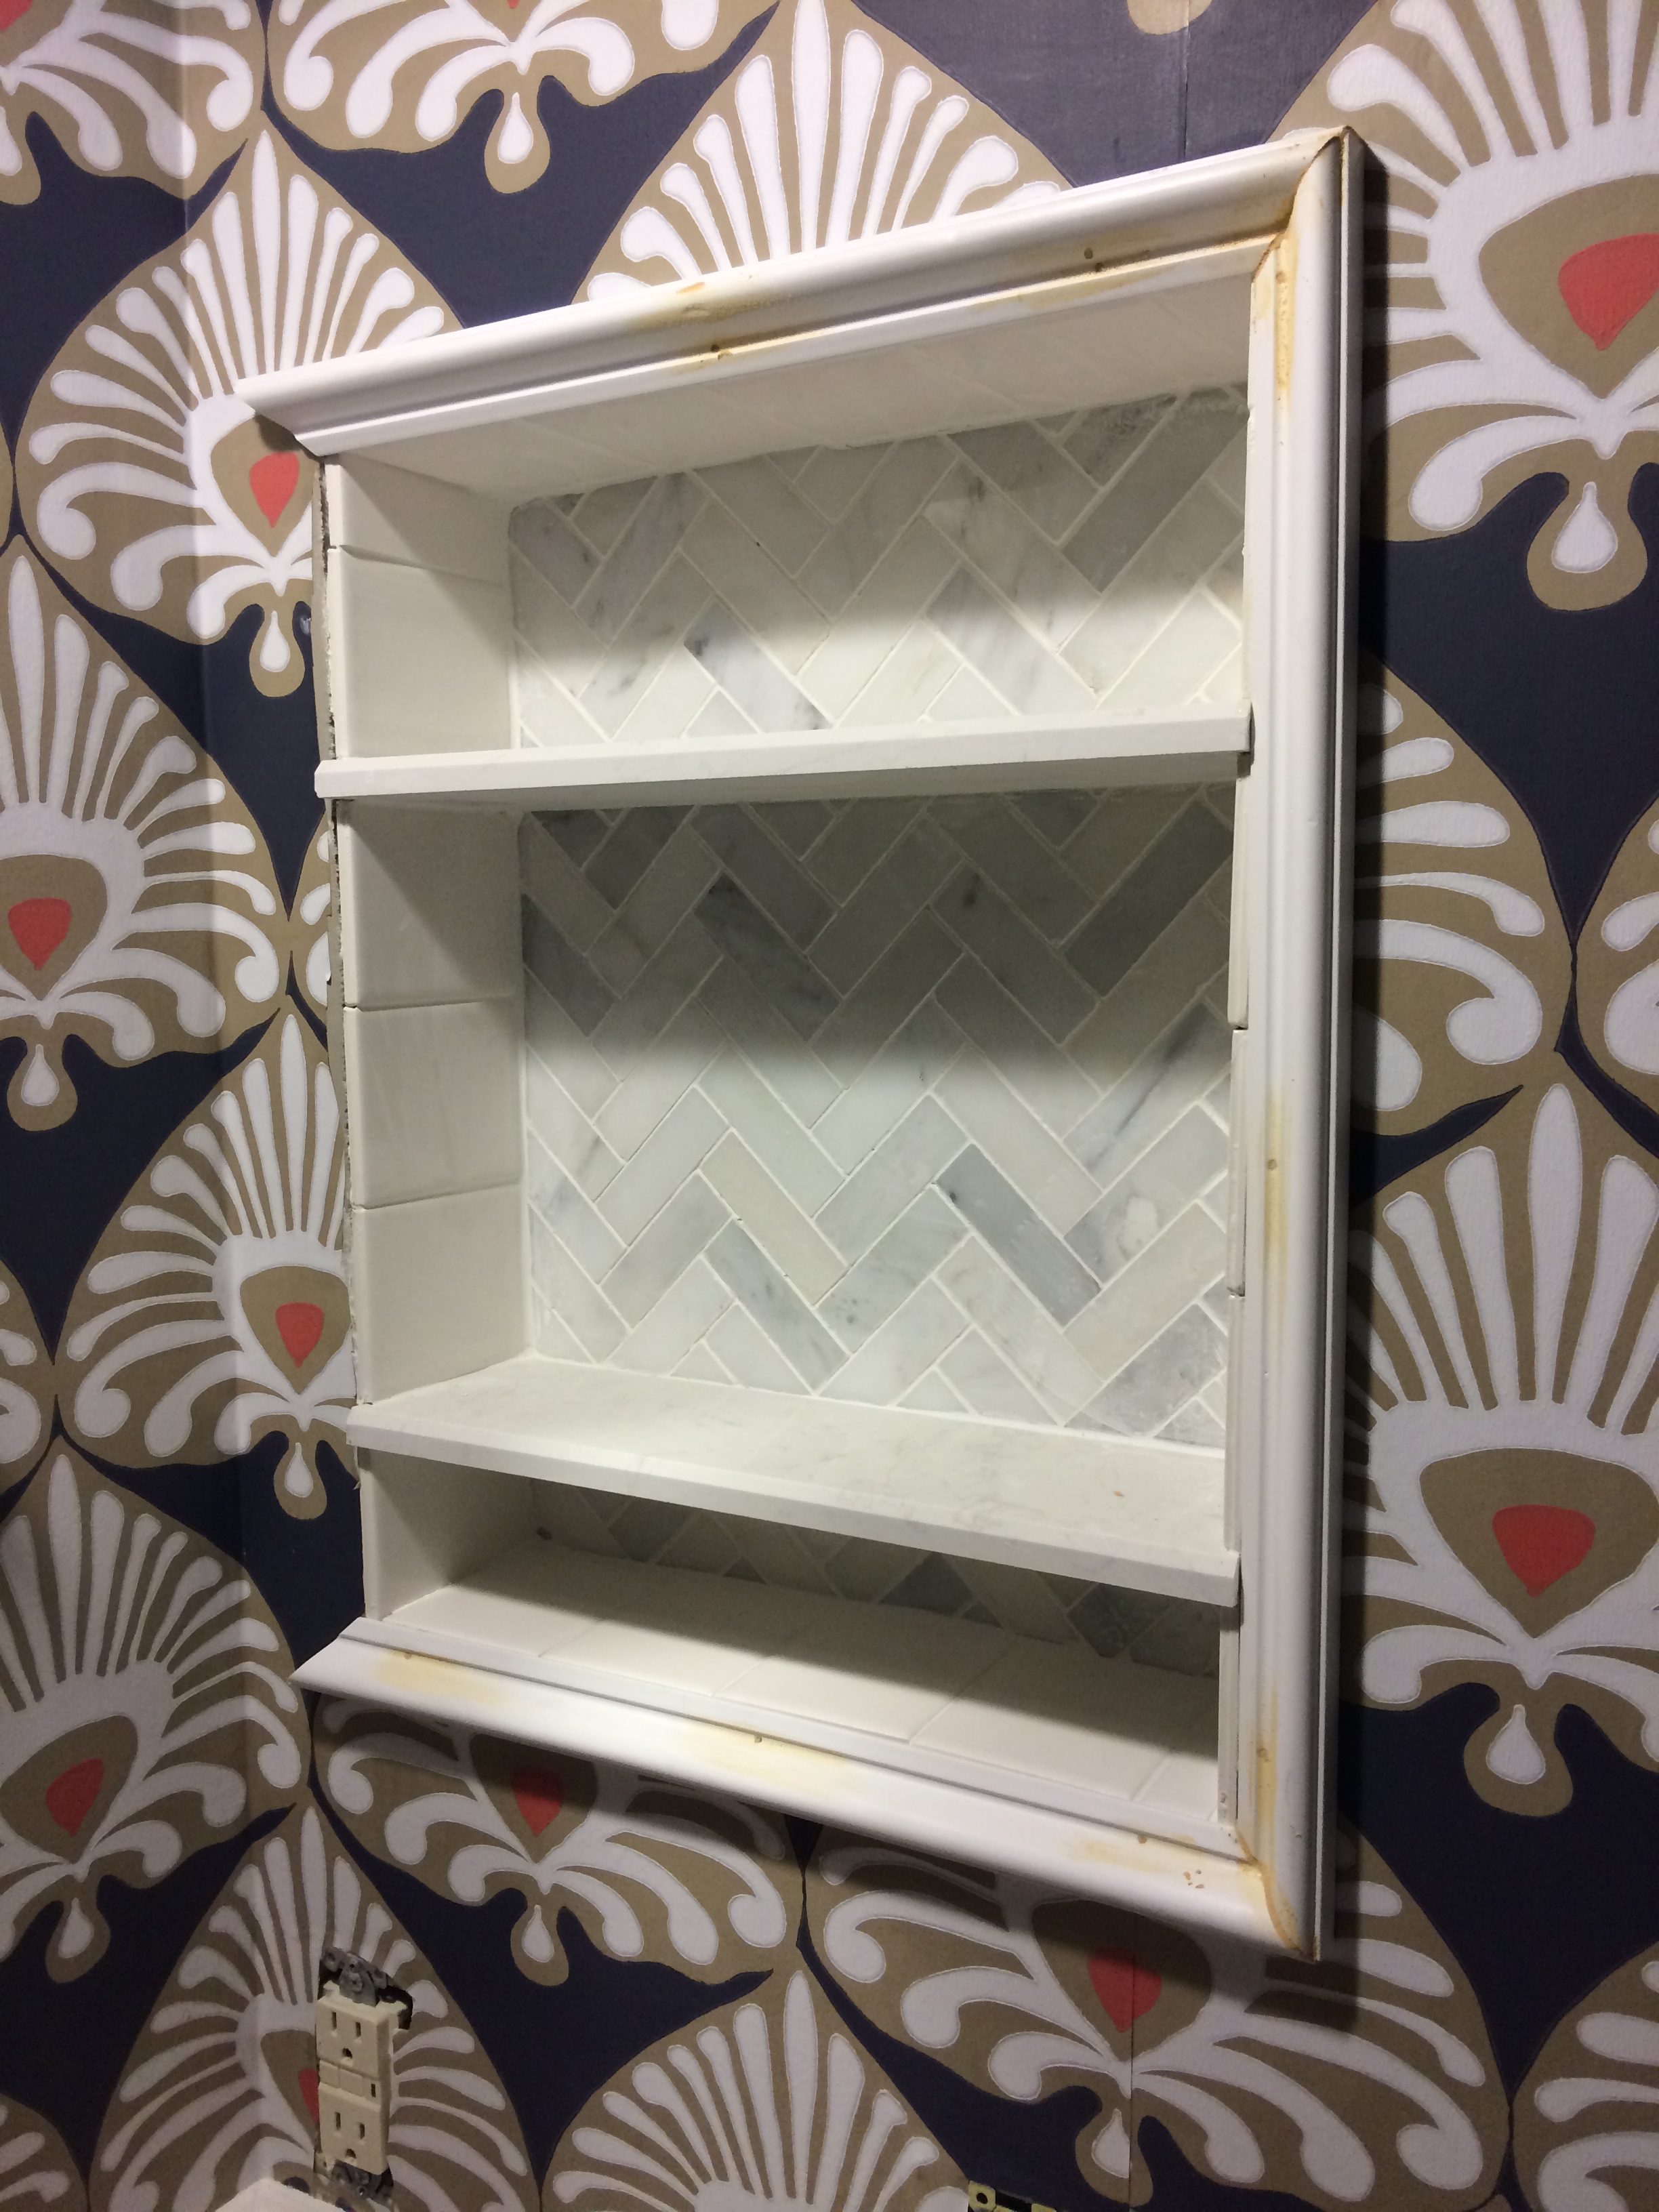
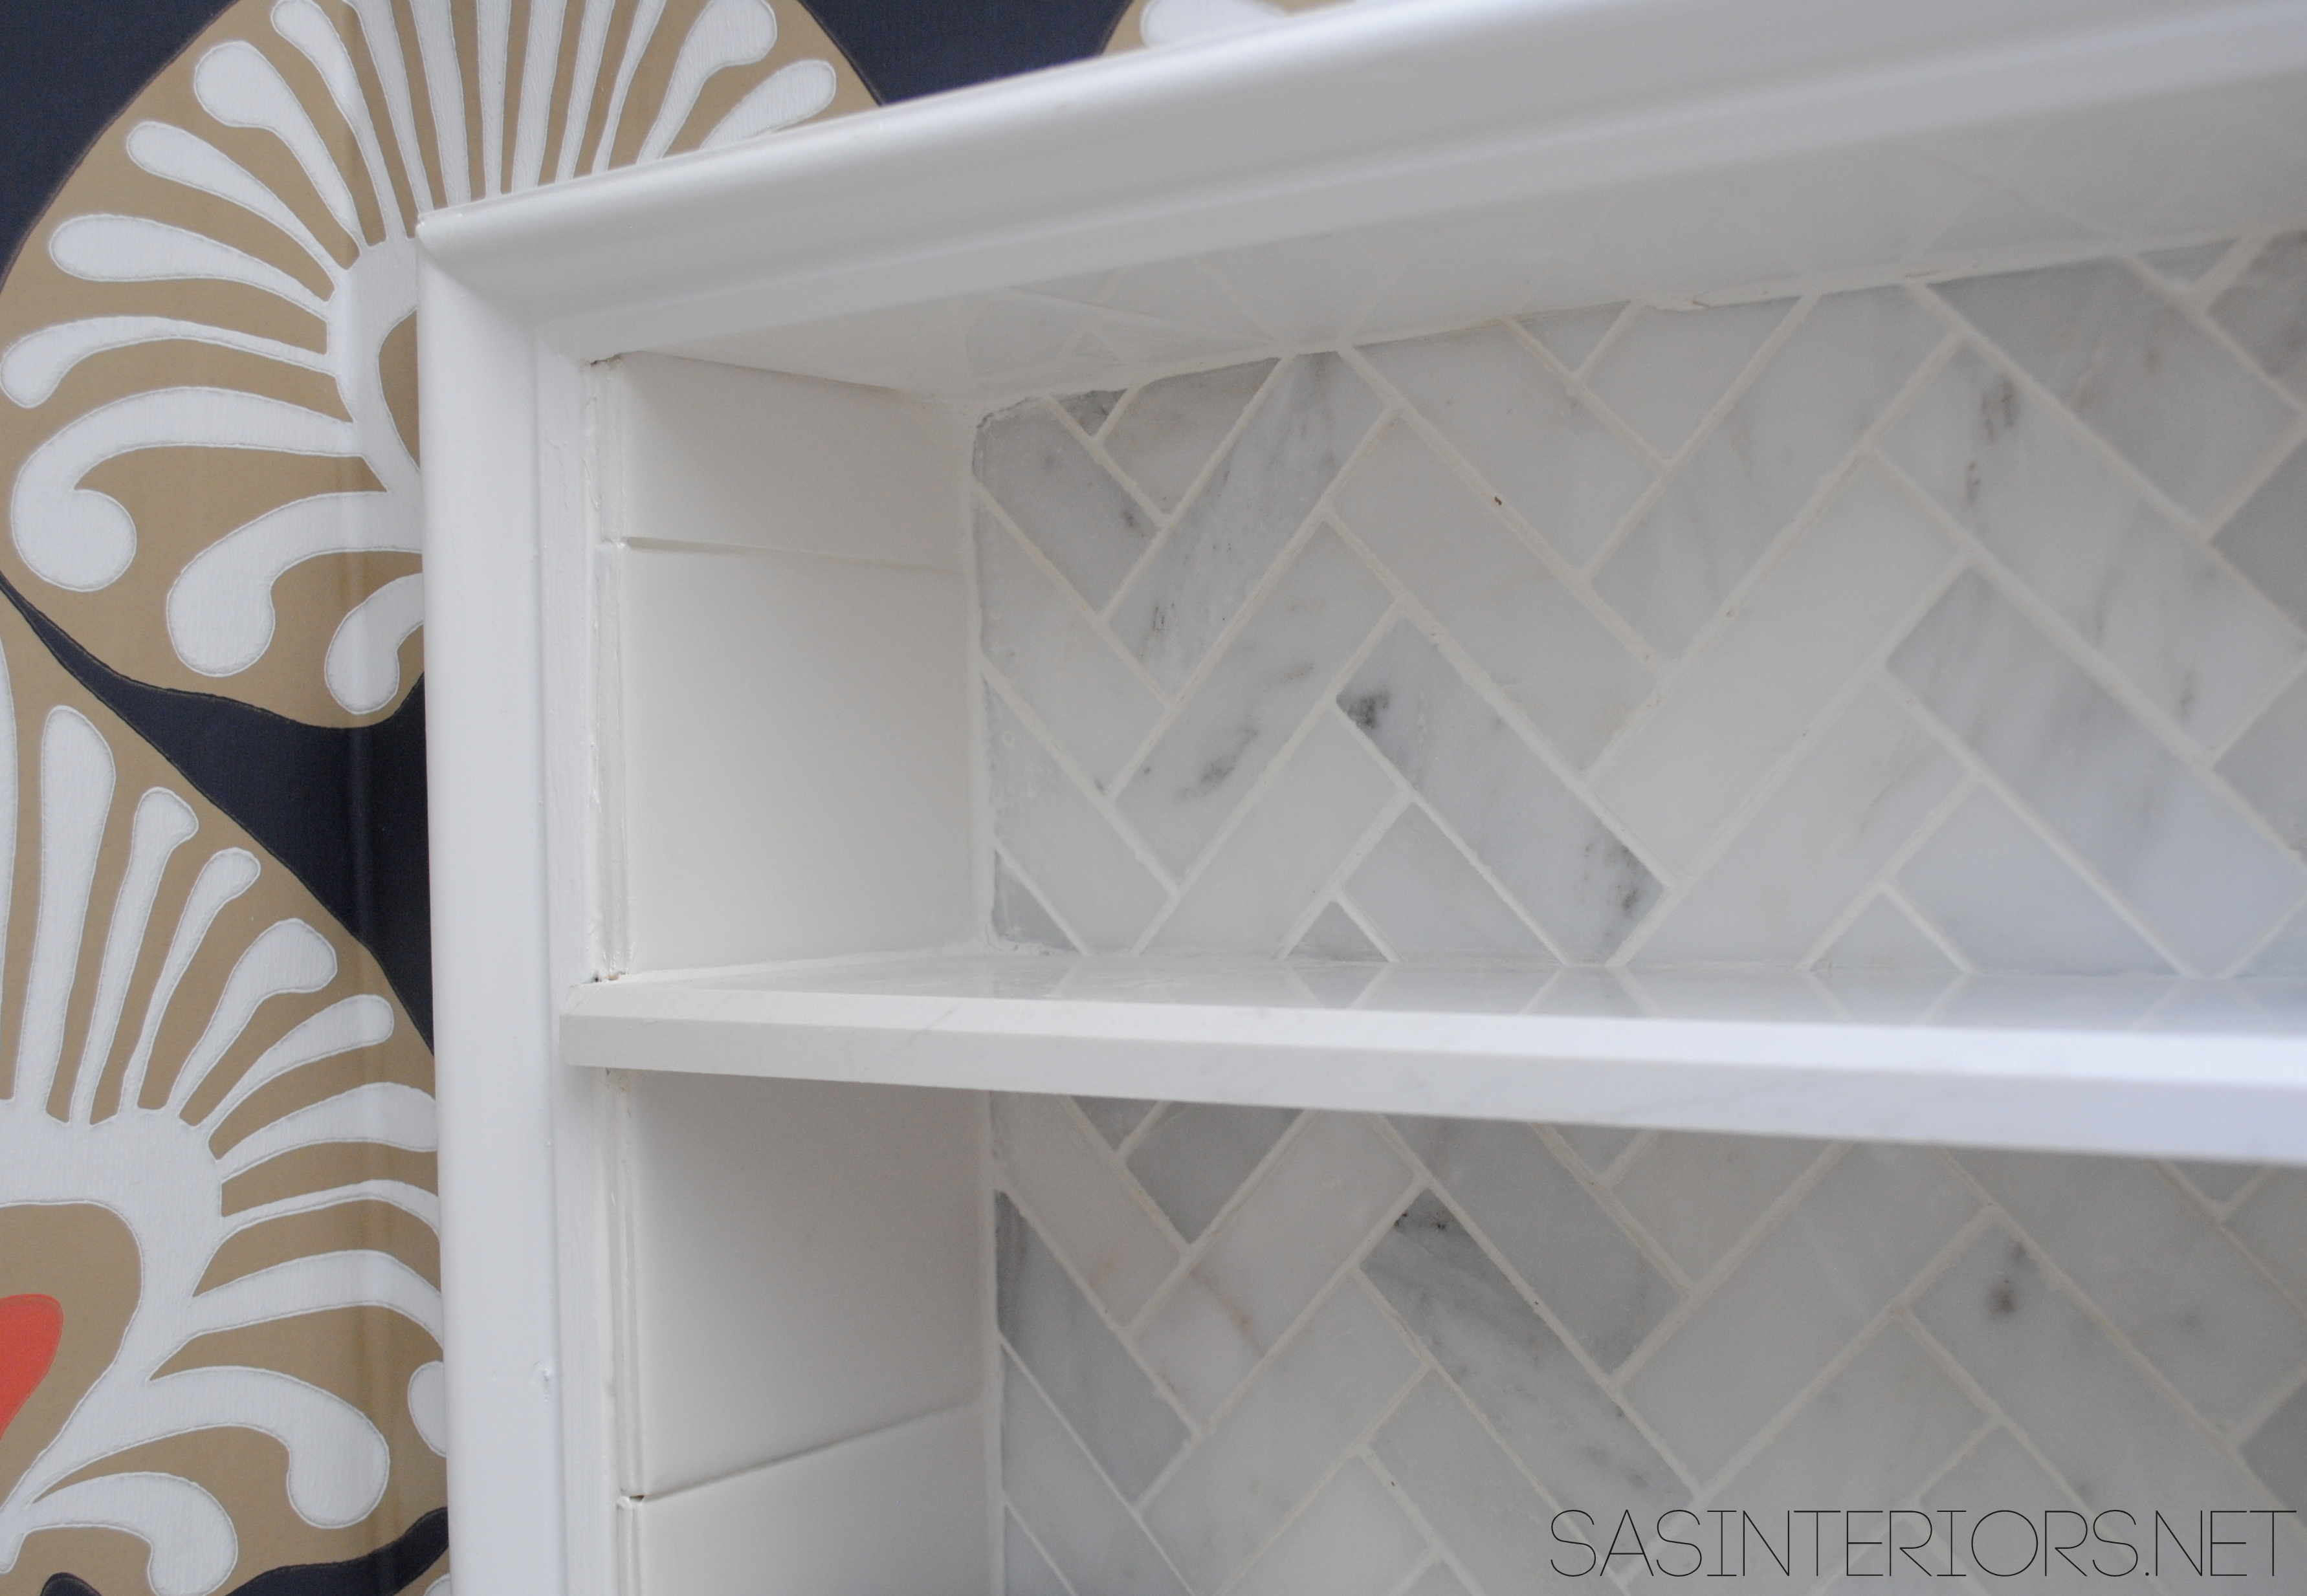
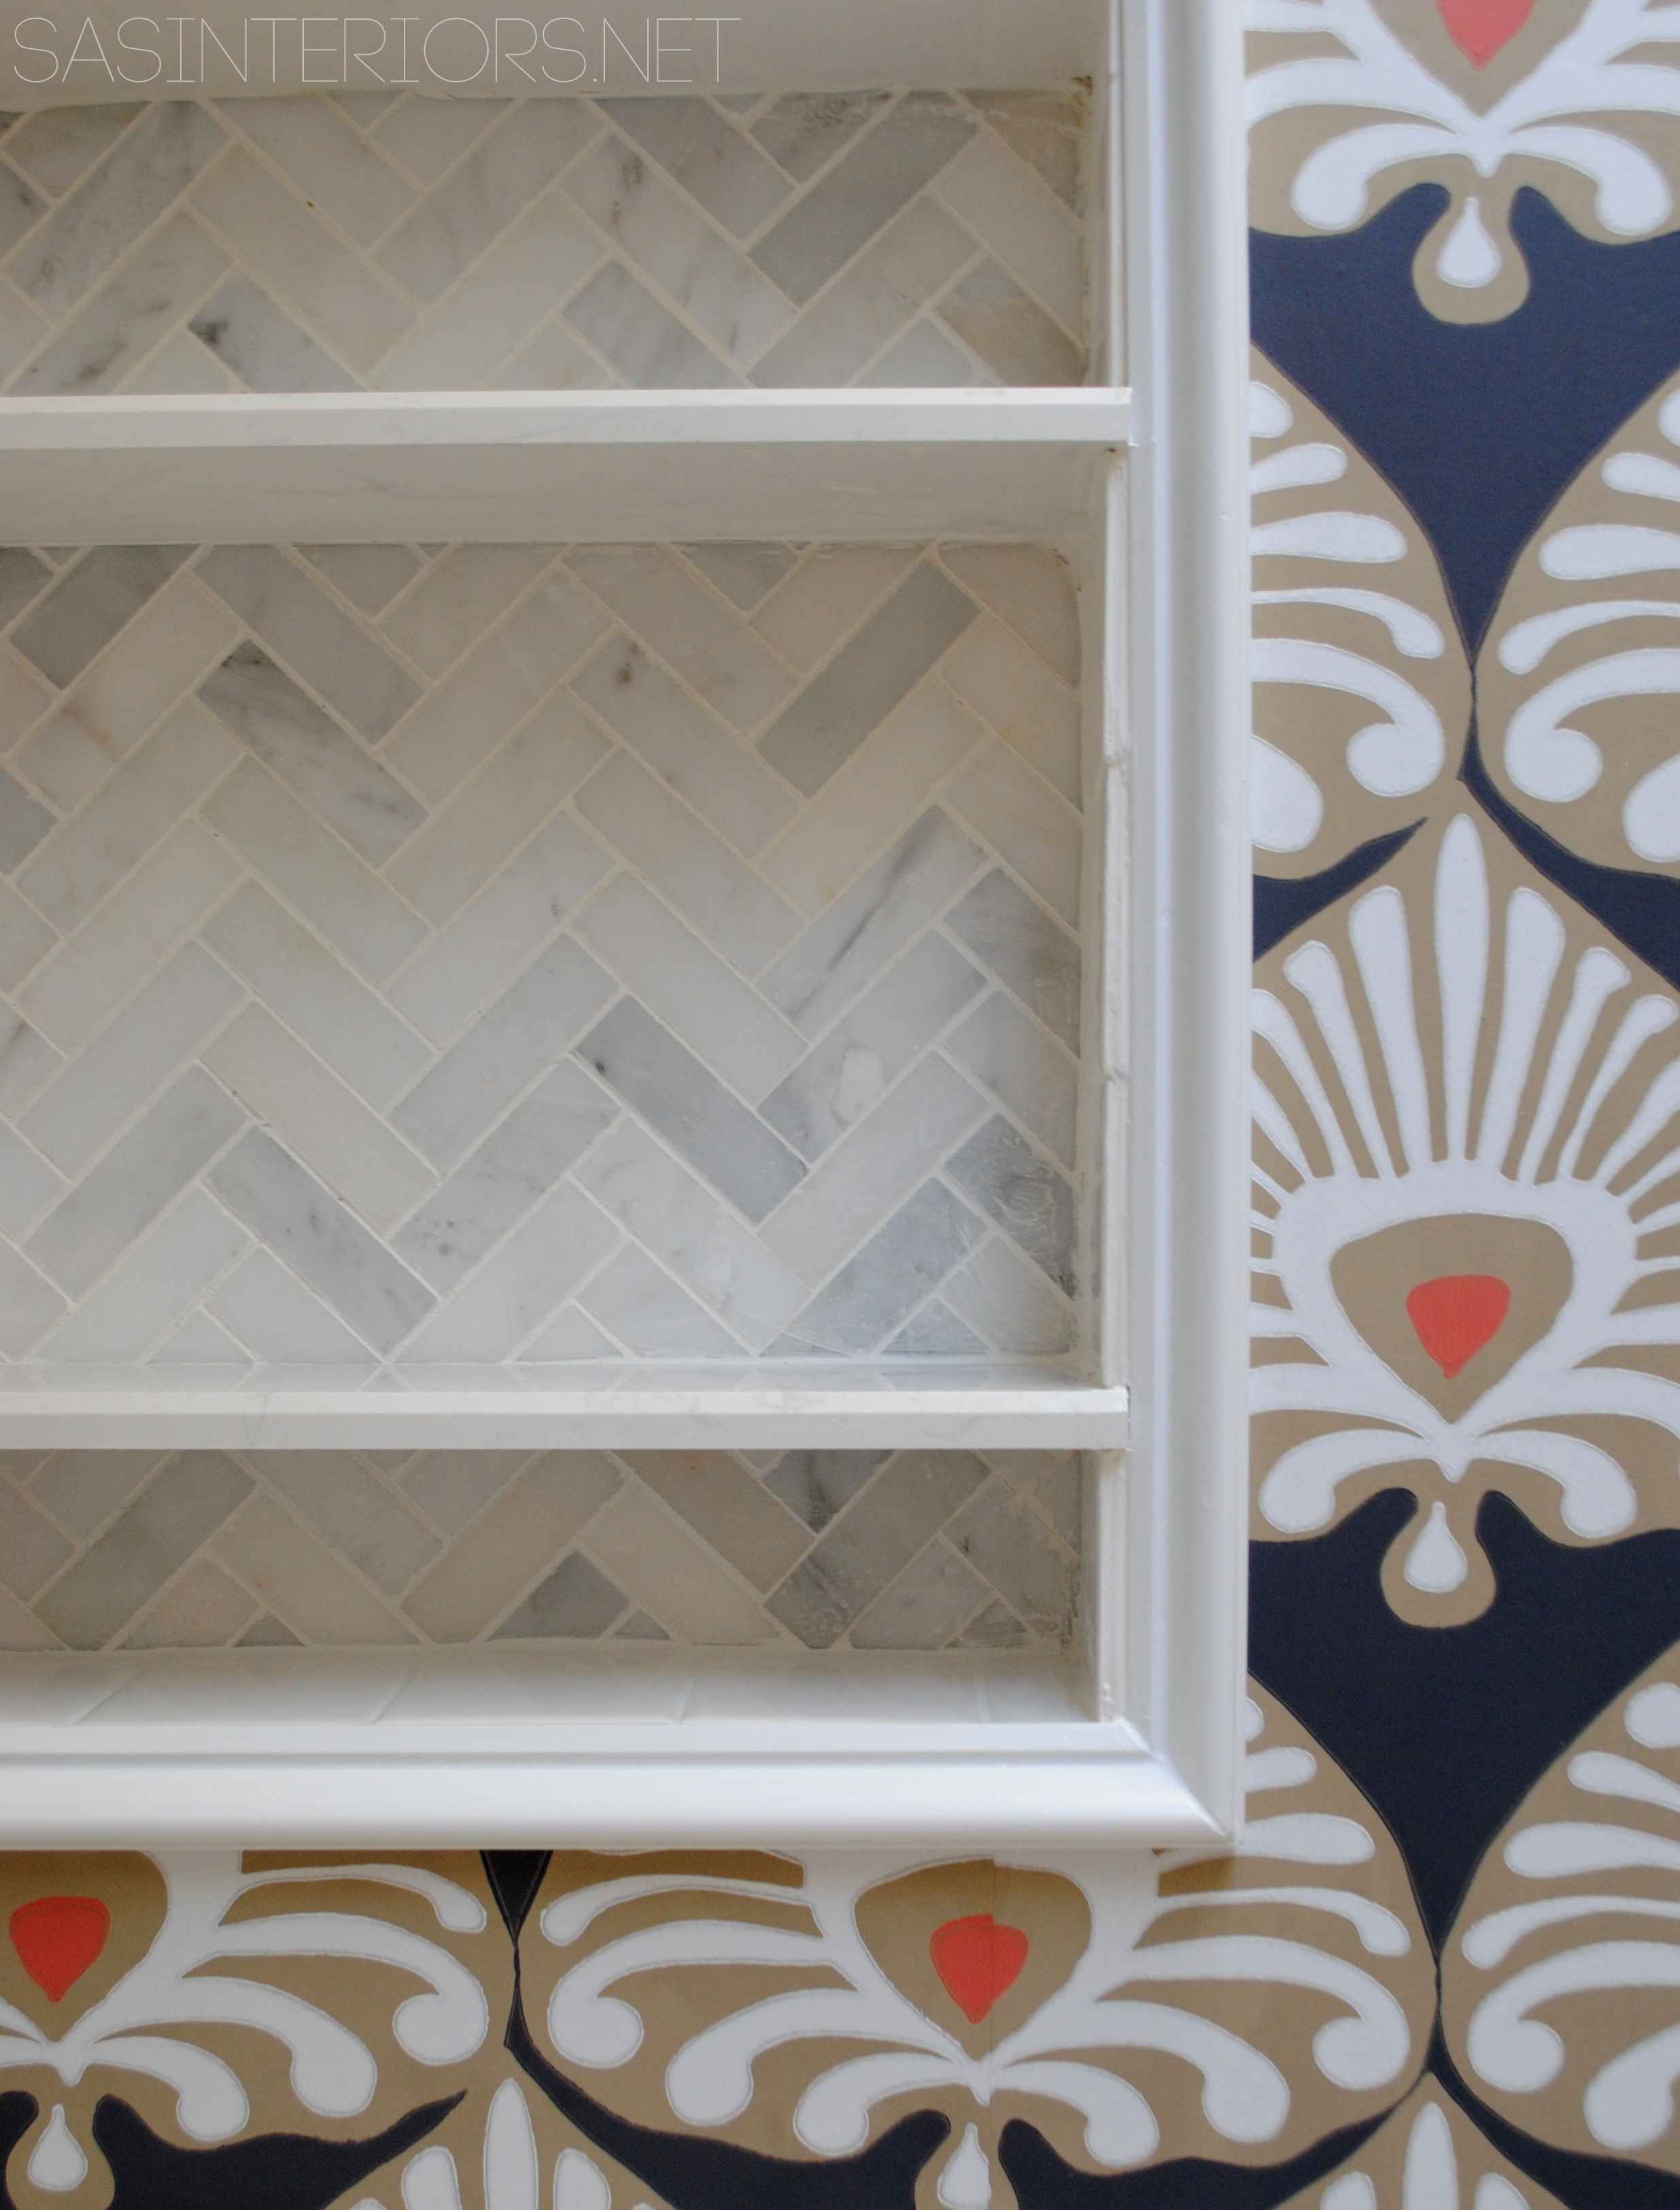
After the last piece was put in place, I gave the moulding a light sanding, and painted it with semi-gloss white. Here’s the result…
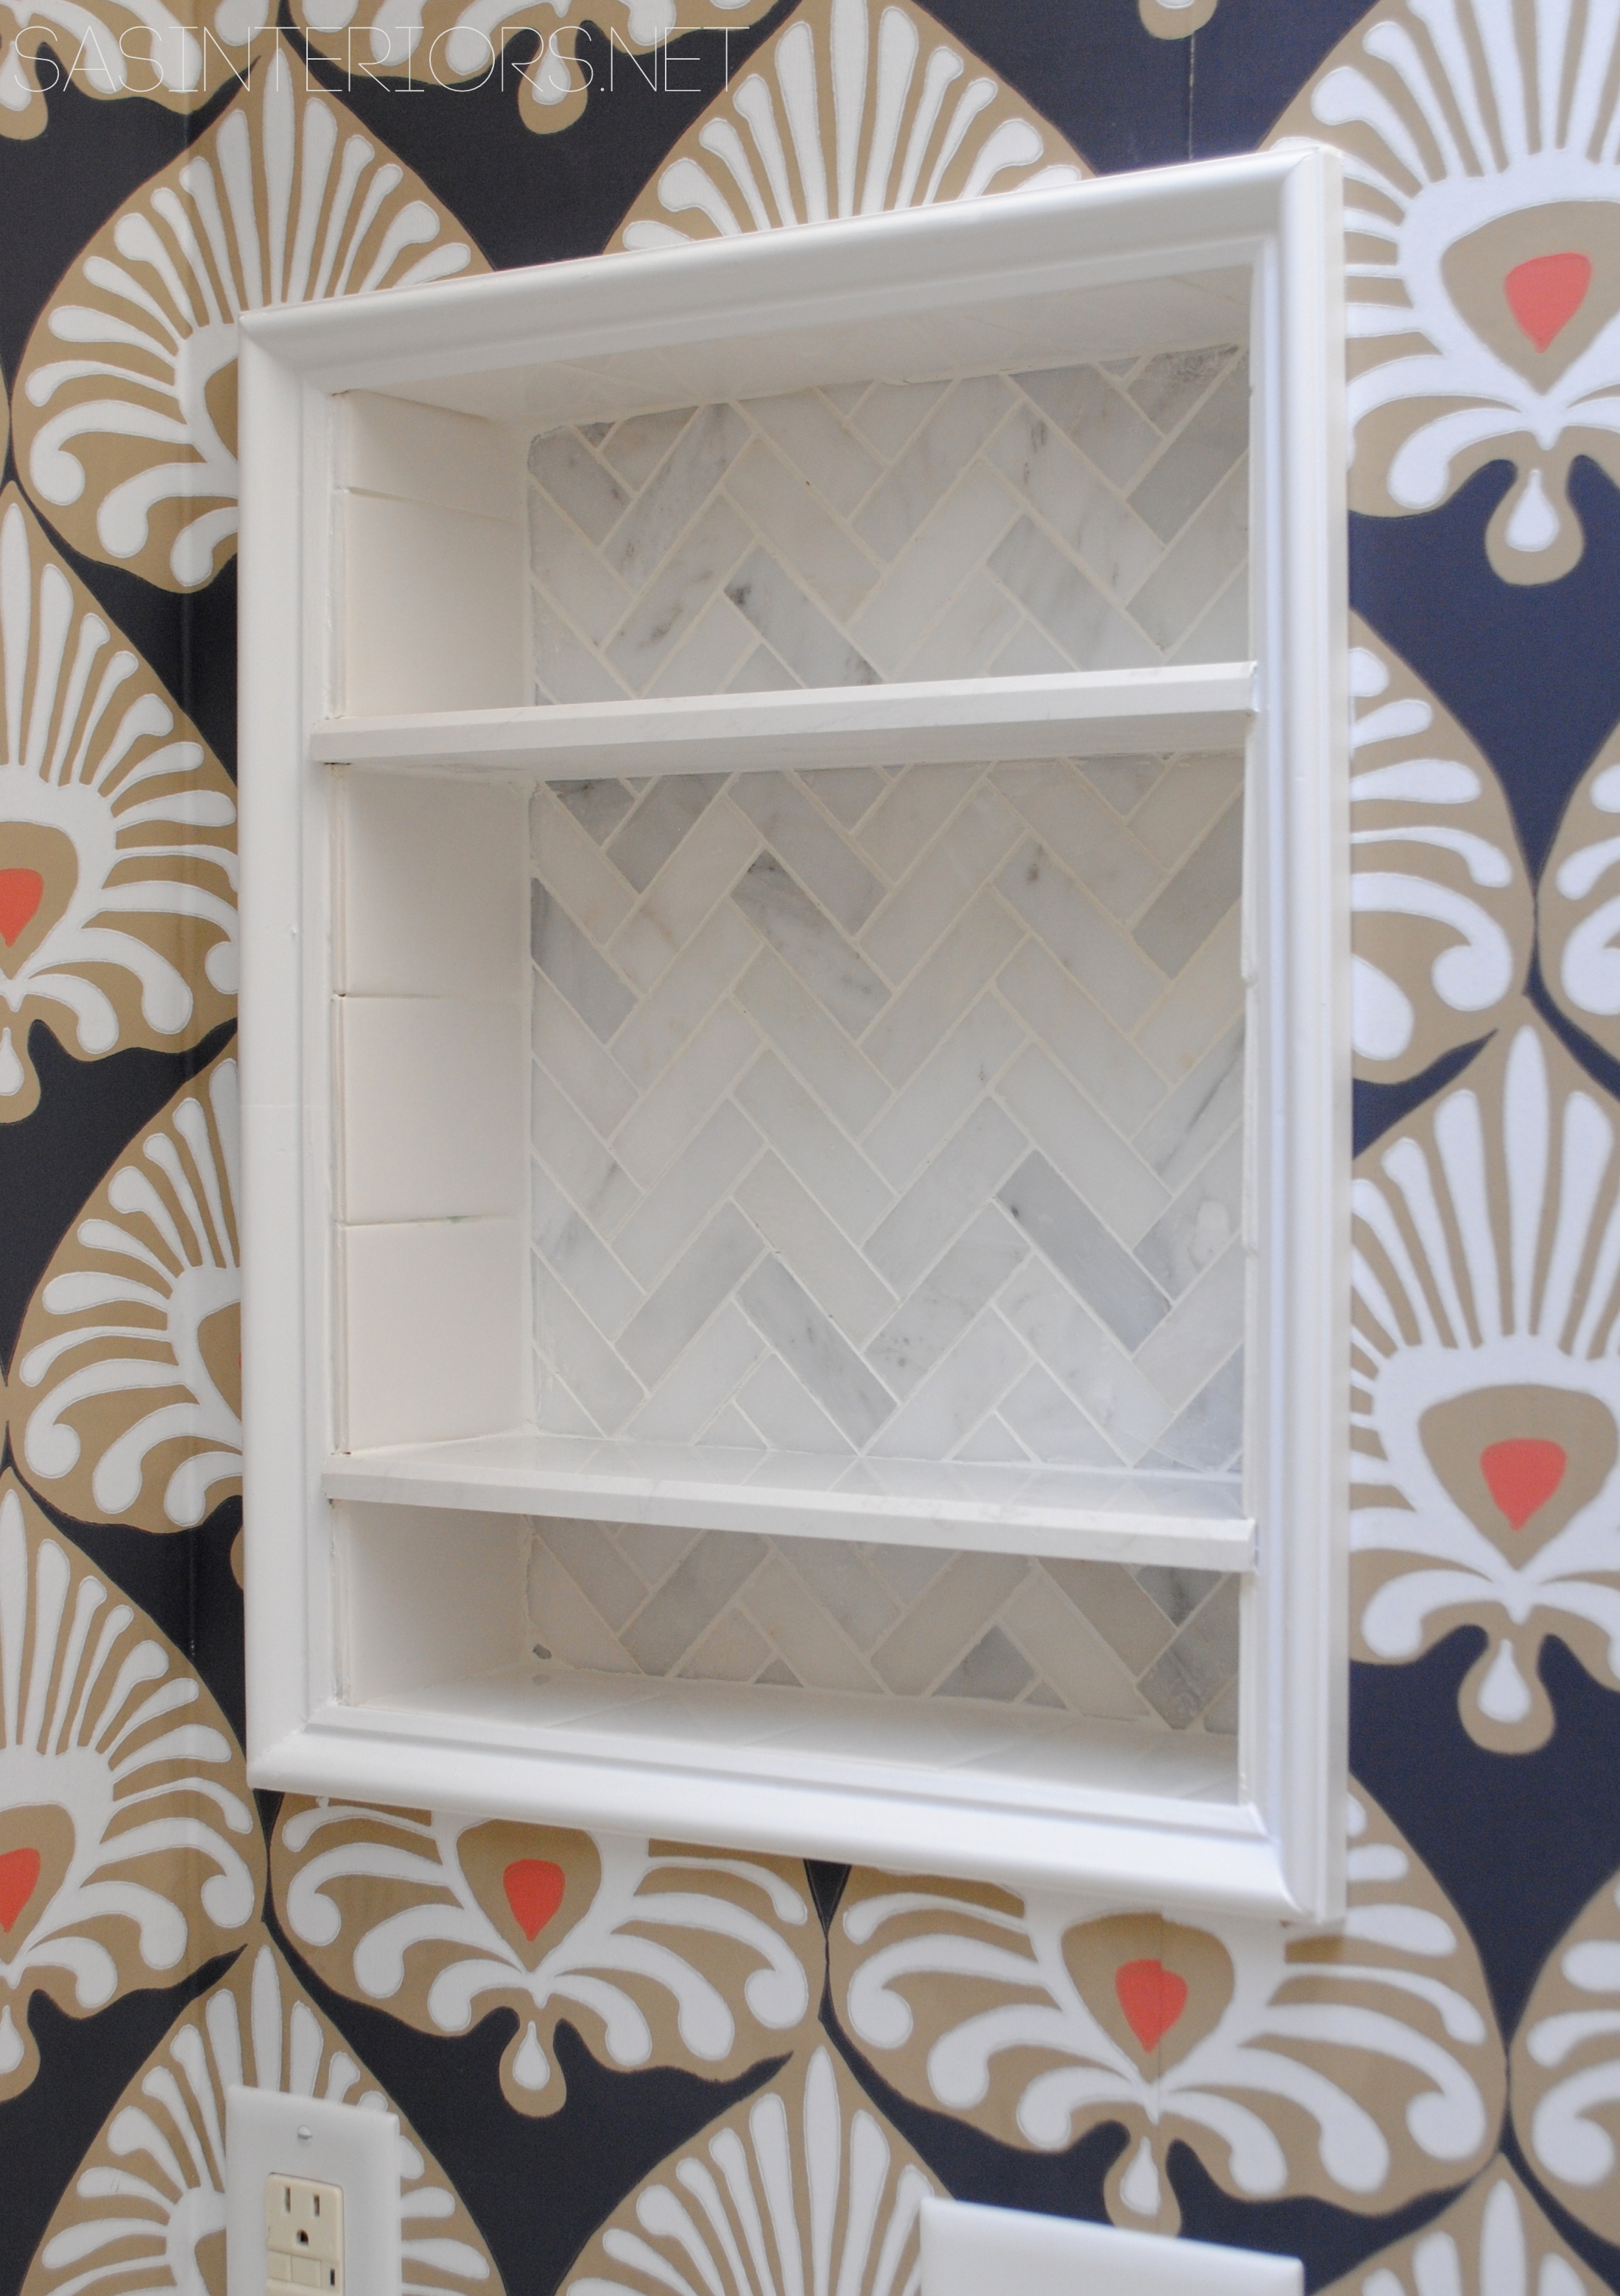
A closeup…
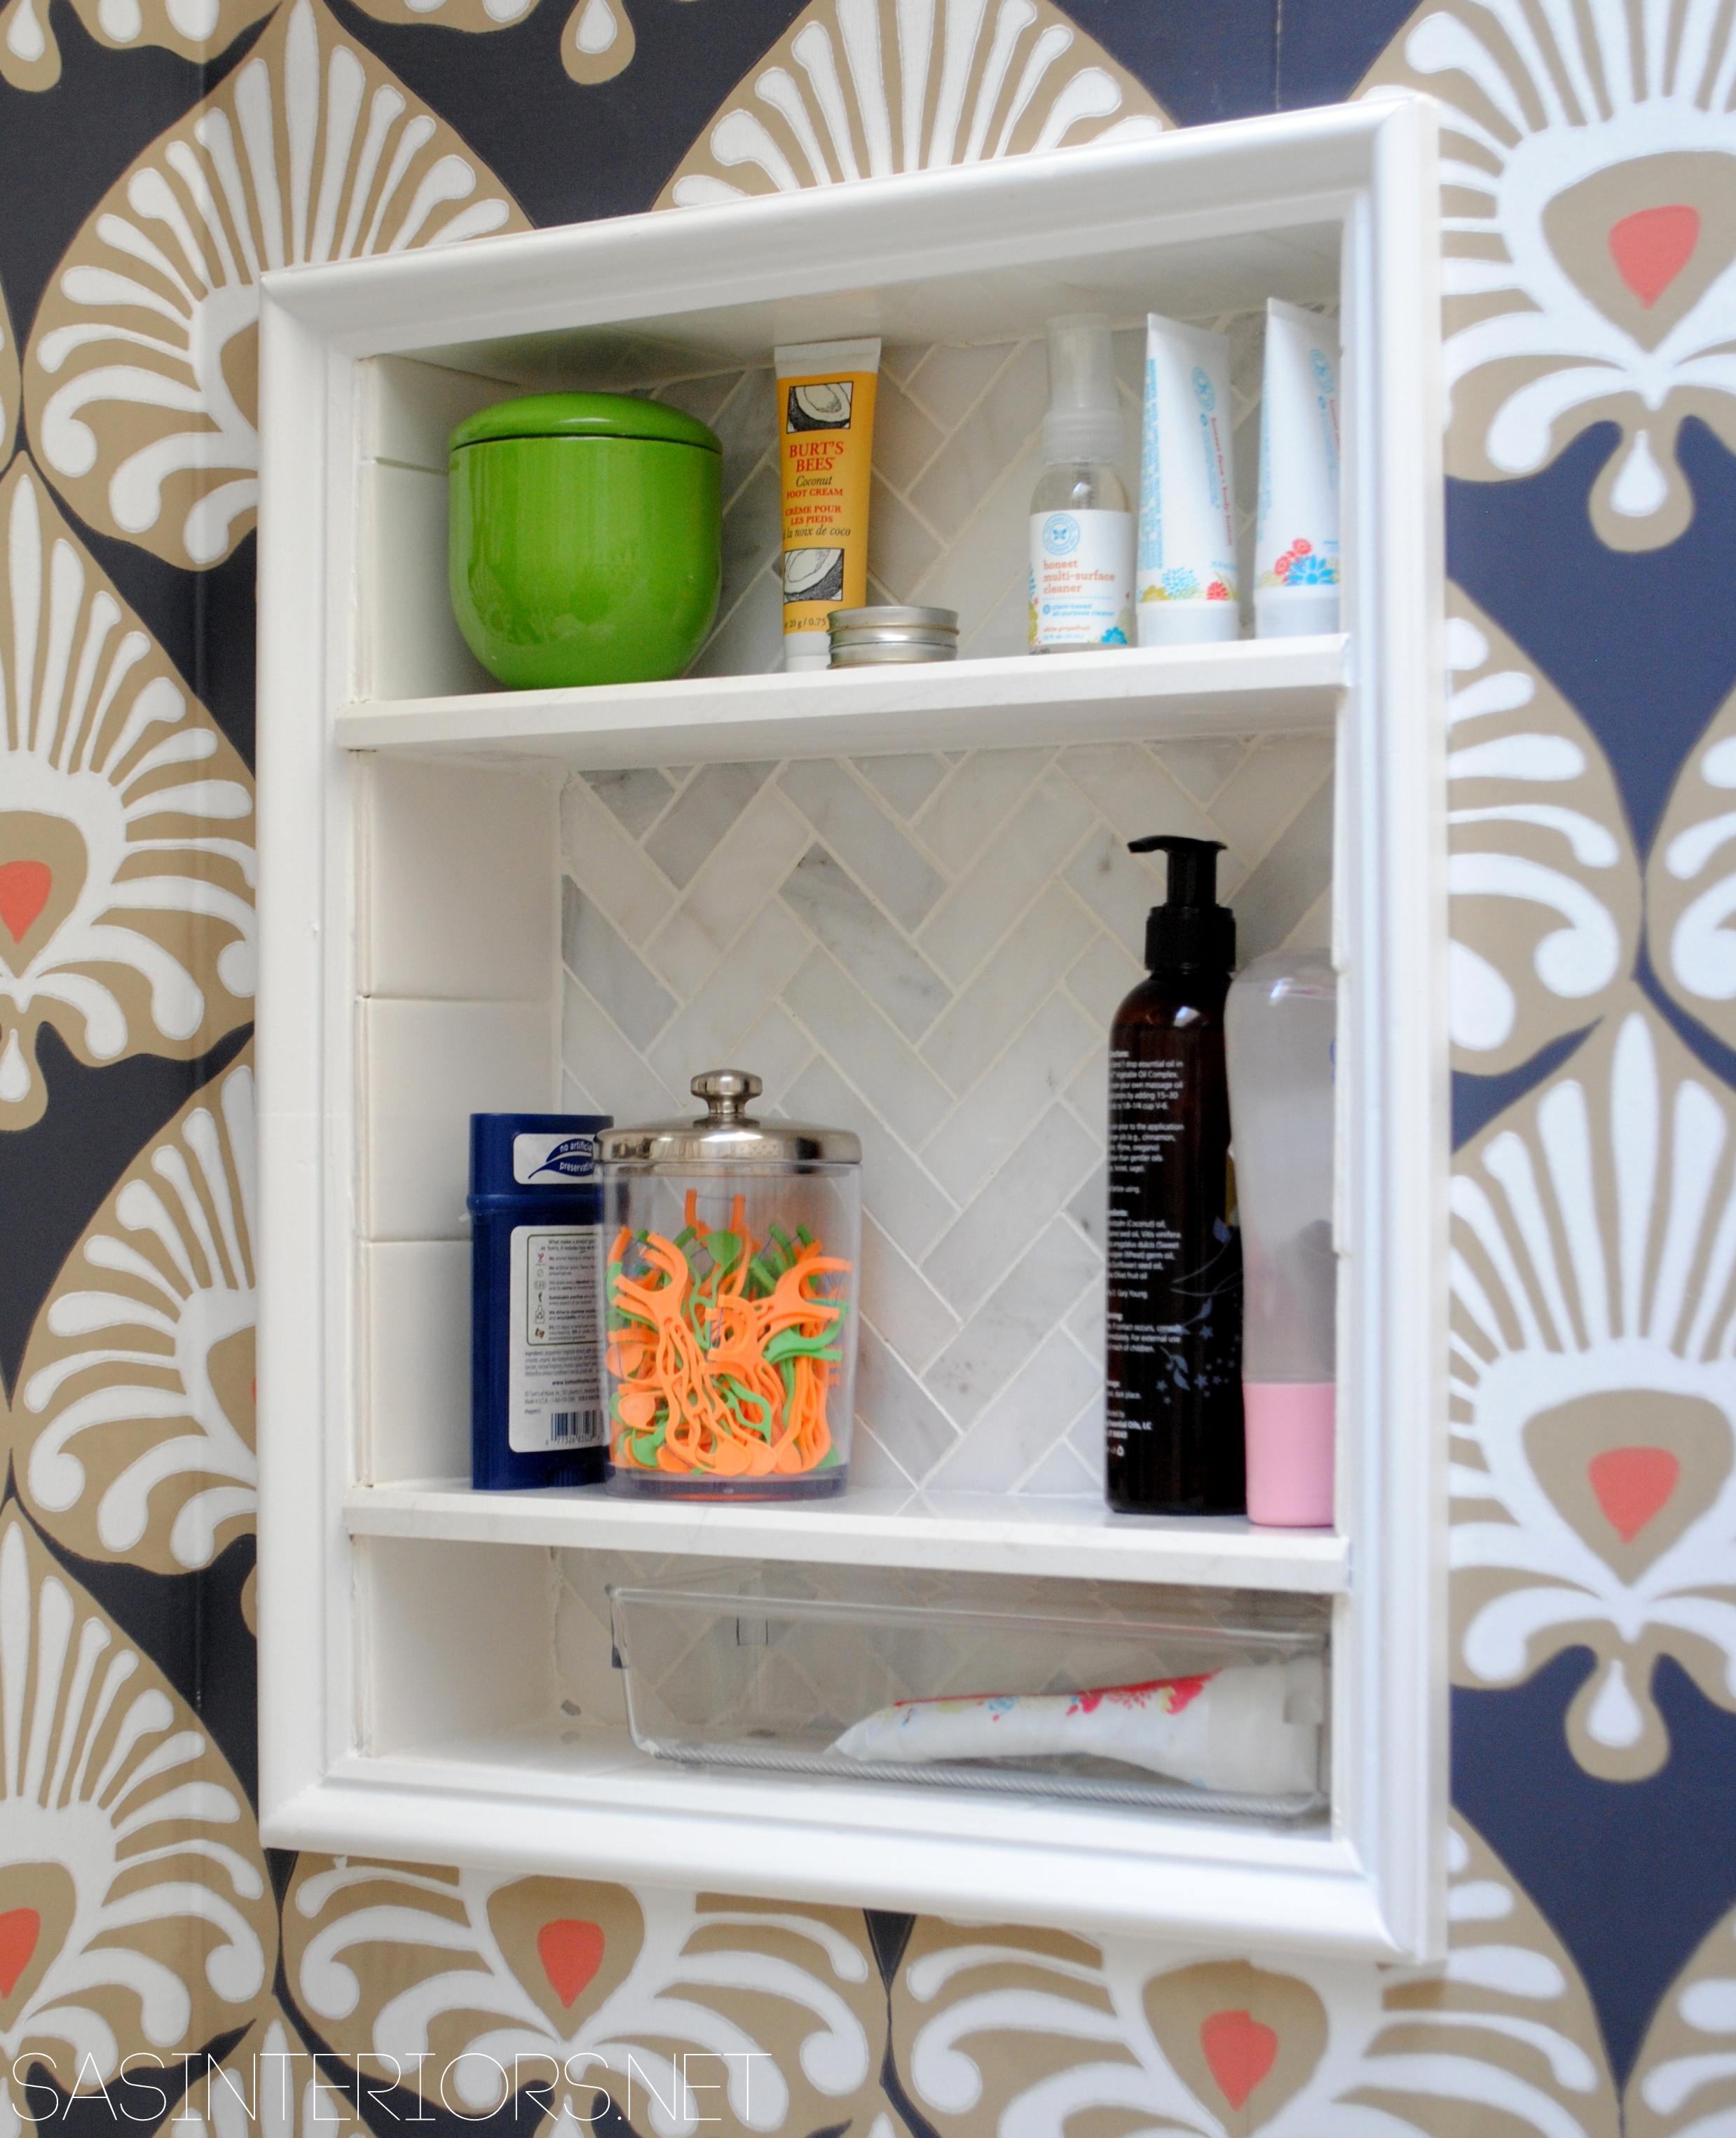
This new niche is such a fun, unexpected addition to the bathroom. Pretty + Functional = A great storage solution
Here is the niche filled with a few things…
And a glimpse a few steps back…
A few more details to go and I will be able to call this bathroom makeover DONE! Adding a tiled niche on Day 19 + 20 is complete! Up next… adding details – moulding, lighting, and accessories. More to come soon!
The installation of the tiled niche took 2 days, about 4 hours each day
From start to finish, these are all the posts pertaining to this bathroom remodel
Plan of Action
Demo: Removal + Installation of the Tub & Walls
How-To Tile + Grout the Bathroom Walls
Installing Wallpaper
Adding a Tile Accent Border
Creating a Tiled Niche
Bathroom Makeover Reveal
Resources
{Day 19+20} Tiled Niche – Complete! 10 more days to go…

To gather even more unique, fun, and creative ideas for your indoor and outdoor Winter spaces, I would definitely suggest downloading the Lowe’s Creative Ideas app on your iphone and/or ipad. I’m always checking out the FREE app for great seasonal + do-it-yourself inspiration.
Disclosure: I am part of the Lowe’s Creative Team and was provided with a Lowe’s gift card to purchase items for my project. I was also compensated for my time to use the products. No one told me what to create, what to buy, how to use the product, or what to write. All opinions are 100% mine!