


How-To Hang Wallpaper Like a Pro!
If you follow me on Instagram – my favorite place on the web to share snippets throughout my day – then you know I had a busy weekend wallpapering. The kids room took a design turn after we found out a few weeks ago that baby #3 is going to be a girl. In the end, as a family, we decided the kids will stay in the rooms they are currently in and the girls will eventually share a room once the baby is ready to move in. So what does that mean?? Design changes! The room that was going to be a shared boy / girl room was no longer needed. Since we had already started on the transformation for my little guy, it meant we had to continue chugging along. And let me tell ya, he’s a happy camper!
After choosing a new paint color (Benjamin Moore Hazy Skies) that I was very unsure of, because it was way lighter of a color than I’m used to, I am now thrilled with the decision. Why? Because I’ve been adding in colors in other ways. Layers, my friends! Layers are huge and in a kids room, books and toys add an amazing pop! BUT, I was in need of more. Yes more! And that more resulted in a fun + unique wallpaper for the focal window wall that instantly turned the entire 12′ width into a photo gallery wall…

How fun is that?! And before we go any further, I want to give you a peak at the before and after…

I want to show you more of the room because it’s turning out pretty fantastic, but I can’t. That’s to come – pinky swear!

This incredible wallpaper is made by Taylor & Wood through Graham & Brown and it truly brings a wall to life. I knew I wanted to do something fun on this focal wall. Originally I was thinking a stencil, but this is way better. So let’s jump right into how I installed it…
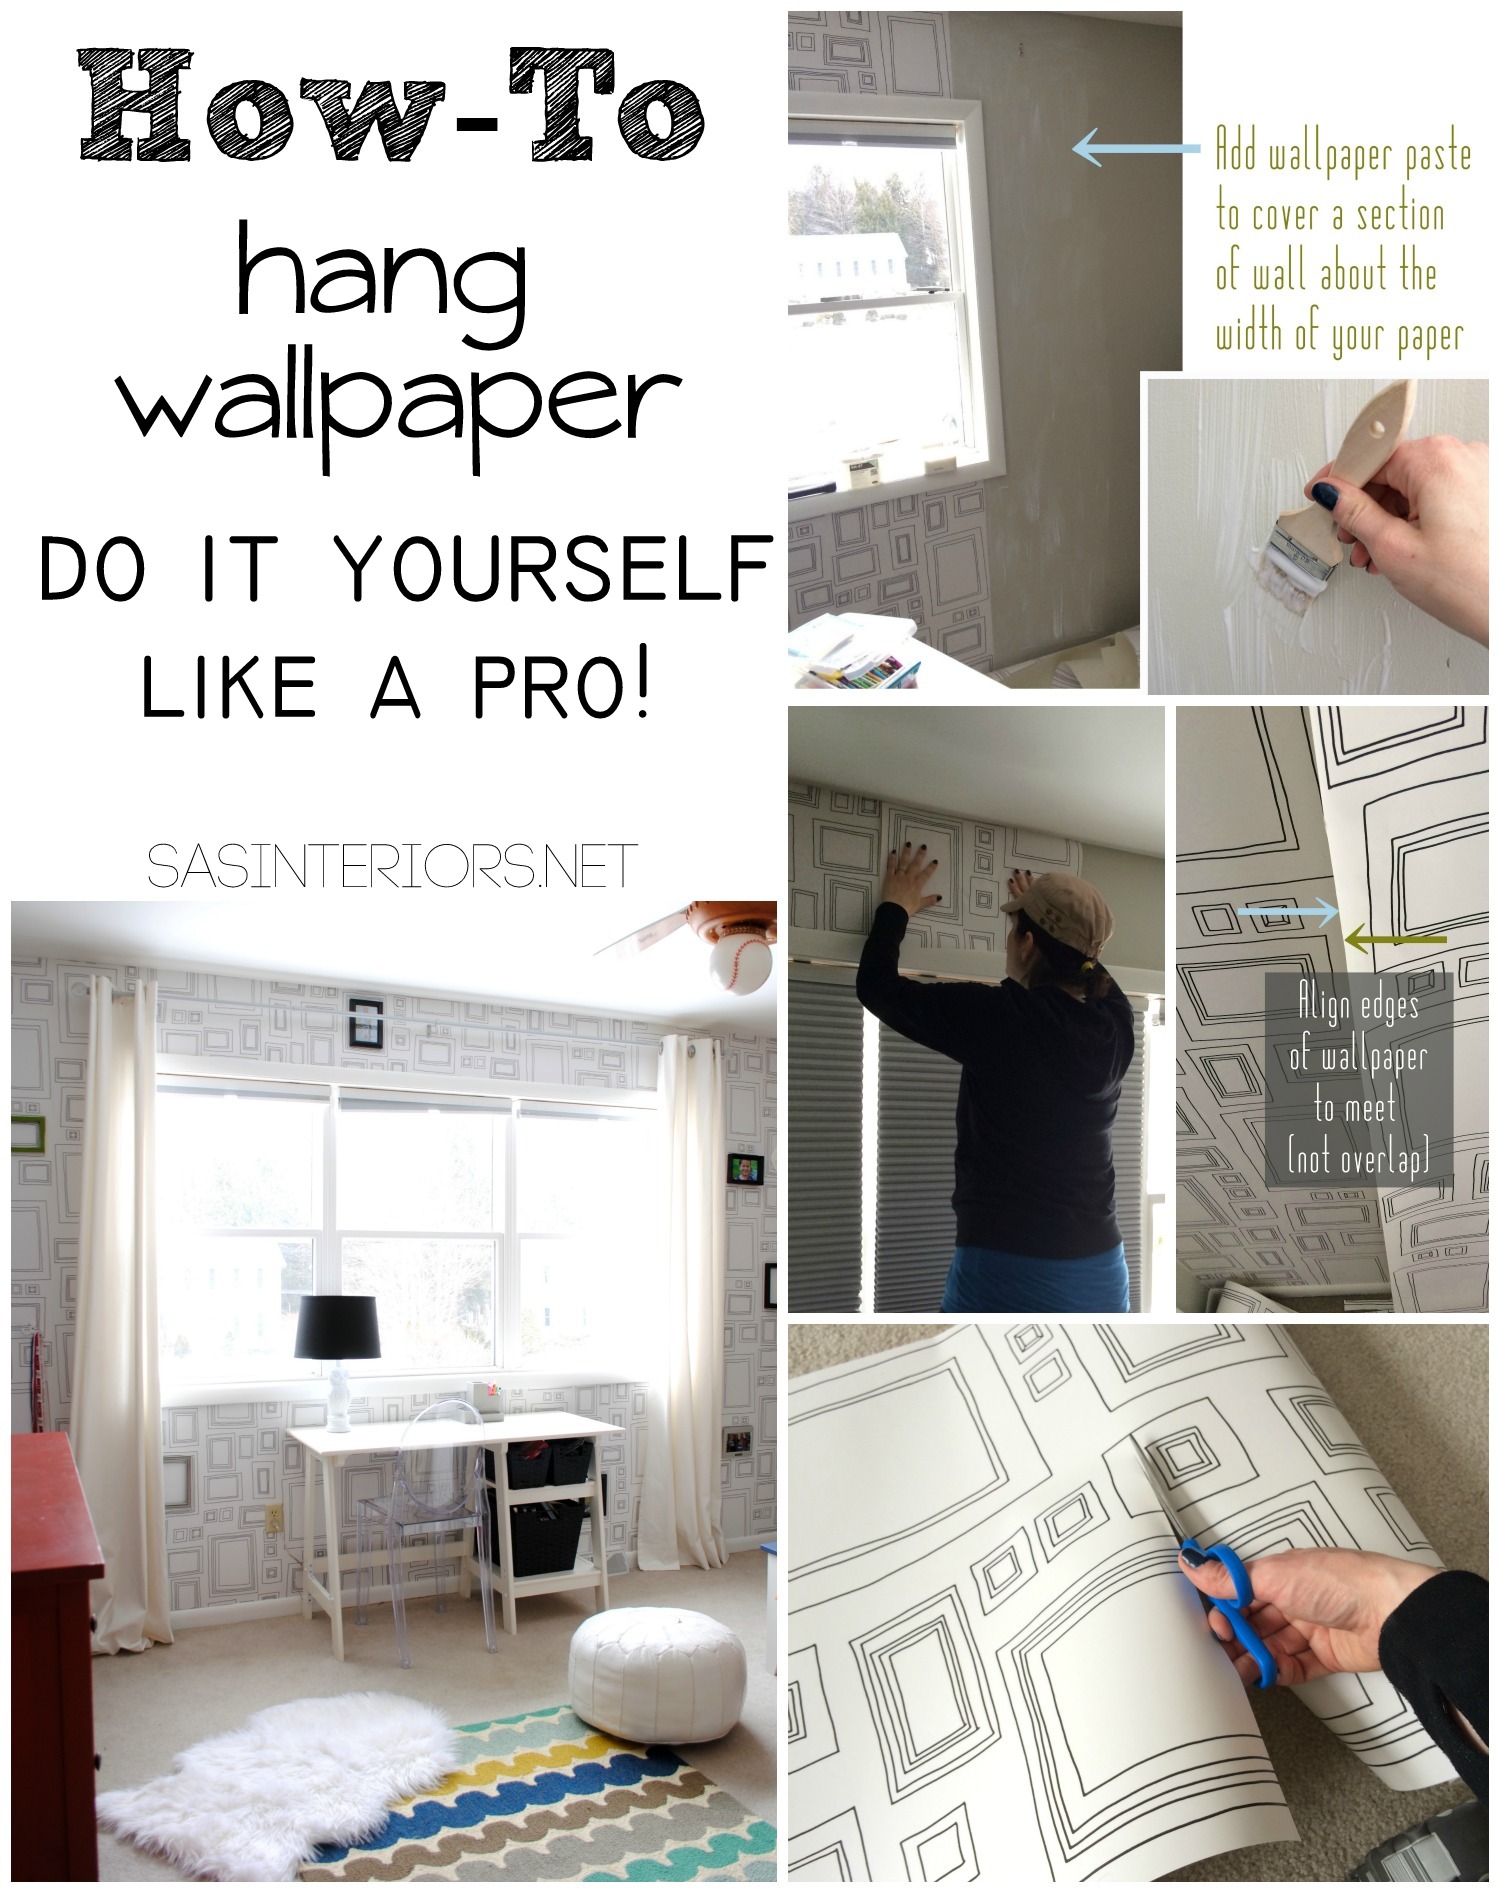
How-To Hang Wallpaper… LIKE A PRO!
Similar to the last time I hung wallpaper in the powder room, this paper was also NOT pre-pasted (wallpaper that has paste and is activated with only water). After wallpapering a few areas in my home, I have found that higher-quality wallpapers typically are not pre-pasted, so instead a paste has to be added. I actually think the paste is easier to use than putting the paper through water. I wrote a tutorial a long time ago on How-To Hang Prepasted Wallpaper, if you want to check that out.
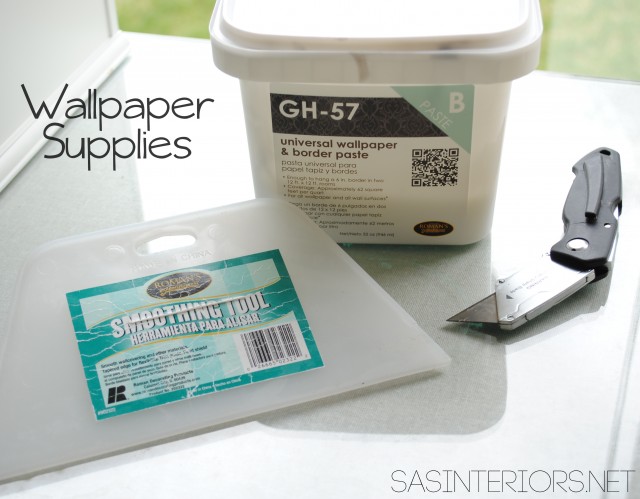
Supplies:
- Wallpaper
- Wallpaper Paste
- Smoothing Took
- Sharp Razor or blade
- Other handy tools for wallpapering are: a tape measure, a laser level, a pencil
The Steps:
1. To start off, I found it best to measure the wall and cut a piece of wallpaper the length of the wall + an additional 6-8″ for extra at the top (ceiling) and bottom (floor).
a little helper is always fun + keeps you entertained!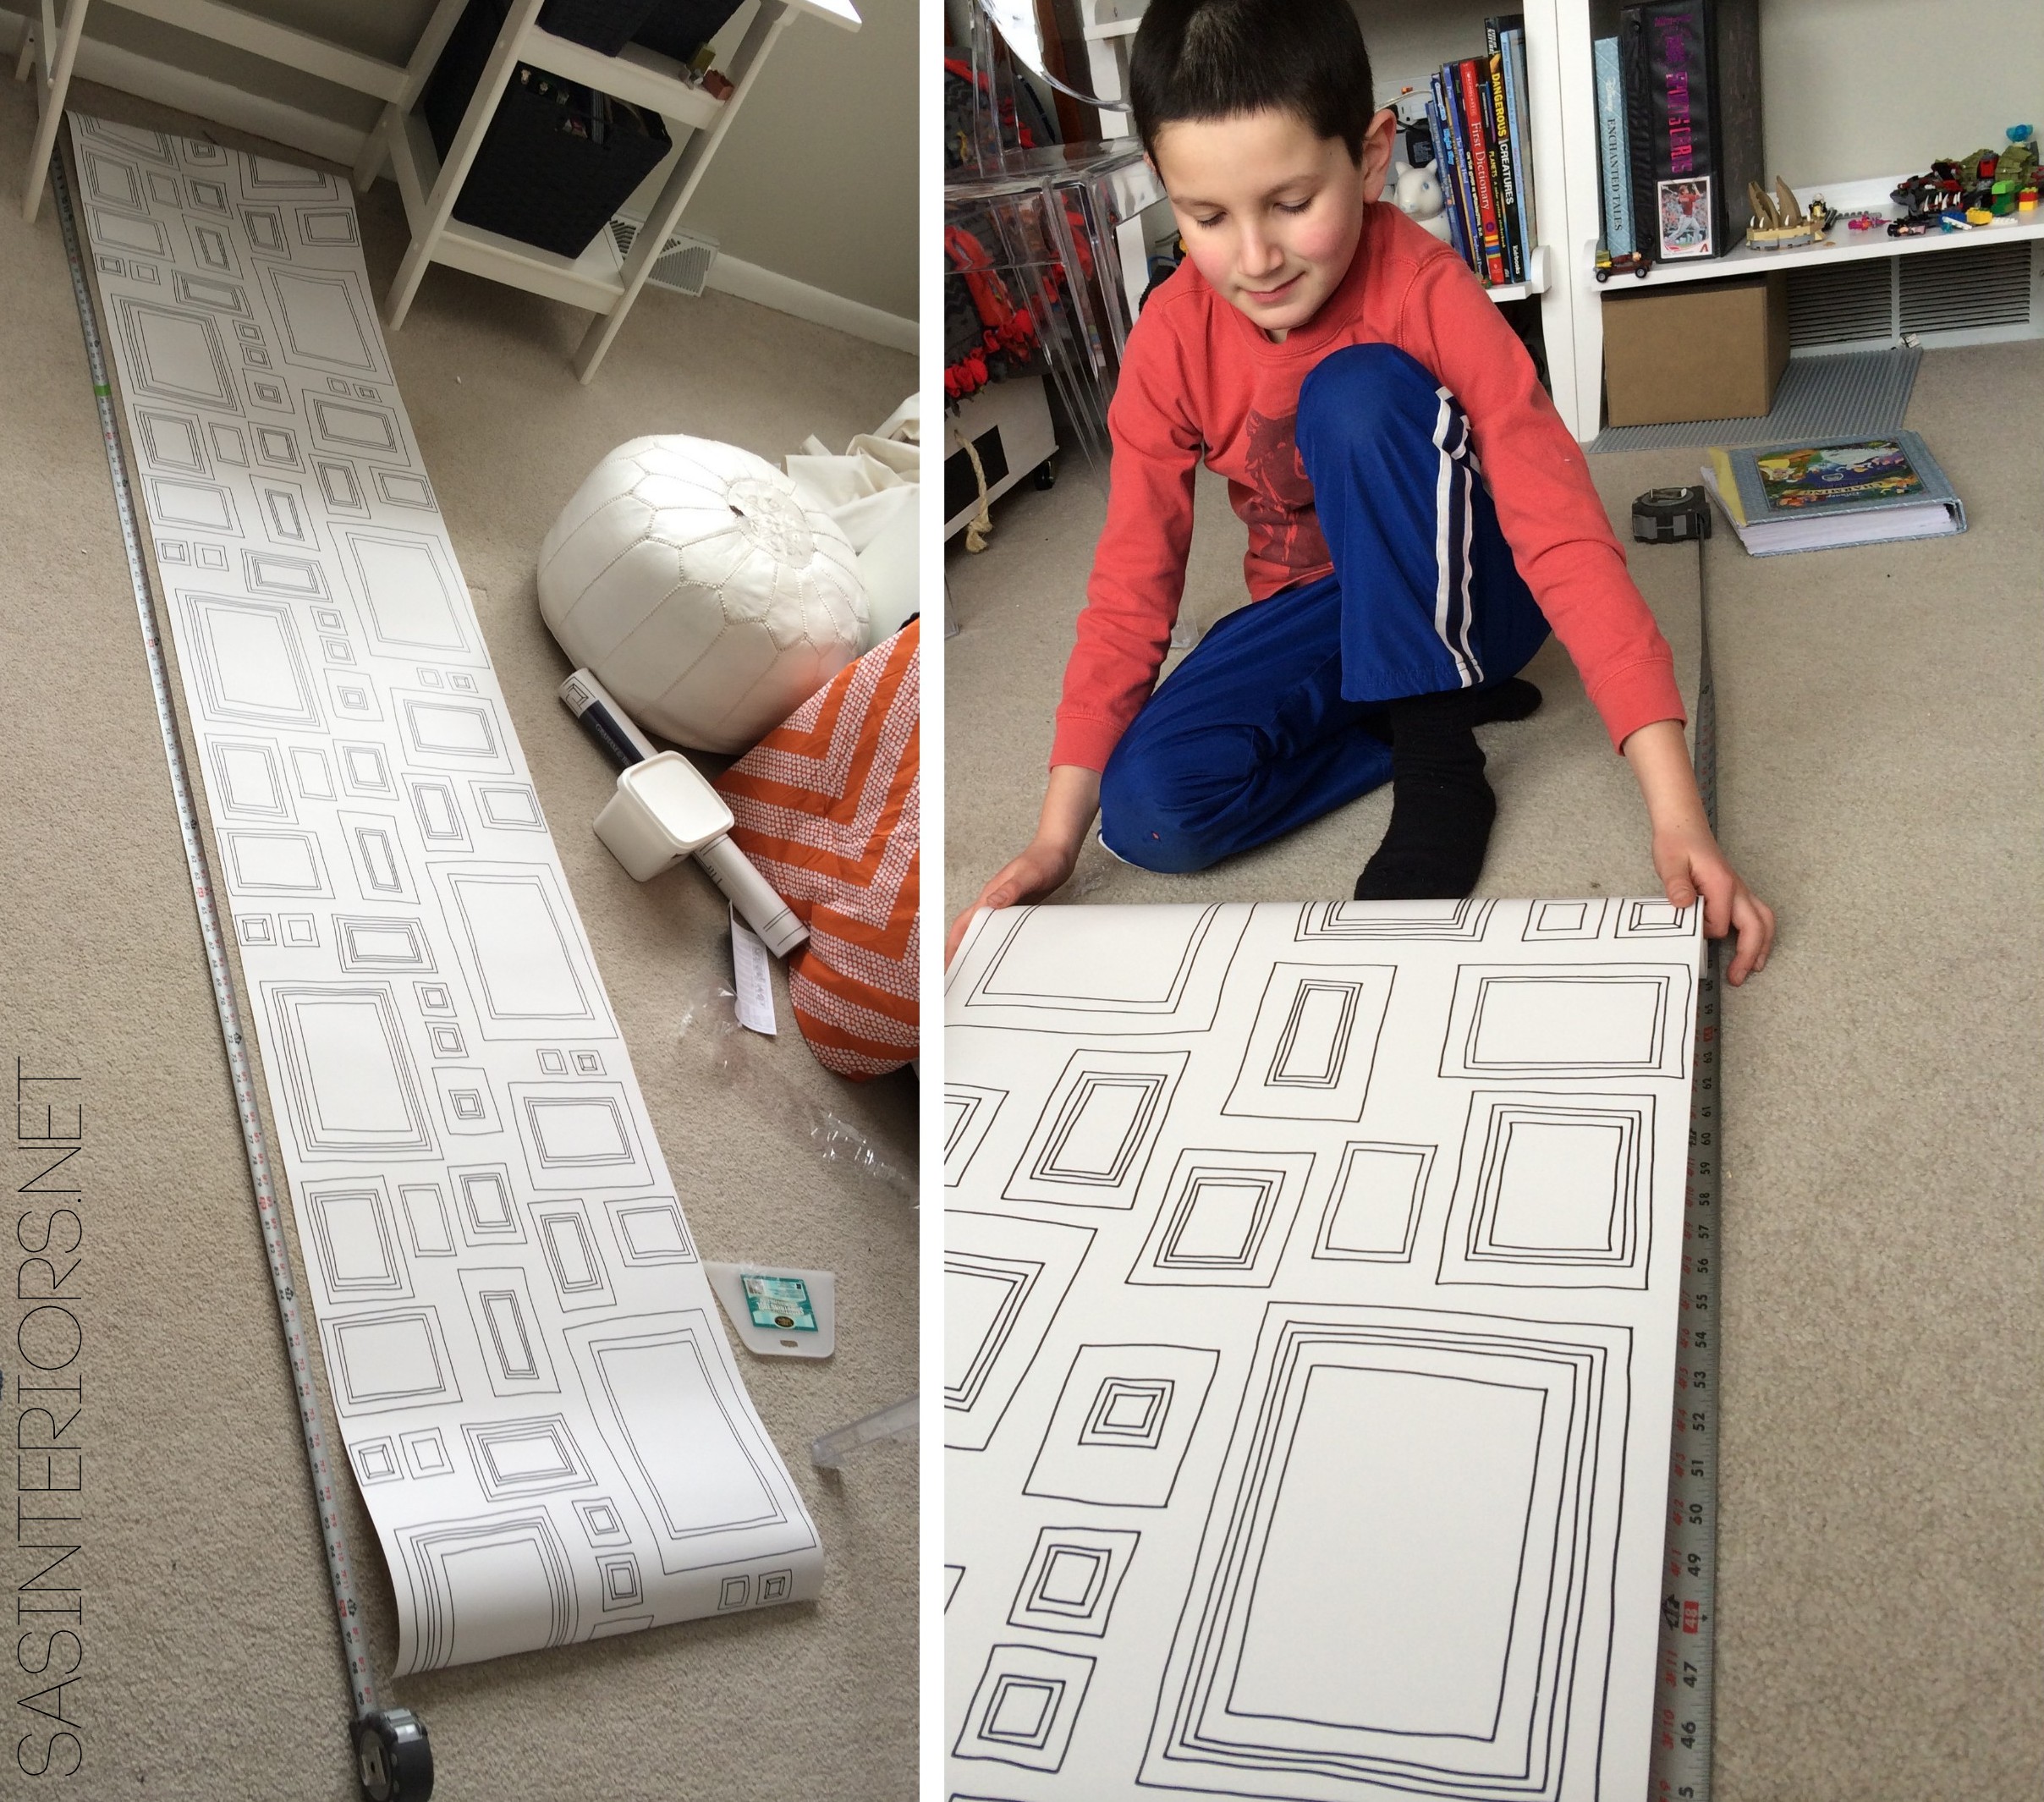

2. I wasn’t worried about centering the paper on the wall for this project (in the powder room I did) and started at the left most edge of the wall. When hanging wallpaper, I find it best to add the best directly to the wall, THEN add the paper. I used a cheap $1 brush to add enough paste to cover the width of the wallpaper (not the entire wall).

3. Once the paste is in place, then I started at the ceiling (adding about 2-3″ extra paper to trim), I hung the paper making sure to match the seam of the adjacent paper. NEVER overlap the paper.

4. When the paper initially adheres to the wall, there are always bumps and wrinkles. No worries. Simply smooth them out with the plastic smoothing tool. It’s best to start at the top and move down the wall, as well as from the center of the paper and smooth out towards the edges. You want to press firmly, but not too hard so all the glue seeps out. Alittle glue seepage is okay and expected.

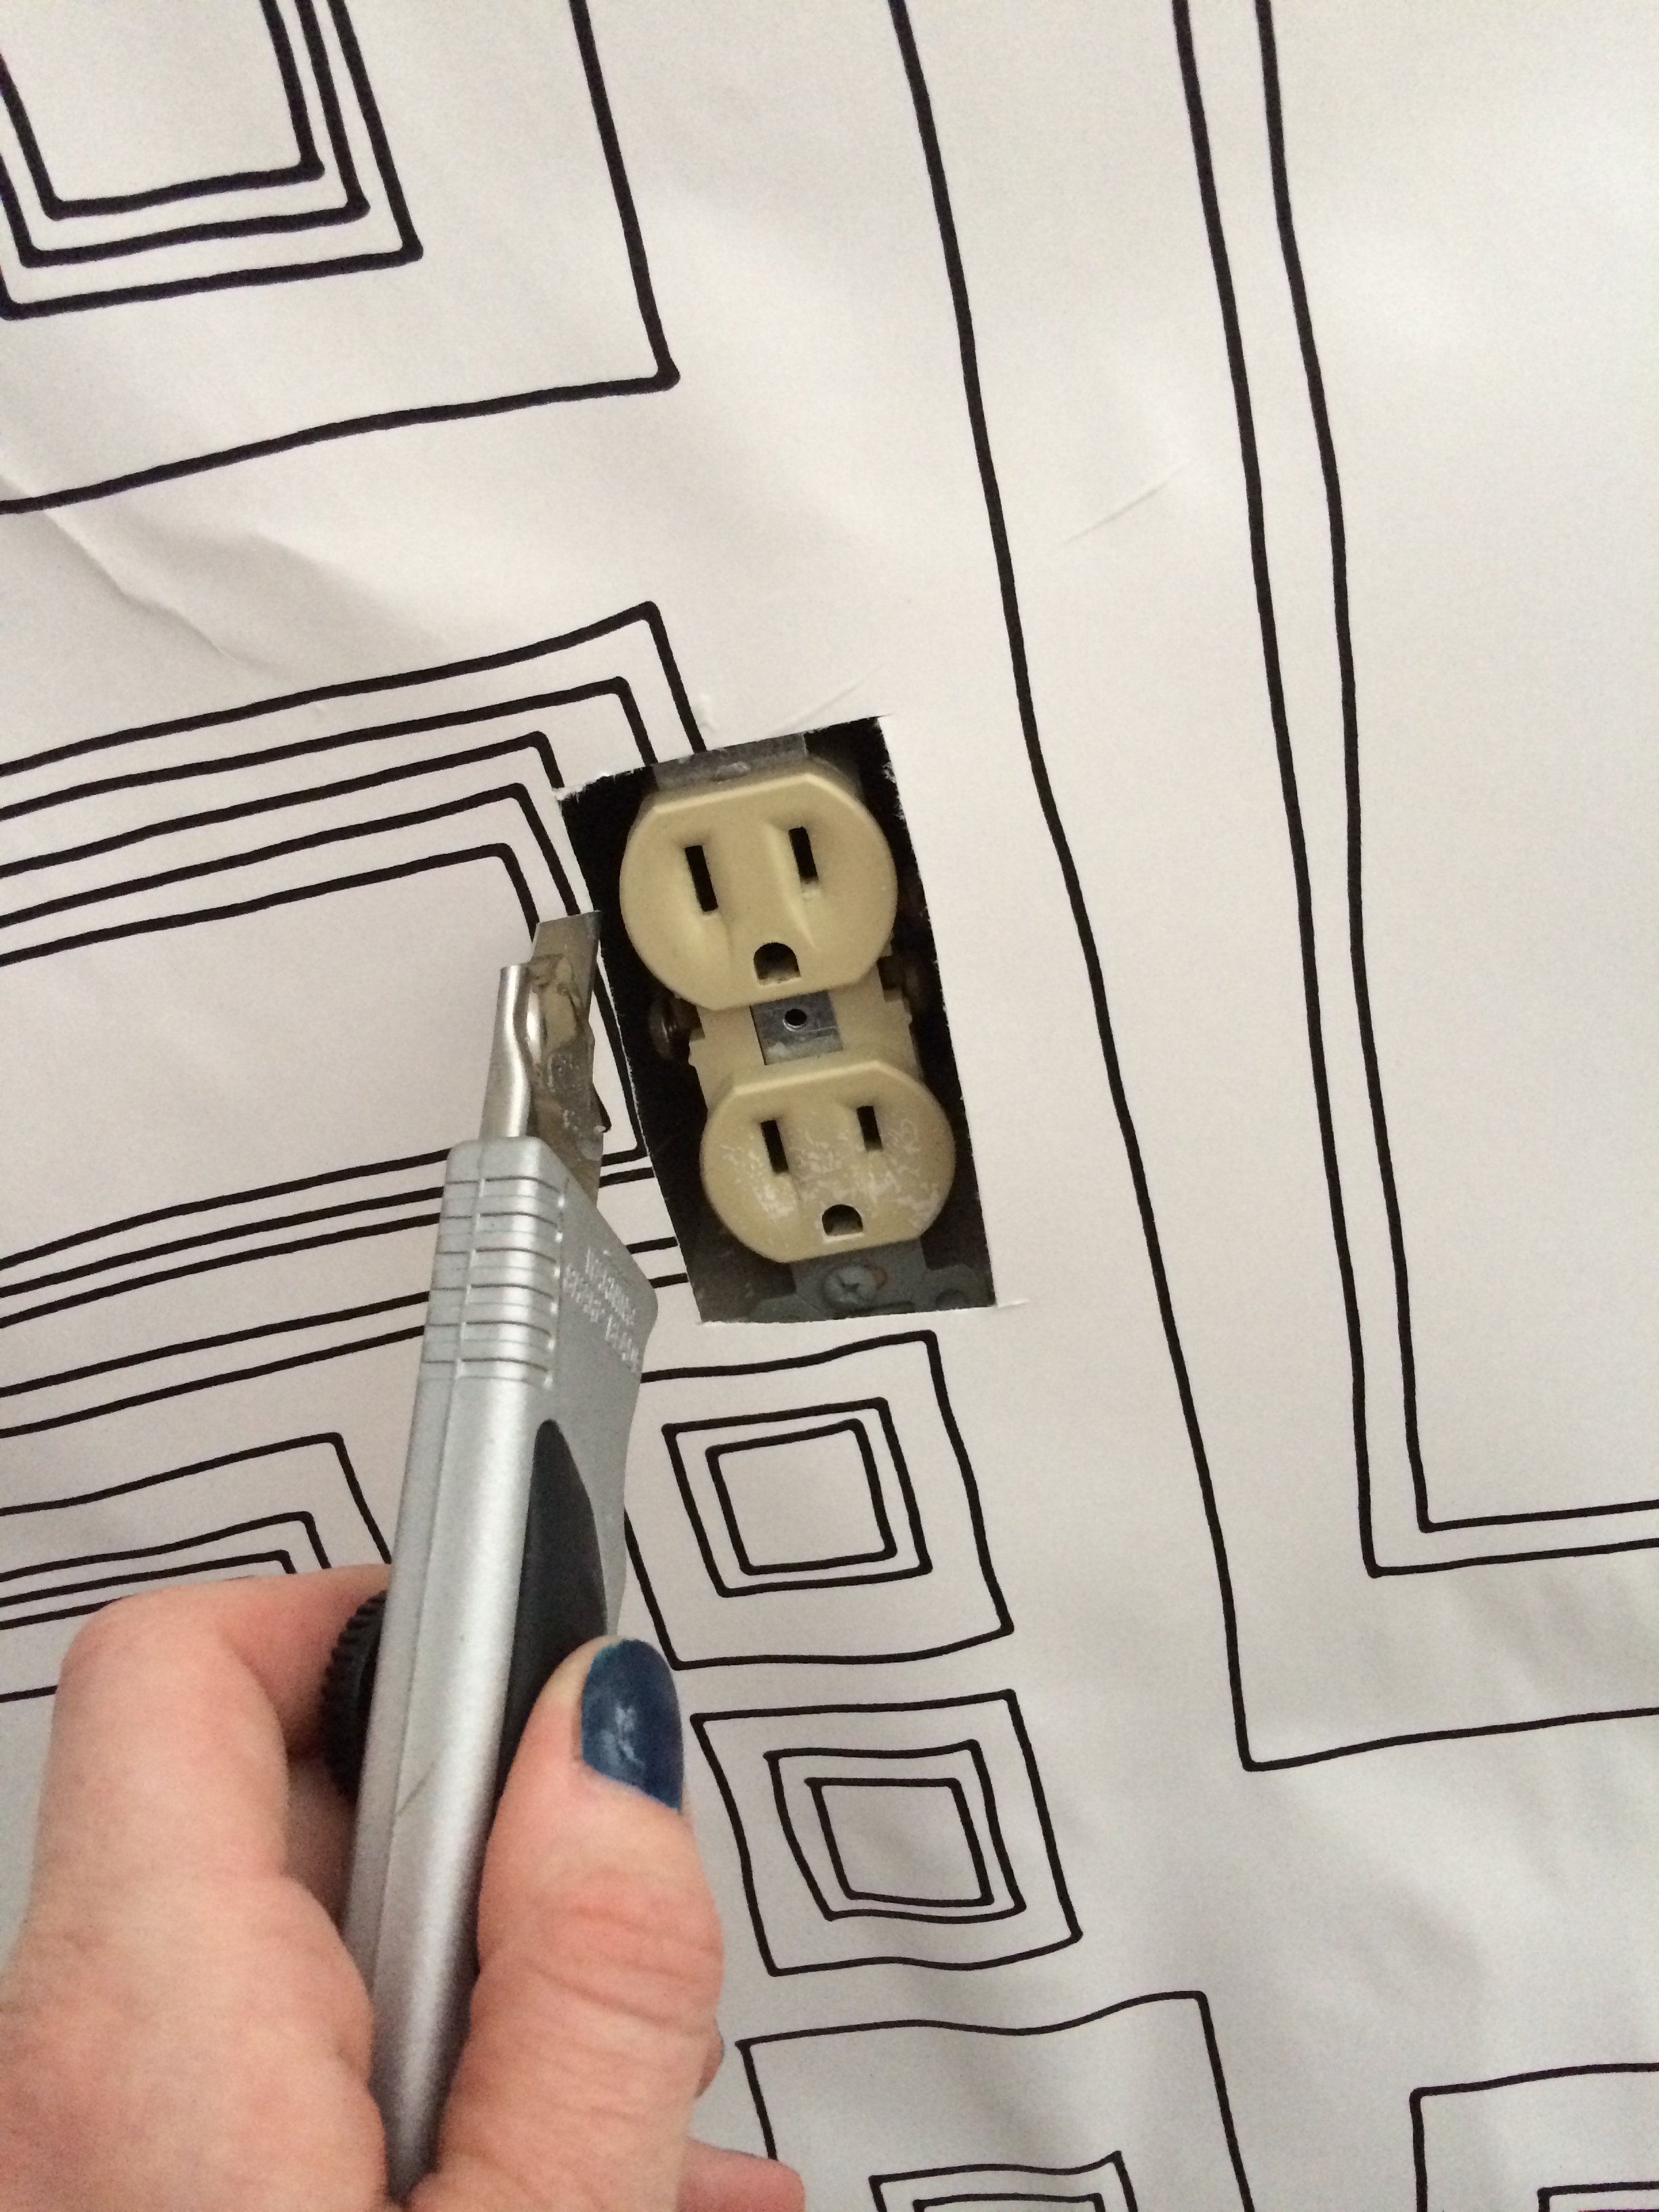
5. Cutting around windows, doors, and outlets. Thought to be tricky, but really not. For the large window, I added the paste to the wall. Then I hung the paper temporarily (very lightly) and trimmed the paper around the window using a scissor, leaving about 2 extra inches for trimming. Once I cut the paper, THEN I went back and adhered the wallpaper to the wall properly.

Here is a picture of me trimming the wallpaper around an outlet. I used a sharp razor, cutting a small hole at the outlet and trimmed so the entire outlet was exposed. The paper was wrinkled, but I smoothed it out after the hole was cut.
CONFESSION: totally my opinion... Wallpaper is kind of like giving birth (that’s all I thought about throughout the process). Going into it, your excited and ready to do “the work”. You’re in the midst of it cheering yourself on. Then there are some snags along the way and you start to get frustrated and defeated. The end is almost near. You’re exhausted and your patience is done. AND it’s over. All is beautiful and you can sit back and relax. After a few days, the memories start to fade and within no time, you think back that it wasn’t so bad after all. Until the next time…
Anyway, let’s move on. Obviously you know where this prego girls head is.
Here are some pictures mid-project (the moments when exhaustion started to set in).


And the result once finished. The part of enjoyment…

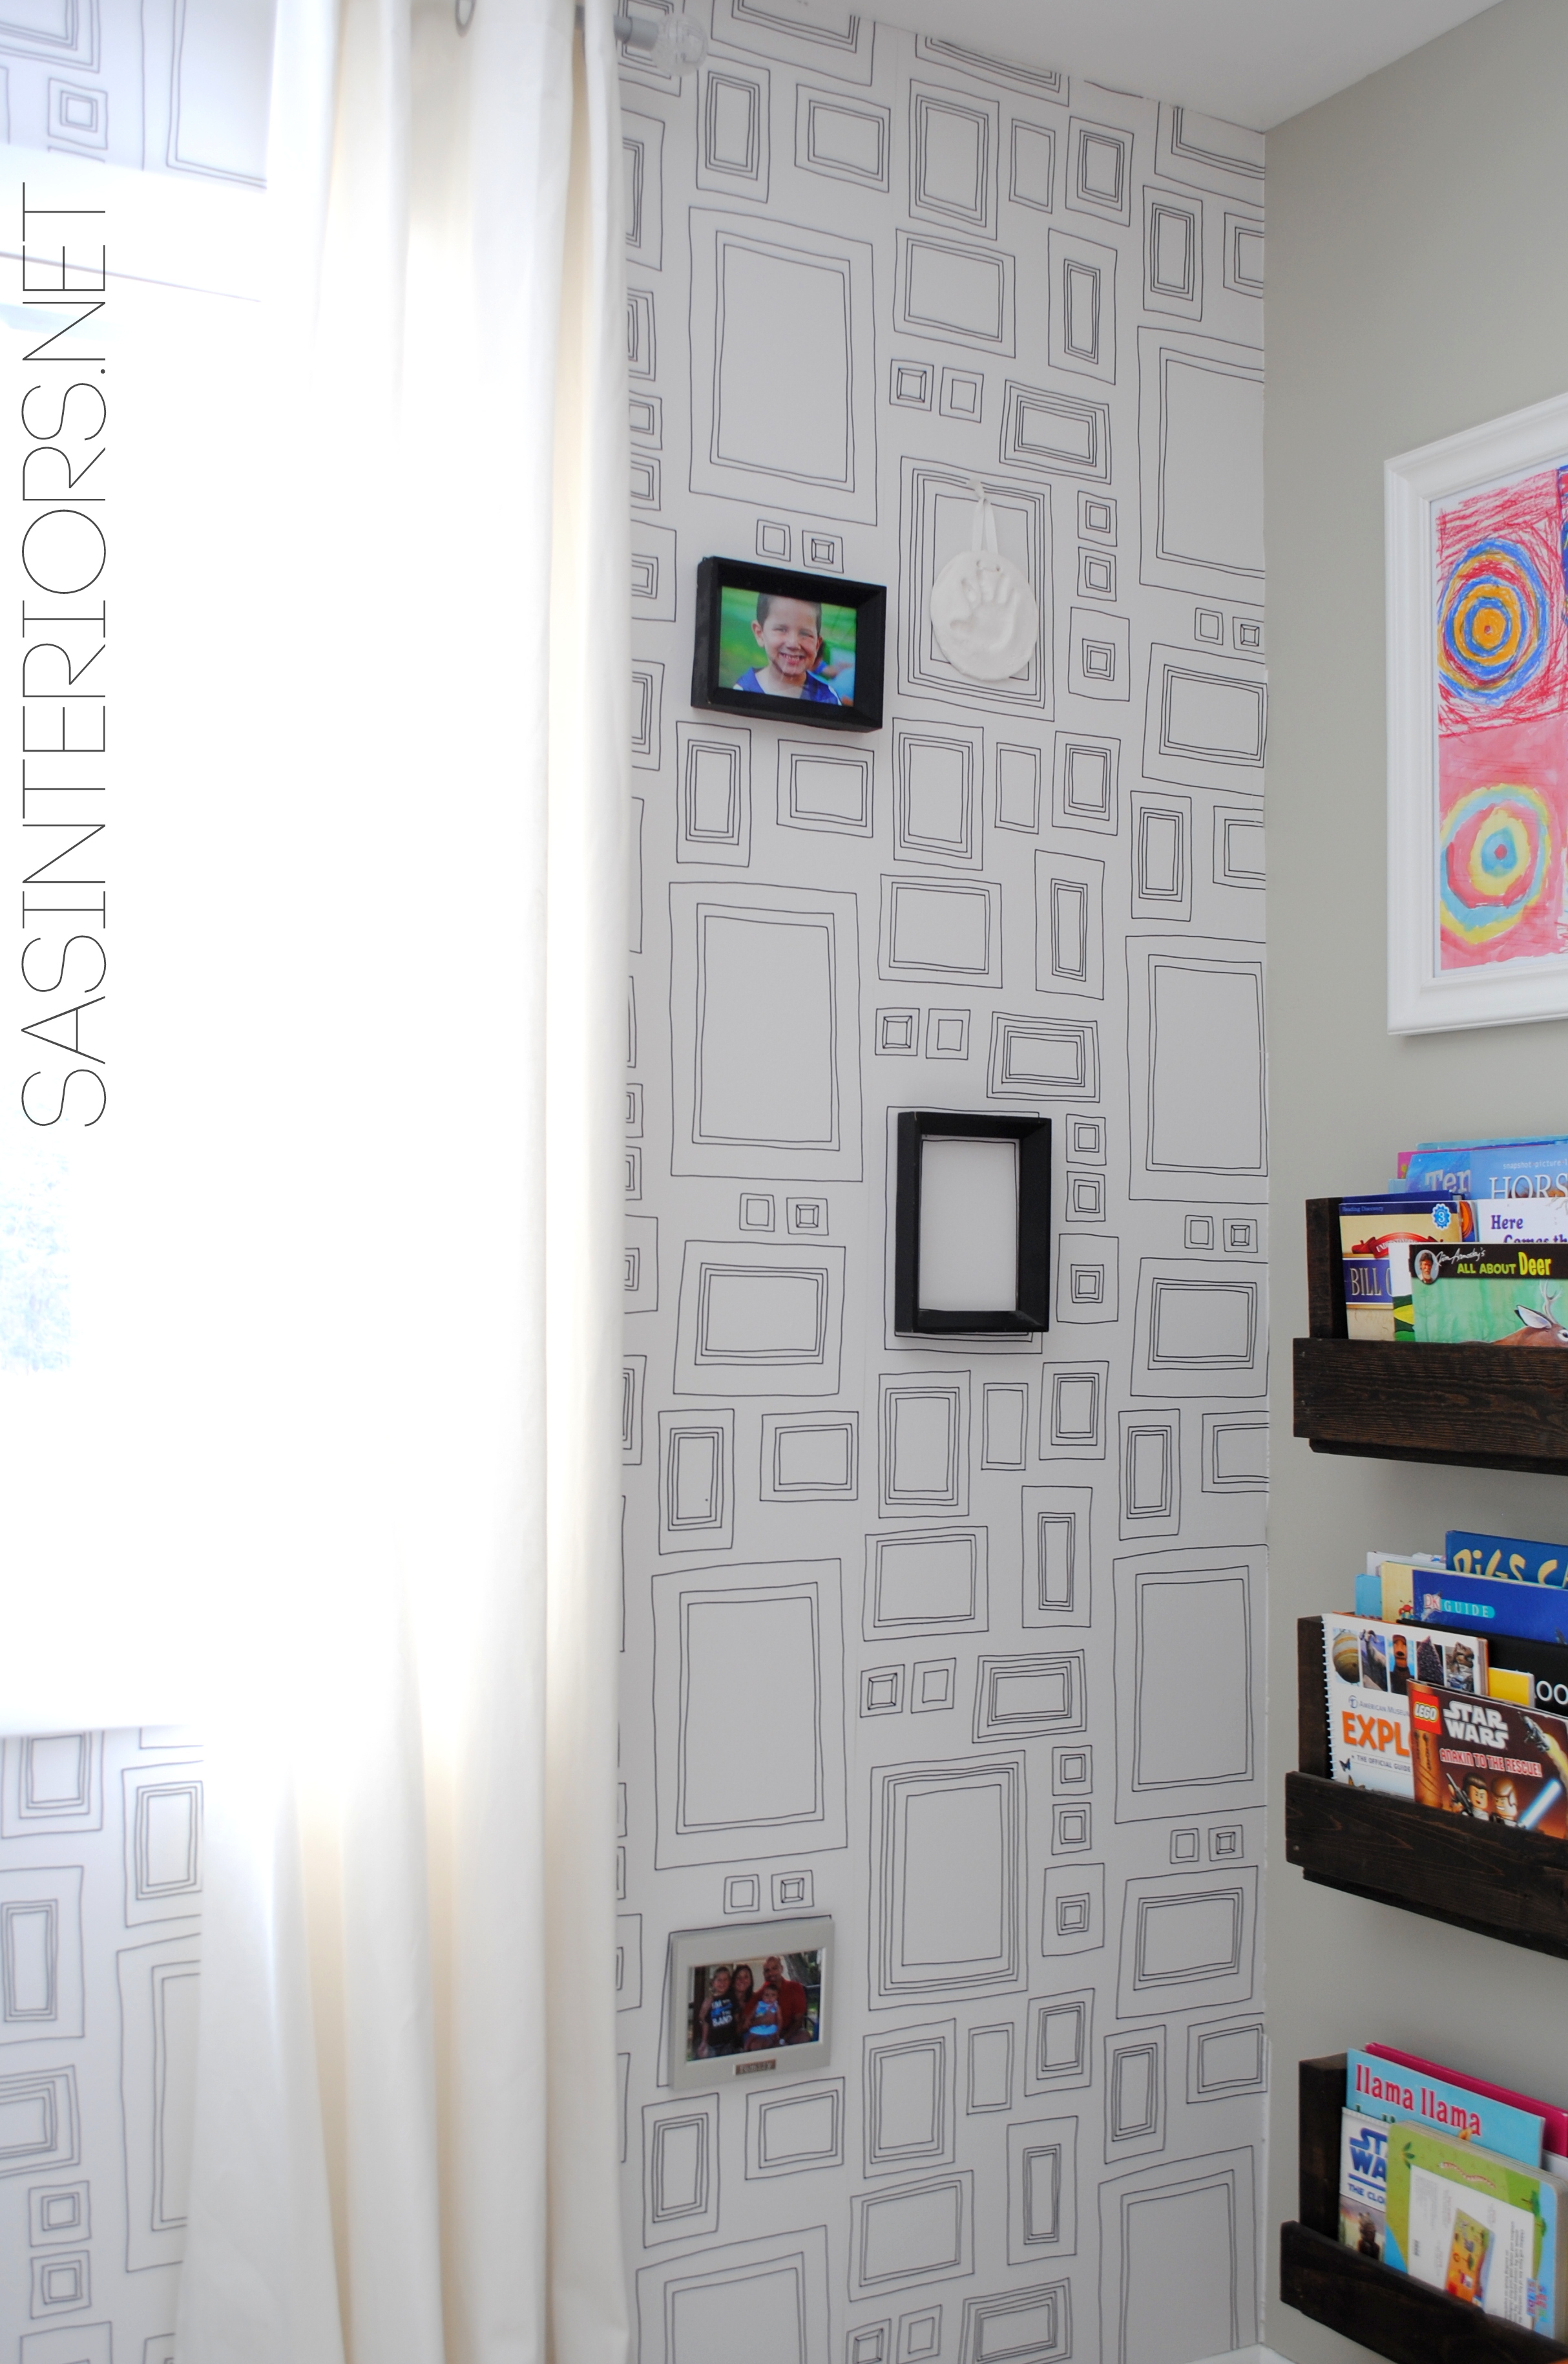
I started to jazz up the wall by hanging a few real picture frames over the “frames”. It started to bring in some color and dimension! I used a few pieces of command strips to keep the frames in place instead of nailing them to the wall.

We (meaning my son + I) have a lot more ideas for making this wall even better. In the meantime though (after hours of joyous wallpaper hanging) a few pictures and frames did the trick for fun.

I even added some hooks for hanging a few hats and metals.


So there you have it. A 2 in 1. A tutorial on how-to hang wallpaper + a fun & unique way to create an instant photo gallery wall. A LOT more is happening in this room to make it suit the style of my little guy. More to come soon…
Comments are closed.